1
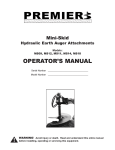
ehRSCamera for Redshift v1.0
Softimage plugin
User’s Manual
1
eh RSCamera
ehRSCamera plugin for Redshift render engine
May 30,2014
First revision
Proof-read by
Jason Shoumar
Special thanks:
Ola Madsen
Alok Gandhi
The Redshift Team
Nicolas Burtnyk
Rob Slater
Panos Zobolas
ehRSCamera, and the contents of this manual are property of
Emilio Hernández © 2014 All rights reserved.
Redshift and the Redshift Logo are property of:
Redshift Rendering Technologies, Inc. © 2014
and are used in this manual and the plugin PPG with permission.
Autodesk Softimage and Softimage are property of:
© 2014 Autodesk Inc. All rights reserved
eh RSCamera
2
Real World Camera plugin for Redshift render engine v 1.0
INTRODUCTION
I was fortunate enough to be one of the alpha and beta testers for Redshift. I immediately fell in love with Redshift, not only because
of its GPU processing speed, but also because of the breathtaking results that it allows you to accomplish.
The speed of Redshift, allowed me to spend more time on the final look of my projects, and less time tweaking the render settings.
The end results were clean, and predictable compared to the older gen rendering engines.
With this extra time, I was able to come up with a camera tool that is based on Real World camera attributes. Thus, any person with
a background in photography can easily jump in and feel right at home when using the virtual camera settings.
The ehRSCamera plug-in is an add-on for Softimage that is used for getting the most out of Redshift GPU Renderer in a way that is
quick and simple. The plug-in, allows you to use real world camera parameters to control your camera layout, and scene lighting as if
you were shooting in a real set.
Thank you for taking the time to try out ehRSCamera. I hope that it brings forth value to your production as it has done for me.
FEATURES:
•
•
•
•
•
•
•
Full control over the Redshift lens shaders within one single PPG.
Real world camera controls
Visual aids of focus and focal range that will help you laying out the camera quickly and easy.
White balance in °K
Accurate calculations for DoF and focal range according to camera sensor size, lens length and f/stop.
Control for scene scale in Softimage units.
HUD (Heads Up Display) that will show basic camera parameters as well as distance to focus, fps, etc.
System requierments:
•
•
Softimage versions 2012 through 2015.
Redshift installed
INSTALLATION
Just drag and drop the ehRSCamera.xsiaddon into the Softimage viewport or
install into a Softimage WorkGroup.
ACCESS
When the ehRSCamera plug-in is properly installed, a new menu will show up
at the Softimage main menu under ehRSCamera. You have also an option to
access the plug-in from a toolbar. View->Toolbars->ehRSCamera.
MENU Items
Both the menu and toolbar have the following items:
Create RS Camera. This creates a new Redshift camera.
Camera Menu. This grants you access to the RS Camera PPG window. This becomes accessible
once a Camera has been created and then by selecting any of the camera components. Camera
Root, Camera, CameraInterest, Focus, and the focal range aids.
Auto Mode. This is the default mode when the camera is first created. In this mode, the Redshift
Camera will automatically drive all the parameters from the PPG. You can choose to manipulate
the shaders and rendering options manually by switching to Manual Mode. This can be done by
selecting any one of the camera components, and switching to Manual Mode in the menu options.
Toolbar Menu
Manual Mode. In this mode, the camera is “Turned Off”. You will be able to drive the Redshift Lens Shaders and the Redshift
Render Options as usual. However, if you want to “Turn On” the camera again, select any of the camera components and click the
Auto Mode button.
NOTE: If the Menu Toolbar appears to be collapsed, a simple resize will fix the problem to show all items.
3
eh RSCamera
Create RS Camera
The Create Redshift Camera menu button can be used in two ways:
You can click it to create a new camera from scratch, or you can have a prebuilt Camera rig
object selected, prior to clicking the Create Redshift Camera button. The Create RS Camera
button reacts depending on what scene element you have selected.
After clicking on the Create RS Camera button, you will be prompted with a pop-up window,
asking you to create a new camera or cancel the current command. If you select a pre-existing
camera to turn into a Redshift camera, another window will show up asking for your confirmation.
A window asking for a camera name will show up. You can leave the default or enter a different name. Each subsequent camera
with the same name will be serialized using the Softimage naming convention to avoid name clashes. After entering a name, a drop
down menu containing several camera types and formats will be displayed.
The following camera types and formats are available:
•
•
•
•
•
ARRI Alexa
RED Scarlet, Epic
Canon 5D, 7D, 60D
Nikon D800
Film 35 mm, Academy, 1.77, 1.85, 2.39 film formats.
Once you select the camera type/format, the rig will be created, and
the camera PPG will load up.
The Camera Rig consists of the following elements:
Primary elements:
Camera Root, Camera, Camera Interest. The behavior is exactly like the default Softimage camera rig.
Visual Aids:
Focus, Near Distance Focus, Far Distance Focus. The focus is a child of the camera root at the same level of the camera and
camera interest. The Near Distance Focus (NDF) and Far Distance Focus (FDF), are children of the camera object. This means
they will always stay in your camera frustum, except for the Focus, which is position constrained to the interest. You can control its
behavior from the cámera PPG or HUD.
eh RSCamera
4
Focus
The Focus Icon is represented by a small circle, in the same color as the rest of the camera’s Primary Elements. This is meant to
help you spot it instantly in a cluttered scene. You can change the size of the Focus Icon by accessing its menu from the Softimage
Explorer. From here, you can choose to increase or decrease its size by modifying its radius. Alternatively you can simply choose to
scale it up or down as any other element in Softimage.
The actual focus of the camera takes place within the proximity of the Focus Icon and NOT at the camera interest. The focus
distance is represented in meters at the HUD. The distance is related directly to the scale of your scene, which you can also choose
to modify.
At first, the Focus will be constrained to the Camera Interest, following its every move. You have the ability, however, to “detach”
the focus of the Camera Interest by changing the value of the Focus at Int slider (in the HUD or Camera PPG), to a value of 0. This
setup allows you to have your camera interest in one location, and your Focus at another. Allowing a kind of “Follow Focus” setup.
You can animate your camera Focus or the camera interest individually. This behavior is similar to holding down your camera
shutter half way to focus at a certain point, or to reframe your shot by moving your camera and taking a picture while maintaining the
focus target.
The slider also controls the influence of the camera’s target area. The slider’s values range from 0 to 1. Having full influence of the
Camera Interest over the Focus when the value is 1.
To place the Focus at your desired target, bring the Focus at Int slider value to 0, and place the Focus icon where you want the
focus to happen.
Near Focus Distance and Far Focus Distance
The NFD (Near Focus Distance), is represented by a cyan square shaped icon and the FFD (Far Focus Distance), by a magenta
colored icon. Objects that lie between the two visual aids will be in the focal range, in accordance to the Lens Focal Length and the
f/stop. Their positions are calculated using real world lens parameters and will always follow the camera frustum. They will remain
at the Focus position at all times.
You will always have a visual guide to see which objects in your scene are in focus and which ones aren’t. You can resize the visual
guides as well by selecting and scaling them as you would do it, with any other object in your scene. Take note, however, you
cannot change their positions since they are related to the Focus.
When moving the Focus independently of the Camera Interest, the NFD and FFD objects will maintain the focal range according to
the Focus position but will not follow it. They will stay inside the Camera frustum, perpendicular to the camera to keep the planes
insight.
You will also notice how the focal range adjusts automatically whenever you change the f/stop values or lens from the HUD, or from
the Camera PPG.
Camera PPG
You will be prompted with the Camera PPG after you’ve created a Redshift Camera from scratch or from a pre-existing Softimage
camera. At anytime, you can access the PPG window at any time by selecting any of the Redshift Camera elements and clicking
on the Camera Menu button in the Toolbar or the Menu. Here, you will find two TABS: the Camera Settings TAB and the Advanced
Options TAB.
Camera Settings TAB
This is where the main camera settings reside. You can control all the camera related settings
from this location.
Lens Focal Length (mm) This function sets up your Camera Lens in mm. Its range is from
an 8mm lens to a 500mm lens. You can zoom in and out, by changing the focal length like you
would with a real camera. This parameter also drives the focal range. A 22mm Camera Lens
has more DoF (depth of field) than a 200mm lens.
F/Stop This parameter allows you to change the f/stop number of the lens.
The f/stop number is related to the lens focal length in mm. The f/stop indicates the fraction of
the total diameter of the lens the diaphragm is opened. It means the amount of light the lens is
allowing through.
F.E. A 50mm lens with an f/stop value of 5.6 will open the lens diaphragm at 50/5.6 mm
thus allowing more light through the lens, than an f/stop value of 16, which is an open lens
diaphragm of 50/16 mm.
This value works in the same manner as a real camera so you can dial in common values.
5
eh RSCamera
Placing a 5.6 means a value of 1/5.6 in f/stop. A value of 11 will close the diaphragm to 1/11 in f/stop and so on.
The following figure shows the typical f/stops values and their relation with the DoF.
Image courtesy of: School of digital photography
The DoF of the ehRSCamera plug-in, is calculated automatically based on real world values for each camera type.
Shutter Settings
Use Rotary Shutter If turned ON, this will setup your camera with a rotary shutter type, like a cinematographic camera. If OFF, The
shutter will be a “leaf” or a digital shutter, like a regular DSLR camera. The rotary shutter is setup in degrees, and the digital shutter
is setup in 1/1000 of a sec.
Shutter Angle When the Use Rotary Shutter checkbox is marked, you can dial in the angle of the rotary shutter used in
cinematographic cameras. The default value is 180°. In terms of seconds, this means that, for a 24fps rate, the shutter is open
1/48th of a second. This is the typical configuration in the real world. You can lower the angle value down to as low as 22°. Lower
values mean higher shutter speed and less motion blur. So a value of 90° means 1/96th of a second again, at a rate of 24 frames
per second.
Typical real world values for the angle of the shutter are 180°, 90°, 45° and 22.5°
Digital Shutter If the Use Rotary Shutter checkbox is unchecked, this parameter will become accessible, and the Shutter Angle will
be grayed out. In this parameter, you can drive the speed at which your shutter will expose the film or camera sensor in 1/1000 of a
second. A value of 90 will setup your shutter speed in 1/90 seconds. A value of 120 will setup the shutter speed on 1/120 fraction of
a second and so on.
Depending on the camera shutter mode, the actual Shutter Speed will be displayed in the HUD for reference.
The amount of motion blur is automatically calculated based on real world parameters depending on your Shutter Angle settings,
Shutter Speed settings and the frame rate per second (fps) of your scene.
Film Speed ASA/ISO This parameter controls the sensibility of the film or digital sensor to light in ASA/ISO values. A high speed
film means that it needs less light than a low speed film. A 250 ASA/ISO film needs more light than a 500 or a 1,000 ASA/ISO film.
In real life, with a higher ASA/ISO film you are able to use higher shutter speeds as the film requires less light coming in. These
high speed films are typically used for capturing high speed actions in a still frame. Like a sports car, sports action, or the famous
water crown. To mimic a real cinematogrpahic world setup, use values from 250 to 500. Using these values will give you shutter
speeds and f/stop values that will render very nicely, and close to the real world cinematography images.
White Balance Color temperature is measured in °K (Kelvin degrees). Different light sources have different temperature values.
A house light bulb normally casts an orange light (2500°K - 3600°K), while a fluorescent light source casts a more “greenish-blue”
light (4000°K - 5000°K). If you place a white cardboard under a regular house light bulb, the effects will become noticeable. The
same happens with sunlight. At dawn or dusk, the light color tends to be more orange than yellow. When the sun is in the zenith, it
casts more of a white light. Our eyes adjust automatically to this phenomena, but the cameras don’t.
eh RSCamera
6
When the sky is cloudy or overcast, the perceived color of the light is more blue than white/yellow. In the real world photography,
before there was a white balance control for cameras, a color chart was used to bring back the white colors to neutral in a color
grading process.
The following figure shows a picture of a color chart. The first one is “unbalanced”. I took it with regular light house and the
camera’s white balance, setup for daylight ~ 5,600 (°K), to reveal the effect of the house lighting. You can see the white chip at the
bottom left looks “orange”, with the black also tinted.
I took the same picture again, but this time I setup the WB to be at 3,200 (°K) (right image), now you can see that even though there
is a faint “reddish” tone in the scale, and some “bleeding” at the logo and typo, the white chip now has the correct look as the rest of
the colors.
With digital cameras, you have the ability to “correct” this cast, using either a “reddish” or “blueish” tone, before taking the picture or
shooting the footage using the white balance built into the camera.
Redshift being a “physical” render engine, is set to mimic real world materials and light, and has the ability to specify the kind of light
you are using as well as its color temperature like in the real life. Some dramatic effects in motion pictures or still photography are
achieved by using different light temperatures in particular areas using an “average white balancing” technique. By using correct
light color temperatures in your lighting setup, and using the White Balance option to adjust your overall scene color temperature,
your renders will look more “realistic “and have a natural feel to it.
The Redshift Camera PPG includes a Kelvin reference that can
be used depending on the lighting conditions of your scene.
The default setup is at 5,600°K for daylight conditions, keeping
some of the yellowish tones for a typical outdoors scene.
For a pure white light effect, adjust the value to 6,600°K.
When using Redshift Physical Light or Redshift IES Light with
a specific color temperature, you can setup the temperature
in this parameter as well to achieve a “realistic” look. Use the
white balance even if you are using an HDRI environment map
to light up your scene and you will notice the difference.
Visual Aids You can turn ON and OFF the Focus, and In Focus Range NDF, and FDF to unclog your scene when you are not
working with them.
Focus at Interest As described in the Focus section, this slider will “unlock” the Focus from the Camera Interest. Dialing a value
of 0 will allow you can to place the Focus icon wherever you want in the scene or at a specific object, without changing the camera
layout.
Scene Units This parameter controls the overall scene scale to perform optical calculations according to the scene scale.
The Softimage “convention” of 1 Softimage unit = 10 cm is used by default. But you can change it for larger or smaller scenes.
If you want to turn 1 Softimage unit into 1 meter, simply enter 100 as 1 Softimage unit, which becomes 100 cm = 1 meter. The
distance at focus and NDF and FDF will update automatically and display the new Focal Range. Remember, at a larger distance
from the focus point, the DoF is greater. When the focus target is at a closer distance to the camera, the DoF will be reduced.
7
eh RSCamera
If you want to go “strictly physical”, then you should also adjust the Redshift render parameters in the render settings, according to
the following table to scale the lights “intensity”.
Redshift Render Options
Advanced Options TAB
The Advanced Options TAB, provides additional control by enabling or disabling the Redshift Lens Shaders, as well as inspecting
the Lens Shaders, and disabling the Redshift Motion blur rendering options.
Manual Mode
From the Menu Toolbar, you can choose to set your Redshift Camera to Manual
Mode. In this mode, the Redshift Bokeh and Redshift Photographic Exposure lens
shaders will stop working with the Camera Parameters, hence, allowing you to adjust
the shader parameters manually, as well as the Motion Blur options from the Redshift
rendering PPG.
The Redshift Camera PPG will turn into a simple layout with two buttons, used
for inspecting and adjusting the Redshift Bokeh and Photographic Exposure lens
shaders.
To go back to your Redshif camera’s default settings, simply select any of the Redshift
Camera elements from the viewport (or Explorer) and select Auto Mode from the
Menu Toolbar.
If your Redshift Camera is no longer visible in the viewport, you can still access the
Redshift Camera PPG from the Explorer window and expanding the Camera Branch.
You will find the Camera Options under the Redshift Camera. Double click on the
Camera Options Custom Property to bring the Redshift Camera PPG insight.
eh RSCamera
8
HUD
The HUD (Heads Up Display) allows you to have visual feedback and to control
the basic parameters of your Redshift Camera.
Additional info like Distance to Focus, Frame Rate, Camera Status and Actual
Shutter Speed in 1/sec are displayed in the HUD.
The chip in blue, indicates that these parameters are automatically calculated and
their values cannot be changed. The Frame Rate (fps) value is taken from your
scene settings and provides only a visual feedback.
Final Thoughts
I hope that you will not only find this plug-in useful in your production, but also fun to use.
A lot of effort was put into assuring this plug-in behaves as close to a real world camera as possible. The camera presets values are
taken from the specs sheet of each manufacturer. The Sensor size, CoC and aspect ratios for each camera are accurately built to the
real thing. A lot of testing has been done to provide accurate DoF, focal range, White Balance and Motion Blur.
NOTE: Be sure not to delete any of the individual Camera Rig Elements. Otherwise you could be left with no alternative but to
create a new Redshift Camera.
Suggestions on improvement are always welcome. I can be contacted at [email protected] with the subject ehRSCamera.
Happy renderings!
Sincerely,
Emilio Hernández
9
eh RSCamera
ehRSCamera Tests
The overall test setup is as follows.
• 2 Redshift IES lights with data from ARRI setup at 3,200 °K
• 1 Redhisft IES light with data from ARRI, setup at 5,600 °K
• 1 SI unit = 10cm
eh RSCamera
10