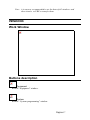
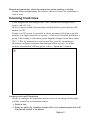
1
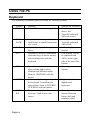
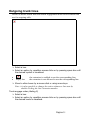
REMOTE PROGRAMMING Software MANUAL 7IS-80287 Thank you for choosing an Esse-ti product This product has been especially designed for easy operation. It has been manufactured with perfect workmanship using suitable materials for longlasting performance. All Esse-ti products are subjected to extensive reliability and operational testing in our laboratories in order to provide total guarantee for the user. The User shall be responsible for defects arising from the use of the product. Esse-ti shall only be responsible for defects according to and within the limitations set by the Presidential Decree dated 24/05/1988 no. 224 (fulfilling the EEC directive no. 85/374 on the harmonization of statutory and administrative regulations of the Member States on the liability for damages arising from defective products under art. 15 of Law no. 183 of 16 April 1987). Esse-ti reserves the right to modify the characteristics of the products at any time without prior notice. Pagina TABLE OF CONTENTS SOFTWARE DI TELEPROGRAMMAZIONE …………………………………………… Errore. Il segnalibro non è definito. Requisiti minimi del sistema ……………………………………………………………………. 7 Installazione ………………………………………………...…………………………… Errore. Il segnalibro non è definito. Software …………………………………………………………………………………………. 7 Collegamenti per la teleprogrammazione locale 7 Collegamenti per la teleprogrammazione a distanza Errore. Il segnalibro non è definito. Avvio del programma Errore. Il segnalibro non è definito. Creare un nuovo utente Errore. Il segnalibro non è definito. Selezionare un utente esistente per accedere alla programmazione dell’Hi-Pro 9 Modificare un utente memorizzato Errore. Il segnalibro non è definito. Eliminare un utente memorizzato Errore. Il segnalibro non è definito. Eliminare una configurazione di un utente Errore. Il segnalibro non è definito. Esportare un utente Errore. Il segnalibro non è definito. Importare un utente Errore. Il segnalibro non è definito. Uscita dal programma Teleprogrammazione 10 Errore. Il segnalibro non è definito. Teleprogrammazione tramite porta USB 11 Teleprogrammazione a distanza con modem V.21 Finestre 13 Errore. Il segnalibro non è definito. Finestra di lavoro Descrizione pulsanti Equipaggiamento Errore. Il segnalibro non è definito. Errore. Il segnalibro non è definito. 19 Descrizione pulsanti Errore. Il segnalibro non è definito. Assegnare una numerazione convenzionale 21 Assegnare un nome ad un interno 21 Aggiungere o eliminare un interno da un gruppo di chiamata 21 Modificare il tempo di flash di ciascun interno 22 Abilitare l’uscita amplificatore 22 Abilitare ingresso A50 (sorgente musicale esterna) Errore. Il segnalibro non è definito. Programmazione di sistema Errore. Il segnalibro non è definito. Informazioni generali Errore. Il segnalibro non è definito. Linee telefoniche Errore. Il segnalibro non è definito. Metodi impegno linee esterne 30 Interfaccia citofono 31 Programmazione interni Linee urbane entranti Linee urbane uscenti Configurazione filtri Abilitazione servizi Stato servizi 39 Sequenze di azioni Definizione Sequenze Ingressi digitali 43 Timer 44 Allarme da interno Errore. Il segnalibro non è definito. Errore. Il segnalibro non è definito. Errore. Il segnalibro non è definito. Errore. Il segnalibro non è definito. Errore. Il segnalibro non è definito. Errore. Il segnalibro non è definito. 40 45 Programmazione filtri / L.C.R. 46 Inserimento di una selezione Configurazione L.C.R. 47 47 Tasti funzione telefoni serie ST Temporizzatori 49 48 Pagina Servizi voce Errore. Il segnalibro non è definito. Definizione messaggi 51 Servizi voce chiamate entranti 53 Operatore automatico Errore. Il segnalibro non è definito. Casella vocale 57 Personalizzazione messaggi 58 Configurazione relè attuatori 59 Rubrica Errore. Il segnalibro non è definito. Esperta Errore. Il segnalibro non è definito. Informazioni e aggiornamenti 62 Pagina EDITING CRITERIA This paragraph describes the editing criteria followed in this manual for easier user’s reference. THE MANUAL Printing styles The following table shows the printing styles on the left and their meaning on the right column. Example Meaning CHAPTER TITLE Primary Title Secondary Title Tertiary Title Example Note Warning Normal text Operation to be carried out Style used for the title of chapters. A new chapter begins on a new page. Style used for the title of large sections in a chapter, such as the main titles of the chapter. Style used for the title of a specific paragraph in the primary title. Style used for additional sections in a specific paragraph Style used for examples. Style used for explicatory notes: pay attention! Style used to indicate possible risks for individuals and properties: caution! Style used for normal text. Style used to indicate the sequence of operations that must be carried out for programming or service implementation. Pagina USING THE PC Keyboard The following keyboard symbols are used for software products. Symbol TAB Meaning Tab: used to switch among fields CAP LOCK Capital lock: it changes from small letters to capital letters and vice versa. Capital letters: used for capital letters. Alternative: used in combination with other keys to access mouseactivated functions with the keyboard. CAP ALT SPC ENTER ARRO WS Pagina Space bar: used to enter a space when writing and to select elements in a different mode. Same as CLICKING with the mouse. Enter: usually the largest key of the keyboard. It confirms the entered data. Same as DOUBLE CLICKING with the mouse. Four arrow keys, one for each direction. Used to move the cursor. Position on keyboard Third row from above, left. Typically indicated with two arrows. Central position, left. Typically indicated with a lock. Left and right, bottom. Left, bottom. Not to be confused with AltGr, on the right side of the space bar, bottom. Central position, bottom. Right side of alphabetical keyboard. Central position, bottom. Between letters (left) and numbers (right). REMOTE PROGRAMMING SOFTWARE The Remote Programmer is a software interface in Windows environment that allows you to access the switchboard programming mode (over an USB connection) or the remote programming.. Local programming works with a serial connection (USB to serial port), while remote programming needs a V.21 standard MODEM. System requirements Windows 98, ME, NT, 2000, XP, Vista and Seven operating system 3 MB of free space on hard disk CD-ROM drive INSTALLATION Software The product is supplied on CD-ROM. To start the installation procedure, in Windows desktop: DOUBLE-CLICK “My Computer” or “Computer”. DOUBLE-CLICK “CD-ROM”. DOUBLE-CLICK “SETUP”. Follow the instructions on the screen. At the end of the installation procedure, select “Programs” in the “Start” menu to run the program. Note: If using Windows Vista or Seven, it could be necessary to launch the program the first time from the right button of the mouse and selecting “Run as administrator” Local Programming connection Connect your PC to Hi-Pro USB port using a standard USB cable. In case of driver request, follow the automatic procedure searching in CD-ROM drivers folder. Pagina Remote Programming connection Remote Programming needs a MODEM which supports the V.21 standard. If the PC is not provided of a V.21 standard MODEM, connect the external MODEM to the PC. Connect the MODEM to PSTN line. Connect a telephone to the remaining RJ11 socket of the MODEM. SOFTWARE START UP When launching the remote programming software, the application will visualize the “Registry” window. This one allows you to store customers and switchboard data for easier faster maintenance, and the access to the programming windows of each installation. Creating a new customer Enter the name of the new customer in the “Name” field. Fill the fields with the customer’s data. Note: You can go from one box to another by clicking on the desired box or with TAB.. Pagina Select the Hi-pro model to be programmed with the arrow of the “PABX” field. Press “Save” to save the information. The software automatically enters the installation date and the review date. Press “Confirm” to close the “Registry” window and continue the Hi-pro programming procedure. Selecting an existing customer to accede Hi-Pro programming This procedure is used to modify the Hi-Pro settings. Select the customer’s name with the arrow of the “Name” field. The software displays the customer’s data in the fields below. Different programming modes can be saved for the same customer and the same switchboard. The desired program can be selected if different programming modes were created for the switchboard. Recall an Hi-pro “Preset” programming is also possible. Select the desired programming mode for the customer and switchboard with the arrow of the “Configuration” field. Press “Confirm” to close the “Registry” window and continue the programming procedure”. Modifying an existing customer This procedure is used to modify the data of an existing customer. Select the customer’s name with the arrow of the “Name” field. The software displays the customer’s data in the fields below. Navigate through the fields and make the necessary modifications. To change the customer’s name press “Change Name”, enter the new name and press OK. Press “Save” to save the information. Press “Confirm” to close the “Registry” window and continue the programming procedure. Deleting an existing customer This procedure is used to delete an existing customer with settings. Select the customer’s name with the arrow of the “Name” field. Pagina Press “Delete” to delete the customer and the switchboard settings. Press “Yes” to confirm deletion. Deleting a customer’s Configuration This procedure is used to delete an existing program. Select the customer’s name with the arrow of the “Name” field. Select the program to be deleted with the arrow of the “Configuration” field. Press “Delete configuration”. Press “Yes” to confirm deletion. Exporting a customer This procedure is used to export the customer’s configuration into a database. Press “Export”. The “Save as” window is displayed. Enter the file name and press “Save”. Importing a customer This procedure is used to import the Hi-pro settings from a database. Note: Before importing data from the database you must create the customer. Press “Import”. The “Open” window is displayed. Select the file and press “Open”. EXITING THE PROGRAM If configuration has been changed, the remote programmer software will ask the user to save the program when exiting the program. To save configuration: Press “Yes”. Enter the new program name in the “Configuration” field or leave the current name unchanged to overwrite configuration. Press “Confirm” to save. Note: disconnect from the PABX before exit. Pagina PROGRAMMING The program must be active on the PC. If necessary, the V.21 standard MODEM must be connected and powered. Read / Writing mode settings In the “File” menu select “Configure”. Select the windows “Writing/Reading Mode”: - Active window: only the active window is written/read. - All open windows: the active window and the other open ones are written/read. - Ask when reading/writing: a mask for the windows choice appears when pressing “Read settings” o “Write setting” button. Select the language. Press “Confirm”. Programming via USB port Port setting Create a new user profile or load an existing one with “Registry”. In the “File” menu select “Configure”. Pagina Select “COM” and the port where connected Hi-pro (or select “FTDI” for an automatic research of the port). Select the windows “Writing/Reading Mode”: - Active window: only the active window is written/read. - All open windows: the active window and the other open ones are written/read. - Ask when reading/writing: a mask for the windows choice appears when pressing “Read settings” o “Write setting” button. Select the language. Press “Confirm”. Connection, Reading, Writing and disconnection Press the “Link to PABX” button: in the Taskbar. The following window appears when connected (with Hi-Pro software release): Press “Close”. “Reading settings” and “Writing settings” buttons are now active. Activate the window to be read or written by pressing the corresponding button in the “Taskbar”. Pagina Press the “Writing settings” or “Reading settings” button to program or read data in the windows. If “Ask when reading/writing” mode is enabled (see “Reading/Writing mode” paragraph), the following window is shown: Choose windows to read or write and press “OK” or “Enter” on PC keyboard. Select “Cancel” to avoid reading o writing. Press the “Link to PABX” button Mode. again to exit from Programming Note: Hi-Pro works normally during the connection, only the programming from the administrator extension is disabled (programming codes are not accepted). Note: action sequences (in case of alarm activation, timer, etc ...) won't be executed during remote programming mode. Remote Programming with V.21 MODEM Port setting Create a new user profile or load an existing one with “Registry”. In the “File” menu select “Configure”. Select “MODEM” and the MODEM connection port. Select the language. Press “Confirm”. Pagina Connection through a “Remote Programming Number” The number from which establish the connection has to be previously configured (see “Remote Programming Number” paragraph in the “Installation and Programming Manual” or “General Information” paragraph in this manual). Press the “Link to PABX” button: in the Taskbar. The following window is shown: Select the number to call from the arrow menu (if in “Telephone numbers” field in “Registry” window), otherwise click in the empty field and write the number of the customer. Press “Connect”. In event of incoming call and if “Caller ID service is active for the customer line, Hi-Pro automatically recognizes the Remote Programming Number, engages the line, verifies the password and enter Programming Mode. When connected, the following windows (with Hi-Pro firmware release) will appear: Instead, in case the password in PC database is different from the installer password in PBX, the following window will appear:: Pagina Insert the correct Installer Password. Press “Close”. Connection with user consent Establish the conversation between the telephone connected to the MODEM and one extension of the Hi-pro to configure. Ask the remote user to dial the code: “R 3910” and hang up after confirmation tone. Press “Link to PBX” button in the Taskbar. The following window is shown Press “Connect”. A window shows: “Connecting! System is waiting for confirmation from PBX.” . Hang up the headset when requested by a message. When connected, the following windows (with Hi-Pro firmware release) will appear: Pagina Reading, Writing and Disconnecting When connected “Reading settings” and “Writing settings” buttons are enabled. Activate the window to be read or written by pressing the corresponding button in the “Taskbar”. Press the “Writing settings” or “Reading settings” button to program or read data in the windows. If “Ask when reading/writing” mode is enabled (see “Reading/Writing mode” paragraph), the following window is shown: Choose windows to read or write and press “OK” or “Enter” on PC keyboard. Select “Cancel” to avoid reading o writing. Press the “Link to PABX” button Mode. again to exit from Programming Note: Hi-Pro works normally during the connection, only the programming from the administrator extension is disabled (programming codes are not accepted). Note: action sequences (in case of alarm activation, timer, etc ...) won't be executed during remote programming mode. Pagina Note: it is anyway recommended to set the data of all windows and then connect to PBX to transfer them. WINDOWS Work Window Buttons description Equipment Recalls “Equipment” window. System Recalls “System programming” window. Pagina Extensions Recalls “Extensions programming” window. Actions sequences Recalls “Actions sequences” programming window. Call barring / L.C.R. Recalls “Call barring/ L.C.R. programming” window. ST Telephone’ keys Recalls “ST Telephone’ keys” programming window. Timers Recalls “Timers” programming window. Voice services Recalls “Voice Services” programming window. Actuator relays Recalls “Relay Actuators Configuration” window. Speed dial Recalls “Speed dial Phonebook” window. Pagina Advanced Recalls “Advanced” window. Link to PBX Allows to connect or disconnect PC to/from Hi-Pro. Reading settings Allows reading from Hi-Pro data of one or more windows (active only if connected). Writing settings Allows sending data to Hi-Pro of one or more windows (active only if connected). Restore settings It cancels unsaved modifications. EQUIPMENT This window allows to: - assing a conventional numbering to each extension or group; Pagina - assign a name to each extension (in order to visualize it on System Telephones display); - add o delete an extension to/from a group call; - check or modify the flash time set for each extension; - enable amplifier output; - enable A50 (external music) input; - check installed optional boards; - visualize the default configuration chosen during installation (a default configuration can be recalled only from administrator extension by a programming code). Window Buttons description Save It allows saving the modified parameters and closes the current window. Pagina Close It allows closing the current window. In case parameter have been changed, software asks if save data. Assigning a conventional numbering This function allows assigning a conventional number to an extension or a group call (“flexible numbering”). Conventional numbering varies between 40 and 499. Note: extension numbers must imperatively start with 4. Note: the same number cannot be assigned to more than one extension. Note: if you set a two-digit number for an extension (e.g. 42), three-digit numbers starting with the same digit (e.g. 420, 421, etc.) cannot be used for other extensions. Select, by a click, the extension or the group box to modify. Dial the number from 40 to 499 to assign. Press “Enter” to confirm or “Esc” to cancel. The extension numbers in conflict are shown in red character. Click on the conflict box and change the number to eliminate conflicts. Assign a name to an extension It allows assigning a name to each extension. This name will be visualized by telephones with alphanumeric displays. Click on the box (in “Name” column) corresponding to the extension to which assign an alphanumeric ID. Insert the name (max. 16 characters). Press “Enter” to confirm or “Esc” to cancel. Add or delete an extension to/from a group call It allows to add or delete an extension to/from a group call. Extensions with ticket group’ checkbox belong to the group. Click on the checkbox to add/delete the extension to/from the group. Press the space bar or double-click to add or delete the extension. Pagina Modify extension flash time It allows to modify flash time of all extension. Double-click the box of the extension to be modified. Increase or decrease flash time using PC keyboard arrow keys. Press “Enter” to confirm or “Esc” to cancel. Enabling amplifier output It allows to enable amplifier output. Enable the output by clicking the amplifier check-box. Note: activating the Amplifier on Hi-Pro 412 will deactivate last extension. Enabling A50 (external music) input It allows to enable input (external music source). Enable the input by clicking the corresponding check-box. Note: to activate the music on hold for each external line or as a background for courtesy messages go to the corresponding windows. SYSTEM PROGRAMMING This window consists of four folders: - General Informations: allows to set options of general nature; - Types of trunk lines: allows to set external lines features; - Lines engages mode: allows to define the Lines Engagement Table; - Doorphone Interface: allows to set doorphone features. Pagina General informations Profile in use It allows to recall DAY, NIGHT, CUSTOM profile permanently or setting the automatic recall of profiles based on daily time bands. Date and Time These boxes allow to visualize Hi-pro’s clock settings. When writing, date and time cannot be changed directly because the programming SW sends to Hi-pro the PC’s clock settings.. Password These boxes allow to set Installer and User Password. Password must be maximum 5 digits long. Automatic profile recall It allows defining Daily and Weekly Time Band to use in case of Automatic Mode activated. Pagina - Daily Time Bands Allow to set start and end time of two different time ranges in which Hi-pro can use NIGHT or CUSTOM profile. Outside of these two intervals, Hi-Pro recalls DAY Profile. - Weekly Time Band Allows to set a weekend period in which Hi-pro can recall NIGHT or CUSTOM profile. Memory buffer - Incoming calls Allows to define how to save incoming calls in buffer. - Outgoing calls Allows to define how to save outgoing calls in buffer. Remote Programming Number Allows to set the Installer number in order to automatically start remote programming when the configured number calls Hi-pro (only with Caller ID). Pagina Types of Trunk lines - Types of Trunk Allows to define the type of trunk: analogue multi-frequency (MF), ISDN or none (Excluded). Analogue lines Allows the configuration of the features available for each analogue line. - Call Forwarding (DAY profile) Defines the possibility of enabling the External Call Forwarding service for the current line. - Call Forwarding (NIGHT profile) Defines the possibility of enabling the External Call Forwarding service for the current line. - Call Forwarding (CUSTOM profile) Defines the possibility of enabling the External Call Forwarding service for the current line. Pagina - Waiting music Allows the activation of the External music source (e.g.: A50) for the current line. - Timed DISA Allows enabling Timed DISA service for the current line. - Receiving CLI Allows to enable the receiving of Caller ID for each line (only advanced users). - Switch-FAX Allows enabling FAX-switch service for the current line. - Detect PABX disconnection (100/100 ms) Allows enabling the detection of the clearing tone used by several PABX (425 Hz 100 ms ON – 100 ms OFF ) to notify when the remote caller leaves the conversation. - Detect Trunk disconnection (200/200 ms) Allows enabling the detection of the clearing tone used by trunk lines (425 Hz 200 ms ON – 200 ms OFF) to notify when the remote caller leaves the conversation. - FAX extension Allows to define, for each external line, the extension where the calls recognized by the FAX-switch are diverted (if enabled). Pagina ISDN lines Allows the configuration of the features available for each BRI. - Type Allows to define the type of ISDN line: Point to Point or Point to Multipoint. - ID CLIR (Calling Line Identification Restriction): allows to restrict the caller ID to the called subscriber. COLR (Connected Line Identification Restriction): allows to restrict the connected user ID to the calling subscriber. - T.E.I. Allows to assign T.E.I. value. It is possible to assign a value from 00 to 63 or set a dynamic T.E.I. assignment ( request of a free value from the network) by inserting the T.E.I. value of 64. - FAX extension Allows to define the extension to which divert FAX calls recognized by the FAX-switch. Pagina - Number (BRI numbers table) Allows to define all BRI numbers assigned by service provider. - Incoming call Allows to configure how to manage incoming calls over each BRI number inserted in table (diverting to a group of extension using VIP virtual lines, to a real line of the BRI or to a single extension and then to a real or virtual line ). - Call Forwarding (DAY profile) Defines the possibility of enabling the External Call Forwarding service for the current number of the BRI numbers table. - Call Forwarding (NIGHT profile) Defines the possibility of enabling the External Call Forwarding service for the current number of the BRI numbers table. - Call Forwarding (CUSTOM profile) Defines the possibility of enabling the External Call Forwarding service for the current number of the BRI numbers table. - Waiting music Allows the activation of the External music source (e.g.: A50) for each BRI number. - Timed DISA Allows enabling Timed DISA service for each BRI number. - Faxswitch Allows enabling the automatic detection of FAX tones for each BRI number. Pagina - Outgoing calls IDs Allows to define which of the BRI numbers in the table will be used by each extension as its identifier in outgoing calls. Pagina Lines engagement mode Allows to define until 8 different line engagement modes. - Memory For each Engagement Mode it is also possible to set if keep track of last engaged line or not (to have a cyclical use of all lines). Pagina Doorphone interface Doorphone call forwarding Allows to set, for each doorphone station, the doorphone call forwarding destination number and the Line Engagement Mode (refer to previous paragraph). Pagina EXTENSIONS PROGRAMMING This window consists of five folders: - Incoming trunk lines: allows to specify (for each profile) which extension will ring, which will ring with a delay, which won't ring but can answer by dialing 5, which can only receive by the transfer of another extension, in case of incoming call from each of the external lines (real or VIP) or doorphone stations; - Outgoing trunk lines: allows to specify (for each profile) which line and which lines engagement mode each extension can use for outgoing calls; - Call barring configuration: allows to assign (for each profile) filter groups to extensions, in order to define admitted dialings; - Services activation: allows, for each extension and profile, to enable or activate some of Hi-pro services; - Services status: allows to visualize and modify the status of : Do Not Disturb, Call Forwardings (timed, on busy and all calls) and Alarm Clock services for each extension. In each folder, all extension are identified by their conventional numbering, while the profile is specified in “Profile” column. Buttons DAY profile Allows to visualize in the folders, parameters corresponding to DAY profile. NIGHT profile Allows to visualize in the folders, parameters corresponding to NIGHT profile. CUSTOM profile Allows to visualize in the folders, parameters corresponding to CUSTOM profile. Pagina Remote programming: choosing extensions when reading or writing During remote programming, the software allows to choose the extensions to read or write. Incoming trunk lines A full equipped Hi-Pro arranges four “real” external lines through which receive calls (L1~L4). Hi-Pro is also provided of an automatic call distribution system based on ID number (ACD). Thanks to ACD system it is possible to divert incoming calls (from a specific number) to a single extension, to a group, or first to an extension and then to a group. Calls routing to extensions groups happens through virtual lines called VIP1...VIP8. As happens for a real external line, even for virtual lines is allowed to configure extensions functioning and line services. To define numbers associated to VIP lines please refer to “Speed dial” window. Incoming calls and Doorphone Allows to configure the extensions actions in case of incoming call through a real line, virtual line or doorphone station. Select a box. Select an option by repetitive mouse clicks or by pressing space bar until the desired symbol is visualized: Pagina the extension rings in case of external line or doorphone incoming call; the extension will ring only after a delay (default 20 sec.), in the meantime it can answer by dialing 5; the extension won’t ring, but it can answer by dialing 5 (call pick up); Empty box the extension won’t ring and cannot answer by a pick up. Move to other boxes by a mouse click or using arrow keys. Note: it is also possible to change the entire column or line state by double clicking the column index / extension number. Pagina Outgoing trunk lines Allows to define which lines and which engagement mode each extension can use for outgoing calls. Select a box. Select an option by repetitive mouse clicks or by pressing space bar until the desired symbol is visualized: Empty box the extension is enabled to use the corresponding line; the extension is not allowed to use the corresponding line. Move to other boxes by a mouse click or using arrow keys. Note: it is also possible to change the entire column or line state by double clicking the line/ extension number. Trunk engage order (dialing 0) Select a box. Select an option by repetitive mouse clicks or by pressing space bar until the desired mode is visualized. Pagina Call barrings Allows to assign to each extension the admitted selections (refer to “Call barring / L.C.R. programming” window). An assigned group is admitted, an empty box means the corresponding group is not admitted. Select a box. Select an option by repetitive mouse clicks or by pressing space bar until the desired symbol is visualized: the extension is enabled to dial the numerical sequences inserted in the corresponding group; Empty box the numerical sequences in the corresponding group are not allowed to the extension. Move to other boxes by a mouse click or using arrow keys. Note: it is also possible to change the entire column or line state by double clicking the group number/ extension number. Pagina Services activation Allows enabling or activating, for each extension and profile, some of the Hi-pro services. - Divert all: enables the access to Divert All Calls service; - Divert on busy: enables the access to Divert On Busy User service; - Divert on no answer: enables the access to Timed Divert service; - Call forwarding: enables the access to External Call Forwarding service; - ETSI Call forwarding: enables the access to ETSI Call Forwarding service; - Trunk to trunk conversation: enables the access to Trunk to trunk conversation service; - Doorphone Call forwarding: enables the access to Doorphone Call Forwarding service; - Do not disturb: enables the access to Do not disturb service; - Relays activation: enables the extension to use relays; - Amplifier: enables the extension to use amplifier; - Voicemail: enables the extension to use Voicemail; - Receive DISA/TD: enables the extension to receive DISA or “DDI from phonebook” calls (VIP calls); - General call on no answered DISA / TD calls: activates on the extension the general call on no answered DISA or “DDI from phonebook” calls (VIP calls); Pagina - Call interception: enables the extension calls to be intercepted from other extensions. - Phonebook calls without restrictions: enables the extension to call numbers in phonebook bypassing any call barring; - Automatic engage: activates the automatic engage of the external line, to avoid dialing 0; - L.C.R. (Least Cost Routing): activates L.C.R. service; - External call capture (Basic): enables basic pick-up service (answering incoming calls by pressing line key over system telephones); - External call capture (Advanced): enables advanced pick-up service (answering incoming calls by pressing line key over system telephones, even if extension is ringing); - ST350 alarm key: activates ST350 alarm key ; - Alarm on no selection: activates the Alarm on no selection. Select a box. Select an option by repetitive mouse clicks or by pressing space bar until the desired symbol is visualized: the corresponding service is enabled/activated for the extension; Empty box the corresponding service is not enabled/activated for the extension. Move to other boxes by a mouse click or using arrow keys. Note: it is also possible to change the entire column or line state by double clicking the services name/ extension number. Pagina Services status Allows to visualize and modify, for each extension, the status of Do Not Disturb, Call Forwardings (timed, on busy and all calls) and Alarm Clock services. Do not disturb Select a box. Select an option by repetitive mouse clicks or by pressing space bar until the desired symbol is visualized: Empty box Do not disturb active; Do not disturb unactive. Move to other boxes by a mouse click or using arrow keys. Note: it is also possible to change the entire column or line state by double clicking the do not disturb type/extension number. Pagina Call diverts Select a box by a double click. Select the destination extension using the down arrow button in the box. Otherwise: Insert the destination extension number. Press “Enter” to confirm or “Esc” to delete data. Move to other boxes by a mouse click or using arrow keys.. Alarm clock Select a box by a double click. Set the alarm clock time using the arrows button in the box. Press “Enter” to confirm or “Esc” to delete data. ACTION SEQUENCES This window consists of four folders: - Define sequences: allows to define an action or actions sequences to be carried out from Hi-pro in case of the following events is happened; - Digital inputs: allows to configure Hi-Pro digital input; - Timer: allows to set timers; - Extension Alarm: allows to configure 2 alarm events, each one is causable by any of the extensions (i.e. pressing ST350 alarm key or picking up the handset without dialing). Nota: the function is not active during remote programming process, then action sequences (caused by an alarm input, a timer etc.) won’t be performed. Sequences Defining Allows to define up to 4 different action sequences. Each one could be made up of a min. of one action to a max. of 8 of the following actions: - closing , opening or pulse activating a relay; - waiting a customizable delay before starting the following action; - making an alarm call to an extension; - making an alarm call to a remote user; - going to another action sequence; - repeating the current sequence. Pagina Note: for the alarm calls management see paragraph “Alarm Dialer function” in “User manual”. To define a sequence: Select box in “Nome” column by clicking on it. Insert desired name (max. 16 characters). Press “Enter” to confirm data or “Esc” to cancel. Select the box in column 01 by double-clicking on it, in order to insert the first action. Select desired action from the drop-down list box. Action on relays Select desired relay. Pagina Select the action to be processed by specified relay. Run pending Insert the number of seconds Hi-Pro has to wait before performing the following action. Internal call Select the extension number to be called. External call Select the phonebook location containing the number to be called. Select the desired Lines Engagement Mode. Repeat sequence Insert the number of repetitions to perform. Select the action from which start sequence repetition deve iniziare la ripetizione della sequenza. Go to sequence Select the sequence to go to. Select the action from which restart the new sequence. Press “Enter” to confirm data or “Esc” to cancel. Double-click the box on the right side of the previous to add another action and so on. Pagina Digital inputs Allows to define: - the input name; - the actions sequence to be executed by Hi-Pro in case of input activation; - the event type (open / close contact) and the duration of it. To configure an input: Select box in “Nome” column by clicking on it. Insert desired name (max. 16 characters). Press “Enter” to confirm data or “Esc” to cancel. Select box in “Event type” column by double-clicking on it. Chose the event type to originate the actions sequence (close contact / open contact). Select box in “Sequence” column by double-clicking on it. Chose one of the 4 available sequences or one of the PABX Profiles (Day / Night /Custom). Select box in “Event duration (sec)” column by double-clicking on it. Insert the minimum number of seconds the input has to be closed (or opened) to make Hi-Pro start the sequence. Press “Enter” to confirm data or “Esc” to cancel. Pagina Timer Allows to configure up to 4 time events. You can define: - the time event name; - the actions sequence to be executed by Hi-Pro when the event happens; - the event hour; - the event date or its periodicity. To configure a Time Event: Select box in “Name” column by clicking on it. Insert desired name (max. 16 characters). Press “Enter” to confirm data or “Esc” to cancel. Select box in “Sequence” column by double-clicking on it. Chose one of 4 available sequence. Select box in “Time” column by double-clicking on it. Select event hour using box arrow keys. Press “Enter” to confirm data or “Esc” to cancel. Select box in “Date” column by double-clicking on it. Select Time Event date. Otherwise: Select desired days in “Periodicity” column with double-clicks or by pressing the space bar until a tick is visualized. Note: specify at list a date or the periodicity for each Time Event. Pagina Extension Alarm Allows to configure 2 alarm events, each one is causable by any of the extensions (i.e. pressing ST350 alarm key or picking up the handset without dialing). You can define: - the event name; - the actions sequence to be executed by Hi-Pro when the event occurs; - the sequence activation delay. Note: in case of “no selection”event, if the user hangs up before the defined delay the sequence won’t be carried out. Pagina To configure an alarm event: Select box in “Name” column by clicking on it. Insert desired name (max. 16 characters). Press “Enter” to confirm data or “Esc” to cancel. Select box in “Sequence” column by double-clicking on it. Select one of the available sequences. Select box in “Activation delay (sec.)” column by double-clicking on it. Insert the number of seconds to wait before starting sequence. Press “Enter” to confirm data or “Esc” to cancel. PROGRAMMAZIONE FILTRI / L.C.R. This window allows to: - configure up to 8 groups to be used as call barrings or admitted selections; - configure L.C.R. (Least Cost Routing) service by associating each group to the lines compliant with its number sequences (codes). How call barrings works - It is possible to assign more then one number sequence to each group. - A number sequence can be inserted in one group only. Una sequenza numerica di filtro inserita in un gruppo non è consentita agli altri gruppi. - is inserted by default and associated with group 1. In this way dialing with initial digit from 0 to 9 is possible. - You can enter filtering criteria up to max. 6 digits in the “Codes” field. - You can enter 32 different criteria in the “Codes” field. - If you enter 0 in group 2 and 00 in group 3, the international number 004538890 is considered as belonging to group 3 although it starts with 0. Pagina Inserting a code Allows to create groups of prefixes (codes, digits sequences) to be used as call barrings or admitted selections, and for L.C.R. service. To insert a selection : Select box in “Codes” column by clicking on it. Insert the sequence of digits (max. 6). Press “Enter” to confirm data or “Esc” to cancel. Associate the dialed code to a group with double-clicks or by pressing the space bar until a tick is visualized. To remove a code (prefix) Select box in “Codes” column by clicking on it. Press “Canc” and then “Enter” to confirm elimination. L.C.R. configuration Prov.code (Provider code) Allows to associate an eventual provider prefix to groups. Hi-Pro will preselect specified digits. Select the box related to the desired group by clicking on it. Insert carrier preselect prefix (max. 6 digits), if required. Press “Enter” to confirm data or “Esc” to cancel. Pagina Trunk search Allows define a Line Engagement Mode for each group, in order to assign lines compliant with group prefixes. Select the box related to the desired group by clicking on it. Select the line engagement mode with double-clicks or by pressing the space bar until the desired option is visualized. FUNCTION KEYS OF ST SERIE TELEPHONES This window allows to modify default configurations and to associate a specific Hi-Pro service with keys of “ST serie” telephones (ST200, ST350 and ST500). Select phone model: ST200, ST350 or ST500. Select desired key box by double-clicking on it. Select one of the available services using the arrow key of the dropdown menu. Pagina TIMERS This windows allows the modification of timers related to some PABX features (only advanced users). Select desired timer box to modify by clicking on it. Modify timer duration (in seconds). Press “Enter” to confirm data or “Esc” to cancel. Pagina VOICE SERVICES This window consists of four folders: - Define messages: to configure up to 30 single messages and 2 message sequences using the memory provided with Hi-Pro; - Incoming calls Voice Services: to define, for each line and profile, the active services (DISA; IVR and/or Courtesy Responder) and the related messages to be played; - Automatic Operator (IVR): to configure up to 10 menus; - Voice Mail: to configure Voice Mail service. Buttons Send file Allows to customize PABX configured messages by sending “.WAV” audio files (see paragraph “Customize messages”). Export Allows to save all configurations in Voice Services folders in a text file. Save Allows to save data end close current window. Close Allows to close the current window. In case of data modifications, it will ask if save changes. Pagina Define messages Allows to configure up to 30 single messages and 2 message sequences using the memory provided with Hi-Pro. Single Messages - MSG Indicates message index. - Protection Allows to protect the message from re-recording. - Background Allows to activate the external music source (A50 input) as background music of the message. - Name Allows to associate a name to messages. - Duration (sec.) Allows to set the maximum message duration. - Quality Allows to define the message recording quality (from 4 to 8 kHz). Note: the occupied memory space changes according to the messages quality and duration . Combined Messages - MSG Indicates message index. - Background Allows to activate the external music source (A50 input) as background music of the message sequence. - Name Allows to associate a name to messages. - Messages Sequences Allows to define two sequences as combination of up to 3 single messages. Note: message sequences do not occupy any of the memory space. Pagina To configure a message: If protection is enabled for the desired message (a lock icon is visualized in related “Protection” column), unblock by double-clicking on it on the lock. Select the box related to the message in “Background” column by double-clicking on it to associate a background music with the message (only with an external music source). Select the box related to the message in “Name” column by clicking on it. Insert desired message name (max. 16 characters). Press “Enter” to confirm data or “Esc” to cancel. Select the box related to the message in “Duration (sec.)” column by clicking on it. Insert the message duration (in seconds). Press “Enter” to confirm data or “Esc” to cancel. Select the box related to the message in “Quality” column with a double click. Select desired quality from the drop-down menu. Pagina Incoming calls Voice services Allows to define, for each line and profile, the active services (DISA; IVR and/or Courtesy Responder) and the related messages to be played. Buttons Day Profile Allows to visualize messages assigned to Day Profile and the active ones. Night Profile Allows to visualize messages assigned to Night Profile and the active ones. Custom Profile Allows to visualize messages assigned to Custom Profile and the active ones. To enable DISA / Automatic Operator service on a specific line: Select the empty box in “DISA Service” column with a double click. Pagina Select the option with mouse clicks or by pressing the space bar until the desired symbol is visualized: Empty box DISA service / Automatic Operator active. DISA service / Automatic Operator inactive. Select the other box in “DISA Service” column with a double click. Select the desired DISA message or Automatic Operator menu from the list of available messages and menus (these last appear at the end of the list only if configured). Note: it is possible to select only menus with an assigned guide message (see following paragraph). Note: according to the message or menu chosen, the PABX processes the DISA or Automatic Operator service (IVR). The procedure to activate Responder Service is similar to the previous. Automatic Operator (IVR) Allows to configure up to 10 menus. For each menu it is possible to: - assign a customizable guide message, in order to tell the caller the digit to press for the available options ; - assign up to 12 actions corresponding to telephone keys (0-9. *, #). In addiction it allows to define: - additional seconds for the selection at the end of guide message; - the operator key (in common for all menu). Note: if no message is assigned to a menu as “guide message”, the menu is unused. Note: a default preset defines menu 10 as “control menu” to activate relays and for the room control. Note: a default preset assigns to event “*”(if the caller dials “*”) of menus 01~09, the redirection to the control menu (menu 10)by dialing Operator Password. Menu Allows scrolling the 10 menus in order to visualize or modify the options (events) of chosen menu. - Guide message Allows to assign a message to the selected menu. - Event Indicates the digit dialed from the caller. Pagina - Action Allows to assign the action to perform when an event occurs. - Parameter Allows to define the desired parameter. Selection-waiting seconds Allows to set how many seconds are available to dial after the end of the guide message. When this timer expires, the “no dial” option is processed. Operator Key Allows to define a common digit for all menus, in order to divert the incoming call to the extensions enabled for the current line. Pagina These are the operations available for the “Automatic Operator” (IVR): - Call extension ( ): the call is diverted to the extension (401~412) defined by parameter. - Call FAX extension: the call is diverted to FAX extension. - DISA: the caller dials the extension desired. - Incoming Call: the call is diverted to extension enabled for the current line. - VIP Incoming Call: the call is diverted to extension enabled for the VIP line (VIP1~VIP8) specified by parameter. - Listen message () and make an incoming call: plays message defined by parameter (01~30 or 91~92) and then diverts the call to the extension enabled for the current line. - Listen message ( ) and clear line: plays message defined by parameter (01~30 or 91~92) and then clears the line. - Repeat guide message: replays guide message. - Recall menu ( ): recalls menu defined by parameter (01~10). - Recall menu ( ) with Operator PWD: recalls menu defined by parameter (01~10) by inserting Operator Password. - Activate Relay ():activates relay (01~02) defined by parameter (closes the contact). If inserted parameter is 00, the relay number has to be specified by the remote caller. - Disactivate Relay ( ): disactivates relay (01~02) defined by parameter (opens the contact). If inserted parameter is 00, the relay number has to be specified by the remote caller. - Pulse Relay ( ): activates relay defined by parameter (01~02) for a pulse of 1 sec (customizable timer). If inserted parameter is 00, the pulse durations has to be specified by the remote caller. - Access the remote programming with Installer PWD: allows to start remote programming mode by dialing Installer Password. - Handsfree Room Control ( ): the room control occurs trough the handsfree of the extension specified in the parameter . To configure a menu: Select the menu number to configure using the arrow keys beside. Associate one of the available messages to the menu. Select the box corresponding to desired event in “Action” column with a double click. Select the desired operation. Select the box in “Parameter” column with a double click, if required. Set the parameter. Pagina Define “Selection-waiting seconds” , if required. Define “Operator key” , if required. Voice Mail Allows to: - assign Voice mail to an extension; - activate or disactivate Voice Mail in each Profile; - modify Voice Mail password; - define maximum message duration and quality; - visualize how many Voice Mail messages are present. Voice mail Allows to define the maximum Voice Mail message length and its quality. Voice mail status - Extension Allows to assign Voice Mail to an extension. - Password Allows to define or modify Voice Mail user password. Pagina - Recorded messages Allows to visualize how many messages are present in Voice Mail. - Day / Night / Custom Allows to define profiles in which the Voice Mail is active. To configure Voice Mail: Modify, if desired, default duration e and quality. To assign Voice Mail to an extension: Dial the extension number in “Extension” box to assign the Voice Mail for a specific extension. Insert a desired password or leave the default one (00000). Select the profiles in which activate Voice Mail Service. Note: to use the Voice mail please refer to “Voice mail service” chapter in “User’s manual”. Customize messages This procedure allows to customize Hi-pro messages using .WAV audio files. Note: use only files: .WAV, 8 kHz, mono, ADPCM, 16-bit minimum. Note: do not use 8-bit files. Note: do not use .MP3 files. To customize a message: Connect to Hi-Pro by pressing “Link to PABX”. “Send File” button is now enabled in “Voice Services” window. Press “Send File”. Double-click over “Message” box to visualize the available messages list. Select the message to customize. Double-click over “File Name” box to open the search window and select the.WAV file to send to PABX. Pagina Select the desired file. Press “Play” to listen the message. Select “Play compressed file” and press “Play” to listen how the pabx will play the message. Press “Send to PABX” to send the message and overwrite the previous one. ACTUATORS RELAY CONFIGURATION This windows allows the set up of the Hi-pro actuator relays. Note: when the doorphone board is present and if “pulse activation” is enabled, relay 1 and relay 2 could be activated as door opener. Local access with password Allows to define if access to relay is password protected. Available actions: - Disactivation Allows to enable or disable the possibility of disactivating the relay (open the contact). - Activation Allows to enable or disable the possibility of activating the relay (close the contact). - Pulse Allows to define if relay can be activated with a timed pulse (see “Timing pulse”). - Timed Allows to define the possibility to activate relay for a duration to be determined in the request itself. Timing pulse Allows to define relay closing time in case of Pulse Activation. Relays condition at start up Allows to define relays status at Hi-pro start up. Pagina To configure relays functioning: Select the box in “Local access with password” column by clicking on it. Select the option with mouse clicks or by pressing the space bar until the desired symbol is visualized: Empty box password required to access relays; password not required to access relays. Select the box in “Allowed actions” column by clicking on it. Select the option with mouse clicks or by pressing the space bar until the desired symbol is visualized: Empty box action allowed; action unavailable. Select the box in “Timing pulse” column by clicking on it. Insert pulse duration in seconds. Press “Enter” to confirm data or “Esc” to cancel. Select the box in “Relay status at start up” column with a double click. Select desired option. PHONEBOOK This window allows to: - save up to 200 numbers in PBX phonebook; - assign one o more numbers to an extension and/or to a VIP line (calls from this number will be divert to the specified extension and/or to the VIP line using ACD system). Pagina Buttons Export Allows to save phonebook in a text file. Save Allows to save data end close current window. Close Allows to close the current window. In case of data modifications, it will ask if save changes. Force phonebook compiling If selected, it allows to write all phonebook entries. If unselected, only modified boxes will be send to PBX. To insert a number in the phonebook: Select the box in “Name” column by clicking on it. Insert the desired name (max. 16 characters). Press “Enter” to confirm data or “Esc” to cancel. Pagina Select the box in “Number” column by clicking on it. Insert the subscriber number (max. 19 digits). Press “Enter” to confirm data or “Esc” to cancel. Select the box in “Extension” column with a double click, if required. Select the desired extension using the arrow key of the box. Select the box in “VIP” column with a double click, if required. Select the chosen VIP line using the arrow key of the box. ADVANCED This windows allows to send special codes to the PBX (only for advanced users). INFO AND UPDATES Allows to: - verify Teleprogramming Software release; - download Teleprogramming Software updates; - download the Hi-pro’s firmware update tool; - download the Hi-pro’s firmware updates. An Internet connection is required. Pagina Press “?“ button. A drop-down menu will appear. Select “Check for Teleprogramming SW Informations” to visualize the current firmware version. Select “Check for Teleprogramming SW firmware updates” to verify if any update is available. In case of updates available: Save updating pack in a PC folder. Close the Remote Programming Software. Double-click the updating pack and follow the guided procedure. Select “Install PABX firmware updating tool” to download and install the Esse-ti Downloader, a tool which allows to update Hi-pro from your PC. Select “Last PABX firmware download” to get the most recent Hi-pro firmware. In case of updates available: Save updating file in a PC folder. To start firmware update: Launch “Esse-Ti Downloader” tool just downloaded. Press “Load” button and select updating file. Select the correct COM port. Press “Connect”. Press “Send” and wait the end of the updating routine. Press “Disconnect” and close the tool. Pagina HI-PRO Remote Programming Software Manual Edition 22/04/2015