1
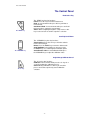
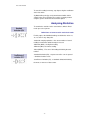
Novo-Curve Manual
Rhopoint Instruments Ltd.
Novo-Curve Operation Manual
Information in this document is subject to change without notice.
© 2008 Rhopoint Instrumentation Ltd. All Rights Reserved.
Novo-Gloss Trio, Novo-Shade DuoTM, Novo-SoftTM, Novo-GlossTM,
TM
TM
TM
Novo-Gloss Lite , Novo-Curve and Rhopoint are either registered
trademarks or trademarks of Rhopoint Instrumentation Ltd. in the UK
and other countries.
Other product and company names mentioned herein may be
trademarks of their respective owner
Rhopoint Instruments Ltd.
12 Beeching Road,
Bexhill-on-Sea,
TN39 3LG
United Kingdom
Tel: +44 (0)1424 214291
Fax: +44 (0)1424 730600
Email: [email protected]
Web Site: www.rhopointinstruments.com
Revision B
Sept 2009
DRD1277-500
-1-
Novo-Curve Manual
Index
Accessories
Options
Power
The Control Panel
Read/select key
Scroll up/down
Angle change/calibrate/cancel
Measuring Gloss
Check the calibration
Positioning the calibration standard
Take a single reading
Using the move and read feature
Calibration Inspection and Tile Care
Inspecting and cleaning the optics
Inspecting and cleaning the calibration tile
Scratched or damaged tiles
Calibration
Calibrate a single angle
Calibrate all angles
Automatic calibration check
Statistics
Definition of terms used in statistics mode
Preferences
Changing the calibration value
Calibrate at low, medium or high gloss
Change calibration value in the setup menu
Change calibration value via Novo-Soft
Customising the Trio using the hidden menu
True zero calibration
Language
Statistical/non statistical mode
Connecting to a PC
Installing the software
Installing the drivers
Connecting the Instrument
Downloading results
Saving and manipulating data
Preferences
Connecting Advice
-2-
3
3
3
4
4
4
5
5
5
5
6
6
6
7
7
7
8
7
7
7
8
8
8
8
8
11
11
13
13
13
13
14
Novo-Curve Manual
Accessories
• Novo-Curve Instrument
• Traceable calibration tile in protective case
• Traceability certificate for calibration tile
• Printed user manual
• Mini-CD containing Novo-Soft, instrument manuals and
registration form
• Registration card
• USB data cable
• Footswitch
• 4 x Jigging posts
• Power supply unit
• Mains cables (UK, EU and USA)
Options
•
Replacement BAM Traceable calibration tile
•
Supplementary calibration/checking tiles
•
UKAS (ISO17025) BAM traceable calibration/checking tiles
•
Novo-Curve Cylinder Measurement Jig
Power
The Novo-Curve is powered using an external low voltage
power supply.
-3-
Novo-Curve Manual
The Control Panel
Read/Select Key
The “READ” key
The “READ” key has four functions;
Power- Press this key to turn the instrument on.
Read- In measurement mode press this key to initiate a
measurement.
Continuous Read- In measurement mode press and hold
this key to take a continuous measurement.
Select- When navigating through the setup menu use this
key to select an item or confirms a previous selection.
Scroll Up/Scroll Down
The “UP/DOWN” key
The “UP/DOWN” key has four functions;
View Statistics- Press the UP key to view the statistics
for the selected angle.
Delete- Press the DOWN key to enter the delete mode.
Scroll Up/Down- In the hidden set up menu use the
UP/DOWN keys to scroll through the available options.
Set Calibration value- In Set Calibration Mode press
the UP/DOWN keys to adjust the calibration value.
Angle Change/Calibrate/Cancel
The “C” key
The “C” key has two functions;
Calibrate- In measurement mode press the “C” key for 2
seconds to initiate the calibration process.
Cancel- During calibration use this key to cancel the
process and revert to previously stored calibration
constants.
-4-
Novo-Curve Manual
Measuring Gloss
Check the Calibration
If the instrument has not been used for some time it is
advisable to check the calibration.
Place the high gloss calibration tile on the instrument aligning
the arrows with the alignement marks on the sole plate. Take a
reading by pressing the READ/SELECT key. Compare the
measured value with the assigned value for the tile.
If it matches the value on the tile holder, the instrument is
within calibration and ready for use.
If the measured value does not match the assigned value, follow
the calibration procedure ( s e e p a g e 6 ) .
Positioning the sample on the Novo-Curve
When a sample is placed on the instrument the aperture is
hidden, the centre of the measurement area can be pinpointed
by the intersection of the white lines marked on the sole plate.
Take a single reading
Press and release the READ/SELECT key in measurement mode
to take a single reading.
The value shown in the display is the gloss value for the section
of the sample covered by the aperture. This value has been
stored in the memory and the number of stored readings
increased by one.
Using the move and read feature
The Novo-Curve has a unique feature to quickly assess large
surfaces for gloss variation.
To use this feature PRESS and HOLD the READ/SELECT key
whilst in read mode. The unit will take a reading.
A value will be shown in the display; this is the gloss value for
the part of the sample currently covered by the measurement
aperture.
To assess the rest of the sample continue to HOLD the
READ/SELECT key and carefully slide the sample to the area to
be inspected.
The value in the display will update IN REAL TIME to reflect the
gloss value of the surface over the aperture at that time.
As soon as the READ/SELECT button is released the last value
measured will be displayed. This is also the value stored in the
memory.
-5-
Novo-Curve Manual
Inspection and tile care
It is necessary to inspect the condition of the calibration tile and
instrument optics before each calibration.
Inspecting and cleaning the instrument optics
Any dust or debris on the optic should be blown from the lenses
using dry clean air- the optics must not be touched without
wearing suitable cotton gloves.
If there are any permanent marks or scratches on the lenses, the
instrument is no longer suitable for measuring gloss and should
be returned to an authorised Rhopoint service center.
Inspecting and cleaning the calibration tile
The calibration tile must be perfectly clean from smears and
scratches before attempting calibration. Fingerprints and dust
can be removed with the supplied optic cleaning cloth.
Scratched or damaged tiles
Scratched or damaged tiles are not suitable for gloss calibration.
The instrument and tile must be returned to an approved
Rhopoint service center for tile replacement and re-calibration.
-6-
Novo-Curve Manual
Calibration
Press and hold the “C” key to begin the calibration procedure. An
on screen instruction will prompt the user to “Sample the zero
ref”.
The calibration tile should be placed on the platen with the foam
side face down, press the “Read Key” to complete this part of the
calibration procedure.
The instrument will then prompt “Sample High Ref”; the
calibration tile should be turned over so that the glass surface
faces down. Align the arrows on the tile with the alignment lines
on the sole plate. There is also a read direction arrow on the tile
this should point from left to right.
Press the read key to complete the calibration process,
Pressing the “C” key at any point during calibration will cancel
the procedure and revert to the last calibration values.
Press and HOLD the “C”
key to start calibration.
Automatic calibration check
During calibration the instrument automatically checks for
changes in the condition of the calibration tile.
If changes to the expected value are detected the instrument will
prompt
“Possible Calibration Error- Check Calibration Tile”
The calibration tile and instrument optics should then be carefully
checked for marks or scratches.
If there are smears mark or dust on the optics, press the “C” key
to abort the calibration, and clean tiles and optics using the
above procedure and repeat the calibration process
If the calibration tile is seen to be completely clean, press the
read key to store the calibration data.
The “C” key can be pressed at any time to abort the calibration
process.
Measuring a Curved Surface
The Novo-Curve is specifically designed to measure curved
surfaces; there are two methods to achieve repeatable results.
Manual Method- Place the sample to be assessed over the
measurement orifice.
It is important that the sample is absolutely flush with the plane
of the sole plate, this is the focal point for the measurement
beam.
The instrument should then be used in “continuous read mode”,
this can be achieved by pressing and holding the “read” key or
continuously depressing the foot switch.
The sample must then be manipulated until a peak gloss
reading is observed. This peak reading is only observed when
the sample is in the correct measurement position.
-7-
Novo-Curve Manual
To store this reading in memory, stop depressing the read button
or the foot switch.
Jig Method- Bespoke jigs can be manufactured which hold a
sample in the correct position. They can be accurately located
using the grooves around the measurement platen.
Analysing Statistics
To examine the statistics for the stored values, whilst in Read
mode -press the up arrow.
Definitions of terms used in statistical mode
For this purpose the individual readings are defined as values x1,
x2, xn, and xi is any data point:
-Statistical sample population, n- the current number of stored
readings on which the statistical analysis is based.
-Maximum (MAX) - the highest reading.
-Minimum (MIN) - the lowest reading.
-Mean (MEAN), - The sum of all readings divided by the total
number.
-Standard deviation (SD), s- Square root of the sum of squared
--deviations from the mean.
-Coefficient of variation (CV), c- Standard deviation divided by
the mean, a measure of data scatter.
-8-
Novo-Curve Manual
Preferences
Changing the calibration value
The instrument is supplied with the assigned values of the
standard tile stored in the instrument memory.
These values are updated when the instrument is recalibrated by
an authorised service center.
The stored values can also be changed by the end user if an
alternative tile is to be used for calibration.
Calibrate at low, medium or high gloss value
It is often desirable to calibrate using a standard that closely
matches the gloss of the samples to be tested.
Rhopoint supply a range of gloss, semi-gloss and matt tiles to
suit all applications. To calibrate the Novo-Curve using a
purchased tile, the calibration value in the instrument memory
must be adjusted to match the assigned value of the new tile.
Rhopoint also supply mirror tiles for verification of measured
values at very high gloss levels. The instrument should not be
calibrated on a mirror tile.
Change calibration values in the set up menu
Access the hidden set up menu using the following key press
combination;
-First press and hold the DOWN button.
-Press and hold the C button whilst continuing to press the
DOWN button.
-Wait until “SYSTEM SET UP” appears in the display.
Press and HOLD the “C”
and “DOWN” keys to enter
the set up menu.
-Scroll up/down until “SET STD CAL VAL.” is shown on the
display.
-Press the read key to change this value.
-Use the UP/DOWN arrow to adjust to the assigned value of the
calibration tile.
-Press the READ KEY when the value is correct, if required
repeat the process for the remaining angles.
Change calibration values via Novo-Soft
It is possible to change the stored values when the instrument is
connected to a PC running Novo-Soft. For more details follow
the connection instructions on page 7 of this manual. Full
instructions are contained in the software help files.
-9-
Novo-Curve Manual
Customising the Novo-Gloss Trio via the hidden set up
menu
Use the following key combination to access the Novo-Curve set
up menu;
Press the DOWN KEY whilst simultaneously pressing the C
button.
SYSTEM SET UP will be shown in the instrument display.
Use the UP/DOWN buttons to cycle through the available
options.
Language
English, French, German, Spanish, Dutch and Italian are the
standard languages available in the Novo-Curve; more
languages will be added as they become available, visit
www.rhopointinstruments.com for a full list or to request
additional language support.
Press read key to enter this menu, use the up/down arrows to
locate the required language. Press the read key to select.
Statistical/Non-statistical mode
The instrument can be used with or without statistical analysis. In
non-stat mode all functions except read and calibrate are
disabled. Press the read key toggle between STATS ON/STATS
OFF modes.
- 10 -
Novo-Curve Manual
CONNECTING TO A PC
Install the software
Place the Novo-Soft mini-cd in the drive of a compatible PC.
Depending on the settings of your PC the Novo-Soft Installation
program should automatically start, alternatively double click on
the Novo-Softinstall.exe icon in the relevant CD drive.
Follow the on screen instructions in the install wizard window to
install Novo-Soft.
Once installed, double click on the Novo-Soft icon on the
desktop to run the software.
Installing the drivers
With the mini-cd in the drive connect the USB cable to a free port
on your PC.
Connect the other end of the cable to the instrument.
Turn on the instrument.
The following will be shown:
Click ‘no, not this time’ and then click ‘next’.
- 11 -
Novo-Curve Manual
Click ‘Install from a list or specific location’ then click ‘next’.
Click ‘search removable media’ then click ‘next’.
The PC should find the driver and install it from the disc.
- 12 -
Novo-Curve Manual
Click ‘finish’.
The PC will detect another new hardware component, follow the
above steps again.
Your Novo-Curve is now installed and ready to use.
Connect the instrument
Connect the instrument to a USB port on your PC with the
supplied data cable.
In the ‘Set-Up’ menu ensure that the ‘high speed coms’ box is
ticked.
Click the “CONNECT” icon in the Novo-Soft main menu to open
the connection window.
Ensure the instrument is switched on (press the read key).
Press the “CONNECT” button in the connection window to
initiate communication.
Downloading results
Use the download buttons to retrieve stored readings from the
instrument memory, once downloaded the data can be deleted
from the instrument memory using the relevant delete button.
Saving and manipulating data
For help using Novo-Soft, click “HELP” in the menu.
Preferences
Automatic power-down time, language, calibration values and
automatic/manual calibration can all be adjusted in the NovoSoft set up menu, click on help the menu for more details.
- 13 -
Novo-Curve Manual
CONNECTING
ADVICE
When the instrument has been successfully connected to the PC
the auto-power off function is disabled.
Measurements should not be made with the data cable plugged
into the instrument as R.F. interference may cause inaccurate
readings.
- 14 -