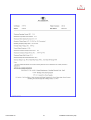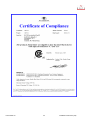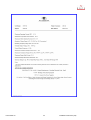
1
Installer’s Manual.
for skilled and authorized electricians
blueplanet...
green power
For skilled and authorized electricians
Installation Instructions
Blue Planet
1501xi / 2901xi / 3601xi
1.
1.1
1.2
1.3
1.4
About this document
Attachment and Maintenance of documents
Symbols used in this document
UL Certification/Labeling
Type label
2
2
2
2
2
2.
Important Safety information and instructions
Save these Instructions
2
3.
3.1
3.2
3.3
Notes concerning installation and operation 3
Factory warranty and liability
3
Service
4
Intended (normal) use
4
4.
4.1
4.2
4.3
Device description
Dimensioning of the PV generator
Protective concepts
Mechanical dimensions
4
4
5
5
5.
5.1
5.2
5.3
Installation and startup
Selecting the appropriate place of installation
Installing the inverter
Electrical connections
6
6
6
8
5.4
5.5
5.6
5.7
5.8
5.9
Connecting the fault-signal relay
Connection of the S0 output
Connection of the RS485 interface
Startup of the inverter
Ground fault indication
Jumper Position
6.
Applications/Acceptance by Your Utility
10
10
10
11
11
11
Company
12
7.
Switching off the inverter
12
8.
Troubleshooting
12
9. Technical Data
9.1 Peak efficiency curves of blueplanet
inverter series
15
16
10. Certificates of Compliance
10.1 UL Certificates of Compliance for
all blueplanet inverters
10.2 Supplement to Certificates of Compliance
18
24
About this document
The following information will guide you through the entire
documentation.
Further documents will be valid in
conjunction with these operating and installation
instructions.
We shall not be liable for any damage caused by nonadherence to the instructions given in this manual.
1.3
UL Certification/Labeling
UL labeling is used to document that the blue planet inverter
indicated on the type label meets the fundamental
requirements according to the following IEC directives:
- Directive concerning Electromagnetic Compatibility with
Class B (Council Directive 89/336/EWG)
- Low Voltage Directive (Council Directive 73/23/EWG
For more information on UL certification please see section
10.
Pertaining documents
During the inverter installation please observe all assembly
and installation instructions for components and other parts
of the system. These instructions are shipped together with
the respective installation components or supplementary
equipment.
1.4
Type label
The type label indicating the exact device description is
located on the support panel at the underside of the
enclosure.
1.1
Attachment and Maintenance of documents
Please keep these operating and installation instructions in
a safe place to ensure that they are available if needed.
2. Important Safety information and
instructions
1.2
Symbols used in this document
Please observe the safety information provided in this
manual when operating your inverter!
Save these Instructions
Warning!
Lethal Hazard!
Warning
Danger
Danger
Danger!
Lethal Hazard by Electric
Shock!
Caution!
Potential hazard for the product
and environment!
Standards and Regulations
Caution
Electrical conformity according to U.S., Canadian and
international safety operating standards and code
requirements:
Note!
Useful information and remarks
- UL 1741 – Standard for Inverters, Converters, and
Controllers for Use in Independent Power Systems
- CSA C22.2 No. 107.1-01 General Use Power Supplies
- IEEE Recommended Practice on Surge Voltages in LowVoltage AC Power Circuits.
- NEC Sections 690 (ANSI/NFPA 70)
Important!
Non-adherence to these instructions may adversely affect the
operating convenience or functionality of the device.
The blue planet inverter has complete on-board overcurrent, over-temperature and anti-islanding protection.
Technical rules
The assembly must be in compliance with the local
regulations and technical rules.
This symTo connect the inverter
the AC and DC side must be
disconnected from all voltage
Regulations concerning the prevention of accidents
The inverter must be installed by an approved skilled
electrician who is responsible for the adherence to existing
standards and regulations.
The proper and safe operation of the device/instrument
requires proper transportation, storage, erection and
assembly, as well as careful operation and maintenance.
Caution!
PoTo reduce the risk of fire,
connect only to a circuit provided
with branch circuit over-current
protection in accordance with the
KACO Solar Inc.
Danger!
Danger due to lethal voltages!
Hazardous live voltages are present inside
the device/instrument and power lines.
Therefore, the device/instrument must only
be installed and opened by a skilled
electrician.
Even when the device/instrument is
switched off, dangerous live voltages may
still be present inside the instrument.
Only personnel who have read and fully understood all
safety information contained in these operating and
installation instructions, as well as the assembly, operating
and maintenance instructions, shall be authorized to
operate the inverter.
2
Installation Instructions (US)
reports must be received by the forwarding agent within six
days after receipt of the goods.
Use exclusively the original packaging for returning the
inverter – only this material will ensure safe transportation.
During the operation of this device, certain parts of the
device inevitably carry hazardous live voltages, which may
lead to severe personal injury or even death. The following
precautions should be followed to minimize the risk of lethal
hazards or personal injuries.
3. Notes concerning installation and
operation
The installation of the device must be in compliance with the
relevant safety regulations (e.g. NEC 690) or other
applicable national or local provisions. Proper grounding,
conductor dimensioning and an appropriate short-circuit
protection must be provided to ensure operational safety.
3.1
Factory warranty and liability
Terms and conditions
Customers shall contact KACO Solar, Inc. to obtain a
Return Merchandise Authorization (RMA) number before
returning products. KACO Solar, Inc. accepts no
responsibility or liability for products returned without prior
authorization. KACO Solar, Inc., at its sole determination,
will repair or replace inverters returned by customers.
Inverters must be returned with a copy of the original dealer
invoice or written proof of installation if the inverter has not
been already registered by fax or mail. Inverters must
include a legible data label showing the serial number and
the type of inverter. The warranty belongs to the unique
serial number of the inverter and not any particular person;
therefore, KACO inverters are sold with a 10 year
transferable warranty.
All instrument covers must remain closed during operation.
Prior to performing any visual checks and maintenance
work the device must be disconnected from all power
sources and protected against accidental activation. If
measurements must be conducted while the device is
connected to power, NEVER touch live terminals. Remove
all jewelry from your wrists and fingers. Ensure that the
equipment is in proper condition.
When working on an energized inverter, use appropriate
tools and do not come into contact with grounded surfaces
including the earth.
The inverter must be returned to KACO Solar, Inc. in the
original packaging materials or packaging providing equal
protection during shipment. KACO Solar, Inc. is not
responsible for damage occurring during shipment.
Exactly follow the instructions given in these operating and
installation instructions and especially observe all
information concerning possible hazards, warnings and
precautions.
To satisfy the claims of our easy swap warranty; KACO
Solar, Inc. will ship any replacement inverter within 24 hours
after a claim has been issued and approved. If the inverter
fails out of the box or within a 6 month period of operation a
new inverter shall be issued. After 6 months of installation, a
factory reconditioned unit of newer or similar age shall be
issued.
Should any specific problems occur, which are specifically
in this or the operators manual, please contact your
specialist dealer.
Modifications/Changes
Performing any modifications or changes on the inverter is
generally prohibited. Performing any changes or
modifications in the environment of the inverter is only
permitted if they comply with national standards.
Exclusion of Liability
KACO Solar, Inc. disclaims any liability for direct or indirect
damages due to:
1. improper installation or commissioning,
2. modifications, alterations or repair attempts,
3. inappropriate use or operation,
4. insufficient ventilation of the device,
5. non-compliance with relevant safety standards or
regulations,
6. flood, lightning, overvoltage, storm, fire (acts of
nature).
We do not guarantee that the software is completely free of
faults. In most cases technical alerts will be posted on the
KACO Solar website describing how to avoid the effects of
the fault. If the concern is greater, written explanation will be
mailed to registered installers. The solar system installer is
responsible for the correct selection, proper use,
supervision and consequences of the use of software.
Transportation
Caution
Caution!
Hazard of damage due to unauthorized
modifications/manipulation!
By
no
means manipulate the inverter or
modify or change the inverter or any
other part of the installation!
The blue planet inverter is subjected to extensive testing
and inspection in our test field, so as to ensure the superb
quality of our products. Our inverters leave our factory in
proper electrical and mechanical condition. Special
packaging ensures that nothing can happen during the
transport to our customers. Nevertheless, transport damage
may not be ruled out completely. In this case, the forwarding
agent/carrier will be responsible.
Please check the inverter carefully on arrival. Should you
discover any visible signs of damage on the packaging,
which may imply that the inverter may be damaged, or
should you find any visible signs of damage on the inverter
please notify your responsible forwarding agent/carrier
immediately?
If necessary, your solar installation provider or KACO solar
service specialist will assist you. However, written damage
KACO Solar Inc.
We reserve the right to make alterations that will improve
the functioning of the device.
KACO Solar, Inc. will not be liable for any direct, indirect or
consequential damages, losses, costs or expenses however
arising in contract or tort, including without restriction any
economic losses of any kind, any loss or damage to
property, any personal injury, any damage or injury arising
from or as a result of misuse or abuse, or the incorrect
installation, integration or operation of the product.
3
Installation Instructions (US)
inverter. Please observe the data given in the Technical
Data Sheet (Section 9) for dimensioning the solar generator.
3.2
Service
From the initial stages of product development, high quality
and longevity for our inverters is of central importance to us.
This philosophy is the result of our experience of over 60
years in the field of power conditioning and current
inverters.
The design and dimensioning KACOCalc
pro is available for easy selection of PV
modules – please obtain your free
download at
http://www.kacosolar.com
Despite these quality-assuring measures, in some rare
cases errors may occur. KACO Solar, Inc. will offer a
maximum of assistance if one of these cases should arise.
KACO Solar, Inc. will take every effort to remedy any
defects fast and without unnecessary bureaucracy. Please
contact our service department directly for fast and efficient
support.
Dimensioning of the PV generator:
The number of PV modules connected in series must be
selected in such a way that the output voltage of the PV
generator is maintained within the admissible input voltage
range of the inverter – even in the event of extreme external
temperatures. The U.S. module temperatures can
significantly vary and you should be sure to consult your
solar installation specialist about the effect on final voltage
calculation. It is important that the temperature coefficient of
the solar modules is observed. The following criteria must
be met for calculating the voltage of the PV generator.
Service Reimbursement
KACO Solar will pay $100.00 for each inverter replacement
and $25 per additional inverter at the site when there is a
true inverter failure within the first one year of
commissioning. Thereafter, KACO customers will still enjoy
the protection of the standard 10 years replacement
guarantee and compensation for service performed to repair
an inverter will be awarded on a case by case basis.
Uo (-13°F) < max. input voltage (400 VDC)
Even at very low external temperatures (-13°F), the no-load
voltage of the connected string must remain within the
admissible input voltage range. For example, if the
temperature falls from 77°F to –13°F, the no-load voltage of
12-V modules will increase by approx. 2.8 V per module
(5.6V for 24V modules). The no-load voltage of the entire
string must be less than 400 volts.
Technical support is available by telephone at 1-866-5226765 Monday through Friday 8 AM – 5PM PST.
3.3
Intended (normal) use
Blue planet inverters are built according to state-of-the-art
and approved safety requirements. However, improper use
may cause lethal hazards for operators or third parties
and/or damage of instruments/devices or other property.
The device is intended to convert the direct voltage
generated in the photovoltaic (PV) modules into alternating
voltage (AC) and feed this voltage into the grid.
UMpp (+140°F) > min. input voltage (125VDC)
Caution
The inverter is intended to convert direct current (dc) energy
generated by the photovoltaic (PV) modules into alternating
current (ac) energy that is then fed into the utility grid.
Caution!
Using the device for any purpose
other than intended/normal use is
prohibited!
Any use other than the specified intended use is not
deemed
intended
or
normal
use,
and
the
manufacturer/supplier shall not be liable for any damage
caused by such unintended use. Damage caused by
unintended use is at the sole risk of the operator.
Even at very high external temperatures (+140°F) the MPP
voltage of the connected string should remain within the
admissible input voltage range. If the temperature rises from
77°F to 140°F, the MPP voltage of 12V modules will
decrease by approx. 3.6 V per module (7.2 V for 24V
modules). The MPP voltage of the entire string should be >
125 V.
The term "intended use" shall also include the adherence to
the operating and installation instructions. Some of the
documents which are needed for these applications and
acceptance are attached to these installation instructions.
Even if the MPP voltage is beyond the admissible input
range, the installation nevertheless will continue to work
properly. However, the delivered power is slightly less than
the maximum yield.
4. Device description
Provided that the input voltage is within the admissible input
voltage range, the inverter will not be damaged if a
connected PV generator should supply current above the
max. usable input current.
The electrically isolated blue planet xi-series devices are
currently available for two different power classes. The
appropriate inverter type should be selected in accordance
with the power rating of the selected photovoltaic module
array. The max. power values are indicated in the data
sheet (Section 9).
If the PV generator should supply more than the max. PV
generator power of the inverter for a short time, particularly
due to clouds and relatively low module temperatures, it is
possible that the inverter switches off for safety reasons and
automatically switches on again after approx. 10 seconds.
The overload status is shown on the display in plain text.
Under normal circumstances, however, the dynamic control
of the inverter ensures that this condition is recognized and
the inverter operation is continued without any interruption.
The inverter designation is shown on the front side above
the display and on the type label.
4.1
Dimensioning of the PV generator
The selection of the PV generator is of crucial importance
when dimensioning a PV installation. It must be observed by
all means that the solar generator is the right match for the
KACO Solar Inc.
The solar generator still represents the most substantial
cost factor of a solar installation. Therefore, it is very
4
Installation Instructions (US)
important to obtain maximum energy yields. To achieve this
goal, solar generators located in the US should be
orientated towards the South at an angle of inclination of
30°, and shading of whatever kind should be prevented
under all circumstances.
4.2
Protective concepts
The following monitoring and protective functions are
integrated in blue planet inverters:
- BiSI grid monitoring to protect against personal
injuries and avoid islanding effects according to UL 1741
- Overvoltage
varistors
to
protect
the
power
semiconductors against high-energy transients on the grid
side
- Temperature monitoring of the heat sink
- EMC filters to protect the inverter against highfrequency grid interference
- Grid-side varistors to earth/ground, to protect the
inverter against burst and surge pulses.
- Ground Fault Detector Interrupter (GFDI) according
In many cases, the recommended angle of inclination
cannot be implemented for technical reasons. To achieve
the highest energy yield of a solar generator with optimal
orientation (South, inclination angle of 30°), the efficiency of
the solar generator can be increased.
For roofs that are orientated towards the East/West we
recommend two-string PV installations. To ensure optimum
yield of the installation, the first string should be installed on
the East side of the roof, whereas the second string should
be installed on the West side of the roof.
to NEC 690.5
Please consult your specialist dealer or notify us if you
should require any further assistance.
4.3
Mechanical dimensions
Figure 4.1: Dimensions of Blue Planet
Type
1501xi
2901xi
3601xi
KACO Solar Inc.
5
Height
17 3/4"
19 5/8“
25 5/8“
Width
13 3/8"
13 3/8“
13/3/8“
Depth
7 7/8"
8 3/8“
8 3/8“
Installation Instructions (US)
5.2
5. Installation and startup
5.1
Installing the inverter
Selecting the appropriate place of installation
Blue planet inverter housings meet
the requirements of NEMA-3R.
The inverter is outdoor rated. In addition, the installation
environment should be well ventilated so as to protect
against overheating and ensure long inverter life.
The following rules should be observed when selecting the
place of installation of your inverter:
- Ensure good access for assembly or service work.
- Maintain a minimum clearance of 19 11/16 in. around the
device and between the device and other objects, such as
cabinets, ceiling, or similar
- The device has been designed for vertical wall
installation.
- Please ensure free air circulation around the device and
through the heat sink at the rear side.
- If the inverter is installed in a switch cabinet or similar,
please provide forced ventilation to ensure that heat is
dissipated adequately.
- Ensure that the wall has an adequate load-bearing
capacity and only use the appropriate installation material.
- In areas with a special risk of flooding, always make sure
to install the inverter in a sufficiently elevated place.
- Installation at eye level makes it easier to read the
display.
- Temperature: Ensure that the GT Inverter is mounted in a
location where the ambient temperature range is -4° to
+104° F.
Figure 5.1a: Wall installation of blue planet
Important!
Due to the high system voltage,
less current may flow on the DC
voltage side than on the AC
voltage side. Given the same cable
cross-sections, losses are therefore higher on the AC voltage side
than on the DC voltage side. The
inverter will ideally be located
in close proximity to the local
utility's electric meter.
Figure 5.1b: Wall installation of blue planet
KACO Solar Inc.
6
Installation Instructions (US)
The inverter is shipped together with an installation kit
consisting of four dowel pins and four 2 ¾ in. screws. Prior
to installation the condition of the mounting wall has to be
checked. If necessary, use a kit other than the one shipped
with your inverter.
- Drill the holes for the dowel pins
according to the positions indicated
on the mounting plate.
- Place the dowel pins into the holes.
- Do not just hang the dowel pins on
holes in drywall (wall board). Ensure
that the screws and preferably the
dowel pins are fastened to a solid
wood support such as a wall stud
(2x4 lumber)
- Using the screws, fasten the
mounting plate to the wall. Make sure
that the arrow shown on the mounting
plate is directed upwards.
- Suspend the inverter in the
suspension fixture. Ensure that the
bars rest on the appropriate
lugs/noses in the heat sink.
Lock the safety catch. To do, this,
slide the upper end of the catch
towards the wall until the groove is
parallel to the wall (see )
Figure 5.2: Safety catch is open (left) and closed (right)
KACO Solar Inc.
7
Installation Instructions (US)
5.3
Electrical connections
General Information
The electrical connections can be established after the
inverter has been installed in its fixed location.
Caution
Caution
Caution
Caution!
The electrical installation of the blue
planet must only be performed by a
qualified electrician.
Caution!
To connect the inverter the AC and DC
side must be disconnected from all
voltage sources and protected against
inadvertent switching-on.
Figure 5.3: Connection box of blue planet
Grid connections
3-lead connections are used (L1, GRD, L2). To insert the
wires use watertight conduits at the underside of the
housing.
We recommend the following wire cross sections for cable
lengths up to 60 feet:
Blue Planet 1501xi:
AWG 12 15A Breaker
Blue Planet 2901xi:
AWG 12 20A Breaker
Blue Planet 3601xi:
AWG 10 30A Breaker
Caution!
To reduce the risk of fire, connect only to a
circuit provided with branch circuit overcurrent protection in accordance with the
National Electrical Code, ANSI/NFPA70.
All applicable safety instructions and technical connections
stipulated by local utility and the relevant NEC codes along
with any other local or regional stipulations must be
followed.
Larger cross sections should be used for longer cable
lengths.
The connection of the PV-Generator and the grid are
established via terminal blocks on the printed circuit board
(See Figure 5.3).
Openings for conduit fittings are located on the bottom plate
of the unit.
Please make sure to use wires with
sufficient cross section width to avoid
excessive line impedance (internal
resistance of the electrical grid)
between the domestic distribution and
the respective blue planet inverter.
NEC, ANSI/NFPA 70 wiring methods
must be used.
Open the door of the housing /
enclosure. The door is secured against
opening by means of two recessed
head screws on the right upper side.
At a high line impedance, i.e. long ACside leads, the voltage at the grid
terminals will increase during power
delivery. This voltage is measured by
the inverter. If the voltage across the
grid terminals exceeds a defined limit,
the inverter will switch off due to grid
overvoltage. This condition must be
taken into consideration when sizing
the AC lead.
The max. connecting wire crosssection for the AC and DC
connection terminals is 13.3 mm2
(AWG 6) for flexible lines and 16
mm2 for rigid (non-flexible) lines. The
stripping length is 10 mm. The
terminal is to be tightened with a
torque of 1.2 to 1.5 Nm.
Danger
KACO Solar Inc.
8
Danger!
Hazard due to electric shock from
contact with terminals carrying
high voltages! The external AC
and DC disconnects should be
opened before any connections
are made.
Installation Instructions (US)
Route the wire through the conduit
fitting. Connect the wire according to
the mark shown on the sticker on the
right side of the PCB.
Determine the DC voltage between
protective earth (PE) and the positive
lead or, respectively, between ground
and the negative lead of the PV
generator. If stabilized voltages can
be measured, this indicates a ground
fault in the PV generator or generator
wiring. The ratio between the
measured voltages indicates the
location of this fault. Make sure to
remedy this fault prior to performing
any further actions!
Caution!
Please check all leads for proper
connection.
Caution
Once again check if all connected
leads are securely fastened. Fasten
the wire connection of the cable
fitting.
Determine the electrical resistance
between the ground and the negative
(minus) lead of the PV generator.
A low resistance value (< 2 MΩ)
indicates a high-resistance ground
fault of the PV generator, which must
be remedied prior to further installation!
A disconnect switch shall be provided
by others for the dc input and ac
output circuit.
5.3.1
PV array connections
The PV array connections are established on the right side
of the connection box.
Caution
Caution
Danger
Caution
Caution!
Do not connect the ground to the
DC negative at any point. This is
already done within the inverter!
Connect the DC leads as described in the following:
- Insert the DC leads through a watertight conduit at the
underside of the housing.
- Connect the positive lead (+) on the DC+ terminal, and
the negative lead (-) on the DC- terminal.
- Connect the ground wire to one of the marked ground
terminals.
- Ensure all connections are correctly wired and properly
torqued with 17 in-lb (1,2Nm).
Caution!
Risk of damage!
Ensure correct polarity.
Danger!
To ensure maximum protection
against hazardous live voltages
during the assembly of the
photovoltaic installation, both the
plus and minus leads must be
strictly
isolated
from
earth
potential (GRD).
KACO Solar Inc.
Caution!
Prior to connecting the DC leads
to the inverter terminals the
voltage of the solar generator
must be measured.
The DC voltage must not exceed
max. 400 VDC. Connecting to
higher voltages will result in the
destruction of the device.
Caution
9
- The input and output circuits are
isolated from the enclosure.
- System grounding is the responsibility of the installer as required by
sections 690.41 and 690.49 of the
NEC, ANSI/NFPA 70
Installation Instructions (US)
5.4
5.7. The total length of the RS485 wiring should not exceed
250 m.
Connecting the fault-signal relay
The inverter is equipped with a potential-isolated relay
contact to signal faults. If a fault occurs, this contact will be
closed.
Max. contact load: 30V / 1A.
Important!
In the event of a power failure in the public
grid
the
relay
will
not
trigger.
In this case, all LEDs and the display will
be extinguished and the inverter will be
shut down completely. A fault signal will not
be possible in this case!
Figure 5.6: Connection terminals for RS485-Interface
120 V
Figure 5.7: Wiring plan for RS485 Interface
Figure 5.7 shows a terminator which is connected to the left
inverter (Ra, 330Ω). This terminator resistor is needed on
the last device in the chain to ensure correct signal transfer.
The terminator is supplied together with the blue planet
inverters.
Figure 5.4 Fault-signal relay
5.5
Within a bus system, such as the RS485, each device
taking part in this system must have a unique address
(regardless of whether this is an inverter or current sensor).
For inverters, the address range can be selected between 0
and 31. The address of each inverter can be determined via
the Set menu, (see Operator’s Manual).
Connection of the S0 output
The inverter is equipped with an S0 pulse output for
connection of, e.g. a large display. The pulse rate is
adjustable (see page 11, Section 5.8)
Important!
Please ensure correct connection of
the A and B wires. If these wires are
improperly connected, no correct
communication will be possible!
Figure 5.5 S0-Connection
5.6
Connection of the RS485 interface
On the control board (at the rear side of the door of the blue
planet inverter), there are four terminals marked RS485 A
and B (see Figure 5.6). To connect several blue planet
inverters, terminal A of the first blue planet must be
connected to terminal A of the second blue planet; terminals
B are connected in the same way.
You need a twisted and shielded data cable for connection,
such as an ISDN cable. The connection to proLOG is
established analogously. The wiring plan is shown in Figure
KACO Solar Inc.
10
Installation Instructions (US)
5.7
Startup of the inverter
After completing the mechanical and electrical installation
you may now put the inverter into operation as follows:
5.9
Jumper position
NOTE!
The inverter can only be put into
operation under daylight conditions
(i.e. at a solar generator voltage of >
100 V).
If no daylight or solar generator
voltage is present, the inverter can be
activated by pressing the Start key
(see Section 4.4 of the Operating
Instructions), but normal operation
will not be possible in this condition.
(Only the values can be read off the
display).
Figure 5.8: Jumper Position in normal feed-in operation
(power delivery) – (shipping status)
- Switch on the grid voltage (via the
external automatic safety breakers).
- Switch on the solar generator via the
DC circuit breaker (or DC plug-type
connector).
Danger
The green LED “PV generator“will now be illuminated (if the
generator voltage is greater than 125V). The display now
shows the current generator voltage: “Start from 125V;
measurement xxx V. “ If the measured voltage is greater
than 125V, the device will start power delivery after approx.
5 minutes. This starting-up period of 5 minutes is necessary
to ensure that the generator voltage is permanently above
the power delivery limit of 125V.
FACTORY USE ONLY! DO NOT
ATTEMPT
TO
ALTER
SETTINGS! DOING SO WILL
VOID WARRANTY AND COULD
POTENTIALLY BE HARMFUL
TO USER!
A quick-start routine is provided for test purposes – this
routine circumvents the start-up period. This quick-start is
menu-controlled and obtained from the set-up mode
(see Operator’s Manual).
During the normal startup procedure the line power relay is
switched on after approx. 5 minutes (audible acoustic
noise), and power delivery is started. This is also signaled
by the green “Grid-feeding” LED. The display now shows
the delivered power. The “Display” key can be used to
indicate the various measurement values (see Operator’s
Manual).
It may be necessary to reset the date and hour (please refer
to the Operator’s Manual).
5.8
Ground fault indication
The Inverter is equipped with a ground-fault detection and
interruption (GFDI) as required by UL 1741. If a ground fault
occurs on the DC side the inverter disconnects from the grid
and a message is displayed. In this case the inverter
blocked until the following actions are done:
- Switch off the AC and DC disconnect.
- Remove the ground fault on the DC side
AMP
- Replace the GFDI fuse with a “Littlefuse KLKD 1
600V” fuse.
- Switch on the AC and DC disconnect.
KACO Solar Inc.
11
Installation Instructions (US)
6. Applications/Acceptance by Your
Utility Company
8. Troubleshooting
Within the scope of our continuously expanding Quality
Assurance System, our goal is to rule out and eliminate any
faults and defects. You have purchased a product that has
left our factory in proper operating condition. Each individual
device has successfully passed extensive inspection tests
for proper operation and functioning of protective devices,
as well as a long-duration test at our factory.
Your PV installation must meet all applicable utility, NEC
and local electrical codes regarding PV installation
requirements. The documents you will need to apply for
acceptance of your PV system can be provided by your
solar system installer. If you are licensed electrical
contractor you may be eligible to install the PV system
yourself. In this case you may then request all necessary
documents directly from your local utility.
Should your PV installation not work properly despite all
these measures, we recommend the following procedure for
remediation:
7. Switching off the inverter
Check the solar generator and grid connections leading to
the PVI, observing all the safety instructions given in this
manual. Please observe the inverter carefully and take note
of the display messages and LED displays.
Below is a summary of possible error and recommended
remedies:
The inverter must be switched off for adjusting,
maintenance and repair work. Please proceed as follows:
To shutdown the inverter follow the
directions exactly or arcing might occur
when disconnecting the DC connector
under load. This will destroy the
connectors.
Warning!
These servicing instructions are for use
by qualified personnel only. To reduce
the risk of electric shock, do not
Warning
perform any servicing other than that
specified in the operation instructions.
- Disconnect
the
grid
voltage
(deactivate the external safety
breakers).
- Disconnect the photovoltaic module
via the DC disconnect.
- Check that the grid terminals of the
inverter are disconnected from all
voltage sources.
Danger!
Lethal hazard by electric shock!
Hazardous live voltages can be
present in the inverter even if the
Danger
electrical connections have been
switched off or disconnected.
Please wait for five minutes before
accessing the inverter. If you have to
work on the solar generator you
must additionally disconnect all
connections of the DC main switch
on the generator connection box (or
DC connector). It is not sufficient to
switch off the grid voltage.
KACO Solar Inc.
12
Installation Instructions (US)
Table 8-1 Troubleshooting Guide
Error
Possible Cause
Daily yield values do not - Tolerances
of
the
correspond to the values
inverter’s
internal
shown on the power
measuring
meter of the Utility
elements/sensors
company
Inverter shows an
- Grid voltage failure
unrealistic daily peak
value
Grid fuse triggers
No display shown
Inverter does not start
- Insufficient grid fuse
rating
- Inverter hardware is
damaged
At times of high solar irradiation the inverter may exceed its rated
current for a short time, depending on the type of solar generator.
Therefore, the grid fuse should have a higher rating than the max.
grid feeding current.
The grid fuse acts immediately if the inverter changes over to grid
feeding (i.e. on termination of the start-up period). In this case,
the inverter hardware is damaged and the device has to be
returned to KACO for repair.
- Device is in the night
The inverter shuts down over night.
shut-down mode
If the display should not be illuminated during a normal time of the
- No grid voltage is present day you should check on the power meter whether or not the
- Solar generator voltage is device delivers power. If power is delivered the display module is
less than 100V
defective, and the inverter has to be returned to KACO for repair.
If no power is delivered you should check that grid voltage is
present and that the solar generator voltage is higher than 125 V.
If this is the case but the inverter still fails to deliver power the
device will have to be returned to KACO for repair.
- Device is in the night
shut-down mode
- No grid voltage is present
- The solar generator
voltage is less than 100 V
Inverter is active but
- Insufficient generator
does not deliver power –
voltage. Voltage
the display reads: Start
measured < 125V
from 125 V
Measurement:
xxx V
Inverter is active but
- The inverter has
does not deliver power –
interrupted grid feeding
the display reads:
due to a
Start from 125 V
malfunction/disturbance
Measurement:
xxx V (measured voltage
is higher than 125V)
The inverter terminates
grid feeding shortly after
starting-up although
there is enough solar
irradiation
KACO Solar Inc.
Remedy/Explanation
Measuring errors are caused by tolerances of the measuring
elements/sensors. The tolerances of the individual measuring
values are given in the Operator’s Instructions. The daily yield
value may deviate from the value shown on the power meter by
up to 15%.
Even if an incorrect daily peak value is displayed the inverter
continues to work properly and without any yield losses. Values
are reset overnight. If you wish to reset the display immediately,
disconnect the inverter and the DC grid voltage supply and switch
on the inverter again.
- Defective grid isolation
relay in the inverter
The inverter shuts down over night.
If the display should not be illuminated during a normal time of the
day you should check on the power meter whether or not the
device delivers power. If power is delivered the display module is
defective and the inverter has to be returned to KACO for repair.
If no power is delivered you should check that grid voltage is
present and that the solar generator voltage is higher than 125 V.
If this is the case but the inverter still fails to deliver power the
device has to be returned to KACO for repair.
After sunrise, at sunset, and during times of low solar irradiation
due to bad weather conditions the generator voltage or,
respectively, generator power fed from the roof may be
insufficient for grid feeding
After an interruption of the grid feeding process due to a
disturbance (grid power failure, overtemperature, overload, etc.)
the inverter always waits for approx. 5 minutes before resuming
its grid feeding operation. Grid failures may cause interruptions
during the day. If more than 10 interruptions per day should occur
over several weeks you should contact your solar installation
provider.
Although there is enough solar irradiation, the inverter delivers
power for a few seconds only and switches off again. During this
short time a grid feeding value between 0 – 5 W is displayed. If
insufficient generator power can be ruled out in this case the grid
isolation relay is presumably defective and prevents the inverter
from being activated.
13
Installation Instructions (US)
Error
Inverter causes noise
Possible causes
- Special environmental
conditions
Remedy / Explanation
Under special environmental conditions the devices may cause
audible noise. This may be due to the following causes:
- Grid effects and/or grid disturbances caused by special
consumers (motors, machines, etc.), which are connected to
the same grid point or which may be installed in the vicinity of
the inverter.
- Dynamic weather conditions (frequent changes between sun
and clouds) may cause slight line hum due to high energy.
- Certain grid conditions may result in grid resonance between
the input filter of the device and the grid, which may continue
to be audible even after the inverter is switched off.
- Persons with very sensitive ears (children, in particular) may
perceive high-frequency hum of the inverter, caused by the
operating frequency of 18 kHz.
This noise does not affect the operation of the inverter or
inverter performance and will not result in any failure, damage
or shorter useful life of the devices.
If the defects found should not be able to be remedied
through utilization of the measures described above, please
contact your solar installation provider or our Service
Department.
Please have the following information ready to enable the
KACO Solar, Inc. Service Department to respond quickly
and properly:
Inverter Data
- Serial number of the device
- Inverter type
- Short description of errors the fault or error reproducible?
(If so, please provide a short description)
- Does the fault or error occur sporadically?
- Describe the solar irradiation conditions when the error
occurred
- Hour of the day when the hour occurred
Photovoltaic module data:
- Module type, manufacturer (if available, send data sheet)
- Number of modules connected in series
- Number of strings
- Generator power
KACO Solar Inc.
14
Installation Instructions (US)
9. Technical Data
Model
DC rated power
Max. PV generator power
MPP range
No-load voltage
Monitoring - input voltage
Max. operating current (DC)
Max. array short circuit
current (DC)
Polarity safeguard
Overvoltage protection
Rated output @ 25°C (AC)
Rated output @ 40°C (AC)
Max. output power (AC)
Nominal voltage (AC)
Grid voltage (AC)
Max. utility backfeed current
(AC)
Max. continuous current (AC)
Overcurrent protection
Frequency
Distortion factor
Fault-signal relay
S0-output
Max. degree of efficiency
CEC efficiency
Internal consumption
Min. grid-feeding power
Circuit design
Clock frequency
Principle
Grid monitoring
Optical displays
Operating elements
Connections
Ambient temperature
Temperature monitoring
Cooling
Protection Class
Noise emission
Housing/enclosure
Dimensions W x D x H
Weight
KACO Solar Inc.
Input – Electrical data
1501xi
2901xi
1580 W
3250 W
3400 W
1700 W
125 – 300 VDC
Up to 400 VDC
Stand-by from Ue>125VDC
Night shutdown from Ue<100VDC
3601xi
4100 W
4400 W
14 ADC
30 ADC
43 ADC
15 ADC
33 ADC
48 ADC
Short-circuit diode
Varistors
Output – Electrical data
3100 W
1500 W
1500 W
2900 W
3400 W
1650 W
240 V
211 – 264 V
0 AAC
0 AAC
3900 W
3600 W
4400 W
0 AAC
15.0 AAC
24.0 AAC
20 AAC
30 AAC
59.3 – 60.5 Hz
<3% at rated power
<5% over the entire range
Potential-free NO contact (make contact), max. 30V / 1A
Open-Collector – output max. 30V / 50mA
Inverter – Electrical data
95.0 %
95.0 %
95.0 %
94.0 %
94.0 %
93.5 %
Night shutdown: 0W
Operation: < 5 W
10W
Grid-tied, electrically isolated, RF transformer
18 kHz
1.) Potential-free DC/DC converter
2.) IGBT full bridge as part of the inverter
UL 1741
Inverter – Mechanical and technical data
DC Power In (green)
AC Power Out (green)
Error (red)
LC display (2 x 16 characters)
2 keys for display operation
PCB terminals inside the device - Cable routing via PG fittings
-4 ... +104°F
>158°F temperature>167°F temperature>167°F temperaturedependent power
dependent power
dependent power
adjustment
adjustment
adjustment
>176°F disconnection from
>185°F disconnection from
>185°F disconnection from
the grid
the grid
the grid
True convection (no fan or blower)
NEMA 3R (IP54) according to EN 60529
< 35dB (soundless)
Aluminum wall-mounted enclosure
13 3/8 x 7 7/8 x 17 3/4 in
13 1/4 x 23 3/4 x 8 3/4 in
13 1/4 x 25 3/4 x 8 3/4 in
30.8 lbs
52.7 lbs
65.7 lbs
7.8 AAC
15 AAC
15
Installation Instructions (US)
9.1
Peak efficiency curve
peak efficiency curve Blue Planet 1501xi
blueplanet 2901xi
125 Vdc
100
95
90
85
80
125 Vdc
75
70
0%
10%
20%
30%
40%
50%
60%
70%
80%
90%
100%
% of Rated Output Power
peak efficiency curve Blue Planet 2901xi
KACO Solar Inc.
16
Installation Instructions (US)
blueplanet 3601xi
100
175 Vdc
Efficiency, %
95
90
85
80
75
175 Vdc
70
0%
10%
20%
30%
40%
50%
60%
70%
80%
90%
100%
% of Rated Output Power
peak efficiency curve Blue Planet 3601xi
KACO Solar Inc.
17
Installation Instructions (US)
10. UL listing confirmation letter
10.1
UL Certificate of Compliance
KACO Solar Inc.
18
Installation Instructions (US)
KACO Solar Inc.
19
Installation Instructions (US)
KACO Solar Inc.
20
Installation Instructions (US)
KACO Solar Inc.
21
Installation Instructions (US)
KACO Solar Inc.
22
Installation Instructions (US)
KACO Solar Inc.
23
Installation Instructions (US)
10.2
Supplement to Certificate of Compliance
KACO Solar Inc.
24
Installation Instructions (US)
KACO Solar Inc.
1002 B OReilly Ave
San Francisco, CA 94129
T: +1 (415) 931 2046
F: +1 (415) 931 1688
[email protected]
www.kacosolar.com