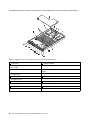
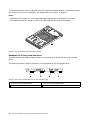
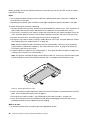
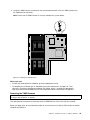
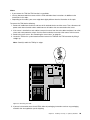
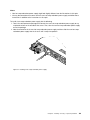
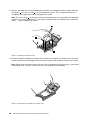
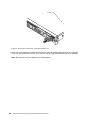
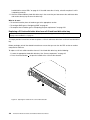
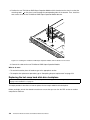
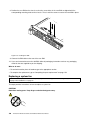
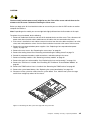
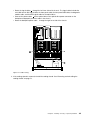
1
ThinkServer RD540
User Guide and Hardware Maintenance
Manual
Machine Types: 70AR, 70AS, 70AT, and 70AU
Note: Before using the information and the product it supports, be sure to read and understand the following:
• The Read Me First that comes with your product
•
“Safety information” on page iii
• Appendix A “Notices” on page 169
First Edition (November 2013)
© Copyright Lenovo 2013.
LIMITED AND RESTRICTED RIGHTS NOTICE: If data or software is delivered pursuant a General Services Administration
“GSA” contract, use, reproduction, or disclosure is subject to restrictions set forth in Contract No. GS-35F-05925.
Contents
Safety information . . . . . . . . . .
iii
Safety inspection guide . . . . . . . . . . . . x
Grounding requirements . . . . . . . . . . . . xi
Chapter 1. General information . . . . . 1
Introduction . . . . . . . . . . . . . . . . .
Server documentation . . . . . . . . . . . . .
1
2
Chapter 2. Server setup road map . . . 5
Chapter 3. Product overview . . . . . . 7
Server package . . . . . . . . . . . . .
Features . . . . . . . . . . . . . . . .
Specifications . . . . . . . . . . . . . .
Software . . . . . . . . . . . . . . . .
ThinkServer EasyStartup . . . . . . . .
ThinkServer EasyUpdate Firmware Updater
Lenovo ThinkServer EasyManage . . . .
BIOS and TMM update utilities . . . . .
RAID configuration utilities . . . . . . .
Remote management software . . . . .
ThinkServer Smart Grid Technology . . .
Diagnostic programs . . . . . . . . .
Locations. . . . . . . . . . . . . . . .
Machine type, model, and serial number
label . . . . . . . . . . . . . . . .
Front view of the server . . . . . . . .
Front panel . . . . . . . . . . . . .
Intelligent Diagnostics Module . . . . . .
Rear view of the server . . . . . . . .
Server components . . . . . . . . . .
Hot-swap hard-disk-drive status LEDs . .
RAID card . . . . . . . . . . . . . .
Hot-swap hard-disk-drive backplane . . .
Mini-SAS to mini-SAS signal cable
connections . . . . . . . . . . . . .
System board components . . . . . . .
System board jumpers and switches . . .
System board LEDs . . . . . . . . . .
. . 7
. . 7
.
11
.
11
.
11
.
12
.
12
.
12
.
12
.
12
.
12
.
12
.
13
.
.
.
.
.
.
.
.
.
13
14
18
21
22
25
30
30
33
.
.
.
.
37
38
42
46
Chapter 4. Turning on and turning off
the server . . . . . . . . . . . . . . .
49
Turning on the server . . . . . . . . . . . .
Turning off the server . . . . . . . . . . . .
49
49
Chapter 5. Configuring the server . .
51
Using the Setup Utility program . . . . . . . .
Starting the Setup Utility program . . . . .
51
51
© Copyright Lenovo 2013
Viewing information in the Setup Utility
program . . . . . . . . . . . . . .
Setup Utility program interface . . . . .
Setting the system date and time . . . .
Using passwords . . . . . . . . . . .
Selecting a startup device . . . . . . .
Configuring the TPM function . . . . . .
Setting the mode of the Ethernet connectors
Exiting the Setup Utility program . . . . .
Updating or recovering the BIOS. . . . .
Using the ThinkServer EasyStartup program . .
Features of the ThinkServer EasyStartup
program . . . . . . . . . . . . . .
Starting the ThinkServer EasyStartup
program . . . . . . . . . . . . . .
Using the ThinkServer EasyStartup program
on a Windows operating system . . . . .
Configuring RAID. . . . . . . . . . . . .
About RAID . . . . . . . . . . . . .
Configuring RAID using the ThinkServer
EasyStartup program . . . . . . . . .
Configuring the advanced SATA or SAS
hardware RAID . . . . . . . . . . . .
Configuring the Ethernet controllers . . . . .
Updating the firmware. . . . . . . . . . .
Using the Firmware Updater program . . .
Using the Lenovo ThinkServer EasyManage
program . . . . . . . . . . . . . . . .
.
.
.
.
.
.
.
.
.
.
51
52
54
55
56
56
57
57
58
59
.
60
.
60
.
.
.
62
62
63
.
64
.
.
.
.
64
65
65
65
.
66
Chapter 6. Installing, removing, or
replacing hardware . . . . . . . . . .
67
Guidelines . . . . . . . . . . . . . . .
Precautions . . . . . . . . . . . . .
Handling static-sensitive devices . . . .
System reliability guidelines . . . . . . .
Working inside the server with the power on
Removing the server cover . . . . . . . . .
Installing, removing, or replacing hardware . .
Removing and reinstalling the rack handles
Removing and reinstalling the cooling
shroud . . . . . . . . . . . . . . .
Installing or removing a memory module. .
Installing or removing the Ethernet card . .
Replacing the RAID card . . . . . . . .
Installing or removing the ThinkServer RAID
500 Upgrade Key for Advanced RAID . . .
Installing or removing the ThinkServer RAID
700 Battery . . . . . . . . . . . . .
.
.
.
.
.
.
.
.
67
67
68
69
69
69
71
71
.
.
.
.
73
75
81
85
.
88
.
91
i
Installing or removing the ThinkServer
Management Module Premium . . . . . .
Installing or removing the ThinkServer Trusted
Platform Module . . . . . . . . . . . .
Installing or replacing a hot-swap redundant
power supply . . . . . . . . . . . . .
Installing or replacing a heat sink. . . . . .
Installing or replacing the microprocessor . .
Installing or replacing a hot-swap hard disk
drive . . . . . . . . . . . . . . . . .
Installing or replacing a 2.5-inch solid-state
drive . . . . . . . . . . . . . . . . .
Installing or replacing the optical drive . . .
Replacing the ThinkServer RAID Super
Capacitor Module. . . . . . . . . . . .
Replacing the hot-swap hard-disk-drive
backplane. . . . . . . . . . . . . . .
Replacing the Intelligent Diagnostics
Module . . . . . . . . . . . . . . . .
Replacing a system fan . . . . . . . . .
Replacing the front panel board . . . . . .
Replacing the riser card assembly 1 . . . .
Replacing the system board battery . . . .
Replacing the system board . . . . . . .
Completing the parts replacement . . . . . . .
Reinstalling the server cover and reconnecting
cables . . . . . . . . . . . . . . . .
Updating the server configuration . . . . .
Chapter 7. Troubleshooting and
diagnostics . . . . . . . . . . . . .
Troubleshooting procedure . . . . . .
Viewing the status and diagnostic LEDs.
Using a diagnostic program . . . . .
Viewing the system event log . . . . .
Basic troubleshooting tables . . . . .
ThinkServer EasyStartup program
problems . . . . . . . . . . .
Optical drive problems . . . . . .
ii
.
.
.
.
.
.
.
.
.
.
.
.
.
.
.
Hard disk drive problems . .
Memory module problems .
Keyboard, mouse, and USB
problems . . . . . . . .
94
97
100
104
107
115
119
126
129
132
136
138
140
142
144
146
154
154
157
159
.
.
.
.
.
159
159
160
160
160
. . . .
. . . .
160
161
. . . . . . .
. . . . . . .
device
. . . . . . .
162
163
164
Chapter 8. Getting information, help,
and service . . . . . . . . . . . . . 165
Information resources . . . . . .
Using the documentation. . .
ThinkServer Web site . . . .
Lenovo Support Web site. . .
Help and service . . . . . . . .
Before you call . . . . . . .
Calling for service. . . . . .
Using other services . . . .
Purchasing additional services
.
.
.
.
.
.
.
.
.
.
.
.
.
.
.
.
.
.
.
.
.
.
.
.
.
.
.
.
.
.
.
.
.
.
.
.
.
.
.
.
.
.
.
.
.
.
.
.
.
.
.
.
.
.
Appendix A. Notices . . . . . . . . .
Trademarks . . . . . . . . . . . . . . .
Important notes . . . . . . . . . . . . .
Polyvinyl Chloride (PVC) cable and cord notice .
Recycling information . . . . . . . . . . .
Battery return program. . . . . . . . .
Requirement for batteries containing
perchlorate . . . . . . . . . . . . .
Particulate contamination . . . . . . . . .
Important WEEE information . . . . . . . .
European Union RoHS . . . . . . . . . .
German Ordinance for Work gloss statement. .
Export classification notice . . . . . . . . .
Electronic emission notices. . . . . . . . .
Federal Communications Commission (FCC)
Statement. . . . . . . . . . . . . .
Eurasian compliance mark . . . . . . . . .
ENERGY STAR model information . . . . . .
Index. . . . . . . . . . . . . . . . .
ThinkServer RD540 User Guide and Hardware Maintenance Manual
165
165
165
165
166
166
166
167
167
169
.
.
.
.
.
170
170
170
170
171
.
.
.
.
.
.
.
171
172
172
173
173
173
173
.
.
.
173
175
175
177
Safety information
Note: Before using the product, be sure to read and understand the multilingual safety instructions on the
documentation DVD that comes with the product.
Antes de usar o produto, leia e entenda as instruções de segurança multilíngues no DVD de documentação
que o acompanha.
Преди да използвате този продукт, задължително прочетете и вникнете в многоезичните инструкции
за безопасност в DVD диска с документация, който се предоставя с продукта.
Prije upotrebe ovog proizvoda obavezno pročitajte višejezične sigurnosne upute koje se nalaze na DVD-u s
dokumentacijom koji dobivate uz proizvod.
Před použitím produktu je třeba si přečíst a porozumět bezpečnostním pokynům uvedeným na disku DVD s
dokumentací, který je dodáván s produktem.
Før du bruger produktet, skal du sørge for at læse og forstå de sikkerhedsforskrifter, der findes på flere
sprog, på den dokumentations-dvd, der følger med produktet.
Lue tuotteen mukana toimitetulla DVD-tietolevyllä olevat monikieliset turvaohjeet ennen tämän tuotteen
käyttöä.
Avant d'utiliser le produit, veillez à bien lire et comprendre les instructions de sécurité multilingues figurant
sur le DVD de documentation fourni avec le produit.
Πριν χρησιμοποιήσετε το προϊόν, βεβαιωθείτε ότι έχετε διαβάσει και κατανοήσει τις οδηγίες ασφάλειας, οι
οποίες είναι διαθέσιμες σε διάφορες γλώσσες στο DVD τεκμηρίωσης που συνοδεύει το προϊόν.
Vor Verwendung des Produkts sollten Sie unbedingt die mehrsprachigen Sicherheitsanweisungen auf der
Dokumentations-DVD lesen, die im Lieferumfang des Produkts enthalten ist.
A termék használata előtt mindenképpen olvassa el és értelmezze a termékhez kapott dokumentációs DVD
lemezen található, több nyelven elolvasható biztonsági előírásokat.
Prima di utilizzare il prodotto, accertarsi di leggere e comprendere le informazioni sulla sicurezza multilingue
disponibili sul DVD di documentazione fornito con il prodotto.
製品をご使用になる前に、製品に付属の Documentation DVD に収録されているマルチリンガルの「安
全に正しくご使用いただくために」を読んで理解してください。
제품을 사용하기 전에 제품과 함께 제공되는 문서 DVD의 다국어 안전 지침을 주의 깊게 읽어보십시오.
Voordat u het product gebruikt, moet u ervoor zorgen dat u de meertalige veiligheidsinstructies op de
documentatie-dvd van het product hebt gelezen en begrijpt.
© Copyright Lenovo 2013
iii
Przed skorzystaniem z produktu należy zapoznać się z wielojęzycznymi instrukcjami bezpieczeństwa
znajdującymi się na płycie DVD z dokumentacją dostarczoną wraz z produktem.
Antes de utilizar o produto, leia atentamente as instruções de segurança multilingues que constam no
DVD de documentação fornecido com o produto.
Înainte de a utiliza produsul, asiguraţi-vă că aţi citit şi înţeles instrucţiunile de siguranţă în mai multe limbi de
pe DVD-ul cu documentaţie care însoţeşte produsul.
Før du bruker produktet, må du lese og forstå den flerspråklige sikkerhetsinformasjonen på DVDen med
dokumentasjon som følger med produktet.
Прежде чем использовать этот продукт, внимательно ознакомьтесь с инструкциями по технике
безопасности на разных языках, которые можно найти на DVD-диске с документацией в комплекте с
продуктом.
在使用本产品之前,请务必先阅读和了解产品附带的文档 DVD 中的多语言安全说明。
Pre nego to upotrebite proizvod obavezno paljivo proitajte i prouite viejeziko uputstvo za bezbednost na
dokumentacionom DVD-u koji ste dobili uz proizvod.
Pred pouvanm produktu si pretajte viacjazyn bezpenostn pokyny na disku DVD s dokumentciou dodanom s
produktom.
Preden začnete uporabljati izdelek, je pomembno, da preberete in razumete večjezična varnostna navodila
na DVD-ju z dokumentacijo, ki ste ga prejeli skupaj z izdelkom.
Antes de utilizar el producto, asegúrese de leer y comprender las instrucciones de seguridad multilingües del
DVD de documentación que se proporciona con el producto.
Var noga med att läsa säkerhetsinstruktionerna på dokumentations-DVD-skivan som följer med produkten
innan du börjar använda produkten.
使用本產品之前,請務必閱讀並瞭解產品隨附的文件 DVD 上的多國語言版本安全資訊。
Bu ürünü kullanmadan önce, ürünle birlikte gönderilen belge DVD'si üzerindeki çok dil içeren güvenlik
yönergelerini okuyup anladýðýnýzdan emin olun.
Перед використанням цього продукту уважно ознайомтеся з інструкціями з техніки безпеки на різних
мовах, що можна знайти на DVD-диску з документацією в комплекті з продуктом.
Important: For translated versions of the caution or danger statement, refer to the Safety, Warranty, and
Support Information document.
Ensure that you read and understand all caution and danger statements in this document before you perform
the procedures. Read and understand any additional safety information that is included with the server or
optional device before you install, remove, or replace the device.
iv
ThinkServer RD540 User Guide and Hardware Maintenance Manual
Statement 1
DANGER
Electrical current from power, telephone, and communication cables is hazardous.
To avoid a shock hazard:
• Do not connect or disconnect any cables or perform installation, maintenance, or reconfiguration of this
product during an electrical storm.
• Connect all power cords to a properly wired and grounded electrical outlet.
• Ensure that all power cord connectors are securely and completely plugged into receptacles.
• Connect to properly wired outlets any equipment that will be attached to this product.
• When possible, use one hand only to connect or disconnect signal cables.
• Never turn on any equipment when there is evidence of fire, water, or structural damage.
• Disconnect the attached power cords, telecommunications systems, networks, and modems before you
open the device covers, unless instructed otherwise in the installation and configuration procedures.
• Connect and disconnect cables as described in the following table when installing, moving, or opening
covers on this product or attached devices.
To connect:
To disconnect:
1. Turn everything OFF.
1. Turn everything OFF.
2. First, attach all cables to devices.
2. First, remove power cords from outlets.
3. Attach signal cables to connectors.
3. Remove signal cables from connectors.
4. Attach power cords to outlets.
4. Remove all cables from devices.
5. Turn devices ON.
Statement 2
DANGER
Danger of explosion if battery is incorrectly replaced.
When replacing the lithium coin cell battery, use only the same or an equivalent type that is
recommended by the manufacturer. The battery contains lithium and can explode if not properly
used, handled, or disposed of.
Do not:
• Throw or immerse into water
• Heat to more than 100°C (212°F)
• Repair or disassemble
Dispose of the battery as required by local ordinances or regulations.
© Copyright Lenovo 2013
v
Statement 3
CAUTION:
When laser products (such as CD-ROMs, DVD drives, fiber optic devices, or transmitters) are
installed, note the following:
• Do not remove the covers. Removing the covers of the laser product could result in exposure to
hazardous laser radiation. There are no serviceable parts inside the device.
• Use of controls or adjustments or performance of procedures other than those specified herein
might result in hazardous radiation exposure.
DANGER
Some laser products contain an embedded Class 3A or Class 3B laser diode. Note the following:
Laser radiation when open. Do not stare into the beam, do not view directly with optical
instruments, and avoid direct exposure to the beam.
Statement 4
≥ 18 kg (39.7 lb)
≥ 32 kg (70.5 lb)
≥ 55 kg (121.2 lb)
< 32 kg (70.5 lb)
< 55 kg (121.2 lb)
< 100 kg (220.5 lb)
CAUTION:
Use safe practices when lifting.
Statement 5
CAUTION:
The power control button on the device and the power switch on the power supply do not turn off
the electrical current supplied to the device. The device also might have more than one power
cord. To remove all electrical current from the device, ensure that all power cords are disconnected
from the power source.
vi
ThinkServer RD540 User Guide and Hardware Maintenance Manual
Statement 6
CAUTION:
If you install a strain-relief bracket option over the end of the power cord that is connected to the
device, you must connect the other end of the power cord to a power source that is easily accessible
in case it needs to be disconnected.
Statement 7
CAUTION:
If the device has doors, ensure that you remove or secure the doors before moving or lifting the
device to protect against personal injury. The doors will not support the weight of the device.
Statement 8
CAUTION:
Never remove the cover on a power supply or any part that has the following label attached.
Hazardous voltage, current, and energy levels are present inside any component that has this label
attached. There are no serviceable parts inside these components. If you suspect a problem with
one of these parts, contact a service technician.
Statement 9
CAUTION:
Disconnect the hot-swap fan cables before removing the fan from the device to protect against
personal injury.
Statement 10
CAUTION:
The following label indicates a sharp-edge hazard.
© Copyright Lenovo 2013
vii
Statement 11
CAUTION:
The following label indicates a potential heat hazard.
Statement 12
DANGER
Overloading a branch circuit is a potential fire hazard and a shock hazard under certain conditions. To
avoid these hazards, ensure that your system electrical requirements do not exceed branch current ratings
at the installation site.
Statement 13
CAUTION:
Ensure that the rack is secured properly to avoid tipping when the server unit is extended on the rails.
Statement 14
CAUTION:
Some accessory or option board outputs exceed Class 2 or limited power source limits. You
must install the appropriate interconnecting cabling in accordance with your local electrical code
requirements.
Statement 15
CAUTION:
The power-control button on the device may put the device in standby mode instead of turning off
the device. In addition, the device might have multiple connections to dc power. To remove all
electrical current from the device, ensure that all connections to dc power are disconnected at
the dc power input terminals.
viii
ThinkServer RD540 User Guide and Hardware Maintenance Manual
Statement 16
CAUTION:
To reduce the risk of electric shock or energy hazards:
• This equipment must be installed by trained service personnel in a restricted-access location, as
defined by your local electrical code and the latest edition of IEC 60950.
• Connect the equipment to a reliably earthed safety extra low voltage (SELV) source. An SELV
source is a secondary circuit that is designed so that normal and single fault conditions do not
cause the voltages to exceed a safe level (60 V direct current).
• The branch circuit overcurrent protection must be rated in accordance with local electrical code
requirements.
• Use 1.3 mm2 or 16 American Wire Gauge (AWG) copper conductor only, not exceeding 3 meters
in length.
• Torque the wiring-terminal screws to 1.4 newton-meters or 12 inch-pounds.
• Provide a readily available, approved and rated disconnect device in the field wiring.
Statement 17
CAUTION:
This product contains a Class 1M laser. Do not view directly with optical instruments.
Statement 18
CAUTION:
Do not place any object on top of rack-mounted products.
Statement 19
CAUTION:
Hazardous moving parts. Keep fingers and other body parts away.
© Copyright Lenovo 2013
ix
Statement 20
CAUTION:
A lithium ion battery is provided. To avoid possible explosion, do not burn the battery. Replace the
battery only with the Lenovo-approved part. Recycle or discard the battery as instructed by local
regulations.
Safety inspection guide
The purpose of this inspection guide is to assist you in identifying potentially unsafe conditions. As each
machine was designed and built, required safety items were installed to protect users and service technicians
from injury. This guide addresses only those items. You should use good judgment to identify potential safety
hazards due to attachment of non-ThinkServer features or options not covered by this inspection guide.
If any unsafe conditions are present, you must determine how serious the apparent hazard could be and
whether you can continue without first correcting the problem.
Consider these conditions and the safety hazards they present:
• Electrical hazards, especially primary power (primary voltage on the frame can cause serious or fatal
electrical shock)
• Explosive hazards, such as a damaged Cathode Ray Tube (CRT) monitor or a bulging capacitor
• Mechanical hazards, such as loose or missing hardware
To determine whether there are any potentially unsafe conditions, use the following checklist at the beginning
of every service task. Begin the checks with the power off, and the power cords disconnected.
Checklist:
1. Check exterior covers for damage (loose, broken, or sharp edges).
2. Power off the server. Disconnect the power cords.
3. Check the power cord for:
a. A third-wire ground connector in good condition. Use a meter to measure third-wire ground
continuity for 0.1 ohm or less between the external ground pin and the frame ground.
b. The power cord should be the authorized type specified for your server. Go to:
http://www.lenovo.com/serviceparts-lookup.
c. Insulation must not be frayed or worn.
4. Check for cracked or bulging batteries.
5. Remove the cover.
6. Check for any obvious non-ThinkServer alterations. Use good judgment as to the safety of any
non-ThinkServer alterations.
7. Check inside the unit for any obvious unsafe conditions, such as metal filings, contamination, water or
other liquids, or signs of fire or smoke damage.
8. Check for worn, frayed, or pinched cables.
9. Check that the power-supply cover fasteners (screws or rivets) have not been removed or tampered with.
x
ThinkServer RD540 User Guide and Hardware Maintenance Manual
Grounding requirements
Electrical grounding of the server is required for operator safety and correct system function. Proper
grounding of the electrical outlet can be verified by a certified electrician.
© Copyright Lenovo 2013
xi
xii
ThinkServer RD540 User Guide and Hardware Maintenance Manual
Chapter 1. General information
This chapter provides some general information about your product.
This chapter contains the following items:
•
“Introduction” on page 1
•
“Server documentation” on page 2
Introduction
This document for your Lenovo® ThinkServer® product contains information about the server features,
specifications, component locations, configuration instructions, hardware replacement procedures, and
basic troubleshooting and diagnostics.
Your server comes with a documentation DVD that contains various server documents to help you use and
maintain the server. Meanwhile, your server comes with a ThinkServer EasyStartup DVD that provides a
convenient solution for configuring the server and installing an operating system.
The Lenovo Limited Warranty (LLW) contains the warranty terms that apply to the product you purchased from
Lenovo. Read the LLW on the documentation DVD that comes with your server. A printable generic version
of the latest LLW also is available in more than 30 languages at http://www.lenovo.com/warranty/llw_01. If
you cannot obtain the LLW through the documentation DVD or Lenovo Web site, contact your local Lenovo
office or reseller to obtain a printed version of the LLW, free of charge.
For warranty service, consult the worldwide Lenovo Support telephone list. Telephone numbers are subject
to change without notice. The most up-to-date telephone list for Lenovo Support is always available on the
Web site at http://www.lenovo.com/support/phone. If the telephone number for your country or region is not
listed, contact your Lenovo reseller or Lenovo marketing representative.
To obtain the most up-to-date information about the server, go to:
http://www.lenovo.com/thinkserver
Lenovo maintains pages on the World Wide Web, where you can get the latest technical information and
download documentation or device drivers and updates. To access the Lenovo Support Web site, go to:
http://www.lenovo.com/support
© Copyright Lenovo 2013
1
Record information about your server in the following table. You will need the information if you ever need
to have your server serviced.
For where to find the product information label on the chassis, see “Machine type, model, and serial number
label” on page 13.
Product name
______________________________________________
Machine type and model (MT-M)
______________________________________________
Serial number (S/N)
______________________________________________
Date of purchase
______________________________________________
You can register your server with Lenovo by following the instructions at:
http://www.lenovo.com/register
When you register your server, information is entered into a database, which enables Lenovo to contact
you in case of a recall or other severe problem. After you register your server with Lenovo, you will receive
quicker service when you call Lenovo for help. In addition, some locations offer extended privileges and
services to registered users.
Server documentation
This topic provides general descriptions of the various documentation for your server and instructions on
how to obtain all the documentation.
Printed documents
The following documents are printed out and contained in your server package.
• Read Me First
This is a multilingual document you should read first. This document guides you to read the complete
warranty, support, and safety information on the documentation DVD that comes with your server before
using the product. This document also provides information about how to find the most up-to-date
information on the Lenovo Support Web site.
• Rack Installation Instructions
This document provides instructions on how to install your server into a standard rack cabinet by using
the rail kit shipped with the server.
Note: A printed English version of this document is included in your server package. PDF versions of
other languages are provided on the documentation DVD that comes with the server.
2
ThinkServer RD540 User Guide and Hardware Maintenance Manual
Documentation DVD
The documentation DVD, which comes with your server, contains various documents for your server in
Portable Document Format (PDF) and HyperText Markup Language (HTML). The documentation DVD is not
bootable. To view the documents on the DVD, you will need a computer with a Web browser and the Adobe
Reader program, which is available for download at:
http://www.adobe.com
To start the documentation DVD, insert the DVD into the optical drive. The DVD is AutoPlay enabled and
starts automatically in most Microsoft® Windows® environments. If the DVD fails to start or if you are using a
Linux® operating system, open the launch.htm file located in the root directory of the DVD.
Note: Lenovo maintains pages on the World Wide Web, where you can get the latest technical information
and download documentation or device drivers and updates. Some information in the documents on the
documentation DVD might change without notice after the first release of the DVD. You can always obtain all
the most up-to-date documentation for your server from the Lenovo Web site at:
http://www.lenovo.com/UserManuals
The following documents are on the documentation DVD that comes with your server:
• Safety, Warranty, and Support Information
This is a multilingual document that includes all the safety statements for your product in more than 30
languages. Be sure to read and understand all the safety statements before using the product. This
document also includes the Lenovo warranty statement, Customer Replaceable Units (CRUs) information,
and information about how to contact the Lenovo Customer Support Center.
• Lenovo License Agreement
This document includes the terms and conditions of the Lenovo License Agreement.
• User Guide
This document provides detailed information to help you get familiar with your server and help you use,
configure, and maintain your server.
• Rack Installation Instructions
This document provides instructions on how to install your server into a standard rack cabinet by using
the rail kit shipped with the server.
• ThinkServer Management Module User Guide
This document provides information about server remote management. This document is in English only.
You might find this document on the documentation DVD that comes with your server. If not, download it
from the Lenovo Web site at:
http://www.lenovo.com/UserManuals
Note: To obtain advanced remote management functions, install a ThinkServer Management Module
Premium (TMM Premium) on the TMM Premium connector on the system board. See “Installing or
removing the ThinkServer Management Module Premium” on page 94.
• MegaRAID SAS Software User Guide
This document provides information about Redundant Array of Independent Disks (RAID) and how to
use the utility programs to configure, monitor, and maintain your server RAID and related devices. This
document is in English only.
Note: Refer to this document for hardware RAID information of the RAID card installed in the server. See
“Replacing the RAID card” on page 85.
Chapter 1. General information
3
• Other documents
You might find other documents for the Host Bus Adapter (HBA), Ethernet card, or other optional parts
on the documentation DVD.
4
ThinkServer RD540 User Guide and Hardware Maintenance Manual
Chapter 2. Server setup road map
This chapter provides a general road map to guide you through setting up your server.
The server setup procedure varies depending on the configuration of the server when it was delivered. In
some cases, the server is fully configured and you just need to connect the server to the network and an
ac power source, and then you can turn on the server. In other cases, the server needs to have hardware
features installed, requires hardware and firmware configuration, and requires an operating system to
be installed.
The general procedure for setting up your server is:
1. Unpack the server package. See “Server package” on page 7.
2. Install any required hardware or server option. See the related topics in Chapter 6 “Installing, removing,
or replacing hardware” on page 67.
3. Install your server into a standard rack cabinet by using the rail kit shipped with the server. See Rack
Installation Instructions that comes with your server.
4. Connect the Ethernet cable and power cords to the server. See “Rear view of the server” on page
22 to locate the connectors.
5. Turn on the server to verify operation. See “Turning on the server” on page 49.
6. Review the Unified Extensible Firmware Interface (UEFI) settings and customize as needed. See “Using
the Setup Utility program” on page 51.
7. Configure RAID and install the operating system and basic drivers. See “Using the ThinkServer
EasyStartup program” on page 59 and “Configuring RAID” on page 62.
8. Install any additional drivers needed for added features. Refer to the instructions that come with the
hardware option.
9. Configure Ethernet settings in the operating system by referring to the operating system help. This step
is not required if the operating system was installed using the ThinkServer EasyStartup program.
10. Check for firmware and driver updates. See “Updating the firmware” on page 65.
11. Install other applications. Refer to the documentation that comes with the applications that you want to
install.
© Copyright Lenovo 2013
5
6
ThinkServer RD540 User Guide and Hardware Maintenance Manual
Chapter 3. Product overview
This chapter provides information about the server package, features, specifications, software programs,
and component locations.
This chapter contains the following items:
•
“Server package” on page 7
•
“Features” on page 7
•
“Specifications” on page 11
•
“Software” on page 11
•
“Locations” on page 13
Server package
The server package includes the server, a rail kit, power cords, printed documentation, a documentation
DVD, and software media.
Note: Depending on the model, your server might look slightly different from the illustration in this topic.
CPU
Mem
PSU
ID
Figure 1. Server package
1 Server
2 Material box, including power cords, printed documentation, a documentation DVD, and software media
3 Rail kit
Features
This topic provides general information about the server features for various models. Depending on your
specific model, some features might vary or not be available. For information about your specific model, use
the Setup Utility program. See “Viewing information in the Setup Utility program” on page 51. You also can
refer to the Personal Systems Reference document for ThinkServer products at:
http://www.lenovo.com/psref/
© Copyright Lenovo 2013
7
Microprocessor
One or two Intel® Xeon® microprocessors (internal cache size varies by model)
For a list of the ThinkServer microprocessor options, go to:
http://www.lenovo.com/thinkserver
Memory
Your server has 20 memory slots. For more information, see “Memory module installation rules” on page 75.
Power supply
One or two 800-watt hot-swap redundant power supplies (Universal input and compliant with 80 PLUS Gold)
System fans
Your server comes with eight system fans to provide proper system cooling and airflow.
Internal drives
Internal drives are devices that your server uses to read and store data. The internal drives supported
by your server vary by model.
• Hard disk drive
– Up to four 3.5-inch hot-swap Serial Advanced Technology Attachment (SATA) hard disk drives, Serial
Attached SCSI (SAS) hard disk drives (SCSI is the acronym for Small Computer System Interface), or
solid-state drives
– Up to eight 2.5-inch hot-swap SATA hard disk drives, SAS hard disk drives, or solid-state drives
• Optical drive
– One slim SATA optical drive in some models
For the location information about the internal drives or drive bays, see “Server components” on page 25.
Expansion slots
• Two riser card assembly slots on the system board
• One PCI Express card slot on the riser card assembly 1
• One PCI Express card slot on the riser card assembly 2
For detailed information, see “Rear view of the server” on page 22.
Input/Output (I/O) features
• One or two video graphics array (VGA) DB-15 connectors
• One serial connector on the rear panel
• Six USB 2.0 connectors (two on the front panel and four on the rear panel)
• Three RJ-45 Ethernet connectors on the rear panel
For the location information about the connectors, refer to the related topics in “Locations” on page 13.
8
ThinkServer RD540 User Guide and Hardware Maintenance Manual
Video subsystem
An integrated graphics controller in the ThinkServer Management Module (TMM), which also is known
as the Baseboard Management Controller (BMC) chip, on the system board to support VGA connectors
for connecting video devices
Ethernet connectivity
There are three RJ-45 Ethernet connectors on the rear panel with 10 megabits per second (Mbps), 100
Mbps, or 1000 Mbps network connectivity. The Ethernet connector 0 is for system management by default.
However, you also can set the Ethernet connector 1 or 2 for system management use in the Setup Utility
program. See “Setting the mode of the Ethernet connectors” on page 57.
For more information, see “Rear view of the server” on page 22.
Reliability, availability, and serviceability
Reliability, availability, and serviceability (hereinafter referred to as RAS) are three important server design
features. The RAS features help you to ensure the integrity of the data stored on the server, the availability of
the server when you need it, and the ease with which you can diagnose and correct problems.
Your server has the following RAS features:
• Security features
– Administrator password and user password to help protect unauthorized access to the server (see
“Using passwords” on page 55)
– ThinkServer Trusted Platform Module (TPM), which is a security chip, to help enhance server security
Note: The TPM is only available in some models.
– Remote monitoring or control by an administrator to provide protection or help
– Hot-swap redundant power supplies to help avoid significant interruption to the operation of the
system when a power supply fails
• Basic system management features
– Ability to store the power-on self-test (POST) hardware test results
– BIOS Setup Utility program
The BIOS Setup Utility program helps you view the server information and configure the server in the
pre-operating system environment. See “Using the Setup Utility program” on page 51.
– TMM (also known as BMC) and Intelligent Platform Management Interface (IPMI) 2.0
The system board platform management subsystem is based on the integrated TMM features. The
TMM is a management chip that is integrated on the system board of your server. With the TMM
chip, no matter what condition the server operating system is in and no matter if the server is on or
off, as long as the server is connected to network and an ac power source, the interaction with the
TMM-controlled servers can be achieved through system network. The user can obtain the server
hardware health information and system event log (SEL), and is able to conduct the operations
including turning on or off the server, restarting the server, and so on. This part of server management
is independent of the operating system and is called out-of-band management.
The system board platform management subsystem consists of the integrated TMM, communication
buses, sensors, the BIOS, and server management firmware. It is responsible for error reporting,
system power control, thermal monitoring, system fan control, and other management features. The
TMM provides system management and monitoring features based on the IPMI 2.0 specification. IPMI
helps lower the overall costs of server management. You can find more information about IPMI 2.0
Chapter 3. Product overview
9
from the Web site of Intel. The TMM also supports some non-IPMI features, such as the Dynamic Host
Configuration Protocol (DHCP) and the Platform Environment Control Interface (PECI), to provide
more system management functions.
For more information, refer to the ThinkServer Management Module User Guide, which is available for
download at:
http://www.lenovo.com/UserManuals
– Hot-swap feature
Your server supports hot-swap hard disk drives and hot-swap redundant power supplies. With the
hot-swap feature, you can install, remove, or replace a hot-swap device without turning off the server.
– Preboot Execution Environment (PXE)
The Intel PXE technology enables you to boot your computers, load an operating system, or deploy
executable images from a remote server by using a network interface. The operation can be done
independently of local data storage devices (such as hard disk drives) or operating systems.
– Redundant Array of Independent Disks (RAID)
Your server supports advanced SATA/SAS hardware RAID with a RAID card installed. For detailed
information, see “Configuring RAID” on page 62.
– Status light-emitting diodes (LEDs) and diagnostic LEDs
For more information about the LEDs for your server, refer to the related topics in “Locations” on
page 13.
– Software programs
For more information about the software programs, see “Software” on page 11.
– Wake on LAN
When the Wake on LAN feature is enabled on a computer that is connected to a LAN, a network
administrator can remotely turn on or wake up the computer from a management console using remote
network management software. Besides, many other functions, such as data transfer and software
updates, can be performed remotely without remote attendance and can be done after normal working
hours and on weekends to save time and increase productivity.
• Advanced system management features
The advanced system management features are only available when the TMM detects the presence of a
ThinkServer Management Module Premium (TMM Premium), which also is known as integrated keyboard,
video, and mouse (iKVM) key. The TMM Premium is a remote management module. You can purchase
a TMM Premium from Lenovo and install it on the TMM Premium connector (also known as iKVM
connector) on the system board of your server to enable the iKVM function and activate the advanced
system management features.
For more information about advanced system management, refer to the ThinkServer Management Module
User Guide, which is available for download at:
http://www.lenovo.com/UserManuals
10
ThinkServer RD540 User Guide and Hardware Maintenance Manual
Specifications
This topic lists the physical specifications for your server.
Dimensions
Width: 436 mm (17.17 inches) without handles; 482.4 mm (18.99 inches) with handles
Height: 43.6 mm (1.72 inches)
Depth: 720.6 mm (28.37 inches) without handles; 734 mm (28.90 inches) with handles
Weight
The product weight varies depending on different system configurations.
Range of product weight without package: 12 kg (26.46 lb) to 17 kg (37.48 lb)
Range of product weight with package: 15 kg (33.07 lb) to 24 kg (52.91 lb)
Environment
• Air temperature:
Operating: 10°C to 35°C (50°F to 95°F)
Storage: -40°C to 70°C (-40°F to 158°F) in original shipping package
• Altitude: 0 to 3048 m (0 to 10 000 ft) in an unpressurized environment
• Humidity:
Operating: 8% to 80% (non-condensing)
Storage without package: 8% to 80% (non-condensing)
Storage with package: 8% to 90% (non-condensing)
Electrical input
• Universal input:
– Low range:
Minimum: 100 V ac
Maximum: 127 V ac
Input frequency range: 50 to 60 Hz
– High range:
Minimum: 200 V ac
Maximum: 240 V ac
Input frequency range: 50 to 60 Hz
Software
This topic provides information about the software programs that you can use to set up, use, and maintain
the server.
ThinkServer EasyStartup
The ThinkServer EasyStartup program simplifies the process of configuring RAID and installing supported
Microsoft Windows and Linux operating systems and device drivers on your server. This program is provided
with your server on a self-starting (bootable) ThinkServer EasyStartup DVD. The user guide for the program
also is on the DVD and can be accessed directly from the program interface. For detailed information, see
“Using the ThinkServer EasyStartup program” on page 59.
Chapter 3. Product overview
11
ThinkServer EasyUpdate Firmware Updater
The ThinkServer EasyUpdate Firmware Updater program (hereinafter referred to as the Firmware Updater
program) enables you to maintain your server firmware up-to-date and helps you avoid unnecessary server
outages. The Firmware Updater program is provided on the Lenovo Support Web site. For more information
about downloading and using the Firmware Updater program, see “Updating the firmware” on page 65.
Lenovo ThinkServer EasyManage
The Lenovo ThinkServer EasyManage program enables enterprise users to remotely control and monitor
multiple Lenovo servers within a LAN.
For detailed information, see “Using the Lenovo ThinkServer EasyManage program” on page 66.
BIOS and TMM update utilities
The BIOS and TMM (also known as BMC) firmware keeps updating after the shipment of the server.
Lenovo maintains pages on the Support Web site and provides the BIOS and TMM update utilities with
instructions for download to help you update the BIOS and TMM firmware if needed. For more information,
see “Updating or recovering the BIOS” on page 58 and “Updating the firmware” on page 65.
RAID configuration utilities
Your server has a RAID card installed, which works with some configuration utilities to support hardware
RAID. For detailed information, see “Configuring RAID” on page 62.
Remote management software
The integrated TMM provides basic remote management features for the server. The add-on TMM Premium
option provides advanced remote management features for the server.
For detailed information about the remote management software and server remote management, refer to
the ThinkServer Management Module User Guide, which is available for download at:
http://www.lenovo.com/UserManuals
ThinkServer Smart Grid Technology
The ThinkServer Smart Grid Technology program helps administrators to monitor and manage server
performance, especially the power consumption for groups of servers equipped with the Intel Intelligent
Power Node Manager technology.
Lenovo provides a trial version of the ThinkServer Smart Grid Technology program with a free 90-day
subscription. After 90 days, you must renew the license to continue using the program. You can purchase
the license from Lenovo to activate the ThinkServer Smart Grid Technology program and expand the
management capability of the program when the free trial ends.
To download the ThinkServer Smart Grid Technology program, go to http://www.lenovo.com/drivers and
follow the instructions on the Web page.
For detailed information about using the ThinkServer Smart Grid Technology program, refer to the help
system for the program.
Diagnostic programs
The following diagnostic programs are available for you to diagnose server problems:
• ThinkServer Diagnostic Tool
12
ThinkServer RD540 User Guide and Hardware Maintenance Manual
• ThinkServer System Profile Collection Tool
For more information, see “Using a diagnostic program” on page 160.
Locations
This topic provides information to help you locate your server components.
Machine type, model, and serial number label
This topic helps you locate the label that contains the machine type, model, and serial number information
for your server.
When you contact Lenovo for help, the machine type, model, and serial number information helps support
technicians to identify your server and provide faster service.
The machine type, model, and serial number label is attached on the pull-out information card, which is a
small plastic tab and can be slid out of the front of the chassis. The following illustrations are samples of the
machine type, model, and serial number labels on server models with different hard disk drive configurations.
Note: Depending on the model, your server might look slightly different from the illustrations in this topic.
MT-M XXXX- XXX
S/N XXXXXXX
U
CP
Me
m
U
PS
ID
Figure 2. Label on server models with 3.5-inch hard disk drives
Chapter 3. Product overview
13
MT-M XXXX- XXX
S/N XXXXXXX
U
CP
m
Me
U
PS
ID
Figure 3. Label on server models with eight 2.5-inch hard disk drives
MT-M XXXX- XXX
S/N XXXXXXX
U
PS
m
Me
U
CP
ID
Figure 4. Label on server models with six 2.5-inch hard disk drives
Front view of the server
This topic provides information to help you locate the parts on the front of the server.
The front view of the server varies by model. The illustrations in this topic show the server front views
based on the supported hard disk drives:
•
“Front view of server models with eight 2.5-inch hard-disk-drive bays” on page 16
•
“Front view of server models with eight 2.5-inch hard-disk-drive bays” on page 16
•
“Front view of server models with six 2.5-inch hard-disk-drive bays” on page 17
Notes:
• Depending on the model, your server might look slightly different from the illustrations in this topic.
14
ThinkServer RD540 User Guide and Hardware Maintenance Manual
• The term “2.5-inch hot-swap hard disk drives” or “2.5-inch hard disk drives” hereinafter refers to all the
supported types of 2.5-inch hard disk drives, including the solid-state drives.
Front view of server models with eight 3.5-inch hard-disk-drive bays
The following illustration shows the front view of server models with eight 3.5-inch hard-disk-drive bays.
ID
PSU
Mem
CPU
Figure 5. Front view of server models with eight 3.5-inch hard-disk-drive bays
1 Front panel
5 Right rack handle
2 Intelligent Diagnostics Module
6 3.5-inch hard-disk-drive area
3 Pull-out information card
7 Left rack handle
4 Slim optical drive (available in some models)
1
Front panel
For detailed information about the controls, connectors, and status LEDs on the front panel, see “Front
panel” on page 18.
2
Intelligent Diagnostics Module
For more information, see “Intelligent Diagnostics Module” on page 21.
3
Pull-out information card
The machine type, model, and serial number label of the server is attached on the pull-out information card.
See “Machine type, model, and serial number label” on page 13.
4
Slim optical drive (available in some models)
Some server models come with a slim SATA optical drive.
5
Right rack handle
7
Left rack handle
If your server is installed in a rack cabinet, you can use the rack handles to slide the server out of the rack
cabinet; or use the rack handles and screws to secure the server in the rack cabinet so that the server
cannot slide out, especially in vibration-prone areas. For more information, refer to the Rack Installation
Instructions that comes with your server.
Chapter 3. Product overview
15
6
3.5-inch hard-disk-drive area
The EMI integrity and cooling of the server are protected by having all drive bays covered or occupied.
The number of the installed hard disk drives in your server varies by model. The vacant hard-disk-drive
bays are occupied by dummy hard-disk-drive trays.
The hard-disk-drive bay numbers are marked on the top edge of the front bezel.
Figure 6. 3.5-inch hard-disk-drive bay numbers (top view of the server)
Front view of server models with eight 2.5-inch hard-disk-drive bays
The following illustration shows the front view of server models with eight 2.5-inch hard-disk-drive bays.
ID
PSU
Mem
CPU
6
Figure 7. Front view of server models with eight 2.5-inch hard-disk-drive bays
1 Front panel
4 Right rack handle
2 Pull-out information card
5 2.5-inch hard-disk-drive area
3 Intelligent Diagnostics Module
6 Left rack handle
1
Front panel
For detailed information about the controls, connectors, and status LEDs on the front panel, see “Front
panel” on page 18.
2
Pull-out information card
The machine type, model, and serial number label of the server is attached on the pull-out information card.
See “Machine type, model, and serial number label” on page 13.
3
Intelligent Diagnostics Module
For more information, see “Intelligent Diagnostics Module” on page 21.
16
ThinkServer RD540 User Guide and Hardware Maintenance Manual
4
Right rack handle
6
Left rack handle
If your server is installed in a rack cabinet, you can use the rack handles to slide the server out of the rack
cabinet; or use the rack handles and screws to secure the server in the rack cabinet so that the server
cannot slide out, especially in vibration-prone areas. For more information, refer to the Rack Installation
Instructions that comes with your server.
5
2.5-inch hard-disk-drive area
The EMI integrity and cooling of the server are protected by having all drive bays covered or occupied.
The number of the installed hard disk drives in your server varies by model. The vacant hard-disk-drive
bays are occupied by dummy hard-disk-drive trays.
The hard-disk-drive bay numbers are marked on the top edge of the front bezel.
0
1
0
1
2
3
4
5
6
7
2
3
4
5
6
7
Figure 8. 2.5-inch hard-disk-drive bay numbers (top view of the server)
Front view of server models with six 2.5-inch hard-disk-drive bays
The following illustration shows the front view of server models with six 2.5-inch hard-disk-drive bays.
ID
PSU
Mem
CPU
6
Figure 9. Front view of server models with six 2.5-inch hard-disk-drive bays
1 Front panel
5 2.5-inch hard-disk-drive area
2 Pull-out information card
6 Slim optical drive (available in some models)
3 Intelligent Diagnostics Module
7 Left rack handle
4 Right rack handle
Chapter 3. Product overview
17
1
Front panel
For detailed information about the controls, connectors, and status LEDs on the front panel, see “Front
panel” on page 18.
2
Pull-out information card
The machine type, model, and serial number label of the server is attached on the pull-out information card.
See “Machine type, model, and serial number label” on page 13.
3
Intelligent Diagnostics Module
For more information, see “Intelligent Diagnostics Module” on page 21.
4
Right rack handle
7
Left rack handle
If your server is installed in a rack cabinet, you can use the rack handles to slide the server out of the rack
cabinet; or use the rack handles and screws to secure the server in the rack cabinet so that the server
cannot slide out, especially in vibration-prone areas. For more information, refer to the Rack Installation
Instructions that comes with your server.
5
2.5-inch hard-disk-drive area
The EMI integrity and cooling of the server are protected by having all drive bays covered or occupied.
The number of the installed hard disk drives in your server varies by model. The vacant hard-disk-drive
bays are occupied by dummy hard-disk-drive trays.
The hard-disk-drive bay numbers are marked on the top edge of the front bezel.
0
1
2
3
4
5
0
1
2
3
4
5
Figure 10. 2.5-inch hard-disk-drive bay numbers (top view of the server)
6
Slim optical drive
Some server models come with a slim SATA optical drive.
Front panel
This topic provides information to help you locate the controls, connectors, and LEDs on the front panel of
the server.
18
ThinkServer RD540 User Guide and Hardware Maintenance Manual
The following illustration shows the controls, connectors, and LEDs on the front panel of the server.
ID
Figure 11. Front panel
1
1 Power switch with power status LED
5 System error LED
2 ID button with ID LED
6 Front USB connector 1
3 Network Interface Controller (NIC) 1 status LED
7 Front USB connector 2
4 NIC 2 status LED
8 Front VGA DB-15 connector (available in some models)
Power switch with power status LED
You can press the power switch to turn on the server when you finish setting up the server. You also can
hold the power switch for several seconds to turn off the server if you cannot turn it off from the operating
system. See Chapter 4 “Turning on and turning off the server” on page 49. The power status LED helps you
to determine the current power status.
2
Power status LED
Color
Description
On
Green
The server is on.
Off
None
The server is off.
Blinking
Green
The server is in ACPI S1 mode, which also is known
as Power On Suspend (POS) mode. In this mode, the
microprocessor is not working while other hardware
devices are still working.
ID button with ID LED
When you press the ID button, the ID LEDs on both the front and rear of the server are lit to help you locate
the server among other servers. You also can turn on the ID LEDs using a remote management program
for server presence detection.
ID LED
Color
Description
On
Blue
The system is identified.
Off
None
The ID LED is not in use or the system is not
identified.
Chapter 3. Product overview
19
3
NIC 1 status LED
4
NIC 2 status LED
The two NIC status LEDs indicate the LAN status for the Ethernet connector 1 and Ethernet connector 2
on the rear panel of the server.
5
Description
NIC status LED
Color
On
Green
The server is connected to a LAN.
Off
None
The server is disconnected from a LAN.
Blinking
Green
The LAN is connected and active.
System error LED
The system error LED helps you to determine if there are any system errors. When the system error LED is on,
check the BMC for errors. Refer to the following table for the error descriptions and actions that you can take.
System error LED
Color
Description
The temperature of the server reached
the non-critical temperature threshold.
Action
• Check the BMC for errors and check
the system fans.
• Ensure that the ambient temperature
limit LED is off.
The voltage of the server reached the
non-critical voltage threshold.
Replace the system board.
Note: This procedure must be performed
only by trained service personnel of
Lenovo. See Chapter 8 “Getting
information, help, and service” on page
165.
A fan has been detected to be running at
low speed.
Check the system fans.
A hot-swap fan has been removed.
On
Amber
1. Ensure that the system fans are
connected securely to the system
board.
2. Reinstall the removed fan or install a
new fan to replace the removed fan.
The power supply has a critical error.
The power cord has been disconnected
from one power supply or a redundant
power supply has been removed.
Check the BMC for detailed information.
1. Ensure that the power supplies are
installed securely in the server.
2. Ensure that the power cords are
connected securely to the power
supplies.
3. Install a new power supply to
replace the removed one.
The THERMTRIP# signal is asserted
because the system is overheated.
• Check the BMC for errors and then
check the system fans.
• Ensure that the ambient temperature
limit LED is off.
Off
20
None
The server is off or the server is on and
is working correctly.
ThinkServer RD540 User Guide and Hardware Maintenance Manual
6
Front USB connector 1
7
Front USB connector 2
Used to attach a USB-compatible device, such as a USB keyboard, mouse, scanner, or printer. If you
have more than six USB devices, you can purchase a USB hub, which you can use to connect additional
USB devices.
8
Front VGA DB-15 connector (available in some models)
Used to attach a VGA-compatible video device, such as a VGA monitor.
Intelligent Diagnostics Module
This topic provides information about the Intelligent Diagnostics Module (hereinafter referred to as the IDM)
and the diagnostic LEDs on the module. Many errors are first indicated by a lit error LED on the diagnostic
panel of the server. If an LED is lit, one or more LEDs elsewhere in the server might also be lit to direct you to
the source of the error. See “System board LEDs” on page 46.
The following illustration shows the location of the IDM and the diagnostic LEDs on the IDM panel in the
front of the server. Depending on the model, your server might look slightly different from the illustrations in
this topic.
PSU
ID
PSU
Mem
Mem
CPU
CPU
Figure 12. IDM panel
LED
1 Power supply error
LED
Status
Description
Solid off
The power supply is working
correctly.
Solid on (amber)
The power supply is likely to fail
or has failed.
Action
Check the BMC for errors and
run the diagnostic programs. See
“Using a diagnostic program” on
page 160.
Note: To identify the failing power
supply, check the status LED
near the power cord connector
on the redundant power supply.
Chapter 3. Product overview
21
LED
2 Ambient temperature
limit LED
3 System fan error LED
4 Memory module
status LED
5 Microprocessor
status LED (also known
as CPU error LED)
Status
Description
Solid off
The server is running at a normal
temperature.
Solid on (amber)
The ambient temperature is below
7°C (44.6°F) or over 40°C (104°F).
Solid off
The system fans are operating
correctly.
Solid on (amber)
One or more system fans are
running at low speed or have
been removed.
Solid off
The memory modules
are operating at a normal
temperature.
Solid on (amber)
One or more memory modules
are overheated.
Solid off
The microprocessors are
operating at a normal
temperature.
Solid on (amber)
One or more microprocessors are
overheated.
Action
Check the BMC for errors and
run the diagnostic programs. See
“Using a diagnostic program” on
page 160.
Check the BMC for errors and
run the diagnostic programs. See
“Using a diagnostic program” on
page 160.
Note: To identify the failing
system fans, check the status
LEDs on the system board. See
“System board LEDs” on page
46.
Check the BMC for errors and
run the diagnostic programs. See
“Using a diagnostic program” on
page 160.
Check the BMC for errors and
run the diagnostic programs. See
“Using a diagnostic program” on
page 160.
Rear view of the server
This topic provides information to help you locate the connectors and components on the rear of your server.
22
ThinkServer RD540 User Guide and Hardware Maintenance Manual
The following illustration shows the rear view of the server with two hot-swap power supplies.
2
1
0
ID
MGMT
9
8
Figure 13. Rear view of the server
1 Hot-swap redundant power supply 2 (available in
some models)
7 VGA DB-15 connector
2 Hot-swap redundant power supply 1
8 Ethernet connector 1 (RJ-45)
3 Low-profile PCI Express card slot
9 Ethernet connector 0 (RJ-45) (for system management)
4 PCI Express card slot
10 Serial port
5 Ethernet connector 2 (RJ-45)
11 ID LED
6 USB connectors (4)
1
Hot-swap redundant power supply 2 (available in some models)
2
Hot-swap redundant power supply 1
The hot-swap redundant power supplies help you avoid significant interruption to the operation of the
system when a power supply fails. You can purchase a hot-swap redundant power supply option directly
from Lenovo and install the power supply to provide power redundancy without turning off the server.
On each hot-swap redundant power supply, there is a status LED near the power cord connector. When the
LED is lit in green, it indicates that the hot-swap redundant power supply is working correctly. When the LED
is lit in amber, it indicates that the hot-swap redundant power supply is likely to fail or has failed.
3
Low-profile PCI Express card slot
It is recommended to attach a RAID card to the low-profile PCI Express card slot.
Note: If a ThinkServer HBA is available, refer to its user guide for detailed information. The user guide is
available for download at:
http://www.lenovo.com/UserManuals
Physical link width
Negotiable link width
Supported card length and height
x8
x8, x4, x2, x1
Low-profile card
Chapter 3. Product overview
23
4
PCI Express card slot
Used to attach an Ethernet card or any other supported PCI Express card.
Note: If a ThinkServer HBA is available, refer to its user guide for detailed information. The user guide is
available for download at:
http://www.lenovo.com/UserManuals
Physical link width
Negotiable link width
Supported card length and height
x16
x16, x8, x4, x2, x1
Half-length, full-height card
5
8
9
Ethernet connectors
Used to attach an Ethernet cable for a LAN. Each Ethernet connector has two status LEDs to help you
identify the Ethernet connectivity, activity, and connection speed.
Note: The Ethernet connector 0 (callout 9 ) marked with “MGMT” is for system management by default.
However, you also can set the Ethernet connector 1 or 2 for system management use in the Setup Utility
program. See “Setting the mode of the Ethernet connectors” on page 57.
Ethernet status LED
1 Left
2 Right
6
Color
Description
Status
Amber
On
The connection speed is 1000 Mbps.
Green
On
The connection speed is 100 Mbps.
None
Off
The connection speed is 10 Mbps.
Green
On
The server is connected to a LAN.
None
Off
The server is disconnected from a LAN.
Green
Blinking
The LAN is connected and active.
USB connectors (4)
Used to attach a USB-compatible device, such as a USB keyboard, mouse, scanner, or printer. If you
have more than six USB devices, you can purchase a USB hub, which you can use to connect additional
USB devices.
7
VGA DB-15 connector
Used to attach a VGA-compatible video device, such as a VGA monitor.
10
Serial port
Used to attach a device that uses a 9-pin serial port.
24
ThinkServer RD540 User Guide and Hardware Maintenance Manual
11
ID LED
When you press the ID button, the ID LEDs on both the front and rear of the server are lit to help you locate
the server among other servers. You also can turn on the ID LEDs using a remote management program
for server presence detection.
ID LED
Color
Description
On
Blue
The system is identified.
Off
None
The ID LED is not in use or the system is not
identified.
Server components
This topic provides information to help you locate the components of your server. For more information
about major components, see the related topics in “Locations” on page 13.
To remove the server cover and the cooling shroud and gain access to the inside of the server, see
“Removing the server cover” on page 69 and “Removing and reinstalling the cooling shroud” on page 73.
The chassis configuration varies by model. The following illustrations show the two chassis configurations
based on the supported hard disk drives.
• Server models with 3.5-inch hot-swap hard disk drives
• Server models with eight 2.5-inch hot-swap hard disk drives
• Server models with six 2.5-inch hot-swap hard disk drives
Note: Depending on the model, your server might look slightly different from the illustrations in this topic.
Chapter 3. Product overview
25
The following illustration shows the components of server models with 3.5-inch hot-swap hard disk drives.
ID
PSU
Mem
CPU
Figure 14. Components of server models with 3.5-inch hot-swap hard disk drives
1 System fans
11 Right rack handle
2 Twenty memory slots (installed memory modules
vary by model)
12 Hard-disk-drive bay 3
3 PCI Express card
13 Optical drive bay (with an optical drive installed in some
models)
4 Cooling shroud
14 Hard-disk-drive bay 2
5 Riser card assembly 1
15 Pull-out information card
6 PCI Express card
16 Hard-disk-drive bay 1
7 Riser card assembly 2
17 Intelligent Diagnostics Module
8 Power supply
18 Hard-disk-drive bay 0
9 Heat sinks (2)
19 Front panel
10 Hot-swap hard-disk-drive backplane
20 Left rack handle
26
ThinkServer RD540 User Guide and Hardware Maintenance Manual
The following illustration shows the components of server models with eight 2.5-inch hot-swap hard disk
drives.
ID
PSU
Mem
CPU
Figure 15. Components of server models with eight 2.5-inch hot-swap hard disk drives
1 System fans
13 Hard-disk-drive bay 6
2 Twenty memory slots (installed memory modules
vary by model)
14 Hard-disk-drive bay 5
3 PCI Express card
15 Hard-disk-drive bay 4
4 Cooling shroud
16 Hard-disk-drive bay 3
5 Riser card assembly 1
17 Hard-disk-drive bay 2
6 PCI Express card
18 Intelligent Diagnostics Module
7 Riser card assembly 2
19 Hard-disk-drive bay 1
8 Power supply
20 Pull-out information card
9 Heat sinks (2)
21 Hard-disk-drive bay 0
10 Hot-swap hard-disk-drive backplane
22 Left rack handle
11 Right rack handle
23 Front panel
12 Hard-disk-drive bay 7
Chapter 3. Product overview
27
Components of server models with six 2.5-inch hot-swap hard disk drives
Figure 16. Components of server models with six 2.5-inch hot-swap hard disk drives
1 System fans
10 Hot-swap hard-disk-drive backplane
2 Twenty memory slots (installed memory modules
vary by model)
11 Right rack handle
3 PCI Express card
12 2.5-inch hard-disk-drive bays
4 Cooling shroud
13 Intelligent Diagnostics Module
5 Riser card assembly 1
14 Slim optical drive (available in some models)
6 PCI Express card
15 Pull-out information card
7 Riser card assembly 2
16 Front panel
8 Power supply
17 Left rack handle
9 Heat sinks (2)
CRUs are parts that can be upgraded or replaced by the customer. If a CRU is determined to be defective
during the warranty period, a replacement CRU will be provided to the customer. Customers are responsible
for installing the self-service CRUs for this product. Customers also can install optional-service CRUs, which
might require some technical skills or tools, or request that a technician install the optional-service CRU
under the terms of the applicable warranty service type for your country or region.
Non-CRUs must be replaced only by trained service technicians.
Notes:
• Before servicing a Lenovo product, ensure that you read and understand “Safety information” on page iii.
• Use only parts provided by Lenovo.
28
ThinkServer RD540 User Guide and Hardware Maintenance Manual
The following table lists the major FRUs in your server and the CRU identification information. For a complete
listing of FRU information, such as FRU part numbers and supported server models, go to:
http://www.lenovo.com/serviceparts-lookup
Description
Self-service CRU
Optional-service
CRU
Cooling shroud
Yes
No
Diagnostic module
No
Yes
Front panel board
No
Yes
Heat sink
Yes
No
Hot-swap hard disk drive
Yes
No
Hot-swap hard disk drive backplane
No
Yes
Hot-swap redundant power supply
Yes
No
Memory module
Yes
No
Microprocessor
No
Yes
Optical drive (available in some models)
Yes
No
Peripheral Component Interconnect (PCI) card
Yes
No
Rack handles
Yes
No
Riser card assembly
Yes
No
System board
No
No
System board battery
Yes
No
System fan
Yes
No
ThinkServer Management Module Premium (available as an option)
Yes
No
ThinkServer RAID 500 Upgrade Key for Advanced RAID (available as an
option)
No
Yes
ThinkServer RAID 700 Battery (available as an option)
No
Yes
ThinkServer RAID Super Capacitor Module (available as an option)
No
Yes
ThinkServer Trusted Platform Module (available as an option)
Yes
No
Chapter 3. Product overview
29
Hot-swap hard-disk-drive status LEDs
Each hot-swap hard disk drive has two status LEDs on the front.
Figure 17. Hot-swap hard-disk-drive status LEDs
1 hard-disk-drive activity LED
2 hard-disk-drive RAID status LED
Description
Off
Off
The hard disk drive has failed or is
not present.
On, green
Off
The hard disk drive is present but not
in use.
Blinking, green
Off
The hard disk drive is active and data
is being transferred.
On, green
Blinking rapidly (about four flashes
per second), amber
The RAID controller is identifying the
hard disk drive.
On, green
On, amber
The RAID array has failed and cannot
be recovered. You need to recreate a
new array.
Blinking, green
Blinking slowly (about one flash per
second), amber
The hard disk drive is being rebuilt.
RAID card
This topic provides information to help you locate the connectors on a RAID card installed on the riser
card assembly 2.
Your server comes with a RAID card to provide advanced SATA/SAS hardware RAID functions to the server.
For more information, refer to “Replacing the RAID card” on page 85.
Your server supports the following RAID cards:
• ThinkServer RAID 500 Adapter (also known as ThinkServer 9240-8i RAID 0/1 Adapter)
• ThinkServer RAID 700 Adapter (also known as ThinkServer 9260-8i SAS RAID Adapter)
• ThinkServer RAID 710 Adapter (also known as 9270CV-8i RAID adapter)
30
ThinkServer RD540 User Guide and Hardware Maintenance Manual
ThinkServer RAID 500 Adapter (also known as ThinkServer 9240-8i RAID 0/1 Adapter)
The following illustration shows the connectors on the ThinkServer RAID 500 Adapter.
Figure 18. ThinkServer RAID 500 Adapter
1 Port 0
3 ThinkServer RAID 500 Upgrade Key for Advanced RAID
connector
2 Port 1
1
Port 0
Used to connect a mini-SAS signal cable. See “Mini-SAS to mini-SAS signal cable connections” on page 37.
2
Port 1
Used to connect a mini-SAS signal cable. See “Mini-SAS to mini-SAS signal cable connections” on page 37.
3
ThinkServer RAID 500 Upgrade Key for Advanced RAID connector
Used to connect a ThinkServer RAID 500 Upgrade Key for Advanced RAID. See “Installing or removing the
ThinkServer RAID 500 Upgrade Key for Advanced RAID” on page 88.
Chapter 3. Product overview
31
ThinkServer RAID 700 Adapter (also known as ThinkServer 9260-8i SAS RAID Adapter)
The following illustration shows the connectors on the ThinkServer RAID 700 Adapter.
Figure 19. ThinkServer RAID 700 Adapter
1 Ports 7-4
3 ThinkServer RAID 700 Battery connector
2 Ports 3-0
1
Ports 7-4
Used to connect a mini-SAS signal cable. See “Mini-SAS to mini-SAS signal cable connections” on page 37.
2
Ports 3-0
Used to connect a mini-SAS signal cable. See “Mini-SAS to mini-SAS signal cable connections” on page 37.
3
ThinkServer RAID 700 Battery connector
Used to connect a ThinkServer RAID 700 Battery. See “Installing or removing the ThinkServer RAID 700
Battery” on page 91.
32
ThinkServer RD540 User Guide and Hardware Maintenance Manual
ThinkServer RAID 710 Adapter (also known as 9270CV-8i RAID adapter)
The following illustration shows the connectors on the ThinkServer RAID 710 Adapter.
Figure 20. ThinkServer RAID 710 Adapter
1 Port 1
3 ThinkServer RAID Super Capacitor Module connector
2 Port 2
1
Port 1
Used to connect a mini-SAS signal cable. See “Mini-SAS to mini-SAS signal cable connections” on page 37.
2
Port 2
Used to connect a mini-SAS signal cable. See “Mini-SAS to mini-SAS signal cable connections” on page 37.
3
ThinkServer RAID Super Capacitor Module connector
Used to connect the cable of a ThinkServer RAID Super Capacitor Module. See “Replacing the ThinkServer
RAID Super Capacitor Module” on page 129.
Hot-swap hard-disk-drive backplane
Your server comes with one of the following hot-swap hard-disk-drive bay and backplane configurations:
• Up to four 3.5-inch hot-swap SATA or SAS hard disk drives with one backplane
• Up to eight 2.5-inch hot-swap SAS hard disk drives or SATA solid-state drives with one backplane
Chapter 3. Product overview
33
The following illustration shows the location of the hot-swap hard-disk-drive backplane. You need to remove
the server cover to access the backplane. See “Removing the server cover” on page 69.
Notes:
• Depending on the model, your server might look slightly different from the illustrations in this topic.
• The following illustration is based on 3.5-inch hot-swap hard disk drives with one backplane 1 .
Figure 21. Hot-swap hard-disk-drive backplane location
Backplane for 3.5-inch hard disk drives
This topic provides information to help you locate the connectors on the backplane for 3.5-inch hard disk
drives.
The following illustrations show the connectors on the backplane for 3.5-inch hard disk drives.
Figure 22. Front view of the backplane for 3.5-inch hard disk drives
1 Slot 0 for a 3.5-inch hard disk drive
3 Slot 2 for a 3.5-inch hard disk drive
2 Slot 1 for a 3.5-inch hard disk drive
4 Slot 3 for a 3.5-inch hard disk drive
34
ThinkServer RD540 User Guide and Hardware Maintenance Manual
Figure 23. Rear view of the backplane for 3.5-inch hard disk drives
1 8-pin power connector
3 Mini-SAS ports 0-3
2 Optical drive power connector
1
8-pin power connector
Used to connect a power cable to provide power to the backplane.
2
Optical drive power connector
Used to connect the power cable for the slim optical drive.
3
Mini-SAS ports 0-3
Used to connect the mini-SAS connector on one end of the mini-SAS signal cable to support the hard
disk drive 0 to hard disk drive 3.
Backplane for eight 2.5-inch hard disk drives
This topic provides information to help you locate the connectors on the backplane for eight 2.5-inch
hard disk drives.
The following illustrations show the connectors on the backplane for eight 2.5-inch hard disk drives.
Figure 24. Front view of the backplane for eight 2.5-inch hard disk drives
1 Slot 2 for a 2.5-inch hard disk drive
5 Slot 5 for a 2.5-inch hard disk drive
2 Slot 4 for a 2.5-inch hard disk drive
6 Slot 3 for a 2.5-inch hard disk drive
3 Slot 6 for a 2.5-inch hard disk drive
7 Slot 1 for a 2.5-inch hard disk drive
4 Slot 7 for a 2.5-inch hard disk drive
8 Slot 0 for a 2.5-inch hard disk drive
Chapter 3. Product overview
35
Figure 25. Rear view of the backplane for eight 2.5-inch hard disk drives
1 8-pin power connector
3 Mini-SAS ports 0-3
2 Mini-SAS ports 4-7
1
8-pin power connector
Used to connect a power cable to provide power to the backplane.
2
Mini-SAS ports 4-7
Used to connect the mini-SAS connector on one end of the mini-SAS signal cable to support the hard
disk drive 4 to hard disk drive 7.
3
Mini-SAS ports 0-3
Used to connect the mini-SAS connector on one end of the mini-SAS signal cable to support the hard
disk drive 0 to hard disk drive 3.
Backplane for six 2.5-inch hard disk drives
This topic provides information to help you locate the connectors on the backplane for six 2.5-inch hard
disk drives.
The following illustrations show the connectors on the backplane for six 2.5-inch hard disk drives.
Figure 26. Front view of the backplane for six 2.5-inch hard disk drives
1 Slot 0 for a 2.5-inch hard disk drive
4 Slot 5 for a 2.5-inch hard disk drive
2 Slot 2 for a 2.5-inch hard disk drive
5 Slot 3 for a 2.5-inch hard disk drive
3 Slot 4 for a 2.5-inch hard disk drive
6 Slot 1 for a 2.5-inch hard disk drive
36
ThinkServer RD540 User Guide and Hardware Maintenance Manual
Figure 27. Rear view of the backplane for six 2.5-inch hard disk drives
1
1 8-pin power connector
3 Mini-SAS ports 0-3
2 Mini-SAS ports 4-5
4 Optical drive power connector
8-pin power connector
Used to connect a power cable to provide power to the backplane.
2
Mini-SAS ports 4-5
Used to connect the mini-SAS connector on one end of a mini-SAS to mini-SAS signal cable to support the
hard disk drive 4 to hard disk drive 5.
3
Mini-SAS ports 0-3
Used to connect the mini-SAS connector on one end of a mini-SAS to mini-SAS signal cable to support the
hard disk drive 0 to hard disk drive 3.
4
Optical drive power connector
Used to connect the power cable for the slim optical drive if the server has one installed.
Mini-SAS to mini-SAS signal cable connections
This topic provides instructions on how to connect the mini-SAS to mini-SAS signal cables. This topic
contains connecting cables from the RAID card to the backplane.
You can connect cables from the RAID card to the backplane to support up to eight hard disk drives. In this
case, you can configure RAID for the hard disk drives using the advanced hardware RAID functions.
Note: The option kit for the RAID card is designed for different types of servers and might contain additional
cables that are not required for your server.
Chapter 3. Product overview
37
Figure 28. Connecting cables from the RAID card to the backplane
To connect cables from the RAID card to the backplane, do one of the following depending on the type of
your RAID card:
• If you are using a ThinkServer RAID 500 Adapter, do the following:
1. Use the mini-SAS to mini-SAS signal cable. Connect the mini-SAS connector 1 to the port 0 on the
RAID card. Then, connect the mini-SAS connector 2 to the mini-SAS ports 0-3 on the backplane.
2. If your server has more than four hard disk drives installed, use the other mini-SAS to mini-SAS
signal cable. Connect the mini-SAS connector 3 to the port 1 on the RAID card. Then, connect the
mini-SAS connector 4 to the mini-SAS ports 4-7 on the backplane.
• If you are using a ThinkServer RAID 700 Adapter, do the following:
1. Use one mini-SAS to mini-SAS signal cable. Connect the mini-SAS connector 3 to the ports 3-0 on
the RAID card. Then, connect the mini-SAS connector 4 to the mini-SAS ports 0-3 on the backplane.
2. If your server has more than four hard disk drives installed, use the other mini-SAS to mini-SAS signal
cable. Connect the mini-SAS connector 1 to the ports 7-4 on the RAID card. Then, connect the
mini-SAS connector 2 to the mini-SAS ports 4-7 on the backplane.
• If you are using a ThinkServer RAID 710 Adapter, do the following:
1. Use the mini-SAS to mini-SAS signal cable. Connect the mini-SAS connector 1 to the port 1 on the
RAID card. Then, connect the mini-SAS connector 2 to the mini-SAS ports 0-3 on the backplane.
2. If your server has more than four hard disk drives installed, use the other mini-SAS to mini-SAS
signal cable. Connect the mini-SAS connector 3 to the port 2 on the RAID card. Then, connect the
mini-SAS connector 4 to the mini-SAS ports 4-7 on the backplane.
Refer to the following topics for information about the connector locations and the power cable connections:
•
“Hot-swap hard-disk-drive backplane” on page 33
•
“RAID card” on page 30
•
“System board components” on page 38
System board components
The following illustration shows the component locations on the system board.
38
ThinkServer RD540 User Guide and Hardware Maintenance Manual
7
8
9
11
10
12
32
31
13
30
29
28
14
27
26
25
15
24
16
23
22
21
20
17
19
18
Figure 29. System board components
1 Front panel connector
17 Redundant power supply connector 2
2 Internal USB connector 1
18 Backplane power connector 1
3 Internal USB connector 2
19 Memory slots (4)
4 Intelligent Diagnostics Module connector
20 System fan 8 connector
5 Front VGA connector
21 System fan 7 connector
6 SATA connector 0
22 Microprocessor 2
7 Platform Controller Hub (PCH)
23 System fan 6 connector
8 System board battery
24 Memory slots (4)
9 Internal USB Type A connector 1
25 System fan 5 connector
10 ThinkServer Management Module Premium
connector
26 Memory slots (6)
11 Internal USB Type A connector 2
27 System fan 4 connector
12 ThinkServer Trusted Platform Module connector
28 System fan 3 connector
13 ThinkServer Management Module
29 System fan 2 connector
14 Riser card assembly 1 slot
30 Microprocessor 1
15 Riser card assembly 2 slot
31 Memory slots (6)
16 Redundant power supply connector 1
32 System fan 1 connector
Chapter 3. Product overview
39
1
Front panel connector
Used to connect the front panel cable.
2
Internal dual-port USB connector 1
Used to connect the front panel USB cable.
3
Internal dual-port USB connector 2
Reserved for the manufacturer.
4
Intelligent Diagnostics Module connector
Used to connect the cable of the Intelligent Diagnostics Module.
5
Front VGA connector
Used to connect the cable of the front VGA connector on the front panel of the server.
6
SATA connector 0
Used to connect the signal cable of the slim optical drive.
7
Platform Controller Hub (PCH)
This chip on the system board serves as a PCH, which provides the data buffering and interface arbitration
required to ensure that system interfaces operate efficiently and provides the bandwidth necessary for the
system to achieve peak performance.
8
System board battery
Your server has a special type of memory that maintains the date, time, and configuration information for
built-in features. The system board battery keeps the information active when you turn off the server.
9
Internal USB Type A connector 1
Used to connect a device that uses a USB Type A connector. For example, in some situations, you might
want to connect a USB key directly to the system board. You can connect it to an internal USB Type A
connector.
10
ThinkServer Management Module Premium connector
Used to connect a server option named ThinkServer Management Module Premium (TMM Premium) to
enable advanced remote management functions on your server. See “Installing or removing the ThinkServer
Management Module Premium” on page 94.
11
Internal USB Type A connector 2
Used to connect a device that uses a USB Type A connector. For example, in some situations, you might
want to connect a USB key directly to the system board. You can connect it to an internal USB Type A
connector.
40
ThinkServer RD540 User Guide and Hardware Maintenance Manual
12
ThinkServer Trusted Platform Module connector
Used to connect a ThinkServer Trusted Platform Module (hereinafter referred to as the TPM), which is
a security chip, to enhance server security. See “Installing or removing the ThinkServer Trusted Platform
Module” on page 97.
13
ThinkServer Management Module
With the integrated ThinkServer Management Module (hereinafter referred to as the TMM), no matter what
condition the server operating system is in and no matter if the server is on or off, as long as the server
is connected to network and an ac power source, the interaction with the TMM controlled servers can be
achieved through system network. The user can obtain the server hardware health information and SEL,
and is able to conduct the operations including turning on or off the server, restarting the server, and so
on. This part of the server management is independent of the operating system and is called out-of-band
management.
14
Riser card assembly 1 slot
Used to install the riser card assembly 1.
15
Riser card assembly 2 slot
Used to install the riser card assembly 2.
16
Redundant power supply connector 1
Used to connect a redundant power supply.
17
Redundant power supply connector 2
Used to connect a redundant power supply.
18
Backplane power connector 1
Used to connect the power cable from the backplane.
19
24
26
31
Memory slots
There are 20 memory slots on the system board. For more information, see “Memory module installation
rules” on page 75.
22
Microprocessor 2
30
Microprocessor 1
For server models with two microprocessors, each of the microprocessor is secured in the microprocessor
socket on the system board and a heat sink is installed above it to provide cooling. For server models with
one microprocessor, the socket for the microprocessor 2 is protected by a microprocessor socket cover.
20 21 23 25 27 28 29 32
System fan connectors
Used to connect the cable of the corresponding system fan.
Chapter 3. Product overview
41
System board jumpers and switches
This topic provides information about the jumpers and switches on the system board.
A jumper is a short length of conductor used to set up or adjust printed circuit boards, such as the system
board of a computer. A jumper usually is encased in a non-conductive block of plastic for convenient use
and to avoid any possible damage to a live circuit. Jumper pins arranged in groups on the system board are
called jumper blocks. When two or more jumper pins are capped with a jumper, an electrical connection is
made between them and the equipment is thus instructed to activate certain settings accordingly.
The following illustration shows a jumper in the default setting position (pin 1 and pin 2). This is the correct
position for normal operation.
Figure 30. Default jumper setting
42
ThinkServer RD540 User Guide and Hardware Maintenance Manual
The following illustration shows the status of the jumpers and switches on the system board of your server.
You can configure, recover, enable, or disable some specific features of the system board by setting the
jumpers or moving the switches.
Figure 31. System board jumpers and switches
Table 1. System jumpers
1 Clear CMOS (Complementary Metal Oxide Semiconductor) jumper
3 Switches
2 ThinkServer Management Module Enable/Disable jumper
Attention: To set the jumpers or move switches, you need to remove the server cover to access the system
board. Do not open your server or attempt any repair before reading and understanding “Safety information”
on page iii and “Guidelines” on page 67.
1
Clear CMOS jumper
Used to clear CMOS and recover your server to the factory default settings.
Note: After clearing CMOS, your BIOS recovers to the factory default settings.
Chapter 3. Product overview
43
To clear CMOS, do the following:
1. Remove all media from the drives and turn off all attached devices and the server. Then, disconnect all
power cords from electrical outlets and disconnect all cables that are connected to the server.
2. If the server is installed in a rack cabinet, remove the server from the rack cabinet and place it on a flat,
clean, and static-protective surface. See the Rack Installation Instructions that comes with the server.
3. Remove the server cover. See “Removing the server cover” on page 69.
4. Locate the Clear CMOS jumper on the system board. Then, remove any parts and disconnect any
cables that might impede your access to the jumper.
5. Move the clear CMOS jumper from the default normal position (pin 1 and pin 2) to the short-circuited
position (pin 2 and pin 3).
6. Wait more than five seconds and then move the Clear CMOS jumper back to the normal position
(pin 1 and pin 2).
7. Reinstall any parts and reconnect any cables. Then, reinstall the server cover. See “Completing the
parts replacement” on page 154.
8. Connect the server to an ac power source and wait about 30 seconds. Then, turn on the server. The
BIOS recovers to the factory default settings.
2
ThinkServer Management Module Enable/Disable jumper
When the ThinkServer Management Module Enable/Disable jumper (hereinafter referred to as the TMM
Enable/Disable jumper) is in the default normal position (pin 1 and pin 2), the server needs about 30 seconds
for the TMM to initialize whenever you connect the server to an ac power source. If you press the power
switch on the front panel during this period, the server will not start immediately; it will start after the TMM
initialization finishes. The TMM function is available in this situation.
If you move the TMM Enable/Disable jumper to pin 2 and pin 3, the TMM function is not available and the
server is turned on directly when you press the power switch without waiting for the TMM to be ready.
44
ThinkServer RD540 User Guide and Hardware Maintenance Manual
3
Switches
There are four switches on the system board of your server.
Figure 32. Switches
Table 2. Switches
1
1 BIOS recovery switch
3 Management Engine (ME) in force update switch
2 Clear password switch
4 Reserved for the manufacturer
BIOS recovery switch
Used to recover the BIOS if the power to your server is interrupted while the BIOS is being updated and your
server cannot start correctly.
To recover the BIOS, see “Recovering from a BIOS update failure” on page 59.
2
Clear password switch
Used to erase forgotten passwords, such as an administrator password and a user password.
Chapter 3. Product overview
45
To clear passwords, do the following:
1. Remove all media from the drives and turn off all attached devices and the server. Then, disconnect all
power cords from electrical outlets and disconnect all cables that are connected to the server.
2. If the server is installed in a rack cabinet, remove the server from the rack cabinet and place it on a flat,
clean, and static-protective surface. See the Rack Installation Instructions that comes with the server.
3. Remove the server cover. See “Removing the server cover” on page 69.
4. Locate the Clear password switch on the system board. Then, remove any parts and disconnect any
cables that might impede your access to the switch.
5. Move the clear password switch from the default off position to the on position.
6. Wait more than five seconds and then move the clear password switch back to the off position.
7. Reinstall any parts and reconnect any cables. Then, reinstall the server cover. See “Completing the
parts replacement” on page 154.
8. Connect the server to an ac power source and wait about 30 seconds. Then, turn on the server. The
BIOS passwords are erased, including the administrator password and user password.
9. To set new passwords, see “Using passwords” on page 55.
3
ME in force update switch
Used to update (flash) the ME.
The ME updating process usually is contained in the BIOS updating (flashing) process.
Note: Only some BIOS versions contain the parameters for updating the ME. If you want to update the ME,
ensure that your BIOS version contains the required parameters.
To update the ME, do the following:
1. Remove all media from the drives and turn off all attached devices and the server. Then, disconnect all
power cords from electrical outlets and disconnect all cables that are connected to the server.
2. If the server is installed in a rack cabinet, remove the server from the rack cabinet and place it on a flat,
clean, and static-protective surface. See the Rack Installation Instructions that comes with the server.
3. Remove the server cover. See “Removing the server cover” on page 69.
4. Locate the ME in force update switch on the system board. Then, remove any parts and disconnect any
cables that might impede your access to the switch.
5. Move the ME in force update switch from the default off position to the on position.
6. Reinstall any parts and reconnect any cables. Then, reinstall the server cover. See “Completing the
parts replacement” on page 154.
7. Connect the server to an ac power source. Then, update the BIOS. See “Updating (flashing) the BIOS”
on page 58.
8. Repeat step 1 through step 4.
9. Move the ME in force update switch back to the off position.
10. Reinstall any parts and reconnect any cables. Then, reinstall the server cover. See “Completing the
parts replacement” on page 154.
11. Connect the server to an ac power source and turn on the server. The BIOS and ME have been
updated. You need to check and configure the BIOS settings for your specific needs. See “Using
the Setup Utility program” on page 51.
System board LEDs
This topic helps you locate the LEDs on the system board.
46
ThinkServer RD540 User Guide and Hardware Maintenance Manual
The server is designed so that LEDs remain lit when the server is connected to an ac power source but is not
turned on, if the power supply is operating correctly. This helps you isolate problems when the server is not
turned on. Many errors are first indicated by a lit error LED on the diagnostic panel of the server. If an LED is
lit, one or more LEDs elsewhere in the server might also be lit to direct you to the source of the error.
The following illustration shows the ThinkServer Management Module status LED and system fan error LEDs
on the system board.
Figure 33. System board LEDs
1 ThinkServer Management Module status LED
6 System fan 4 error LED
2 System fan 8 error LED
7 System fan 3 error LED
3 System fan 7 error LED
8 System fan 2 error LED
4 System fan 6 error LED
9 System fan 1 error LED
5 System fan 5 error LED
1
ThinkServer Management Module status LED
This LED indicates the ThinkServer Management Module (TMM) status of your server.
Description
ThinkServer Management Module
status LED
Color
On
Green
The TMM is not ready.
Off
None
The TMM has no power or has failed.
Blinking
Green
The TMM is working.
Chapter 3. Product overview
47
2
- 9 System fan error LEDs
When a system fan error LED on the system board is lit, it indicates that the corresponding system fan is
operating too slowly or has failed. To solve the problem, you might need to reinstall or replace the system
fan. See “Replacing a system fan” on page 138. If it is a system board problem, contact the Lenovo
Customer Support Center.
48
ThinkServer RD540 User Guide and Hardware Maintenance Manual
Chapter 4. Turning on and turning off the server
This chapter provides information about turning on and turning off the server.
Turning on the server
The server can be turned on in one of the following ways:
• After you finish unpacking and setting up the server, connect it to an ac power source. Press the power
switch on the front panel to turn on the server. See “Front panel” on page 18. The server needs about
30 seconds for the TMM to initialize whenever you connect the server to an ac power source. If you
press the power switch on the front panel during this period, the server will not start immediately; it will
start after the TMM initialization finishes.
• When the Wake on LAN feature is enabled on the server that is connected to an ac power source and a
LAN, a network administrator can remotely turn on or wake up the server from a management console
using remote network management software.
• You also can use the related TMM feature to remotely turn on the server through the management LAN.
For more information about the TMM, refer to the ThinkServer Management Module User Guide, which is
available for download at:
http://www.lenovo.com/UserManuals
Turning off the server
CAUTION:
The power control button on the device and the power switch on the power supply do not turn off
the electrical current supplied to the device. The device also might have more than one power
cord. To remove all electrical current from the device, ensure that all power cords are disconnected
from the power source.
The server can be turned off in one of the following ways:
• Turn off the server from the operating system if your operating system supports this feature. After an
orderly shutdown of the operating system, the server will turn off automatically. For instructions on how
to shut down your specific operating system, refer to the related documentation or help system for
the operating system.
• Press the power switch on the front panel to start an orderly shutdown of the operating system and turn
off the server, if your operating system supports this feature.
• If your server stops responding and you cannot turn it off, press and hold the power switch on the
front panel for four seconds or more. If you still cannot turn off the server, disconnect all power cords
from the server.
• If the server is connected to a LAN, a network administrator can remotely turn off the server from a
management console using remote network management software.
• You also can use the related TMM feature to remotely turn off the server through the management LAN.
For more information about the TMM, refer to the ThinkServer Management Module User Guide, which is
available for download at:
http://www.lenovo.com/UserManuals
© Copyright Lenovo 2013
49
• The server might be turned off as an automatic response to a critical system failure.
Notes:
• When you turn off the server and leave it connected to an ac power source, the server also can respond
to a remote request to turn on the server. To remove all power from the server, you must disconnect
the server from the ac power source.
• For information about your specific operating system, refer to the related documentation or help system
for the operating system.
50
ThinkServer RD540 User Guide and Hardware Maintenance Manual
Chapter 5. Configuring the server
This chapter provides the following information to help you configure the server:
•
“Using the Setup Utility program” on page 51
•
“Using the ThinkServer EasyStartup program” on page 59
•
“Configuring RAID” on page 62
•
“Configuring the Ethernet controllers” on page 65
•
“Updating the firmware” on page 65
•
“Using the Lenovo ThinkServer EasyManage program” on page 66
Using the Setup Utility program
This topic provides information about using the Setup Utility program.
The Setup Utility program is part of the server firmware. You can use the Setup Utility program to view and
change the configuration settings of your server, regardless of which operating system you are using.
However, the operating system settings might override any similar settings in the Setup Utility program.
Starting the Setup Utility program
This topic provides instructions on how to start the Setup Utility program.
To start the Setup Utility program, do the following:
1. Connect the server to an ac power source and press the power switch on the front panel to turn on the
server. See “Turning on the server” on page 49.
2. Press the F1 key as soon as you see the logo screen. Then, wait for several seconds, and the Setup
Utility program opens. If you have set a password, you need to type the correct password to enter the
Setup Utility program. For password information, see “Using passwords” on page 55.
Viewing information in the Setup Utility program
The Setup Utility program menu lists various items about the system configuration. Select a desired item
to view information or change settings.
When working with the Setup Utility program, you must use the keyboard. The keys used to perform various
tasks are displayed on the right bottom pane of each screen. You also can press the F1 key for general help
about the keys. For most items, the corresponding help message is displayed on the right top pane of the
screen when the item is selected. If the item has submenus, you can display the submenus by pressing Enter.
You can view the following information about your specific server model in the Setup Utility program:
• The Main menu lists information about the BIOS, microprocessor type, microprocessor speed and core
numbers, total memory size, and system date and time.
• On the Advanced menu:
– Select Processor Configuration and follow the instructions on the screen to view information about
the installed microprocessor and its supported technologies.
– Select Memory Configuration and follow the instructions on the screen to view information about the
installed memory modules.
© Copyright Lenovo 2013
51
– Select SATA/SAS Configuration and follow the instructions on the screen to view information about
the installed SATA or SAS devices, such as a hard disk drive or an optical drive.
• On the Server Management menu, select System Information to view information about your system.
Setup Utility program interface
This topic provides general information about the menus and items in the Setup Utility program.
Depending on the BIOS version of your server, some menu or item information might differ slightly from
the information in this topic.
Notes:
• The default settings already are optimized for you. Use the default value for any item you are not familiar
with. Do not change the value of unfamiliar items to avoid unexpected problems. If you consider
changing the server configuration, proceed with extreme caution. Setting the configuration incorrectly
might cause unexpected results. If you cannot turn on the server because of incorrect BIOS settings,
use the Clear CMOS jumper to restore the BIOS settings to the factory default settings. See “System
board jumpers and switches” on page 42.
• If you have changed any hardware in the server, you might need to reflash the BIOS, the BMC firmware,
and the FRU/Sensor Data Records (SDR).
The Setup Utility program main interface consists of the following menus:
•
“Main menu” on page 52
•
“Advanced menu” on page 52
•
“Security menu” on page 53
•
“Server Management menu” on page 53
•
“Boot Options menu” on page 54
•
“Boot Manager menu” on page 54
•
“Save & Exit menu” on page 54
Lenovo provides the BIOS update utility on the Lenovo Support Web site. You can download the BIOS
update utility to update the BIOS if the newer BIOS version specifically solves a problem you have. See
“Updating or recovering the BIOS” on page 58.
If the power to your server is interrupted while the BIOS is being updated and your server cannot start
correctly, use the BIOS recovery switch to recover from a BIOS update failure. See “System board jumpers
and switches” on page 42.
Main menu
After entering the Setup Utility program, you can see the Main menu, which lists basic information about
the BIOS, microprocessor type, microprocessor speed and core numbers, total memory size, and system
date and time.
To set the system date and time on the Main menu, see “Setting the system date and time” on page 54.
Advanced menu
You can view or change various server component settings on the Advanced menu in the Setup Utility
program. The Advanced menu contains various configuration submenus and items. On each submenu,
press Enter to show selectable options and select a desired option by using the up and down arrow
keys or type desired values from the keyboard. Some items are displayed on the menu only if the server
supports the corresponding features.
52
ThinkServer RD540 User Guide and Hardware Maintenance Manual
Notes:
• Enabled means that the function is configured.
• Disabled means that the function is not configured.
The Advanced menu contains the following submenus. For more information, enter the corresponding
submenu and refer to the instructions on the screen.
• PCI/PCIE Configuration: View and set PCI configuration parameters.
• ACPI Configuration: View and set ACPI configuration parameters.
• Processor Configuration: View information about the installed microprocessors and set microprocessor
configuration parameters.
• Memory Configuration: View information about the installed memory modules and set memory
configuration parameters.
• Chipset Configuration: View and set chipset configuration parameters.
• SATA/SAS Configuration: View information about the installed SATA or SAS devices and set SATA or
SAS configuration parameters.
• USB Configuration: View and set USB configuration parameters, such as enabling or disabling USB
devices.
• Serial Configuration: View and set serial connector configuration parameters.
• UEFI Network Setup: View and set UEFI Ipv4 PXE and UEFI Ipv6 PXE configuration parameters.
• iSCSI Configuration: View and configure the iSCSI parameter.
Security menu
You can set passwords and configure the TPM function on the Security menu in the Setup Utility program.
For each menu item, press Enter to show selectable options and select a desired option by using the up and
down arrow keys or type desired values from the keyboard. Some items are displayed on the menu only if
the server supports the corresponding features.
Notes:
• Enabled means that the function is configured.
• Disabled means that the function is not configured.
The Security menu contains the following items:
• Administrator Password: Set an administrator password to protect against unauthorized access to
your server. See “Using passwords” on page 55.
• User Password: Set a user password to protect against unauthorized access to your server. See “Using
passwords” on page 55.
• TPM/TCM: Configure the TPM function if your server has a TPM installed in the TPM connector on the
system board. See “Configuring the TPM function” on page 56.
Server Management menu
You can view system information and view or change event log and BMC settings on the Server
Management menu in the Setup Utility program. On each submenu, press Enter to view the information or
show selectable options and select a desired option by using the up and down arrow keys. Some items are
displayed on the menu only if the server supports the corresponding features.
The Server Management menu contains the following submenus. For more information, enter the
corresponding submenu and refer to the instructions on the screen.
Chapter 5. Configuring the server
53
• Erase SEL: Erase system event log (SEL).
• System Information: View basic information about your server.
• BMC Network Configuration: Set BMC configuration parameters.
Boot Options menu
The Boot Options menu in the Setup Utility program provides an interface to help you view or change the
server startup options, including the startup sequence and boot priority for various devices. Changes in the
startup options take effect when the server starts.
The startup sequence specifies the order in which the server checks devices to find a boot record. The server
starts from the first boot record that it finds. For example, you can define a startup sequence that checks a
disc in the optical drive, then checks the hard disk drive, and then checks a network device. For information
about setting the startup sequence or selecting a startup device, see “Selecting a startup device” on page 56.
Boot Manager menu
The Boot Manager menu in the Setup Utility program lists all the bootable devices installed in your server
and the listed items vary depending on your server configuration. If you select a desired device listed on this
menu, the server will start from the device you select.
You can press F12 when turning on the server and select a temporary startup device from the boot device
selection window. See “Selecting a startup device” on page 56.
Save & Exit menu
After you finish viewing or changing settings in the Setup Utility program, you can choose a desired
action from the Save & Exit menu to save changes, discard changes, or load default values, and exit the
program. Press Enter to select the item on the Save & Exit menu and then select Yes when prompted to
confirm the action. For information about exiting the Setup Utility program, see “Exiting the Setup Utility
program” on page 57.
The Save & Exit menu contains the following items:
• Save Changes and Exit: Save changes and exit the Setup Utility program.
• Save Changes and Reset: Save changes and then continue with the configuration in the Setup Utility
program.
• Discard Changes and Exit: Discard changes, load previous values, and then exit the Setup Utility
program.
• Discard Changes: Discard changes and load previous values.
• Restore Defaults: Return to the optimized default settings.
• Save as User Defaults: Save the current settings as user default values.
• Restore User Defaults: Restore the user default values for all the items.
Setting the system date and time
This topic provides instructions on how to set the system date and time in the Setup Utility program.
To set the system date and time in the Setup Utility program, do the following:
1. Start the Setup Utility program. See “Starting the Setup Utility program” on page 51.
2. On the Main menu, select System Date or System Time.
3. Use the Tab key to switch between data elements and type the numbers from the keyboard to set the
system date and time.
54
ThinkServer RD540 User Guide and Hardware Maintenance Manual
4. Press F10 to save settings and exit the Setup Utility program.
Using passwords
By using the Setup Utility program, you can set a password to prevent unauthorized access to your server.
You do not have to set a password to use your server. However, using a password improves computing
security. If you decide to set a password, read the following topics.
Setup Utility program password types
The following types of passwords are available in the Setup Utility program:
• Administrator password
Setting an administrator password deters unauthorized users from changing configuration settings. If you
are responsible for maintaining the configuration settings of several computers, you might want to set
an administrator password. When an administrator password is set, you are prompted to type a valid
password each time you try to access the Setup Utility program. The Setup Utility program cannot
be accessed until a valid password is typed in.
• User password
When a user password is set, the server cannot be used until a valid password is typed in.
Note: If both the administrator password and user password are set, you can type either password to use
the server. However, you must use your administrator password to change any configuration settings.
Password considerations
For security reasons, it is recommended to use a strong password that cannot be easily compromised.
Notes:
• The Setup Utility program passwords are not case sensitive.
• The server supports Setup Utility program passwords that consist of three to 20 characters.
To set a strong password, use the following guidelines:
• Have at least eight characters in length
• Contain at least one alphabetic character and one numeric character
• Not be your name or your user name
• Not be a common word or a common name
• Be significantly different from your previous passwords
Besides the alphabetic characters (a-z) and numeric characters (0-9), the server also supports characters
typed using special keys on the keyboard for a password. Refer to the help message on the screen when
setting a password to determine the valid special characters.
Setting, changing, or deleting a password
This topic provides instructions on how to set, change, or delete a password in the Setup Utility program.
To set, change, or delete a password in the Setup Utility program, do the following:
1. Start the Setup Utility program. See “Starting the Setup Utility program” on page 51.
2. On the Security menu, select Administrator Password to set an administrator password or select
User Password to set a user password.
Chapter 5. Configuring the server
55
3. See “Password considerations” on page 55. Then, follow the instructions on the screen to set or
change a password.
4. If you want to delete a password, type your current password. Press Enter when you are prompted
to type a new password. Then, press Enter to confirm the new password. The previous password
will be cleared.
Note: For security reasons, it is recommended that you always set a password for your server.
5. Press F10 to save settings and exit the Setup Utility program.
If you have forgotten the password, you can use the Clear password switch on the system board to erase the
password. See “System board jumpers and switches” on page 42. Then, set a new password for the server.
Selecting a startup device
If your server does not start up from a desired device such as the disc or hard disk drive as expected, do one
of the following to select the startup device you want.
Note: Not all discs, hard disk drives, or other removable devices are bootable.
• To select a temporary startup device, do the following:
Note: Selecting a startup device using the following method does not permanently change the startup
sequence.
1. Turn on or restart your server.
2. When you see the logo screen, press F10 if your server is connected to a network and you want to
start up the server from the network. Otherwise, press F12 to display the boot menu. The boot
device selection window opens.
3. In the boot device selection window, use the up and down arrow keys on the keyboard to switch
between the selections. Press Enter to select the device of your choice. Then, the server will start
up from the selected device.
• To view or permanently change the configured startup device sequence, do the following:
1. Start the Setup Utility program. See “Starting the Setup Utility program” on page 51.
2. On the Boot Options menu, follow the instructions on the screen to set the startup device for Boot
Option #1 to Boot Option #5 depending on your needs. You also can set the boot priority for various
devices. See “Boot Options menu” on page 54.
3. Press F10 to save settings and exit the Setup Utility program. The server will follow the startup device
sequence you have set each time you turn on the server.
Configuring the TPM function
The TPM works as a hardware security solution to help you to encrypt data and protect the server. The TPM
function is only available when there is a TPM installed in your server. See “Installing the ThinkServer Trusted
Platform Module” on page 97. You can purchase a TPM from Lenovo.
After installing a TPM, you need to check if the TPM function is enabled in the Setup Utility program.
To enable the TPM function in the Setup Utility program, do the following:
1. Start the Setup Utility program. See “Starting the Setup Utility program” on page 51.
2. On the Security menu, select TPM/TCM ➙ TPM Support. Ensure that TPM Support is set to Enabled.
3. When TPM Support is set to Enabled, the TPM State item is displayed. Set TPM State to Enabled.
4. Press F10 to save settings and exit the Setup Utility program. The server will restart to enable the
TPM function.
56
ThinkServer RD540 User Guide and Hardware Maintenance Manual
Setting the mode of the Ethernet connectors
There are three RJ-45 Ethernet connectors on the rear of the server. The Ethernet connector 0 is for system
management by default. However, you also can set the Ethernet connector 1 or 2 for system management
use. You also can install an operating system through the system management connector. To locate the
three Ethernet connectors, see “Rear view of the server” on page 22.
If you set one of the Ethernet connectors for system management, the other two Ethernet connectors can be
teamed. If two Ethernet connectors are teamed, the connection speed of two Ethernet connectors will be the
same with the lower connection speed after teaming.
Ethernet connector for system
management
Ethernet connectors for teaming
Connection speed for each of the
two teamed Ethernet connectors
Ethernet connector 0
Ethernet connector 1 and Ethernet
connector 2
1000 Mbps
Ethernet connector 1
Ethernet connector 0 and Ethernet
connector 2
1000 Mbps
Ethernet connector 2
Ethernet connector 0 and Ethernet
connector 1
1000 Mbps
To set the mode of the Ethernet connectors in the Setup Utility program, do the following:
1. Start the Setup Utility program. See “Starting the Setup Utility program” on page 51.
2. On the Server Management menu, select BMC Network Configuration ➙ BMC LAN Share Setting.
3. Do one of the following:
• If you want to use the Ethernet connector 0 as an Ethernet connector and a system management
connector, select Management NIC Shared.
• If you want to use the Ethernet connector 0 as a dedicated system management connector, select
Management NIC Dedicated.
• If you want to use the Ethernet connector 1 as an Ethernet connector and a system management
connector, select Onboard LAN port1 Shared.
• If you want to use the Ethernet connector 2 as an Ethernet connector and a system management
connector, select Onboard LAN port2 Shared.
Note: If you set one Ethernet connector as the system management connector, the other two Ethernet
connectors will be ordinary Ethernet connectors by default.
4. Press F10 to save settings and exit the Setup Utility program.
Exiting the Setup Utility program
After you finish viewing or changing settings, press Esc to return to the Setup Utility program main interface.
If you are on a nested submenu, press Esc repeatedly until you reach the main interface. Then, you can do
one of the following to exit the Setup Utility program:
• If you want to save the new settings and exit the Setup Utility program, press F10 or select Save & Exit ➙
Save Changes and Exit. Otherwise, your changes will not be saved.
• If you do not want to save the new settings, select Save & Exit ➙ Discard Changes and Exit.
• If you want to return to the default settings, press F9 or select Save & Exit ➙ Restore Defaults.
For more information about the Save & Exit menu in the Setup Utility program, see “Save & Exit menu”
on page 54.
Chapter 5. Configuring the server
57
Updating or recovering the BIOS
This topic provides instructions on how to update the BIOS and how to recover from a POST and BIOS
update failure.
System programs are the basic layer of software built into your server. System programs include the POST,
the UEFI BIOS, the Setup Utility program, and the TMM firmware. The POST is a set of tests and procedures
that are performed each time you turn on your server. The UEFI BIOS is a layer of software that translates
instructions from other layers of software into electrical signals that the server hardware can execute. You
can use the Setup Utility program to view or change the configuration settings of your server. See “Using the
Setup Utility program” on page 51. The TMM firmware provides remote management features.
Lenovo might make changes and enhancements to the BIOS and TMM firmware. When updates are released,
they are available for download on the Lenovo Web site at http://www.lenovo.com/drivers. You can update
the server firmware by downloading an update package and following the instructions on the Web page.
You also can use the Firmware Updater program to help you keep the server firmware up-to-date. See
“Updating the firmware” on page 65.
Updating (flashing) the BIOS
This topic provides instructions on how to update (flash) the BIOS.
Notes:
• Update the BIOS on your server only if the newer BIOS version specifically solves a problem you have.
We do not recommend BIOS updates for servers that do not need them. You can view the updated
information for the new BIOS version in the installation instructions for the BIOS update package.
• Downgrading the BIOS to an earlier version is not recommended and might not be supported. An earlier
BIOS version might not support the latest system configurations.
• If the power to your server is interrupted while the POST and BIOS are being updated, your server might
not restart correctly. Ensure that you perform the BIOS update procedure in an environment with a
steady power supply. Besides, ensure that your server can restart successfully without encountering
hardware problems.
• If you have updated the BIOS firmware, all the BIOS settings become the default settings of the updated
BIOS version. You need to check and reconfigure the BIOS settings for your specific needs. You can
select Save as User Defaults on the Save & Exit menu in the Setup Utility program to save your current
BIOS settings as user default values before updating the BIOS. Then, you can select Restore User
Defaults on the Save & Exit menu in the Setup Utility program to restore the user default values after
updating the BIOS. In this case, you can keep your previous BIOS settings and do not need to reconfigure
the settings after updating the BIOS. You also can record your specific BIOS settings before updating the
BIOS for an easier reconfiguration in the new BIOS version.
To update (flash) the BIOS, do the following:
1. Go to http://www.lenovo.com/drivers and follow the instructions on the Web page to locate the BIOS
update package.
2. Download the BIOS update package and the installation instructions in a TXT file.
3. Print the TXT file that contains the installation instructions and follow the instructions to update (flash)
the BIOS.
4. Do one of the following after the BIOS update process is completed:
• If you have saved your BIOS settings as user default values before updating the BIOS, select
Restore User Defaults on the Save & Exit menu in the Setup Utility program to restore the user
default values. Then, do a double-check.
58
ThinkServer RD540 User Guide and Hardware Maintenance Manual
• Check and reconfigure the BIOS settings for your specific needs based on your note or refer to
“Using the Setup Utility program” on page 51.
Recovering from a BIOS update failure
If the power to your server is interrupted while the BIOS is being updated, your server might not restart
correctly. If this happens, perform the following procedure to recover from the BIOS update failure.
Note: If the operating system of your server is installed under EFI mode, you need to reinstall the operating
system after recovering the BIOS.
To recover from a BIOS update failure, do the following:
1. Go to http://www.lenovo.com/drivers and follow the instructions on the Web page to download a BIOS
update utility program package. Then, put the amiboot.rom file contained in the package into the
root directory of a bootable USB key.
2. Remove all media from the drives and turn off all attached devices and the server. Then, disconnect all
power cords from electrical outlets and disconnect all cables that are connected to the server.
3. If the server is installed in a rack cabinet, remove the server from the rack cabinet and place it on a flat,
clean, and static-protective surface. See the Rack Installation Instructions that comes with the server.
4. Remove the server cover. See “Removing the server cover” on page 69.
5. Locate the BIOS recovery switch on the system board. See “System board jumpers and switches” on
page 42. Then, remove any parts and disconnect any cables that might impede your access to the
switch.
6. Move the BIOS recovery switch from the default off position to the on position.
7. Reinstall any parts and reconnect any cables. Then, reinstall the server cover. See “Completing the
parts replacement” on page 154.
8. Connect the server to an ac power source and then start the server from the bootable USB key that
contains the amiboot.rom file. The recovery process starts. After the recovery process is completed,
your server will automatically turn off.
9. Repeat step 2 through step 5.
10. Move the BIOS recovery switch back to the off position.
11. Reinstall any parts and reconnect any cables. Then, reinstall the server cover. See “Completing the
parts replacement” on page 154.
12. Connect the server to an ac power source and turn on the server. The BIOS settings recover to the
factory default settings. You need to check and configure the BIOS settings for your specific needs. See
“Using the Setup Utility program” on page 51.
Note: If you cannot recover the BIOS after using the instructions in this topic, the BIOS ROM might be
damaged and you need to replace the system board. Contact the Lenovo Customer Support Center.
Using the ThinkServer EasyStartup program
This topic guides you to use the ThinkServer EasyStartup program to set up and configure your server.
The ThinkServer EasyStartup program simplifies the process of configuring RAID and installing supported
Windows and Linux operating systems and device drivers on your server. The program works with your
Windows or Linux operating system installation disc to automate the process of installing the operating
system and associated device drivers. This program is provided with your server on a self-starting (bootable)
ThinkServer EasyStartup DVD. The user guide for the program also is on the DVD and can be accessed
directly from the program interface.
Chapter 5. Configuring the server
59
If you do not have a ThinkServer EasyStartup DVD, you also can download an ISO image from the Lenovo
Support Web site and make a disc by yourself.
To download the ThinkServer EasyStartup program image and burn it into a disc, do the following:
1. Go to http://www.lenovo.com/drivers and follow the instructions on the Web page to locate the
ThinkServer EasyStartup program.
2. Download the ISO image for the ThinkServer EasyStartup program and the readme file. The readme file
contains important information about the ThinkServer EasyStartup program.
3. Print the readme file and read it carefully.
4. Use an optical drive and any DVD burning software to create a bootable disc with the ISO image.
Features of the ThinkServer EasyStartup program
This topic lists the features of the ThinkServer EasyStartup program.
The ThinkServer EasyStartup program has the following features:
• Contained in a self-starting (bootable) DVD
• Easy-to-use, language-selectable interface
• Integrated help system and user guide
• Automatic hardware detection
• Contains the RAID configuration utility
• Provides device drivers based on the server model and detected devices
• Downloads device drivers from the ThinkServer EasyStartup DVD according to the operating system
or add-on device
• Selectable partition size and file system type
• Support for multiple operating systems
• Ability to install the operating system and device drivers in an unattended mode to save time
• Ability to create a reuseable response file that can be used with similarly configured Lenovo servers to
make future installations even faster
Starting the ThinkServer EasyStartup program
This topic provides instructions on how to start the ThinkServer EasyStartup program. After you start the
program and enter the main interface, click User Guide for detailed information about how to use this
program to help you configure the server and install an operating system.
To start the ThinkServer EasyStartup program, do the following:
1. Insert the ThinkServer EasyStartup DVD into an optical drive, set the optical drive as the first startup
device, and start your server from the DVD in the optical drive. See “Selecting a startup device” on
page 56.
2. Wait for the program to load. Then, you will be prompted for the following selections:
• The language in which you want to view the program
• The language of the keyboard layout you will be using with the program
Note: The supported languages and keyboard layouts for the ThinkServer EasyStartup program are
Dutch, English, French, German, Italian, Japanese, Russian, Spanish, and Turkish. Your ThinkServer
EasyStartup DVD might be English only. In this case, the keyboard layout should be English.
60
ThinkServer RD540 User Guide and Hardware Maintenance Manual
3. After selecting the language and keyboard layout, click OK. Then, you will see one or more reminders
or messages about configuring storage devices. Click Next until you are presented with the Lenovo
License Agreement. Read the Lenovo License Agreement carefully. In order to continue, you must
accept the terms by clicking Agree. Then, the Date and time window opens.
4. Set the current date and time and click OK. The Start option window opens.
5. The Start option window provides the following selections:
• Continue to the main interface.
• Install the operating system using a pre-existing response file.
• Configure RAID using a pre-existing response file.
Read the explanations on the screen and select a desired option. Then, follow the instructions on the
screen. If this is the first time you are using the ThinkServer EasyStartup program, select the option to
continue to the main interface and view the compatibility notes and user guide.
Notes:
• Functionality and supported operating systems vary depending on the version of the ThinkServer
EasyStartup program. From the main interface of the program, click Compatibility notes to view the
information about the RAID controllers, operating systems, and server configurations supported by the
specific version of the program; and click User Guide to view the various functions and learn how to
use the program.
• Before using the ThinkServer EasyStartup program to install an operating system, ensure that any external
storage devices and fiber channels are configured correctly.
The ThinkServer EasyStartup program main interface provides the following menus on the left pane of
the screen:
• Home
This menu is the welcome page that contains some general descriptions about the program and the
Lenovo copyright and trademark statements.
• Compatibility notes
This menu provides information about the RAID controllers, operating systems, and server configurations
supported by the version of the program you are using.
• User Guide
This menu provides information about the features of the program and instructions on how to use the
program.
• Hardware list
This menu displays a list of hardware devices detected by the program.
• Configure RAID
This menu guides you to configure RAID or view the current RAID configuration and make changes
if needed.
• Install operating system
This menu displays a series of choices and prompts to collect information required for operating system
installation, prepares the hard disk drive for installation, and then initiates the installation process using
your operating system installation disc.
• Download drivers
This menu helps you download the required device drivers from the ThinkServer EasyStartup DVD to a
removable storage device so that you can easily get the drivers for server configuration when you need
them.
Chapter 5. Configuring the server
61
Note: The most up-to-date device drivers for various server models are always available for download on
the Lenovo Support Web site at:
http://www.lenovo.com/drivers
• About
This menu provides the version information and legal notices.
Using the ThinkServer EasyStartup program on a Windows operating
system
You can run the ThinkServer EasyStartup DVD on a Windows operating system with the Internet Explorer® 6.0
Web browser or a later version installed. Enter the operating system and insert the ThinkServer EasyStartup
DVD into an internal or external optical drive. The DVD starts automatically in most environments. If the DVD
fails to start, open the launch.exe file located in the root directory of the DVD.
Notes:
• You should read and accept the Lenovo License Agreement when prompted.
• On the Microsoft Windows Server® 2003 operating system, you might need to add the Uniform Resource
Locator (URL) for the ThinkServer EasyStartup program Web page to the trusted Web site list so that
the page can open correctly.
You can do the following when using the ThinkServer EasyStartup program on a Windows operating system.
For detailed information, refer to the help system.
• View a general introduction to your ThinkServer server model and the specific server configuration
information.
• View general guidance on how to use the ThinkServer EasyStartup DVD.
• Download the required device drivers to a removable storage device so that you can easily get the
drivers for server configuration when you need them, especially when you finish installing an operating
system without using the ThinkServer EasyStartup DVD and need appropriate device drivers to configure
your server.
• Install the required device drivers directly on the server on which you are running the ThinkServer
EasyStartup DVD.
• View information about all server models supported by the ThinkServer EasyStartup program and
information about the device drivers for each server model, including the driver versions and driver
locations in the root directory of the ThinkServer EasyStartup DVD.
Note: The most up-to-date device drivers for various server models are always available for download on
the Lenovo Support Web site at:
http://www.lenovo.com/drivers
Configuring RAID
This topic provides information about RAID and the utility programs that are available for you to configure
RAID.
This topic contains the following items:
•
“About RAID” on page 63
•
“Configuring RAID using the ThinkServer EasyStartup program” on page 64
•
“Configuring the advanced SATA or SAS hardware RAID” on page 64
62
ThinkServer RD540 User Guide and Hardware Maintenance Manual
About RAID
RAID, an acronym for Redundant Array of Independent Disks, is a technology that provides increased
storage functions and reliability through redundancy. This is achieved by combining multiple hard disk drives
into a logical unit, where data is distributed across the drives in one of several ways called RAID levels.
When a group of independent physical hard disk drives are set up to use RAID technology, they are in a
RAID array. This array distributes data across multiple hard disk drives, but the array appears to the host
server as one single storage unit. Creating and using RAID arrays provides high performance, such as the
expedited I/O performance, because several drives can be accessed simultaneously.
RAID drive groups also improve data storage reliability and fault tolerance compared with single-drive
storage systems. Data loss resulting from a drive failure can be prevented by reconstructing missing data
from the remaining drives.
The following list describes some of the most commonly used RAID levels:
• RAID 0: block-level striping without parity or mirroring
Simple stripe sets are normally referred to as RAID 0. RAID 0 uses striping to provide high data
throughput, especially for large files in an environment that does not require fault tolerance. RAID 0 has no
redundancy and it provides improved performance and additional storage without fault tolerance. Any
drive failure destroys the array and the likelihood of failure increases with more drives in the array. RAID
0 does not implement error checking, so any error is uncorrectable. More drives in the array means
higher bandwidth, but greater risk of data loss.
RAID 0 requires a minimum number of two hard disk drives.
• RAID 1: mirroring without parity or striping
RAID 1 uses mirroring so that data written to one drive is simultaneously written to another drive. This is
good for small databases or other applications that require small capacity but complete data redundancy.
RAID 1 provides fault tolerance from disk errors or failures and continues to operate as long as at least
one drive in the mirrored set is functioning. With appropriate operating system support, there can be
increased read performance and only a minimal write performance reduction.
RAID 1 requires a minimum number of two hard disk drives.
• RAID 5: block-level striping with distributed parity
RAID 5 uses disk striping and parity data across all drives (distributed parity) to provide high data
throughput, especially for small random access. RAID 5 distributes parity along with the data and requires
all drives but one to be present to operate; drive failure requires replacement, but the array is not
destroyed by a single drive failure. Upon drive failure, any subsequent read operations can be calculated
from the distributed parity so that the drive failure is masked from the end user. The array will have data
loss in the event of a second drive failure and is vulnerable until the data that was on the failing drive is
rebuilt onto a replacement drive. A single drive failure in the set will result in reduced performance of
the entire set until the failing drive has been replaced and rebuilt.
RAID 5 requires a minimum number of three hard disk drives.
• RAID 10: a combination of RAID 0 and RAID 1
RAID 10 consists of striped data across mirrored spans. A RAID 10 drive group is a spanned drive
group that creates a striped set from a series of mirrored drives. RAID 10 allows a maximum of eight
spans. You must use an even number of drives in each RAID virtual drive in the span. The RAID 1
virtual drives must have the same stripe size. RAID 10 provides high data throughput and complete data
redundancy but uses a larger number of spans.
RAID 10 requires a minimum number of four hard disk drives and also requires an even number of drives,
for example, six hard disk drives or eight hard disk drives.
Chapter 5. Configuring the server
63
• RAID 50: a combination of RAID 0 and RAID 5
RAID 50 uses distributed parity and disk striping. A RAID 50 drive group is a spanned drive group in
which data is striped across multiple RAID 5 drive groups. RAID 50 works best with data that requires
high reliability, high request rates, high data transfers, and medium-to-large capacity.
Note: Having virtual drives of different RAID levels, such as RAID 0 and RAID 5, in the same drive group is
not allowed. For example, if an existing RAID 5 virtual drive is created out of partial space in an array, the
next virtual drive in the array has to be RAID 5 only.
RAID 50 requires a minimum number of six hard disk drives.
For detailed information about RAID, refer to “Introduction to RAID” in the MegaRAID SAS Software User
Guide on the documentation DVD that comes with your server.
Configuring RAID using the ThinkServer EasyStartup program
The ThinkServer EasyStartup program simplifies the process of configuring supported RAID and installing
supported Windows and Linux operating systems and device drivers on your server. The user guide for the
program can be accessed directly from the program interface.
The ThinkServer EasyStartup program has the following features for RAID configuration:
• For use with all supported RAID controllers
• Automatically detects hardware and lists all supported RAID configurations
• Configures one or more disk arrays per controller depending on the number of drives attached to the
controller and the RAID level selected
• Supports hot-spare drives
• Creates a RAID response file that can be used to configure RAID controllers on similarly configured
Lenovo servers
See “Using the ThinkServer EasyStartup program” on page 59 and view the user guide from the main
interface of the program.
Some RAID management software also is provided on the ThinkServer EasyStartup DVD to help you manage
RAID arrays and RAID controllers in an operating system environment. After you enter the operating system,
insert the ThinkServer EasyStartup DVD into the optical drive. The installation packages for the programs
are located in the Utilities and Others folder in the root directory of the DVD. The ThinkServer EasyStartup
DVD is designed for different types of servers and the Utilities and Others folder might contain additional
installation packages that are not required to be installed on your server.
Configuring the advanced SATA or SAS hardware RAID
Before configuring RAID for your server, observe the following precautions:
• Use hard disk drives that are of the same type (SATA or SAS) and have the same capacity within a
single RAID array.
• Depending on the operating system, the total drive capacity of the primary RAID might be limited to 2 TB.
Your server comes with a RAID card to provide advanced SATA or SAS hardware RAID functions. See
“RAID card” on page 30.
The RAID card provides the WebBIOS Configuration Utility program to help you configure RAID
independently of the operating system. You also can install the MegaRAID Storage Manager program and
the MegaCLI Configuration Utility program to help you manage the RAID array and RAID controller in an
operating system environment.
64
ThinkServer RD540 User Guide and Hardware Maintenance Manual
The installation packages for the MegaRAID Storage Manager program and the MegaCLI Configuration
Utility program are on the ThinkServer EasyStartup DVD. After you enter the operating system, insert the
ThinkServer EasyStartup DVD into the optical drive. The installation packages for the programs are located in
the Utilities and Others folder in the root directory of the DVD.
Note: The ThinkServer EasyStartup DVD is designed for different types of servers and the Utilities and Others
folder might contain additional installation packages that are not required to be installed on your server.
For instructions on how to configure and manage the advanced SATA or SAS hardware RAID, refer to
the MegaRAID SAS Software User Guide on the documentation DVD that comes with your server. This
document also is available on the Lenovo Web site at:
http://www.lenovo.com/UserManuals
Configuring the Ethernet controllers
The Ethernet controllers are integrated on the system board. They provide an interface for connecting to
a 10 Mbps, 100 Mbps, or 1000 Mbps network and provide full-duplex (FDX) capability, which enables
simultaneous transmission and reception of data on the network.
You do not have to set any jumpers or configure the Ethernet controllers. However, you must install a device
driver to enable the operating system to recognize the controllers.
The ThinkServer EasyStartup program simplifies the process of configuring RAID and installing supported
operating systems and device drivers on your server. See “Using the ThinkServer EasyStartup program”
on page 59.
The device drivers for onboard Ethernet controllers also are available for download at:
http://www.lenovo.com/drivers
Updating the firmware
The firmware in the server is periodically updated and is available for download on the Lenovo Web site.
Go to http://www.lenovo.com/drivers and follow the instructions on the Web page to check for the latest
level of firmware, such as the BIOS updates and device drivers.
When you replace a device in the server, you might have to either update the server with the latest version of
the firmware that is stored in memory on the device or reflash the BIOS, the TMM firmware, and the FRU/SDR.
Using the Firmware Updater program
The Firmware Updater program enables you to maintain your system firmware up-to-date and helps you
avoid unnecessary outages.
To update your system firmware using the Firmware Updater program, do the following:
Note: Before distributing the firmware updates to a server, ensure that your server can restart successfully
without encountering hardware problems.
1. Go to http://www.lenovo.com/drivers and follow the instructions on the Web page to locate the
Firmware Updater program.
2. Download the ISO image for the Firmware Updater program and the installation instructions in a TXT file.
3. Use any CD or DVD burning software to create a bootable disc with the ISO image.
Chapter 5. Configuring the server
65
4. Print the TXT file that contains the installation instructions and follow the instructions to use the Firmware
Updater program to update your system firmware.
Using the Lenovo ThinkServer EasyManage program
The Lenovo ThinkServer EasyManage program enables enterprise users to remotely control and monitor
multiple Lenovo servers within a LAN. The program provides an interface to display all severs being
managed, which enables the administrator to conveniently search for, monitor, and manage servers.
To download the Lenovo ThinkServer EasyManage program, go to http://www.lenovo.com/drivers and
follow the instructions on the Web page.
For detailed information about using the Lenovo ThinkServer EasyManage program, refer to the help system
for the program.
66
ThinkServer RD540 User Guide and Hardware Maintenance Manual
Chapter 6. Installing, removing, or replacing hardware
This chapter provides instructions on how to install, remove, or replace hardware for your server.
This chapter contains the following items:
•
“Guidelines” on page 67
•
“Removing the server cover” on page 69
•
“Installing, removing, or replacing hardware” on page 71
•
“Completing the parts replacement” on page 154
For a list of the ThinkServer options, go to:
http://www.lenovo.com/thinkserver
Guidelines
This topic provides some guidelines that you should read and understand before using your server.
Precautions
Before you use the server, ensure that you read and understand the following precautions:
• Before using the product, be sure to read and understand the multilingual safety instructions and the
Lenovo Limited Warranty (LLW) on the documentation DVD that comes with the product. Reading and
understanding the safety instructions reduces the risk of personal injury and damage to your product.
• When you install your new server, take the opportunity to download and apply the most recent firmware
updates. This step will help to ensure that any known issues are addressed and that your server is
ready to function at maximum levels of performance. To download firmware updates for your server, go
to http://www.lenovo.com/drivers, and then follow the instructions on the Web page. See “Updating
the firmware” on page 65 for more information.
• Before you install optional hardware devices, ensure that the server is working correctly. If the server
is not working correctly, see Chapter 7 “Troubleshooting and diagnostics” on page 159 to do basic
troubleshooting. If the problem cannot be solved, see Chapter 8 “Getting information, help, and service”
on page 165.
• Observe good housekeeping in the area where you are working. Put removed covers and other parts
in a safe place.
• If you must turn on the server while the server cover is removed, ensure that no one is near the server
and that no tools or other objects have been left inside the server.
• Do not attempt to lift an object that you think is too heavy for you. If you have to lift a heavy object,
observe the following precautions:
– Ensure that you can stand safely without slipping.
– Distribute the weight of the object equally between your feet.
– Use a slow lifting force. Never move suddenly or twist when you lift a heavy object.
– To avoid straining the muscles in your back, lift by standing or by pushing up with your leg muscles.
• Ensure that you have an adequate number of properly grounded electrical outlets for the server, monitor,
and other devices.
• Back up all important data before you make changes to drives.
• Have a small flat-blade screwdriver available.
© Copyright Lenovo 2013
67
• You do not have to turn off the server to install or replace a hot-swap redundant power supply, a
hot-swap hard disk drive, or a hot-plug USB device. However, you must turn off the server before
performing any step that involves installing, removing, or replacing adapter cables or non-hot-swap
devices or components.
• To view the LEDs on the system board and internal components, leave the server connected to power.
• When you are finished working on the server, reinstall all safety shields, guards, labels, and ground wires.
• When working inside the server, you might find some tasks easier if you lay the server on its side.
Handling static-sensitive devices
Attention: Do not open the static-protective package that contains the new part until the defective part has been
removed from the server and you are ready to install the new part. Static electricity, although harmless to you,
can seriously damage server components and parts.
Any server part containing transistors or integrated circuits (ICs) should be considered sensitive to
electrostatic discharge (ESD). ESD damage can occur when there is a difference in charge between objects.
Protect against ESD damage by equalizing the charge so that the machine, the part, the work mat, and the
person handling the part are all at the same charge.
Notes:
• Use product-specific ESD procedures when they exceed the requirements noted here.
• Ensure that the ESD protective devices you use have been certified (ISO 9000) as fully effective.
When you handle server parts and components, take these precautions to avoid static-electricity damage:
• Limit your movement. Movement can cause static electricity to build up around you.
• Always carefully handle the parts and other components (such as PCI Express cards, memory modules,
system boards, and microprocessors) by edges or frame. Do not touch solder joints, pins, or exposed
circuitry.
• Do not leave the device where others can handle and possibly damage the device.
• Before you replace a new part, touch the static-protective package containing the new part to an
unpainted metal part of the server for at least two seconds. This reduces static electricity from the
package and your body.
• Remove the new part from the static-protective package and directly install it in the server without
placing it on any other surface. If it is hard for you to do this in your specific situation, place the
static-protective package of the new part on a smooth, level surface, and then place the new part on
the static-protective package.
• Do not place the part on the server cover or other metal surface.
• Take additional care when handling devices during cold weather. Heating reduces indoor humidity
and increases static electricity.
• Use a grounded work mat to provide a static-free work surface. The mat is especially useful when
handling ESD-sensitive devices.
• Prevent the part from touching your clothing. Most clothing is insulative and retains a charge even when
you are wearing a wrist strap.
• The use of a grounding system is recommended. For example, it is recommended to wear an electrostatic
discharge (ESD) wrist strap, if one is available. Ensure that you work in an ESD-safe area. Select a
grounding system, such as those listed below, to provide protection that meets the specific service
requirement.
Note: The use of a grounding system to guard against ESD damage is desirable but not necessary.
68
ThinkServer RD540 User Guide and Hardware Maintenance Manual
– Attach the ESD ground clip to any frame ground, ground braid, or green-wire ground.
– When working on a double-insulated or battery-operated system, use an ESD common ground or
reference point. You can use coax or connector-outside shells on these systems.
– Use the ground prong of the ac plug on ac-operated servers.
System reliability guidelines
To help ensure proper cooling and system reliability, strictly follow these guidelines:
• Each of the drive bays has a drive or a dummy tray installed.
• If the server supports hot-swap redundant power supplies, each of the power supply bay has a redundant
power supply installed, or one bay has a redundant power supply installed while the other bay is covered
by a shield.
• Leave adequate space around the server to ensure that the server cooling system works well. Leave
approximately 50 mm (2 inches) of open space around the front and rear of the server. Do not place
objects in front of the fans. For proper cooling and airflow, install the server cover before you turn on
the server. Operating the server for extended periods of time (more than 30 minutes) with the server
cover removed might damage server components.
• Properly route the cables. For some options, such as PCI Express cards, follow the cabling instructions
that come with the options in addition to the instructions in this manual.
• When replacing a hot-swap drive, install the new hot-swap drive within two minutes of removal.
• If your server has air ducts or air baffles, do not remove them while the server is running. Operating the
server without the air ducts or air baffles might cause the microprocessors to overheat.
• For servers that support up to two microprocessors, ensure that the second microprocessor socket
always contains a microprocessor or is protected by a microprocessor socket cover.
Working inside the server with the power on
Attention: Static electricity that is released to internal server components when the server is turned on might cause
the server to halt, which might result in the loss of data. To avoid this potential problem, always use an ESD wrist strap
or other grounding system when you work inside the server with the power on.
The server supports hot-swap devices and is designed to operate safely while it is turned on and the cover is
removed. Follow these guidelines when you work inside the server with the power on:
• Avoid wearing loose-fitting clothing on your forearms. Button long-sleeved shirts before working inside
the server; do not wear cuff links while you are working inside the server.
• Do not allow your necktie or scarf to hang inside the server.
• Remove jewelry, such as bracelets, necklaces, rings, and loose-fitting wrist watches.
• Remove items from your shirt pocket, such as pens and pencils. These items might fall into the server as
you lean over it.
• Avoid dropping any metallic objects into the server, such as paper clips, hairpins, and screws.
Removing the server cover
Attention: Do not open your server or attempt any repair before reading and understanding “Safety information”
on page iii and “Guidelines” on page 67.
This topic provides instructions on how to remove the server cover.
Chapter 6. Installing, removing, or replacing hardware
69
Before you begin, print all the related instructions or ensure that you can view the PDF version on another
computer for reference.
Note: Depending on the model, your server might look slightly different from the illustrations in this topic.
To remove the server cover, do the following:
1. Remove all media from the drives and turn off all attached devices and the server. Then, disconnect all
power cords from electrical outlets.
2. Disconnect the power cords, Input/Output (I/O) cables, and all other cables that are connected to
the server.
3. If the server is installed in a rack cabinet, remove the server from the rack cabinet and place it on a flat,
clean, and static-protective surface. See the Rack Installation Instructions that comes with the server.
4. Press the release button 1 in the direction as shown.
CPU
Mem
PSU
ID
Figure 34. Pressing the release button
70
ThinkServer RD540 User Guide and Hardware Maintenance Manual
5. Fully open the cover latch 1 and slide the server cover to the rear until it is disengaged from the chassis.
Then, lift the server cover off the chassis and set it aside.
Note: It is recommended that you wait three to five minutes to let the server cool before removing
the server cover.
CPU
Mem
PSU
ID
Figure 35. Removing the server cover
Attention: For proper cooling and airflow, install the server cover before turning on the server. Operating the
server for more than 30 minutes with the server cover removed might damage server components.
To reinstall the server cover, see “Reinstalling the server cover and reconnecting cables” on page 154.
Installing, removing, or replacing hardware
This topic provides instructions on how to install, remove, or replace hardware for your server. You can
expand the capabilities of your server by adding new hardware devices, such as memory modules or other
server options, and maintain your server by replacing the failing hardware devices.
If you are handling a server option, refer to the appropriate installation or removal instructions in this topic
along with the instructions that come with the option.
Notes:
• Use only parts provided by Lenovo.
• Depending on the model, your server might look slightly different from the illustrations in this topic.
The EMI integrity and cooling of the server are protected by having all drive bays and PCI Express card slots
covered or occupied. When you install an internal drive or a PCI Express card, save the EMI shield or dummy
tray from the drive bay or save the PCI Express card slot bracket in the event that you later remove the device.
Attention: An unoccupied drive bay or PCI Express card slot without a cover, shield, dummy tray, filler,
or any other protection might impact the EMI integrity and cooling of the server, which might result in
overheating or component damage.
Removing and reinstalling the rack handles
Attention: Do not open your server or attempt any repair before reading and understanding “Safety information”
on page iii and “Guidelines” on page 67.
Chapter 6. Installing, removing, or replacing hardware
71
This topic provides instructions on how to remove and reinstall the rack handles.
Before you begin, print all the related instructions or ensure that you can view the PDF version on another
computer for reference.
Note: Depending on the model, your server might look slightly different from the illustrations in this topic.
To remove and reinstall the rack handles, do the following:
1. On each side of the server, remove the screw that secures the rack handle and then remove the rack
handle from the chassis.
ID
PSU
Mem
CPU
Figure 36. Removing the rack handles
72
ThinkServer RD540 User Guide and Hardware Maintenance Manual
2. To reinstall the rack handles, insert the small tab 1 on the rack handle into the hole 2 in the chassis.
Then, align the screw hole in the rack handle with the corresponding hole in the chassis and install the
screw to secure the rack handle on each side of the server.
ID
PSU
Mem
CPU
Figure 37. Installing the rack handles
Removing and reinstalling the cooling shroud
The cooling shroud must be removed to allow access to some of the server components. This topic provides
instructions on how to remove and reinstall the cooling shroud.
Removing the cooling shroud
Attention: Do not open your server or attempt any repair before reading and understanding “Safety information”
on page iii and “Guidelines” on page 67.
This topic provides instructions on how to remove the cooling shroud.
Before you begin, print all the related instructions or ensure that you can view the PDF version on another
computer for reference.
Note: Depending on the model, your server might look slightly different from the illustrations in this topic.
To remove the cooling shroud, do the following:
1. Remove all media from the drives and turn off all attached devices and the server. Then, disconnect all
power cords from electrical outlets and disconnect all cables that are connected to the server.
Chapter 6. Installing, removing, or replacing hardware
73
2. If the server is installed in a rack cabinet, remove the server from the rack cabinet and place it on a flat,
clean, and static-protective surface. See the Rack Installation Instructions that comes with the server.
3. Remove the server cover. See “Removing the server cover” on page 69.
4. Insert a finger into each of the two holes in the cooling shroud and then lift the cooling shroud out of
the server.
ID
PSU
Mem
CPU
Figure 38. Removing the cooling shroud
Attention: For proper cooling and airflow, reinstall the cooling shroud before turning on the server. Operating
the server for more than 30 minutes with the cooling shroud removed might damage server components.
Reinstalling the cooling shroud
Attention: Do not open your server or attempt any repair before reading and understanding “Safety information”
on page iii and “Guidelines” on page 67.
This topic provides instructions on how to reinstall the cooling shroud.
Before you begin, print all the related instructions or ensure that you can view the PDF version on another
computer for reference.
Note: Depending on the model, your server might look slightly different from the illustrations in this topic.
To reinstall the cooling shroud, do the following:
1. Ensure that all components have been reassembled correctly and that no tools or loose screws are
left inside your server.
2. Ensure that all internal cables are routed correctly and secured by any cable clips or ties in the server.
Keep cables clear of the hinges and sides of the server chassis to avoid interference with reinstalling the
cooling shroud.
74
ThinkServer RD540 User Guide and Hardware Maintenance Manual
3. Note the orientation of the cooling shroud and then place it above the server so that the tabs on both
sides of the cooling shroud are aligned with the corresponding holes or gaps in both sides of the
chassis. Then, lower the cooling shroud into the chassis until it snaps into position.
Note: If necessary, gently press the cooling shroud on both sides so that the tabs on the cooling shroud
completely engage with both sides of the chassis.
ID
PSU
Mem
CPU
Figure 39. Reinstalling the cooling shroud
4. Reinstall the server cover and reconnect cables to the server. For more information, refer to “Reinstalling
the server cover and reconnecting cables” on page 154.
Installing or removing a memory module
This topic provides instructions on how to install or remove a memory module.
Note: The memory modules are extremely sensitive to ESD. Ensure that you read and understand “Handling
static-sensitive devices” on page 68 first and carefully perform the operation.
Memory module installation rules
Your server has 20 memory slots.
• Each slot supports 4 GB, 8 GB, and 16 GB DDR3 RDIMMs.
• Your server supports up to 12 normal RDIMMs when one microprocessor is installed and up to 20
RDIMMs when two microprocessors are installed.
• The minimum system memory is 4 GB (only one microprocessor installed and only one 4 GB memory
module installed in the CPU1 DIMMA1 slot).
• The maximum system memory for RDIMMs is 320 GB (two microprocessors installed and one 16 GB
RDIMM installed in each of the 20 memory slots).
Chapter 6. Installing, removing, or replacing hardware
75
For more information about the memory modules in your specific server model, use the Setup Utility
program. See “Viewing information in the Setup Utility program” on page 51.
For a list of the supported ThinkServer memory module options, go to:
http://www.lenovo.com/thinkserver
The following illustration shows the locations of all memory slots on a system board that has two
microprocessors (also known as CPUs) and two heat sinks installed.
Figure 40. Memory slots on the system board
1 Memory slot (CPU1 DIMMC1)
11 Memory slot (CPU1 DIMMA2)
2 Memory slot (CPU1 DIMMC2)
12 Memory slot (CPU1 DIMMA1)
3 Memory slot (CPU1 DIMMC3)
13 Memory slot (CPU2 DIMMC1)
4 Memory slot (CPU1 DIMMD1)
14 Memory slot (CPU2 DIMMC2)
5 Memory slot (CPU1 DIMMD2)
15 Memory slot (CPU2 DIMMD1)
6 Memory slot (CPU1 DIMMD3)
16 Memory slot (CPU2 DIMMD2)
7 Memory slot (CPU1 DIMMB3)
17 Memory slot (CPU2 DIMMB2)
8 Memory slot (CPU1 DIMMB2)
18 Memory slot (CPU2 DIMMB1)
9 Memory slot (CPU1 DIMMB1)
19 Memory slot (CPU2 DIMMA2)
10 Memory slot (CPU1 DIMMA3)
20 Memory slot (CPU2 DIMMA1)
76
ThinkServer RD540 User Guide and Hardware Maintenance Manual
The following table explains the memory module installation rules for servers that have only one
microprocessor (CPU1) installed. The “X” mark indicates the memory slots into which the memory modules
should be installed in different situations.
Notes:
• All memory modules to be installed on a server must be the same type.
• When you install memory modules with different ranks in one channel, start from the farthest memory slot
in the channel and install the memory module that has the most ranks first.
• When 1.35 V memory modules and 1.50 V memory modules are installed into the memory slots for the
same microprocessor, all the memory modules run at 1.50 V.
• When memory modules with different frequencies are installed into the memory slots for the same
microprocessor, all the memory modules run at the lowest frequency.
• It is recommended that you install the high-frequency memory modules into the memory slots for the
same microprocessor to ensure high performance.
Figure 41. CPU1 DIMMs
Table 3. Memory module installation rules for servers with one microprocessor
CPU1 DIMM
A1
A2
A3
B1
B2
B3
C1
C2
C3
D1
One DIMM
X
Two DIMMs
X
X
Three DIMMs
X
X
X
Four DIMMs
X
X
X
X
Six DIMMs
X
X
X
X
X
X
Eight DIMMs
X
X
X
X
X
X
Twelve DIMMs
X
X
X
X
X
X
X
X
X
D2
X
X
X
X
D3
X
Note: The 12 DIMMs configuration is supported only when you are using normal RDIMMs.
The following table explains the memory module installation rules for servers that have two microprocessors
(CPU1 and CPU2) installed. The “X” mark indicates the memory slots into which the memory modules
should be installed in different situations.
Chapter 6. Installing, removing, or replacing hardware
77
Notes:
• All memory modules to be installed on a server must be the same type.
• When you install memory modules with different ranks in one channel, start from the farthest memory slot
in the channel and install the memory module that has the most ranks first.
• When 1.35 V memory modules and 1.50 V memory modules are installed into the memory slots for the
same microprocessor, all the memory modules run at 1.50 V.
• When memory modules with different frequencies are installed into the memory slots for the same
microprocessor, all the memory modules run at the lowest frequency.
• It is recommended that you install the high-frequency memory modules into the memory slots for the
same microprocessor to ensure high performance.
Figure 42. CPU1 DIMMs and CPU2 DIMMs
Table 4. Memory module installation rules for servers with two microprocessors
CPU1 DIMM
A1
A2
A3
B1
B2
B3
CPU2 DIMM
C1 C2 C3
Two DIMMs
X
Four DIMMs
X
X
Six DIMMs
X
X
X
Eight DIMMs
X
X
X
Twelve DIMMs
X
X
X
X
X
Sixteen DIMMs
X
X
X
X
X
X
Twenty DIMMs
X
X
X
X
X
X
D1
D2 D3 A1
A2
B1
C1 C2
D1 D2
X
X
X
X
X
X
X
X
X
X
X
X
X
X
X
X
X
X
X
X
X
X
X
X
X
X
X
X
X
X
X
X
X
X
X
X
X
X
X
X
X
X
Note: The 20 DIMMs configuration is supported only when you are using normal RDIMMs.
78
B2
ThinkServer RD540 User Guide and Hardware Maintenance Manual
Installing a memory module
Attention: Do not open your server or attempt any repair before reading and understanding “Safety information”
on page iii and “Guidelines” on page 67.
This topic provides instructions on how to install a memory module.
Before you begin, print all the related instructions or ensure that you can view the PDF version on another
computer for reference.
Notes:
• To optimize system performance, ensure that you consider and follow the memory module installation
rules when performing the operation. See “Memory module installation rules” on page 75.
• Use any documentation that comes with the memory module and follow those instructions in addition to
the instructions in this topic.
To install a memory module, do the following:
1. Remove all media from the drives and turn off all attached devices and the server. Then, disconnect all
power cords from electrical outlets and disconnect all cables that are connected to the server.
2. If the server is installed in a rack cabinet, remove the server from the rack cabinet and place it on a flat,
clean, and static-protective surface. See the Rack Installation Instructions that comes with the server.
3. Remove the server cover. See “Removing the server cover” on page 69.
4. Remove the cooling shroud. See “Removing and reinstalling the cooling shroud” on page 73.
5. Locate the memory slots on the system board and read the memory module installation rules. See
“Memory module installation rules” on page 75.
6. Remove any parts or disconnect any cables that might prevent your access to the memory slots.
7. Open the retaining clips of the appropriate memory slot.
Figure 43. Opening the retaining clips of the memory slots
8. Touch the static-protective package that contains the new memory module to any unpainted surface on
the outside of the server. Then, take the new memory module out of the package.
Note: Carefully handle the memory module by its edges.
Chapter 6. Installing, removing, or replacing hardware
79
9. Position the new memory module over the memory slot. Ensure that the notch 1 on the new memory
module is aligned with the key 2 in the memory slot. Then, press the new memory module straight down
into the memory slot until the retaining clips close and the new memory module snaps into position.
Note: If there is a gap between the memory module and the retaining clips, the memory module has
not been installed correctly. Open the retaining clips, remove the memory module, and then reinstall it
into the memory slot until the retaining clips are completely closed.
Figure 44. Installing a memory module
10. Reinstall any parts or reconnect any cables that you have removed.
What to do next:
• To work with another piece of hardware, go to the appropriate section.
• To complete the installation, go to “Completing the parts replacement” on page 154.
Removing a memory module
Attention: Do not open your server or attempt any repair before reading and understanding “Safety information”
on page iii and “Guidelines” on page 67.
This topic provides instructions on how to remove a memory module.
Before you begin, print all the related instructions or ensure that you can view the PDF version on another
computer for reference.
Note: To optimize system performance, ensure that you consider and follow the memory module installation
rules when performing the operation. See “Memory module installation rules” on page 75.
To remove a memory module, do the following:
1. Remove all media from the drives and turn off all attached devices and the server. Then, disconnect all
power cords from electrical outlets and disconnect all cables that are connected to the server.
2. If the server is installed in a rack cabinet, remove the server from the rack cabinet and place it on a flat,
clean, and static-protective surface. See the Rack Installation Instructions that comes with the server.
3. Remove the server cover. See “Removing the server cover” on page 69.
4. Remove the cooling shroud. See “Removing and reinstalling the cooling shroud” on page 73.
5. Locate the memory slots on the system board and read the memory module installation rules. See
“Memory module installation rules” on page 75.
80
ThinkServer RD540 User Guide and Hardware Maintenance Manual
6. Remove any parts or disconnect any cables that might prevent your access to the memory slots.
7. Locate the memory module that you want to remove and open the retaining clips on both ends of the
memory slot. Then, grasp the memory module by its edges and carefully pull it straight up to remove it
from the memory slot.
Figure 45. Removing a memory module
8. Reinstall any parts or reconnect any cables that you have removed.
9. If you are instructed to return the old memory module, follow all packaging instructions and use any
packaging materials that are supplied to you for shipping.
What to do next:
• To work with another piece of hardware, go to the appropriate section.
• To complete the removal procedure, go to “Completing the parts replacement” on page 154.
Installing or removing the Ethernet card
This topic provides instructions on how to install or remove the Ethernet card. If you are installing or
removing any other types of supported PCI Express cards, the procedure is similar.
Note: The Ethernet card is extremely sensitive to ESD. Ensure that you read and understand “Handling
static-sensitive devices” on page 68 first and carefully perform the operation.
Installing the Ethernet card
Attention: Do not open your server or attempt any repair before reading and understanding “Safety information”
on page iii and “Guidelines” on page 67.
This topic provides instructions on how to install the Ethernet card.
Before you begin, print all the related instructions or ensure that you can view the PDF version on another
computer for reference.
Notes:
• Use any documentation that comes with the Ethernet card and follow those instructions in addition to
the instructions in this topic.
• Depending on the specific type, the Ethernet card might look different from the illustrations in this topic.
To install the Ethernet card, do the following:
Chapter 6. Installing, removing, or replacing hardware
81
1. Remove all media from the drives and turn off all attached devices and the server. Then, disconnect all
power cords from electrical outlets and disconnect all cables that are connected to the server.
2. If the server is installed in a rack cabinet, remove the server from the rack cabinet and place it on a flat,
clean, and static-protective surface. See the Rack Installation Instructions that comes with the server.
3. Remove the server cover. See “Removing the server cover” on page 69.
4. Remove the riser card assembly 1 and lay it upside down on a flat, clean, and static-protective surface.
See “Replacing the riser card assembly 1” on page 142.
Note: Usually an Ethernet card is installed on the riser card assembly 1 and also can be installed in
any PCI Express card slot that supports it. See “Rear view of the server” on page 22 to identify the
PCI Express card slots of your server.
5. Locate the PCI Express card slot for installing the Ethernet card and then remove the PCI Express card
slot bracket from the riser card assembly 1. Store the PCI Express card slot bracket in the event that
you later remove the Ethernet card and need the bracket to cover the place.
Figure 46. Removing a PCI Express card slot bracket
6. Touch the static-protective package that contains the Ethernet card to any unpainted surface on the
outside of the server. Then, take the Ethernet card out of the package.
Note: Carefully handle the Ethernet card by its edges.
82
ThinkServer RD540 User Guide and Hardware Maintenance Manual
7. Position the Ethernet card near the PCI Express card slot and align the tab of the Ethernet card with
the hole in the riser card assembly 1. Then, press the Ethernet card straight into the slot until it is
securely seated in the slot.
Figure 47. Installing the Ethernet card
8. Depending on the type of the Ethernet card, you might need to connect any required cables. Refer to
the documentation that comes with the Ethernet card for specific information.
9. Reinstall the riser card assembly 1. See “Replacing the riser card assembly 1” on page 142.
What to do next:
• To work with another piece of hardware, go to the appropriate section.
• To complete the installation, go to “Completing the parts replacement” on page 154. Then, continue with
the following procedure to install the Ethernet card driver if required.
To install the required device driver for the Ethernet card, do one of the following:
Note: You do not need to use the driver disc that might come with the Ethernet card.
• If you are using a Windows operating system, run the ThinkServer EasyStartup DVD that comes with
your server and follow the instructions on the screen to download and install the required Ethernet
card driver to the server. For more information, see “Using the ThinkServer EasyStartup program on a
Windows operating system” on page 62.
• If you are using a Linux operating system, run the ThinkServer EasyStartup DVD that comes with your
server on a computer with a Windows operating system and download the required Ethernet card driver
to a removable storage device. Then, transfer the Ethernet card driver from the removable storage device
to your server and run the driver file to install the driver.
The most up-to-date device drivers for various server models are always available for download on the
Lenovo Support Web site at:
http://www.lenovo.com/drivers
Removing the Ethernet card
Attention: Do not open your server or attempt any repair before reading and understanding “Safety information”
on page iii and “Guidelines” on page 67.
This topic provides instructions on how to remove the Ethernet card.
Chapter 6. Installing, removing, or replacing hardware
83
Before you begin, print all the related instructions or ensure that you can view the PDF version on another
computer for reference.
Notes:
• Use any documentation that comes with the Ethernet card and follow those instructions in addition to
the instructions in this topic.
• Depending on the specific type, the Ethernet card might look different from the illustration in this topic.
To remove the Ethernet card, do the following:
1. Remove all media from the drives and turn off all attached devices and the server. Then, disconnect all
power cords from electrical outlets and disconnect all cables that are connected to the server.
2. If the server is installed in a rack cabinet, remove the server from the rack cabinet and place it on a flat,
clean, and static-protective surface. See the Rack Installation Instructions that comes with the server.
3. Remove the server cover. See “Removing the server cover” on page 69.
4. Remove the riser card assembly 1 and lay it upside down on a flat, clean, and static-protective surface.
See “Replacing the riser card assembly 1” on page 142.
Note: Usually an Ethernet card is installed on the riser card assembly 1 and also can be installed in
any PCI Express card slot that supports it. See “Rear view of the server” on page 22 to identify the
PCI Express card slots of your server.
5. Locate the Ethernet card on the riser card assembly 1. Then, grasp the Ethernet card by its edges and
carefully pull it out of the riser card assembly 1.
Note: The Ethernet card might fit tightly into the Ethernet card slot. If necessary, alternate moving each
side of the Ethernet card a small and equal amount until it is completely removed from the slot.
Figure 48. Removing the Ethernet card
6. Install a new Ethernet card to replace the old one or install a PCI Express card slot bracket to cover the
place. See “Installing the Ethernet card” on page 81.
7. Reinstall the riser card assembly 1. See “Replacing the riser card assembly 1” on page 142.
8. If you are instructed to return the old Ethernet card, follow all packaging instructions and use any
packaging materials that are supplied to you for shipping.
What to do next:
• To work with another piece of hardware, go to the appropriate section.
84
ThinkServer RD540 User Guide and Hardware Maintenance Manual
• To complete the removal procedure, go to “Completing the parts replacement” on page 154.
Replacing the RAID card
Attention: Do not open your server or attempt any repair before reading and understanding “Safety information”
on page iii and “Guidelines” on page 67.
This topic provides instructions on how to replace the RAID card.
Your server comes with a required RAID card to provide advanced SATA/SAS hardware RAID functions to
the server. For more information, see “RAID card” on page 30 and “Configuring RAID” on page 62.
Before you begin, print all the related instructions or ensure that you can view the PDF version on another
computer for reference.
Notes:
• The RAID card is extremely sensitive to ESD. Ensure that you read and understand “Handling
static-sensitive devices” on page 68 first and carefully perform the operation.
• Use any documentation that comes with the RAID card and follow those instructions in addition to
the instructions in this topic.
• Depending on the specific type, the RAID card might look different from the illustration in this topic.
• Ensure that you back up your data before replacing the RAID card because you might need to reconfigure
RAID and reinstall the operating system after replacing the RAID card.
To replace the RAID card, do the following:
1. Remove all media from the drives and turn off all attached devices and the server. Then, disconnect all
power cords from electrical outlets and disconnect all cables that are connected to the server.
2. If the server is installed in a rack cabinet, remove the server from the rack cabinet and place it on a flat,
clean, and static-protective surface. See the Rack Installation Instructions that comes with the server.
3. Remove the server cover. See “Removing the server cover” on page 69.
4. Remove the cooling shroud. See “Removing and reinstalling the cooling shroud” on page 73.
5. Remove the riser card assembly 2 and lay it upside down on a flat, clean, and static-protective surface.
The procedure is similar to that of the riser card assembly 1. See “Replacing the riser card assembly
1” on page 142.
6. Locate the RAID card, which is installed in the PCI Express card slot on the riser card assembly 2.
7. Record the cable connections. Then, disconnect all cables from the RAID card and any other related
parts.
Chapter 6. Installing, removing, or replacing hardware
85
8. Grasp the RAID card by its edges and gently slide the RAID card out of the RAID card retention bracket
and the riser card assembly 2.
Note: The RAID card might fit tightly into the PCI Express card slot. If necessary, alternate moving each
side of the RAID card a small and equal amount until it is completely removed from the slot.
Figure 49. Removing the RAID card
9. Touch the static-protective package that contains the RAID card to any unpainted surface on the outside
of the server. Then, take the RAID card and the low-profile bracket out of the package.
Note: Carefully handle the RAID card by its edges.
10. Remove the two screws from the RAID card and then remove the full-height bracket from the RAID card.
Figure 50. Removing the full-height bracket from the RAID card
86
ThinkServer RD540 User Guide and Hardware Maintenance Manual
11. Align the two screw holes in the low-profile bracket with the corresponding screw holes in the RAID card
and then install the screws to secure the bracket.
Figure 51. Installing the low-profile bracket to the RAID card
12. Position the RAID card near the PCI Express card slot. Ensure that the left edge of the RAID card is
inserted into the notch of the RAID card retention bracket 1 . Then, carefully press the RAID card
straight into the slot until it is securely seated and the low-profile bracket also is secured by the riser
card assembly 2.
Figure 52. Installing the RAID card
13. Connect signal cables to the connectors on the new RAID card and the connectors on the hot-swap
hard-disk-drive backplane. See your note and “Mini-SAS to mini-SAS signal cable connections” on
page 37.
14. Reinstall the riser card assembly 2. The procedure is similar to that of the riser card assembly 1. See
“Replacing the riser card assembly 1” on page 142.
15. If you are instructed to return the old RAID card, follow all packaging instructions and use any packaging
materials that are supplied to you for shipping.
What to do next:
• To work with another piece of hardware, go to the appropriate section.
Chapter 6. Installing, removing, or replacing hardware
87
• To complete the replacement, go to “Completing the parts replacement” on page 154. Then, configure
RAID for your server. See “Configuring RAID” on page 62.
• After a Lenovo RAID card is replaced, do the following:
1. Check the version of the new RAID card firmware by pressing Ctrl+H when starting the Setup
Utility program.
2. Go to http://www.lenovo.com/drivers and follow the instructions on the Web page to download the
latest version of firmware. Then, install the firmware to your server.
Note: If you want to use the Firmware Updater program, ensure that it is the latest version. To get the
latest version of the Firmware Updater program, go to http://www.lenovo.com/drivers, locate different
versions of the program, and then identify the latest version by comparing readme files. If the latest
version of the Firmware Updater program does not contain the latest version of the driver you need,
download that driver separately from the Web page and install it individually to your server.
Installing or removing the ThinkServer RAID 500 Upgrade Key for
Advanced RAID
This topic provides instructions on how to install or remove the ThinkServer RAID 500 Upgrade Key for
Advanced RAID (hereinafter referred to as the TR 500 Key).
The TR 500 Key expands the capability of the installed ThinkServer RAID 500 Adapter by activating RAID 5
and RAID 50 levels for advanced SATA/SAS hardware RAID. You can purchase a TR 500 Key from Lenovo.
Installing the TR 500 Key
Attention: Do not open your server or attempt any repair before reading and understanding “Safety information”
on page iii and “Guidelines” on page 67.
This topic provides instructions on how to install the TR 500 Key on the ThinkServer RAID 500 Adapter and it
applies only to server models that have a ThinkServer RAID 500 Adapter installed.
Attention: Back up your data before you begin if you want to reconfigure RAID and reinstall the operating
system after installing the TR 500 Key.
Before you begin, print all the related instructions or ensure that you can view the PDF version on another
computer for reference.
Note: Use any documentation that comes with the TR 500 Key and follow those instructions in addition to
the instructions in this topic.
To install the TR 500 Key, do the following:
1. Remove all media from the drives and turn off all attached devices and the server. Then, disconnect all
power cords from electrical outlets and disconnect all cables that are connected to the server.
2. If the server is installed in a rack cabinet, remove the server from the rack cabinet and place it on a flat,
clean, and static-protective surface. See the Rack Installation Instructions that comes with the server.
3. Remove the server cover. See “Removing the server cover” on page 69.
4. Remove the cooling shroud. See “Removing and reinstalling the cooling shroud” on page 73.
5. Locate the ThinkServer RAID 500 Adapter, which is installed in the PCI Express card slot on the riser
card assembly 2. Then, disconnect any cables from the ThinkServer RAID 500 Adapter.
6. Remove the riser card assembly 2. The procedure is similar to that of the riser card assembly 1. See
“Replacing the riser card assembly 1” on page 142.
88
ThinkServer RD540 User Guide and Hardware Maintenance Manual
7. Touch the static-protective package that contains the TR 500 Key to any unpainted surface on the
outside of the server. Then, take the TR 500 Key out of the package.
Note: Carefully handle the TR 500 Key by its edges.
8. Locate the TR 500 Key connector on the ThinkServer RAID 500 Adapter and then insert the TR 500 Key
into the connector. You might need to remove the ThinkServer RAID 500 Adapter first, install the TR 500
Key on the ThinkServer RAID 500 Adapter, and then reinstall the ThinkServer RAID 500 Adapter. See
“Replacing the RAID card” on page 85.
Note: Ensure that the TR 500 Key is securely seated on the ThinkServer RAID 500 Adapter.
Figure 53. Installing the TR 500 Key
9. Reconnect cables to the ThinkServer RAID 500 Adapter. See “Mini-SAS to mini-SAS signal cable
connections” on page 37.
10. Reinstall the riser card assembly 2. The procedure is similar to that of the riser card assembly 1. See
“Replacing the riser card assembly 1” on page 142.
What to do next:
• To work with another piece of hardware, go to the appropriate section.
• To complete the installation, go to “Completing the parts replacement” on page 154. Then, the hardware
RAID 5 and RAID 50 levels are available for your server if your server has the required number of hard disk
drives installed. Refer to the MegaRAID SAS Software User Guide on the documentation DVD that comes
with your server for information about how to configure the hardware RAID.
Removing the TR 500 Key
Attention: Do not open your server or attempt any repair before reading and understanding “Safety information”
on page iii and “Guidelines” on page 67.
This topic provides instructions on how to remove the TR 500 Key from the ThinkServer RAID 500 Adapter
and it applies only to server models that have a ThinkServer RAID 500 Adapter with the TR 500 Key
option installed.
Attention: Back up your data before you begin if you need to reconfigure RAID and reinstall the operating
system after removing the TR 500 Key.
Chapter 6. Installing, removing, or replacing hardware
89
Before you begin, print all the related instructions or ensure that you can view the PDF version on another
computer for reference.
Notes:
• If you remove the TR 500 Key from the ThinkServer RAID 500 Adapter, the hardware RAID 5 and RAID 50
levels will be disabled.
• Use any documentation that comes with the TR 500 Key and follow those instructions in addition to
the instructions in this topic.
To remove the TR 500 Key, do the following:
1. Remove all media from the drives and turn off all attached devices and the server. Then, disconnect all
power cords from electrical outlets and disconnect all cables that are connected to the server.
2. If the server is installed in a rack cabinet, remove the server from the rack cabinet and place it on a flat,
clean, and static-protective surface. See the Rack Installation Instructions that comes with the server.
3. Remove the server cover. See “Removing the server cover” on page 69.
4. Remove the cooling shroud. See “Removing and reinstalling the cooling shroud” on page 73.
5. Locate the ThinkServer RAID 500 Adapter, which is installed in the PCI Express card slot on the riser
card assembly 2. Then, disconnect all cables from the ThinkServer RAID 500 Adapter.
6. Remove the riser card assembly 2. The procedure is similar to that of the riser card assembly 1. See
“Replacing the riser card assembly 1” on page 142.
7. Locate the TR 500 Key on the ThinkServer RAID 500 Adapter and then remove it from the ThinkServer
RAID 500 Adapter. You might need to remove the ThinkServer RAID 500 Adapter first, remove the TR
500 Key from the ThinkServer RAID 500 Adapter, and then reinstall the ThinkServer RAID 500 Adapter.
See “Replacing the RAID card” on page 85.
Note: Carefully handle the TR 500 Key by its edges.
Figure 54. Removing the TR 500 Key
8. Reconnect cables to the ThinkServer RAID 500 Adapter. See “Mini-SAS to mini-SAS signal cable
connections” on page 37.
9. Reinstall the riser card assembly 2. The procedure is similar to that of the riser card assembly 1. See
“Replacing the riser card assembly 1” on page 142.
90
ThinkServer RD540 User Guide and Hardware Maintenance Manual
10. If you are instructed to return the old TR 500 Key, follow all packaging instructions and use any
packaging materials that are supplied to you for shipping.
What to do next:
• To work with another piece of hardware, go to the appropriate section.
• To complete the removal procedure, go to “Completing the parts replacement” on page 154. As the
hardware RAID 5 and 50 levels are not available without the TR 500 Key, you might need to reconfigure
RAID for your server. Refer to the MegaRAID SAS Software User Guide on the documentation DVD that
comes with your server for information about how to configure the hardware RAID.
Installing or removing the ThinkServer RAID 700 Battery
This topic provides instructions on how to install or remove the ThinkServer RAID 700 Battery (also known as
the ThinkServer 9260-8i Battery and hereinafter referred to as the TR 700 Battery).
The TR 700 Battery protects the integrity of the cached data on the ThinkServer RAID 700 Adapter by
providing backup power up to 72 hours in the case of a complete ac power failure or a brief power outage.
It has built-in functionality to automatically charge the battery pack and to communicate battery status
information (such as voltage, temperature, and current) to your server. It also provides an inexpensive
alternative to using an uninterruptible power supply, and a second level of fault tolerance when used in
conjunction with an uninterruptible power supply.
The temperature of the TR 700 Battery is generally 15-20°C (59-68°F) higher than the ambient temperature
during fast charge. Therefore, to complete a recharge cycle, the ambient temperature should be lower
than 55°C (131°F). If the ambient temperature exceeds 55°C (131°F), the recharge cycle will terminate
prematurely, thus preventing the TR 700 Battery from reaching a fully charged state. A recharge cycle lasts
at least six hours under normal operating conditions.
Attention: It is recommended that you replace the TR 700 Battery annually or after 500 recharging cycles,
whichever comes first.
Installing the ThinkServer RAID 700 Battery
Attention: Do not open your server or attempt any repair before reading and understanding “Safety information”
on page iii and “Guidelines” on page 67.
This topic provides instructions on how to install the TR 700 Battery on the ThinkServer RAID 700 Adapter
and it applies only to server models that have a ThinkServer RAID 700 Adapter installed.
Before you begin, print all the related instructions or ensure that you can view the PDF version on another
computer for reference.
Note: Use any documentation that comes with the TR 700 Battery and follow those instructions in addition
to the instructions in this topic.
To install the TR 700 Battery, do the following:
1. Remove all media from the drives and turn off all attached devices and the server. Then, disconnect all
power cords from electrical outlets and disconnect all cables that are connected to the server.
2. If the server is installed in a rack cabinet, remove the server from the rack cabinet and place it on a flat,
clean, and static-protective surface. See the Rack Installation Instructions that comes with the server.
3. Remove the server cover. See “Removing the server cover” on page 69.
4. Remove the cooling shroud. See “Removing and reinstalling the cooling shroud” on page 73.
5. Locate the ThinkServer RAID 700 Adapter, which is installed in the PCI Express card slot on the riser
card assembly 2. Then, disconnect cables from the ThinkServer RAID 700 Adapter.
Chapter 6. Installing, removing, or replacing hardware
91
6. Remove the riser card assembly 2. The procedure is similar to that of the riser card assembly 1. See
“Replacing the riser card assembly 1” on page 142.
7. Remove the ThinkServer RAID 700 Adapter from the riser card assembly 2. See “Replacing the RAID
card” on page 85.
8. With the front side up, place the ThinkServer RAID 700 Adapter on a flat, clean, and static-free surface.
9. Touch the static-protective package that contains the TR 700 Battery to any unpainted surface on the
outside of the server. Then, take the TR 700 Battery out of the package.
10. Hold the TR 700 Battery with the battery side up and the J1 board-to-board connector 1 lining up with
the J6B1 BBU connector 2 on the ThinkServer RAID 700 Adapter. Carefully install the TR 700 Battery
onto the ThinkServer RAID 700 Adapter so that the two connectors are firmly joined. Then, install the
three screws that come with the TR 700 Battery option kit to secure the TR 700 Battery in place.
Figure 55. Installing the TR 700 Battery
Note: When attaching the TR 700 Battery to the ThinkServer RAID 700 Adapter, center the screwdriver
to avoid damaging the screw head and do not over-tighten the screws as you might damage the
TR 700 Battery.
11. Reinstall the ThinkServer RAID 700 Adapter to the riser card assembly 2. See “Replacing the RAID
card” on page 85.
12. Reconnect cables to the ThinkServer RAID 700 Adapter. See “Mini-SAS to mini-SAS signal cable
connections” on page 37.
13. Reinstall the riser card assembly 2. The procedure is similar to that of the riser card assembly 1. See
“Replacing the riser card assembly 1” on page 142.
What to do next:
• To work with another piece of hardware, go to the appropriate section.
• To complete the installation, go to “Completing the parts replacement” on page 154. Then, configure
RAID for your server. See “Configuring RAID” on page 62.
Removing the ThinkServer RAID 700 Battery
Attention: Do not open your server or attempt any repair before reading and understanding “Safety information”
on page iii and “Guidelines” on page 67.
92
ThinkServer RD540 User Guide and Hardware Maintenance Manual
This topic provides instructions on how to remove the TR 700 Battery from the ThinkServer RAID 700
Adapter and it applies only to server models that have a ThinkServer RAID 700 Adapter with the TR 700
Battery installed.
Before you begin, print all the related instructions or ensure that you can view the PDF version on another
computer for reference.
Notes:
• If you remove the TR 700 Battery, you will lose the backup power for the ThinkServer RAID 700 Adapter.
• Use any documentation that comes with the TR 700 Battery and follow those instructions in addition to
the instructions in this topic.
To remove the TR 700 Battery, do the following:
1. Remove all media from the drives and turn off all attached devices and the server. Then, disconnect all
power cords from electrical outlets and disconnect all cables that are connected to the server.
2. If the server is installed in a rack cabinet, remove the server from the rack cabinet and place it on a flat,
clean, and static-protective surface. See the Rack Installation Instructions that comes with the server.
3. Remove the server cover. See “Removing the server cover” on page 69.
4. Remove the cooling shroud. See “Removing and reinstalling the cooling shroud” on page 73.
5. Locate the ThinkServer RAID 700 Adapter, which is installed in the PCI Express card slot on the riser
card assembly 2. Then, disconnect all cables from the ThinkServer RAID 700 Adapter.
6. Remove the riser card assembly 2. The procedure is similar to that of the riser card assembly 1. See
“Replacing the riser card assembly 1” on page 142.
7. Remove the ThinkServer RAID 700 Adapter from the riser card assembly 2. See “Replacing the RAID
card” on page 85.
8. Remove the three screws first. Then, hold the TR 700 Battery and lift it up from the ThinkServer RAID
700 Adapter.
Note: Center the screwdriver when you remove the screws to avoid possible damage to any parts.
Figure 56. Removing the TR 700 Battery
9. Reinstall the ThinkServer RAID 700 Adapter to the riser card assembly 2. See “Replacing the RAID
card” on page 85.
Chapter 6. Installing, removing, or replacing hardware
93
10. Reconnect cables to the ThinkServer RAID 700 Adapter. See “Mini-SAS to mini-SAS signal cable
connections” on page 37.
11. Reinstall the riser card assembly 2. The procedure is similar to that of the riser card assembly 1. See
“Replacing the riser card assembly 1” on page 142.
What to do next:
• To work with another piece of hardware, go to the appropriate section.
• To complete the removal procedure, go to “Completing the parts replacement” on page 154. Then,
configure RAID for your server. See “Configuring RAID” on page 62.
Installing or removing the ThinkServer Management Module Premium
This topic provides instructions on how to install or remove the ThinkServer Management Module Premium
(hereinafter referred to as the TMM Premium).
The TMM Premium offers convenient, remote KVM access and control through the LAN or Internet. You
can use the TMM Premium to gain location-independent remote access to respond to critical incidents and
to undertake necessary maintenance. Therefore, working as an integrated solution in your server, the
TMM Premium provides an increased level of manageability over the basic server management. You can
purchase a TMM Premium from Lenovo.
Installing the TMM Premium
Attention: Do not open your server or attempt any repair before reading and understanding “Safety information”
on page iii and “Guidelines” on page 67.
This topic provides instructions on how to install the TMM Premium.
Before you begin, print all the related instructions or ensure that you can view the PDF version on another
computer for reference.
Notes:
• Use any documentation that comes with the TMM Premium and follow those instructions in addition to
the instructions in this topic.
• Depending on the model, your server might look slightly different from the illustration in this topic.
To install the TMM Premium, do the following:
1. Remove all media from the drives and turn off all attached devices and the server. Then, disconnect all
power cords from electrical outlets and disconnect all cables that are connected to the server.
2. If the server is installed in a rack cabinet, remove the server from the rack cabinet and place it on a flat,
clean, and static-protective surface. See the Rack Installation Instructions that comes with the server.
3. Remove the server cover. See “Removing the server cover” on page 69.
4. Touch the static-protective package that contains the TMM Premium to any unpainted surface on the
outside of the server. Then, take the TMM Premium out of the package.
94
ThinkServer RD540 User Guide and Hardware Maintenance Manual
5. Locate the TMM Premium connector on the system board and then insert the TMM Premium into
the TMM Premium connector.
Note: Ensure that the TMM Premium is securely seated on the system board.
Figure 57. Installing the TMM Premium
What to do next:
• To work with another piece of hardware, go to the appropriate section.
• To complete the installation, go to “Completing the parts replacement” on page 154. Then,
refer to the ThinkServer Management Module User Guide, which is available for download at
http://www.lenovo.com/UserManuals, for more information about server remote management.
Removing the TMM Premium
Attention: Do not open your server or attempt any repair before reading and understanding “Safety information”
on page iii and “Guidelines” on page 67.
This topic provides instructions on how to remove the TMM Premium if the server has one installed.
Before you begin, print all the related instructions or ensure that you can view the PDF version on another
computer for reference.
Chapter 6. Installing, removing, or replacing hardware
95
Notes:
• Use any documentation that comes with the TMM Premium and follow those instructions in addition to
the instructions in this topic.
• If you remove the TMM Premium, the iKVM function for server remote management will be unavailable.
• Depending on the model, your server might look slightly different from the illustration in this topic.
To remove the TMM Premium, do the following:
1. Remove all media from the drives and turn off all attached devices and the server. Then, disconnect all
power cords from electrical outlets and disconnect all cables that are connected to the server.
2. If the server is installed in a rack cabinet, remove the server from the rack cabinet and place it on a flat,
clean, and static-protective surface. See the Rack Installation Instructions that comes with the server.
3. Remove the server cover. See “Removing the server cover” on page 69.
4. Locate the TMM Premium on the system board and then lift the TMM Premium straight up to remove
it from the TMM Premium connector.
Figure 58. Removing the TMM Premium
5. If you are instructed to return the old TMM Premium, follow all packaging instructions and use any
packaging materials that are supplied to you for shipping.
96
ThinkServer RD540 User Guide and Hardware Maintenance Manual
What to do next:
• To work with another piece of hardware, go to the appropriate section.
• To complete the removal procedure, go to “Completing the parts replacement” on page 154.
Installing or removing the ThinkServer Trusted Platform Module
This topic provides instructions on how to install or remove the ThinkServer Trusted Platform Module
(hereinafter referred to as the TPM).
The TPM is a security chip designed by the Trusted Computing Group (TCG) to provide a hardware method
of data encryption. It stores passwords, encryption keys, and digital certificates to help provide security
solutions and protect the computer.
Installing the ThinkServer Trusted Platform Module
Attention: Do not open your server or attempt any repair before reading and understanding “Safety information”
on page iii and “Guidelines” on page 67.
This topic provides instructions on how to install the TPM.
Before you begin, print all the related instructions or ensure that you can view the PDF version on another
computer for reference.
Notes:
• Use any documentation that comes with the TPM and follow those instructions in addition to the
instructions in this topic.
• Depending on the model, your server might look slightly different from the illustration in this topic.
To install the TPM, do the following:
1. Remove all media from the drives and turn off all attached devices and the server. Then, disconnect all
power cords from electrical outlets and disconnect all cables that are connected to the server.
2. If the server is installed in a rack cabinet, remove the server from the rack cabinet and place it on a flat,
clean, and static-protective surface. See the Rack Installation Instructions that comes with the server.
3. Remove the server cover. See “Removing the server cover” on page 69.
4. Touch the static-protective package that contains the TPM to any unpainted surface on the outside of
the server. Then, take the TPM out of the package.
Note: Carefully handle the TPM by its edges.
Chapter 6. Installing, removing, or replacing hardware
97
5. Locate the TPM connector on the system board and then insert the TPM into the TPM connector.
Figure 59. Installing the TPM
What to do next:
• To work with another piece of hardware, go to the appropriate section.
• To complete the installation, go to “Completing the parts replacement” on page 154. Then, you can
configure the TPM function in the Setup Utility program. See “Configuring the TPM function” on page 56.
Removing the ThinkServer Trusted Platform Module
Attention: Do not open your server or attempt any repair before reading and understanding “Safety information”
on page iii and “Guidelines” on page 67.
This topic provides instructions on how to remove the TPM if the server has one installed.
Before you begin, print all the related instructions or ensure that you can view the PDF version on another
computer for reference.
98
ThinkServer RD540 User Guide and Hardware Maintenance Manual
Notes:
• If you remove the TPM, the TPM function is unavailable.
• Use any documentation that comes with the TPM and follow those instructions in addition to the
instructions in this topic.
• Depending on the model, your server might look slightly different from the illustration in this topic.
To remove the TPM, do the following:
1. Remove all media from the drives and turn off all attached devices and the server. Then, disconnect all
power cords from electrical outlets and disconnect all cables that are connected to the server.
2. If the server is installed in a rack cabinet, remove the server from the rack cabinet and place it on a flat,
clean, and static-protective surface. See the Rack Installation Instructions that comes with the server.
3. Remove the server cover. See “Removing the server cover” on page 69.
4. Locate the TPM on the system board and then remove the TPM from the TPM connector by lifting it
straight up.
Note: Carefully handle the TPM by its edges.
Figure 60. Removing the TPM
5. If you are instructed to return the old TPM, follow all packaging instructions and use any packaging
materials that are supplied to you for shipping.
Chapter 6. Installing, removing, or replacing hardware
99
What to do next:
• To work with another piece of hardware, go to the appropriate section.
• To complete the removal procedure, go to “Completing the parts replacement” on page 154.
Installing or replacing a hot-swap redundant power supply
This topic provides instructions on how to install or replace a hot-swap redundant power supply.
On each hot-swap redundant power supply, there is a status LED near the power cord connector. When the
LED is lit in green, it indicates that the hot-swap redundant power supply is working correctly. When the LED
is lit in amber, it indicates that the hot-swap redundant power supply is likely to fail or has failed.
The hot-swap redundant power supply helps you avoid significant interruption to the operation of the
system when a power supply fails and you can replace a hot-swap redundant power supply without
turning off the server.
Note: To maintain the EMI integrity and cooling of the server, install a new hot-swap redundant power
supply as soon as you remove the failing one or cover the other bay with a shield if you just use one module
to provide power.
CAUTION:
Hazardous moving parts. Keep fingers and other body parts away.
CAUTION:
Never remove the cover on a power supply or any part that has the following label attached.
Hazardous voltage, current, and energy levels are present inside any component that has this label
attached. There are no serviceable parts inside these components. If you suspect a problem with
one of these parts, contact a service technician.
Installing a hot-swap redundant power supply
Attention: Do not open your server or attempt any repair before reading and understanding “Safety information”
on page iii and “Guidelines” on page 67.
This topic provides instructions on how to install a hot-swap redundant power supply.
Before you begin, print all the related instructions or ensure that you can view the PDF version on another
computer for reference.
100
ThinkServer RD540 User Guide and Hardware Maintenance Manual
Notes:
• Your hot-swap redundant power supply might look slightly different from the illustrations in this topic.
• Use any documentation that comes with the new hot-swap redundant power supply and follow those
instructions in addition to the instructions in this topic.
To install a hot-swap redundant power supply, do the following:
1. Touch the static-protective package that contains the new hot-swap redundant power supply to any
unpainted surface on the outside of the server. Then, take the new hot-swap redundant power supply
out of the package.
2. Note the orientation of the new hot-swap redundant power supply and then slide the new hot-swap
redundant power supply into the chassis until it snaps into position.
ID
0
MG
MT
1
Figure 61. Installing a hot-swap redundant power supply
Chapter 6. Installing, removing, or replacing hardware
101
Note: If your server comes with one hot-swap power supply installed in the power supply bay 1 (the bay
number is marked on the rear of the chassis) and you are installing a hot-swap redundant power supply
to provide redundant power, you need to remove the shield that protects the power supply bay 2 first
and save the shield for future use. Insert a finger into the hole in the metal shield, press the tab 1 in
the direction as shown, and then pull the shield out of the chassis.
ID
Figure 62. Removing the shield
3. Connect the power cord to the power connector on the new hot-swap redundant power supply. Then,
check the status LED near the power connector. When the LED is lit in green, it indicates that the
hot-swap redundant power supply is working correctly. When the LED is lit in amber, it indicates that the
hot-swap redundant power supply is likely to fail or has failed. You need to reinstall or replace it.
Replacing a hot-swap redundant power supply
Attention: Do not open your server or attempt any repair before reading and understanding “Safety information”
on page iii and “Guidelines” on page 67.
This topic provides instructions on how to replace a hot-swap redundant power supply.
Before you begin, print all the related instructions or ensure that you can view the PDF version on another
computer for reference.
Notes:
• Your hot-swap redundant power supply might look slightly different from the illustrations in this topic.
• Use any documentation that comes with the hot-swap redundant power supply and follow those
instructions in addition to the instructions in this topic.
102
ThinkServer RD540 User Guide and Hardware Maintenance Manual
To replace a hot-swap redundant power supply, do the following:
1. Locate the failing hot-swap redundant power supply in the rear of your server. Then, disconnect the
power cord from the failing hot-swap redundant power supply.
ID
Figure 63. Disconnecting the power cord
Chapter 6. Installing, removing, or replacing hardware
103
2. Press the tab 1 and carefully pull the handle at the same time to slide the hot-swap redundant power
supply out of the chassis.
Note: Do not use too much force. You can first carefully slide the hot-swap redundant power supply a
little bit out to release it from the secured position. Then, completely slide it out of the chassis.
ID
Figure 64. Removing a hot-swap redundant power supply
3. Install a new hot-swap redundant power supply. See “Installing a hot-swap redundant power supply” on
page 100.
4. If you are instructed to return the old hot-swap redundant power supply, follow all packaging instructions
and use any packaging materials that are supplied to you for shipping.
Installing or replacing a heat sink
Attention: Do not open your server or attempt any repair before reading and understanding “Safety information”
on page iii and “Guidelines” on page 67.
This topic provides instructions on how to install or replace a heat sink.
CAUTION:
The heat sink might be very hot. Turn off the server and wait three to five minutes to let the server
cool before removing the server cover.
104
ThinkServer RD540 User Guide and Hardware Maintenance Manual
Before you begin, print all the related instructions or ensure that you can view the PDF version on another
computer for reference.
Note: Use any documentation that comes with the heat sink and follow those instructions in addition to
the instructions in this topic.
To install or replace a heat sink, do the following:
1. Remove all media from the drives and turn off all attached devices and the server. Then, disconnect all
power cords from electrical outlets and disconnect all cables that are connected to the server.
2. If the server is installed in a rack cabinet, remove the server from the rack cabinet and place it on a flat,
clean, and static-protective surface. See the Rack Installation Instructions that comes with the server.
3. Remove the server cover. See “Removing the server cover” on page 69.
4. Remove the cooling shroud. See “Removing and reinstalling the cooling shroud” on page 73.
5. Locate the heat sink or the place for installing the second heat sink. See “Server components” on
page 25.
Chapter 6. Installing, removing, or replacing hardware
105
6. If you are replacing a heat sink, remove the four screws that secure the heat sink to the system board. It
is recommended that you carefully remove the four screws from the system board using the following
method to avoid any possible damage to the system board.
a. Partially remove screw 1 , then completely remove screw 3 , and then return to screw 1 and
completely remove it.
b. Partially remove screw 2 , then completely remove screw 4 , and then return to screw 2 and
completely remove it.
Note: The four screws are integrated parts of the heat sink. Do not try to remove the four screws
from the heat sink.
Figure 65. Removing the screws that secure the heat sink
7. Gently twist the heat sink to free it from the microprocessor and then lift the heat sink off the system
board.
8. Lay aside the old heat sink. Touch the static-protective package that contains the new heat sink to any
unpainted surface on the outside of the server. Then, take the new heat sink out of the package.
Notes:
• If you are replacing a heat sink, you need to use a cleaning pad that might come with the new heat
sink to wipe the thermal grease from the top of the microprocessor before installing the new heat
sink. Dispose of the cleaning pad after all of the thermal grease is removed from the microprocessor.
• When handling the new heat sink, do not touch the thermal grease on the bottom of it.
9. Remove any protective cover that protects the thermal grease on the bottom of the new heat sink. Then,
place the new heat sink on the system board so that the four screws on the new heat sink are aligned
with the corresponding mounting studs on the system board.
106
ThinkServer RD540 User Guide and Hardware Maintenance Manual
10. Install the four screws to secure the new heat sink on the system board. It is recommended that you
carefully install the four screws using the following method to avoid any possible damage to the system
board.
a. Partially tighten screw 1 , then firmly tighten screw 3 , and then return to screw 1 and firmly tighten
it. Do not over-tighten the screws.
b. Partially tighten screw 2 , then firmly tighten screw 4 , and then return to screw 2 and firmly tighten
it. Do not over-tighten the screws.
Figure 66. Installing the screws to secure the heat sink
11. If you are instructed to return the old heat sink, follow all packaging instructions and use any packaging
materials that are supplied to you for shipping.
What to do next:
• To work with another piece of hardware, go to the appropriate section.
• To complete the installation or replacement, go to “Completing the parts replacement” on page 154.
Installing or replacing the microprocessor
This topic provides instructions on how to install or replace the microprocessor.
Installing the second microprocessor
Attention: Do not open your server or attempt any repair before reading and understanding “Safety information”
on page iii and “Guidelines” on page 67.
This topic provides instructions on how to install the second microprocessor.
Chapter 6. Installing, removing, or replacing hardware
107
Depending on the model, your server might come with one or two microprocessors. For server models with
one microprocessor, the microprocessor is installed in the microprocessor socket 1 and the microprocessor
socket 2 is protected by a plastic socket cover. You can purchase a microprocessor option kit from Lenovo
and install the second microprocessor to expand system capabilities.
CAUTION:
Turn off the server and wait three to five minutes to let the server cool before removing the server
cover.
Before you begin, print all the related instructions or ensure that you can view the PDF version on another
computer for reference.
Notes:
• Ensure that you install the correct type of microprocessor option your server supports. See “Memory
module installation rules” on page 75. When two microprocessors are installed, both must have the same
core voltage and core speed.
• Use any documentation that comes with the microprocessor option kit and follow those instructions in
addition to the instructions in this topic.
• Your microprocessor, socket, and socket cover might look slightly different from the illustrations in this
topic.
To install the second microprocessor, do the following:
1. Remove all media from the drives and turn off all attached devices and the server. Then, disconnect all
power cords from electrical outlets and disconnect all cables that are connected to the server.
2. If the server is installed in a rack cabinet, remove the server from the rack cabinet and place it on a flat,
clean, and static-protective surface. See the Rack Installation Instructions that comes with the server.
3. Remove the server cover. See “Removing the server cover” on page 69.
4. Remove the cooling shroud. See “Removing and reinstalling the cooling shroud” on page 73.
5. Locate the microprocessor socket 2 on the system board. See “System board components” on page 38.
6. Open the small handle 2 first. Then, open the other small handle 1 .
Note: There are two marks on the microprocessor retainer. You need to open the small handle marked
with
first and then you can open the other small handle marked with
Figure 67. Opening the handles
108
ThinkServer RD540 User Guide and Hardware Maintenance Manual
7. Gently press the microprocessor retainer to open it. Ensure that the small handles and the
microprocessor retainer are in the fully open position.
Note: Do not drop anything onto the microprocessor socket while it is exposed. The socket pins must
be kept as clean as possible.
Figure 68. Opening the microprocessor retainer
8. Touch the static-protective package that contains the new microprocessor to any unpainted surface on
the outside of the server. Then, remove the new microprocessor from the package.
9. Remove the new microprocessor from the protective cover that protects the gold contacts on the
bottom of the new microprocessor. Do not touch the pins on the microprocessor socket and the gold
contacts on the bottom of the new microprocessor.
Figure 69. Do not touch the pins
Chapter 6. Installing, removing, or replacing hardware
109
10. Note the orientation of the new microprocessor. Hold the new microprocessor by its edges and align
the notches 1 on it with the tabs 2 in the microprocessor socket. Then, carefully lower the new
microprocessor straight down into the microprocessor socket.
Note: The small triangle 3 on one corner of the new microprocessor is the microprocessor orientation
indicator. The new microprocessor is in the correct orientation when this indicator faces the beveled
corner 4 of the microprocessor socket.
Figure 70. Installing the microprocessor
11. Remove the plastic microprocessor socket cover. Store the microprocessor socket cover in the event
that you later remove the microprocessor and need the socket cover to protect the pins on the socket.
Note: Do not remove the socket cover until you install a microprocessor into the socket. If you remove
the microprocessor, install the socket cover or a new microprocessor immediately.
Figure 71. Removing the microprocessor socket cover
110
ThinkServer RD540 User Guide and Hardware Maintenance Manual
12. Close the microprocessor retainer. Then, close the small handle 1 first and then close the small handle
2 to lock the retainer into position and secure the new microprocessor in the socket.
Note: There are two marks on the microprocessor retainer. Ensure that you close the small handle
marked with
first and then close the small handle marked with
. Always follow the correct
sequence when you close the small handles.
Figure 72. Securing the microprocessor in the socket
13. Install the new heat sink that comes with the microprocessor option kit. See “Installing or replacing a
heat sink” on page 104.
What to do next:
• To work with another piece of hardware, go to the appropriate section.
• To complete the installation, go to “Completing the parts replacement” on page 154.
Replacing the microprocessor
Attention: Do not open your server or attempt any repair before reading and understanding “Safety information”
on page iii and “Guidelines” on page 67.
This topic provides instructions on how to replace the microprocessor.
CAUTION:
The heat sink and microprocessor might be very hot. Turn off the server and wait three to five minutes
to let the server cool before removing the server cover.
Before you begin, print all the related instructions or ensure that you can view the PDF version on another
computer for reference.
Chapter 6. Installing, removing, or replacing hardware
111
Notes:
• Ensure that the new microprocessor is the correct type your server supports. See “Memory module
installation rules” on page 75. When two microprocessors are installed, both must have the same core
voltage and core speed.
• Use any documentation that comes with the microprocessor option kit and follow those instructions in
addition to the instructions in this topic.
• Your microprocessor, socket, and socket cover might look slightly different from the illustrations in this
topic.
To replace the microprocessor, do the following:
1. Remove all media from the drives and turn off all attached devices and the server. Then, disconnect all
power cords from electrical outlets and disconnect all cables that are connected to the server.
2. If the server is installed in a rack cabinet, remove the server from the rack cabinet and place it on a flat,
clean, and static-protective surface. See the Rack Installation Instructions that comes with the server.
3. Remove the server cover. See “Removing the server cover” on page 69.
4. Remove the cooling shroud. See “Removing and reinstalling the cooling shroud” on page 73.
5. Remove the heat sink. See “Installing or replacing a heat sink” on page 104.
6. Locate the microprocessor socket and open the small handle 2 first. Then, open the other small
handle 1 .
Note: There are two marks on the microprocessor retainer. You need to open the small handle marked
first and then you can open the other small handle marked with
.
with
Figure 73. Opening the handles
112
ThinkServer RD540 User Guide and Hardware Maintenance Manual
7. Gently press the microprocessor retainer to open it. Ensure that the small handles and the
microprocessor retainer are in the fully open position.
Figure 74. Opening the microprocessor retainer
8. Touch only the edges of the microprocessor and carefully lift it straight up and out of the microprocessor
socket. Place the old microprocessor on a static-protective surface.
Notes:
a. Do not touch the gold contacts on the bottom of the microprocessor.
b. Do not drop anything onto the microprocessor socket while it is exposed. The socket pins must be
kept as clean as possible.
Figure 75. Removing the microprocessor
9. Touch the static-protective package that contains the new microprocessor to any unpainted surface on
the outside of the server. Then, remove the new microprocessor from the package.
Chapter 6. Installing, removing, or replacing hardware
113
10. Remove the new microprocessor from the protective cover that protects the gold contacts on the
bottom of the new microprocessor. Do not touch the pins on the microprocessor socket and the gold
contacts on the bottom of the new microprocessor.
Figure 76. Do not touch the pins
11. Note the orientation of the new microprocessor. Hold the new microprocessor by its edges and align
the notches 1 on it with the tabs 2 in the microprocessor socket. Then, carefully lower the new
microprocessor straight down into the microprocessor socket.
Note: The small triangle 3 on one corner of the new microprocessor is the microprocessor orientation
indicator. The new microprocessor is in the correct orientation when this indicator faces the beveled
corner 4 of the microprocessor socket.
Figure 77. Installing the microprocessor
114
ThinkServer RD540 User Guide and Hardware Maintenance Manual
12. Close the microprocessor retainer. Then, close the small handle 1 first and then close the small handle
2 to lock the retainer into position and secure the new microprocessor in the socket.
Note: There are two marks on the microprocessor retainer. Ensure that you close the small handle
marked with
first and then close the small handle marked with
. Always follow the correct
sequence when you close the small handles.
Figure 78. Securing the microprocessor in the socket
13. Reinstall the heat sink. See “Installing or replacing a heat sink” on page 104.
14. If you are instructed to return the old microprocessor, follow all packaging instructions and use any
packaging materials that are supplied to you for shipping.
What to do next:
• To work with another piece of hardware, go to the appropriate section.
• To complete the replacement, go to “Completing the parts replacement” on page 154.
Installing or replacing a hot-swap hard disk drive
Attention: Do not open your server or attempt any repair before reading and understanding “Safety information”
on page iii and “Guidelines” on page 67.
This topic provides instructions on how to install or replace a hot-swap hard disk drive.
For a list of the ThinkServer hard disk drive options, go to:
http://www.lenovo.com/thinkserver
You can install or replace a hot-swap hard disk drive without turning off the server, which helps you avoid
significant interruption to the operation of the system.
The EMI integrity and cooling of the server are protected by having all drive bays covered or occupied. The
number of the installed hard disk drives in your server varies depending on the server model. The vacant
bays are occupied by dummy hard-disk-drive trays. When you install a hot-swap hard disk drive, save the
removed dummy hard-disk-drive tray from the drive bay in the event that you later remove the hot-swap hard
disk drive and need the dummy tray to cover the place.
Attention: An unoccupied drive bay without any other protection might impact the EMI integrity and cooling
of the server, which might result in overheating or component damage. To maintain the EMI integrity and
Chapter 6. Installing, removing, or replacing hardware
115
cooling of the server, install a new hot-swap hard disk drive as soon as you remove the failing one or
the dummy tray.
Before you begin, review the following hard disk drive installation rules:
• Follow the order of the hard-disk-drive bays when installing a hard disk drive. See “Server components”
on page 25 to locate the hard-disk-drive bays in your server.
• For RAID configuration, the hard disk drives must be the same type with the same capacity if they are
within a single RAID array. For more information, see “Configuring RAID” on page 62.
• For hard disk drives with different capacities, install the hard disk drive by following the order of the
hard-disk-drive bays as well as the order from the lowest capacity to the highest capacity.
Before you begin, print all the related instructions or ensure that you can view the PDF version on another
computer for reference.
Notes:
• Depending on the model, your server might come with 3.5-inch hot-swap hard disk drives or 2.5-inch
hot-swap hard disk drives. The illustrations in this topic are based on server models with 3.5-inch
hot-swap hard disk drives. For other models, the replacement procedure is similar.
• Depending on the model, your server might look slightly different from the illustrations in this topic.
• Use any documentation that comes with the hot-swap hard disk drive and follow those instructions in
addition to the instructions in this topic.
To install or replace a hot-swap hard disk drive, do the following:
1. Locate the appropriate hard-disk-drive bay. See “Server components” on page 25.
2. Press the release button 1 to open the handle of the hot-swap hard disk drive or the dummy tray.
ID
PS
U
Mem
CP
U
Figure 79. Opening the handle of the hot-swap hard disk drive
116
ThinkServer RD540 User Guide and Hardware Maintenance Manual
Figure 80. Opening the handle of the dummy hot-swap hard-disk-drive tray
3. Pull the handle and carefully slide the hot-swap hard disk drive or the dummy tray out of the front of
the chassis.
ID
PS
U
Mem
CP
U
Figure 81. Removing the hot-swap hard disk drive
Chapter 6. Installing, removing, or replacing hardware
117
Figure 82. Removing the dummy hot-swap hard-disk-drive tray
4. Touch the static-protective package that contains the new hot-swap hard disk drive to any unpainted
surface on the outside of the server. Then, take the new hot-swap hard disk drive out of the package.
Note: Do not touch the circuit board on the hard disk drive.
118
ThinkServer RD540 User Guide and Hardware Maintenance Manual
5. Slide the new hot-swap hard disk drive into the drive bay from the front until it snaps into position
and then completely close the handle.
ID
PS
U
Me
m
CP
U
Figure 83. Installing the hot-swap hard disk drive
6. Check the hot-swap hard-disk-drive status LEDs to ensure that the hard disk drive is operating correctly.
You might have to restart the server for the newly installed hard disk drive to be recognized. See
“Hot-swap hard-disk-drive status LEDs” on page 30. If the hard disk drive is faulty, you need to reinstall
or replace it until it is operating correctly.
7. Do one of the following:
• If you are installing a hot-swap hard disk drive, save the removed dummy hard-disk-drive tray in
the event that you later remove the hot-swap hard disk drive and need a dummy tray to cover the
drive bay.
• If you are replacing a hot-swap hard disk drive and are instructed to return the old hot-swap hard
disk drive, follow all packaging instructions and use any packaging materials that are supplied to
you for shipping.
What to do next:
• To work with another piece of hardware, go to the appropriate section.
• To configure RAID, go to “Configuring RAID” on page 62.
Installing or replacing a 2.5-inch solid-state drive
This topic contains the following items:
•
“Installing a 2.5-inch solid-state drive into a 3.5-inch hard-disk-drive bay” on page 120
•
“Replacing a 2.5-inch solid-state drive from a 3.5-inch hard-disk-drive bay” on page 124
Chapter 6. Installing, removing, or replacing hardware
119
For a list of ThinkServer solid-state drive options, go to:
http://www.lenovo.com/thinkserver
You can install or replace a hot-swap solid-state drive without turning off the server, which helps you avoid
significant interruption to the operation of the system.
The EMI integrity and cooling of the server are protected by having all drive bays covered or occupied. The
number of the installed hard disk drives or solid-state drives in your server varies depending on the server
model. The vacant bays are occupied by dummy hard-disk-drive trays. When you install a hot-swap hard
disk drive or solid-state drive, save the removed dummy hard-disk-drive tray from the drive bay in the
event that you later remove the hot-swap hard disk drive or solid-state drive and need the dummy tray to
cover the place.
Attention: An unoccupied drive bay without any other protection might impact the EMI integrity and cooling
of the server, which might result in overheating or component damage. To maintain the EMI integrity and
cooling of the server, install a new hot-swap hard disk drive or solid-state drive as soon as you remove the
failing one or the dummy tray.
Before you begin, review the following solid-state drive installation rules:
• Follow the order of the hard-disk-drive bays when installing a solid-state drive. See “Server components”
on page 25 to locate the hard-disk-drive bays in your server.
• For RAID configuration, the solid-state drives must be the same type with the same capacity if they are
within a single RAID array. For more information, see “Configuring RAID” on page 62.
• For solid-state drives with different capacities, install the solid-state drive by following the order of the
hard-disk-drive bays as well as the order from the lowest capacity to the highest capacity.
Before you begin, print all the related instructions or ensure that you can view the PDF version on another
computer for reference.
Notes:
• Depending on the model, your server might come with 3.5-inch hot-swap hard disk drives or 2.5-inch
hot-swap hard disk drives. The illustrations in this topic are based on server models with 3.5-inch
hot-swap hard disk drives. For other models, the replacement procedure is similar.
• Depending on the model, your server might look slightly different from the illustrations in this topic.
• Use any documentation that comes with the solid-state drive and follow those instructions in addition to
the instructions in this topic.
Installing a 2.5-inch solid-state drive into a 3.5-inch hard-disk-drive bay
Attention: Do not open your server or attempt any repair before reading and understanding “Safety information”
on page iii and “Guidelines” on page 67.
This topic provides instructions on how to install a 2.5-inch solid-state drive into a 3.5-inch hard-disk-drive
bay.
Before you begin, print all the related instructions or ensure that you can view the PDF version on another
computer for reference.
Note: Ensure that you have a 3.5-inch to 2.5-inch drive adapter and a 3.5-inch drive bracket available
before the installation.
To install a 2.5-inch solid-state drive into a 3.5-inch hard-disk-drive bay, do the following:
1. Locate the appropriate hard-disk-drive bay. See “Server components” on page 25.
120
ThinkServer RD540 User Guide and Hardware Maintenance Manual
2. Press the release button 1 to open the handle of the dummy hard-disk-drive tray.
Figure 84. Opening the handle of the dummy hard-disk-drive tray
3. Pull the handle and carefully slide the dummy hard-disk-drive tray out of the front of the chassis.
Figure 85. Removing the dummy hard-disk-drive tray
4. Touch the static-protective package that contains the 2.5-inch solid-state drive to any unpainted surface
on the outside of the server. Then, take the solid-state drive out of the package.
Note: Do not touch the circuit board on the solid-state drive.
Chapter 6. Installing, removing, or replacing hardware
121
5. Position the 2.5-inch solid-state drive into the 3.5-inch to 2.5-inch drive adapter as shown in the
following illustration.
Figure 86. Positioning the 2.5-inch solid-state drive into the drive adapter
6. Align the two screw holes in the solid-state drive with the corresponding holes in the drive adapter.
Then, install the two screws to secure the solid-state drive to the drive adapter.
Figure 87. Installing the screws to secure the solid-state drive to the drive adapter
7. Position the drive adapter with the solid-state drive into the 3.5-inch drive bracket.
122
ThinkServer RD540 User Guide and Hardware Maintenance Manual
8. Align the screw holes in the drive adapter and the solid-state drive with the corresponding holes in the
drive bracket. Then, install the five screws to secure the drive adapter and the solid-state drive to
the bracket.
Figure 88. Installing the screws to secure the drive adapter and the solid-state drive to the bracket
9. Slide the bracket with the solid-state drive into the drive bay from the front until it snaps into position
and then completely close the handle.
ID
PS
U
Me
m
CP
U
Figure 89. Installing the bracket with the solid-state drive
10. Check the hard-disk-drive-status LEDs to ensure that the solid-state drive is operating correctly. You
might have to restart the server for the newly installed solid-state drive to be recognized. See “Hot-swap
Chapter 6. Installing, removing, or replacing hardware
123
hard-disk-drive status LEDs” on page 30. If the solid-state drive is faulty, reinstall or replace it until it
is operating correctly.
11. Save the removed dummy hard-disk-drive tray in the event that you later remove the solid-state drive
and need a dummy tray to cover the drive bay.
What to do next:
• To work with another piece of hardware, go to the appropriate section.
• To configure RAID, go to “Configuring RAID” on page 62.
• To complete the installation, go to “Completing the parts replacement” on page 154.
Replacing a 2.5-inch solid-state drive from a 3.5-inch hard-disk-drive bay
Attention: Do not open your server or attempt any repair before reading and understanding “Safety information”
on page iii and “Guidelines” on page 67.
This topic provides instructions on how to replace a 2.5-inch solid-state drive from a 3.5-inch hard-disk-drive
bay.
Before you begin, print all the related instructions or ensure that you can view the PDF version on another
computer for reference.
To replace a 2.5-inch solid-state drive from a 3.5-inch hard-disk-drive bay, do the following:
1. Locate the appropriate hard-disk-drive bay. See “Server components” on page 25.
2. Press the release button 1 to open the handle of the 3.5-inch drive bracket.
ID
PS
U
Mem
CP
U
Figure 90. Opening the handle of the 3.5-inch drive bracket
124
ThinkServer RD540 User Guide and Hardware Maintenance Manual
3. Pull the handle and carefully slide the bracket with the solid-state drive out of the front of the chassis.
ID
PS
U
Mem
CP
U
Figure 91. Removing the bracket with the solid-state drive
4. Remove the five screws that secure the solid-state drive and the 3.5-inch to 2.5-inch drive adapter.
Then, remove the drive adapter with the solid-state drive from the bracket.
Figure 92. Removing the screws that secure the solid-state drive and the drive adapter
Chapter 6. Installing, removing, or replacing hardware
125
5. Remove the two screws that secure the solid-state drive.
Figure 93. Removing the screws that secure the solid-state drive
6. Lift the solid-state drive up to remove it from the drive adapter.
Figure 94. Removing the solid-state drive from the drive adapter
7. Install a new solid-state drive. See “Installing a 2.5-inch solid-state drive into a 3.5-inch hard-disk-drive
bay” on page 120.
8. If you are instructed to return the old solid-state drive, follow all packaging instructions and use any
packaging materials that are supplied to you for shipping.
What to do next:
• To work with another piece of hardware, go to the appropriate section.
• To configure RAID, go to “Configuring RAID” on page 62.
• To complete the replacement, go to “Completing the parts replacement” on page 154.
Installing or replacing the optical drive
Attention: Do not open your server or attempt any repair before reading and understanding “Safety information”
on page iii and “Guidelines” on page 67.
126
ThinkServer RD540 User Guide and Hardware Maintenance Manual
This topic provides instructions on how to replace the optical drive.
CAUTION:
When laser products (such as CD-ROMs, DVD drives, fiber optic devices, or transmitters) are
installed, note the following:
• Do not remove the covers. Removing the covers of the laser product could result in exposure to
hazardous laser radiation. There are no serviceable parts inside the device.
• Use of controls or adjustments or performance of procedures other than those specified herein
might result in hazardous radiation exposure.
DANGER
Some laser products contain an embedded Class 3A or Class 3B laser diode. Note the following:
Laser radiation when open. Do not stare into the beam, do not view directly with optical
instruments, and avoid direct exposure to the beam.
Before you begin, print all the related instructions or ensure that you can view the PDF version on another
computer for reference.
Notes:
• Depending on the model, your server might look slightly different from the illustrations in this topic.
• Use any documentation that comes with the new optical drive and follow those instructions in addition to
the instructions in this topic.
• If no optical drive is installed on your server, there is a dummy optical drive.
To install or replace the optical drive, do the following:
1. Remove all media from the drives and turn off all attached devices and the server. Then, disconnect all
power cords from electrical outlets and disconnect all cables that are connected to the server.
2. If the server is installed in a rack cabinet, remove the server from the rack cabinet and place it on a flat,
clean, and static-protective surface. See the Rack Installation Instructions that comes with the server.
3. Remove the server cover. See “Removing the server cover” on page 69.
4. Locate the optical drive or dummy optical drive. See “Server components” on page 25.
5. Disconnect the signal cable and the power cable from the rear of the optical drive.
Chapter 6. Installing, removing, or replacing hardware
127
6. Press the rear of the retaining bracket 1 in the direction as shown and push the optical drive or dummy
optical drive from the rear until it is projected from the front of the chassis. Then, hold the optical drive
or dummy optical drive from the front and completely slide it out of the chassis.
PS
U
Me
m
CP
U
Figure 95. Removing the optical drive
7. Touch the static-protective package that contains the new optical drive to any unpainted surface on the
outside of the server. Then, take the new optical drive out of the package.
8. Do one of the following:
• If you are installing the optical drive, remove the retaining bracket from the dummy optical drive and
install it on the side of the new optical drive.
• If you are replacing the optical drive, remove the retaining bracket from the old optical drive and
install it on the side of the new optical drive.
Figure 96. Installing the optical drive retaining bracket
128
ThinkServer RD540 User Guide and Hardware Maintenance Manual
9. Slide the new optical drive with the retaining bracket into the drive bay from the front until it snaps
into position.
PS
U
Me
m
CP
U
Figure 97. Installing the optical drive
10. Connect the power cable 1 and the signal cable 2 to the rear of the new optical drive.
Figure 98. Connecting cables to the rear of the optical drive
11. If necessary, connect the other end of the signal cable to the SATA connector 0 on the system board.
See “System board components” on page 38.
12. If you are instructed to return the old optical drive, follow all packaging instructions and use any
packaging materials that are supplied to you for shipping.
What to do next:
• To work with another piece of hardware, go to the appropriate section.
• To complete the installation or replacement, go to “Completing the parts replacement” on page 154.
Replacing the ThinkServer RAID Super Capacitor Module
Attention: Do not open your server or attempt any repair before reading and understanding “Safety information”
on page iii and “Guidelines” on page 67.
This topic provides instructions on how to replace the ThinkServer RAID Super Capacitor Module.
This topic applies only to server models that have a ThinkServer RAID Super Capacitor Module installed.
Chapter 6. Installing, removing, or replacing hardware
129
The ThinkServer RAID Super Capacitor Module protects the cache memory on the installed ThinkServer
RAID 710 Adapter. You can purchase a ThinkServer RAID Super Capacitor Module from Lenovo.
Before you begin, print all the related instructions or ensure that you can view the PDF version on another
computer for reference.
Notes:
• Depending on the model, your server might look slightly different from the illustrations in this topic.
• Use any documentation that comes with the ThinkServer RAID Super Capacitor Module and follow those
instructions in addition to the instructions in this topic.
To replace the ThinkServer RAID Super Capacitor Module, do the following:
1. Remove all media from the drives and turn off all attached devices and the server. Then, disconnect all
power cords from electrical outlets and disconnect all cables that are connected to the server.
2. If the server is installed in a rack cabinet, remove the server from the rack cabinet and place it on a flat,
clean, and static-protective surface. See the Rack Installation Instructions that comes with the server.
3. Remove the server cover. See “Removing the server cover” on page 69.
4. Disconnect the cable from the ThinkServer RAID Super Capacitor Module and then remove the two
screws that secure the ThinkServer RAID Super Capacitor Module bracket. Then, hold the bracket with
the ThinkServer RAID Super Capacitor Module and lift it up from the chassis.
ID
PS
U
Mem
CP
U
Figure 99. Removing the ThinkServer RAID Super Capacitor Module with the bracket from the chassis
130
ThinkServer RD540 User Guide and Hardware Maintenance Manual
5. Gently press the tab 1 on the bracket and remove the ThinkServer RAID Super Capacitor Module from
the bracket at the same time.
Figure 100. Removing the ThinkServer RAID Super Capacitor Module from the bracket
6. Touch the static-protective package that contains the new ThinkServer RAID Super Capacitor Module
to any unpainted surface on the outside of the server. Then, take the new ThinkServer RAID Super
Capacitor Module out of the package.
7. Note the orientation of the new ThinkServer RAID Super Capacitor Module. Then, gently press the tab
1 on the bracket and install the new ThinkServer RAID Super Capacitor Module into the bracket at
the same time.
Figure 101. Installing the ThinkServer RAID Super Capacitor Module into the bracket
Chapter 6. Installing, removing, or replacing hardware
131
8. Position the new ThinkServer RAID Super Capacitor Module with the bracket on the chassis so that the
mounting studs 1 on the chassis pass through the corresponding holes in the bracket. Then, install the
two screws to secure the ThinkServer RAID Super Capacitor Module bracket.
ID
PS
U
Mem
CP
U
Figure 102. Installing the ThinkServer RAID Super Capacitor Module with the bracket on the chassis
9. Connect the cable to the new ThinkServer RAID Super Capacitor Module.
What to do next:
• To work with another piece of hardware, go to the appropriate section.
• To complete the replacement procedure, go to “Completing the parts replacement” on page 154.
Replacing the hot-swap hard-disk-drive backplane
Attention: Do not open your server or attempt any repair before reading and understanding “Safety information”
on page iii and “Guidelines” on page 67.
This topic provides instructions on how to replace the hot-swap hard-disk-drive backplane.
Before you begin, print all the related instructions or ensure that you can view the PDF version on another
computer for reference.
132
ThinkServer RD540 User Guide and Hardware Maintenance Manual
Notes:
• The hot-swap hard-disk-drive backplane is sensitive to ESD. Ensure that you read and understand
“Handling static-sensitive devices” on page 68 first and carefully perform the operation.
• Depending on the model, your server might look slightly different from the illustrations in this topic.
• The illustrations in the following procedure show the backplane for 3.5-inch hard disk drives. For the
backplane for 2.5-inch hard disk drives, the replacement procedure is similar.
• In the following illustrations, system fans are removed in order to make the hot-swap hard-disk-drive
backplane clearly visible.
To replace the hot-swap hard-disk-drive backplane, do the following:
1. Remove all media from the drives and turn off all attached devices and the server. Then, disconnect all
power cords from electrical outlets and disconnect all cables that are connected to the server.
2. If the server is installed in a rack cabinet, remove the server from the rack cabinet and place it on a flat,
clean, and static-protective surface. See the Rack Installation Instructions that comes with the server.
3. Remove the server cover. See “Removing the server cover” on page 69.
4. Locate the hot-swap hard-disk-drive backplane. See “Hot-swap hard-disk-drive backplane” on page 33.
5. Remove all the installed hot-swap hard disk drives and dummy trays (if any) from the hard-disk-drive
bays. See “Installing or replacing a hot-swap hard disk drive” on page 115.
6. Record the cable connections on the backplane and then disconnect all the cables from the backplane.
7. Press the two retaining latches in the direction as shown to release the backplane.
Figure 103. Releasing the hot-swap hard-disk-drive backplane
Chapter 6. Installing, removing, or replacing hardware
133
8. Carefully lift up the hot-swap hard-disk-drive backplane. When the hooks 1 are aligned with the
holes in the backplane, slowly move the backplane a little bit outward. Then, completely remove the
hot-swap hard-disk-drive backplane.
Figure 104. Removing the hot-swap hard-disk-drive backplane
9. Touch the static-protective package that contains the new hot-swap hard-disk-drive backplane to any
unpainted surface on the outside of the server. Then, remove the new backplane from the package.
Note: Carefully handle the backplane by its edges.
134
ThinkServer RD540 User Guide and Hardware Maintenance Manual
10. Position the new backplane as shown so that the hooks 1 on the chassis pass through the
corresponding holes in the new backplane. Then, press the backplane straight down until it is secured
in place by the small retaining studs on the chassis.
Figure 105. Installing the hot-swap hard-disk-drive backplane
Chapter 6. Installing, removing, or replacing hardware
135
11. Press the two retaining latches. Then, the backplane is secured.
Figure 106. Securing the hot-swap hard-disk-drive backplane
12. Reinstall all the hot-swap hard disk drives and dummy trays (if any) on the backplane. See “Installing or
replacing a hot-swap hard disk drive” on page 115.
13. Refer to your note to reconnect the cables to the backplane.
14. If you are instructed to return the old hot-swap hard-disk-drive backplane, follow all packaging
instructions and use any packaging materials that are supplied to you for shipping.
What to do next:
• To work with another piece of hardware, go to the appropriate section.
• To complete the replacement, go to “Completing the parts replacement” on page 154.
Replacing the Intelligent Diagnostics Module
Attention: Do not open your server or attempt any repair before reading and understanding “Safety information”
on page iii and “Guidelines” on page 67.
This topic provides instructions on how to replace the Intelligent Diagnostics Module (hereinafter referred to
as the IDM).
The IDM provides diagnostic LEDs through the IDM panel to help you easily identify a problem. For more
information, see “Intelligent Diagnostics Module” on page 21.
136
ThinkServer RD540 User Guide and Hardware Maintenance Manual
Before you begin, print all the related instructions or ensure that you can view the PDF version on another
computer for reference.
Notes:
• Depending on the model, your server might look slightly different from the illustrations in this topic.
• If you remove the IDM, the server will lose the diagnostic LEDs on the IDM panel.
To replace the IDM, do the following:
1. Remove all media from the drives and turn off all attached devices and the server. Then, disconnect all
power cords from electrical outlets and disconnect all cables that are connected to the server.
2. If the server is installed in a rack cabinet, remove the server from the rack cabinet and place it on a flat,
clean, and static-protective surface. See the Rack Installation Instructions that comes with the server.
3. Remove the server cover. See “Removing the server cover” on page 69.
4. Locate the IDM. See “Server components” on page 25.
5. Disconnect the cable from the rear of the IDM.
6. Remove the two screws that secure the IDM and then carefully remove the IDM from the chassis.
ID
PS
U
Me
m
CP
U
Figure 107. Removing the IDM
7. Touch the static-protective package that contains the new IDM to any unpainted surface on the outside
of the server. Then, take the new IDM out of the package.
Chapter 6. Installing, removing, or replacing hardware
137
8. Position the new IDM on the chassis so that the screw holes in the new IDM are aligned with the
corresponding mounting studs on the chassis. Then, install the screws to secure the new IDM in place.
ID
PS
U
Me
m
CP
U
Figure 108. Installing the IDM
9. Connect the IDM cable to the rear of the new IDM.
10. If you are instructed to return the old IDM, follow all packaging instructions and use any packaging
materials that are supplied to you for shipping.
What to do next:
• To work with another piece of hardware, go to the appropriate section.
• To complete the replacement, go to “Completing the parts replacement” on page 154.
Replacing a system fan
Attention: Do not open your server or attempt any repair before reading and understanding “Safety information”
on page iii and “Guidelines” on page 67.
This topic provides instructions on how to replace a system fan.
CAUTION:
Hazardous moving parts. Keep fingers and other body parts away.
138
ThinkServer RD540 User Guide and Hardware Maintenance Manual
Before you begin, print all the related instructions or ensure that you can view the PDF version on another
computer for reference.
Note: Depending on the model, your server might look slightly different from the illustrations in this topic.
To replace a system fan, do the following:
1. Remove all media from the drives and turn off all attached devices and the server. Then, disconnect all
power cords from electrical outlets and disconnect all cables that are connected to the server.
2. If the server is installed in a rack cabinet, remove the server from the rack cabinet and place it on a flat,
clean, and static-protective surface. See the Rack Installation Instructions that comes with the server.
3. Remove the server cover. See “Removing the server cover” on page 69.
4. Remove the cooling shroud. See “Removing and reinstalling the cooling shroud” on page 73.
5. Reconnect the power cord to the server and the electrical outlet.
6. Locate the system fan. The system fan error LED is lit. See “System board LEDs” on page 46.
7. Disconnect the power cord from the electrical outlet.
8. Disconnect the cable of the system fan from the system fan connector on the system board. See
“System board components” on page 38 to identify the system fan connector.
9. Lift up the tape of the system fan to remove the system fan out of the chassis.
Figure 109. Removing the system fan
10. Touch the static-protective package that contains the new system fan to any unpainted surface on the
outside of the server. Then, remove the new system fan from the package.
Chapter 6. Installing, removing, or replacing hardware
139
11. Note the orientation of the system fan and then insert the new system fan into the chassis until it
snaps into position.
Figure 110. Inserting the system fan
12. Press down the tape of the system fan and then connect the cable of the new system fan to the system
fan connector on the system board.
13. If you are instructed to return the old system fan, follow all packaging instructions and use any
packaging materials that are supplied to you for shipping.
What to do next:
• To work with another piece of hardware, go to the appropriate section.
• To complete the replacement, go to “Completing the parts replacement” on page 154.
Replacing the front panel board
Attention: Do not open your server or attempt any repair before reading and understanding “Safety information”
on page iii and “Guidelines” on page 67.
This topic provides instructions on how to replace the front panel board.
Before you begin, print all the related instructions or ensure that you can view the PDF version on another
computer for reference.
Notes:
• Depending on the model, your server might look slightly different from the illustrations in this topic.
• The front panel board is extremely sensitive to ESD. Ensure that you read and understand “Handling
static-sensitive devices” on page 68 first and carefully perform the operation.
To replace the front panel board, do the following:
140
ThinkServer RD540 User Guide and Hardware Maintenance Manual
1. Remove all media from the drives and turn off all attached devices and the server. Then, disconnect all
power cords from electrical outlets and disconnect all cables that are connected to the server.
2. If the server is installed in a rack cabinet, remove the server from the rack cabinet and place it on a flat,
clean, and static-protective surface. See the Rack Installation Instructions that comes with the server.
3. Remove the server cover. See “Removing the server cover” on page 69.
4. Locate the front panel board. See “Front view of the server” on page 14.
5. Disconnect the front panel cable and the front panel USB cable from the front panel board.
6. Remove the two screws that secure the front panel board and then carefully remove the front panel
board from the chassis.
ID
PS
U
Me
m
CP
U
Figure 111. Removing the front panel board
7. Touch the static-protective package that contains the new front panel board to any unpainted surface
on the outside of the server. Then, take the new front panel board out of the package.
Note: Carefully handle the front panel board by its edges.
Chapter 6. Installing, removing, or replacing hardware
141
8. Carefully position the new front panel board on the chassis so that the front controls, connectors,
and LEDs are through the corresponding holes in the front bezel and the two screw holes in the new
front panel board are aligned with the corresponding mounting studs on the chassis. Then, install the
screws to secure the front panel board in place.
ID
PS
U
Me
m
CP
U
Figure 112. Installing the front panel board
9. Connect the front panel cable and the front panel USB cable to the rear of the new front panel board.
10. If you are instructed to return the old front panel board, follow all packaging instructions and use any
packaging materials that are supplied to you for shipping.
What to do next:
• To work with another piece of hardware, go to the appropriate section.
• To complete the replacement, go to “Completing the parts replacement” on page 154.
Replacing the riser card assembly 1
Attention: Do not open your server or attempt any repair before reading and understanding “Safety information”
on page iii and “Guidelines” on page 67.
This topic provides instructions on how to replace the riser card assembly 1.
Before you begin, print all the related instructions or ensure that you can view the PDF version on another
computer for reference.
Notes:
• Depending on the model, your server might look slightly different from the illustrations in this topic.
• Use any documentation that comes with the new riser card assembly 1 and follow those instructions in
addition to the instructions in this topic.
To replace the riser card assembly 1, do the following:
142
ThinkServer RD540 User Guide and Hardware Maintenance Manual
1. Remove all media from the drives and turn off all attached devices and the server. Then, disconnect all
power cords from electrical outlets and disconnect all cables that are connected to the server.
2. If the server is installed in a rack cabinet, remove the server from the rack cabinet and place it on a flat,
clean, and static-protective surface. See the Rack Installation Instructions that comes with the server.
3. Remove the server cover. See “Removing the server cover” on page 69.
4. Remove the cooling shroud. See “Removing and reinstalling the cooling shroud” on page 73.
5. Locate the riser card assembly 1. See “Server components” on page 25.
6. If necessary, remove any parts or disconnect any cables that might impede your access to the riser
card assembly 1.
7. Grasp the riser card assembly 1 by its edges and carefully lift it straight up and off the chassis.
Figure 113. Lifting the riser card assembly 1 off the chassis
8. If there is any PCI Express card (such as an Ethernet card) installed on the riser card assembly 1, record
the cable connections, and then disconnect all cables from the card to completely remove the riser
card assembly 1 out of the chassis. Then, remove the PCI Express card from the riser card assembly 1.
See “Removing the Ethernet card” on page 83.
9. Touch the static-protective package that contains the new riser card assembly 1 to any unpainted
surface on the outside of the server. Then, take the new riser card assembly 1 out of the package.
Chapter 6. Installing, removing, or replacing hardware
143
10. Align the tabs of the new riser card assembly 1 with the holes in the rear of the server. Then, press the
new riser card assembly 1 straight down until it is securely seated in the slot.
Note: If there is any PCI Express card (such as an Ethernet card) installed on the riser card assembly
1, install the PCI Express card to the new riser card assembly 1 first. See “Installing the Ethernet
card” on page 81.
1
MG
MT
2
Figure 114. Installing the riser card assembly 1
11. Reinstall any parts or reconnect any cables that you have removed.
12. If you are instructed to return the old riser card assembly, follow all packaging instructions and use any
packaging materials that are supplied to you for shipping.
What to do next:
• To work with another piece of hardware, go to the appropriate section.
• To complete the replacement, go to “Completing the parts replacement” on page 154.
Replacing the system board battery
Attention: Do not open your server or attempt any repair before reading and understanding “Safety information”
on page iii and “Guidelines” on page 67.
This topic provides instructions on how to replace the system board battery.
Your server has a special type of memory that maintains the date, time, and configuration information for
built-in features. The system board battery keeps the information active when you turn off the server. The
144
ThinkServer RD540 User Guide and Hardware Maintenance Manual
system board battery normally requires no charging or maintenance throughout its life; however, no battery
lasts forever. If the system board battery fails, the date, time, and configuration information, including
passwords, are lost and an error message is displayed when you turn on the server.
DANGER
Danger of explosion if battery is incorrectly replaced.
When replacing the lithium coin cell battery, use only the same or an equivalent type that is
recommended by the manufacturer. The battery contains lithium and can explode if not properly
used, handled, or disposed of.
Do not:
• Throw or immerse into water
• Heat to more than 100°C (212°F)
• Repair or disassemble
Dispose of the battery as required by local ordinances or regulations.
The following statement applies to users in the state of California, U.S.A.
California Perchlorate Information:
Products containing CR (manganese dioxide) lithium coin cell batteries may contain perchlorate.
Perchlorate Material - special handling may apply, See
http://www.dtsc.ca.gov/hazardouswaste/perchlorate
Before you begin, print all the related instructions or ensure that you can view the PDF version on another
computer for reference.
To replace the system board battery, do the following:
Note: After you replace the system board battery, you must reset passwords, reset system date and time,
and reconfigure the server.
1. Remove all media from the drives and turn off all attached devices and the server. Then, disconnect all
power cords from electrical outlets and disconnect all cables that are connected to the server.
2. If the server is installed in a rack cabinet, remove the server from the rack cabinet and place it on a flat,
clean, and static-protective surface. See the Rack Installation Instructions that comes with the server.
3. Remove the server cover. See “Removing the server cover” on page 69.
4. Locate the system board battery. See “System board components” on page 38.
Note: If there is any PCI Express card installed on the riser card assembly 1, it might block your access
to the system board battery. In this case, you need to remove the cooling shroud and then carefully
lift the riser card assembly 1 up so that you can access the system board battery. You do not need to
disconnect any cables from the riser card assembly 1 or completely remove the riser card assembly 1.
Chapter 6. Installing, removing, or replacing hardware
145
5. Remove the old system board battery.
Figure 115. Removing the system board battery
6. Install a new system board battery.
Figure 116. Installing the system board battery
7. If you have lifted up the riser card assembly 1, reinstall it into the chassis. See “Replacing the riser
card assembly 1” on page 142.
8. Dispose of the old system board battery as required by local ordinances or regulations.
What to do next:
• To work with another piece of hardware, go to the appropriate section.
• To complete the replacement, go to “Completing the parts replacement” on page 154. After you replace
the system board battery, you must reset passwords, reset system date and time, and reconfigure the
server. See Chapter 5 “Configuring the server” on page 51.
Replacing the system board
Attention: Do not open your server or attempt any repair before reading and understanding “Safety information”
on page iii and “Guidelines” on page 67.
This topic provides instructions on how to replace the system board.
Note: This procedure must be performed only by trained service personnel of Lenovo.
CAUTION:
Hazardous moving parts. Keep fingers and other body parts away.
146
ThinkServer RD540 User Guide and Hardware Maintenance Manual
CAUTION:
The heat sink(s) and microprocessor(s) might be very hot. Turn off the server and wait three to five
minutes to let the server cool before removing the server cover.
Before you begin, print all the related instructions or ensure that you can view the PDF version on another
computer for reference.
Note: Depending on the model, your server might look slightly different from the illustrations in this topic.
To replace the system board, do the following:
1. Remove all media from the drives and turn off all attached devices and the server. Then, disconnect all
power cords from electrical outlets and disconnect all cables that are connected to the server.
2. If the server is installed in a rack cabinet, remove the server from the rack cabinet and place it on a flat,
clean, and static-protective surface. See the Rack Installation Instructions that comes with the server.
3. Remove the hot-swap redundant power supplies. See “Replacing a hot-swap redundant power
supply” on page 102.
4. Remove the server cover. See “Removing the server cover” on page 69.
5. Remove the cooling shroud. See “Removing and reinstalling the cooling shroud” on page 73.
6. Record the component locations, cable connections, and cable routing in the server.
7. Remove all memory modules. See “Removing a memory module” on page 80.
8. Remove the two riser card assemblies. See “Replacing the riser card assembly 1” on page 142.
9. Remove the TPM if one is installed. See “Removing the ThinkServer Trusted Platform Module” on
page 98.
10. Remove the TMM Premium if one is installed. See “Removing the TMM Premium” on page 95.
11. Remove the system board battery. See “Replacing the system board battery” on page 144.
12. Disconnect all the system fan cables from the system board. Then, hold the two system fan cages
and lift them straight up and out of the chassis.
ID
PSU
Mem
CPU
Figure 117. Removing the two system fan cages with the system fans
Chapter 6. Installing, removing, or replacing hardware
147
13. Remove the heat sink(s) and place them on a clean, flat, and static-protective surface. See “Installing or
replacing a heat sink” on page 104.
14. Disconnect all cables from the system board. Then, remove the ten screws that secure the system
board following the recommended numerical sequence as shown.
Note: The screws 9 and 10 are different from the other eight screws. Reinstall the two screws to the
same positions after you install the new system board.
Figure 118. Removing the screws that secure the system board
148
ThinkServer RD540 User Guide and Hardware Maintenance Manual
15. Gently lift each edge of the system board a little bit upward so that the system board is completely
released from the mounting studs on the chassis. Slowly move the system board to the front of the
chassis, and then lift it up to completely remove it out of the chassis.
Note: Carefully handle the system board by its edges.
1
1
1
ID
1
PSU
Mem
CPU
Figure 119. Removing the system board
16. Place the old system board on a clean, flat, and static-protective surface. Touch the static-protective
package that contains the new system board to any unpainted surface on the outside of the server.
Then, remove the new system board from the package.
17. Note the orientation of the new system board and carefully place it into the chassis so that the rear
connectors are inserted into the corresponding holes in the rear panel.
1
1
1
1
ID
PSU
Mem
CPU
Figure 120. Installing the new system board
Chapter 6. Installing, removing, or replacing hardware
149
18. Ensure that the ten screw holes in the new system board are aligned with the mounting studs in the
chassis. Then, install the ten screws following the numerical sequence as shown to secure the new
system board in the chassis.
Figure 121. Installing the screws to secure the system board
19. For the new system board, open the small handles and microprocessor retainer on each of the
microprocessor socket. See “Installing the second microprocessor” on page 107.
20. Remove the microprocessor(s) from the old system board and install them directly on the new system
board. See “Replacing the microprocessor” on page 111.
150
ThinkServer RD540 User Guide and Hardware Maintenance Manual
21. Remove the plastic microprocessor socket cover(s) from the new system board. Then, close the small
handles and microprocessor retainer on each of the microprocessor socket.
Note: Do not remove the socket cover(s) until you have installed microprocessor(s) into the socket(s).
Figure 122. Removing the microprocessor socket cover
22. Install the heat sink(s) that are removed from the old system board to the new system board. See
“Installing or replacing a heat sink” on page 104.
23. The old system board must be returned with the microprocessor socket cover(s) to protect the pins on
the socket(s) during shipping and handling. Use the microprocessor socket cover(s) removed from the
new system board. To install them on the old system board, do the following:
a. Pivot the microprocessor retainer on each of the microprocessor socket downward to close the
retainer.
Chapter 6. Installing, removing, or replacing hardware
151
b. Gently press down the small handle 1 first and then push the handle inward to secure it. Then, press
down the small handle 2 and then push the handle inward to lock the microprocessor retainer on
each of the microprocessor socket into position.
Notes:
• Do not touch the pins on the microprocessor socket and the gold contacts on the bottom of the
new microprocessor.
Figure 123. Do not touch the pins
• There are two marks on the microprocessor retainer. Ensure that you close the small handle
first and then close the small handle marked with
. Always follow the
marked with
correct sequence when you close the small handles.
Figure 124. Securing the microprocessor retainer
152
ThinkServer RD540 User Guide and Hardware Maintenance Manual
c. Align the small triangle 1 of the microprocessor socket cover with the small triangle 2 on the
microprocessor retainer. Lower the socket cover straight down to the microprocessor socket, and
then press it down until it snaps into position.
Figure 125. Installing the microprocessor socket cover
24. Note the orientation of the two system fan cages and carefully place them into the chassis. Then,
press the two system fan cages straight down until they are securely seated in the chassis. After that
connect the system fan cables to the system board.
ID
PSU
Mem
CPU
Figure 126. Installing the two system fan cages with the system fans
25. Install other parts and connect all cables that you removed from the old system board to the new
system board. Refer to the information that you have recorded and the related topics in “Installing,
removing, or replacing hardware” on page 71.
26. If you are instructed to return the old system board, follow all packaging instructions and use any
packaging materials that are supplied to you for shipping.
What to do next:
• To work with another piece of hardware, go to the appropriate section.
• To complete the replacement, go to “Completing the parts replacement” on page 154.
• After a system board is replaced, do the following:
1. Start the Setup Utility program by pressing the F1 key, and then check the BIOS and BMC version.
2. Go to http://www.lenovo.com/drivers and follow the instructions on the Web page to download the
latest version of firmware. Then, install the firmware to your server.
Chapter 6. Installing, removing, or replacing hardware
153
3. Update the machine type, model number, and serial number of the system board. Either you will
be prompted to do this while upgrading the BIOS, or you can locate the files for updating the
VPD within the DOS BIOS package. For some servers, the VPD utility is available for download
at: http://www.lenovo.com/drivers.
Note: If you want to use the Firmware Updater program, ensure that it is the latest version. To get the
latest version of the Firmware Updater program, go to http://www.lenovo.com/drivers, locate different
versions of the program, and then identify the latest version by comparing readme files. If the latest
version of the Firmware Updater program does not contain the latest version of the driver you need,
download that driver separately from the Web page and install it individually to your server.
Completing the parts replacement
This topic provides instructions to help you complete the parts replacement and turn on your server.
To complete the parts replacement, you must properly route the cables inside the server, reinstall the cooling
shroud (if necessary), reinstall the server cover, reconnect all the external cables and, for some devices,
update the firmware and run the Setup Utility program to do further setup.
Reinstalling the server cover and reconnecting cables
Attention: Do not open your server or attempt any repair before reading and understanding “Safety information”
on page iii and “Guidelines” on page 67.
This topic provides instructions on how to reinstall the server cover and reconnect cables to your server.
Attention: For proper cooling and airflow, reinstall the server cover before turning on the server. Operating
the server for extended periods of time (more than 30 minutes) with the server cover removed might
damage server components.
Before you begin, print all the related instructions or ensure that you can view the PDF version on another
computer for reference.
Note: Depending on the model, your server might look slightly different from the illustrations in this topic.
To reinstall the server cover and reconnect cables to your server, do the following:
1. Ensure that all components have been reassembled correctly and that no tools or loose screws are
left inside your server.
2. Ensure that all internal cables are routed correctly and secured by any cable clips or ties in the server.
Keep cables clear of the hinges and sides of the server chassis to avoid interference with reinstalling the
cooling shroud and the server cover. The following illustration shows an example of the cable routing in
the chassis with one backplane and four 3.5-inch hard disk drives.
154
ThinkServer RD540 User Guide and Hardware Maintenance Manual
• Route the signal cables 1 through the left inner side of the chassis. The signal cables include the
mini-SAS to mini-SAS signal cable, the front panel cable, the front panel USB cable, the diagnostic
module cable, and the SATA signal cable for the optical drive.
• Connect the power cable 2 for the optical drive to the optical drive power connector on the
backplane and properly route the cable in the chassis.
• Route the backplane power cable 3 through the right inner side of the chassis.
Figure 127. Cable routing
3. If the cooling shroud is removed, reinstall the cooling shroud. See “Removing and reinstalling the
cooling shroud” on page 73.
Chapter 6. Installing, removing, or replacing hardware
155
4. Ensure that the cover latch is in the open position. Place the server cover above the chassis so that
the cover latch is aligned with the cover latch slot in the chassis. Then, lower the server cover onto
the chassis until the cover latch is inserted into its slot and both sides of the server cover engage the
guides on both sides of the chassis.
CPU
Mem
PSU
ID
Figure 128. Installing the server cover
5. Pivot the cover latch to the closed position and slide the server cover to the front of the chassis at the
same time until the server cover snaps into position and the cover latch is completely closed.
CPU
Mem
PSU
ID
Figure 129. Closing the server cover completely
6. If the server is installed in a rack cabinet, reinstall the server into the rack cabinet. See the Rack
Installation Instructions that comes with the server.
156
ThinkServer RD540 User Guide and Hardware Maintenance Manual
7. Reconnect external cables and power cords to the server. See “Rear view of the server” on page 22 to
identify the connectors on the rear panel of the server.
Attention: To avoid component damage, connect the power cords last.
Note: In most areas of the world, Lenovo requires the return of the defective CRU. Information about this will
come with the CRU or will come a few days after the CRU arrives.
Updating the server configuration
When you turn on the server for the first time after you install, remove, or replace a device, you might
need to update the server configuration.
Some optional devices have device drivers that you must install. For information about installing device
drivers, use the documentation that comes with each optional device. To obtain the supported device drivers
for your server from the Lenovo Support Web site, go to http://www.lenovo.com/drivers, and then follow the
instructions on the Web page to find and download the device drivers you need.
Refer to the following information resources to update the server configuration:
• To update the BIOS configuration, see “Using the Setup Utility program” on page 51.
• To update the RAID configuration, see “Configuring RAID” on page 62.
• To use the ThinkServer EasyStartup program, see “Using the ThinkServer EasyStartup program” on
page 59.
• To update your system firmware, see “Updating the firmware” on page 65.
Chapter 6. Installing, removing, or replacing hardware
157
158
ThinkServer RD540 User Guide and Hardware Maintenance Manual
Chapter 7. Troubleshooting and diagnostics
This chapter provides information about basic troubleshooting and diagnostic methods to help you solve
problems that might occur in the server.
If you cannot diagnose and correct a problem by using the information in this chapter, see Chapter 8
“Getting information, help, and service” on page 165 for additional troubleshooting resources.
Troubleshooting procedure
Use the following information as a general procedure for diagnosing and troubleshooting problems you
experience with your server:
1. Verify that the power cords and the cables for all attached devices are connected correctly and securely.
2. Verify that the server and all attached devices that require ac power are connected to properly grounded,
functioning electrical outlets.
3. Verify that all installed hardware and attached devices are enabled in the BIOS settings of your server.
For more information about accessing and changing the BIOS settings, see “Using the Setup Utility
program” on page 51.
4. View the status and diagnostic LEDs to identify the system and device status and diagnose problems.
See “Viewing the status and diagnostic LEDs” on page 159.
5. If the server is not working after you have added new software, installed a new optional device, or
replaced a piece of hardware, remove or reinstall the software, device, or hardware to see if the problem
could be solved.
6. View the system event log to diagnose problems. See “Viewing the system event log” on page 160.
7. Turn on the server and press Esc as soon as you see the logo screen to view any diagnostic messages.
8. Download and use a diagnostic program to diagnose problems. See “Using a diagnostic program” on
page 160.
9. Refer to “Basic troubleshooting tables” on page 160 and follow the instructions for the type of problem
you are experiencing. If the basic troubleshooting information does not help you resolve a problem,
continue with the next step.
10. Try using a previous server configuration to see if a recent change to hardware or software settings has
caused a problem. Before restoring your previous configuration, capture your current configuration in
case the older configuration settings do not solve the problem or have adverse effect.
11. Use an antivirus program to see if your server has been infected by a virus. If the program detects a
virus, remove the virus.
12. If none of these actions solve the problem, seek technical assistance. See Chapter 8 “Getting
information, help, and service” on page 165.
Viewing the status and diagnostic LEDs
Your server has status and diagnostic LEDs on the front panel, the rear panel, the panel of the diagnostic
module (varies by model), the system board, the hot-swap hard disk drives, and the optical drive (if
supported). The various LEDs help you easily identify the system and device status and diagnose problems.
For information about the LEDs, refer to the related topics in “Locations” on page 13.
© Copyright Lenovo 2013
159
Using a diagnostic program
The following diagnostic programs are available for you to diagnose server problems:
• ThinkServer Diagnostic Tool
• ThinkServer System Profile Collection Tool
To use a diagnostic program, do the following:
1. Go to http://www.lenovo.com/drivers and follow the instructions on the Web page to locate a diagnostic
program.
2. Download and unzip the diagnostic program package to get the diagnostic program package folder.
3. Open the diagnostic program package folder and run the QTW.exe file.
4. Select the language when prompted. Then, click Continue.
5. Read the End-User License Agreement (EULA) terms carefully and click Accept to start the program.
6. Follow the instructions on the screen to use the diagnostic program.
For detailed information about using a diagnostic program, refer to the user guide of the diagnostic program,
which is available for download at:
http://www.lenovo.com/drivers
Viewing the system event log
The system event log (SEL) contains information about all the POST and system management interrupt (SMI)
events. You can view the SEL to diagnose system problems.
The TMM implements the SEL as specified in the IPMI 2.0 specification. The SEL is accessible regardless of
the system power state through the TMM in-band and out-of-band interfaces.
For more information about viewing the SEL, refer to the ThinkServer Management Module User Guide,
which is available for download at http://www.lenovo.com/UserManuals.
Basic troubleshooting tables
Use the basic troubleshooting information to find solutions to problems that have definite symptoms.
ThinkServer EasyStartup program problems
Follow the suggested actions for the corresponding symptom in the order in which they are listed until the
problem is solved. If none of these actions solve the problem, see “Troubleshooting procedure” on page 159
for the subsequent steps you should check after using the information in this topic. If the problem still cannot
be solved, seek technical assistance. See Chapter 8 “Getting information, help, and service” on page 165.
Note: If you are instructed to remove, install, or replace any CRUs, refer to the related procedure in Chapter
6 “Installing, removing, or replacing hardware” on page 67.
160
ThinkServer RD540 User Guide and Hardware Maintenance Manual
Action
Symptom
The ThinkServer EasyStartup DVD does not start.
1. Ensure that the server supports the ThinkServer
EasyStartup program and has a bootable DVD drive
installed or a bootable external DVD drive attached.
2. Ensure that you have set the optical drive with the
ThinkServer EasyStartup DVD installed as the first
startup device. See “Selecting a startup device” on
page 56.
3. Verify if the optical drive or the disc has problems.
See “Optical drive problems” on page 161.
The operating system installation program continuously
loops.
The ThinkServer EasyStartup program cannot start the
operating system medium.
Make more space available on the hard disk drive.
1. Ensure that the operating system medium is
supported by the ThinkServer EasyStartup program
version your are using. For a list of the supported
operating systems, refer to the user guide and
compatibility notes for the ThinkServer EasyStartup
program through the program main interface. See
“Starting the ThinkServer EasyStartup program” on
page 60.
2. Verify if the optical drive or the disc has problems.
See “Optical drive problems” on page 161.
Optical drive problems
Follow the suggested actions for the corresponding symptom in the order in which they are listed until the
problem is solved. If none of these actions solve the problem, see “Troubleshooting procedure” on page 159
for the subsequent steps you should check after using the information in this topic. If the problem still cannot
be solved, seek technical assistance. See Chapter 8 “Getting information, help, and service” on page 165.
Notes:
• If you are instructed to remove, install, or replace any CRUs, refer to the related procedure in Chapter 6
“Installing, removing, or replacing hardware” on page 67.
• If an action step is preceded by “(Trained service technician only),” this action step is reserved for a trained
service technician and must be performed only by a trained service technician.
Action
Symptom
The optical drive is not recognized.
1. Ensure that:
• The related cables and connectors are not
damaged and the connector pins are not bent.
• The optical drive is securely connected to the
correct SATA connector on the system board and
the SATA connector is enabled in the Setup Utility
program. See “Using the Setup Utility program”
on page 51.
• All cables and jumpers (if any) are installed
correctly.
• The correct device driver is installed for the optical
drive.
2. Run any optical drive diagnostic programs if you
have.
3. Reinstall the optical drive and reconnect cables.
Chapter 7. Troubleshooting and diagnostics
161
Action
Symptom
4. Replace the signal cable for the optical drive.
5. Replace the power cable for the optical drive.
6. Replace the power cable for the backplane.
7. Replace the optical drive.
8. Replace the backplane.
9. (Trained service technician only) Replace the system
board.
A disc is not working correctly.
1. Ensure that the disc is in the optical drive with the
shiny side facing down.
2. Ensure that the disc surface is clean and not
scratched.
3. Check the disc or package for regional coding. You
might need to purchase a disc with coding for the
region where you are using the product.
4. Restart the disc player program.
5. Restart the server.
6. Run any optical drive diagnostic programs if you
have.
7. Reinstall the optical drive and reconnect cables.
8. Replace the signal cable for the optical drive.
9. Replace the optical drive.
Hard disk drive problems
Follow the suggested actions for the corresponding symptom in the order in which they are listed until the
problem is solved. If none of these actions solve the problem, see “Troubleshooting procedure” on page 159
for the subsequent steps you should check after using the information in this topic. If the problem still cannot
be solved, seek technical assistance. See Chapter 8 “Getting information, help, and service” on page 165.
Notes:
• If you are instructed to remove, install, or replace any CRUs, refer to the related procedure in Chapter 6
“Installing, removing, or replacing hardware” on page 67.
• The status LEDs on each hot-swap hard disk drive help you easily identify a problem. See “Hot-swap
hard-disk-drive status LEDs” on page 30.
Action
Symptom
A newly installed hot-swap hard disk drive is not
recognized.
1. Ensure that the drive is installed into the correct drive
bay.
2. Restart the server.
3. Remove the drive from the bay, wait 45 seconds,
and reinsert the drive into the bay, making sure that
the drive connects to the hot-swap hard-disk-drive
backplane.
4. Run any diagnostic programs to test the hard disk
drive if you have.
5. Ensure that the hot-swap hard-disk-drive backplane
is correctly seated. When it is correctly seated,
the drive assemblies correctly connect to the
162
ThinkServer RD540 User Guide and Hardware Maintenance Manual
Action
Symptom
backplane without bowing or causing movement of
the backplane.
6. Ensure that the cable connection is correct. See
“Mini-SAS to mini-SAS signal cable connections” on
page 37.
7. Reconnect the backplane power cable and repeat
step 1 through step 4.
8. Reconnect the backplane signal cable and repeat
step 1 through step 4.
9. If you suspect a problem with the backplane signal
cable or the backplane:
a. Replace the affected backplane signal cable.
b. Replace the affected backplane.
Multiple hard disk drives fail.
1. Ensure that the cable connection is correct. See
“Mini-SAS to mini-SAS signal cable connections” on
page 37.
2. Reconnect the power cables.
3. Reconnect the signal cables.
4. Replace the affected signal cables.
5. If you suspect a problem with the backplane, replace
the affected backplane.
Memory module problems
Follow the suggested actions for the corresponding symptom in the order in which they are listed until the
problem is solved. If none of these actions solve the problem, see “Troubleshooting procedure” on page 159
for the subsequent steps you should check after using the information in this topic. If the problem still cannot
be solved, seek technical assistance. See Chapter 8 “Getting information, help, and service” on page 165.
Notes:
• If you are instructed to remove, install, or replace any CRUs, refer to the related procedure in Chapter 6
“Installing, removing, or replacing hardware” on page 67.
• If an action step is preceded by “(Trained service technician only),” this action step is reserved for a trained
service technician and must be performed only by a trained service technician.
Action
Symptom
The amount of system memory that is displayed is less
than the total capacity of the installed physical memory
modules and you suspect a memory module problem.
1. Ensure that:
• All memory modules are the correct type
supported by the server. See “Memory module
installation rules” on page 75.
• You followed the memory module installation
rules. See “Memory module installation rules” on
page 75.
• All memory modules are seated correctly and
securely.
• The system firmware is up-to-date.
2. Reinstall the memory modules.
3. Replace the suspect memory modules.
Chapter 7. Troubleshooting and diagnostics
163
Action
Symptom
4. (Trained service technician only) Replace the system
board.
Keyboard, mouse, and USB device problems
Follow the suggested actions for the corresponding symptom in the order in which they are listed until the
problem is solved. If none of these actions solve the problem, see “Troubleshooting procedure” on page 159
for the subsequent steps you should check after using the information in this topic.
Action
Symptom
All or some keys on the keyboard do not work.
1. Ensure that:
• The USB keyboard cable is securely connected
to a USB connector on the server. If the USB
keyboard is connected to a USB hub, disconnect
the keyboard from the hub and connect it directly
to the server.
• No keys are stuck.
• The USB controller is enabled in the Setup Utility
program. See “Using the Setup Utility program”
on page 51.
2. Restart the server.
3. Replace the keyboard.
The mouse or pointing device does not work.
1. Ensure that:
• The mouse or pointing device cable is securely
connected to the server. If the USB mouse or
pointing device is connected to a USB hub,
disconnect the mouse or pointing device from the
hub and connect it directly to the server.
• The mouse or pointing device is clean and no dust
accumulates.
• The device drivers are installed correctly.
• The USB controller is enabled in the Setup Utility
program. See “Using the Setup Utility program”
on page 51.
2. Restart the server.
3. Replace the mouse or pointing device.
A USB device does not work.
1. Ensure that:
• The USB cable is securely connected to the server.
If the USB device is connected to a USB hub,
disconnect the device from the hub and connect
it directly to the server.
• The device drivers are installed correctly.
• The USB controller is enabled in the Setup Utility
program. See “Using the Setup Utility program”
on page 51.
2. Restart the server.
3. Replace the USB device.
164
ThinkServer RD540 User Guide and Hardware Maintenance Manual
Chapter 8. Getting information, help, and service
This chapter contains information about help, service, and technical assistance for products manufactured
by Lenovo and where to go for additional information about Lenovo and Lenovo products.
Information resources
You can use the information in this topic to access useful resources relating to your needs when using
the product.
Using the documentation
Information about your Lenovo system and installed software, if any, or optional devices is available in the
documentation that comes with the product. The documentation can include printed documents, online
documents, readme files, and help files. Most of the documentation for your server is on the documentation
DVD provided with your server. Refer to the troubleshooting information for instructions on how to diagnose
problems and do basic troubleshooting. The troubleshooting and diagnostics information might tell you that
you need additional or updated device drivers or other software. Lenovo maintains pages on the World Wide
Web where you can get the latest technical information and download documentation or device drivers and
updates. To access the Lenovo Support Web site, go to:
http://www.lenovo.com/support
For more information about your server documentation, see “Server documentation” on page 2.
If you suspect a software problem, refer to the documentation, including readme files and online help, that
comes with the operating system or software program.
ThinkServer Web site
The ThinkServer Web site provides up-to-date information and services to help you buy, use, upgrade, and
maintain your server. You also can do the following by visiting the ThinkServer Web site at:
http://www.lenovo.com/thinkserver
• Shop for servers as well as upgrades and accessories for your server.
• Purchase additional services and software.
• Purchase upgrades and extended hardware repair services.
• Access the Lenovo Limited Warranty (LLW).
• Access the online manuals for your products.
• Access troubleshooting and support information for your server model and other supported products.
• Download the latest device drivers and software updates for your server model.
• Find the service and support phone numbers for your country or region.
• Find a Service Provider located near you.
Lenovo Support Web site
Technical support information is available on the Lenovo Support Web site at:
http://www.lenovo.com/support
This Web site is updated with the latest support information such as the following:
• Drivers and software
© Copyright Lenovo 2013
165
• Diagnostic solutions
• Product and service warranty
• Product and parts details
• User guides and manuals
• Knowledge base and frequently asked questions
Help and service
This topic contains information about obtaining help and service.
Before you call
Before you call, do the following to try to solve the problem by yourself:
• Check all cables to ensure that they are connected.
• Check the power switches to ensure that the system and optional devices are turned on.
• Use the troubleshooting information in your system documentation on the documentation DVD that
comes with your product.
• Check for the updated information, new device drivers, and hints and tips on the Lenovo Support Web
site at:
http://www.lenovo.com/support
• Download the diagnostic program from the Lenovo Web site, and then run it. See “Using a diagnostic
program” on page 160.
If possible, be at your product when you call. Have the following information available:
• Machine type and model
• Serial numbers of your Lenovo hardware products
• Description of the problem
• Exact wording of any error messages
• Hardware and software configuration information
Calling for service
During the warranty period, you can get help and information by telephone through the Customer Support
Center.
The following services are available during the warranty period:
• Problem determination - Trained service personnel are available to assist you with determining a
hardware problem and deciding what action is necessary to fix the problem.
• Hardware repair - If the problem is caused by hardware under warranty, trained service personnel are
available to provide the applicable level of service.
• Engineering Change management - There might be changes that are required after a product has
been sold. Lenovo or your reseller will make selected Engineering Changes (ECs) that apply to your
hardware available.
166
ThinkServer RD540 User Guide and Hardware Maintenance Manual
The warranty does not cover the following:
• Replacement or use of parts not manufactured for or by Lenovo or non-warranted Lenovo parts
• Identification of software problem sources
• Configuration of the Unified Extensible Firmware Interface (UEFI) BIOS as part of an installation or upgrade
• Changes, modifications, or upgrades to device drivers
• Installation and maintenance of network operating systems (NOS)
• Installation and maintenance of application programs
For the warranty type and duration for your product, refer to the Warranty and Support Information on
the documentation DVD that comes with your server. You must retain your proof of purchase to obtain
warranty service.
For warranty service, consult the worldwide Lenovo Support telephone list. Telephone numbers are subject
to change without notice. The most up-to-date telephone list for Lenovo Support is always available on the
Web site at http://www.lenovo.com/support/phone. If the telephone number for your country or region is not
listed, contact your Lenovo reseller or Lenovo marketing representative.
Using other services
If you travel with a Lenovo notebook computer or relocate your computer to a country where your desktop,
notebook, or server machine type is sold, your computer might be eligible for International Warranty Service,
which automatically entitles you to obtain warranty service throughout the warranty period. Service will be
performed by service providers authorized to perform warranty service.
Service methods and procedures vary by country, and some services might not be available in all countries.
International Warranty Service is delivered through the method of service (such as depot, carry-in, or
on-site service) that is provided in the servicing country. Service centers in certain countries might not be
able to service all models of a particular machine type. In some countries, fees and restrictions might
apply at the time of service.
To determine whether your computer is eligible for International Warranty Service and to view a list of the
countries where service is available, go to http://www.lenovo.com/support, click Warranty, and follow
the instructions on the screen.
For technical assistance with the installation of or questions related to Service Packs for
your installed Windows product, refer to the Microsoft Product Support Services Web site at
http://support.microsoft.com/directory or you can contact the Customer Support Center. Some fees might
apply.
Purchasing additional services
During and after the warranty period, you can purchase additional services, such as support for hardware,
operating systems, and application programs; network setup and configuration services; upgraded or
extended hardware repair services; and custom installation services. Service availability and service names
might vary by country or region. For more information about these services, go to the Lenovo Web site at:
http://www.lenovo.com
Chapter 8. Getting information, help, and service
167
168
ThinkServer RD540 User Guide and Hardware Maintenance Manual
Appendix A. Notices
Lenovo may not offer the products, services, or features discussed in this document in all countries. Consult
your local Lenovo representative for information on the products and services currently available in your
area. Any reference to a Lenovo product, program, or service is not intended to state or imply that only that
Lenovo product, program, or service may be used. Any functionally equivalent product, program, or service
that does not infringe any Lenovo intellectual property right may be used instead. However, it is the user's
responsibility to evaluate and verify the operation of any other product, program, or service.
Lenovo may have patents or pending patent applications covering subject matter described in this
document. The furnishing of this document does not give you any license to these patents. You can send
license inquiries, in writing, to:
Lenovo (United States), Inc.
1009 Think Place - Building One
Morrisville, NC 27560
U.S.A.
Attention: Lenovo Director of Licensing
LENOVO PROVIDES THIS PUBLICATION “AS IS” WITHOUT WARRANTY OF ANY KIND, EITHER EXPRESS
OR IMPLIED, INCLUDING, BUT NOT LIMITED TO, THE IMPLIED WARRANTIES OF NON-INFRINGEMENT,
MERCHANTABILITY OR FITNESS FOR A PARTICULAR PURPOSE. Some jurisdictions do not allow
disclaimer of express or implied warranties in certain transactions, therefore, this statement may not apply
to you.
This information could include technical inaccuracies or typographical errors. Changes are periodically
made to the information herein; these changes will be incorporated in new editions of the publication.
Lenovo may make improvements and/or changes in the product(s) and/or the program(s) described in this
publication at any time without notice.
The products described in this document are not intended for use in implantation or other life support
applications where malfunction may result in injury or death to persons. The information contained in this
document does not affect or change Lenovo product specifications or warranties. Nothing in this document
shall operate as an express or implied license or indemnity under the intellectual property rights of Lenovo
or third parties. All information contained in this document was obtained in specific environments and is
presented as an illustration. The result obtained in other operating environments may vary.
Lenovo may use or distribute any of the information you supply in any way it believes appropriate without
incurring any obligation to you.
Any references in this publication to non-Lenovo Web sites are provided for convenience only and do not in
any manner serve as an endorsement of those Web sites. The materials at those Web sites are not part of
the materials for this Lenovo product, and use of those Web sites is at your own risk.
Any performance data contained herein was determined in a controlled environment. Therefore, the result
obtained in other operating environments may vary significantly. Some measurements may have been
made on development-level systems and there is no guarantee that these measurements will be the same
on generally available systems. Furthermore, some measurements may have been estimated through
extrapolation. Actual results may vary. Users of this document should verify the applicable data for their
specific environment.
© Copyright Lenovo 2013
169
Trademarks
Lenovo, the Lenovo logo, and ThinkServer are trademarks of Lenovo in the United States, other countries, or
both.
Intel and Intel Xeon are trademarks of Intel Corporation in the United States, other countries, or both.
Internet Explorer, Microsoft, Windows, and Windows Server are trademarks of the Microsoft group of
companies.
Linux is a registered trademark of Linus Torvalds.
Other company, product, or service names may be trademarks or service marks of others.
Important notes
Processor speed indicates the internal clock speed of the microprocessor; other factors also affect
application performance.
CD or DVD drive speed is the variable read rate. Actual speeds vary and are often less than the possible
maximum.
When referring to processor storage, real and virtual storage, or channel volume, KB stands for 1 024 bytes,
MB stands for 1 048 576 bytes, and GB stands for 1 073 741 824 bytes.
When referring to hard disk drive capacity or communications volume, MB stands for 1 000 000 bytes,
and GB stands for 1 000 000 000 bytes. Total user-accessible capacity can vary depending on operating
environments.
Maximum internal hard disk drive capacities assume the replacement of any standard hard disk drives
and population of all hard-disk-drive bays with the largest currently supported drives that are available
from Lenovo.
Maximum memory might require replacement of the standard memory with an optional memory module.
Lenovo makes no representations or warranties with respect to non-Lenovo products. Support (if any) for
the non-Lenovo products is provided by the third party, not Lenovo.
Some software might differ from its retail version (if available) and might not include user manuals or all
program functionality.
Polyvinyl Chloride (PVC) cable and cord notice
WARNING: Handling the cord on this product or cords associated with accessories sold with this product
will expose you to lead, a chemical known to the State of California to cause cancer, and birth defects or
other reproductive harm. Wash hands after handling.
Recycling information
Lenovo encourages owners of information technology (IT) equipment to responsibly recycle their equipment
when it is no longer needed. Lenovo offers a variety of programs and services to assist equipment owners in
recycling their IT products. For information on recycling Lenovo products, go to:
http://www.lenovo.com/recycling
170
ThinkServer RD540 User Guide and Hardware Maintenance Manual
Battery return program
This product may contain a lithium or lithium ion battery. Consult your user manual or service manual for
specific battery information. The battery must be recycled or disposed of properly. Recycling facilities may
not be available in your area. For information on disposal or batteries outside the United States, go to
http://www.lenovo.com/recycling or contact your local waste disposal facility.
Battery recycling information for the United States and Canada
Battery recycling information for the European Union
Notice: This mark applies only to countries within the European Union (EU).
Batteries or packaging for batteries are labeled in accordance with European Directive 2006/66/EC
concerning batteries and accumulators and waste batteries and accumulators. The Directive determines the
framework for the return and recycling of used batteries and accumulators as applicable throughout the
European Union. This label is applied to various batteries to indicate that the battery is not to be thrown
away, but rather reclaimed upon end of life per this Directive.
In accordance with the European Directive 2006/66/EC, batteries and accumulators are labeled to indicate
that they are to be collected separately and recycled at end of life. The label on the battery may also
include a chemical symbol for the metal concerned in the battery (Pb for lead, Hg for mercury, and Cd for
cadmium). Users of batteries and accumulators must not dispose of batteries and accumulators as unsorted
municipal waste, but use the collection framework available to customers for the return, recycling, and
treatment of batteries and accumulators. Customer participation is important to minimize any potential
effects of batteries and accumulators on the environment and human health due to the potential presence of
hazardous substances. For proper collection and treatment, go to:
http://www.lenovo.com/lenovo/environment
Requirement for batteries containing perchlorate
The following statement applies to users in the state of California, U.S.A.
California Perchlorate Information:
Products containing CR (manganese dioxide) lithium coin cell batteries may contain perchlorate.
Appendix A. Notices
171
Perchlorate Material - special handling may apply, See
http://www.dtsc.ca.gov/hazardouswaste/perchlorate
Particulate contamination
Attention: Airborne particulates (including metal flakes or particles) and reactive gases acting alone or in
combination with other environmental factors such as humidity or temperature might pose a risk to the
server that is described in this document. Risks that are posed by the presence of excessive particulate
levels or concentrations of harmful gases include damage that might cause the server to malfunction or
cease functioning altogether. This specification sets forth limits for particulates and gases that are intended
to avoid such damage. The limits must not be viewed or used as definitive limits, because numerous
other factors, such as temperature or moisture content of the air, can influence the impact of particulates
or environmental corrosives and gaseous contaminant transfer. In the absence of specific limits that are
set forth in this document, you must implement practices that maintain particulate and gas levels that are
consistent with the protection of human health and safety. If Lenovo determines that the levels of particulates
or gases in your environment have caused damage to the server, Lenovo may condition provision of repair
or replacement of servers or parts on implementation of appropriate remedial measures to mitigate such
environmental contamination. Implementation of such remedial measures is a customer responsibility.
Table 5. Limits for particulates and gases
Contaminant
Limits
Particulate
• The room air must be continuously filtered with 40% atmospheric dust spot efficiency
(MERV 9) according to ASHRAE Standard 52.21.
• Air that enters a data center must be filtered to 99.97% efficiency or greater, using
high-efficiency particulate air (HEPA) filters that meet MIL-STD-282.
• The deliquescent relative humidity of the particulate contamination must be more than 60%2.
• The room must be free of conductive contamination such as zinc whiskers.
Gaseous
• Copper: Class G1 as per ANSI/ISA 71.04-19853
• Silver: Corrosion rate of less than 300 Å in 30 days
1 ASHRAE 52.2-2008 - Method of Testing General Ventilation Air-Cleaning Devices for Removal Efficiency by Particle
Size. Atlanta: American Society of Heating, Refrigerating and Air-Conditioning Engineers, Inc.
2
The deliquescent relative humidity of particulate contamination is the relative humidity at which the dust absorbs
enough water to become wet and promote ionic conduction.
3
ANSI/ISA-71.04-1985. Environmental conditions for process measurement and control systems: Airborne
contaminants. Instrument Society of America, Research Triangle Park, North Carolina, U.S.A.
Important WEEE information
The WEEE marking on Lenovo products applies to countries with WEEE and e-waste regulations (for example,
European Directive 2002/96/EC, India E-Waste Management & Handling Rules, 2011). Appliances are
labeled in accordance with local regulations concerning waste electrical and electronic equipment (WEEE).
These regulations determine the framework for the return and recycling of used appliances as applicable
172
ThinkServer RD540 User Guide and Hardware Maintenance Manual
within each geography. This label is applied to various products to indicate that the product is not to be
thrown away, but rather put in the established collective systems for reclaiming these end of life products.
Users of electrical and electronic equipment (EEE) with the WEEE marking must not dispose of end of
life EEE as unsorted municipal waste, but use the collection framework available to them for the return,
recycle, and recovery of WEEE and to minimize any potential effects of EEE on the environment and
human health due to the presence of hazardous substances. For additional WEEE information go to:
http://www.lenovo.com/recycling
European Union RoHS
Lenovo products sold in the European Union, on or after 3 January 2013 meet the requirements of Directive
2011/65/EU on the restriction of the use of certain hazardous substances in electrical and electronic
equipment (“RoHS recast” or “RoHS 2”).
For more information about Lenovo progress on RoHS, go to:
http://www.lenovo.com/social_responsibility/us/en/RoHS_Communication.pdf
German Ordinance for Work gloss statement
The product is not suitable for use with visual display work place devices according to clause 2 of the
German Ordinance for Work with Visual Display Units.
Das Produkt ist nicht für den Einsatz an Bildschirmarbeitsplätzen im Sinne § 2 der
Bildschirmarbeitsverordnung geeignet.
Export classification notice
This product is subject to the United States Export Administration Regulations (EAR) and has an Export
Classification Control Number (ECCN) of 4A994.b. It can be re-exported except to any of the embargoed
countries in the EAR E1 country list.
Electronic emission notices
The following information refers to the Lenovo ThinkServer machine types 70AR, 70AS, 70AT, and 70AU.
Federal Communications Commission (FCC) Statement
This equipment has been tested and found to comply with the limits for a Class A digital device, pursuant
to Part 15 of the FCC Rules. These limits are designed to provide reasonable protection against harmful
interference when the equipment is operated in a commercial environment. This equipment generates, uses,
and can radiate radio frequency energy and, if not installed and used in accordance with the instruction
manual, may cause harmful interference to radio communications. Operation of this equipment in a
residential area is likely to cause harmful interference in which case the user will be required to correct the
interference at his own expense.
Properly shielded and grounded cables and connectors must be used in order to meet FCC emission limits.
Lenovo is not responsible for any radio or television interference caused by using other than specified or
recommended cables and connectors or by unauthorized changes or modifications to this equipment.
Unauthorized changes or modifications could void the user's authority to operate the equipment.
This device complies with Part 15 of the FCC Rules. Operation is subject to the following two conditions: (1)
this device may not cause harmful interference, and (2) this device must accept any interference received,
including interference that may cause undesired operation.
Appendix A. Notices
173
Industry Canada Class A emission compliance statement
This Class A digital apparatus complies with Canadian ICES-003.
Cet appareil numérique de la classe A est conforme à la norme NMB-003 du Canada.
United Kingdom telecommunications safety requirement
Notice to Customers
This apparatus is approved under approval number NS/G/1234/J/100003 for indirect connection to public
telecommunication systems in the United Kingdom.
European Union - Compliance to the Electromagnetic Compatibility Directive
This product is in conformity with the protection requirements of EU Council Directive 2004/108/EC on the
approximation of the laws of the Member States relating to electromagnetic compatibility. Lenovo cannot
accept responsibility for any failure to satisfy the protection requirements resulting from a non-recommended
modification of the product, including the installation of option cards from other manufacturers.
This product has been tested and found to comply with the limits for Class A Information Technology
Equipment according to European Standard EN 55022. The limits for Class A equipment were derived for
commercial and industrial environments to provide reasonable protection against interference with licensed
communication equipment.
Lenovo, Einsteinova 21, 851 01 Bratislava, Slovakia
Warning: This is a Class A product. In a domestic environment this product may cause radio interference
in which case the user may be required to take adequate measures.
German Class A compliance statement
Deutschsprachiger EU Hinweis:
Hinweis für Geräte der Klasse A EU-Richtlinie zur Elektromagnetischen Verträglichkeit
Dieses Produkt entspricht den Schutzanforderungen der EU-Richtlinie 2004/108/EG (früher 89/336/EWG) zur
Angleichung der Rechtsvorschriften über die elektromagnetische Verträglichkeit in den EU-Mitgliedsstaaten
und hält die Grenzwerte der EN 55022 Klasse A ein.
Um dieses sicherzustellen, sind die Geräte wie in den Handbüchern beschrieben zu installieren und zu
betreiben. Des Weiteren dürfen auch nur von der Lenovo empfohlene Kabel angeschlossen werden.
Lenovo übernimmt keine Verantwortung für die Einhaltung der Schutzanforderungen, wenn das Produkt
ohne Zustimmung der Lenovo verändert bzw. wenn Erweiterungskomponenten von Fremdherstellern ohne
Empfehlung der Lenovo gesteckt/eingebaut werden.
Deutschland:
Einhaltung des Gesetzes über die elektromagnetische Verträglichkeit von Betriebsmittein
Dieses Produkt entspricht dem „Gesetz über die elektromagnetische Verträglichkeit von Betriebsmitteln“
EMVG (früher „Gesetz über die elektromagnetische Verträglichkeit von Geräten“). Dies ist die Umsetzung der
EU-Richtlinie 2004/108/EG (früher 89/336/EWG) in der Bundesrepublik Deutschland.
174
ThinkServer RD540 User Guide and Hardware Maintenance Manual
Zulassungsbescheinigung laut dem Deutschen Gesetz über die elektromagnetische Verträglichkeit
von Betriebsmitteln, EMVG vom 20. Juli 2007 (früher Gesetz über die elektromagnetische
Verträglichkeit von Geräten), bzw. der EMV EG Richtlinie 2004/108/EC (früher 89/336/EWG), für
Geräte der Klasse A.
Dieses Gerät ist berechtigt, in Übereinstimmung mit dem Deutschen EMVG das EG-Konformitätszeichen
- CE - zu führen. Verantwortlich für die Konformitätserklärung nach Paragraf 5 des EMVG ist die Lenovo
(Deutschland) GmbH, Gropiusplatz 10, D-70563 Stuttgart.
Informationen in Hinsicht EMVG Paragraf 4 Abs. (1) 4:
Das Gerät erfüllt die Schutzanforderungen nach EN 55024 und EN 55022 Klasse A.
Nach der EN 55022: „Dies ist eine Einrichtung der Klasse A. Diese Einrichtung kann im Wohnbereich
Funkstörungen verursachen; in diesem Fall kann vom Betreiber verlangt werden, angemessene Maßnahmen
durchzuführen und dafür aufzukommen.“
Nach dem EMVG: „Geräte dürfen an Orten, für die sie nicht ausreichend entstört sind, nur mit besonderer
Genehmigung des Bundesministers für Post und Telekommunikation oder des Bundesamtes für Post und
Telekommunikation betrieben werden. Die Genehmigung wird erteilt, wenn keine elektromagnetischen
Störungen zu erwarten sind.“ (Auszug aus dem EMVG, Paragraph 3, Abs. 4). Dieses Genehmigungsverfahren
ist nach Paragraph 9 EMVG in Verbindung mit der entsprechenden Kostenverordnung (Amtsblatt 14/93)
kostenpflichtig.
Anmerkung: Um die Einhaltung des EMVG sicherzustellen sind die Geräte, wie in den Handbüchern
angegeben, zu installieren und zu betreiben.
Eurasian compliance mark
ENERGY STAR model information
ENERGY STAR® is a joint program of the U.S. Environmental Protection Agency and the U.S. Department
of Energy aimed at saving money and protecting the environment through energy efficient products and
practices.
Lenovo is proud to offer our customers products with an ENERGY STAR compliant designation. Some
models of the following machine types have been designed and tested to conform to the ENERGY STAR
program requirement for computer servers at the time of manufacture: 70AR, 70AS, 70AT, and 70AU.
For more information about ENERGY STAR ratings for Lenovo servers, go to http://www.lenovo.com.
By using ENERGY STAR compliant products and taking advantage of the power-management features of
your server, you reduce the consumption of electricity. Reduced electrical consumption contributes to
potential financial savings, a cleaner environment, and the reduction of greenhouse gas emissions.
Appendix A. Notices
175
For more information about ENERGY STAR, go to:
http://www.energystar.gov
Lenovo encourages you to make efficient use of energy an integral part of your day-to-day operations. To
help in this endeavor, set the following power-management features to take effect when your servers
have been used:
• Processor- or core-reduced power states
• Variable speed fan control based on power or thermal readings
• Low power memory states
• Liquid cooling capability
176
ThinkServer RD540 User Guide and Hardware Maintenance Manual
Index
2.5-inch hard disk drive backplane
locations 36
2.5-inch hard-disk-drive backplane
locations 35
3.5-inch hard-disk-drive backplane
locations 34
documentation
using 165
E
BIOS and TMM update utilities
software 12
Boot Manager menu
Setup Utility program 54
Boot Options menu
Setup Utility program 54
EasyUpdate Firmware Updater program
using 65
error LEDs
system fan 48
Ethernet card
installing 81
removing 83
Ethernet connectivity
features 9
Ethernet connector 0
Setup Utility program 57
Ethernet controllers
configuring 65
Ethernet status
LED 24
exiting
Setup Utility program 57
expansion slots
features 8
export classification notice 173
C
F
cable connection 37
configuring
Ethernet controllers 65
server 51
configuring RAID
advanced SATA or SAS hardware RAID 64
using the ThinkServer EasyStartup program 64
configuring the server 51
considerations, password 55
contamination, particulate and gaseous 172
cooling shroud
reinstalling 74
removing 73
CRU
completing the replacement 154
features 7
ThinkServer EasyStartup program
firmware
updating 65
flashing
the BIOS 58
front panel
LED 18
locations 18
front panel board
replacing 140
front view of the server
locations 14
A
about RAID 63
Advanced menu
Setup Utility program 52
advanced SATA or SAS hardware RAID
configuring 64
ambient temperature limit
LED 22
B
D
devices, handling static-sensitive 68
diagnostic program
troubleshooting and diagnostics 160
Diagnostic programs
software 12
DIMM
installation rules 75
installing 79
removing 80
© Copyright Lenovo 2013
60
G
gaseous contamination 172
German gloss statement 173
getting help 165
getting information 165
getting service 165
guidelines 67
H
hardware
installing
67
177
removing 67
replacing 67
heat sink
installing or replacing 104
help, getting 165
hot-swap hard disk drive
installing
115
replacing 115
hot-swap hard-disk-drive backplane
locations 33
replacing 132
hot-swap hard-disk-drive status
LED 30
hot-swap hard-disk-drive status LEDs
locations 30
hot-swap redundant power supply
installing 100
replacing 102
hot-swap redundant power supply status
LED 23
I
ID button
LED 19
IDM
replace 136
IDM panel
LED 21
locations 21
information, getting 165
Input/Output (I/O)
features 8
installation rules
DIMM 75
memory module 75
installing
DIMM 79
Ethernet card 81
hardware 67
hot-swap hard disk drive 115
hot-swap redundant power supply 100
memory module 79
microprocessor 107
server cover 154
solid-state drive 119–120
ThinkServer Trusted Platform Module 97
TMM Premium 94
TR 500 Key 88
TR 700 Battery 91
installing or replacing
heat sink 104
optical drive 126
Intelligent Diagnostics Module
locations 21
interface
Setup Utility program 52
internal drives
features 8
178
L
LED
ambient temperature limit 22
Ethernet status 24
front panel 18
hot-swap hard-disk-drive status 30
hot-swap redundant power supply status 23
ID button 19
IDM 21
memory module status 22
microprocessor status 22
NIC status 20
power status 19
power supply error 21
LED 21
system board 46
system fan error 22
system status 20
ThinkServer Management Module status 47
Lenovo ThinkServer EasyManage
software 12
Lenovo ThinkServer EasyManage program
using 66
locations 13
low-profile
PCI Express card slot 23
M
machine type and model label
locations 13
Main menu
Setup Utility program 52
memory
features 8
memory module
installation rules 75
installing 79
removing 80
memory module installation
guidelines 75
memory module status
LED 22
microprocessor
features 8
installing 107
replacing 111
microprocessor status
LED 22
N
NIC status
LED 20
O
optical drive
installing or replacing
option
ThinkServer RD540 User Guide and Hardware Maintenance Manual
126
completing the replacement
154
P
particulate contamination 172
parts replacement, completing 154
password
considerations 55
setting, changing, deleting 55
Setup Utility program 55
PCI Express card slot
low-profile 23
power status
LED 19
power supply
features 8
precautions
guidelines 67
R
RAID
configuring 62
introduction 63
RAID card
locations 30
replacing 85
RAID configuration utilities
software 12
rear view of the server
locations 22
recovering
the BIOS 59
reinstalling
cooling shroud 74
reliability, availability, and serviceability
features 9
remote management
software 12
removing
cooling shroud 73
DIMM 80
Ethernet card 83
hardware 67
memory module 80
server cover 69
ThinkServer Trusted Platform Module 98
TMM Premium 95
TR 500 Key
89
TR 700 Battery 92
replace
IDM 136
replacing
front panel board
140
hardware 67
hot-swap hard disk drive 115
hot-swap hard-disk-drive backplane 132
hot-swap redundant power supply 102
microprocessor 111
RAID card 85
© Copyright Lenovo 2013
riser card assembly 1 142
solid-state drive 119, 124
system board 146
system board battery 144
system fan 138
ThinkServer RAID Super Capacitor Module
riser card assembly 1
replacing 142
road map
server setup 5
129
S
Save & Exit menu
Setup Utility program 54
Security menu
Setup Utility program 53
serial number label
locations 13
server components
locations 25
server configuration
updating 157
server cover
installing 154
removing 69
server documentation 2
Server Management menu
Setup Utility program 53
server package 7
server setup
road map 5
service, getting 165
setting, changing, deleting
password 55
Setup Utility program
Ethernet connector 0 57
exiting 57
interface 52
password 55
starting 51
TPM 56
using 51
slim optical drive
locations 15, 18
software 11
solid-state drive
installing
119–120
replacing 119, 124
specifications 11
starting
Setup Utility program 51
ThinkServer EasyStartup program 60
startup device
selecting 56
Setup Utility program 56
static-sensitive devices
guidelines 68
static-sensitive devices, handling 68
system board 38
179
LED 46
replacing 146
system board battery
replacing 144
system board components
locations 38
system board jumpers and switches
locations 42
system board LEDs
locations 46
system date
setting 54
system event log
troubleshooting and diagnostics 160
system fan
replacing 138
system fan error
LED 22
system fan error LEDs
LED 48
system fans
features 8
system reliability
guidelines 69
system status
LED 20
system time
setting 54
T
the BIOS
flashing 58
recovering 59
updating 58
updating or recovering 58
ThinkServer EasyStartup
software 11
ThinkServer EasyStartup program
features 60
starting 60
using 59
Windows operating system 62
ThinkServer EasyUpdate Firmware Updater
software 12
ThinkServer Management Module status
LED 47
ThinkServer RAID Super Capacitor Module
replacing 129
ThinkServer Smart Grid Technology
software 12
ThinkServer Trusted Platform Module
installing 97
removing 98
ThinkServer Web address 1
TMM Premium
installing 94
removing 95
TPM
Setup Utility program 56
180
TR 500 Key
installing 88
removing 89
TR 700 Battery
installing 91
removing 92
troubleshooting and diagnostics
diagnostic program 160
hard disk drive problems 162
keyboard, mouse, and USB device problems 164
memory module problems 163
optical drive problems 161
status and diagnostic LEDs 159
system event log 160
ThinkServer EasyStartup program problems 160
troubleshooting procedure 159
turning off the server 49
turning on the server 49
TÜV gloss statement 173
U
updating
firmware 65
server configuration 157
the BIOS 58
updating or recovering
the BIOS 58
using
documentation 165
EasyUpdate Firmware Updater program 65
Lenovo ThinkServer EasyManage program 66
passwords 55
Setup Utility program 51
ThinkServer EasyStartup program 59
V
video subsystem
features 9
viewing information
Setup Utility program
51
W
Web site
compatible options 75–76
working inside the server with the power on
guidelines 69
ThinkServer RD540 User Guide and Hardware Maintenance Manual