Transcript
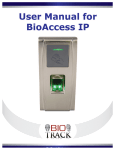
QUICK START GUIDE
For more information about BioAccessIP,
refer to the Downloads section of our website.
BioAccessIP
www.BioTrackSoftware.com
1. TURNING IT ON FOR THE FIRST TIME
When you turn the device on for the first time, you must register a proximity card as Administrator “Management
Card”.You will not be able to do anything else with the device until you do so. Follow the audible voice
instructions to complete this process. The Administrator user will be registered under code number 1.
Warning: Once the Administrator card is configured, you must keep it in a safe place, as you will need it
to perform any administrative tasks, such as adding and erasing users, USB management, etc.
You may only register one card as the device Administrator.
2. SYNCHRONIZING ITS TIME AND DATE
Before you begin to regularly use the device, it is very important to synchronize its time and date. For that
purpose, use the “Device Management-Synchronize Time/Date”option in the Administrator Program’s menu.
For more details, refer to the Administrator Program’s User’s Manual.
3. CREATING NEW USERS
Scan the Administrator card once. The USB port must be free in order to perform this operation.
Follow the audible instructions to register a fingerprint or proximity card. You may register up to ten
fingerprints per user. If you wish to register more than one fingerprint per user, continue with the same
process after registering the previous one.
To finalize the process and save the information, scan the Administrator card.
4. ADDING FINGERPRINTS OR A CARD FOR EXISTING USERS
Scan the Administrator card once. The USB port must be free in order to perform this operation.
If the existing user has a registered proximity card, scan it. If the user has a fingerprint in file, make a print
record on the reader 3 times in a row.
You will immediately hear a voice indicating the existing user’s number.
Follow the audible instructions to record the new fingerprint or proximity card.
To finalize the process and save the information, scan the Administrator card.
5. DAILY VERIFICATION
Users are verified by scanning their finger on the fingerprint reader, or their proximity card, if it has been
registered. A voice message will inform you if the verification process was successful or not.
6. ERASING USERS
Scan the Administrator card 5 times in a row.The USB port must be free in order to perform this operation.
Scan the fingerprint or proximity card of the user you want to erase.
To finalize the process, scan the Administrator card again.
Note: If it is not possible to scan the fingerprint or proximity card of the user to erase, you may do it
through the Administrator program too. For more information, refer to the Administrator Program manual.
7. USB MANAGEMENT
Connect the USB drive into the port on the bottom of the device.
Scan the Administrator card once.
You will hear the following sequence of options (with a five second pause between options). To enter any
of them, scan the Administrator card after the desired option:
Download records: downloads all the records made by users into the USB drive.
Download users: downloads all the users registered on the device into the USB drive.
Upload users: Uploads all users in the USB drive into the device.
Update firmware: Only use this option under the direction of a certified technician.
8. RESETTING DEFAULT OPTIONS
User information and records are not erased with this process. It reestablishes the IP address, device number, etc.
Turn the device on and off by holdingon the anti-dismantling button located on the back of the device.
When the device restarts, release the anti-dismantling button, and wait for 30 seconds.
Briefly press the anti-dismantling 3 times in a row.You will hear a beep each time.