1
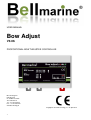
USER MANUAL Bow Adjust V3.06 PROPORTIONAL BOW THRUSTER CONTROLLER IDTechnology BV Nobelweg 26, NL-3899BN Zeewolde The Netherlands Tel.: +31-36-5387270 Fax.: +31-36-5387279 www.idtechnology.nl Copyright © 2012 IDTechnology, V 3.16 April 2012 1 CONTENTS GENERAL INFORMATION ..........................................................................................................................................................................3 1.1 USE OF THIS MANUAL ..................................................................................................................................... 3 1.2 VALIDITY OF THIS MANUAL ............................................................................................................................ 3 1.3 GUARANTEE SPECIFICATION......................................................................................................................... 3 1.4 LIABILITY ........................................................................................................................................................... 3 1.5 IDENTIFICATION LABEL ................................................................................................................................... 3 2 SAFETY GUIDELINES AND MEASURES ....................................................................................................................................4 2.1 WARNINGS AND SYMBOLS ............................................................................................................................. 4 2.2 USE FOR INTENDED PURPOSE...................................................................................................................... 4 2.3 GENERAL SAFETY AND INSTALLATION PRECAUTIONS.............................................................................. 4 2.4 WARNING REGARDING LIFE SUPPORT APPLICATIONS.............................................................................. 4 2.5 WARNING REGARDING THE USE OF BATTERIES ........................................................................................ 5 3 HOW IT WORKS ................................................................................................................................................................................6 3.1 BOW-ADJUST CONTROLLER .......................................................................................................................... 6 3.2 COMPONENTS.................................................................................................................................................. 6 3.3 OPERATIONAL MODES .................................................................................................................................... 6 3.3.1 CONTROLLER IN OFF /SLEEP MODE ............................................................................................ 6 3.3.2 MOTOR CONTROLLER IN ON / NORMAL MODE ........................................................................... 6 3.3.3 MOTOR CONTROLLER IN HOLD MODE ........................................................................................ 7 3.3.4 OPERATING PANEL ......................................................................................................................... 7 3.3.5 MAIN SWITCH AND MAIN FUSE (F1) .............................................................................................. 7 3.3.6 BOW THRUSTER STALL PROTECTION ......................................................................................... 7 4 OPERATION .......................................................................................................................................................................................8 4.1 SWITCHING ON AND OFF ................................................................................................................................ 8 4.2 SWITCHING BETWEEN NORMAL AND HOLD FUNCTION ............................................................................ 8 4.3 USE OF OPERATING PANEL ........................................................................................................................... 8 4.4 USE OF THE JOYSTICK ................................................................................................................................... 8 4.5 DEPARTURE ..................................................................................................................................................... 8 4.6 ARRIVAL ............................................................................................................................................................ 8 5 INSTALLATION .................................................................................................................................................................................9 5.1 BOW-ADJUST CONTROLLER .......................................................................................................................... 9 5.2 OPERATING PANEL ......................................................................................................................................... 9 5.3 WIRING .............................................................................................................................................................. 9 5.3.1 MOTOR CONTROLLER CONNECTIONS ...................................................................................... 10 5.3.2 CONNECTION OF MOTOR DIRECTION CABLE ........................................................................... 10 5.3.3 CONNECTION OF MOTOR CABLES ............................................................................................. 11 5.3.4 CONNECTION OF SIGNAL CABLES UTP ..................................................................................... 11 6 MAINTENANCE ...............................................................................................................................................................................12 6.1 PREVENTIVE MAINTENANCE........................................................................................................................ 12 6.2 MAINTENANCE ............................................................................................................................................... 12 7 TROUBLE SHOOTING ...................................................................................................................................................................13 8 TECHNICAL DATA .........................................................................................................................................................................14 8.1 TECHNICAL SPECIFICATIONS ...................................................................................................................... 14 8.2 SAFETY ........................................................................................................................................................... 14 8.3 ORDERING LIST ............................................................................................................................................. 14 9 EC DECLARATION OF CONFORMITY .......................................................................................................................................15 2 GENERAL INFORMATION 1.1 USE OF THIS MANUAL Copyright 2012 IDTechnology. All rights reserved. Reproduction, transfer, distribution or storage of part or all of the contents in this document in any form without the prior written permission of IDTechnology is prohibited. This manual contains important safety and operating instructions for the safe and effective operation of the Bow Adjust controller. Also maintenance instructions and possible correction of minor malfunctions of the Bow-Adjust controller are included. It is therefore obligatory that every person who works on or with a Bow-Adjust controller is completely familiar with the contents of this manual, and that he/she carefully follows the instructions and important safety instructions contained herein. Installation and maintenance of a Bow-Adjust controller system may only be performed by qualified and authorized personnel, in accordance with regulations and in compliance with the mentioned safety measures. Keep this manual in a safe place! 1.2 VALIDITY OF THIS MANUAL All of the specifications, provisions and instructions contained in this manual apply solely to standard versions of the Bow-Adjust controller delivered by IDTechnology. For other models see other manuals available on our website: www.idtechnology.nl 1.3 GUARANTEE SPECIFICATION IDTechnology guarantees that this unit has been built according to the legally applicable standards and specifications. Should work take place, which is not in accordance with the guidelines, instructions and specifications contained in this user manual, then damage may occur and/or the unit may no longer meet its specifications. All of these matters may mean that the guarantee becomes void. The guarantee is limited to the costs of repair and/or replacement of the product. Costs for installation labor or shipping of the defective parts are not covered by this guarantee. During production and before delivery, all equipment is tested and inspected. The standard warranty period is two years after purchase. See chapter 10 for the EC Declaration of Conformity. 3 1.4 LIABILITY IDTechnology can accept no liability for: Consequential damage due to the use of a BowAdjust controller system; Possible errors in the manuals and their consequences. 1.5 IDENTIFICATION LABEL Fig-1.1 Identification number Figure 1-1: Identification label on the Bow-Adjust Bow Thruster controller The identification labels are found on the Bow-Adjust controller (see Figure 1-1). Important technical information required for services, maintenance and secondary delivery of parts can be derived from the identification label. ATTENTION! Never remove the identification label. 2 SAFETY GUIDELINES AND MEASURES 2.1 WARNINGS AND SYMBOLS The following warning, caution and attention symbols are used in this manual. WARNING! A WARNING refers to possible injury to persons if the user does not (carefully) follow the procedures. CAUTION! A CAUTION sign refers to possible significant damage to the equipment if the user does not (carefully) follow the procedures, restrictions and rules. 2.4 WARNING REGARDING LIFE SUPPORT APPLICATIONS The Bow-adjust is not intended for use in any medical equipment that is intended for use as a component of any life support system unless a specific written agreement pertaining to such intended use is executed between the manufacturer and IDTechnology. Such agreement will require the equipment manufacturer either to contract additional reliability testing of the Bow–Adjust controller and/or to commit to undertake such testing as a part of the manufacturing process. In addition, the manufacturer must agree to indemnify and not hold IDTechnology responsible for any claims arising from the use of the Bow-Adjust in life support equipment. ATTENTION! An ATTENTION sign refers to procedures, circumstances, etc. which deserve extra attention. 2.2 USE FOR INTENDED PURPOSE Bow-Adjust controller may only be used for ship propulsion and according to the installation, operation and maintenance instructions of this manual. 2.3 GENERAL SAFETY AND INSTALLATION PRECAUTIONS Read this manual thoroughly before installing and/or using the electric components; Follow the assembly instructions carefully; Only work with the controller when the drive is switched off. It is important to switch off the power supply of the Bow-Adjust controller with the main switch. Remove the key and keep it with you so that nobody else can turn it back on; Be aware of swimming people next your boat! Be alert to your surroundings; Your bow thruster propeller can hearth people or animals. 4 2.5 WARNING REGARDING THE USE OF BATTERIES Pay attention to the following when working with batteries: Someone should be within hearing range or close enough to come to your aid when you work near a lead-acid (AGM or gel) or Li-Ion battery; Have plenty of fresh water and soap nearby in case battery acid contacts skin, clothing or eyes; Wear complete eye protection and clothing protection. Avoid touching eyes while working near a battery; If battery acid contacts skin or clothing, wash immediately with soap and water. If acid enters the eye, immediately flood the eye with cold running water for at least 10 minutes and get medical attention immediately; NEVER smoke or allow a spark or flame in the vicinity of a battery or engine; Do not short circuit batteries, as this may result in an explosion and fire hazard! Take extra care to reduce the risk of dropping a metal tool onto a battery. It might spark or short-circuit the battery or other electrical part and it may cause an explosion; Remove personal metal items such as rings, bracelets, necklaces, and watches when working with a battery. A battery can produce a short-circuit current that is high enough to weld a ring or anything like it, to metal, causing a severe burn; NEVER charge a frozen battery; Excessive battery discharge and/or high charging voltages can cause serious damage to batteries. Do not exceed the recommended limits of the discharge level of your batteries; If it is necessary to remove a battery, always remove the grounded terminal from the battery first. Make sure all accessories are off, so as not to cause an arc; Be sure that the area around the battery is well ventilated while the battery is being charged. Refer to the recommendations of the battery manufacturer; Batteries are heavy! It may become a projectile if it is involved in an accident! Ensure adequate and secure mounting and always use suitable handling equipment for transportation. 5 3 HOW IT WORKS Figure 2-1: System overview 3.1 BOW-ADJUST CONTROLLER The Bow-Adjust controller is a proportional motor controller to combine with every standard Bow thruster 12 or 24 Volt. The diagram of Fout! Verwijzingsbron niet gevonden. 21 shows a simplified view of this system. The main parts of the system are the battery and controller, supplying the motor with energy. The system is operated by the joystick The joystick sends speed and direction information to the controller which transmits the right amount of power to the motor. The on/off switch is used to turn the system on and off and select its Hold mode. Information about the system and battery voltage, and possible malfunctions is shown on the panel by Led indications. Furthermore, there is a need for a fuse for protection and a main switch for powering on and off. The motor controller is the key element in the system. It manages operation, protection and information. 3.2 COMPONENTS A Bow-Adjust controller comes with the following components: Bow-Adjust motor controller 2 1 x Motor cable 70mm (Red Length 1,0 meter) 2 1 x Motor cable 70mm (Red Length 1,0 meter) 2 1 x Battery cable 70mm (Red Length 1,0 meter) 1 x Relay direction switch cable Length 1,5 meter pre assembled to controller. 1 x Single Operating panel with proportional Joystick and On/Off switch + Led 1 x Connection cable Length 10 meters (controller to display) Please check the contents of the box before you start with the installation. If any of the items is missing, please contact your supplier. 3.3 OPERATIONAL MODES Three different operational modes are possible with the Bow adjust controller: Off-Sleep mode On-Normal mode (proportional propulsion Bow thruster) Hold mode (Fix the adjusted holding speed) 3.3.1 Controller in Off /Sleep mode The Controller is switched off, the controller will switch automatically to this mode every time after 10 minutes if no input signals are given, or push 2 x the On / Off Button • The led in the center of the push button = Off 3.3.2 Motor controller in On / normal mode The Bow-Adjust motor controller serves to control the speed of the Bow thruster motor • The led in the center of the push button = On The microprocessor control allows the motor to be completely and accurately controlled and monitored. Some of these properties are: Maximum speed Maximum modus / Hold modus Maximum power Stall detect Acceleration Deceleration Drive direction : Relay switches These properties and many others have already been set by IDTechnology. They can be adjusted to specific wishes 6 3.3.3 Motor controller in Hold mode It is possible to Hold the adjusted speed of the BowThruster till a max- output of 30%. Move the joystick in the requested direction and speed and push the On/ Off button. • The led in the center of the push button = Blinks Return to the normal mode > move the joystick or push the On/Off Button. • The led in the center of the push button = On The Main Switch is mounted between the fuse and the Bow-Adjust controller in order to disconnect the batteries during emergencies and maintenance. The Main switch and main fuse is not included in the system and needs to be ordered separately. Various versions are available in relation of the rated power of your Bow Thruster and the voltage of your battery package (See figure 3-1) 3.3.4 Operating Panel The control cable will connect the Bow-Adjust controller to the operating panel: Standard Length of the cable is 10 meter. Optional: Double operating version (Bow & Stern Thruster) Double operating position switch board Extra Operating Panel single Extra operating Panel Double ATTENTION! 3.3.5 Main switch and Main fuse (F1) The Main Fuse is mounted between the Battery and the Main Switch. 7 Figure 3-1: Recommended Max. value Main Fuse (F1) ATTENTION! 3.3.6 Bow Thruster Stall protection The Bow-Adjust controller will detect if something is blocking your propeller. If the voltage is low (speed) and the Output is High (Amps) the controller will automatically stop! 4 OPERATION 4.1 SWITCHING ON AND OFF The Bow-Adjust controller is switched on by pressing the On/Off switch. The controller will switch off automatically after 10 minutes if no input signal is received from the joystick. 4.4 USE OF THE JOYSTICK The desired power / speed can be adjusted in Left (Port) or Right (Starboard) direction with the joystick, by pressing it over the full stroke. This happens without intermediate steps. If f releases the joystick it will go automatically to the middle and neutral position. On = 1x pressing the On/Off Switch Off= 2 x pressing the On/Off Switch 4.2 SWITCHING BETWEEN NORMAL AND HOLD FUNCTION It is possible to Hold the adjusted speed of the BowThruster till a max- output of 30%. This speed is Limited to protect the Bow thruster of overheating. Move the joystick in the requested direction and adjust the speed, if the On/Off switch pushed 1 x the controller will hold the requested direction and speed. Return to the Normal mode move the joystick or push the On/Off switch. CAUTION! Never leave your boat , or your position behind the control panel with the controller in the Hold function! 4.3 USE OF OPERATING PANEL After switching on the controller by pressing the green button the green LED will light up. 4.5 DEPARTURE Before departure, always check the system in Normal mode for correct functioning. Follow these steps: 1. Disconnect the shore connection. 2. Turn the main switch on. 3. Check the battery condition. 4. Switch the system to On 5. Check system Port / Starboard 4.6 ARRIVAL Follow these steps after arrival: 1. Check the battery condition. 2. Turn the main switch off. 3. Connect the shore connection and make sure it works properly. 4. Reload the batteries after arrival. Figure 4-1: Bow-Adjust Operating Panel 8 5 INSTALLATION During installation and commissioning of a Bow-Adjust motor controller, the safety instructions of Chapter 2 must be followed. CAUTION! The complete set is fully tested and provided with the correct base settings in the factory, Notes For a proper installation of the Bow adjust controller, take note of the following: Check the Bow thruster and read the manual of this. Check the Voltage of the existing Bow Thruster Check the Bow Thruster Output Voltage adjustment on the Bow-Adjust controller. This must be the same Value. Be assure the Main switch is shut off / or the batteries are disconnected! 5.1 BOW-ADJUST CONTROLLER Note the following when installing the motor controller: The controller must be mounted at a dry, wellprotected and accessible location in the boat near the Bow Thruster. Take note of the length of the motor cables since you can not extend these cables. Never install a controller near (or in the same location) as a so-called wet / open battery; The controller must be able to take in enough cool air, make sure there is adequate ventilation; After the most suitable location in the boat has been determined, the controller can be mounted in place. The motor controller must be mounted by using four bolts, as shown in Figure 5-6. Refer to chapter 8 for the controller dimensions. 5.2 OPERATING PANEL The Operating panel is usually mounted on the control console of the boat. The location of the display is not critical, it is important that (rain) water does not remain on the display and can run off. Upright or slightly slanted installation is recommended. This does not apply to an indoor arrangement. The Operating panel requires a rectangular (width by height) 70 mm by 50 mm. (single version) 70 x 100 mm. (double version). * panel cut-out see Fig Refer to chapter 8 for the display dimensions. Note the following: The joystick and Switch button is IP67 protected.. Position the joystick carefully; The lever has to be able to rotate freely in both directions; Choose the location so that the risk of turning the lever in the unwanted direction is minimal. 5.3 WIRING Each system has the following wiring: Main battery power connections; Control cable, including preassembled connectors; Preassembled motor cables, including clamp connection (+ and -); The power cables for connecting the batteries to the motor controller are not included in the delivery. The connection of the cables is explained in the following sections. Connect the cables in the following order: 1. Connect the motor cables. 2. Connect the signal cables. 3. Connect the battery power cables. See the block diagram in chapter 3 and the wiring diagram in Figure 6-1. Figure 5-1: Bow-Adjust controller mounting 9 Figure 6-1: Wiring diagram The battery, Main Fuse (F1) Main Switch and the Fuse (F2) are not included in the system (See: 3.3.5) and your Bow Thruster manual to define (F2) or Calculate: Motor power kW / Voltage = Fuse Amp 5.3.1 Motor controller connections 5.3.2 Connection of motor direction cable Figure 6-3: Connecting points for motor direction cables. Remove original direction cabling and connect new Bow adjust direction cable direct on relays terminal A & B. Connect the + (Red labeled) on the + position of each Relays! (If the Rotation direction is not right please change both connections (+ and -) from position A / B to B / A A Figure 6-2: Bow –Adjust controller B - - + + Figure 6-2 gives an overview of the connections on the motor controller. The connections include: 1. – Pole for Motor (Bow-Thruster) 2. – Pole Battery 3. + Pole For Motor (Bow –Thruster) 4. + Pole Battery 5. Connection for Operating Panel (See Fig: 6-3) 6. Direction Power cable to Bow Thruster Direction relays (2 x + & - > 12 or 24 Volt) 10 5.3.3 Connection of motor cables Figure 6-4: Connecting points for motor cables (see your Bow Thruster manual) Follow these steps to connect the display, joystick and motor switch to the motor controller: 1. Determine the position of the operating panel. 2. Bring the supplied signal cable to this position. 3. Connect the panel an Bow-Adjust controller with the preassembled plugs. CAUTION! Operating control signals are transferred through this cable. Therefore, never run this cable along power cables or 230 Volt wiring. CAUTION! Motor cables must not be shortened or extended. Secure cables properly; loose cables can eventually cause malfunctions. Connections must be preserved with acidfree Vaseline. 5.3.4 Connection of Signal cables UTP Figure 6-5: Signal cable UTP Straight Twisted pairs (Length: 10 meter) 11 Follow these steps after installation and before switching on the power: 1. Check all connections again. 2. Check the voltage of the battery. 3. Check the Output voltage adjustment of the BowAdjust controller 4. When you are convinced that everything has been connected properly, turn the main switch on. 6 MAINTENANCE 6.1 PREVENTIVE MAINTENANCE Check your whole system regularly on the following points: Check the system for irregularities, such as abnormal noise, vibration and wear. Keep the system always connected (even in winter storage) to the shore connection. This will keep the batteries in 100% condition and prevents self-discharging of batteries. If the system is not going to be used for a long time and a permanent shore connection is not available, charge the batteries for 100% and switch off the Main Switch. 6.2 MAINTENANCE The Bow-Adjust basically does not need any maintenance. However, you should be alert for moisture and salt, which can permanently damage your system. The body of the motor controller can be cleaned with a dry or slightly damp cloth. Never use water or a solvent to clean the motor or motor controller. Check the condition of connections of Power and operating cables on a regular base. Have your whole system checked by a qualified installer every two years. This will help keeping your system in optimal condition. 12 7 TROUBLE SHOOTING In case of a failure, the Bow-adjust Led on the operating panel shows an error code to help you find the cause. If you cannot solve a problem with the aid of the fault finding table below, contact your Dealer or See www.idtechnology.nl • The controller is protected against overheating by decreasing the maximum current when the temperature of the controller rises above 70°C • Also the controller will stop if the battery voltage is under 9 Volt or above 58Volt • The controller will not start if the joystick is not in Neutral position (at rest) The controller will also not start if control wires are loose or wrong connected. It will then display error codes on the LED in the on/off switch: 2 blinks: joystick not in neutral position 3 blinks: -wire from joystick not connected 4 blinks: +wire from joystick not connected 5 blinks: heat sensor 1 not connected 6 blinks: heat sensor 2 not connected 7 blinks: temperature coolblock > 70°C 8 blinks: temperature softstart module > 70°C 9 blinks: battery voltage too high (> 58Volt) 10 blinks: battery voltage > 57V 11 blinks: battery voltage too low (< 9 Volt) 13 8 TECHNICAL DATA 8.1 TECHNICAL SPECIFICATIONS Model Bow-Adjust V3-06 Article number BA-V3-06 Battery Nominal battery voltage DC 12 - 48 V (Auto-adjust) Battery voltage nominal DC 12 - 24 - 48 V (Auto select) Minimal battery capacity 200 Ah Controller Performance Maximum motor drive power 400A 350A (3 min) Motor Motor type 8.2 DC / Series SAFETY The controller is protected against overheating by decreasing the maximum current when the temperature of the controller rises above 70°C Also the controller will stop if the battery voltage is under 9 Volt or above 58Volt The controller will not start if the joystick is not in Neutral position (at rest) The controller will also not start if control wires are loose or wrong connected. It will then display error codes on the LED in the on/off switch: Ordering information 8.3 ORDERING LIST Part number 10060600 10060700 10060800 10061110 10061115 10061120 Description Operating Panel single Operating panel Double 2 x Operating panel Switch box Operating UTP cable 10 meters Operating UTP cable 15 meters Operating UTP cable 20 meters 14 9 EC DECLARATION OF CONFORMITY We, Manufacturer Address IDTechnology B.V. Nobelweg 26 3899BN Zeewolde The Netherlands Declare under our sole responsibility that the products: Bow-Adjust controller V3.06 are in conformity with the provisions of the following EC directives: Electromagnetic Compatibility (EMC) Directive 2004/108/EC Low Voltage Directive 2006/95/EC The following harmonized standards have been applied: EMC Emission standard for industrial environments EN 61000-6-4:2007 EMC Immunity standard for industrial environments EN 61000-6-2:2005 General Safety Information Technology Equipment EN 60950-1:2006 Furthermore we hereby declare that the same products are intended to be incorporated into other machinery, and must not be put into service until the relevant machinery into which it is to be incorporated has been declared in conformity with the essential requirements of the following EC directive: Machinery Directive Zeewolde, 01-05-2012 M.H.M. Schoonen CEO - IDTechnology B.V. 15 2006/42/EC