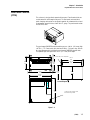
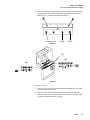
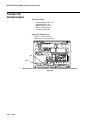
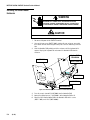
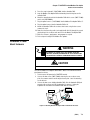
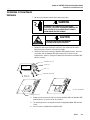
1
Terminal Technical Manual D14957000A (4-02) ©Mettler-Toledo, Inc. 2002 No part of this manual may be reproduced or transmitted in any form or by any means, electronic or mechanical, including photocopying and recording, for any purpose without the express written permission of Mettler-Toledo, Inc. U.S. Government Restricted Rights: This documentation is furnished with Restricted Rights. CUSTOMER FEEDBACK Your feedback is important to us! If you have a problem with this product or its documentation, or a suggestion on how we can serve you better, please fill out and send this form to us. Or, send your feedback via email to: [email protected]. If you are in the United States, you can mail this postpaid form to the address on the reverse side or fax it to (614) 438-4355. If you are outside the United States, please apply the appropriate amount of postage before mailing. Your Name: Organization Name: Address: Phone Number: ( E-mail Address: ) Fax Number: ( Date: METTLER TOLEDO Order Number: Part / Product Name: Part / Model Number: Serial Number: Company Name for Installation: Contact Name: Phone Number: ) Please check the appropriate box to indicate how well this product met your expectations in its intended use? Met and exceeded my needs Met all needs Met most needs Met some needs Did not meet my needs Comments/Questions: DO NOT WRITE IN SPACE BELOW; FOR METTLER TOLEDO USE ONLY Retail Light Industrial Heavy Industrial RESPONSE: Include Root Cause Analysis and Corrective Action Taken. B12745800A Custom FOLD THIS FLAP FIRST NO POSTAGE NECESSARY IF MAILED IN THE UNITED STATES BUSINESS REPLY MAIL FIRST CLASS PERMIT NO. 414 COLUMBUS, OH POSTAGE WILL BE PAID BY ADDRESSEE Mettler-Toledo, Inc. Quality Manager - MTWI P.O. Box 1705 Columbus, OH 43216 USA Please seal with tape. DECLARATION OF CONFORMITY Konformitätserklärung Déclaration de conformité Declaración de Conformidad Conformiteitsverklaring Dichiarazione di conformità We/Wir/Nous/Wij/Noi: Mettler-Toledo, Inc. 1150 Dearborn Drive Worthington, Ohio 43085 USA declare under our sole responsibility that the product, erklären, in alleiniger Verantwortung, daß dieses Produkt, déclarons sous notre seule responsabilité que le produit, declaramos, bajo nuestra sola responsabilidad, que el producto, verklaren onder onze verantwoordelijkheid, dat het product, dichiariamo sotto nostra unica responsabilitá, che il prodotto, Model/Type: Panther to which this declaration relates is in conformity with the following standard(s) or other normative document(s). auf das sich diese Erklärung bezieht, mitder/den folgenden Norm(en) oder Richtlinie(n) übereinstimmt. Auquel se réfère cette déclaration est conforme à la (aux) norme(s) ou au(x) document(s) normatif(s). Al que se refiere esta declaración es conforme a la(s) norma(s) u otro(s) documento(s) normativo(s). Waarnaar deze verklaring verwijst, aan de volende norm(en) of richtlijn(en) beantwoordt. A cui si riferisce questa dichiarazione è conforme alla/e sequente/i norma/e o documento/i normativo/i. in combination with a weighing platform produced by Mettler-Toledo is in conformity with the following directives and standards. Council directive on the harmonization of the laws of the Member states: standards: relating to non-automatic weighing instruments (90/384/EEC) amended by directive (93/68/EEC) EN 45501:1992 relating to electromagnetic compatibility (89/336/EEC) amended by directive (93/68/EEC; 92/31/EEC) EN 55022, B relating to electrical equipment designed for use within certain voltage limits (73/23/EEC amended by directive (93/68/EEC) EN 60950 Worthington, Ohio USA, November, 2000 EN 50082-2 Mettler-Toledo, Inc. Darrell Flocken, Manager - Weights & Measures Office of Weights and Measures Original issue: Revised: January, 1997 February, 1997 November, 2000 added compliance to Non-automatic Weighing Instrument Directive added compliance to Heavy Industrial Immunity, EN 50082-2 According to EN 45014 INTRODUCTION This publication is provided solely as a guide for individuals who have received Technical Training in servicing the METTLER TOLEDO product. Information regarding METTLER TOLEDO Technical Training may be obtained by writing to: METTLER TOLEDO 1900 Polaris Parkway Columbus, Ohio 43240 Phone (US and Canada): (614) 438-4511 Phone (International): (614) 438-4888 FCC Notice This device complies with Part 15 of the FCC Rules and the Radio Interference Requirements of the Canadian Department of Communications. Operation is subject to the following conditions: (1) this device may not cause harmful interference, and (2) this device must accept any interference received, including interference that may cause undesired operation. This equipment has been tested and found to comply with the limits for a Class A digital device, pursuant to Part 15 of FCC Rules. These limits are designed to provide reasonable protection against harmful interference when the equipment is operated in a commercial environment. This equipment generates, uses, and can radiate radio frequency energy and, if not installed and used in accordance with the instruction manual, may cause harmful interference to radio communications. Operation of this equipment in a residential area is likely to cause harmful interference in which case the user will be required to correct the interference at his own expense. This manual correctly describes the operation and functionality of the PANTHER terminal containing software versions as follows. The software number is displayed during the power-up sequence. Model PANTHER Analog PANTHER Analog PANTHER DigiTOL Software # G14891100A C15379000A E14988700A Rev. L 7.1 L 3.1 L 5.1 METTLER TOLEDO RESERVES THE RIGHT TO MAKE REFINEMENTS OR CHANGES WITHOUT NOTICE. PRECAUTIONS WARNING READ this manual BEFORE operating or servicing this equipment. FOLLOW these instructions carefully. ONLY PERMIT QUALIFIED PERSONNEL TO SERVICE THIS EQUIPMENT. EXERCISE CARE WHEN MAKING CHECKS, TESTS AND ADJUSTMENTS THAT MUST BE MADE WITH POWER ON. FAILING TO OBSERVE THESE PRECAUTIONS CAN RESULT IN BODILY HARM AND/OR PROPERTY DAMAGE. WARNING FOR CONTINUED PROTECTION AGAINST SHOCK HAZARD CONNECT TO PROPERLY GROUNDED OUTLET ONLY. DO NOT REMOVE THE GROUND PRONG. SAVE this manual for future reference. DO NOT allow untrained personnel to operate, clean, inspect, maintain, service, or tamper with this equipment. ALWAYS DISCONNECT this equipment from the power source before cleaning or performing maintenance. CALL METTLER TOLEDO for parts, information, and service. WARNING DISCONNECT ALL POWER TO THIS UNIT BEFORE INSTALLING, SERVICING, CLEANING, OR REMOVING THE FUSE. FAILURE TO DO SO COULD RESULT IN BODILY HARM AND/OR PROPERTY DAMAGE. CAUTION BEFORE CONNECTING/DISCONNECTING ANY INTERNAL ELECTRONIC COMPONENTS OR INTERCONNECTING WIRING BETWEEN ELECTRONIC EQUIPMENT ALWAYS REMOVE POWER AND WAIT AT LEAST THIRTY (30) SECONDS BEFORE ANY CONNECTIONS OR DISCONNECTIONS ARE MADE. FAILURE TO OBSERVE THESE PRECAUTIONS COULD RESULT IN DAMAGE TO OR DESTRUCTION OF THE EQUIPMENT OR BODILY HARM. CAUTION OBSERVE PRECAUTIONS FOR HANDLING ELECTROSTATIC SENSITIVE DEVICES. WARNING IN ORDER TO USE THE PANTHER ANAlOG PANEL-MOUNT TERMINAL IN AN AREA CLASSIFIED AS CLASS I, II AND III, DIVISION 2, GROUPS A, B, C, D, F OR G, METTLER TOLEDO CONTROL DRAWING 155907R MUST BE FOLLOWED WITHOUT EXCEPTION. FAILURE TO DO SO COULD RESULT IN BODILY HARM AND/OR PROPERTY DAMAGE. WARNING THE PANTHER TERMINAL IS NOT INTRINSICALLY SAFE! DO NOT USE WITHIN AREAS CLASSIFIED AS HAZARDOUS DIVISION 1 OR ZONE 0/1 BECAUSE OF COMBUSTIBLE OR EXPLOSIVE ATMOSPHERES. WARNING THE PANTHER DIGITOL AND ANALOG HARSH VERSIONS ARE NOT APPROVED FOR USE IN HAZARDOUS AREAS. DO NOT INSTALL THESE VERSIONS IN HAZARDOUS AREAS. WARNING! WHEN THIS EQUIPMENT IS INCLUDED AS A COMPONENT PART OF A SYSTEM, THE RESULTING DESIGN MUST BE REVIEWED BY QUALIFIED PERSONNEL WHO ARE FAMILIAR WITH THE CONSTRUCTION AND OEPRATION OF ALL COMPONENTS IN THE SYSTEM AND THE POTENTIAL HAZARDS INVOLVED. FAILURE TO OBSERVE THIS PRECAUTION COULD RESULT IN BODILY HARM AND/OR PROPERTY DAMAGE. WARNING! IF THIS DEVICE IS USED IN AN AUTOMATIC OR MANUAL FILLING CYCLE, ALL USERS MUST PROVIDE A HARD-WIRED EMERGENCY STOP CIRCUIT OUTSIDE THE DEVICE CIRCUITRY. FAILURE TO OBSERVE THIS PRECAUTION COULD RESULT IN BODILY INJURY AND/OR PROPERTY DAMAGE. WARNING POWER OUTLETS MUST BE EASILY ACCESSIBLE AND LOCATED NO FURTHER THAN THE LENGTH OF THE POWER CORD SUPPLIED WITH THE PRODUCT. FAILURE TO DO SO COULD IN RESULT IN PERSONAL INJURY AND/OR PROPERTY. Note: For installations in Division 2 areas, refer to the PANTHER Terminal Division 2 Installation Guide (15791600A). CONTENTS 1 Introduction ....................................................................................................................1-1 Warnings/Precautions ......................................................................................................1-1 Model Identification .........................................................................................................1-2 Compliance and Approvals ...............................................................................................1-2 UL, cUL Listing; CSA Certification .............................................................................1-2 Weights and Measures Approvals...........................................................................1-3 Conducted and Radiated Emissions (RFI).................................................................1-3 Radio Frequency Interference Susceptibility ...............................................................1-3 AC Power Line Voltage Variation ..............................................................................1-4 Hazardous Area Use ..............................................................................................1-4 Specifications..................................................................................................................1-5 Physical Dimensions and Features ....................................................................................1-5 Harsh Environment Terminal (PTHN) .......................................................................1-5 Panel-Mount Terminal (PTPN) ................................................................................1-7 Display and Keyboard............................................................................................1-8 2 Installation......................................................................................................................2-1 Inspection and Contents Checklist ....................................................................................2-1 Location .........................................................................................................................2-1 Accessing the Harsh Environment Terminal ........................................................................2-2 Accessing the Panel-mount Terminal.................................................................................2-4 Power Requirements........................................................................................................2-4 Electrical Connections......................................................................................................2-5 Confirm Power Connection......................................................................................2-5 Analog Load Cell Connections.................................................................................2-6 ® UltraRes and DigiTOL Load Cell Connections ...........................................................2-9 DigiTOL J-Box Connections.....................................................................................2-9 Main PCB Serial Port Connection ...........................................................................2-10 Discrete I/O Connection ........................................................................................2-10 Setpoint Output Option..........................................................................................2-11 Allen-Bradley RIO Option (09170251000)....................................................................2-12 PROFIBUS Option (09170252000) ..............................................................................2-13 Modbus Plus Option (09170253000) ..........................................................................2-14 Analog Output ...............................................................................................................2-15 Controller PCB Switches/Jumpers ...................................................................................2-16 3 Programming and Configuration........................................................................................3-1 General Information .........................................................................................................3-2 Program Block Access ...........................................................................................3-2 General Programming Procedure.............................................................................3-2 Keystroke Functions in Setup Mode..........................................................................3-3 Default Settings .....................................................................................................3-3 Exiting Program Blocks and Setup Mode ..................................................................3-5 F1 Scale Interface Program Block......................................................................................3-6 F1.1 Scale Type ....................................................................................................3-6 F1.2 Calibration Units Sub-block .............................................................................3-7 F1.3 Scale Capacity Sub-block ............................................................................... 3-8 F1.4 Increment Size Sub-block ............................................................................... 3-8 Calibration Sub-block (No "F" Designation).............................................................. 3-9 F1.5 Shift Adjust (DigiTOL only).............................................................................. 3-9 F1.6 Zero Calibration Adjust Sub-block .................................................................. 3-10 F1.7 Span Calibration Adjust Sub-block................................................................. 3-10 F1.8 Geo Code Sub-block.................................................................................... 3-10 F2 Application Environment Block................................................................................... 3-11 F2.1 Alternate Units Sub-block.............................................................................. 3-11 F2.3 Tare Operations Sub-block ........................................................................... 3-12 F2.4 Zero Operations Sub-block ........................................................................... 3-12 F2.5 Motion Sensitivity Selection Sub-block............................................................ 3-13 F2.6 Low Pass Filter Corner Frequency .................................................................. 3-14 F3 Configure Serial I/O Block.......................................................................................... 3-14 F3.1 Select Serial Port Parameters Sub-block ......................................................... 3-15 F3.2 Serial Data Out............................................................................................ 3-15 F3.3 Extended Weight Hold Sub-block................................................................... 3-16 F4 Configure Discrete Block ........................................................................................... 3-16 F4.1 Configure Discrete Input Sub-block ................................................................ 3-16 F5 Weigh Mode Block.................................................................................................... 3-17 F5.1 Enter Weigh Mode Sub-block ........................................................................ 3-17 F5.2 Memory Key Editing Sub-block...................................................................... 3-18 F5.4 Select Setpoint Zero Tolerance Range ............................................................. 3-19 F5.5 Auto Print at SP1 Sub-block.......................................................................... 3-20 F5.6 Auto Print at SP2 Sub-block.......................................................................... 3-20 F5.7 Enable Stored Target Weights........................................................................ 3-20 F5.8 Zone Increment Size for Pushbutton Target ..................................................... 3-21 F5.9 Display Enable Sub-block ............................................................................ 3-21 F6 Diagnostics Block ..................................................................................................... 3-22 F6.1 Expanded Display Sub-block ........................................................................ 3-22 F6.2 Edit Calibration Factors Sub-block ................................................................. 3-22 F6.3 Display Individual Load Cell Counts (DigiTOL Only)......................................... 3-23 F6.4 Print Setup.................................................................................................. 3-23 F6.5 Reset to Factory Defaults .............................................................................. 3-23 F7 Analog Output Option Block....................................................................................... 3-23 F7.2 Analog Output Zero Calibration with Test Weights ............................................. 3-24 F7.3 Analog Output Span Calibration with Test Weights Sub-block ............................. 3-24 F7.4 Analog Output Trim Adjustment ..................................................................... 3-25 F8 PLC Setup Block....................................................................................................... 3-25 F8.1 Weight Data Type........................................................................................ 3-25 F8.2 Rack Address.............................................................................................. 3-25 F8.3 Start Quarter Address ................................................................................... 3-26 F8.4 Last Rack ................................................................................................... 3-26 F8.5 Data Rate ................................................................................................... 3-26 F8.6 Global Data Enable ..................................................................................... 3-26 Exit Setup Mode Program Block...................................................................................... 3-26 Additional Information ................................................................................................... 3-26 4 Service and Maintenance .................................................................................................4-1 Cleaning and Maintenance ...............................................................................................4-1 Troubleshooting...............................................................................................................4-1 5 PANTHER Terminal Allen-Bradley Option ............................................................................5-1 Allen-Bradley RIO Network Specifications...........................................................................5-1 Allen-Bradley Overview ....................................................................................................5-1 Allen Bradley RIO Kit Installation .......................................................................................5-1 AB RIO Interface PCB Wiring and Specifications .................................................................5-6 Status Lights ...................................................................................................................5-6 Allen-Bradley Setup In PANTHER Terminal..........................................................................5-6 Communications .............................................................................................................5-6 Discrete Data Formats....................................................................................................5-10 6 PANTHER Terminal PROFIBUS Option.................................................................................6-1 PROFIBUS Overview.........................................................................................................6-1 PROFIBUS Kit Installation .................................................................................................6-1 Wiring ............................................................................................................................6-4 PROFIBUS Setup in PANTHER terminal...............................................................................6-5 Data Definition ................................................................................................................6-6 7 PANTHER Terminal Modbus Plus Option.............................................................................7-1 Modbus Plus Overview .....................................................................................................7-1 Modbus Plus Kit Installation .............................................................................................7-1 Wiring to PANTHER Terminal.............................................................................................7-5 Switch Settings................................................................................................................7-5 Status Lights ...................................................................................................................7-6 Modicon 984-385E Setup Example ...................................................................................7-6 Modbus Plus Setup in the PANTHER Terminal.....................................................................7-8 Discrete Read/Write Format ..............................................................................................7-8 Data Definition ................................................................................................................7-8 8 PANTHER Terminal Analog Output Option...........................................................................8-1 Analog Output Option Overview.........................................................................................8-1 Installation in Harsh Environment Enclosure .......................................................................8-1 Installation in Panel Mount Enclosure ................................................................................8-3 9 Parts and Accessories......................................................................................................9-1 Harsh Enclosure ..............................................................................................................9-1 Panel Mount Enclosure......................................................................................................9-4 10 Appendices ...................................................................................................................10-1 Appendix 1: RS232 Serial I/O .........................................................................................10-1 Appendix 2: Standard Interface Command Set (SICS) Protocol ..........................................10-7 Appendix 3: Discrete I/O Reference ...............................................................................10-13 Appendix 4: GEO Codes ...............................................................................................10-15 Chapter 1: Introduction Warnings/Precautions 1 Introduction This manual provides detailed information for installing, programming, and servicing the PANTHER Industrial Scale Terminal, a high performance basic capability weighing instrument. Information on operating the terminal (basic and advanced functions) can be found in the PANTHER Terminal User's Guide. Review all instructions and safety precautions carefully. Installation and service procedures should be performed only by authorized personnel. If you encounter problems not covered in this manual, please contact your local authorized METTLER TOLEDO representative. Panel-Mount Enclosure Harsh Environment (Desk/Wall) Enclosure Warnings/Precautions WARNING ONLY PERMIT QUALIFIED PERSONNEL TO SERVICE THIS EQUIPMENT. EXERCISE CARE WHEN MAKING CHECKS, TESTS AND ADJUSTMENTS THAT MUST BE MADE WITH POWER ON. FAILING TO OBSERVE THESE PRECAUTIONS CAN RESULT IN BODILY HARM AND/OR PROPERTY DAMAGE. CAUTION OBSERVE PRECAUTIONS FOR HANDLING ELECTROSTATIC SENSITIVE DEVICES. WARNING IN ORDER TO USE THE PANTHER ANALOG PANEL-MOUNT TERMINAL IN AN AREA CLASSIFIED AS CLASS I, II, OR III, DIVISION 2, GROUPS A, B, C, D, F OR G, METTLER TOLEDO CONTROL DRAWING 155907R MUST BE FOLLOWED WITHOUT EXCEPTION. FAILURE TO DO SO COULD RESULT IN BODILY HARM AND/OR PROPERTY DAMAGE. (4-02) 1-1 METTLER TOLEDO PANTHER Terminal Technical Manual Model Identification Use the information below to confirm the correct model number for the PANTHER terminal with which you will be working. The model number is found on the data plate on the side of the PANTHER terminal. P T XX - X X X X - X X X PANTHER Terminal Enclosure/Display Type PN – Panel-mount, numeric display HN – Harsh environment (desk/wall), numeric display Scale Interface 1--Analog load cell 3– DigiTOL load cell Interface Option 0--No Option 5—Modbus Plus 6—Allen-Bradley 8—Analog output (not available when used with more than 4 analog load cells) 9--PROFIBUS Setpoint Option 0—None 1—3 Opto Setpoint (panel only) Unused 0—Always Destination Market (Refer to Market Destination Chart in the Appendix.) Compliance and Approvals UL, cUL Listing; CSA Certification The PANTHER terminal has been tested and complies with UL 1950. The PANTHER terminal is designed to meet CSA standard C22.2 No 143-1975, Office Machines. It carries the UL and cUL labels. 1-2 (4-02) Chapter 1: Introduction Compliance and Approvals Weights and Measures Approvals USA NTEP COC The PANTHER terminal meets or exceeds requirements for Class III, 10000e NTEP division accuracy requirements in accordance with the National Institute of Standards and Technology (NIST) Handbook 44. A certificate of conformance 96-125A2 has been issued under the National Type Evaluation Program (NTEP) of the National Conference on Weights and Measures. Canada Notice Of Approval The PANTHER terminal was submitted for approval to the Canadian Weights and Measures Laboratories in Canada. After evaluation, the PANTHER terminal was found to meet and/or exceed requirements for Class III, 10000d rating and approval AM-5162 was issued by statutory authority of the Minister of Industry, Science and Technology of Canada. European Approval The PANTHER terminal was submitted for approval to The Nederlands Meetindtituut (NMi) in the Netherlands. After evaluation, the PANTHER terminal was found to meet and/or exceed the requirements for a Class III, 5000 division and a Class IIIL, 1000 division weighing instrument. EC type-approval certificate TC2969 Rev. 4 was issued by the NMi in accordance to Council Directive 90/384/EEC on Non-automatic Weighing Instruments. Conducted and Radiated Emissions (RFI) The PANTHER terminal meets or exceeds FCC docket 80-284 for conducted and radiated emissions requirements as a Class A digital device. Radio Frequency Interference Susceptibility The PANTHER terminal meets USA, Canadian, and EC requirements for RFI susceptibility as listed in the following table with a maximum of one display increment of change when calibrated for recommended builds. RFI Susceptibility U.S.A. Canadian EC Radio Interference Frequency Field Strength Transmitted Power at Specified Distance Field Strength 27 MHz 3 volts/meter 4 watts at 2 meters N/A 144 MHz N/A N/A N/A 169 MHz 3 volts/meter N/A N/A 464 MHz 3 volts/meter 4 watts at 2 meters N/A 27-1000 MHz N/A N/A 3 volts/meter (4-02) 1-3 METTLER TOLEDO PANTHER Terminal Technical Manual AC Power Line Voltage Variation The PANTHER terminal meets NIST H-44, Canadian Gazette Part 1, and OIMLSP7/SP2 line voltage variation specifications as listed in the following table: AC Power Line Voltages Specification AC Line Voltage Line Frequency in Hz Line Voltage Variation Minimum Nominal Maximum Minimum Nominal Maximum NIST H-44 100 120 130 59.5 60 60.5 Canadian 108 120 132 58.8 60 61.2 OIML-SP7/SP2 102 187 204 120 220 240 132 242 264 58.8 49.0 49.0 60 50 50 61.2 51 51 Hazardous Area Use The analog load cell version of the PANTHER panel-mount terminal has been approved by Factory Mutual for use in areas classified as Class I, II or III, Division 2, Groups A, B, C, D, F or G when installed in a National Testing Laboratory approved dust tight enclosure and connected per METTLER TOLEDO control drawing 155907R. Refer to the PANTHER Panel-Mount Terminal Division 2 Installation Guide (*15791600A) for additional details. Note: The DigiTOL version of the PANTHER panel-mount terminal and the harsh environment terminal are NOT approved for use in Division 2 areas. WARNING TO USE THE PANEL MOUNT PANTHER ANALOG TERMINAL IN AN AREA CLASSIFIED AS CLASS I, II OR III, DIVISION 2, GROUPS A, B, C, D, F OR G, METTLER TOLEDO CONTROL DRAWING 155907R MUST BE FOLLOWED WITHOUT EXCEPTION. FAILURE TO DO SO COULD RESULT IN BODILY HARM AND/OR PROPERTY DAMAGE. The PANTHER terminal is not intrinsically safe but is capable of operation with load cells and bases in a Division 1 or Zone 1 hazardous area when used with approved barriers or when purging is utilized. Contact your authorized METTLER TOLEDO representative for information about hazardous area applications for the PANTHER terminal. WARNING THE PANTHER TERMINAL IS NOT INTRINSICALLY SAFE! DO NOT USE WITHIN AREAS CLASSIFIED AS HAZARDOUS DIVISION 1 OR ZONE 0/1 BECAUSE OF COMBUSTIBLE OR EXPLOSIVE ATMOSPHERES. 1-4 (4-02) Chapter 1: Introduction Specifications Specifications Specifications Harsh Environment Panel Mount WxDxH 178 x 66 x 159 mm (7 x 2.59 x 6.25 in) 171.5 x 132 x 91.9 mm (6.75 x 5.2 x 3.62 in) Construction Stainless steel; designed to provide NEMA 4X and IP65 protection Stainless steel front panel; certified TYPE 12, 4 and 4X Power Universal AC power supply works with 100, 120, 220, 240 VAC power sources Operating Temperature Display/ Keypad -1- C to 45 C (14 F to 113 F) 12.7 mm/0.55 in high, 7-digit, 7-segment vacuum fluorescent numeric display/6-function keypad Scale Performance Internal resolution 1,000,000; External 10,000 Scale Interface (analog) Maximum of eight 350 ohm analog load cells Scale Interface (DigiTOL) Compatible with METTLER TOLEDO xx97, UltraRes, and DigiTOL junction box products Scale Update Rate >300 Hz Digital Filtering METTLER TOLEDO’s exclusive TraxDSP filtering Process Control 2 setpoints with preact; zero tolerance Checkweighing 4 targets with 5 zones each Discrete Outputs/Inputs 3 outputs/1 input/5 zone status LEDs Serial Interface Shipping Weight Options 3 outputs/1 input/3 zone status LEDs Standard RS232 printer connections or bi-directional serial continuous output 2.5 kg (5.5 lb) 2.04 kg (4.5 lb) Analog output (0-10 V or 4-20 mA analog output Three high level outputs for switching between 28-230 VAC (panel mount only) Direct PLC connectivity (Allen-Bradley RIO, PROFIBUS, or Modbus Plus) Physical Dimensions and Features Harsh Environment Terminal (PTHN) This PANTHER harsh environment enclosure is designed to TYPE 4X (IP65) standards. The enclosure is a fabricated stainless steel box with a removable cover. The unit is designed to sit on a flat surface or can be mounted to a wall or to METTLER TOLEDO columns. The bottom of the enclosure contains grip bushings to seal all cables entering the enclosure. The harsh enclosure version includes five multi-colored LEDs used to indicate over or under tolerance conditions for manual checkweighing applications. In setpoint applications, these LEDs indicate the status of the individual setpoints. (4-02) 1-5 METTLER TOLEDO PANTHER Terminal Technical Manual The PANTHER harsh environment terminal measures: 159 mm (6.25 in.) high × 178 mm (7.00 in.) wide at the front of the terminal and is 66 mm (2.59 in.) deep. The location of the keyholes for wall mounting screws is shown in Figure 1-1. Wall Mount Orientation 2 x Ø0.29 (17.8) (178) 7.00 (19.0) 0.75 (254) 1.00 METTLER TOLEDO (76.6) 3.01 (159) 6.25 (140) 5.50 (19.0) 0.75 (09.7) 0.38 (146.3) 5.75 (66.0) 2.59 (74.0) 2.91 (178) 7.00 2 x Ø0.50 (202) 7.94 Desk Mount Orientation 90º (155.7) 6.12 Figure 1-1 1-6 (4-02) Chapter 1: Introduction Physical Dimensions and Features Panel-Mount Terminal (PTPN) This enclosure is designed to be mounted into a panel. Four threaded studs are used to mount the unit through a flat panel. The front panel and associated panel clamping mechanism are designed to provide an environmental seal and accommodate a panel thickness from 16 to 11 gauge. The panel mount version includes three LEDs. The panel-mount PANTHER terminal model measures: 3.62 in. (91.9 mm) high × 6.75 in. (171.5 mm) wide at the front and 5.20 in. (132 mm) deep. Refer to the cutout diagram when installing the panel-mount PANTHER terminal. Note: The optional high-level optos add 1.25 in. (31.7 mm) to the depth. (4) 0.188” dia (3/16” drill) holes (159.3) 6.26 (68.6) 2.70 (136.1) 5.38 (91.9) 3.62 (171.5) 6.75 (8.08) 3.18 (6.98) 2.75 (157.5) 6.20 Cut-out Diagram (132.0) 5.20 (4) M4 x 20 mm stainless steel studs with nuts provided. Figure 1-2 (4-02) 1-7 METTLER TOLEDO PANTHER Terminal Technical Manual WARNING TO USE THE PANEL-MOUNT PANTHER ANALOG TERMINAL IN AN AREA CLASSIFIED AS CLASS I, II OR III, DIVISION 2, GROUPS A, B, C, D, F OR G, METTLER TOLEDO CONTROL DRAWING 155907R MUST BE FOLLOWED WITHOUT EXCEPTION. FAILURE TO DO SO COULD RESULT IN BODILY HARM AND/OR PROPERTY DAMAGE. Display and Keyboard The front panel of the PANTHER terminal panel-mount model is made of stainless steel and is certified to TYPE 12, 4 and 4X specifications. The harsh environment front panel is fabricated stainless steel, and when locked onto the rear enclosure, is designed to TYPE 4X (IP65) specifications. The display is a seven-character, seven-segment, 0.55 in. (12.7 mm) vacuum fluorescent numeric display. The keyboard consists of a flat membrane switch covered with a domed polyester overlay. The lens on both models is polyester and has hardcoating to resist damage to the lens. (168.4) 6.63 METTLER TOLEDO (89.9) 3.50 Figure 1-3 1-8 (4-02) Chapter 2: Installation Inspection and Contents Checklist 2 Installation Inspection and Contents Checklist If you will be responsible for installing the PANTHER terminal, please follow the procedures listed here. • If the PANTHER terminal's shipping container appears damaged upon delivery, check inside for damage. File a freight claim with the carrier if necessary. • If the container was undamaged, unpack the container if you have not already done so. Keep the original packing materials for future use. • Make sure the PANTHER terminal package contains the following: • • • • • • • PANTHER terminal (indicator) Security Seal Capacity Sheet Labels Cursor Legends Labels Address Labels Installation Guide (paper copy) Documentation CD-ROM Location The first step in installing the PANTHER terminal is to select the best location. Placing the PANTHER terminal in an appropriate location will enhance its longevity and operation. Keep in mind the following when choosing a location for the PANTHER terminal: • The PANTHER terminal can be operated between a temperature range of 14°F to 113 °F (−10°C to 45 °C) at 10% to 95% humidity, noncondensing. • The storage temperature range is from −40 to 140 °F (−40 to 60 °C) at 10% to 95% humidity, noncondensing. • The PANTHER panel-mount terminal's enclosure meets TYPE 4X (IP65) requirements for a dust-tight and splash-proof enclosure. The harsh environment is designed to those specifications. • The PANTHER terminal is not intrinsically safe! However, the PANTHER terminal is capable of operation with scales and barriers located in a hazardous area. Contact your authorized METTLER TOLEDO representative for assistance with hazardous area applications. • For installations into Division 2 areas, refer to the PANTHER Terminal Division 2 Installation Guide. (4-02) 2-1 METTLER TOLEDO PANTHER Terminal Technical Manual WARNING TO USE THE PANTHER PANEL-MOUNT ANALOG TERMINAL IN AN AREA CLASSIFIED AS CLASS I, II OR III, DIVISION 2, GROUPS A, B, C, D, F OR G, METTLER TOLEDO CONTROL DRAWING 155907R MUST BE FOLLOWED WITHOUT EXCEPTION. FAILURE TO DO SO COULD RESULT IN BODILY HARM AND/OR PROPERTY DAMAGE. WARNING! THE PANTHER TERMINAL IS NOT INTRINSICALLY SAFE! DO NOT USE IN AREAS CLASSIFIED AS HAZARDOUS BY THE NATIONAL ELECTRIC CODE (NEC) BECAUSE OF COMBUSTIBLE OR EXPLOSIVE ATMOSPHERES. WARNING! THE DIGITOL VERSION AND THE ANALOG HARSH VERSION OF THE PANTHER TERMINAL ARE NOT APPROVED FOR USE IN DIVISION 2 AREAS. DO NOT INSTALL THESE VERSIONS IN HAZARDOUS AREAS! Accessing the Harsh Environment Terminal WARNING DISCONNECT ALL POWER TO THIS UNIT BEFORE INSTALLING, SERVICING, CLEANING OR REMOVING THE FUSE. FAILURE TO DO SO COULD RESULT IN BODILY HARM AND/OR PROPERTY DAMAGE. To access the Controller PCB for internal wiring and setting switches: 1. Separate the front panel from the enclosure by inserting the tip of a flat-blade screwdriver into one of the two slots on the bottom of the front panel assembly. 2. Gently push in toward the enclosure. You should hear a quiet “pop” when the cover has been released. 3. Push in on the side of the slot closest to the bottom of the cover. Repeat for the other slot. 4. Lift the bottom of the front panel out until it completely clears the enclosure. 2-2 (4-02) Chapter 2: Installation Accessing the Harsh Environment Terminal 5. Squeeze the top of the front panel to the enclosure slightly and raise it to clear the two top clips. The cover will swing down, hinged by a wire cable at the bottom. Figure 2-1 shows the location of the slots (A). Load Cell Connection Serial Cable AC Power Figure 2-1 TB1 TB2 TB3 Figure 2-2 To connect the unit: 1. Pass the cables that enter the enclosure through an appropriately sized cable grip before connecting the wires. 2. Tighten the cable grip sufficiently to provide a water-tight seal around the cable only after re-securing the back cover. This will allow any internal cable slack to be received through the cable grip. (4-02) 2-3 METTLER TOLEDO PANTHER Terminal Technical Manual Accessing the Panel-mount Terminal The PANTHER panel-mount model uses an exposed terminal access design. All connections are made at the back of the indicator on the controller PCB (See Figure 2-3). If access inside the unit is necessary, remove the two screws holding the cover plate at the rear of the unit and lift the cover plate over the terminal strips. Figure 2-3 Power Requirements The PANTHER terminal is provided with a universal (manually selectable) power supply which operates from 85 to 264 VAC. The supply operates with a line frequency of 49 to 63 Hz. Power consumption is 12 Watts maximum. Power is applied through a permanently attached line cord on the harsh environment model. (No power cord is shipped with the panel-mount model.) 2-4 (4-02) Chapter 2: Installation Electrical Connections Note: The integrity of the power ground for equipment is important for both safety and dependable operation of the PANTHER terminal and its associated scale base. A poor ground can result in an unsafe condition if an electrical short develops in the equipment. A good ground connection is needed to minimize extraneous electrical noise pulses. The PANTHER should not share power lines with noisegenerating equipment. To confirm ground integrity, use a commercial branch circuit analyzer like an ICE model SureTest ST-1D. If adverse power conditions exist, a dedicated power circuit or power line conditioner may be required. Electrical Connections WARNING DISCONNECT ALL POWER TO THIS UNIT BEFORE REMOVING THE FUSE OR SERVICING. When the analog PANTHER panel-mount terminal is installed within an enclosure, which resides within an area classified as Division 2, special AC wiring requirements must be met. These requirements are shown on METTLER TOLEDO control drawing 155907R in the PANTHER Panel-Mount Terminal Installation Guide (*15791600A). Confirm Power Connection Harsh Environment Terminal. The harsh environment terminal is shipped with the power cord installed at the factory. Before applying power, confirm that the power cord is wired properly for the AC voltage where the terminal will be used. The power cord connects to the TB1 terminal strip on the controller PCB. Standard Power Cord Colors Neutral Blue TB1 Hot Neut 100V 120V 230V Ground (Chassis) Brown Green/Yellow Panel-Mount Terminal. No power cord is shipped with the panel-mount model. Wiring to terminal strip TB1 on the rear of the PANTHER terminal is shown below. Ground is connected to the chassis ground. TB1 Pin # AC Power Input 1 Neutral 2 100 VAC 3 120 VAC 4 230 VAC (4-02) 2-5 METTLER TOLEDO PANTHER Terminal Technical Manual When the analog PANTHER panel-mount terminal is installed within an enclosure, which resides within an area classified as Division 2, special AC wiring requirements must be met. These requirements are shown on METTLER TOLEDO control drawing 155907R in the PANTHER Panel-Mount Terminal Installation Guide (*15791600A). Analog Load Cell Connections CAUTION TO AVOID DAMAGE TO THE PCB OR LOAD CELL, REMOVE POWER FROM THE PANTHER TERMINAL AND WAIT AT LEAST 30 SECONDS BEFORE CONNECTING OR DISCONNECTING ANY HARNESS. Note: There is a jumper on the Controller PCB for selection of 2 mV/V or 3 mV/V load cells. This W1 jumper is described later in this chapter. NOTE: Instructions for making the analog load cell connections are the same for the harsh environment and panel-mount models. If an analog version of the PANTHER panel-mount terminal is used in a hazardous area classified as Division 2 or if only the load cells will be in a hazardous area classified as Division 2, METTLER TOLEDO control drawing 155907R must be followed. Please refer to the PANTHER Panel-Mount Terminal Installation Guide (*15791600A) for specifics about load cell non-incendive parameters and required calculations. The maximum cable length for analog load cell connections to the PANTHER terminal depends on the total scale resistance (TSR) of the scale base. To calculate TSR: TSR = Load Cell Input Resistance (Ohms) Number of Load Cells This chart gives recommended cable lengths based on TSR and cable gauge. The PANTHER terminal can power up to eight 350 Ohm analog load cells. Recommended Maximum Cable Length TSR (Ohms) 24 Gauge (feet/meters) 350 87 (4-350Ω cells) 45 (8-350 Ω cells) 800/244 200/61 100/31 20 Gauge (feet/meters) 2000/610 600/183 300/91 16 Gauge (feet/meters) 4000/1219 1000/305 500/152 Once the length of the cable is determined, connect to TB3 of the PANTHER Terminal Controller PCB. The pinout for TB3 is labeled on the bottom of the controller. The following diagrams describe the PANTHER terminal analog load cell terminal strip TB3 wiring for standard 6-wire cable, Heavy Capacity (MASSTRON) 6-wire cable, and standard 4-wire cable. 2-6 (4-02) Chapter 2: Installation Electrical Connections PANTHER TB3 Standard 6-wire Cable -EXC 7 Blue -SEN 6 Red -SIG 5 Black Shield 4 Orange +SIG 3 Green +SEN 2 Yellow +EXC 1 White PANTHER TB3 Heavy Capacity (Masstron) 6-wire Cable -EXC 7 Black -SEN 6 Blue -SIG 5 Red Shield 4 Yellow +SIG 3 White +SEN 2 Brown +EXC 1 Green PANTHER TB3 4-wire Cable Black -EXC 7 -SEN 6 -SIG 5 Red* Shield 4 Yellow or Orange +SIG 3 White* +SEN 2 +EXC q Green *If an increase in load results in a decrease in weight display, reverse the signal wires (+SIG and −SIG). (4-02) 2-7 METTLER TOLEDO PANTHER Terminal Technical Manual Minimum Increment Size for Analog Scale Input The minimum increment size selection for an analog scale input is determined by calculating the microvolts per increment for the desired build. To calculate the microvolts per increment, solve the following equation for µV per increment. Increment Size × Cell Output × 5000 µV per Increment = _______________________________________ Load Cell Capacity × Ratio The increment size, scale capacity, and load cell capacity must all be measured in the same weight units, lb or kg. If the weight units for any of these variables are listed in kg units, multiply by 2.2046 to convert to lb units for the purposes of this calculation. Load cell output is rated in mV/V (millivolts per volt of excitation), marked on load cell data tag. Mettler Toledo load cells are typically 2 mV/V. Other load cells can range from 1 mV/V to 4.5 mV/V. The load cell capacity is the rated capacity marked on load cell data tag. The ratio is the total number of load cells in the system or the total lever ratio (if scale is a mechanical lever system conversion). Sample Calculation 1. Refer to the following example of µV per increment calculation for a Model 2158 floor scale installation. Scale Capacity Increment Size Load Cell Capacity Number of Cells Cell Output Excitation Voltage 5000 lb 1.0 lb 2500 lb 4 2 mV/V 5 VDC 2. Use the following formula to calculate the µV per increment: µV per Increment = Increment Size × Cell Output × Excitation (mV) __________________________________________ Load Cell Capacity × Ratio Substituting the 2158 parameters in the formula: µV per Increment = 1.0 lb × 2 mV / V ×5000 ___________________________ = 1.0µV/inc. 2500 lb ×4 Load Cells The PANTHER terminal is approved as legal-for-trade at a minimum of 1 µV per increment. Acceptable weighing performance for non-legal-for-trade applications can be obtained when a minimum of 0.6 µV per increment is provided. At full scale, the maximum load cell output may not exceed 10 mV when the W1 jumper is in the 2 mV/V position or 15 mV when the W1 jumper is in the 3 mV/V position. 2-8 (4-02) Chapter 2: Installation Electrical Connections ® UltraRes and DigiTOL Load Cell Connections The fifth character of the product ID on the serial tag indicates if the unit is analog or DigiTOL® (1=Analog, 3=DigiTOL). Always verify the type of load cell interface before any connections are made and disconnect power to the PANTHER terminal before connecting or disconnecting any UltraRes or DigiTOL® bases. The maximum cable length for all DigiTOL® bases is 50 feet (15.24 meters). CAUTION TO AVOID DAMAGE TO THE PCB OR LOAD CELL, REMOVE POWER FROM THE PANTHER AND WAIT AT LEAST 30 SECONDS BEFORE CONNECTING OR DISCONNECTING ANY HARNESS. Connect UltraRes or DigiTOL® bases to the PANTHER terminal as follows: PANTHER Color Code UltraRes or DigiTOL® B/P Base Ground 1 Blue 7 Ground TxD+ 2 Red 1 RxD A TxD- 3 White 4 Batt In RxD+ 4 Black 8 TxD A RxD- 5 Yellow 6 TxD B +18 VDC 6 Green 5 +20 VDC Shield 7 Orange *NC *No connection DigiTOL J-Box Connections The maximum cable length for the DigiTOL J-Box is 300 feet (91.4 meters). The following diagram illustrates load cell terminal strip wiring to the J-Box. PANTHER Color Code DigiTOL® J-Box Ground 1 Blue TB2-12 Ground TxD+ 2 Red TB1-2 RxD A TxD- 3 White TB1-3 RxD B RxD+ 4 Black TB1-5 TxD A RxD- 5 Yellow TB1-4 TxD B +18VDC 6 Green TB2-1- Shield +20 VDC Orange (4-02) 2-9 METTLER TOLEDO PANTHER Terminal Technical Manual Main PCB Serial Port Connection The COM1 serial port is bi-directional. It can receive simple commands or serial target data, as well as transmit data to a printer or other serial device. The following diagram and table describe the PANTHER terminal block TB2 COM1 pin-to-pin cable connections using an RS-232 cable. The maximum recommended cable length for RS-232 communications is 50 feet. PANTHER TB2 COM1 1 TXD RS-232 Transmit 2 RXD RS-232 Receive 3 GND Signal Ground PANTHER TB2 COM1 TXD RXD GND Pin Connection for METTLER TOLEDO Devices Using COM1 RS-232 8806 8861 8808 8845 8617-TB2 8867 8863 8857 8865 8807 9323-TB2 9325-TBS 3* 2 2 3 ----7* 3 7 5 8846 2 -5 *Each of these devices uses this connection. Discrete I/O Connection Discrete I/O TB2 terminal block assignments. All parallel port outputs are TTL Level, 5 VDC maximum. Discrete input levels are VIN LOW = 0.0 - 0.8 VDC, VIN HIGH = 3.5 - 5.0 VDC. TB2 4 +5 VDC, current limited to 15 mA 5 OUT1 6 OUT2 7 OUT3 8 GND 9 IN1 Re Refer to the appendix for additional information on discrete I/O functions. 2-10 (4-02) Chapter 2: Installation Electrical Connections Setpoint Output Option The Setpoint Output Option converts logic level outputs available at the Controller PCB terminal strip into high level AC, DC or contact outputs. Panel-Mount Terminal (09170247000) The panel-mount high level output option is usable only in the panel-mount PANTHER terminal. It consists of a PCB mounted on the rear of the panel-mount enclosure, which replaces the usual rear cover plate. Connections are made between the Controller PCB and the Setpoint Output Option PCB using discrete wires between the Controller PCB terminal strip and a dual 5-pin connector on the Setpoint Output PCB. Each AC output module is individually fused (located on the module), and is rated at 1A, 28-280 VAC, 50/60 Hz. Alternate output modules (e.g. for DC switching) may be substituted. Field wiring for the outputs is provided by terminal strips on the option PCB. Overall dimensions: 53 mm wide x 152 mm deep (2.12" x 6.2") Power consumption: 15 mA @ 5 VDC External Field Wiring terminal strip assignments: TB1-1 TB1-2 TB2-1 TB2-2 TB3-1 TB3-2 Output 1 (fused) Output 1 Output 2 (fused) Output 2 Output 3 (fused) Output 3 Logic Level Wiring J1 1, 2 3, 4 5, 6 7, 8 9, 10 GND OUT3 OUT2 OUT1 +5 VDC Harsh Environment Terminal (09610086000) The harsh environment Setpoint Output option is available for the harsh or panelmount terminals. It consists of a PCB mounted in a NEMA 4X enclosure with an attached interface harness. Connections are made between the interface harness and the controller PCB terminal strip. Each output module is individually fused (located on the module) and is rated at 1A, 28-280 VAC, 50/60 Hz. Alternate output models (e.g. for DC switching) may be substituted. Field wiring for the outputs is provided by terminal strips on the option PCB. Overall dimensions: 165 mm wide x 254 mm long x 150 mm deep (6.5in x 10 in x 6 in) (4-02) 2-11 METTLER TOLEDO PANTHER Terminal Technical Manual External Field Wiring Terminal Strip Assignments Setpoint PCB J2-1 J2-2 J2-3 J2-4 J2-5 J2-6 J2-7 J2-8 J2-9 J2-10 Function Output 1 (fused) Output 1 Output 2 (fused) Output 2 Output 3 (fused) Output 3 Input 1 (fused) Input 1 Not Used Not Used Logic Level Wiring (Interface Harness) Option Harness PANTHER TB2 Black 4 Brown 5 Red 6 Orange 7 Yellow 9 Blue Not Used Green 8 *This unit does not come with Optos and does not have to be configured as shown. Allen-Bradley RIO Option (09170251000) Wiring The Allen-Bradley RIO network interface terminal strip is wired as follows: Electrical: centered, transformer isolated line drivers Connector: Three position removable terminal strip wired from left to right (rear connector view) as: Blue Shield Clear Refer to Chapter 5, PANTHER Terminal Allen-Bradley Option, for more information. 2-12 (4-02) Chapter 2: Installation PROFIBUS( Option (09170252000) PROFIBUS Option (09170252000) Wiring The PROFIBUS connection is available at two locations on the PROFIBUS PCB. The first is a female 9 pin D subminiature connector, which is the PROFIBUS standard connection. The field connector assembly is not supplied by Mettler Toledo. This connection is the preferred connection in the panel-mount PANTHER terminal (PTPN). For the harsh environment terminal (PTHN), the pluggable terminal strip must be used. A pigtail harness is available to wire from the terminal strip to a female 9-pin D connector. Female DE-9 1 GND (isolated) 2 N.C. 3 TX/RX+ 4 RTS 5 GND (isolated) 6 +5V (isolated) 7 N.C. 8 TX/RX9 N.C. Terminal strip 1 RTS 2 TXD/RXD+ 3 TXD/RXD4 +5 V (isolated) 5 GND (isolated) PROFIBUS Pigtail Harness Wiring The PROFIBUS Pigtail Adapter 0900-0311 is wired to the terminal strip as follows: Color Yellow Blue Green Red Black Green Terminal Number 1 2 3 4 5 Chassis Gnd Signal RTS COM A COM B +5VDC GND 0900-0311 Adapter to Terminal Strip Wiring Refer to Chapter 6, PANTHER Terminal Profibus Option, for more information. (4-02) 2-13 METTLER TOLEDO PANTHER Terminal Technical Manual Modbus Plus Option (09170253000) Switch Settings Each node on the Modbus Plus network must have a unique address. The PANTHER Terminal Modbus Plus node address is set with the “dip switches” on the Modbus Plus interface card. The node address value of the card is equal to the value of the switches plus 1 and it can be equal to a value of 1 to 64. Switch pos. 1 value 1 2 2 3 4 4 8 5 16 6 32 With the switch in the OFF position, the value is as shown above. With the switch in the ON position, the value is zero for that switch. Example: SW1 = OFF SW2 = ON SW3 = ON SW4 = OFF SW5 = OFF SW6 = ON Switch Value = ( PLUS 1) NODE ADDRESS = 1 0 0 8 16 0 +1 26 NOTE: With all of the switches in the OFF position, the node address equals 1. Wiring The Modbus Plus network uses pins 1, 2, and 3 of the DE-9 connector, supplied by Modicon. Wiring instructions come with the connector. The 0900-0320 Modbus Plus Pigtail Adapter is wired to the PANTHER Terminal as follows: Color Terminal Strip # DE-9 Red 1 1 Clear 2 2 Black 3 3 0900-0320 Adapter to Terminal Strip Wiring Refer to Chapter 7, PANTHER Terminal Modbus Plus Option, for more information. 2-14 (4-02) Chapter 2: Installation Analog Output Analog Output The Analog Output terminal strip is shown here. Refer to Chapter 8, PANTHER Terminal Analog Output Option, for more information. J2 1 4-20 mA 2 GND 3 N.C. 4 0-10 V 5 ALARM 6 +5V Wiring WARNING DO NOT APPLY POWER TO THE PANTHER TERMINAL UNTIL INSTALLATION OF COMPONENTS AND EXTERNAL WIRING HAVE BEEN COMPLETED. FAILURE TO OBSERVE THIS PRECAUTION COULD RESULT IN BODILY INJURY. The maximum recommended cable length for the 0-10VDC output is 50 feet (15.2 meters). The recommended cable for use with the analog output is shielded 2conductor stranded 20 gauge cable (Belden #8762 or equivalent) which is available from Mettler Toledo using part number 510220190. J2 Note: The output from the analog module is fixed at absolute displayed weight. J2 1 2 3 4 5 6 4 to 20mA PANTHER Terminal 4-20mA GND N.C. 0-10 VDC ALRM* +5 VDC Customer Device (4-20mA) + - Customer Device (0-10VDC) 1 2 3 4 5 6 0 to 10 VDC PANTHER Terminal 4-20mA GND N.C 0-10 VDC ALRM* +5 VDC + The ALRM Output (Alarm) is an open collector output. If the PANTHER terminal weight display goes to an over capacity or under zero display, or Setup is entered, the connection closes and the ALRM Output will be capable of sinking up to 30 mA DC to ground. The voltage source can be the +5V supplied with the Analog Output PCB or a maximum of +30 VDC external source. (4-02) 2-15 METTLER TOLEDO PANTHER Terminal Technical Manual Controller PCB Switches/Jumpers SW1 Switch Settings 1 Setup/Calibration Enable = On Normal Operation = Off 2 Display Comma Tail = On 3 Not Used (Should be Off) 4 Test Mode (Must be Off) Jumper W1 (Analog Version) Installed = 2 mV/V Load Cells Not Installed = 3 mV/V Load Cells W1 SW1 Fuse F1 Main PCB Analog Versions (P/N *14865400A or *14865200A) (P/N #15201300A or #15201500A) Figure 2-4 2-16 (4-02) Chapter 2: Installation Controller PCB Switches/Jumpers W1 SW1 Fuse F1 Main PCB DigiTOL Versions (P/N *1503180A or 14977900A) Figure 2-5 Connections on the Keyboard Connector J1 Pins 1-3 Memory Pins 1-4 Select Pins 1-5 Print Pins 2-3 Zero Pins 2-4 Tare Pins 2-5 Clear (4-02) 2-17 METTLER TOLEDO PANTHER Terminal Technical Manual NOTES 2-18 (4-02) Chapter 3: Programming and Configuration General Information 3 Programming and Configuration The PANTHER terminal's functions and the accessibility of those functions to an operator are determined by how you configure the individual parameters of the terminal's eight program blocks (F1-F8). This chapter describes each program block and sub-block, and walks you through the various options for configuring them. The factory defaults loaded into the PANTHER terminal appear on page 3-3. Setup Mode F1 Scale Interface F2 Application Environment F3 Configure Serial I/O F4 Configure Discrete Calibration Units Alternate Units Baud Rate Configure Input Enable Tare Parity Tare Interlock Checksum Auto Tare STX Capacity Increment Size Calibration F5 Weigh Mode Weigh Mode Memory Key Editing Setpoint Value Preact Value Auto Clear Tare Output Mode Zero Tolerance DigiTOL Shift Adjust PB Zero Data Format Autoprint at SP Zero Adjust AZM Expanded Print Target Weights AZM Net XX38 Format Targets 1-10 Span Adjust Extended Weight Hold Zone Width Zero Cursor Geo Value Under Zero Blanking Motion Sensitivity Motion Blanking Low Pass Filter Stability Filter % Wgt Display F6 Diagnostics F7 Analog Output F8 PLC Setup Expanded Display Zero Calibration with Weights Weight Data Type Calibration Factors Display DigiTOL Load Cell Counts Print Setup Reset to Factory Zero Calibration via Keyboard Rack Address Start Quarter Span Calibration with Weights Last Rack? Span Calibration via Keyboard Data Rate Analog Output Trim Exit Setup Mode Wt. Difference from Target “Under” Zone High Level Output Control Zone Inc. Size Edit High Zone Edit High Accept Zone Edit Low Accept Zone Edit Low Zone Display Enable (4-02) 3-1 METTLER TOLEDO PANTHER Terminal Technical Manual General Information Program Block Access Note: the setup switch can remain closed if terminal security is not required. To access and configure the program blocks, you must enter Setup Mode. Open the PANTHER terminal as described in Chapter 2 and close SW1-1. Close the terminal. Press PRINT and ZERO simultaneously. The [F1] prompt will be displayed, signaling you that you are now in Setup Mode. General Programming Procedure After accessing Setup Mode, each program block and sub-block can be configured. If the PANTHER terminal is being configured for the first time, it is recommended that the programmer configure each program block to assure the terminal is setup correctly as the application and/or environment dictates. You configure the program blocks and sub-blocks by using the keypad. When you are in setup mode, each key has a specific function. See Keystroke Functions in Setup Mode in the following section. Once the [F1] prompt is displayed: • The SELECT key will skip to the next block. • The PRINT key will enter the block. Once PRINT is pressed, the PANTHER terminal advances to the first parameter in the block. The display shows the sub-block number and the current value setting. Press PRINT to accept the value and advance to the next sub-block. Or, press the SELECT key to toggle through the choices until the desired selection is displayed. After the desired selection is displayed, press PRINT to accept the value. Continue until all required changes have been made. 3-2 (4-02) Chapter 3: Programming and Configuration General Information Keystroke Functions in Setup Mode The following keys are used to configure the program blocks. ZERO Backup to the previous step. T TARE Moves the blinking edit cursor left one digit. CLEAR resets a numeric data entry value to zero and/or allows programmer to skip to the end of setup. MEMORY moves the blinking edit cursor right one digit. M SELECT increments the numeric data entry digit and/or allows the programmer to view the next in a selection list. PRINT (ENTER) Accepts/terminates a data entry. Default Settings The following is a list of the factory default setup parameters loaded in the PANTHER terminal. You can return to these settings by following the procedures outlined in Reset to Factory Defaults (F6.5) on page 3-25. State DESCRIPTION F1.1 2 Scale Type (DigiTOL version only) F1.1.1 4 Number of Load Cells F1.2 1 Calibration Units = lb F1.3 100 Scale Capacity F1.4 0.01 Scale Increment Size F1.5 0 DigiTOL Shift Adjust F1.6 0 Zero Adjust F1.7 0 Span Adjust F1.8 16 Geo Code F2.1 0 Alternate Units = none (unit switching disabled) (4-02) 3-3 METTLER TOLEDO PANTHER Terminal Technical Manual 3-4 (4-02) F2.3.1 1 Pushbutton Tare Enabled F2.3.2 0 Tare Interlock Disabled F2.3.3 0 Auto Tare Disabled F2.3.4 0 Auto Clear Tare Disabled F2.4.1 1 Push Button Zero Enabled, 2% Range F2.4.2 1 Auto zero Maintenance Enabled within 0.5 Window. F2.4.3 1 Auto Zero Maint in Net Mode F2.4.4 1 Zero Cursor Enabled F2.4.5 0 No Under Zero Blanking F2.5 1 Motion Sensitivity ± 0.5 Increments. F2.5.1 0 Blanking Disabled F2.6 2.0 Filter Corner Frequency F2.6.1 0 Noise Filter Disabled F3.1.1 9600 Baud F3.1.4 2 Even Parity F3.1.5 0 Checksum Disabled F3.1.6 0 STX Disabled F3.2 1 Demand Output F3.2.1 0 Print Format = Single Line Printing F3.2.2 0 No Expanded Print F3.2.3 1 XX38 Data Format Disabled F3.3 0 Extended Weight Hold Timer = 0.0 seconds F4.1 1 Discrete input = Print Command F5.1 0 Indicator Weighing Mode F5.2 1 Setpoints/Targets Editing MEMORY Key SP1 0 Setpoint 1/Target 1 SP2 0 Setpoint 2/Target 2 SP3 0 Target 3 (over/under only) SP4 0 Target 4 (over/under only) P10 No Preact for Setpoint 1. P20 No Preact for Setpoint 2. F5.4 0 No Zero Tolerance F5.5 0 No Print at Setpoint 1Ccoincidence F5.6 0 No Print at Setpoint 2 Coincidence F5.7 0 Stored Target Weight Enabled (only appears if F5.1 = 2) F5.7.1 1 Zone Weight Entered in Increments F5.7.2 0 Display is in Weight Units F5.7.3 1 Enable Weight Difference from Target F5.7.4 1 Output on until weight is within 10d of zero. Chapter 3: Programming and Configuration General Information F5.8.1 5 High Zone Width F5.8.2 5 High Accept Zone Width F5.8.3 5 Low Accept Zone Width F5.8.4 5 Low Zone Width F5.9 1 Enable Weight Display and Status Lights F6.1 0 No expanded display mode F6.2 0 Edit Cal. Factors F6.3 0 No DigiTOL Counts Displayed F6.4 0 Print Setup F6.5 0 Reset to Factory *F7.2 Analog Output Zero Calibration with Test Weights, No Default *F7.2.1 Analog Output Zero Calibration via Keyboard, No Default *F7.3 Analog Output Span Calibration w/Test Weights, No Default *F7.3.1 Analog Output Span Calibration with Keyboard, No Default *F7.4 Analog Output Trim Adjustment, no default *F8.1 0 PLC Weight Data Type? (Weight in Display Increments) *F8.2 1 Rack Address? *F8.3 1 Start Quarter? *F8.4 1 Last Rack? *F8.5 2 Data Rate? (115.2 Kb) *F8.6 0 Enable Global Data for Modbus Plus *If analog output PCB option is installed. Exiting Program Blocks and Setup Mode Once you have finished configuring the PANTHER terminal to meet the needs of your application, you can exit setup mode by doing the following: • Press CLEAR. • The [CALOFF] display appears. • Press PRINT. The PANTHER terminal returns to the normal operating mode. The S1-1 switch can be turned off to secure the terminal. (4-02) 3-5 METTLER TOLEDO PANTHER Terminal Technical Manual F1 Scale Interface Program Block The Scale Interface program block allows the user to set and calibrate the features that affect weighing performance. The following diagram describes this block: Scale Interface F1 Calibration Unit F1.2 DigiTOL Hi, DigiTOL Low, DigiTOL J-Box, UltraRes High, UltraRes Low Number of Cells Units lb, kg, g, oz, lb-oz, ozt, dwt, t, ton Scale Capacity F1.3 Enter Capacity Increment Size F1.4 Enter Increment Size Scale Calibration CAL Empty the Scale Capture Zero Zero Adjustment F1.6 Empty the Scale Capture Zero Span Adjustment F1.7 Add Test Weight Capture Span Geo Code F1.8 Add Test Weight Capture Span Enter Code Press PRINT (ENTER) to access the Scale Interface program block and configure the sub-blocks. Or, press SELECT to skip to the next program block. F1.1 Scale Type [F1.1 X] SCALE TYPE: Enter the value for X that corresponds to the type of DigiTOL scale base or DigiTOL J-Box. NOTE: This parameter is skipped if using an analog PCB. X=1 Reserved (Analog only) X=4 DigiTOL J-Box X=2 DigiTOL Hi Res X=5 UltraRes Hi X=3 DigiTOL Lo Res X=6 UltraRes Lo [F1.1.1 ] Number of load cells (DigiTOL only). Select the number of load cells connected to the DigiTOL scale base or DigiTOL J-Box. 3-6 (4-02) X=1 1 load cell X=3 3 load cells X=2 2 load cells X=4 4 load cells Chapter 3: Programming and Configuration F1 Scale Interface Program Block F1.2 Calibration Units Sub-block Example: The PANTHER terminal is calibrated using kg test weights and is switchable to metric tons. Kg is the primary unit and "ton" (metric tons) is the alternate unit. The "ton" overlay would be placed over the blank on the PANTHER terminal display lens. NOTE: If neither the primary or alternate unit is lb or kg, then the left cursor (blank position) is used to indicate the primary unit and the right cursor (kg position) is used to indicate the alternate unit. Alternate unit decals are provided with the PANTHER terminal. [F1.2 X] CALIBRATION UNITS: Enter the value for X that corresponds to the type of test weights that will be used for calibration. X=1 X=2 X-3 X=4 X=5 lb kg g oz ton X=5 X=6 X=7 X=8 lb-oz ozt dwt t The PANTHER terminal provides a wide array of primary and alternate weight units. Primary Units is selected in Step F1.2 as the Calibrated Unit. Alternate Units is selected in Step F2.1. If the primary weight unit selection is something other than kg or if alternate units will be used, an adhesive overlay (shipped with the terminal) needs to be installed over the blank position or "kg" legend on the display lens. This will correctly identify the displayed weight when shown converted to this unit (ton for metric tons for example). The label should be applied as follows: • If one of the selected units is lb, the other legend overlay should be placed over "kg" and the lb overlay should be placed in the blank position. • If one of the selected units is kg, the other legend overlay should be placed over the blank position. 0 B/G kg NET Blank Position NOTE: To access the legend label: • Remove the AC power. • Open the enclosure. • Remove the controller PCB. • Remove the legend label from the bottom of the display window. • After modifying the label, reassemble in reverse order. (4-02) 3-7 METTLER TOLEDO PANTHER Terminal Technical Manual F1.3 Scale Capacity Subblock [F1.3 ] [XXXXXX] SCALE CAPACITY Current scale capacity, available for Numeric Entry editing. Only legal scale capacities from the capacity table below are permitted. Increment Size 0.001 0.002 0.005 0.01 0.02 0.05 0.1 0.2 0.5 1 2 5 10 20 50 For lb-oz mode, the capacity must be entered in whole ounces. 1000d 1 2 5 10 20 50 100 200 500 1000 2000 5000 10000 20000 50000 Capacity (lb oz) 7 lb 8.00 oz 9 lb 6.00 oz 18 lb 12.00 oz 25 lb 0.0 oz 37 lb 8.0 oz 50 lb 0.0 oz 75 lb 0.0 oz 93 lb 12.0 oz 187 lb 8 oz 375 lb 0 oz 750 lb 0 oz 2000d 2 4 10 20 40 100 200 400 1000 2000 4000 10000 20000 40000 100000 LOAD CELL SCALE CAPACITIES 3000d 4000d 5000d 6000d 3 4 5 6 6 8 10 12 15 20 25 30 30 40 50 60 60 80 100 120 150 200 250 300 300 400 500 600 600 800 1000 1200 1500 2000 2500 3000 3000 4000 5000 6000 6000 8000 10000 12000 15000 20000 25000 30000 30000 40000 50000 60000 60000 80000 100000 120000 150000 200000 250000 300000 Increment (oz) 0.02 0.05 0.05 0.1 0.1 0.2 0.2 0.5 1 2 4 Calibration Capacity (oz) 120 150 300 400 600 800 1200 1500 3000 6000 12000 8000d 8 16 40 80 160 400 800 1600 4000 8000 16000 40000 80000 160000 400000 10000d 10 20 50 100 200 500 1000 2000 5000 10000 20000 50000 100000 200000 500000 # div 6000 3000 6000 4000 6000 4000 6000 3000 3000 3000 3000 F1.4 Increment Size Sub-block [F1.4 [ XXXX] 3-8 (4-02) ] INCREMENT SIZE Current Increment size is displayed for Selection List editing. Press the SELECT key to toggle through valid selections. Chapter 3: Programming and Configuration F1 Scale Interface Program Block Calibration Sub-block (No "F" Designation) [CAL X ] SCALE CALIBRATION PROCEDURE X=0 X=1 Skip calibration procedure Continue calibration [E SCL] Empty scale platform and press ENTER to continue. [15 CAL] Delay while initial is set (display counts down). If motion sensitivity is not disabled and motion is detected, the display returns to [E SCL]. [Add Ld] Place test weight on the scale platform, and press ENTER. [‘0’0000] Enter test weight value. No decimal point is permitted. Maximum test weight is 105% of full scale capacity. [15 CAL] Delay while span is set (display counts down). If the motion is detected at this step then the display returns to the [Add Ld] prompt. [CAL d] "Calibration done" is displayed momentarily. Note: When in lb-oz mode, enter the test weight value in ounces. F1.5 Shift Adjust (DigiTOL only) [F1.5 x] SHIFT ADJUST X=0 X=1 X=2 Skip shift adjust Continue with shift adjust Set shift constants = 1.0. Skip remainder of procedure. If "1" is selected, the following sequence will occur: [E SCL] Empty the scale platform and press ENTER to continue. [ 15] Delay while initial is set (display counts down). The weight will be averaged if motion occurs during this process. [CELL X] Place the test weight on the platform over cell "X”. Press ENTER. Load cell #1 is to the left of the J-Box (viewed from the top of the deck). Cells 2,3, and 4 are located as shown in the following illustration: Load Cell #4 Load Cell #2 J-Box Load Cell #1 [ 15] Load Cell #3 Delay while weight reading is recorded (display counts down). The weight will be averaged if motion occurs during this process. The [CELL X] step followed by the [ 15] count down step is repeated until all load cells selected in F1.5 (number of load cells connected) have been shift compensated. (4-02) 3-9 METTLER TOLEDO PANTHER Terminal Technical Manual If "2" is selected, any previously stored shift adjust values are removed. This causes the load cell outputs to be used without any trim built into the values. This feature is used when the terminal is connected to a tank or hopper scale using the DigiTOL power module and the shift test is not practical. F1.6 Zero Calibration Adjust Sub-block [F1.6 X] ZERO CALIBRATION ADJUST X=0 X=1 Skip zero adjustment Store current initial on scale as zero. [15 CAL] If zero calibration adjust is selected, the display counts down from 15 to 0 while scale reading are being taken. Scale motion causes the countdown to restart from 15. Pressing CLEAR during the countdown aborts zero adjust so the motion sensitivity selection can be modified. When the countdown reaches "0," the scale reading is adjusted to the new zero reading. F1.7 Span Calibration Adjust Sub-block [F1.7 X] SPAN CALIBRATION ADJUST X=0 X=1 [ Skip span calibration adjust Perform span calibration adjustment. 0] Numeric data entry of current scale test load. If the PRINT key is pressed with the display showing " 0" then span adjust is aborted. [15 CAL] After valid non-zero data entry, the display counts down from 15 to 0 while scale readings are taken. Scale motion causes the countdown to restart from 15. Pressing CLEAR during countdown aborts span adjust so the motion sensitivity selection can be modified. When countdown reaches "0," an attempt is made to calculate the span calibration. If weight is negative, over-capacity or in expand mode, [E 35] is displayed to show span adjustment cannot be performed. If the weight is more than twice the original displayed weight, [E 35] is displayed. Press any key to clear [E 35] and proceed to the end of setup. F1.8 Geo Code Sub-block [F1.8 X X ] GEO CODE Values from 00 to 31 are accepted. The Geo Code is used to compensate for differences in the acceleration of gravity due to latitude and elevation if the scale was calibrated in one location then moved to another. Gravitational acceleration decreases with increasing height above sea level by approximately 0.2 parts per thousand every 1000 meters. The Geo Code has 32 settings with an increment size of 0.2 parts per thousand. The default Geo Code is 16 (U.S.) See the Geo Code Table in the appendix. 3-10 (4-02) Chapter 3: Programming and Configuration F2 Application Environment Block F2 Application Environment Block Application Environment F2 Alternate Units F2.1 Tare Operations F2.3 Enable Tare F2.3.1 Tare Interlock F2.3.2 Auto Tare F2.3.3 Auto Clear Tare F2.3.4 Zero Operations F2.4 Pushbutton Zero F2.4.1 Auto Zero Maintenance F2.4.2 AZM in Net Mode F2.4.3 Zero Cursor F2.4.4 Motion Sensitivity F2.5 Motion Blanking F2.5.1 Low Pass Filter Corner Frequency F2.6 Stability Filter F2.6.1 [F2 ] Under Zero Blanking F2.4.5 APPLICATION ENVIRONMENT Press SELECT to skip to [F3 ]. Press PRINT to continue. F2.1 Alternate Units Sub-block [F2.1 X] Example: The PANTHER terminal is calibrated using kg test weights and is switchable to metric tons. Kg is the primary unit and "ton" (metric tons) is the alternate unit. The "ton" overlay would be placed over the blank position on the PANTHER terminal display lens. ALTERNATE UNITS: Enter a value for X that corresponds to the unit of measure desired as a secondary unit. X=0 X=1 X=2 X=3 X=4 None lb kg g oz X=5 X=6 X=7 X=8 X=9 lb-oz ozt dwt t ton (metric) Refer to setup step F1.2 for additional information on the optional weight legends. (4-02) 3-11 METTLER TOLEDO PANTHER Terminal Technical Manual F2.3 Tare Operations Subblock [F2.3 For lb-oz mode, no Keyboard Tare is permitted. Remote Tare from the discrete input or serial port is possible if enabled. ] TARE OPERATIONS Press SELECT to skip to [F2.4 ], press PRINT to continue. [F2.3.1 X] ENABLE TARE FROM FRONT PANEL: Enter a value for X that will enable or disable Tare. X=0 Tare disabled X=1 Only Pushbutton Tare enabled [F2.3.2 X] TARE INTERLOCK: The tare interlock feature, if enabled, places certain limitations on how tare values can be cleared and entered in legalfor-trade applications. Specifically, tare interlock meets legal-fortrade requirements by making the following restrictions: Tare weights can be cleared only at gross zero (with scale empty). Tare can be entered only when the scale is in gross mode. Previous tare values must be cleared before a new tare value can be entered (chain tare disabled). X=0 Tare Interlock disabled X=1 Tare interlock enabled [F2.3.3 X] AUTO TARE X=0 Auto Tare disabled X=1 Auto Tare enabled after no motion following > 5d in GROSS mode [F2.3.4 X] AUTO CLEAR TARE X=0 Auto Clear Tare disabled X=1 Auto Clear Tare enabled, tare automatically clears at gross zero F2.4 Zero Operations Subblock [F2.4 ] ZERO OPERATIONS Press SELECT to skip to [F2.5 ], press PRINT to continue. If AZM=0, the tare and zero value will be stored during a power loss. The terminal will display a correct net value when power is restored. 3-12 (4-02) [F2.4.1 X] PUSHBUTTON ZERO ENABLE X=0 Pushbutton zero disabled X=1 Enable pushbutton zero and AZM within ±2% FS range X=2 Enable pushbutton zero and AZM within ±20% FS range Chapter 3: Programming and Configuration [F2.4.2 X] AUTOZERO MAINTENANCE: Auto Zero Maintenance (AZM) automatically compensates for small changes in zero resulting from material build-up or temperature changes. This sub-block lets you select the weight range (±) around gross zero within which the terminal will capture zero. If residual weight on the scale exceeds the weight range, the PANTHER terminal will not capture zero. X=0 No AZM or zero capture at power-up X=1 AZM within 0.5 d window and power-up zero capture ±2%. X=2 AZM within 1d window and power-up zero capture ±2%. X=3 AZM within 3d window and power-up zero capture ±2%. [F2.4.3 X] AZM IN NET MODE X=0 Disable AZM in net mode X=1 Enable AZM in net mode [F2.4.4 X] ZERO CURSOR X=0 No Zero cursor X=1 Zero cursor enabled [F2.4.5 X] UNDER ZERO BLANKING X=0 No Under Zero blanking X=1 Blank Display and internal signal “Under Capacity” if gross weight is greater than 5d under zero. F2.5 Motion Sensitivity Selection Sub-block [F2.5 X] MOTION SENSITIVITY SELECTION: The motion detection feature determines when a no-motion condition exists on the scale platform. The sensitivity level determines what is considered stable. Printing, pushbutton zero, and tare entry will wait for scale stability before carrying out the command. Stability detection occurs over a predefined period of time and allows a predetermined “acceptable” amount of motion (in scale increments). X=0 Motion detector disabled X=1 1.0 d motion sensitivity X=2 3.0 d motion sensitivity [F2.5.1 X] MOTION BLANKING X=0 Blanking disabled X=1 Blank the weight display during motion (4-02) 3-13 METTLER TOLEDO PANTHER Terminal Technical Manual F2.6 Low Pass Filter Corner Frequency [F2.6 X.X] Note: Stability filter should not be enabled in batching or filling operations. LOW PASS FILTER CORNER FREQUENCY X.X is the numeric data entry for the low pass filter corner frequency (0.5-9.9 Hz). [F2.6.1 X] STABILITY FILTER ENABLE/DISABLE This is a break-out filter for nomotion. When this parameter is enabled and the scale is at nomotion, this filter stiffens the low pass filter so that it is harder to go back to a motion condition. Once motion is detected, the filtering goes back to the parameter set in [F2.6 x]. X=0 Disable stability filter X=1 Enable stability filter The stability filter can be used to improve the readability of a static weight display by removing small variations in weight around a steady state value. If the stability filter is enabled and a “no-motion” condition is detected, a very heavy filer is utilized. This keeps the display stable during slight changes in weight. If motion is detected while in this condition, the very heavy filter is removed and the “normal” filter is used. This permits quick changes between stable weight readings. The stability filter is normally used for static weighing applications. If the stability filter is enabled in dynamic applications, such as batching or filling, unrepeatable cutoff weights may result if the heavy filter switches in as the cutoff point is reached. F3 Configure Serial I/O Block Configure Serial I/O F3 Baud Rate F3.1.1 Parity F3.1.4 Serial Data Out F3.2 Data Format F3.2.1 Checksum F3.1.5 Expanded Print F3.2.2 [F3 ] STX F3.1.6 XX38 Data Format F3.2.3 CONFIGURE SERIAL I/O Press SELECT to skip to [F4 ]. Press PRINT to continue. 3-14 (4-02) Extended Weight Hold F3.3 Chapter 3: Programming and Configuration F3 Configure Serial I/O Block F3.1 Select Serial Port Parameters Sub-block [F3.1.1 ] DATA RATE [ XXXX] XXXX = Select 300, 1200, 2400, 4800, or 9600 baud [F3.1.4 X] PARITY X=0 No parity X=1 Odd parity X=2 Even parity [F3.1.5 X] CHECKSUM X=0 No checksum sent X=1 Checksum enabled [F3.1.6 X] STX X=0 No STX sent X=1 STX enabled F3.2 Serial Data Out [F3.2 X] SERIAL DATA OUT Refer to the appendix for details on output strings. X=0 Continuous mode. If continuous mode, the display skips to [F3.3 X]. X=1 Demand mode. Continue to next step. X=2 SICS Protocol. If 2 is selected, the display skips to F4. [F3.2.1 X] DATA FORMAT (Demand Mode output only) X=0 Single line X= 1 Single line gross net tare. X=2 Multiple line gross net tare X=3 Single line with over/under status (over/under mode only) [F3.2.2 X] EXPANDED PRINT (Demand Mode output only) X=0 Normal print X=1 Expanded print [F3.2.3 X] XX38 Data Format x=0 No “G” in single line demand string x=1 “G” in single line demand string (4-02) 3-15 METTLER TOLEDO PANTHER Terminal Technical Manual F3.3 Extended Weight Hold Sub-block [F3.3 X.X] EXTENDED WEIGHT HOLD DISPLAY Use the numeric keypad to enter a value for the time (in seconds from 0.0 to 9.9) that the weight will be held (frozen) on the display when a print is initiated. F4 Configure Discrete Block Configure Discrete F4 Configure Discrete Input F4.1 [F4 ] CONFIGURE DISCRETE Press SELECT to skip this block. Press PRINT to continue. F4.1 Configure Discrete Input Sub-block [F4.1 X] CONFIGURE DISCRETE INPUT Assign a function to the discrete input: 3-16 (4-02) X=0 No function X=1 Print X=2 Tare X=3 Zero X=4 Select (switches units) X=5 Target Chapter 3: Programming and Configuration F5 Weigh Mode Block F5 Weigh Mode Block Weigh Mode F5 Enter Weigh Mode F5.1 Memory Key Editing F5.2 Enter Setpoint 1 SP1 Enter Setpoint 2 SP2 Enter Preact 1 P1 Enter Preact 2 P2 Select Setpoint Zero Tolerance Range F5.4 Auto Print at SP1 F5.5 Auto Print at SP2 F5.6 Enable Stored Target Weights F5.7 Zone Width Entry Mode F5.7.1 Zone Increment Zone F5.8 Enter Targets 1-4 Edit High Zone F5.8.1 Enable Percent Weight Display F5.7.2 Edit High Accept Zone F5.8.2 “Under” Zone High Enable Weight Difference From Target Level Output Control F5.7.4 Display F5.7.3 Edit Low Accept Zone F5.8.3 Edit Low Zone F5.8.4 Display Enable F5.9 [F5 ] WEIGH MODE Press PRINT to continue. Press SELECT to skip to [F6 ]. F5.1 Enter Weigh Mode Sub-block [F5.1 X] ENTER WEIGH MODE X=0 X=1 X=2 Indicator (Setpoints and Targets disabled). Skip to [F6 ] Setpoint Over/Under (4-02) 3-17 METTLER TOLEDO PANTHER Terminal Technical Manual F5.2 Memory Key Editing Sub-block [F5.2 X] MEMORY KEY EDITING X=0 No Setpoint or Over/Under editing using MEMORY key Setpoint or Over/Under editing only in Setup Mode. Proceed to Setpoint or Over/Under Editing. If F5.1 was set to 2, this goes to F5.7. X=1 Setpoints/Targets may be edited only using the MEMORY key. Preact /Zones editing only in Setup Mode. Proceed to Preact or Zone Editing. If F5.1 was set to 2, this goes to F5.7. X=2 Setpoints/Targets and Preacts/Zones may be edited only using the MEMORY key. Tolerance editing only in Setup mode. Proceed to Tolerance Editing. (Setpoint Mode Only) If F5.1 was set to 2, this goes to F5.7. X=3 All Setpoint or Over/Under editing is done only using the MEMORY key. If F5.1 was set to 2, this goes to F5.7. Note: The next two sections related to the entry of setpoint values are allowed from the front panel. The following section permits editing of Setpoint related functions. If the Weigh Mode is “Indicator” or “Over/Under” skip this section. If Memory Key Editing (F5.2) > 0, skip Setpoint Entry. [SP1 ] ENTER SETPOINT 1 Press CLEAR to go to preact editing Press PRINT to proceed. [012345] Display now shows the previous setpoint 1 value, which may now be edited. If the new setpoint value is less than the existing preact value, then [E 20] will be displayed for approximately 2 seconds to flag the error before the display returns to the [SP1 ] display. [SP2 ] ENTER SETPOINT 2 Press CLEAR to proceed to preact editing Press PRINT to proceed. Press ZERO to backup to [SP1] 3-18 (4-02) Chapter 3: Programming and Configuration F5 Weigh Mode Block [012345] Display shows the previous setpoint 2 value. If the new setpoint value is less than the existing preact value, then [E 20] will be displayed for approximately 2 seconds to flag the error before the display returns to [SP2 ]. If the Weigh Mode is “Indicator” or “Over/Under” skip this section. If Memory Key Editing (F5.2) > 1, skip Preact Entry. Values entered for preact adjust the corresponding cutoff action as follows: Note: If the editing of Preact values from the front panel is allowed, skip the next two steps related to Preact Entry. (Only appears if Setpoint Mode is selected in F5.1) Setpoint actuation = Setpoint entry - preact entry [P1 ] ENTER PREACT FOR SETPOINT 1 Press CLEAR to go to F5.4. Press PRINT to proceed. [012345] Display shows the previous preact value for editing. Press ZERO back up to [SP2 ]. Press PRINT to accept entry and go to [P2 ] Press CLEAR to zero display and start entry of a new value. If the new preact value is greater than the existing setpoint value, then [E 20] will be displayed for approximately 2 seconds to flag the error before the display returns to the [P1 ] display. [P2 ] ENTER PREACT FOR SETPOINT 2 Press CLEAR to go to F5.4. Press PRINT to proceed. [012345] Display shows the previous preact 2 value for editing. Press ZERO back up to [P1 ]. Press PRINT to accept entry and proceed to [F5.4 ] Note: If the editing of setpoint zero tolerance values from the front panel is allowed, skip the next section. Press CLEAR to zero display and start entry of a new value. If the new preact value is greater than the existing setpoint value, then [E 20] will be displayed for approximately 2 seconds to flag the error before the display returns to the [P2 ] display. F5.4 Select Setpoint Zero Tolerance Range [F5.4 X] SELECT SETPOINT ZERO TOLERANCE RANGE. X=0 no zero tolerance output. X=1 1 increment. X=5 5 increments. (4-02) 3-19 METTLER TOLEDO PANTHER Terminal Technical Manual F5.5 Auto Print at SP1 Sub-block [F5.5 X] AUTO PRINT AT SP1 (Setpoint Mode only) X = 0 Auto print at SP1 disabled X = 1 Auto print when setpoint reached after coming from zero. F5.6 Auto Print at SP2 Sub-block (Only appears if Setpoint Mode is selected in F5.1) [F5.6 X] AUTO PRINT AT SP2 (Setpoint Mode only) X = 0 Auto print at SP2 disabled X = 1 Auto print when setpoint reached after coming from zero. F5.7 Enable Stored Target Weights [F5.7 X] ENABLE STORED TARGET WEIGHTS X=0 Disable stored target weight, skip to zone editing X=1 Enable stored target weight. (If entry of target values from the front panel is allowed, skip the next four steps related to target entry.) [F5.7.1] ZONE WIDTH ENTRY MODE X=0 Zone width entered in increments 0-15d. X=1 Zone width entered as % of target, 0 to 4% [SP1 ] ENTER TARGET 1 (Only if F5.2 = 0) (Only appears if Setpoint Mode is selected in F5.1) Press CLEAR to go to F5.7.2. Press PRINT to proceed. Value is displayed. Edit. Press PRINT again. (Only appears if Over/Under Mode is selected in F5.1) Press ZERO to backup to [F5.7 ] NOTE: You camnot use the ZERO key to back up through the setpoints. Press SELECT to move to other setpoints. [012345] Display now shows the previous target 1 value for editing. When new value is entered, press PRINT. Repeat for SP2, SP3, and SP4. [F5.7.1 X] ZONE WIDTH ENTRY MODE X=0 Zone width is entered in increments (0-15) X=1 Zone width is entered in percent of target (0-4%) If units switching is enabled, display is always in weight units; skip this prompt. [F5.7.2 X] ENABLE PERCENT WEIGHT DISPLAY X=0 Weight display is in weight units X=1 Weight display is in percent of target Note: If F5.7.2 is set to 1, the display skips to F5.7.4. 3-20 (4-02) Chapter 3: Programming and Configuration F5 Weigh Mode Block [F5.7.3 X] ENABLE WEIGHT DIFFERENCE FROM TARGET DISPLAY MODE When enabled, if a valid target weight is available , weight is displayed as the difference from the target weight instead of the “normal” weight. X=0 Disable Weight Difference from Target X=1 Enable Weight Difference from Target If the Weigh Mode is “Indicator” or “Setpoint” skip this section. [F5.7.4 X] WEIGHT UNDER TARGET HIGH LEVEL OUTPUT CONTROL X=0 Under target output always on when weight falls below Low zone. X=1 Under target output on until weight falls below 10 increments of gross zero. If entry of zone values from the front panel is allowed, skip to section 5.9. F5.8 Zone Increment Size for Pushbutton Target [F5.8] ZONE INCREMENT SIZE [F5.8.1 XX] EDIT HIGH ZONE XX = Current number of increments for High zone for selection list editing. (0 to 4.0% of target or 0 to 15 increments of weight) [F5.8.2 XX] EDIT HIGH ACCEPT ZONE XX = Current number of increments for High Accept zone for selection list editing. [F5.8.3 XX] EDIT LOW ACCEPT ZONE XX = Current number of increments for Low Accept zone for selection list editing. [F5.8.4 XX] EDIT LOW ZONE XX = Current number of increments for Low zone for selection list editing. If the Weigh Mode is “Indicator” or “Setpoint” skip this section. F5.9 Display Enable Subblock [F5.9 X] DISPLAY ENABLE X=0 Status lights only X=1 Weight displayed in minors (4-02) 3-21 METTLER TOLEDO PANTHER Terminal Technical Manual F6 Diagnostics Block Diagnostics F6 Expanded Display F6.1 Edit Calibration Factors F6.2 Display DigiTOL Load Cell Counts F6 3 Print Setup Report F6.4 Reset to Factory F6.5 [F6 ] DIAGNOSTICS Press SELECT to skip to [F7 ]. Press PRINT to continue F6.1 Expanded Display Sub-block [F6.1 X] EXPANDED DISPLAY. X=0 Normal display mode X=1 Weight displayed in minors [F6.2 X] EDIT CALIBRATION FACTORS X=0 Skip this block X=1 Edit calibration factors F6.2 Edit Calibration Factors Sub-block [123456] Zero factor, available for numeric data editing [123456] Span factor, available for numeric data editing, page 1 [123456] Span factor, available for numeric data editing, page 2 3-22 (4-02) Chapter 3: Programming and Configuration F7 Analog Output Option Block F6.3 Display Individual Load Cell Counts (DigiTOL Only) [F6.3 X] X=0 Skip this operation. X=1 Display cell readings in count. F6.4 Print Setup [F6.4 X] PRINT SETUP Display will show [ PS - XX] during printing. The XX will increment from 01 to indicate printing is proceeding. X=0 Skip this sub-block X=1 Print setup report F6.5 Reset to Factory Defaults [F6.5 X] RESET SOFTSWITCH CONFIGURATION TO FACTORY SETTINGS X=0 Skip this sub-block X=1 Restore all settings to factory defaults [LOAd 0] Are you sure prompt. Toggle to “1” for yes, “0” to abort, then press PRINT. If “yes”, soft switches are now set to the factory default values. F7 Analog Output Option Block Analog Output Option F7 Analog Output Zero Calibration with Test Weights F7.2 Analog Output Zero Calibration Via Keyboard F7.2.1 Analog Output Span Calibration with Weights F7.3 Analog Output Span Calibration via Keyboard F7.3.1 Analog Output Trim Adjustment F7.4 [F7 ] ANALOG OUTPUT OPTION (if option is installed) Press SELECT to skip to [CALOFF ]. Press PRINT to continue. (4-02) 3-23 METTLER TOLEDO PANTHER Terminal Technical Manual F7.2 Analog Output Zero Calibration with Test Weights [F7.2 X] ANALOG OUTPUT ZERO CALIBRATION WITH WEIGHTS If X=0 then, Skip this step. If X=1 then proceed to: [0 Ld ] Operate the PRINT key to acknowledge desired 'zero' weight is on scale. [15 CAL] Delay while reading for application zero reading taken. Go to [F7.3 X]. [F7.2.1 X] ANALOG OUTPUT ZERO CALIBRATION VIA KEYBOARD X=0 Skip this step. [ZZZZZZ] X = 1 Numeric Data entry of the previous application zero offset value. Go to [F7.3.1 X ] F7.3 Analog Output Span Calibration with Test Weights Sub-block [F7.3 X] ANALOG OUTPUT SPAN CALIBRATION WITH WEIGHTS X=0 Skip this step. [15 CAL] X=1 [Add Ld] Press PRINT key to acknowledge addition of 'span' weight to the platform. Delay while zero reading for span determination is made. [15 CAL] Delay while reading for span determination is made. If a weight representing less than 1000d is used, an error message [E 32] is displayed and the previous span calibration is retained. This error display can be terminated by: ZERO key -- prompt [F7.2 X] CLEAR key -- prompt [CALOFF]. PRINT key-- prompt [F7.4 X] If no errors occurred, then advance to [CALOFF] [F7.3.1 X] ANALOG OUTPUT SPAN CALIBRATION VIA KEYBOARD X=0 Skip this step [SSSSSS] X = 1 3-24 (4-02) Numeric Data entry of previous application span factor value. Chapter 3: Programming and Configuration F8 PLC Setup Block F7.4 Analog Output Trim Adjustment [F7.4] ANALOG OUTPUT TRIM ADJUSTMENT X=0 X=1 X=2 Skip this section Continue calibration using constant Zero and Full Scale values. Continue calibration using active load cell weight. Empty the scale when calibrating Zero. Load scale when adjusting Span. [S SLO] [0 FAS] Decrease zero reading analog output with SELECT key or increase with ZERO key. One ‘click’ per key operation. [0 SLO] If MEMORY is pressed, then alter zero reading analog output as above but at a slower rate. Successive operation of the MEMORY key causes a toggle back and forth between fast and slow mode operation. Finish entry with ENTER key. Abort using the CLEAR key. [S FAS] Decrease span reading analog output with SELECT key or increase with the ZERO key; one ‘click’ per key operation. If the MEMORY key is pressed, then alter span reading as above at a slower rate. Successive operation of the MEMORY key causes a toggle back and forth between fast and slow mode prompt and operation. Finish entry with PRINT key. Abort using the CLEAR key. F8 PLC Setup Block PLC Setup F8 Weight Data Type F8.1 Rack Address F8.2 Press SELECT to skip to [CALOFF]. Press PRINT to continue. F8.1 Weight Data Type [F8.1 X] WEIGHT DATA TYPE X=0 Weight is in display increments, decimal point is implied X=1 Weight is in integer increments, no decimal point implied F8.2 Rack Address [F8.2 XXX] RACK ADDRESS XXX Scale node address. 0-64 for Allen-Bradley, 0-126 for PROFIBUS. Only displays node address for Modbus Plus. (Switch on Modbus Plus PCB is used to set node address). (4-02) 3-25 METTLER TOLEDO PANTHER Terminal Technical Manual F8.3 Start Quarter Address [F8.3 X] START QUARTER ADDRESS (Allen-Bradley Only) X=Starting 1=rack address, 1-4. F8.4 Last Rack [F8.4 X] LAST RACK? (Allen-Bradley Only) X=0 No X=1 Yes F8.5 Data Rate [F8.5 X] DATA RATE (Allen-Bradley Only) X=1 57.6 Kb X=2 115.2 Kb X=3 230.4 Kb F8.6 Global Data Enable [F8.6 X] GLOBAL DATA ENABLE (Modbus Plus Only) X=0 Global Data Disabled X=1 Global Data Enabled Exit Setup Mode Program Block [CALOFF] EXIT SETUP MODE The prompt reminds the user to move the Setup switch to “off”. Press ZERO to return to the previous block. Press PRINT to exit setup. Additional Information In order to secure the PANTHER terminal from accidental or unintentional changes in setup mode, turn switch SW1-1 off. In legal-for-trade applications, after checking for correct operation and turning switch SW1-1 off, the enclosure must be "sealed." It may be sealed by using adhesive labels on two opposite sides of the enclosure and sticking the labels between the front and rear portions. If a wire and lead seal are required, loop the wire through the bottom center hole of the front door. Secure it with a seal. Once the terminal has been configured (programmed), it is ready for use. Instructions for using the PANTHER terminal are provided in the PANTHER Terminal User's Guide. Operators can perform any of the basic functions listed in that manual. The advanced functions must have been enabled during the programming sequence just completed in order for operators to have access to them. 3-26 (4-02) Chapter 4: Service and Maintenance Cleaning and Maintenance 4 Service and Maintenance Cleaning and Maintenance WARNING ONLY PERMIT QUALIFIED PERSONNEL TO SERVICE THIS EQUIPMENT. EXERCISE CARE WHEN MAKING CHECKS, TESTS AND ADJUSTMENTS THAT MUST BE MADE WITH POWER ON. FAILING TO OBSERVE THESE PRECAUTIONS CAN RESULT IN BODILY HARM. Wipe the keyboard with a clean, soft cloth dampened with a mild glass cleaner. Do not use any type of industrial solvent such as toluene or isopropanol (IPA). These may damage the terminal’s finish. Do not spray cleaner directly onto the terminal. Regular maintenance inspections by a qualified service technician are also recommended. WARNING IF THE KEYBOARD, DISPLAY LENS OR ENCLOSURE IS DAMAGED ON A PANTHER PANEL-MOUNT TERMINAL THAT IS BEING USED IN AN AREA CLASSIFIED AS DIVISION 2, THE DEFECTIVE COMPONENT MUST BE REPAIRED IMMEDIATELY. REMOVE AC POWER AND DO NOT RE-APPLY POWER UNTIL QUALIFIED SERVICE PERSONNEL HAVE REPLACED THE DISPLAY LENS, KEYBOARD OR ENCLOSURE. FAILURE TO DO SO COULD RESULT IN BODILY HARM AND/OR PROPERTY DAMAGE. WARNING IF THE PANTEHR TERMINAL IS LOCATED IN A HAZARDOUS AREA (INCLUDING DIVISION 2 AREAS), MAKE SURE THE AREA IS MADE SAFE. FAILURE TO DO SO COULD RESULT IN PERSONAL INJURY AND/OR PROPERTY DAMAGE. Troubleshooting The PANTHER terminal is designed to be virtually error-free and reliable. If problems do occur, do not attempt to repair the scale or terminal before the source of the problem has been determined. Record as much information as possible about what has happened including any error messages and physical responses of the terminal and/or scale. If the PANTHER terminal is malfunctioning, perform the troubleshooting tests described in the next few pages to identify the problem. (4-02) 4-1 METTLER TOLEDO PANTHER Terminal Technical Manual Error Codes and Actions Error Description E1 PROGRAM MEMORY ERROR E2 INTERNAL RAM ERROR E3 EEPROM MEMORY ERROR E4 E7 EXTERNAL RAM ERROR A/D CIRCUIT MALFUNCTION OR NO ANALOG LOAD CELL CONNECTED DigiTOL LOAD CELL COMMUNICATION ERROR DigiTOL LOAD CELL OUT OF RANGE DigiTOL LOAD CELL RAM ERROR DigiTOL LOAD CELL ROM ERROR INTERNAL MATH ERROR PREACT VALUE IS GREATER THAN SETPOINT VALUE INSUFFICIENT TEST WEIGHT USED FOR CALIBRATION TEST WEIGHT EXCEEDS 105% OF CAPACITY SPAN CALIBRATION ERROR ANALOG LOAD CELL OUT OF RANGE WEIGHT CAN NOT BE DISPLAYED IN ALTERNATE UNITS STACK OVERFLOW. POSITIVE MORE THAN ZERO CAPTURE LIMIT OF 2% OF SCALE CAPACITY NEGATIVE MORE THAN ZERO CAPTURE LIMIT OF 2% OF SCALE CAPACITY NO ANALOG LOAD CELL DETECTED E8 E9 E10 E13 E16 E20 E32 E34 E35 E36 E50 E60 EEE -E E E ------ Corrective Measures Check power supply voltages. Replace Main Logic PCB. Check power supply voltages. Replace Main Logic PCB. Press the CLEAR key. Check power supply voltages. Reprogram. Recalibrate. Replace Main Logic PCB. Replace Main Logic PCB. Program for correct load cell type. Check load cells and cables. Check power supply voltages. Replace Main Logic PCB Cycle power. Check load cells and cables. Check power supply voltages. Replace Main Logic PCB. Recalibrate. Replace load cell. Cycle power. Check power supply voltages. Replace load cell. Cycle power. Check power supply voltages. Replace Main Logic PCB. Press CLEAR to acknowledge. Unit will reset. Clear preact value, then re-enter setpoint value Recalibrate using more test weight Use less than 105% of capacity Press CLEAR and re-enter Recalibrate. If error persists, check programming or replace load cell. Recalibrate. Replace load cell Some alternate units combinations are illegal. Choose another scale build or disable alternate units. Press CLEAR. Unit resets. Remove material from scale base. Disable AZM in setup. Cycle power. Disable AZM in setup. Calibrate scale. Cycle power. Check load cell wiring. Replace load cell. Replace Main PCB. AC Power Test Using a multi-meter, check the AC input power. Input power must be within -15% and +10% of the nominal AC line voltage. 4-2 (4-02) Chapter 4: Service and Maintenance Troubleshooting Main Logic PCB Voltage Test PANTHER Terminal (Analog) Verify voltage of 5.00 VDC between + and - Excitation (±10%). If the PANTHER terminal has power and there is no excitation voltage, replace the PCB. PANTHER Terminal (DigiTOL) Verify +20 VDC between +20 VDC and ground. Keyboard Test The keyboard can be tested by removing it from the J1 connector on the Main PCB and making a continuity test between the pins shown below. The keyboard is a matrix type and should indicate less than 100 ohms resistance when a key is pressed. Key Name J1 Pins Zero 2-3 Tare 2-4 Clear 2-5 Memory 1-3 Select 1-4 Print 1-5 Discrete Output Voltage With no load applied and the PANTHER terminal at gross zero, the following voltages should be measured. Refer to the following table for correct voltage readings. Test Points Voltage Readings GND & +5 VDC 5 VDC* +5 VDC & OUT1 5 VDC* +5 VDC & OUT2 5 VDC* +5 VDC & OUT3 5 VDC* *If voltages are not within the +4.5 to +5.2 VDC range, check: • Discrete outputs (refer to information in the Appendix). • Programming. • Setpoint weight values. (4-02) 4-3 METTLER TOLEDO PANTHER Terminal Technical Manual RS232 Serial Output Test Use the following test procedure to determine whether the RS-232 serial port is operational. When measuring the higher baud rates in the Demand mode, the meter display will fluctuate for a shorter period of time. 1. Remove power from the PANTHER terminal and the printer. Disconnect the data cable from the printer. 2. Set the voltmeter to read 20 volts DC. 3. Connect the red lead to pin 3 of the printer end of the data cable and connect the black lead to pin 7. 4. Apply power. The meter should read as follows: • In Demand mode, the meter should read between −5 and −15 with no fluctuation. • In Continuous mode, the meter should fluctuate between −5 and +5 continuously. The constant fluctuation on the meter display indicates the scale/indicator is transmitting information. To test Demand baud rates, press the PRINT key. The display should fluctuate between •5 volts to +5 volts for the duration of the transmission, then become stable again. This indicates the terminal has transmitted data. Analog Output Option Test the voltages of each output to ground. Depending on the calibration of the scale and the displayed weight, each output should be outputting a linear voltage with respect to calibration. If the voltages are not present or the error code repeats, replace the analog output PCB. 4-4 (4-02) Chapter 5: PANTHER Terminal Allen-Bradley Option Allen-Bradley RIO Network Specifications 5 PANTHER Terminal Allen-Bradley Option Allen-Bradley RIO Network Specifications Refer to your Allen-Bradley documentation or Allen-Bradley directly for questions related to the A-B RIO network such as cable length, number of nodes, and PLC model compatibility. This manual does not attempt to provide all information pertaining to the Allen-Bradley RIO. The Allen-Bradley RIO option consists of a PANTHER terminal I/O PCB and the software that resides in the PANTHER terminal, which implements the data exchange. The PANTHER terminal A-B RIO PCB has the following features: • A-B RIO Node Adapter Chip Set (licensed from Allen-Bradley) and termination for the A-B network cable (blue hose) on a three-position removable terminal block. • User programmable RIO communication parameters are configured in software set up through the PANTHER terminal. The parameters are as follows: 57.6K, 115.2K, or 230.4K baud rate rack address starting quarter last rack designation • Capability for bi-directional discrete mode communications of weight, display increments, status, and control data between the PLC and PANTHER terminal. Allen-Bradley Overview Information on data exchange to and from the Allen-Bradley RIO, and data formats are not made available by Allen-Bradley. The PANTHER terminal initiates a communication exchange with the PLC at every A-to-D weight update. This mode is also known as the Discrete I/O mode in Allen-Bradley terminology. This weight-synchronous communications is a high-speed, real-time message interface between the PANTHER terminal and PLC for process control. Allen Bradley RIO Kit Installation The PANTHER Allen Bradley Option Kit 0971-0251 provides connectivity to an AllenBradley PLC using the remote I/O (RIO) protocol. The Allen Bradley Kit may be installed in the PANTHER harsh environment or panel-mount enclosure type. Part Number (*)15098500A (*)14915300A (*)14467400A (*)14829500A (*)14828800A (*)14828700A (*)15069600A (*)14827600A (*)14217400A R0511100A R0519600A (*) May have letter prefix. Description Allen Bradley PCB Assembly Option Harness Snap-in Standoff Mounting Bracket Terminal Block Label Controller Label, Analog Controller Label, Digital Rear Panel Terminal Block, 3 position Screw, M4 Nut, M4 Quantity 1 1 1 1 1 1 1 1 1 4 2 (4-02) 5-1 METTLER TOLEDO PANTHER Terminal Technical Manual Installing the Harsh Environment Enclosure WARNING DISCONNECT ALL POWER TO THIS UNIT BEFORE INSTALLING, SERVICING, CLEANING, OR REMOVING THE FUSE. FAILURE TO DO SO COULD RESULT IN BODILY HARM AND/OR PROPERTY DAMAGE. WARNING DO NOT APPLY POWER TO THE PANTHER TERMINAL UNTIL THE EXTERNAL WIRING AND THE INSTALLATION OF ALL COMPONENTS HAS BEEN COMPLETED. CAUTION OBSERVE PRECAUTIONS FOR HANDLING ELECTROSTATIC SENSITIVE DEVICES. WARNING ONLY PERMIT QUALIFIED PERSONNEL TO SERVICE THIS EQUIPMENT. EXERCISE CARE WHEN MAKING CHECKS, TESTS AND ADJUSTMENTS THAT MUST BE MADE WITH POWER ON. FAILING TO OBSERVE THESE PRECAUTIONS CAN RESULT IN BODILY HARM. WARNING IN ORDER TO USE THE PANTHER ANALOG PANEL-MOUNT TERMINAL IN AN AREA CLASSIFIED AS CLASS I, II, OR III, DIVISION 2, GROUPS A, B, C, D, F OR G, METTLER TOLEDO CONTROL DRAWING 155907R MUST BE FOLLOWED WITHOUT EXCEPTION. FAILURE TO DO SO COULD RESULT IN BODILY HARM AND/OR PROPERTY DAMAGE. 5-2 (4-02) Chapter 5: PANTHER Terminal Allen-Bradley Option Allen Bradley RIO Kit Installation To install the 0971-0251 Allen-Bradley RIO PCB kit, refer to this illustration and the instructions that follow. Option PCB 15098500A 14467400A R0511100A x4 14217400A 14829500A R0519600A x2 Figure 5-1 Allen-Bradley PCB Installation in Harsh Environment Enclosure 1. Disconnect AC power to the PANTHER terminal. 2. Locate the two slots found on the bottom of the enclosure lid. Press a large flat bladed screwdriver into the each slot until a gentle "pop" sound is heard, indicating that the latch has released. 3. Swing the bottom of the enclosure cover up until it clears the enclosure. Next lightly squeeze the top of the front cover to the enclosure then raise the cover to clear the upper two spring clips. The cover will swing down and be suspended by a grounding strap. 4. Remove the four screws which mount the Controller PCB to the cover. 5. Press the snap-in standoff (14467400A) into the Controller PCB (see Figure 5-1). 6. Plug the option harness (14915300A) to the Allen Bradley PCB at J1. 7. Connect the option harness to the Controller PCB at J2. 8. Attach the Allen Bradley Option PCB to the Controller PCB with 2 screws (R0511100A) and 2 nuts (R0519600A). 9. Mount the Controller PCB to the enclosure front cover using the four screws removed in step 3. 10. Insert terminal block (14217400A) into Allen Bradley PCB connector and wire interconnecting cable (not supplied with this kit). 11. Close the enclosure, apply power, and program as required. Refer to the chapter on programming information. (4-02) 5-3 METTLER TOLEDO PANTHER Terminal Technical Manual Installing the Panel-Mount Enclosure WARNING DISCONNECT ALL POWER TO THIS UNIT BEFORE INSTALLING, SERVICING, CLEANING, OR REMOVING THE FUSE. FAILURE TO DO SO COULD RESULT IN BODILY HARM AND/OR PROPERTY DAMAGE. CAUTION OBSERVE PRECAUTIONS FOR HANDLING ELECTROSTATIC SENSITIVE DEVICES. 1. Disconnect AC power to the PANTHER terminal. 2. Unscrew the two screws (R0511100A) retaining the rear enclosure cover plate, then remove and discard the original cover plate. Save the mounting screws for later. 3. Slide the Controller PCB partially out of the enclosure until the keyboard tail is exposed. Unplug the keyboard tail and remove the Controller PCB from the enclosure. Option PCB 15098500A 14467400A R0511100A x4 14217400A 14829500A R0519600A x2 Figure 5-2 Allen-Bradley PCB Installation in Panel Mount Enclosure 4. Press the snap-in standoff (14467400A) into the Controller PCB. 5. Connect the option harness (14915300A ) to the Controller PCB at J2. 6. Attach the Allen Bradley Option PCB to the Controller PCB with 2 screws (R0511100A) and 2 nuts (R0519600A). 5-4 (4-02) Chapter 5: PANTHER Terminal Allen-Bradley Option Allen Bradley RIO Kit Installation 14915300A R0511100A x2 14829500A 15098500A Figure 5-3 Allen-Bradley PCB Installation in Panel Mount Enclosure R0511100A x2 A14827600A Figure 6-4 Allen-Bradley PCB Installation in Panel Mount Enclosure 8. Plug the option harness (14915300A) to the Allen Bradley Option PCB. 9. Plug the keyboard tail into the mating connector on the bottom of the Controller PCB. 10. Slide the Controller PCB assembly into the enclosure. Make sure the keyboard tail does not fold in front of the display. 11. Attach the new rear panel (14827600A) to the enclosure using the two screws (R0511100A) removed in step 2. 12. Affix the controller label (14828700A Analog or 15069600A DigiTOL) to the Allen Bradley Option rear panel to identify the Controller PCB terminals. 13. Insert terminal block (14217400A) into the Allen Bradley PCB connector. Affix the terminal block. 14. Wire interconnecting cable (not supplied with this kit) to the terminal block. Apply power and program as required. (4-02) 5-5 METTLER TOLEDO PANTHER Terminal Technical Manual AB RIO Interface PCB Wiring and Specifications Processor: Memory: I/O: Allen-Bradley ASIC None Allen-Bradley RIO network interface Electrical: centered, transformer isolated line drivers Connector: Three position removable terminal strip wired from left to right (rear connector view) as: Blue Shield Clear Bus Interface: Same as Connector PCB Power Requirements: +5 VDC PCB Outline: 6.8” x 5.3”. 0.50” max height. Status Lights The Allen-Bradley option board has a status LED with three modes: ON indicates normal operation Flashing indicates the PLC is in Program Mode OFF indicates a communication problem with the PLC Allen-Bradley Setup In PANTHER Terminal To configure the PANTHER terminal for an Allen-Bradley PCB, first select F8 in setup, then select the following options. F8.1 Weight Data Type 0 = Weight is in display increments, decimal point is implied. 1 = Weight is in integer divisions, no decimal point implied. F8.2 Rack Address Enter 0-64 for the Rack Address. F8.3 Start Quarter Enter the starting ¼ rack address 1-4. F8.4 Last Rack? 0 = No 1 = Yes F8.5 Data Rate 1 = 57.6Kb 2 = 115.2 Kb 3 = 230.4Kb Communications The Allen-Bradley Remote I/O (RIO) network is an Allen-Bradley proprietary network that permits certain A-B PLCs to communicate to additional racks of input and output 5-6 (4-02) Chapter 5: PANTHER Terminal Allen-Bradley Option Communications devices or to other peripheral devices that implement the RIO interface. The network has evolved with generations of A-B PLCs to implement higher speeds and more connections. The PANTHER terminal utilizes component parts that are provided by A-B thereby assuring complete compatibility with the RIO network. PANTHER terminals are recognized as an Allen-Bradley device by the PLC. Each PANTHER terminal connected to the RIO network represents a physical node. The connection is facilitated by a three-position removable terminal block on the PANTHER terminal RIO Option back panel. The terminal block is labeled 1, SHLD, and 2. These terminals correspond to the like terminals on the A-B PLC RIO connector. The wiring between the PLC and the PANTHER terminal RIO connector uses the standard RIO cable supplied by Allen-Bradley. This cable is often referred to as the "blue hose." The cable installation procedures and specifications are the same as recommended by AllenBradley for the RIO network. Node Address Although each PANTHER RIO option represents one physical node, the addressing of the node is defined as a logical rack address. This address is determined by the system designer, then programmed into the PANTHER terminal. Programming is done through the Allen-Bradley program block in setup. Each scale occupies a quarter rack in the RIO address space and the quarter may be defined as the first, second, third, or fourth quarter of a rack. It is also necessary to designate the location of the PLC which is the highest quarter used in a logical rack. The PANTHER terminal’s programming capabilities allow selection of the starting quarter and designation of the last rack. Controlling PANTHER Terminal Discrete I/O Using a PLC Interface PANTHER terminals on RIO: • Use Allen-Bradley licensed technology. • Looks like an A-B RIO device. • Use standard Blue Hose connections. The PANTHER terminal provides the ability to directly control its discrete outputs and read its discrete inputs via the (digital) PLC interface options. The PANTHER terminal’s discrete I/O updates are synchronized with the PANTHER A/D rate, not with the PLC I/O scan rate. This may cause a noticeable delay in reading inputs or updating outputs as observed from the PLC to real world signals." Data Definition The PANTHER RIO I/O network supports Discrete Data Transfer that allows for bidirectional communication of discrete bit encoded information or 16 bit binary word (signed integer) numerical values. Each PANTHER represents a quarter rack of data to the RIO Option and each quarter rack provides two input (read) and two output (write) words. A quarter logical rack has 32 input bits (two 16 bit words) and 32 output bits (two 16 bit words). The data in these input and output words is formatted as follows: (4-02) 5-7 METTLER TOLEDO PANTHER Terminal Technical Manual DISCRETE READ - PANTHER Terminal Output to PLC Input 1. 2. 3. 4. 5. 6. 7. 5-8 (4-02) Bit Numbers Word 01 Word 1 0 Integer Weight bit 00 Setpoint 15 1 Integer Weight bit 01 Setpoint 26 2 Integer Weight bit 02 Zero Tolerance7 3 Integer Weight bit 03 Unused 4 Integer Weight bit 04 Unused 5 Integer Weight bit 05 Unused 6 Integer Weight bit 06 Unused 7 Integer Weight bit 07 Unused 8 Integer Weight bit 08 Unused 9 Integer Weight bit 09 PAR 1.11 10 Integer Weight bit 10 Unused 11 Integer Weight bit 11 Unused 12 Integer Weight bit 12 Motion2 13 Integer Weight bit 13 Net Mode2 14 Integer Weight bit 14 Update in Progress3 15 Integer Weight bit 15 Data OK4 PAR 1.1 is the current state of the PANTHER terminal discrete input. Positive true (1=True) If 1, the PANTHER terminal was updating the PLC interface shared memory while data was read. The PLC should ignore this data and rescan. Set to 1 if scale is operating properly, not over or under range, in power up, expanded mode, or in setup mode (Integer weight will be set to zero.) Setpoint 1 output bit status if in Setpoint mode or Under bit status if in Over-Under mode. Setpoint 2 output bit status if in Setpoint mode or “Low OK - OK - High OK” bit status if in Over-Under mode. Zero Tolerance output bit status if in Setpoint mode or Over bit status if in Over-Under mode. Chapter 5: PANTHER Terminal Allen-Bradley Option Communications DISCRETE WRITE - PLC Output to PANTHER Terminal Input 1. 2. 3. 4. 5. 6. 7. 8. Bit Numbers Word 0 Word 1 0 Integer tare/Setpoint Bit 00 Select 11 1 Integer tare/Setpoint Bit 01 Select 21 2 Integer tare/Setpoint Bit 02 Select 31 3 Integer tare/Setpoint Bit 03 Load Preset Tare2,7 4 Integer tare/Setpoint Bit 04 Clear Tare Command3,8 5 Integer tare/Setpoint Bit 05 Pushbutton Tare Command3,7 6 Integer tare/Setpoint Bit 06 Print Command3 7 Integer tare/Setpoint Bit 07 Zero Command3 8 Integer tare/Setpoint Bit 08 Enable Setpoint Command4 9 Integer tare/Setpoint Bit 09 Unused 10 Integer tare/Setpoint Bit 10 Unused 11 Integer tare/Setpoint Bit 11 Unused 12 Integer tare/Setpoint Bit 12 PAR 2.15 13 Integer tare/Setpoint Bit 13 PAR 2.25 14 Integer tare/Setpoint Bit 14 PAR 2.35 15 Integer tare/Setpoint Bit 15 Load Setpoint 1 Value6 A binary value in bits 0-2 select the data in Discrete Read weight data source: 0 = Gross weight, 1 = Net weight, 2 = Displayed weight, 3 = Tare or active Target if in Over/Under mode, 4 = Setpoint 1, 5-7 = Gross. A transition from 0 to 1 causes the value in Word 0 to be written into the preset tare register. A transition from 0 to 1 activates the command. Setpoint or Over-Under high level outputs are disabled if this bit is set = 0, enabled if set = 1. Setting this bit to 1 after a downloaded Setpoint 1 or Target 1 value will store the downloaded value in non-volatile memory. PAR2.1 - PAR2.3 are the PANTHER terminal parallel outputs. Writing a 1 to these bits causes the output to turn on. Output control is only accepted if the PANTHER terminal is in Indicator mode. A transition from 0 to 1 causes the value in Word 0 to be written into PANTHER terminal memory, however, the non-volatile memory Setpoint 1 target register (if in Setpoint mode) or Target 1 target register (if in Over-Under mode) will not be updated unless the Enable Setpoint Command bit = 1. The Word 0 value for Setpoint 1 or Target 1 is in the primary unit (calibrated unit). When tare interlocks are set, accumulative tares will not be permitted. When tare interlocks are set, tare can only be cleared at gross zero. (4-02) 5-9 METTLER TOLEDO PANTHER Terminal Technical Manual Discrete Data Formats Discrete Read (PANTHER Terminal Output to PLC Input) A/B Addr Word 0 In Word 1 In 17 16 15 14 13 12 11 10 7 6 5 4 3 2 1 0 X X X X X X X X X X X X X X X X Data OK Update in Progress NET MOT Zero TOL SP2 SP1 PAR 1.1 Discrete Write (PLC Output to PANTHER Terminal Input) A/B Addr Word 0 Out Word 1 Out 17 16 15 14 13 12 11 10 7 6 5 4 3 2 1 0 X X X X X X X X X X X X X X X X Load SP1 PAR 2.3 PAR 2.2 PAR 2.1 Enab l SP ZERO PRNT PB TARE CLR Tare Load Tare SEL 3 SEL 2 SEL 1 Discrete Read Word 0 is a sixteen-bit signed integer that represents the weight value of the scale. The three SEL bits of Discrete Write Word 1 determine whether it is gross, net, tare, or displayed weight, or SP1. Discrete Write Word 0 is a sixteen-bit signed integer whose value can be loaded into tare or SP1 depending on the Load SP1 or Load Tare bits in Discrete Write Word 1. SEL 1-3 represent a binary value to select the data for Discrete Read Word 0. 0= gross weight, 1 = net weight, 2 = displayed weight, 3 = tare weight, 4 = SP1 5-7 = gross weight. 5-10 (4-02) Chapter 6: PANTHER Terminal PROFIBUS Option PROFIBUS Overview 6 PANTHER Terminal PROFIBUS Option PROFIBUS Overview Note: As of this printing, the current gsd file required for use with PANTHER terminals is: Me1_0858.gsd. GSD files can be downloaded from the PROFIBUS web site. This section describes the option that permits the PANTHER terminal to communicate to a PROFIBUS L2-DP master according to DIN 19 245. The option consists of a module and software that resides in the PANTHER terminal, which implements the data exchange. The PANTHER terminal PROFIBUS PCB interfaces to PLCs such as Texas Instruments 505 series and Siemens S5-115 series. The Texas Instruments (TI) 505 PLCs interface to the PROFIBUS via an I/O processor called a Field Interface Module (FIM). The FIM bus master recognizes a fixed set of PROFIBUS slave devices, all of which are viewed by it as some sort of remote I/O rack. On power up, the FIM queries each PROFIBUS slave node to determine which of the recognized types a device might be and configures itself accordingly. The PANTHER PROFIBUS option appears to the FIM to be a small ET200U I/O rack. The Siemens S5-115 series PLC also interfaces to the PROFIBUS using an I/O processor, an IM-308, which has no preconceived notions about PROFIBUS devices. This device must be locally programmed with the PANTHER Interface Device Data Base (DDB). PROFIBUS Kit Installation The PROFIBUS option is available as a field-installed kit by ordering P/N 09170252. This kit provides connectivity to a PROFIBUS PLC using the remote I/O (RIO) protocol. The PROFIBUS kit may be installed in either the PANTHER harsh environment or panel mount enclosure. Included in the kit are: Part Number (*)15166100A (*)14915300A (*)14467400A (*)14829500A (*)14828700A (*)15069600A (*)15174000A R0511100A R0519600A Description PROFIBUS PCB Assembly** Option Harness Snap-in Standoff Mounting Bracket Controller Label, Analog Controller Label, Digital Rear Panel Screw, M4 Nut, M4 Quantity 1 1 1 1 1 1 1 4 2 * May have letter prefix. **When replacing this item on a PANTHER terminal (panel-mount analog version) that is located in a Division 2 hazardous area, the following part number with a minimum of the following revision level of the part MUST BE USED – A15166100A. Later revisions are acceptable. Earlier revisions are not acceptable. (4-02) 6-1 METTLER TOLEDO PANTHER Terminal Technical Manual Installation in the Harsh Environment Enclosure WARNING DISCONNECT ALL POWER TO THIS UNIT BEFORE INSTALLING, SERVICING, CLEANING, OR REMOVING THE FUSE. FAILURE TO DO SO COULD RESULT IN BODILY HARM AND/OR PROPERTY DAMAGE. CAUTION OBSERVE PRECAUTIONS FOR HANDLING ELECTROSTATIC SENSITIVE DEVICES. To install PROFIBUS Option PCB Kit 0917-0252 in the harsh environment enclosure: 1. First disconnect AC power to the PANTHER terminal. 2. Locate the two slots found on the bottom of the enclosure lid. Press a large flat bladed screwdriver into the each slot until a gentle "pop" sound is heard, indicating that the latch has released. 3. Swing the bottom of the enclosure cover up until it clears the enclosure. Next lightly squeeze the top of the front cover to the enclosure then raise the cover to clear the upper two spring clips. The cover will swing down and be suspended by a grounding strap. 4. Remove the four screws which mount the Controller PCB to the cover. Option PCB 15166100A 14467400A R0511100A x4 14829500A R0519600A x2 Figure 6-1 Mounting PROFIBUS Option PCB in Harsh Environment Enclosure 4. Press the snap-in standoff (14467400A) into the Controller PCB. 5. Snap the PROFIBUS Option PCB and mounting bracket assembly into place on the Controller PCB. 6. Attach the mounting bracket to the Controller PCB with 2 screws (R0511100A) and 2 nuts (R0519600A). 7. Plug the option harness (14915300A) into the PROFIBUS Option PCB at J1. 8. Plug the option harness into the Controller PCB at J2. 9. Mount the Controller PCB to the enclosure front cover using the four screws removed in step 4. 6-2 (4-02) Chapter 6: PANTHER Terminal PROFIBUS Option PROFIBUS Kit Installation 10. Route the interconnecting cable (not supplied with this kit) through the unused grip bushing in the enclosure and connect it to the PROFIBUS Option PCB. 11. Close the enclosure, apply power, and program as required. Refer to the setup section. Installation in PanelMount Enclosure WARNING DISCONNECT ALL POWER TO THIS UNIT BEFORE INSTALLING, SERVICING, CLEANING, OR REMOVING THE FUSE. FAILURE TO DO SO COULD RESULT IN BODILY HARM AND/OR PROPERTY DAMAGE. CAUTION OBSERVE PRECAUTIONS FOR HANDLING ELECTROSTATIC SENSITIVE DEVICES. To install the PROFIBUS Option PCB Kit 0917-0252 in the PANTHER terminal panel-mount enclosure: 1. First disconnect AC power to the PANTHER terminal. 2. Unscrew the two screws (R0511100A) on the rear enclosure cover plate. Remove and discard the cover plate. Save the mounting screws for later. 3. Unscrew the two screws holding Controller PCB. Slide the Controller PCB part way out of the enclosure until the keyboard tail is exposed. Unplug the keyboard tail and remove the Controller PCB from the enclosure. Option PCB 15166100A 14467400A R0511100A x4 14829500A Figure 6-2 Mounting PROFIBUS Option PCB in Panel-Mount Enclosure 4. Press the snap-in standoff (14467400A) into the Controller PCB. 5. Snap the PROFIBUS Option PCB and mounting bracket into place on the Controller PCB. 6. Attach the mounting bracket to the Controller PCB with 2 screws (R0511100A). 7. Plug the option harness into the Controller PCB at J2. (Fold harness 90° to make connection to J2.) (4-02) 6-3 METTLER TOLEDO PANTHER Terminal Technical Manual 14915300A R0511100A x2 14829500A 15166100A Figure 6-3 Installation in Panel Mount Enclosure R0511100A x2 15174000A Figure 6-4 Installation in Panel Mount Enclosure 9. Plug the option harness into the PROFIBUS Option PCB. 10. Plug the keyboard tail into the mating connector on the Controller PCB. 11. Slide the Controller PCB assembly into the enclosure. Make sure the keyboard tail does not fold in front of the display. Attach Controller PCB to unit with the two screws removed in step 3. 12. Attach the new rear panel (15174000A) to the enclosure using the two screws (R0511100A) removed in step 2. 13. Affix the appropriate Controller Label (14828700A Analog or 15069600A Digital) to the PROFIBUS Option rear panel to identify the Controller PCB terminals. (Use the one that matches the label from the original rear panel.) 14. Attach interconnecting cable (not supplied with this kit) to the PROFIBUS Option PCB. Apply power and program as required. Wiring The PROFIBUS connection is available at two locations on the PROFIBUS PCB. The first is a female 9 pin D subminiature connector, which is the PROFIBUS standard connection. The field connector assembly is not supplied by METTLER TOLEDO. This connection is the preferred connection in the panel-mount terminal. For the PANTHER harsh environment (terminal, the pluggable terminal strip must be used. In these cases, a pigtail harness is available to wire from the terminal strip to a female 9-pin D connector. 6-4 (4-02) Chapter 6: PANTHER Terminal PROFIBUS Option PROFIBUS Setup in PANTHER terminal Female DE-9 Terminal strip 1 GND (isolated) 2 N.C. 3 TX/RX+ 4 RTS 5 GND (isolated) 6 +5V (isolated) 7 N.C. 8 TX/RX9 N.C. 1 RTS 2 TXD/RXD+ 3 TXD/RXD4 +5 V (isolated) 5 GND (isolated) P/N 14852800A When using the PANTHER harsh environment terminal, a pigtail adapter harness is required in order to install the front cover on the PANTHER terminal. The adapter harness can be ordered using factory number 0900-0311. The adapter is shown here. P1 14852800A Profibus Pigtail Adapter For Desk Mount Jaguar FROM PT. 1 P1-4 END 1 10856700A TO PT. 2 --- END 2 COLOR 1/4" STRIP YELLOW SIGNAL RTS (*)14852800A Profibus Pigtail Adapter TO END 1 PT. 2 END 2 10856700A --1 / 4” Strip 10856700A --1 / 4” Strip 10856700A --1 / 4” Strip 10856700A --1 / 4” Strip 10856700A --1 / 4” Strip 12471400A Drain Solder SIGNAL FROM PT. 1 P1-4 P1-8 P1-3 P1-6 P1-5 1G COLOR Yellow Blue Green Red Black Green RTS COM A COM B +5V GND DRAIN PROFIBUS Setup in PANTHER terminal To configure the PANTHER terminal for a PROFIBUS PCB, select F8 in setup, then select the following options. F8.1 Weight Data Type 0 = Weight is in display increments, decimal point is implied. 1 = Weight is in integer divisions, no decimal point implied. F8.2 Rack Address Enter 0-126 for the Rack Address. (4-02) 6-5 METTLER TOLEDO PANTHER Terminal Technical Manual Data Definition The PANTHER PROFIBUS PLC Interface supports Discrete Data Transfer that allows for bi-directional communication of discrete bit encoded information or 16 bit binary word (signed integer) numerical values. Each PANTHER terminal represents a quarter rack of data to the PLC Option and each quarter rack provides two input (read) and two output (write) words. A quarter logical rack has 32 input bits (two 16 bit words) and 32 output bits (two 16 bit words). The data in these input and output words is formatted as follows: DISCRETE READ - PANTHER TERMINAL Output to PLC Input 1. 2. 3. 4. 5. 6. 7. 6-6 (4-02) Bit Numbers Word 01 Word 1 0 Integer Weight bit 00 Setpoint 15 1 Integer Weight bit 01 Setpoint 26 2 Integer Weight bit 02 Zero Tolerance7 3 Integer Weight bit 03 Unused 4 Integer Weight bit 04 Unused 5 Integer Weight bit 05 Unused 6 Integer Weight bit 06 Unused 7 Integer Weight bit 07 Unused 8 Integer Weight bit 08 Unused 9 Integer Weight bit 09 PAR 1.11 10 Integer Weight bit 10 Unused 11 Integer Weight bit 11 Unused 12 Integer Weight bit 12 Motion2 13 Integer Weight bit 13 Net Mode2 14 Integer Weight bit 14 Update in Progress3 15 Integer Weight bit 15 Data OK4 PAR 1.1 is the current state of the PANTHER terminal parallel input. Positive true (1=True) If 1, the PANTHER terminal was updating the PLC interface shared memory while data was read. The PLC should ignore this data and rescan. Set to 1 if scale is operating properly, not over or under range, in power up, expanded mode, or in setup mode (Integer weight will be set to zero.) Setpoint 1 output bit status if in Setpoint mode or Under bit status in Over-Under mode. Setpoint 2 output bit status if in Setpoint mode or “Low OK - OK - High OK” bit status if in Over-Under mode. Zero Tolerance output bit status if in Setpoint mode or Over bit status if in Over-Under mode. Chapter 6: PANTHER Terminal PROFIBUS Option Data Definition DISCRETE WRITE - PLC Output to PANTHER TERMINAL Input 1. 2. 3. 4. 5. 6. 7. 8. Bit Numbers Word 0 Word 1 0 Integer tare/Setpoint Bit 00 Select 11 1 Integer tare/Setpoint Bit 01 Select 21 2 Integer tare/Setpoint Bit 02 Select 31 3 Integer tare/Setpoint Bit 03 Load Preset Tare2,7 4 Integer tare/Setpoint Bit 04 Clear Tare Command3,8 5 Integer tare/Setpoint Bit 05 Pushbutton Tare Command3,7 6 Integer tare/Setpoint Bit 06 Print Command3 7 Integer tare/Setpoint Bit 07 Zero Command3 8 Integer tare/Setpoint Bit 08 Enable Setpoint Command4 9 Integer tare/Setpoint Bit 09 Unused 10 Integer tare/Setpoint Bit 10 Unused 11 Integer tare/Setpoint Bit 11 Unused 12 Integer tare/Setpoint Bit 12 PAR 2.15 13 Integer tare/Setpoint Bit 13 PAR 2.25 14 Integer tare/Setpoint Bit 14 PAR 2.35 15 Integer tare/Setpoint Bit 15 Load Setpoint 1 Value6 A binary value in bits 0-2 select the data in Discrete Read weight data source: 0 = Gross weight, 1 = Net weight, 2 = Displayed weight, 3 = Tare or active Target if in Over/Under mode, 4 = Setpoint 1, 5-7 = Gross. A transition from 0 to 1 causes the value in Word 0 to be written into the preset tare register. A transition from 0 to 1 activates the command. Setpoint or Over-Under high level outputs are disabled if this bit is set = 0, enabled if set = 1. Setting this bit to 1 after a downloaded Setpoint 1 or Target 1 value will store the downloaded value in non-volatile memory. PAR2.1 - PAR2.3 are the PANTHER terminal parallel outputs. Writing a 1 to these bits causes the output to turn on. Output control is only accepted if the PANTHER terminal is in Indicator mode. A transition from 0 to 1 causes the value in Word 0 to be written into PANTHER terminal memory, however, the non-volatile memory Setpoint 1 target register (if in Setpoint mode) or Target 1 target register (if in Over-Under mode) will not be updated unless the Enable Setpoint Command bit = 1. The Word 0 value for Setpoint 1 or Target 1 is in the primary unit (calibrated unit). When tare interlocks are set, accumulative tares will not be permitted. When tare interlocks are set, tare can only be cleared at gross zero. (4-02) 6-7 METTLER TOLEDO PANTHER Terminal Technical Manual NOTES 6-8 (4-02) Chapter 7: PANTHER Terminal Modbus Plus Option Modbus Plus Overview 7 PANTHER Terminal Modbus Plus Option Modbus Plus Overview The PANTHER Modbus Plus Interface is an option card that plugs into the PANTHER terminal. It has an 80C152 "Peer Processor" that implements the network protocol; a 1K Dual Port RAM that is the data path to the PANTHER controller card; an FM Encoder/Decoder; and an RS485 driver that provides the interface to the Modbus Plus network. The PANTHER terminal is a single Modbus Plus node. Point-to-point communication in the Modbus Plus network is the communication between two network nodes. The "Master Task" at the initiating node generates a "transaction query" for the "Slave Command Handler Task" at the destination node. The Slave Command Handler Task sends a "transaction response" to the transaction query. Peer Processors route the messages through the network. The Modicon 984 PLC acts as the Master Task, and the PANTHER terminal has the Slave Command Handler Task. The PLC initiates all transactions, and the PANTHER terminal responds to the transaction queries. The general format for Modbus transaction query command is a one-byte command followed by a group of bytes. The maximum length is 252 bytes. The function bytes tell the slave device what action to perform. The PANTHER supports the following Modbus functions: • 03 Read Holding Registers. Requests the value of one or more 16-bit holding registers. • 16 Preset Multiple Registers. Places values into a series of consecutive holding registers. The transaction query messages contain register values that specify what data that the PLC is requesting from the PANTHER. For example, if the PLC issues Function 03, the data field must contain information telling the PANTHER which register to start at and how many registers to read. All address references within the Modbus messages are relative to zero. For example, the first holding register in the Modicon 984 PLC is 40001, but has the value 0000 in the messages. Modbus Plus Kit Installation The PANTHER Modbus Plus Option Kit provides connectivity to a Modbus Plus PLC using the remote I/O (RIO) protocol. The Modbus Plus Kit may be installed in either the PANTHER harsh environment or panel-mount enclosure. (4-02) 7-1 METTLER TOLEDO PANTHER Terminal Technical Manual Included in the kit are the following parts: Part Number (*)15165700A (*)14915300A (*)14467400A (*)14829500A (*)14828700A (*)15069600A (*)15174000A R0511100A R0519600A (*) May have letter prefix. Description Modus Plus PCB Assembly Option Harness Snap-in Standoff Mounting Bracket Controller Label, Analog Controller Label, Digital Rear Panel Screw, M4 Nut, M4 Quantity 1 1 1 1 1 1 1 4 2 Installation in Harsh Environment Enclosure WARNING DISCONNECT ALL POWER TO THIS UNIT BEFORE INSTALLING, SERVICING, CLEANING, OR REMOVING THE FUSE. FAILURE TO DO SO COULD RESULT IN BODILY HARM AND/OR PROPERTY DAMAGE. CAUTION OBSERVE PRECAUTIONS FOR HANDLING ELECTROSTATIC SENSITIVE DEVICES. To install the Modbus Plus Option PCB Kit 0917-0253 in the PANTHER terminal harsh environment enclosure: 1. Disconnect AC power to the PANTHER terminal. 2. Locate the two slots on the bottom of the enclosure lid. Press a large flatbladed screwdriver into the each slot until a gentle "pop" sound is heard, indicating the latch has released. 3. Swing the bottom of the enclosure cover up until it clears the enclosure. Lightly squeeze the top of the front cover to the enclosure. Raise the cover to clear the upper two spring clips. The cover will swing down and be suspended by a grounding strap. 4. Remove the four screws which mount the Controller PCB to the cover. Option PCB 15165700A 14467400A R0511100A x4 14829500A R0519600A x2 Figure 7-1 Mounting Modbus Plus Option PCB in Harsh Environment Enclosure 7-2 41-02) Chapter 7: PANTHER Terminal Modbus Plus Option Modbus Plus Kit Installation 4. Press the snap-in standoff (14467400A) into the Controller PCB. 5. Snap the Modbus Plus Option PCB and mounting bracket into place on the controller PCB. 6. Attach the mounting bracket to the Controller PCB with 2 screws (R0511100A) and 2 nuts (R0519600A). 7. Plug the option harness (14915300A) into the Modbus Plus Option PCB at J1. 8. Plug the option harness into the Controller PCB at J2. 9. Mount the Controller PCB to the enclosure front cover using the four screws removed in step 4. 10. Route the interconnecting cable (not supplied with this kit) through the unused grip bushing in the enclosure and connect it to the Modus Plus Option PCB. 11. Close the enclosure, apply power, and program as required. 12. Enter setup and configure the Modbus Plus options. Installation in Panel Mount Enclosure WARNING DISCONNECT ALL POWER TO THIS UNIT BEFORE INSTALLING, SERVICING, CLEANING, OR REMOVING THE FUSE. FAILURE TO DO SO COULD RESULT IN BODILY HARM AND/OR PROPERTY DAMAGE. CAUTION OBSERVE PRECAUTIONS FOR HANDLING ELECTROSTATIC SENSITIVE DEVICES. To install the Modbus Plus Option PCB Kit 0917-0253 in the PANTHER terminal panel-mount enclosure: 1. First disconnect AC power to the PANTHER terminal. 2. Unscrew the two screws (R0511100A) retaining the rear enclosure cover plate, then remove and discard the original cover plate. Save the mounting screws for later. 3. Unscrew the two screws holding Controller PCB. Slide the Controller PCB part way out of the enclosure until the keyboard tail is exposed. Unplug the keyboard tail and remove the Controller PCB from the enclosure. Option PCB 15165700A 14467400A R0511100A x4 14829500A Figure 7-2 Mounting Modbus Plus Option PCB in Panel Mount Enclosure (4-02) 7-3 METTLER TOLEDO PANTHER Terminal Technical Manual 4. Press the snap-in standoff (14467400A) into the Controller PCB. 5. Snap the Modbus Plus Option PCB and mounting bracket into place on the Controller PCB. 6. Attach the mounting bracket to the Controller PCB with 2 screws (R0511100A). See Figure 8-3. 7. Plug the option harness (14915300A ) into the Controller PCB at J2. 14915300A R0511100A x2 14829500A 15165700A Figure 7-3 Installation in Panel Mount Enclosure R0511100A x2 15174000A Figure 7-4 Installation in Panel Mount Enclosure 9. Plug the option harness into the Modbus Plus Option PCB at J1. (Fold Harness 90° to make connection to J2.) 10. Plug the keyboard tail into the mating connector on the Controller PCB. 11. Slide the Controller PCB assembly into the enclosure. Make sure the keyboard tail does not fold in front of the display. Attach Controller PCB to unit with the two screws removed in step 3. 12. Attach the new rear panel (15174000A) to the enclosure using the two screws (R0511100A) removed in step 2. See Figure 7-4. 13. Affix the appropriate Controller label (14828700A Analog or 15069600A Digital) to the Modbus Plus Option rear panel to identify the Controller PCB terminals. (Use the one that matches the label from the original rear panel.) 14. Attach interconnecting cable (not supplied with this kit) to the Modbus Plus Option PCB. Apply power and program as required. 15. Enter setup and configure the Modbus Plus options (Refer to Modbus Plus Setup in PANTHER terminal). 7-4 41-02) Chapter 7: PANTHER Terminal Modbus Plus Option Wiring to PANTHER Terminal Wiring to PANTHER Terminal The Modbus Plus network uses pins 1, 2, and 3 of the DE-9 connector, supplied by Modicon. Wiring instructions come with the connector. The Modbus Plus pigtail is wired to the PANTHER terminal as follows: DE-9 1 2 3 Terminal Strip 1 2 3 White Clear Black There are two connections for the Modbus Plus Interface. The standard connection for the PANTHER panel-mount terminal is the DE-9 female connector. The PANTHER harsh environment terminal must use a pluggable terminal strip. When the terminal strip is used, the Modbus Pigtail Cable kit 0900-0320 is available. The 0900-0320 pigtail cable is shown below. Switch Settings Each node on the Modbus Plus network must have a unique address. The PANTHER terminal Modbus Plus node address is set with the "dip switches" on the ModBus Plus Interface card. The node address value of the card is equal to the value of the switches plus 1, and it can be equal to a value of 1 to 64. Switch pos. 1 2 3 4 5 6 Value 1 2 4 8 16 32 With the switch in the OFF position, the value is as shown above. With the switch in the ON position, the value is zero for that switch. Example: SW1 = OFF Switch Value = 1 SW2 = ON 0 SW3 = ON 0 SW4 = OFF 8 SW5 = OFF 16 SW6 = ON 0 (PLUS 1) +1 Node Address = 26 (4-02) 7-5 METTLER TOLEDO PANTHER Terminal Technical Manual Status Lights There is a green diagnostic LED on the PANTHER Modbus Plus Options board, viewable through a small hole in the interface mounting bracket at the rear of the PANTHER terminal. The repetitive flashing patterns have the following meanings: • Flash every 160 milliseconds. The PANTHER node is receiving and passing the token. Every node on the link should be flashing this same pattern. • Flash every 1 second. The PANTHER node is in an off-line state where it must monitor the link for 5 seconds. During this period, it hears all active nodes on the network and is building the active station table. • Two flashes, off for 2 seconds. The PANTHER node is permanently in an idle, never-getting-token state. It is hearing the other nodes but never getting the token itself. This PANTHER node may have a bad transmitter. • Three flashes, off for 1.7 seconds. This PANTHER node is not hearing any other nodes so it is periodically claiming and winning the token, then finding no other node to which to send it. It could be the only node on the link, or there are other nodes but this node had a bad receiver or network connection. The latter situation could be disruptive to the entire network. • Four flashes, off for 1.4 seconds. This PANTHER node has heard a valid packet that was a duplicate-node-address sent from another node on the network. The node is now in an off-line state where it will passively monitor the link until it has not heard the duplicate node for 5 seconds. Modicon 984-385E Setup Example A Modbus Plus network cable connects the PANTHER Modbus Plus Interface to the Modbus Plus port on the 984-385E Programmable Controller Module. The Modicon Modbus Plus Network Planning and Installation Guide, (GM-MBPL-001) describes the network cabling, terminating connectors, and in-line connectors needed to build a network cable. Set the node address for the 984-385E PLC using the DIP switches on the bottom of the Programmable Controller Module. The Modbus Plus Indicator on the 984385E front panel indicates a good connection to the terminal when it constantly flashes green. A green diagnostic LED on the PANTHER Modbus Plus Options card flashes every 160 seconds when the terminal makes a good connection. Modsoft Programming Software running on a PC controls the Modicon 984-385E PLC. A serial cable connects a serial port on the PC to the Modbus port on the PLC. The Modsoft Programmer User Manual, Part Number 890-USE-115-00 Version 1.0, describes in detail how to use Modsoft. Use version 2.32 or a later version of the Modsoft software. Perform the following steps from Modsoft to read and write to a PANTHER terminal on the Modbus Plus network from a Modicon 984-385 PLC. • 7-6 41-02) With Modsoft running on a PC, go to the Configuration Overview screen and select the 984-385E PLC. Switch to the Configuration Overview - Ports menu, and change the Modbus port to Bridge mode. This allows commands issued from Modsoft to be transferred to the Modbus Plus network. Chapter 7: PANTHER Terminal Modbus Plus Option Modicon 984-385E Setup Example • From the Modsoft main menu, go “on-line” to the 984-385E PLC from Modsoft. Once a connection is made, use the MSTR instruction to access the PANTHER. The Modicon Ladder Logic Block Library User Guide, (840 USE 101 00 Version 1.0) gives detailed information about MSTR instruction. MSTR Instruction Example to Read PANTHER Integer Registers This example shows using the MSTR instruction to read the integer status and weight registers in the PANTHER terminal. In this example, the PANTHER terminal is at node 2 in the dipswitches on the PANTHER Modbus Plus interface card. This MSTR reads the holding registers for the scale in integer mode. Control Block Register Content 40001 40002 40003 40004 0002 Dec xxxx Hex 0002 Dec 0001 Dec Read command Error status Number of registers to be read Starting address of integer weight/status registers in the PANTHER terminal. (1 = 40001). 40005 40006 40007 40008 40009 0002 Hex 0001 Dec 0000 Dec 0000 Dec 0000 Dec Routing path. PANTHER address = node 2. Data slave routing path. Additional routing register Additional routing register Additional routing register Data Area Register 40100 The PLC stores registers read from the PANTHER starting here. Length 0002 This integer value defines the length of the Data Area. MSTR Instruction Example to Write PANTHER Integer Registers The following example shows using the MSTR instruction to write the integer command registers in the PANTHER. In this example, the PANTHER address is set to node 2. This MSTR writes the holding registers for the scale in integer mode. Control Block Register Content 40011 40012 40013 40014 0001 Dec Write command xxxx Hex Error status 0002 Dec Number of registers to be read 0009 Dec Starting address of integer command registers in the PANTHER terminal. (9 = 40009) 0002 Hex Routing path. PANTHER address = node 2. 0001 Dec Data slave routing path. 0000 Dec Additional routing register 0000 Dec Additional routing register 0000 Dec Additional routing register 40015 40016 40017 40018 40019 Data Area Register 40150 MSTR writes data from registers starting at this address. Length 0002 This value defines the length of the Data Area. (4-02) 7-7 METTLER TOLEDO PANTHER Terminal Technical Manual Modbus Plus Setup in the PANTHER Terminal To configure the PANTHER terminal for a Modbus Plus PCB, first select F8 in setup, then select the following options. F8.1 Weight Data Type 0 = Weight is in display increments, decimal point is implied. 1 = Weight is in integer divisions, no decimal point implied. F8.2 F8.6 Enter 1-64 for rack address. Global Data 0 = Global Data Disabled 1 = Global Data Enabled Discrete Read/Write Format The PANTHER terminal can communicate weight to the PLC in a discrete integer weight format. The Modbus Plus uses Discrete Data Transfer that allows for bidirectional communication of discrete bit encoded information or 16-bit binary word (signed integer) numerical values. On Modbus Plus, there are two words (32 bits) of input data for each scale and two words of output data for each scale. The Modicon PLC uses these holding registers assignments to request integer weight and scale status from the PANTHER terminal. 40001 Scale 1 Integer Weight 40002 Scale 1 Status The Modicon PLC uses these holding registers assignments to send "bit-oriented" commands and associated integer values to the PANTHER terminal. 40009 Scale 1 Integer Tare or Setpoint Value 40010 Scale 1 Bit-Oriented Commands Data Definition The PANTHER Modbus Plus PLC Interface supports Discrete Data Transfer that allows for bi-directional communication of discrete bit encoded information or 16 bit binary word (signed integer) numerical values. Each PANTHER represents a quarter rack of data and each quarter rack provides two input (read) and two output (write) words. A quarter logical rack has 32 input bits (two 16 bit words) and 32 output bits (two 16 bit words). 7-8 41-02) Chapter 7: PANTHER Terminal Modbus Plus Option Data Definition The data is formatted as follows: DISCRETE READ - PANTHER OUTPUT TO PLC INPUT Word 01 Word 1 16 Bit Numbers 0 Integer Weight bit 00 Setpoint 15 15 1 Integer Weight bit 01 Setpoint 26 14 2 Integer Weight bit 02 Zero Tolerance7 13 3 Integer Weight bit 03 Unused 12 4 Integer Weight bit 04 Unused 11 5 Integer Weight bit 05 Unused 10 6 Integer Weight bit 06 Unused 9 7 Integer Weight bit 07 Unused 8 8 Integer Weight bit 08 Unused 7 9 Integer Weight bit 09 PAR 1.11 6 10 Integer Weight bit 10 Unused 5 11 Integer Weight bit 11 Unused 4 12 Integer Weight bit 12 Motion2 3 13 Integer Weight bit 13 Net Mode2 2 14 Integer Weight bit 14 Update in Progress3 1 15 Integer Weight bit 15 Data OK4 PLC Bit Programming 1. 2. 3. 4. 5. 6. 7. PAR 1.1 is the current state of the PANTHER terminal parallel input. Positive true (1=True) If 1, the PANTHER terminal was updating the PLC interface shared memory while data was read. The PLC should ignore this data and rescan. Set to 1 if scale is operating properly, not over or under range, in power up, expanded mode, or in setup mode (Integer weight will be set to zero.) Setpoint 1output bit status in Setpoint mode; Under bit status if in Over-Under mode. Setpoint 2 output bit status if in Setpoint mode or “Low OK - OK - High OK” bit status if in Over-Under mode. Zero Tolerance output bit status in Setpoint mode; Over bit status in Over-Under mode. (4-02) 7-9 METTLER TOLEDO PANTHER Terminal Technical Manual DISCRETE WRITE - PLC OUTPUT TO PANTHER INPUT 1. 2. 3. 4. 5. 6. 7. 8. 7-10 41-02) PLC Bit Programming Bit Numbers Word 0 Word 1 16 0 Integer tare/Setpoint Bit 00 Select 11 15 1 Integer tare/Setpoint Bit 01 Select 21 14 2 Integer tare/Setpoint Bit 02 Select 31 13 3 Integer tare/Setpoint Bit 03 Load Preset Tare2,7 12 4 Integer tare/Setpoint Bit 04 Clear Tare Command3,8 11 5 Integer tare/Setpoint Bit 05 Pushbutton Tare Command3,7 10 6 Integer tare/Setpoint Bit 06 Print Command3 9 7 Integer tare/Setpoint Bit 07 Zero Command3 8 8 Integer tare/Setpoint Bit 08 Enable Setpoint 4 Command 7 9 Integer tare/Setpoint Bit 09 Unused 6 10 Integer tare/Setpoint Bit 10 Unused 5 11 Integer tare/Setpoint Bit 11 Unused 4 12 Integer tare/Setpoint Bit 12 PAR 2.15 3 13 Integer tare/Setpoint Bit 13 PAR 2.25 2 14 Integer tare/Setpoint Bit 14 PAR 2.35 1 15 Integer tare/Setpoint Bit 15 Load Setpoint 1 Value6 A binary value in bits 0-2 select the data in Discrete Read weight data source: 0 = Gross weight, 1 = Net weight, 2 = Displayed weight, 3 = Tare or active Target if in Over/Under mode, 4 = Setpoint 1, 5-7 = Gross. A transition from 0 to 1 causes the value in Word 0 to be written into the preset tare register. A transition from 0 to 1 activates the command. Setpoint or Over-Under high level outputs are disabled if this bit is set = 0, enabled if set = 1. Setting this bit to 1 after a downloaded Setpoint 1 or Target 1 value will store the downloaded value in non-volatile memory. PAR2.1 - PAR2.3 are the PANTHER terminal parallel outputs. Writing a 1 to these bits causes the output to turn on. Output control is only accepted if the PANTHER terminal is in Indicator mode. A transition from 0 to 1 causes the value in Word 0 to be written into PANTHER terminal memory, however, the non-volatile memory Setpoint 1 target register (if in Setpoint mode) or Target 1 target register (if in Over-Under mode) will not be updated unless the Enable Setpoint Command bit = 1. The Word 0 value for Setpoint 1 or Target 1 are in the primary unit (calibrated unit). When tare interlocks are set, accumulative tares will not be permitted. When tare interlocks are set, tare can only be cleared at gross zero. Chapter 8: PANTHER Terminal Analog Output Option Analog Output Option Overview 8 PANTHER Terminal Analog Output Option Analog Output Option Overview The PANTHER Analog Output Option Kit provides output ranges of 0-10 VDC or 4 - 20 mA plus an optically isolated open collector status indication output. The Analog Output Kit may be installed in either the harsh environment or panel mount terminal. Included in the kit are the following parts: Part Number (*)14882700A (*)14915300A (*)14467400A (*)14829500A (*)14828800A (*)14828700A (*)15069600A (*)14827600A (*)13162500A R0511100A R0519600A Description Analog Output PCB Assembly Option Harness Snap-in Standoff Mounting Bracket Terminal Block Label Controller Label, Analog Controller Label, Digital Rear Panel Terminal Block, 6 position Screw, M4 Nut, M4 Quantity 1 1 1 1 1 1 1 1 1 4 2 (*) May have a revision level prefix Installation in Harsh Environment Enclosure 1. Disconnect the AC power from the outlet before proceeding. WARNING DISCONNECT ALL POWER TO THIS UNIT BEFORE INSTALLING, SERVICING, CLEANING OR REMOVING THE FUSE. FAILURE TO DO SO COULD RESULT IN BODILY HARM AND/OR PROPERTY DAMAGE. CAUTION OBSERVE PRECAUTIONS FOR HANDLING ELECTROSTATIC SENSITIVE DEVICES. (4-02) 8-1 METTLER TOLEDO PANTHER Terminal Technical Manual 2. Locate the two slots found on the bottom of the enclosure lid. Gently press a large, flat-bladed screwdriver into the each slot until a gentle “pop” sound is heard, indicating that the latch has released. 3. Swing the bottom of the enclosure cover up until it clears the enclosure. Lightly squeeze the top of the front cover to the enclosure, then raise the cover to clear the upper two spring clips. The cover will swing down and be suspended by a grounding cable. 4. Remove the four screws which mount the Controller PCB to the cover. TERMINAL BLOCK SCREW X 4 ANALOG OUTPUT OPTION PCB NUT X 2 MOUNTING BRACKET SNAP-IN STANDOFF CONTROLLER PCB OPTION ASSEMBLED 4. The mounting bracket is attached to the Analog Output Option PCB with two screws. 5. Press the snap-in standoff into the Controller PCB. 6. Snap the Analog Output Option PCB and mounting bracket assembly into place on the Controller PCB. 7. Attach the mounting bracket to the Controller PCB with two screws and two nuts. 8. Plug the option harness into the analog output option PCB at J1. 9. Plug the option harness into the Controller PCB at J2. 10. Mount the Controller PCB to the enclosure front cover using the four screws removed in step 4. 11. Insert the terminal block into the Analog Output Option PCB connector and wire interconnecting cable (not supplied with this kit). Terminal designations are provided on the Analog Output Option PCB mating connector. 8-2 (4-02) Chapter 8: PANTHER Terminal Analog Output Option Installation in Panel Mount Enclosure Close the enclosure, apply power, and program as required. Installation in Panel Mount Enclosure 1. Disconnect the AC power from the outlet before proceeding. WARNING DISCONNECT ALL POWER TO THIS UNIT BEFORE INSTALLING, SERVICING, CLEANING OR REMOVING THE FUSE. FAILURE TO DO SO COULD RESULT IN BODILY HARM AND/OR PROPERTY DAMAGE. CAUTION OBSERVE PRECAUTIONS FOR HANDLING ELECTROSTATIC SENSITIVE DEVICES. 2. Remove the two screws retaining the rear panel, then remove and discard the original rear panel. Retain the screws for reassembly. 3. Remove the two screws retaining the Controller PCB mounting bracket. Retain for reassembly. Slide the Controller PCB part way out of the enclosure until the keyboard tail is exposed. Unplug the keyboard tail and remove the Controller PCB from the enclosure. TERMINAL BLOCK SCREW X 4 ANALOG OUTPUT OPTION PCB NUT X 2 MOUNTING BRACKET SNAP-IN STANDOFF OPTION ASSEMBLED CONTROLLER PCB 4. Remove the two screws on the right securing the Controller PCB to the Controller PCB mounting bracket. (Leave the one on the left alone.) 5. The mounting bracket is already attached to the Analog Output Option PCB with two screws. 6. Press the snap-in standoff into the Controller PCB. (4-02) 8-3 METTLER TOLEDO PANTHER Terminal Technical Manual 7. Snap the Analog Output Option PCB and mounting bracket assembly into place on the Controller PCB. 8. Attach the Analog Output Option PCB to the Controller PCB with the two screws from step 4. 9. Plug the option harness into the Controller PCB at J2. ANALOG OUTPUT OPTION PCB TERMINAL BLOCK OPTION HARNESS SNAP-IN STANDOFF MOUNTING BRACKET SCREW X 2 SCREW x 2 (RIGHT SIDE) REAR PANEL TERMINAL BLOCK LABEL SCREW X 2 CONTROLLER LABEL (POWER) 10. Plug the option harness into the Analog Output Option PCB at J1. 11. Plug the keyboard tail into the mating connector on the bottom of the Controller PCB. 12. Slide the Controller PCB assembly into the enclosure. Make sure the keyboard tail does not fold in front of the display. Attach Controller PCB mounting bracket with two screws removed in step 4. 13. Attach the new rear panel to the enclosure using the two screws removed in step 2. 14. Affix the appropriate Controller label (analog or DigiTOL) power section (left side) to the new rear panel to identify the Controller PCB terminals. (Use the one that matches the label from the original rear panel.) 15. Insert the terminal block into the analog output PCB connector. Affix the terminal block label above the terminal block on the rear panel. Match the orientation of the label on the analog output option connector. 16. Wire interconnecting cable (not supplied with this kit) to the terminal block. Apply power and program as required. 8-4 (4-02) Chapter 9: Parts and Accessories Harsh Enclosure 9 Parts and Accessories Harsh Enclosure (4-02) 9-1 METTLER TOLEDO PANTHER Terminal Technical Manual Sym 1A 1B 1C 1D 1E 1F 1G 1H 1J 1K 1L 1M 1N 1P 1Q 1R 1S 1T 1U 1V 1W 1X 1Y 2A 3A Qty 1 1 1 2 1 1 1 1 1 1 1 1 1 1 1 1 1 1 1 1 2 4 5 1 1 1 1 1 1 1 Part Number A12237300A 12471400A 12901800A 13002300A 14399900A 14577900A 15048200A 14467600A 14531400A 14800000A 14801800A 14826100A 14826200A 14828700A 14830600A 14829300A A14829400A 14829600A D11397100A 14830500A R02072020 R0511100A R0519600A (*)14865200A (*)14977900A 14501500A 14503200A A13894700A 14053000A 14202800A Consists of: (Common Parts) Description LABEL, WARNING-POWER TERMINAL. #2 RING BUSHING, CORD W/ NUT .11 - .25 BUSHING, CORD W/ NUT .11 - .25 HOLE PLUG, PG7 HEX NUT, PG7 GROUND HARNESS HOLE PLUG, .24/.38 DIA. LABEL, GROUND BSI LABEL, DATA SHIELD, LABEL BRACKET, MOUNTING KEYBOARD ASSEMBLY LABEL, CONTROLLER I/O LEGEND PLATE, CURSOR ENCLOSURE ASSEMBLY FRONT COVER ASSEMBLY DAMPER PAD, TRANSFORMER LABEL, FCC RUBBER FOOT SCREW, 1/4-20 X .38 HEX HEAD STAINLESS STEEL SCREW, M4 X 10 PH PAN HEAD HEX NUT, M4 W/ LOCKWASHER Add for Scale Option (PTHN-1XXX-XXX) PCB ASSEMBLY, MAIN ANALOG LOAD CELL PCB ASSEMBLY, MAIN DigiTOL LOAD CELL Add for Power Cord LINE CORD, NORTH AMERICA LINE CORD, CONTINENTAL EUROPE LINE CORD, U.K./IRELAND LINE CORD, AUSTRALIA LINE CORD, CHILE (ITALY) Add for Analog Output Interface Option (PTHN-X8XX-XXX) 4A 1 13162500A CONNECTOR PLUG, 6 POS. ANALOG OUTPUT 4B 1 14467400A SPACER, SNAP-IN 5/8” 4C 1 14829500A MOUNTING BRACKET 4D 1 14882700A PCB ASSEMBLY, ANALOG OUTPUT 4E 1 14915300A HARNESS, OPTION 4F 4 R0511100A SCREW, M4 X 10 PH PAN 4G 2 R0519600A NUT, HEX M4 W/ LOCKWASHER (*) May have revision letter prefix. 9-2 (4-02) Chapter 9: Parts and Accessories Harsh Enclosure 1 1 1 1 4 2 Add for Modbus Plus Interface Option (PTHN-X5XX-XXX) 14467400A STANDOFF, SNAP-IN 5/8” 14829500A MOUNTING BRACKET 15165700A PCB ASSEMBLY, MODBUS PLUS OPTION 14915300A HARNESS, OPTION R0511100A SCREW, M4 X 10 PH PAN R0519600A NUT, HEX M4 W/ LOCKWASHER 4A 4B 4C 4D 4E 4F 4G 1 1 1 1 1 4 2 Add for Allen Bradley Interface Option (PTHN-X6XX-XXX) 14217400A TERMINAL BLOCK, 3 POSITION 14467400A STANDOFF, SNAP-IN 5/8” 14829500A MOUNTING BRACKET 15098500A PCB ASSEMBLY, ALLEN BRADLEY RIO OPTION 14915300A HARNESS, OPTION R0511100A SCREW, M4 X 10 PH PAN R0519600A NUT, HEX M4 W/ LOCKWASHER 4B 4C 4D 4E 4F 4G 1 1 1 1 4 2 14467400A 14829500A 15166100A 14915300A R0511100A R0519600A 4B 4C 4D 4E 4F 4G Add for PROFIBUS Interface Option (PTHN-X9XX-XXX) STANDOFF, SNAP-IN 5/8” MOUNTING BRACKET PCB ASSEMBLY, PROFIBUS OPTION HARNESS, OPTION SCREW, M4 X 10 PH PAN NUT, HEX M4 W/ LOCKWASHER (4-02) 9-3 METTLER TOLEDO PANTHER Terminal Technical Manual Panel Mount Enclosure 1K 2A 9-4 (4-02) Chapter 9: Parts and Accessories Panel Mount Enclosure Sym 1A 1B 1C 1D 1E 1F 1G 1H 1J 1K 1L 1M 1N 1P 1Q 1R (*) (*) Qty 1 1 1 1 1 1 1 1 1 1 1 1 1 7 4 1 3 4 Part Number 14531400A 14800000A 14801800A 14827100A 14827200A 14827300A 14827400A 14828300A** A14829100A 14829600A R0159600A A12237300A D11397100A R0511100A R0529400A 12471500A R0510000A R0519600A Consists of: (Common Parts) Description LABEL, GROUND BSI LABEL, DATA LABEL SHIELD ENCLOSURE FRONT PANEL ASSEMBLY GASKET, FRONT PANEL BRACKET, CONTROLLER BOARD KEYBOARD ASSEMBLY LEGEND PLATE, CURSOR DAMPER PAD, TRANSFORMER NUT, HEX M4 W/ LOCKWASHER LABEL, WARNING POWER LABEL, FCC SCREW, M4 X 10 PH PAN SCREW, M4 X 10 FL HD POZID. TERMINAL, #8 RING SCREW, M4 X 10 HD. DRILLED NUT, HEX M4 X 10 W/ LOCKWASHER 2A 1 1 (*)15201500A** (*)14977900A 3A 3B 1 1 14827500A 14828700A Add for Scale Option (PTPN-1XXX-XXX) PCB ASSEMBLY, MAIN, ANALOG LOAD CELL PCB ASSEMBLY, MAIN, DigiTOL LOAD CELL Add for Power Cord REAR PANEL, BASIC LABEL, CONTROLLER I/O 3B 4A 4B 4C 4D 4E 4F 4G 4H 1 1 1 1 1 1 2 1 1 14828700A 14162500A 14467400A 14827600A 14829500A 14882700A 14915300A R0511100A 14828800A Add for Analog Option (PTPN-X8XX-XXX) LABEL, CONTROLLER I/O CONNECTOR, TERM. BLOCK 6 POS. SPACER, 5/8” SNAP IN REAR PANEL, ANALOG OUTPUT MOUNTING BRACKET PCB ASSEMBLY, ANALOG BOARD HARNESS, OPTION SCREW, M4 X 10 PH PAN HD LABEL, ANALOG OUTPUT Add For Setpoint Option (PTPN-XX1X-XXX) 5A 3 13636700A AC RELAY, SOLID STATE 5B 1 14880500A PCB ASSEMBLY, SETPOINT 5C 1 14915400A HARNESS, SETPOINT (*) May have revision letter prefix. **When replacing these items on a PANTHER terminal that is located in a Division 2 hazardous area, the following part numbers with the minimum of the following revision levels of the part MUST BE USED – later revisions are acceptable but earlier ones are not: Keyboard Assembly E14828300A; Main PCB D15201500A (4-02) 9-5 METTLER TOLEDO PANTHER Terminal Technical Manual 4B 4D 4E 4F 4G 1 1 1 1 4 Add for Modbus Plus Interface Option (PTHN-X5XX-XXX) 14467400A STANDOFF, SNAP-IN 5/8” 14829500A MOUNTING BRACKET 15165700A PCB ASSEMBLY, MODBUS PLUS OPTION 14915300A HARNESS, OPTION R0511100A SCREW, M4 X 10 PH PAN 4A 4B 4D 4E 4F 4G 1 1 1 1 1 4 Add for Allen Bradley Interface Option (PTHN-X6XX-XXX) 14217400A TERMINAL BLOCK, 3 POSITION 14467400A STANDOFF, SNAP-IN 5/8” 14829500A MOUNTING BRACKET 15098500A PCB ASSEMBLY, ALLEN BRADLEY RIO OPTION 14915300A HARNESS, OPTION R0511100A SCREW, M4 X 10 PH PAN Add for PROFIBUS Interface Option (PTHN-X9XX-XXX) 4B 1 14467400A STANDOFF, SNAP-IN 5/8” 4D 1 14829500A MOUNTING BRACKET 4E 1 15166100A** PCB ASSEMBLY, PROFIBUS OPTION 4F 1 14915300A HARNESS, OPTION 4G 4 R0511100A SCREW, M4 X 10 PH PAN **When replacing this item on a PANTHER terminal that is located in a Division 2 hazardous area, the following part number with a minimum of the following revision level MUST BE USED – later revisions are acceptable but earlier ones are not: Profibus PCB Assembly A15166100A 9-6 (4-02) Chapter 10: Appendices Appendix 1: RS232 Serial I/O 10 Appendices Appendix 1: RS232 Serial I/O The PANTHER terminal has a bi-directional RS-232 port that may be programmed for several functions. The input can provide simple commands from another device. The output can be configured for simple output to a printer, computer, or remote display. The output is always 10 bit framing (1 start bit, 7 ASCII data bits, 1 parity bit, and 1 stop bit). The parity bit is selectable in setup as even, odd or always a ‘0’. The baud rate is also selectable from 300 to 9600. An ASCII Start of Text (STX) and a checksum character may be added to the data output if desired. The checksum character is defined as the 2’s complement of sum of the 7 least significant bits of all preceding characters including the <STX> and <CR> (dropping all bits that carry past the 7 least significant bits). The checksum character is transmitted with the same parity as all other characters. The checksum must be supported, but may be optionally selected “off” by the installer, in which case the character is not sent. Serial Input The PANTHER terminal has an input mode that allows simple commands to be received. These commands duplicate the front panel keyboard functions. Note that all characters are uppercase and no control characters need to be sent. All other ASCII characters are ignored, which permits the use of termination characters such as CR (Carriage Return) or LF (Line Feed). The PANTHER terminal recognizes the following commands when the output mode is programmed as demand or continuous. Command Function Description C Clear Clear target or tare value T Tare Take a pushbutton tare (always active) P Print Transmit data Z Zero Zero the scale (if within range and no-motion) S Send Transmit data U Select Switch units (if enabled in setup) X Target Take a pushbutton target (over/under mode only) (4-02) 10-1 METTLER TOLEDO PANTHER Terminal Technical Manual The terminal will transmit RS232C serial data when a print command is issued using the PRINT pushbutton, Auto Print, or a remote print command from a host. The data format, baud rate, checksum, parity, etc. are selectable in the setup mode. The serial data is output in an 10-bit ASCII frame which includes: 1 start bit, 7 data bits, 1 parity bit, and 1 stop bit. Parity is selectable as none, odd, or even using F3.1.4. Checksum and STX can be enabled or disabled using F3.1.5 and F3.1.6. All demand mode printing is inhibited during motion and when the weight is under gross zero. Printing is allowed on power-up whether or not zero is captured if AZM is enabled (parameter or sub-block F2.4.2). The available formats are: SINGLE LINE DISPLAYED WEIGHT FORMAT DATA NOTES S O A S T X B X X X X X X C D D D D D S P D L B F S P G N E T G S I H C R I C H K J L F K NOTES A -SO = Shift-out character (optional). If F3.2.2 = 1, expanded print is enabled if receiving device is capable of using SO for enabling expanded (double-width) printing. B -STX = Start of Text character (optional). If F3.1.5 = 1, STX and checksum characters will be sent in this position. C -X = weight data digit, minus sign (-) for negative weight or tare, or space character will be sent in this position. D -X = Weight data digit or decimal point character. E -SP = Space character. F - “LB” sent for pounds when F1.2 = 1, “kg” sent for kilograms when F1.2 = 2, “g” sent for grams when F1.2=3, “oz” sent for ounces when F1.2=4, “XXXXXX LB XXXXXXoz” sent for lb-oz when F1.2=5, “ozt” sent when F1.2=6, “dwt” sent when F1.2=7, “t” sent when F1.2=8, “ton” sent when F1.2=9, “%” sent when F1.2=2 and F5.7.2=1. G -Space character and NET will be sent if displayed weight is a net weight. Space character and G will be sent if the displayed weight is gross. H -SI = Shift-In character. If F3.2.2 = 1, SI will reset receiving device to normal print mode (if receiving device is capable of using SO/SI to toggle between expanded and normal print modes.) I -CR = carriage return character. J -CHK = checksum character (optional). Checksum will be sent with STX if F3.1.5 = 1. K -LF = line feed character. 10-2 (4-02) Chapter 10: Appendices Appendix 1: RS232 Serial I/O SINGLE LINE GROSS/TARE/NET FORMAT DATA NOTES S 0 A S T X B * X X X X X X C C C C C C C S P D L B E S P D G F S P D * * X X X X X G G G G G G G S P D L B E S P D T H S P D S O J * X X X X X X J J J JI J JI J S P D L B E S P D N E T K S I L C H K N C R M L F O NOTES A –SO = Shift out B -- STX = Start of Text character (optional). If F3.1.5 = 1, STX and checksum characters will be sent in data string C -Gross weight data field (7 characters). (* = digit, minus sign (-), or space, X = digit or decimal point.) D -SP = Space character E - “LB” = pounds when F1.2 = 1, “kg” sent for kilograms when F1.2 = 2, “g” sent for grams when F1.2=3, “oz” sent for ounces when F1.2=4, “XXXXXX LB XXXXXXoz” sent for lb-oz when F1.2=5, “ozt” sent when F1.2=6, “dwt” sent when F1.2=7, “t” sent when F1.2=8, “ton” sent when F1.2=9, “%” sent when F1.2=2 and F5.7.2=1. F -G = Character for gross weight. G -Tare weight data field (7 characters). (* = digit, space, X = digit or decimal point) H -T = characters for tare weight I -SO = Shift-Out character (optional). If F3.2.2 = 1, expanded print is enabled (if receiving device is capable of using SO for enabling expanded (double-width) printing J -Net weight data field (7 characters), (* = digit, minus sign (-), or space, X = digit or decimal point.) K -NET = characters for net weight L -SI = Shift-in character. If F3.2.2 = 1, SI will reset receiving device to normal print mode (if receiving device is capable of using SO/SI to toggle between expanded and normal print modes.) M -CR = carriage return character N -CHK = checksum character (optional). Checksum will be sent with STX if F3.1.5 =1 0 -LF = line feed character (4-02) 10-3 METTLER TOLEDO PANTHER Terminal Technical Manual MULTIPLE LINE GROSS/TARE/NET FORMAT LINE 1 GROSS WEIGHT Line One Data NOTES S 0 X X X X X X X A S T X B C C C C C C Line Two Data NOTES S 0 X X X X X X X J J J J J J J J F C R G C H K H C R G C H K H L F I L B E S P D G C S P D S P D L B E S P D T LINE 2 TARE WEIGHT K LINE 3 NET WEIGHT Line Three Data NOTES S O K X X X X X X X L L L L L L L S P C L B D S P C N E S T I M N C R F C H K G L F H NOTES A -STX = Start of Text character (optional). If F3.1.5 = 1, STX and checksum characters will be sent in data string. B -Gross weight data field (7 characters). (* = digit, minus sign (-), or space, X = digit or decimal point.) C -SP = Space character D - “LB” = pounds when F1.2 = 1, “kg” sent for kilograms when F1.2 = 2, “g” sent for grams when F1.2=3, “oz” sent for ounces when F1.2=4, “XXXXXX LB XXXXXXoz” sent for lb-oz when F1.2=5, “ozt” sent when F1.2=6, “dwt” sent when F1.2=7, “t” sent when F1.2=8, “ton” sent when F1.2=9, “%” sent when F1.2=2 and F5.7.2=1. E - G = Character for gross weight F -CR = carriage return character G -CHK = checksum character (optional). Checksum will be sent with STX if F3.1.5 = 1 H -LF = line feed character I -Tare weight data field (7 characters), (* = digit, space, X = digit or decimal point) J -T = characters for tare weight K -SO = Shift-out character (optional). If F3.2.2 = 1, expanded print is enabled (if receiving device is capable of using SO for enabling expanded (double-width) printing). L -Net weight data field (7 characters), (* = digit, minus sign (-), or space, X = digit or decimal point) M -NET = characters for net weight N -SI = Shift-in character. If F3.2.2 = 1, SI will reset receiving device to normal print mode (if receiving device is capable of using SO/SI to toggle between expanded and normal print modes) 10-4 (4-02) Chapter 10: Appendices Appendix 1: RS232 Serial I/O Serial Data Output in Continuous Mode A 300-9600 baud continuous output may be selected instead of the print on demand output. This data consists of 16 or 18 bytes transmitted in a 10-bit ASCII frame consisting of: 1 start bit, 7 data bits, 1 even parity bit, and 1 stop bit. The format is: Character 1 2 3 4 5 6 7 8 9 10 11 12 13 14 15 16 17 18 Function STX (Start of text - Optional) Status Word A Status Word B Status Word C Weight MSD Weight Weight Weight Weight Weight LSD Tare Weight MSD Tare Weight Tare Weight Tare Weight Tare Weight Tare Weight LSD CR (carriage return) CKSM (Checksum - Optional Non-significant weight data and tare data digits will be transmitted as spaces. A description of the status words A, B, and C is shown in Tables 4-6. TABLE 4A - CONTINUOUS MODE STATUS WORD A - SETPOINTS ENABLED (F5.1=1) Bit 0, 1, 2 Bit 3 Bit 4 Bit 5 Bit 6 Bit 7 STATUS WORD A - SETPOINT OPTION ENABLED (F5.1=1) Encoded Decimal Point Display Bit 2 Bit 1 XXXXX0 0 0 XXXXXX 0 1 XXXXX.X 0 1 XXXX.XX 1 0 XXX.XXX 1 0 Setpoint Output 1 (0 = less than setpoint value) Setpoint Output 2 (0 = less than setpoint value) Always = 1 Always = 1 Parity of Status Word A Bit 0 1 0 1 0 1 (4-02) 10-5 METTLER TOLEDO PANTHER Terminal Technical Manual TABLE 4B - CONTINUOUS MODE STATUS WORD A - SETPOINTS DISABLED (F5.1=1) STATUS WORD A - SETPOINTS OPTION DISABLED (F5.1=1) Bit 0, 1, 2 Encode Decimal Point Display Bit 2 Bit 1 Bit 0 XXXXX0 0 01 XXXXXX 0 1 0 XXXXX.X 0 1 1 XXXX.XX 1 0 0 XXX.XXX 1 0 1 Bit 3, 4 Increment Size Bit 5 Bit 6 Bit 7 3 0 1 1 X1 X2 X5 Always = 1 Always = 1 Parity of Status Word A 4 1 0 1 TABLE 5 - CONTINUOUS MODE STATUS WORD B Bit 0 Bit 1 Bit 2 Bit 3 Bit 4* Bit 5 Bit 6 Bit 7 STATUS WORD B Gross = 0, Net = 1 Minus sign = 1 Overcapacity = 1 Motion = 1 lb = 0, kg = 1 Always = 1 - If setpoints enabled (F5.1 = 1), bit 6 = within zero tolerance. - If setpoints disabled (F5.1 = 0), bit 6 = Power Up Flag. Parity of Status Word B Note: Bit 4 is set if units are other than lb or kg. TABLE 6 - CONTINUOUS MODE STATUS WORD C Bit 0 Bit 1 Bit 2 Bit 3 Bit 4 Bit 5 Bit 6 Bit 7 10-6 (4-02) TABLE 6 - CONTINUOUS MODE STATUS WORD C Always = 0 Always = 0 Always = 0 Print = 1 Always = 1 Always = 1 Always = 1 Parity of Status Word C Chapter 10: Appendices Appendix 2: Standard Interface Command Set (SICS) Protocol Appendix 2: Standard Interface Command Set (SICS) Protocol All newer METTLER TOLEDO terminals support the standardized command set “METTLER TOLEDO Standard Interface Command Set” (MT-SICS), which is divided into 4 levels, depending on the functionality of the weighing instrument. The PANTHER terminal supports the MT-SICS level 0 command set. What Do the Commands of MT-SICS Level 0 Offer? You can use the commands of MT-SICS level 0 to perform the following operations via the interface: • Request weighing results • Tare the terminal • Zero the terminal • Identify MT-SICS implementation • Identify the terminal • Reset the terminal Additional Documentation on Data Interface Settings of the interface such as baud rate, parity, and connector pin assignments are described in previous sections of this manual. Version number of the MT-SICS Each level of the MT-SICS has its own version number which can be requested with the command I1. This section describes: MT-SICS level 0, version 2.1x. You can use the command I1 via the interface to request the MT-SICS level and MTSICS version implemented on the PANTHER terminal. Command Formats Each command received by the PANTHER terminal via the data interface is acknowledged by a response of the PANTHER terminal to the transmitter. Commands and responses are data strings with a fixed format. Commands sent to the balance comprise one or more characters of the ASCII character set. Here, the following must be noted: • Enter commands only in uppercase. • The possible parameters of the command must be separated from one another and from the command name by a space (ASCII 32 dec. in this description represented as _ ). • Each command must be closed by CR LF (ASCII 13 dec., 10 dec.) The characters CR and LF, which can be inputted using the Enter or Return key of most entry keypads, are not listed in this description, but it is essential they be included for communications with the PANTHER terminal. (4-02) 10-7 METTLER TOLEDO PANTHER Terminal Technical Manual Response Formats All responses sent by the PANTHER terminal to the transmitter to acknowledge the received command have one of the following formats: • Response with weight value • Response without weight value • Error message Format of the Response with Weight Value A general description of the response with weight value is the following: ID ••• | | 1-2 Characters Status • • • Weight Value ••• | | 1 Character 10 Characters Unit CR | 1-3 Characters LF • ID--Response identification. • _-- Space (ASCII 32 dec.) • Status--Status of the terminal, see description of the commands and responses. • Weight Value--Weighing result: shown as number with 10 digits, including sign directly in front of the first digit. The weight value appears right-aligned. Preceding zeroes are not shown with the exception of the zero to the left of the decimal point. • Unit--Weight unit displayed after the terminal has been switched on. • CR--Carriage Return (ASCII 13 dec.) • LF--Line Feed (ASCII 10 dec.) Comment--CR LF will not be shown in the description. Example Response with stable weight value of 0.256 g: S_S_ _ _ _ _ _0.256_g Format of the Response Without Weight Value A general description of the response without weight value is the following: ID ••• Status | 1-4 Characters ••• | 1 Character Parameters CR • ID--Response identification. • _--Space (ASCII 32 dec.) • Status--Status of the terminal, see description of the commands and responses. • Parameters--Command-dependent response code. • Unit--Weight unit displayed after the terminal has been switched on. • CR--Carriage Return (ASCII 13 dec.) • LF--Line Feed (ASCII 10 dec.) 10-8 (4-02) LF Chapter 10: Appendices Appendix 2: Standard Interface Command Set (SICS) Protocol Error messages ID CR LF ID--Error Identification The PANTHER terminal supports the following two error ID: • ES--Syntax error The terminal does not recognize the command. CR--Carriage return (ASCII 13 dec.) LF--Line Feed (ASCII 10 dec.) Tips for the Programmer. Command and Response---You can improve the dependability of your application software by having your program evaluate the response of the terminal to a command. The response is the acknowledgment that the terminal has received the command. Reset. To start from a determined state when establishing the communication between terminal and system, you should send a reset command to the terminal. When the terminal or system is switched on or off, faulty characters can be received or sent. Quotation Marks (“”). Quotation marks included in the command must always be entered. Commands and Responses MT-SICS Level 0 The PANTHER terminal receives commands from the system computer and acknowledges the command with an appropriate response. The following sections contain a detailed description of all commands of the command set in alphabetical order with the associated responses. Commands and responses are closed with CR and LF. These termination characters are not shown in the following description, but they must always be entered with commands or sent with responses. The commands of MT-SICS level 0 are supported by the PANTHER terminal and include: • I1 Inquiry of MT-SICS level and MT-SICS version • I2 Inquiry of terminal data • I3 Inquiry of terminal SW version • I4 Inquiry of serial number • S Send stable weight value • SI Send weight value immediately • SIR Send weight value immediately and repeat • T Tare • Z Zero • @ Reset 1. I1--INQUIRY OF MT-SICS LEVEL AND MT-SICS VERSIONS Command: I1--Inquiry of MT-SICS level and MT-SICS versions Response: I1_A_”x1”_”x2”_”x3”_”x4”_”x5” • x1 = 0--Terminal with MT-SICS level 0 • x2--Version of the implemented MT-SICS0 commands • x3--Version of the implemented MT-SICS1 commands • x4--Version of the implemented MT-SICS2 commands • x5--Version of the implemented MT-SICS3 commands (4-02) 10-9 METTLER TOLEDO PANTHER Terminal Technical Manual Example Command I1--Inquiry of MT-SICS level and versions used in the PANTHER terminal. Response--I 1_A_”0”_”2.10”_””_””_”” • 0 Level 0 implemented in PANTHER terminal • 2.10 Level 0, version 2.10 in PANTHER terminal • “” Level 1 not supported in PANTHER terminal • “” Level 2 not supported in PANTHER terminal • “” Level 3 not supported in PANTHER terminal Comments • In the case of MT-SICS level, only fully implemented levels are listed. In other words, if it is not possible to implement all commands from a certain level, the level is not specified. • In the case of the MT-SICS version, all levels are specified even those only partially implemented. 2. I2--INQUIRY OF TERMINAL DATA Command: I2--Inquiry of terminal type. Response: I2_A_”text” • Terminal data as “text”. Example Command I2--Inquiry of PANTHER terminal type. Response--I2_A_”Panther_ Analog_ _ _ _ _ _10000_lb” • This response shows the PANTHER terminal is used with analog load cells and has been calibrated for 10000 lb capacity. 3. I3--INQUIRY OF TERMINAL SOFTWARE VERSION Command: I3--Inquiry of terminal SW version Response: I3_A_”text” • Terminal SW version as “text”. Example Command I3--Inquiry of terminal SW version. Response--I3_A_”0.00_0.00_154879R • 0.00--PANTHER terminal has no operating system • 0.00--Always this value for PANTHER terminal • 154879R--PANTHER terminal software number 4. I4--INQUIRY OF SERIAL NUMBER Command: I4--Inquiry of serial number. Response: I4_A_”text” • Serial number as “text” Example Command I4--Inquiry of serial number Response--I4_A_”00000000 • 0000000000--Always this value for the PANTHER terminal. Comments • The response to I4 appears after the reset command (@) and at power-up. 5. S--SEND STABLE WEIGHT VALUE 10-10 (4-02) Chapter 10: Appendices Appendix 2: Standard Interface Command Set (SICS) Protocol Command: S--Send the current stable weight Responses: • S_S_WeightValue_Unit--Current stable weight value. • S_I--Command not executable (time-out since stability was not achieved.) • S_+ --Terminal in overcapacity range. • S_- --Terminal in under capacity range. Example Command S--Send a stable weight value. Response: S_S_ _ _ _ _100.00_g • The current stable weight is 100.00 g. Comments • The duration of the stability time-out is 2 seconds for the PANTHER terminal. • The weight unit is the currently selected unit. 6. SI--SEND WEIGHT VALUE IMMEDIATELY Command: SI--Send the current weight value regardless of scale stability. Responses: • S_S_WeightValue_Unit--Stable weight value. • S_D_WeightValue_Unit--Dynamic weight value. • S_+ --Terminal in overcapacity range. • S_- --Terminal in under capacity range. Example Command SI--Send current weight value. Response: S_D_ _ _ _ _129.02_LB • The current dynamic weight is 129.02 LB. Comments • The response to the command SI is the last internal weight value (stable or dynamic) prior to receipt of the command SI. • The weight unit is the currently selected unit. 7. SIR--SEND WEIGHT VALUE IMMEDIATELY AND REPEAT Command: SIR--Send weight values repeatedly, regardless of terminal stability. Responses: • S_S_WeightValue_Unit--Stable weight value. • S_D_WeightValue_Unit--Dynamic weight value. • S_+ --Terminal in overcapacity range. • S_- --Terminal in under capacity range. Example Command: SIR--Send current weight values at intervals. Responses:• S_D_ _ _ _ _129.02_LB • S_D_ _ _ _ _129.06_LB • S_D_ _ _ _ _129.08_LB • S_D_ _ _ _ _114.14_LB • ...__Terminal sends stable or dynamic weight values at intervals. Comments • SIR is overwritten by the commands S, SI, SIR, @ and thus canceled. • The PANTHER terminal updates 20 times per second. • The weight unit is the currently selected unit. 8. T--TARE Command: T--Tare, i.e. store the next stable weight value as a new tare weight value. (4-02) 10-11 METTLER TOLEDO PANTHER Terminal Technical Manual Responses: • T_S_WeightValue_Unit--Taring performed, i.e. stability criterion and taring range complied with. The tare weight value returned corresponds to the weight change on the terminal since the last zero setting. • T_I--Taring not performed (time-out since stability was not reached.) • T_+ --Upper limit of taring range exceeded. • T_- --Lower limit of taring range exceeded. Example Command: T--The PANTHER terminal is tared and has a value of 100.00 kg in the tare memory. Response--T_S_ _ _ _ _100.00_kg Comments • The tare memory is overwritten by the new tare weight value. • The duration of the stability time-out is 2 seconds for the PANTHER. • The tare memory can be cleared using the command Z. • The weight unit is the currently selected unit. 9. Z--ZERO Command: Z--Zero the terminal. Responses: • Z_A--The following then holds: • Gross = net + tare = 0 • Zero setting performed, i.e. stability criterion and zero setting range complied with. • Z_I--Zero setting not performed (time-out since stability was not reached). • Z_+ --Upper limit of zero setting range exceeded. • Z_- --Lower limit of zero setting range exceeded. Example Command Z--Zero. Response--Z_A--Zero setting performed. Comments • The tare memory is cleared during zero setting. • The duration of the stability time-out is 2 seconds for the PANTHER terminal. 10. @--RESET Command: @--Reset the terminal to the conditions found after switching on. Response: • I4_A_”text”--Serial number of the terminal, the terminal is ready for operation. Example Command @--Reset Response--I4_A_”0000000000”—The PANTHER terminal resets and sends the null serial number. Comments • All commands awaiting responses are canceled. • The tare memory is reset to zero. • The “reset” command is always executed. 10-12 (4-02) Chapter 10: Appendices Appendix 3: Discrete I/O Reference Appendix 3: Discrete I/O Reference The PANTHER terminal has a discrete I/O port with one input terminal and three output terminals. Inputs Inputs can be programmed as various commands including tare, clear tare, zero scale, print, switch units or blank display. The input is TTL compatible and capable of handling from 5 to 24 volt DC signals. To initiate the input, you must ground the input terminal. Input functions are edge triggered and must be held at logic ground level for at least 100 ms. The following table defines the available functions: FUNCTION NAME Tare Zero Print Switch Units None TYPE Edge Edge Edge Edge N/A DESCRIPTION OF ACTION Tares the Scale to a Net Mode Zeros the Scale Initiates a Print Switches the Scale Weight Units Input Not Assigned It is not necessary to supply voltage to the inputs when not triggering. Internally, a 5 volt power supply with a pull-up resistor keeps the inputs in the “OFF” condition. Because the signals are low level, the maximum recommended distance between the terminal and the device triggering the input (switch or relay contact) is 10 feet (3 meters) or less. The following shows a typical wiring scheme. Outputs The outputs are +5 VDC. A solid-state relay or OPTO 22 is typically connected to buffer the outputs to a 120 or 220 volt AC signal. An output terminal supplies a 5volt DC supply for reference to the setpoint outputs. Because the supply is rated at 115 mA or DC current, make sure the total current draw from the devices used (relays or optos) do not exceed this limit. If the calculated current draw exceeds 115 mA, an external power supply is required. External power supplies are available from your authorized METTLER TOLEDO representative. The following diagram shows a typical wiring scheme: The discrete outputs may be used in conjunction with either the setpoint mode or over/under mode. (4-02) 10-13 METTLER TOLEDO PANTHER Terminal Technical Manual Setpoint Mode The setpoint outputs are negative true and "ON" when the scale weight is below the setpoint coincidence value. The setpoints operate on the absolute value of the scale weight so they can be used for both weigh-in and weigh-out processes. No interlocks or relay logic are included with the standard PANTHER terminal. If startstop logic is required, METTLER TOLEDO recommends that you purchase this hardware (and design) through your local authorized METTLER TOLEDO representative. The outputs are assigned the following functions: Output Function Out 1 Setpoint 1 Out 2 Setpoint 2 Out 3 Zero Tolerance WARNING! WHEN THIS EQUIPMENT IS INCLUDED AS A COMPONENT PART OF A SYSTEM, THE RESULTING DESIGN MUST BE REVIEWED BY QUALIFIED PERSONNEL WHO ARE FAMILIAR WITH THE CONSTRUCTION AND OEPRATION OF ALL COMPONENTS IN THE SYSTEM AND THE POTENTIAL HAZARDS INVOLVED. FAILURE TO OBSERVE THIS PRECAUTION COULD RESULT IN BODILY HARM AND/OR PROPERTY DAMAGE. WARNING! IF THIS DEVICE IS USED IN AN AUTOMATIC OR MANUAL FILLING CYCLE, ALL USERS MUST PROVIDE A HARD-WIRED EMERGENCY STOP CIRCUIT OUTSIDE THE DEVICE CIRCUITRY. FAILURE TO OBSERVE THIS PRECAUTION COULD RESULT IN BODILY INJURY AND/OR PROPERTY DAMAGE. Over/Under Mode The discrete outputs available in the over/under mode coincide with the "Over," "Accept," and "Under" LEDs on the front panel of the PANTHER terminal. The outputs are assigned the following functions: Output 10-14 (4-02) Function Out 1 Under Out 2 OK, OK light, OK heavy Out 3 Over Chapter 10: Appendices Appendix 4: GEO Codes Appendix 4: GEO Codes Use the following GEO Codes if you relocate the PANTHER terminal to a location other than the original location where it was calibrated. Height above sea-level in meters Northern and southern latitude 0 325 325 650 650 975 975 1300 1625 1950 1950 2275 2275 2600 2600 2925 2925 3250 3250 3575 Height above sea-level in feet in degrees and minutes 1300 1625 0 1060 1060 2130 2130 3200 3200 4260 4260 5330 5330 6400 6400 7460 7460 8530 8530 9600 9600 10660 10660 11730 0° 0′ —5° 46′ 5 4 4 3 3 2 2 1 1 0 0 5° 46′ — 9° 52′ 5 5 4 4 3 3 2 2 1 1 0 9° 52′ — 12° 44′ 6 5 5 4 4 3 3 2 2 1 1 12° 44′ — 15° 6′ 6 6 5 5 4 4 3 3 2 2 1 15° 6′ — 17° 10′ 7 6 6 5 5 4 4 3 3 2 2 17° 10′ — 19° 2′ 7 7 6 6 5 5 4 4 3 3 2 19° 2′ — 20° 45′ 8 7 7 6 6 5 5 4 4 3 3 20° 45′ — 22° 22′ 8 8 7 7 6 6 5 5 4 4 3 22° 22′ — 23° 54′ 9 8 8 7 7 6 6 5 5 4 4 23° 54′ — 25° 21′ 9 9 8 8 7 7 6 6 5 5 4 25° 21′ — 26° 45′ 10 9 9 8 8 7 7 6 6 5 5 26° 45′ — 28° 6′ 10 10 9 9 8 8 7 7 6 6 5 28° 6′ — 29° 25′ 11 10 10 9 9 8 8 7 7 6 6 29° 25′ — 30° 41′ 11 11 10 10 9 9 8 8 7 7 6 30° 41′ — 31° 56′ 12 11 11 10 10 9 9 8 8 7 7 31° 56′ — 33° 9′ 12 12 11 11 10 10 9 9 8 8 7 33° 9′ — 34° 21′ 13 12 12 11 11 10 10 9 9 8 8 34° 21′ — 35° 31′ 13 13 12 12 11 11 10 10 9 9 8 35° 31′ — 36° 41′ 14 13 13 12 12 11 11 10 10 9 9 36° 41′ — 37° 50′ 14 14 13 13 12 12 11 11 10 10 9 37° 50′ — 38° 58′ 15 14 14 13 13 12 12 11 11 10 10 38° 58′ — 40° 5′ 15 15 14 14 13 13 12 12 11 11 10 40° 5′ — 41° 12′ 16 15 15 14 14 13 13 12 12 11 11 41° 12′ — 42° 19′ 16 16 15 15 14 14 13 13 12 12 11 42° 19′ — 43° 26′ 17 16 16 15 15 14 14 13 13 12 12 43° 26′ — 44° 32′ 17 17 16 16 15 15 14 14 13 13 12 44° 32′ — 45° 38′ 18 17 17 16 16 15 15 14 14 13 13 45° 38′ — 46° 45′ 18 18 17 17 16 16 15 15 14 14 13 46° 45′ — 47° 51′ 19 18 18 17 17 16 16 15 15 14 14 47° 51′ — 48° 58′ 19 19 18 18 17 17 16 16 15 15 14 48° 58′ — 50° 6′ 20 19 19 18 18 17 17 16 16 15 15 50° 6′ — 51° 13′ 20 20 19 19 18 18 17 17 16 16 15 51° 13′ — 52° 22′ 21 20 20 19 19 18 18 17 17 16 16 52° 22′ — 53° 31′ 21 21 20 20 19 19 18 18 17 17 16 53° 31′ — 54° 41′ 22 21 21 20 20 19 19 18 18 17 17 54° 41′ — 55° 52′ 22 22 21 21 20 20 19 19 18 18 17 (4-02) 10-15 METTLER TOLEDO PANTHER Terminal Technical Manual Height above sea-level in meters Northern and southern latitude 0 325 325 650 650 975 975 1300 1625 1950 1950 2275 2275 2600 2600 2925 2925 3250 3250 3575 Height above sea-level in feet in degrees and minutes 1300 1625 0 1060 1060 2130 2130 3200 3200 4260 4260 5330 5330 6400 6400 7460 7460 8530 8530 9600 9600 10660 10660 11730 55° 52′ — 57° 4′ 23 22 22 21 21 20 20 19 19 18 18 57° 4′ — 58° 17′ 23 23 22 22 21 21 20 20 19 19 18 58° 17′ — 59° 32′ 24 23 23 22 22 21 21 20 20 19 19 59° 32′ — 60° 49′ 24 24 23 23 22 22 21 21 20 20 19 60° 49′ — 62° 9′ 25 24 24 23 23 22 22 21 21 20 20 62° 9′ — 63° 30′ 25 25 24 24 23 23 22 22 21 21 20 63° 30′ — 64° 55′ 26 25 25 24 24 23 23 22 22 21 21 64° 55′ — 66° 24′ 26 26 25 25 24 24 23 23 22 22 21 66° 24′ — 67° 57′ 27 26 26 25 25 24 24 23 23 22 22 67° 57′ — 69° 35′ 27 27 26 26 25 25 24 24 23 23 22 69° 35′ — 71° 21′ 28 27 27 26 26 25 25 24 24 23 23 71° 21′ — 73° 16′ 28 28 27 27 26 26 25 25 24 24 23 73° 16′ — 75° 24′ 29 28 28 27 27 26 26 25 25 24 24 75° 24′ — 77° 52′ 29 29 28 28 27 27 26 26 25 25 24 77° 52′ — 80° 56′ 30 29 29 28 28 27 27 26 26 25 25 80° 56′ — 85° 45′ 30 30 29 29 28 28 27 27 26 26 25 85° 45′ — 90° 00′ 31 30 30 29 29 28 28 27 27 26 26 10-16 (4-02) METTLER TOLEDO 1900 Polaris Parkway Columbus, Ohio 43240 Phone (US and Canada): Phone (International): www.mt.com (614) 438-4511 (614) 438-4888 P/N: D14957000A 4-02 METTLER TOLEDO, PANTHER, DigiTOL, and ULTRARES are registered trademarks of Mettler-Toledo, Inc. ©2002 Mettler-Toledo, Inc. Printed in U.S.A. D14957000A