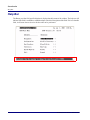
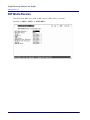
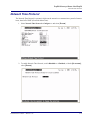
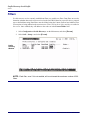
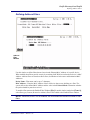
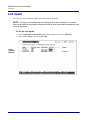
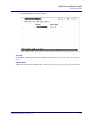
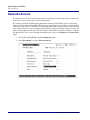
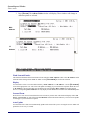
1
Terminal Server Router
MENU-DRIVEN USER INTERFACE
USER MANUAL
Part Number: 770-0105-BL
Product Release: 2.97
August 2009
Copyright © 2009 Force10 Networks Inc. All rights reserved.
Force10 Networks® reserves the right to change, modify, revise this publication without notice.
The hardware and software described herein are furnished under a license or non-disclosure agreement. The hardware,
software, and manual may be used or copied only in accordance with the terms of this agreement. It is against the law to
reproduce, transmit, transcribe, store in a retrieval system, or translate into any medium - electronic, mechanical, magnetic,
optical, chemical, manual, or otherwise - any part of this manual or software supplied with the product for any purpose
other than the purchaser’s personal use without the express written permission of Force10 Networks Inc.
Trademarks
Adit and Force10 Networks are registered trademarks of Force10 Networks, Inc. Force10 and the Force10 logo are
trademarks of Force10 Networks, Inc. or its affiliates in the United States and other countries and are protected by U.S. and
international copyright laws. All other brand and product names are trademarks or registered trademarks of their respective
holders.
Statement of Conditions
In the interest of improving internal design, operational function, and/or reliability, Force10 Networks reserves the right to
make changes to products described in this document without notice. Force10 Networks does not assume any liability that
may occur due to the use or application of the product(s) described herein.
Corporate Contact Information:
Technical Assistance Center:
Force10 Networks, Inc.
350 Holger Way
San Jose, CA 95134-1362
Phone: +1 (866) 571-2600 or +1 (408) 571-3500
www.Force10Networks.com
E-mail: [email protected]
Phone: (US) 866-887-4638
Phone (International/Direct): 1-707-665-4355
Supporting Software Versions:
TSR Software Release 2.97
Adit 600 Controller Release 10.1.1
PREFACE
Preface
Warranty
Force10 Networks, Inc. warrants to BUYER that Product Hardware will be free from substantial defect in material and
workmanship under normal use in accordance with its Documentation and given proper installation and maintenance for
period of five years from the date of shipment by Force10 Networks.
Force10 Networks warrants that the Licensed Software, when used as permitted under its License Terms and in
accordance with the instructions and configurations described in the Documentation (including use on Force10 Networks
product or a computer hardware and operating system platform supported by Force10 Networks), will operate
substantially as described in the Documentation for a period of ninety (90) days after date of shipment of the Licensed
Software to BUYER.
This warranty shall not apply to Products or Software that have been either resold or transferred from BUYER to any other
party. Any such transfer voids the above warranty and related licenses. Force10 Networks offers expanded product care
beyond what is covered by the warranty through different support plans. The plans are designed to maximize network
availability through advance replacement for defective equipment. Please contact your Force10 Networks representative
for support program details.
Warranty Procedure
BUYER must promptly notify Force10 Networks of any defect in the Product or Software and comply with Force10
Networks' return/repair policy and procedures. Force10 Networks or its agent will have the right to inspect the Product or
workmanship on BUYER's premises. With respect to a warranty defect in Product hardware reported to Force10
Networks by BUYER during the warranty period, Force10 Networks, as its sole obligation and BUYER's exclusive
remedy for any breach of warranty, will use commercially reasonable efforts, at its option, to:
a. repair, replace, or service at its factory or on the BUYER's premises the Product, or component therein,
or workmanship found to be defective so that the Product hardware operates substantially in accordance
with Force10 Networks Documentation; or
b. credit BUYER for the Product in accordance with Force10 Networks' depreciation policy.
With respect to a warranty defect in the Licensed Software reported to Force10 Networks by BUYER during the 90-day
software warranty period, Force10 Networks, at its own expense and as its sole obligation and BUYER's exclusive
remedy for any breach of the software warranty, will use commercially reasonable efforts to, at its option,
a. correct any reproducible error in the Licensed Software, or
b. replace the defective Licensed Software, as follows:
Should a Severity 1 or 2 warranty defect with the Software occur during the 90-day warranty period,
Force10 Networks will provide, in its sole determination, either
1. software to resolve the defect to be downloaded into the affected units by the BUYER or
2. a documented workaround to address the issue.
Severity 1 issues are failures of the Licensed Software to comply with the Force10 Networks software specifications
and that completely or severely affect the Force10 Networks Product and its traffic or service capacity, or
maintenance or monitoring capabilities.
Severity 2 issues are failures of the Licensed Software to comply with the Force10 Networks software specifications
and that result in a major degradation of the Force10 Networks Product so as to impact its system or service
performance, or significant impairments to network operator control or effectiveness. Should a Severity 3 warranty
Preface
defect with the Licensed Software occur during the 90-day warranty period, Force10 Networks will provide
assistance to Buyer to determine if a solution or workaround will be provided in a subsequent software release
following the reported issue.
Severity 3 issues are defined as failures of the Licensed Software to comply with the Force10 Networks software
specifications but that do not significantly impair the function or service of the Force10 Networks Product or the
system.
Determination of Severity 1, 2 or 3 shall be made solely by Force10 Networks following receipt of the reported
problem. Refurbished material may be used to repair or replace the Product. BUYER shall bear the risk of loss for
Products or Software returned to Force10 Networks for repair, replacement, or service, and the same must be shipped
pre-paid by BUYER.
Requests for warranty services and troubleshooting must be made to, and will be provided by, the Force10 Networks
Customer Support Center via telephone during the warranty period and during normal business hours. Normal business
hours for Force10 Networks Customer Support Center are 7:00 a.m. to 6:00 p.m. Mountain Standard Time, Monday
through Friday, excluding weekends and standard Force10 Networks recognized holidays.
Limitation of Warranty & Limitation of Remedies
Correction of defects by repair, replacement, or service will be at Force10 Networks' option and constitute Force10
Networks' sole obligation and BUYER's sole and exclusive remedy under the limited warranty. Any such error correction
or replacement provided to BUYER does not extend the original warranty period for hardware or software, respectively.
Force10 Networks assumes no warranty or other liability with respect to defects in the Product or Software caused by:
a. modification, repair, storage, installation, operation, or maintenance of the Product or Software by anyone
other than Force10 Networks or its agent, or as authorized and in accordance with the Force10 Networks
Documentation; or
b. the negligent, unlawful or other improper use or storage of the Product or Software, including its use with
incompatible equipment or software; or
c. fire, explosion, power failures, acts of God, or any other cause beyond Force10 Networks' reasonable
control; or
d. handling or transportation after title of the Product passes to BUYER.
Other manufacturer's equipment or software purchased by Force10 Networks and resold to BUYER will be limited to that
manufacturer's warranty. Force10 Networks assumes no warranty liability for other manufacturer's equipment or software
furnished by BUYER.
BUYER UNDERSTANDS AND AGREES AS FOLLOWS: Except for the limited warranty set forth above, the Product,
License Software and all services performed by Force10 Networks hereunder are provided "as is," without representations
or warranties of any kind. Force10 Networks does not warrant that the Product, License Software, any hardware or
software, or any update, upgrade, fix or workaround furnished to BUYER will meet BUYER's requirements, that the
operation thereof, including any maintenance or major releases thereto will be uninterrupted or error-free.
THE WARRANTIES IN THIS AGREEMENT REPLACE ALL OTHER WARRANTIES, EXPRESSED OR IMPLIED,
AND ALL OTHER OBLIGATIONS OR LIABILITIES OF FORCE10 NETWORKS, INCLUDING ANY
WARRANTIES OF MERCHANTABILITY, FITNESS FOR A PARTICULAR PURPOSE, NONINFRINGEMENT
AND/OR ANY IMPLIED WARRANTIES ARISING OUT OF COURSE OF PERFORMANCE OR COURSE OF
DEALING. ALL OTHER WARRANTIES ARE DISCLAIMED AND EXCLUDED BY FORCE10 NETWORKS.
THE REMEDIES CONTAINED IN THIS AGREEMENT WILL BE THE SOLE AND EXCLUSIVE REMEDIES
WHETHER IN CONTRACT, TORT, OR OTHERWISE, AND FORCE10 NETWORKS WILL NOT BE LIABLE FOR
INJURIES OR DAMAGES TO PERSONS OR PROPERTY RESULTING FROM ANY CAUSE WHATSOEVER,
WITH THE EXCEPTION OF INJURIES OR DAMAGES CAUSED BY THE GROSS NEGLIGENCE OF FORCE10
NETWORKS. THIS LIMITATION APPLIES TO ALL SERVICES, SOFTWARE, AND PRODUCTS DURING AND
AFTER THE WARRANTY PERIOD. IN NO EVENT WILL FORCE10 NETWORKS BE LIABLE FOR ANY
SPECIAL, INCIDENTAL, OR CONSEQUENTIAL DAMAGES, LOSS OF DATA, OR COMMERCIAL LOSSES
EVEN IF FORCE10 NETWORKS HAS BEEN ADVISED THEREOF.
No agent, BUYER, or representative is authorized to make any warranties on behalf of Force10 Networks or to assume
for Force10 Networks any other liability in connection with any of Force10 Networks' Products, software, or services.
The foregoing summarizes Force10 Networks' entire product and software warranties, which are subject to change
without notice.
iv
Terminal Server Router - Release 2.97
Preface
Warranty Product Returns
Before returning any equipment to Force10 Networks, Inc., first contact the distributor or dealer from which you
purchased the product.
A Return Material Authorization (RMA) number is required for all equipment returned to Force10 Networks, Inc. Call
Force10 Networks Customer Support at 1-866-887-4638 (US) or 1-707-665-4355 (International/Direct) for RMA
number, repair/warranty information and shipping instructions. Be prepared to provide the following information:
Force10 Networks serial number(s) from the system chassis or circuit card(s)
Name of distributor or dealer from which you purchased the product
Description of defect
Terminal Server Router - Release 2.97
v
Preface
Notices
This manual contains important information and warnings that must be followed to ensure safe
operation of the equipment.
DANGER! A DANGER NOTICE INDICATES THE PRESENCE OF A HAZARD THAT CAN OR WILL
CAUSE DEATH OR SEVERE PERSONAL INJURY IF THE HAZARD IS NOT AVOIDED.
CAUTION! A CAUTION NOTICE INDICATES THE POSSIBILITY OF INTERRUPTING NETWORK
SERVICE IF THE HAZARD IS NOT AVOIDED.
WARNING! A WARNING NOTICE INDICATES THE POSSIBILITY OF EQUIPMENT DAMAGE IF THE
HAZARD IS NOT AVOIDED.
NOTE: A Note indicates information to help you understand how to perform a procedure or
how the system works. Notes should be read before performing the required action.
vi
Terminal Server Router - Release 2.97
TABLE OF CONTENTS
Table of Contents
Preface
Warranty . . . . . . . . . . . . . . . . . . . . . . . . . . . . . . . . . . . . . . . . . . . . . . . . . . . . . . . . . . iii
Warranty Procedure . . . . . . . . . . . . . . . . . . . . . . . . . . . . . . . . . . . . . . . . . . . . . . iii
Limitation of Warranty & Limitation of Remedies . . . . . . . . . . . . . . . . . . . . . . iv
Warranty Product Returns . . . . . . . . . . . . . . . . . . . . . . . . . . . . . . . . . . . . . . . . . . v
Notices . . . . . . . . . . . . . . . . . . . . . . . . . . . . . . . . . . . . . . . . . . . . . . . . . . . . . . . . . . . vi
1
Introduction
Overview . . . . . . . . . . . . . . . . . . . . . . . . . . . . . . . . . . . . . . . . . . . . . . . . . . . . . . . . .
Installation . . . . . . . . . . . . . . . . . . . . . . . . . . . . . . . . . . . . . . . . . . . . . . . . . . . . . . . .
Install a Router Card . . . . . . . . . . . . . . . . . . . . . . . . . . . . . . . . . . . . . . . . . . . . .
Maneuvering in the System . . . . . . . . . . . . . . . . . . . . . . . . . . . . . . . . . . . . . . . . . . .
Fields . . . . . . . . . . . . . . . . . . . . . . . . . . . . . . . . . . . . . . . . . . . . . . . . . . . . . . . . . . . .
Scroll Field . . . . . . . . . . . . . . . . . . . . . . . . . . . . . . . . . . . . . . . . . . . . . . . . . . . .
Select Field . . . . . . . . . . . . . . . . . . . . . . . . . . . . . . . . . . . . . . . . . . . . . . . . . . . .
Edit Field. . . . . . . . . . . . . . . . . . . . . . . . . . . . . . . . . . . . . . . . . . . . . . . . . . . . . .
Help Bar . . . . . . . . . . . . . . . . . . . . . . . . . . . . . . . . . . . . . . . . . . . . . . . . . . . . . . . . . .
Connecting to the Router . . . . . . . . . . . . . . . . . . . . . . . . . . . . . . . . . . . . . . . . . . . . .
Establish a Telnet Session. . . . . . . . . . . . . . . . . . . . . . . . . . . . . . . . . . . . . . . . .
Set a New Password . . . . . . . . . . . . . . . . . . . . . . . . . . . . . . . . . . . . . . . . . . . . .
2
1-2
1-2
1-2
1-2
1-3
1-3
1-3
1-3
1-4
1-5
1-5
1-6
Management Window
Management Overview . . . . . . . . . . . . . . . . . . . . . . . . . . . . . . . . . . . . . . . . . . . . . . 2-2
System Time/Login . . . . . . . . . . . . . . . . . . . . . . . . . . . . . . . . . . . . . . . . . . . . . . . . . 2-2
System Date and Time . . . . . . . . . . . . . . . . . . . . . . . . . . . . . . . . . . . . . . . . . . . 2-3
Daylight Savings Time Adjustment . . . . . . . . . . . . . . . . . . . . . . . . . . . . . . . . . 2-3
Auto-Logout Timer. . . . . . . . . . . . . . . . . . . . . . . . . . . . . . . . . . . . . . . . . . . . . . 2-3
View Password . . . . . . . . . . . . . . . . . . . . . . . . . . . . . . . . . . . . . . . . . . . . . . . . . 2-4
Config Password . . . . . . . . . . . . . . . . . . . . . . . . . . . . . . . . . . . . . . . . . . . . . . . . 2-4
Admin Password . . . . . . . . . . . . . . . . . . . . . . . . . . . . . . . . . . . . . . . . . . . . . . . . 2-4
Enhanced Security . . . . . . . . . . . . . . . . . . . . . . . . . . . . . . . . . . . . . . . . . . . . . . 2-5
Upload/Download . . . . . . . . . . . . . . . . . . . . . . . . . . . . . . . . . . . . . . . . . . . . . . . . . . 2-7
Set up the Router for Uploads/Downloads . . . . . . . . . . . . . . . . . . . . . . . . . . . . 2-7
Upload/Download Setup Menu Fields . . . . . . . . . . . . . . . . . . . . . . . . . . . . . . . 2-9
Load Defaults . . . . . . . . . . . . . . . . . . . . . . . . . . . . . . . . . . . . . . . . . . . . . . . . . . . . . 2-10
Software Images. . . . . . . . . . . . . . . . . . . . . . . . . . . . . . . . . . . . . . . . . . . . . . . . . . . 2-11
Options . . . . . . . . . . . . . . . . . . . . . . . . . . . . . . . . . . . . . . . . . . . . . . . . . . . . . . 2-11
Table of Contents
3
Profile Directory: Router Card Profile
Overview . . . . . . . . . . . . . . . . . . . . . . . . . . . . . . . . . . . . . . . . . . . . . . . . . . . . . . . . . .3-2
Configuration . . . . . . . . . . . . . . . . . . . . . . . . . . . . . . . . . . . . . . . . . . . . . . . . . . . . . .3-2
RIP Mode Receive . . . . . . . . . . . . . . . . . . . . . . . . . . . . . . . . . . . . . . . . . . . . . . . . . .3-4
RIP Mode Send . . . . . . . . . . . . . . . . . . . . . . . . . . . . . . . . . . . . . . . . . . . . . . . . . . . . .3-5
Trunk . . . . . . . . . . . . . . . . . . . . . . . . . . . . . . . . . . . . . . . . . . . . . . . . . . . . . . . . . . . . .3-6
Security . . . . . . . . . . . . . . . . . . . . . . . . . . . . . . . . . . . . . . . . . . . . . . . . . . . . . . . . . . .3-8
SNMP . . . . . . . . . . . . . . . . . . . . . . . . . . . . . . . . . . . . . . . . . . . . . . . . . . . . . . . . . . .3-11
DNS Proxy . . . . . . . . . . . . . . . . . . . . . . . . . . . . . . . . . . . . . . . . . . . . . . . . . . . . . . .3-15
Spanning Tree Protocol. . . . . . . . . . . . . . . . . . . . . . . . . . . . . . . . . . . . . . . . . . . . . .3-17
Network Time Protocol. . . . . . . . . . . . . . . . . . . . . . . . . . . . . . . . . . . . . . . . . . . . . .3-19
SysLog. . . . . . . . . . . . . . . . . . . . . . . . . . . . . . . . . . . . . . . . . . . . . . . . . . . . . . . . . . .3-21
DNS Resolver . . . . . . . . . . . . . . . . . . . . . . . . . . . . . . . . . . . . . . . . . . . . . . . . . . . . .3-23
4
Profile Directory:Local Profile
LAN (Local) Profile Overview . . . . . . . . . . . . . . . . . . . . . . . . . . . . . . . . . . . . . . . . .4-2
Set up a Local Profile: . . . . . . . . . . . . . . . . . . . . . . . . . . . . . . . . . . . . . . . . . . . .4-3
LAN IP: . . . . . . . . . . . . . . . . . . . . . . . . . . . . . . . . . . . . . . . . . . . . . . . . . . . . . . .4-6
LAN IPX: . . . . . . . . . . . . . . . . . . . . . . . . . . . . . . . . . . . . . . . . . . . . . . . . . . . . . .4-6
Setup < > . . . . . . . . . . . . . . . . . . . . . . . . . . . . . . . . . . . . . . . . . . . . . . . . . . . . . .4-6
Link Speed . . . . . . . . . . . . . . . . . . . . . . . . . . . . . . . . . . . . . . . . . . . . . . . . . . . . .4-7
Static Networks . . . . . . . . . . . . . . . . . . . . . . . . . . . . . . . . . . . . . . . . . . . . . . . . . . . . .4-8
Set up Static Networks. . . . . . . . . . . . . . . . . . . . . . . . . . . . . . . . . . . . . . . . . . . .4-9
Static Addresses . . . . . . . . . . . . . . . . . . . . . . . . . . . . . . . . . . . . . . . . . . . . . . . . . . .4-13
Filters. . . . . . . . . . . . . . . . . . . . . . . . . . . . . . . . . . . . . . . . . . . . . . . . . . . . . . . . . . . .4-16
Defining Custom Filters. . . . . . . . . . . . . . . . . . . . . . . . . . . . . . . . . . . . . . . . . .4-19
Defining Protocol Filters . . . . . . . . . . . . . . . . . . . . . . . . . . . . . . . . . . . . . . . . .4-20
Defining Address Filters. . . . . . . . . . . . . . . . . . . . . . . . . . . . . . . . . . . . . . . . . .4-21
Firewall Filters (Local Profile) . . . . . . . . . . . . . . . . . . . . . . . . . . . . . . . . . . . . . . . .4-22
Advertise Network/Server. . . . . . . . . . . . . . . . . . . . . . . . . . . . . . . . . . . . . . . . . . . .4-28
IPX Server Advertising . . . . . . . . . . . . . . . . . . . . . . . . . . . . . . . . . . . . . . . . . .4-30
DHCP Server/Client/Relay . . . . . . . . . . . . . . . . . . . . . . . . . . . . . . . . . . . . . . . . . . .4-32
Spanning Tree . . . . . . . . . . . . . . . . . . . . . . . . . . . . . . . . . . . . . . . . . . . . . . . . . . . . .4-38
Secondary IP Address . . . . . . . . . . . . . . . . . . . . . . . . . . . . . . . . . . . . . . . . . . . . . . .4-41
Link Speed. . . . . . . . . . . . . . . . . . . . . . . . . . . . . . . . . . . . . . . . . . . . . . . . . . . . . . . .4-44
viii
Terminal Server Router - Release 2.97
Table of Contents
5
Profile Directory:Remote Profile
Remote (WAN) Profile Overview . . . . . . . . . . . . . . . . . . . . . . . . . . . . . . . . . . . . . . 5-2
Transmission Options . . . . . . . . . . . . . . . . . . . . . . . . . . . . . . . . . . . . . . . . . . . . 5-5
Security/Options. . . . . . . . . . . . . . . . . . . . . . . . . . . . . . . . . . . . . . . . . . . . . . . . . . . 5-14
Static/VPN Networks. . . . . . . . . . . . . . . . . . . . . . . . . . . . . . . . . . . . . . . . . . . . . . . 5-17
GRE Tunnel set to <All> . . . . . . . . . . . . . . . . . . . . . . . . . . . . . . . . . . . . . . . . 5-18
GRE Tunnel set to <By Network> . . . . . . . . . . . . . . . . . . . . . . . . . . . . . . . . . 5-21
Static NAT Addresses . . . . . . . . . . . . . . . . . . . . . . . . . . . . . . . . . . . . . . . . . . . . . . 5-24
NAT Bypass Subnets . . . . . . . . . . . . . . . . . . . . . . . . . . . . . . . . . . . . . . . . . . . . . . . 5-26
Static Addresses . . . . . . . . . . . . . . . . . . . . . . . . . . . . . . . . . . . . . . . . . . . . . . . . . . . 5-28
Firewall Filters (Remote Profile) . . . . . . . . . . . . . . . . . . . . . . . . . . . . . . . . . . . . . . 5-31
Filter Network/Server . . . . . . . . . . . . . . . . . . . . . . . . . . . . . . . . . . . . . . . . . . . . . . 5-37
Spanning Tree . . . . . . . . . . . . . . . . . . . . . . . . . . . . . . . . . . . . . . . . . . . . . . . . . . . . 5-41
Trunk Port . . . . . . . . . . . . . . . . . . . . . . . . . . . . . . . . . . . . . . . . . . . . . . . . . . . . . . . 5-44
6
Terminal Server Window
Overview . . . . . . . . . . . . . . . . . . . . . . . . . . . . . . . . . . . . . . . . . . . . . . . . . . . . . . . . . 6-2
Configuration . . . . . . . . . . . . . . . . . . . . . . . . . . . . . . . . . . . . . . . . . . . . . . . . . . . . . . 6-2
Manual Closure of a Telnet Socket . . . . . . . . . . . . . . . . . . . . . . . . . . . . . . . . . . . . . 6-9
7
Basic Configuration
Overview . . . . . . . . . . . . . . . . . . . . . . . . . . . . . . . . . . . . . . . . . . . . . . . . . . . . . . . . . 7-2
Start Basic Configuration. . . . . . . . . . . . . . . . . . . . . . . . . . . . . . . . . . . . . . . . . . . . . 7-2
Local Unit Identification . . . . . . . . . . . . . . . . . . . . . . . . . . . . . . . . . . . . . . . . . . . . . 7-4
Routing Protocol/Security . . . . . . . . . . . . . . . . . . . . . . . . . . . . . . . . . . . . . . . . . . . . 7-5
WAN Interface Connections . . . . . . . . . . . . . . . . . . . . . . . . . . . . . . . . . . . . . . . . . . 7-7
Remote Unit Profile . . . . . . . . . . . . . . . . . . . . . . . . . . . . . . . . . . . . . . . . . . . . . . . . . 7-9
SNMP Configuration . . . . . . . . . . . . . . . . . . . . . . . . . . . . . . . . . . . . . . . . . . . . . . . 7-12
Setup Complete . . . . . . . . . . . . . . . . . . . . . . . . . . . . . . . . . . . . . . . . . . . . . . . . . . . 7-13
8
Verification Window
Ping Utility. . . . . . . . . . . . . . . . . . . . . . . . . . . . . . . . . . . . . . . . . . . . . . . . . . . . . . . . 8-2
Trace Route . . . . . . . . . . . . . . . . . . . . . . . . . . . . . . . . . . . . . . . . . . . . . . . . . . . . . . . 8-5
Port Monitor. . . . . . . . . . . . . . . . . . . . . . . . . . . . . . . . . . . . . . . . . . . . . . . . . . . . . . . 8-7
9
Statistics Window
Run-Time . . . . . . . . . . . . . . . . . . . . . . . . . . . . . . . . . . . . . . . . . . . . . . . . . . . . . . . . . 9-2
Terminal Server Router - Release 2.97
ix
Table of Contents
10
System Reports Window
Events . . . . . . . . . . . . . . . . . . . . . . . . . . . . . . . . . . . . . . . . . . . . . . . . . . . . . . . . . . .10-2
View the Event Log: . . . . . . . . . . . . . . . . . . . . . . . . . . . . . . . . . . . . . . . . . . . .10-2
Alarms . . . . . . . . . . . . . . . . . . . . . . . . . . . . . . . . . . . . . . . . . . . . . . . . . . . . . . . . . . .10-4
Networks/Servers . . . . . . . . . . . . . . . . . . . . . . . . . . . . . . . . . . . . . . . . . . . . . . . . . .10-6
Address Tables . . . . . . . . . . . . . . . . . . . . . . . . . . . . . . . . . . . . . . . . . . . . . . . . . . . .10-9
11
Exit Window
Logout . . . . . . . . . . . . . . . . . . . . . . . . . . . . . . . . . . . . . . . . . . . . . . . . . . . . . . . . . .11-2
Reinitialize . . . . . . . . . . . . . . . . . . . . . . . . . . . . . . . . . . . . . . . . . . . . . . . . . . . . . . .11-3
12
Router Configuration
Basic Setup . . . . . . . . . . . . . . . . . . . . . . . . . . . . . . . . . . . . . . . . . . . . . . . . . . . . . . .12-2
PPP Internet Connection and Public IP Address Routing. . . . . . . . . . . . . . . . . . . .12-3
Router in Slot 1 . . . . . . . . . . . . . . . . . . . . . . . . . . . . . . . . . . . . . . . . . . . . . . . .12-3
Frame Relay Internet Connection and Public IP Address Routing. . . . . . . . . . . . .12-4
Router in Slot 1 . . . . . . . . . . . . . . . . . . . . . . . . . . . . . . . . . . . . . . . . . . . . . . . .12-4
Internet Connection using PPP, NAT/PAT and Firewall Filters . . . . . . . . . . . . . .12-5
Router in Slot 1 . . . . . . . . . . . . . . . . . . . . . . . . . . . . . . . . . . . . . . . . . . . . . . . .12-5
Internet Connection using NAT and Static NAT Addresses. . . . . . . . . . . . . . . . . .12-6
Router in Slot 1 . . . . . . . . . . . . . . . . . . . . . . . . . . . . . . . . . . . . . . . . . . . . . . . .12-6
Back-to-Back with PPP. . . . . . . . . . . . . . . . . . . . . . . . . . . . . . . . . . . . . . . . . . . . . .12-8
Boulder Router in Slot 1 . . . . . . . . . . . . . . . . . . . . . . . . . . . . . . . . . . . . . . . . .12-8
Denver Router in Slot 1 . . . . . . . . . . . . . . . . . . . . . . . . . . . . . . . . . . . . . . . . . .12-9
Back-to-Back with Multi-Link PPP . . . . . . . . . . . . . . . . . . . . . . . . . . . . . . . . . . .12-10
Boulder Router in Slot 1 . . . . . . . . . . . . . . . . . . . . . . . . . . . . . . . . . . . . . . . .12-10
Denver Router in Slot 1 . . . . . . . . . . . . . . . . . . . . . . . . . . . . . . . . . . . . . . . . .12-11
Back-to-Back with Frame Relay . . . . . . . . . . . . . . . . . . . . . . . . . . . . . . . . . . . . . .12-12
Boulder Router in Slot 1 . . . . . . . . . . . . . . . . . . . . . . . . . . . . . . . . . . . . . . . .12-12
Denver Router in Slot 3 . . . . . . . . . . . . . . . . . . . . . . . . . . . . . . . . . . . . . . . . .12-13
A
User Events
User Events . . . . . . . . . . . . . . . . . . . . . . . . . . . . . . . . . . . . . . . . . . . . . . . . . . . . . . .
Authenticate Events. . . . . . . . . . . . . . . . . . . . . . . . . . . . . . . . . . . . . . . . . . . . . . . . .
Triggered Events . . . . . . . . . . . . . . . . . . . . . . . . . . . . . . . . . . . . . . . . . . . . . . . . . . .
Alarms . . . . . . . . . . . . . . . . . . . . . . . . . . . . . . . . . . . . . . . . . . . . . . . . . . . . . . . . . . .
B
A-2
A-3
A-4
A-5
Protocol Types
Protocol Number in Firewall Filters . . . . . . . . . . . . . . . . . . . . . . . . . . . . . . . . . . . . B-2
Ethernet Protocol Types . . . . . . . . . . . . . . . . . . . . . . . . . . . . . . . . . . . . . . . . . . . . . B-6
x
Terminal Server Router - Release 2.97
Table of Contents
C
Troubleshooting
Communication Related Issues . . . . . . . . . . . . . . . . . . . . . . . . . . . . . . . . . . . . . . . . C-2
Excessive Triggered Update Events on the Events screen . . . . . . . . . . . . . . . . C-2
LAN Related Issues . . . . . . . . . . . . . . . . . . . . . . . . . . . . . . . . . . . . . . . . . . . . . . . . . C-2
Unable to add data filters, advertise networks or create static route entries. . . C-2
Unable to access the Local (LAN) Router unit via Telnet . . . . . . . . . . . . . . . . C-4
Unable to access a remote unit via Telnet . . . . . . . . . . . . . . . . . . . . . . . . . . . . C-4
Diagnostics and Performance Tools . . . . . . . . . . . . . . . . . . . . . . . . . . . . . . . . . . . . C-5
Verification . . . . . . . . . . . . . . . . . . . . . . . . . . . . . . . . . . . . . . . . . . . . . . . . . . . . C-5
Statistics . . . . . . . . . . . . . . . . . . . . . . . . . . . . . . . . . . . . . . . . . . . . . . . . . . . . . . C-6
System Reports . . . . . . . . . . . . . . . . . . . . . . . . . . . . . . . . . . . . . . . . . . . . . . . . . C-6
Alarms . . . . . . . . . . . . . . . . . . . . . . . . . . . . . . . . . . . . . . . . . . . . . . . . . . . . . . . . . . . C-7
Identify Alarm. . . . . . . . . . . . . . . . . . . . . . . . . . . . . . . . . . . . . . . . . . . . . . . . . . C-7
Clear Alarm. . . . . . . . . . . . . . . . . . . . . . . . . . . . . . . . . . . . . . . . . . . . . . . . . . . . C-9
Glossary
Index
Terminal Server Router - Release 2.97
xi
Table of Contents
xii
Terminal Server Router - Release 2.97
CHAPTER
1
Introduction
In this Chapter
Overview
Installation
Maneuvering in the System
Fields
Help Bar
Connecting to the Router
Introduction
Overview
Overview
The TSR can be configured using CLI via telnet or through the Router Menu-driven software. This
manual covers the Router menu-driven software only. For additional information on the TSR, please
see the Adit 600 User Manual.
Installation
The TSR card can be installed into any of the service card slots of the Adit 600 chassis. This card is hotswappable, therefore the card can be removed and replaced without bringing down the system or with
or without power to the unit.
Install a Router Card
1. Slide the Router card into a service card slot of the chassis.
2. Press firmly into slot to engage, until card is seated completely.
3. Card has completed bootup when a solid Red CRD light (an LED) is displayed.
Maneuvering in the System
[TAB] moves from one field to the next.
Keyboard arrows move to the next field in the direction of the arrow.
[ ] Items in brackets are scrollable options. With the Spacebar the operator can move through the
selections.
[ENTER] displays the window for the selected feature or to enter a alphanumeric value.
[ESC] Exit and return to previous window or to the Main Menu.
Help Bar - is displayed along the bottom of the window and lists options for the selected feature.
The router software contains three different field types that may be used in entering information: scroll,
select and edit.
1-2
Terminal Server Router - Release 2.97
Introduction
Fields
Fields
Scroll Field
A field enclosed in angle brackets is a scrollable option field. While the field is selected use the
following keystrokes:
[SPACEBAR] will scroll forward through the options
[ENTER] will open the option’s window or accept the entered value.
Example: Terminal: <generic>
Select Field
A field followed by –> is a selectable field, which causes an action to be performed, highlight the
field and press [ENTER] to perform the action, for example, to enter the Trunk Port Setup screen.
Example: SETUP <Trunk> –>
Some selectable fields, such as Main Menu options, are also a scrollable option field. For example,
<Events>–>. Press the [SPACEBAR] to select the desired option and then press [ENTER] to
perform the action.
Edit Field
A field value enclosed in parentheses ( ) may be modified by entering an alphanumeric character.
Example: SYSTEM NAME:
(Adit 600)
You will note that many editable fields are displayed with a default value. To change this value,
highlight the field and type over the existing entry or press [DELETE] and then enter new value.
Note: these fields are case sensitive. To enter this value press [ENTER].
Terminal Server Router - Release 2.97
1-3
Introduction
Help Bar
Help Bar
The Router provides field specific help that is displayed at the bottom of the window. The help text will
indicate if the field is scrollable or editable and provide a brief description of the field. If it is a selectable
field, it will state what to do to invoke the action to be performed.
1-4
Terminal Server Router - Release 2.97
Introduction
Connecting to the Router
Connecting to the Router
Establish a Telnet Session
1. Use the telnet {rtr_card-addr} CLI command to connect to the Router card. The
following example is when the router is located in slot 3.
> telnet 3
Connected.
Escape character is '^]'.
Attempting Force10 Networks QTSR connection...
QTSR [Sat Apr 10, 2004 10:51:23] (<CR> to login)
2. Select [ENTER] or <CR> to log in.
Password >
3. Enter default password (admin) and select [ENTER].
Password >******
Select a terminal type...
(<space> or <back-space> to toggle, <CR> to accept)
Terminal: <VT100>
4. Select Terminal Type: scroll through options with the [SPACEBAR] and then [ENTER] to
select. Recommended: <generic>.
Terminal: <generic>
Terminal Server Router - Release 2.97
1-5
Introduction
Set a New Password
Set a New Password
If you have logged in with a default password, for security reasons the password should be changed, the
system directs the user to do so.
> telnet 3
Connected.
Escape character is '^]'.
Attempting Force10 Networks QTSR connection...
QTSR [Wed Apr 10, 2004 5:51:21] (<CR> to login)
Password >*****
Select a terminal type...
(<space> or <back-space> to toggle, <CR> to accept)
Terminal: <generic>
You have logged in with a default password.
For security reasons the password should be changed.
Complete the change request and record your new password for future use.
Password Change Request
(Valid QTSR passwords are from 5 to 15 alpha-numeric characters)
NEW Password >******
RETYPE Password >******
After a successful login, the system prompts the user to change the password from the default.
1. Type in New Password, and press [ENTER]
2. Retype in New Password, and press [ENTER]
1-6
Terminal Server Router - Release 2.97
CHAPTER
2
Management Window
In this Chapter
Management Overview
System Time/Login
Upload/Download
Load Defaults
Software Images
Management Window
Management Overview
Management Overview
The Management menu contains the system components of the TSR software. This section is used to
define security parameters, factory default settings, as well as providing software loading and
configuration settings for the Router.
Management Menu options allow the user to:
Establish the system security features
Install and backup system software
Backup and install configuration settings
Default system parameters to factory settings
NOTE: Two simultaneous sessions are allowed to access the Router software. For example,
one local and one remote (one must be accessing with the VIEW level).
System Time/Login
1. Select Management <System Time/Login> from the Main Menu, and select [ENTER].
2-2
Terminal Server Router - Release 2.97
Management Window
System Date and Time
This screen provides the basic system and security options for the Router card.
The Router is equipped with three password levels and an enhanced security password.
Level 1 VIEW
allows the user to view only, no changes are allowed.
Level 2 CONFIG allows the user to view and change all screens.
Level 3 ADMIN allows the user to view and change all screens, terminate
users, as well as change all three password.
The Enhanced Security option provides an additional level of security for the network
administrator.
System Date and Time
The time and date values are used for reporting purposes. Enter the date in the following format: Mmm
DD, YYYY. Immediately follow the date with the desired time entry. The appropriate time format is
HH:MM:SS (hour:minute:second). Press [TAB] to proceed to the next field.
Daylight Savings Time Adjustment
Use this field to enable or disable automatic adjustment of the system clock for Daylight Savings Time.
Auto-Logout Timer
This field defines the minutes of inactivity before the current session is terminated. The default time is
30 minutes. Type the desired auto-logout time (between 1-255).
NOTE: Any changes that have not been saved will be lost when the timer is activated.
Terminal Server Router - Release 2.97
2-3
Management Window
View Password
View Password
Users assigned to this level may view only, no changes are allowed. The default VIEW password is
"public". This field must be unique from the CONFIG and ADMIN passwords. The field may be a 515 characters alphanumeric value.
Config Password
Users assigned to this level may view and change all screens. The default CONFIG password is
"config". This entry must be unique from the VIEW and ADMIN passwords. The field may be a 5-15
character alphanumeric value.
Admin Password
Users assigned to this level may view and change all screens, as well as change all three password
levels. The default ADMIN password is "admin". This entry must be unique from the VIEW and
CONFIG passwords. The field value may be a 5-15 character alphanumeric value.
NOTE: If the default login passwords are not changed, the user will be prompted, at each
login, to enter new passwords at the CONFIG and ADMIN levels.
2-4
Terminal Server Router - Release 2.97
Management Window
Enhanced Security
Enhanced Security
The Enhanced Security option provides another level of password security that restricts access to the
Main Menu via Telnet or the Async port. It can be used by a Network Administrator to only allow those
with the Enhanced Security password to access the Router. When enabled, this option hides the system
login prompt until the appropriate password is entered.
1. Use the [SPACEBAR] to select <Enabled> and [TAB] to enter this selection.
2. The Change Enhanced Security Password - > field will display. Select [ENTER] to change
password. You will be requested to enter the password twice to confirm.
When Telneting into the Router with Enhanced Security enabled, the following will appear:
> telnet 3
Connected.
Escape character is '^]'.
1. Type the Enhanced Security Password here.
Note: There will be no effect to the screen here until the correct password is typed in. When
the correct password is typed, no return or other keystroke is needed, the following will appear:
Password >
WARNING! IF ENHANCED SECURITY IS ENABLED, AND THE ADMINISTRATOR DOES NOT NOTE
THE PASSWORD, THERE IS NO WAY TO ACCESS THE ROUTER UNTIL YOU HAVE RESET THE ROUTER
BACK TO ITS DEFAULT SETTINGS, LOSING ALL CONFIGURATION SETTINGS.
SEE set {rtr_card-addr} default.
Terminal Server Router - Release 2.97
2-5
Management Window
Enhanced Security
2. At this point the Router is requesting your Level 1, 2 or 3 User Password. Enter your password
and select [ENTER] and continue as you would Telnet into the Router normally.
Password >******
Select a terminal type...
(<space> or <backspace> to toggle, <CR> to accept)
Terminal: <generic>
2-6
Terminal Server Router - Release 2.97
Management Window
Upload/Download
Upload/Download
WARNING! BEFORE LOADING A DOWN-LEVEL OF ROUTER CODE, SAVE THE CONFIGURATION TO
A FILE.
LOST.
CONFIGURATION MAY BE RESET TO THE DEFAULT SETTING AND CURRENT CONFIGURATION
This window allows the network administrator to manage the list of devices and users who are
authorized to perform:
Installation of software
Backup of software and configuration settings (via tftp)
The Router management enables a network administrator to perform a Router Code Upload from a
central location via the LAN or WAN connection using TFTP. A Code Download can also be
performed as a backup (binary image) of the software. Config Upload and Config Download can be
performed remotely via TFTP to install and backup the Router’s configuration to and from a binary file.
There is an additional option to upload code to the Router, with the CLI command load {slot}
tftp {ip-addr}{"file-name"}
Set up the Router for Uploads/Downloads
1. Select Management: <Upload/Download> from the Main Menu, and [ENTER].
Terminal Server Router - Release 2.97
2-7
Management Window
Set up the Router for Uploads/Downloads
2. Select [CTRL A] to add a TFTP Upload/Download User.
NOTE: The IP Address 1. (* ) will display. The * denotes any IP Address on the defined
Client Site. The user may define a specific IP Address for Uploads/Downloads by replacing the
* or by Adding another Upload/Download User.
3. Specify the Client Site
Selections are: <Local LAN> (default) or Remote Unit(s) that have been set up.
2-8
Terminal Server Router - Release 2.97
Management Window
Upload/Download Setup Menu Fields
4. For Mode, specify whether the IP Address can perform code uploads/downloads, config file
uploads/downloads, or both.
5. Press [ESC] to save your changes and return to the Main Menu. These changes will go into
effect immediately.
Upload/Download Setup Menu Fields
Feature and Release Key Options
Options may be available to purchase, to upgrade the Router. Once this option is purchased, a key
code will be given to enable the feature on this product. For more information please call Force10
Networks’ Technical Assistance Center.
Reboot After Load Code
Use this option to automatically reboot the Router after software is successfully installed. A
software load verification checks and verifies that the new software is good before the unit will
accept it. If it is determined to be bad or damaged, the Router will reject it and continue to use the
original software.
Reboot After Load Config
Use this option to automatically reboot the Router after a configuration file is successfully installed.
IP Address
The IP Address field is use to identify which device(s) will be allowed to perform config and/or
code uploads and downloads. A “*” in this field will allow all devices at the selected Client Site to
perform Uploads/Downloads.
Client Site
This field identifies the profile the Router will use to reach the IP Address entered in the previous
field. If <Local LAN> is selected, it indicates the device can be reached via the LAN. If the device
can be reached via a WAN connection, you should select one of the Remote (WAN) profiles.
Mode
Use this field option to enable uploads/downloads of software and configuration files for specific
IP addresses.
Code – Authorizes the IP Address to perform software uploads and downloads. When new software
is installed on the Router, a software load verification checks and verifies that the new software is
good before the unit will accept it. If it is determined to be bad or damaged, the Router will reject
it and continue to use the original software. Acceptable binary file extensions are .mgm or .MGM.
Config – Authorizes the IP Address to perform configuration file uploads and downloads. For
uploads, this selection allows the device(s) in the IP Address field to transfer or restore a previously
backed-up configuration file to the Router via TFTP. For downloads, this selection defines an IP
Address to which a backup copy of the Router’s configuration can be sent. Acceptable file
extensions are “.cfg” or “.CFG”.
Both – Authorizes the IP Address to perform code and config file uploads/downloads.
NOTE: Code and Config uploads require a reboot of the unit before the changes take effect.
Terminal Server Router - Release 2.97
2-9
Management Window
Load Defaults
Load Defaults
Use the Load Defaults option to reset the Router software to the factory defaults. This option will delete
all configuration settings, including the passwords.
Use the [SPACEBAR] to choose <Yes> and press [ENTER]. If you have a Telnet connection to the unit,
your session will be terminated.
1. Select Management <Load Defaults> from the Main Menu, and select [ENTER].
2. A dialog box will display a confirmation message to load factory defaults.
3. Select <YES> with the [SPACEBAR] and select [ENTER].
4. Defaults will be loaded.
2-10
Terminal Server Router - Release 2.97
Management Window
Software Images
Software Images
Use Software Images to switch the active with the backup application images stored in the Router.
1. Select Management <Software Images> from the Main Menu, and select [Enter].
Options
Show Current Images - Displays the application images stored in the Router (shown below).
Switch Appl. Images - Switch the active with the backup application images stored in the router. Note:
More than one software image must be loaded for an active and a backup image to display.
Terminal Server Router - Release 2.97
2-11
Management Window
Options
2-12
Terminal Server Router - Release 2.97
CHAPTER
3
Profile Directory: Router Card Profile
In this Chapter
Overview
Configuration
RIP Mode Receive
RIP Mode Send
Trunk
Security
SNMP
DNS Proxy
Spanning Tree Protocol
Network Time Protocol
SysLog
DNS Resolver
Profile Directory: Router Card Profile
Overview
Overview
The Router Card Profile of the Profile Directory is used to review/configure base router features.
Configuration
1. Select Configuration: <Profile Directory> from the Main Menu, and select [ENTER].
Main
Menu
3-2
Terminal Server Router - Release 2.97
Profile Directory: Router Card Profile
Configuration
2. Select Router CARD <Setup -> and select [ENTER].
Profile
Directory
Window
Router
Card
Configuration
Window
Terminal Server Router - Release 2.97
3-3
Profile Directory: Router Card Profile
RIP Mode Receive
RIP Mode Receive
This field sets the RIP receive mode, to RIP version 1, RIP version 2, or to both.
Selection is: <RIP1>, <RIP2>, or <RIP1/RIP2>.
3-4
Terminal Server Router - Release 2.97
Profile Directory: Router Card Profile
RIP Mode Send
RIP Mode Send
This field sets the RIP send mode, to RIP version 1, RIP version 2, or to both.
Selection is: <RIP1>, <RIP2>, or <RIP1/RIP2>.
Terminal Server Router - Release 2.97
3-5
Profile Directory: Router Card Profile
Trunk
Trunk
This window is used to configure the Trunk setup for the Router. Although the Router is designed to
connect remote sites over dedicated connections, the unit supports a number of different encapsulation
protocols simultaneously, including Frame Relay and PPP. The Router provides the flexibility to allow
the user to define which slots will be used for the selected WAN protocol.
1. Select Trunk < Configure -> and select [ENTER].
2. All WAN connections will display in this window. To select the WAN Connection Type,
[TAB] to the Type on the specific WAN Link #, use the [SPACEBAR] to select the Type (PPP,
MLPPP, PPP in Frame Relay, or Frame Relay 1490) and select [ENTER]. For more
information on this window, see the field definitions on the next page.
3-6
Terminal Server Router - Release 2.97
Profile Directory: Router Card Profile
Trunk
Trunk Setup Menu Fields
WAN Link #
This field displays the WAN Link Number (1-24) for the WAN Connection.
WAN Connection
The WAN Connection displays the current connection of this WAN, in the form {slot:port:channel}.
WAN Connection Type
The value in this field determines the type of protocol encapsulation that will be used for the selected WAN.
PPP
Point-to-Point Protocol. Provides a standard means of encapsulating data packets sent over a single-channel
WAN link. It is the standard WAN encapsulation protocol for the inter- operability of bridges and routers.
MLPPP
MultiLink PPP. When PPP is selected and a Multilink group is chosen the WAN Connection Type will
display MLPPP.
PPP in Frame Relay
Point-to-Point Protocol encapsulated in Frame Relay.
Frame Relay 1490
A packet-switching protocol for connecting devices on a WAN. Frame Relay networks in the U.S. support data transfer
rates at T1 (1.544 Mbps) and T3 (45 Mbps) speeds. Frame Relay service is provided for customers who want connections
at 56 Kbps to T1 speeds.
Multilink Group
The Multilink Group will specify a trunk as part of a multilink PPP group. Selection is: <None> or <1> through
<24>. Available only when MLPPP connection type is selected.
Data Speed
The Data Speed will specify the data speed for each DS0 in the given trunk. Selection is: <56K> or <64K>. The
default is 64K.
PVC Management
Field
Description
Disabled
Annex D
Disables PVC Management
Frame Relay standard
Poll Interval - Range is between 5-30. Default 10.
Poll Counter - Range is between 1-255. Default 6.
Local Management Interface
Poll Interval - Range is between 5-30. Default 10.
Poll Counter - Range is between 1-255. Default 6.
LMI
Terminal Server Router - Release 2.97
3-7
Profile Directory: Router Card Profile
Security
Security
1. Select Security < Configure -> and select [ENTER].
The fields on this screen may be used to define the authentication process for the local unit. This
window will change with the selection of field options.
Security
Setup
Window
3-8
Terminal Server Router - Release 2.97
Profile Directory: Router Card Profile
Security
Security Setup Menu Fields
Authentication by Remote
Protocol: CHAP, PAP or NONE
Use this first field to identify the authentication protocol to be used by remote units when authenticating this unit.
<CHAP> Challenge Handshake Authentication Protocol
<CHAP> Secret
Select [ENTER] and a NEW Password dialog box will display. Enter a 1 - 15 character password and select
[ENTER] and a RETYPE Password dialog box will display. Retype password and select [ENTER]. Password
is now set.
<PAP> Password Authentication Protocol
<PAP> Password
Same as above <CHAP> Password.
<NONE > (no authentication protocol) is the default.
User ID
Use this field to define the local unit’s User ID. During the authentication process, the local unit will send a name or User
ID, along with the authentication protocol’s secret or password (see above). Use the [SPACEBAR] to scroll between
<Local Profile Name> (the default value) and <Local Custom Name>. If set at <Local Profile Name>, the local unit
will send the 11 character unit name which was defined on the Local (LAN) Profile screen. If this field is set to <Local
Custom Name> you may define a 32 character maximum alphanumeric value to represent the User ID which is sent
during the authentication process. Defining a custom User ID simply gives the end user more flexibility for this value.
To assign a custom User ID, set the USER ID field to <Local Custom Name> and press [TAB]. Up to ten (10) custom
names may be configured.
Authentication of Remote
Protocol: CHAP, PAP or NONE
Use this field to identify the authentication protocol to be used by this Router when authenticating remote devices.
Local Security Server
Use these fields to identify the local server that is used to authenticate remote devices. This field is only necessary
if you are using either the <RADIUS> or <TACACS+> security authentication method. If you are not using either
of these security methods, the Router will respond to the authentication requests of remote devices and will accept
or reject them based on their validity.
Type
Use the [SPACEBAR] to choose the security authentication method that you are using.
<None> Use this setting if the local unit will be used to authenticate remote devices. Please note that you may not use
the <None> setting if the Security Server field for a remote device has been set to <External Server>
<RADIUS> Will set the server to use the RADIUS (Remote Authentication Dial-In Service) protocol.
RADIUS is a client/server-based authentication software system.
<TACACS+> Will set the server to use the TACACS+ (Terminal Access Controller Access Control System)
protocol. TACACS+ provides services of authentication, authorization and accounting independently.
Terminal Server Router - Release 2.97
3-9
Profile Directory: Router Card Profile
Security
Address
Enter the IP Address of the local server that will be used during the authentication process. If <None> was selected in the
<Type> field, this field will be disabled.
Password
Enter the password of the local server that will be used during the authentication process. You must make sure that the
password entered into the server is the same as the value entered here or the authentication process will fail. If <None>
was selected in the <Type> field, this field will be disabled.
3-10
Terminal Server Router - Release 2.97
Profile Directory: Router Card Profile
SNMP
SNMP
By defining specific IP Addresses, devices may be specified to manage the Local Unit via SNMP.
NOTE: The Router is compatible with the Standard MIB and MIB II.
1. Select SNMP < Configure -> and select [ENTER].
2. Use the SNMP setup window to set up SNMP configurations.
SNMP
Setup
Window
Terminal Server Router - Release 2.97
3-11
Profile Directory: Router Card Profile
SNMP
SNMP Setup Menu Fields
SYS Name
Set the value of sysName. Value has a maximum of 64 ASCII characters.
SYS Contact
Set the value of sysContact. Value has a maximum of 64 ASCII characters.
SYS Location
Set the value of sysLocation. Value has a maximum of 64 ASCII characters.
SNMP Community Name(s)
Use these fields to specify the community name, address and access privileges of devices needing to communicate
with the Local (LAN) unit through SNMP. If no IP Addresses is defined on this screen, any device may access
the local unit using the IP Address assigned on the Local (LAN) Profile Setup screen, regardless of the specified
community name. The values entered in these fields will be used by the SNMP program as verification of entry
into the unit.
Name
Enter the community name(s) of the device to access the Local (LAN) unit through SNMP. Community names entered
into the SNMP program MUST match the values entered here or access for remote management will not be allowed. The
default community name is public, new community names can have a maximum of 10 characters.
Address
Enter the corresponding IP Address of the device(s) that were entered in the Name field.
Access
<Read> device is allowed to view the settings, but cannot make any changes
<Write> device is allowed to make changes but not view settings
<Both> device is allowed to both read and write privileges
3-12
Terminal Server Router - Release 2.97
Profile Directory: Router Card Profile
SNMP
SNMP Trap Destinations
SNMP
Setup
Window
Select SNMP Trap Destination - > and select [ENTER]. This window defines the SNMP Trap
Destinations to which the Router will report alarm information.
SNMP
Setup
Window
Terminal Server Router - Release 2.97
3-13
Profile Directory: Router Card Profile
SNMP
Name
Enter the community name(s) of the devices to which the Router will report. The default community name is public. To
enter a new community name, highlight the field and type the desired value, with a maximum of 10 characters.
Address
Enter the corresponding IP Address of the device that was entered in the Name field.
Location
<Local LAN>, <RemoteUnit>
Available options are the <Local LAN> and all defined Remote (WAN) Units, defined in the Profile Directory (there can
be up to 24).
3-14
Terminal Server Router - Release 2.97
Profile Directory: Router Card Profile
DNS Proxy
DNS Proxy
The DNS (Domain Name Servers) Proxy specifies the IP address of DNS name servers to be used by
the DHCP (Dynamic Host Configuration Protocol) clients.
1. Select DNS Proxy < Configure -> and select [ENTER].
2. Type [CTRL A] to Add a DNS Proxy.
Terminal Server Router - Release 2.97
3-15
Profile Directory: Router Card Profile
DNS Proxy
3. Enter the appropriate data in the following fields.
4. Select [ESC] and <YES> to exit the window and save changes.
DNS Proxy Setup Menu Fields
Domain Name
Define a name for the Domain with up to 41 characters.
DNS Server
Enter the IP Address for the DNS Server.
Site
This field lists the Local LAN and all the RemoteUnit that have a profile created for them. Use the [SPACEBAR] to
scroll through the list.
3-16
Terminal Server Router - Release 2.97
Profile Directory: Router Card Profile
Spanning Tree Protocol
Spanning Tree Protocol
The Spanning Tree Protocol configures the global setup for using the Spanning Tree Algorithm as
specified in the IEEE 802.1D specification.
1. Select Spanning Tree Protocol < Configure -> and select [ENTER].
2. To enable Spanning Tree, scroll <Disabled> to <Enabled>, with the [SPACEBAR], select
[ENTER].
Terminal Server Router - Release 2.97
3-17
Profile Directory: Router Card Profile
Spanning Tree Protocol
3. Enter the appropriate data in the following fields.
Spanning Tree Global Setup Menu Fields
Bridge Hello Time
The Bridge Hello Time specifies the time interval between transmissions of Topology Change Notification BPDUs
towards the Root when the Bridge is attempting to notify the Designated Bridge on the LAN to which its Root Port is
attached of a topology change. The value can range from 1 to 10 seconds, with a default of 2 seconds.
Bridge Max Age
The Bridge Max Age value specifies the maximum age of received protocol information before it is discarded. The value
can range from 6 to 40 seconds, with a default of 20 seconds.
Bridge Forward Delay
The Bridge Forward Delay is the time spent by a Port in the Listening or Learning States before transitioning to the
Learning or Forwarding State, respectively. The value can range from 4 to 30 seconds, with a default of 15 seconds.
Bridge Priority
The Bridge Priority is the priority part of the bridge identifier. The value can range from 0 to 65535, with a default of
32768.
3-18
Terminal Server Router - Release 2.97
Profile Directory: Router Card Profile
Network Time Protocol
Network Time Protocol
The Network Time Protocol is a protocol which sets the network to a common time system for Internet
hosts, based off of GMT (Greenwich Mean Time).
1. Select Network Time Protocol < Configure -> and select [ENTER].
2. To enable Network Time Protocol, scroll <Disabled> to <Enabled>, with the [SPACEBAR],
select [ENTER].
Terminal Server Router - Release 2.97
3-19
Profile Directory: Router Card Profile
Network Time Protocol
3. Enter the appropriate data in the following fields.
Network Time Protocol Setup Menu Fields
Network Time Protocol
<Disabled> to disable Network Processing.
<Enabled> to enable Network Processing. The following items appear once enabled.
NTP Server Address
The IP address or domain name of the NTP server.
<IP Address> IP address of the NTP server. Setting the NTP server value to 0.0.0.0 will cause the router to listen to and
process NTP broadcasts.
<Domain Name> Domain name of the NTP server. Maximum of 43 characters.
Poll Interval
The Poll Interval specifies the polling of the NTP server to a defined number of seconds. The range (in seconds) is from
16 to1024 seconds, with a default of 16.
Time Zone Offset HOURS
The hours Time Zone Offset is used to calculate gateway time from GMT (Greenwich Mean Time). Range is -12 to 12.
Time Zone Offset MINUTES
The minutes Time Zone Offset is used to calculate gateway time from GMT (Greenwich Mean Time). Range is 0 to 60.
3-20
Terminal Server Router - Release 2.97
Profile Directory: Router Card Profile
SysLog
SysLog
The SysLog client capability enables or disables sending alarm and event messages to an external
Syslog server from the Router.
1. Select SysLog
Configure -> and select [ENTER].
2. To enable SysLog (System Log Message Service), scroll <Disabled> to <Enable> with the
[SPACEBAR], select [ENTER].
Terminal Server Router - Release 2.97
3-21
Profile Directory: Router Card Profile
SysLog
3. Enter the appropriate data in the following fields.
SysLog Setup Menu Fields
Sys Log
To enable the Sys Log, use the [SPACEBAR] to scroll <Disabled> to <Enabled> and select
The window will now display the optional settings for SysLog.
[TAB] or [ENTER].
Facility
The value can range from 0 to 23, with a default of 16.
Level
The value can range from 0 to 7, with a default of 3. Level 3 is Alarms and level 5 is Events.
Server IP Address
The server IP Address is a unique, dotted decimal notation entry that is used for data routing purposes. This IP address of
the SysLog Server or the Host that has the SysLog Server software running.
3-22
Terminal Server Router - Release 2.97
Profile Directory: Router Card Profile
DNS Resolver
DNS Resolver
The DNS Resolver enables the use of the Domain Name Service (DNS) resolver to convert domain
names to IP addresses.
1. Select DNS Resolver
Configure -> and select [ENTER].
2. To enable DNS Resolver, scroll <Disabled> to <Enable> with the [SPACEBAR], select
[ENTER].
Terminal Server Router - Release 2.97
3-23
Profile Directory: Router Card Profile
DNS Resolver
3. Enter the appropriate data in the following fields.
DNS Resolver Setup Menu Fields
DNS Resolver
Disable/enable use of DNS resolver to convert domain names to IP addresses.
My Domain Name
<Enable> <Disable>
Set the default domain that the DNS resolver will add to any name queries that are not fully qualified. Identifier of up to
43 characters.
My Node Name
Set the card’s host name. Identifier of up to 15 characters.
DNS Primary Server IP Address
Configure IP address of DNS server #1.
DNS Secondary Server IP Address
Configure IP address of DNS server #2.
DNS Resolver Cache Contents
<Flush> - will clear the cache contents
<Display> - will display the cache contents
3-24
Terminal Server Router - Release 2.97
Profile Directory: Router Card Profile
DNS Resolver
Static Host List: View or Modify - >
Select this field and press [ENTER]. The system will confirm that you want to save this configuration. Scroll the <No>
to <Yes> to save.
Terminal Server Router - Release 2.97
3-25
Profile Directory: Router Card Profile
DNS Resolver
After the configuration is saved, the DNS Static Host window displays and a Static Host can be added or modifed. Note:
If any changes are made they must be saved when exiting the window.
#
Number of Static Hosts set up. A maximum of 33 can be entered.
IP Address
IP address of the static host.
Host Name
Enter the filter name, with a maximum of 42 characters, no spaces or numbers.
3-26
Terminal Server Router - Release 2.97
CHAPTER
4
Profile Directory:Local Profile
In this Chapter
LAN (Local) Profile Overview
Static Networks
Static Addresses
Filters
Firewall Filters (Local Profile)
Advertise Network/Server
DHCP Server/Client/Relay
Spanning Tree
Secondary IP Address
Link Speed
Profile Directory:Local Profile
LAN (Local) Profile Overview
LAN (Local) Profile Overview
The LAN Profile is the largest, most detailed portion of the Router software. The fields on this screen
allow definition of how data transmission will occur on the LAN port. This includes defining the
protocol(s) that it will use to send and receive data, defining security protocols, specifying which LAN
servers and networks will be advertised to WAN units, and establishing specific data filtering options.
The LAN profile is used in conjunction with the WAN profiles. The WAN profiles identify which
remote units the local unit can communicate with, as well as the data transmission requirements of each
remote.
In addition to the fields on this screen, there are several other areas that directly relate to the
communication abilities of the Router. You may use the fields at the bottom of this screen to access the
following areas:
Defining static addresses at the local unit
Establishing static networks
Establishing Remote (WAN) advertising
Establishing DHCP Server/Client/Relay agent parameters
Defining firewalls
Defining data filters
The Router can accommodate a maximum of 500 filters, such as those created when establishing static
routes or data filters. The following entries consume a filter:
Configured address, custom and protocol filters
Static IP networks and static IPX networks
Enabling any learned items listed on the Advertise Network/Server screen or Filter
Network/Server screen
Static IP and MAC Addresses
Firewall filters
In a large network, it is necessary to selectively use of each of these options so that the number of
configured filters is within the maximum allowed.
The Local Profile is used to define the Local (LAN) port parameters for the unit at the present location.
4-2
Terminal Server Router - Release 2.97
Profile Directory:Local Profile
Set up a Local Profile:
Set up a Local Profile:
1. The Local (LAN) Profile Setup is found in Configuration <Profile Directory>.
Main
Menu
2. Select LocalUnit LAN < Setup -> and select [ENTER].
Profile
Directory
window
Terminal Server Router - Release 2.97
4-3
Profile Directory:Local Profile
Set up a Local Profile:
3. Configure the LAN on this Main window. Note: there are additional windows for specific
features. See the following section.
Local
Profile
Setup
Window
Local Profile Setup Menu Fields
Profile Setup for (LocalUnit)
The (LocalUnit) is the default name for this unit and will be used during the authentication process to ensure this
unit’s identity. This name can easily by changed by simply typing over the "LocalUnit" and saving when closing
this window. This name can be up to 11 characters.
Protocol
This column includes three protocol options, IP, IPX and Other. These protocols are used to define Frame Types
and LAN Network Updates to be used by this Router.
Frame Types
Define the frame type of the packets that are sent and received by the Router. If a packet is received formatted in
a frame type that has not been enabled, the Router will not accept the data.
Note that multiple frame types may be supported simultaneously for IPX and Other protocols.
802.2
When selected (X) this Unit may send and receive packets that match the 802.2 format.
Eth II
When selected (X) this Unit may send and receive packets that match the Ethernet II format. Note that the IP protocol
commonly uses this format.
SNAP
When selected (X) this Unit may send and receive packets that match the SNAP (Subnet Network Address Protocol)
format.
802.3
When selected (X) this Unit may send and receive packets that match Novell’s X802.3 format.
4-4
Terminal Server Router - Release 2.97
Profile Directory:Local Profile
Set up a Local Profile:
LAN Network Updates
Use the LAN Network Updates field to determine whether the Local (LAN) unit will learn, via RIP and SAP
packets, which networks and services are attached to the local LAN, and whether Remote (WAN) networks and
services will be advertised to the LAN. If this information is learned, it may be advertised to remote devices if
advertising is established. Use the [SPACEBAR] to select from the following options: <Both>, <Neither>,
<Send> and <Receive>.
When set to <Both>, the Local Unit will accept the RIPs and SAPs from the LAN and the networks and
services learned from the WAN will be broadcast to the LAN.
LAN
Local
Unit
WAN
Remote
Unit
<Both> send and receive network/service
information to/from LAN
The <Send> value will enable the Local Unit to send to the LAN information regarding the networks and services
that it has learned from remote devices on the WAN. However, the unit will not accept RIPs and SAPs from the
LAN.
LAN
Local
Unit
WAN
Remote
Unit
<Send> network/service information from remote
to LAN
When this field value is set to <Receive>, the Local Unit will monitor the RIPs and SAPs on the LAN, learn the
available networks and services and then pass this information on to the appropriate remote units on the WAN.
Network information from the WAN, however, will not be broadcast to the LAN.
LAN
Local
Unit
WAN
Remote
Unit
<Receive> network/service information from the LAN
and send to the Remotes
The <Neither> value will not allow the Local Unit to send or receive information regarding networks and services
on the LAN.
Terminal Server Router - Release 2.97
4-5
Profile Directory:Local Profile
LAN IP:
LAN IP:
IP Address
This is the IP Address of this Router, used to uniquely identify the device on the internetwork. The default for this
IP Address is 10.0.0.1
Subnet Mask
A subnet mask determines which bits in the IP address are used to identify the network number. The default for
the Subnet Mask is 255.0.0.0.
Default Router
This is an optional entry depending on your network configuration. Use this field to identify a router that is
physically connected to your LAN. If the Router receives a packet which contains a network that is not known,
the packet will be sent to the router identified in this field.
If there are other routers and networks behind the Default Router add Static Network IP information with the
Default Router as the Default Gateway.
If you are communicating with different network domains, you will need to enter the IP Address of your Router
as the default router on each workstation or make sure that the local router will redirect to the Unit when
appropriate, so that they may use the Unit to reach the remote site.
LAN IPX:
These fields enable the Unit to route IPX to Remote (WAN) networks, even if an IPX server does not exist on the
local LAN. Typically, the Router will learn its external network number. However, if the local LAN does not have
a server or if the LAN NETWORK UPDATES field (see above) is set to <Neither>, and you wish to route IPX
to Remote (WAN) networks, the external network number must be defined using these fields.
If you are not using IPX on your LAN, these fields will not apply. Please note that these are all
hexadecimal entries. For the following see you network administrator for the appropriate numbers. If
the frame type is unsupported leave the field set to 0s.
802.2 Ext. Network - Enter the corresponding IPX external network number.
Ethernet II Ext. Network - Enter the corresponding IPX external network number.
SNAP - Enter the corresponding IPX external network number.
802.3 Ext. Network - Enter the corresponding IPX external network number.
Setup < >
The Setup field accesses additional setup screens for the Local Profile. The screen that is accessed
depends on the chosen option. Listed below are the available field options:
<Static Networks >
Used to configure static network routes that can be reached locally. See Static Networks on page 4-8, for more
information.
<Static Addresses >
Configure static addresses for the local devices. See Static Addresses on page 4-13, for more information.
<Filters >
Define data filters for this Local Unit. Filtering provides additional security by restricting which packets will be forwarded
to/from the LAN. See Filters on page 4-16, for more information.
4-6
Terminal Server Router - Release 2.97
Profile Directory:Local Profile
Link Speed
<Firewall Filters >
This option is used to access the Firewall Rules screen which allows the operator to establish firewall filters for this local
unit. See Firewall Filters (Local Profile) on page 4-22, for more information.
<Advertise Network/Server >
Enables the unit to advertise all networks and services to all remote units, or to advertise to no remotes. See Advertise
Network/Server on page 4-28, for more information.
<DHCP Server/Client/Relay >
Establish the Router as a DHCP Server, Client, or Relay Agent. See DHCP Server/Client/Relay on page 4-32, for more
information.
<Spanning Tree>
Configures the global setup for using the Spanning Tree Algorithm as specified in the IEEE 802.1D specification. See
Spanning Tree on page 4-38, for more information.
<Secondary IP Address >
Add a secondary IP address and subnet to the specified LAN interface. The router will then be capable of routing between
the various subnets on the LAN interface or between any of the LAN subnets and any WAN subnet. A maximum of 8
secondary IP addresses can be added to the LAN interface. See Secondary IP Address on page 4-41, for more information.
Link Speed
Sets the Ethernet PHY mode and speed for the Router.
Note: it is highly recommended that this setting be left at auto-negotiation. Connection of Ethernet
devices with incompatible settings can lead to severe performance degradation and errors on a network.
See Link Speed on page 4-44, for more information.
Terminal Server Router - Release 2.97
4-7
Profile Directory:Local Profile
Static Networks
Static Networks
Static networks allow fixed, or pre-determined routes, which increases the control over routing choices
within your network. Although the Router is able to dynamically learn routing information through RIP
packets, you may wish to disable this feature and manually enter fixed routes. (Disable Learning by
choosing the <Neither> option in the LAN Network Updates field on the Local (LAN) Profile Setup
screen.) Static routing may be preferred if:
Routers within a network are not configured to advertise, thereby escaping the automatic
learning capabilities of the Local Unit
Advertising is disabled so that access to certain networks may be restricted for security
purposes or, to decrease traffic on the LAN and across the WAN
You wish to keep routing tables small in order to increase LAN/WAN performance
Static routing may also be preferable when managing large networks. Often times it is easier to disable
the learning mode and manually enter routes, rather than review each routing table entry and determine
its advertising status.
As a static routing example, let’s assume that we have three networks, A, B and C. Network B, is
connected to Network C via a router, and to Network A via a remote Unit. Network B may not learn of
Network A’s existence if advertising was disabled on Router 1. Therefore, if you wish to establish an
entry in the routing table indicating a route between Network B and Network C, you can define a static
route on Network B.
Network A
Network B
Unit
A
Enter a static route which
indicates that Network C
may be reached through
remote Unit B
Unit
B
Network C
Router 1
Enter a static route which
indicates that Network C
may be reached through
Router 1
To continue with this example, if Network B is not configured to advertise Network C to Network A,
then Network A will not dynamically learn of Network C’s existence. If you wish to establish a route
on Network A to Network C, you must define a static route on Network A that indicates that Network
C may be accessed through remote Unit B.
To set up a static route, you must define the following routing information:
The address of the network you wish to reach;
How far away from the local LAN the network is located (in terms of metric measurement
or hops, depending on the protocol)
Whether the network can be reached on the local LAN (via the LAN port) or through a
remote unit.
4-8
Terminal Server Router - Release 2.97
Profile Directory:Local Profile
Set up Static Networks
If you are using the local LAN, you will also need to define the address (either IP or MAC, depending
on the protocol) of the first gateway (i.e. router) you will use to reach the network you are defining.
It is important to note that if the static network is reached via a remote unit, it must be defined by
choosing the SETUP <Static Networks> option on the corresponding Remote (WAN) Profile Setup
screen. Static networks that are reached via the local LAN must be defined by choosing the SETUP
<Static Networks> option on the Local (LAN) Profile Setup screen.
NOTE: All static routes are considered filters and will be applied toward the maximum
allowable number of 500 filters.
IP Networks - An Internet Protocol Network.
IPX Networks - Internet Packet Exchange Network. A Novell NetWare’s native LAN communications
protocol.
Set up Static Networks
1. Select Configuration <Profile Directory> from the Main menu, and [ENTER].
2. Select LAN <Setup -> and [ENTER].
Profile
Directory
Window
Terminal Server Router - Release 2.97
4-9
Profile Directory:Local Profile
Set up Static Networks
3. Select Setup: <Static Networks > if <Static Networks> is not displayed, scroll to selection
with the [SPACEBAR], select [ENTER].
Local
Profile
Window
4. Select <IP Networks> or <Static IPX Networks>.
Static
Networks
Setup (IP)
4-10
Terminal Server Router - Release 2.97
Profile Directory:Local Profile
Set up Static Networks
5. Select [CTRL A] to add a Static Network.
Static
Networks
Setup (IP)
Static Network Menu Fields
Network
Enter the address of the destination network for the route that you are adding. Static networks reached via a remote
Unit must be configured through the corresponding Remote (WAN) Profile Setup screen. Those configured
through the Local (LAN) Profile Setup screen can be reached via the local LAN. If this is an IP network, enter the
value in dotted decimal notation. If this is an IPX network, enter the appropriate value in hexadecimal notation.
Subnet Mask
A subnet mask determines which bits in the IP address are used to identify the network number. It is also a method
of extending the IP Network Address so that a site may use one network address for several different networks.
This is accomplished by reassigning the portion of the IP Network Address that normally identifies a node, to
further identify the physical network. This serves to lessen the number of available device numbers, while
expanding the available number of physical networks.
Metric
Enter a numeric value indicating the distance from your local network to the destination network. Originally this
measured by the number of gateways between the two networks, the number may be modified, either higher or
lower, to indicate a desired priority. To ensure a route is considered primary, the value in this Metric field must
be less than that of a secondary route. This field is only used on IP networks. Valid entries range from 1 to 15.
(Please note that a value of 1 usually indicates a direct network.)
Hops
See Metric, above. When defining the number of hops in a given route, remember to increment the actual number
by 1, since your locally attached unit is counted as “1”. This field is only used on IPX networks. Valid entries
range from 1 to 15.
Terminal Server Router - Release 2.97
4-11
Profile Directory:Local Profile
Set up Static Networks
Ticks
Indicates the distance between two networks as measured in time increments
(1/18th of a second). Only IPX Networks use this information. Like hops, ticks may be used to designate primary
and secondary routes to the same network. Although both the hops and ticks values are considered when
determining routing priority, for Novell networks, the tick value is considered first. To designate routing priority
between two routes, manipulate the tick value so that the preferred route is given the lower value. This field value
has a range of 1 to 15.
Next Gateway
Enter the IP Address of the first gateway (router) that the data will use to reach the destination network. Referring
back to Example 1, Network B would enter the IP Address of Router 1, since that is the first gateway on the route
to Network C. This field is only used on IP Networks.
Next IPX Router
Enter the MAC Address of the next gateway (router) on the route that the data will use to reach the destination
network. Referring back to Example 1, Network B would enter the MAC Address of Router 1, since that is the
next gateway on the route to Network C. This field is only used on IPX networks.
4-12
Terminal Server Router - Release 2.97
Profile Directory:Local Profile
Static Addresses
Static Addresses
Use this screen to define static addresses that are based on the Ethernet MAC or IP Address of a specific
device on the local LAN. Typically, the Router would learn of these devices by monitoring LAN/WAN
packets. By defining a static address, you are telling the Router the location of the corresponding device
before it learns where this device resides. Static addresses are typically used in a bridging situation.
Use the Local (LAN) Profile to define static addresses for devices that are located on the LAN. If you
wish to establish static addresses for devices on remote LANs, access this screen using the
corresponding Remote Profile.
NOTE: Each static address filter will count toward the maximum number of 500 filters.
1. Select Configuration <Profile Directory> on the Main menu, and select [ENTER].
2. Select LAN <Setup -> and select [ENTER].
Profile
Directory
Window
Terminal Server Router - Release 2.97
4-13
Profile Directory:Local Profile
Static Addresses
3. Select Setup: <Static Addresses > if Static Addresses is not displayed scroll to the selection
with the [SPACEBAR], and select [ENTER].
Local
Profile
Window
4. Select [CTRL A] to add static routes, as needed.
Static MAC
Address
Setup
4-14
Terminal Server Router - Release 2.97
Profile Directory:Local Profile
Static Addresses
Static IP
Address
Setup
Static IP Address Menu Fields
Setup Static
Use the [SPACEBAR] to scroll between <IP Address > and <MAC Address >. The fields on this screen will
vary depending on your choice.
IP Address
A unique, 32-bit identifier for a specific TCP/IP device on a network. The address is in dotted decimal form,
xxx.xxx.xxx.xxx, where xxx = 1-255.
MAC Address
The address for a device as it is identified at the Media Access Control layer in the network structure.
Device Name
Use this field to identify the user-defined name of the LAN device that is associated with this static address. The
maximum number of alphanumeric characters for this field is 7.
MAC Address
Enter the MAC Address of the desired device that can be reached via the local LAN. This field is only available
if the Setup Static field is set to <MAC Address >.
IP Address
Enter the IP Address of the desired device. If the static address is configured through the Local (LAN) Profile
Setup screen, the device can be reached via the local LAN. This field is only available if the Setup Static field is
set to <IP Address>.
Terminal Server Router - Release 2.97
4-15
Profile Directory:Local Profile
Filters
Filters
Use this screen to review currently enabled data filters or to enable new filters. Data filters are used to
determine whether data can be sent or received on the LAN/WAN based on a specific device, protocol
type or defined data string. Data filters must be defined using the Custom, Protocol and Address Filter
screens prior to being enabled on the current screen. Filters will not be in effect until they are added to
this screen. Once enabled, they will adhere to the value set in the Forward Mode field.
1. Select Configuration <Profile Directory> on the Main menu, and select [ENTER].
2. Select LAN < Setup -> and select [ENTER].
Profile
Directory
Window
NOTE: Each filter, even if it is not enabled, will count toward the maximum number of 500
filters.
4-16
Terminal Server Router - Release 2.97
Profile Directory:Local Profile
Filters
3. Select Setup: <Filters >. If Filters is not displayed, scroll to the selection with the
[SPACEBAR], select [ENTER].
Local
Profile
Window
4. Press [CTRL A] to add filters. See the following sections on defining custom, protocol and
address filters.
Enabled
Filter
Window
Terminal Server Router - Release 2.97
4-17
Profile Directory:Local Profile
Filters
Filters Menu Fields
Forward Mode
This field determines what data to pass/not to pass, based on this field value and the filters listed on the current
window. There are two available values which determine how the Router will handle data to/from the LAN:
<All Frames NOT Matching Filters> any packets matching the filters listed will not be passed (i.e., pass all
frames except those matching the enabled filters).
<ONLY Frames Matching Filters> enabled filters will have the PASS action. All packets matching the filters
listed will be passed to/from the LAN. Any packets that do not match will be dropped (i.e., will not pass through
the Local Unit).
Define Filter
Use this field to choose the appropriate filter type. The filter screens are used to define the actual filter prior to
enabling (adding) it on the current window.
<Custom> see Defining Custom Filters on page 4-19
<Protocol> see Defining Protocol Filters on page 4-20
<Address> see Defining Address Filters. on page 4-21
Once the filter type is defined, select [Enter] and the Define Filter window will appear. See the following sections
on defining filters.
Filter Type
This field value represents the type of filter <Custom>, <Protocol> or <Address>.
Source/Destination
This field is active only with an Address Filter.
<Source> Filters by Source only.
<Destination> Filters by Destination only.
<Both> Filter by Source and Destination.
Filter Name
This field displays the name the filter has been given.
4-18
Terminal Server Router - Release 2.97
Profile Directory:Local Profile
Defining Custom Filters
Defining Custom Filters
Custom
Filter
Window
This screen defines filters that “search” for a matching string of characters within a packet. The defined
character string can consist of up to 32 bits. The user must specify:
Custom Name - Filter name can be up to 7 characters.
Packet Offset - designates where in the packet to begin looking for a matching character string. Range
is 0 to 60 bytes.
32-Bit Mask - indicates which bits are to be searched for a possible match.Within the mask, a 1 turns a
bit ON, 0 is OFF. Only bits that are on (set to 1) will be searched for.
32-Bit Match - specifies the character string that the system is searching for. When a match is located,
the packet adheres to the Forward Mode field value.
To enable a filter return to the Enabled Filter Window ([ESC] from this window) and select [CTRL A],
select filter type (Custom, Protocol or Address) filter will be added to the Enabled Filters window.
NOTE: Each filter, even if it is not enabled, will count toward the maximum number of 500
filters.
Terminal Server Router - Release 2.97
4-19
Profile Directory:Local Profile
Defining Protocol Filters
Defining Protocol Filters
Protocol
Filter
Window
Use this screen to define filters that are based on specific protocols being used by LAN devices. These
filters, when enabled, provide security by restricting LAN/WAN access based on a specific protocol.
Protocol Name - Filter name can be up to 7 characters.
Ethernet Value - Enter the assigned Ethernet value for this protocol, see Addendum B, Protocol Types.
IEEE Value - Enter assigned IEEE value for this protocol (same as the DSAP and SSAP values in a
SNAP packet).
NOTE: Only need to identify either an Ethernet or IEEE value, but not both.
To enable a filter return to the Enabled Filter Window ([ESC] from this window) and select [CTRL A],
select filter type (Custom, Protocol or Address) filter will be added to the Enabled Filters window.
NOTE: Each filter, even if it is not enabled, will count toward the maximum number of 500
filters.
4-20
Terminal Server Router - Release 2.97
Profile Directory:Local Profile
Defining Address Filters.
Defining Address Filters.
Address
Filter
Window
Use this window to define filters that are based on the Ethernet MAC Address of a specific device.
When enabled, these filters provide security by restricting LAN/WAN access based on a device’s MAC
Address. Address filters are based on either source, destination or both source and destination MAC
Addresses.
Device Name - Filter name can be up to 7 characters.
MAC Address - Enter the MAC Address of the LAN device that you are defining as a filter. The
system will use the defined MAC Address and the value in the Forward Mode to determine whether
the packet should be passed or received.
To enable a filter return to the Enabled Filter Window ([ESC] from this window) and select [CTRL A],
select filter type (Custom, Protocol or Address) filter will be added to the Enabled Filters window.
NOTE: Each filter, even if it is not enabled, will count toward the maximum number of 500
filters.
Terminal Server Router - Release 2.97
4-21
Profile Directory:Local Profile
Firewall Filters (Local Profile)
Firewall Filters (Local Profile)
A firewall is a method for keeping a network secure from intruders, by using filters to block the
transmission of certain types of traffic (services). Once created, firewalls are a security feature that
allow only certain types of services to pass in and/or out of your LAN. Each filter consists of a set of
drop/pass rules that are applied in the order in which they appear on the list — in other words, rule 1 is
applied before rule 2 and so on. This set of rules constitutes a filter for the local profile and will be
applied to incoming traffic, outgoing traffic, or both traffic types (service flows).
Firewall
Rules
Window
Symbol
4-22
Description
#
Rule Number
!
Pass (no! (blank) indicates Drop)
Services(s)
Lists current service defined
LAN Device(s)
Lists LAN defined for this rule (* indicates any)
==>
Outgoing
<==
Incoming
<== ==>
Outgoing and incoming
WAN Device(s)
Lists WAN defined for this rule (* indicates any)
Log
X = Logged in the Event or Alarm log
Terminal Server Router - Release 2.97
Profile Directory:Local Profile
Firewall Filters (Local Profile)
To Add a Firewall Filter:
WARNING! THE ADDITION OF THE FIRST FIREWALL RULE WILL AUTOMATICALLY SECURE THE
UNIT AGAINST ACCESS VIA TELNET (UNLESS THE FIRST RULE EXPRESSLY PERMITS TELNET). TO
ENSURE THE ABILITY TO TELNET INTO THE UNIT BY AT LEAST ONE REMOTE DEVICE, YOU MUST
CREATE A RULE INDICATING WHICH DEVICE HAS TELNET ACCESS.
1. On the Main Menu, press [TAB] until Configuration <Profile Directory> is highlighted, and
press [ENTER].
2. Select <Setup -> on the LocalUnit LAN line and press [ENTER].
Profile
Directory
Window
Terminal Server Router - Release 2.97
4-23
Profile Directory:Local Profile
Firewall Filters (Local Profile)
3. Tab down to Setup: <Static Addresses> and scroll with the [SPACEBAR] to <Firewall
Filters>. Press [ENTER].
Local
Profile
Window
4. Select [CTRL A] to add an IP Firewall Rule.
Firewall
Filters
Window
4-24
Terminal Server Router - Release 2.97
Profile Directory:Local Profile
Firewall Filters (Local Profile)
5. Enter the parameters of the rule, select [ESC] to close the window and save the configuration.
See Firewall Filters Fields on page 4-25 for a description of all fields for the Firewall Setup
window.
Firewall Filters Fields
Rule Number
The rule number defines the order in which the rules are applied. Once there are two or more rules created, the
rule number can be changed to put them in the desired order. The Last! rule displayed is automatically set after
the first rule is defined, and states that the router should drop any service (incoming or outgoing) that has not been
addressed in the proceeding rules.
Action: (Pass/Drop)
This column indicates the service(s) that will <Pass> or <Drop> from the remote network to the local network and
vice versa. On the Firewall Filters window, the following indicate Pass/Drop:
! in this column = Drop
Blank column = Pass
Typically, rules are established with the Pass action, since the last rule (which is automatically defined by the
software) Drops all services not expressly permitted by the previous rule(s). For example, if you wish to deny all
transmissions except Telnet, you would create a rule indicating that Telnet has the Pass action. The Adit software
would create the last rule that states the unit should Drop all other services.
Since any service that is not expressly permitted to pass will be prohibited, it is important that you thoroughly
understand the security policies of your LAN before attempting to create a firewall. We suggest that only
experienced Network Administrators create and maintain firewall filters. Incorrectly defined filters may
compromise the security and functionality of your LAN.
Terminal Server Router - Release 2.97
4-25
Profile Directory:Local Profile
Firewall Filters (Local Profile)
Service
This field displays the service that this particular rule affects. While the most common services have been predefined, there are a few options where you may further define the service to be filtered.
Name
Description
Finger
FTP
Gopher
HTTP
ICMP
Display information about users
File Transfer Protocol
Document search and retrieval
World Wide Web
Internet Control Message
Type <Equal> or <Range> = Specify a number or range.
Number = 0-65535
Start Number = 0-65535
End Number = 0-65535
IP protocol number to be specified, see Protocol Number in Firewall Filters on page
B-2 for a list of these Protocols and the assigned number.
Protocol Number = number between 1-255
Network News Transfer
ICMP echo request/reply
Post Office Protocol Version 3
Simple Mail Transfer
Simple Network Management Protocol
Transmission Control Protocol
Port <Equal> or <Range> = Specify a number or range.
Number = 0-65535
Start Number = 0-65535
End Number = 0-65535
User interface to local unit
User Datagram Protocol
Wide Area Information Services
NUM
NNTP
Ping
POP3
SMTP
SNMP
TCP
Telnet
UDP
WAIS
Service Establishment
Use this field to establish the transmission direction that will be affected by this rule.
4-26
Name
Description
Incoming
All session establishments coming from the local unit that match the value in
the Service field will adhere to the value in the Action field.
Outgoing
All transmissions outbound from the LAN toward the local unit that match the
value in the Service field will adhere to the value in the Action field.
In/Out
Will affect both incoming and outgoing transmissions.
Terminal Server Router - Release 2.97
Profile Directory:Local Profile
Firewall Filters (Local Profile)
Local IP Address/Network
IP Address of the local device or network that this rule will affect. If you enter the address of a local device, this
rule will affect only the session establishments of the local device and the destination address entered in the
Remote IP Address/Network field, below. If this rule is to affect “any” local devices/networks, leave this field
with the default asterisk symbol *.
Significant Bits
Use this field to identify the number of bits, from left to right that will be used to match the IP Address field
within the data packet with the value entered into the Local IP Address/Network. Range is between 1-32.
Remote IP Address/Network
Enter the IP Address of the remote device or network that this rule will affect. If you enter the address of a remote
device, this rule will affect only the session establishments of the remote device and the device/network address
entered in the Local IP Address/Network field, above. If this rule is to affect “any” remote devices/networks,
leave this field with the default asterisk symbol *.
Significant Bits
Use this field to identify the number of bits, from left to right, that will be used to match the IP Address field
within the data packet with the value entered into the Remote IP Address/Network. Range is between 1 to
32.
<
> Packets which match this rule
Use this field to indicate whether a rule match should trigger an Alarm or Log entry.
(Blank)
A transmission match will not trigger an Alarm or Events log entry.
Alarm
A transmission match will trigger an Alarm entry.
Log
A transmission match will trigger an Events log entry.
Log or Alarm entries may also be useful when a specific security issue is at stake. For example, if your security
policy does not permit Telnetting, you may wish to keep track of all Telnet attempts. As a general rule, however,
we do not recommend keeping a log of all rule matches since this may impact system performance and may cause
an Event or Alarm screen overflow.
NOTE: When enabled, a single event/alarm will be logged for all TCP session initiations. An
event/alarm will be logged for each packet for all UDP transfers. UDP traffic should typically
not be allowed across a firewall.
NOTE: All firewall rules are considered filters and will be applied toward the maximum
allowable number of 500 filters.
Terminal Server Router - Release 2.97
4-27
Profile Directory:Local Profile
Advertise Network/Server
Advertise Network/Server
1. Select Configuration <Profile Directory> from the Main menu, select [ENTER].
2. Select LAN <Setup -> and select [ENTER].
Profile
Directory
Window
3. Select Setup: <Advertise Network/Server >. If the Advertise Network/Server is not displayed
scroll to the selection with the [SPACEBAR], select [ENTER].
Local
Profile
Window
4-28
Terminal Server Router - Release 2.97
Profile Directory:Local Profile
Advertise Network/Server
Use these windows to review networks that your unit has discovered through the LAN. By sending out
IPX and IP RIP (Routing Information Protocol) and IPX SAP (Service Advertising Protocol) packets
and monitoring RIP and SAP packets from other devices, your unit can learn about other networks. The
system constantly monitors RIP packets to ensure that the status of the network has remained
unchanged. Should a RIP packet indicate a change in status, the unit will update the data in the table and
exchange the updated data with all remotes.
Advertise
Network/
Server
Window
Once the Local Unit has learned of a network, you may choose to have the Router advertise broadcast
RIP packets on behalf of the actual network. Selecting which networks you wish your Local Unit to
advertise provides added security by restricting what information is passed on to the remote.
For added control in network advertising, automatic learning may be turned off and, using the Static
Network windows, manually enter the network routes to be advertised.
Disable Learning:
On the LAN Profile setup window set LAN Network Updates to <Neither>
On the WAN Profile setup window set WAN Network Updates to <Never>
The Advertise Network/Server Window can be used in two ways, depending on which Selected
Items mode is chosen:
<Do Not Advertise> Selected Items mode causes the unit to not advertise the learned network to all
remotes if you place an X next to the selected item.
<Advertise> Selected Items mode causes the unit to advertise the learned network to all remotes if
you place an X next to the selected item.
NOTE: Since each network that contains an X next to it consumes a filter, choose an
approach that consumes the least number of filters. With 15 learned networks of which 5 need
to be advertised, it uses less filters to <Advertise> 5 networks than to select <Do Not
Advertise> 10.
Terminal Server Router - Release 2.97
4-29
Profile Directory:Local Profile
IPX Server Advertising
NOTE: Each selected network will be counted as a filter. A maximum of 500 filters can be
defined.
Advertise Network/Server Fields
Setup
Use this field to identify which networks or server types you wish to review. Options are: <IP
Networks>, <IPX Servers> and <IPX Networks>.
Selected Items
<Advertise> With this option selected Networks will advertise to all Remote Units that are listed in
your Profile Directory.
<Do Not Advertise> With this option selected Networks will not be advertised.
Network
This field displays the network address of each network learned from the local LAN. If this route was
added using one of the Static Network windows, “Static Fltr” will appear before the network address of
this entry. If this is not a static route, and has been selected, “Config Fltr” will appear before the network
address of this entry. Only static routes for the Local Unit will display on this window.
IPX Server Advertising
Servers are learned and maintained by the Router in the same way as network tables, by sending out
IPX SAP (Service Advertising Protocol) packets and monitoring SAP packets from other devices, the
unit learns about other servers. Once a server has been discovered, the information is displayed on this
window.
4-30
Terminal Server Router - Release 2.97
Profile Directory:Local Profile
IPX Server Advertising
This window may be used in two ways, depending on which Selected Items mode is chosen: <Do Not
Advertise> Selected Items or <Advertise> Selected Items. The <Do Not Advertise> mode causes the
unit to not advertise the learned services. To advertise under this mode, remove the X next to the server
to advertise. The <Advertise> mode causes the unit to advertise all learned services to all remotes. If a
specific server under this mode is not to be advertised the X must be removed next to the listed server.
Since each server that contains an X next to it consumes a filter, you should choose the approach that
consumes the least number of filters. For example, if the Router has learned 15 services of which you
want to advertise only 5. It would consume fewer filters to set the Selected Items field to <Advertise>
and place an X next to the 5 servers to, than to choose <Do Not Advertise> and place an X next to the
10 servers.
NOTE: Each selected server will be counted as a filter. A max. of 500 filters on the system.
Network
This field displays the network address of each learned or configured server. If a server has been selected using
the [X] key, “Config Fltr” will appear before the network address of this entry.
Type
The TYPE field displays the Hex value assigned to each known server. When a server is added using [CTRL A],
a Hex value must be defined. If you wish to learn certain services that match a particular server type, manually
add an entry specifying the desired Hex value. This setting will enable the unit to learn all services that match the
specified service type. This field may be used in conjunction with the NAME field, described below.
Name
This field displays the first 11 characters of the name of each known server. If the server is manually added and a
server name is not defined, all servers matching the added type will be learned and the first 11 characters of their
names will be displayed. If the server name is defined when the server is manually added, then only servers
matching both type and name will be learned.
Selected Items
Use this field to determine whether your Router will advertise the information listed on this window to remote
units. Valid field options include <Do Not Advertise> and <Advertise>. If <Advertise> is selected, checked
items (with X) will advertise to all Remote Units in the Profile Directory. If <Do Not Advertise> is selected,
checked items will not be advertised.
Use the [CTRL A] keys to manually configure a service. When manually configuring a service, the following
prompt is displayed:
You must define a server type (see TYPE field, above), however the corresponding server name may be left blank.
If a server name is not defined, all services of the specified type will be learned, regardless of the name.
If the server type and name are specified, only server types that match both values will be learned. Be aware that
the NAME value is case and spacing sensitive.
Press [ESC] to save changes and return to the Local (LAN) Profile Setup window.
Terminal Server Router - Release 2.97
4-31
Profile Directory:Local Profile
DHCP Server/Client/Relay
DHCP Server/Client/Relay
Use the options on this window to enable the Router to act as a DHCP server, client, or relay agent.
Workstations with DHCP (Dynamic Host Configuration Protocol) client software will generate a
broadcast message requesting an IP Address from a DHCP server. As a relay agent, the Router will
forward these requests to the appropriate server. When the server assigns the workstation an IP Address,
the Router will then send this address back to the appropriate workstation. Using this method, the DHCP
server can reside at a Remote (WAN) location and the Router can serve as an agent between requesting
workstations and the server. As a DHCP server, the Router can assign up to 254 IP Addresses to DHCP
clients on the local LAN. It will not assign to clients across the WAN.
1. Select Configuration <Profile Directory> from the Main menu, select [ENTER].
2. Select LAN < Setup -> and select [ENTER].
Profile
Directory
Window
4-32
Terminal Server Router - Release 2.97
Profile Directory:Local Profile
DHCP Server/Client/Relay
3. Select Setup: <DHCP Server/Client/ Relay >. If not displayed, scroll to the selection with
the [SPACEBAR], select [ENTER].
Local
Profile
Window
4. DHCP Mode: <Disabled>, <Server>, <Client> or <Relay>. Opens the DHCP Setup window
for the following:
DHCP
Mode:
Disabled
Terminal Server Router - Release 2.97
4-33
Profile Directory:Local Profile
DHCP Server/Client/Relay
DHCP Mode: <Server>
DHCP
Mode:
Server
Info: <Active Leases>
Displays the Active Lease Information below.
Domain Name
This option is used if the DHCP Server is enabled on the DHCP Server/Client/Relay screen. On a LAN network
where this unit is the DHCP Server, the Domain Name will be assigned with IP addressing information to DHCP
clients. This value is a maximum of 41 characters.
Start IP Address
If this Unit is specified to act as a DHCP server, enter the first valid IP Address the Unit may assign to a DHCP
client. This field acts in conjunction with the Number field.
Number
Enter the number of IP Addresses that this unit may assign. This field acts in conjunction with the Start IP
Address field by using a contiguous block of IP Addresses. Number range is 1 through 254.
Lease Duration
Enter the duration, in hours and minutes, that an IP Address assigned by this Unit will remain valid. If this field
is left at 000.00, the IP Address will remain valid indefinitely.
Domain Name Servers
The Domain Name Servers option specifies the IP address of DNS name servers to be used by DHCP clients.
Enter the IP address of up to 4 domain name servers.
4-34
Terminal Server Router - Release 2.97
Profile Directory:Local Profile
DHCP Server/Client/Relay
Option Type Value
These fields add the optional DHCP server attributes that will be advertised every time a DHCP client discovery
is initiated. This provisioning takes effect immediately and can only be performed when the DHCP server is
enabled. Once the option number is entered the other fields become active.
Option
Range is 1-254. Options tags are unique, duplicate numbers will be rejected. 0 = off
Reserved numbers = 6, 15, 44, 46, 47, 50, 51, 53, 54 and 61. The operator will be notified when exiting this window, that
a Reserved or Duplicate Option number has been used, and will direct you to modify the option number.
Type/Value
<Bool> - Boolean uses <true> <false>
<1Byt> <2Byte> <3Byte> <4Byte> - sends a value in 1, 2, 3 or 4 bytes.
<IP> - IP Address in the form xxx.xxx.xxx.xxx, where xxx is a number from 0 to 255.
<TEXT> - String with a maximum of 50 characters, enclosed in quotes.
NetBIOS over TCP/IP
Node Type
This option allows NetBIOS over TCP/IP clients, which are configurable to be configured as described in RFC 1001/
1002. The value is specified as a single octet that identifies the client type (1=B-node, 2=P-node, 4=M-node, 8=H-node).
Scope
The Scope is a DHCP option that represents a grouping of computers on a subnet using the same NetBIOS name. This
name has a maximum of 41 characters.
Name Server (NBNS)
This option specifies a list of RFC 1001/1002 NBNS name servers listed in order of preference. Enter the IP address and
subnet mask of the NBNS servers.
Terminal Server Router - Release 2.97
4-35
Profile Directory:Local Profile
DHCP Server/Client/Relay
DHCP Mode: <Relay>
The DHCP Relay will forward the DHCP/BOOTP requests to the defined address of the remote unit
selected.
DHCP
Mode:
Relay
Forward DHCP/BOOTP Requests to:
1. At the (0.0.0.0 ) field, enter the IP address of the remote unit, and select [ENTER] or
[TAB]. The next field will appear.
2. At the at <
> field, select the remote unit (scroll through the list), and select
[ENTER] or [TAB].
3. A second IP address can be entered, in the same manner on the second line.
4. Press [ESC] to save changes and return to the Local (LAN) Profile Setup window.
4-36
Terminal Server Router - Release 2.97
Profile Directory:Local Profile
DHCP Server/Client/Relay
DHCP Mode: <Client>
DHCP
Mode:
Client
<Renew/Release>:
This option will force a lease to be renewed or released.
<Renew> - The card will perform a typical lease renewal sequence based on its current DHCP configurables.
<Release> - If valid IP based leases exist and the DHCP Client interface is up, a release message will be sent to
the server. Then the Lease Contents will be cleared and all configurable settings will be left at their last value. The
DHCP Client will acquire a new lease when the user sends a renew command.
Automatic DNS:
<Disabled> - No automatic enabling/disabling of the DNS Resolver will occur and the enable/disable setting of
the DNS Resolver will be under manual configuration control.
<Enabled> - The DNS Resolver management will be managed automatically by the Client based on completeness
of DNS configurables to operate the DNS Resolver.
Set Tx Packets Broadcast Bit:
Use this parameter to indicate if the broadcast bit is to be set (checked box) or clear in the bootp flags header value
for all transmitted DHCP/BOOTP packets for the DHCP Client.
Request:
The following DHCP Client configurables can be requested (check box) from a DHCP Server.
IP Address/Mask
Gateway
DNS Host Name
DNS Domain Name
DNS Primary Server
DNS Secondary Server
Description:
This column will display the current Client information items.
Current Lease Value:
This column will display the current Lease information for the items under the Client Description list.
Terminal Server Router - Release 2.97
4-37
Profile Directory:Local Profile
Spanning Tree
Spanning Tree
NOTE: This option does not display on the Local LAN Profile Setup until Spanning Tree is
enabled on the Router CARD Profile.
The Spanning Tree configures the setup for the Spanning Tree Algorithm.
To Configure Spanning Tree:
1. Select Configuration <Profile Directory> from the Main menu, and [ENTER].
2. Select LAN < Setup -> and select [ENTER].
Profile
Directory
Window
4-38
Terminal Server Router - Release 2.97
Profile Directory:Local Profile
Spanning Tree
3. Select Setup: <Spanning Tree > and select [ENTER].
4. To enable Spanning Tree, scroll <Disabled> to <Enabled>, with the [SPACEBAR], select
[ENTER].
Terminal Server Router - Release 2.97
4-39
Profile Directory:Local Profile
Spanning Tree
5. Enter the appropriate data in the following fields.
Spanning Tree Fields
Port Priority
The Port Priority value can range from 0 to 255, with a default of 128.
Port Cost
The Port Priority value can range from 0 to 65535, with a default of 100.
4-40
Terminal Server Router - Release 2.97
Profile Directory:Local Profile
Secondary IP Address
Secondary IP Address
This option will add a secondary IP address and subnet to the specified LAN interface. The router will
then be capable of routing between the various subnets on the LAN interface or between any of the LAN
subnets and any WAN subnet. A maximum of 8 secondary IP addresses can be added to the LAN
interface.
To Add a Secondary IP Address:
1. Select Configuration <Profile Directory> from the Main menu, and [ENTER].
2. Select LAN < Setup -> and select [ENTER].
Profile
Directory
Window
Terminal Server Router - Release 2.97
4-41
Profile Directory:Local Profile
Secondary IP Address
3. Select Setup: <Secondary IP Address>, by scrolling through the options with the
[SPACEBAR] and select [ENTER].
Local
Profile
Window
4. Select [CTRL A] to enter an IP Address.
4-42
Terminal Server Router - Release 2.97
Profile Directory:Local Profile
Secondary IP Address
Secondary IP Address Fields
IP Address
The secondary IP Address, in the form xxx.xxx.xxx.xxx, where xxx is between 1 -255.
Subnet Mask
The Subnet Mask to the corresponding Secondary IP address listed, in the form xxx.xxx.xxx.xxx, where xxx is
between 1 -255.
Terminal Server Router - Release 2.97
4-43
Profile Directory:Local Profile
Link Speed
Link Speed
The Link Speed sets the Ethernet PHY mode and speed for the Router.
NOTE: It is highly recommended that this setting be left at auto-negotiation. Connection
ethernet devices with incompatible settings can lead to severe performance degradation and
errors on a network.
To Set the Link Speed:
1. Select Configuration <Profile Directory> from the Main menu, select [ENTER].
2. Select LAN < Setup -> and select [ENTER].
Profile
Directory
Window
4-44
Terminal Server Router - Release 2.97
Profile Directory:Local Profile
Link Speed
3. Select Link Speed: <Auto Negotiate >. All options are available by scrolling with the
[SPACEBAR]. Once the selection has been made, select [ENTER] to set the configuration.
Local
Profile
Window
Link Speed Fields
Auto Negotiate
This selection is the default and is highly recommended to be left at this setting. The router and the device will
negotiate common features and functions.
100T Full Duplex
The selection will force the ethernet PHY to 100 MHz full-duplex on the Router.
100T Half Duplex
The selection will force the ethernet PHY to 100 MHz half-duplex on the Router.
10T Full Duplex
The selection will force the ethernet PHY to 10 MHz full-duplex on the Router.
10T Half Duplex
The selection will force the ethernet PHY to 10 MHz half-duplex on the Router.
Terminal Server Router - Release 2.97
4-45
Profile Directory:Local Profile
Link Speed
4-46
Terminal Server Router - Release 2.97
CHAPTER
5
Profile Directory:Remote Profile
In this Chapter
Remote (WAN) Profile Overview
Security/Options
Static/VPN Networks
Static NAT Addresses
NAT Bypass Subnets
Static Addresses
Firewall Filters (Remote Profile)
Filter Network/Server
Spanning Tree
Trunk Port
Profile Directory:Remote Profile
Remote (WAN) Profile Overview
Remote (WAN) Profile Overview
The fields on the Remote (WAN) Profile Setup window allow you to define how and when data
transmission will occur with a specific remote device. This includes defining the protocol(s) that it will
use to send and receive data, defining security information, static networks and WAN lines. The Local
Unit will depend on this information to determine communication guidelines with remote sites.
The Remote (WAN) profile can support up to 24 remote profiles.
The Remote (WAN) profile complements the Local (LAN) profile. The remote profiles identify which
remote devices the local unit can communicate with by defining the data transmission requirements of
each remote device. The local profile defines the local unit’s transmission requirements and may appear
as a remote profile in each remote unit’s profile directory. It is important to understand that the
information contained in the remote profile determines how the local and remote units establish
communication.
1. On the Main Menu, press [TAB] until Configuration <Profile Directory> is highlighted and
press [ENTER].
Profile
Directory
Window
5-2
Terminal Server Router - Release 2.97
Profile Directory:Remote Profile
Remote (WAN) Profile Overview
2. Select RemoteUnit WAN <Setup -> and press [ENTER].
Profile
Directory
window
3. Configure the WAN on this Main window. There are additional windows for specific features.
See the following sections.
Note: The Remote Profile Window will change as options are selected. The graphic below
displays the window at its default settings.
Remote
Profile
Setup
Window
Terminal Server Router - Release 2.97
5-3
Profile Directory:Remote Profile
Remote (WAN) Profile Overview
The graphic below displays how the window changes with the NAT Gateway enabled.
Remote
Profile
Window
Profile Setup for (RemoteUnit)
This is an 11 character maximum field to uniquely identify this remote device. This value identifies the remote
system’s name on the remote unit’s Local (LAN) Profile Setup window. All remote devices will initially have the
default name "RemoteUnit". To change the name of the remote device, simply type over the existing name.
This name will be used during the authentication process to ensure this unit’s identity. Please note that the system
is case and spacing sensitive.
5-4
Terminal Server Router - Release 2.97
Profile Directory:Remote Profile
Transmission Options
Transmission Options
The following fields are always displayed on the Remote Profile setup window. By selecting options on
this section, other fields are displayed or removed.
Protocol
This field displays three protocol options, IP, IPX and Other. Use the Mode, WAN Network Updates, and GRE
Tunnel fields to determine how and if the listed protocols will be used. This screen will change dramatically as
different modes are selected.
Mode
This field works in conjunction with the Protocol field, above, and defines which protocol(s) the Remote Unit will
use to send and receive data when communicating with this remote device.
Protocol
IP
IPX
Other
Route
Blocked
Bridge
Optimize
X
X
X
X
X
X
X
X
<Route> - When used in conjunction with the LAN Network Updates (Local Profile window) and WAN
Network Updates setting (below), the <Route> values enable the Router to use Force10 Networks’ network
optimization feature, which ensures that only necessary data is transmitted over the WAN connection. The Router
will initiate IP and IPX learning mode. With each of these selections the Router will initiate learning mode to gain
knowledge of local and remote networks and services. Once it knows of remote networks and services, it can
advertise the information on the local LAN on behalf of the remote networks and servers.
<Bridge> - will not prompt the Router to initiate WAN bandwidth optimization. Note that the unit will not
advertise servers and networks.
<Blocked> - if you do not wish to use the corresponding protocol.
<Optimize> - See <Route> above
WAN Network Updates
Routing information updates across the WAN will occur based on this selection. This field is only available when
IP (Protocol) is set to <Route> or when IPX (Protocol) is set to <Optimize>. This field should be set to <Never>
if the NAT Gateway field, below, is set to <Enabled>.
<Never> To prohibit all routing information updates. When this is selected, static routes between the Router
and the remote units must be configured.
<Periodic> Periodic updates across the WAN occur every 30 seconds for the IP protocol and every 60
seconds for IPX.
<Triggered> Triggered updates occur only when changes within the network are detected. This is the
recommended setting.
Terminal Server Router - Release 2.97
5-5
Profile Directory:Remote Profile
Transmission Options
GRE Tunnel
Use this field to define IP Tunneling for GRE (Generic Route Encapsulation). If enabled, define the local and
remote IP Tunnel Addresses, as well as the Secured GRE Tunneled Data. This field is only available if the IP
protocol is set to <Route>.
<All> Tunnel all packets on this interface to the tunnel destination address.
<By Network> Tunnel packets based on their destination address by matching GRE network entries.
Note: If the IP protocol is set to <By Network>, establish the remote address in the Static Networks
window.
<Disabled> Disable GRE tunneling.
NAT Gateway
Enable NAT Gateway for this Router to translate addresses from all of its local devices to a specific IP Address
(typically assigned by an Internet Service Provider). This will allow the remote device to dynamically assign a
single IP Address to the Router or to configure a specific IP Address, which in turn will be used by all devices on
that network.
<Enabled> with GRE Tunnel <Disabled>
NAT Port Numbers: Port numbers are associated with applications that run on the workstation. The NAT
Gateway may translate the socket, or combination of IP Address and TCP port number.
<Dynamic> IP Address and the port number will be translated.
<Preserved> NAT Gateway will only translate the IP Address. This should only be set to <Preserved>
if an application you are using requires a specific port number.
NAT Address: Use this field to define the IP Address for the Local (LAN) tunneling or NAT Gateway
device.
<Assigned by Remote>
<Configured> with Configured selected the following fields are displayed:
Address: Enter the Local IP Tunnel Address/Subnet Mask. If you are only GRE Tunneling, this will
probably be your local IP Address in the Local Profile. If the address is dynamically assigned, the Local
Unit will receive an IP Address from this remote device.
Number of NAT Addresses: With a setting of NAT addresses to greater than 1 you a pool of public
addresses is created from which the NAT translation will draw. Range is between 1-255.
5-6
Terminal Server Router - Release 2.97
Profile Directory:Remote Profile
Transmission Options
<Enabled> with GRE Tunnel <By Network>
NAT Port Numbers: See definition on previous page.
NAT and Local IP Tunnel Address: Use this field to define the IP Address for the Local (LAN) tunneling
or NAT Gateway device.
<Configured> See previous page.
<Assigned by Remote>
<Enabled> with GRE Tunnel <All>
IP Protocol VPN Setup - > window will display
This field displays only when GRE Tunnel is set to <All>.
Terminal Server Router - Release 2.97
5-7
Profile Directory:Remote Profile
Transmission Options
To open the setup window select IP Protocol VPN Setup - > and select [ENTER].
Tunnel Name
Enter Tunnel name, up to 11 characters.
Remote IP Tunnel Address
Enter IP Tunnel Address.
5-8
Terminal Server Router - Release 2.97
Profile Directory:Remote Profile
Transmission Options
WAN IP
This field is used to enable the Router to assign an IP Address to the remote device that this remote
profile is attached to.
Remote
Profile
Window
Numbered
Designate if the local unit will have an IP Address assigned to the WAN when communicating with this
remote unit. If the remote unit is an Axxius, it is recommended that the WAN remain unnumbered, thus
conserving IP Addresses. This field displays if the IP Mode field is set to <Route>.
IP Address: This address is used to uniquely identify the Remote Unit on the internetwork. Use this field
to assign an IP Address to the WAN.
Subnet Mask: A subnet mask determines which bits in the IP address are used to identify the network
number. It is also a method of extending the IP Network Address so that a site may use one network
address for several different networks.
Terminal Server Router - Release 2.97
5-9
Profile Directory:Remote Profile
Transmission Options
Default Router
Use this field to identify a router that is physically connected to your LAN. If the Router receives a packet
destined to a network that is not known, the packet will be sent to the router identified in this field. This field
is only displayed if the IP Mode field is set to <Bridge>.
Remote
Profile
Window
5-10
Terminal Server Router - Release 2.97
Profile Directory:Remote Profile
Transmission Options
FW Allow Frags
Use this field to allow fragmented packets to pass though the firewall to accommodate devices that send reverseordered or out-of-ordered packets. It is recommended that this field be left at Disabled since this is a security risk.
<Enabled> Enables the passage of fragmented packets.
<Disabled> Disables the passage of fragmented packets. (Default).
Terminal Server Router - Release 2.97
5-11
Profile Directory:Remote Profile
Transmission Options
Setup < > (bottom of the Remote main window)
Remote
Profile
Window
The Setup field has the following options. Use the [SPACEBAR] to scroll through the selections.
<Security/Options >
Use this option to access the Remote (WAN) Security/Options Setup window. The fields on this window may
be used to configure the remote security parameters and options such as compression. See Security/Options
on page 5-14, for more information.
<Static/VPN Networks >
Use this option to access the Static/VPN Networks window. These windows can be used to configure static
network routes for the remote device. See Static/VPN Networks on page 5-17, for more information.
<Static NAT Addresses >
Use this option to access the Static NAT Addresses window which allows the operator to configure static bidirectional NAT mappings between local server addresses and public addresses. See Static NAT Addresses
on page 5-24, for more information.
<NAT Bypass Subnets >
Use this option to access the Static NAT Addresses window which allows the operator to configure static bidirectional NAT mappings between local server addresses and public addresses. See Static NAT Addresses
on page 5-24, for more information.
<Static Addresses >
This option is used to access the Static Addresses window which allows the operator to configure static
addresses for the remote unit. See NAT Bypass Subnets on page 5-26, for more information.
<Firewall Filters >
This option is used to access the Firewall Rules screen which allows the operator to establish firewall filters
for this remote unit. See Firewall Filters (Remote Profile) on page 5-31, for more information
<Filter Network/Server >
This option is used to access the Filter Network/Server screen which allows the operator to establish network
and server filtering for this remote unit. See Filter Network/Server on page 5-37, for more information.
5-12
Terminal Server Router - Release 2.97
Profile Directory:Remote Profile
Transmission Options
<Spanning Tree>
Configures the global setup for using the Spanning Tree Algorithm as specified in the IEEE 802.1D
specification. See Spanning Tree on page 5-41, for more information. Note: IP Mode must be set to
<Bridged> for this option to display in the scrolled list.
<Trunk Port>
Configures the Router Remote trunks. See Trunk Port on page 5-44, for more information.
Terminal Server Router - Release 2.97
5-13
Profile Directory:Remote Profile
Security/Options
Security/Options
The purpose of this window is to define security information and miscellaneous options pertaining to
this Router. The security portion of this window allows the setup of password or secret (depending on
the chosen security protocol) that this remote device will use during the authentication process. Also the
setup of authentication on the LAN of the Local Unit or a specified security server.
Authentication is a security process whereby the transmitting and receiving devices determine which
security protocol to use during data transmission, as well as establish confirmation identity. This
authentication process must match between the receiving and transmitting devices prior to actual data
transmission, if the process fails, the link is terminated. The protocol used by the remote unit to
authenticate the local unit and vice versa is defined in the LAN Profile.
1. On the Main Menu, press [TAB] until Configuration <Profile Directory> is highlighted, and
press [ENTER].
2. Select WAN <Setup -> on the RemoteUnit line and press [ENTER].
Profile
Directory
Window
5-14
Terminal Server Router - Release 2.97
Profile Directory:Remote Profile
Security/Options
3. Tab down to Setup:<Security/Options> Scroll through the list of options with the
[SPACEBAR] and select [ENTER].
Remote
Profile
Window
4. The following Security/Options setup window will display.
Terminal Server Router - Release 2.97
5-15
Profile Directory:Remote Profile
Security/Options
Security/Options Fields
Authentication By Remote
User ID: Local Profile Name
This field displays the User ID of the Local Unit
Authentication of Remote
This fields defines the parameters the remote unit expects to receive from this local unit.
Protocol
This field displays the authentication protocol, if any, to be used by remote units when authenticating the local
unit. The authentication protocol is defined on the Local (LAN) Security/SNMP window.
User ID
<Remote Profile Name> Displays the current Remote Profile name
<Remote Custom Name> User-defined name, up to 32 characters. This user ID is sent during the
authentication process.
Security Server
Displays the defined method as to where the remote device will be authenticated. This option is set in the Router
CARD Setup - > Security/SNMP window.
Compression
<Enabled> Will negotiate compression with a remote device.
<Disabled> If the remote device will not negotiate compression, leave this field
as <Disabled>.
Typical Data
This allows the data compression to be customized to the type of data on a given network.
<Easy to Compress>. If typical compression ratios are greater than 2/1, then this setting should achieve the
best compression. This is the default.
<Hard to Compress> If compression ratios are less than 2/1.
5-16
Terminal Server Router - Release 2.97
Profile Directory:Remote Profile
Static/VPN Networks
Static/VPN Networks
Static networks allow you to establish fixed, or pre-determined routes, which increases the control that
you have over routing choices within your network. Although Router is able to dynamically learn
routing information through RIP packets, you may wish to disable this feature and manually enter fixed
routes. Disable Learning by selecting the <Never> option in the WAN Network Updates field on the
Remote (WAN) Profile Setup window. Static routing may be preferred if:
Routers that are not configured to advertise, cannot utilize the automatic learning capabilities
of the unit
Advertising is disabled for security purposes
Keeping routing tables small in order to increase LAN/WAN performance
Advertising is disabled to decrease traffic on the LAN and across the WAN
Static routing may also be preferable when managing large networks. Often times it is easier to disable
the learning mode and manually enter routes, rather than review each routing table entry and determine
its advertising status.
As a static routing example, let’s assume that we have three networks, A, B and C. Network B, is
connected to Network C via a router, and to Network A via a Remote Unit. Network B may not learn
of Network A’s existence if advertising was disabled on Router 1. Therefore, if you wish to establish
an entry in the routing table indicating a route between Network B and Network C, you can define a
static route on Network B.
Network A
Network B
Unit
A
Enter a static route which
indicates that Network C
may be reached through
remote Unit B
Unit
B
Network C
Router 1
Enter a static route which
indicates that Network C
may be reached through
Router 1
To continue with this example, if Network B is not configured to advertise Network C to Network A,
then Network A will not dynamically learn of Network C’s existence. If you wish to establish a route
on Network A to Network C, you must define a static route on Network A that indicates that Network
C may be accessed through Remote Unit B.
To set up a static route, you must define the following routing information:
The address of the network you wish to reach;
How far away from the local LAN the network is located (in terms of metric measurement or
hops, depending on the protocol)
Whether the network can be reached on the local LAN (via the LAN port) or through a Remote
Unit.
Terminal Server Router - Release 2.97
5-17
Profile Directory:Remote Profile
GRE Tunnel set to <All>
If you are using the local LAN, you will also need to define the address (either IP or MAC, depending
on the protocol) of the first gateway (i.e. router) you will use to reach the network you are defining.
It is important to note that if the static network is reached via a Remote (WAN) Unit, it must be defined
by choosing the SETUP: <Static Networks> option on the corresponding Remote (WAN) Profile
Setup window. Static networks that are reached via the local LAN must be defined by choosing the
SETUP <Static Networks> option on the Local (LAN) Profile Setup window.
NOTE: All static routes are considered filters and will be applied toward the maximum
allowable number of 500 filters.
Depending on the GRE Tunnel field setting, the Static/VPN Networks window display fields are
modified. The following displays two options.
GRE Tunnel set to <All>
1. Select Configuration <Profile Directory> from the Main Menu, and press [ENTER].
2. Select WAN <Setup -> on the RemoteUnit line and press [ENTER].
Profile
Directory
Window
5-18
Terminal Server Router - Release 2.97
Profile Directory:Remote Profile
GRE Tunnel set to <All>
3. Set GRE Tunnel to <All >.
4. Select Setup: <Static/VPN Networks>, scroll with the [SPACEBAR] to through the options
and select [ENTER].
Remote
Profile
Window
5. Select [CTRL A] to add a Static IP Network. Enter Network Address, Subnet Mask and Metric
value. Note: this window displays additional fields depending on the field setting for GRE
Tunnel (on the Remote Profile window).
Static/
VPN
Networks
Window
Terminal Server Router - Release 2.97
5-19
Profile Directory:Remote Profile
GRE Tunnel set to <All>
Static/VPN Networks Fields
Setup Static
<IP Networks> Enter the Subnet IP Address. Note: The host bits should all be zero.
<IPX Networks> Enter the Hexidecimal Address. Note: The host bits should all be zero.
Network
Enter the Subnet IP Address. Note: The host bits should all be zero.
Subnet Mask
Enter the Subnet Mask of the Network IP Address.
Metric
Enter the distance, in hops, to the network. Value must be between 1-15.
5-20
Terminal Server Router - Release 2.97
Profile Directory:Remote Profile
GRE Tunnel set to <By Network>
GRE Tunnel set to <By Network>
1. Select Configuration <Profile Directory> from the Main Menu, and press [ENTER].
2. Select WAN <Setup -> on the RemoteUnit line and press [ENTER].
Profile
Directory
Window
3. Set GRE Tunnel to <By Network >.
4. Select Setup: <Static/VPN Networks>, scroll with the [SPACEBAR] to through the options
and select [ENTER].
Remote
Profile
Window
Terminal Server Router - Release 2.97
5-21
Profile Directory:Remote Profile
GRE Tunnel set to <By Network>
5. Press [CTRL A] to add a Static IP Network. Enter Network Address, Subnet Mask and Metric
value. Note: this window displays additional fields depending on the field setting for GRE
Tunnel (on the Remote Profile window).
Static/
VPN
Networks
Window
Static/VPN Networks Fields
Setup Static
<IP Networks> Enter the Subnet IP Address. Note: The host bits should all be zero.
Network
Enter the Subnet IP Address. Note: The host bits should all be zero.
Subnet Mask
Enter the Subnet Mask of the Network IP Address.
Metric
Enter the distance, in hops, to the network. Value must be between 1-15.
VPN Features
GRE Tunnel
Displays the Tunnel Name defined on the VPN setup window.
Encrypt
Not supported in this release.
5-22
Terminal Server Router - Release 2.97
Profile Directory:Remote Profile
GRE Tunnel set to <By Network>
VPN - >
Opens the VPN Setup window.
Tunnel Data ?
<Yes> - Enables tunnel. Displays additional fields to setup.
<No> - Disables tunnel.
Tunnel Name
Enter Tunnel name, with a maximum of 11 characters.
Remote IP Tunnel Address
Enter the IP address of the far end of the tunnel, in the form xxx.xxx.xxx.xxx, where xxx is between 0-255.
Terminal Server Router - Release 2.97
5-23
Profile Directory:Remote Profile
Static NAT Addresses
Static NAT Addresses
Use this window to configure Static Bi-directional NAT mappings between local server addresses and
public addresses.
NOTE: Up to 16 Static NAT addresses can be configured. Each Static NAT address filter will
count toward the maximum number of 500 filters.
1. Select Configuration <Profile Directory> from the Main Menu and press [ENTER].
2. Select WAN <Setup -> on the RemoteUnit line and press [ENTER].
Profile
Directory
Window
5-24
Terminal Server Router - Release 2.97
Profile Directory:Remote Profile
Static NAT Addresses
3. Select Setup: <Static NAT Addresses>, scroll with the [SPACEBAR] to select this option and
select [ENTER].
Remote
Profile
Window
4. Select [CTRL A] to add a Static NAT Address.
Static
Addresses
Window
Local IP Address
Enter the IP Address of the local device.
NAT IP Address
Enter the NAT IP Address of the target device.
TypePort
<ALL> - Selects all port types.
<UDP> - Selects UDP port types.
Local Port - Enter a local port. Range = 1-65535.
NAT Port - Enter a NAT port. Range = 1-65535.
<TCP> - Selects TCP port types.
Local Port - Enter a local port. Range = 1-65535.
NAT Port - Enter a NAT port. Range = 1-65535.
Terminal Server Router - Release 2.97
5-25
Profile Directory:Remote Profile
NAT Bypass Subnets
NAT Bypass Subnets
Use this window to define NAT Bypass Subnets which will create a list of source addresses that will
not be subject to NAT translation when passing through a NAT enabled WAN interface.
1. Select Configuration <Profile Directory> from the Main Menu, and press [ENTER].
2. Select WAN <Setup -> on the RemoteUnit line and press [ENTER].
Profile
Directory
Window
3. Select Setup: <Static Addresses >, scroll through the list of options with the [SPACEBAR] if
<NAT Bypass Subnets> is not displayed. Press [ENTER].
NAT
Bypass
Subnets
Window
5-26
Terminal Server Router - Release 2.97
Profile Directory:Remote Profile
NAT Bypass Subnets
4. Press [CTRL A] to add a NAT Bypass.
Network
An IP address or host to bypass the NAT Translation, in the form of xxx.xxx.xxx.xxx, where xxx is between
0-255.
Subnet Mask
Subnet mask of the Network IP address above, in the form of xxx.xxx.xxx.xxx, where xxx is between 0-255.
Terminal Server Router - Release 2.97
5-27
Profile Directory:Remote Profile
Static Addresses
Static Addresses
Use this screen to define static addresses that are based on the Ethernet MAC or IP Address of a specific
device on the local LAN. Typically, the Router would learn of these devices by monitoring LAN/WAN
packets. By defining a static address, you are telling the Router the location of the corresponding device
before it learns where this device resides. Static addresses are typically used in a bridging situation.
Use the Local (LAN) Profile to define static addresses for devices that are located on the LAN. If you
wish to establish static addresses for devices on remote LAN’s, access this screen using the
corresponding Remote (WAN) Profile.
NOTE: Each static address filter will count toward the maximum number of 500 filters.
1. Select Configuration <Profile Directory> from the Main Menu, and press [ENTER].
2. Select WAN <Setup -> on the RemoteUnit line and press [ENTER].
Profile
Directory
Window
5-28
Terminal Server Router - Release 2.97
Profile Directory:Remote Profile
Static Addresses
3. Select Setup: <Static Addresses >, scroll through the list of options with the [SPACEBAR] if
<Static Addresses> is not displayed. Press [ENTER].
Remote
Profile
Window
4. Scroll through the list of options with the [SPACEBAR] to select Setup Static: <MAC
Address> or Setup Static: <IP Address>. Press [CTRL A] to add a Static Address.
Static
Addresses
Window
(MAC
Address)
Terminal Server Router - Release 2.97
5-29
Profile Directory:Remote Profile
Static Addresses
Static
Addresses
Window
(IP Address)
Static Addresses Fields
Setup Static
<IP Address> - To setup a static IP address.
<MAC Address> - To setup a static MAC address.
Device Name
A user-defined name of the LAN device that is associated with this static address. Up to 7 characters is allowed
for this field.
MAC Address
Enter the MAC Address of the desired device. If the static address is configured through the Local (LAN) Profile
Setup screen, the device can be reached via the local LAN. If the static address is configured on a specific Remote
(WAN) Profile screen, the device can be reached via that specific remote. This field is only available if the Setup
Static field is set to <MAC Address>.
IP Address
Enter the IP Address of the desired device. If the static address is configured through the Local Profile Setup
screen, the device can be reached via the local LAN. If the static address is configured on a specific Remote
(WAN) Profile screen, the device can be reached via that specific remote. This field is only available if the Setup
Static field is set to <IP Address>.
5-30
Terminal Server Router - Release 2.97
Profile Directory:Remote Profile
Firewall Filters (Remote Profile)
Firewall Filters (Remote Profile)
A firewall is a method for keeping a network secure from intruders, by using filters to block the
transmission of certain types of (service) traffic. Once created, firewalls are a security feature that
allows only certain types of services to pass in and/or out of your LAN. Firewalls can be created on a
per remote basis. Each filter consists of a set of drop/pass rules which are applied in the order in which
they appear on the list — in other words, rule 1 is applied before rule 2 and so on. This set of rules
constitutes a filter for a specific remote profile and will be applied to that profile’s incoming or
outgoing, or both traffic types (service flows).
Firewall
Rules
Window
Fields
#
!
Services(s)
LAN Device(s)
==>
<==
<== ==>
WAN Device(s)
Log
Terminal Server Router - Release 2.97
Rule Number
Pass (no ! [blank] indicates Drop)
Lists current service defined
Lists LAN defined for this rule (* indicates any)
Outgoing
Incoming
Outgoing and incoming
Lists WAN defined for this rule (* indicates any)
X = Logged in the Event or Alarm log
5-31
Profile Directory:Remote Profile
Firewall Filters (Remote Profile)
To Add a Firewall Filter:
WARNING! THE ADDITION OF THE FIRST FIREWALL RULE WILL AUTOMATICALLY SECURE THE
UNIT AGAINST ACCESS VIA TELNET (UNLESS THE FIRST RULE EXPRESSLY PERMITS TELNET). TO
ENSURE THE ABILITY TO TELNET INTO THE UNIT BY AT LEAST ONE REMOTE DEVICE, YOU MUST
CREATE A RULE INDICATING WHICH DEVICE HAS TELNET ACCESS.
1. On the Main Menu, press [TAB] until Configuration <Profile Directory> is highlighted, and
press [ENTER].
2. Select WAN <Setup -> on the RemoteUnit line and press [ENTER].
Profile
Directory
Window
5-32
Terminal Server Router - Release 2.97
Profile Directory:Remote Profile
Firewall Filters (Remote Profile)
3. Tab down to Setup: <Security/Options> and scroll with the [SPACEBAR] to <Firewall
Filters>. Press [ENTER]
Remote
Profile
Window
4. Select [CTRL A] to add an IP Firewall Rule.
Firewall
Filters
Window
Terminal Server Router - Release 2.97
5-33
Profile Directory:Remote Profile
Firewall Filters (Remote Profile)
5. Enter the parameters of the rule, select [ESC] to close the window and save the configuration.
See below for a description of all fields for the Firewall Setup window.
Firewall Filters Fields
Rule Number
The rule number defines the order in which the rules are applied. Once there is two or more rules created, the rule
number can be changed to put them in the desired order. The Last! rule displayed, is automatically set after the
first rule is defined, and states that the Router should drop any service (incoming or outgoing) which has not been
addressed in the proceeding rules.
Action: (Pass/Drop)
This column indicates the service(s) that will <Pass> or <Drop> from the local network to the remote
network and vice versa. On the Firewall Filters window the following indicated Pass/Drop:
! in this column = Drop
Blank column = Pass
Typically, rules are established with the Pass action, since the last rule (which is automatically defined by the
software) Drops all services not expressly permitted by the previous rule(s). For example, if you wish to deny all
transmissions except Telnet, you would create a rule indicating that Telnet has the Pass action. The Router
software would create the last rule that states the unit should Drop all other services.
Since any service that is not expressly permitted to pass will be prohibited, it is important that you thoroughly
understand the security policies of your WAN before attempting to create a firewall. We suggest that only
experienced Network Administrators create and maintain firewall filters. Incorrectly defined filters may
compromise the security and functionality of your WAN.
5-34
Terminal Server Router - Release 2.97
Profile Directory:Remote Profile
Firewall Filters (Remote Profile)
Service
This field displays the service that this particular rule affects. The most common services have been pre-defined
however, there are a select few options where you may further define the service to be filtered.
Name
Description
Finger
FTP
Gopher
HTTP
ICMP
Display information about users
File Transfer Protocol
Document search and retrieval
World Wide Web
Internet Control Message
Type <Equal> or <Range> = Specify a number or range.
Number = 0-65535
Start Number = 0-65535
End Number = 0-65535
IP protocol number to be specified, see Protocol Number in Firewall Filters on
page B-2 for a list of these Protocols and the assigned number.
Protocol Number = number between 1-255
Network News Transfer
ICMP echo request/reply
Post Office Protocol Version 3
Simple Mail Transfer
Simple Network Management Protocol
Transmission Control Protocol
Port <Equal> or <Range> = Specify a number or range.
Number = 0-65535
Start Number = 0-65535
End Number = 0-65535
User interface to remote unit
User Datagram Protocol
Wide Area Information Services
NUM
NNTP
Ping
POP3
SMTP
SNMP
TCP
Telnet
UDP
WAIS
Service Establishment
Use this field to establish the transmission direction that will be affected by this rule.
Incoming
All session establishments coming from the remote which match the value in the
Service field, will adhere to the value in the Action field.
Outgoing
All transmissions outbound from the LAN toward this remote which match the value
in the Service field, will adhere to the value in the Action field.
In/Out
Will affect both incoming and outgoing transmissions.
Local IP Address/Network
Enter the IP Address of the local device or network that this rule will affect. If you enter the address of a local
device, this rule will affect only the session establishments of the local device and the destination address entered
in the Remote IP Address/Network field, below. If this rule is to affect “any” local devices/networks, leave this
field with an asterisk default symbol *.
Significant Bits
Use this field to identify the number of bits, from left to right that will be used to match the IP Address field
within the data packet with the value entered into the Local IP Address/Network. Range is between 1-32.
Terminal Server Router - Release 2.97
5-35
Profile Directory:Remote Profile
Firewall Filters (Remote Profile)
Remote IP Address/Network
Enter the IP Address of the remote device or network that this rule will affect. If you enter the address of a remote
device, this rule will affect only the session establishments of the remote device and the device/network address
entered in the Local IP Address/Network field, above. If this rule is to affect “any” remote devices/networks,
leave this field at the default symbol *.
Significant Bits
Use this field to identify the number of bits, from left to right, that will be used to match the IP Address field
within the data packet with the value entered into the Remote IP Address/Network. Range is between 1 to
32.
<
> Packets which match this rule
Use this field to indicate whether a rule match should trigger an Alarm or Log entry.
(Blank)
A transmission match will not trigger an Alarm or Events log entry.
Alarm
A transmission match will trigger an Alarm entry.
Log
A transmission match will trigger an Events log entry.
Log or Alarm entries may also be useful when a specific security issue is at stake. For example, if your security
policy does not permit Telnetting, you may wish to keep track of all Telnet attempts. As a general rule, however,
we do not recommend keeping a log of all rule matches since this may impact system performance and may cause
an Event or Alarm screen overflow.
NOTE: When this field is enabled, a single event/alarm will be logged for all TCP session
initiations. An event/alarm will be logged for each packet for all UDP transfers. UDP traffic
should not be allowed across a firewall.
NOTE: All firewall rules are considered filters and will be applied toward the maximum
allowable number of 500 filters.
5-36
Terminal Server Router - Release 2.97
Profile Directory:Remote Profile
Filter Network/Server
Filter Network/Server
This screen allows you to filter the Remote (WAN) networks/servers in two ways, depending on which
mode is selected. The <Filter> mode causes the unit to learn all networks/services on known networks,
and then advertise these services to the LAN.
In the <Learn> mode the unit will disable or restrict learning of networks/services. Under this mode,
services will only be learned if they are selected or added. For example, when you enter the current
screen, all known networks/services will be displayed, since the <Filter> mode is the default mode. If
you wish to restrict which services are learned you may change the Selected Items field to <Learn>
and then enable only selected services displayed on the screen. Once you exit this screen and save the
changes, only those services that you enabled and/or added will be learned and displayed.
Since the <Filter> mode learns all services, it may be most appropriate for smaller networks. The
<Learn> mode however, may be best for larger networks since it allows you to restrict which types of
services are learned.
1. On the Main Menu, press [TAB] until Configuration <Profile Directory> is highlighted, and
press [ENTER].
2. Select WAN <Setup -> on the RemoteUnit line and press [ENTER].
Profile
Directory
Window
Terminal Server Router - Release 2.97
5-37
Profile Directory:Remote Profile
Filter Network/Server
3. Tab down to Setup: <Security/Options> and scroll with the [SPACEBAR] to <Filter
Network/Server>. Press [ENTER].
Remote
Profile
Window
4. Select with the [SPACEBAR] <IP Networks>, <IPX Networks> or <IPX Servers>. [TAB] to
the Selected Items field.
Filter
Network/
Server
5-38
Terminal Server Router - Release 2.97
Profile Directory:Remote Profile
Filter Network/Server
5. Select <Learn> or <Filter> and select [ENTER].
6. To manually configure a service, see Static/VPN Networks on page 5-17.
Filter Network/Server Fields
Setup
Use this field to identify which networks or server types you wish to review and filter.
<IP Networks>, <IPX Networks> or <IPX Servers>
Selected Items (Filter/Learn)
<Filter> (default) The Router will learn all networks/servers and advertise them to the LAN. This mode is
particularly useful for small networks with few items to be learned/advertised. Customize the advertised networks/
servers in one of two ways; <Learn> or see Static/VPN Networks on page 5-17 to add a filter.
<Learn> Under this mode, learning and advertising are disabled until a specific server type is selected from the
displayed servers or is manually added. The <Learn> mode is much better suited for larger networks, as
specifying which networks/servers you wish the Router to learn may consume less filters than specifying which
networks/servers you Do Not want learned.
Terminal Server Router - Release 2.97
5-39
Profile Directory:Remote Profile
Filter Network/Server
If the server type and name are specified, only servers that match both values will be learned or filtered. Be aware
that the Name value is case and spacing sensitive.
Network
This field displays the network address of each service/network learned from the remote unit. If this route was
added using the Static Network screen, “Static Fltr” will appear before the network address of this entry.
Type
This field is only available when the Setup field is set to <IPX Servers>. The Type field displays the Hex value
assigned to each known server. When a service is added using
[CTRL A], a Hex value must be defined. If you wish to learn or filter certain services that match a particular
server type, manually add an entry specifying the desired Hex value. This setting will enable the unit to learn or
filter all services that match the specified service type. This field may be used in conjunction with the Name field,
described below. Range 1-FFFF.
Name
This field displays the first 11 characters of the name of each known network/server. If a server is manually added
and a server name is not defined, all servers matching the added type will be learned and the first 11 characters of
their names will be displayed. If both the server name and type are defined when the server is manually added then
only servers matching both criteria will be learned.
Filter [ ]
This field will change depending on the value set in the Selected Items field. Use the [SPACEBAR] to place and
X in this field to choose that the Router will Filter the chosen network or server.
Learn [ ]
This field will change depending on the value set in the Selected Items field. Use the [SPACEBAR] to place and
X in this field to choose that the Router will Learn the chosen network or server.
5-40
Terminal Server Router - Release 2.97
Profile Directory:Remote Profile
Spanning Tree
Spanning Tree
NOTE: This option displays only when Spanning Tree is <Enabled> on the Router CARD
Profile AND the Remote Profile Mode is set to <Bridge>.
The Spanning Tree configures the setup for the Spanning Tree Algorithm. To Configure Spanning
Tree:
1. Select Configuration <Profile Directory> from the Main menu, and [ENTER].
2. Select WAN < Setup -> and select [ENTER].
Profile
Directory
Window
Terminal Server Router - Release 2.97
5-41
Profile Directory:Remote Profile
Spanning Tree
3. Select Setup: <Spanning Tree > and select [ENTER].
4. To enable Spanning Tree, scroll <Disabled> to <Enabled>, with the [SPACEBAR], select
[ENTER].
5-42
Terminal Server Router - Release 2.97
Profile Directory:Remote Profile
Spanning Tree
5. Enter the appropriate data in the following fields.
Port Priority
The Port Priority value can range from 0 to 255, with a default of 128.
Port Cost
The Port Priority value can range from 0 to 65535, with a default of 651.
Terminal Server Router - Release 2.97
5-43
Profile Directory:Remote Profile
Trunk Port
Trunk Port
Use this screen to define the Router Interface.
1. On the Main Menu, press [TAB] until Configuration <Profile Directory> is highlighted.
2. Select WAN <Setup -> on the RemoteUnit line and press [ENTER].
Profile
Directory
Window
3. Select Setup:<Trunk Port> and select [ENTER].
Remote
Profile
Window
5-44
Terminal Server Router - Release 2.97
Profile Directory:Remote Profile
Trunk Port
WAN Port
Setup
Window
WAN Port Number
Select the WAN Port Number by scrolling through the options in the <> brackets. Note: Only WANs that are
set up will display here. As the selections scroll through the WAN numbers, the connection ID will be
modified to reflect this selection. WAN Connection Type: MLPPP, PPP, PPP in Frame Relay, or Frame
Relay 1490.
DLCI
Set DLCI value. Range is 16 - 1022.
Note: this field is not applicable with all connection types.
ML Fragment Threshold
This field appears when the WAN selected is WAN Connection Type: MLPPP. The MultiLink Fragment
Threshold is the size at which non-prioritized packets will be inspected to determine if they should be
fragmented. Range 320-1600, with a default of 1600.
WAN Port
Setup
Window
with
MLPPP
Terminal Server Router - Release 2.97
5-45
Profile Directory:Remote Profile
Trunk Port
5-46
Terminal Server Router - Release 2.97
CHAPTER
6
Terminal Server Window
In this Chapter
Overview
Configuration
Manual Closure of a Telnet Socket
Terminal Server Window
Overview
Overview
The Terminal Server window will configure the four ports on the TSR card. These settings apply only
if the jumper for the port is set to RS-232. Each port can be set independently with the jumper on the
TSR card to either RS-232 or to Ethernet. See the Adit 600 User Manual for information on setting the
port jumpers.
Configuration
1. Select Configuration: <Terminal Server> from the Main Menu, and select [ENTER].
Main
Menu
6-2
Terminal Server Router - Release 2.97
Terminal Server Window
Configuration
The Terminal Server Setting window displays current settings for all ports on the TSR card.
Terminal
Server
Setup
Window
2. Select with the [SPACEBAR], the port (1-4) to configure the Select Port to change, or ESC to
Exit field and select [ENTER].
3. This window will display the current settings of the selected port. These settings will only apply
if the jumper on the card is set to RS-232.
Terminal
Server
Setup
Window
Terminal Server Router - Release 2.97
6-3
Terminal Server Window
Configuration
NOTE: If the port is set to Ethernet, there will be a warning listed on the bottom of the window.
Terminal
Server
Setup
Window
with a port
set to
Ethernet
The following windows show how the selection of the Port Type changes the fields displayed.
6-4
Terminal Server Router - Release 2.97
Terminal Server Window
Configuration
Terminal Server Router - Release 2.97
6-5
Terminal Server Window
Configuration
Port Type
This option only applies to ports that are set to RS-232 (not Ethernet).
<TermServer> - Set the port type to Terminal Server. Default.
<TermCompat> - Set the port type to Terminal Server with special compatibility features.
<TBOS> - Set the port type to TBOS (Telemetry Byte Oriented Serial) port type. Note: TBOS is only available
on TSR cards with the TBOS feature enabled. This option only applies to ports that are RS-232 (not Ethernet).
<RawTCP> - Set the port type to Raw TCP (Transmission Control Protocol).
Port Name
A defined Port name, with up to 15 characters. Default is "none".
Password
The access password for the configured asynchronous port, with up to 15 characters. This single password shall
grant or deny access to the port. No other security levels such as "Admin" or "View" shall be required.
Note: This field is not displayed for a TBOS port type.
Prompt
<Disabled>, <Enabled> - This field will enable/disable a visible password prompt. Note: This field is not
displayed for a TBOS port type. Default is <Disabled>.
IP Address
The IP address for the defined port of the TSR card, in the form of xxx.xxx.xxx.xxx, where xxx is between 0-255.
Note: This field is not displayed for a TBOS port type.
Protocol Port
The protocol port number, with range of 1 - 65535, a setting of 0 defines a null-port. Default is 23. Note: This
field is not displayed for a TBOS port type.
Baud Rate
Defines the Transmission rate for the port. Tested baud rates are: 110, 300, 1200, 2400, 4800, 9600, 19200, 38400,
57600, 115200. Default is 9600.
Data Bits
To set the number of data bits encoding a character. Allowable data bits 5, 6, 7 and 8. Default is 8 bits.
NOTE: If 1.5 Stop Bits is selected, the Data Bits setting MUST be 5 Data Bits, if 2 Stop Bits
is selected, 5 Data Bits MUST NOT be selected.
Parity
To set the parity on this TSR port.
<None> - Set no parity to the TSR port. Default.
<Even> - Set even parity to the TSR port.
<Odd> - Set odd parity to the TSR port.
6-6
Terminal Server Router - Release 2.97
Terminal Server Window
Configuration
Stop Bits
A stop bit is an interval at the end of each Asynchronous Character that allows the receiving computer to pause
before the start of the next character. Stop Bits values available are 1, 1.5 and 2.
NOTE: If 1.5 Stop Bits is selected, the Data Bits setting MUST be 5 Data Bits, if 2 Stop Bits
is selected, 5 Data Bits MUST NOT be selected.
Flow Control
To set the flow control on a TSR port.
None
Set flow control to none. Default.
RTS/CTS
Set flow control to hardware
XON/XOFF
Set flow control to xonxoff
Inactivity Timer
The number of minutes of inactivity on the port before resetting the socket to close the port. Range is 0 - 999
minutes, with 0 used to disable. Default is 0.
Reset on DSR Low
<Disabled>, <Enabled> - When DSR (Data Set Ready) input goes low, socket is reset. Default is <Disabled>.
Terminal Server Router - Release 2.97
6-7
Terminal Server Window
Configuration
TBOS Display Mapping
To set the TBOS mapping for each of the 8 available displays.
Set Device Type for Monitoring:
<None> - None will disable monitoring for that TBOS display.
<Lynx.sc> - Proxium Lynx radio with up to 2xT1/E1 capacity exceeding 50 miles.
<Lynx.HD 31145-10> - Proxium Lynx radio with up to 8 T1/E1 capacity exceeding 40 miles.
<Lynx.HD 31145-1f> - Proxium Lynx radio with up to 8 T1/E1 capacity exceeding 40 miles.
<Lynx DS3> - Proxium Lynx radio with DS3 capacity exceeding 15 miles.
<Lynx 1-4 Port Prot Sw> - Proxium Lynx radio.
<Lynx 8 Port Prot Sw> - Proxium Lynx radio.
<Alcatel MDR-4000> - Alcatel MDR-4000 radio.
Description = Field used to further identify the monitored equipment. Up to 20 characters can be used.
TBOS
Setup
Window
6-8
Terminal Server Router - Release 2.97
Terminal Server Window
Manual Closure of a Telnet Socket
Manual Closure of a Telnet Socket
The TSR provides the ability to manually close a currently open Telnet socket associated with a specific
asynchronous port. The process is as follows:
1. Select Configuration: <Terminal Server> from the Main Menu, and select [ENTER].
Main
Menu
2. Select with the [SPACEBAR], the port (1-4) the port to close and select [ENTER].
NOTE: Port must be set to RS-232 (Example: port 1 and port 2). This does not apply to a
port configured to support Ethernet traffic (Example; port 3 and 4).
Terminal
Server
Setup
Window
Terminal Server Router - Release 2.97
6-9
Terminal Server Window
Manual Closure of a Telnet Socket
3. The RS-232 setup window will appear. Exit this window with the [ESC] button, without
making any changes.
Terminal
Server
RS-232
Setup
Window
4. A message will appear the bottom of the window, asking to reset the socket. Select <YES> and
[ENTER]. The window will close and the socket is now closed.
6-10
Terminal Server Router - Release 2.97
CHAPTER
7
Basic Configuration
In this Chapter
Overview
Start Basic Configuration
Local Unit Identification
Routing Protocol/Security
WAN Interface Connections
Remote Unit Profile
SNMP Configuration
Setup Complete
Basic Configuration
Overview
Overview
The Basic Configuration is designed to walk the user through all the Basic Setup to operate the Router
effectively. This feature can be used at any time, to initially setup the Router, or to change the
configuration of the Router. As setup information is entered and the Enter button is selected, the next
setup item will appear.
ESC will exit this setup program at any time.
ENTER will move to the next page or enter the information into the system.
Start Basic Configuration
1. Select Configuration: <Basic Config > -> from the Router Main menu and select ENTER.
7-2
Terminal Server Router - Release 2.97
Basic Configuration
Start Basic Configuration
2. Select <Yes> to enter the setup program and select ENTER.
Terminal Server Router - Release 2.97
7-3
Basic Configuration
Local Unit Identification
Local Unit Identification
Note: When this window is opened the items below in the box are not displayed. As you fill in
information or accept the current (default) information (by hitting [ENTER]) the next line will display.
This is the same process that you will find on all of the windows in the Guide.
QTSR Name: (LocalUnit)
Enter a unique name for this unit. Name can be up to 11 characters.
IP Address of this QTSR
Enter the IP Address of the Router.
Subnet Mask of this QTSR
Enter the Subnet Mask of the Router IP Address.
Default Router of this QTSR
Enter the default Router IP Address for the QTSR.
7-4
Terminal Server Router - Release 2.97
Basic Configuration
Routing Protocol/Security
Routing Protocol/Security
Select direction(s) for LAN Network Updates
< Both> - Set LAN Network updates in both directions.
<Neither> - Disable LAN Network updates. Default.
<Send> - Set LAN Network updates in the send direction.
<Receive> - Set LAN Network updates in the receive direction.
Select RIP mode to be received from remotes
<RIP1> - Set to RIP version 1. Default.
<RIP2> - Set to RIP version 2.
<RIP1/RIP2> - Set to Rip Version 1 or 2.
Select RIP mode to send to remotes
<RIP1> - Set to RIP version 1. Default.
<RIP2> - Set to RIP version 2.
<RIP1/RIP2> - Set to Rip Version 1 or 2.
Select the protocol remotes will use to authenticate local LocalUnit
<CHAP> - Set authentication to CHAP (Challenge-Handshake Authentication Protocol).
<PAP> - Set authentication to PAP (Password Authentication Protocol).
<NONE> - Disable authentication. Default.
Terminal Server Router - Release 2.97
7-5
Basic Configuration
Routing Protocol/Security
Change the CHAP Secret LocalUnit will send?
Note: this field displays only with a selection on <CHAP>
Selection is: <YES>, <NO>. Below the current Secret Password is listed.
If <YES> is selected, the operator will be requested to enter in a new password, and retype this password to confirm.
Change the PAP Secret LocalUnit will send?
Note: this field displays only with a selection on <PAP>.
Selection is: <YES>, <NO>. Below the current Secret Password is listed.
If <YES> is selected, the operator will be requested to enter in a new password, and retype this password to confirm.
Select the authentication User ID
<Local Profile Name> - Displays the current Local Unit name. Default.
<Local Custom Name> - With this selection you will be prompted to enter a Custom name. This name can be
up to 32 characters long.
Select the protocol LocalUnit will use to authenticate all remotes
<CHAP> - Set authentication to CHAP (Challenge-Handshake Authentication Protocol).
<PAP> - Set authentication to PAP (Password Authentication Protocol).
<NONE> - Disable authentication. Default.
7-6
Terminal Server Router - Release 2.97
Basic Configuration
WAN Interface Connections
WAN Interface Connections
This screen will display the Port Number and connection information of existing WANs. The window
displays one WAN initially. As you set the connection type and then hit [ENTER] the next WAN will
display.
Note: You are not allowed to back up to the previous WAN on the list. This screen will only hold 8
WANs on a page, additional pages are added as needed.
Port Number
Displays the Port Number of the WAN (1-24).
WAN Connection
Displays the connection {slot:port:channel} of each existing WAN.
WAN Connection Type
<PPP> - Set the connection type to Point-to-Point Protocol.
<Frame Relay 1490> - Set the connection type to Frame Relay per RFC 1490.
<PPP in Frame Relay> - Set the connection type to PPP over Frame Relay per RFC 1973.
For Frame Relay, Set Option for PVC Management
<Disabled> - Disables Frame Relay
<Annex D> - Set to Annex D, which is a Frame Relay standard extension.
<LMI> - Set to Local Management Interface (LMI) rev1 (DLCI 1023).
Set Poll Interval
Range is between 5-30.
Terminal Server Router - Release 2.97
7-7
Basic Configuration
WAN Interface Connections
Set Poll Counter
Range is between 1-255.
7-8
Terminal Server Router - Release 2.97
Basic Configuration
Remote Unit Profile
Remote Unit Profile
A screen will ask you if you would like to Edit a Remote Unit Profile. Select <YES> and [ENTER].
The guide will walk through each Remote Profile that has been set up.
When exiting the last profile the guide will ask if you if you would like to add a Remote Profile.
Terminal Server Router - Release 2.97
7-9
Basic Configuration
Remote Unit Profile
The following window will configure the Remote Unit.
Profile Name
Enter a unique name for this Remote Unit. Name can be up to 11 characters.
Protocol
IP
Mode - <Route>, <Blocked> and <Bridge>.
WAN Network Updates - <Never>, <Periodic> and <Triggered>.
IPX
Mode - <Blocked>, <Bridge> and <Optimized>.
WAN Network Updates - <Never>, <Periodic>, <Triggered>.
Other
Mode - <Blocked>, <Bridge> and <Optimized>.
Does this unit have a numbered IP address assigned on the WAN?
Selection is: <Yes>, <No>. If <Yes> is selected IP Address and Subnet Mask below are listed.
IP Address
Enter the IP Address of the Remote Unit.
Subnet Mask
Enter the Subnet Mask of the above IP Address.
7-10
Terminal Server Router - Release 2.97
Basic Configuration
Remote Unit Profile
Select WAN Port Number
Selection is: <None>, <1> through <24> (all existing WAN ports are listed).
Connection
Displays the connection information for the selected WAN in the form {slot:port:channel}.
WAN Connection Type
Displays the WAN connection type (PPP, Frame Relay 1490 or PPP in Frame Relay).
DLCI
Enter the Data Link Connection Identifier. Range is between 16-1022.
Note: This field is not available with a WAN that has PPP set as its connection type.
Terminal Server Router - Release 2.97
7-11
Basic Configuration
SNMP Configuration
SNMP Configuration
A screen will ask you if you would like to Add a Remote Unit Profile. Select <NO> and [ENTER]. The
guide will move onto the SNMP setup page.
SNMP Communities
Name - Enter a 10 character name.
Address - Enter an IP address (first line) Subnet Mask for second line.
Access - Selection is: <read>, <write>, <both>.
SNMP Trap Destinations
Name - Enter a 10 character name.
Address - Enter an IP address (first line) Subnet Mask for second line.
Location - Selection is: <Local LAN>, will have a selection for each Remote Unit that a profile has been created for.
7-12
Terminal Server Router - Release 2.97
Basic Configuration
Setup Complete
Setup Complete
You have now completed the Basic Configuration. You may re-enter the Basic Configuration to make
changes now or at any time.
Terminal Server Router - Release 2.97
7-13
Basic Configuration
Setup Complete
7-14
Terminal Server Router - Release 2.97
CHAPTER
8
Verification Window
The Verification window is used to identify suspected communication problems between the
Local (LAN) and Remote (WAN) devices.
In this Chapter
Ping Utility
Trace Route
Port Monitor
Verification Window
Ping Utility
Ping Utility
Use this option to verify any communication problems between the Router and various devices
connected to your LAN or at a Remote location. Problems are detected when a “ping” is sent to a device.
If the device echoes back to the Router, then communications are operating normally. If no echo returns,
then further investigation is needed. Devices must be running TCP/IP software in order for the ping to
be successful.
A single ping may be used, where only one packet is sent to the device being tested, or a continuous
ping to the device until you manually terminate the test. Continual pinging may help identify
intermittent communication problems. Please note that when pinging a device on a remote LAN, it is
not unusual for the first ping to fail.
NOTE: In order to perform LAN port testing, the selected frame type must be Ethernet II and
the Router’s IP Address must be configured.
1. On the Main Menu, press [TAB] until the Ping Utility is highlighted on the Verification
option.
2. Press [ENTER]. The LAN Port Verification window will display.
8-2
Terminal Server Router - Release 2.97
Verification Window
Ping Utility
3. To initiate a Ping, select START PING <Single Ping >, scroll to <Continuous Ping> if
desired and select [ENTER]. The Ping process will begin.
LAN Port Verification Fields
DstHost (Destination Host)
Enter an IP Address or, domain name to use for this query. IP Address must be in the form of xxx.xxx.xxx.xxx,
where xxx is between 0-255.
Access Port
This is the local or remote profile of the network used during the test. The operator can scroll (with the
[SPACEBAR]) through the selections of the Access Port: <Local LAN> to select the Local LAN or any of the
defined Remote Unit(s). All defined Remote Profiles will be in this selection.
Src IP Address (Source IP Address)
This is one of the multiple IP addresses assigned to the Ethernet LAN port and will override the IP address that
will be used as the source IP address. Default is to use the IP address of the interface from which the ping is sent.
Payload Size
This optional parameter sets the number of bytes to send in the ICMP echo request payload. Range is 0 to 65500,
default is 64.
Terminal Server Router - Release 2.97
8-3
Verification Window
Ping Utility
START PING < >
<Single Ping >
Test for device failure. The single ping test will send one ping and display the results of the test.
<Continuous Ping >
Test for intermittent communication problems.
A continuous ping will send a ping until the test is manually terminated. Results of the continuous ping test
are constantly updated, based on the result of each ping sent. Press [ESC] to terminate the test at any time.
Successful Single Ping
Status
IP Dst Address
IP Src Address
MAC Address
: 100.1.0.26
: 100.1.0.10
: 00-00_86_62_72_17
Response Time
Last Result
: < 1ms
: Host Responding
Unsuccessful Single Ping
Status
IP Dst Address
IP Src Address
MAC Address
: 100.1.0.26
: 100.1.0.10
:
Last Result
: Destination Unreachable
Successful Single Ping
Unsuccessful Single Ping
Status
IP Dst Address
IP Src Address
MAC Address
: 100.1.0.26
: 100.1.0.10
: 00-00_86_62_72_17
Status
IP Dst Address
IP Src Address
MAC Address
Response Time
Last Result
: < 1ms
: Host Responding
Last Result
: Destination Unreachable
Response Count: 19
Timeout Count: 0
Response Count: 19
Timeout Count: 0
: 100.1.0.26
: 100.1.0.10
:
Response Window Fields:
IP Address
Displays the IP Address entered on the setup window.
MAC Address
When a Single Ping is successful, the MAC Address is displayed. When the test has failed, the MAC Address
field does not display, and a timeout result is displayed.
Result or Last Result
Will indicate if the host is responding to the test. Result notices will be one of the following:
Host Responding - This is a successful test with a ping responding.
Destination Unreachable - This is an unsuccessful test. The Router is not able to talk to the IP Address.
Timeout - This is an unsuccessful test. There is no response within a reasonable amount of time.
Response Count
During successful testing the Response Count field will display the number of times that the Router received
an echo back from the device.
Timeout Count
The Timeout Count will increment with each unsuccessful ping. During successful testing, the Timeout
Count field will display a 0, which means that no communications errors have been encountered.
NOTE: A continuous ping test may be intermittently unsuccessful. This is an indication that
a transmission error may occur with this device during actual data transmission.
8-4
Terminal Server Router - Release 2.97
Verification Window
Trace Route
Trace Route
The Trace Route option is used to verify timely and reliable connections. The Trace Route utility
determines the path a packet follows from source to destination.
1. On the Main Menu, press [TAB] until the Ping Utility is highlighted on the Verification
option.
2. Press [SPACEBAR] to scroll to Trace Route.
3. Press [ENTER]. The Trace Route window will display.
Terminal Server Router - Release 2.97
8-5
Verification Window
Trace Route
Trace Route Utility - <START TRACERT> - >
After all parameters are entered, select <START TRACERT> and [ENTER] to start the trace.
DstHost (Destination Host)
Enter an IP Address or, domain name to use for this query. IP Address must be in the form of xxx.xxx.xxx.xxx,
where xxx is between 0-255.
Src Port (Source Port)
Scroll through the available options (Local LAN and Remote Units).
SrcIP Port (Source IP Port)
The source IP address from any of the routers numbered IP addresses. Default is the IP address of the router
interface used to send the packets.
InitialTTL
This optional parameter defines the beginning of the range of hops to query. Range is 1 - 254 hops.
Note: must be less than MaxTTL. Default is 1.
MaxTTL
This optional parameter defines the end (or the maximum) of the range of hops to query. Range is 2 - 255 hops.
Note: must be more than InitialTTL. Default is 30.
Method
<ICMP> - Internet Control Message Protocol (ICMP) method of trace routing is the most widely used and has
the best reliability. (Default).
<UDP> - User Datagram Protocol (UDP) method requires that all devices in the chain of the trace route support
probes on the particular UDP port. This method is not recommended.
Size
Define Packet Size. Range 0 - 65500
IP: Tos
Sets the IP type of service. Range 0x00 - 0xFF Hex. Default is 0.
Don’t Frag
Sets the "Don’t Fragment" flag in the IP header. This can be used along with the size setting to determine the
maximum payload size that can be sent between the router and the destination without fragmentation occurring,
the path MTU.
UDP Port
Sets the UDP port to send to. Range is 1 - 65535, with a default of 33434. This setting only applies if the method
is set to UDP.
Query: Number
Defines the number of probe packets sent to each hop along the route. Range is 1 - 10. Default is 3.
Wait
Defines the wait time between queries. Range is 0 - 250 ms. Default is 1 ms.
Timeout
Defines the query timeout. Range is 1 - 60 seconds. Default is 3 seconds.
8-6
Terminal Server Router - Release 2.97
Verification Window
Port Monitor
Port Monitor
The Port Monitor option is a diagnostic tool that can be used to review the actual data being transmitted
to, or received by the Local (LAN) unit. This can be especially useful in determining where a
transmission failure is occurring.
When monitoring is started, a hex display of each transmission, may be viewed as it occurs. The number
of packets that are displayed is determined by the value given at the Number of bytes to display for
each packet prompt. When attempting to determine a transmission problem, it may be useful to print
the hex displays for further analysis.
NOTE: The Port Monitor should only be used for installation verification and PPP negotiation
verification. Under normal operation the Port Monitor should not be used as it will decrease
performance, and if used for an extended period of time it may cause service interruption.
1. On the Main Menu, press [TAB] until the Ping Utility is highlighted on the Verification
option.
2. Press [SPACEBAR] to scroll to Port Monitor.
Terminal Server Router - Release 2.97
8-7
Verification Window
Port Monitor
3. Press [ENTER]. The Port Monitor window will display, along with a warning that using the
Port Monitor will degrade performance.
Port Name:
Select the Port Name, by scrolling through the list of (LAN Port, Remote Units) with the [SPACEBAR].
Start Monitor
Use this prompt to initiate the packet trace. Select START MONITOR - > and press [ENTER] to begin the trace.
As the transmission occurs, the packet hex dump will be displayed on the screen.
If you wish, you may end the trace at any point. Press [ESC] to terminate.
Trap On
Use this field to define what traps to turn on.
<All> - Enable all traps.
<No LCP/PVC> - No Link Control Protocol/PVC keep-alive packets
<ARP/RARP> - Address Resolution Protocol/Reverse Address Resolution Protocol
<ALL IP> - All IP addresses.
<IP ADDR #> - Enter IP address
<All UDP> - All UDP Protocol ports
<UDP Port # > - User Datagram Protocol. Port number range 0 - 65535
<BootP/DHCP> - Bootstrap Protocol/Dynamic Host Configuration Protocol
<RIP> - Routing Information Protocol
<STP> - Spanning Tree Protocol
<IPX> - Internet Packet Exchange
<ICMP> - Internet Control Message Protocol
<MGCP> - Master Gateway Control Protocol
<RTP> - Realtime Transport Protocol
<BLOCK TCP> - Block the Transmission Control Protocol
Number of bytes to display for each packet:
Use this field to enter the number of bytes to display for each packet. The range is 0-512.
8-8
Terminal Server Router - Release 2.97
Verification Window
Port Monitor
Direction
Use this field to define the direction to trace. <Both>, <Transmit> or <Receive>.
The following an example of a Port Monitor trace.
>>>Sending>>> Time= 2:55:31 msg-0001 WAN-WAN+2 14 octets (ESC to stop)
00: 00 01 03 08 00 75 95 01 01 00 03 02 67 66
FR DLCI-0 Bridged Eth
<<<Receiving<<< Time= 2:55:31 msg-0002 WAN-WAN+2 19 octets (ESC to stop)
00: 00 01 03 08 00 7D 95 01 01 00 03 02 67 67 07 03
10: 06 A0 82
FR DLCI-0 Bridged Eth
<<<Receiving<<< Time= 2:55:38 msg-0003 WAN-WAN+2 100 octets (ESC to stop)
00: 18 41 03 CC 45 00 00 60 E5 1F 00 00 7F 11 81 AA
10: 14 14 00 03 C0 A8 00 04 00 89 00 89 00 4C 48 0F
FR DLCI-100 IP
IP4-HDR: src=20.20.0.3 dst=192.168.0.4 ttl=127 len=20
UDP-HDR: Ports src=137 dst=137 len=76 cksum is=480F,cacl=0
>>>Sending>>> Time= 2:55:38 msg-0004 WAN-WAN+2 100 octets (ESC to stop)
00: 18 41 03 CC 45 00 00 60 E5 1F 00 00 7E 11 82 AA
10: 14 14 00 03 C0 A8 00 04 00 89 00 89 00 4C 48 0F
FR DLCI-100 IP
IP4-HDR: src=20.20.0.3 dst=192.168.0.4 ttl=126 len=20
UDP-HDR: Ports src=137 dst=137 len=76 cksum is=480F,cacl=0
Terminal Server Router - Release 2.97
8-9
Verification Window
Port Monitor
8-10
Terminal Server Router - Release 2.97
CHAPTER
9
Statistics Window
The Statistics window is used to review data transmission information between the Local
(LAN) unit and Remote (WAN) devices. This option allows you to review data transmission
statistics to/from remote units. This data will help you to monitor the Router’s connection/
performance capabilities such as throughput, compression, and errors.
In this Chapter
Run-Time
Statistics Window
Run-Time
Run-Time
Use this screen to review the statistics regarding data transmission to and from remote units. All remote
units that appear on the Profile Directory screen will be displayed here. If no data is currently being
transmitted to a specific unit, the transmission fields will display 0’s.
1. On the Main Menu, press [TAB] until the Run-time is highlighted on the Statistics option.
2. Press [ENTER]. The Run-time Statistics window will display.
9-2
Terminal Server Router - Release 2.97
Statistics Window
Run-Time
Auto-Update
Use this field to select whether you wish to have this screen automatically updated with new transmission statistics
while you are viewing the screen. <On> will update the screen every 2 seconds. <Off> will disable this feature.
Clear < > Totals
Use this field to reset (clear) the total packets displayed in the following fields.
<All>
Will clear both the LAN and WAN Packet Totals.
<LAN>
Will clear only the LAN Packet Totals.
<WAN>
Will clear only the WAN Packet Totals.
LAN Packet Totals
Use this field to review the number of LAN packets that the local unit has Received, Transmitted, and contained
Errors. If Auto-Update is set to <No>, the LAN packet totals will not increment while the screen is displayed.
Received
This field will increment as packets are received from the LAN. For this total to update,
Auto-Update must be <On>.
Transmitted
This field will increment as packets are transmitted by the Router to the LAN. These include packets received
from the WAN as well as internally generated packets. For this total to update, Auto-Update must be <On>.
Errors
This field increments as packets are transmitted to, or received from the LAN in error. This includes RX CRC
errors (partial frames, aborted frames and “bad frames”) and TX retry failures and RX carrier loss errors. This
does not include bad packets that result from collisions. For this total to update, Auto-Update must be <On>.
Note: There are WAN protocol packets sent to the telephone company switch, even when there are no
active calls.
WAN Packet Totals
Use this field to review the number of WAN packets that the local unit has Received, Transmitted, and contained
Errors. If Auto-Update is set to <No>, the WAN packet totals will not increment while the screen is displayed.
Received
This field increments as packets are received from the WAN. This includes packets from all remote sites. For
this total to update, Auto-Update must be <On>.
Transmitted
This field increments as packets are received from the LAN and internally generated packets, such as network
optimization packets, which have been transmitted to the WAN. For this total to update, Auto-Update must
be <On>.
Errors
This field identifies packets that have been transmitted to, or received from the WAN in error. This includes
RX CRC errors (partial frames, aborted frames, long frames and “bad frames”) as well as aborted TX frames.
It is used to identify WAN communication problems prior to contacting the telephone company for further
diagnosis. For this total to update, Auto-Update must be <On>.
Remote’s Name
This field reflects the names of all the Remote (WAN) profiles listed in the Profile Directory.
Terminal Server Router - Release 2.97
9-3
Statistics Window
Run-Time
Forwarded to WAN
This field represents the number of data packets per second (pps) that are being forwarded from the LAN to the
respective remote units. Each screen update is a current snapshot of transmission activity.
Throughput to/from WAN
This field value displays two numbers which represent the current bandwidth utilization in bits per second (bps)
for each remote site listed. The TO number represents transmission utilization going from the LAN to the listed
remote unit. The FROM number represents transmission utilization received from the listed remote unit.
Comp. Ratio to/from WAN
Using advanced data compression algorithms, the Router constantly seeks to determine the best way to compress
the data to be transmitted across the WAN. The values in this field represent how much the Router was able to
compress the data. Since some data is more compressible than others, the compression ratio will reflect this.
Remote Conns.
The numeric value in this field represents the number of connections currently active per Remote (WAN) site.
9-4
Terminal Server Router - Release 2.97
CHAPTER
10
System Reports Window
In this Chapter
Events
Alarms
Networks/Servers
Address Tables
System Reports Window
Events
Events
Displays the log of events for the Router.
View the Event Log:
1. On the Main Menu, press [TAB] until Events is highlighted on the System Reports option.
2. Press [ENTER]. The Event Log will display.
10-2
Terminal Server Router - Release 2.97
System Reports Window
View the Event Log:
Auto-Update
<On> or <Off>.
Time
The value in this column represents the date and time that the specific event occurred. Events are displayed in
descending order with the most recent event displayed at the top of the screen.
Message
This column displays the actual event that occurred on the Router. Use this field to trace the activities of your
Router.
Count
If the same event occurs consecutively, the value in the count column will display the number of times that the
event occurred, although the message will display only once. Note that the time stamp reflects the date and time
that the event first occurred.
Terminal Server Router - Release 2.97
10-3
System Reports Window
Alarms
Alarms
This screen displays alarms that have occurred on your Router. When an alarm is triggered, the LED
labeled CRD on the front of the Router will be RED and will remain until the alarm is cleared. Unlike
the System Events, alarms will not increment the Count field each time they occur. Each alarm will be
listed separately and the Count field will display a value of 1.
Alarm listings will also appear as flashing or bold text entries in the User Event Log. Please note that
all alarms will generate SNMP traps.
The Alarm Log is cleared when the Router is reinitialized.
1. On the Main Menu, press [TAB] until the Alarms is highlighted on the System Reports option.
Use the [SPACEBAR] to scroll to Alarms if it not displayed.
10-4
Terminal Server Router - Release 2.97
System Reports Window
Alarms
2. Press [ENTER]. The Alarm Log will display.
Auto-Update
Use this field to have this screen automatically update with events while you are viewing the screen. <On> will
update the screen every 5 seconds, <Off> will disable this feature.
Time
Displays the date and time that the alarm occurred. Alarms are displayed in descending order with the most recent
alarm first.
Message
Displays the actual alarm that triggered the alarm on the Router.
Count
Unlike the Event screen, the value in the count column will not increment each time that the alarm occurs. Note
that the time stamp reflects the time that the alarm first occurred.
Terminal Server Router - Release 2.97
10-5
System Reports Window
Networks/Servers
Networks/Servers
Use this screen to review all of the networks and servers that your Local (LAN) Unit has learned on its
Local LAN or from remote units, as well as static entries.
By sending out IPX and IP RIP (Routing Information Protocol) and IPX SAP (Service Advertising
Protocol) packets and monitoring RIP and SAP packets from other devices, the Router will learn about
other servers and networks. The Router will constantly monitor RIP and SAP packets to ensure that the
status of the network or server has changed. Should a RIP or SAP packet indicate a change in status, the
Router would update the data in the table and send the information to all enabled remotes to exchange
the updated data. This screen will change depending on the values in the Display and Learned From
fields.
1. On the Main Menu, [TAB] to the System Reports option.
2. Press [SPACEBAR] to scroll to Networks/Servers.
10-6
Terminal Server Router - Release 2.97
System Reports Window
Networks/Servers
3. Press [ENTER]. The Networks/Servers listing will display.
4. To view the other display options, scroll through the Display: <IP Networks> field.
Terminal Server Router - Release 2.97
10-7
System Reports Window
Networks/Servers
Display
Use this field to select whether you wish to view the table for <IP Networks>, <IPX Networks> or < IPX
Servers>. Use the [SPACEBAR] to scroll though the options, the screen will update accordingly.
Learned From
Will select what to learn from, the Local LAN or from any of the Remote sites listed in the Profile Directory. Use
the [SPACEBAR] to scroll though the options, the screen will update accordingly.
Auto-Update
Use this field to have this screen automatically update with events while you are viewing the screen. <On> will
update the screen every 5 seconds.
Network
This field displays the network IP address of each network known to the Router. If this route was added using one
of the Static Network screens, Static will appear before the address of this entry. If this route was learned by the
local unit, Direct will appear before the address.
Type
This field displays the Hex value assigned to each known server. This field applies only to IPX Servers.
Name
This field displays the first 11 characters of the name of each known server. This field applies only to IPX Servers.
Metric
This field displays the numeric value (of hops) indicating the distance from your Local (LAN) network to the
destination network. This field applies only to IP Networks.
Next Gateway
This field displays the MAC Address of the first gateway (router) that the data will use to reach the destination
network. This field is only used on IP Networks.
Hops
See Metric, above. This field is only used on IPX Networks.
Ticks
This field displays the distance between two networks as measured in time increments (1/18th of a second). This
information is only used by IPX Networks. Like hops, ticks may be used to designate primary and secondary
routes to the same network. Although both the hops and ticks values are considered when determining routing
priority, for Novell networks, the tick value is considered first.
Next IPX Router
This field displays the MAC Address of the next gateway (router) that the data will use to reach the destination
network. This applies only to IPX Networks.
Frame Type
This field will display the chosen frame type of the packets that are sent and received by the Router. If a packet is
received that is formatted in a frame type that has not been enabled, the Router will not accept the data. Note that
multiple frame types may be supported simultaneously. This field applies only to IPX Networks.
10-8
Terminal Server Router - Release 2.97
System Reports Window
Address Tables
Address Tables
Use this screen to review the MAC Address and IP Address of the devices that are known by the Local
Unit. The Router will monitor traffic on the LAN/WAN and dynamically learn the MAC Address and/
or IP Address of each device. This learning is a continuous process that occurs automatically as
communication takes place on the LAN or across the WAN. The MAC Address and IP Address Tables,
along with Network Tables are used to determine if and where the Router should send packets.
1. On the Main Menu, [TAB] to the System Reports option.
2. Press [SPACEBAR] to scroll to Address Tables.
Terminal Server Router - Release 2.97
10-9
System Reports Window
Address Tables
3. Press [ENTER]. The Address Tables window will display. These windows will change as
different options are selected.
MAC
Address
IP
Address
Flush Learned Entries
This field will eliminate all the learned entries from either the <MAC Address> table or the <IP Address> table
when the field is changed from <Off> to <On>. Use the [SPACEBAR] to scroll to the selection.
Display
Use this field to select to view the address table by <MAC Address> or <IP Address>. Use the [SPACEBAR]
to select the appropriate view. The screen will update accordingly as you scroll between options. When the view
by IP Address is selected, the table may also display the corresponding MAC Address for locally learned
devices. Corresponding MAC Addresses are only displayed if the Router has encountered an ARP/RARP packet.
Learned From
Will select to view devices learned from the LAN or from any remote units. This field will display either <All
Ports>, <Local LAN> or each of the individual Remotes listed in the Profile Directory. The screen will update
accordingly as you scroll between options.
Auto-Update
Use this field to have this screen automatically update with events while you are viewing the screen. <On> will
update the screen every 5 seconds.
10-10
Terminal Server Router - Release 2.97
System Reports Window
Address Tables
Port Name
Displays the Port Name of the learned address.
IP Address
Displays the IP Address of the learned address.
MAC Address
Displays the MAC Address of the learned address.
Terminal Server Router - Release 2.97
10-11
System Reports Window
Address Tables
10-12
Terminal Server Router - Release 2.97
CHAPTER
11
Exit Window
In this Chapter
Logout
Reinitialize
Exit Window
Logout
Logout
1. On the Main Menu, press [TAB] until the Logout is highlighted on the Exit option.
2. Press [ENTER]. The system will exit out of the Router GUI and the following message is
displayed.
11-2
Terminal Server Router - Release 2.97
Exit Window
Reinitialize
Reinitialize
Some changes that you make to the Management software will not take effect until the Router is
reinitialized. Since this procedure is common to all functions within the software, the reinitialization
procedure appears on the Main Menu.
1. On the Main Menu, press [TAB] until the Logout is highlighted on the Exit option.
2. Press [SPACEBAR] to scroll to Reinitialize.
3. Press [ENTER]. The following message is displayed:
Terminal Server Router - Release 2.97
11-3
Exit Window
Reinitialize
4. Press [SPACEBAR] to scroll <NO> to <YES>, and press [ENTER].
5. System will close the session and reboot.
11-4
Terminal Server Router - Release 2.97
CHAPTER
12
Router Configuration
In this Chapter
Basic Setup
PPP Internet Connection and Public IP Address
Routing
Frame Relay Internet Connection and Public IP
Address Routing
Internet Connection using PPP, NAT/PAT and
Firewall Filters
Internet Connection using NAT and Static NAT
Addresses
Back-to-Back with PPP
Back-to-Back with Multi-Link PPP
Back-to-Back with Frame Relay
Router Configuration
Basic Setup
Basic Setup
Command
Description
set {ds0-addr} type data
Confirm DS0 is set to type data.
ds0-addr = {slot:port:channel} of DS0
Example: set a:1:1-24 type data
connect {slot:port:trunk}
{slot:port:channel}
Cross-connect T1 to router card.
Example: connect a:1:1-24 6:1:1 (router in slot 6)
set {router-addr} proxy
Disable/enable router proxy.
router-addr = {slot:port}| of router card.
Example: set 6:1 disable.
set {slot:port} up
Set Router LAN as In-Service.
Example: set 6:1 up
telnet {router_card-addr}
Telnet to Router card.
router_card-addr = {slot} location of router card
Example: telnet 6 (if earlier than 3.0 release {slot:port} must
be used)
Local and Remote Profile Setup
reset
12-2
For most router configuration changes to go into
effect, the router must be reset. Best practice is to
always reset the router after making configuration
changes.
Terminal Server Router - Release 2.97
Router Configuration
PPP Internet Connection and Public IP Address Routing
PPP Internet Connection and Public IP Address Routing
Router in Slot 1
ISP Router that provides the Internet connection.
Command
Description
set clock1 a:1
Set primary master transmit clock source
set 1 default
Set Router to default settings
disconnect a:1
Disconnect all connections to the T1 on the Controller (slot
a)
disconnect 1
Disconnect all connections to the router in slot 1
set a:1:all type data
Set the T1-1 of the Controller, Type to Data
connect a:1:all 1:1:1
Connect all of T1-1 to the Router that is in slot 1
rename 1 "LocalUnit" "Boulder"
Rename the Unit from "LocalUnit" (default) to "Boulder"
(LAN)
rename 1 "RemoteUnit" "wan1"
Rename WAN #1 from "RemoteUnit" (default) to "wan1"
set 1:1 ip address 215.168.21.14
255.255.255.0
Set the ethernet IP address, in the conventional IP address
format. (Router LAN)
add 1 "wan1" static ip network 0.0.0.0
0.0.0.0 1
Adds a static IP network (route) to the WAN interface
set 1 "wan1" trunk 1
Set the WAN interface named "wan1" to be mapped to trunk
1
set 1:1:1 encapsulation ppp
Set the encapsulation on trunk 1 to PPP
reset 1
Reboot the router, to enable all configurations set
Terminal Server Router - Release 2.97
12-3
Router Configuration
Frame Relay Internet Connection and Public IP Address Routing
Frame Relay Internet Connection and Public IP Address Routing
Router in Slot 1
ISP Router that provides the Internet connection.
12-4
Command
Description
set clock1 a:1
Set primary master transmit clock source
set 1 default
Set Router to default settings
disconnect a:1
Disconnect all the T1connections on the Controller (slot a)
disconnect 1
Disconnect all connections to the router in slot 1
set a:1:all type data
Set the T1-1 of the Controller, Type to Data
connect a:1:all 1:1:1
Connect all of T1-1 to the Router that is in slot 1
rename 1 "LocalUnit" "Boulder"
Rename the Unit from "LocalUnit" (default) to "Boulder"
(LAN)
rename 1 "RemoteUnit" "wan1"
Rename WAN #1 from "RemoteUnit" (default) to "wan1"
set 1:1 ip address 215.168.21.14
255.255.255.0
Set the ethernet IP address, in the conventional IP address
format. (Router LAN)
add 1 "wan1" static ip network 0.0.0.0
0.0.0.0 1
Adds a static IP network (route) to the WAN interface
set 1:1:1 encapsulation fr
Set the encapsulation on trunk 1 to Frame Relay
set 1 lmi annexd
Disable LMI to Annex D
set 1 "wan1" trunk 1
Set the WAN interface "wan1" to be mapped to trunk 1
set 1 "wan1" dlci 101
Set the DLCI number
reset 1
Reboot the router, to enable all configurations set
Terminal Server Router - Release 2.97
Router Configuration
Internet Connection using PPP, NAT/PAT and Firewall Filters
Internet Connection using PPP, NAT/PAT and Firewall Filters
Router in Slot 1
ISP Router that provides the Internet connection. Router with NAT/PAT and Firewall Filters.
Command
Description
set clock1 a:1
Set primary master transmit clock source
set 1 default
Set Router to default settings
disconnect a:1
Disconnect all connections to the Controller T1 (a:1)
disconnect 1
Disconnect all connections to the router in slot 1
set a:1:all type data
Set the T1-1 of the Controller, Type to Data
connect a:1:all 1:1:1
Connect all of T1-1 to the Router that is in slot 1
rename 1 "LocalUnit" "Boulder"
Rename "LocalUnit" (default) to "Boulder" (LAN)
rename 1 "RemoteUnit" "wan1"
Rename WAN #1 from "RemoteUnit" (default) to "wan1"
set 1:1 ip address 192.168.21.14
255.255.255.0
Set the ethernet IP address, in the conventional IP address
format. (Router LAN)
set 1 "wan1" nat enable
Set the WAN interface named "wan1" enable NAT mapping
set 1 "wan1" nat port dynamic
Set the WAN interface named "wan1" to set NAT port
mapping to be dynamic
set 1 "wan1" nat address 216.174.44.2 1
Set the WAN interface named "wan1" NAT address
add 1 "wan1" static ip network 0.0.0.0
0.0.0.0 1
Adds a static IP network (route) to the WAN interface
add 1 "wan1" firewall 1 pass incoming
log telnet 192.168.21.14/32
xxx.xxx.xxx.xxx/32
Adds a Firewall rule to the WAN. Where xxx.xxx.xxx.xxx
is the host’s IP address at the far end that will be able to ping
or telnet to the router. 0.0.0.0/0 will allow any other host at
the far end to ping and/or telnet to the router.
add 1 "wan1" firewall 2 pass inout nolog
ping 192.168.21.14/32 xxx.xxx.xxx.xxx/32
Adds a Firewall rule to the WAN. Where xxx.xxx.xxx.xxx
is the host’s IP address at the far end that will be able to ping
or telnet to the router. 0.0.0.0/0 will allow any other host at
the far end to ping and/or telnet to the router.
add 1 "wan1" firewall 3 pass inout nolog
ping 0.0.0.0/0 0.0.0.0/0
Adds a Firewall rule to the WAN.
add 1 "wan1" firewall 4 pass inout nolog
tcp 1-65535 0.0.0.0/0 0.0.0.0/0
Adds a Firewall rule to the WAN.
add 1 "wan1" firewall 5 pass inout nolog
udp 1-65535 0.0.0.0/0 0.0.0.0/0
Adds a Firewall rule to the WAN.
set 1 "wan1" trunk 1
Set WAN interface "wan1" to be mapped to trunk 1
set 1:1:1 encapsulation ppp
Set the encapsulation on trunk 1 to PPP
reset 1
Reboot the router, to enable all configurations set
Terminal Server Router - Release 2.97
12-5
Router Configuration
Internet Connection using NAT and Static NAT Addresses
Internet Connection using NAT and Static NAT Addresses
Router in Slot 1
ISP Router that provides the Internet connection. Router with NAT and Static NAT addresses.
12-6
Command
Description
set clock1 a:1
Set primary master transmit clock source
set 1 default
Set Router to default settings
disconnect a:1
Disconnect all T1 connections on the Controller (slot a)
disconnect 1
Disconnect all connections to the router in slot 1
set a:1:all type data
Set the T1-1 of the Controller, Type to Data
connect a:1:all 1:1:1
Connect all of T1-1 to the Router that is in slot 1
rename 1 "LocalUnit" "Boulder"
Rename "LocalUnit" (default) to "Boulder" (LAN)
rename 1 "RemoteUnit" "wan1"
Rename WAN #1 from "RemoteUnit" (default) to "wan1"
set ethernet ip address 192.168.21.15
255.255.255.0
Set the Ethernet IP address and Subnet Mask for the Unit
set ip gateway 192.168.21.14
Set the IP gateway (default route) for the Unit
set 1:1 ip address 192.168.21.14
255.255.255.0
Set the ethernet IP address, in the conventional IP address
format. (Router LAN)
set 1 "wan1" nat enable
Set the WAN interface named "wan1" enable NAT mapping
set 1 "wan1" nat port dynamic
Set the WAN interface named "wan1" to set NAT port
mapping to be dynamic
set 1 "wan1" nat address 216.174.44.2 1
Set the WAN interface named "wan1" NAT address
add 1 "wan1" static ip network 0.0.0.0
0.0.0.0 1
Adds a static IP network (route) to the WAN interface
add 1 "wan1" static nat address
192.168.21.14 216.174.44.232
Add static NAT bi-directional mapping to wan1
add 1 "wan1" static nat address
192.168.21.15 216.174.44.233
Add static NAT bi-directional mapping to wan1
add 1 "wan1" static nat address
192.168.21.16 216.174.44.234
Add static NAT bi-directional mapping to wan1
add 1 "wan1" static nat address
192.168.21.17 216.174.44.235
Add static NAT bi-directional mapping to wan1
set 1:1:1 encapsulation fr
Set the encapsulation on trunk 1 to Frame Relay
set 1 lmi annexd
Disable LMI Annex D
set 1 "wan1" trunk 1
Set the WAN interface ( "wan1") to be mapped to trunk 1
set 1 "wan1" dlci 101
Set the DLCI number
reset 1
Reboot the router, to enable all configurations set
Terminal Server Router - Release 2.97
Router Configuration
Router in Slot 1
216.174.44.232 is the static NAT address assigned to the router.
216.174.44.233 is the static NAT address assigned to the controller.
216.174.44.234 is the static NAT address for a server*.
216.174.44.235 is the static NAT address for a host*.
*In the private network that can be reached from the outside world.
There can be up to 16 static NAT addresses, therefore the actual range can be 216.174.44.232 to
216.174.44.247. Only 4 were used in this example.
Terminal Server Router - Release 2.97
12-7
Router Configuration
Back-to-Back with PPP
Back-to-Back with PPP
The following configuration will set up two Routers back-to-back with PPP.
Boulder Router in Slot 1
12-8
Command
Description
set 1 default
Set Router to default settings
disconnect a:1
Disconnect all T1 connections on the Controller (slot a)
disconnect 1
Disconnect all connections to the router in slot 1
set a:1:all type data
Set the T1-1 of the Controller, Type to Data
connect a:1:all 1:1:1
Connect all of T1-1 to the Router that is in slot 1
rename 1 "LocalUnit" "Boulder"
Rename "LocalUnit" (default) to "Boulder" (LAN)
rename 1 "RemoteUnit" "wan1"
Rename WAN #1 from "RemoteUnit" (default) to "wan1"
set 1:1 ip address 1.1.1.1 255.255.255.0
Set the ethernet IP address, in the conventional IP address
format. (Router LAN)
set 1:1 phy auto
Set the Physical Specifications to auto-negotiate
set 1 "wan1" rip ip updates never
Set "wan1" to not send RIP updates
add 1 "wan1" static ip network 2.2.2.0
255.255.255.0 1
Adds a static IP network (route) to the WAN interface
set 1:1:1 encapsulation ppp
Set the encapsulation on trunk 1 to PPP
set 1 "wan1" trunk 1
Set the WAN interface "wan1" to be mapped to trunk 1
reset 1
Reboot the router, to enable all configurations set
Terminal Server Router - Release 2.97
Router Configuration
Denver Router in Slot 1
Denver Router in Slot 1
Command
Description
set 1 default
Set Router to default settings
disconnect a:1
Disconnect all T1 connections on the Controller (slot a)
disconnect 1
Disconnect all connections to the router in slot 1
set clock1 a:1
Set primary master transmit clock source
set a:1:all type data
Set the T1-1 of the Controller, Type to Data
connect a:1:all 1:1:1
Connect all of T1-1 to the Router that is in slot 1
rename 1 "LocalUnit" "Denver"
Rename "LocalUnit" (default) to "Denver" (LAN)
rename 1 "RemoteUnit" "wan1"
Rename WAN #1 from "RemoteUnit" (default) to "wan1"
set 1:1 ip address 2.2.2.1 255.255.255.0
Set the ethernet IP address, in the conventional IP address
format. (Router LAN)
set 1:1 phy auto
Set the Physical Specifications to auto-negotiate
set 1 "wan1" rip ip updates never
Set "wan1" to not send RIP updates
add 1 "wan1" static ip network 1.1.1.0
255.255.255.0 1
Adds a static IP network (route) to the WAN interface
set 1:1:1 encapsulation ppp
Set the encapsulation on trunk 1 to PPP
set 1 "wan1" trunk 1
Set the WAN interface "wan1" to be mapped to trunk 1
reset 1
Reboot the router, to enable all configurations set
Terminal Server Router - Release 2.97
12-9
Router Configuration
Back-to-Back with Multi-Link PPP
Back-to-Back with Multi-Link PPP
The following configuration will set up two Adit 600 Routers back-to-back with Multi-Link PPP.
Boulder Router in Slot 1
12-10
Command
Description
set 1 default
Set Router to default settings
disconnect a:1
Disconnect all connections to the T1 on the Controller
(slot a)
disconnect 1
Disconnect all connections to the router in slot 1
set a:1:all type data
Set the T1-1 of the Controller, Type to Data
connect a:1:all 1:1:1
Connect all of T1-1 to the Router that is in slot 1
connect a:2:all 1:1:2
Connect all of T1-2 to the Router that is in slot 1
rename 1 "LocalUnit" "Boulder"
Rename the "LocalUnit" (default) to "Boulder" (LAN)
set 1:1:1-2
Assign 1:1:1-2 to multilink group 1
multilink group 1
rename 1 "RemoteUnit" "wan1"
Rename WAN #1 from "RemoteUnit" (default) to
"wan1"
set 1:1 ip address 1.1.1.1 255.255.255.0
Set the Ethernet IP address, in the conventional IP
address format. (Router LAN)
add 1 "wan1" static ip network 2.2.2.0
255.255.255.0 1
Adds a static IP network (route) to the WAN interface
set 1 "wan1" trunk multilink group 1
Set the WAN interface named "wan1" to be mapped to
trunk multilink group 1
reset 1
Reboot the router, to enable all configurations set
Terminal Server Router - Release 2.97
Router Configuration
Denver Router in Slot 1
Denver Router in Slot 1
Command
Description
set 1 default
Set Router to default settings
disconnect a:1
Disconnect all connections to the T1 on the Controller
(slot a)
disconnect 1
Disconnect all connections to the router in slot 1
set clock1 a:1
Set primary master transmit clock source
set a:1:all type data
Set the T1-1 of the Controller, Type to Data
connect a:1:all 1:1:1
Connect all of T1-1 to the Router that is in slot 1
connect a:2:all 1:1:2
Connect all of T1-2 to the Router that is in slot 1
rename 1 "LocalUnit" "Denver"
Rename "LocalUnit" (default) to "Denver" (LAN)
set 1:1:1-2
Assign 1:1:1-2 to multilink group 1
multilink group 1
rename 1 "RemoteUnit" "wan1"
Rename WAN #1 from "RemoteUnit" (default) to
"wan1"
set 1:1 ip address 2.2.2.1 255.255.255.0
Set the ethernet IP address, in the conventional IP
address format. (Router LAN)
add 1 "wan1" static ip network 1.1.1.0
255.255.255.0 1
Adds a static IP network (route) to the WAN interface
set 1 "wan1" trunk multilink group 1
Set the WAN interface named "wan1" to be mapped to
trunk multilink group 1
reset 1
Reboot the router, to enable all configurations set
Terminal Server Router - Release 2.97
12-11
Router Configuration
Back-to-Back with Frame Relay
Back-to-Back with Frame Relay
The following configuration will set up two Routers back-to-back with Frame Relay.
Boulder Router in Slot 1
12-12
Command
Description
set clock1 internal
Set primary master transmit clock source
set 1 default
Set Router to default settings
disconnect a:1
Disconnect all T1 connections on the Controller (slot a)
disconnect 1
Disconnect all connections to the router in slot 1
set a:1:all type data
Set the T1-1 of the Controller, Type to Data
connect a:1:all 1:1:1
Connect all of T1-1 to the Router that is in slot 1
rename 1 "LocalUnit" "Boulder"
Rename "LocalUnit" (default) to "Boulder" (LAN)
rename 1 "RemoteUnit" "wan1"
Rename WAN #1 from "RemoteUnit" (default) to "wan1"
set 1:1 ip address 1.1.1.1 255.255.255.0
Set the ethernet IP address, in the conventional IP address
format. (Router LAN)
set 1:1 phy auto
Set the Physical Specifications to auto-negotiate
add 1 "wan1" static ip network 2.2.2.0
255.255.255.0 1
Adds a static IP network (route) to the WAN interface
set 1:1:1 encapsulation fr
Set the encapsulation on trunk 1 to Frame Relay
set 1 lmi disable
Disable LMI (Local Management Interface)
set 1 "wan1" trunk 1
Set the WAN interface "wan1" to be mapped to trunk 1
set 1 "wan1" dlci 101
Set the DLCI number
reset 1
Reboot the router, to enable all configurations set
Terminal Server Router - Release 2.97
Router Configuration
Denver Router in Slot 3
Denver Router in Slot 3
Command
Description
set 3 default
Set Router to default settings
disconnect a:1
Disconnect all T1 connections on the Controller (slot a)
disconnect 3
Disconnect all connections to the router in slot 1
set clock1 a:1
Set primary master transmit clock source
set a:1:all type data
Set the T1-1 of the Controller, Type to Data
connect a:1:all 3:1:1
Connect all of T1-1 to the Router that is in slot 1
rename 3 "LocalUnit" "Denver"
Rename "LocalUnit" (default) to "Denver" (LAN)
rename 3 "RemoteUnit" "wan1"
Rename WAN #1 from "RemoteUnit" (default) to "wan1"
set 3:1 ip address 2.2.2.1 255.255.255.0
Set the ethernet IP address, in the conventional IP address
format. (Router LAN)
set 3:1 phy auto
Set the Physical Specifications to auto-negotiate
add 3 "wan1" static ip network 1.1.1.0
255.255.255.0 1
Adds a static IP network (route) to the WAN interface
set 3:1:1 encapsulation fr
Set the encapsulation on trunk 1 to Frame Relay
set 3 lmi disable
Disable LMI (Local Management Interface)
set 3 "wan1" trunk 1
Set the WAN interface "wan1" to be mapped to trunk 1
set 3 "wan1" dlci 101
Set the DLCI number
reset 3
Reboot the router, to enable all configurations set
Terminal Server Router - Release 2.97
12-13
Router Configuration
Denver Router in Slot 3
12-14
Terminal Server Router - Release 2.97
APPENDIX
A
User Events
In this Appendix
User Events
Authenticate Events
Triggered Events
Alarms
User Events
User Events
User Events
Description
“access” login terminated
Adit Initialized
“IP Address” was dynamically assigned by “remote”
Login accepted at “access” level
Login rejected
Password changed for “access” level
Port “X” connected
Port “X” down
System Date/Time Change recorded
Terminal inactivity, login terminated
A-2
Terminal Server Router - Release 2.97
User Events
Authenticate Events
Authenticate Events
Description
“sysname” failed to authenticate us using CHAP
“sysname” failed to authenticate us using PAP
Authentication successful to “remote” using CHAP
Authentication successful to “remote” using PAP
Authentication failure to “remote” using CHAP
Authentication failure to “remote” using CHAP
CHAP secret mismatch
Authentication failure to “remote” using CHAP
system name mismatch
Authentication failure to “remote” using CHAP
Retry timeout occurred
WAN protocol is active (inactive) to “remote” on port “X”
LCP negotiation was successful to “remote”
IPCP negotiation was successful to “remote”
CCP negotiation failed to
Terminal Server Router - Release 2.97
A-3
User Events
Triggered Events
Triggered Events
Description
Triggered IPX Network request from “X”
Triggered IPX Server request (to) from “X”
Triggered 802.3 IPX Server update (to) from “X”
Triggered 802.3 IPX Network update (to) from “X”
Triggered 802.2 IPX Server update (to) from “X”
Triggered 802.2 IPX Network update (to) from “X”
Triggered ETH II IPX Network update (to) from “X”
Triggered ETH II IPX Server update (to) from “X”
Triggered SNAP IPX Network update (to) from “X”
Triggered SNAP IPX Server update (to) from “X”
Triggered IP Network request (to) from “X”
Triggered ETH II IP Network update (to) from “X”
A-4
Terminal Server Router - Release 2.97
User Events
Alarms
Alarms
Data integrity fault detected and corrected
This is logged when the unit detects and recovers from a loss of data synchronization.
Dedicated trunk connection on Port “X” lost
Description
[Local LAN, “remote”] [IPX SAP, IPX RIP] [“server name”,“network”] exists at [Local
LAN,“remote”]
MAC Address Table is full
Triggered 802.3 IPX (Eth II IP) network update to “remote” fail
Triggered 802.3 IPX server update to “remote” fail
WAN data loss detected, recovery action taken
This is logged when the unit begins the recovery process from trunks with high error conditions.
[Pass, Drop] [dyn] [Any, Protocol=xx,Type=xx,Port=xx] [to, from] <rem sys> Firewall Rule <rule
num>
Note: All alarms generate SNMP traps.
Terminal Server Router - Release 2.97
A-5
User Events
Alarms
A-6
Terminal Server Router - Release 2.97
APPENDIX
B
Protocol Types
In this Appendix
Protocol Number in Firewall Filters
Ethernet Protocol Types
Protocol Types
Protocol Number in Firewall Filters
Protocol Number in Firewall Filters
The Router card can filter based on protocol numbers. See Firewall Filters (Local Profile) on page 422 and Firewall Filters (Remote Profile) on page 5-31 for instructions. The following table defines the
protocol numbers.
B-2
Number
Keyword
Protocol
Reference
0
1
2
3
4
5
6
7
8
9
HOPOPT
ICMP
IGMP
GGP
IP
ST
TCP
CBT
EGP
IGP
[RFC1883]
[RFC702]
[RFC1112]
[RFC823]
[RFC2003]
[RFC1190, RFC1819]
[RFC793]
[Ballardie]
[RFC888, DLM1]
[IANA]
10
11
12
13
14
15
16
17
18
19
20
21
22
23
24
25
26
27
28
29
30
31
32
33
34
35
36
BBN-RCC-MON
NVP-II
PUP
ARGUS
EMCON
XNET
CHAOS
UDP
MUX
DCN-MEAS
HMP
PRM
XNS-IDP
TRUNK-1
TRUNK-2
LEAF-1
LEAF-2
RDP
IRTP
ISO-TP4
NETBLT
MFE-NSP
MERIT-INP
SEP
3PC
IDPR
XTP
IPv6 Hop-by-Hop Option
Internet Control Message
Internet Group Management
Gateway-to-Gateway
IP in PIP (encapsulation)
Stream
Transmission Control
CBT
Exterior Gateway Protocol
any private interior gateway
(used by Cisco for their IGRP)
BBN RCC Monitoring
Network Voice Protocol
PUP
ARGUS
EMCON
Cross Net Debugger
Chaos
User Datagram
Multiplexing
DCN Measurement Subsystems
Host Monitoring
Packet Radio Measurement
XEROX NS IDP
Trunk-1
Trunk-2
Leaf-1
Leaf-2
Reliable Data Protocol
Internet Reliable Transaction
ISO Transport Protocol Class 4
Bulk Data Transfer Protocol
NFE Network Services Protocol
MERIT Internodal Protocol
Sequential Exchange Protocol
Third Party Connect Protocol
Inter-Domain Policy Routing Protocol
XTP
[SGC]
[RFC741, SC3]
[PUP, XEROX]
[RWS4]
[BN7]
[IEN158, JFH2]
[NC3]
[RFC768, JBP]
[IEN90, JBP]
[DLM1]
[RFC890, RH6]
[ZSU]
[ETHERNET, XEROX]
[BWB6]
[BWB6]
[BWB6]
[BWB6]
[RFC908, RH6]
[RFC938, TXM]
[RFC905, RC77]
[RFC969, DDC1]
[MFENET, BCH2]
[HWB]
[JC120]
[SAF3]
[MXS1]
[GXC]
Terminal Server Router - Release 2.97
Protocol Types
Protocol Number in Firewall Filters
Number
Keyword
Protocol
Reference
37
38
DDP
IDPR-CMTP
[WXC]
[MXS1]
39
40
41
42
43
44
45
46
47
48
49
50
51
52
53
54
55
56
TP++
IL
IPv6
SDRP
IPv6-Route
IPv6-Frag
IDRP
RSVP
GRE
MHRP
BNA
ESP
AH
I-NLSP
SWIPE
NARP
MOBILE
TLSP
57
58
59
60
61
62
63
64
65
66
67
68
69
70
71
72
73
74
75
76
77
78
SKIP
IPv6-ICMP
IPv6-NoNxt
IPv6-Opts
Datagram Delivery Protocol
IDPR Control Message Transport
Protocol
TP++ Transport Protocol
IL Transport Protocol
IPv6
Source Demand Routing Protocol
Routing Header for IPv6
Fragment Header for IPv6
Inter-Domain Routing Protocol
Reservation Protocol
General Routing Encapsulation
Mobile Host Routing Protocol
BNA
Encap Security Payload for IPv6
Authentication Header for IPv6
Integrated Net Layer Security TUBA
IP with Encryption
NBMA Address Resolution Protocol
IP Mobility
Transport Layer Security Protocol using
Kryptonet key management
SKIP
ICMP for IPv6
No Next Header for IPv6
Destination Options for IPv6
any host internal protocol
CFTP
any local network
SATNET and Backroom EXPAK
Kryptolan
MIT Remote Virtual Disk Protocol
Internet Pluribus Packet Core
any distributed file system
SATNET Monitoring
VISA Protocol
Internet Packet Core Utility
Computer Protocol Network Executive
Computer Protocol Heart Beat
Wang Span Network
Packet Video Protocol
Backroom SATNET Monitoring
SUN ND PROTOCOL-Temporary
WIDEBAND Monitoring
CFTP
SAT-EXPAK
KRYPOTOLAN
RVD
IPPC
SAT-MON
VISA
IPCV
CPNX
CPHB
WSN
PVP
BR-SAT-MON
SUN-ND
WB-MON
Terminal Server Router - Release 2.97
[DXF]
[Presotto]
[Deering]
[DXE1]
[Deering]
[Deering]
[Sue Hares]
[Bob Braden]
[Tony Li]
[David Johnson]
[Gary Salamon]
[RFC2406]
[RFC2402]
[GLENN]
[J16]
[RFC1735]
[Perkins]
[Oberg]
[Markson]
[RFC1883]
[RFC1883]
[RFC1883]
[IANA]
[CFTP, HCF2]
[IANA]
[SHB]
[PXL1]
[MBG]
[SHB]
[IANA]
[SHB]
[GXT1]
[SHB]
[DXM2]
[DXM2]
[VXD]
[SC3]
[SHB]
[WM3]
[SHB]
B-3
Protocol Types
Protocol Number in Firewall Filters
B-4
Number
Keyword
Protocol
Reference
79
80
81
82
83
84
85
86
87
88
89
90
91
92
93
94
95
96
97
98
99
100
101
102
103
104
105
106
107
108
109
110
111
112
113
114
115
116
117
118
119
120
121
WB-EXPAK
ISO-IP
VMTP
SECURE-VMTP
VINES
TTP
NSFNET-IGP
DGP
TCF
EIGRP
OSPFIGP
Sprite-RPC
LARP
MTP
AX.25
IPIP
MICP
SCC-SP
ETHERIP
ENCAP
WIDEBAND EXPAK
ISO Internet Protocol
VMTP
SECURE-VMTP
VINES
TTP
NSFNET-IGP
Dissimilar Gateway Protocol
TCF
EIGRP
OSPFIGP
Sprite RPC Protocol
Locus Address Resolution Protocol
Multicast Transport Protocol
AZ.25 Frames
IP-within-IP Encapsulation Protocol
Mobile Internetworking Control Pro
Semaphore Communications Sec. Pro.
Ethernet-within-IP Encapsulation
Encapsulation Header
any private encryption scheme
GMTP
Ipsilon Flow Management Protocol
PNNI over IP
Protocol Independent Multicast
ARIS
SCPS
QNX
Active Networks
IP Payload Compression Protocol
Sitara Networks Protocol
Compaq Peer Protocol
IPX in IP
Virtual Router Redundancy Protocol
PBM Reliable Transport Protocol
any 0-hop protocol
Layer Two Tunneling Protocol
D-II Data Exchange (DDX)
Interactive Agent Transfer Protocol
Schedule Transfer Protocol
SpectraLink Radio Protocol
UTI
SMP
[SHB]
[MTR]
[DRC3]
[DRC3]
[BXH]
[JXS]
[HWB]
[DGP, ML109]
[GAL5]
[CISCO, GXS]
[RFC1583, JTM4]
[SPRITE, BXW]
[BXH]
[SXA]
[BK29]
[JI6]
[JI6]
[HXH]
[RFC3378]
[FRC1241, RXB3]
[IANA]
[RXB5]
[Hinden]
[Callon]
[Farinacci]
[Feldman]
[Durst]
[Hunter]
[Braden]
[RFC2393]
[Sridhar]
[Volpe]
[Lee]
[Hinden]
[Speakman]
[IANA]
[Aboba]
[Worley]
[Murphy]
[JMP]
[Hamilton]
[Lothberg]
[Ekblad]
GMTP
IFMP
PNNI
PIM
ARIS
SCPS
QNX
A/N
IPComp
SNP
Compaq-Peer
IPX-in-IP
VRRP
PGM
L2TP
DDX
IATP
STP
SRP
UTI
SMP
Terminal Server Router - Release 2.97
Protocol Types
Protocol Number in Firewall Filters
Number
Keyword
Protocol
Reference
122
123
124
125
126
127
128
129
130
131
132
133
134
135-254
255
SM
PTP
ISIS over IPv4
FIRE
CRTP
CRUDP
SSCOPMCE
IPLT
SPS
PIPE
SCTP
FC
RSVP-E2E-IGNORE
SM
Performance Transparency Protocol
[Crowcroft]
[Welzl]
[Przygienda]
[Partridge]
[Sautter]
[Sautter]
[Waber]
[Hollbach]
[McIntosh]
[Petri]
[Stewart]
[Rajagopal]
[RFC3175]
[IANA]
[IANA]
Terminal Server Router - Release 2.97
Combat Radio Transport Protocol
Combat Radio User Datagram
Secure Packet Shield
Private IP Encapsulation within IP
Stream Control Transmission Protocol
Fibre Channel
Unassigned
Reserved
B-5
Protocol Types
Ethernet Protocol Types
Ethernet Protocol Types
This table defines the protocol types that can be used by the LAN Protocol filters. The associated Hex
number is entered into the Ethernet Value field see, Defining Protocol Filters on page 4-20.
B-6
HEX
Description
0000-05DC
IEEE 802.3 Length Field (0-1500 decimal)
1010-01FF
Experimental (for development) Conflicts with 802.3 length fields
0200
Xerox PUP - Conflicts with 802.3 length fields
0201
PUP Address Translation - Conflicts with 802.3 length fields
0600
Xeros XNS IDP
0800
DOD IP
0801
X.75 Internet
0802
NBS Internet
0803
ECMA Internet
0804
CHAOSnet
0805
X.25 Level 3
0806
ARP (for IP and for CHAOS)
0807
SNX Compatibility
081C
Symbolics Private
0888-088A
Xyplex
0900
Ungermann-Bass network debugger
0A00
Xerox 802.3 PUP
0A01
PUP 802.3 Address Translation
0BAD
Banyan Systems Inc.
1000
Berkeley trailer negotiation
1001-100F
Berkeley Trailer encapsulation
1600
VALID
4242
BXS Basic Block Protocol
5208
BBN Simnet Private
6000
DEC Unassigned
6001
DEC MOP Dump/Load Assistance
6002
DEC MOP Remote Console
6003
DEC DECnet Phase IV
6004
DEC LAT
6005
DEC DECnet Diagnostics
6006
DEC DECnet Customer Use
6007
DEC DECnet SCA
6008
DEC unassigned
6009
DEC unassigned
Terminal Server Router - Release 2.97
Protocol Types
Ethernet Protocol Types
HEX
Description
6010-6014
3Com Corporation
7000
Ungermann-Bass download
7001
Ungermann-Bass NIU
7002
Ungermann-Bass NIU
7007
OS/9 Microware
7020-7029
LRT (England)
7030
Proteon
7034
Cabletron
8003
Cronus VLN
8004
Cronus Direct
8005
HP Probe protocol
8006
Nestar
8008
AT&T
8010
Excelan
8013
SGI diagnostic type (obsolete)
8014
SGI network games (obsolete)
8015
SGI reserved type (obsolete)
8016
SGI "bounce server" (obsolete)
8019
Apollo
802E
Tymshare
802F
Tigan, Inc.
8035
Reverse ARP
8036
Aeonic Systems
8038
DEC LANBridge
8039
DEC Unassigned
803A
DEC Unassigned
803B
DEC Unassigned
803C
DEC Unassigned
803D
DEC Ethernet CSMA/CD Encryption Protocol
803E
DEC Unassigned
803F
DEC LAN Traffic Monitor
8040
DEC Unassigned
8041
DEC Unassigned
8042
DEC Unassigned
8044
Planning Research Corporation
8046
AT&T
8047
AT&T
8049
ExperData (France)
Terminal Server Router - Release 2.97
B-7
Protocol Types
Ethernet Protocol Types
B-8
HEX
Description
805B
VMTP (Versatile Message Transaction Protocol, RFC-1045, Stanford)
805C
Stanford V Kernel production, Version 6.0
805D
Evans & Sutherland
8060
Little Machines
8062
Counterpoint Computers
8065
University of Massachusetts, Amherst
8066
University of Massachusetts, Amherst
8067
Vecco Integrated Automation
8068
General Dynamics
8069
AT&T
806A
Autophon (Switzerland)
806C
ComDesign
806D
Compugraphic Corporation
806E-8077
Landmark Graphics Corporation
807A
Matra (France)
807B
Dansk Data Elektronic A/S (Denmark)
807C
Merit Internodal
807D
VitaLink Communications
807E
VitaLink Communications
807F
VitaLink Communications
8080
VitaLink Communications bridge
8081
Counterpoint Computers
8082
Counterpoint Computers
8083
Counterpoint Computers
8088
Xyplex
8089
Xyplex
808A
Xyplex
809B
Kinetics Ethertalk-Appletalk over Ethernet
809C
Datability
809D
Datability
809E
Datability
809F
Spider Systems, Ltd. (England)
80A3
Nixdorf Computer (West Germany)
80A4-80B3
Siemens Gammasonics Inc.
80C0
Digital Communication Associates
80C1
Digital Communication Associates
80C2
Digital Communication Associates
80C3
Digital Communication Associates
Terminal Server Router - Release 2.97
Protocol Types
Ethernet Protocol Types
HEX
Description
80C6
Pacer Software
80C7
Applitek Corporation
80C8-80CC
Integraph Corporation
80CD
Harris Corporation
80CE
Harris Corporation
80CF-80D2
Taylor Inst.
80D3
Rosemount Corporation
80D4
Rosemount Corporation
80D5
IBM SNA Services over Ethernet
80DD
Varian Associates
80DE
Integrated Solutions TRFS (Transparent Remote File System)
80DF
Integrated Solutions
80E0-80E3
Allen-Bradley
80E4-80F0
Datability
80F2
Retix
80F3
Kinetics, AppleTalk ARP (AARP)
80F4
Kinetics
80F5
Kinetics
80F7
Apollo Computer
80FF-8103
Wellfleet Communications
8107
Symbolics Private
8108
Symbolics Private
8109
Symbolics Private
8130
Waterloo Microsystems
8131
VG Laboratory Systems
8137
Novell (old) NetWare IPX (ECONFIG E Option)
8138
Novell
8139-813D
KTI
9000
Loopback (Configuration Test Protocol)
9001
Bridge Communications XNS Systems Management
9002
Bridge Communications TCP/IP Systems Management
9003
Bridge Communications
FF00
BBN BITAL LANBridge cache wakeup
Terminal Server Router - Release 2.97
B-9
Protocol Types
Ethernet Protocol Types
B-10
Terminal Server Router - Release 2.97
APPENDIX
C
Troubleshooting
In this Appendix
Communication Related Issues
LAN Related Issues
Diagnostics and Performance Tools
- Verification
-
Statistics
System Reports
Troubleshooting
Communication Related Issues
Communication Related Issues
Excessive Triggered Update Events on the Events screen
This generally is an indication that the network is changing due to the addition or deletion of hardware.
Once the information has been exchanged, these events should subside. If this continues, it may indicate
that the number of networks or servers on the LAN exceed the Router’s table capacity. Set the LAN
NETWORK UPDATES field, located on the Local Profile window to <Send> or <Neither> and then
statically configure the appropriate networks.
Excessive triggered update events may also be the result of information advertised to the Router by a
Remote Unit. If this is the case, restrict advertising on the remote unit see, Chapter 5, Profile
Directory:Remote Profile.
LAN Related Issues
Unable to add data filters, advertise networks or create static route
entries
The Router software will accommodate a maximum of 150 filters. Data filters, such as address, custom
or protocol filters, networks advertised to no remotes, firewall filter rules and all static route entries are
all considered filters. If you have been able to add filters in the past, but are no longer able to do so, this
is an indication that the maximum limit has been reached. We suggest that you review all created data
filters, advertised networks and static route entries and eliminate those that are no longer applicable. See
Chapter 4, LAN (Local) Profile Overview.
C-2
Terminal Server Router - Release 2.97
Troubleshooting
Unable to add data filters, advertise networks or create static route entries
Unable to connect to anything outside
the LAN from LAN host
Ping the Router
LAN IP address
Is the ping
successful
No
No
Verify cabling is correct (straight cable
if connected to a switch or hub,
crossover if connected to a NIC)
Is the Link LED
green
Yes
Yes
Change IP
address and/or
subnet mask
No
Host & LAN IP in the
same subnet
Yes
Reboot host and
reinitialize router
Statistics:Run-Time
Check Remote Conns
No
WAN packets
received and
transmitted
No
Remote Conns 1
Yes
Yes
Verify that the
encapsulation is correct
and that there isn ’t an
authentication
mismatch
Check WAN profile
Static/VPN Networks
Correct network defined
No
No
Is T1 up
Repair T1 issue
Yes
Verify channels
match from end to
end. Verify that
remote router port is
enabled.
Add network to Static/
VPN Network field
Yes
Verify that remote router has route
defined back to local router ‘s newtorks
Terminal Server Router - Release 2.97
C-3
Troubleshooting
Unable to access the Local (LAN) Router unit via Telnet
Unable to access the Local (LAN) Router unit via Telnet
First, verify that the local Router was given an IP Address that is on the same network as the
workstation. Since Telnet uses the IP protocol, establish that IP is functioning correctly by “pinging”
the local unit from the workstation or by pinging the workstation from the local unit. Pinging will verify
that there is communication between the workstation and the Router. Since you are unable to Telnet into
the local unit, you will need to connect the local unit to a workstation using the Async port. Once you
are connected to the local unit, refer to Chapter 8, Ping Utility. The inability to ping from one device to
the other indicates a problem with IP or possibly the Telnet software. Refer to your Telnet
documentation for more information.
Unable to access a remote unit via Telnet
Refer to the instructions given above in Unable to access the local unit via Telnet. In addition, make
sure that the workstation trying to Telnet, as well as the IP and ARP packets are authorized to
communicate across the WAN. Review the FORWARD MODE field setting as well as the enabled
filters on both the local and remote units to verify that they are set up to communicate (refer to Chapter
3, Configuration - Profile Directory, Chapter 4, LAN (Local) Profile Overview, and Chapter 5, Remote
(WAN) Profile Overview. Also, if the remote network is different, define the local unit’s IP Address as
the default route for the workstation and make sure that there is a remote route to the remote’s network
in the Network/Server table.
Be aware that if you establish a firewall filter and do not expressly permit Telnetting into this unit, you
will be denied access.
C-4
Terminal Server Router - Release 2.97
Troubleshooting
Diagnostics and Performance Tools
Diagnostics and Performance Tools
The Verification, Statistics and System Reports features are instrumental in diagnosing and
troubleshooting the Router card.
Verification
The Verification section may be used to identify suspected communication problems between the local
and remote devices. Verification options are:
Ping Utility
Verifies the ability of the local unit to communicate by pinging remote or local devices. See Ping
Utility on page 8-2 for more information on this feature.
Trace Route
The Trace Route option is used to verify timely and reliable connections. The Trace Route utility
determines the path a packet follows from source to destination. See Trace Route on page 8-5 for
more information on this feature.
Port Monitor
The Port Monitor is a diagnostic tool that is used to review the actual data being transmitted from,
or received by the local Router. When the monitoring is started, a hexadecimal display of each
transmission as it occurs is shown. See Port Monitor on page 8-7 for more information on this
feature.
NOTE: The Port Monitor decreases the throughput of the Router. It should only during
installation and troubleshooting procedures, not during normal operation.
Terminal Server Router - Release 2.97
C-5
Troubleshooting
Statistics
Statistics
Run-Time
The Run-Time is used to review data transmission information between the Local (LAN) unit and
Remote (WAN) devices. This option allows you to review data transmission statistics to/from
remote units. This data will help you to monitor the Router’s connection/performance capabilities
such as throughput, compression, and errors. See Chapter 9, Statistics Window for more
information regarding this feature.
System Reports
The System Reports menu presents data that may be useful in identifying WAN communication
problems.
Events
The Events listing offers on-going historical activity for the Router, while the Alarm listing
indicates events that suggest further investigation. See Events on page 10-2 for more information
regarding this feature.
Alarms
This screen provides a listing of any Alarms that have occurred on the Router. When an Alarm is
triggered, the Router LED (labeled CRD) will display a red indicator light, which will stay on until
the Alarm is cleared. Each Alarm is listed separately and the Count field will display a value of 1.
See Alarms on page 10-4 for more information regarding this feature.
Network/Servers
By sending out IPX and IP RIP (Routing Information Protocol) and IPX SAP (Service Advertising
Protocol) packets and monitoring RIP and SAP packets from other devices, the Router will learn
about other servers and networks. The Router will constantly monitor RIP and SAP packets to
ensure that the status of the network or server has changed. Should a RIP or SAP packet indicate a
change in status, the Router would update the data in the table and send the information to all
enabled remotes to exchange the updated data. See Networks/Servers on page 10-6 for more
information regarding this feature.
Address Tables
The MAC Address and IP Address Tables, along with Network Tables are used to determine if and
where the Router should send packets. See Address Tables on page 10-9 for more information
regarding this feature.
C-6
Terminal Server Router - Release 2.97
Troubleshooting
Alarms
Alarms
Identify Alarm
Alarm indicators
Router LEDs - When an Alarm is triggered, the Router LED (labeled CRD) displays a red
indicator light that stays on until the Alarm is cleared
The Terminal Server Router card has 2 LEDs per port.
At Power-up
TOP LED
Bottom LED
Description
Off
Red
Flashing Red
Off
Red
Flashing Red
At Power Up/Boot = Loss of power
Card is inoperative
Self-test or Boot in-process
Normal Operation
TOP LED
Bottom LED
Description
Green Solid (Link)
Flashing Red
Green Solid (Link)
Flashing Red
Port set for Ethernet - see below
Self-test or Boot in-process
Port Set for Ethernet
Top LED indicates 100M Link, Bottom LED indicates 10M Link
State
Description
Off
Green
Red Flashing
Green Flashing
Yellow Flashing
No Ethernet link
Link but no activity
Current Ethernet collision
Current Ethernet receive
Current Ethernet transmit
Port Set for RS-232
TOP LED
Bottom LED
Description
Yellow
Yellow
Yellow
Off
Flashing Yellow
Flashing Green
No Activity
Current transmit
Current receive
Terminal Server Router - Release 2.97
C-7
Troubleshooting
Identify Alarm
Display Alarms
To display Router alarms:
On the Main Menu, System Reports option select <Alarms - >, or use the [SPACEBAR] to scroll
to Alarms if not displayed.
C-8
Terminal Server Router - Release 2.97
Troubleshooting
Clear Alarm
This Window provides a listing of any Alarms that have occurred on the Router. Each Alarm is
listed separately and the Count field will display a value of 1. See Alarms on page 10-4 for more
information regarding this feature.
Clear Alarm
Once an alarm is identified then the process of clearing it can begin.
Silence Alarm, if necessary (Alarm Cut Off CLI command: aco)
Check Connection
Check Cable, replace if necessary
Check hardware and replace if necessary
Call Customer Service
Terminal Server Router - Release 2.97
C-9
Troubleshooting
Clear Alarm
C-10
Terminal Server Router - Release 2.97
Glossary
GLOSSARY
Annex D
A frame relay standard extension dealing with the communication and signaling between
customer premises and equipment and frame relay network equipment for the purpose of
querying network status information.
B8ZS
Bipolar 8-Zero Substitution, a coding scheme that maintains ones density.
Bit
Contraction of the words "binary" and "digit".
bps
Bits per second
CHAP
Challenge Handshake Authentication Protocol
CLI
Command Line Interface
command line
The command line is where you enter MS-DOS commands.
CSU
Channel Service Unit, the interface to the T1 line that terminates the local loop.
DHCP
Dynamic Host Configuration Protocol. DHCP is a network configuration that allows
maintenance to be performed from a central site rather than by end users.
DNS
Domain Name Servers, also known as resolvers, are a system of computer which convert
domain names into IP addresses, which consist of a string of four numbers up to three digits
each.
filter
An operating parameter used with routers that can be set to block the transfer of packets
from one LAN to another.
firewall
Any of a number of security schemes that prevent unauthorized users from gaining access
to a computer network and/or may monitor the transfer of information to and from the
network.
frame
A fragment of data that is packaged into a frame format, which comprises a header,
payload, and trailer.
hops
Each individual short trip that packets make from router to router, as they are routed to their
destination.
IP
Internet Protocol
LMI
Local Management Interface. A specification for the use of frame-relay products that
define a method of exchanging status information between devices such as routers.
loopback
A diagnostic test in which a signal is transmitted across a medium while the sending device
waits for its return.
Glossary
Mbps
Million Bits Per Second.
NTP
Network Time Protocol, developed to maintain a common sense of time among Internet
hosts around the world. Many systems on the Internet run NTP, and have the same time
(relative to Greenwich Mean Time).
PAP
Password Authentication Protocol
ping
Packet InterNet Grouper. PING is a program used to test whether a particular network
destination on the Internet is online (i.e. working) by repeatedly bouncing a "signal" off a
specified address and seeing how long that signal takes to complete the round trip. No
return signal - site is down or unreachable. Portion is returned - trouble with the connection.
protocol
Procedure or set of rules.
PVC
Permanent Virtual Circuit. A PVC is a permanent channel connection between two ATM
devices. PVC’s allow network transmissions to be started without having to first establish
a connection with the end point ATM device. When a PVC is constructed, the end points
of the connection will agree upon a path in which data will travel, and therefore agree upon
the route that data will travel to reach its destination.
RADIUS
Remote Authentication Dial-In Service. RADIUS is a client/server-based authentication
software system. The software supports remote access applications, allowing an
organization to maintain user profiles in a centralized database residing on an
authentication server which can be shared by multiple remote access servers.
RIP
Routing Information Protocol. RIP is based on distance vector algorithms that measure the
shortest path between two points on a network, based on the addresses of the originating
and destination devices. The shortest path is determined by the number of "hops" between
those points. Each router maintains a routing table, or routing database, of known addresses
and routes; each router periodically broadcasts the contents of its table to neighboring
routers in order that the entire network can maintain a synchronized database.
SNMP
Simple Network Management Protocol. SNMP is the most common method by which
network managements applications can query a management agent using a supported MIB
(Management Information Base). SNMP operates at the OSI application layer.
Spanning Tree
Spanning Tree Protocol is a link management protocol that provides path redundancy while
preventing undesirable loops in the network. For an Ethernet network to function properly,
only one active path can exist between two stations.
SNMP
Simple Network Management Protocol. SNMP is the most common method by which
network managements applications can query a management agent using a supported MIB
(Management Information Base). SNMP operates at the OSI application layer.
TBOS
Telemetry Byte Oriented Serial. TBOS is an alarm monitoring and control prototype for
telephone network equipment.
T1
Trunk Level 1. A digital transmission link with a total signaling speed of 1.544 Mbps. T-1
is a standard for the digital transmission in North America
Glossary-2
Terminal Server Router - Release 2.97
Glossary
telnet
An Internet standard protocol that enables a computer to function as a terminal working
from a remote computer
trunk
A communication line between two switching systems.
Terminal Server Router - Release 2.97
Glossary-3
Glossary
Glossary-4
Terminal Server Router - Release 2.97
INDEX
Index
Numerics
B
100T
Full Duplex . . . . . . . . . . . . . . . . . . . . . . . . . . . . . . 4-45
Half Duplex . . . . . . . . . . . . . . . . . . . . . . . . . . . . . . 4-45
10T
Full Duplex . . . . . . . . . . . . . . . . . . . . . . . . . . . . . . 4-45
Half Duplex . . . . . . . . . . . . . . . . . . . . . . . . . . . . . . 4-45
802.2 . . . . . . . . . . . . . . . . . . . . . . . . . . . . . . . . . . . . . . . 4-4
802.3 . . . . . . . . . . . . . . . . . . . . . . . . . . . . . . . . . . . . . . . 4-4
B8ZS . . . . . . . . . . . . . . . . . . . . . . . . . . . . . . . . Glossary-1
Back-to-Back with PPP . . . . . . . . . . . . . . . . . . . . . . . 12-8
Basic Configuration
LocalUnit Identification . . . . . . . . . . . . . . . . . . . . . 7-4
Overview . . . . . . . . . . . . . . . . . . . . . . . . . . . . . . . . . 7-2
RemoteUnit Profile . . . . . . . . . . . . . . . . . . . . . . . . . 7-9
Routing Protocol/Security . . . . . . . . . . . . . . . . . . . 7-5
Setup Complete . . . . . . . . . . . . . . . . . . . . . . . . . . . 7-13
SNMP Configuration . . . . . . . . . . . . . . . . . . . . . . 7-12
WAN Interface Connections . . . . . . . . . . . . . . . . . . 7-7
Basic Setup . . . . . . . . . . . . . . . . . . . . . . . . . . . . . . . . 12-2
Bipolar 8 Zero Substitution . . . . . . . . . . . . . . . Glossary-1
Bit . . . . . . . . . . . . . . . . . . . . . . . . . . . . . . . . . . Glossary-1
bps . . . . . . . . . . . . . . . . . . . . . . . . . . . . . . . . . . Glossary-1
Bridge
Forward Delay . . . . . . . . . . . . . . . . . . . . . . 3-18, 3-20
Hello Time . . . . . . . . . . . . . . . . . . . . . . . . . . . . . . 3-18
Max Age . . . . . . . . . . . . . . . . . . . . . . . . . . . . . . . . 3-18
Priority . . . . . . . . . . . . . . . . . . . 3-18, 4-40, 5-43, 5-45
A
Access . . . . . . . . . . . . . . . . . . . . . . . . . . . . . . . . . . . . 7-12
Add a Firewall Filter (Local Profile) . . . . . . . . . . . . . 4-23
Add a Firewall Filter (Remote Profile) . . . . . . . . . . . 5-32
Address . . . . . . . . . . . . . . . . . . . . . . . . . . . . . . . . . . . . 7-12
Address Filter
Device Name . . . . . . . . . . . . . . . . . . . . . . . . . . . . . 4-21
MAC Address . . . . . . . . . . . . . . . . . . . . . . . . . . . . 4-21
Address Tables
Auto-Update . . . . . . . . . . . . . . . . . . . . . . . . . . . . 10-10
Display . . . . . . . . . . . . . . . . . . . . . . . . . . . . . . . . . 10-10
Learned From . . . . . . . . . . . . . . . . . . . . . . . . . . . . 10-10
Port Name . . . . . . . . . . . . . . . . . . . . . . . . . . . . . . 10-11
Admin
Password . . . . . . . . . . . . . . . . . . . . . . . . . . . . . . . . . 2-4
security level . . . . . . . . . . . . . . . . . . . . . . . . . . . . . . 2-3
Advertise
Network/Server . . . . . . . . . . . . . . . . . . . . . . 4-28, 4-30
Selected Items . . . . . . . . . . . . . . . . . . . . . . . . . . 4-30
Setup Advertisement . . . . . . . . . . . . . . . . . . . . . 4-30
Alarms . . . . . . . . . . . . . . . . . . . . . . . . . . . . . . . . . . . . A-5
Auto-Update . . . . . . . . . . . . . . . . . . . . . . . . . . . . . 10-5
Count . . . . . . . . . . . . . . . . . . . . . . . . . . . . . . . . . . . 10-5
Message . . . . . . . . . . . . . . . . . . . . . . . . . . . . . . . . . 10-5
Time . . . . . . . . . . . . . . . . . . . . . . . . . . . . . . . . . . . . 10-5
Annex D . . . . . . . . . . . . . . . . . . . . . . . . . . . . . . Glossary-1
Authenticate Events . . . . . . . . . . . . . . . . . . . . . . . . . . A-3
Authentication . . . . . . . . . . . . . . . . . . . . . . . . . . . . . . 5-16
by Remote . . . . . . . . . . . . . . . . . . . . . . . . . . . . . . . . 3-9
of Remote . . . . . . . . . . . . . . . . . . . . . . . . . . . . . . . . . 3-9
Protocol
CHAP . . . . . . . . . . . . . . . . . . . . . . . . . . . . . . . . . 3-9
PAP . . . . . . . . . . . . . . . . . . . . . . . . . . . . . . . . . . . 3-9
Auto
Logout Timer . . . . . . . . . . . . . . . . . . . . . . . . . . . . . . 2-3
Negotiate . . . . . . . . . . . . . . . . . . . . . . . . . . . . . . . . 4-45
Update . . . . . . . . . . . . . . . . . . . . . . . . 9-3, 10-5, 10-10
C
CHAP . . . . . . . . . . . . . . . . . . . . . . . . . . . 3-9, Glossary-1
Clear Totals
All . . . . . . . . . . . . . . . . . . . . . . . . . . . . . . . . . . . . . . 9-3
LAN . . . . . . . . . . . . . . . . . . . . . . . . . . . . . . . . . . . . 9-3
WAN . . . . . . . . . . . . . . . . . . . . . . . . . . . . . . . . . . . . 9-3
CLI . . . . . . . . . . . . . . . . . . . . . . . . . . . . . . . . . Glossary-1
Code Load . . . . . . . . . . . . . . . . . . . . . . . . . . . . . . . . . . 2-9
Command Line . . . . . . . . . . . . . . . . . . . . . . . . Glossary-1
Community Name . . . . . . . . . . . . . . . . . . . . . . . . . . . 3-12
Compression . . . . . . . . . . . . . . . . . . . . . . . . . . . . . . . 5-16
Ratio to/from WAN . . . . . . . . . . . . . . . . . . . . . . . . 9-4
Config Load . . . . . . . . . . . . . . . . . . . . . . . . . . . . . . . . 2-9
Config Password . . . . . . . . . . . . . . . . . . . . . . . . . . . . . 2-4
Config Upload/Download . . . . . . . . . . . . . . . . . . . . . . 2-9
config, security level . . . . . . . . . . . . . . . . . . . . . . . . . . 2-3
Configuration . . . . . . . . . . . . . . . . . . . . . . . . . . . . . . 12-1
Terminal Server . . . . . . . . . . . . . . . . . . . . . . . . . . . 6-2
connecting to the router . . . . . . . . . . . . . . . . . . . . . . . . 1-5
connecting with Telnet . . . . . . . . . . . . . . . . . . . . . . . . 1-5
Continuous Ping . . . . . . . . . . . . . . . . . . . . . . . . . . . . . 8-4
Continuous Ping Status
Response Count . . . . . . . . . . . . . . . . . . . . . . . . . . . 8-4
Timeout Count . . . . . . . . . . . . . . . . . . . . . . . . . . . . 8-4
CSU . . . . . . . . . . . . . . . . . . . . . . . . . . . . . . . . . Glossary-1
Index
D
F
Daylight Savings Time Adjustment . . . . . . . . . . . . . . . 2-3
Default Router . . . . . . . . . . . . . . . . . . . . . . . . . . . . . . 5-10
Defining
Address Filters . . . . . . . . . . . . . . . . . . . . . . . . . . . . 4-21
Custom Filters . . . . . . . . . . . . . . . . . . . . . . . . . . . . 4-19
Protocol Filters . . . . . . . . . . . . . . . . . . . . . . . . . . . 4-20
Device Name . . . . . . . . . . . . . . . . . . . . . . . . . . . . . . . 5-30
Devices, Local . . . . . . . . . . . . . . . . . . . . . . . . . 4-26, 5-35
DHCP . . . . . . . . . . . . . . . . . . . . . . . . . . . . . . . . Glossary-1
DHCP Server . . . . . . . . . . . . . . . . . . . . . . . . . . 4-34, 4-37
DHCP Server/BOOTP Relay
DHCP Server . . . . . . . . . . . . . . . . . . . . . . . . 4-34, 4-37
Domain Name . . . . . . . . . . . . . . . . . . . . . . . . . . . . 4-34
Domain Name Servers . . . . . . . . . . . . . . . . . . . . . . 4-34
Lease Duration . . . . . . . . . . . . . . . . . . . . . . . . . . . . 4-34
Name Server (NBNS) . . . . . . . . . . . . . . . . . . . . . . 4-35
NetBIOS Name Server . . . . . . . . . . . . . . . . . . . . . 4-35
NetBIOS Node Type . . . . . . . . . . . . . . . . . . . . . . . 4-35
Node Type . . . . . . . . . . . . . . . . . . . . . . . . . . 4-35, 4-36
Number . . . . . . . . . . . . . . . . . . . . . . . . . . . . . . . . . 4-34
Scope . . . . . . . . . . . . . . . . . . . . . . . . . . . . . . . . . . . 4-35
DHCP Server/Client/Relay . . . . . . . . . . . . . . . . . . . . 4-32
Diagnostics and Performance Tools . . . . . . . . . . . . . .C-5
Display . . . . . . . . . . . . . . . . . . . . . . . . . . . . . . . . . . . 10-10
DLCI . . . . . . . . . . . . . . . . . . . . . . . . . . . . . . . . . . . . . 7-11
DNS Proxy . . . . . . . . . . . . . . . . . . . . . . . . . . . . . . . . . 3-15
DNS Server . . . . . . . . . . . . . . . . . . . . . . . . . . . . . . 3-16
Domain Name . . . . . . . . . . . . . . . . . . . . . . . . . . . . 3-16
Site . . . . . . . . . . . . . . . . . . . . . . . . . . . . . . . . . . . . . 3-16
DNS Resolver . . . . . . . . . . . . . . . . . . . . . . . . . . . . . . 3-23
DNS Server . . . . . . . . . . . . . . . . . . . . . . . . . . . . . . . . 3-16
Domain Name . . . . . . . . . . . . . . . . . . . . . . . . . 3-16, 4-34
Facility . . . . . . . . . . . . . . . . . . . . . . . . . . . . . . . . . . . 3-22
Fields
Edit . . . . . . . . . . . . . . . . . . . . . . . . . . . . . . . . . . . . . 1-3
Scroll . . . . . . . . . . . . . . . . . . . . . . . . . . . . . . . . . . . . 1-3
Select . . . . . . . . . . . . . . . . . . . . . . . . . . . . . . . . . . . . 1-3
Filter . . . . . . . . . . . . . . . . . . . . . . . . . . . 5-40, Glossary-1
Filter Network/Server . . . . . . . . . . . . . . . . . . . . . . . . 5-37
Filter . . . . . . . . . . . . . . . . . . . . . . . . . . . . . . . . . . . 5-40
Learn . . . . . . . . . . . . . . . . . . . . . . . . . . . . . . . . . . . 5-40
Name . . . . . . . . . . . . . . . . . . . . . . . . . . . . . . . . . . . 5-40
Network . . . . . . . . . . . . . . . . . . . . . . . . . . . . . . . . 5-40
Selected Items
Filter/Learn . . . . . . . . . . . . . . . . . . . . . . . . . . . . 5-39
Setup . . . . . . . . . . . . . . . . . . . . . . . . . . . . . . . . . . . 5-39
Type . . . . . . . . . . . . . . . . . . . . . . . . . . . . . . . . . . . 5-40
Filters . . . . . . . . . . . . . . . . . . . . . . . . . . . . . . . . . . . . 4-16
Define . . . . . . . . . . . . . . . . . . . . . . . . . . . . . . . . . . 4-18
Define Filter . . . . . . . . . . . . . . . . . . . . . . . . . . . . . 4-18
Defining Custom . . . . . . . . . . . . . . . . . . . . . . . . . . 4-19
Filter Name . . . . . . . . . . . . . . . . . . . . . . . . . . . . . . 4-18
Filter Type . . . . . . . . . . . . . . . . . . . . . . . . . . . . . . 4-18
Firewall . . . . . . . . . . . . . . . . . . . . . . . . . . . . . . . . . 5-12
Firewall (Local Profile) . . . . . . . . . . . . . . . . 4-7, 4-22
Firewall (Remote Profile) . . . . . . . . . . . . . . . . . . . 5-31
Forward Mode . . . . . . . . . . . . . . . . . . . . . . . . . . . 4-18
Network/Server . . . . . . . . . . . . . . . . . . . . . . . . . . . 5-12
Setup . . . . . . . . . . . . . . . . . . . . . . . . . . . . . . . . . . . . 4-6
Source/Destination . . . . . . . . . . . . . . . . . . . . . . . . 4-18
Type . . . . . . . . . . . . . . . . . . . . . . . . . . . . . . . . . . . 4-18
Firewall . . . . . . . . . . . . . . . . . . . . . . . . . . . . . . Glossary-1
Filters . . . . . . . . . . . . . . . . . . . . . . . . . . . . . 5-12, 12-5
Local
Device(s) . . . . . . . . . . . . . . . . . . . . . . . . . . . 5-35
Local IP Address/Network . . . . . . . . . . . . . . . . 5-35
Packets which Match this Rule . . . . . . . . . . . . 5-36
Remote IP Address/Network . . . . . . . . . . . . . . 5-36
Rule #1 (Remote Profile) . . . . . . . . . . . . . . . . . 5-34
Services . . . . . . . . . . . . . . . . . . . . . . . . . . . . . . 5-35
Firewall (Local Profile)
Filters . . . . . . . . . . . . . . . . . . . . . . . . . . . . . . 4-7, 4-22
Local Device(s) . . . . . . . . . . . . . . . . . . . . . . . . 4-26
Local IP Address/Network . . . . . . . . . . . . . . . . 4-27
Packets which Match this Rule . . . . . . . . . . . . 4-27
Remote IP Address/Network . . . . . . . . . . . . . . 4-27
Rule #1 . . . . . . . . . . . . . . . . . . . . . . . . . . . . . . . 4-25
Services . . . . . . . . . . . . . . . . . . . . . . . . . . . . . . 4-26
Firewall (Remote Profile)
Filters . . . . . . . . . . . . . . . . . . . . . . . . . . . . . . . . . . 5-31
FW Allow Frags . . . . . . . . . . . . . . . . . . . . . . . . . . 5-11
Forward Mode . . . . . . . . . . . . . . . . . . . . . . . . . . . . . . 4-18
Forwarded to WAN . . . . . . . . . . . . . . . . . . . . . . . . . . . 9-4
E
Enhanced Security . . . . . . . . . . . . . . . . . . . . . . . . . . . . 2-5
Esc Key . . . . . . . . . . . . . . . . . . . . . . . . . . . . . . . . . . . . 1-2
Eth II . . . . . . . . . . . . . . . . . . . . . . . . . . . . . . . . . . . . . . 4-4
Events . . . . . . . . . . . . . . . . . . . . . . . . . . . . . . . . . . . . . 10-2
Authenticate . . . . . . . . . . . . . . . . . . . . . . . . . . . . . . .A-3
Count . . . . . . . . . . . . . . . . . . . . . . . . . . . . . . . . . . . 10-3
Message . . . . . . . . . . . . . . . . . . . . . . . . . . . . . . . . . 10-3
Time . . . . . . . . . . . . . . . . . . . . . . . . . . . . . . . . . . . . 10-3
Triggered . . . . . . . . . . . . . . . . . . . . . . . . . . . . . . . . .A-4
User . . . . . . . . . . . . . . . . . . . . . . . . . . . . . . . . . . . . .A-2
Excessive Triggered Update Events . . . . . . . . . . . . . .C-2
Exit . . . . . . . . . . . . . . . . . . . . . . . . . . . . . . . . . . . . . . . 11-1
Logout . . . . . . . . . . . . . . . . . . . . . . . . . . . . . . . . . . 11-2
Reinitialize . . . . . . . . . . . . . . . . . . . . . . . . . . . . . . . 11-3
Exiting . . . . . . . . . . . . . . . . . . . . . . . . . . . . . . . 11-2, 11-3
Index - 2
Terminal Server Router - Release 2.97
Index
Frame . . . . . . . . . . . . . . . . . . . . . . . . . . . . . . . Glossary-1
Relay . . . . . . . . . . . . . . . . . . . . . . . . . . . . . . . .3-7, 12-4
Type . . . . . . . . . . . . . . . . . . . . . . . . . . . . . . . . . . . 10-8
802.2 . . . . . . . . . . . . . . . . . . . . . . . . . . . . . . .4-4, 4-6
802.3 . . . . . . . . . . . . . . . . . . . . . . . . . . . . . . .4-4, 4-6
Eth II . . . . . . . . . . . . . . . . . . . . . . . . . . . . . . . . . . 4-4
Ethernet II . . . . . . . . . . . . . . . . . . . . . . . . . . . . . . 4-6
SNAP . . . . . . . . . . . . . . . . . . . . . . . . . . . . . . . . . 4-4
Frame Relay
Internet Connection . . . . . . . . . . . . . . . . . . . . . . . 12-4
G
Gateway . . . . . . . . . . . . . . . . . . . . . . . . . . . . . .4-12, 10-8
GRE Tunnel . . . . . . . . . . . . . . . . . . . . . . . . . . . . . . . . 5-6
H
Help . . . . . . . . . . . . . . . . . . . . . . . . . . . . . . . . . . . . . . . 1-4
Hops . . . . . . . . . . . . . . . . . . . . . . .4-11, 10-8, Glossary-1
I
Installation . . . . . . . . . . . . . . . . . . . . . . . . . . . . . . . . . 1-1
IP . . . . . . . . . . . . . . . . . . . . . . . . . . . . . . 7-10, Glossary-1
Address . . . . . . . . . . . . . . . . . . . . . . . . .5-30, 7-10, 8-4
Firewall (Local Profile)
Significant Bits . . . . . . . . . . . . . . . . . . . . . . . . . 4-27
Firewall significant bits . . . . . . . . . . . . . . . . . . . . 5-36
IPX . . . . . . . . . . . . . . . . . . . . . . . . . . . . . . . . . . . . . . 7-10
Router . . . . . . . . . . . . . . . . . . . . . . . . . . . . . .4-12, 10-8
Server Advertising . . . . . . . . . . . . . . . . . . . . . . . . 4-30
Name . . . . . . . . . . . . . . . . . . . . . . . . . . . . . . . . 4-31
Network . . . . . . . . . . . . . . . . . . . . . . . . . . . . . . 4-31
Selected Items . . . . . . . . . . . . . . . . . . . . . . . . . 4-31
Type . . . . . . . . . . . . . . . . . . . . . . . . . . . . . . . . . 4-31
L
LAN . . . . . . . . . . . . . . . . . . . . . . . . . . . . . . . . . . . . . .
Collision Threshold . . . . . . . . . . . . . . . . . . . . . . . .
Network Updates . . . . . . . . . . . . . . . . . . . . . . . . . .
Packet
Errors . . . . . . . . . . . . . . . . . . . . . . . . . . . . . . . . .
Received . . . . . . . . . . . . . . . . . . . . . . . . . . . . . . .
Transmitted . . . . . . . . . . . . . . . . . . . . . . . . . . . . .
Packet Totals . . . . . . . . . . . . . . . . . . . . . . . . . . . . .
LAN IP . . . . . . . . . . . . . . . . . . . . . . . . . . . . . . . . . . . .
Default Router . . . . . . . . . . . . . . . . . . . . . . . . . . . .
IP Address . . . . . . . . . . . . . . . . . . . . . . . . . . . . . . .
Subnet Mask . . . . . . . . . . . . . . . . . . . . . . . . . . . . . .
LAN IPX . . . . . . . . . . . . . . . . . . . . . . . . . . . . . . . . . . .
802.2 Ext. Network . . . . . . . . . . . . . . . . . . . . . . . . .
802.3 Ext. Network . . . . . . . . . . . . . . . . . . . . . . . . .
Ethernet II Ext. Network . . . . . . . . . . . . . . . . . . . .
Terminal Server Router - Release 2.97
9-3
4-7
4-5
9-3
9-3
9-3
9-3
4-6
4-6
4-6
4-6
4-6
4-6
4-6
4-6
LAN Port Tests
Continuous Ping Status
Response Count . . . . . . . . . . . . . . . . . . . . . . . . . . 8-4
Timeout Count . . . . . . . . . . . . . . . . . . . . . . . . . . . 8-4
Operation
Single Ping . . . . . . . . . . . . . . . . . . . . . . . . . . . . . 8-4
Single Ping Status . . . . . . . . . . . . . . . . . . . . . . . . . . 8-4
IP Address . . . . . . . . . . . . . . . . . . . . . . . . . . . . . . 8-4
MAC Address . . . . . . . . . . . . . . . . . . . . . . . . . . . 8-4
Result . . . . . . . . . . . . . . . . . . . . . . . . . . . . . . . . . . 8-4
Learn . . . . . . . . . . . . . . . . . . . . . . . . . . . . . . . . . . . . . 5-40
Lease Duration . . . . . . . . . . . . . . . . . . . . . . . . . . . . . . 4-34
Level . . . . . . . . . . . . . . . . . . . . . . . . . . . . . . . . . . . . . . 3-22
Link Speed . . . . . . . . . . . . . . . . . . . . . . . . . . . . . 4-7, 4-44
100T
Full Duplex . . . . . . . . . . . . . . . . . . . . . . . . . . . . 4-45
Half Duplex . . . . . . . . . . . . . . . . . . . . . . . . . . . . 4-45
10T
Full Duplex . . . . . . . . . . . . . . . . . . . . . . . . . . . . 4-45
Half Duplex . . . . . . . . . . . . . . . . . . . . . . . . . . . . 4-45
AutoNegotiate . . . . . . . . . . . . . . . . . . . . . . . . . . . . 4-45
LMI . . . . . . . . . . . . . . . . . . . . . . . . . . . . . . . . . Glossary-1
Local
Device(s) . . . . . . . . . . . . . . . . . . . . . . . . . . . . . . . . 4-26
IP Address . . . . . . . . . . . . . . . . . . . . . . . . . . . . . . . 5-25
Security Server . . . . . . . . . . . . . . . . . . . . . . . . . . . . . 3-9
Local Device(s) . . . . . . . . . . . . . . . . . . . . . . . . . . . . . 5-35
Local IP Address/Network . . . . . . . . . . . . . . . . 4-27, 5-35
Significant Bits . . . . . . . . . . . . . . . . . . . . . . 4-27, 5-35
Local Profile . . . . . . . . . . . . . . . . . . . . . 4-1, 4-2, 4-4, 6-1
Advertise Network/Server . . . . . . . . . . . . . . . . . . . 4-28
DHCP Server/Client/Relay . . . . . . . . . . . . . . . . . . 4-32
Filters . . . . . . . . . . . . . . . . . . . . . . . . . . . . . . . . . . . 4-16
Firewall Filters . . . . . . . . . . . . . . . . . . . . . . . . 4-7, 4-22
Frame Type . . . . . . . . . . . . . . . . . . . . . . . . . . . . . . . 4-4
802.2 . . . . . . . . . . . . . . . . . . . . . . . . . . . . . . . . . . 4-4
802.3 . . . . . . . . . . . . . . . . . . . . . . . . . . . . . . . . . . 4-4
Eth II . . . . . . . . . . . . . . . . . . . . . . . . . . . . . . . . . . 4-4
SNAP . . . . . . . . . . . . . . . . . . . . . . . . . . . . . . . . . . 4-4
LAN Network Updates . . . . . . . . . . . . . . . . . . . . . . 4-5
Link Speed . . . . . . . . . . . . . . . . . . . . . . . . . . . . . . . 4-44
LocalUnit . . . . . . . . . . . . . . . . . . . . . . . . . . . . . . . . . 4-4
Secondary IP Address . . . . . . . . . . . . . . . . . . . . . . 4-41
Setup . . . . . . . . . . . . . . . . . . . . . . . . . . . . . . . . . . . . 4-6
Filters . . . . . . . . . . . . . . . . . . . . . . . . . . . . . . . . . . 4-6
LAN Collision Threshold . . . . . . . . . . . . . . . . . . 4-7
Link Speed . . . . . . . . . . . . . . . . . . . . . . . . . . . . . . 4-7
Spanning Tree . . . . . . . . . . . . . . . . . . . . . . . . . . . . 4-38
Static Addresses . . . . . . . . . . . . . . . . . . . . . . . . . . . 4-13
Static Networks . . . . . . . . . . . . . . . . . . . . . . . . . . . . 4-8
Local Security Server . . . . . . . . . . . . . . . . . . . . . . . . . . 3-9
Index - 3
Index
LocalUnit
IP Address . . . . . . . . . . . . . . . . . . . . . . . . . . . . . . . . 7-4
Name . . . . . . . . . . . . . . . . . . . . . . . . . . . . . . . . . . . . 7-4
Reinitializing . . . . . . . . . . . . . . . . . . . . . . . . . . . . . 11-4
Subnet Mask . . . . . . . . . . . . . . . . . . . . . . . . . . . . . . 7-4
LocalUnit Identification . . . . . . . . . . . . . . . . . . . . . . . . 7-4
IP Address . . . . . . . . . . . . . . . . . . . . . . . . . . . . . . . . 7-4
LocalUnit
Default Router . . . . . . . . . . . . . . . . . . . . . . . . . . . 7-4
Name . . . . . . . . . . . . . . . . . . . . . . . . . . . . . . . . . . 7-4
Subnet Mask . . . . . . . . . . . . . . . . . . . . . . . . . . . . 7-4
Location . . . . . . . . . . . . . . . . . . . . . . . . . . . . . . . . . . . 7-12
login setup . . . . . . . . . . . . . . . . . . . . . . . . . . . . . . . . . . 2-2
Logout . . . . . . . . . . . . . . . . . . . . . . . . . . . . . . . . . . . . 11-2
Loopback . . . . . . . . . . . . . . . . . . . . . . . . . . . . . Glossary-1
M
MAC Address . . . . . . . . . . . . . . . . . . . . . 4-21, 5-30, 8-4
Management
Overview . . . . . . . . . . . . . . . . . . . . . . . . . . . . . . . . . 2-2
Window . . . . . . . . . . . . . . . . . . . . . . . . . . . . . . . . . . 2-1
Mask, Subnet . . . . . . . . . . . . . . . . . . . . . . . . . . . . . . . 4-11
Mbps . . . . . . . . . . . . . . . . . . . . . . . . . . . . . . . . Glossary-2
Metric . . . . . . . . . . . . . . . . . . . . . . 4-11, 5-20, 5-22, 10-8
Mode Forward . . . . . . . . . . . . . . . . . . . . . . . . . . . . . . 4-18
N
Name . . . . . . . . . . . . . . . . . . . . . . . . . . . 3-12, 5-40, 7-12
Device . . . . . . . . . . . . . . . . . . . . . . . . . . . . . 4-15, 4-21
Remote . . . . . . . . . . . . . . . . . . . . . . . . . . . . . . . . . . . 9-3
Server (NBNS) . . . . . . . . . . . . . . . . . . . . . . . . . . . 4-35
NAT
Addresses . . . . . . . . . . . . . . . . . . . . . . . . . . . . . . . . 12-6
Bypass Subnets . . . . . . . . . . . . . . . . . . . . . . . . . . . 5-26
Gateway . . . . . . . . . . . . . . . . . . . . . . . . . . . . . . . . . . 5-6
IP Address . . . . . . . . . . . . . . . . . . . . . . . . . . . . . . . 5-25
NAT/PAT . . . . . . . . . . . . . . . . . . . . . . . . . . . . . . . . . . 12-5
NetBIOS
Name Server . . . . . . . . . . . . . . . . . . . . . . . . . . . . . 4-35
Node Type . . . . . . . . . . . . . . . . . . . . . . . . . . . . . . . 4-35
Network . . . . . . . . . . . . . . . .4-11, 4-30, 5-20, 5-22, 5-40
Network Time Protocol . . . . . . . . . . . . . . . . . . . . . . . 3-19
Networks/Servers
Frame Type . . . . . . . . . . . . . . . . . . . . . . . . . . . . . . 10-8
Hops . . . . . . . . . . . . . . . . . . . . . . . . . . . . . . . . . . . . 10-8
Metric . . . . . . . . . . . . . . . . . . . . . . . . . . . . . . . . . . 10-8
Name . . . . . . . . . . . . . . . . . . . . . . . . . . . . . . . . . . . 10-8
Network . . . . . . . . . . . . . . . . . . . . . . . . . . . . . . . . . 10-8
Next Gateway . . . . . . . . . . . . . . . . . . . . . . . . . . . . 10-8
Next IPX Router . . . . . . . . . . . . . . . . . . . . . . . . . . 10-8
Ticks . . . . . . . . . . . . . . . . . . . . . . . . . . . . . . . . . . . 10-8
Type . . . . . . . . . . . . . . . . . . . . . . . . . . . . . . . . . . . . 10-8
Index - 4
New Password . . . . . . . . . . . . . . . . . . . . . . . . . . . . . . . 1-6
Next
Gateway . . . . . . . . . . . . . . . . . . . . . . . . . . . 4-12, 10-8
IPX Router . . . . . . . . . . . . . . . . . . . . . . . . . 4-12, 10-8
Node Type . . . . . . . . . . . . . . . . . . . . . . . . . . . . 4-35, 4-36
Number
Bytes to Display . . . . . . . . . . . . . . . . . . . . . . . 8-8, 8-9
O
Operation
Single Ping . . . . . . . . . . . . . . . . . . . . . . . . . . . . . . . 8-4
P
Packet
RIP . . . . . . . . . . . . . . . . . . . . . . . . . . . . . . . . . . . . 4-29
SAP . . . . . . . . . . . . . . . . . . . . . . . . . . . . . . . . . . . . 4-29
Packets which match this rule . . . . . . . . . . . . . 4-27, 5-36
PAP . . . . . . . . . . . . . . . . . . . . . . . . . . . . . 3-9, Glossary-2
Password . . . . . . . . . . . . . . . . . . . . . . . . . . .1-6, 3-9, 3-10
Ping . . . . . . . . . . . . . . . . . . . . . . . . . . . . . . . . . Glossary-2
Continuous . . . . . . . . . . . . . . . . . . . . . . . . . . . . . . . 8-4
single . . . . . . . . . . . . . . . . . . . . . . . . . . . . . . . . . . . . 8-4
Single Status . . . . . . . . . . . . . . . . . . . . . . . . . . . . . . 8-4
Utility . . . . . . . . . . . . . . . . . . . . . . . . . . . . . . . . . . . 8-2
Port
Monitor . . . . . . . . . . . . . . . . . . . . . . . . . . . . . . . . . . 8-7
Name . . . . . . . . . . . . . . . . . . . . . . . . . . . . . . . . . . 10-11
Number . . . . . . . . . . . . . . . . . . . . . . . . . . . . . . . . . . 7-7
PPP . . . . . . . . . . . . . . . . . . . . . . . . . . 3-6, 3-7, 12-5, 12-8
in Frame Relay . . . . . . . . . . . . . . . . . . . . . . . . . . . . 3-7
Internet Connection . . . . . . . . . . . . . . . . . . . . . . . 12-3
Profile
Directory . . . . . . . . . . . . . . . . . . . . . . . . . . . . . 4-2, 6-2
Local . . . . . . . . . . . . . . . . . . . . . . . . . . . . . . . . . . . . 4-2
Name . . . . . . . . . . . . . . . . . . . . . . . . . . . . . . . . . . . 7-10
Remote . . . . . . . . . . . . . . . . . . . . . . . . . . . . . . . . . . 5-2
Protocol . . . . . . . . . . . . . . . . . .4-4, 5-5, 7-10, Glossary-2
Network Time . . . . . . . . . . . . . . . . . . . . . . . . . . . . 3-19
Spanning Tree . . . . . . . . . . . . . . . . . . .3-17, 4-38, 5-41
Types . . . . . . . . . . . . . . . . . . . . . . . . . . . . . . . . . . . . B-1
PVC . . . . . . . . . . . . . . . . . . . . . . . . . . . . . . . . . Glossary-2
R
Reboot
After Load Code . . . . . . . . . . . . . . . . . . . . . . . . . . . 2-9
After Load Config . . . . . . . . . . . . . . . . . . . . . . . . . . 2-9
Record
Configurable . . . . . . . . . . . . . . . . . . . . . . . . . . . . . . 4-2
Reinitialize . . . . . . . . . . . . . . . . . . . . . . . . . . . . . . . . 11-3
Remote
Connections . . . . . . . . . . . . . . . . . . . . . . . . . . . . . . 9-4
Name . . . . . . . . . . . . . . . . . . . . . . . . . . . . . . . . 8-8, 9-3
Terminal Server Router - Release 2.97
Index
Profile . . . . . . . . . . . . . . . . . . . . . . . . . . . . . . . .5-1, 5-2
Security . . . . . . . . . . . . . . . . . . . . . . . . . . . . . . . . . 5-12
Remote IP Address/Network . . . . . . . . . . . . . .4-27, 5-36
Significant Bits . . . . . . . . . . . . . . . . . . . . . . .4-27, 5-36
Remote Profile
Default Router . . . . . . . . . . . . . . . . . . . . . . . . . . . 5-10
Filter Network/Server . . . . . . . . . . . . . . . . . .5-12, 5-37
Firewall Filters . . . . . . . . . . . . . . . . . . . . . . .5-12, 5-31
FW Allow Frags . . . . . . . . . . . . . . . . . . . . . . . . . . 5-11
GRE Tunnel . . . . . . . . . . . . . . . . . . . . . . . . . . . . . . 5-6
Mode . . . . . . . . . . . . . . . . . . . . . . . . . . . . . . . . . . . . 5-5
NAT Bypass Subnets . . . . . . . . . . . . . . . . . . . . . . 5-26
NAT Gateway . . . . . . . . . . . . . . . . . . . . . . . . . . . . . 5-6
Numbered . . . . . . . . . . . . . . . . . . . . . . . . . . . . . . . . 5-9
Protocol . . . . . . . . . . . . . . . . . . . . . . . . . . . . . . . . . . 5-5
RemoteUnit . . . . . . . . . . . . . . . . . . . . . . . . . . . . . . . 5-4
Security/Options . . . . . . . . . . . . . . . . . . . . . . . . . . 5-12
Security/SNMP . . . . . . . . . . . . . . . . . . . . . . . . . . . 5-14
Setup . . . . . . . . . . . . . . . . . . . . . . . . . . . . . . . . . . . 5-12
Spanning Tree . . . . . . . . . . . . . . . . . . . . . . . . . . . . 5-41
Static Addresses . . . . . . . . . . . . . . . . . . . . . .5-12, 5-28
Static NAT Addresses . . . . . . . . . . . . . . . . . . . . . 5-24
Static Networks . . . . . . . . . . . . . . . . . . . . . . . . . . 5-12
Static/VPN Networks . . . . . . . . . . . . . . . . . . . . . . 5-17
Subnet Mask . . . . . . . . . . . . . . . . 3-22, 3-24, 3-26, 5-9
Trunk Port . . . . . . . . . . . . . . . . . . . . . . . . . . . . . . . 5-44
WAN Network Updates . . . . . . . . . . . . . . . . . . . . . 5-5
RemoteUnit . . . . . . . . . . . . . . . . . . . . . . . . . . . . . . . . . 5-4
RemoteUnit Profile . . . . . . . . . . . . . . . . . . . . . . . . . . . 7-9
Profile Name . . . . . . . . . . . . . . . . . . . . . . . . . . . . . 7-10
Protocol . . . . . . . . . . . . . . . . . . . . . . . . . . . . . . . . . 7-10
IP . . . . . . . . . . . . . . . . . . . . . . . . . . . . . . . . . . . 7-10
IPX . . . . . . . . . . . . . . . . . . . . . . . . . . . . . . . . . . 7-10
Other . . . . . . . . . . . . . . . . . . . . . . . . . . . . . . . . . 7-10
Reports Alarm Log . . . . . . . . . . . . . . . . . . . . . . . . . . 10-5
Response Count . . . . . . . . . . . . . . . . . . . . . . . . . . . . . 8-4
Result . . . . . . . . . . . . . . . . . . . . . . . . . . . . . . . . . . . . . 8-4
RIP . . . . . . . . . . . . . . . . . . . . . 4-5, 4-8, 5-17, Glossary-2
Mode Send . . . . . . . . . . . . . . . . . . . . . . . . . . . . . . . 3-5
RIP Mode Receive . . . . . . . . . . . . . . . . . . . . . . . . . . . 3-4
Router . . . . . . . . . . . . . . . . . . . . . . . . . . . . . . . . . . . . 12-1
Router Card Profile . . . . . . . . . . . . . . . . . . . . . . . . . . . 3-1
Configuration . . . . . . . . . . . . . . . . . . . . . . . . . . . . . 3-2
DNS Proxy . . . . . . . . . . . . . . . . . . . . . . . . . . . . . . 3-15
DNS Resolver . . . . . . . . . . . . . . . . . . . . . . . . . . . . 3-23
Network Time Protocol . . . . . . . . . . . . . . . . . . . . 3-19
Overview . . . . . . . . . . . . . . . . . . . . . . . . . . . . . . . . 3-2
RIP
Mode Receive . . . . . . . . . . . . . . . . . . . . . . . . . . . 3-4
Mode Send . . . . . . . . . . . . . . . . . . . . . . . . . . . . . 3-5
Security . . . . . . . . . . . . . . . . . . . . . . . . . . . . . . . . . . 3-8
SNMP . . . . . . . . . . . . . . . . . . . . . . . . . . . . . . . . . . 3-11
Terminal Server Router - Release 2.97
Spanning Tree Protocol . . . . . . . . . . . . . . . . . . . . . 3-17
SysLog . . . . . . . . . . . . . . . . . . . . . . . . . . . . . . . . . . 3-21
Trunk . . . . . . . . . . . . . . . . . . . . . . . . . . . . . . . . . . . . 3-6
Router Configuration . . . . . . . . . . . . . . . . . . . . . . . . . 12-1
Back-to-Back with PPP . . . . . . . . . . . . . . . . . . . . . 12-8
Basic Setup . . . . . . . . . . . . . . . . . . . . . . . . . . . . . . 12-2
Frame Relay Internet Connection . . . . . . . . . . . . . 12-4
Internet Connection using NAT . . . . . . . . . . . . . . . 12-6
Internet Connection using PPP,NAT/PAT . . . . . . 12-5
PPP Internet Connection . . . . . . . . . . . . . . . . . . . . 12-3
Routing Protocol/Security . . . . . . . . . . . . . . . . . . . . . . 7-5
Rule #1 (Local Profile) . . . . . . . . . . . . . . . . . . . . . . . 4-25
Rule #1 (Remote Profile) . . . . . . . . . . . . . . . . . . . . . . 5-34
Run-Time . . . . . . . . . . . . . . . . . . . . . . . . . . . . . . . . . . . 9-2
Auto-Update . . . . . . . . . . . . . . . . . . . . . . . . . . . . . . 9-3
Clear Totals . . . . . . . . . . . . . . . . . . . . . . . . . . . . . . . 9-3
All . . . . . . . . . . . . . . . . . . . . . . . . . . . . . . . . . . . . 9-3
LAN . . . . . . . . . . . . . . . . . . . . . . . . . . . . . . . . . . . 9-3
WAN . . . . . . . . . . . . . . . . . . . . . . . . . . . . . . . . . . 9-3
Comp. Ratio to/from WAN . . . . . . . . . . . . . . . . . . . 9-4
Errors . . . . . . . . . . . . . . . . . . . . . . . . . . . . . . . . . . . . 9-3
Forwarded to WAN . . . . . . . . . . . . . . . . . . . . . . . . . 9-4
LAN Packet Totals . . . . . . . . . . . . . . . . . . . . . . . . . 9-3
Statistics . . . . . . . . . . . . . . . . . . . . . . . . . . . . . . . . 9-3
Received . . . . . . . . . . . . . . . . . . . . . . . . . . . . . . . . . 9-3
Remote Connections . . . . . . . . . . . . . . . . . . . . . . . . 9-4
Remote’s Name . . . . . . . . . . . . . . . . . . . . . . . . . . . . 9-3
Throughput to/from WAN . . . . . . . . . . . . . . . . . . . . 9-4
Transmitted . . . . . . . . . . . . . . . . . . . . . . . . . . . . . . . 9-3
WAN Packet Totals . . . . . . . . . . . . . . . . . . . . . . . . . 9-3
S
SAP . . . . . . . . . . . . . . . . . . . . . . . . . . . . . . . . . . . . . . . 4-5
Scope . . . . . . . . . . . . . . . . . . . . . . . . . . . . . . . . . . . . . 4-35
Secondary IP Address . . . . . . . . . . . . . . . . . . . . . . . . 4-41
Security . . . . . . . . . . . . . . . . . . . . . . . . . . . . . . . . . . . . 3-8
Address . . . . . . . . . . . . . . . . . . . . . . . . . . . . . . . . . 3-10
Authentication by Remote . . . . . . . . . . . . . . . . . . . . 3-9
Authentication of Remote . . . . . . . . . . . . . . . . . . . . 3-9
CHAP . . . . . . . . . . . . . . . . . . . . . . . . . . . . . . . . . . . . 3-9
Local Security Server . . . . . . . . . . . . . . . . . . . . . . . 3-9
Password . . . . . . . . . . . . . . . . . . . . . . . . . . . . . . . . 3-10
Server . . . . . . . . . . . . . . . . . . . . . . . . . . . . . . . . . . . 5-16
Type . . . . . . . . . . . . . . . . . . . . . . . . . . . . . . . . . . . . . 3-9
User ID . . . . . . . . . . . . . . . . . . . . . . . . . . . . . . . . . . . 3-9
Security Level
1 - View . . . . . . . . . . . . . . . . . . . . . . . . . . . . . . . . . . 2-3
2 - Config . . . . . . . . . . . . . . . . . . . . . . . . . . . . . . . . . 2-3
3 - Admin . . . . . . . . . . . . . . . . . . . . . . . . . . . . . . . . . 2-3
Security/Options . . . . . . . . . . . . . . . . . . . . . . . . . . . . . 5-12
Security/SNMP . . . . . . . . . . . . . . . . . . . . . . . . 3-12, 5-14
Access . . . . . . . . . . . . . . . . . . . . . . . . . . . . . . . . . . 3-12
Index - 5
Index
Address . . . . . . . . . . . . . . . . . . . . . . . . . . . . . . . . . 3-12
Authentication by Remote . . . . . . . . . . . . . . . . . . . 5-16
Community Name . . . . . . . . . . . . . . . . . . . . . . . . . 3-12
Compression . . . . . . . . . . . . . . . . . . . . . . . . . . . . . 5-16
Password . . . . . . . . . . . . . . . . . . . . . . . . . . . . . . . . . 3-9
Security Server . . . . . . . . . . . . . . . . . . . . . . . . . . . 5-16
Typical Data . . . . . . . . . . . . . . . . . . . . . . . . . . . . . 5-16
Selected Items . . . . . . . . . . . . . . . . . . . . . . . . . . . . . . 5-39
Server IP Address . . . . . . . . . . . . . . . . . . . . . . 3-22, 3-24
Services (Local Profile) . . . . . . . . . . . . . . . . . . . . . . . 4-26
Services (Remote Profile) . . . . . . . . . . . . . . . . . . . . . 5-35
Set Poll Counter . . . . . . . . . . . . . . . . . . . . . . . . . . . . . . 7-8
Set Poll Interval . . . . . . . . . . . . . . . . . . . . . . . . . . . . . . 7-7
Setup
Advertisement . . . . . . . . . . . . . . . . . . . . . . . . . . . . 4-30
Local Profile . . . . . . . . . . . . . . . . . . . . . . . . . . . . . . 4-6
Setup Complete . . . . . . . . . . . . . . . . . . . . . . . . . . . . . 7-13
Significant Bits . . . . . . . . . . . . . . . . . . . 4-27, 5-35, 5-36
Single Ping . . . . . . . . . . . . . . . . . . . . . . . . . . . . . . . . . . 8-4
Single Ping Status . . . . . . . . . . . . . . . . . . . . . . . . . . . . 8-4
Continuous Ping . . . . . . . . . . . . . . . . . . . . . . . . . . . 8-4
IP Address . . . . . . . . . . . . . . . . . . . . . . . . . . . . . . . . 8-4
MAC Address . . . . . . . . . . . . . . . . . . . . . . . . . . . . . 8-4
Result . . . . . . . . . . . . . . . . . . . . . . . . . . . . . . . . . . . . 8-4
Site . . . . . . . . . . . . . . . . . . . . . . . . . . . . . . . . . . . . . . . 3-16
SNAP . . . . . . . . . . . . . . . . . . . . . . . . . . . . . . . . . . . . . . 4-4
SNMP . . . . . . . . . . . . . . . . . . . . . . . . . . 3-11, Glossary-2
Community Name . . . . . . . . . . . . . . . . . . . . . . . . . 3-12
Configuration . . . . . . . . . . . . . . . . . . . . . . . . . . . . . 7-12
SYS Contact . . . . . . . . . . . . . . . . . . . . . . . . . . . . . 3-12
SYS Location . . . . . . . . . . . . . . . . . . . . . . . . . . . . . 3-12
SYS Name . . . . . . . . . . . . . . . . . . . . . . . . . . . . . . . 3-12
Trap Destination
Address . . . . . . . . . . . . . . . . . . . . . . . . . . . . . . . 3-14
Location . . . . . . . . . . . . . . . . . . . . . . . . . . . . . . . 3-14
Name . . . . . . . . . . . . . . . . . . . . . . . . . . . . . . . . . 3-14
Trap Destinations . . . . . . . . . . . . . . . . . . . . . . . . . . 3-13
SNMP Communities
Access . . . . . . . . . . . . . . . . . . . . . . . . . . . . . . . . . . 7-12
Address . . . . . . . . . . . . . . . . . . . . . . . . . . . . . . . . . 7-12
Name . . . . . . . . . . . . . . . . . . . . . . . . . . . . . . . . . . . 7-12
SNMP Configuration
SNMP Communities . . . . . . . . . . . . . . . . . . . . . . . 7-12
SNMP Trap Destinations . . . . . . . . . . . . . . . . . . . . 7-12
SNMP Trap Destinations
Address . . . . . . . . . . . . . . . . . . . . . . . . . . . . . . . . . 7-12
Location . . . . . . . . . . . . . . . . . . . . . . . . . . . . . . . . . 7-12
Name . . . . . . . . . . . . . . . . . . . . . . . . . . . . . . . . . . . 7-12
Source Destination . . . . . . . . . . . . . . . . . . . . . . . . . . . 4-18
Spanning Tree . . . . . . . . . . . . . . . . . . . . . . . . . Glossary-2
Spanning Tree Protocol . . . . . . . . . . . . . 3-17, 4-38, 5-41
Bridge Forward Delay . . . . . . . . . . . . . . . . . 3-18, 3-20
Index - 6
Bridge Hello Time . . . . . . . . . . . . . . . . . . . . . . . . 3-18
Bridge Max Age . . . . . . . . . . . . . . . . . . . . . . . . . . 3-18
Bridge Priority . . . . . . . . . . . . . 3-18, 4-40, 5-43, 5-45
Start
IP Address . . . . . . . . . . . . . . . . . . . . . . . . . . . . . . . 4-34
Start Basic Configuration . . . . . . . . . . . . . . . . . . . . . . 7-2
Start Monitor . . . . . . . . . . . . . . . . . . . . . . . . . . . . . . . . 8-8
Static
Address . . . . . . . . . . . . . 4-13, 4-24, 5-12, 5-25, 5-26,
5-29, 5-33, 5-39, 5-45
Networks . . . . . . . . . . . . . . . . . . . . . . . . . . . . . . . . 5-12
Setup . . . . . . . . . . . . . . . . . . . . . . . . . . . . . . . . . . . 5-30
Static Addresses . . . . . . . . . . . . . . . . . . . . . . . . . . . . 5-28
Device Name . . . . . . . . . . . . . . . . . . . . . . . 4-15, 5-30
IP Address . . . . . . . . . . . . . . . . . . . . . . . . . . 4-15, 5-30
MAC Address . . . . . . . . . . . . . . . . . . . . . . . 4-15, 5-30
Setup Static . . . . . . . . . . . . . . . . . . . . . . . . . 4-15, 5-30
IP Address . . . . . . . . . . . . . . . . . . . . . . . . . . . . 4-15
MAC Address . . . . . . . . . . . . . . . . . . . . . . . . . . 4-15
Static NAT Addresses . . . . . . . . . . . . . . . . . . . 5-24, 12-6
Local IP Address . . . . . . . . . . . . . . . . . . . . . . . . . . 5-25
NAT IP Address . . . . . . . . . . . . . . . . . . . . . . . . . . 5-25
Static Networks . . . . . . . . . . . . . . . . . . . . . . . . . 4-8, 4-12
Hops . . . . . . . . . . . . . . . . . . . . . . . . . . . . . . . . . . . 4-11
Metric . . . . . . . . . . . . . . . . . . . . . . . . . . . . . . . . . . 4-11
Network . . . . . . . . . . . . . . . . . . . . . . . . . . . . . . . . 4-11
Next Gateway . . . . . . . . . . . . . . . . . . . . . . . . . . . . 4-12
Subnet Mask . . . . . . . . . . . . . . . . . . . . . . . . . . . . . 4-11
Ticks . . . . . . . . . . . . . . . . . . . . . . . . . . . . . . . . . . . 4-12
Static/VPN Networks . . . . . . . . . . . . . . . . . . . . . . . . 5-17
Metric . . . . . . . . . . . . . . . . . . . . . . . . . . . . . 5-20, 5-22
Network . . . . . . . . . . . . . . . . . . . . . . . . . . . 5-20, 5-22
Subnet Mask . . . . . . . . . . . . . . . . . . . . . . . . 5-20, 5-22
Statistics
Run-Time . . . . . . . . . . . . . . . . . . . . . . . . . . . . . . . . 9-2
Auto-Update . . . . . . . . . . . . . . . . . . . . . . . . . . . . 9-3
Clear Totals . . . . . . . . . . . . . . . . . . . . . . . . . . . . 9-3
Statistics Window . . . . . . . . . . . . . . . . . . . . . . . . . . . . 9-1
Subnet Mask . . . . . . . . . . . . . . . . . 4-11, 5-20, 5-22, 7-10
SYS Contact . . . . . . . . . . . . . . . . . . . . . . . . . . . . . . . 3-12
SYS Location . . . . . . . . . . . . . . . . . . . . . . . . . . . . . . 3-12
SYS Name . . . . . . . . . . . . . . . . . . . . . . . . . . . . . . . . . 3-12
SysLog . . . . . . . . . . . . . . . . . . . . . 3-21, 3-22, 3-23, 3-24
System Date and Time . . . . . . . . . . . . . . . . . . . . . . . . 2-3
System Log Message Service . . . . . . . . . . . . . 3-21, 3-23
System Reports
Address Tables
Auto-Update . . . . . . . . . . . . . . . . . . . . . . . . . . 10-10
Display . . . . . . . . . . . . . . . . . . . . . . . . . . . . . . 10-10
Learned From . . . . . . . . . . . . . . . . . . . . . . . . . 10-10
Port Name . . . . . . . . . . . . . . . . . . . . . . . . . . . . 10-11
Terminal Server Router - Release 2.97
Index
Alarms
Auto-Update . . . . . . . . . . . . . . . . . . . . . . . . . . . 10-5
Count . . . . . . . . . . . . . . . . . . . . . . . . . . . . . . . . 10-5
Message . . . . . . . . . . . . . . . . . . . . . . . . . . . . . . 10-5
Time . . . . . . . . . . . . . . . . . . . . . . . . . . . . . . . . . 10-5
Events . . . . . . . . . . . . . . . . . . . . . . . . . . . . . . . . . . 10-2
Count . . . . . . . . . . . . . . . . . . . . . . . . . . . . . . . . 10-3
Message . . . . . . . . . . . . . . . . . . . . . . . . . . . . . . 10-3
Time . . . . . . . . . . . . . . . . . . . . . . . . . . . . . . . . . 10-3
Networks/Servers . . . . . . . . . . . . . . . . . . . . . . . . . 10-8
Frame Type . . . . . . . . . . . . . . . . . . . . . . . . . . . 10-8
Hops . . . . . . . . . . . . . . . . . . . . . . . . . . . . . . . . . 10-8
Metric . . . . . . . . . . . . . . . . . . . . . . . . . . . . . . . . 10-8
Name . . . . . . . . . . . . . . . . . . . . . . . . . . . . . . . . 10-8
Network . . . . . . . . . . . . . . . . . . . . . . . . . . . . . . 10-8
Next Gateway . . . . . . . . . . . . . . . . . . . . . . . . . . 10-8
Ticks . . . . . . . . . . . . . . . . . . . . . . . . . . . . . . . . . 10-8
Type . . . . . . . . . . . . . . . . . . . . . . . . . . . . . . . . . 10-8
System Reports Window . . . . . . . . . . . . . . . . . . . . . 10-1
System Time/Login . . . . . . . . . . . . . . . . . . . . . . . .2-2, 2-3
Admin Password . . . . . . . . . . . . . . . . . . . . . . . . . . . 2-4
Auto-Logout Timer . . . . . . . . . . . . . . . . . . . . . . . . 2-3
Config Password . . . . . . . . . . . . . . . . . . . . . . . . . . . 2-4
Daylight Savings Time Adjustment . . . . . . . . . . . . 2-3
Enhanced Security . . . . . . . . . . . . . . . . . . . . . . . . . 2-5
System Date and Time . . . . . . . . . . . . . . . . . . . . . . 2-3
View Password . . . . . . . . . . . . . . . . . . . . . . . . . . . . 2-4
T
T1 . . . . . . . . . . . . . . . . . . . . . . . . . . . . . . . . . . Glossary-2
Tab Key . . . . . . . . . . . . . . . . . . . . . . . . . . . . . . . . . . . . 1-2
Telnet . . . . . . . . . . . . . . . . . . . . . . . . . . . . . . . Glossary-3
Telnet Session . . . . . . . . . . . . . . . . . . . . . . . . . . . . . . . 1-5
Terminal Server setup . . . . . . . . . . . . . . . . . . . . . . . . . 6-2
Throughput to/from WAN . . . . . . . . . . . . . . . . . . . . . 9-4
Ticks . . . . . . . . . . . . . . . . . . . . . . . . . . . . . . . . .4-12, 10-8
Time
Login Setup . . . . . . . . . . . . . . . . . . . . . . . . . . . . . . 2-3
setup . . . . . . . . . . . . . . . . . . . . . . . . . . . . . . . . . . . . 2-2
Timeout Count . . . . . . . . . . . . . . . . . . . . . . . . . . . . . . 8-4
Trace Route . . . . . . . . . . . . . . . . . . . . . . . . . . . . . . . . . 8-5
Trap Destinations . . . . . . . . . . . . . . . . . . . . . . . . . . . 3-13
Triggered Events . . . . . . . . . . . . . . . . . . . . . . . . . . . . . A-4
Troubleshooting . . . . . . . . . . . . . . . . . . . . . . . . . . . . . C-1
Communication Related Issues . . . . . . . . . . . . . . . C-2
LAN Related Issues . . . . . . . . . . . . . . . . . . . . . . . . C-2
Trunk . . . . . . . . . . . . . . . . . . . . . . . . . . . . 3-6, Glossary-3
Trunk Port . . . . . . . . . . . . . . . . . . . . . . . . . . . . . . . . . 5-44
WAN Connection . . . . . . . . . . . . . . . . . . . . . . . . . . 3-7
WAN Connection Type . . . . . . . . . . . . . . . . . . . . . 3-7
Type . . . . . . . . . . . . . . . . . . . . . . . . . . . . . . . . . . . . . 5-40
Typical Data . . . . . . . . . . . . . . . . . . . . . . . . . . . . . . . 5-16
Terminal Server Router - Release 2.97
U
Unable to
Access a Remote Unit via Telnet . . . . . . . . . . . . . . .C-4
Access the Local Router unit via Telnet . . . . . . . . .C-4
Add Data Filters . . . . . . . . . . . . . . . . . . . . . . . . . . . .C-2
Advertise Networks . . . . . . . . . . . . . . . . . . . . . . . . .C-2
Create Static Route Entries . . . . . . . . . . . . . . . . . . .C-2
Upload/Download . . . . . . . . . . . . . . . . . . . . . . . . . . . . 2-7
User Events . . . . . . . . . . . . . . . . . . . . . . . . . . . . A-1, A-2
Alarms . . . . . . . . . . . . . . . . . . . . . . . . . . . . . . . . . . A-5
User ID . . . . . . . . . . . . . . . . . . . . . . . . . . . . . . . . 3-9, 5-16
V
Verification
Ping Utility . . . . . . . . . . . . . . . . . . . . . . . . . . . . . . . . 8-2
Port Monitor . . . . . . . . . . . . . . . . . . . . . . . . . . . . . . . 8-7
Trace Route . . . . . . . . . . . . . . . . . . . . . . . . . . . . . . . 8-5
Verification Window . . . . . . . . . . . . . . . . . . . . . . . . . . 8-1
View
Password . . . . . . . . . . . . . . . . . . . . . . . . . . . . . . . . . 2-4
security level . . . . . . . . . . . . . . . . . . . . . . . . . . . . . . 2-3
W
WAN . . . . . . . . . . . . . . . . . . . . . . . . . . . . . . . . . . . . . . 9-3
Connection . . . . . . . . . . . . . . . . . . . . . . . . . . . . 3-7, 7-7
Connection Type . . . . . . . . . . . . . . . . . . . . . . . 3-7, 7-7
Frame Relay . . . . . . . . . . . . . . . . . . . . . . . . . . . . 3-7
PPP . . . . . . . . . . . . . . . . . . . . . . . . . . . . . . . . . . . 3-7
PPP in Frame Relay . . . . . . . . . . . . . . . . . . . . . . . 3-7
Network Updates . . . . . . . . . . . . . . . . . . . . . . . . . . . 5-5
Packet
Errors . . . . . . . . . . . . . . . . . . . . . . . . . . . . . . . . . . 9-3
Received . . . . . . . . . . . . . . . . . . . . . . . . . . . . . . . 9-3
Totals . . . . . . . . . . . . . . . . . . . . . . . . . . . . . . . . . . 9-3
Transmitted . . . . . . . . . . . . . . . . . . . . . . . . . . . . . 9-3
WAN Interface Connections . . . . . . . . . . . . . . . . . . . . 7-7
Port Number . . . . . . . . . . . . . . . . . . . . . . . . . . . . . . . 7-7
WAN Connection . . . . . . . . . . . . . . . . . . . . . . . . . . 7-7
WAN Connection Type . . . . . . . . . . . . . . . . . . . . . . 7-7
WAN Monitor
Number of Bytes to Display . . . . . . . . . . . . . . 8-8, 8-9
Remote Name . . . . . . . . . . . . . . . . . . . . . . . . . . . . . 8-8
Start Monitor . . . . . . . . . . . . . . . . . . . . . . . . . . . . . . 8-8
WAN Port Number . . . . . . . . . . . . . . . . . . . . . . . . . . 7-11
DLCI . . . . . . . . . . . . . . . . . . . . . . . . . . . . . . . . . . . 7-11
Index - 7
Index
Index - 8
Terminal Server Router - Release 2.97