1
USER MANUAL
DVD RW RECORDER
EXTERNAL DOUBLE LAYER DVD RW DRIVE / USB 2.0
WIN
Rev. 712
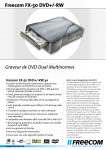
Freecom DVD RW Recorder
Dear user!
GB
welcome to the installation of your Freecom DVD RW Recorder. Before installing the
drive, please read through the following points regarding its compatibility with your
system.
Freecom Technologies • Germany
www.freecom.com
Copyright Statement
This product and the software contained within it are designed to assist you in reproducing
only material in which you own the copyright or for which you have obtained permission
to copy from the copyright owner. Unless you own the copyright or hold permission to
copy from the copyright owner, you may be violating copyright law and be subject to payment of damages and other remedies. If you are uncertain about your rights, you should
contact your legal advisor. You assume full responsibility for the legal and responsible
use of the product and the software.
Warning !
All rights reserved. The products named in this manual are only used for identification
purposes and may be trademarks or registered trademarks of the respective companies.
This device was designed for home or office use.
Warning! This device is equipment complying with EN55022 class B.
Freecom cannot be made liable for any damages, loss of data or damage following thereof
-whatsoever (including, without limitation, damages for loss of business profits, business
interruption, loss of business information, or other pecuniary loss) arising out of the use
of or inability to use this Freecom product, even if Freecom has been advised of the possibility of such damages.
We reserve the right to upgrade our products in keeping with technological advances.
Table of Contents
User’s manual
GB
General information............................................................................................................ Page 4
Chapter 1:
Start Up..................................................................................................................................... Page 6
Chapter 2:
Installing the application software................................................................................ Page 9
Chapter 3:
Using the Drive...................................................................................................................... Page 11
Chapter 4:
Trouble shooting - General problems........................................................................... Page 13
© 2007 Freecom Technologies
Freecom DVD RW Recorder
General information
GB
Reliable performance of the Freecom DVD RW Recorder cannot be guaranteed for configurations that do not meet the following requirements:
Hardware Requirements
To use the Freecom DVD RW Recorder, you must have a computer with the following
minimum requirements:
•
Intel / AMD CPU 1.6 GHz or faster
•
at least 512 MB RAM (1 GB recommended)
•
USB interface (USB 1.1 or USB 2.0*)
•
at least 2 GB of free hard disk space (10 GB recommended)
Software Requirements
The Freecom DVD RW Recorder is setup for use with the following operating systems:
•
Windows 2000
•
Windows XP
•
Windows Vista
* For maximum performance of the Freecom DVD RW Recorder, both computer system and software must
support USB 2.0. Connecting the Freecom DVD RW Recorder to a USB 1.1 interface will limit the CD recording
speed to 4x. DVD recording is not reliable through USB 1.1.
General information
Media standards
•
GB
DVD single/dual layer, DVD-R, DVD+R, DVD-RW, DVD+RW, CD-DA, CD-ROM, CD-ROM
XA, CD Extra, CD-I, Mixed-ModeCD, VideoCD, PhotoCD, CD TEXT, Bootable CD, Disc
At Once, Session At once, Track At Once, Multi-Session.
Precautionary Measures and General Notes
•
After transport, particularly at low outside temperatures, condensation can form
which can lead to a malfunctioning. For that reason, you should not begin operation
until the drive and CDs/DVDs have reached room temperature.
•
Operate the Freecom drive only in a horizontal position, to prevent damage to the
media or mechanical parts.
•
Operate the device only at temperatures ranging from 10 - 35 °C.
•
Do not use the device in a dusty and humid environment.
•
Protect the drive from shocks and other mechanical effects!
•
The device should not be operated in the vicinity of strong electromagnetic radiation
sources (loudspeakers, mobile telephones etc.).
•
Due to the high data transfer rates, the cable length should not exceed 1 m. Error-free
transmission cannot be guaranteed for longer cables.
•
The DVD RW Recorder is USB 2.0 compliant. While USB 2.0 supports CD recording
speeds higher than 4x, if this drive is connected to a USB 1.1 port the maximum CD
recording speed is 4x.
Freecom DVD RW Recorder
Chapter 1: Start Up
GB
1.1 Hardware installation
1
1. Connect the interface cable to the Freecom DVD RW
Recorder.
2. Connect the cable of the power supply to the Freecom
DVD RW Recorder and the power supply itself to the
socket.
3. Connect the interface cable to the interface port of your
computer.
4. Switch on the Freecom DVD RW Recorder.
Since USB .0 is backwards compatible with USB 1.1, the Freecom DVD RW
Recorder can be connected to all USB ports. When connected to a USB 1.1 port,
however,theperformance(datatransferrate)oftheFreecomDVD RW Recorder
will be much lower than when the drive is connected to a USB .0 port.
6
Start Up
GB
Note: You can plug the USB cable into your computer and unplug it while
the computer is running ("hot plug & play"). Remove the cable from the
computer when doing so, never remove the cable from the drive when
the computer is on.
1
For optimal performance, the Freecom DVD RW Recorder should always
be connected to a USB .0 port.
1. Power Switch
The Freecom DVD RW Recorder is always powered, even if the USB cable is disconnected
from your computer. Therefore, please turn off the Freecom DVD RW Recorder if it is not
used. The power switch is on the back side of the Freecom DVD RW Recorder.
Attention! Before switching off the Freecom DVD RW Recorder manually,
make sure to safely remove the Freecom DVD RW Recorder via your operating system (the „unplug or eject hardware“ option in the Windows
taskbar). Failing to do so may result in loss of data.
Note: In the event of no sound when an audio CD is placed into the Freecom DVD RW Recorder, "Enable Digital CD audio for this CD-ROM device"
from within "Control Panel"-"Multi Media".
7
Freecom DVD RW Recorder
1.3Driver Installation
GB
Under Windows 2000 , XP and Vista a separate driver is not required. The drivers will be
installed automatically by the operating system after plugging in the Freecom DVD RW
Recorder into the USB port of your computer.
1
Your Freecom DVD RW Recorder is fully backwards compatible with USB 1.1. The installation for USB 1.1 is the same as described below for USB 2.0.
1.4Allocation of the drive letter to the Freecom drive
After successfully completing the installation of the Freecom DVD RW Recorder, a new
drive letter is assigned automatically (the first available letter after the internal DVD RW
Recorders). This can shift the drive letter of an internal CD-ROM drive (for example, 'D'
to 'E'). If this leads to problems, it is possible to change the drive letter assignment as
follows:
1. Click "Start" - "Settings" - "Control Panel" - "Administration" - "Computer Administration".
2. Click "Disk Maintenance" and then select the Freecom drive.
3. In the "Operation" menu ("Action" in Windows XP), select All Tasks and then click
Change drive letter and path.
4. In the next window, click "Change" and select a drive letter in Assign the following
drive letters.
5. Click "Yes" to confirm your change.
Installing the application software
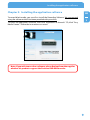
Chapter 2: Installing the application software
GB
To record blank media, you must first install the Recording Software. We recommend
using the software which has been provided with your drive.
2
To install the application software, insert the "Application & Manuals" CD, klick "Easy
Media Creator". Follow the instructions on screen.
Note: If you wish to use other software, please find out from the supplier
whether his products support the Freecom DVD RW Recorder.
Freecom DVD RW Recorder
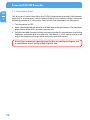
2.1 Special Instructions before Writing a CD / DVD
GB
2
•
You should realize that writing CD/DVDs is principally a sensitive data transmission
procedure which can be disrupted by even the smallest mechanical disturbance.
•
Never clean the Freecom DVD RW Recorder with a commercially available CD or a
CD-ROM cleaning set. This can damage the drive.
•
Recordable and Rewritable CD/DVDs (blanks) are more sensitive than commercially
available CD/DVDs. Use only a solvent-free, non-abrasive marker when writing on a
CD/DVD.
•
Do not stick any conventional labels on the CD-Rs/CD-RWs, since the adhesive can
attack the medium. Special labels for CD-R/CD-RW media are available in retail
computer stores. Never remove a label from a CD-R/CD-RW media otherwise you
will damage the protective layer and make the CD-R/CD-RW unusable.
•
The drive recognizes the medium as soon as it is placed into the drive. CD-R media
are compatible with the vast majority of CD-ROM drives and CD audio players and
work in most DVD-ROM drives. DVDs created on this DVD Recorder can be viewed
on nearly all DVD players and DVD-ROM drives.
For optimal results, use CD/DVDs with a brand name.
10
Using the Drive
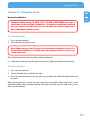
Chapter 3: Using the Drive
GB
How to Use the Discs
3
Attention! When using CD-ROM, CD-R, CD-RW or DVD R/RW discs, don’t
attach any stickers or labels to the discs. Using discs with them attached
not only causes read and write errors, but data on the disc may be lost
due to damage to the disc itself.
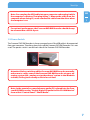
3.1 Load the disc
1. Press the eject button.
2. Place the disc on the disc tray.
Note! When using a 8 cm CD, place it in the small round depression. The
face with the label on it should be up. Never place two discs in the tray
at the same time.
Be careful not to touch the recording surface of the disc.
3. Load the disc by pressing the eject button or by lightly pushing in the disc tray.
3.2 Disc ejection
1. Press the eject button.
2. Slowly take the disc out of the disc tray.
3. Press the eject button or push the disc tray and the tray will be brought back into
the drive.
After ejecting the disc, return the tray inside the unit quickly. When the tray is in the
ejected position, dust and other debris will enter, possibly causing read errors, write
errors, or drive failure.
11
Freecom DVD RW Recorder
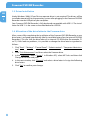
3.3 Emergency Eject
GB
This drive has a function that allows the CD/DVD to be ejected manually if this becomes
necessary in an emergency such as failure of the drive or a power outage. Follow the
following procedures in such a case. Don’t use this feature except in an emergency.
3
1. Turn the power to OFF.
2. Poke a fine tipped object into the small hole above the eject button. The front door
pops open and the disk tray comes partway out.
3. Pull the front door to open it all the way, then grip the disc tray between thumb and
forefinger and gently pull it straight out. This feature is a last measure to be used
only in an emergency. Using it excessively will cause malfunction.
Note! If you cannot get a good grip on the disc tray with your fingers, use
a steel binder clip or spring clamp to pull it out.
12
Trouble shooting - General problems
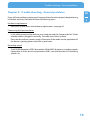
Chapter 4: Trouble shooting - General problems
GB
If you still have problems getting your Freecom drive to function properly despite having
installed it correctly, then please check the following items:
4
Hardware requirements:
•
Does your system meets the hardware requirements (see page 4)?
Connecting the Freecom device:
•
Is the cable connected correctly to your computer and the Freecom device? Check
whether cable is plugged in correctly. The cable must firmly in place!
•
Does the device have a power supply? Determine if the media can be ejected and if
the device is getting power when the system boots.
Recording speed:
•
The DVD RW Recorder is USB 2.0 compliant. While USB 2.0 supports recording speeds
higher than 4x, if this drive is connected to a USB 1.1 port the maximum CD recording
speed is 4x.
13
WARRANTY
(valid in Europe/Turkey only)
We thank you for purchasing this Freecom product and hope you will enjoy using it.
In order to avoid unnecessary inconvenience on your part, we suggest reading the quick
install guide, instruction manual and any additional electronic and or printed manuals.
When problems occur we have a database with Frequently Asked Questions (FAQ) on
our Freecom website (www.freecom.com), please check this site before you contact the
helpdesk.
Your Guarantee
All Freecom products come with unlimited technical phone and web support. By this
Guarantee, Freecom warrants their products to be free from defects in material and workmanship for a period listed below from the date of its original purchase. If during this period
of guarantee the product proves defective due to improper materials or workmanship,
Freecom will, without charge for labour or parts, at its sole discretion, repair or replace the
product or its defective parts upon the terms and conditions set out below.
Conditions
This guarantee will be granted only when the original invoice or sales receipt (indicating
the date of purchase, product and serial number) is presented together with the defective
product and a Freecom RMA number received from the Freecom Website or given by a
Freecom Service Center. Freecom reserves the right to refuse the free-of-charge guarantee services when the date of purchase of the product cannot be proven. This guarantee
will not apply if the RMA number is missing, the serial number on the product has been
altered, removed or made illegible.
This guarantee covers only the hardware components packaged with the product. This
guarantee covers none of the following: (a) any consumable supplied with the product,
such as media or batteries; (b) damage to or loss of any software programs, data or removable storage media; (c) any damage resulting from adaptations, changes or adjustments,
which may have been made to the product, without the prior written consent of Freecom;
(d) attempted repair by any party other than authorized by Freecom and (e) accidents,
lightning, water, fire or any other such cause beyond the reasonable control of Freecom.
With respect to all services provided, Freecom is not responsible for any damage to or loss
of any programs, data or other information stored on any media or any part of any product
serviced. Freecom is not liable for the consequence of business loss in case of system
failure. Be sure to exclude all parts not covered by this guarantee prior to returning the
product to Freecom. Freecom is not liable for any loss or damage to these items. If during
the repair of the product the contents of the hard drive are altered, deleted or in any way
modified, Freecom is not liable whatsoever.
Repair parts and replacement products will be provided on an exchange basis and will be
either new, equivalent to new or reconditioned. All replaced parts and products become
the property of Freecom The period of guarantee for any product or part repaired or replaced in warranty shall be the balance of the original guarantee. Repairs or replacements
on product or parts out of warranty carry 6 (six) months guarantee.