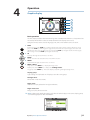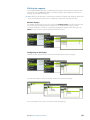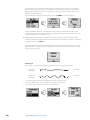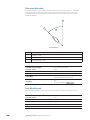
1
H5000
Operation Manual
ENGLISH
www.bandg.com
Preface
As Navico is continuously improving this product, we retain the right to make changes to the
product at any time which may not be reflected in this version of the manual. Please contact
your nearest distributor if you require any further assistance.
It is the owner’s sole responsibility to install and use the instrument and transducers in a
manner that will not cause accidents, personal injury or property damage. The user of this
product is solely responsible for observing safe boating practices.
NAVICO HOLDING AS AND ITS SUBSIDIARIES, BRANCHES AND AFFILIATES DISCLAIM ALL
LIABILITY FOR ANY USE OF THIS PRODUCT IN A WAY THAT MAY CAUSE ACCIDENTS, DAMAGE
OR THAT MAY VIOLATE THE LAW.
Governing Language: This statement, any instruction manuals, user guides and other
information relating to the product (Documentation) may be translated to, or has been
translated from, another language (Translation). In the event of any conflict between any
Translation of the Documentation, the English language version of the Documentation will be
the official version of the Documentation.
This manual represents the product as at the time of printing. Navico Holding AS and its
subsidiaries, branches and affiliates reserve the right to make changes to specifications
without notice.
Copyright
Copyright © 2014 Navico Holding AS.
Warranty
The warranty card is supplied as a separate document. In case of any queries, refer to the
brand website of your display or system:
www.bandg.com
Declarations and conformance
This equipment is intended for use in international waters as coastal sea area administered by
countries of the E.U. and E.E.A.
The H5000 system complies with the following regulations:
• CE under EMC directive 2004/108/EC
• Level 2 devices of the Radio communications (Electromagnetic Compatibility) standard 2008
The relevant Declaration of conformity is available in the H5000 section on the following
website: www.bandg.com
| H5000 Operation Manual
|1
Contents
5
Introduction
5
About this manual
7
System overview
7
8
8
8
9
9
10
10
11
11
12
H5000 components
H5000 Central Processor Unit - CPU
Webserver - Network portal
Graphic display
Race display
HV Displays
Analog displays
Expansion modules
Sensor modules
Alarm module
H5000 Pilot Controller
13
System examples
13
14
15
16
16
Hydra
Hercules
Performance
Autopilot minimum system requirement
Basic System - No H5000 CPU
17
Operation
17
18
25
25
26
27
28
30
31
32
34
34
34
35
40
43
44
45
Graphic display
Default graphic display pages
Data page transition
Available data pages
Replacing a data page
Menus
Race timer
Man Over Board
HV display support
Alarms
Damping
Trip log
Log
Race display
Diagnostics
H5000 Pilot Controller
Autopilot operation
Autopilot modes
48
Sensor calibration
48
49
52
53
55
Depth
Boat speed
Environment
Masthead unit adjustment
Heading (compass)
Contents | H5000 Operation Manual
|3
57
System setup
57
59
60
60
60
61
61
61
62
62
62
64
67
68
69
71
Network
Units
Language
Time
Simulate
Restore defaults
Global reset
About
Autopilot setup
Source selection
Rudder drive
Commissioning
Response
Sailing
Steering
Setup
73
Webserver
78
Operating variables
105 Example data tables
105
106
106
106
106
Polar table
Boat speed / Heel correction table
True wind angle correction table
True Wind Speed correction table
Down wind speed correction table
107 Maintenance
107
108
4|
Basic maintenance procedures
Winter Storage / Laying Up
Contents | H5000 Operation Manual
1
Introduction
About this manual
This manual is a reference guide for operating the B&G H5000 instrument system. It assumes
that all equipment is installed correctly, and that the system is ready to use.
The manual assumes that the user has basic knowledge of navigation, nautical terminology
and practices. The manual does not cover basic background information about how
equipment such as radars, echo sounders and AIS work.
Important text that requires special attention from the reader is emphasized as follows:
¼ Note: Used to draw the reader’s attention to a comment or some important information.
Warning: Used when it is necessary to warn personnel that they
should proceed carefully to prevent risk of injury and/or damage to
equipment/personnel.
Introduction | H5000 Operation Manual
|5
6|
Introduction | H5000 Operation Manual
System overview
2
The H5000 instrument and autopilot systems combine unique sailing features with raceproven technology in a straightforward package. Developed for blue water cruisers and
racing yachts alike, the range brings powerful system options to match your exacting
requirements. From an ultra-fast CPU to a convenient web-browser interface access, full-color
and custom displays and a dedicated autopilot controller, the H5000 system was developed
to provide the best instrument and autopilot system available. The H5000 range comprises
several units which network with other onboard electronics including the Zeus range of chart
plotters.
The H5000 system is driven by a powerful Central Processing Unit (CPU) reaching speeds
up to 50 times greater than its predecessor, with Hydra, Hercules and Performance level
software options tailored for all users from serious cruisers to professional racers. It works with
B&G’s H3000 Wind, Speed, Heel and meteorological sensors for straightforward upgrades.
The high resolution H5000 Graphic Display is highly intuitive and delivers information on a
5-inch bonded screen with fast, smooth display updates. The H5000 Race Display provides
segmented text, numbers and target indicator for the race information you need in a glance.
The H5000 Autopilot brings the functionality and dedicated sailing algorithms of its recordbreaking predecessor , supporting the exact needs of a performance sailboat and its crew –
whether short-handed cruising or solo racing. In addition, the H5000 Pilot Controller provides
dedicated access to autopilot functions.
B&G’s web-browser interface lets you connect your PC or tablet to the network for setup,
calibration and control of every part of your H5000 system. It utilizes a familiar web browser
interface to allow quick calibration of instruments, easy setup of displays and configuration of
features. You can also access online product manuals, data backups and network diagnostics.
H5000 components
•
•
•
•
•
•
•
•
•
•
•
H5000 Central Processor Unit - CPU
Webserver - Network portal
Graphic display
Race display
HV displays
Analog displays
Expansion modules
Sensor modules
Alarm module
H5000 Pilot Computer
H5000 Pilot Controller
System overview | H5000 Operation Manual
|7
H5000 Central Processor Unit - CPU
The H5000 CPU takes sensor inputs and uses a dedicated processor to calculate and calibrate
the data and distribute it to display units and external devices.
Connect a router via the ethernet port to take advantage of the webserver interface via a PC,
tablet or smart-phone.
There is a USB port to upgrade the CPU with the latest software.
Webserver - Network portal
The browser-based configuration of the H5000 system enables advanced calibration, set-up
and diagnostics. Its web-style interface can be accessed via PC, tablet or smartphone.
Graphic display
The H5000 Graphic Display is a 5-inch, sunlight viewable, color display. It shows sailing data in
digital or graphical form.
8|
System overview | H5000 Operation Manual
Race display
The H5000 Race Display is a 7 segment display, 5-inch screen designed for viewing essential
data at a glance. A dedicated page key allows quick switching between stored pages
displaying 2 data values on each page alongside a unique bargraph providing immediate
visual indication of performance targets, countdown timer status and more.
MENU
HV Displays
The HVision range of displays are lightweight, single-line data units incorporating B&G’s
unique HV technology. HV technology ensures the maximum contrast, perfect backlighting
and no possibility of condensation. HV displays are the clearest displays available.
¼ Note: There are four displays in the HV range, each with their ideal application:
10/10 HV
The 10/10 is a compact display that allows data to be positioned where it is
needed, rather than where it fits. Its compact dimensions allow the 10/10
to be installed almost anywhere – typical installation areas are the base of
winch pedestals, alongside hydraulic control panels, steering pedestals or
as a companionway display on the smaller yacht.
20/20 HV
The latest generation of the classic 20/20 mast display. The 20/20 is the
de facto standard for mast displays on yachts up to 70’ (21m). The 20/20
is also ideal for use as a cockpit, saloon or bridge display.
30/30 HV
The 30/30 is designed as a mast display for yachts in the range
60-90’ (18-27m) LOA. Providing these larger yachts with the
perfect size of display. The 30/30 is also the ideal display for deck
or bridge displays on super yachts.
40/40 HV
The 40/40 is the largest instrument display available.
Designed specifically for mast mounting applications on
super yachts, it also is the ideal display for forward beam
mounting on maxi-multi hulls or as a deck or helipad
display on large motor yachts.
System overview | H5000 Operation Manual
|9
Analog displays
Before a value will be shown on an analog display ensure that a sensor (source) has been
selected via the CPU or Graphic Display. Go to source selection to achieve this.
The analog display backlighting is achieved by a long press of the MENU key on any of the
Graphic displays.
There is a wide range of analog indicators available, all listed below.
• Apparent Wind Angle
• Apparent Wind Speed
• Boat Speed 12.5 Knot
• Boat Speed 25 Knot
• Depth 200 Meters
• Depth Ft / Fathom
• Heading
• Rudder
• True Wind Angle
• True Wind Speed
• Magnified Apparent Wind
Expansion modules
There are two types of Expansion module, Analog and Serial. The modules act as the interface
between analog sensors, serial devices and other in and outputs to and from the CPU.
The correct module must be used in conjunction with its corresponding sensors. All modules
are powered from the network and can supply power to the sensors connected.
Analog
The analog module has 6 analog inputs and 2 pulse inputs. This allows the unit to act as an
interface for masthead units, speed sensor, analog rate-gyros, potentiometer etc.
Serial
The serial module has 2 COM ports, each with input & output. The modules support RS232,
RS422, RS485 and NMEA 0183 devices.
Modules can be located wherever is most convenient for the installer and can connect
anywhere on the network.
10 |
System overview | H5000 Operation Manual
Sensor modules
There are two types of H5000 sensor module.
Barometric & temperature sensor
Measures the atmospheric pressure and air temperature, allowing the CPU to record
atmospheric pressure changes over varying periods of time and current air temperature.
3D Motion
The Tri-Axis Motion Sensor provides accurate measurement of the heel and trim angles as
well as pitch, roll and yaw rates of the yacht, allowing the CPU software to correct the wind
data for errors induced by this motion.
Alarm module
The alarm module is a network audible alarm that can be positioned anywhere on the
network.
H5000 Pilot Computer
The H5000 Pilot Computer links with the H5000 instrument system. The instrument system
transmits sensor information over the network to the Pilot Computer. This information is
processed by the Pilot Computer and sends signals to the drive system (linear ram, rotary
drive or hydraulic pump) to steer the vessel on the desired heading/course.
System overview | H5000 Operation Manual
| 11
H5000 Pilot Controller
The H5000 Pilot Controller manages all autopilot functions as well as setup and
commissioning. Use the H5000 Pilot Controller to select autopilot modes or manually steer
the vessel.
12 |
System overview | H5000 Operation Manual
Hydra
An example of a typical H5000 system. At the centre of the system is the H5000 Central
Processor Unit (CPU). All sensor information is fed back to the CPU and can be easily
controlled and configured via the Graphic display.
1
2
4
3
5
6
7
12V
T
12V
8
9
10
11
12
T
14
16
15
PILOT
12V
17
12V
13
18
WIFI-1
3
System examples
12V
19
No.
Description
20
No.
Description
1
Masthead unit
11
Motion sensor (Heel / Trim only)
2
HV Display
12
Alarm module
3
Graphic display
13
Wireless access point WiFi-1
4
Race display
14
Central processor unit
5
Analogue display
15
Man Overboard Button - MOB
6
Zeus Touch
16
H5000 Pilot Computer
7
H5000 Pilot Controller
17
Rudder reference unit
8
RC42N compass
18
Hydraulic ram
9
GPS
19
Speed sensor
10
Baro / Air temp sensor
20
Depth sensor
T
Terminator
System examples | H5000 Operation Manual
12V
12 Volt DC power supply
| 13
Hercules
1
2
3
4
5
6
7
12V
8
12V
T
12V
9
13
11
14
15
16
12
10
T
17
18
19
22
20
21
12V
12V
24
No.
NMEA0183 Tx/Rx
Description
No.
Description
1
Vertical masthead unit
14
Barometric / temperature sensor
2
HV Display
15
Motion sensor
3
Graphic display
16
Alarm module
4
Race display
17
Central processor unit
5
Analogue display
18
Man Overboard Button - MOB
6
Zeus Touch
19
H5000 Pilot Computer
7
Zeus
20
Webserver
8
H5000 Pilot Controller
21
Deckman
9
Analog module
22
Rudder reference unit
10
Mast rotation sensor
23
Hydraulic ram
11
Serial module
24
NMEA 0183 Tx / Rx
12
Halcyon Gyro Stabilized Compass
25
Speed sensor
13
GPS
26
Depth sensor
T
14 |
23
25
Terminator
System examples | H5000 Operation Manual
12V
12 Volt DC power supply
Performance
1
2
4
3
5
6
7
8
PLOT
MARK
GO TO
VESSEL
MENU
WIN
IN
OUT
1MOB
2 ABC
4 GHI
5 JKL
7 PQRS 8 TUV
STBY
AUTO
CHART
12V
RADAR
ECHO
NAV
INFO
0
3 DEF
6 MNO
9WXYZ
PWR
PAGES
12V
T
12V
9
10
15
16
17
13
11
9
14
12
T
18
19
22
26
12V
27
No.
23
21
20 20
28
Description
29
No.
24
12V
25
Description
1
Fwd & Aft vertical masthead unit
16
Motion sensor
2
HV Display
17
Alarm module
3
Graphic display
18
Central processor unit
4
Race display
19
Man Overboard Button - MOB
5
Analogue display
20
Analog module
6
Zeus Touch
21
Analog module
7
Zeus
22
Analog device *
8
H5000 Pilot Controller
23
H5000 Pilot Computer
9
Analog module
24
Rudder reference unit
10
Analog module
25
Hydraulic ram
11
Mast rotation sensor
26
Webserver
12
Serial module
27
Deckman
13
Halcyon Gyro Stabilized Compass
28
Port & Starboard speed sensor
14
GPS
29
NMEA 0183 Depth sensor
15
Barometric / temperature sensor
30
Depth sensor
T
Terminator
12V
12 Volt DC power supply
¼ Note: * See analog expansion for more information on type and quantity of devices
System examples | H5000 Operation Manual
| 15
Autopilot minimum system requirement
2
1
3
4
T
T
12V
5
7
8
12V
10
12V
9
DPT
6
No.
Description
No.
Description
1
Masthead unit
6
Speed sensor
2
Graphic display
7
H5000 Pilot Computer
3
H5000 Pilot Controller
8
Rudder Reference Unit
4
GPS antenna
9
Hydraulic Ram
5
H5000 Central Processor Unit
10
Compass
T
Terminator
12V
12 Volt DC power supply
Basic System - No H5000 CPU
1
2
3
4
T
T
12V
5
No.
Description
No.
Description
1
Masthead unit
4
ZG100 GPS
2
HV Display
5
DST800 Speed & Depth sensor
3
Graphic Display
T
Terminator
12V
12 Volt DC power supply
¼ Note: A system without an H5000 CPU will only provide data from the available sensors
on the network and limited functionality. Only those menu options visible on the Graphic
Display will be available to the user.
16 |
System examples | H5000 Operation Manual
Operation
4
Graphic display
1
2
3
4
MENU
5
Basic operation
The first display added to the network will go into a startup wizard when it is first powered on.
The startup wizard will need to be completed before the display can be used.
Using the wizard, set the desired language, time, units and network source selection.
1 PAGE
Each short press of the PAGE key scrolls through the data pages. When viewing a data page a long
press of the PAGE key will bring up the pages menu, from here the required page can be selected
directly from a list. From any dialog screen, pressing the PAGE key navigates back to the data pages.
When using a menu the PAGE key navigates back a step.
2 UP
Scrolls up through selected menus / set values
3 ENTER
Used to enter the selected sub menus and confirm selection
4 DOWN
Scrolls down through selected menus / set values
5 MENU / LIGHTS
MENU
Single press of the MENU key – displays the Page menu
Double press of the MENU key – displays the Settings menu
Long press of the MENU key - Enters the display setup dialog and light settings menu.
Display group
Light settings are replicated on all displays set to the same group.
Backlight level
Min to Max in 10% increments
Night mode
Alternative display palette for low light conditions.
Night mode color
Red, green, blue, white text color
¼ Note: Adjusting the backlight settings will effect all other displays in the same display group.
See Network groups for more information.
Operation | H5000 Operation Manual
| 17
Standby
MENU
All of the displays can be placed in Standby mode via any display Setup dialog.
¼ Note: Once in Standby mode a single press of the MENU key will turn the displays back on.
3sec
Default graphic display pages
Sail Steer
7
1
8
2
3
9
4
10
5
11
6
Displayed data
No.
Description
No.
Description
1
Course / Heading
7
Port / Starboard indicator
2
Boat speed
8
True Wind Angle
3
Tide set
9
Laylines
4
Waypoint
10
Tide rate
5
True wind direction
11
True Wind Speed
6
True wind indicator
¼ Note: See configuring the Sail Steer page for more information on using this page
Configuring the Sail Steer page
When navigating to a waypoint you can configure the Sail Steer page to show laylines to aid
navigation.
Tidal flow correction
Tidal flow correction will calculate the tidal flow and offset the laylines accordingly.
18 |
Operation | H5000 Operation Manual
Target wind angle
There are 3 sources available for target wind angle.
Polar
Takes the target wind angle from your polar table
Actual
Takes the current value of target wind angle
Manual
Manually input the upwind and downwind numbers into the dialog boxes.
Layline limits
When selected will show a dotted line indicating the minimum and maximum tack/gybe time
period either side of the layline. This can be set from 5 to 30 minutes in 5 minute increments.
Speed / Depth
1
2
3
Displayed data
No.
Description
1
Speed
2
Acceleration bargraph
Operation | H5000 Operation Manual
No.
3
Description
Depth
| 19
Wind plot
3
1
4
2
5
6
Displayed data
No.
Description
No.
Description
1
True wind direction
4
Mean value
2
True wind direction histogram
5
True Wind Speed histogram
3
True Wind Speed
6
Time period (5 to 60 minutes)
¼ Note: Wind histogram time periods can be set to show 1, 5, 10, 30 or a 60 minute history.
Toggle between the time periods using the UP/DOWN keys.
Start line
6
1
7
2
8
3
9
4
10
5
11
Displayed data
No.
20 |
Description
No.
Description
1
Distance to port end of start line
7
Distance to starboard end of start line
2
Tide direction indicator
8
Starboard end start line indicator
3
Port end start line indicator
9
Wind indicator (wind barb)
4
Start line bias angle
10
Start line - Arrow points to favored end
5
Race timer
11
Bias advantage (boat lengths)
6
Distance to start line (perpendicular)
Operation | H5000 Operation Manual
Setting up a Start line page
The Start Line page is used as a visual aid to boat distance from the start line, tide direction,
recommended start end bias and what advantage in degrees and boat lengths the biased
end will give.
¼ Note: Before setting the start line position It is important that the Bow offset is updated to
negate the difference between the GPS postion and the bow of the vessel.
1 Approach the port end of the start line
2 Select ping from the start Line menu
3 Highlight Port end...
MENU
4 When the bow touches the start line, press the ENTER key.
5 The port end mark on the start line screen will go to solid red indicating it has been pinged
6 Repeat steps 1 to 4 at the starboard end selecting ping starboard end as the bow touches the line
7 The starboard end mark on the start line screen will go to solid green indicating it has been pinged
Operation | H5000 Operation Manual
| 21
Start line screen explained
1
4
5
2
3
6
Start line end not pinged (position not recorded)
Start line end pinged (position recorded)
Start line end stale (historic start line position)
Start line end becomes stale at 23:59 hrs on the day it was recorded but
remains valid.
Invalid start line - One or more ends invalid (position not recorded)
Start line - Blue - Square line - No bias advantage
Start line - Red & Arrow left - Port end bias
Start line - Green & Arrow right - Starboard end bias
Tide direction indicator
Wind speed and direction indicator (wind barb)
22 |
1
DIST P: Distance to port end of start line
2
BIAS: Start line bias angle
3
Race timer
4
DIST LINE: Distance to start line (perpendicular)
5
DIST S: Distance to starboard end of start line
6
BIAS ADV: Bias advantage (boat lengths)
Operation | H5000 Operation Manual
Depth history
1
2
4
3
5
Displayed data
No.
Description
No.
Description
1
Current depth
4
Water line
2
Shallow water limit
5
Depth histogram
3
Depth scale
¼ Note: Depth histogram time periods can be set to show 5, 10, 30 or a 60 minute history.
Toggle between the time periods using the UP/DOWN keys.
Highway
6
1
7
2
8
3
9
4
10
5
11
Displayed data
No.
Description
No.
Description
1
Waypoint bearing
7
Estimated waypoint arrival time
2
Course over ground
8
Waypoint
3
Off course limit (user setting)
9
Course line
4
Distance to waypoint
10
Vessel indicator
5
Cross track error
11
XTE correction direction Left or Right
6
Waypoint name
Operation | H5000 Operation Manual
| 23
Tide
6
1
7
2
3
8
4
9
5
10
Displayed data
No.
Description
No.
Description
1
Boat speed
6
TWA Port / Starboard indicator
2
Tide angle relative to vessel
7
True Wind Angle
3
Heading
8
True Wind Speed
4
Depth
9
True wind direction
5
Tide rate
10
Tide direction
Autopilot
1
2
6
3
7
4
8
5
9
Displayed data
No.
24 |
Description
No.
Description
1
Set heading / Wind angle
6
Heading indicator
2
Compass scale
7
Set heading / Wind / Rudder angle
3
Heading
8
Wind angle
4
Autopilot mode indicator
9
Rudder angle
5
Rudder angle indicator
Operation | H5000 Operation Manual
Data page transition
1
2
8
3
7
4
6
5
Available data pages
1
Sail steer (default)
Full screen*
2
Speed / Depth 2x1 grid (default)
2x1 grid*
3
Wind plot (default)
2x2 grid*
4
Start line (default)
2x2 grid offset*
5
Depth history (default)
3x3 grid*
6
Highway (default)
1+3 digital*
7
Tide (default)
1+6 digital*
8
Autopilot (default)
Centre analog*
Satellites
Analog +2*
Weather
Analog +3*
Single time plot*
Dual analog*
Dual time plot*
¼ Note: * indicates, User configurable page
Operation | H5000 Operation Manual
| 25
Replacing a data page
1 Go to the pages menu.
2 Highlight the page you wish to replace
MENU
x2
3 Press MENU
4 Highlight Replace and press the ENTER key
5 Highlight the desired page and press the ENTER key
The new chosen page will be shown in the pages list.
Enabling / Disabling a data page
To make a data page available via the PAGE key you will need to first ensure it has been
selected as one of the eight available pages.
Once the page has been selected as one of the eight data pages you can enable / disable it
1
2
3
4
Highlight the required page via the pages menu
Press MENU
Highlight Enabled
Press the ENTER key to switch the page on or off.
¼ Note: A tick symbol next to the page denotes that the page is active.
26 |
Operation | H5000 Operation Manual
Menus
From a data page a single press of the MENU key will open the Page menu for that specific
page. A double press of the MENU key will open up the Settings menu.
MENU
Page menu
The Page menu options vary from page to page. All Page menus have a race timer and
settings option to access the Settings menu. All other options listed will relate directly to the
current data page.
Settings menu
The Settings menu is where display options, display and system settings and calibration can
be accessed.
MENU
x2
Example menu structure
1 Select a menu as above.
2 Use the UP/DOWN and ENTER keys to navigate through the menu options.
¼ Note: Whilst navigating a menu a single press of the PAGE key will return to the previous
menu option.
Example below: How to access the Time dialog via the Settings menu.
MENU
x2
Operation | H5000 Operation Manual
| 27
Race timer
The race timer can be used to countdown to zero from a specified time, ideal for counting
down to a race start. It can also be used to count up from zero to record the elapsed time.
The timer can be started at any time by selecting Start Timer from the timer setup menu. If
the start value is set to zero (00:00) when the timer is started the timer will begin counting up,
recording the elapsed time.
MENU
x2
¼ Note: The timer is shared between all displays on the network. All timer values are
synchronized.
¼ Note: The timer set value is in Hours : Minutes (hh:mm), the timer counter will show Minutes :
Seconds (mm:ss) with the hours shown in the top right hand corner of the display.
Countdown timer
To count down to a race start, a time value can be set in the Set start value field in the Race
Timer setup menu.
Set start value
1
2
3
4
5
Select the Start Time field.
Use the UP & DOWN keys to set the desired number
Press the the ENTER key to move to each consecutive number.
Press the PAGE key to exit the number edit field.
Once complete select OK to confirm.
¼ Note: Selecting Cancel or navigating away using the PAGE key will lose any changed settings.
When a time is present in the start value field the timer will begin to count down from that
number when the timer is started. Once the time reaches zero it will begin counting up
recording the elapsed time.
28 |
Operation | H5000 Operation Manual
Start/Stop timer
To start the timer, select Start in the Race Timer menu. When the timer is started it will return
to the previous data page. To stop the timer from counting select Stop in the Race Timer
menu.
Sync
When the timer is counting down selecting Sync will synchronize the time up or down to the
nearest full minute.
Reset
Selecting Reset will reset the timer to the start value. If the timer was running, it will continue
to run from the start value.
Auto start trip
Selecting Auto trip start will enable the Trip Log to record your time and mileage from the
moment the countdown timer begins counting up from zero.
Operation | H5000 Operation Manual
| 29
Man Over Board
If an emergency situation should occur and a man over board event is triggered, the display
automatically switches to the MOB screen.
1
4
5
2
6
3
7
Displayed data
No.
•
•
•
Description
No.
Description
1
Last known MOB position
5
Direction to MOB from vessel
2
Bearing to MOB
6
Dead reckoned MOB position
3
Range to MOB
7
Last known MOB position
4
Vessel (Always points up)
A waypoint becomes active at the position the man over board is activated. This is indicated
with a circular symbol. If the man over board event is activated via an AIS-SART then this
position will update via the AIS-SART signal.
The GPS longitude and latitude co-ordinates of the last known position are shown in the top
left of the screen with the bearing and range MOB waypoint data listed below.
If you have an H5000 CPU on the network the CPU will perform dead reckoning calculations
to provide the estimated position of the man over board. This position will be displayed as a
triangle symbol.
Vessel
Last known MOB position (H5000 CPU or MFD required)
Dead reckoned MOB position (H5000 CPU required)
¼ Note: To cancel the man over board event press MENU and select cancel.
30 |
Operation | H5000 Operation Manual
HV display support
Any compatible B&G HV display e.g. 20/20 HV mast display connected to the network can be
configured via the H5000 CPU webserver, Graphic Display or Race Display to show desired
data e.g. speed, depth, wind speed.
¼ Note: When a new HV display is added to the network the default data displayed will be boat
speed. If no boat speed data source is available the display will show the word ‘OFF’
Remote displays
The remote display page can be accessed from the Settings menu. Here all HV Displays will
be listed by size. Any displays that are not present on the network will be greyed out.
To change what data is shown on a HV display, highlight the display in this menu, press the
ENTER key and select the required data type from those listed.
Configuring an HV display
From the remote display menu, select the HV display that you wish to configure.
Select the information source you wish to show on the selected HV display.
Once selected the screen will revert to the remote display page.
Operation | H5000 Operation Manual
| 31
Alarms
If you have the relevant sensor connected to the network you can enable that alarm by
selecting it/them from the alarm list.
Alarm on / off
Turn an alarm on or off from the alarm list. A tick symbol next to the alarm in the alarm list will
indicate that the alarm is on.
¼ Note: It is possible to enable / disable all alarms by selecting the ‘Alarms Enabled’ field from
the Alarms menu.
Alarm settings
1 Press MENU on an alarm that requires parameters to be set will take you to the Enabled / Set limit
menu.
2
3
4
5
32 |
Select Set limit
Set the required alarm parameter
Press the PAGE key once you have finished editing
Select OK to confirm.
Operation | H5000 Operation Manual
Alarm indication
The alarm system is activated if any alarm settings are exceeded. Alarms are indicated with an
alarm text and with an audible alarm (optional).
¼ Note: See Alarm settings for further details on how to set an alarm. If an autopilot is not on
the network, autopilot alarms will not be accessible.
If no specific alarm text is available, an alarm code will appear.
Acknowledging an alarm
An alarm is acknowledged by pressing the ENTER key. This will remove the alarm notification,
and silence the alarm from all units that belongs to the same alarm group. A reminder will
reappear at given intervals for as long as the alarm condition exists.
¼ Note: An alarm received from non B&G units on the network must be acknowledged on the
unit generating the alarm.
Alarm history
The alarm history can be accessed via the Alarm history menu. This stores alarm messages
until they are manually cleared.
Clear alarm history
To clear the alarm history list, select ‘Clear All’ from the Alarm history menu.
Operation | H5000 Operation Manual
| 33
Damping
The damping rate affects the frequency that the sensor data is updated, the greater the
damping value the smoother the number change will be but the slower the response will be
to data change.
Damped parameters
•
•
•
•
•
•
•
•
•
Below is a list of parameters that a damping value can be applied to. Set the damping value
(response rate) for each parameter from 0 to 9 seconds.
Heading
Apparent wind (angle & speed)
True wind
True wind direction
Boat speed
Dynamic boat speed (Bspd)
Tide
Speed Over Ground (SOG)
Course Over Ground (COG)
Trip log
There are two recorded trip logs. Trip log 1 records distance traveled through the water, trip
log 2 records distance traveled via GPS input.
¼ Note: Trip log 2 requires a compatible GPS connected to the network.
1
3
2
4
No.
Description
No.
Description
1
Trip distance
3
Trip time
2
Average speed
4
Maximum speed
¼ Note: Correctly calibrated boat speed is essential for accurate trip records.
Log
Shows total miles run from installation. This is based on distance over the water.
34 |
Operation | H5000 Operation Manual
Race display
1
2
3
4
MENU
5
Basic operation
1 PAGE
Each press of the PAGE key scrolls through the data pages in rotation or navigates back to the display
pages from within any menu. Press and hold the PAGE key to save the current page configuration.
2 UP
Selects the upper half of the display to change variables; scrolls through menus and variables; increases
/ decreases values.
3 ENTER
Used to enter the selected sub menus and confirm selections.
4 DOWN
Selects the lower half of the display to change variables; scrolls through menus and variables; increases /
decreases values.
MENU
5 MENU / LIGHTS
Used to enter the Settings menu and scroll through the menu options. Long press enters the lights
settings page.
Display information
1
3
6
7
8
2
9
5
10
11
2
4
13
1
No.
12
Description
3
No.
Description
1
Data variable name
8
Alarm - Warning
2
Display data value
9
Alarm - Info
3
Units of measure
10
Controlling remote (HV) Displays
4
Bargraph data type
11
Autopilot engaged
5
Bargraph data
12
Active page number
6
Page stored / Source select
13
B&G H5000 CPU on the network
7
Alarm - Critical
Operation | H5000 Operation Manual
| 35
Menus
To enter the menu function press the MENU key. To operate a menu use the UP and DOWN
directional keys and press the ENTER key to select a menu item. Press the PAGE key to
navigate back to the display pages.
Pages
The display shows five configurable data pages. Data pages show a variety of data and
information available from sensors and devices on the network.
¼ Note: All of the default pages can be edited to show the users preferred boat data.
Each press of the PAGE key will change the current data page to the next page in the cycle.
¼ Note: Pressing the PAGE key will change the data pages in sequence and in continuous
rotation from pages 1 to 5.
Edit data page contents
You can edit any of the five data pages so that they display the specific boat data that you
require.
Page data editing
Select the page you wish to edit. Press the UP key to select the top data field or the DOWN
key to select the bottom data field.
Once selected the chosen data field text will flash to indicate the menu has been selected.
Using the UP and DOWN keys choose the required data type required, once selected press
the ENTER key. The field text will stop flashing and return to the data page. A long press of
the PAGE key will save the display configuration.
36 |
Operation | H5000 Operation Manual
Bargraph data editing
Select Bargraph menu option, use the arrow keys to select the required bargraph variable.
Press the PAGE key to save the change and return to the data page screen.
MENU
x7
Race timer
The race timer can be used to countdown to zero from a specified time, ideal for counting
down to a race start. It can also be used to count up from zero to record the elapsed time.
¼ Note: Once the countdown timer reaches zero it will start counting up showing the elapsed
time from zero. The timer will continue to count until it is stopped.
Set
Sets the value of the timer.
MENU
Once set is selected, use the directional keys to set the required time.
¼ Note: The timer can only be set to whole minutes.
Start
Starts the timer. If a time value is preset the timer will countdown. If the timer is on zero it will
count up.
MENU
Synchronize
Synchronizing the timer will cause the timer to reset to the nearest whole minute.
Operation | H5000 Operation Manual
| 37
Stop
Stops the timer. Press the ENTER key again to restart the timer.
Reset
If the timer is running, selecting reset will automatically start counting down from the
originally set value for the race timer. If the timer is stopped when reset is selected it will set
the clock to the originally set value and will not begin the countdown until start is selected.
Remote displays
Remote displays can be individually set via the race display to show a single variable.
Configuring remote display data
Select the remote menu, then select the remote display (e.g. 20/20 HV) you wish to configure.
¼ Note: The remote display will flash on and off to indicate it has been selected for editing by
the race display.
MENU
x2
Use the UP/DOWN and ENTER keys to navigate to a variable and select the variable to
display. Exit by pressing the PAGE key.
Lighting zone selection
Set the lighting zone on the display. All units in the selected lighting zone will mirror each
others light settings. Default setting is network.
MENU
¼ Note: Press and hold the MENU / LIGHTS key to get to the Lighting menu.
38 |
Operation | H5000 Operation Manual
Backlighting
Set the desired lighting level on the display.
¼ Note: All units in the selected lighting zone will mirror each others light settings. Default
setting is network. To change the lighting zone select the lighting menu and press DOWN
the lighting zone type will flash. Select the desired zone and press the ENTER key.
MENU
Trip log
There are two recorded trip logs. Trip log 1 records distance traveled through the water, trip
log 2 records distance traveled via GPS input.
¼ Note: Trip log 2 requires a compatible GPS connected to the network.
Start trip log
MENU
x3
Stop trip log
MENU
x3
Reset trip log
Alarms
When alarms are set to ‘On’ the race display will show alarm messages when predefined
alarm parameters on the network are triggered. When the race display alarm is set to off, no
alarm message will be displayed on the race display.
MENU
x8
Operation | H5000 Operation Manual
| 39
Alarm notification
When an alarm event is received the display will change to show the variable name that is
alarming and the current value. An icon will be highlighted to indicate the severity of the
alarm.
Alarm icons
There are three alarm icons for the three levels of alarm severity as shown below.
Important / Critical
Warning
Information
Depth alarm example
Acknowledging an alarm
An alarm is acknowledged by pressing the ENTER key twice in quick succession. This
will remove the alarm notification (text, light and sound) from all units on the network. A
reminder will reappear at given intervals for as long as the alarm condition exists.
x2
MENU
Diagnostics
The diagnostic pages show details of the display, instance number, software version, LCD test
and reset options. To access the diagnostic pages, press and hold the MENU key when you
power on the display. Use the UP/DOWN keys to scroll through the pages.
Version
Software version number. Check the B&G website for the current available software version.
1
2
No.
1
40 |
Description
Software version number
Operation | H5000 Operation Manual
No.
2
Description
R = Indicates released version.
Any other identification is used for
internal testing only
Checksum
Additional version information in hexadecimal format. This information is for B&G support
only.
1
2
No.
1
Description
Boot code
No.
2
Description
User code
Full reset
Factory reset of the display. All settings will revert to factory default. Select the full reset page,
press the ENTER key and a full reset will take place and return the display back to the default
speed and depth page.
User reset
Resets page configuration to their default settings. All other settings will remain unchanged.
Select user reset, press the ENTER key. The display will show complete once finished.
LCD segment test
When the LCD segment test page is selected the display will automatically begin the LCD test.
This is a visual test that needs to be performed by the user. Each segment will switch on in
sequence until all segments are lit. It is the responsibility of the user to visually spot any faulty
/ missing LCD segments.
Missing
segment
Operation | H5000 Operation Manual
| 41
Lights test
Select the lights page. Press the ENTER key, the display will go through each of the light
settings in sequence. It is the responsibility of the user to visually check the light levels.
Instance
The display instance is a number that can be set as a reference for the user to distinguish
between different displays. By default the display instance is set to zero.
Voltage
Shows the current voltage supply to the display.
42 |
Operation | H5000 Operation Manual
H5000 Pilot Controller
a
d
b
e
f
c
1
4
2
5
3
6
7
8
Display
The displayed information will change depending which mode is selected.
X
Description
X
Description
a
Performance level
d
Target
b
Autopilot mode
e
Compass: ºT = True ºM = Magnetic
c
Rudder angle indicator
f
Heading
Keys
The H5000 Pilot Controller is operated by 8 keys. These are used to operate the autopilot and
adjust autopilot parameters.
1 MODE
Changes the autopilot mode / Scrolls up in menu options / Increases values. With active autopilot:
Toggles between Wind mode and Auto mode
2 10º COURSE CONTROL STARBOARD (10º RIGHT)
Changes target course 10º Starboard
3 1º COURSE CONTROL STARBOARD (1º RIGHT)
Changes target course 1º Starboard / Activates Non Follow Up (NFU) mode when in Standby mode /
Enter menu
4 10º COURSE CONTROL PORT (10º LEFT)
Changes target course 10º Port
5 1º COURSE CONTROL PORT (1º LEFT)
Changes target course 1º Port / Activates Non Follow Up (NFU) mode when in Standby mode / Exit
menu
6 STBY
Disengages the autopilot
7 AUTO
Engages the autopilot
8 MENU
Enter the Main menu / Scrolls down in the menu options / Decreases values. Press and hold for 3 secs
enters the lighting settings.
Warning: The installation settings must be performed as part of the
commissioning of the autopilot system. Failure to do so correctly may
prohibit the autopilot from functioning properly! The Installation menu
can only be accessed in Standby mode.
Operation | H5000 Operation Manual
| 43
Autopilot operation
Turning the autopilot on / off
Engaging the autopilot
At anytime while the autopilot is disengaged press the AUTO key to engage
the autopilot. The autopilot will steer the boat on the current selected
heading.
Disengaging the autopilot
At any time the autopilot is engaged press the STBY key to disengage the
autopilot. The autopilot will go into Standby mode and you will be required
to take manual control of the helm.
Warning: In Standby mode pressing either of the 1º directional keys
will engage the autopilot in Non Follow Up mode!
Menu navigation
Single press of the MENU key will open the Main menu.
¼ Note: Whilst navigating the menu system If no selection is made after 10 seconds the screen
will revert to the autopliot status screen
Key
Action
1º RIGHT Opens highlighted menu option
1º LEFT Return to previous menu - Continued presses
will return the display to the navigation screen.
MODE Scroll up
MENU Scroll down
¼ Note: At anytime a single press of the STBY key will exit the menu and switch the autopilot
to Standby mode!
44 |
Operation | H5000 Operation Manual
Autopilot modes
The current heading and Set heading information will change on the display depending
on which mode the autopilot is in. Below is a list of the autopilot modes, autopilot mode
symbol and the current/target data that will be displayed.
Mode
Symbol
Standby
S
Description
Required Input
Passive mode used when manually
steering the boat at the helm
Keeps the boat on set heading
Press
& Hold
3 sec +
to enter mode
menu then select
required mode
Cancels a turn and continues on the
heading read from the compass. Press Heading
the MODE key to enter Wind mode.
Press MODE key again to revert to
Auto mode
A
Auto
Wind
W
Steers the boat to maintain the set
wind angle. Press MODE key to enter Heading, Speed,
to Auto mode. Press MODE key again True Wind Angle
to revert to Wind mode
NoDrift
ND
Steers the vessel on a straight bearing
Heading, Position
line by compensating for drift
Navigation
N
Non Follow
Up
Steers the boat to a specific waypoint
location, or along a route
Steer the boat
manually using
the H5000 Pilot
Controller
NFU
Standby
•
•
NFU
Heading (True or Magnetic)
Rudder angle
NAV
•
Bearing to next
waypoint
•
Cross track distance
(XTD), analog and
graphical
Operation | H5000 Operation Manual
Heading, Speed,
Position, Waypoint,
Route information
(MFD)
AUTO
•
•
WIND
Set heading
Heading
NoDrift
•
Set wind angle
•
Set course
•
Heading
•
Course Over Ground
(COG)
| 45
Mode selection
From Standby mode, press the AUTO key once to enter Auto mode. Whilst in Auto mode a
single press of the MODE key will set the autopilot to Wind mode. Press the MODE key again
to revert to Auto mode.
To access other autopilot modes press and hold the MODE key for 2 seconds. Highlight the
required mode and press the 1º RIGHT key to confirm.
¼ Note: The mode selection menu will time out after a few seconds. Whichever mode is
highlighted at this time will be selected.
2 sec
Non Follow Up mode
Whilst in Standby mode, pressing any of the 1º LEFT / RIGHT keys will move the rudder to
your desired angle and change the autopilot mode to Non Follow Up.
Non Follow Up mode allows you to control the rudder position manually via the autopilot
controller.
¼ Note: The autopliot will remain in Non Follow Up mode until it is disengaged by pressing the
STBY key or a new mode is selected.
46 |
Operation | H5000 Operation Manual
Tacking & Gybing in Wind mode
Tacking & Gybing in Wind mode can be performed when sailing with apparent or true wind
as the reference; in either case the True Wind Angle must be less than 90 degrees (tacking)
and more than 120º (gybing).
The tacking/gybing operation will mirror the set wind angle on the opposite tack and a tack
confirmation window will appear on the display.
To tack or gybe in wind mode press both 1° COURSE CONTROL keys on the H5000 Pilot
Controller simultaneously. Hold them down until the confirmation window appears. Press 1º
RIGHT to confirm, 1º LEFT to cancel.
The rate of turn during the tack/gybe is set by the Tack time parameter in the Setup/
Sailing menu. The tack/gybe time is also related to the speed of the boat to prevent excessive
loss of speed during a tack.
¼ Note: The autopilot will temporarily add a 5 degree bear-away on the new tack to allow the
boat to pick up speed. After a short period the wind angle will return to the set angle.
If neither tack/gybe or cancel is selected the tack/gybe pop up will close after 10 seconds and
the requested tack/gybe will not be initiated.
Tacking & Gybing in Auto mode
To tack in Auto mode press and hold the Port 10 & 1º COURSE Keys to set a tack to Port and
the Starboard 10 & 1º COURSE keys to set a tack to Starboard.
Port
Starboard
The rate of turn during the tack/gybe is set by the Tack time parameter in the Setup/
Sailing menu. The change in heading is controlled by the tack angle parameter in the Setup/
Sailing menu.
¼ Note: Default tack angle setting is 100 degrees.
Operation | H5000 Operation Manual
| 47
Sensor calibration
5
Once the display is setup and before you proceed with calibration ensure all network sources
are selected and configured as shown in section 6.
Calibration example:
Depth
A typical transducer installation is through the hull in front of the keel. A datum (offset value)
can be set, such that the depth display refers to either the water line or the base of the keel.
+VE: Positive Datum for Waterline
(0.0)
- VE: Negative Datum for Keel
Setting the depth offset displays depth readings from directly below the keel or propellers of
the boat, or from the waterline to the seabed. This makes it easier to see the available depth,
taking into account the draught of the boat.
The offset value to be entered should represent the distance between the face of the depth
transducer, and the lowest part of the boat below the waterline, or the distance between the
face of the depth transducer and the water surface.
Depth offset value
MENU
1 Enter the Settings menu.
2 Select depth via the calibration menu.
3 Select Offset.
x2
4 A dialog box will appear showing the current depth offset value.
¼ Note: The default value is zero
48 |
Sensor calibration | H5000 Operation Manual
Setting a calibration value
1
2
3
4
Highlight the value field.
Press the MENU key to enable editing of the calibration value. The cursor will flash in the value field.
Use the UP/DOWN Keys to adjust the value or toggle between plus and minus (+ / -).
Press the ENTER key to move to the next number in sequence. The current number will flash when
selected.
5 Press the ENTER key when the last digit is highlighted in the calibration field to exit.
6 Select OK.
7 Press ENTER to confirm and exit. The offset will then be set to the desired value and the
display will return to the calibration page.
¼ Note: If the calibration offset value fails an error message will appear “Setting offset failed”.
Check sensor connection and source selection and retry.
Boat speed
Speed calibration is necessary to compensate for hull shape and paddlewheel location
on your boat. For accurate speed and log readings, it is essential that the paddlewheel is
calibrated. Boat speed values can be shown in knots, kph or mph. Your preferred unit of
measurement can be set in the units page of the setup menu.
Sensor calibration | H5000 Operation Manual
| 49
Auto - Calibration via reference to GPS SOG value
This is an AutoCal facility that uses speed over ground (SOG) from your GPS and compares the
average of SOG against the average boat speed from the speed sensor for the duration of the
calibration run.
¼ Note: This calibration should be made in calm sea with no effect from wind or tidal current.
1 Bring the boat up to cruising speed (above 5 knots)
2 Select Auto correct on the Calibrate boat speed page
3 When the calibration is completed the Boat speed calibration scale will show the adjusted percentage
value of the boat speed.
4 Select OK once complete to confirm correction and exit.
Manual adjustment of boat speed
Adjust the boat speed manually by selecting the Boat speed percentage slider. Adjust the
percentage up or down as desired via the calibrate boat speed page. Confirm the value.
Select OK once complete.
50 |
Sensor calibration | H5000 Operation Manual
Distance reference
This facility enables the user to calibrate the log accurately and simply. Calculations are
performed by the display that works out the boat speed over a known distance.
To calibrate the boat speed via a distance reference you will need to complete consecutive
runs, under power at a constant speed made along a given course and distance.
¼ Note: To eliminate the effect of tidal conditions it is advisable to perform at least two runs,
preferably three, along the measured course.
How To Calibrate boat speed via Distance Reference
1 Enter the desired distance in nautical miles that you would like to calculate the distance reference over.
2 When the boat gets to the predetermined starting position of the distance reference calculation start
the calibration timer.
3 As the boat passes marks A and B on each run, instruct the system to start (Start Run) and stop (Stop
Run) and finally OK to end calibration (End Cal Runs).
4 After the last run is completed and OK has been selected, Select save to store the calibration.
5 A pop up warning will ask you if you wish to replace the current calibration with the new one. Select Yes
to complete or cancel to not replace the calibration value.
Distance reference diagram
Referring to the diagram, A and B are the markers for each run and X is the actual distance for
each run as measured from a suitable chart.
A
X
B
Start Run 1
Stop Run 1
Stop Run 2
Start Run 2
Start Run 3
End Calibration
¼ Note: It is important to maintain the same constant boat speed over each run.
Sensor calibration | H5000 Operation Manual
| 51
Use SOG as boat speed
If boat speed is not available from a paddle wheel sensor it is possible to use speed over
ground from a GPS. SOG will be used in the true wind calculations.
Environment
Sea / Air Temperature & Barometric pressure
If a suitable sensor is fitted, the system will monitor the current sea / air temperature and
barometric pressure.
The offset value to be entered should adjust the reading from the sensor to match a
calibrated source, i.e. adjust sea temperature to match reading from a thermometer when
submersed in the water.
52 |
Sensor calibration | H5000 Operation Manual
Masthead unit adjustment
This provides an offset calibration in degrees to compensate for any mechanical misalignment
between the masthead unit and the center line of the vessel.
To check the masthead unit alignment error we recommend you use the following method
which involves a sailing trial.
Sail on a starboard tack on a close hauled course and record the wind angle, then repeat the
process on a port tack. Divide the difference between the two recorded numbers and enter
this as the wind angle offset.
WIND
Starboard Tack
Port Tack
33º
27º
Starboard tack
=
33º
Port tack
=
27º
Difference : 33º - 27º
=
6º
Offset : 6º / 2
=
3º
If the starboard apparent wind angle is greater than the port angle then divide the difference
by 2 and enter this as a negative offset. If the port angle is greater than the starboard then
divide the difference by 2 and enter this as a positive offset.
MHU Align
Once the offset has been calculated enter it into the MHU Align calibration field
TWA / TWS Correction tables
The TWA and TWS Correction tables receive their information from the H5000 CPU and does
not store this information on the display.
¼ Note: TWA / TWS correction tables can also be adjusted from the webserver and the Zeus
family MFDs
Sensor calibration | H5000 Operation Manual
| 53
Editing a correction table
1 Highlight the field that requires editing and press the ENTER key
2 Adjust the correction value to the desired number
3 Select OK once complete to return to the correction table
True Wind Angle calibration
There are two methods of calibrating TWA, monitoring true wind direction from tack to
tack or gybe to gybe, or use the compass to verify the angles the yacht is tacking or gybing
through.
Start the TWA calibration process for either method by setting the boat up to do a number of
tacks upwind or gybes downwind in as steady conditions as possible.
Method 1
If an error is seen in true wind direction, then the following rule applies:
• If true direction is lifting you tack to tack then True Wind Angle is reading too wide, half the
error must be subtracted from the TWA correction table.
• If true direction is heading you tack to tack then True Wind Angle is reading too narrow, add
half the error to the TWA correction table.
Method 2
If according to the compass you are tacking through an angle different than the sum of the
True Wind Angles on each tack (Port TWA + Starboard TWA) then the following rule applies:
• If the tack angle < the sum of the TWA’s, the True Wind Angle is reading too wide, half the
error must be subtracted from the TWA correction table.
• If the tack angle > the sum of the TWA’s, the True Wind Angle is reading too narrow, add half
the error to the TWA correction table.
True Wind Speed calibration
True Wind Speed errors are seen from sailing upwind to downwind. This is due to the
acceleration of the airflow over the top of the mast and around the sails when sailing
downwind. -10% is the default value for TWA calibration. Monitoring the change in True Wind
Speed from close hauled to flat running will enable further refinement of this calibration
value.
Auto Calibration via webserver
It is possible to auto calibrate both tables via the Webserver. See the Webserver help files for
more details.
54 |
Sensor calibration | H5000 Operation Manual
Heading (compass)
Auto Cal
The compass Auto Cal process records the magnetic fields in the yacht that cause deviation
errors. It calculates the corrections when the compass calibration is started provided the
following conditions are met:
•
•
•
•
•
•
•
•
The 360º turn - RC42 compass or 2 x 360º turn Halcyon Gyro Stabilized compass is completed
in the same direction.
The rate of change of heading does not exceed 3º/s; i.e. the turn should take about 2 minutes
to complete.
The rate of change of heading must not fall below 0.2 °/s during the 360° turn, i.e. the turn
must not take longer than 12 minutes.
The rate of change in heading is reasonably constant.
The compass is installed in a location a safe distance from magnetic interference such as iron
keels, engines, loudspeakers etc.
Consideration should also be given to electrical cables which may carry high currents (e.g.
large motors).
The compass is installed in a location as close to the centre line of the boat as possible. Avoid
areas such as the fore peak and the sides of the hull where the effects of pitch and roll are at
their greatest.
On steel hulled vessels, the compass will need to be installed above decks away from the
effects of the hull.
1 Select Auto Cal
2 Select Calibrate
3 Steer the vessel through 360º maintaining a steady rate of turn
Sensor calibration | H5000 Operation Manual
| 55
Offset
The compass offset compensates for fixed errors (misalignment) between the compass sensor
and the direction of the boat.
To accurately enter a compass offset, the boat’s heading must be referenced to, for example:
a calibrated bowl compass . The offset value will be the difference between the known source
and the currently displayed heading. Enter this value as the offset in the compass heading
field as a plus or minus integer up to 180º
Magnetic variation
Adjust how the system handles magnetic variation.
Auto
Automatically calculates variation based on position and date.
Manual
If variation is not available enter a value manually.
Use COG as heading
If heading data is not available from a compass sensor it is possible to use course over
ground from a GPS. COG will be used in the true wind calculations.
¼ Note: The autopilot cannot be operated using COG as the heading source. COG cannot be
calculated when stationary.
56 |
Sensor calibration | H5000 Operation Manual
6
System setup
From the system menu there are several display and system options as listed in the following
section.
¼ Note: The graphic display can do most system settings, however the webserver should be
used for more detailed system setup.
Network
Before the system can be used, the data sources need to be configured.
Sources
A data source can be a sensor or a device connected to the network, providing information
and commands to other networked devices. The data sources are normally configured at first
time turn on. It should only be necessary to update this data if a new source is added, source
is missing (sensor failure), source has been enabled/disabled, sensor replaced or a network
reset.
Auto select
The Auto select option will look for all sources connected to the instrument system. If more
than one source is available for each item, the display will automatically select from the
internal device priority list.
¼ Note: Auto select can be performed via a Graphic Display, Webserver or one of the Zeus
family of MFDs.
1 Verify that all interfaced units are powered on
2 Press the ENTER key to start the auto select procedure
System setup | H5000 Operation Manual
| 57
The operator will be informed when the auto select process is completed.
¼ Note: If more than one source is available on the network you can choose your preferred
source from the sources menu. See Manual source selection below for more information.
Manual source selection
If more than one source is available for an item, the preferred source may be selected
manually. As an example, the following illustrations show how the compass source is
changed.
Select the preferred data source. The selected source will be indicated by a tick in the check
box.
Device list
Shows a list of all devices connected to the Network.
Diagnostics
Diagnostic data on the network.
58 |
System setup | H5000 Operation Manual
H5000 CPU info
H5000 CPU software version and IP address.
¼ Note: IP address is required for Webserver login.
Groups
The group function is used to globally control parameter settings in groups of units. By
assigning several units to the same group, a parameter update on one unit will have the same
effect on the rest in that group.
¼ Note: All groups are shipped from the factory set to ‘Default’.
Units
Set the preferred unit of measurement you want data to be displayed in.
¼ Note: This can be performed via a Graphic Display, Webserver or one of the Zeus family of
MFDs.
System setup | H5000 Operation Manual
| 59
Language
Set your preferred language for the display.
¼ Note: This is not a network function. You will need to change all displays separately.
¼ Note: Once the required language is selected the unit will automatically restart and continue
with step 2 of the startup wizard.
Time
From the time menu you can set the preferred time / date format and local time offset. Once
complete select Save to save the settings and return to the settings menu.
Simulate
Simulator mode sends simulated data to the display.
¼ Note: All other displays on the network will remain to display the current boat data and will
not change to simulate mode.
Warning: It is not advisable to enter simulator mode when using your
instrument system as a navigation aid.
60 |
System setup | H5000 Operation Manual
Restore defaults
Restore Defaults has the option to wipe all settings or partial settings out of the Graphic
Display. Select the data from the list that you wish to delete.
¼ Note: This is not a network function. This will only reset and delete history on the display that
‘Restore defaults’ is selected on.
Global reset
The global reset will reset all settings in all displays along with performing a network reset
removing all source selection.
¼ Note: After performing a global reset the Graphic Display will ask to do an auto source
selection.
About
Shows the device information and software version currently installed on the display. Press
the ENTER key to navigate back to the menu
System setup | H5000 Operation Manual
| 61
Autopilot setup
If an H5000 autopilot computer is connected to the network as per the instructions in the
H5000 installation manual then the installation process can be performed via the H5000 Pilot
Controller.
Source selection
A data source can be a sensor or a device connected to the network, providing information
and commands to other networked devices. The data sources are normally configured at first
time turn on. It should only be necessary to update this data if a new source is added, source
is missing (sensor failure), source has been enabled/disabled, sensor replaced or a network
reset.
¼ Note: Source selection can also be performed by a Graphic Display, Webserver or one of the
Zeus family of MFDs.
Auto selection
The Auto select option will look for all sources connected to the network If more than one
source is available for each item, the display will automatically select from the internal device
priority list.
Manual source selection
If more than one source is available for an item, the preferred source may be selected
manually. As an example, the following illustrations show how the compass source is
changed.
Select the preferred data source. The selected source will be highlighted.
Rudder drive
Ensure that the rudder information is set correctly before you continue with the Dockside
commissioning.
62 |
System setup | H5000 Operation Manual
Drive voltage (V)
Sets the drive voltage to the type installed on the vessel 12 or 24V
Drive engage
Drive engage has the following settings: Auto and Clutch.
Clutch:
This is the default setting and it allows you to steer the boat from the helm when in Standby
mode. A clutch will be engaged on the drive unit locking out the steering when Auto is
selected.
Auto:
This setting is implemented for future use. Always use the Clutch (default) setting.
Motor output
The Motor output (displayed as a percentage) is the amount of available power needed
to achieve correct rudder speed on automatic steering (Maximum speed is used in NFU
mode). This setting will allow you to adjust the rudder speed to be different from the one
automatically set in the rudder test.
Rudder deadband
The rudder deadband function is adaptive and is continuously updating. It prevents the
rudder from hunting and the adaptive function optimizes the deadband to the speed of the
boat and the load on the rudder.
¼ Note: If the auto-setting does not perform properly due to high inertia from the wheel, it can
be adjusted manually.
Find the lowest possible value that will prevent the rudder from continuous hunting. A wide
deadband will cause inaccurate steering. It is recommended to check rudder stability in Auto
mode when the boat is moving to get pressure on the rudder.
Manual deadband
If rudder deadband is set to manual then you can make manual adjustments to the deadband
value
Rudder feedback
Set the rudder feedback type.
¼ Note: It is important that you select the relevant rudder feedback unit via source selection.
System setup | H5000 Operation Manual
| 63
Commissioning
Dockside
Boat length
Set the length of the vessel. Press the 1º LEFT key to return to the dockside menu.
Drive voltage
Select the drive voltage 12 or 24 Volts. Press the 1º PORT key to return to the dockside menu.
Rudder calibration
Make sure the rudder feedback unit is installed and aligned as per it’s installation manual. The
rudder calibration will set the correct relationship between the physical rudder movement
and the rudder angle readout.
Follow the rudder calibration procedure:
Max starboard
Manually move the helm to starboard until the rudder stops at starboard lock hard over. Press
1º RIGHT to confirm
• The Enter max starboard angle is the angle read by the rudder feedback unit before any
adjustment is made.
• If the max angle is different from the angle displayed, correct the reading with the UP/DOWN
keys.
• Confirm Rudder feedback calibration to starboard by pressing 1º RIGHT
•
Max port
Manually move the helm to port until the rudder stops at port lock hard over. Press 1º RIGHT
to confirm
• Adjust the displayed angle the same way as for starboard rudder.
• Confirm Rudder feedback calibration to port by pressing 1º RIGHT
•
¼ Note: Many boats have ±45° (90° H.O. - H.O.) rudder angle as standard. The default angle is set
to 35º Ensure to make adjustments accordingly.
64 |
System setup | H5000 Operation Manual
•
Set rudder to 0 (zero)
Bring the rudder to midship position and confirm. This will adjust an incorrect reading caused
by misalignment of the rudder feedback unit.
Rudder Test
¼ Note: If the boat uses power assisted steering, it is important that the engine or electric
motor used to enable the power assist steering be turned on prior to this test.
Warning: Stand CLEAR of the wheel and do not attempt to take
manual control of the wheel during this test!
•
Bring the rudder manually to midship position before starting the test.
•
After a few seconds the autopilot Computer will issue a series of port and starboard rudder
commands and automatically verify correct rudder direction. It detects minimum power to
drive the rudder and reduces the rudder speed if it exceeds the maximum preferred speed
(8°/sec.) for autopilot operation.
The Rudder test is verified by the display showing ‘Success’. Press 1º RIGHT to return to the
menu.
•
¼ Note: If Failed is given, check for correct electrical connection, check rudder feedback device
has been configured correctly and or selected as the current source.
Sea trial
After completing the installation and all settings in the installation menu, you will need to
perform a final sea trial.
Auto tune
Autotune is a feature that automatically sets the most important steering parameters (Rudder
and Counter Rudder) by taking the boat through a number of S-turns. The scaling factors of
the parameters are also set automatically as a function of the boat type selection performed
in the Dockside menu.
The automatic tuning process is also verifying/adjusting the Rudder zero alignment made
in Dockside setup. Automatic tuning is a procedure that is not required for the autopilot to
function as it is preset with steering parameters that should steer most boats in the 30 - 50
foot range.
System setup | H5000 Operation Manual
| 65
Recommended speed during Automatic tuning should not exceed 10 knots. It should be
performed in calm or moderate sea conditions. For displacement boats use a speed that is
approximately half the normal cruising speed (i.e. if cruising speed is 10 knots, perform the
Autotune at about 5 knots).
Select Autotune to begin the tuning process. Press 1º RIGHT to confirm Autotune.
After the Autotune has been completed the rudder must be controlled manually, as the
autopilot has returned to Standby mode. The Automatic tuning function will take control of
the boat and perform a number of S-turns.
¼ Note: Autotune must always be performed in open waters at a safe distance from other
traffic. The Automatic tuning function may take from 2 to 3 minutes to complete. To stop the
Autotune, press the 1º LEFT key.
After the Autotune process has been completed, ‘Finished’ will be shown on the screen and
there should be no need for further adjustments. Fine tuning of these parameters are made
by the response control.
Rudder gain
Rudder gain is the ratio between the commanded angle and the heading error.
•
•
•
66 |
Too little
rudder gain
Set Course
Too much
rudder gain
Set Course
Too little Rudder gain and the autopilot fails to keep a steady course
Too much Rudder gain gives unstable steering and reduces speed
Low speed requires more rudder gain than high speed
System setup | H5000 Operation Manual
Counter rudder
Counter Rudder is the parameter that counteracts the effect of the boat’s turn rate and inertia.
For a short time period it is superimposed on the proportional rudder response caused by the
heading error. It may sometimes appear as if it tends to make the rudder move to the wrong
side (counter rudder).
The best way of checking the value of the Counter Rudder setting is when making turns. The
figures illustrate the effects of various Counter Rudder settings.
Counter rudder
setting too low
= Overshoot
response
New course
New course
Counter rudder
setting too high
= Sluggish and
creeping response
New course
Correct setting of
counter rudder,
ideal response
Response
The Response Mode controls the response of the autopilot steering. There are five levels of
performance response modes. Level one consumes the least amount of power when steering
the autopilot and offers the slowest response. Level five consumes the most power and has
the highest response.
System setup | H5000 Operation Manual
| 67
Sailing
The sailing specific autopilot features are only available if advanced is enabled in the local
menu.
Once enabled the sailing autopilot features can be accessed via the Main menu.
•
•
•
•
Wind mode
Select what wind function the autopilot will use when in wind mode.
Auto - In auto if the AWA is ≤60º Wind mode will use apparent wind. <61º Wind mode will use
TWA (True).
Apparent
True
Polar
¼ Note: The current selection will be highlighted when you enter the menu.
Gust response
Effects how the autopilot will react to rapid changes in heel angle caused by gusts.
To activate this feature select ‘Enable’
Gust response settings
Gust Min
Minimum gust in knots before gust compensation is applied.
Response rate
How aggresively the autopilot will react to gusts.
TWA response
Controls the size of the window in which gust response will
operate.
TWS response (True Wind Speed)
True Wind Speed response is used to compensate for long term changes in wind speed. If the
average wind speed increases and stays high, the boat will bear away accordingly, and remain
low to the wind until the wind decreases.
68 |
System setup | H5000 Operation Manual
Response rate
Set the rate of TWS response 1 to 10. 1 = slowest response, 10 = quickest response.
Tack time
Controls the rate of turn (tack time) when performing a tack in wind mode.
Range
Change per step
Default
Units
2 - 50
1
12
Second
Tack angle
Controls the angle that the boat will tack to between 50º - 150º
¼ Note: Only works in Auto mode.
Range
Change per step
Default
Units
0 - 180º
1
100º
Degrees
Heel compensation
Heel compensation provides protection against roll induced broaching in heavy seas or high
gust conditions, by applying the correct amount of rudder compensation before adverse
events become dangerous.
Response rate
Set the rate of heel compensation 1 to 10. 1 = slowest response, 10 = quickest response.
Steering
Auto response
The Auto response mode controls the rate that which the autopilot reacts to any
environmental influences on the vessels desired course.
System setup | H5000 Operation Manual
| 69
There are four auto response options available:
Off
The autopilot will always remain in the response mode selected.
Economy
The autopilot will need to sense large environmental changes before
increasing the response setting.
Normal
The autopilot will respond to moderate environmental changes state
before increasing the response setting.
Sport
The autopilot will be most sensitive to changing conditions and will
automatically increase its response rate to counter environmental
changes.
Recovery
Recovery Mode allows the user to set the sensitivity to course errors and how the autopilot
will react to unexpected events, for example sudden wave or wind shifts. This function allows
the autopilot to instantaneously increase the steering response to its maximum setting (Perf
5), and make a rapid recovery.
The Recovery Mode will automatically switch off after 15 seconds or when the heading
error has been corrected. The autopilot will then resume the previous response setting and
continue normal operation.
There are four options available.
Off
The Recovery Mode function is switched off.
Narrow
The autopilot is most sensitive to sudden course changes corrected.
Medium
The autopilot is configured to the medium value when correcting sudden
course changes.
Wide
The autopilot is least sensitive to sudden course changes.
Limits
This allows control of the True Wind Angle range where Gust and True Wind Speed response
can be configured and controlled.
70 |
System setup | H5000 Operation Manual
TWA minimum
Sets the minimum True Wind Angle that heel, gust and True Wind Speed operate in.
Use the MODE / MENU keys UP/DOWN to set the desired value. Press the 1º LEFT key to
return.
TWA maximum
Sets the maximum True Wind Angle that heel, gust and True Wind Speed operate in.
Use the MODE / MENU keys UP/DOWN to set the desired value. Press the 1º LEFT key to
return.
Bear away max
The maximum angle the vessel will bear away during stability control. 0º to 20º
Transition speed
The speed in knots that the vessel will transfer from displacement to plaining mode.
Speed source
The Autopilot will automatically prioritise which speed source it uses.
Automatic speed source priority
1 Boat speed - Paddle wheel sensor
2 Speed Over Ground (SOG) - GPS sensor (Only used if there is no boat speed source)
Manual speed source
If neither boat speed or SOG data is available and or deemed reliable a manual value for
speed source can be entered and used by the autopilot to aid steering calculations.
¼ Note: Entering a speed source in the manual field will automatically make the autopilot use
the manual speed source. Set the value back to zero to return to automatic speed source
selection.
¼ Note: It is important that a close approximation of the vessel’s boatspeed is used.
Setup
Adjust the display settings, enable the alarm buzzer, change the language, key beeps and
enable advanced mode.
System setup | H5000 Operation Manual
| 71
Display
Day mode
Day is the default display mode. The following parameters can be manually adjusted.
• Red backlight
• Inverse display
• Contrast
Night mode
Change the display to night mode color pallet. Lighting adjustments can be made as per the
day mode settings. All displays in the selected lighting zone will also change to night mode.
Lighting group
Set the lighting group on the display. All units in the selected lighting group will mirror each
others light settings. Default setting is Network.
Light level adjustment
Press the MENU key for 3 seconds to access the backlight level screen. The MODE key will
increase the brightness level, the MENU key will decrease the brightness.
3sec
¼ Note: Brightness level (1-10). The light level selection times out after 2 seconds.
Alarm buzzer
Enable / disable the H5000 Pilot Controller alarm buzzer.
Language
Set the desired language
Local
•
•
Reset the H5000 Pilot Controller settings without resetting the autopilot. This will return the
H5000 Pilot Controller to its default sound and light settings
Advanced settings menu - Enable / Disable
Key beeps
Enable / disable H5000 Pilot Controller key beeps
Software info
•
•
•
72 |
H5000 Pilot Controller serial number
Software version
Software release date
System setup | H5000 Operation Manual
7
Webserver
The B&G Webserver is an easy to use web-style portal that lets you calibrate instruments,
configure displays and choose from an array of features. You can also access product manuals,
data backups and system diagnostics.
¼ Note: An up to date web browser that supports web sockets must be used to access the B&G
webserver.
Connecting to the webserver
¼ Note: Before you can you use the B&G webserver you will need to connect your PC directly to
the H5000 CPU via an ethernet cable or wirelessly via a WiFi-1 router.
Direct via Ethernet
Connect a computer directly to the H5000 CPU via an ethernet cable.
1 Connect device to the H5000 CPU via the ethernet port
2 Open web browser on the connected computer or device
3 Type the IP address [ 192.168.0.2 ] into the web browser address bar
¼ Note: Unit will attempt to select a DHCP server for 2 minutes after power on. If the server is
not detected the unit will revert to IP address [ 192.168.0.2 ]
¼ Note: Ensure that your computers network settings are set so you can access this IP address
Webserver | H5000 Operation Manual
| 73
4 Once connected correctly the B&G H5000 Webserver home screen will appear
¼ Note: It will say “Websocket: Connected” in the top right-hand corner of the screen next to
the help tab. If it says “Websocket: Not Connected” then check the H5000 CPU and router
power and connections.
Wireless via a WiFi-1 router
Connect wireless devices to the H5000 CPU via a WiFi-1 router.
WIFI-1
WiFi-1 Router
¼ Note: To connect the WiFi-1 router to the H5000 CPU an Ethernet to RJ45 converter cable is
required. Part No. 000-10438-001
WIFI-1
12V
1 Connect a WiFi-1 to the H5000 CPU ethernet port via RJ45 converter cable
74 |
Webserver | H5000 Operation Manual
2 Find the IP address of the H5000 CPU via a Graphic Display on the network.
¼ Note The H5000 CPU IP address can be found via the Graphic displays system, network menu
under H5000 CPU info. Make a note of this IP address.
3 Open web browser on the connected computer or device.
4 Type the H5000 CPU IP address into the web browser address bar
¼ Note: Unit will attempt to select a DHCP server for 2 minutes after power on. If the server is
not detected the unit will revert to IP address [ 192.168.0.2 ]
Once connected correctly, the Webserver will show ‘Websocket: Connected’ in the top
righthand corner of the screen the same as with a direct ethernet connection.
Webserver | H5000 Operation Manual
| 75
Webserver menus
The Webserver menu tabs can be found at the top of the web page. Select the desired main
menu and the available sub menu tabs will be shown directly below as indicated.
MAIN
SUB
MAIN MENU
TABS
Data
Time Plots
Live graphical data
Race Timer
Race timer control
Trip
Trip log data
All Data
All available data from H5000 CPU
HV Displays
Display List
All HV Displays on network
Calibration
Depth
Configure & setup
Heading
Configure & setup
Boat Speed
Configure & setup
Measured Wind
Configure & setup
True Wind
Configure & setup
Heel
Configure & setup
Trim
Configure & setup
Leeway
Configure & setup
Settings
Data settings
Units
System units
Damping
Damping values
Alarms
Configure & setup alarms
Device List
All devices on network
Backup & Restore
Save and load system settings
Software
CPU & devices on network software info
Manuals
Documentation PDFs
Reset
System reset options
Diagnostics
Diagnostics information
Auto Source Selection
Automatically select sources
Network reset
Delete all source selections
System
CPU
Sources
76 |
SUB MENU
TABS
Webserver | H5000 Operation Manual
Webserver help files.
Selecting the help tab located in the top righthand corner of the screen will show the help
files related to the current page or feature.
Webserver | H5000 Operation Manual
| 77
8
Operating variables
This section details the operating functions within the H5000 system.
The System Requirements sections advise of any additional requirements over a standard
system.
For this purpose a standard system is taken as being a Graphic display and CPU with Wind,
Speed, Depth and Compass sensors.
Where a function is obtained from a NMEA source the update rate published is the maximum,
if the incoming NMEA data is slower this will affect the displayed data.
All variables described in this section refer to the standard Hydra processor settings unless
indicated with a Hercules or Performance logo.
Indicates that the information listed relates to Hercules
processor functionality which includes Hydra functions.
Indicates that the information listed relates to
Performance processor functionality which includes
Hydra & Hercules functions.
Please contact your local dealer if you wish to upgrade your processor. A list of B&G approved
dealers can be found at www.bandg.com
Aft depth
Aft Depth is an auxiliary Depth function which allows the system to display two Depth
readings: one from the standard transducer, one from an external NMEA sensor or source.
Aft Depth is declared by the system when a valid source of NMEA data is received from a
compatible device. The function name is Aft Depth by default, it can be changed to suit the
configuration (e.g. “Fwd Depth”).
¼ Note: Aft Depth is calibrated in the same manner as the standard depth. See ‘Calibration’ for
more details.
78 |
Variable name (default)
Function name (Race & HV Display)
Aft Depth (ADep)
DEPTH-A
Units
m, ft, fm
Alarms
Low (Shalllow)
Calibration
Datum (offset)
Damping
N/A
Operating variables | H5000 Operation Manual
Analog
There are four analog channels built into the CPU and multiple analog modules can be added
to the network.
Once a device is wired into an analog channel it must be configured before it will provide the
correct data.
Calibration of analog (linear) functions
For all linear functions it is necessary to set the Type value (see table below).
Description
Function declared
0 to 10 Linear
None
0 to 100 Linear
None
0 to 1000 Linear
None
y2
y1
x1
x2
x1
=
Analog Volts 1
y1
=
Analog value 1
x2
=
Analog Volts 2
y2
=
Analog value 2
¼ Note: Analog linear channel is the channel on the display where the data is sent to. There are
user channels available.
Operating variables | H5000 Operation Manual
| 79
Apparent wind angle
Apparent Wind Angle (AWA) is the angle of the wind relative to the bow of the boat. The value
displayed is back-calculated from the True Wind data so as to include True Wind Correction
data. Raw wind angle data from the masthead unit is displayed as Measured Wind Angle.
Variable name (default)
Function name
App. Wind Angle (AWA)
AWA
Units
Degrees
Alarms
N/A
Calibration
MHU Offset, Heel correction On/Off
AutoCal Offset routine.
Damping
N/A
Apparent wind speed
Apparent Wind Speed (AWS) is the speed of the wind relative to the boat. The value displayed
is back-calculated from the True Wind data so as to include True Wind Correction data. Raw
wind speed data from the masthead unit is displayed as Measured Wind Speed.
Variable name (default)
Function name
App. Wind Speed (AWS)
AWS
Units
kph, mph
Alarms
N/A
Calibration
Hz/Kt
Speed Offset
Damping
0-9s
¼ Note: The calibration values are factory set based on wind-tunnel tested sample units and it
is not recommended to change these. The option to change them exists for advanced users
who may choose to individually test masthead units to obtain specific calibration data. Both
calibration values are set to 1.04 by default.
Average speed
Average Speed (AVS) is a Trip Function that displays the average Boat Speed [speed through
the water] since the Trip Log was started.
In simple terms this can be calculated as:
Average Speed
80 |
=
Trip Log
Trip Time
Variable name (default)
Function name
Average Speed (AVS)
AVG SPD
Units
kt, mph, kph
Alarms
N/A
Calibration
N/A
Damping
N/A
Operating variables | H5000 Operation Manual
Barometric pressure
There is a calibration if you wish to check your pressure reading against another barometer.
CAL VAL1 should be set to the current correct barometric pressure.
Variable name (default)
Function name
Barometric Pressure (BARO)
BARO
Units
mb
Alarms
N/A
Calibration
N/A
Damping
N/A
Battery voltage
Battery Voltage displays the power supply voltage measured internally by the CPU.
Variable name (default)
Function name
Battery Volts (BATT)
BATTERY
Units
V
Alarms
High, Low
Calibration
Offset (set to known value)
Damping
N/A
Bearing to waypoint
Bearing To Waypoint displays the bearing from the yachts current position (Boat Position) to
the current active waypoint.
This function repeats information received from a position fixing device (e.g. GPS) via a NMEA
input.
Variable name (default)
Function name
Bearing origin to destination
WPT BRG
Units
ºM, ºT
Great Circle, Rhumb Line
Alarms
High, Low
Calibration
N/A
Damping
N/A
Operating variables | H5000 Operation Manual
| 81
Bearing waypoint to waypoint
Bearing Waypoint to Waypoint displays the bearing of the current leg of a route, from the
origin to destination waypoints. The value is constant until the position fixer advances to the
next leg.
Variable name (default)
Function name
Bearing To Waypoint (BTW)
BRG WPT
Units
ºM, ºT
Great Circle, Rhumb Line
Alarms
High, Low
Calibration
N/A
Damping
N/A
Boat position
Boat position displays the current boat position of the yacht. This function is only available on
Graphic Displays.
This function repeats information received from a position-fixing device (e.g. GPS) via a NMEA
input.
Variable name (default)
Function name
Boat Position (POS)
N/A
Units
ddº mm.mm, dddº mm.mm
Alarms
N/A
Calibration
N/A
Damping
N/A
Boat speed
Boat Speed displays the speed of the boat through the water. Accurate calibration of Boat
Speed is critical to the overall performance of the system. On larger format displays an
indicator showing acceleration/deceleration trend is displayed.
82 |
Variable name (default)
Function name
Boat Speed (BSpd)
BOAT SPD
Units
kt, mph, kph
Alarms
High, Low
Calibration
Distance Reference, known distance
SOG Reference, reference speed
Hz/Kt, port and starboard and single
Linearity correction
Use SOG – Select SOG as alternative boat
speed source.
Damping
0-9s
Dynamic Damping
Operating variables | H5000 Operation Manual
Boom position
Boom Position is designed to allow the boom height to be set accurately to allow furling
systems to work with optimum efficiency.
Calibration of Boom Position
Boom Position is an arbitrary value and the value is not used in further calculations, as such an
absolutely accurate calibration is not required.
If Boom Position is not available in the menu it is necessary to determine the linear input in
use and configure it correctly.
Position the boom at the optimum point for furling/reefing, set POINT 1 to be 0.0, the voltage
is automatically recorded and can be noted from VOLTS 1 if required.
Position the boom at its highest normal position, set POINT 2 to be 5.0, the voltage is
automatically recorded and can be noted from VOLTS 2 if required.
After calibration check that the value displayed for Boom Position is positive if the boom is
high of the furling position, zero at the furling position and negative when the boom is below
the furling position.
Before furling it is a simple case of adjusting the boom height until Boom Position reads 0.0.
Variable name (default)
Function name
Boom Position (Boom)
BOOM POS
Units
Arbitrary
Alarms
N/A
Calibration
Position 1 (known value 1)
Volts 1 (automatically recorded)
Position 2 (known value 2)
Volts 2 (automatically recorded)
Damping
N/A
Operating variables | H5000 Operation Manual
| 83
Canard angle
Canard Angle is designed to display the angle of a canard or forward rudder.
Calibration of Canard Angle
If Canard Angle is not available in the menu it is necessary to determine the linear input in use
and configure it correctly.
Position the canard centrally, set POINT 1 to be 0.0, the voltage is automatically recorded
and can be noted from VOLTS 1 if required. Position the canard at a known angle (e.g. 10º
starboard), set POINT 2 to be this angle (e.g. 10.0), the voltage is automatically recorded and
can be noted from VOLTS 2 if required. By convention if the rudder is turned anti-clockwise
from the centre the value should be positive.
Variable name (default)
Function name
Canard (Can)
CANARD
Units
Degrees
Alarms
N/A
Calibration
Position 1 (known value 1)
Volts 1 (automatically recorded)
Position 2 (known value 2)
Volts 2 (automatically recorded)
Damping
N/A
Course
Course is a combination of Heading and Leeway and gives a more accurate number than
heading alone on which to base tacking angles etc.
In the absence of a Heel Angle sensor and/or Leeway calibration the Course value will be
identical to the Heading.
Variable name (default)
Function name
Course (CSE)
COURSE
Units
ºM, ºT
Alarms
N/A
Calibration
Heading Node
Damping
N/A
Course over ground
Course Over Ground (COG) displays the current course of the yacht relative to land (rather
than the water), referenced to North.
84 |
Variable name (default)
Function name
Course Over Ground (COG)
COG
Units
ºM, ºT
Alarms
N/A
Calibration
N/A
Damping
N/A
Operating variables | H5000 Operation Manual
Cross Track Error (XTE)
XTE displays the distance the yacht is from the direct route (Great Circle or Rhumb
Line depending on the position fixer) between two waypoints. The measurement is a
perpendicular distance from the direct route to the yacht.
Variable name (default)
Function name
XTE
XTE
Units
nm
Alarms
N/A
Calibration
N/A
Damping
N/A
Daggerboard
Daggerboard Position will display a value which indicates the current vertical position of a
daggerboard.
Calibration of Daggerboard
The recommended procedure is as follows, this procedure is designed to display “0.0” when
the daggerboard is fully down and a negative value as it is raised. If Daggerboard is not
available in the menu structure it is necessary to determine the linear input in use and
configure it correctly - Refer to‘installtion information’.
Position the daggerboard in the fully extended position, set POINT 1 to be 0.0, the voltage is
automatically recorded and can be noted from VOLTS 1 if required. Position the daggerboard
at its fully retracted position, set POINT 2 to be a negative value equal to the travel of the
daggerboard. The voltage is recorded and can be noted from VOLTS 2 if required.
Variable name (default)
Function name
Daggerboard (Dag)
DAGGER
Units
As set by calibration
Alarms
N/A
Calibration
Position 1 (known value 1)
Volts 1 (automatically recorded)
Position 2 (known value 2)
Volts 2 (automatically recorded)
Damping
N/A
Operating variables | H5000 Operation Manual
| 85
Dead reckoning
Dead Reckoning provides Course and Distance from a base point, which is set when you start
the function running, both the bearing from the start point and its distance in nautical miles
can be displayed as separate functions.
N
1
2
3
4
6
5
Dead Reckoning
No.
Description
1
Starting point
2
Course made good
3
Actual course sailed
4
Distance made good
5
Course reads: 213º Distance reads: 17.8 miles
6
Tide vector
D/R calculations are based on the Course function, therefore if a Heel Angle sensor is fitted
the D/R data can be corrected for Leeway.
86 |
System requirements
N/A
Connection
N/A
Variable name (default)
Function name
D/RCourse, D/RDistance DRD/DRC
DR BRG and DR DIST
Units
ºM, ºT, nm
Alarms
N/A
Calibration
N/A
Damping
N/A
Operating variables | H5000 Operation Manual
Depth
The depth offset adjustment allows the datum to be moved to give either depth below the
keel, below the waterline or from the transducer face.
Variable name (default)
Function name
Depth
Depth
Units
m, ft, fm
Alarms
High (Deep), Low (Shallow)
Calibration
Datum
Damping
N/A
Distance to waypoint
Distance To Waypoint displays the distance from the yachts current position (Boat Position) to
the current active GPS waypoint.
Variable name (default)
Function name
Distance to waypoint
WPT DIST
Units
Nm
Alarms
N/A
Calibration
N/A
Damping
N/A
Heading
Heading displays the compass heading relative to North (either Magnetic or True reference
depending on sensor choice and system setup).
Variable name (default)
Function name
Heading (Hdg)
HDG
Units
ºM, ºT,
Alarms
N/A
Calibration
Offset
AutoSwing (depending on sensor)
Damping
Operating variables | H5000 Operation Manual
0-9s
Dynamic Damping B&G Sensors only
| 87
Heading on opposite tack
Heading on Opposite Tack displays the compass heading that the yacht would be following
after tacking to the same TWA on the other tack.
¼ Note: This function does not take any tidal effects into consideration.
Variable name (default)
Function name
Heading Opp. Tack (OppT)
OPP HDG
Units
ºM, ºT,
Alarms
N/A
Calibration
N/A
Damping
0-9s
Heel angle
The Heel Angle function displays the port/starboard inclination of the yacht. Heel data is
used to calculate other functions including Leeway and Course. Heel Angle is also used
by Hercules systems to correct wind data for the change of orientation of the sensor in the
airflow.
Variable name (default)
Function name
Heel
HEEL
Units
Degrees
Alarms
N/A
Calibration
Offset
Damping
0-9s
Keel angle
Keel Angle indicates the current axial position of a canting keel.
Calibration of Keel Angle.
The recommended procedure is as follows, this procedure is designed to display “0.0” when
the keel is central with negative values displayed on the port side. In this example the
maximum angle attainable by the keel is 40º.
If Keel Angle is not available in the menu structure it is necessary to determine the linear
input in use and configure it correctly - Refer to ‘Installtion Information’.
Position the keel centrally, set POINT 1 to be 0.0, the voltage is automatically recorded and
can be noted from VOLTS 1 if required. Position the keel at its maximum travel to starboard,
set POINT 2 to be a value equal to the angle of the keel (in this example 40.0), the voltage is
automatically recorded and can be noted from VOLTS 2 if required.
88 |
Variable name (default)
Function name
Keel Angle (Keel)
KEEL ANG
Units
Degrees
Alarms
N/A
Calibration
Position 1 (KNown Value 1)
Volts 1 (Automatically Recorded)
Position 2 (Known Value 2)
Volts 2 (Automatically Recorded)
Damping
0-9s
Operating variables | H5000 Operation Manual
Latitude/Longitude
Latitude and Longitude are displayed on the Graphic display as Boat Position (refer to
‘operating functions’.
Distance to layline
This function displays the distance of both left and right-hand laylines by alternating the
display between the two. An P or S is shown in the left hand digits to signify Port or Starboard
laylines respectively
¼ Note: The Race display doesn’t show the P or S
Variable name (default)
Function name
Layline Distance (dLL)
LL DIST
Units
Nm
Alarms
N/A
Calibration
N/A
Damping
N/A
Leeway
Leeway is the angle between the compass heading (Heading) and the course through the
water (Course). The diffrence is caused by the boat slipping sideways through the water
whilst sailing upwind.
Variable name (default)
Function name
Leeway (Lway)
LEEWAY
Units
º Degrees
Alarms
N/A
Calibration
N/A
Damping
N/A
User
Variable name (default)
Function name
Linear n (LIN n)
LINEAR n
Units
N/A
Alarms
N/A
Calibration
Type (see table below)
Minimum (value at 0V)
Maximum (value at 5V)
Damping
N/A
Operating variables | H5000 Operation Manual
| 89
Local time
Displays local time from an interfaced position fixer. Ensure that your position fixer is
configured to apply the correct local time offset.
¼ Note: Not availavle on Race DIsplay
Variable name (default)
Function name
Local Time (Time)
TIME LOC
Units
N/A
Alarms
N/A
Calibration
N/A
Damping
N/A
Mast angle
Mast Angle measurement is required for yachts with rotating masts as the wind sensor rotates
with the rig, which introduces errors into the wind calculations. To correct for this issue a mast
rotation sensor is fitted to the system, which provides the angle information.
When Mast Angle data is available all wind data is corrected to ensure that all angles are
relative to the bow of the boat. In addition a new function, Wind Angle to Mast, is created.
Variable name (default)
Function name
Mast Angle (MST)
MAST ANG
Units
Degrees
Alarms
N/A
Calibration
Offset
Damping
0-9s
Measured wind angle
Measured Wind Angle is the angle measured by the masthead unit, no calibrations are
applied except the basic offset value for alignment.
Measured Wind is not used whilst sailing, but is a useful function for checking the operation
and alignment of the wind instruments before additional corrections are applied to the data
during the calculation of the True Wind and Apparent Wind.
90 |
Variable name (default)
Function name
Measured Wind Angle (MWA)
MWA
Units
Degrees
Alarms
N/A
Calibration
Offset
Damping
0-9s
Operating variables | H5000 Operation Manual
Measured wind Speed
¼ Note: Only available via the Webserver
Measured Wind Speed is the wind speed measured by the masthead unit, no calibrations
are applied except the factory set offset and Hz/Kt values. Measured Wind is not used whilst
sailing, but is a useful function for checking the operation of the wind instruments before
additional corrections are applied to the data during the calculation of the True Wind and
Apparent Wind.
Variable name (default)
Function name
Measured Wind Speed (MWS)
MWS
Units
Kt
Alarms
N/A
Calibration
N/A
Damping
N/A
Next leg apparent wind angle
¼ Note: Only available via the Webserver
Next Leg wind information is a prediction of the conditions of Apparent Wind Angle and
Speed that the yacht will experience after altering course onto the next leg.
This data is calculated from the current True Wind and a bearing that you enter for the next
leg course. From this information the True Wind Angle on the next leg is calculated, then by
using the polar tables the corresponding Boat Speed is given and hence the Apparent Wind
Speed and Angle can be calculated.
Should the leg be upwind or downwind, rather than free, the H5000 calculates the data using
the Target TWA on the favoured tack, this situation is indicated on the display by the position
of a small bar at the top (upwind) or bottom (downwind) of the digits.
The tide calculated by the system can be applied to the calculation if required.
The tide is calculated by the Processor when a position fixing system is connected.
Variable name (default)
Function name
Next Leg AWA (NL AWA)
NL AWA
Units
Degrees
Alarms
N/A
Calibration
Next Leg Bearing
Tide On
Damping
N/A
Next leg apparent wind speed
See Next Leg Apparent Wind Angle for operation information.
Variable name (default)
Function name
Next Leg AWS (NL AWS)
NL AWS
Units
Kt
Alarms
N/A
Calibration
N/A
Damping
N/A
Operating variables | H5000 Operation Manual
| 91
Optimum wind angle
Optimum Wind Angle provides an alternative method of presenting Target TWA data, which
some people find easier to use.
For every Target Boat Speed there is a wind angle at which that speed will be achieved (Target
TWA). The Optimum Wind Angle is the difference between this angle and that at which you
are presently sailing, so keeping the Optimum Wind Angle at zero achieves the Target TWA for
Target Boat Speed.
If you are sailing at the optimum wind angle then you will achieve optimum VMG up/
downwind for the current wind condition. Sometimes, particularly downwind, it is easier to
try to sail to a wind angle rather than to the Target True Wind Angle (TWA). The accuracy of
this function will depend on how accurate the polar tables are for your boat.
Variable name (default)
Function name
Optimum Wind Angle (OPT WA)
OPT TWA
Units
Degrees
Alarms
N/A
Calibration
N/A
Damping
N/A
Polar Boat Speed
Polar Boat Speed is the predicted achievable boat speed for the current wind conditions.
Unlike Target Boat Speed, which only applies whilst sailing upwind or downwind. Polar Boat
Speed applies at all wind angles; it is therefore useful when sailing on a free leg.
The helmsman and trimmers can use this figure as the target to achieve maximum
performance independent of any changes in the wind speed. The same data is also available
via the Polar Performance % function in terms of Boat Speed as a percentage of Polar Boat
Speed.
Variable name (default)
Function name
Polar Speed (POL)
POL SPD
Units
Kt
Alarms
N/A
Calibration
N/A
Damping
N/A
Polar Performance
Polar Performance displays boat speed as a percentage of the polar target for any given wind
speed and True Wind Angle.
92 |
Variable name (default)
Function name
Polar Performance (POL %)
POL PERF
Units
%
Alarms
N/A
Calibration
N/A
Damping
N/A
Operating variables | H5000 Operation Manual
Pitch Rate
¼ Note: Hydra will show this data but cannot use it.
Pitch Rate displays the current value of Pitch Rate as used by Hercules Motion for wind
correction. This function is shown for diagnostic purposes only.
¼ Note: Also see Roll Rate.
Variable name (default)
Function name
Pitch Rate
PITCH
Units
Degrees per Second
Alarms
N/A
Calibration
N/A
Damping
N/A
Remote n
The Remote functions are declared (in the External menu) by the Performance software and
are used to display data from an external system (e.g. a PC running B&G Deckman) via the
H-Link protocol.
Roll rate
¼ Note: Hydra will show this data but cannot use it.
Roll Rate displays the current value of Roll Rate as used by Hercules Motion for wind
correction. This function is shown for diagnostic purposes only.
¼ Note: Also see Pitch Rate.
Variable name (default)
Function name
Roll Rate
ROLL
Units
Degrees per Second
Alarms
N/A
Calibration
N/A
Damping
N/A
Rudder angle
Displays the current Rudder Angle. Useful for assessing the balance of the yacht, especially
upwind.
Variable name (default)
Function name
Rudder Angle (Rud)
RUDDER
Units
Degrees
Alarms
N/A
Calibration
Offset
Damping
N/A
Operating variables | H5000 Operation Manual
| 93
Speed over ground
Speed Over Ground (SOG) displays the current speed of the yacht relative to land (rather than
the water).
Variable name (default)
Function name
SOG
SOG
Units
kt
Alarms
N/A
Calibration
Offset
Damping
0-9
Stored log
The Stored Log runs continually and records the total distance travelled by the yacht since the
system was initially commissioned.
Variable name (default)
Function name
Stored Log (Log)
STD LOG
Units
nm
Alarms
N/A
Calibration
N/A
Damping
N/A
Target boat speed
Target Boat Speed is the Boat Speed at which optimum VMG will be achieved, derived from
the polar table.
Variable name (default)
Function name
Target Boat Speed (TG SPD)
TARG SPD
Units
kt
Alarms
N/A
Calibration
N/A
Damping
N/A
Target True Wind Angle
Target TWA is the TWA at which optimum VMG will be achieved, derived from the polar table.
94 |
Variable name (default)
Function name
Target TWA (TG TWA)
TARG TWA
Units
Degrees
Alarms
N/A
Calibration
N/A
Damping
N/A
Operating variables | H5000 Operation Manual
Temperature - Air
Air Temperature (AIR) displays the current temperature read via the sensor.
Variable name (default)
Function name
Air Temperature (AIR)
AIR TEMP
Units
ºC, ºF
Alarms
High and Low
Calibration
Offset
Damping
N/A
Temperature - Aux
Displays the current temperature read via the sensor.
Variable name (default)
Function name
Aux Temperature (AUX)
AUX TEMP
Units
ºC, ºF
Alarms
High and Low
Calibration
Offset
Damping
N/A
Temperature - Sea
Displays the current water temperature.
Variable name (default)
Function name
Sea Temperature (Sea)
SEA TEMP
Units
ºC, ºF
Alarms
High and Low
Calibration
Offset
Damping
N/A
Operating variables | H5000 Operation Manual
| 95
Tide set and rate
The system calculates current flow by comparing the Boat Speed and Course (which are
measured relative to the water) to the ground referenced data (SOG and COG) from a GPS.
This calculation therefore includes all water motion including both tides and permanent
currents.
As the calculation utilizes the Course function its accuracy can be enhanced by the use of a
Heel Angle sensor and accurate Leeway calibration.
¼ Note: If your position fixer sends magnetic bearing, check that the variation is correctly entered (or calculated) in the position fixer.
Importantly the damping on this function is adjustable, in rapidly changing tidal situations
you need to lower the damping down as far as possible to be able to see the changes quickly.
However in stable conditions, probably offshore, averaging the data over a longer time will
normally give a more stable, accurate figure. In addition note that particularly frequent
manoeuvring can produce unreliable figures due to the lag in update from position fixing
devices.
Variable name (default)
Function name
Tide Set (T SET), Tide Rate (T RTE)
TIDE SET, TIDE RTE
Units
ºM, ºT, nm
Alarms
N/A
Calibration
Magnetic Variation
Damping
0-24minutes, 15seconds increments
Timer
The system Timer can be used for either countdown or as a straight-forward stopwatch.
¼ Note: If your position fixer sends magnetic bearing, check that the variation is correctly entered (or calculated) in the position fixer.
Variable name (default)
Function name
Timer
TIMER
Units
hh:mm:ss
Alarms
Countdown bleep via Audible Alarm
Calibration
Set countdown period
Damping
N/A
Time to layline
The information displayed shows the time to go before reaching the appropriate layline.
A value of zero indicates that the layline has been reached. P and S are shown on Graphic
Display to indicate time on each layline. Race Display only shows current layline.
¼ Note: This data is provided by Zeus MFD, normally using arbitrary tacking angles, as such it
should only be considered an approximation.
96 |
Variable name (default)
Function name
Time to Layline (tLL)
L/L TIME
Units
hh:mm:ss
Alarms
N/A
Calibration
N/A
Damping
N/A
Operating variables | H5000 Operation Manual
Time to waypoint
Displays time until arrival at the active waypoint at the current speed and course.
Variable name (default)
Function name
Time to Waypoint (t WPT)
TTW
Units
hh:mm:ss
Alarms
N/A
Calibration
N/A
Damping
N/A
Trip log
The Trip Log records the distance travelled through the water. The value displayed is the
distance, in nautical miles, travelled from the time the Trip Log was started.
¼ Note: There are two trip logs
Menu
Variable name (default)
Function name
LOG
Trip Log (TRIP)
TRIP LOG
Units
nm
Alarms
N/A
Calibration
N/A
Damping
N/A
Trim (Fore/Aft)
The Trim function displays the fore/aft trim angle of the yacht.
Variable name (default)
Function name
Trim
TRIM
Units
Degrees
Alarms
N/A
Calibration
Offset
Damping
0-9s
Operating variables | H5000 Operation Manual
| 97
Trim tab angle
Trim Tab Angle is designed to display the angle of an attached trim tab, traditionally this
would be attached to the keel, however because this value is not used within the system for
further calculation it can be used for any trim tab type device.
Calibration of Trim Tab Angle
The recommended procedure is as follows: If Trim Tab is not available in the menu structure it
is necessary to determine the linear input in use and configure it correctly
Position the tab centrally, set POINT 1 to be 0.0, the voltage is automatically recorded and can
be noted from VOLTS 1 if required.
Position the tab at a known angle (e.g. 10º starboard), set POINT 2 to be this angle (e.g.
10.0), the voltage is automatically recorded and can be noted from VOLTS 2 if required. By
convention if the tab is to starboard of the centreline the value should be positive.
98 |
Variable name (default)
Function name
Trim Tab (Tab)
TRIM TAB
Units
Degrees
Alarms
N/A
Calibration
Position 1 (known value 1)
Volts 1 (automatically recorded)
Position 2 (known value 2)
Volts 2 (automatically recorded)
Damping
N/A
Operating variables | H5000 Operation Manual
True Wind Angle
True Wind Angle is calculated from Measured Wind Speed, Measured Wind Angle and Boat
Speed, this data is then combined with True Wind correction and heel angle correction values
to create True Wind data. True Wind data is used to back-calculate Apparent Wind data as
shown in the vector triangle below.
7
2
1
3
4
5
6
Wind Triangle
No.
Description
1
True Wind Speed
2
True Wind Direction
3
True Wind Angle
4
Apparent Wind Speed
5
Heading
6
Apparent Wind Angle
7
Wind
Variable name (default)
Function name
True Wind Angle (TWA)
TWA
Units
Degrees
Alarms
Sector
Calibration
True Wind Correction Tables
AutoCal TWA correction routine
Damping
0-9s
Operating variables | H5000 Operation Manual
| 99
True wind direction
True Wind Direction is the compass direction that the wind is coming from. It is calculated
from the True Wind Angle and Heading and is therefore corrected for errors induced by
aerodynamic effects via True Wind correction tables along with Heel Angle correction if
available (Hercules).
2
1
3
True Wind Direction
No.
Description
1
Heading = 240º
2
True Wind Direction = 280º
3
True Wind Angle = 40º
Variable name (default)
Function name
True Wind Angle (TWA)
TWA
Units
Degrees ºm / ºT
Alarms
N/A
Calibration
True Wind Correction Tables
AutoCal TWA correction routine
Damping
0-9s
Dynamic Damping
True Wind Speed
True Wind Speed (TWS) is the speed of the wind measured relative to the water surface.
100 |
Variable name (default)
Function name
True Wind Speed (TWS)
TWS
Units
kt, m/s
Alarms
High, Low
Calibration
True Wind Correction Tables
Damping
0-9s
Operating variables | H5000 Operation Manual
UTC Time
Universal Co-ordinated Time (UTC) is equivalent to Greenwich Mean Time (GMT) and is the
time used by all GPS systems. It is also referred to as Zulu Time (z) in some cases.
This function repeats information received from a position fixing device (e.g. GPS) via a NMEA
input.
Variable name (default)
Function name
UTC Time (UTC)
TIME UTC
Units
hh:mm:ss
Alarms
N/A
Calibration
N/A
Damping
N/A
VMG
Velocity Made Good (VMG) is the component of Boat Speed in the direction of the True Wind.
VMG is used for monitoring performance of the yacht on upwind or downwind legs as the
data considers both Boat Speed and True Wind Angle therefore indicating whether sailing
slower, but closer to the wind, is better than sailing faster, but at a wider TWA.
1
5
6
UP
WIND
2
8
4
DOWN
WIND
3
7
Calculation of VMG
No.
Description
1
True wind direction
2
Boat speed
3
True Wind Angle
4
VMG Upwind
5
True wind direction
6
True Wind Angle
7
Boat speed
8
VMG Downwind
Variable name (default)
Function name
Velocity Made Good (VMG)
VMG
Units
kt
Alarms
N/A
Calibration
N/A
Damping
0-9s
Operating variables | H5000 Operation Manual
| 101
VMG to waypoint
Velocity Made Good, on Course to Waypoint (VMC) displays the component of your speed
in the direction of the waypoint. Normally SOG is the speed reference used as the data is
provided by the position fixer.
1
2
3
4
Optimum VMG to Mark
No.
102 |
Description
1
True wind direction
2
Direction of new mark
3
Optimum VMC course
4
Polar curve
Variable name (default)
Function name
VMG Waypoint (VMC)
VMG CSE
Units
kt
Alarms
N/A
Calibration
N/A
Damping
N/A
Operating variables | H5000 Operation Manual
VMG performance
VMG Performance shows the current VMG as a percentage of the VMG derived from the polar
table. The value is corrected for changes in wind speed.
Variable name (default)
Function name
VMG Performance (VMG Perf )
TACKING
Units
%
Alarms
N/A
Calibration
N/A
Damping
N/A
1
8
6
4
2
3
4
5
2
0
2
6
4
7
6
8
Polar Performance Curve
No.
Description
1
Boat speed Kts
2
Optimum True Wind Angle upwind
3
Optimum True Wind Angle downwind
4
Target boat speed upwind
5
Maximum VMG upwind
6
Maximum VMG downwind
7
Target boat speed downwind
The Polar Table describes the performance of the boat in all conditions of True Wind Speed
and Angle. The Boat Speed is plotted radially against the True Wind Angle for each True Wind
Speed in turn. The result is a Polar Performance Curve shown above, this shows the boat
speed plotted for just one value of True Wind Speed.
Polar tables can be derived either by theoretical predictions, e.g. measurement certificates, or
by analysing the boat’s actual performance via software such as Deckman. The H5000 has one
polar table stored in its memory.
Operating variables | H5000 Operation Manual
| 103
Wind angle to mast
Wind Angle to Mast gives the Measured Wind relative to the mast of the yacht, effectively
giving the angle of attack of the foil specifically for yachts equipped with rotating wing masts
(or for non-wing masts to align the rig for minimum drag).
Variable name (default)
Function name
Mast MWA (WAM)
MAST AWA
Units
Degrees
Alarms
N/A
Calibration
N/A
Damping
N/A
Yaw rate
¼ Note: Only available via the Webserver
Yaw Rate is the turn rate of the boat in degrees/second.
¼ Note: Yaw rate is displayed on the system for diagnostic purposes only.
104 |
Variable name (default)
Function name
Yaw Rate (Yaw)
YAW RATE
Units
Degrees
Alarms
N/A
Calibration
N/A
Damping
N/A
Operating variables | H5000 Operation Manual
Example data tables | H5000 Operation Manual
7.23
6.78
6.87
6.86
6.75
5.95
5.99
6.15
6.20
5.00
5.20
5.50
5.40
17.5
20.0
22.5
25.0
7.29
7.35
7.33
6.95
6.54
5.66
4.80
15.0
6.50
5.99
4.50
12.5
5.30
4.88
4.10
10.0
5.90
4.04
3.57
7.5
3.52
3.29
5.49
3.04
2.70
5.0
2.13
2.08
4.67
1.87
1.56
2.5
50
40
4.40
30
20
7.50
7.51
7.45
7.36
7.07
6.69
6.09
4.95
3.75
2.19
60
7.72
7.67
7.58
7.48
7.22
6.79
6.18
5.22
3.83
2.10
70
7.95
7.89
7.73
7.61
7.30
6.88
6.27
5.40
391
2.02
80
7.06
7.65
8.00
8.30
8.43
8.53
5.26
6.39
7.11
7.65
7.96
8.19
8.40
8.50
5.40
6.39
7.10
8.03
8.30
8.18
8.11
7.88
7.74
7.45
7.02
6.31
5.45
8.39
7.87
7.59
6.30
3.76
3.85
3.90
5.08
3.65
1.97
1.99
1.98
2.00
120
110
100
90
8.48
8.36
8.21
7.96
7.51
6.87
6.00
4.90
3.50
1.90
130
5.00
5.23
5.33
5.37
5.32
3.42
4.30
5.29
6.02
6.83
7.44
7.88
8.17
3.65
4.50
5.50
6.31
6.96
7.53
7.93
8.22
3.90
4.80
5.80
6.60
7.20
7.70
8.05
8.27
4.20
5.23
6.30
7.04
7.56
7.93
8.19
8.37
4.60
8.42
8.28
8.10
7.80
7.38
6.67
5.67
2.40
2.60
2.80
3.01
3.25
34
34
34
35
35
36
37
4.34
4.69
38
39
40
Target
TWA
Down
3.79
2.85
1.80
1.70
1.75
1.80
1.84
1.87
VMG
Up
180
170
160
150
140
True Wind Angle
8.10
7.80
7.40
6.80
6.20
5.70
4.80
3.70
2.70
1.80
VMG
Down
172
170
166
165
163
162
161
160
158
157
Target
TWA
Up
9
Example data tables
Polar table
True Wind Speed
| 105
Boat speed / Heel correction table
Default boat speed and heel correction table. All values are set to zero.
Column
0
1
2
3
4
5
6
Row
Boat Spd >
0
5
10
15
20
25
30
0
0º Heel
0.0
0.0
0.0
0.0
0.0
0.0
0.0
1
10º Heel
0.0
0.0
0.0
0.0
0.0
0.0
0.0
2
20º Heel
0.0
0.0
0.0
0.0
0.0
0.0
0.0
True wind angle correction table
Column
0
1
2
3
4
5
6
Row
TWS >
0
5
10
15
20
25
30
0
40º TWA
0
-7.0
-3.0
-2.5
4.5
6.5
8.0
1
90º TWA
0
-2.0
-1.0
0.0
1.0
1.0
1.5
2
165º TWA
0
4.0
3.0
1.0
-1.0
-1.0
-2.0
True Wind Speed correction table
Column
0
1
2
3
4
5
6
Row
TWS >
0
5
10
15
20
25
30
0
Correction
0
-0.6
-1.2
-1.8
-2.4
-3.0
-3.6
Down wind speed correction table
Column
106 |
0
1
2
3
4
5
6
Row
TWS >
0
5
10
15
20
25
30
0
Down angle
0
165
165
165
165
165
165
Example data tables | H5000 Operation Manual
10
Maintenance
Basic maintenance procedures
Cleaning
A non abrasive cleaning cloth should be used to clean the displays. Use plenty of water to
resolve and take away salt remains. Crystallized salt may scratch the coating if using a damp
cloth. Apply minimal pressure to the screen.
Where marks on the screen can’t be removed by the cloth alone, use a 50/50 mixture of warm
water and isopropyl alcohol to clean the screen. Avoid any contact with solvents (acetone,
mineral turpentine etc.), or ammonia based cleaning products, as they may damage the antiglare layer, plastics bezel, or rubber keys.
Always fit the supplied protective sun cover when the displays are not in use.
Checking the keys
Make sure that no keys are stuck in the down position. If one is stuck, wiggle the key to free it
back to normal.
Checking the connectors
The connectors should be checked by visual inspection only.
Push the connector plugs into the connector, if the connector plugs are equipped with a lock;
ensure that this is in the correct position.
Software upgrades
Please contact your local dealer if you wish to upgrade your processor. A list of B&G approved
dealers can be found at www.bandg.com
Through-hull housings
Keep the screw threads of through-hull housings well greased with silicone or water pump
grease. Ensure that the outer surfaces of the housing are properly coated with anti-fouling
paint.
Boat speed sensor (paddlewheel type)
Use a stiff brush to remove marine growth that may cause the paddlewheel to freeze, and
then clean the surfaces with a very weak solution of household detergent. If fouling is very
severe, push the paddlewheel axle out by using a small drift, and then very gently, wet sand
the surface with a fine grade wet/dry paper.
Inspect the o-rings on both the sensor and the blanking plug and replace if necessary, and
then lubricate with silicone lubricant or petroleum jelly (Vaseline®).
Maintenance | H5000 Operation Manual
| 107
Winter Storage / Laying Up
Masthead unit
Storage of the masthead unit when the yacht is laid up afloat will increase the life of the
transmitters. It should always be removed from the masthead before the mast is unstepped. It
should be stored in its packing box with the vane and cups removed. The exposed socket and
connector threads at the top of the mast should be smeared with silicone grease such as MS4
(Midland Silicones Ltd), and then protected with the plastic cap supplied with it.
The contacts in the masthead unit connector should be inspected for cleanliness and sprayed
with a water inhibitor such as WD40. The outer casing of the connector should also be
smeared with silicone grease.
The masthead unit must never be oiled. The bearings are of the sealed pre-lubricated type
and any additional oil may cause chemical breakdown of the existing lubricant. Any scratch
marks or corrosion on masthead unit spar should be rubbed clean with a soft cloth and lightly
smeared with silicone grease. This should not be necessary if care is taken when hoisting or
lowering the masthead unit, to protect it from collision against the rigging.
If the mast is un-stepped, care must be taken to ensure that the cable is not cut through, but
disconnected at the junction box below decks. The bare ends of the cable should be smeared
with silicone grease.
108 |
Maintenance | H5000 Operation Manual
www.bandg.com
*988-10630-001*