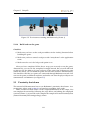
1
Badumna Network Suite User Manual For Badumna 1.4 c 2010 by Scalify Pty Ltd. Copyright All rights reserved. No part of this publication can be reproduced, stored in a retrieval system, or transmitted in any form or by any means without prior written permission of Scalify Pty, Ltd. badumna, n. a genus of spiders from Australasia. badumna network suite, n. a suite of network tools that provide a complete framework for developing multiplayer applications. Contents Preface 1 2 3 4 5 Introduction 1.1 What’s in this manual? 1.2 Badumna Overview . . 1.3 How Badumna works 1.4 Services and features . 1.5 Network Structure . . viii . . . . . . . . . . . . . . . . . . . . . . . . . . . . . . . . . . . . . . . . . . . . . . . . . . . . . . . . . . . . . . . . . . . . . . . . . . . . . . . . . . . . . . . . . . . . . . . . . . . . . . . . . . . . . . . . . . . . . . . . 1 1 2 3 3 5 Setting up 2.1 Requirements . . . . . . . . . . . . . . 2.2 Where to get Badumna Network Suite. 2.3 Installation . . . . . . . . . . . . . . . . 2.4 Setting up a Badumna network . . . . . . . . . . . . . . . . . . . . . . . . . . . . . . . . . . . . . . . . . . . . . . . . . . . . . . . . . . . . . . . . 6 6 7 8 8 Badumna Basics 3.1 Replication and interest management 3.2 Proximity Chat . . . . . . . . . . . . . 3.3 Dead Reckoning . . . . . . . . . . . . . 3.4 Multiple scenes . . . . . . . . . . . . . 3.5 Private Chat . . . . . . . . . . . . . . . . . . . . . . . . . . . . . . . . . . . . . . . . . . . . . . . . . . . . . . . . . . . . . . . . . . . . . . . . . . . . . . . . . . . . . . . . . . 16 16 37 41 47 50 Centralised Services 4.1 Authentication and user management 4.2 Arbitration . . . . . . . . . . . . . . . . 4.3 Overload Server . . . . . . . . . . . . . 4.4 HTTP Tunnelling Service . . . . . . . . 4.5 Distributed lookup service . . . . . . . . . . . . . . . . . . . . . . . . . . . . . . . . . . . . . . . . . . . . . . . . . . . . . . . . . . . . . . . . . . . . . . . . . . . . . . . . . . 55 55 67 84 87 91 Unity3D 5.1 Getting started with the Unity package . . . . . . . . . . . . . . . 5.2 Basic multiplayer game . . . . . . . . . . . . . . . . . . . . . . . . 94 94 95 v Contents 5.3 5.4 5.5 5.6 5.7 5.8 5.9 Proximity chat demo . . . . . . . . . . . . . . Dead reckoning demo . . . . . . . . . . . . . Multiple scenes demo . . . . . . . . . . . . . . Private chat demo . . . . . . . . . . . . . . . . Authentication and user management demo Buddy list Demo . . . . . . . . . . . . . . . . Combat Arbitration Server demo . . . . . . . . . . . . . . 111 116 118 121 130 134 138 6 Non Player Characters 6.1 Server based NPCs . . . . . . . . . . . . . . . . . . . . . . . . . . 6.2 Client based NPCs . . . . . . . . . . . . . . . . . . . . . . . . . . 6.3 Distributed Controller based NPCs . . . . . . . . . . . . . . . . . 145 145 149 156 7 Additional Features 7.1 Custom messages . . . . . . . . . . . . . . . . . . . . . . . . . . . 7.2 Streaming protocol . . . . . . . . . . . . . . . . . . . . . . . . . . 7.3 Debugging . . . . . . . . . . . . . . . . . . . . . . . . . . . . . . . 171 171 173 177 8 The Control Center 8.1 Initial Configuration . . . . . . . . . . 8.2 Starting the Control Center . . . . . . . 8.3 Accessing the Control Center . . . . . 8.4 Authentication and user accounts . . . 8.5 Germ installation . . . . . . . . . . . . 8.6 Main information page . . . . . . . . . 8.7 Germs host . . . . . . . . . . . . . . . . 8.8 Global Settings . . . . . . . . . . . . . . 8.9 Available services . . . . . . . . . . . . 8.10 Monitoring service performance . . . 8.11 Starting services on Windows . . . . . 8.12 Custom services . . . . . . . . . . . . . 8.13 Notification . . . . . . . . . . . . . . . 8.14 Certificate update . . . . . . . . . . . . 8.15 Using a different database application 8.16 Advanced connectivity options . . . . 8.17 User administration . . . . . . . . . . . . . . . . . . . . . . . . . . . . . . . . . . . . . . . . . . . . . . . . . . . . . . . . . . . . . . . . . . . . . . . . . . . . . . . . . . . . . . . . . . . . . . . . . . . . . . . . . . . . . . . . . . . . . . . . . . . . . . . . . . . . . . . . . . . . . . . . . . . . . . . . . . . . . . . . . . . . . . . . . . . . . . . . . . . . . . . . . . . . . . . . . . . . . . . . . . . . . . . . . . . . . . . . . . . . . . . . . . . . . . . . . . . . . . . . . . . . . . . . . . . . . . . . . . . . . . . . . . 178 178 179 180 181 183 186 186 186 187 194 194 196 197 198 199 201 202 A Changes from Badumna 1.3 to Badumna 1.4 A.1 Local spatial replicas . . . . . . . . . . A.2 Initializing Badumna . . . . . . . . . . A.3 UPnP port forwarding . . . . . . . . . A.4 GetNetworkStatus() . . . . . . . . . . . . . . . . . . . . . . . . . . . . . . . . . . . . . . . . . . . . . . . . . . . . . . . . . . . . . . . . . . . . . . . 203 203 203 204 204 vi . . . . . . . . . . . . . . . . . . . . . . . . . . . . . . . . . . . . . . . . . . . . . . . . . . . . . . . . . . . . . . . . . . . . . . Contents A.5 A.6 A.7 A.8 A.9 A.10 A.11 A.12 A.13 A.14 A.15 A.16 A.17 Presence information . . . . . . . . . . . . Http tunnel . . . . . . . . . . . . . . . . . . API calling order . . . . . . . . . . . . . . Arbitration Server . . . . . . . . . . . . . . Decentralized Service Discovery Support Dei server . . . . . . . . . . . . . . . . . . Distributed non-player objects . . . . . . . Unity and API Examples . . . . . . . . . . Buddy list . . . . . . . . . . . . . . . . . . Control Center . . . . . . . . . . . . . . . . Seed Peer . . . . . . . . . . . . . . . . . . . Default port numbers . . . . . . . . . . . . Bug fixes . . . . . . . . . . . . . . . . . . . . . . . . . . . . . . . . 204 204 204 205 205 205 206 206 206 206 207 207 207 B Game development on a residential network B.1 Universal Plug and Play (UPnP) . . . . . . . . . . . . . . . . . . . B.2 Port Forwarding . . . . . . . . . . . . . . . . . . . . . . . . . . . . B.3 LAN Test Mode . . . . . . . . . . . . . . . . . . . . . . . . . . . . 209 209 210 210 C Default port numbers 212 D Known issues in Badumna 1.4 213 vii . . . . . . . . . . . . . . . . . . . . . . . . . . . . . . . . . . . . . . . . . . . . . . . . . . . . . . . . . . . . . . . . . . . . . . . . . . . . . . . . . . . . . . . . . . . . . . . . . . . . . . . . . . . . . . . . . . . . . . . . . . . . . . . . . . . . . . . . . . . . . . . . . . . . . . . . . . . . Preface Badumna is a generic network engine for multiplayer applications. This companion is a detailed user manual that takes you through the ins and outs of Badumna providing you with a ready reference to the full functionality of Badumna Network Suite. Badumna was designed with a very simple philosophy - make game creation easy and affordable so that users around the world can develop massively multiplayer online games. Badumna is not difficult to learn and a beginner can benefit by reading this manual, especially the first few chapters. If you are one of the users who would like to develop a multiplayer game without becoming a networking guru, then this manual is for you. You will be guided, step-by-step with how Badumna operates and what it expects from an application. Apart from the functionality, there are examples of applications that show how to use Badumna along with an explanation of the source code. Badumna has been fully integrated with Unity3D and there is a chapter dedicated to using Badumna with Unity3D complete with many example projects demonstrating Badumna functionality. This user manual can be used as a user guide or it can be used as a reference manual for Badumna. The individual chapters convey the subject area addressed in each case. Each chapter can be read independently and there are links to other parts of the manual whenever there is complimentary information that can be found in other parts of the book. We hope you find Badumna Network Suite useful and are excited about it as much as we are. If you have any comments, suggestions, or remarks to make the presented information more complete, and useful then please send us an email at: [email protected]. We would be glad to correct any mistakes or oversights and are open to suggestions for improvements. T HE S CALIFY TEAM viii Chapter 1 Introduction The Badumna Network Suite is a complete technology solution designed for fast and efficient creation of multi-user applications, especially online games. The Badumna network library provides a scalable service for game state synchronisation and object replication by using a decentralised network. The suite also includes applications for additional centralised services including authentication, arbitration, load distribution and administration. The functionality of the suite is demonstrated in a set of tutorials and game examples complete with source code. 1.1 What’s in this manual? The manual begins with an overview of the Badumna Network Suite, and a highlevel description of the functionality and services it provides. Chapter 2 details the installation instructions, and explains how to configure a Badumna network. Chapter 3 presents a step-by-step guide to getting started with the Badumna network library, explained through a series of tutorials that show the creation of a small demonstration application. It demonstrates all the distributed services required to get a small game up and running. Chapter 4 introduces Badumna’s centralised services and demonstrates how to use them to provide security, data persistence, and arbitration for a game, and how central services can support users behind restrictive firewalls and with low-bandwidth connections. These topics are all illustrated through further tutorials. Chapter 5 shows how to use Badumna with Unity3D, through a set of tutorials showing the creation of a basic multi-player game using the Badumna package in the Unity game development environment. These tutorials mirror Chapter 1. Introduction those in Chapters 3 and 4, and show explicitly how to access Badumna functionality using the Unity3D game development environment. Chapter 6 explains how Badumna supports non-playing characters (NPCs). The tutorials are followed by game examples that demonstrate the functionality in both Windows game demos and Unity3D. Chapter 7 explains Badumna’s advanced functionality. It is targeted for advanced developers who wish to use the custom networking features available. This chapter also covers Badumna’s streaming functionality. Chapter 8 introduces the Badumna Control Center, which can be used by game administrators to manage the game services remotely and ensure that the game is running smoothly. Appendices The appendices include information about changes in the latest version of Badumna, and technical information relevant to typical Badumna usage scenarios. The manual is complemented by separate API documentation for the Badumna Network Suite, available online, and also included as a compiled HTML help file (.chm) as part of the Badumna Network Suite installation. 3 Jump right in If you are eager to get hands-on with Badumna as soon as possible, then you can jump straight into the tutorials, beginning with Chapter 3 for the Windows examples, or Chapter 5 for Unity developers. You’ll be directed back to the relevant instructions (e.g. for installing and configuring your network) as and when required. 1.2 Badumna Overview Badumna is a network engine designed for multi-user applications such as online games and virtual worlds. The uniqueness of Badumna lies in its ability to provide a highly scalable networking framework for application developers. An application that uses Badumna can scale to truly massive player counts using minimal operator-owned infrastructure and network resources. The key to achieving this goal is making use of the local bandwidth available to each player. Badumna was designed with simplicity in mind. Game state synchronisation which is the main task for an online game is provided as an automated feature by Badumna. Developers do not have to worry about any server side code for 2 Chapter 1. Introduction synchronising state information. Badumna manages all that in the network and exchanges object updates to and from relevant remote objects. Using Badumna, you can make your game network-enabled in a matter of minutes. The Badumna package comes with built-in scripts and many examples complete with source code and detailed tutorials. 1.3 How Badumna works One of the key features of Badumna is scalability. It allows the creation of large (potentially unlimited) un-sharded MMOs and virtual worlds without the need for massive server farms. Decentralisation is the key to providing a scalable platform for online games. Badumna uses a structured peer-to-peer network to connect all the users in the system. Services such as state synchronisation and chat are offered on this network making them extremely scalable. Badumna supports the fundamental requirements of any peer-to-peer network engine such as NAT traversal. Direct connections are established between users behind most routers, with relay connections used when this is not possible. Badumna forms a secondary ring of servers (operator controlled machines) that are used for services such as authentication, third-party arbitration and HTTP tunnelling. Badumna provides a distributed look-up service to access these servers thereby eliminating the single point of failure and making them scalable. Badumna’s functionality can be accessed through an easy to use API. Documentation for the API includes an overview of the expected calling pattern along with examples that use the API (see section 6). 1.4 Services and features Badumna provides a complete networking framework for online game developers. The following services are offered by Badumna Network Suite: Game state synchronisation: One of the most important requirements of any online game is state synchronisation. Badumna uses the concept of entities to provide state synchronisation. Any object that needs to be accessible across multiple users is an entity. Badumna implements a location-based interest management to ensure that entities get replicated efficiently to all relevant users in the network. Application developers do not even have to worry about who needs to receive the updates for a given entity. Badumna manages all that functionality in the network while providing a reliable mechanism to deliver the updates. Badumna also supports dead-reckoning — the ability to send object updates only when necessary — at the network level. This reduces network traffic significantly. It also makes ob- 3 Chapter 1. Introduction ject movement very smooth as Badumna extrapolates positional information and applies it to the objects at the desired frame rate. Chat interface: Badumna offers two different types of chat services to game developers: proximity and private. Proximity chat provides a service so that entities can chat with other entities in their visible region. The private chat interface provides a secure mechanism to send messages between two entities. HTTP tunnelling: Badumna’s http tunnelling service provides an ability to support users that cannot send or receive UDP packets (for example, users behind a corporate proxy). Badumna provides a mechanism to host a tunnelling peer. Users that are not able to communicate directly via UDP, send their entity updates to the tunnelling peer using the http protocol. The tunnelling peer manages state synchronisation and sends updates to the relevant entities in the network. Overload Service: The overload service provides a mechanism to relieve starving peers (a peer that is overloaded). If a certain peer in the network is struggling to send the necessary object updates to its interested entities, it will try and switch some of its load to the overload peer. The overload service ensures that Badumna is capable of supporting low bandwidth users and providing them with the same user experience. Arbitration Server: Badumna’s arbitration server provides a simple interface to support complex game logic that requires third-party arbitration. Badumna clients are able to send arbitration messages as byte streams to the server and receive call back messages from the server. The arbitration server is also the gateway for handling persistence. For security reasons, Badumna clients are not allowed to access the database directly. The arbitration server provides the gateway to access any information from the database. Dei Server: Dei Server provides user management, security, and authentication functionality. Authentication is the process of ensuring that the identity of a particular user is what they claim it to be. Authentication is provided by using a system similar to Public Key Infrastructure (PKI) in which user certificates are signed by a trusted authority (Dei server) and provided to other users as authorisation and authentication proof. Dei server stops invalid users from joining the network. Control Centre: Control Centre is the central management interface for application providers. It provides a web interface to all applications that are running on Badumna’s network. It uses a concept of germs to give application providers the ability to install Badumna components on remote machines and start and stop them as required. It also allows them to monitor the network and measure the performance of the remote machines that are running Badumna specific modules. 4 Chapter 1. Introduction Figure 1.1: Badumna - Network Structure 1.5 Network Structure In order to understand how Badumna works, it is important to understand the network structure of Badumna. Figure 1.1 shows Badumna’s network structure with all the major components. It is a ring based structure with different services being offered on each ring. For example, the outer most ring comprising all the peers in the network is used to provide services such as interest management (entity discovery), object replication and synchronisation, and chat. The inner ring comprising only trusted peers (these are operator controlled peers) provides services such as authentication, arbitration, offloading and http tunnelling. Control Centre is a central administration tool that is used to monitor the network and its status. 5 Chapter 2 Setting up This chapter contains instructions on how to install the Badumna Network Suite, configure a Badumna network. 2.1 Requirements Badumna requires the .NET framework 2.0. It supports the Microsoft framework and the Mono framework. Badumna therefore supports all .NET and Mono based game engines. We also have built-in support for Unity 3D game engine. If you are a Unity game developer, you will be able to install the Unity package and access all the built-in Badumna scripts via the Unity editor. You will require the Unity development environment installed on your machine. Windows: Microsoft .NET framework 2.0 Mac OS X / Linux: Mono 2.61 Unity 3D: Unity 2.62 1 The Badumna network library is compatible with earlier versions of Mono, and so will work in Unity 2.6 which uses Mono 1.2.5. The Badumna Network Suite’s applications such as SeedPeer, DeiServer, and ControlCenter, however, require Mono 2.6. Version 1.4 of the Badumna Network Suite has not yet been tested against more recent versions of Mono. 2 Badumna is compatible with Unity 3 for stand-alone applications only. For targeting the web player, Unity 2.6 should be used at present. 6 Chapter 2. Setting up Running under Mono 3 Badumna applications can run under Mono on Windows, Mac OS X or Linux. The commandsa listed in this manual show how to run applications on Windows using the Microsoft .NET framework. To launch Badumna Network Suite applications under Mono, simply prefix the command line input with “mono”. For example, the instructions to launch a seed peer are as follows: Ï SeedPeer.exe -application-name=MyApp To launch a seed peer using Mono, you would enter: Ï mono SeedPeer.exe -application-name=MyApp a 2.2 Command line input is identified by the Ï symbol. Where to get Badumna Network Suite. A free trial version of the Badumna Network Suite can be downloaded from the Scalify web site. There are downloads for Windows (XP / Vista / 7) and OS X / Linux. The trial version contains all features, but is restricted to run for only an hour at a time before ceasing to function. An unrestricted version is available under various licenses suitable for indie and professional developers. There are also two cross-platform demonstration packages showing how to build games using Badumna: one for Windows and one for Unity. These will be covered in chapters 3 – 5. 3 Trace version A version of the Badumna Network Library with trace enabled to provide developers with debugging output is available to customers upon request (see section 7.3). 7 Chapter 2. Setting up 2.3 Installation 2.3.1 Windows (XP / Vista / 7) Download and run the Windows installer. The installer will copy Badumna Network Suite into the directory of your choice, and create Start menu shortcuts.3 ! Permissions under Windows Vista and 7 Windows Vista and Windows 7 users should make sure they have full permissions for the directory they choose to install Badumna Network Suite in. 2.3.2 Mac OS X / Linux Download the Mac OS X / Linux installation file and unzip it in the directory of your choice. For example: Ï unzip BadumnaNetworkSuite-v1.4.0-Trial.zip 2.4 Setting up a Badumna network There are a couple of key requirements governing the setting up of a Badumna network: 1. To function correctly, every Badumna network needs at least one peer running on a machine with a open connection, where an open connection is one that: • has a public IP address, • has an open or full-cone NAT type, • uses a port not blocked by your firewall. 2. To join a Badumna network, a peer needs to find an existing member of the network. These requirements are easily satisfied by running a peer on a machine with an open connection, and configuring other peers to connect to this first peer (known 3 To uninstall simply delete the installation directory and Start Menu folder that were created. The installer does not place content anywhere else or make any system changes including in the registry. 8 Chapter 2. Setting up as a seed peer). This is the standard way to set up a Badumna network. Section 2.4.2 explains how to start a seed peer for your network, and subsection 2.4.1 explains how to configure other peers to connect to the seed peer. 3 SeedPeer can tell you if you have an open connection. See section 2.4.2 If you only want to run your Badumna network within a local area network (LAN) for development purposes, then it is possible to relax these requirements. Badumna clients can be configured to run in LAN mode where no peer with an open connection is required. Badumna clients can also be configured to find each other on the local subnet using broadcast, so no seed peer is required in that scenarios. Section 2.4.1 explains how to configure peers to run in LAN mode, and use subnet broadcast. 2.4.1 Configuring Badumna client connectivity A Badumna client’s connectivity configuration can be specified in two different ways - either using a configuration stored in a local file called NetworkConfig.xml or by configuring Badumna within your application program. Configuring Badumna by using NetworkConfig.xml The NetworkConfig.xml file can be used to configure a peer’s connectivity.4 If such a file exists, it will be loaded automatically and the settings will be applied when initializing Badumna. The xml file must be located in the same directory as the client executable. The Connectivity module provides Badumna with a range of information such as the UDP port range to be used, whether to use broadcast in the local subnet, et cetera. The different parameters that you can specify within the Connectivity module are as follows: Port range: The UDP port range that will be used by Badumna to connect with other clients. Broadcast: Inform Badumna whether broadcast should be used within the local subnet. 4 The NetworkConfig.xml file contains configuration settings for different Badumna specific modules. The Connectivity module is a prerequisite for Badumna to function. Other modules that can optionally be configured are Arbitration, Overload, Tunnel, and Logger. These modules will be described later in the manual. 9 Chapter 2. Setting up Initializer: Inform a Badumna client if you have a Seed Peer set up for the game network. LanTestMode: Inform Badumna to operate in LAN mode. You don’t require external network connectivity in this mode. PortForwarding: Use port forwarding. This is required when peers are connected behind a router or other NAT device, as is typically the case. It is recommended that port forwarding is always enabled.5 Stun: Informs Badumna whether to enable STUN and also provides a list of STUN servers to use. STUN is required by Badumna to detect the NAT-type of a particular client. This is required for Badumna to function beyond the LAN. ! NetworkConfig.xml is case-sensitive. XML element and attribute names used in NetworkConfig.xml are case sensitive. Cases must match those used in the documentation and example files. The Connectivity module for a typical client using a seed peer is configured as follows: <Module Name= " C o n n e c t i v i t y " > <PortRange> 2 1 3 0 0 , 2 1 3 9 9</PortRange> < B r o a d c a s t Enabled= " t r u e " >21250</ B r o a d c a s t> < I n i t i a l i z e r type= " SeedPeer " >seedpeer . example . com:21251</ I n i t i a l i z e r > <PortForwarding Enabled= " t r u e " /> <Stun> < S e r v e r >stun1 . noc . ams−i x . n e t</ S e r v e r > < S e r v e r >stun . v o i p b u s t e r . com</ S e r v e r > < S e r v e r >stun01 . sipphone . com</ S e r v e r > < S e r v e r >stun . v o x g r a t i a . org</ S e r v e r > </Stun> </Module> Listing 2.1: Standard NetworkConfig.xml connectivity configuration. 5 The option of disabling port forwarding is primarily provided to allow troubleshooting of router issues. 10 Chapter 2. Setting up Note that broadcast is enabled even though a seed peer is being used. This will mean that peers on the same subnet can establish direct connections more efficiently, and will be able to communicate even if their NAT does not support hairpinning. If you only want to run your Badumna network within a LAN, it is not necessary to use a seed peer. Instead, you can enable LAN mode: <Module Name= " C o n n e c t i v i t y " > <PortRange> 2 1 3 0 0 , 2 1 3 9 9</PortRange> < B r o a d c a s t Enabled= " t r u e " >21250</ B r o a d c a s t> <LanTestMode Enabled= " t r u e " /> </Module> Listing 2.2: NetworkConfig.xml connectivity configuration for LAN mode. When using LAN mode, broadcast must be enabled. Configuring Badumna within the application program It is possible to configure the client network settings within the application program. This may be necessary if you don’t have access to the local file system (i.e. if you are developing a browser-based game using Unity3D). To configure Badumna, you need to create a new ConfigurationOptions object as follows: C o n f i g u r a t i o n O p t i o n s badumnaConfigOptions = new C o n f i g u r a t i o n O p t i o n s ( ) ; You can now set the different values using this object. For example, to set the Seed peer address and the discovery type as Seed Peer, use the following code: badumnaConfigOptions . DiscoveryType = DiscoveryType . SeedPeer ; badumnaConfigOptions . DiscoverySource = " seedpeer . example . com : 2 1 2 5 1 " ; To enable broadcast in the local subnet on port 21250 and to set the UDP port range for the clients from 21300 to 21399, use the following code: 11 Chapter 2. Setting up badumnaConfigOptions . B r o a d c a s t P o r t = 2 1 2 5 0 ; badumnaConfigOptions . MinumumPort = 2 1 3 0 0 ; badumnaConfigOptions . MaximumPort = 2 1 3 9 9 ; The Badumna configuration should be done before you initialize the network library. Please refer to the examples in chapter 5 for more details on how to configure the connectivity settings for the client within the application program. 2.4.2 Starting a Seed Peer Every Badumna enabled application requires a seed peer to allow peers to find the the network.6 The seed peer must be started on a machine with an open connection (see page 8. Badumna networks should have an application name to identify them. Only peers using the same application name will be able to join the network. The Seed Peer must also be configured with the same application name, which can be achieved using the --application-name command line option. Ensure that the Seed Peer application is installed on the relevant machine. If you haven’t installed Seed Peer, then please refer to the installation instructions and make sure you include ‘Seed Peer’ during the installation process. The Seed Peer application SeedPeer is installed in the SeedPeer directory inside the Badumna Network Suite installation directory. It can be launched from the command line: Ï SeedPeer.exe --application-name=my-app where ’my-app’ should be replaced with the name for your Badumna network. By default, the seed peer listens on port 21251. You can configure the seed peer to listen on a different port. This may be required if the default port number is not available on that machine. To change the port number you need to edit the NetworkConfig.xml file that is stored in the SeedPeer folder. Open the file and change the following line: <PortRange>21251,21251</PortRange> Since the seed peer must run using a known port, its port range must be limited to include a single port. Replace both occurrences of the number 21251 by the new port number. This must be done before you start the SeedPeer. 6 Unless configured for LAN-mode and/or using local subnet broadcast. 12 Chapter 2. Setting up Figure 2.1: Verbose SeedPeer output Checking you have an open connection The seed peer should be run on a machine with an open connection (see page 8. To check that your machine has an open connection, run SeedPeer with the verbose option: Ï SeedPeer.exe --verbose Figure 2.1 show typical output. The line beginning ‘Public address’ shows the NAT type, followed by the public IP address, followed by the port being used. If the NAT type shown is ‘Open’ or ’Full cone’, then the host machine has an open connection. Starting multiple Seed Peers You can increase reliability, and make sure there is always a seed peer for clients to connect to even if one host is unavailable, it is possible to run multiple seed peers for the same network on different hosts. If you want to support multiple Seed Peers in your network, you need to include the information of the other Seed Peers in the NetworkConfig.xml file. For 13 Chapter 2. Setting up example, let us assume that you want to start three Seed Peers in your network on three machines: seedpeer1.example.com, seedpeer2.example.com, and seedpeer3.example.com. Let us assume that all three Seed Peers will be started on port number 21251. The connectivity module for seedpeer1.example.com needs to be updated as follows: <Module Name= " C o n n e c t i v i t y " > <PortRange> 2 1 2 5 1 , 2 1 2 5 1</PortRange> < B r o a d c a s t Enabled= " t r u e " >21250</ B r o a d c a s t> < I n i t i a l i z e r type= " Seed " >seedpeer2 . example . com:21251 , seedpeer3 . example . com:21251</ I n i t i a l i z e r > <Stun Enabled= " True " > < S e r v e r >stun1 . noc . ams−i x . n e t</ S e r v e r > < S e r v e r >stun . fwd . org</ S e r v e r > < S e r v e r >stun . v o i p b u s t e r . com</ S e r v e r > < S e r v e r >stun01 . sipphone . com</ S e r v e r > < S e r v e r >stun . v o x g r a t i a . org</ S e r v e r > </Stun> </Module> Listing 2.3: NetworkConfig.xml connectivity configuration with multiple seed peers. As you can see we have included the address and port number of the other two Seed Peers as part of the Initializer settings. The connectivity module for the other two seed peers should be updated accordingly. Re-starting a Seed Peer Typically, Seed Peer is the first application that you start in your game network. When you start the Seed Peer it starts a new network. All other clients use the Seed Peer as a reference peer and join that network. There may be an occasion when you have to restart the Seed Peer application after you have deployed the game and there are active users in the network. In such a situation, you can start the Seed Peer with a special command line option. This tells the Seed Peer to join the existing network and not start a new network. Use the following command to re-start a Seed Peer and have it join an existing network: Ï SeedPeer.exe --rejoin 14 Chapter 2. Setting up Starting a Seed Peer for a Secure Badumna Network. If you are running a secure Badumna network, you will need to specially configure your Seed Peer. Badumna security is introduced in chapter 4. Please refer to subsection 4.1.4 for full instructions on starting a Seed Peer for a secure Badumna Network. Seed Peer command line options summary --application-name=VALUE The name to give the Badumna network. --dei-config-file the name of a file containing the Dei configuration (used for secure networks – see subsection 4.1.4). --dei-config-string a string containing the Dei configuration (used for secure networks – see subsection 4.1.4). --harness-port=VALUE Only used by the Control Centre. --control-id=VALUE Only used by the Control Centre. -v, --verbose Print verbose output when running. -r, --rejoin Rejoin an existing network (see section 2.4.2). -h, --help Display usage instructions. 15 Chapter 3 Badumna Basics This chapter provides a simple guide to using the Badumna network library. The core functionality includes: • entity replication and interest management, • proximity chat, • dead-reckoning, • multiple scenes, • and private chat. These topics are each introduced with a short overview of key concepts, and a summary of the parts of the Badumna API used to implement them, followed by a full step-by-step example of how to incorporate the functionality in a simple game. Full source code for each example is included in the Windows example package available with the Badumna Network Suite free trial edition from the Scalify website (see section 2.2). ! 3.1 Visual Studio 2008 or Visual C# 2008/2010 Express required. Replication and interest management In an online game, it is necessary to replicate changes in game state over the network. Typically these changes in game state are realized as the changes in properties of game objects. In practice, it is desirable to only replicate those parts of the game state that a particular client needs, and this can be limited to those changes that occur within a client’s area of interest (AOI). 16 Chapter 3. Badumna Basics X Local entities A Remote enties Entity radius Entity region of interest B Y Peer region of interest Z Figure 3.1: Interest Management. A peer with two original entities, A and B, will ‘see’ the remote entities X and Y whose radii intersect it’s area of interest, but not Z. 3.1.1 Key concepts To support this basic functionality Badumna uses the concept of a spatial entity, which is a game object with dynamic properties (properties that change over time) that has a position in three-dimensional space, a bounding radius, and an interest radius. An entity will define additional properties as required by its function in the game, such as orientation, colour, et cetera. In Badumna, a spatial entity originating on the local machine is termed a spatial original, and spatial entities being replicated from other machines are termed spatial replicas. A Badumna application will replicate state changes of spatial originals over the network to other interested peers, and receive updates to the states of spatial replicas. Badumna defines a virtual space in which spatial entities may exists as a scene. Every spatial entity must belong to a scene, and will not receive updates from the other spatial entities that are not in the same scene. A game may have multiple scenes representing multiple levels, instances or shards. Within a scene, each client will only receive updates relating to spatial replicas whose radius (three-dimensional bounding sphere) intersect with its area of interest. A client’s area of interest is defined as the union of the areas of interest of all its spatial originals. A spatial original’s area of interest is defined as the sphere centred upon its position with radius set to its interest radius. 17 Chapter 3. Badumna Basics A two-dimensional illustration of these concepts is depicted in Figure 3.1. There are two local entities, A and B, which will be spatial originals on the local peer. There are three remote entities, X, Y, and Z. The local peer is only interested in those remote entities whose bounds intersect with its area of interest, that is the union of the areas of interest of A and B. Therefore, the local peer will receive updates from X and Y as spatial replicas, but will be unaware of Z. Conversely, the peer hosting entity X will receive updates for entity A, but not B, despite them being hosted on the same peer. The peers hosting entity Y will not receive updates for B, even though it is within B’s AOI, as its own AOI is too small. Area of Interest can be set for each entity type according to need. For example, a player character’s AOI should be at least as big as their view distance. A nonplayer character’s AOI could be smaller, if they are intended to ignore players who are not close to them. ! AOI and bandwidth consumption Increasing entities’ AOI will typically lead to increased bandwidth consumption, so care should be taken to choose AOI values that are large enough to provide a consistent experience to users, but no larger. 3 Units in Badumna 3 Badumna does not specify units for distance – they are determined by the application. 3 Velocity is measured in units per second. 3 Badumna’s default values for AOI and velocity are optimized for Unity 3D – optimize your own application by calling NetworkFacade.RegisterEntityDetails(...). 3.1.2 Badumna API usage The following steps using the Badumna API are required to set up entity replication and interest management in a Badumna-enabled game: 1. Initialize the peer (local machine): NetworkFacade.Initialize(string) Badumna will start the network thread and perform other initialization nec- 18 Chapter 3. Badumna Basics essary for the machine to join the network. The name of the network to join must be passed to this method. 2. Log in to the Badumna network: NetworkFacade.Login(ITokenSupplier) It is necessary to log in to allow the local client to begin using the peer-topeer network. Secure networks require security tokens to be provided when logging in. These are supplied by Badumna’s security system, Dei, which is covered in chapter 4. In this chapter, we will not be using security features, and so use the overloaded Login method that does not require security tokens. 3. Join the scene: NetworkFacade.JoinScene(string, CreateSpatialReplica, RemoveSpatialReplica) The application has to join a specific scene in the game. When you join the scene you also provide Badumna with the names of two call back functions. These are called when there is a new remote entity in the scene or if a remote entity leaves the scene. 4. Register entity types: NetworkFacade.RegisterEntityDetails(uint entityType, float areaOfInterestRadius, Badumna.DataTypes.Vector3 maxVelocity) Each different type of entity must have its interest radius and maximum velocity registered with the network. This allows Badumna to internally optimize interest management. 5. Register local entities with the scene: NetworkScene.RegisterEntity(ISpatialOriginal, uint) Each network enabled entity needs to be registered with a scene. This will publish the entity making it visible to any other entities that have joined the same scene and are nearby. The scene’s call-back function for entity creation is called on the nearby remote peers in the scene to instantiate the given entity. 6. Flag for the properties of entities that have changed: NetworkFacade.FlagForUpdate(ISpatialOriginal, int) Whenever an entity’s property has changed, you inform Badumna about it by calling FlagForUpdate() with the appropriate parameters. Badumna will then ensure that interested remote entities receive this update. 7. Trigger Badumna’s regular processing: NetworkFacade.ProcessNetworkState() Periodically (possibly every frame) notify the network engine that it is safe to perform any operations on entities, invoke call-backs. Operations include 19 Chapter 3. Badumna Basics dispatching updates from local entities and applying updates to remote entities. 8. Unregister local entities from the scene: NetworkScene.UnregisterEntity(ISpatialOriginal) When a local entity is no longer required, it should be unregistered with the network scene, so that remote peers will remove their replica, by calling their RemoveSpatialReplica callback. 9. Leave the scene: NetworkScene.Leave() When the client is no longer hosting entities in a scene it should leave the scene. 10. Log out from the Badumna network: NetworkFacade.Logout() Stop communicating with the other peers in the Baduna Network. 11. Shut down Badumna: NetworkFacade.Shutdown() Inform Badumna that the user is closing the application. This will enable Badumna to shutdown the network thread and also perform other finalization. In real applications it is recommended that the overload Shutdown(true) should be used to block so Badumna can clean up the network correctly. These steps are illustrated in the context of a small network game demo in the following section. 3 Replication message reliability Replication messages are sent semi-reliably. If an update for a property is not acknowledged, it is resent, but only if no more recent updates for that property have been sent in the meantime. This means that terminal states are guarenteed to be replicated given enough time, but transient states may be lost. For this reason, entity property replication is best suited to replicating state information rather than events. Badumna supports custom messages as an alternative that is better suited to commuincating events (see section 7.1). 3.1.3 API Example 1 - Basic Badumna Demo This demo application shows how to create a multi-player game that uses Badumna for synchronizing basic state information. The game simply allows a user to 20 Chapter 3. Badumna Basics move their avatar around a 2D space, and see other players’ avatars in the same virtual world. This example will demonstrate the following Badumna facilities: • Logging in to a Badumna Network. • Joining a network scene. • Registering entities with a network scene. • Replicating entity state data across the network. The basic control and rendering of the game scene is achieved by representing an avatar as a UserControl which is moved around a Canvas, with position updated according to key-presses. The example is simple enough that you should not need prior knowledge of .NET controls. If you wish to understand more about these items, please refer to Microsoft’s .NET framework documentation. In this tutorial we’ll see how to create entities that can be replicated across the network, and then what steps an application needs to follow to use Badumna to perform the replication. Our entities will be responsible for representing their state data, serializing and deserializing this data, and notifying Badumna of changes in state data that need to be replicated across the network. In our simple demo the only entities we have are the avatars. There are two kinds of avatars: one for representing the local player and one for representing remote players on other machines. To begin, we’ll look at the base class for our game entities, called Avatar. This is defined in the file Avatar.xaml.cs. Since the avatars are represented in the game using user controls, the Avatar class inherits from UserControl, but this is obviously just an application-specific detail, and not important for the functioning of Badumna. As we wish our avatars to be replicated across the network, the Avatar class implements the Badumna interface ISpatialEntity, and includes the properties Guid (a globally unique identifier), Position, Radius, and AreaOfInterest, and the method HandleEvent(). public p a r t i a l c l a s s Avatar : UserControl , I S p a t i a l E n t i t y { ... # r e g i o n I S p a t i a l E n t i t y implementation public BadumnaId Guid { g e t ; s e t ; } public f l o a t Radius { g e t ; s e t ; } public f l o a t A r e a O f I n t e r e s t R a d i u s { g e t ; s e t ; } public Vector3 P o s i t i o n { 21 Chapter 3. Badumna Basics get { r e t u r n t h i s . mPosition ; } set { t h i s . mPosition = value ; t h i s . mTranslate . X = value . X ; t h i s . mTranslate . Y = value . Y ; OnPositionUpdate ( ) ; } } public void HandleEvent ( Stream stream ) { } # endregion // I S p a t i a l E n t i t y implementation ... } These properties will allow Badumna to perform position-related interest management. Since the position property is also important for rendering the avatar in the game, there is application-specific code in the property’s Set() method to update the translational data used to render the user control in the right place. In our game, there is other information about our avatars that we want to replicate across the network, namely the avatar’s color and orientation. To prepare for this, the Avatar has two further properties: public p a r t i a l c l a s s Avatar : UserControl , I S p a t i a l E n t i t y { ... # region Properties public Color Color { get { r e t u r n t h i s . mColor ; } set { t h i s . mColor = value ; 22 Chapter 3. Badumna Basics t h i s . T r i a n g l e . F i l l = new S o l i d C o l o r B r u s h ( value ) ; OnColorUpdate ( ) ; } } public f l o a t O r i e n t a t i o n { get { r e t u r n t h i s . mOrientation ; } set { // Limit t h e while ( value { value −= } while ( value { value += } value t o modulo 360 degrees . >= 3 6 0 . 0 f ) 360.0 f ; < 0.0 f ) 360.0 f ; t h i s . mOrientation = value ; t h i s . mRotate . Angle = value ; OnOrientationUpdate ( ) ; } } # endregion // P r o p e r t i e s ... } Notice that the Avatar class also includes a number of ‘OnUpdate’ virtual methods: public p a r t i a l c l a s s Avatar : UserControl , I S p a t i a l E n t i t y { ... # r e g i o n On update methods p r o t e c t e d v i r t u a l void OnPositionUpdate ( ) { // Do nothing . 23 Chapter 3. Badumna Basics } p r o t e c t e d v i r t u a l void OnColorUpdate ( ) { // Do nothing . } p r o t e c t e d v i r t u a l void OnOrientationUpdate ( ) { // Do nothing . } # endregion // On update methods } These methods are called in their corresponding properties’ Set() methods, and as we shall see shortly, they can be overridden in classes deriving from Avatar to allow further actions to be taken in response to property updates. We will be deriving two classes from Avatar: LocalAvatar to represent the avatar controlled by the local player, and RemoteAvatar to represent the avatars of other remote players. LocalAvatar is defined in the file LocalAvatar.cs. The local avatar is termed an ’original’ entity that will be replicated across the network, and the copies represented as remote avatars on other machines are termed ’replicas’. LocalAvatar therefore implements the Badumna interface ISpatialOriginal: c l a s s LocalAvatar : Avatar , I S p a t i a l O r i g i n a l { // I S p a t i a l O r i g i n a l implementation public void S e r i a l i z e ( BooleanArray r e q u i r e d P a r t s , Stream stream ) { B i n a r y W r i t e r w r i t e r = new B i n a r y W r i t e r ( stream ) ; i f ( r e q u i r e d P a r t s [ ( i n t ) Avatar . StateSegment . Color ] ) { Color c = t h i s . Color ; w r i t e r . Write ( c .A) ; w r i t e r . Write ( c . R) ; w r i t e r . Write ( c .G) ; w r i t e r . Write ( c . B ) ; } i f ( r e q u i r e d P a r t s [ ( i n t ) Avatar . StateSegment . O r i e n t a t i o n ] ) 24 Chapter 3. Badumna Basics { w r i t e r . Write ( t h i s . O r i e n t a t i o n ) ; } } ... } ISpatialOriginals are responsible for serializing their state to a stream by implementing the Serialize() method. Badumna automagically serializes the properties defined in the ISpatialEntity interface, so in this case the Serialize method only needs to take care of the Color and Orientation properties. In order to minimize network traffic, only those parts of an entity’s state that have changed should be serialized. To achieve this, Badumna calls the Serialize method with a Boolean array indicating the parts that have changed. It is the application programmer’s responsibility to notify Badumna when properties have changed. LocalAvatar does this by overriding the Avatar class’s ’OnUpdate’ methods to call NetworkFacade’s FlagForUpdate() method: c l a s s LocalAvatar : Avatar , I S p a t i a l O r i g i n a l { ... # r e g i o n On update o v e r r i d e s p r o t e c t e d o v e r r i d e void OnPositionUpdate ( ) { NetworkFacade . I n s t a n c e . FlagForUpdate ( t h i s , ( i n t ) SpatialEntityStateSegment . Position ) ; } p r o t e c t e d o v e r r i d e void OnOrientationUpdate ( ) { NetworkFacade . I n s t a n c e . FlagForUpdate ( t h i s , ( i n t ) Avatar . StateSegment . O r i e n t a t i o n ) ; } p r o t e c t e d o v e r r i d e void OnColorUpdate ( ) { NetworkFacade . I n s t a n c e . FlagForUpdate ( t h i s , ( i n t ) Avatar . StateSegment . Color ) ; } # endregion // On update o v e r r i d e s } 25 Chapter 3. Badumna Basics Notice how the Boolean array identifying which data should be serialized is indexed using an enumeration. Badumna provides the SpatialEntityStateSegment enumeration to identify properties defined in Badumna interfaces. Entities with custom properties (such as Color and Orientation in this example) need to define an enumeration identifying these, beginning with the first available value as defined by SpatialEntityStateSegment. This can be found in the Avatar class in Avatar.xaml.cs: public p a r t i a l c l a s s Avatar : UserControl , I S p a t i a l E n t i t y { public enum StateSegment : i n t { Orientation = SpatialEntityStateSegment . FirstAvailableSegment , Color , } ... } The counterpart to LocalAvatar is RemoteAvatar, which is defined in the file RemoteAvatar.cs: c l a s s RemoteAvatar : Avatar , I S p a t i a l R e p l i c a { public void D e s e r i a l i z e ( BooleanArray i n c l u d e d P a r t s , Stream stream , i n t estimatedMillisecondsSinceDeparture ) { BinaryReader r e a d e r = new BinaryReader ( stream ) ; i f ( i n c l u d e d P a r t s [ ( i n t ) Avatar . StateSegment . Color ] ) { byte a = r e a d e r . ReadByte ( ) ; byte r = r e a d e r . ReadByte ( ) ; byte g = r e a d e r . ReadByte ( ) ; byte b = r e a d e r . ReadByte ( ) ; t h i s . Color = new Color { A = a , R = r , G = g , B = b }; } i f ( i n c l u d e d P a r t s [ ( i n t ) Avatar . StateSegment . Orientation ] ) { 26 Chapter 3. Badumna Basics t h i s . O r i e n t a t i o n = r e a d e r . ReadSingle ( ) ; } } } As an ISpatialReplica, RemoteAvatar must implement a Deserialize() method that will read state data from a stream to set replicated properties. It is important that properties are identified using the same enumeration values as in the corresponding ISpatialOriginal’s Serialize() method, and that a property’s data is written and read in the same format. Once again the properties that are defined in ISpatialEntity are automagically deserialized by Badumna, so only the additional properties Color and Orientation need to be dealt with here. We now have the classes for representing our original and replica game entities (i.e. our local and remote avatars) and have made sure that they implement the key interfaces for representing entities’ state and serializing and deserializing state change data respectively, and that the originals will notify Badumna when their state changes. Next we will see how they are used in the game. In our demo, the remainder of logic required to create the game and use Badumna is in the main window class, which can be found in the file MainWindow.xaml.cs. The class begins with an enumeration which is used to define the types of entities that exist in the game. We have only one kind of entity, avatars, although as is typical, we are using two separate classes derived from a common base to represent local and remote avatars. public p a r t i a l c l a s s MainWindow : Window { // Enumeration d e f i n i n g t y p e s o f e n t i t i e s i n t h e game p r i v a t e enum EntityType : u i n t { None , Avatar , } ... } Next, the member variables are defined. The ones that are relevant to Badumna are mAvatar, and mScene. mAvatar is used to hold the local avatar when it is created, and is of type LocalAvatar, which implements ISpatialOriginal as described above. mScene is used to hold the scene. Each game has to have one or more 27 Chapter 3. Badumna Basics scenes and each scene has a unique name. The name for the scene is stored in the constant SceneName. public p a r t i a l c l a s s MainWindow : Window { ... # r e g i o n Member v a r i a b l e s // Constants p r i v a t e c o n s t s t r i n g SceneName = " world " ; p r i v a t e c o n s t f l o a t MoveAmount = 5 f ; p r i v a t e c o n s t f l o a t RotateAmount = 5 f ; // Random number g e n e r a t o r ( used f o r s e t t i n g a v a t a r c o l o r ) public s t a t i c readonly Random RandomSource = new Random ( ) ; // Badumna s p e c i f i c : The l o c a l a v a t a r ( implements ISpatialOriginal ) p r i v a t e LocalAvatar mAvatar ; // Badumna s p e c i f i c : Network scene p r i v a t e NetworkScene mScene ; // Flag t o i n d i c a t e whether logged i n p r i v a t e bool mIsLoggedIn ; // Timer used t o schedule r e g u l a r updates t o t h e game state p r i v a t e DispatcherTimer mProcessTimer ; # endregion // Member v a r i a b l e s ... } The first step to enable Badumna is to initialize the network thread and perform any other initialization tasks. This has to be done once, and here it is done in the MainWindow constructor. Since the initialization can take several seconds to return, and will block until it does, it is best to do it in a background worker thread. The constructor also contains application-specific code for initializing the window, and creating a timer to schedule updates to the game state. 28 Chapter 3. Badumna Basics public p a r t i a l c l a s s MainWindow : Window { ... public MainWindow ( ) { // Windows s p e c i f i c i n i t i a l i z a t i o n InitializeComponent ( ) ; // Do r e q u i r e d i n i t i a l i z a t i o n work i n t h e background so t h a t t h e UI appears q u i c k l y BackgroundWorker worker = new BackgroundWorker ( ) ; t h i s . S t a t u s . Content = " I n i t i a l i z i n g Badumna . . . " ; worker . DoWork += delegate { // Badumna s p e c i f i c : I n i t i a l i z e t h e network . NetworkFacade . I n s t a n c e . I n i t i a l i z e ( " api−example " ) ; }; worker . RunWorkerCompleted += delegate { t h i s . S t a t u s . Content = " " ; t h i s . LoginButton . I s E n a b l e d = t r u e ; }; worker . RunWorkerAsync ( ) ; // S e t up t h e t i m e r t o schedule r e g u l a r updates t h i s . mProcessTimer = new DispatcherTimer ( ) ; t h i s . mProcessTimer . I n t e r v a l = TimeSpan . FromSeconds ( 1 . 0 / 60.0) ; t h i s . mProcessTimer . Tick += d e l e g a t e { t h i s . R e g u l a r P r o c e s s i n g () ; }; } ... } When a user wants to start a session, we need to login to Badumna network and also join the scene. This task is performed in the Login_Click() method: public p a r t i a l c l a s s MainWindow : Window { ... p r i v a t e void L o g i n _ C l i c k ( o b j e c t sender , RoutedEventArgs e ) { // Update t h e i n t e r f a c e t o d i s a l l o w l o g g i n g i n when logged i n t h i s . LoginButton . I s E n a b l e d = f a l s e ; 29 Chapter 3. Badumna Basics // S e t t h e s t a t u s bar t e x t because t h i s may be a l e n g t h y operation t h i s . S t a t u s . Content = " Logging i n . . . " ; BackgroundWorker worker = new BackgroundWorker ( ) ; worker . DoWork += delegate { // Badumna s p e c i f i c : Log i n t o t h e network // We do t h i s i n t h e background as i t may t a k e a l i t t l e time NetworkFacade . I n s t a n c e . Login ( ) ; }; worker . RunWorkerCompleted += delegate { // Badumna s p e c i f i c : R e g i s t e r e n t i t y d e t a i l s // Avater ’ s a r e a o f i n t e r e s t i s 1 5 0 , i t s max v e l o c i t y i s 60 on both X and Y a x i s and 0 on t h e Z a x i s . NetworkFacade . I n s t a n c e . R e g i s t e r E n t i t y D e t a i l s ( ( u i n t ) EntityType . Avatar , 1 5 0 . 0 f , new Vector3 ( 6 0 , 6 0 , 0 ) ); // Badumna s p e c i f i c : J o i n t h e network scene t h i s . mScene = NetworkFacade . I n s t a n c e . J o i n S c e n e ( MainWindow . SceneName , t h i s . C r e a t e S p a t i a l R e p l i c a , t h i s . RemoveSpatialReplica ) ; // C r e a t e t h e l o c a l a v a t a r and add i t t o our canvas t h i s . mAvatar = new LocalAvatar ( ) ; t h i s . Viewport . Children . Add( t h i s . mAvatar ) ; // Badumna s p e c i f i c : R e g i s t e r t h e l o c a l a v a t a r with t h e scene t h i s . mScene . R e g i s t e r E n t i t y ( t h i s . mAvatar , ( u i n t ) EntityType . Avatar ) ; // I n i t i a l i z e t h e a v a t a r ’ s p o s i t i o n and c o l o r t h i s . mAvatar . P o s i t i o n = new Vector3 ( 5 0 f , 50 f , 0 f ) ; t h i s . mAvatar . Color = Colors . Blue ; // Enable t h e s c h e d u l e r t h i s . mProcessTimer . I s E n a b l e d = t r u e ; // S e t logged i n f l a g t h i s . mIsLoggedIn = t r u e ; // Update t h e i n t e r f a c e t o allow l o g g i n g out t h i s . LogoutButton . I s E n a b l e d = t r u e ; 30 Chapter 3. Badumna Basics // C l e a r t h e s t a t u s bar t e x t t h i s . S t a t u s . Content = " " ; }; worker . RunWorkerAsync ( ) ; } ... } The important steps relating to Badumna in this method are logging in to the network, registering entity details, joining the scene, creating the local avatar and registering it with the scene. The Login() function call logs the user into the network by verifying user details and also provides other security features. In this example, we are not supplying user details (refer to Dei server documentation for use of this feature). Since the login method will block until it has finished, login is done in a background worker thread, with the rest of the steps being scheduled to run upon completion of login. The RegisterEntityDetails() method will tell Badumna the size of avatars’ AOI and their maximum velocity. Badumna uses these values to optimize its internal interest management algorithms. The JoinScene() function call ensures that the local avatar is connected to the scene. It also supplies Badumna with two call-back functions (CreateSpatialReplica() and RemoveSpatialReplica()). CreateSpatialReplica() is called by Badumna when a new remote entity enters the user’s area of interest and RemoveSpatialReplica() is called by Badumna when an existing remote entity is no longer in the user’s area of interest and can be removed by the user. The RegisterEntity() function call registers the local avatar with the scene, and informs Badumna of the entity type using the enumeration defined above. Any other instances of the game running on the network that have already joined the scene would then be notified of the new entity via the CreateSpatialReplica() callback function they passed to Badumna. The remainder of the code in this method is application-specific and deals with initialization of the local avatar, enabling the scheduler and configuring the UI. Now we’ll take a closer look at the call-backs for creating and removing spatial replicas. The CreateSpatialReplica() call back function has three arguments: a NetworkScene, a BadumnaId, and a uint used to store the enumerated entity type. The NetworkScene informs the application which scene the new remote entity is part of (this is important for an application that has multiple scenes). The BadumnaId is a unique id assigned to every single entity. This is how Badumna identifies any entity in the network. In the current example, there is only one type of entity 31 Chapter 3. Badumna Basics (avatar). However, an application may have different entity types such as NPCs, and other dynamic objects. Here the CreateSpatialReplica only needs to create a RemoteAvatar object and add it to the canvas used to display our game. public p a r t i a l c l a s s MainWindow : Window { ... public I S p a t i a l R e p l i c a C r e a t e S p a t i a l R e p l i c a ( NetworkScene scene , BadumnaId e n t i t y I d , u i n t e n t i t y T y p e ) { i f ( e n t i t y T y p e == ( u i n t ) EntityType . Avatar ) { RemoteAvatar remoteAvatar = new RemoteAvatar ( ) ; t h i s . Viewport . Children . Add( remoteAvatar ) ; r e t u r n remoteAvatar ; } return null ; } ... } Conversely, RemoveSpatialReplica merely has to remove the RemoteAvatar object it is passed from the canvas. Note that we can assume the ISpatialReplica it is passed is of type RemoteAvatar, as avatar is the only entity type we have. public p a r t i a l c l a s s MainWindow : Window { ... public void RemoveSpatialReplica ( NetworkScene scene , ISpatialReplica replica ) { RemoteAvatar remoteAvatar = r e p l i c a as RemoteAvatar ; i f ( remoteAvatar ! = n u l l ) { t h i s . Viewport . Children . Remove ( remoteAvatar ) ; } } ... } 32 Chapter 3. Badumna Basics So far we have covered how an application sets up the network and scene, adds its own original entities, and handles the creation and removal of replicas. Next we will see how entities’ states are continually synchronized across the network. As described above, our local and remote avatar classes already take care of serializing and deserializing changes in their game state, by implementing the ISpatialOriginal and ISpatialReplica interfaces, and the local avatar notifies Badumna when state has changed. Badumna will make use of the methods defined by these interfaces to accomplish the state synchronization whenever prompted by the application. This needs to take place regularly. We have already seen that the MainWindow class set up a timer in its constructor to schedule regular calls to a method called RegularProcessing(). That method just needs to call the NetworkFacade’s ProcessNetworkState() method to trigger Baduma to perform state synchronization, as long as we are logged in: public p a r t i a l c l a s s MainWindow : Window { ... p r i v a t e void R e g u l a r P r o c e s s i n g ( ) { i f ( t h i s . mIsLoggedIn ) { NetworkFacade . I n s t a n c e . ProcessNetworkState ( ) ; } } ... } That’s all that needs to be done in the MainWindow to keep our entities synchronized across the network. There is a W indow_KeyDown method that responds to user input by updating the local avatar’s position, orientation and color properties as appropriate, and these properties will notify Badumna that the state changes need to be replicated by calling Badumna’s FlagForUpdate() method, as explained above. All that is left for the MainWindow class to take care of is logging out and shutting down. Logging out requires our original entity (the local avatar) to be unregistered from the scene, the scene to be left, and the network to be logged out from. This is handled in the Logout_Click() method which also performs the application-specific steps of removing the local avatar from the canvas, disabling the scheduler, and reconfiguring the UI. 33 Chapter 3. Badumna Basics public p a r t i a l c l a s s MainWindow : Window { ... p r i v a t e void Logout_Click ( o b j e c t sender , RoutedEventArgs e) { // Update t h e i n t e r f a c e t o d i s a l l o w l o g g i n g out when logged out t h i s . LogoutButton . I s E n a b l e d = f a l s e ; // Badumna s p e c i f i c : U n r e g i s t e r t h e l o c a l a v a t a r from t h e scene t h i s . mScene . U n r e g i s t e r E n t i t y ( t h i s . mAvatar ) ; t h i s . mAvatar = n u l l ; // Badumna s p e c i f i c : l e a v e t h e scene t h i s . mScene . Leave ( ) ; t h i s . mScene = n u l l ; // Remove a l l a v a t a r s from t h e canvas t h i s . Viewport . Children . C l e a r ( ) ; // D i s a b l e t h e s c h e d u l e r t h i s . mProcessTimer . I s E n a b l e d = f a l s e ; // Unset t h e logged i n f l a g t h i s . mIsLoggedIn = f a l s e ; // Badumna s p e c i f i c : l o g out from t h e network NetworkFacade . I n s t a n c e . Logout ( ) ; // Update t h e i n t e r f a c e t o allow l o g g i n g i n t h i s . LoginButton . I s E n a b l e d = t r u e ; } ... } Finally, when the application is shutdown, it needs to log out (if currently logged in), and then shut down the network, by calling the NetworkFacade’s Shutdown() method. In our demo this is done by overriding the Window’s OnClosed() virtual method: public p a r t i a l c l a s s MainWindow : Window { ... 34 Chapter 3. Badumna Basics p r o t e c t e d o v e r r i d e void OnClosed ( EventArgs e ) { // I f logged in , l o g out i f ( t h i s . mIsLoggedIn ) { t h i s . Logout_Click ( t h i s , n u l l ) ; } // Badumna s p e c i f i c : shut down t h e network NetworkFacade . I n s t a n c e . Shutdown ( ) ; base . OnClosed ( e ) ; } ... } We have now explained all the tasks that are required to make this application a multi-player application. The last thing that needs to be done is configuring the network discovery method. When a user starts an application, it has to connect to other peers in the network. There are several methods the application can use to find peers, including local subnet broadcast, or looking up a known seed peer. A seed peer is a Badumna node that is typically the first peer in the network. This is used as a reference peer by all other peers to establish their position in the network. It is important that this peer is started on a machine that has an open connection (see pages 8 and 13). The network configuration is done in the file NetworkConfig.xml (please refer to section 2.3 to learn more about configuring a Badumna client). <Modules> <Module Name= " C o n n e c t i v i t y " > <PortRange MaxPortsToTry= " 3 " >21300 ,21399 </ PortRange > < B r o a d c a s t Enabled= " t r u e " >21250</ Broadcast > <!−− I n i t i a l i z e r type= " SeedPeer " >seedpeer . example . com :21251 </ I n i t i a l i z e r −−> <PortForwarding Enabled= " t r u e " /> <Stun Enabled= " t r u e " > <Server >stun1 . noc . ams−i x . net </Server > <Server >stun . v o i p b u s t e r . com</Server > <Server >stun01 . sipphone . com</Server > <Server >stun . v o x g r a t i a . org </Server > </Stun > </Module> ... </Modules> 35 Chapter 3. Badumna Basics The current configuration is only relying on local broadcast for discovery. Therefore, the application would work in a given subnet (and then only if the first peer to join had an open connection, see page 8). In order to make the application work across the entire internet, we need to specify a seed peer as a secondary discovery mechanism. If you would like to do this, please refer to subsection 2.4.2 for instructions on how to start your own seed peer. Application names must match. ! The seed peer must use the same application name as the client applications, in this case “api-example”. To configure the demo game to use a seed peer, uncomment the Initializer element and replace seedpeer.example.com with the actual host name or IP address of the machine that has the SeedPeer application installed. The default port is 21251. You can configure the seed peer to change the port number (see Section 2.4). This may be necessary if you want to run multiple applications using the same machine. For example, if your seed peer is running on a machine with the host name ’public.mydomain.com’, and using port 1234, you would use the following line: < I n i t i a l i z e r type= " SeedPeer " >public . mydomain . com:1234 </ Initializer > ! Open connection required. The SeedPeer application must be installed and started on a machine that has a public IP address. See pages 8 and 13. Once you have edited the NetworkConfig.xml file, you are ready to build the application and run it. If you start the application on two different machines or even the same machine, you should be able to see the other game objects and their movement. Checklist: 36 Chapter 3. Badumna Basics 3 Configure connectivity by either: 3 (a) Using a seed peer: 3 Start the seed peer with the application name “api-example” 3 Configure the API Example with the seed peer’s address and port (see subsection 2.4.1). 3 or (b) Configure the API Example to run in LAN mode (see subsection 2.4.1). 3 Build and run ApiExample. 3 Experiment with AOI Badumna will make sure that remote entities are replicated as long as they are within the local entity’s area of interest. To see this, maxmize the window and move one avatar far away from the other. At a certain point, the avatars will no longer ‘see’ each other. 3.2 Proximity Chat Badumna offers several types of chat facility. The first one presented here is proximity chat that allows an entity to send messages to all other entities near by. 3.2.1 Key Concepts Proximity chat depends upon Badumna’s interest management to send messages from one entity to the other entities whose area of interest it is in. Note, it is whether the speaking entity is within the listening entity’s AOI that determines whether the message will be delivered, not vice versa. 3.2.2 Badumna API usage In order to set up proximity chat, applications need to make the following use of the Badumna API: 1. Create a chat service: NetworkFacade.CreateChatService() A chat service must be created for each entity that wishes to send or receive proximity messages. 37 Chapter 3. Badumna Basics 2. Subscribe to the chat service’s proximity channel: IChatService.SubscribeToProximityChannel(BadumnaId, string, ChatMessageHandler) The subscription is made using the Badumna ID of the entity concerned, and includes a string to use a display name, and a delegate to handle proximity messages received from other entities in this entity’s AOI. 3. Send chat message: IChatService.SendChannelMessage(ChatChannelId, string) Messages must be sent as strings to the proximity channel using the ID ChatChannelId.Proximity. Other channels are used for private chat messages which are covered in section 3.5. 3.2.3 API Example 2 - Proximity Chat Demo The first example demonstrated how to configure a game object as a Badumnaenabled entity and synchronize its properties with other remote objects. This example will build on that and demonstrate how to enable proximity chat. All the logic for using Badumna’s chat service is in the MainWindow class in the file MainWindow.xaml.cs. The only other change to the project is to add the controls to to the main window to allow users to enter text, and see messages, which is done in the file MainWindow.xaml. To simplify the code, we include the Badumna.Chat namespace with the using directive: using Badumna.Chat; Add a member variable to MainWindow to hold the chat service: public p a r t i a l c l a s s MainWindow : Window { ... # r e g i o n Member v a r i a b l e s // Badumna s p e c i f i c : Chat s e r v i c e p r i v a t e I C h a t S e r v i c e mChatService ; ... } When a user logs in to the application and joins the scene, we create an instance of Badumna’s chat service and subscribe to the proximity chat channel for the local avatar: 38 Chapter 3. Badumna Basics p r i v a t e void L o g i n _ C l i c k ( o b j e c t sender , RoutedEventArgs e ) { ... // C r e a t e t h e c h a t s e r v i c e mChatService = NetworkFacade . I n s t a n c e . CreateChatService ( ) ; // S u b s c r i b e t o a proximity channel f o r t h e l o c a l avatar mChatService . SubscribeToProximityChannel ( mAvatar . Guid , " d e f a u l t " , HandleChatMessage ) ; ... } The arguments to SubscribeToProximityChannel() include the Guid of the entity we wish to listen near (in this case our local avatar), a display name to use in the proximity channel (not used in this demo), and a handler to deal with incoming chat messages. HandleChatMessage is the call back function that is called by Badumna when the local entity receives a chat message. In this example, we are simply going to display the message in a very simple text-box. p r i v a t e void HandleChatMessage ( ChatChannelId channel , BadumnaId userId , s t r i n g message ) { t h i s . ChatDisplayBox . V i s i b i l i t y = V i s i b i l i t y . V i s i b l e ; t h i s . ChatTextBox . C l e a r ( ) ; t h i s . ChatDisplayTextBox . Text = message ; } In our demo, the chat UI is supported by helper methods to show and hide the chat controls. ShowMiniChat() displays the chat-box, clears the contents of the box and switches the focus of the application to the chat-box. HideMiniChat() clears the contents of the chat-box and hides the box from the screen. p r i v a t e void ShowMiniChat ( o b j e c t sender , RoutedEventArgs e ) { t h i s . ChatBox . V i s i b i l i t y = V i s i b i l i t y . V i s i b l e ; t h i s . ChatTextBox . C l e a r ( ) ; 39 Chapter 3. Badumna Basics t h i s . ChatTextBox . Focus ( ) ; } p r i v a t e void HideMiniChat ( ) { t h i s . ChatBox . V i s i b i l i t y = V i s i b i l i t y . Collapsed ; t h i s . ChatTextBox . C l e a r ( ) ; } The final change required is to modify the Window_KeyDown() method to call ShowMiniChat() when the user hits Space, and send any message in the chat box and call HideMiniChat()when the user hits Enter. To send a chat message to the proximity channel, you use the chat service’s SendChannelMessage() method. p r i v a t e void Window_KeyDown ( o b j e c t sender , KeyEventArgs e ) { ... switch ( e . Key ) { ... c a s e Key . Space : t h i s . ShowMiniChat ( t h i s , n u l l ) ; break ; c a s e Key . E n t e r : var message = ChatTextBox . Text . Trim ( ) ; i f ( ! s t r i n g . IsNullOrEmpty ( message ) ) { mChatService . SendChannelMessage ( ChatChannelId . Proximity , message ) ; ChatTextBox . C l e a r ( ) ; } HideMiniChat ( ) ; e . Handled = t r u e ; break ; ... } ... } The rest of the application is exactly the same as the previous example. You should be able to build the application and test the proximity chat functionality across multiple machines. 40 Chapter 3. Badumna Basics Checklist: 3 Configure connectivity by either: 3 (a) Using a seed peer: 3 Start the seed peer with the application name “api-example” 3 Configure the API Example with the seed peer’s address and port (see subsection 2.4.1). 3 or (b) Configure the API Example to run in LAN mode (see subsection 2.4.1). 3 Build and run ApiExample. 3.3 Dead Reckoning In the previous examples you may have noticed that the object movement is not very smooth. In this example we will demonstrate how to enable dead reckoning in order to make the object movement smooth and also optimise network traffic. 3.3.1 Key Concepts Dead reckoning is a method of estimating an object’s current position based on a previous known position and the object’s velocity. By replicating an entity’s velocity to its replicas, dead reckoning can be used to frequently update the replica’s position in between updates received over the network. When dead reckoning is being used, it is not necessary to replicate position information as frequently, since it is being calculated by Badumna. It is up to the application to determine when to flag position for update for each entity, according to how much positional error can be tolerated in the game. For example, if an entity is moving at a constant velocity, then position updates need not be sent, as the position can be calculated accurately from the current velocity. Each time velcoity changes, there will be a small error introduced on the remote machine due to the time taken to receive the velocity update. One possible strategy for deciding when to replicate position information, would be to do it whenever velocity changes. A more conservative strategy would be to also replicate it periodically even when the velocity has not changed, if the velocity is non-zero. This would reduce positional error at the cost of increased bandwidth consumption. Peers can perform local checking on the dead-reckoned position calculated for a dead-reckoned remote entity. For example, the application could do collision tests to see if the calculated position would mean walking through a wall, and adjust the calculated position accordingly if required. It is up to the application how sophisticated this checking is required to be. 41 Chapter 3. Badumna Basics 3.3.2 Badumna API usage 1. Make entities implement the IDeadReckonable interface: IDeadReckonable Both original and remote entities need to implement IDeadReckonable for the entity to use dead reckoning. The IDeadReckonable interface inherits from AttemptMovement(Vector3). 2. Original dead-reckonable entities must update the entity’s velocity: IDeadReckonable.Velocity The velocity must be flagged for update like other replicated properties. The position property must still be replicated as it is used to correct the deadreckoned position on remote peers, however it can be replicated less freqently. 3. Remote entities must resolve their dead-reckoned position: IDeadReckonable.AttemptMovement(Vector3) Badumna will call dead-reckoned remote entities’ AttemptMovement method during regular processing, with a dead-reckoned position calculated by Badumna. Applications can simply use this position directly to update the entity, or can do checks first, such as collision tests. These steps are illustrated in the following example, again building upon the demo game developed in the preceding examples. 3.3.3 API Example 3 - Dead Reckoning Demo Dead reckoning works by replicating an entity’s velocity. When an application knows a remote entity’s velocity it can extrapolate to smoothly update the entity’s position every frame, rather than just when updates are received. Also, when an original entity is moving at constant velocity, the application does not have to send any messages to the network for other peers to be able to keep their remote copies’ positions synchronized, as the position can be calculated locally. To use dead-reckoning, we need to change the Avatar class to implement the interface IDeadReckonable, instead of ISpatialEntity. Note that IDeadReckonable derives from ISpatialEntity, and just adds one new property (Velocity) and one new method (AttemptMovement). These additions mean we also need a new field to support the velocity property, and a new ’OnUpdate’ method to allow child classes to act upon Velocity updates. The new code required in Avatar file are shown below: public p a r t i a l c l a s s Avatar : UserControl , IDeadReckonable 42 Chapter 3. Badumna Basics { ... # region Fields p r i v a t e Vector3 mVelocity = new Vector3 ( 0 f , 0 f , 0 f ) ; ... # endregion // F i e l d s # r e g i o n IDeadReckonable implementation ... public Vector3 V e l o c i t y { get { r e t u r n t h i s . mVelocity ; } set { t h i s . mVelocity = value ; OnVelocityUpdate ( ) ; } } public void AttemptMovement ( Vector3 r e c k o n e d P o s i t i o n ) { this . Position = reckonedPosition ; } ... # endregion // IDeadReckonable implementation # r e g i o n On update methods ... p r o t e c t e d v i r t u a l void OnVelocityUpdate ( ) { // Do nothing . } # endregion // On update methods } } When using dead reckoning, Badumna will estimates an entity’s position based on the current velocity for you, and will call the IDeadReckonable’s AttemptMovement() method peridocially, to update its position. This ensures that the remote object is rendered smoothly on the screen. As shown above, in this demo all the AttemptMovement() method needs to do is set the avatar’s position. A more so- 43 Chapter 3. Badumna Basics phisticated game might check locally to see if the update is permited according to collision logic, for example. Now we are using velocity to calculate position, LocalAvatar is responsible for performing this computation, which requires a new ComputePosition() method that calculates position based upon an old position, the velocity and elapsed time. We also need a method, FixPosition(), that will update position and old position, to allow client code to move the avatar without ComputePosition() reverting it back based upon it’s old position. LocalAvatar also needs to override the OnVelocityUpdate() method to notify Badumna when velocity changes. The new code added to LocalAvatar.cs is shown below: c l a s s LocalAvatar : Avatar , I S p a t i a l O r i g i n a l { # region Fields p r i v a t e Vector3 mOldPosition = new Vector3 ( 0 f , 0 f , 0 f ) ; p r i v a t e DateTime mOldTime = DateTime .Now; # endregion // F i e l d s ... # r e g i o n P u b l i c methods public void ComputePosition ( ) { ///Compute t h e p o s i t i o n p e r i o d i c a l l y based upon old p o s i t i o n , v e l o c i t y and e l a p s e d time DateTime currentTime = DateTime .Now; f l o a t secondsElapsed = ( f l o a t ) ( currentTime − t h i s . mOldTime ) . T o t a l S e c o n d s ; Vector3 displacement = t h i s . V e l o c i t y ∗ secondsElapsed ; t h i s . P o s i t i o n = t h i s . mOldPosition + displacement ; t h i s . mOldPosition = t h i s . P o s i t i o n ; t h i s . mOldTime = DateTime .Now; } public void F i x P o s i t i o n ( Vector3 newPosition ) { // F i x t h e p o s i t i o n , by s e t t i n g t h e p o s i t i o n , z e r o i n g v e l o c i t y and r e s e t i n g o l d P o s i t i o n . t h i s . P o s i t i o n = newPosition ; t h i s . V e l o c i t y = new Vector3 ( 0 f , 0 f , 0 f ) ; t h i s . mOldPosition = t h i s . P o s i t i o n ; } 44 Chapter 3. Badumna Basics # endregion // P u b l i c methods # r e g i o n On update o v e r r i d e s ... p r o t e c t e d o v e r r i d e void OnVelocityUpdate ( ) { NetworkFacade . I n s t a n c e . FlagForUpdate ( t h i s , ( i n t ) SpatialEntityStateSegment . Velocity ) ; } # endregion // On update o v e r r i d e s } } The final changes required, are to update the MainWindow class to change the local avatar’s velocity in response to user input, rather than changing its position directly, and to periodically call the local avatar’s ComputePosition() method. These changes occur in the Window_KeyDown() and RegularProcessing() methods respectively. We’ve also updated the Login_Click() method to set the local avatar’s initial position using the FixPosition() method rather than directly setting the Position property, and added a ’reset’ key, to reset the avatar to its original position, again in the Window_KeyDown() method. The code changes are shown below: p r i v a t e void L o g i n _ C l i c k ( o b j e c t sender , RoutedEventArgs e ) { ... // I n i t i a l i z e t h e a v a t a r ’ s p o s i t i o n and c o l o r t h i s . mAvatar . F i x P o s i t i o n (new Vector3 ( 5 0 f , 50 f , 0 f ) ) ; t h i s . mAvatar . Color = Colors . Blue ; ... } ... p r i v a t e void R e g u l a r P r o c e s s i n g ( ) { i f ( t h i s . mIsLoggedIn ) { NetworkFacade . I n s t a n c e . ProcessNetworkState ( ) ; mAvatar . ComputePosition ( ) ; } } ... p r i v a t e void Window_KeyDown ( o b j e c t sender , KeyEventArgs e ) 45 Chapter 3. Badumna Basics { ... switch ( e . Key ) { ... c a s e Key . R : t h i s . mAvatar . F i x P o s i t i o n (new Vector3 ( 5 0 f , 50 f , 0f ) ) ; break ; ... } ... i f ( moveDirection ! = 0 ) { Vector3 velocityChange = new Vector3 ( ) ; double angle = t h i s . mAvatar . O r i e n t a t i o n ∗ Math . PI / 180.0; velocityChange . X = ( f l o a t ) ( moveDirection ∗ MainWindow . MoveAmount ∗ Math . Cos ( angle ) ) ; velocityChange . Y = ( f l o a t ) ( moveDirection ∗ MainWindow . MoveAmount ∗ Math . S in ( angle ) ) ; t h i s . mAvatar . V e l o c i t y += velocityChange ; } e . Handled = t r u e ; } In this example, Position is still replicated every time it changes, as ComputePosition() will set the Position property, which in turn will flag for update by calling OnPositionUpdate(). Since the avatar’s position is being dead-reckoned on remote peers, it is not always necessary to replicate the position data in addition to velocity. It is up to the application to determine a strategy for deciding when to flag dead-reckoned entities’ positions for update. A conservative strategy would be to still replicate position data whenever it changes as in this demo. A less conservative strategy, for example only replicating position data when velocity changes, would reduce bandwidth consumption at the cost of increasing the probability of positional errors creeping in. Most applications will be able to tolerate small errors without impairing user experience. Checklist: 3 Configure connectivity by either: 3 (a) Using a seed peer: 3 Start the seed peer with the application name “api-example” 46 Chapter 3. Badumna Basics 3 Configure the API Example with the seed peer’s address and port (see subsection 2.4.1). 3 or (b) Configure the API Example to run in LAN mode (see subsection 2.4.1). 3 Build and run ApiExample. 3.4 Multiple scenes As described earlier in this chapter, Badumna uses the concept of a scene to represent a discrete part of a virtual world. Entities in a given scene will only be replicated to other peers if that peer has joined the same scene. Scenes can be used to represent different levels in a game, or distinct parts of a virtual world, that cannot be ‘seen’ from each other. 3.4.1 Key Concepts In order to change scenes, a peer simply has to unregister its original entities and leave the current scene, join a new scene an reregister its original entities. 3.4.2 Badumna API usage 1. Unregister original entities: NetworkScene.UnregisterEntity(ISpatialOriginal) Entities will no longer be replicated to peers joined to that scene. 2. Leave the scene: NetworkScene.Leave() The local peer will leave the scene. 3. Join a new scene NetworkFacade.JoinScene(string, CreateSpatialReplica, RemoveSpatialReplica) The locak peer will join the new scene. 4. Reregister original entities: NetworkScene.RegisterEntity(ISpatialOriginal, uint) Local entities are registered with the new scene. 3.4.3 API Example 4 - Multiple Scene Demo In this example we will demonstrate Badumna’s multiple scene functionality. Badumna uses the concept of scenes to support multiple levels, instances or shards. 47 Chapter 3. Badumna Basics These are essentially physically disjoint parts of the game. At any one time an entity can only belong to a single scene. Entities in different Badumna scenes will not see each other and will not replicate state changes to each other. As already shown in ApiExample 1, a Badumna client joins a scene using the network facade’s JoinScene method, which takes a scene name and delegates for dealing with when an entity on the network (a replica) joins or leaves the scene so the local client can show the replica in its game display. Local entities (originals) must be registered with the scene using its RegisterEntity method for them to be replicated over the network to other clients that have joined the scene. In the previous example there was a single scene. Now we add an additional scene associated with a region of space. As the player moves between the two zones, we need to: 1. Unregister our local entity (the avatar) from the scene we are leaving with NetworkScene’s UnregisterEntity method. 2. Stop our client from receiving updates from that scene by calling the NetworkScene’s Leave method. 3. Join the new scene to start receiving updates from entities in it by calling the network facade’s JoinScene method. 4. Register our local entity with the new scene by calling its RegisterEntity method. To implement the new scene in our example application, we first add an event to the local avatar class that will be triggered whenever the avatar moves: c l a s s LocalAvatar : Avatar , I S p a t i a l O r i g i n a l { ... public d e l e g a t e void PositionChangedHandler ( Vector3 p o s i t i o n ) ; public event PositionChangedHandler PositionChangedEvent ; ... p r o t e c t e d o v e r r i d e void OnPositionUpdate ( ) { NetworkFacade . I n s t a n c e . FlagForUpdate ( t h i s , ( i n t ) SpatialEntityStateSegment . Position ) ; i f ( t h i s . PositionChangedEvent ! = n u l l ) { t h i s . PositionChangedEvent ( t h i s . P o s i t i o n ) ; } } 48 Chapter 3. Badumna Basics In the main window class, when we create to local avatar we subscribe to this event with a handler that will check to see if the avatar has changed zone as a result, and if so, unregister the avatar from the old scene, leave it, join the new scene, and register the avatar with that one: p r i v a t e void L o g i n _ C l i c k ( o b j e c t sender , RoutedEventArgs e ) { ... // R e g i s t e r t h e p o s i t i o n changed event handler t h i s . mAvatar . PositionChangedEvent += t h i s . CheckChangeScene ; ... } ... p r i v a t e void CheckChangeScene ( Vector3 p o s i t i o n ) { i f ( ! t h i s . mIsLoggedIn ) { return ; } // Check t h e p o s i t i o n o f t h e l o c a l Avatar i f ( p o s i t i o n . X >= 135 && p o s i t i o n . X <= 384 && p o s i t i o n . Y >= 87 && p o s i t i o n . Y <= 2 8 2 ) { //change scene i f ( t h i s . mScene . Name . Equals ( SceneName ) ) { // change from t h e main scene t o t h e i n n e r scene named " r e c t a n g l e " . t h i s . mScene . U n r e g i s t e r E n t i t y ( t h i s . mAvatar ) ; t h i s . mScene . Leave ( ) ; t h i s . mScene = NetworkFacade . I n s t a n c e . J o i n S c e n e ( " rectangle " , this . CreateSpatialReplica , this . RemoveSpatialReplica ) ; t h i s . mScene . R e g i s t e r E n t i t y ( t h i s . mAvatar , ( u i n t ) EntityType . Avatar ) ; } } else { i f ( ! t h i s . mScene . Name . Equals ( SceneName ) ) { // change from t h e i n n e r scene named " r e c t a n g l e " t o t h e main scene . t h i s . mScene . U n r e g i s t e r E n t i t y ( t h i s . mAvatar ) ; t h i s . mScene . Leave ( ) ; 49 Chapter 3. Badumna Basics t h i s . mScene = NetworkFacade . I n s t a n c e . J o i n S c e n e ( MainWindow . SceneName , t h i s . C r e a t e S p a t i a l R e p l i c a , t h i s . RemoveSpatialReplica ) ; t h i s . mScene . R e g i s t e r E n t i t y ( t h i s . mAvatar , ( u i n t ) EntityType . Avatar ) ; } } } You are now ready to run the multiple scene API example. Checklist: 3 Configure connectivity by either: 3 (a) Using a seed peer: 3 Start the seed peer with the application name “api-example” 3 Configure the API Example with the seed peer’s address and port (see subsection 2.4.1). 3 or (b) Configure the API Example to run in LAN mode (see subsection 2.4.1). 3 Build and run ApiExample. 3.5 Private Chat In section 3.2 we saw how proximity chat allows messages to be sent from a local entity to all other entities nearby. Badumna supports a second chat facility called private chat which allows an application to send chat messages to other specific users. 3.5.1 Key Concepts To use private chat, users must announce themselves to the network, providing a name by which they can be contacted. Others who know this name can invite the user to a private chat. When a private chat invitation has been accepted, the inviter can send private messages directly to the invitee. Private chat sessions are uni-directional, so both users need to establish sessions in order to have a two-way conversation. 50 Chapter 3. Badumna Basics ! Unique user names not enforced At present, uniqueness of user names is not enforced by Badumna, and it is up to the application to resolve this. 3.5.2 Badumna API usage 1. Create a chat service: NetworkFacade.CreateChatService() A peer can use a single chat service for multiple, simultaneous, separate private chat sessions with friends. 2. Open private channels to allow other users to try to chat: IChatService.OpenPrivateChannels(ChatInvitationHandler, username) Pass a delegate to handle chat invitations and a username for other users to identify us by. 3. Update presence information to the network: IChatService.ChangePresence(ChatStatus) Chat status can be Online, Away, Chat, Do Not Disturb, or Extended Away. Please note, the Offline status is automatically set by Badumna when user goes offline, application should not call ChangePresence to change the chat status to Offline. The Dont Reply, Ask and Notify chat status are used internally by Badumna, they should not be set by calling ChangePresence. 4. Accept invitations from other users (if desired): ChatInvitationHandler passed when opening private channels. It in turn passes delegates for handling messages from other users and updates to their presence information. 5. Invite other users to chat privately: InviteUserToPrivateChannel(string) Once other users have opened a private chat channel using a given username, we can invite them to chat with us. 6. Unsubscribe from a channel to stop the private chat: IChatService.UnsubscribeFromChatChannel(ChatChannelId) It is best practice to check for existing chat sessions with a given user when receiving a private chat invitation, and closing them with this method before accepting the invitation. 51 Chapter 3. Badumna Basics 3.5.3 API Example 5 - Private Chat Demo This example demonstrates how to use Badumna’s private chat feature including how to subscriber to presence information regarding specific users in the network. Badumna will notify appropriately if the user is online, offline, or idle. This presence information coupled with Badumna’s private chat feature can be used to build chat rooms or provide this functionality as part of a more complex game. The example presented is a very simplfied example of a private chat example as our goal is to demonstrate how to access Badumna functionality. We therefore want to keep the graphics user interface to a bare minimum. To use Badumna’s private chat feature, NetworkFacade.Instance.CreateChatService() should be called to get an IChatService object, which provides access to all Badumna private chat features. In the following example code, the private chat session is initialized in a few steps: (i) get the IChatService object, (ii) call OpenPrivateChannels to register the Channel Invitation Handler and local peer’s user name, (iii) change local peer’s presence status to the default status, which is Online and then (iv) invite all friends on local peer’s buddy list to the private channel. t h i s . badumnaChatService = NetworkFacade . I n s t a n c e . CreateChatService ( ) ; i f ( t h i s . badumnaChatService == n u l l ) { return false ; } ... t h i s . badumnaChatService . OpenPrivateChannels ( t h i s . HandleChannelInvitation , t h i s .myName) ; t h i s . badumnaChatService . ChangePresence ( C h a t S t a t u s . Online ) ; // i n v i t e a l l u s e r s t o p r i v a t e channel f o r e a c h ( Friend f r i e n d in f r i e n d s ) { t h i s . badumnaChatService . I n v i t e U s e r T o P r i v a t e C h a n n e l ( f r i e n d . Name) ; } The ChatInvitationHandler delegate specified when calling OpenPrivateChannels will be invoked when there is any incoming request from other users to subscribe the private channel. The following method is used in this private chat example program. 52 Chapter 3. Badumna Basics p r i v a t e void H a n d l e C h a n n e l I n v i t a t i o n ( ChatChannelId channel , s t r i n g username ) { Friend f r i e n d = t h i s . f r i e n d s . GetFriend ( username ) ; i f ( friend != null ) { i f ( f r i e n d . ChannelId ! = n u l l ) { i f ( ! f r i e n d . ChannelId . Equals ( channel ) ) { t h i s . badumnaChatService . UnsubscribeFromChatChannel ( f r i e n d . ChannelId ) ; f r i e n d . ChannelId = channel ; t h i s . badumnaChatService . A c c e p t I n v i t a t i o n ( channel , t h i s . HandlePrivateMessage , t h i s . HandlePresence ) ; } return ; } else { f r i e n d . ChannelId = channel ; t h i s . badumnaChatService . A c c e p t I n v i t a t i o n ( channel , t h i s . HandlePrivateMessage , t h i s . HandlePresence ) ; } } } When the ChatInvitationHandler delegate is called, the specified chat channel object and its associated user name parameters are provided to identify the remote requesting user. AcceptInvitation should be called to accept the invitation or return from ChatInvitationHandler without calling AcceptInvitation. The ChatMessageHandler and ChatPresenceHandler delegates are specified in the above example code when calling AcceptInvitation. ChatMessageHandler will be invoked for each incoming chat message from the remote user and ChatPresenceHandler is invoked to notify the local peer that the remote user has changed his/her presence status. In our private chat example program, both the ChatMessageHandler delegate and the ChatPresenceHandler delegate just pass the incoming message or present status to the graphics user interface for display purpose. When the ChatInvitationHandler delegate is invoked, the specified chat channel object should be stored in some custom class, such as a friend list container, these 53 Chapter 3. Badumna Basics per remote user chat channel objects will be required when you call SendChannelMessage to send messages to the remote user. In Badumna 1.4, each peer may call the Network Facade’s CreateChatService() method multiple times to get many IChatService objects, each of them represents a chat session. In most cases, each peer only needs to call NetworkFacade.Instance.CreateChatService() once to get its IChatService, which will be used for both proximity and private chat. Multiple IChatService objects are required when there are more than one ISpatialOriginal objects registered on the local peer, for example, if you are running multiple NPCs in the same process then each of these NPCs should have its own IChatService object. You are now ready to run the privat chat API example. When running the private chat API example, you will prompted to select one of the included buddy files (john.list or mary.list). This will load the buddies for the given player, who can then be chatted with if they are online. Run two instances to try out the chat feature, and see the presence feature in operation. Checklist: 3 Configure connectivity by either: 3 (a) Using a seed peer: 3 Start the seed peer with the application name “api-example” 3 Configure the API Example with the seed peer’s address and port (see subsection 2.4.1). 3 or (b) Configure the API Example to run in LAN mode (see subsection 2.4.1). 3 Build and run ApiExample. 54 Chapter 4 Centralised Services The previous chapter focussed on Badumna’s functionality that can be offered using its decentralised architecture and does not require any centralised servers. This chapter will focus on Badumna’s functionality that requires centralised resources in the network. Each new functionality is explained by means of an example. We also demonstrate how to set up the server component of Badumna. In certain cases, we have also provided the source code for the server component. This will allow you to customise the server module to your requirements. Applications are included as part of the Badumna Network Suite installation package. Source code for the examples is included in the same Windows examples package as used in the previous chapter. See section 2.2 to find out how to obtain all downloads. 4.1 Authentication and user management Dei Server provides the authentication and user management service used in conjunction with the Badumna framework. The service is responsible for authenticating users, validating their permission to use the application and issuing certificates that can be used by other users to verify the validity of the users in the network. A user will require an account to join a Dei-enabled application. When a user first starts the application, it connects to the Dei Server and sends their user name and password for authentication. Once the user is authenticated and verified as a valid user to join the network, the Dei server issues a series of digitally signed security tokens to the user, which must be used to log in to the Badumna network. In short, Dei Server ensures that only valid users are allowed to join the network while providing identity protection. To set up a secure Badumna network, you need to do the following four things: • Configure and run an instance of Dei Server. 55 Chapter 4. Centralised Services • Provide a means for end-users to obtain accounts. • Configure your Badumna clients to use Dei. • Configure your services (seed peer, overload peer, arbitration servers) to use Dei. 4.1.1 Dei Server Dei Server is preconfigured to work out of the box. It is recommended that you configure Dei Server to use secure connections. By default, Dei Server uses a SQLite database to store user account information, but can be configured to use MySQL or Microsoft SQL Server instead. Running Dei Server Dei Server can simply be launched from the command line: Ï DeiServer.exe. By default, Dei Server will listen for incoming connection on port 21248. Use the --port option if you wish to use a different port, e.g.: Ï DeiServer.exe --port=1234 When you run Dei Server for the first time, in addition to creating the necessary database tables for storing user account information, it will create an administration account with the user name ‘admin’ and the password ‘admin_password’. This account does not have permission to join a Badumna network. Instead it has special administration permissions to create and modify other user accounts. You should change the password immediately using the administration tool described in the following section. ! Do not forget to change the default admin password. Using secure connections Dei Server can be configured to use SSL for secure communication, using the --ssl option. 56 Chapter 4. Centralised Services ! Unity 2.6 and SSL Unity 2.6 does not support the use of SSL, so Dei Server cannot use SSL for Unity-based games at present. In order to offer secure communications with clients over SSL, your Dei Server installation will need an SSL certificate signed by a trusted Certificate Authority. The certificate will need to include the URL that your Dei Server is hosted at in it’s common name. Certificates can be obtained from various certificate authorities including VeriSign. Once you have obtained a signed certificate it should be saved in the same directory as the Dei Server executable (DeiServer.exe) in a file named “certificate.pfx”. This certificate file will be password-protected, and you will need to pass the password to Dei Server using the --certificate-password option. If you do not have a signed certificate from a Certificate Authority, you can either configure Dei Server to not use SSL, or you can use a self-signed certificate generated by Dei Server automatically for you. If you choose the latter option, then you will have to configure your Badumna client applications to permit selfsigned certificates to be used (see subsection 4.1.3). The common-name used in the self-signed certificate can be specified using the --common-name option. For example, to use SSL with an existing certificate with the password ‘foo’: Ï DeiServer.exe --ssl --certificate-password=foo To use SSL with an auto-generated self-signed certificate using the host name ‘my.server.com’: Ï DeiServer.exe --ssl --common-name=my.server.com Using a different database Dei Server currently supports the following databases: Microsoft SQL Server, MySQL and SQLite. Dei Server is configured to use SQLite by default, and since SQLite is a “zeroconfiguration” database, it does not require any database to be created prior to use. However, if you want to use Microsoft SQL Server or MySQL instead, then you will need to create an empty database called “DeiAccounts” or another name of your choice. Dei Server will create the required tables in the database on its first run. Please refer to your Database vendor’s documentation for instructions on creating a new database. 57 Chapter 4. Centralised Services Please note that if you wish to use MySQL you will also need to install MySQL Connector/Net, available from the MySQL web site. ! Using MySQL Connector/Net with Mono On Windows, the MySQL Connector/Net installer will installed the required mysql.data.dll in the global assembly cache (GAC), and edits the machine.config file to indicate that the MySQL data provider is available in that assembly. There is no Linux or Mac OS X installer, so if you are on one of those platforms you will need to either install mysql.data.dll into the GAC yourself using gacutil or move it into the same directory as the Dei Server executable. You will also need to edit the DeiServer.exe.config to indicate that the MySQL data provider is available in that assembly. To do this, just uncomment the relevant part of the DbProviderFactories configuration, and check that the version and public key token match the version of MySQL Connector/Net that you are using. Dei Server uses a data provider to connect to a database. It ships with data providers for Microsoft SQL Server (version 7.0 or later), and SQLite, and the data provider for MySQL (MySql Connector/Net) is freely available (see above). Dei Server’s database configuration is set in the file DeiServer.exe.config. This file contains an application setting specifying which data provider to use, and the connection string to use for your chosen data provider. Edit this file to use your chosen database as follows: 1. Specify the correct data provider to use with your database: System.Data.SQLite for SQLite (shown), System.Data.SqlClient for Microsoft SQL Server, or MySql.Data.MySqlClient for MySql. 2. Specify the connection string to use to connect to your database. Default connection strings for each supported database are already specified, assuming that you created the database called “DeiAccounts” on the same machine as the one Dei Server is hosted on. If you are using MySQL you will need to specify the user name and password for the account Dei Server will use to access the database. For more information on connection strings please refer to connectionstrings.com or your database vendor’s documentation. <?xml v e r s i o n= " 1 . 0 " encoding= " u t f −8" ?> 58 Chapter 4. Centralised Services <configuration> <appSettings> < !−− Database P r o v i d e r −−> <add key= " d a t a P r o v i d e r " value= " System . Data . SQLite " /> </ a p p S e t t i n g s > < !−− Connection s t r i n g s −−> <connectionStrings> <add name= " System . Data . S q l C l i e n t " c o n n e c t i o n S t r i n g = " Data Source =( l o c a l ) \SQLEXPRESS ; I n t e g r a t e d S e c u r i t y =SSPI ; I n i t i a l Catalog=DeiAccounts " /> <add name= " System . Data . SQLite " c o n n e c t i o n S t r i n g = " Data Source=DeiAccounts . s3db " /> <add name= " MySql . Data . MySqlClient " c o n n e c t i o n S t r i n g = " S e r v e r = l o c a l h o s t ; P o r t = 3 3 0 6 ; Database= DeiAccounts ; Uid=YourAccountName ; Pwd=YourPassword ; " /> </ c o n n e c t i o n S t r i n g s > < !−− Third p a r t y data p r o v i d e r s −−> <system . data> <DbProviderFactories> <remove i n v a r i a n t = " System . Data . SQLite " /> <add name= " SQLite Data P r o v i d e r " i n v a r i a n t = " System . Data . SQLite " d e s c r i p t i o n = " . Net Framework Data P r o v i d e r f o r SQLite " type= " System . Data . SQLite . SQLiteFactory , System . Data . SQLite " /> </ D b P r o v i d e r F a c t o r i e s > </system . data> </ c o n f i g u r a t i o n > Listing 4.1: DeiServer.exe.config Dei Server command line option summary When launching Dei Server from the command line, the following optional arguments are supported: -p, --port=VALUE Listen on the given port for client connections. If not specified, the default port is 21248. -s, --ssl Use SSL for secure client connections. -c, --certificate-password=VALUE The password for the provided SSL certificate. If this option is not specified when using SSL, an auto-generated selfsigned certificate will be used. 59 Chapter 4. Centralised Services -n, --commonname=VALUE The name to use in the auto-generated self-signed SSL certificate. -g, --generate-keys Generate new keys. 4.1.2 Creating user accounts Your application will require some means of creating user accounts. User accounts must be created through the Dei Server, rather than accessing the accounts database directly, since the database stores encrypted passwords, and Dei Server is responsible for the encryption. To support this and other administrative functionality Dei provides an administration client class, Dei.AdminClient, in the Dei.AdminClient.dll library. Badumna applications will typically be accompanied by a website that allows users to sign up for new accounts, and the web application behind the site will use Dei.AdminClient to achieve this. The Badumna Network Suite provides “DeiAdministrationTool”, which serves as a development tool for creating test accounts on the Dei Server, and includes the source code to show an example of how to use DeiAdminClient to create your own account sign-up website. Dei Administration Tool The Dei Administration Tool can be found under the Dei directory in the directory where you installed Badumna Network Suite. The Dei Administration Tool must be configured to connect to your Dei Server instance. The configuration is in the file Configuration.xml in the App_Data directory. <?xml v e r s i o n= " 1 . 0 " encoding= " u t f −8" ?> <Configuration D e i S e r v e r= " l o c a l h o s t : 2 1 2 4 8 " Username= " admin " Password= " admin_password " S s l C o n n e c t i o n = " f a l s e " /> Listing 4.2: DeiAdministrationTool\App_Data\Configuration.xml The default configuration tries to connect to Dei Server on the local host using the default Dei Server port, 21248, and the automatically created administration account with its default password. Edit this configuration file to match the host name, port and connection type of you running Dei Server instance. 60 Chapter 4. Centralised Services To launch the Dei Administration Tool run the launcher executable found inside the Dei\DeiAdministrationTool\ directory: Ï DeiAdministrationTool.exe Command line arguments that can be specified are: -p, --port The port to listen on. -i, --ip The IP address to host the application at. The default port is 21255. The default IP address is localhost. To make DeiADministrationTool accessible remotely, you should use your machine’s internal IP address. For remote access, you will also need to configure your router to perform port forwarding to forward http requests to the specified port. ! Running DeiAdministrationTool on Windows Vista/7 On Windows Vista and Windows 7, DeiAdministrationTool needs to be run with administrator privileges the first time it is using a particular port, including the very first time it is run. When running with administrator privileges, DeiAdministrationTool will add the port to the URL Access Control List. After this has been done, DeiAdministrationTool will not need administrator privileges on subsequent runs. 3 Running DeiAdministrationTool with administrator privileges To run DeiAdministraionTool with administrator privileges, launch Command Prompt with administrator privileges by right clicking on its Start Menu shortcut (Start > All Programs > Accessories > Command Prompt) and selecting ‘Run as administrator’. You can then launch DeiAdministrationTool from the command line as described above. When you run the tool, you can create new user accounts that can be used to join your Badumna network. Each user account (including the automatically created administrator account) can have various permissions set on it. All user accounts should have participation permission, which means they may join a Badumna Network. The other permissions an account may be assigned relate to the creation and modification of user accounts on Dei. The administration account created on Dei Server’s first run does not have participation permission, but does have full permission to create and 61 Chapter 4. Centralised Services modify other user accounts. User accounts created with the Dei Administration Tool only have participation permission. For more information on permissions, please refer to the Dei API documentation. ! Change default password. Do not forget to change the admin account password when you first run the tool. 3 Creating your own Dei Administration Tool Full source code for the Dei Administration Tool is available in the Source directory in the Badumna Network Suite installation directory. It is written as an ASP.NET MVC web application, and requires the free ASP.NET MVC installation from Microsoft. Open DeiAdministrationTool.csproj in Visual Studio to see the source code. Dei Administration Tool uses the DeiAdminClient.dll library. Game operators will typically host their own website where users can sign up for an account, that uses an ASP.NET web application using this library. To learn more about building web applications using ASP.NET see the official Microsoft site: www.asp.net. 4.1.3 Using Dei in Badumna clients To use Dei security in your Badumna client, you need to use a DeiTokenSupplier. The DeiTokenSupplier takes care of connecting to the Dei Server, authenticating user account details, and retrieving the security tokens. It will then use these tokens to let you log in to the Badumna network. The API requires three steps: 1. Create a DeiTokenSupplier. 2. Authenticate the DeiTokenSupplier. 3. Use the DeiTokenSupplier to log in to the Badumna network. For example: 62 Chapter 4. Centralised Services // C r e a t e a token s u p p l i e r p a s s i n g t h e address o f t h e machine where Dei S e r v e r i s running , t h e p o r t t o connect on , and a f l a g i n d i c a t i n g whether t o use SSL f o r a s e c u r e c o n n e c t i o n . Dei . DeiTokenSupplier t o k e n S u p p l i e r = new DeiTokenSupplier ( " d e i s e r v e r . example . com" , 2 1 2 4 8 , t r u e ) ; // R e t r i e v e s e c u r i t y tokens from Dei Server , using an e x i s t i n g account . Dei . L o g i n R e s u l t r e s u l t = t o k e n S u p p l i e r . A u t h e n t i c a t e ( username , password , n u l l /∗ No p r o g r e s s t r a c k e r ∗/ ) ; i f ( r e s u l t . WasSuccessful ) { NetworkFacade . I n s t a n c e . Login ( t o k e n S u p p l i e r ) ; } Listing 4.3: Example: using Dei in a Badumna client. When creating a DeiTokenSupplier you pass in the host name of the Dei Server, and the port to try to connect to, which must of course match the port you specified when launching the Dei Server. The third argument is a flag indicating whether to use SSL, again this must tally with the command line arguments you specified when launching the Dei Server. If flag for using SSL is set to true then by default the call to Authenticate will fail if the Dei Server installation is not using an SSL certificate that is signed by a trusted authority, and contains a name that matches the address of the machine it is running on. To allow developers to use SSL when they do not have such a certificate, DeiTokenSupplier can be configured to ignore various SSL authentication errors, with the following properties: IgnoreSslErrors Ignore all SSL certificate validation errors (Dei Server must still be using SSL). IgnoreSslCertificateNameMismatch Ignore SSL certificate name mismatch errors. IgnoreSslSelfSignedCertificateErrors Permit the use of self-signed SSL certificates. These properties must be set on the DeiTokenSupplier object before Authenticate is called. The authenticate method takes a user name and password, and a delegate for monitoring progress. Please refer to the API documentation for further information. 4.1.4 Configuring a Seed Peer to use Dei When running a secure network, any Seed Peers will also have to be configured to use Dei. Seed Peers need to be configured with the address and port of the Dei 63 Chapter 4. Centralised Services Server instance to connect to, a user name and password, and a flag indicating whether to use SSL. This information can be specified using the --dei-config-string option, or in a configuration file specified using the --dei-config-file option: Ï SeedPeer.exe --dei-config-string=localhost;21248;true;username;password Ï SeedPeer.exe --dei-config-file=deiConfig When using the --dei-config-string option, the option value should be a semi-colon delimitted string consisting of host, port, SSL flag, username and password. Any double quotation marks in the password will have to be escaped using the backslash character and if the password includes white space, the entire configuration string will need to be quoted using double quotation marks. White space is not permitted anywhere else in the configuration string. When using the --dei-config-file option, the specified file must be in the local directory, and should be formatted as follows: deiHost:deiserver.example.com deiPort:21248 deiUsername:username deiPassword:password useSslConnection:true Replace ‘deiserver.example.com’, ‘21248’, ‘username’, and ‘password’ with the hostname or IP address of your Dei server, the port number your Dei server is running on, and the user name and password of the account to use when connecting to Dei respectively. The SSL connection flag should be set to ’true’ or ’false’. ! White space is not permitted. The Dei configuration file must not include white space around the colons. The password is permitted to include leading white space which is interpreted as part of the password itself. ! Participation permission required. The account your Seed Peer uses must have participation permission, so you cannot use the administration account. See subsection 4.1.2 to learn how to create a user account with participation permission. 64 Chapter 4. Centralised Services Make sure you have configured the networkconfig.xml file as described in subsection 2.4.2. To start the SeedPeer manually with Dei server settings use the following command: Ï SeedPeer.exe --dei-config-file=deiConfig where ‘deiConfig’ is the file containing the Dei configuration information as described above. 4.1.5 API Example 6: Dei Server Demo The following tutorial will demonstrate how to add Dei security to the API Example application. In this example, we have added a login window to the application in the new file LoginWindow.xaml. The window includes a text box for the user name, a password box for the password, and a login button. The logic for this window is in the file LoginWindow.xaml.cs. When the user clicks on the login button the LoginWindow’s loginbutton_Click() method is called, which gets the username and password and passes them to the DoDeiLogin() method. public p a r t i a l c l a s s LoginWindow : Window { ... p r i v a t e void l o g i n b u t t o n _ C l i c k ( o b j e c t sender , RoutedEventArgs e ) { s t r i n g username = t h i s . username . Text = t h i s . username . Text . Trim ( ) ; s t r i n g password = t h i s . password . Password ; t h i s . DoDeiLogin ( username , password ) ; } ... } Listing 4.4: LoginWindow.xaml.cs The DoDeiLogin() method creates a DeiTokenSupplier, using a known host and port. You will need to change the host (“dei.example.com”) to the IP address or host name of the machine where you are running Dei Server. In this example, SSL is turned off by passing false as the third argument, so the Dei Server must not be configured to use SSL. 65 Chapter 4. Centralised Services The DeiTokenSupplier then authenticates the username and password using its Authenticate() method. public p a r t i a l c l a s s LoginWindow : Window { ... p r i v a t e void DoDeiLogin ( s t r i n g username , s t r i n g password ) { t h i s . mTokenSupplier = new DeiTokenSupplier ( " d e i . example . com" , 2 1 2 4 8 , f a l s e ) ; L o g i n R e s u l t r e s u l t = t h i s . mTokenSupplier . A u t h e n t i c a t e ( username , password , n u l l ) ; i f ( r e s u l t . WasSuccessful ) { t h i s . mlogin = t r u e ; t h i s . Close ( ) ; } else { t h i s . password . C l e a r ( ) ; t h i s . password . Focus ( ) ; } } } Listing 4.5: LoginWindow.xaml.cs To use this login window, the application just needs to add the following code to M ainW indow.Login_Click() : p r i v a t e void L o g i n _ C l i c k ( o b j e c t sender , RoutedEventArgs e ) { ... // C r e a t e and show Log i n window LoginWindow mWindow = new LoginWindow ( ) ; mWindow . ShowDialog ( ) ; // I f l o g i n not s u c c e s s f u l , c l o s e t h e window i f ( ! mWindow . mlogin ) { t h i s . Close ( ) ; return ; 66 Chapter 4. Centralised Services } // Badumna s p e c i f i c : Log i n t o t h e network NetworkFacade . I n s t a n c e . Login (mWindow . mTokenSupplier ) ; ... } Listing 4.6: MainWindow.xaml.cs This is all that is required to enable Dei security in your Badumna client. Don’t forget that before you can test this application, you need to have configured and launched Dei Server, and created at least one user account. Checklist: 3 Launch an instance of Dei Server. 3 Configure Dei Administration Tool to connect to the Dei Server. 3 Run Dei Administration Tool: 3 Change the default admin password. 3 Create a new user account. 3 Edit LoginWindow.xaml.cs to connect to the Dei Server. 3 Configure connectivity as in previous chapter’s examples: 3 Run seed peer with application name “api-example” and configure ApiExample6 to use this seed peer, 3 or, configure ApiExample6 to run in LAN mode. 3 Build and run ApiExample6. 4.2 Arbitration In addition to the key peer to peer networking facilities offered by Badumna, the network suite also provides the facility to host central servers. These may be used for services such as reliably hosting persistent data, and arbitrating parts of the application logic that might be vulnerable to cheating if it were run on peer machines. To support this, Badumna allows arbitration services to be implemented, where a special peer running on a central server can register with the network as an arbitration server, and other peers can connect to them as arbitration clients, and communicate reliably. 67 Chapter 4. Centralised Services 3 Germ Harnesses • The Badumna Network Suite includes Control Center which can be used to remotely start and stop central services (see chapter 8). To be controlled via the Control Center, applications ned to be implemented using a Germ Harness which will host a process and listen to Control Center instructions for starting and stopping it et cetera. • There are two kinds of Germ Harness: Process Harness for hosting normal processes, and Peer Harness for hosting processes that will be peers in a Badumna Network. The arbitration servers in this section are implemented using Peer Harnesses. 4.2.1 Arbitration Servers In order to act as an arbitration server, a Badumna peer needs to specify the name of the arbitration service it offers in its NetworkConfig.xml file. Each Badumna peer can only offer a single arbitration service. <Module Name= " A r b i t r a t i o n " > <Server> <Name> E x a m p l e A r b i t r a t i o n S e r v i c e </Name> <ServerAddress> a r b i t r a t i o n . example . com:21260</ServerAddres> </ S e r v e r > </Module> Badumna API Usage The responsibilities of an arbitration server include: 1. Register as an arbitrator with the network, and handle received messages: void RegisterArbitrationHandler(HandleClientMessage handler, TimeSpan disconnectTimeout, HandleClientDisconnect disconnect) The peer then registers with the network, passing in a client message handler, a client disconnection handler, and a disconnection timeout. Connected 68 Chapter 4. Centralised Services clients are automatically assigned a session ID, and when they send a message to the server this ID is passed in to the client message handler along with the message itself, serialized as a byte array. The server will receive notification via the client disconnection handler if a client connection is lost (i.e. a message sent to the client fails to be delivered). The disconnection handler is also triggered if a client has not sent a message to the server for longer than the disconnection timeout period. 2. Send replies to clients: void SendServerArbitrationEvent(int destinationSessionId, byte[] message) The server can send messages back to the client, passing it the session ID, and the message again serialized as a byte array. ! Arbitration Callback Exception Safety When running using a peer harness, the handlers passed to RegisterArbitrationHandler will be called by the peer harness during regular processing. For this reason they should not throw exceptions, as these exceptions will not be caught, and will cause the program to arbitration server to crash. 4.2.2 Arbitration Clients Badumna clients that need to use an abitration server, must specify the arbitration service in their NetworkConfig.xml file. A Badumna client can connect to multiple Arbitration Servers. <Module Name= " A r b i t r a t i o n " > <Server> <Name> C o m b a t A r b i t r a t i o n S e r v i c e </Name> <ServerAddress> c o m b a t a r b i t r a t i o n . example . com:21260</ServerAddres> </ S e r v e r > <Server> <Name> T r a d e A r b i t r a t i o n S e r v i c e </Name> <ServerAddress> t r a d e a r b i t r a t i o n . example . com:21260</ServerAddres> </ S e r v e r > </Module> 69 Chapter 4. Centralised Services To use the arbitration service, clients must get an arbitrator from the network facade by name using the GetArbitrator method, and connect to it using its Connect method: public i n t e r f a c e INetworkFacade { ... Badumna . A r b i t r a t i o n . I A r b i t r a t o r G e t A r b i t r a t o r ( s t r i n g name ) ; ... } namespace Badumna . A r b i t r a t i o n { public i n t e r f a c e Badumna . A r b i t r a t i o n . I A r b i t r a t o r { ... void Connect ( ArbitrationConnectionResultHandler con nectionResultHandler , HandleConnectionFailure c o n n e c t i o n F a i l e d H a n d l e r , HandleServerMessage serverEventHandler ) ; ... } } The Connect method takes handlers for receiving the connection result, connection failure notifications, and server messages. When the connected, the arbitrator’s SendEvent method can be used to send messages to the arbitration server. Messages should be serialized to byte arrays using the ArbitrationEventSet class. namespace Badumna . A r b i t r a t i o n { public i n t e r f a c e Badumna . A r b i t r a t i o n . I A r b i t r a t o r { ... void SendEvent ( byte [ ] message ) ; ... } } Messages can only be sent when the arbitrator is connected. 70 Chapter 4. Centralised Services 4.2.3 Arbitration Events To facilitate message serialization, Badumna provides two classes: ArbitrationEvent and ArbitrationEventSet. Applications should subclass ArbitrationEvent to create application-specific event classes, that can serialize themselves to a byte stream, and construct themselves from data read from a byte stream. These classes should then be registered with an ArbitrationEventSet, which can then be used to handle serialization and deserialization of arbitration events. Since arbitration messages need to be used by both client and server applications, they will usually be defined in a separate project. When an arbitration events are registered with an ArbitrationEventSet, they will be assigned unique IDs based upon the order in which they are registered. The ArbitrationEventSet will encode this ID into the byte array when serializing the event, and use it to decide how to deserialize the byte array upon receipt of an event. For this reason it is necessary that arbitration events are registered in the same order on both server and client. ! Arbitration Events and Exceptions Arbitrtation Events will typically be deserialized in the call to Arbitration Server’s client event handler, which is invoked during the call to NetworkFacade’s ProcessNetworkStatus() method. The client event handler should not throw any exceptions (see page 69). It is therefore recommended that any exceptions thrown during ArbitrationEvent construction are caught in the constructor and a single custom exception is rethrown. This exception can then easily be caught in the client event handler where deserialization is attempted. There are two example applications demonstrating the use of the arbitration API: API Example 7 shows how to store persistent data on an arbitration server, and API Example 8 shows how vulnerable parts of the game logic can be run on arbitration servers. 4.2.4 API Example 7: Buddy List Demo It may be desirable to store persistent data on a central server, to allow a user to retrieve that data when joining the network from any machine. For example, the application may support a “buddy list” storing users’ friends so they can chat with them in the application. To illustrate this, API Example 7 builds on API example 5, Private Chat, but instead of storing buddy lists to disc on the user’s local machine, they are stored on an arbitration server. 71 Chapter 4. Centralised Services The client application is called Private Chat Client, and is based upon API Example 5. The NetworkConfig.xml has been updated to specify the arbitration server to use: <Module Name= " A r b i t r a t i o n " > <Server> <Name> f r i e n d s e r v e r </Name> < U s e S e r v i c e D i s c o v e r y>Enabled</ U s e S e r v i c e D i s c o v e r y> </ S e r v e r > </Module> Listing 4.7: NetworkConfig.xml (partial listing) Notice that rather than specifying the address of the arbitration server, the configuration enables ‘service discovery’ instead. This tells Badumna to use distributed lookup to locate the server on the network by its name. The server must also register itself by name with the network for this to work. See section 4.5 for more information on distributed lookup. The only change to the client application code is in the ChatManager class. Where previously the Initialize() method loaded the buddy list from a file, and then immediately opened chat channels with found buddies, this method now calls the new method RetrieveFriendsList(), which attempts to connect to the arbitrator: p r i v a t e void R e t r i e v e F r i e n d s L i s t ( ) { t h i s . b u d d y L i s t A r b i t r a t o r = NetworkFacade . I n s t a n c e . GetArbitrator ( " friendserver " ) ; t h i s . b u d d y L i s t A r b i t r a t o r . Connect ( this . HandleArbitrationServerConnectionResult , this . HandleArbitrationServerConnectionFailure , t h i s . HandleServerMessage ) ; } Listing 4.8: ChatManager.cs (partial listing) The connection result handler will, upon notification of successful connection, send a message to the arbitrator requesting the buddy list: 72 Chapter 4. Centralised Services p r i v a t e void H a n d l e A r b i t r a t i o n S e r v e r C o n n e c t i o n R e s u l t ( ServiceConnectionResultType r e s u l t ) { i f ( r e s u l t == S e r v i c e C o n n e c t i o n R e s u l t T y p e . S u c c e s s ) { BuddyListRequest r e q u e s t = new BuddyListRequest ( t h i s . MyUsername ) ; t h i s . b u d d y L i s t A r b i t r a t o r . SendEvent ( BuddyListArbitrationEvents . BuddyListArbitrationEventSet . S e r i a l i z e ( request ) ) ; } } Listing 4.9: ChatManager.cs (partial listing) Notice that the message is sent using a request object of type BuddyListRequest. This arbiration event is defined in the separate project BuddyListArbitrationEvents, as it will be required by the client and server projects. BuddyListArbitrationEvents also includes a second arbitration event, BuddyListReply, along with the arbitration event set that is used to serialize and deserialize the events. The buddy list request just stores the user name of the user making the request. The buddy list reply contains a list of the user names of the requestor’s buddies. The client’s server message handler will process buddy lists received from the server, and this is where the code for establishing private chat channels with buddies that used to reside in the Initialize method has been moved to: p r i v a t e void HandleServerMessage ( byte [ ] message ) { ArbitrationEvent reply = BuddyListArbitrationEvents . B u d d y L i s t A r b i t r a t i o n E v e n t S e t . D e s e r i a l i z e ( message ) ; i f ( r e p l y i s BuddyListReply ) { BuddyListReply buddyListReply = r e p l y as BuddyListReply ; f o r e a c h ( s t r i n g name in buddyListReply . BuddyNames ) { t h i s . f r i e n d s . AddFriend ( name ) ; } // i n v i t e a l l u s e r s t o p r i v a t e channel f o r e a c h ( Friend f r i e n d in f r i e n d s ) { t h i s . badumnaChatService . I n v i t e U s e r T o P r i v a t e C h a n n e l ( f r i e n d . Name) ; } 73 Chapter 4. Centralised Services this . UpdateFriendsList ( ) ; t h i s . UpdateSendToList ( ) ; } } Listing 4.10: ChatManager.cs (partial listing) That completes the changes required to the private chat client. The arbitrtaion server that will service the client is a simple application that just processes incoming buddy list requests and responds with the known list of the user’s buddies. It has been implemented using Badumna’s PeerHarness which allows the Badumna Control Centre to launch and monitor processes on remote machines, but this not compulsory for an arbitration server. Applications using PeerHarness require a class implementing the IHostedProcess interface: public i n t e r f a c e I H o s t e d P r o c e s s { void O n I n i t i a l i z e ( s t r i n g [ ] arguments ) ; bool OnPerformRegularTasks ( i n t d e l a y M i l l i s e c o n d s ) ; byte [ ] OnProcessRequest ( i n t requestType , byte [ ] r e q u e s t ) ; void OnShutdown ( ) ; bool OnStart ( ) ; } Listing 4.11: IHostedProcess The PeerHarness will take care of logging in to the Badumna network, and will use this interface to initialize, start and shutdown the hosted process, as well as trigger regular processing and pass messages to it. In our example the PeerHarness hosts an instance of the ArbitrionProcess class. The arbitration process holds an arbitrator which does the actual work. The arbitration process’s OnInitialize and OnShutdown pass on initialization and shutdown requests to the arbitrator respectively. The OnStart method registers the arbitrator with the network as an arbitration handler, by passing in it’s client event and disconnection handlers to the network facade’s RegisterArbitrationHanler method: public bool OnStart ( ) { // r e g i s t e r i n g t h e A r b i t r a t i o n E v e n t H a n d l e r NetworkFacade . I n s t a n c e . R e g i s t e r A r b i t r a t i o n H a n d l e r ( 74 Chapter 4. Centralised Services t h i s . a r b i t r a t o r . HandleClientEvent , TimeSpan . FromSeconds ( 6 0 ) , t h i s . a r b i t r a t o r . HandleClientDisconnect ) ; Console . WriteLine ( " The a r b i t r a t o r i s i n s e s s i o n . " ) ; return true ; } Listing 4.12: ArbitrationProcess (partial listing) The arbitrator stores buddy lists in a database, and use of the database is encapsulated in a data access layer (DAL) called ArbitrationDAL. There are no restrictions on how arbitration servers handle requests or store data, however, it is good practise to minimize disc reads and writes and database queries and updates, particularly when there will be a rate of requests to be served. In this exaple, each client is only likely to need to request its Buddy List once per session, so a database hit is unlikely to cause a problem, even with thousands of users. Since the arbitrator only receives one type of request, it’s HandleClientEvent method simply deserializes the message that it knows is a BuddyListRequest. It reads the user name of the requestor and retrieves the user’s buddy list from the DAL. The buddy list is encoded in a BuddyListReply and sent back to the client using the network facade’s SendServerArbitrationEvent method: p r i v a t e void HandleBuddyListRequest ( i n t s e s s i o n I d , BuddyListRequest r e q u e s t ) { Console . WriteLine ( " Handling buddy l i s t r e q u e s t . . . " ) ; C o l l e c t i o n < s t r i n g > buddyList = new C o l l e c t i o n < s t r i n g >( t h i s . a r b i t r a t i o n D A L . GetBuddies ( r e q u e s t . UserName ) ) ; Console . WriteLine ( " { 0 } buddies found ( { 1 } ) " , buddyList . Count , buddyList . T o S t r i n g ( ) ) ; BuddyListReply r e p l y = new BuddyListReply ( buddyList ) ; t h i s . networkFacade . S e n d S e r v e r A r b i t r a t i o n E v e n t ( s e s s i o n I d , BuddyListArbitrationEventSet . S e r i a l i z e ( reply ) ) ; } Listing 4.13: Arbitrator (partial listing) The remainder of the code in the BuddyListArbitrator project relates to the storage of buddy lists in a database, and the generation of test data, and is application specific, so not further discussed here. 75 Chapter 4. Centralised Services Running the example The Buddy List Arbitration Server must be passed the application name to use on the command line using the --application-name option: Ï BuddyListArbitrationServer.exe --application-name=api-example The Private Chat Client has the application name “api-example” hard-coded, so can be launched with no command line arguments. Checklist: 3 Configure connectivity for server and clients: 3 Run a seed peer with the correct application name, and configure server and clients’ initializer to point to it, 3 or, configure server and clients to run in LAN mode. 3 Build and run BuddyListArbitrationServer with the correct application name. 3 Build and run PrivateChatClient. 4.2.5 API Example 8: Combat Arbitration Demo The previous example demonstrated a minimal example of using an arbitration server to store persistent data. The second general use for arbitration servers is to run sensitive game logic on trusted machines to prevent cheating. To illustrate this, API Example 8 shows how to use arbitration servers to police player combat. It also shows how multiple arbitration servers can access a single database storing game data, and ensure that they do not try to make conflicting updates. The game The client application is based upon the demo application developed through API examples 1 to 3. A toy combat element is added to the game, by allowing users to click on other players’ avatars to attack them. Combat can only take place when both players have ‘joined’ a combat zone. Combat zones are conceptual artefacts rather than ‘physical’ zones mapped to an area of space. The example has two combat zones managed by separate combat arbitrators. Each client should connect to both arbitrators. A player can ‘join’ a combat zone by sending a join request to the arbitrator. A player can only be in one combat zone at a time. 76 Chapter 4. Centralised Services The client In order to illustrate the interaction with the arbitration servers clearly, the client interface are additional interface components. For each arbitrator, there is a panel indicating whether the client is connected to the arbitrator, and whether the player has joined its combat zone. There are buttons to allow the user to connect to the arbitrator, join its combat zone, and also leave its combat zone. There is also a log window which reports on the interaction with the arbitration servers. The example uses this interface to allow users to make invalid join and requests to show that the arbitration server will reject them. The avatars have been updated to display a self-assigned user ID used to identify the player to the arbitration server, and also indicate any combat zone joined. In a real application, if persistent data is used by an arbitration server, players should be identified by their Dei user ID, and player avatars identified by the combination of their Badumna ID and the users ’s Dei ID, but that is beyond the scope of this example. The client is implemented using the Model-View-View Model (MVVM) pattern and interaction with the arbitration servers is managed by the CombatZoneViewModel class. Command for connecting to the arbitrator, and joining and leaving the arbitrator are exposed as ICommand objects. The ConnectCommand property wraps the Connect method, which gets an arbitrator by name (using a name that must be specified in the NetworkConfig.xml file), and tries to connect to it: p r i v a t e void Connect ( ) { t h i s . a r b i t r a t o r = t h i s . networkFacade . G e t A r b i t r a t o r ( t h i s . arbitratorName ) ; t h i s . a r b i t r a t o r . Connect ( t h i s . HandleConnectionResult , t h i s . HandleConnectionFailure , t h i s . HandleServerMessage ) ; t h i s . IsConnecting = true ; } Listing 4.14: CombatZoneViewModel.cs (partial listing) The connection result and failure handlers update the UI to enable and disable the ConnectCommand. The server message handler will deserialize the received message, and report on the request result received from the arbitrator: 77 Chapter 4. Centralised Services p r i v a t e void HandleServerMessage ( byte [ ] message ) { A r b i t r a t i o n E v e n t r e p l y = Comb atAr bit rati onE vent Set . D e s e r i a l i z e ( message ) ; i f ( reply i s StatusReply ) { t h i s . Log ( " Received s t a t u s from " + t h i s . arbitratorName ) ; S t a t u s R e p l y s t a t u s R e p l y = r e p l y as S t a t u s R e p l y ; i f ( s t a t u s R e p l y . CurrentZone == t h i s . arbitratorName ) { this . IsJoined = true ; } } else i f ( reply i s JoinReply ) { J o i n R e p l y j o i n R e p l y = r e p l y as J o i n R e p l y ; i f ( joinReply . Result ) { t h i s . Log ( t h i s . arbitratorName + " a c c e p t e d j o i n request . " ) ; this . IsJoined = true ; } else { t h i s . Log ( t h i s . arbitratorName + " r e j e c t e d j o i n request . " ) ; } } e l s e i f ( r e p l y i s LeaveReply ) { t h i s . Log ( " Received s t a t u s from " + t h i s . arbitratorName ) ; LeaveReply leaveReply = r e p l y as LeaveReply ; i f ( leaveReply . R e s u l t ) { t h i s . Log ( t h i s . arbitratorName + " a c c e p t e d l e a v e request . " ) ; this . IsJoined = false ; } else { t h i s . Log ( t h i s . arbitratorName + " r e j e c t e d l e a v e request . " ) ; } } e l s e i f ( r e p l y i s CombatResult ) { t h i s . Log ( " Received s t a t u s from " + t h i s . arbitratorName ) ; CombatResult combatResult = r e p l y as CombatResult ; i f ( combatResult . I s V a l i d ) { i f ( combatResult . A t t a c k e r I d == t h i s . P l a y e r I d ) 78 Chapter 4. Centralised Services { i f ( combatResult . R e s u l t ) { t h i s . Log ( " Attack on p l a y e r " + combatResult . VictimId + " succeeded ( " + t h i s . arbitratorName + " ) ."); } else { t h i s . Log ( " Attack on p l a y e r " + combatResult . VictimId + " f a i l e d ( " + t h i s . arbitratorName + " ) . " ) ; } } e l s e i f ( combatResult . VictimId == t h i s . P l a y e r I d ) { i f ( combatResult . R e s u l t ) { t h i s . Log ( " Attack by p l a y e r " + combatResult . VictimId + " succeeded ( " + t h i s . arbitratorName + " ) ."); } else { t h i s . Log ( " Attack by p l a y e r " + combatResult . VictimId + " f a i l e d ( " + t h i s . arbitratorName + " ) . " ) ; } } else { t h i s . Log ( " Received i r r e l e v e n t combat r e s u l t ( " + combatResult . A t t a c k e r I d + " on " + combatResult . VictimId + " ) . " ) ; } } else { t h i s . Log ( t h i s . arbitratorName + " denied combat attempt . " ) ; } } 79 Chapter 4. Centralised Services else { t h i s . Log ( " Received unknown message from " + t h i s . arbitratorName ) ; } } Listing 4.15: CombatZoneViewModel.cs (partial listing) The servers The combat arbitration server uses a PeerHarness to run an IHostedProcess as in the previous example. The hosted process, ArbitrationProcess again holds an arbitrator object whose methods it registers with the network for arbitration handling: public bool OnStart ( ) { // r e g i s t e r i n g t h e A r b i t r a t i o n E v e n t H a n d l e r NetworkFacade . I n s t a n c e . R e g i s t e r A r b i t r a t i o n H a n d l e r ( t h i s . a r b i t r a t o r . HandleClientEvent , TimeSpan . FromSeconds ( 6 0 ) , t h i s . a r b i t r a t o r . HandleClientDisconnect ) ; Console . WriteLine ( " The a r b i t r a t o r i s i n s e s s i o n . " ) ; return true ; } Listing 4.16: ArbitrationProcess.cs (partial listing) The arbitrator uses the arbitration event set to deserialize messages from the client, then it handles them according to their type: public void HandleClientEvent ( i n t s e s s i o n I d , byte [ ] message ) { A r b i t r a t i o n E v e n t a r b i t r a t i o n E v e n t = Comb atA rbit rati onE vent Set . D e s e r i a l i z e ( message ) ; S t a t u s R e q u e s t s t a t u s R e q u e s t = a r b i t r a t i o n E v e n t as StatusRequest ; i f ( statusRequest != null ) { Console . WriteLine ( " Handling s t a t u s r e q u e s t " ) ; 80 Chapter 4. Centralised Services t h i s . HandleStatusRequest ( s e s s i o n I d , s t a t u s R e q u e s t ) ; return ; } J o i n R e q u e s t j o i n R e q u e s t = a r b i t r a t i o n E v e n t as J o i n R e q u e s t ; i f ( joinRequest != null ) { Console . WriteLine ( " Handling j o i n r e q u e s t " ) ; t h i s . HandleJoinRequest ( s e s s i o n I d , j o i n R e q u e s t ) ; return ; } LeaveRequest l e a v e R e q u e s t = a r b i t r a t i o n E v e n t as LeaveRequest ; i f ( leaveRequest != null ) { Console . WriteLine ( " Handling l e a v e r e q u e s t " ) ; t h i s . HandleLeaveRequest ( s e s s i o n I d , l e a v e R e q u e s t ) ; return ; } CombatRequest combatRequest = a r b i t r a t i o n E v e n t as CombatRequest ; i f ( combatRequest ! = n u l l ) { Console . WriteLine ( " Handling combat r e q u e s t " ) ; t h i s . HandleCombatRequest ( s e s s i o n I d , combatRequest ) ; return ; } } Listing 4.17: Arbitrator.cs (partial listing) The arbitrators share access to a database, and this is managed through a data access layer (DAL). The database contains a table listing each player’s strength and victory count. It also holds a table listing which combat zone each player is in, if any. When a player make a join request to the arbitrator, the arbitrator will only let the player join if it is not in another zone already, in which case it will update the database table to show the player is now in the zone. The DAL makes this check and update as a single atomic operation, and an arbitrator will only read or update a player’s data in the database while the player is in it’s zone. This implements the /emphpessimistic offline lock pattern to prevent database conflicts, and means that multiple arbitrators can share access to the players’ combat data. When a player successfully joins a zone, the arbitrator retrieves the player’s combat data from the DAL, and caches it, reporting the success of the join request to the client: 81 Chapter 4. Centralised Services p r i v a t e void HandleJoinRequest ( i n t s e s s i o n I d , J o i n R e q u e s t joinRequest ) { PlayerCombatData pcd = t h i s . a r b i t r a t i o n D A L . J o i n A r b i t r a t o r ( joinRequest . PlayerId ) ; i f ( pcd ! = n u l l ) { t h i s . playerCombatData . Add( j o i n R e q u e s t . P l a y e r I d , pcd ) ; t h i s . s e s s i o n I d B y P l a y e r I d . Add( j o i n R e q u e s t . P l a y e r I d , sessionId ) ; t h i s . p l a y e r I d B y S e s s i o n I d . Add( s e s s i o n I d , j o i n R e q u e s t . PlayerId ) ; } J o i n R e p l y r e p l y = new J o i n R e p l y ( pcd ! = n u l l ) ; t h i s . networkFacade . S e n d S e r v e r A r b i t r a t i o n E v e n t ( s e s s i o n I d , Co mbat Arbi tra tion Even tSe t . S e r i a l i z e ( r e p l y ) ) ; } Listing 4.18: Arbitrator.cs (partial listing) Combat requests are adjudicated on the basis of the two players’ combat data, with a victory awarded to the player with the highest strength value. The result is returned to players involved: p r i v a t e void HandleCombatRequest ( i n t s e s s i o n I d , CombatRequest combatRequest ) { i f ( t h i s . playerCombatData . ContainsKey ( combatRequest . A t t a c k e r I d ) && t h i s . playerCombatData . ContainsKey ( combatRequest . VictimId ) ) { f l o a t a t t a c k e r S t r e n g t h = t h i s . playerCombatData [ combatRequest . A t t a c k e r I d ] . S t r e n g t h ; f l o a t v i c t i m S t r e n g t h = t h i s . playerCombatData [ combatRequest . VictimId ] . S t r e n g t h ; i f ( a t t a c k e r S t r e n g t h >= v i c t i m S t r e n g t h ) { t h i s . playerCombatData [ combatRequest . A t t a c k e r I d ] . V i c t o r i e s ++; } else { 82 Chapter 4. Centralised Services t h i s . playerCombatData [ combatRequest . VictimId ] . V i c t o r i e s ++; } CombatResult r e s u l t = new CombatResult ( true , combatRequest . A t t a c k e r I d , combatRequest . VictimId , a t t a c k e r S t r e n g t h >= v i c t i m S t r e n g t h ) ; byte [ ] message = C omba tAr bitr ati onEv entS et . S e r i a l i z e ( result ) ; t h i s . networkFacade . S e n d S e r v e r A r b i t r a t i o n E v e n t ( s e s s i o n I d , message ) ; t h i s . networkFacade . S e n d S e r v e r A r b i t r a t i o n E v e n t ( t h i s . s e s s i o n I d B y P l a y e r I d [ combatRequest . VictimId ] , message ) ; } else { CombatResult r e s u l t = new CombatResult ( false , combatRequest . A t t a c k e r I d , combatRequest . VictimId , false ) ; byte [ ] message = C omba tAr bitr ati onEv entS et . S e r i a l i z e ( result ) ; t h i s . networkFacade . S e n d S e r v e r A r b i t r a t i o n E v e n t ( s e s s i o n I d , message ) ; } } Listing 4.19: Arbitrator.cs (partial listing) The DAL does not contain any Badumna-specific code, and so is not explicitly described here. The important point about it is that its design allows each arbitrator to operate on the same database, while minimizing database hits, and therefore it should scale well to allow thousands of players easily. Running the example The server requires the arbitrator name to be passed on the command line, and also specified in the network configuration file. A configuration file to be used instead of the default NetworkConfig.xml can be specified on the command line using the --network-configuration option. The server will also require the application name to be specified on the command line using the --application-name option. This name must match the name used by the client (“api-example”). 83 Chapter 4. Centralised Services For ease of use the combat arbitrator project includes two scripts to launch arbitration servers with appropriately configured configuration files: LaunchCombatZoneA.bat and LaunchCombatZoneB.bat. The arbitration client (ApiExample) should specify the arbitrators to use in its NetworkConfig.xml file. Checklist: 3 Configure connectivity for server and clients: 3 Run a seed peer with the correct application name, and configure servers and clients’ initializer to point to it, 3 or, configure server and clients to run in LAN mode. 3 N.B. the configuration for the two servers should be done in their individual configuration files (CombatZoneAConfig.xml and CombatZoneBConfig.xml), but the clients can share the usual NetworkConfig.xml. 3 Build CombatArbitrationServer and launch two instances using the provided batch scripts (LaunchCombatZoneA.bat and LaunchCombatZoneB.bat).1 . 3 Build and run several instances of ApiExample8, picking a different player ID each time when prompted. 4.3 Overload Server Overload Server is a Badumna peer with special functionality associated with it. It provides load balancing and fall back mechanism for normal Badumna peers to share their load in the event of starvation (a Badumna node experiencing high outgoing network traffic and unable to handle the load). This can happen due to a flash crowd event, e.g. lots of people gathering in a small space. In such a scenario, if a normal Badumna peer is unable to handle the network activity by itself then it will offload some of its network load to an Overload Server (if available). Hence, the Overload Server needs to be a Badumna peer running on an operator controlled machine that can support such load balancing functionality. Instructions to setup an Overload Server for your application are as follows: 1. Install the Overload Server application on an appropriate machine (Overload Server is available as part of Badumna Network Suite installation package). 2. Edit the network configuration for the Overload Server, setting the port to use (if the default is unsuitable) and enter the details of your Seed Peer in 1 If running under mono, launch them from the command line, using the commands in the batch scripts preceded by mono or mono service 84 Chapter 4. Centralised Services the Initializer tag. The network configuration is stored in a file called "networkconfig.xml" which you can find in the Overload Server folder. Within the connectivity module of this file , you will find the following line: <PortRange >21252 , 21252 </ PortRange > The port range specifies the port number at which Overload Server should run at. You do not have to change this value unless for some reason, you are not able to use the default port number 21252 on your machine. If this is the case, then change the number 21252 (both occurrences) with a port number that is available. The connectivity module also has the following line: < I n i t i a l i z e r type= " SeedPeer " >seedpeer . example . com:21251 </ I n i t i a l i z e r > Please change ‘seedpeer.example.com’ with the details of your Seed Peer and also the port number to the port number of your Seed Peer. 3. Start the Overload Server. The Overload Server should be run from the command line, optionally specifying an application name: Ï OverloadPeer.exe --application-name=my-application If Dei is being used to run a secure network, the Dei configuration can also be specified using the command line options • --dei-config-file, or • --dei-config-string. See subsection 4.1.4 for information on Dei configurations. 4. Now you need to specify the details of the Overload Server in your client network configuration (Badumna network configuration). Please add the 85 Chapter 4. Centralised Services following code to the network configuration of your client. If you are using NetworkConfig.xml file then add this to that file. <Module Name= " Overload " > <EnableOverload >enabled </EnableOverload > <OverloadPeer > o v e r l o a d s e r v e r . example . com:21252 </ OverloadPeer > </Module> where overloadserver.example.com is the hostname of your machine running the Overload Server and 21252 is the port number. Alternatively, you can use distributed lookup to locate overload servers on the network (see section 4.5): <Module Name= " Overload " > <EnableOverload >enabled </EnableOverload > < U s e S e r v i c e D i s c o v e r y >enabled </U s e S e r v i c e D i s c o v e r y > </Module> 3 Multiple overload servers If you require multiple overload servers, you must use distributed lookup. If you are a Unity3D user, then you need to include this network configuration information within the networkinitialization.cs script (configurin badumna programmatically). badumnaConfigOptions . IsOverloadEnabled = t r u e ; badumnaConfigOptions . OverloadPeer = " o v e r l o a d s e r v e r . example . com : 2 1 2 5 2 " ; Your Overload Server has now been configured and is ready for use. 86 Chapter 4. Centralised Services Prefix http://+:8080/ https://+:8080/ http://localhost:8081/ Meaning Listen for requests on all interfaces on port 8080. Listen for requests on all interfaces on port 8080 using SSL (a certificate must be configured). Listen for requests to localhost on port 8081. Table 4.1: HTTP Prefix Examples 4.4 HTTP Tunnelling Service 4.4.1 Introduction The HTTP Tunnelling Service allows clients to connect to the peer-to-peer network using a client-server HTTP connection. This enables users behind restrictive firewalls to connect to the network. It can also support clients on bandwidthconstrained devices. The client only makes a connection to the tunnelling service and the tunnelling service is responsible for sending the appropriate messages on the peer-to-peer network. The machine which runs the tunnel server must have sufficient network, CPU, and memory resources to supported the connected clients. 4.4.2 Server Configuration The tunnel server is a process that can be run standalone or under the control center. The tunnel server requires either Microsoft .NET Framework v2.0 or later running on Microsoft Windows XP SP2 or later; or Mono on any platform. Because the tunnel server acts as a proxy client, it requires the same NetworkConfig.xml as used by the clients to be placed in its working directory. The only other configuration information required for the tunnel server is the “URL prefix” to listen on. The prefix is specified as the first parameter on the command line when in standalone mode, or in the tunnel server’s configuration page in the control center. Some example prefixes and their meanings are listed in Table 4.1. See UrlPrefix Strings on Microsoft’s site for a full description of URL prefix strings. For example, to start the tunnel listening for requests on all interfaces on port 8080: Ï Tunnel.exe http://+:8080/ Additional configuration may be required depending on the prefix used, see below for details. 87 Chapter 4. Centralised Services Permissions When running the tunnel server on Microsoft Windows using the Microsoft .NET Framework, the user running the tunnel server must have permissions to listen on the specified URL prefix. This requirement does not apply when using Mono because Mono does not use Microsoft’s HTTP Server API. Note that when running the tunnel server on a Unix-based platform it may require root privileges if configured to listen on a port below 1024. On Windows Vista and later the netsh.exe program can be used to grant permissions to listen on a given prefix. For Windows XP, httpcfg.exe2 must be used. To grant permission for “Everyone” to listen on “http://+:8080/” use one of the following commands: Vista and later: netsh http add urlacl url=http://+:8080/ user=Everyone XP: httpcfg set urlacl /u http://+:8080/ /a "D:(A;;GX;;;WD)" See Configuring Namespace Reservations on Microsoft’s website for further details. 4.4.3 Client Configuration The client configuration consists of setting the tunnel mode and specifying a list of URIs of tunnel servers. The configuration can be specified in the XML configuration file or by using the ConfigurationOptions class. The XML configuration takes the following form: <Tunnel Mode= "On" > <Uri> h t t p : // t u n n e l 1 . example . com:8085/</Uri> <Uri> h t t p : // t u n n e l 2 . example . com:8085/</Uri> </Tunnel> The tunnel mode can be set as described in Table 4.2. By default the tunnel mode is set to Auto. Note that if the tunnel mode is set to On and no URIs are specified then the client will not be able to connect at all. At least one tunnel URI must be specified for tunnelling to be used. If multiple tunnel URIs are specified then Badumna will randomly select one to connect to. If a connection cannot be formed then the remaining tunnels will be tried in a random order until a connection is successful or the list is exhausted. 2 httpcfg.exe is part of the Optional Tools component of the Windows XP SP2 Support Tools. 88 Chapter 4. Centralised Services Mode Off On Auto Description Tunnelling will not be used. If a direct UDP connection cannot be established then the client will not be able to connect to the network. Tunnelling will always be used. If a tunnel server cannot be contacted then the client will not be able to connect to the network. A direct UDP connection will be attempted. If UDP traffic is blocked then a tunnelled connection will be attempted. Table 4.2: Tunnel Modes Note that when in Auto mode Badumna will try all ports in the range it is configured to use before falling back to tunnelled mode. This occurs synchronously when NetworkFacade.Instance is first accessed. If a large port range is specified it could take a long time so it is recommended that the port range be restricted by the “MaxPortsToTry” attribute when using Auto mode. e.g.: <Module Name= " C o n n e c t i v i t y " > <PortRange MaxPortsToTry= " 3 " > 2 7 3 5 0 , 2 7 3 5 9</PortRange> </Module> Also note that when tunnelling is in use (i.e. tunnel mode is On or tunnel mode is Auto and UDP is detected as blocked), a connection to the tunnel server is not initiated until the Login(...) method is called. This is a safeguard – the initial connection to the tunnel server must send the user’s credential so that the tunnel server can validate the user’s permission to use the network. 4.4.4 Programming Considerations When Badumna is using a tunnelled connection most API calls require a message to be sent to the tunnel server. These calls all make synchronous (blocking) requests to the tunnel server. If a tunnel request fails then the API method will throw a TunnelRequestException (this can occur if, e.g., the network connection to the tunnel server is lost). This behaviour should be taken into account when deciding to support tunnelled connections. As an explicit exception, the NetworkFacade.FlagForUpdate(...) methods do not make a request to the tunnel server and do not block. 89 Chapter 4. Centralised Services Another restriction when using a tunnelled connection is that certain API methods are not supported. These will throw NotSupportedExceptions if called when a tunnel connection is in use (the API documentation for each method indicates if it’s not supported under tunnelling). NetworkFacade.IsTunnelled can be used to determine if the connection is tunnelled. The unsupported methods are limited to methods intended to be used for ‘server’-type behaviour such as the arbitration server. All methods required by end-user clients are supported over tunnelled connections. 90 Chapter 4. Centralised Services 4.5 Distributed lookup service One of the new features introduced in Badumna 1.4 is Distributed Service Discovery, also known as distributed lookup. Instead of requiring the IP addresses and ports of centralised services to be known to all clients at start up, Distributed Service Discovery allows clients to locate these services at runtime in a completely decentralized manner. The benefits of using Distributed Service Discovery include: 1. Flexibility: Extra instances of centralised services can be added at runtime. Clients can locate and start using them in a matter of minutes. 2. Reliability: Usually a central server is employed to store the address information of all the servers in the game network and supply that information to the clients at start-up. However, the central server introduces an additional single point of failure to the already complex gaming system. Distributed Service Discovery eliminates the single point of failure thereby increasing the fault tolerance of the system significantly. The Distributed Service Discovery feature can be used in Badumna based games by configuring the NetworkConfig.xml files of both the server and client. For example, for an arbitration server called combatzonea, the server side can enable the Service Discovery feature by including the following XML snippet in the NetworkConfig.xml file. <Module Name= " A r b i t r a t i o n " > <Server > <Name>combatzonea </Name> <UseServiceDiscovery >enabled </UseServiceDiscovery > </Server > </Module> The client side NetworkConfig.xml file should contain the same configuration snippet as the one above. This will ensure that the client requests the address of combatzonea arbitration server during runtime. To use Service Discovery for Overload Service, the following configuration should be used in Overload server’s NetworkConfig.xml. <Module Name= " Overload " > <AcceptOverload >enabled </AcceptOverload > <UseServiceDiscovery >enabled </UseServiceDiscovery > 91 Chapter 4. Centralised Services </Module> The client networkconfig.xml should include the following: <Module Name= " Overload " > <EnableOverload >enabled </EnableOverload > <UseServiceDiscovery >enabled </UseServiceDiscovery > </Module> Or for Unity3D user you should use the following codes: badumnaConfigOptions . IsOverloadEnabled = t r u e ; badumnaConfigOptions . I s O v e r l o a d S e r v i c e D i s c o v e r y E n a b l e d = t r u e ; In Badumna 1.4, both arbitration and overload servers can be located using the Distributed Service Discovery method. Our results indicate that the vast majority of clients can successfully locate the requested server in less than 30 seconds after start up. As already pointed out at the beginning of this section, the major benefits of the Distributed Service Discovery feature is the flexibility and reliability it brings to the system. Consider the situation where there is a deployed overload server with service discovery enabled, when the game operator decides to add another overload server to the network to increase the overall capacity of overload servers, they can start another overload server with the exact same configuration. The newly added overload server will be located by peers in minutes and peers will randomly connect to one of the servers to access its functionality. On server failure, peers connected to the affected overload server will automatically reconnect to the other server. Once the server failure is recovered, peers will start connecting to the restarted server again to achieve server load balancing. 92 Chapter 4. Centralised Services ! Clients cannot mix distributed and direct lookup for a service. If a client is using distributed lookup for a service type (arbitration or overload), it cannot also specify some servers using a fixed address. Clients can still use different lookup methods between service types, e.g. direct connection for arbitration and distributed lookup for overload. 93 Chapter 5 Unity3D Badumna has built-in support for Unity3D (www.unity3d.com). Badumna‘s Unity package provides ready-to-use scripts to enable multiplayer functionality. This chapter provides a simple guide to using the Unity package. It will give step-bystep instructions on how to create multiplayer games using the Unity package in a series of tutorials. 5.1 Getting started with the Unity package These tutorials refer to the Unity package that can be downloaded as an accompaniment to the Badumna Network Suite (see section 2.2). Extract the UnityPackages.zip file and copy the contents into the Standard Packages directory inside your Unity installation directory. ! Unity 3D required. You will require a copy of Unity3D installed on your machine. These packages are built using Unity 2.6. The tutorials introduce Badumna concepts and features in the same order as the API Example presented in chapters 3 and 4. It is recommended that developers refer to those chapter for more details on the key concepts and Badumna API used in the scripts. Each demo, except for the first, builds upon an earlier demo. The Unity package includes are provided with full source code for each completed demo. These tutorials provide a full description of the changes required to add the new functionality in each demo. Developers can either use the completed demo file, or follow the tutorial to add the new features to the previous demo themselves. 94 Chapter 5. Unity3D 5.2 Basic multiplayer game The first Unity tutorial will demonstrate how to build a very simple game with just a player character game object, and synchronise basic state information across the network. Before following this tutorial it is recommended that you read section 3.1 to learn about how Badumna performs replication and interest management. This tutorial refers to Demo 1 (Demo1-BasicDemo.unitypackage). It makes use of the SmallLerpz model for the player character. This is one of the default models included in the Unity toolset. The demo package includes an initial scene file (Demo1-initial.unity) with some basic objects (ground, camera, light and a cube). The tutorial will show how to build a basic networked game using Badumna through a series of steps. The demo package also includes a final scene file that shows the completed tutorial.1 5.2.1 Create a new project Open the Unity editor and create a new project. If you successfully copy the packages into the Standard Packages directory you should be able to see it under the list of available packages when you create a new project. Include the Demo1BasicDemo.unitypackage only and press the create button. 5.2.2 Open the Unity scene file Open Demo1-initial.unity file. You will notice there are four objects initially - Cube, Directional light, ground and Main Camera (see Figure 5.1). 5.2.3 Create an empty game object and rename it ‘Network Initialization’ 1. Drag and drop the NetworkInitialization script on to this object (NetworkInitialization.cs can be found in /Plugins/NetworkingScript/). 2. In NetworkInitialization (see inspector window), see ListOfAvatars. In this example we only have one type of avatar, so set the size to 1 and set the element 0 with SmallLerpz prefab (see figures 5.2 and 5.3). 3. Make sure the position of the NetworkInitalization object is above the ground. As you can see in 5.3, the position is set to 0,0,0. Set the y coordinate to -13.5 as the ground is located at -18.522 (y-coordinate). Set the X coordinate to -2.4 and the Z coordinate to 0.8 (i.e. make sure that the X and Z coordinates are still within the ground level). 1 The completed tutorial will still require one edit before you can build and run it — you must set the SeedPeer address in the Awake() function (see autorefunity-network-configuration). 95 Chapter 5. Unity3D Figure 5.1: Demo1-initial.unity 5.2.4 Set the application to run in background Make sure that your application runs in the background by performing the following steps. 1. Select: Edit → Project Settings → Player, from the Menu bar. 2. In the Inspector window you will see all the player settings. Enable ‘Run in Background‘ (see Figure 5.4). 5.2.5 NetworkInitialization.cs NetworkInitialization.cs handles Badumna Network initialization, joining and leaving a scene, registering and unregistering the local entity (the local player object) and creating remote entities in the current scene. Before initializing Badumna ensure that the network configuration has been loaded successfully. 96 Chapter 5. Unity3D Figure 5.2: Network Initialization Figure 5.3: Network Initialization (inspector window) 97 Chapter 5. Unity3D Figure 5.4: Setting player to run in background Network Configuration Configure Badumna’s network settings in the Awake() function. In general, it is a good idea to use an XML file for network configuration. However, due to security restrictions in the Unity web player, access to the file system is not allowed. Hence, Badumna network configuration is done in the application program. The seed peer discovery method is used in these examples (see section 2.4). You need to change the IP address (host name) of DiscoverySource to the IP address or host name of the machine that is running the seed peer (see the yellow highlighted section in Listing 5.1). //// s e t t h e o p t i o n s p r o g r a m a t i c a l l y C o n f i g u r a t i o n O p t i o n s badumnaConfigOptions = new C o n f i g u r a t i o n O p t i o n s ( ) ; badumnaConfigOptions . DiscoveryType = DiscoveryType . SeedPeer ; badumnaConfigOptions . DiscoverySource = "seedpeer.example.com:21251" ; //// The p o r t used f o r d i s c o v e r y o f p e e r s v i a UDP b r o a d c a s t . //// 0 d i s a b l e s t h e use o f b r o a d c a s t badumnaConfigOptions . B r o a d c a s t P o r t = 2 1 2 5 0 ; 98 Chapter 5. Unity3D //// The b r o a d c a s t p o r t shouldn ’ t be within t h e peer p o r t range , //// o t h e r w i s e Badumna w i l l throw an e x c e p t i o n badumnaConfigOptions . MinumumPort = 2 1 3 0 0 ; badumnaConfigOptions . MaximumPort = 2 1 3 9 9 ; Debug . Log ( badumnaConfigOptions . ToXml ( ) ) ; //// For f u t h e r c o n f i g u r a t i o n s o p e r a t i o n s s e e //// h t t p ://www. badumna . com/a p i /1.4/badumna/ NetworkFacade . ConfigureFrom ( badumnaConfigOptions ) ; Listing 5.1: Badumna network configuration Joining the Badumna Network This section will explain how to join the Badumna network. As commented in the code, there are three steps required before replication can proceed: 1. Initialize Badumna by calling NetworkFacade.Instance.Initialize(appName) function. In this case "unity-demo" will be used as the application name for all the unity demos. 2. Login to a network by calling NetworkFacade.Instance.Login() function. 3. Joint the specific scene by calling NetworkFacade.Instance.JoinScene(sceneName, CreateEntity, RemoveEntity), where: • sceneName is a unique name identifying the scene. • CreateEntity is a callback function that is called by Badumna when there is anew remote entity in the scene and its position is within the area of interest of the local entity. • RemoveEntity is a callback function that is called by Badumna when a remote entity from the same scene leaves the scene or its position is outside the area of interest of the local entity. The following code can be found inside the Awake() function in the NetworkInitialization.cs file. //// Check whether t h e network has been i n i t i a l i z e d y e t 99 Chapter 5. Unity3D i f ( ! NetworkFacade . I n s t a n c e . I s I n i t i a l i z e d ) { //// I n i t i a l i z e t h e Badumna network l i b r a r y NetworkFacade . I n s t a n c e . I n i t i a l i z e ( " unity−demo" ) ; NetworkFacade . I n s t a n c e . Login ( ) ; } i f ( NetworkFacade . I n s t a n c e . IsLoggedIn ) { //// R e g i s t e r E n t i t y D e t a i l s NetworkFacade . I n s t a n c e . R e g i s t e r E n t i t y D e t a i l s ( ( u i n t ) PlayerType . SmallLerpz , 2 0 . 0 f , new Badumna . DataTypes . Vector3 ( 6 . 0 f , 6 . 0 f , 6 . 0 f )); //// J o i n t h e chosen scene . //// Scenes a r e i d e n t i f i e d by a name ( a s t r i n g ) which should //// be unique . A l l e n t i t i e s within a scene w i l l s e e each //// other , but not any e n t i t i e s i n o t h e r s c e n e s . t h i s . networkScene = NetworkFacade . I n s t a n c e . J o i n S c e n e ( t h i s . networkSceneName , t h i s . C r e a t e E n t i t y , t h i s . RemoveEntity ) ; Debug . Log ( NetworkFacade . I n s t a n c e . GetNetworkStatus ( ) . T o S t r i n g ( ) ) ; } else { Debug . LogError ( " Login e r r o r " ) ; return ; } Listing 5.2: Starting Badumna network Register Local Entity After Badumna has been initialized and the scene has been successfully joined, the local entities can be registered with the current scene. The steps that are required to register a local entity are as follows: 1. First create the game object that will be used as a local player (i.e. call the CreateLocalPlayer() function inside the NetworkInitialization.cs script). 2. Inside the CreateLocalPlayer function add all the necessary scripts that will be attached to the local entity object (see Listing 5.3). 3. Register the entity by calling the RegisterEntity(ISpatialOriginal entity, uint entityType) function. 100 Chapter 5. Unity3D p r i v a t e bool C r e a t e L o c a l P l a y e r ( ) { try { s t r i n g playerName = " SmallLerpz " ; u i n t e n t i t y T y p e = ( u i n t ) PlayerType . SmallLerpz ; GameObject p l a y e r O b j e c t = ( GameObject ) GameObject . I n s t a n t i a t e ( t h i s . ListOfAvatars [ ( int ) entityType ] , transform . position , transform . r o t a t i o n ) ; i f ( playerObject != null ) { //// s e t a l l t h e components r e q u i r e d p l a y e r O b j e c t . AddComponent ( typeof ( C h a r a c t e r C o n t r o l l e r ) ) ; p l a y e r O b j e c t . AddComponent ( typeof ( T h i r d P e r s o n C o n t r o l l e r ) ) ; p l a y e r O b j e c t . AddComponent ( typeof ( ThirdPersonSimpleAnimation ) ) ; p l a y e r O b j e c t . AddComponent ( typeof ( AnimationHandler ) ) ; p l a y e r O b j e c t . AddComponent ( typeof ( CameraFollowerScript ) ) ; p l a y e r O b j e c t . AddComponent ( typeof ( LocalAvatar ) ) ; CharacterController controller = ( CharacterController ) p l a y e r O b j e c t . GetComponent ( typeof ( C h a r a c t e r C o n t r o l l e r ) ) ; c o n t r o l l e r . radius = 0.4 f ; c o n t r o l l e r . c e n t e r = new UnityEngine . Vector3 ( 0 , 1 . 1 f , 0 ) ; t h i s . l o c a l A v a t a r = ( LocalAvatar ) p l a y e r O b j e c t . GetComponent ( typeof ( LocalAvatar ) ) ; i f ( t h i s . localAvatar != null ) { //// S e t t h e game o b j e c t used by t h e l o c a l a v a t a r , //// and g i v e t h e r e t u r n e d e n t i t y type t o t h e //// R e g i s t e r E n t i t y ( ) method . This type id w i l l be //// passed t o t h e C r e a t e E n t i t y ( ) method on remote //// p e e r s when t h i s a v a t a r ’ s r e p l i c a i s i n s t a n t i a t e d t h i s . l o c a l A v a t a r . SetAvatarToUse ( p l a y e r O b j e c t , playerName ) ; i f ( e n t i t y T y p e >= 0 ) { t h i s . networkScene . R e g i s t e r E n t i t y ( t h i s . l o c a l A v a t a r , entityType ) ; this . isRegistered = true ; return true ; } } } } c a t c h ( Ex cep ti on e ) 101 Chapter 5. Unity3D { Debug . LogError ( e ) ; return false ; } return false ; } Listing 5.3: CreateLocalPlayer() function Create Remote Entity Entities from other peers will be represented as remote entities only if they are within the interest radius of the local entity. Badumna will call the CreateEntity function previously passed to JoinScene when a remote entity has entered the sphere of interest. The steps that are required to create a remote entity are listed below followed by the actual function listed in Listing 5.4. 1. Create a remote entity object based on the entity type passed to CreateEntity (i.e. choose the right type of game object that will be used as a remote player object). 2. Attach required scripts to the remote avatar object including the RemoteAvatar.cs script. 3. Add the remote object to the remote object list to keep track the number of remote avatars that currently exist. p r i v a t e I S p a t i a l R e p l i c a C r e a t e E n t i t y ( NetworkScene scene , BadumnaId entityId , uint entityType ) { GameObject r e m o t e P l a y e r O b j e c t = ( GameObject ) GameObject . I n s t a n t i a t e ( t h i s . ListOfAvatars [ ( int ) entityType ] , transform . position , transform . r o t a t i o n ) ; RemoteAvatar remoteAvatar ; i f ( remotePlayerObject != null ) { r e m o t e P l a y e r O b j e c t . AddComponent ( typeof ( SyncAnimation ) ) ; r e m o t e P l a y e r O b j e c t . AddComponent ( typeof ( RemoteAvatar ) ) ; remoteAvatar = ( RemoteAvatar ) r e m o t e P l a y e r O b j e c t . GetComponent ( typeof ( RemoteAvatar ) ) ; 102 Chapter 5. Unity3D i f ( remoteAvatar ! = n u l l ) { //// The network guid should be s e t t o t h e given guid remoteAvatar . Guid = e n t i t y I d ; remoteAvatar . SetAvatarToUse ( r e m o t e P l a y e r O b j e c t ) ; //// Add t h e remote a v a t a r t o mRemoteEntities t h i s . r e m o t e E n t i t i e s . Add( e n t i t y I d , remoteAvatar ) ; I S p a t i a l R e p l i c a s p a t i a l R e p l i c a = remoteAvatar as ISpatialReplica ; return s p a t i a l R e p l i c a ; } } return null ; } Listing 5.4: CreateRemoteEntity function Remove Entity Entity removal is the opposite of entity creation. Accordingly, the RemoveEntity function will be called by Badumna when a remote entity from the same scene leaves the scene or its position is outside the interest radius of the local entity (see Listing 5.5). p r i v a t e void RemoveEntity ( NetworkScene scene , I S p a t i a l R e p l i c a r e p l i c a ) { RemoteAvatar remoteAvatar = ( RemoteAvatar ) r e p l i c a ; i f ( t h i s . r e m o t e E n t i t i e s . TryGetValue ( remoteAvatar . Guid , out remoteAvatar ) ) { remoteAvatar . DestroyRemoteAvatar ( ) ; t h i s . r e m o t e E n t i t i e s . Remove ( remoteAvatar . Guid ) ; } } Listing 5.5: RemoveEntity function 103 Chapter 5. Unity3D Process Network State ProcessNetworkState() is called in Unity’s FixedUpdate() function which is called every frame, if MonoBehaviour is enabled. ProcessNetworkState() will perform any regular processing in Badumna and synchronize the network events (see Listing 5.6. public void FixedUpdate ( ) { i f ( NetworkFacade . I s I n s t a n t i a t e d && NetworkFacade . I n s t a n c e . IsLoggedIn ) { NetworkFacade . I n s t a n c e . ProcessNetworkState ( ) ; } } Listing 5.6: FixedUpdate() function Shutdown Badumna Badumna needs to be shutdown tidily before closing the application. Shutdown of Badumna should be initiated inside the OnDisable() function. There are three steps to shutdown the Badumna network properly: • Unregister the local entity from the current scene before leaving the scene. • Logout from Badumna. • Shutdown Badumna. The script is displayed in Listing 5.7 public void OnDisable ( ) { if ( this . isRegistered ) { t h i s . networkScene . U n r e g i s t e r E n t i t y ( t h i s . l o c a l A v a t a r ) ; t h i s . networkScene . Leave ( ) ; this . isRegistered = false ; //// when l e a v e scene , c l e a r t h e remote o b j e c t c o n t a i n e r s t h is . remoteEntities . Clear ( ) ; 104 Chapter 5. Unity3D } //// c a l l t h i s two f u n c t i o n s when e x i t i n g not when move t o o t h e r //// l e v e l i f ( NetworkFacade . I n s t a n c e . IsLoggedIn ) { NetworkFacade . I n s t a n c e . Logout ( ) ; } i f ( NetworkFacade . I n s t a n c e . I s I n i t i a l i z e d ) { NetworkFacade . I n s t a n c e . Shutdown ( ) ; } } Listing 5.7: Shutdown Badumna 5.2.6 LocalAvatar.cs The LocalAvatar class implements ISpatialOriginal interface. For more information about this interface please refer to section section 3.1. The LocalAvatar class stores the position, rotation and animation of the local player and replicates these variables across the Badumna network. LocalAvatar Construction There are three variables which need to be set during the class initialization (i.e. on the Awake() function) which are radius, areaOfInterestRadius and position (see Listing 5.8); radius represents the radius of the entity’s bounding shpere (i.e. the size of the local entity) and areaOfInterestRadius is the radius of the entity’s sphere of interest. This local entity will send its updates to every other entity within this sphere of interest. public void Awake ( ) { t h i s . p o s i t i o n = new UnityEngine . Vector3 ( 0 f , 0 f , 0 f ) ; this . radius = 1.0 f ; this . areaOfInterestRadius = 100.0 f ; } Listing 5.8: LocalAvatar Construction 105 Chapter 5. Unity3D Check for Update As mention before, the LocalAvatar class is responsible for updating the local player’s position and other properties and sending these updates to Badumna. Badumna will then send the updates to relevant remote peers. LocalAvatar will check for any changes in each variable in the FixedUpdate() function. If there is any change in at least one of the variables then it will call the FlagForUpdate() function to inform Badumna that there are some updates that need to be processed. public void FixedUpdate ( ) { i f ( t h i s . l o c a l P l a y e r O b j e c t == n u l l ) { return ; } this . requiredParts . SetAll ( false ) ; //// Check whether t h e e n t i t y ( p l a y e r ) has moved s i n c e t h e l a s t //// update by comparing i t with t h e c u r r e n t p o s i t i o n . This i s //// used t o avoid unnecessary updates when a s l i g h t changes i n //// t h e p o s i t i o n ( l e s s than 0 . 1 i n t h i s c a s e ) i s made . //// Note : Change t h e value o f 0 . 1 t o an a p p r o p r i a t e value //// depending on t h e s c a l e o f you u n i t s . i f ( ( t h i s . p o s i t i o n − t h i s . l o c a l P l a y e r O b j e c t . transform . p o s i t i o n ) . magnitude > 0 . 1 f ) { t h i s . p o s i t i o n = t h i s . l o c a l P l a y e r O b j e c t . transform . p o s i t i o n ; this . requiredParts [ ( int ) SpatialEntityStateSegment . Position ] = true ; i f ( t h i s . c o n t r o l l e r != null ) { this . velocity = this . controller . velocity ; this . requiredParts [ ( int ) SpatialEntityStateSegment . Velocity ] = true ; } e l s e i f ( t h i s . rigidBody ! = n u l l ) { t h i s . v e l o c i t y = t h i s . rigidBody . v e l o c i t y ; this . requiredParts [ ( int ) SpatialEntityStateSegment . Velocity ] = true ; } } //// Note : I f r o t a t i o n i s only about a s i n g l e a x i s then i t w i l l be 106 Chapter 5. Unity3D //// more e f f i c i e n t , t o s e r i a l i z e only t h a t component o f t h e //// rotation . i f ( t h i s . o r i e n t a t i o n != t h i s . l o c a l P l a y e r O b j e c t . transform . r o t a t i o n . eulerAngles . y ) { t h i s . o r i e n t a t i o n = t h i s . l o c a l P l a y e r O b j e c t . transform . r o t a t i o n . eulerAngles . y ; t h i s . r e q u i r e d P a r t s [ ( i n t ) UpdateParameter . O r i e n t a t i o n ] = t r u e ; } i f ( t h i s . isAnimationChange ) { t h i s . r e q u i r e d P a r t s [ ( i n t ) UpdateParameter . AnimationName ] = t r u e ; t h i s . isAnimationChange = f a l s e ; } //// T e l l Badumna which p a r t s have changed and should thus //// be updated . NetworkFacade . I n s t a n c e . FlagForUpdate ( t h i s , t h i s . r e q u i r e d P a r t s ) ; } Listing 5.9: Check for Update As it can be seen from Listing 5.9, requiredParts is a Boolean array with flags that are set to indicate the properties that have changed. Badumna will use this Boolean array to update the changed properties only. Serialize Packet After Badumna gets the notification about the property changes, it will call the Serialize() function in LocalAvatar.cs which is part of the ISpatialOriginal interface. The Serialize function will serialize the updates before sending them through Badumna based on the flags set in the FlagForUpdate() function (refer to Check for Update section on page 106). Badumna will therefore serialize only the properties that have changed. public void S e r i a l i z e ( BooleanArray r e q u i r e d P a r t s , Stream stream ) { B i n a r y W r i t e r w r i t e r = new B i n a r y W r i t e r ( stream ) ; //// 1 . Orientation i f ( r e q u i r e d P a r t s [ ( i n t ) UpdateParameter . O r i e n t a t i o n ] ) { 107 Chapter 5. Unity3D w r i t e r . Write ( t h i s . o r i e n t a t i o n ) ; } //// 2 . Animation i f ( r e q u i r e d P a r t s [ ( i n t ) UpdateParameter . AnimationName ] ) { w r i t e r . Write ( t h i s . animationName ) ; } //// Note : Add any a d d i t i o n a l update parameters here . //// Don ’ t f o r g e t t o modify t h e UpdateFlag enumeration //// as w e l l } Listing 5.10: Serialize Packet 5.2.7 RemoteAvatar.cs RemoteAvatar.cs implements the ISpatialReplica interface. It stores the position, rotation and animation of the corresponding remote entity and it will receive updates from Badumna and apply those updates by deserializing the packet. Deserialize and Apply update While LocalAvatar is responsible for sending updates, the RemoteAvatar class is responsible for applying the updates. The incoming data packets from the other peers will be deserialized in this class, specifically inside the Deserialize() function. This function will only be called if there is an incoming update. Deserialization is the exact opposite of the Serialization process (see Listing 5.11). The position and rotation updates should be applied in the FixedUpdate() function (see Listing 5.12). public void D e s e r i a l i z e ( BooleanArray i n c l u d e d P a r t s , Stream stream , i n t estimatedMillisecondsSinceDeparture ) { BinaryReader r e a d e r = new BinaryReader ( stream ) ; //// 1 . Orientation i f ( i n c l u d e d P a r t s [ ( i n t ) UpdateParameter . O r i e n t a t i o n ] ) { t h i s . r o t a t i o n = Quaternion . AngleAxis ( r e a d e r . ReadSingle ( ) , UnityEngine . Vector3 . up ) ; 108 Chapter 5. Unity3D } //// 2 . Animation i f ( i n c l u d e d P a r t s [ ( i n t ) UpdateParameter . AnimationName ] ) { t h i s . animationName = r e a d e r . ReadString ( ) ; } //// You can add any a d d i t i o n a l parameters t h a t a r e a p p l i c a b l e here . //// Don ’ t f o r g e t t o add them i n t h e S e r i a l i z e ( ) method too . } Listing 5.11: Deserialize incoming data stream public void FixedUpdate ( ) { //// NOTE : I f t h e r e a r e more parameters r e q u i r e d f o r update add them here t h i s . remotePlayerObject . transform . p o s i t i o n = t h i s . p o s i t i o n ; t h i s . remotePlayerObject . transform . r o t a t i o n = t h i s . r o t a t i o n ; } Listing 5.12: Apply Update 5.2.8 Enumeration.cs The Enumeration.cs file contains both player type and update parameter enumerations. Player type is a list of all types of player that are available in the game. In this example, there are two types of player which are SmallLerpz and MonsterLerpz character. The update parameters enumeration is used to index which parameter has been modified when generating and applying updates. The value is used as the index in the Boolean array, passed to Serialize and Deserialize in the LocalAvatar and RemoteAvatar class respectively (refer to Check for Update section on page 106 for more details on how the Boolean array is used). 109 Chapter 5. Unity3D 5.2.9 AnimationHandler.cs and SyncAnimation.cs AnimationHandler.cs and SyncAnimation.cs are two additional scripts used to synchronize the animation from the local entity to the remote entities on other machines. Neither script uses Badumna — they are just standard Unity scripts. public enum PlayerType { /// <summary> /// A s m a l l l e r p z model /// </summary> SmallLerpz = 0 , /// <summary> /// A big l e r p z model /// </summary> MonsterLerpz = 1 } Listing 5.13: PlayerType enumeration public enum UpdateParameter : i n t { /// <summary> /// The f i r s t unused index f o r update parameters w i l l be used . /// O r i e n t a t i o n paramater . /// </summary> Orientation = SpatialEntityStateSegment . FirstAvailableSegment , /// <summary> /// Animation name paramter . /// </summary> AnimationName } Listing 5.14: UpdateParameter enumeration 110 Chapter 5. Unity3D Figure 5.5: Two instances running simultaneously (Demo 1) 5.2.10 Build and run the game Checklist: 3 Make sure you have set the seed peer address in the Awake() function before building the game. 3 Make sure you have started a seed peer with “unity-demo” as the application name. 3 Make sure the run in the background option is set. After you have completed all the above steps you are ready to run the game. Alternatively, you can use the completed example instead, but you will still need to edit it to set the address of your seed peer. If the game runs without any error within the editor, you can build the game and run two instances simultaneously. You should see that the two games are connected through Badumna network. You can test the game on different machines and make sure that the player objects can communicate via Badumna (see Figure 5.5). 5.3 Proximity chat demo This tutorial will demonstrate how to use Badumna’s proximity chat feature. As a prerequisite, please read section 3.2 to learn how proximity chat works. Demo 2 is derived from Demo 1 with a slight modification on the scripts. You can complete the tutorial by following the steps below and editing the completed version of Demo 1, or just look at the completed example in Demo2-ProximityChat (Demo2-ProximityChat.unitypackage). demo. 111 Chapter 5. Unity3D 5.3.1 Create a new project As in the previous tutorial, create a new unity project and import the Demo2ProximityChat.unitypackage. 5.3.2 Open the Unity scene file Open Demo2.unity file. 5.3.3 Changes in NetworkInitialization.cs In order to instantiate the ChatInterface on the runtime, the NetworkInitialization class will call InitiateChatInterface() function as soon as the local player is created successfully (see Listing 5.15). public void S t a r t ( ) { i f ( ! this . CreateLocalPlayer ( ) ) { Debug . LogError ( " F a i l e d t o c r e a t e l o c a l a v a t a r . " ) ; return ; } this . InitiateChatInterface ( ) ; } Listing 5.15: Call InitiateChatInterface function on Start InitateChatInterface() adds a GUIChatScript into the Network Initialization object (see Listing 5.16). p r i v a t e void I n i t i a t e C h a t I n t e r f a c e ( ) { GameObject p a r e n t O b j e c t = ( GameObject ) t r a n s f o r m . gameObject ; p a r e n t O b j e c t . AddComponent<GUIChatScript > ( ) ; GUIChatScript c h a t S c r i p t = t r a n s f o r m . GetComponent<GUIChatScript > ( ) ; c h a t S c r i p t . LocalAvatar = t h i s . l o c a l A v a t a r ; } Listing 5.16: InitiateChatInterface function 112 Chapter 5. Unity3D Figure 5.6: Chat GUI 5.3.4 GUIChatScript.cs The GUIChatScript class is used to handle the chat messages including incoming and outgoing messages. It is also responsible for displaying the messages. The current layout is just one example of a chat GUI (see Figure 5.6). The implementation of MakeWindow() can be modified and customized to change the layout and the GUI style according to your application’s requirements. IChatService (Badumna’s chat interface) is used in this class to handle incoming messages from other peers and send the messages to the proximity channel. See the IChatService API documentation for more information. Setup IChatService Before you can send and receive chat messages, you need to subscribe the local entity to a chat channel. For proximity chat use the proximity channel. The steps that are required for setting up the IChatService are as follows: 1. Initialize the IChatService class within the Start() function (see Listing 5.17). 2. Subscribe to proximity channel by calling SubscribeToProximityChannel as shown in Listing 5.18 where HandleChatMessage is a callback function that is called when there is a new incoming chat message. public void S t a r t ( ) { 113 Chapter 5. Unity3D i f ( NetworkFacade . I s I n s t a n t i a t e d && NetworkFacade . I n s t a n c e . IsLoggedIn ) { t h i s . c h a t S e r v i c e = NetworkFacade . I n s t a n c e . C r e a t e C h a t S e r v i c e ( ) ; } } Listing 5.17: Initialize IChatService public void Update ( ) { i f ( t h i s . LocalAvatar ! = n u l l && t h i s . localAvatarName == n u l l && t h i s . LocalAvatar . LocalAvatarName ! = n u l l ) { t h i s . localAvatarName = t h i s . LocalAvatar . LocalAvatarName ; i f ( t h i s . chatService != null ) { t h i s . c h a t S e r v i c e . SubscribeToProximityChannel ( t h i s . LocalAvatar . Guid , t h i s . localAvatarName , t h i s . HandleChatMessage ) ; } else { t h i s . c h a t S e r v i c e = NetworkFacade . I n s t a n c e . C r e a t e C h a t S e r v i c e ( ) ; t h i s . c h a t S e r v i c e . SubscribeToProximityChannel ( t h i s . LocalAvatar . Guid , t h i s . localAvatarName , t h i s . HandleChatMessage ) ; } } } Listing 5.18: Subscribe to proximity channel Dispatch messages When there is a message from the local player that is ready for dispatch, DispatchMessage() will be called, which in turn calls IChatService’s SendChannelMessage() method to send the message to the proximity channel (see Listing 5.19). 114 Chapter 5. Unity3D p r i v a t e void DispatchMessage ( ) { t h i s . c h a t S e r v i c e . SendChannelMessage ( ChatChannelId . Proximity , t h i s . localAvatarName + " : " + t h i s . t e x t E n t e r e d ) ; t h i s . t e x t E n t e r e d = s t r i n g . Empty ; } Listing 5.19: Dispatch message Handle incoming messages When there is a new incoming message from other Badumna entities, the HandleChatMessage() function will be called. In this demo, HandleChatMessage has responsibility for storing the incoming messages in a collection of messages (i.e. messageHistory) and displaying it on the screen immediately (see Listing 5.20). p r i v a t e void HandleChatMessage ( ChatChannelId channel , BadumnaId userId , s t r i n g message ) { t h i s . s c r o l l P o s i t i o n . y += 2 5 ; //// S t o r e t h e message i n messageHistory i f ( ! t h i s . chatBox ) { t h i s . chatBox = t r u e ; } if ( this { this this } else { this } . messageHistory . Count == GUIChatScript . MaximumNumberOfLines ) . messageHistory . RemoveAt ( 0 ) ; . messageHistory . Add( message ) ; . messageHistory . Add( message ) ; } Listing 5.20: HandleChatMessages function 115 Chapter 5. Unity3D Figure 5.7: Two instances running simultaneously (Demo2) 5.3.5 Build and run the game Checklist: 3 Make sure you have set the seed peer address before building the game. 3 Make sure you have started a seed peer with “unity-demo” as the application name. 3 Make sure the run in the background option is set. Build the game and run two instances simultaneously. You should see that the two games are connected through Badumna network. You can test the game on different machines and make sure that the player objects can chat with each other (see Figure 5.7). 5.4 Dead reckoning demo This tutorial will demonstrate how to use dead reckoning. When performing dead reckoning, Badumna replicates entities’ velocities over the network, and uses them to estimates replicas’ positions between updates using extrapolation and smoothing. This eliminates the jerkiness in replicas’ movement that could be seen in the previous demo. Before following this tutorial, please read section 3.3 to find out about the key concepts and API usage involved in implementing dead reckoning. The tutorial will explain the changes that are required to the previous completed tutorial to add dead reckoning. Completed code for this tutorial is in Demo3DeadReckoning.unitypackage. 116 Chapter 5. Unity3D 5.4.1 Create a new project Create a new unity project and import the Demo3-DeadReckoning.unitypackage. 5.4.2 Open the Unity scene file Open Demo3.unity file (under Demo3-DeadReckoning/Assets/). 5.4.3 LocalAvatar.cs In order to integrate the dead reckoning in Badumna, LocalAvatar has been modified to also implement the IDeadReckonable interface. See the IDeadReckonable API documentation for more information about this interface. The AttemptMovement function is left empty since the local entity position should not be extrapolated. 5.4.4 RemoteAvatar.cs RemoteAvatar must also implement the IDeadReckonable interface. The RemoteAvatar position needs to be extrapolated and smoothed in order to reduce jitter on the display. Thus, the AttemptMovement function is implemented in this class and uses the reckoned position to update the position (see Listing 5.21). public void AttemptMovement ( Badumna . DataTypes . Vector3 r e c k o n e d P o s i t i o n ) { this . Position = reckonedPosition ; } Listing 5.21: AttemptMovement implementation 5.4.5 Build and run the game Checklist: 3 Make sure you have set the seed peer address before building the game. 3 Make sure you have started a seed peer with “unity-demo” as the application name. 3 Make sure the run in the background option is set. 117 Chapter 5. Unity3D Build the game and run two instances simultaneously. You should see that the movement of remote avatars is now much smoother. 5.5 Multiple scenes demo This tutorial will demonstrate how to use more than one Badumna scene in a Unity game. To understand about scenes, please refer to sections 3.1 and 3.4 before following this tutorial. Multiple scenes are useful when a game has more than one level or scene (for example, when a character enters a different world or enters into a dungeon). It is not necessary that a Badumna scene has to match a Unity scene. One Unity scene can have multiple Badumna scenes and vice versa. Players in different Badumna scenes will not be able to see each other. This demo will show you how to create two different Badumna scenes inside one Unity scene. As in the previous demo, you are not required to modify anything. The tutorial will explain how to use multiple Badumna scenes. The multiple scene demo is derived from the Dead reckoning demo. The tutorial refers to Demo4-MultipleScene (Demo4-MultipleScene.unitypackage), and describes the changes that have been made since the preceding demo. 5.5.1 Create a new project Create a new unity project and import the Demo4-MultipleScene.unitypackage. 5.5.2 Open the Unity scene file Open Demo4.unity file. 5.5.3 NetworkInitialization.cs To accommodate the multiple Badumna scene demo, the following modifications to the NetworkInitialization class need to be made: 1. Add GUI text, to display the current Badumna scene name (see Listing 5.22). 2. Add a new function called ChangeScene() to this class (see Listing 5.23). This function tests the local avatar’s position in the Z dimension and will change the scene (un-join one, and join another) if the player has moved across the boundary. 3. Call the ChangeScene() function regularly from FixedUpdate() (see Listing 5.24). 118 Chapter 5. Unity3D /// <summary> /// GUIText d i s p l a y t h e c u r r e n t badumna scene name on t h e s c r e e n /// </summary> public GUIText SceneName ; Listing 5.22: Badumna Scene name p r i v a t e void ChangeScene ( ) { i f ( t h i s . l o c a l A v a t a r . P o s i t i o n . Z < −11 && t h i s . networkSceneName . Equals ( " Demo4_Scene1 " ) ) { //// Change t h e badumna scene if ( this . isRegistered ) { Debug . Log ( s t r i n g . Format ( " Leave a scene : { 0 } " , t h i s . networkSceneName ) ) ; t h i s . networkScene . U n r e g i s t e r E n t i t y ( t h i s . l o c a l A v a t a r ) ; t h i s . networkScene . Leave ( ) ; this . isRegistered = false ; t h i s . networkSceneName = " Demo4_Scene2 " ; t h i s . SceneName . t e x t = " Demo4_Scene2 " ; Debug . Log ( s t r i n g . Format ( " J o i n new scene : { 0 } " , t h i s . networkSceneName ) ) ; t h i s . networkScene = NetworkFacade . I n s t a n c e . J o i n S c e n e ( t h i s . networkSceneName , t h i s . C r e a t e E n t i t y , t h i s . RemoveEntity ) ; t h i s . networkScene . R e g i s t e r E n t i t y ( t h i s . l o c a l A v a t a r , ( u i n t ) PlayerType . SmallLerpz ) ; this . isRegistered = true ; } } e l s e i f ( t h i s . l o c a l A v a t a r . P o s i t i o n . Z > −11 && t h i s . networkSceneName . Equals ( " Demo4_Scene2 " ) ) { //// Change t h e badumna scene Debug . Log ( s t r i n g . Format ( " Leave a scene : { 0 } " , t h i s . networkSceneName ) ) ; t h i s . networkScene . U n r e g i s t e r E n t i t y ( t h i s . l o c a l A v a t a r ) ; t h i s . networkScene . Leave ( ) ; this . isRegistered = false ; t h i s . networkSceneName = " Demo4_Scene1 " ; t h i s . SceneName . t e x t = " Demo4_Scene1 " ; 119 Chapter 5. Unity3D Debug . Log ( s t r i n g . Format ( " J o i n new scene : { 0 } " , t h i s . networkSceneName ) ) ; t h i s . networkScene = NetworkFacade . I n s t a n c e . J o i n S c e n e ( t h i s . networkSceneName , t h i s . C r e a t e E n t i t y , t h i s . RemoveEntity ) ; t h i s . networkScene . R e g i s t e r E n t i t y ( t h i s . l o c a l A v a t a r , ( u i n t ) PlayerType . SmallLerpz ) ; this . isRegistered = true ; } } Listing 5.23: ChangeScene function public void FixedUpdate ( ) { i f ( NetworkFacade . I s I n s t a n t i a t e d && NetworkFacade . I n s t a n c e . IsLoggedIn ) { NetworkFacade . I n s t a n c e . ProcessNetworkState ( ) ; t h i s . ChangeScene ( ) ; } } Listing 5.24: FixedUpdate() function 5.5.4 Build and run the game Checklist: 3 Make sure you have set the seed peer address before building the game. 3 Make sure you have started a seed peer with “unity-demo” as the application name. 3 Make sure the run in the background option is set. Build the game and run two instances simultaneously. You can test the demo by moving one avatar between the two scenes and seeing the other avatar appear and disappear. Figure 5.8 shows two instances that are in the different scene, one in Demo4_Scene1 and the other in Demo4_Scene2 and they cannot see each other. 120 Chapter 5. Unity3D Figure 5.8: Two instances running simultaneously (Demo4) 5.6 Private chat demo This tutorial will show you how to use private chat in a Badumna network. To understand the concepts behind private chat, please refer to section 3.5. This demo builds upon Demo2-ProximityChat. In this demo, both Proximity and Private chat will be used. The completed tutorial can be found in Demo5PrivateChat (Demo5-PrivateChat.unitypackage). The changes for this tutorial are detailed in the steps below. 5.6.1 Create a new project Create a new unity project and import the Demo5-PrivateChat.unitypackage. 5.6.2 Open the Unity scene file Open Demo5.unity file. 5.6.3 GUILoginScript.cs The GUI login script is used to display the login GUI. In this demo you will be required to enter a username before starting the game. For demo purposes, (i.e. to test the private chat) you should pick JOHN, MARY, PETER or SUSAN as your username, as the demo is pre-configured with buddy lists for these users. ! Usernames are case-sensitive. The GUILoginScript will block the game from starting, it will start only when the GameStarted boolean variable is set to true (see Listing 5.25 and 5.26). 121 Chapter 5. Unity3D p r i v a t e void DoLogin ( ) { t h i s . hideLoginWindow = t r u e ; N e t w o r k I n i t i a l i z a t i o n . GameStarted = t r u e ; } Listing 5.25: DoLogin() function 5.6.4 NetworkInitialization.cs In order to block the game from starting, the NetworkInitialization class is modified by replacing the old Start() function with the code shown in Listing 5.26. public IEnumerator S t a r t ( ) { while ( ! N e t w o r k I n i t i a l i z a t i o n . GameStarted ) { yield return null ; } i f ( ! this . CreateLocalPlayer ( ) ) { Debug . LogError ( " F a i l e d t o c r e a t e l o c a l a v a t a r . " ) ; y i e l d break ; } this . InitiateChatInterface ( ) ; y i e l d break ; } Listing 5.26: IEnumerator Start function The following code is added to the CreateLocalPlayer() function to grab the username from GUILoginScript and use it to create a local player (see Listing 5.27). GUILoginScript l o g i n S c r i p t = t r a n s f o r m . gameObject . GetComponent< GUILoginScript > ( ) ; i f ( l o g i n S c r i p t != null ) { playerName = l o g i n S c r i p t . Username ; 122 Chapter 5. Unity3D } Listing 5.27: Grab username from GUILoginScript 5.6.5 GUIChatScript.cs In this demo the GUIChatScript class has a slightly different role compared with the one used in Demo2-ProximityChat. Here, GUIChatScript will be used as a chat manager. Proximity chat will be handled by the ProximityChat class and each private chat channel will be handled by an instance of the PrivateChat class. Both of these classes are derived from the Chat class. The GUIChatScript class also has responsibility for displaying the buddy list which in this case is just a static list of buddies. Setup IChatService The IChatService is set up as in Demo2-ProximityChat. Before you can send and receive chat messages, you need to subscribe the local entity to the chat channel (this script uses the proximity channel). 1. Initialize the IChatService class within the Start() function (see Listing 5.28). public void S t a r t ( ) { i f ( NetworkFacade . I s I n s t a n t i a t e d && NetworkFacade . I n s t a n c e . IsLoggedIn ) { t h i s . c h a t S e r v i c e = NetworkFacade . I n s t a n c e . C r e a t e C h a t S e r v i c e ( ) ; } } Listing 5.28: Setup IChatService Set up the proximity chat and private chat channels After successfully initializing the chat service, in the Update() function, initialize a proximity chat (i.e. initialize the ProximityChat class) and invite all buddies from 123 Chapter 5. Unity3D the buddy list to private chat by calling the the IChatService’s OpenPrivateChannels method, and change your presence to online. HandleChannelInvitation is a callback function that will be called when there is a private channel invitation received from other user. public void Update ( ) { i f ( t h i s . LocalAvatar ! = n u l l && t h i s . LocalAvatar . LocalAvatarName ! = n u l l && ! t h i s . i n i t i a l i z e d ) { //// I n i t i a l i z e proxmity c h a t . t h i s . proximityChat . C h a t S e r v i c e = t h i s . c h a t S e r v i c e ; t h i s . proximityChat . LocalAvatar = t h i s . LocalAvatar ; t h i s . proximityChat . I n i t ( ) ; t h i s . c h a t S e r v i c e . OpenPrivateChannels ( t h i s . HandleChannelInvitation , t h i s . LocalAvatar . LocalAvatarName ) ; t h i s . c h a t S e r v i c e . ChangePresence ( C h a t S t a t u s . Online ) ; //// I n v i t e a l l u s e r s t o p r i v a t e c h a n n e l s . f o r e a c h ( s t r i n g buddyName in t h i s . buddys ) { //// Note : we don ’ t want t o have t h e l o c a l a v a t a r name d i s p l a y e d on t h e buddy l i s t . //// However t h e buddy l i s t should be o b t a i n e d from t h e a r b i t r a t i o n s e r v e r , not from t h e s t a t i c l i s t , //// i t s only f o r demo purposes and on t h e r e a l a p p l i c a t i o n t h i s c a s e shouldn ’ t be happening . i f ( buddyName ! = t h i s . LocalAvatar . LocalAvatarName ) { Buddy buddy = new Buddy ( buddyName ) ; P r i v a t e C h a t p r i v a t e C h a t = new P r i v a t e C h a t ( ) ; t h i s . privateChatChannels . Add( buddyName , buddy ) ; t h i s . privateChatWindows . Add( buddyName , p r i v a t e C h a t ) ; p r i v a t e C h a t . Buddy = buddy ; privateChat . ChatService = this . chatService ; p r i v a t e C h a t . ChatWindowId = chatWindowId ; p r i v a t e C h a t . LocalAvatarName = t h i s . LocalAvatar . LocalAvatarName ; privateChat . I n i t ( ) ; chatWindowId ++; } } this . i n i t i a l i z e d = true ; 124 Chapter 5. Unity3D } } Listing 5.29: Setup proximity chat and private chat channel HandleChannelInvitation function When a private channel invitation is received from another user, you need to check whether this user is in your buddy list. If they are on the buddy list then check whether the chat channel used needs to be updated (see Listing 5.30). After updating the channel, call the IChatService’s AcceptInvitation method to accept the invitation and pass two call back functions HandlePrivateMessage and HandlePresence, where HandlePrivateMessage will be called when there is incoming message from this user and HandlePresence when the user’s presence status changes. p r i v a t e void H a n d l e C h a n n e l I n v i t a t i o n ( ChatChannelId channel , s t r i n g username ) { PrivateChat privateChat = null ; i f ( t h i s . privateChatWindows . TryGetValue ( username , out p r i v a t e C h a t ) ) { i f ( p r i v a t e C h a t . Buddy ! = n u l l ) { i f ( p r i v a t e C h a t . Buddy . ChannelId ! = n u l l ) { i f ( ! p r i v a t e C h a t . Buddy . ChannelId . Equals ( channel ) ) { t h i s . c h a t S e r v i c e . UnsubscribeFromChatChannel ( p r i v a t e C h a t . Buddy . ChannelId ) ; p r i v a t e C h a t . Buddy . ChannelId = channel ; t h i s . c h a t S e r v i c e . A c c e p t I n v i t a t i o n ( channel , p r i v a t e C h a t . HandlePrivateMessage , p r i v a t e C h a t . HandlePresence ) ; } return ; } else { p r i v a t e C h a t . Buddy . ChannelId = channel ; t h i s . c h a t S e r v i c e . A c c e p t I n v i t a t i o n ( channel , p r i v a t e C h a t . HandlePrivateMessage , p r i v a t e C h a t . HandlePresence ) ; } } 125 Chapter 5. Unity3D } } Listing 5.30: HandleChannelInvitation 5.6.6 Buddy.cs The Buddy class stores information about a particular buddy (friend), e.g. buddy name, chat channel ID used for private chat with this buddy, and the buddy’s presence status. 5.6.7 Chat.cs A chat base class stores information including the local player name, current chat message, messages history and IChatService passed from GUIChatScript. The chat class has properties that are common to both proximity and private chat class. The implementation of the Buddy and Chat classes can be altered according to your needs. 5.6.8 ProximityChat.cs The ProximityChat class handles the sending and receiving of messages to and from the proximity channel. There are three important operations that need to be implemented in this class: • Subscribe to the proximity channel by calling SubscribeToProximityChannel inside the Init() function (see Listing 5.31). • Implement the HandleChatMessage callback function as can be seen in 5.32. • Send messages to the proximity channel by calling SendChannelMessage as shown in Listing 5.33. public o v e r r i d e void I n i t ( ) { t h i s . ChatWindowId = 1 ; //// ChatWindowId 1 i s f o r ProximityChat t h i s . ChatWindow = new Rect ( 2 , 4 5 , 2 2 0 , 2 7 5 ) ; i f ( ! t h i s . i n i t i a l i z e d && t h i s . l o c a l A v a t a r ! = n u l l && t h i s . C h a t S e r v i c e != null ) { 126 Chapter 5. Unity3D t h i s . C h a t S e r v i c e . SubscribeToProximityChannel ( t h i s . l o c a l A v a t a r . Guid , t h i s . l o c a l A v a t a r . LocalAvatarName , t h i s . HandleChatMessage ) ; t h i s . LocalAvatarName = t h i s . l o c a l A v a t a r . LocalAvatarName ; this . i n i t i a l i z e d = true ; } base . I n i t ( ) ; } Listing 5.31: Subscribe to proximity channel p r i v a t e void HandleChatMessage ( ChatChannelId channel , BadumnaId userId , s t r i n g message ) { t h i s . S c r o l l P o s i t i o n += new Vector2 ( 0 , 2 5 ) ; //// S t o r e t h e message i n messageHistory i f ( ! t h i s . ShowingChatBox ) { t h i s . ShowingChatBox = t r u e ; } t h i s . MessageHistory . Add( message ) ; } Listing 5.32: HandleChatMessage callback function HandleChatMessage is responsible for storing the incoming messages in the message history and displaying the chat box when there is a new message received. p r o t e c t e d o v e r r i d e void DispatchMessage ( ) { t h i s . C h a t S e r v i c e . SendChannelMessage ( ChatChannelId . Proximity , t h i s . LocalAvatarName + " : " + t h i s . TextEntered ) ; t h i s . TextEntered = s t r i n g . Empty ; } Listing 5.33: Sennding message to proximity channel 127 Chapter 5. Unity3D When a message from the local user is ready to be dispatched, call DispatchMessage() which in turn calls the SendChannelMessage function. 5.6.9 PrivateChat.cs Each PrivateChat class handles one private chat channel, which means if you have three buddies then GUIChatScript class will create three instances of the PrivateChat class, one for each buddy (see Listing 5.29). As in the ProximityChat class, the PrivateChat class has to subscribe to a particular channel to establish a private channel connection. In the Init() function it calls the InviteUserToPrivateChannel method (see Listing 5.33). public o v e r r i d e void I n i t ( ) { t h i s . ChatWindow = new Rect ( 5 0 ∗ t h i s . ChatWindowId , 4 5 , 2 2 0 , 2 7 5 ) ; i f ( ! t h i s . i n i t i a l i z e d && t h i s . buddy ! = n u l l && t h i s . C h a t S e r v i c e ! = null ) { t h i s . C h a t S e r v i c e . I n v i t e U s e r T o P r i v a t e C h a n n e l ( t h i s . buddy . Name) ; this . i n i t i a l i z e d = true ; } base . I n i t ( ) ; } Listing 5.34: Invite user to private channel Where the ProximityChat has a HandleChatMessage callback and a DispatchMessage function for receiving and sending message to the proximity channel, PrivateChat has the callbacks HandlePrivateMessage and HandlePresence for handling incoming messages and presence status changes, and a DispatchMessage function which is used for sending private messages on the particular channel. public void HandlePrivateMessage ( ChatChannelId channel , BadumnaId userId , s t r i n g message ) { t h i s . S c r o l l P o s i t i o n += new Vector2 ( 0 , 2 5 ) ; //// S t o r e t h e message i n messageHistory i f ( ! t h i s . ShowingChatBox ) { 128 Chapter 5. Unity3D t h i s . ShowingChatBox = t r u e ; } t h i s . MessageHistory . Add( message ) ; } Listing 5.35: HandlePrivateMessage public void HandlePresence ( ChatChannelId channel , BadumnaId userId , s t r i n g username , C h a t S t a t u s s t a t u s ) { Debug . Log ( s t r i n g . Format ( " ( PrivateChatMessageType . c s ) { 0 } i s { 1 } " , username , s t a t u s . T o S t r i n g ( ) ) ) ; i f ( t h i s . buddy . Name . Equals ( username ) ) { Debug . Log ( s t r i n g . Format ( " ( PrivateChatMessageType . c s ) change s t a t u s o f { 0 } " , username ) ) ; t h i s . buddy . S t a t u s = s t a t u s ; } } Listing 5.36: HandlePresence p r o t e c t e d o v e r r i d e void DispatchMessage ( ) { s t r i n g message = t h i s . LocalAvatarName + " : " + t h i s . TextEntered ; t h i s . C h a t S e r v i c e . SendChannelMessage ( t h i s . buddy . ChannelId , message ) ; t h i s . MessageHistory . Add( message ) ; t h i s . TextEntered = s t r i n g . Empty ; } Listing 5.37: DispatchMessage 5.6.10 Build and run the game Checklist: 129 Chapter 5. Unity3D Figure 5.9: Demo5 Login screen 3 Make sure you have set the seed peer address before building the game. 3 Make sure you have started a seed peer with “unity-demo” as the application name. 3 Make sure the run in the background option is set. 3 Make sure to use a valid username to test the private chat (i.e. JOHN, PETER, MARY or SUSAN) Build the game and run two instances simultaneously. Make sure to use a valid username to test the private chat (i.e. JOHN, PETER, MARY or SUSAN). Figure 5.9 shows two instances run with different usernames — one uses ’JOHN’ and the other instance uses ’MARY’ for login. After successfully logging in, press the BuddyList toggle button to get your buddy list and if the two instances are connected, on JOHN’s instance you should be able to see the status of MARY to be online and vice versa. Press the Buddy’s name to open the private chat windows as you can see in Figure 5.10. 5.7 Authentication and user management demo This section will demonstrate how to use Badumna’s authentication server (Dei Server) with Unity. This demo is derived from Demo3-DeadReckoning and refers to the Demo6-DeiServer (Demo6-DeiServer.unitypackage) tutorial. This tutorial will show you how to integrate the unity game with Dei server. 130 Chapter 5. Unity3D Figure 5.10: Two instances running simultaneously (Demo5) 5.7.1 Create a new project Create a new unity project and import the Demo6-DeiServer.unitypackage. 5.7.2 Open the Unity scene file Open the Demo6.unity file. 5.7.3 GUILoginScript.cs GUILoginScript is used in the previous demo (Demo5-PrivateChat) for obtaining the username only. GUILoginScript needs to be modified so it will obtain the username and password from the user and use this information to login to a specified Dei server. The new GUILoginScript will still block the game from starting until it successfully logs in to Dei server. The DoLogin function is replaced with the following code (see Listing 5.38). p r i v a t e void DoLogin ( ) { //// The token s u p p l i e r i s r e s p o n s i b l e f o r i s s u i n g user c e r t i f i c a t e s , which i n turn //// a r e used t o a u t h e n t i c a t e u s e r s f o r forming c o n n e c t i o n s and performing o t h e r //// s e c u r i t y o p e r a t i o n s . //// //// The Dei token s u p p l i e r i s a c e n t r a l i s e d remote s e r v i c e which can be customised t o any //// back end data base . 131 Chapter 5. Unity3D //// t h i s . t o k e n S u p p l i e r = new DeiTokenSupplier ( "www. d e i s e r v e r . com " , 21259 , f a l s e ) ; //// I g no r e t h e s s l e r r o r s when running t h e Dei s e r v e r on l o c a l h o s t t h i s . t o k e n S u p p l i e r = new DeiTokenSupplier ( " l o c a l h o s t " , 2 1 2 5 6 , f a l s e ) ; this . tokenSupplier . IgnoreSslErrors = true ; L o g i n R e s u l t r e s u l t = t h i s . t o k e n S u p p l i e r . A u t h e n t i c a t e ( t h i s . username , t h i s . password , n u l l ) ; i f ( r e s u l t . WasSuccessful ) { t h i s . hideLoginWindow = t r u e ; N e t w o r k I n i t i a l i z a t i o n . GameStarted = t r u e ; } else { Debug . Log ( r e s u l t . E r r o r D e s c r i p t i o n ) ; } } Listing 5.38: DoLogin function Specify the Dei server address when creating a new instance of DeiTokenSupplier and remember to set the third argument to false (i.e. Unity2.6 doesn’t support SSL connections, use TCP connections instead). You should set IgnoreSslErrors to true when the DeiServer is on the local machine. Call the Authenticate() function to log in to Dei server. When the result is successful set the GameStarted variable to true. Please refer to section 4.1 for more details on starting a Dei server. 5.7.4 NetworkInitialization.cs NetworkInitialization.cs is modified to block the game until the GameStarted variable is set to true, by replacing the Start function with the following code (see Listing 5.39). public IEnumerator S t a r t ( ) { while ( ! N e t w o r k I n i t i a l i z a t i o n . GameStarted ) { yield return null ; } //// Note : when d e i i s used , badumna should be i n i t i a l i z e d a f t e r we got t h e token from Dei . 132 Chapter 5. Unity3D //// Check whether t h e network has been i n i t i a t e d y e t i f ( ! NetworkFacade . I n s t a n c e . I s I n i t i a l i z e d ) { //// I n i t i a l i z e t h e Badumna network l i b r a r y NetworkFacade . I n s t a n c e . I n i t i a l i z e ( ) ; l o g i n S c r i p t = t r a n s f o r m . gameObject . GetComponent<GUILoginScript > ( ) ; i f ( l o g i n S c r i p t != null ) { NetworkFacade . I n s t a n c e . Login ( l o g i n S c r i p t . TokenSupplier ) ; } else { NetworkFacade . I n s t a n c e . Login ( ) ; } } i f ( NetworkFacade . I n s t a n c e . IsLoggedIn ) { //// J o i n t h e chosen scene . //// Scenes a r e i d e n t i f i e d by a name ( a s t r i n g ) which should be unique . //// A l l e n t i t i e s within a scene w i l l s e e each other , but not any entities //// i n o t h e r s c e n e s . t h i s . networkScene = NetworkFacade . I n s t a n c e . J o i n S c e n e ( t h i s . networkSceneName , t h i s . C r e a t e E n t i t y , t h i s . RemoveEntity ) ; Debug . Log ( NetworkFacade . I n s t a n c e . GetNetworkStatus ( ) . T o S t r i n g ( ) ) ; } else { Debug . LogError ( " Login e r r o r " ) ; y i e l d break ; } i f ( ! this . CreateLocalPlayer ( ) ) { Debug . LogError ( " F a i l e d t o c r e a t e l o c a l a v a t a r . " ) ; y i e l d break ; } this . InitiateChatInterface ( ) ; y i e l d break ; } Listing 5.39: Start function 133 Chapter 5. Unity3D Badumna Initialization When Dei is used, Badumna has to log in using the Dei token obtained from the authentication process earlier. Thus the Badumna initialization process is moved from Awake() to Start(), to occur after the game has started (i.e. a token has been obtained from Dei). 5.7.5 Build and run the game Checklist: 3 Make sure you have set the seed peer address before building the game. 3 Make sure you have started a seed peer with “unity-demo” as the application name and make sure that the seed peer starts with Dei as well (refer to subsection 4.1.4 for more information). 3 Make sure that DeiServer is running. 3 Make sure that the Dei server address is set properly in GUILoginScript.cs. 3 Make sure the run in the background option is set. Start the Dei Server and make sure the Dei server address has been set properly on the GUILoginScript.cs. Build the game and run two instances simultaneously. You have to use a valid Dei username and password to test this demo. See subsection 4.1.2 to learn how to create Dei server accounts. 5.8 Buddy list Demo The buddy list demo is a simple example to demonstrate how to fetch persistent data from an arbitration server. This demo will show how to use a buddy list arbitration server using Unity3D. It is derived from Demo5-PrivateChat, but here the buddy list will be obtained from an arbitration server. To be able to use the buddy list arbitration server you need to modify some of the classes from Demo5PrivateChat. The completed tutorial can be found in Demo7-BuddyList (Demo7BuddyList.unitypackage). Two files that needed to be modified were NetworkInitialization.cs and GUIChatScript.cs. 5.8.1 Create a new project Create a new unity project and import the Demo7-BuddyList.unitypackage. 134 Chapter 5. Unity3D 5.8.2 Open the Unity scene file Open Demo7.unity file. 5.8.3 NetworkInitialization.cs The buddy list arbitration server configuration is added to the Awake() function as part of the Badumna configuration options (see Listing 5.40). //// A d d i t i o n a l c o n f i g u r a t i o n f o r buddyList ( a r b i t r a t i o n s e r v e r ) A r b i t r a t i o n C o n f i g a r b i t r a t i o n C o n f i g = new A r b i t r a t i o n C o n f i g ( " f r i e n d s e r v e r "); L i s t < A r b i t r a t i o n C o n f i g > a r b i t r a t i o n s = new L i s t < A r b i t r a t i o n C o n f i g > ( ) ; a r b i t r a t i o n s . Add( a r b i t r a t i o n C o n f i g ) ; badumnaConfigOptions . A r b i t r a t i o n S e r v e r s = a r b i t r a t i o n s ; badumnaConfigOptions . I s A r b i t r a t i o n E n a b l e d = t r u e ; Listing 5.40: Buddy list arbitration configuration The name of the arbitrator used to create ArbitrationConfig has to match the arbitrator name specified in the NetworkConfig.xml file of Buddy list arbitration application. In this case, ‘friendserver’ is used as the name of the arbitrator. Also, do not forget to set IsArbitrationEnabled to true. If you do not specify the address of the arbitration server, the discovery lookup module will be used automatically. 5.8.4 GUIChatScript.cs Instead of using a static buddy list, the buddy list will be obtained from the arbitration server. The two steps required to fetch the buddy list data from the arbitration server are as follows: • Connect to arbitration server by calling the Connect() function (see Listing 5.41). • Call the RetrieveFriendList function after successfully connecting to the arbitration server to retrieve a friend (buddy) list (see Listing 5.43). p r i v a t e void Connect ( ) { 135 Chapter 5. Unity3D Debug . Log ( " ( GUIChatScript . c s ) t r y connect t o a r b i t r a t i o n s e r v e r " ) ; t h i s . b u d d y L i s t A r b i t r a t o r = NetworkFacade . I n s t a n c e . G e t A r b i t r a t o r ( " friendserver " ) ; t h i s . b u d d y L i s t A r b i t r a t o r . Connect ( this . HandleArbitrationServerConnectionResult , this . HandleArbitrationServerConnectionFailure , t h i s . HandleServerMessage ) ; } Listing 5.41: Connect() function Get the arbitrator by calling NetworkFacade.Instance.GetArbitrator("friendserver") where "friendserver" is the arbitration name. Then, connect to the arbitration server by calling the Connect() function and passing three delegate functions for handling the connection result (HandleArbitrationServerConnectionResult, connection failures (HandleArbitrationServerConnectionFailure, and incoming server events (HandleServerMessage), see Listing 5.42). p r i v a t e void H a n d l e A r b i t r a t i o n S e r v e r C o n n e c t i o n R e s u l t ( ServiceConnectionResultType r e s u l t ) { i f ( r e s u l t . Equals ( S e r v i c e C o n n e c t i o n R e s u l t T y p e . S u c c e s s ) ) { t h i s . isConnected = t r u e ; Debug . Log ( " Connected t o BuddyList a r b i t r a t i o n s e r v e r " ) ; } e l s e i f ( r e s u l t . Equals ( S e r v i c e C o n n e c t i o n R e s u l t T y p e . ConnectionTimeout ) ) { Debug . Log ( " Unsucessfuly connected t o a r b i t r a t i o n s e r v e r ( c o n n e c t i o n timeout ) " ) ; } else { Debug . Log ( " BuddyList a r b i t r a t i o n s e r v e r i s not a v a i l a b l e " ) ; } } p r i v a t e void H a n d l e A r b i t r a t i o n S e r v e r C o n n e c t i o n F a i l u r e ( ) { Debug . Log ( " The c o n n e c t i o n t o BuddyList a r b i t r a t i o n s e r v e r was l o s t " ) ; } p r i v a t e void HandleServerMessage ( byte [ ] message ) { 136 Chapter 5. Unity3D ArbitrationEvent reply = BuddyListArbitrationEvents . B u d d y L i s t A r b i t r a t i o n E v e n t S e t . D e s e r i a l i z e ( message ) ; i f ( r e p l y i s BuddyListReply ) { BuddyListReply buddyListReply = r e p l y as BuddyListReply ; t h i s . buddys = new s t r i n g [ buddyListReply . BuddyNames . Count ] ; f o r ( i n t i = 0 ; i < buddyListReply . BuddyNames . Count ; i ++) { s t r i n g buddyName = buddyListReply . BuddyNames [ i ] ; t h i s . buddys [ i ] = buddyName ; //// I n v i t e a l l u s e r s t o p r i v a t e c h a n n e l s . Buddy buddy = new Buddy ( buddyName ) ; P r i v a t e C h a t p r i v a t e C h a t = new P r i v a t e C h a t ( ) ; t h i s . privateChatChannels . Add( buddyName , buddy ) ; t h i s . privateChatWindows . Add( buddyName , p r i v a t e C h a t ) ; p r i v a t e C h a t . Buddy = buddy ; privateChat . ChatService = this . chatService ; p r i v a t e C h a t . ChatWindowId = chatWindowId ; p r i v a t e C h a t . LocalAvatarName = t h i s . LocalAvatar . LocalAvatarName ; privateChat . I n i t ( ) ; chatWindowId ++; } } } Listing 5.42: HandleServerMessage function p r i v a t e void R e t r i e v e F r i e n d L i s t ( ) { i f ( t h i s . isConnected ) { BuddyListRequest r e q u e s t = new BuddyListRequest ( t h i s . LocalAvatar . LocalAvatarName ) ; t h i s . b u d d y L i s t A r b i t r a t o r . SendEvent ( BuddyListArbitrationEvents . BuddyListArbitrationEventSet . S e r i a l i z e ( request ) ) ; } } 137 Chapter 5. Unity3D Listing 5.43: Retrieve buddy list 5.8.5 Build and run the game Checklist: 3 Start the BuddyList arbitration server using “unity-demo” as the application name. 3 Make sure you have set the seed peer address before building the game. 3 Make sure you have started a seed peer with “unity-demo” as the application name. 3 Make sure the run in the background option is set. 3 Make sure to use the specified username to test the private chat (i.e. JOHN, PETER, MARY or SUSAN) Start the BuddyList arbitration application first. Please refer to subsection 4.2.3 for more details on starting this server. Build the game and run two instances simultaneously, to test this buddy list demo you should use the specified username (i.e. JOHN, PETER, MARY or SUSAN) as the username. When the game instance has successfully connected to the buddy list arbitration server you should be able to see name and status of your buddies on the buddy list window. 5.9 Combat Arbitration Server demo This demo will show how to use multiple arbitration servers in one Unity game. The tutorial refers to Demo8-ArbitrationServer. This demo is derived from Demo3Dead Reckoning with minor changes in the scene. We have added multiple blocks with different colour for indicating different combat zones. The combat zone arbitration server application from the API example 8 (see subsection 4.2.5) will be used for this purpose. Two instances of the combat zone arbitration server must be started (i.e. Combat Zone A and Combat Zone B arbitrators). Please refer to subsection 4.2.5 for more details on starting these arbitration server instances. 5.9.1 Create a new project Create a new unity project and import the Demo8-ArbitrationServer.unitypackage. 138 Chapter 5. Unity3D 5.9.2 Open the Unity scene file Open the Demo8.unity. 5.9.3 CombatZone.cs CombatZone class stores the information about a particular combat zone arbitration server including the arbitration server name and the connectivity status. It also has responsibility for connecting to the combat zone arbitration server, sending requests to join and leave this combat zone and handling the server reply messages (see HandleServerMessage in Listing 5.44). A player can be connected to multiple combat zone servers simultaneously, but it can only join one combat zone at a time. To be able to join to a specific combat zone you have to do the following steps: • Connect to the relevant combat zone arbitration server by calling the Connect() function, see Listing 5.45. • After successfully connecting, you can send a join request or a leave request to the server (see Listing 5.46 and 5.47). p r i v a t e void HandleServerMessage ( byte [ ] message ) { A r b i t r a t i o n E v e n t r e p l y = Comb atAr bit rati onE vent Set . D e s e r i a l i z e ( message ) ; i f ( reply i s StatusReply ) { Debug . Log ( s t r i n g . Format ( " Received s t a t u s from { 0 } " , t h i s . arbi trationN ame ) ) ; S t a t u s R e p l y s t a t u s R e p l y = r e p l y as S t a t u s R e p l y ; i f ( s t a t u s R e p l y . CurrentZone . Equals ( t h i s . arb itration Name ) ) { this . isJoined = true ; } this . isLeaving = false ; this . isJoining = false ; } else i f ( reply i s JoinReply ) { J o i n R e p l y j o i n R e p l y = r e p l y as J o i n R e p l y ; i f ( joinReply . Result ) { Debug . Log ( s t r i n g . Format ( " { 0 } a c c e p t e d j o i n r e q u e s t . " , t h i s . arbi trationN ame ) ) ; this . isJoined = true ; 139 Chapter 5. Unity3D } else { Debug . Log ( s t r i n g . Format ( " { 0 } r e j e c t e d j o i n r e q u e s t . " , t h i s . arbi trationN ame ) ) ; } this . isJoining = false ; } e l s e i f ( r e p l y i s LeaveReply ) { LeaveReply leaveReply = r e p l y as LeaveReply ; i f ( leaveReply . R e s u l t ) { Debug . Log ( s t r i n g . Format ( " { 0 } a c c p e t e d l e a v e r e q u e s t " , t h i s . arbi trationN ame ) ) ; this . isJoined = false ; } else { Debug . Log ( s t r i n g . Format ( " { 0 } r e j e c t e d l e a v e r e q u e s t " , t h i s . arbi trationN ame ) ) ; } this . isLeaving = false ; } e l s e i f ( r e p l y i s CombatResult ) { //// I s not implemented i n t h i s demo ( s e e ApiExample ) . } } Listing 5.44: HandleServerMessage function public void Connect ( ) { Debug . Log ( s t r i n g . Format ( " ( CombatZone . c s ) c o n n e c t i n g t o { 0 } " , t h i s . arbi trationN ame ) ) ; t h i s . combatZoneArbitrator = NetworkFacade . I n s t a n c e . G e t A r b i t r a t o r ( t h i s . arbi tration Name ) ; t h i s . combatZoneArbitrator . Connect ( this . HandleArbitrationServerConnectionResult , this . HandleArbitrationServerConnectionFailure , t h i s . HandleServerMessage ) ; } 140 Chapter 5. Unity3D Listing 5.45: Connect function public void J o i n ( i n t p l a y e r I d ) { this . i s J o i n i n g = true ; J o i n R e q u e s t r e q u e s t = new J o i n R e q u e s t ( p l a y e r I d ) ; t h i s . combatZoneArbitrator . SendEvent ( C omb atAr bitr ati onEv entS et . S e r i a l i z e ( request ) ) ; } Listing 5.46: Join to combat zone request public void Leave ( i n t p l a y e r I d ) { this . isLeaving = true ; LeaveRequest r e q u e s t = new LeaveRequest ( p l a y e r I d ) ; t h i s . combatZoneArbitrator . SendEvent ( C omb atAr bitr ati onEv entS et . S e r i a l i z e ( request ) ) ; } Listing 5.47: Leave combat zone request 5.9.4 CombatZoneManager.cs The CombatZoneManager class manages multiple combat zone arbitration servers. In this demo there are only two zones which are ‘combatzonea’ and ‘combatzoneb’. The main responsibility of this class is to automatically get the player to join or leave a particular combat zone based on its position. In this demo the red coloured ground represents ‘combatzonea’ and the green area is ‘combatzoneb’. Connect to all available combat zones in Start() (see Listing 5.48). public IEnumerator S t a r t ( ) { 141 Chapter 5. Unity3D while ( ! N e t w o r k I n i t i a l i z a t i o n . GameStarted ) { yield return null ; } i f ( NetworkFacade . I s I n s t a n t i a t e d && NetworkFacade . I n s t a n c e . IsLoggedIn ) { Debug . Log ( " ( CombatZoneManager . c s ) Connecting t o each combatzone arbitration server " ) ; t h i s . combatZoneA . Connect ( ) ; t h i s . combatZoneB . Connect ( ) ; } y i e l d break ; } Listing 5.48: Connect to all available combat zone server 5.9.5 NetworkInitialization.cs As in to Demo7-BuddyList, you have to add the arbitration configuration as part of Badumna’s configuration before start initializing Badumna network (see Listing 5.49). //// A d d i t i o n a l c o n f i g u r a t i o n f o r buddyList ( a r b i t r a t i o n s e r v e r ) A r b i t r a t i o n C o n f i g combatZoneA = new A r b i t r a t i o n C o n f i g ( " combatzonea " ) ; A r b i t r a t i o n C o n f i g combatZoneB = new A r b i t r a t i o n C o n f i g ( " combatzoneb " ) ; L i s t < A r b i t r a t i o n C o n f i g > a r b i t r a t i o n s = new L i s t < A r b i t r a t i o n C o n f i g > ( ) ; a r b i t r a t i o n s . Add( combatZoneA ) ; a r b i t r a t i o n s . Add( combatZoneB ) ; badumnaConfigOptions . A r b i t r a t i o n S e r v e r s = a r b i t r a t i o n s ; badumnaConfigOptions . I s A r b i t r a t i o n E n a b l e d = t r u e ; Listing 5.49: Arbitration server configuration 5.9.6 Build and run the game Checklist: 142 Chapter 5. Unity3D Figure 5.11: Demo 8 login screen and non-zone region 3 Start two combat zone arbitrators with “unity-demo” as the application name. 3 Make sure you have set the seed peer address before building the game. 3 Make sure you have started a seed peer with “unity-demo” as the application name. 3 Make sure the run in the background option is set. Start two combat zone arbitration servers, using the combat zone server that used in the ApiExample. Make sure the name of the arbitration servers are ‘combatzonea’ and ‘combatzoneb’ to match the name used by this demo. Refer to chapter 4 for instructions on how to run the arbitration servers. Note that the scripts for launching the combat arbitrators for use with the API examples in chapter 4 use “api-example” as the application name, and “unity-demo” must be used here. Build the game and run two instances simultaneously. Each instance should use a unique playerID, as this playerID will be passed to the combat zone arbitration server and used to uniquely identify a player. Figure 5.11 shows an instance of Demo8 that uses playerID 1 for login. After successful login, the player will be spawned in the non-zone region (see Figure 5.11). As you move the player to the red region on the right, it should be automatically join to combat zone A, on the other hand if you move the player to the green region it will join to combat zone B (see Figure 5.12). 143 Chapter 5. Unity3D Figure 5.12: Demo 8 Combat Zone A and B 144 Chapter 6 Non Player Characters This chapter focuses on non player characters (NPCs) and how to support them using Badumna. Depending on the behaviour of the NPC, there are three general methods you can use. This chapter will describe the three methods in detail and provide a Unity demo for each of the methods. 6.1 Server based NPCs Server based NPCs are NPCs that are hosted on a dedicated machine. This approach is ideal for supporting NPCs that are very reliable and must be in the game all the time. For example, a manager that allows people to enter a room or a monster that each player has to fight before they can cross a bridge. In terms of Badumna’s functionality, these NPCs are just regular entities in a scene and Badumna will treat them as regular entities. The only difference between such entities and regular players is that the NPCs have a pre-defined behaviour and are not controlled by user input. We will now demonstrate how to support such behaviour using Unity3D’s headless mode. The tutorial refers to Demo9-HeadlessServer (Demo9-Headless Server.unitypackage). This demo is derived from Demo3-DeadReckoning, but as mentioned before, the player is now controlled by an NPC script instead of user input. This demo uses RandomWalker NPC behaviour (i.e. NPCs walk around randomly). This is a simple NPC behaviour used for demonstration purposes. You can create your own script according to your application needs. This tutorial will explain the Badumna specific steps required to support this functionality. 6.1.1 Create a new project Create a new unity project and import the Demo9-HeadlessServer.unitypackage. 145 Chapter 6. Non Player Characters 6.1.2 Open the Unity scene file Open Demo9.unity file. 6.1.3 NetworkInitialization.cs In this demo, two NPCs will be created and both of them will have the same behaviour (RandomWalker). Badumna’s NetworkInitialization class is responsibility for creating those NPCs. Hence, this class now has to be able to handle multiple local entities instead of just a single local entity. To support this, a slight modification is required in the NetworkInitialization class. 1. Use a dictionary to store the collection of local avatars instead of just using a single variable (see Listing 6.2). This dictionary is very similar to the dictionary we use to store the list of remote avatar entities. 2. The Start function is responsible for creating two NPC characters. As shown in listing 6.1 the Start function calls the CreateNPC function twice to create NPC1 and NPC2. 3. The CreateNPC function is responsible for creating an NPC and attaching all the required scripts including the RandomWalker script to this NPC object. The code for CreateNPC function is listed in Listing 6.3. You will notice the RandomWalker script has been added to the NOC player object instead of the ThirdPersonController script. You will also notice that after the local entity has been created it is registered in the Badumna scene by calling the RegisterEntity function. Finally the function adds the local avatar instance to the localEntities dictionary collection using the Add function. This dictionary keeps track of the number of local avatars that are currently in the game. 4. OnDisable function should now unregister all the local entities instead of just one single local entity (see Listing 6.4). 5. Note that we have not subscribed the local entities to Badumna’s chat channel in this demo. However, if you application requires that the NPC’s receive chat messages from other players and respond to them automatically, you can subscribe to Badumna’s chat channel. public void S t a r t ( ) { //// C r e a t e two NPC ( SmallLerpz type ) i f ( ! ( t h i s . CreateNPC ( PlayerType . SmallLerpz , "NPC1" ) && t h i s . CreateNPC ( PlayerType . SmallLerpz , "NPC2" ) ) ) 146 Chapter 6. Non Player Characters { Debug . LogError ( " F a i l e d t o c r e a t e l o c a l a v a t a r . " ) ; return ; } } Listing 6.1: Start function p r i v a t e D i c t i o n a r y <BadumnaId , LocalAvatar > l o c a l E n t i t i e s = new D i c t i o n a r y <BadumnaId , LocalAvatar > ( ) ; Listing 6.2: Collection of local avatar p r i v a t e bool CreateNPC ( PlayerType playerType , s t r i n g playerName ) { try { u i n t e n t i t y T y p e = ( u i n t ) playerType ; GameObject p l a y e r O b j e c t = ( GameObject ) GameObject . I n s t a n t i a t e ( t h i s . ListOfAvatars [ ( int ) entityType ] , transform . position , transform . r o t a t i o n ) ; i f ( playerObject != null ) { //// s e t a l l t h e components r e q u i r e d p l a y e r O b j e c t . AddComponent ( typeof ( C h a r a c t e r C o n t r o l l e r ) ) ; p l a y e r O b j e c t . AddComponent ( typeof ( RandomWalker ) ) ; p l a y e r O b j e c t . AddComponent ( typeof ( AnimationHandler ) ) ; p l a y e r O b j e c t . AddComponent ( typeof ( LocalAvatar ) ) ; CharacterController controller = ( CharacterController ) p l a y e r O b j e c t . GetComponent ( typeof ( C h a r a c t e r C o n t r o l l e r ) ) ; c o n t r o l l e r . radius = 0.4 f ; c o n t r o l l e r . c e n t e r = new UnityEngine . Vector3 ( 0 , 1 . 1 f , 0 ) ; LocalAvatar l o c a l A v a t a r = ( LocalAvatar ) p l a y e r O b j e c t . GetComponent ( typeof ( LocalAvatar ) ) ; i f ( localAvatar != null ) { 147 Chapter 6. Non Player Characters t h i s . l o c a l A v a t a r . SetAvatarToUse ( p l a y e r O b j e c t , playerName ) ; i f ( e n t i t y T y p e >= 0 ) { t h i s . networkScene . R e g i s t e r E n t i t y ( l o c a l A v a t a r , entityType ) ; t h i s . l o c a l E n t i t i e s . Add( l o c a l A v a t a r . Guid , l o c a l A v a t a r ) ; return true ; } } } } c a t c h ( Ex cep ti on e ) { Debug . LogError ( e ) ; return false ; } return false ; } Listing 6.3: Create NPC funtion public void OnDisable ( ) { f o r e a c h ( LocalAvatar l o c a l A v a t a r in t h i s . l o c a l E n t i t i e s . Values ) { t h i s . networkScene . U n r e g i s t e r E n t i t y ( l o c a l A v a t a r ) ; } t h i s . networkScene . Leave ( ) ; //// when l e a v e scene , c l e a r t h e remote e n t i t i e s and l o c a l e n t i t i e s t h is . remoteEntities . Clear ( ) ; t h is . l o c a l E n t i t i e s . Clear ( ) ; i f ( NetworkFacade . I n s t a n c e . IsLoggedIn ) { NetworkFacade . I n s t a n c e . Logout ( ) ; } i f ( NetworkFacade . I n s t a n c e . I s I n i t i a l i z e d ) { NetworkFacade . I n s t a n c e . Shutdown ( ) ; } 148 Chapter 6. Non Player Characters } Listing 6.4: OnDisable function 6.1.4 RandomWalker.cs The RandomWalker script is a normal Unity script that defines the NPC behaviour. This script is not specific to Badumna and hence is not explained in this tutorial. 6.1.5 Build and run the game Checklist: 3 Make sure you have set the seed peer address before building the game. 3 Make sure you start a seed peer with “unity-demo” as the application name. 3 Make sure the run on the background option is set. 3 Make sure both Demo3 and Demo9 use the same network scene name. It can be set on NetworkInitialization.cs, by default both demos used “Demo3” as the network scene name. Run the application from the Unity editor and make sure there are no errors. The easiest way to test the application is by running this demo and Demo3-Dead Reckoning. Make sure you have set up the same seed peer address for both applications before you start them. If it succeed, you should be able to see two Lerpz (NPCs) walking around from Demo3-DeadReckoning window. You can also test this demo by starting it in headless mode. Demo3-Deadreckoning should still be able to see the two NPCs. (Note: only Unity Professional provides the headless mode functionality). 6.2 Client based NPCs If you want to support NPCs that are tied to a specific user, then you can use this approach. The NPCs are hosted on the client machines. As long as the user is online the NPC will also be online. When the user goes offline, the NPC disappears. For example, a user has a pet that they are allowed to have in the game and it exists only if the user exists. Once again, in terms of Badumna functionality, the NPC is a regular entity running on the client machine. 149 Chapter 6. Non Player Characters We will now demonstrate how to support such NPCs using a Unity example (i.e. multiple originals on the Unity game). The tutorials refers to Demo11LocalNPC (Demo11-LocalNPC.unitypackage). This demo is derived from Demo3DeadRekconing by adding the extra model Canetoad that will be used as a NPC. Each SmallLerpz will spawn with its pet. This tutorial will show you how to support multiple original on your Unity game. In addition, Follower behaviour script will be used instead of RandomWalker script as it used on the previous tutorial. According to the name, the NPC with this behaviour will follow to something which in this case it will follow its owner (i.e. SmallLerpz object). 6.2.1 Create a new project Create a new unity project and import the Demo11-LocalNPC.unitypackage. 6.2.2 Open the Unity scene file Open Demo11.unity file. 6.2.3 Enumeration.cs As mention before a new model will be used in this demo (i.e the Canetoad model). The PlayerType enumeration needs to be modified, replacing the MonsterLerpz with Toad. MonsterLerpz was used in Badumna 1.3 and it is not longer used. 6.2.4 NetworkInitialization.cs This demo will created two local objects which are the SmallLerpz and NPC with Follower behaviour. The NetworkInitialization class is responsible for initializing those two and some modifications is required as follow. 1. Use a dictionary to store the collection of local avatar class instead of just using a single variable see Listing 6.2). 2. Register the entity details for the Canetoad type (see Listing 6.5). 3. CreateLocalPlayer function now take three arguments: player name, player type and a boolean indicating whether this object is a pet (NPC) or just a normal player (see Listing 6.6). It is called from the Start() function (see Listing 6.7). 4. The OnDisable function should now unregister all the local entities instead of just one single local entity (see Listing 6.4). 150 Chapter 6. Non Player Characters 5. The CreateEntity function has to be modified as the canetoad model has a slightly different structural hierarchy compared with SmallLerpz model. Add the SyncAnimation script inside the toad game object, instead of adding the SyncAnimation script to the remote player object (see Listing 6.8). 6. Only the SmallLerpz should subscribe to proximity chat. To be able to do this you have to modified the InitiateChatInterface() function (see Listing 6.9). i f ( NetworkFacade . I n s t a n c e . IsLoggedIn ) { //// R e g i s t e r E n t i t y D e t a i l s NetworkFacade . I n s t a n c e . R e g i s t e r E n t i t y D e t a i l s ( ( u i n t ) PlayerType . SmallLerpz , 2 0 . 0 f , new Badumna . DataTypes . Vector3 ( 6 . 0 f , 6 . 0 f , 6 . 0 f )); NetworkFacade . I n s t a n c e . R e g i s t e r E n t i t y D e t a i l s ( ( u i n t ) PlayerType . Toad , 2 0 . 0 f , new Badumna . DataTypes . Vector3 ( 3 . 0 f , 3 . 0 f , 3 . 0 f ) ) ; //// J o i n t h e chosen scene . //// Scenes a r e i d e n t i f i e d by a name ( a s t r i n g ) which should be unique . //// A l l e n t i t i e s within a scene w i l l s e e each other , but not any entities //// i n o t h e r s c e n e s . t h i s . networkScene = NetworkFacade . I n s t a n c e . J o i n S c e n e ( t h i s . networkSceneName , t h i s . C r e a t e E n t i t y , t h i s . RemoveEntity ) ; Debug . Log ( NetworkFacade . I n s t a n c e . GetNetworkStatus ( ) . T o S t r i n g ( ) ) ; } else { Debug . LogError ( " Login e r r o r " ) ; return ; } Listing 6.5: Join badumna scene p r i v a t e bool C r e a t e L o c a l P l a y e r ( s t r i n g playerName , PlayerType playerType , bool i s P e t ) { try { u i n t e n t i t y T y p e = ( u i n t ) playerType ; 151 Chapter 6. Non Player Characters GameObject p l a y e r O b j e c t = ( GameObject ) GameObject . I n s t a n t i a t e ( t h i s . ListOfAvatars [ ( int ) entityType ] , transform . position , transform . r o t a t i o n ) ; i f ( playerObject != null ) { if ( isPet ) { p l a y e r O b j e c t . AddComponent ( typeof ( C h a r a c t e r C o n t r o l l e r ) ) ; p l a y e r O b j e c t . AddComponent ( typeof ( AnimationHandler ) ) ; p l a y e r O b j e c t . AddComponent ( typeof ( LocalAvatar ) ) ; p l a y e r O b j e c t . AddComponent ( typeof ( Follower ) ) ; CharacterController controller = ( CharacterController ) p l a y e r O b j e c t . GetComponent ( typeof ( C h a r a c t e r C o n t r o l l e r ) ); c o n t r o l l e r . height = 1.0 f ; c o n t r o l l e r . radius = 0.4 f ; c o n t r o l l e r . c e n t e r = new UnityEngine . Vector3 ( 0 , 0 . 5 f , 0 ) ; Follower f o l l o w e r = ( Follower ) p l a y e r O b j e c t . GetComponent ( typeof ( Follower ) ) ; i f ( t h i s . l o c a l E n t i t i e s . Count > 0 ) { //// Get t h e f i r s t l o c a l e n t i t y and f o l l o w i t , i t j u s t a hack with t h e purpose o f demo //// shouldn ’ t be used f o r t h e r e a l games . f o r e a c h ( KeyValuePair <BadumnaId , LocalAvatar > p a i r in this . localEntities ) { //// TODO : f i x t h i s , i s ugly f o l l o w e r . FollowedObject = p a i r . Value . t r a n s f o r m . gameObject ; } } GameObject toad = p l a y e r O b j e c t . GetComponentInChildren ( typeof ( Animation ) ) . t r a n s f o r m . gameObject ; f o l l o w e r . Toad = toad ; } else { //// s e t a l l t h e components r e q u i r e d p l a y e r O b j e c t . AddComponent ( typeof ( C h a r a c t e r C o n t r o l l e r ) ) ; p l a y e r O b j e c t . AddComponent ( typeof ( T h i r d P e r s o n C o n t r o l l e r ) ) ; p l a y e r O b j e c t . AddComponent ( typeof ( ThirdPersonSimpleAnimation ) ) ; p l a y e r O b j e c t . AddComponent ( typeof ( AnimationHandler ) ) ; p l a y e r O b j e c t . AddComponent ( typeof ( CameraFollowerScript ) ) ; 152 Chapter 6. Non Player Characters p l a y e r O b j e c t . AddComponent ( typeof ( LocalAvatar ) ) ; CharacterController controller = ( CharacterController ) p l a y e r O b j e c t . GetComponent ( typeof ( C h a r a c t e r C o n t r o l l e r ) ); c o n t r o l l e r . radius = 0.4 f ; c o n t r o l l e r . c e n t e r = new UnityEngine . Vector3 ( 0 , 1 . 1 f , 0 ) ; } LocalAvatar l o c a l A v a t a r = ( LocalAvatar ) p l a y e r O b j e c t . GetComponent ( typeof ( LocalAvatar ) ) ; i f ( localAvatar != null ) { l o c a l A v a t a r . SetAvatarToUse ( p l a y e r O b j e c t , playerName ) ; i f ( e n t i t y T y p e >= 0 ) { t h i s . networkScene . R e g i s t e r E n t i t y ( l o c a l A v a t a r , entityType ) ; t h i s . l o c a l E n t i t i e s . Add( l o c a l A v a t a r . Guid , l o c a l A v a t a r ) ; return true ; } } } } c a t c h ( Ex cep ti on e ) { Debug . LogError ( e ) ; return false ; } return false ; } Listing 6.6: CreateLocalPlayer function public void S t a r t ( ) { i f ( ! t h i s . C r e a t e L o c a l P l a y e r ( " SmallLerpz " , PlayerType . SmallLerpz , f a l s e ) || ! t h i s . C r e a t e L o c a l P l a y e r ( " Toad " , PlayerType . Toad , t r u e ) ) { Debug . LogError ( " F a i l e d t o c r e a t e l o c a l a v a t a r . " ) ; return ; } 153 Chapter 6. Non Player Characters this . InitiateChatInterface ( ) ; } Listing 6.7: Start() function Check the player type. If the player type is Toad then added the SyncAnimation to the toad object where the object animation is stored. i f ( playerType . Equals ( PlayerType . Toad ) ) { GameObject toad = r e m o t e P l a y e r O b j e c t . GetComponentInChildren ( typeof ( Animation ) ) . t r a n s f o r m . gameObject ; toad . AddComponent ( typeof ( SyncAnimation ) ) ; } else { r e m o t e P l a y e r O b j e c t . AddComponent ( typeof ( SyncAnimation ) ) ; } Listing 6.8: CreateEntity function You have to pass the right local avatar class to GUIChatScript class. In this case pass the SmallLerpz local avatar instance. This is not a good solution but it will work for this demo. p r i v a t e void I n i t i a t e C h a t I n t e r f a c e ( ) { GameObject p a r e n t O b j e c t = ( GameObject ) t r a n s f o r m . gameObject ; p a r e n t O b j e c t . AddComponent<GUIChatScript > ( ) ; GUIChatScript c h a t S c r i p t = t r a n s f o r m . GetComponent<GUIChatScript > ( ) ; f o r e a c h ( KeyValuePair <BadumnaId , LocalAvatar > p a i r in t h i s . localEntities ) { //// NOTE: t h i s w i l l only work with t h i s demo , t h e r i g h t t h i n g t o do //// i s t o i n l c u d e a unique i d e n t i f i e r f o r t h e l o c a l p l a y e r controller //// by human t h a t d i f f e r e n t i a t e from o t h e r l o c a l e n t i t i e s . i f ( p a i r . Value . LocalAvatarName . Equals ( " SmallLerpz " ) ) 154 Chapter 6. Non Player Characters { c h a t S c r i p t . LocalAvatar = p a i r . Value ; break ; } } } Listing 6.9: InitiateChatInterface() function 6.2.5 Follower.cs The Follower script is an NPC behaviour script which is a normal Unity script. This script is not specific to Badumna and hence is not explained in this tutorial. 6.2.6 SyncAnimation.cs Make the SyncAnimation class more general, as previously it was used only by the SmallLerpz object, but in this demo this class will be used by both SmallLerpz and Canetoad objects. The Canetoad object has a different structural hierarchy, where the RemoteAvatar class is not stored on the same level as the SyncAnimation class. In order to solve the problem, you have to modify the Start() function so it will look for RemoteAvatar in two different places (see Listing 6.10). Also remove the use of jumpland and run animations as canetoad doesn’t have those animations (i.e. remove animation.Blend("jumpland", 0); and animation["run"].normalizedSpeed = 1.0F;). public void S t a r t ( ) { i f ( t h i s . remoteAvatar == n u l l ) { t h i s . remoteAvatar = ( RemoteAvatar ) t r a n s f o r m . GetComponent ( typeof ( RemoteAvatar ) ) ; } i f ( t h i s . remoteAvatar == n u l l ) { //// Check t h e remote a v a t a r from t h e p a r e n t o b j e c t t h i s . remoteAvatar = ( RemoteAvatar ) t r a n s f o r m . p a r e n t . GetComponent ( typeof ( RemoteAvatar ) ) ; } } 155 Chapter 6. Non Player Characters Listing 6.10: Start() function 6.2.7 Build and run the game Checklist: 3 Make sure you have set the seed peer address before building the game. 3 Make sure you start a seed peer with “unity-demo” as the application name. 3 Make sure the run on the background option is set. Run the game from Unity editor and make sure there are no errors. Build the game and run two instances and make sure you have set the seed peer address correctly. On success, you should be able to see the others players with their own pet. 6.3 Distributed Controller based NPCs Badumna 1.4 comes with an advanced feature called Distributed Controller that supports executing game code reliably in a non-reliable distributed environment such as the game network. Many games have NPCs that have non-critical roles. Such NPCs are usually designed to allow players to interact (e.g. fight/talk) with them and gain experience points, gold, weapons, etc. Due to the non-critial nature of these NPCs, as long as the majority of such NPCs keep functioning correctly, it doesn’t affect the overall gaming experience. To support a large number of such NPCs would typically require significant server resources(in terms of CPU, memory and bandwidth requirements) for the game operator. In Badumna, the Distributed Controller is provided to host such NPCs within the game network without the need for dedicated servers. The Distributed Controller therefore offloads the CPU and bandwidth requirements that are imposed by such NPCs. It has been designed to ensure that majority of the NPCs will work consistently even as players keep joining and leaving the game. Before we demonstrate the use of Distributed Controller NPCs via a Unity example, we would like to introduce certain relevant concepts. 1. NPC Migration: A distributed controller NPC is hosted on a regular user computer. If a user decides to exit the game, their computer will be disconnected from the Badumna network immediately. In order to ensure that 156 Chapter 6. Non Player Characters NPCs keep running irrespective of users joining and leaving the game network, the NPCs need to relocate to a different computer and resume working as quickly as possible. This automatic relocation of NPCs is termed as NPC migration in Badumna. 2. Checkpoint/Recover: To support NPC migration, NPCs need to save their current status, called Checkpoint, and Recover from this saved status on a different computer. 3. Non-critical NPCs: As mentioned above, the distributed controller should only be used to implement NPCs that are non-critical. Game developers should expect that some of the NPCs would occasionally stop working for a few seconds during migration or even disappear for an extended period of time during the game session. Badumna ensures that most NPCs will work consistently when there are enough peers in the network. To use this feature, a custom controller class inherited from DistributedSceneController in the Badumna.Controllers namespace needs to be implemented. The following methods must be overridden in the child controller class: 1. TakeControlOfEntity is called when the controller is created. It should create an ISpatialOriginal object, which is usually an NPC avatar. This object needs to be initialized and then returned. The ISpatialOriginal object is inactive when returned from the TakeControlOfEntity function. This means that the ISpatialOriginal object is created and stored locally by the Distributed Controller module, but it has not been registered to any scene yet. There will be no processing or communications overhead from such inactive ISpatialOriginal objects. 2. The InstantiateRemoteEntity and RemoveEntity methods are called when the NPC is notified to create a replica of a remote entity and when the NPC becomes no longer interested in the remote entity respectively. 3. Checkpoint and Recover are used to checkpoint the status of the NPC avatar and recover from the saved status respectively. 4. Sleep is called to notify the controller that the NPC avatar is going to be switched to inactive status. 5. Wake is used to notify the controller that the NPC avatar will become active. 6. Process is called regularly when the NPC avatar is active. You can invoke any game logic within this method. For example, it is common to execute the NPC’s behaviour code within this method 1 . 1 Unity3D provides other functions such as FixedUpdate to define NPC behaviour. This will be clear in the demo 157 Chapter 6. Non Player Characters To start or stop the Distributed Controller based NPCs in the game, the game code should call one of the following APIs: 1. NetworkFacade.Instance.StartController<T>(string uniqueName) will start a controller named uniqueName. There will only be one NPC character created if all computers call this StartController method using the same uniqueName parameter. This is because the NPC instances are identified by this string (uniqueName). The uniqueName parameter also must follow a defined pattern to include the Scene Name for which the NPC will join. 2. string NetworkFacade.Instance.StartController<T>(string sceneName, string controllerName, ushort max) will start a controller of type T with the name controllerName, and have the created NPC to join the scene specified by sceneName. The parameter max defines the maximum number of such NPCs to be created. If all computers call this method with the same max parameter, then up to max instances of the specified NPCs will be created in the game. The returned value of this method is the uniqueName of the created controller instance. 3. NetworkFacade.Instance.StopController<T>(string uniqueName) is used to stop the controller and its associated NPC identified by the uniqueName parameter. Please note that a maximum of one NPC is created per game client. For example, if you set the vale of max to 50, Badumna will start a maximum of one NPC on each game client. Therefore, you will require more than 50 online users (each will call StartController with same parameters on the local machine) to have all 50 NPCs created. When the number of online users drops to say 20, the total number of such NPCs will also eventually drop to 20 in about one minute. It is possible to call StartController multiple times on the same machine with different controllerName to start different types of distributed controller based NPCs. Each peer can start up to 64 different types of NPCs. We now demonstrate how to use a Distributed Controller NPC using a Unity demo. This tutorial refers to Demo10-DistributedController (Demo10-Distributed Controller.unitypackage). This demo is derived from Demo3-DeadRekconing. This tutorial will explain how to integrate Demo3 with the DistributedController feature. In this demo, the NPCs will be created using distributed controllers. They will use the same behaviour script as before (i.e. RandomWalker script). Two additional classes are added in this demo which are NPCController and NPCManager. 6.3.1 Create a new project Create a new unity project and import Demo10-DistributedController.unitypackage. 158 Chapter 6. Non Player Characters 6.3.2 Open the Unity scene file Open Demo10.unity file. 6.3.3 NetworkInitialization.cs In order to integrate the distributed controller, you need to modify some parts of NetworkInitialization class as follows: 1. Start the distributed controller by calling StartController function (see Listing 6.11). 2. Modify CreateEntity callback function (see Listing 6.12). CreateEntity function is called by Badumna every time a new remote entity enters the clients area of interest. //// S t a r t t h e d i s t r i b u t e d c o n t r o l l e r . NetworkFacade . I n s t a n c e . S t a r t C o n t r o l l e r <NPCController >( t h i s . networkSceneName , "Random−walk−NPC" , 1 ) ; Listing 6.11: Start Controller As explained before, NPCController is the type of distributed controller that needs to be created (see NPCController section at page 162). This is usually the name of the class that implements the NPC behaviour. You will also need to specify the network scene name, a name to recognise the NPCs and the maximum number of NPCs in the game. p r i v a t e I S p a t i a l R e p l i c a C r e a t e E n t i t y ( NetworkScene scene , BadumnaId entityId , uint entityType ) { GameObject r e m o t e P l a y e r O b j e c t = ( GameObject ) GameObject . I n s t a n t i a t e ( t h i s . ListOfAvatars [ ( int ) entityType ] , transform . position , transform . r o t a t i o n ) ; bool isLocalNPCReplica = f a l s e ; //// Check whether t h e r e p l i c a i s a r e p l i c a o f t h e d i s t r i b u t e d c o n t r o l l e r NPC i f ( e n t i t y I d . T o S t r i n g ( ) . Contains ( " Dht " ) ) { //// Check i f t h e l o c a l NPC o f t h i s r e p l i c a i s on t h i s machine . 159 Chapter 6. Non Player Characters Debug . Log ( s t r i n g . Format ( " ( N e t w o r k I n i t i a l i z a t i o n . c s ) NPC r e p l i c a with e n t i t y id { 0 } " , e n t i t y I d ) ) ; i f ( GameObject . Find ( e n t i t y I d . T o S t r i n g ( ) ) ! = n u l l ) { Debug . Log ( s t r i n g . Format ( " ( N e t w o r k I n i t i a l i z a t i o n . c s ) NPC r e p l i c a have l o c a l a v a t a r on t h i s machine " ) ) ; isLocalNPCReplica = t r u e ; r e m o t e P l a y e r O b j e c t . t r a n s f o r m . name = s t r i n g . Format ( " {0} − remoteNPC " , e n t i t y I d . T o S t r i n g ( ) ) ; } else { Debug . Log ( s t r i n g . Format ( " ( N e t w o r k I n i t i a l i z a t i o n . c s ) NPC r e p l i c a with e n t i t y id { 0 } i s c r e a t e d " , e n t i t y I d ) ) ; r e m o t e P l a y e r O b j e c t . t r a n s f o r m . name = e n t i t y I d . T o S t r i n g ( ) ; } } RemoteAvatar remoteAvatar ; i f ( remotePlayerObject != null ) { r e m o t e P l a y e r O b j e c t . AddComponent ( typeof ( SyncAnimation ) ) ; r e m o t e P l a y e r O b j e c t . AddComponent ( typeof ( RemoteAvatar ) ) ; remoteAvatar = ( RemoteAvatar ) r e m o t e P l a y e r O b j e c t . GetComponent ( typeof ( RemoteAvatar ) ) ; i f ( remoteAvatar ! = n u l l ) { //// The network guid should be s e t t o t h e given guid remoteAvatar . Guid = e n t i t y I d ; remoteAvatar . SetAvatarToUse ( r e m o t e P l a y e r O b j e c t ) ; //// Add t h e remote a v a t a r t o mRemoteEntities t h i s . r e m o t e E n t i t i e s . Add( e n t i t y I d , remoteAvatar ) ; I S p a t i a l R e p l i c a s p a t i a l R e p l i c a = remoteAvatar as ISpatialReplica ; i f ( isLocalNPCReplica ) { //// D e a c t i v a t e t h i s r e p l i c a , s i n c e t h e o r i g i n a l o f t h i s //// r e p l i c a i s here . remotePlayerObject . SetActiveRecursively ( false ) ; NPCManager . I n s t a n c e . NonActiveReplica . Add( e n t i t y I d , remotePlayerObject ) ; } return s p a t i a l R e p l i c a ; } } 160 Chapter 6. Non Player Characters return null ; } Listing 6.12: CreateEntity function The CreateEntity callback function for this example is a little complex. The key points that you must know are as follows. Firstly check whether the replica is a replica representing a distributed controller NPC, by checking the entity Id of the replica. All distributed controller NPCs have the string ‘Dht’ as part of their entity id. Hence we check for this string in the entityId. If the replica is a distributed controller NPC then you have to treat it differently. You need to check whether this distributed controller NPC is already present as a local entity on the client. This is checked by going through the list of game objects and trying to find a match with the entityId. A positive match indicates that the distributed controller is currently running on this machine as a local entity, hence we shouldn’t create an active remote replica for this remote entity on this client machine. Creating an active remote entity would mean having a local and remote entity for the same NPC on the machine which is not desirable. Hence we set a flag isLocalNPCReplica and give this remote entity a different name 0-remoteNPC. You cannot ignore this remote entity as it may be required if the local entity (distributed controller object) migrates to another machine. Hence we keep track of this remote entity and set the remote entity to a non-active state. In this demo, we keep track of the inactive replicas by storing them in the list NPCManager.Instance.NonActiveReplica. This allows us to access the remote entity if required at a later stage. This is done when the isLocalNPCRelica flag is true in the CreateEntity function. i f ( isLocalNPCReplica ) { //// D e a c t i v a t e t h i s r e p l i c a , s i n c e t h e o r i g i n a l o f t h i s //// r e p l i c a i s here . remotePlayerObject . SetActiveRecursively ( false ) ; NPCManager . I n s t a n c e . NonActiveReplica . Add( e n t i t y I d , r e m o t e P l a y e r O b j e c t ); } If the remote entity is a normal remote entity, then we just add it to the list of remote entities as we have done in the other Unity demos. This is done in the 161 Chapter 6. Non Player Characters following code that is part of the CreateEntity function. else { Debug . Log ( s t r i n g . Format ( " ( N e t w o r k I n i t i a l i z a t i o n . c s ) NPC r e p l i c a with e n t i t y id { 0 } i s c r e a t e d " , e n t i t y I d ) ) ; r e m o t e P l a y e r O b j e c t . t r a n s f o r m . name = e n t i t y I d . T o S t r i n g ( ) ; } The rest of the CreateEntity function does all the usual list of things that need to be done for a remote entity such as adding all the relevant components (SyncAnimation, RemoteAvatar); setting the global unique id; and adding the remote entity to the mRemoteEntities list. 6.3.4 NPCContoller NPCController class is derived from DistributedSceneController. It is mandatory to implement this class. The name of this class should match the distributed controller type specified in StartController function. As explained before this class needs to implement the following DistributedSceneController functions - TakeControlOfEntity, InstantiateRemoteEntity, Checkpoint and Recover, Sleep, Awake and Process. The following code shows all the private methods for the class public c l a s s NPCController : D i s t r i b u t e d S c e n e C o n t r o l l e r { /// <summary> /// L o c a l NPC c h a r a c t e r . /// </summary> p r i v a t e LocalAvatar l o c a l A v a t a r ; /// <summary> /// C o l l e c t i o n s o f remote e n t i t i e s . /// </summary> p r i v a t e D i c t i o n a r y <BadumnaId , RemoteAvatar > r e m o t e E n t i t i e s = new D i c t i o n a r y <BadumnaId , RemoteAvatar > ( ) ; /// /// /// /// <summary> C o l l e c t i o n s o f remote o b j e c t ( i . e . o b j e c t with remote a v a t a r s c r i p t a t t a c h e d t o i t ) . </summary> 162 Chapter 6. Non Player Characters p r i v a t e D i c t i o n a r y <BadumnaId , GameObject> r e m o t e O b j e c t s = new D i c t i o n a r y <BadumnaId , GameObject > ( ) ; /// <summary> /// L a s t time t h i s c o n t r o l l e r does t h e c h e c k p o i n t . /// </summary> p r i v a t e DateTime l a s t C h e c k p o i n t ; The constructor for this class creates an instance of an NPC character. In this demo, we use SmallLerpz as our NPC character. /// <summary> /// I n i t i a l i z e s a new i n s t a n c e o f t h e NPCController c l a s s . /// </summary> /// <param name="uniqueName" >The c o n t r o l l e r unique name. </param> public NPCController ( s t r i n g uniqueName ) : base ( uniqueName ) { //// C r e a t e one s m a l l l e r p z . t h i s . C o n s t r u c t C o n t r o l l e d E n t i t y ( ( u i n t ) PlayerType . SmallLerpz ) ; } We will now explain the member functions. TakeControlOfEntity is called when Badumna wants the client to create the controller. We first check if a remote replica of this NPC exists on this client machine. If it exists then we deactivate the remote entity. //// Check whether t h e NPC has a r e p l i c a i n t h i s peer . GameObject r e p l i c a = GameObject . Find ( e n t i t y I d . T o S t r i n g ( ) ) ; i f ( r e p l i c a != null ) { //// D e a c t i v a t e i t s r e p l i c a f i r s t . Debug . Log ( s t r i n g . Format ( " ( NPCController . c s ) { 0 } r e p l i c a i s found , deactivate f i r s t " , e n t i t y I d . ToString ( ) ) ) ; r e p l i c a . t r a n s f o r m . name = s t r i n g . Format ( " {0} −remoteNPC " , e n t i t y I d . ToString ( ) ) ; replica . SetActiveRecursively ( false ) ; NPCManager . I n s t a n c e . NonActiveReplica . Add( e n t i t y I d , r e p l i c a ) ; } 163 Chapter 6. Non Player Characters After this check, you then create a new local entity and assign all the relevant components to this object. //// C r e a t e t h e i n s t a n c e o f t h i s e n t i t y type GameObject p l a y e r O b j e c t = ( GameObject ) GameObject . I n s t a n t i a t e ( NPCManager . Instance . ListOfAvatars [ ( int ) entityType ] ) ; i f ( playerObject != null ) { p l a y e r O b j e c t . t r a n s f o r m . name = e n t i t y I d . T o S t r i n g ( ) ; p l a y e r O b j e c t . AddComponent< C h a r a c t e r C o n t r o l l e r > ( ) ; p l a y e r O b j e c t . AddComponent<RandomWalker > ( ) ; p l a y e r O b j e c t . AddComponent<AnimationHandler > ( ) ; p l a y e r O b j e c t . AddComponent<LocalAvatar > ( ) ; CharacterController c o n t r o l l e r = ( CharacterController ) playerObject . GetComponent ( typeof ( C h a r a c t e r C o n t r o l l e r ) ) ; c o n t r o l l e r . radius = 0.4 f ; c o n t r o l l e r . c e n t e r = new UnityEngine . Vector3 ( 0 , 1 . 1 f , 0 ) ; t h i s . l o c a l A v a t a r = ( LocalAvatar ) p l a y e r O b j e c t . GetComponent ( typeof ( LocalAvatar ) ) ; We finally set the local avatar to use and assign the entityId as its global unique id and return this object. i f ( t h i s . localAvatar != null ) { // S e t t h e game o b j e c t used by t h e l o c a l a v a t a r t h i s . l o c a l A v a t a r . SetAvatarToUse ( p l a y e r O b j e c t , "NPC" ) ; t h i s . l o c a l A v a t a r . Guid = e n t i t y I d ; t h i s . l a s t C h e c k p o i n t = DateTime .Now; r e t u r n t h i s . l o c a l A v a t a r as I S p a t i a l O r i g i n a l ; } InstantiateRemoteEntity is called when there is a new remote entity that has entered the NPCs area of interest. Hence this remote entity has to be added to its list of the remote entities. 164 Chapter 6. Non Player Characters p r o t e c t e d o v e r r i d e I S p a t i a l R e p l i c a I n s t a n t i a t e R e m o t e E n t i t y ( BadumnaId entityId , uint entityType ) { GameObject remoteObject = new GameObject ( e n t i t y I d . T o S t r i n g ( ) + " _remoteObject " ) ; i f ( remoteObject ! = n u l l ) { //// Attach t h e remote a v a t a r s c r i p t t o t h e o b j e c t . RemoteAvatar remoteAvatar = remoteObject . AddComponent< RemoteAvatar > ( ) ; //// S e t t h e remote a v a t a r network id ( e n t i t y id ) . remoteAvatar . Guid = e n t i t y I d ; //// Add t h e remote a v a t a r t o t h e c o l l e c t i o n o f remote e n t t i t i e s and i t s game o b j e c t //// t o t h e c o l l e c t i o n s o f remote o b j e c t s . t h i s . r e m o t e E n t i t i e s . Add( e n t i t y I d , remoteAvatar ) ; t h i s . r e m o t e O b j e c t s . Add( e n t i t y I d , remoteObject ) ; r e t u r n remoteAvatar as I S p a t i a l R e p l i c a ; } return null ; } RemoteEntity is called when a particular remote entity leaves the NPC’s area of interest. Hence the remote entity has to be removed from its list of remote avatars. p r o t e c t e d o v e r r i d e void RemoveEntity ( I S p a t i a l R e p l i c a r e p l i c a ) { RemoteAvatar remoteAvatar ; GameObject remoteObject ; i f ( t h i s . r e m o t e E n t i t i e s . TryGetValue ( r e p l i c a . Guid , out remoteAvatar ) ) { t h i s . r e m o t e E n t i t i e s . Remove ( remoteAvatar . Guid ) ; } i f ( t h i s . r e m o t e O b j e c t s . TryGetValue ( r e p l i c a . Guid , out remoteObject ) ) { GameObject . Destroy ( remoteObject ) ; t h i s . r e m o t e O b j e c t s . Remove ( r e p l i c a . Guid ) ; } } 165 Chapter 6. Non Player Characters Checkpoint needs to save the status of the NPC. In this example, the only status information for our NPC is its position. Hence we save this position to the binary writer that is passed as a parameter. Badumna enforces checkpoint data to be smaller than 4Kbytes each. p r o t e c t e d o v e r r i d e void Checkpoint ( System . IO . B i n a r y W r i t e r w r i t e r ) { w r i t e r . Write ( t r u e ) ; w r i t e r . Write ( t h i s . l o c a l A v a t a r . t r a n s f o r m . p o s i t i o n . x ) ; w r i t e r . Write ( t h i s . l o c a l A v a t a r . t r a n s f o r m . p o s i t i o n . y ) ; w r i t e r . Write ( t h i s . l o c a l A v a t a r . t r a n s f o r m . p o s i t i o n . z ) ; } Recover is the opposite of Checkpoint. Hence in this function you read the properties from the binary reader and assign them to your NPC. p r o t e c t e d o v e r r i d e void Recover ( System . IO . BinaryReader r e a d e r ) { bool c o n t a i n s D a t a = r e a d e r . ReadBoolean ( ) ; i f ( containsData ) { UnityEngine . Vector3 p o s i t i o n = new UnityEngine . Vector3 ( r e a d e r . ReadSingle ( ) , r e a d e r . ReadSingle ( ) , r e a d e r . ReadSingle ( ) ) ; i f ( t h i s . localAvatar != null ) { t h i s . localAvatar . transform . p o s i t i o n = p o s i t i o n ; } } } p r o t e c t e d o v e r r i d e void Recover ( ) { i f ( t h i s . localAvatar != null ) { t h i s . l o c a l A v a t a r . t r a n s f o r m . p o s i t i o n = UnityEngine . Vector3 . zero ; } } 166 Chapter 6. Non Player Characters Recover() method will be called when there is no existing checkpoint has been made. In this case, when there is no checkpoint data, set the position of the NPC to a valid position. Note that position (0, 0, 0) is a valid position in this demo. ! Position must be verified during recovery. When you recover from a checkpoint image, the position of the NPC must be verified to ensure it is always valid. Sleep is called when the NPC controller is going to migrate to another client. Therefore, we need to perform the following steps. First, we need to check if the client holds a remote replica of the NPC controller. If it does have a remote replica of the controller, then it needs to be activated. Once the replica is activated, the distributed controller object can be destroyed as it is no longer needed. p r o t e c t e d o v e r r i d e void S l e e p ( ) { Debug . Log ( " ( NPCController . c s ) S l e e p i s c a l l e d " ) ; i f ( t h i s . localAvatar != null ) { //// Check whether t h e r e i s an i n a c t i v e r e p l i c a o f l o c a l a v a t a r , since the l o c a l avatar //// w i l l migrate , then have t o r e a c t i v a t e i t . GameObject n o n A c t i v e R e p l i c a = n u l l ; i f ( NPCManager . I n s t a n c e . NonActiveReplica . TryGetValue ( t h i s . l o c a l A v a t a r . Guid , out n o n A c t i v e R e p l i c a ) ) { i f ( nonActiveReplica != null ) { Debug . Log ( " ( NPCController . c s ) Found a non−a c t i v e r e p l i c a " ); nonActiveReplica . SetActiveRecursively ( true ) ; n o n A c t i v e R e p l i c a . t r a n s f o r m . name = t h i s . l o c a l A v a t a r . Guid . ToString ( ) ; NPCManager . I n s t a n c e . NonActiveReplica . Remove ( t h i s . l o c a l A v a t a r . Guid ) ; Debug . Log ( " ( NPCController . c s ) Re−a c t i v a t e r e p l i c a " ) ; } } Debug . Log ( " ( NPCController . c s ) Destroy NPC o b j e c t " ) ; GameObject . Destroy ( t h i s . l o c a l A v a t a r . t r a n s f o r m . gameObject ) ; t h i s . localAvatar = null ; } } 167 Chapter 6. Non Player Characters Wake is called when the NPC Controller is activated on the client. This call is immediately followed by the InstantiateRemoteEntity call. Hence, we don’t need to perform any specific actions. p r o t e c t e d o v e r r i d e void Wake ( ) { Debug . Log ( " ( NPCController . c s ) C o n t r o l l e r i s awake . " ) ; } Process is called regularly by Badumna. One of the important tasks to be performed in this function is to save the status of the NPC. This can be done by calling the Badumna function Replicate. In this demo, we call Replicate every 10 seconds, the latest checkpoint data will be stored on Badumna networks for up to 90 seconds. This will save the NPC status every 10 seconds. Since the Process function is called regularly by Badumna, normally it is a good place to define the NPC behaviour. In this demo, we use Unity3D’s FixedUpdate function to trigger NPC behaviour. p r o t e c t e d o v e r r i d e void P r o c e s s ( TimeSpan d u r a t i o n ) { //// C a l l t h e r e p l i c a t i o n method every 10 seconds . DateTime now = DateTime .Now; i f ( ( now − t h i s . l a s t C h e c k p o i n t ) . T o t a l S e c o n d s > 1 0 ) { t h i s . l a s t C h e c k p o i n t = now ; this . Replicate ( ) ; } } All the above functions are designed in such a manner that most Unity users can reuse use them in their application without any modification. All that needs to be done is to define the NPC behaviour as has been done in RandomWalker class in this demo. 168 Chapter 6. Non Player Characters 6.3.5 NPCManager NPCManager is a class that derives the MonoBehaviour class. Its main role is to help the NPCController class obtain the information from the Unity game objects. This class is required as NPCController class is not derived from MonoBehaviour. NPCManager stores a collection of inactive replicas and a list of available avatars. This class is fairly straightforward and it does not have to be modified. This class should be included inside the NPCManager game object — refer to Demo10.unity scene. 6.3.6 Build and run the game Checklist: 3 Make sure you have set the seed peer address before building the game. 3 Make sure you start a seed peer with “unity-demo” as the application name. 3 Make sure the run on the background option is set. You can now build the game and run two instances simultaneously. If you set the number of maximum NPC to be 1 then you should be able to see an NPC started using distributed controller and one of your game instance should have the controller awake. You should be able to see three players — two players are normal players and the third player is an NPC. You can test the game on different machines and make sure that two instances can communicate via Badumna. 6.3.7 Additional Note When you build a game with multiple unity scenes and use the distributed controller to host the NPCs, you have to make sure that the NPCs have the terrain information. For example, assuming your game have two unity scenes (i.e. scene A and B). The player is located on scene A and one of the NPC is located on scene B, then to ensure both player and NPC has the terrain information, the game must load both scene A and B. 169 Chapter 6. Non Player Characters ! Make sure the NPCs have terrain/unity scene information Failure to load the scene when using Distributed Controller based NPCs can cause high bandwidth consumption. If the terrain at the NPC’s location is not loaded, the NPC will fall rapidly towards negative infinity, and Badumna will send many unnecessary position or velocity updates. It is the application’s responsibility to ensure that the scene is loaded where required for NPCs. 3 Windows distributed controller example The Windows examples download includes a bonus distributed controller demo in API Example 9. See section 2.2 for information on where to find the Windows examples download. 170 Chapter 7 Additional Features This chapter will explain three additional features of the Badumna Network Suite. The features covered in this chapter are: 1. Custom messages - Sending and receiving of custom messages between local and remote entities. 2. Streaming - Badumna’s streaming protocol and its use. 3. Debugging - Debug version of Badumna library with trace enabled. 7.1 Custom messages The previous chapters have explained how Badumna supports game state synchronisation so that all the entities in the game have an accurate representation of all the remote entities. There may also be a need in the game to exchange custom messages between original and replicated entities. This is especially important if you are not using the Arbitration Server and want to provide client-side arbitration. Note that custom messages are not intended for regular state updates (e.g. position and velocity changes) which occur frequently and are insensitive to missing some intermediate changes. Custom messages are guaranteed to arrive reliably and in order, so they are more costly than normal replication messages. This reliability makes them ideal for sending transient events, such as a player waving their hand. Because this action lasts only a short time it may not be seen by all replicas if it were sent using the normal replication system. By sending a custom message all replicas are guaranteed to be notified of the event. Badumna provides two methods to support this functionality – SendCustomMessageToRemoteCopies and SendCustomMessageToOriginal. SendCustomMessageToRemoteCopies sends a single message directly to all remote replicas of the 171 Chapter 7. Additional Features specified entity. SendCustomMessageToOriginal is used to send a custom message from a specific remote replica to its original entity. We will now demonstrate how to use these two functions using sample code. Let us assume a scenario where a specific remote entity was hit by a weapon and as a result of that has reduced its health value. The remote entity is just a spatial replica and hence this information needs to be sent to the original entity that is responsible so that it can incorporate the health change. To do this operation we will be using the SendCustomMessageToOriginal method. This functions takes two arguments - the instance of the remote avatar and a binary stream that holds the custom message. Let us assume that the health damage is stored as a float. The following code will enable us to send the health damage information to the original entity. This code will typically appear just after the health damage has happened. RemoteAvatar remoteAvatar1 ; f l o a t healthDamage = −50 f ; using ( MemoryStream eventStream = new MemoryStream ( ) ) { B i n a r y W r i t e r w r i t e r = new B i n a r y W r i t e r ( eventStream ) ; w r i t e r . Write ( healthDamage ) ; NetworkFacade . I n s t a n c e . SendCustomMessageToOriginal ( remoteAvatar1 , eventStream ) ; } In the code above, you will notice that we have written healthDamage into eventStream via a binary writer. The stream is then passed as the second argument to the SendCustomMessageToOriginal method. When the message arrives at the original its HandleEvent function will be invoked. Hence we need to implement that method in the LocalAvatar class (which implements ISpatialOriginal). public { // // // void HandleEvent ( Stream stream ) In t h i s example , f o r s i m p l i c i t y r e a s o n s we assume t h e r e i s only one type o f event so we j u s t read i t d i r e c t l y as t h e healthDamage variable . BinaryReader r e a d e r = new BinaryReader ( stream ) ; f l o a t healthDamage = r e a d e r . ReadSingle ( ) ; // Apply t h e healthDamage t o t h e o r i g i n a l here . 172 e . g . You might c a l l Chapter 7. Additional Features // // // // a method t h a t a p p l i e s t h i s value t o t h e LocalAvatar h e a l t h pro perty and f l a g s i t as changed . This w i l l ensure t h a t t h e new h e a l t h value g e t s s e r i a l i s e d during t h e next update and a l l remote e n t i t i e s w i l l be updated . } All we have to do in the HandleEvent callback is to read from the binary stream in the same order as we have written. In this example, we have only written a float so the first value we read is a float and represents the health damage on the local entity. If you wanted to implement custom messages for different events such as one for health damage, one for being attacked, etc, then you can use an integer to identify the different commands and always write that integer as the first data item in the binary reader. Therefore at the receiving end, you can read the integer and based on the value, take appropriate action. The method SendCustomMessageToRemoteCopies is implemented in exactly the same manner. This method will send the custom message from the original entity to all its remote replicas. Hence the HandleEvent callback in the class implementing ISpatialReplica will be triggered. Everything else is exactly the same as demonstrated above. For more details regarding these API methods please refer to the API documentation. 7.2 Streaming protocol The Badumna streaming protocol provides a high performance yet easy to use and reliable way of streaming content (data stream or file) between Badumna peers. A peer can request to send content to a remote peer or it can also request the remote side to start sending content. The following two methods can be used to subscribe to requests: 1. SubscribeToSendStreamRequests 2. SubscribeToReceiveStreamRequests An EventHandler delegate, which will be invoked on receiving incoming requests, is specified when invoking the above methods. This handler is described in more detail below. A peer can call one of the following two methods to request to start sending content to a specified remote peer. The data transmission is asynchronous meaning that the begin send methods will return immediately. The completion callback specified when invoking the send methods will be called on completion. 1. BeginSendReliableFile 173 Chapter 7. Additional Features 2. BeginSendReliableStream A peer can also request the remote peer to start sending file or content by calling one of the following two methods: 1. BeginRequestReliableFile 2. BeginRequestReliableStream To learn more about the streaming protocol, you can refer to the associated API documentation for the Streaming namespace. The StreamingManager class provides all the API for streaming related functions whereas the IStreamController interface controls the streaming operation and provides information on its current status. We will now take you through the steps that are required to support streaming functionality in your application and demonstrate that using sample code written in C#. The first thing that a client has to do is to subscribe to Badumna’s streaming service. This allows the client to receive files from other clients. This step is typically done during application start up. To subscribe to receive files you use the SubscribeToReceiveStreamRequests method that is part of the StreamingManager class as follows: public void I n i t i a l i z e ( ) { // . . . o t h e r i n i t i a l i z a t i o n code . . . NetworkFacade . I n s t a n c e . Streaming . SubscribeToReceiveStreamRequests ( "MyTag" , t h i s . HandleMyTagStreamEvent ) ; // . . . o t h e r i n i t i a l i z a t i o n code . . . } This above method takes two arguments. The first argument is a string used to identify the type of streaming request. Multiple calls may be made to SubscribeToReceiveStreamRequests to associate different tags with different handlers. When sending a file, the string passed to the BeginSendReliableStream or BeginSendReliableFile method must match one of the strings registered on the remote end. The second argument is the handler that will get invoked when a request is 174 Chapter 7. Additional Features received from a remote client. In the example above we have used a handler called HandleMyTagStreamEvent (defined below). We will now explain how to send a file using the streaming interface. You can send a file using the BeginSendReliableFile method as shown below. We have defined a class called FileTransfer which will initiate a transfer when it is constructed. It will also update details in a GUI as the transfer progresses, via the IStreamController instance returned from BeginSendReliableFile. public c l a s s F i l e T r a n s f e r { private IStreamController transferController ; public F i l e T r a n s f e r ( s t r i n g filename , BadumnaId d e s t i n a t i o n I d , s t r i n g username ) { t h i s . t r a n s f e r C o n t r o l l e r = NetworkFacade . I n s t a n c e . Streaming . B e g i n S e n d R e l i a b l e F i l e ( "MyTag" , filename , d e s t i n a t i o n I d , username , t h i s . Complete , n u l l ) ; t h i s . t r a n s f e r C o n t r o l l e r . InformationChanged += t h i s . UpdateProgress ; } p r i v a t e void UpdateProgress ( o b j e c t sender , EventArgs a r g s ) { // Update p r o g r e s s d i s p l a y on t h e GUI from data on // t r a n s f e r C o n t r o l l e r . } p r i v a t e void Complete ( IAsyncResult a r ) { // Execute any a c t i o n s r e q u i r e d on completion such // as removing t h e p r o g r e s s d i s p l a y from t h e GUI . } } The call to BeginSendReliableFile takes six arguments: string The unique string that should match what was used in the subscribe call at the destination client. string The full path to the file to be sent. BadumnaId The BadumnaId of an entity owned by the destination client. 175 Chapter 7. Additional Features string The username of the client sending the file, this is not validated and is only an aid for the destination user. AsyncCallback The callback function that will be invoked when the streaming operation is complete. object Custom state passed to the callback. The BeginSendReliableFile method will cause the HandleMyTagStreamEvent method to be invoked on the destination client. We now describe how to implement this method. public void HandleMyTagStreamEvent ( o b j e c t sender , StreamRequestEventArgs args ) { // The StreamRequestEventArgs parameter provides a c c e s s t o // i n f o r m a t i o n about t h e stream , and methods t o a c c e p t or // r e j e c t i t . For f u l l d e t a i l s r e f e r t o t h e API // Documentation . // This i s t h e name t h a t we ’ l l save t h e f i l e t o . Here we ’ r e // using t h e o r i g i n a l name o f t h e f i l e from t h e s o u r c e c l i e n t . s t r i n g f i l e n a m e = a r g s . StreamName ; // Make sure t h a t t h e user i s happy t o a c c e p t t h e f i l e and s e t // t h e value o f ’ agree ’ a c c o r d i n g l y . bool agree = t r u e ; i f { agree } { I S t r e a m C o n t r o l l e r t r a n s f e r C o n t r o l l e r = a r g s . A c c e p t F i l e ( filename , t h i s . Complete , n u l l ) ; t r a n s f e r C o n t r o l l e r . InformationChanged += t h i s . TriggerPropertyChanged ; } else { // The user does not want t o r e c e i v e t h e f i l e args . R e j e c t ( ) ; } } On receiving a stream request, the handler must call AcceptFile or AcceptStream to accept the transfer, or call Reject to reject the transfer. If the transfer is accepted then an IStreamController is returned and can be used to monitor the 176 Chapter 7. Additional Features transfer in the same way as shown in the FileTransfer class above. In particular, IStreamController has properties such as BytesTotal (total bytes to be transferred), BytesTransfered (number of bytes transferred so far), and TransferRateKBps (estimated transfer rate in KBps). There are several other methods available in the streaming API but their usage all follows the pattern above. Refer to the Badumna.Streaming section of the API documentation for full details. 7.3 Debugging A version of the Badumna Network Library with trace enabled is available for Scalify customers upon request from Scalify. This version of the library will write trace information to a log according to the configuration specified in the NetworkConfig.xml file. Full instructions will be distributed with the trace version of Badumna. ! Trace version is for development only. The trace version of Badumna is intended for development use only and should not shipped. 177 Chapter 8 The Control Center Control Center is a central administrative tool for managing all Badumna related services. It is ideal for large-scale deployments which may involve multiple services deployed across several remote machines. The Control Center provides game administrators with the ability to install services on remote machines and manage (start/stop/update/monitor) them via a web interface. It uses a program called Germ to communicate with remote machines. You have to install and start a Germ on a remote machine that you want to use for Badumna related services. Once the Germ is running on the remote machine, you can use the Control Center to install and start new services on this remote machine. You can also monitor the services that are running on this remote machine via the Control Center. As the Control Center comes with a web interface, you can access it from any machine using a web browser. 8.1 Initial Configuration Before you can use the Control Center, you need to understand how the Control Center operates. For obvious security reasons, we want the Control Center to communicate with its Germs only (and not any other Germ processes from some other Control Center). The Control Center uses a certificate based system to support this feature. The first time you start the Control Center, it will auto generate a certificate (that includes a private key and a public key). As part of the certificate generation, you will be asked to enter a pass phrase. Please enter a unique pass phrase and store it in a secure place. You cannot change this pass phrase once the certificate has been generated (refer to section 8.14 if you forget your pass phrase). As the Control Center can be accessed via a web browser, it can be accessed from any remote machine. In order to make it secure, the Control Center comes with a user authentication system. This ensures that you have the convenience of accessing the Control Center from anywhere you want but at the same time 178 Chapter 8. The Control Center you can restrict who is allowed to access the Control Center. The Control Center uses a SQLite database to store user information. The default installation of Control Center includes all the necessary database files that are required for this operation and it is preconfigured to work with this database. If you wish to use a different database application such as MySql for this purpose, then please refer to section 8.15 for more details. Finally, you can use one Control Center to manage one application. Therefore, if you intend to deploy multiple applications and manage them via the Control Center, you will require one instance of Control Center for each application. 8.2 Starting the Control Center The Control Center application can be found in the ControlCenter directory. To start the Control Center, run the launcher executable from the command line: Ï ControlCenter.exe Command line options the can be specified are: -p, --port The port to listen on. -i, --ip The IP address to host the application at. The default port is 21254. The default IP address is localhost. To make Control Center accessible remotely, you should use your machine’s internal IP address. For remote access, you will also need to configure your router to perform port forwarding to forward http requests and TCP connections to the specified port. For example, to start an instance of the Control Center at port number 1234 on the local host: Ï ControlCenter.exe --port=1234 --ip=127.0.0.1 If you want to start a second instance of the Control Center for another application, you can do so by using a different port number. The port number is therefore important. It allows you to identify the Control Center that you are using for a specific application. 179 Chapter 8. The Control Center ! Running Control Center on Windows Vista/7 On Windows Vista and Windows 7, Control Center needs to be run with administrator privileges the first time it is using a particular port, including the very first time it is run. When running with administrator privileges, Control Center will add the port to the URL Access Control List. After this has been done, Control Center will not need administrator privileges on subsequent runs. 3 Running Control Center with administrator privileges To run Control Center with administrator privileges, launch Command Prompt with administrator privileges by right clicking on its Start Menu shortcut (Start > All Programs > Accessories > Command Prompt) and selecting ‘Run as administrator’. You can then launch Control Center from the command line as described above. If it is the first time you are starting the Control Center, it will auto-generate a certificate and will prompt you to enter a pass phrase for the certificate. Please enter a unique pass phrase and store the information in a secure location. The Control Center will now start and run in the background. If you restart the Control Center at some point in the future, it will start automatically using the same certificate. You will be asked to enter the pass phrase if you restart the Control Center. 8.3 Accessing the Control Center Once you have the Control Center running, you can access it from any machine using a standard web browser. To access the Control Center you can enter the IP address/hostname of the machine that is running the Control Center followed by its port number. For example if you are accessing the Control Center from the local machine, you can enter the following address in the browser window: http://localhost:21254. This will start the Control Center that is running on port 21254 of the local machine. If you are accessing the Control Center from a remote machine, you need to enter the complete IP address or hostname along with the port number. Please note that when you start the Control Center (as explained in section 8.2) it will automatically start a browser on the local machine for convenience. 180 Chapter 8. The Control Center Figure 8.1: Control Center - Application settings 8.4 Authentication and user accounts As the Control Center can be accessed from any remote machine, its access is controlled by an authentication system. You need a valid username and password. The default installation of Control Center comes with an admin account that has been created. Hence, the first time you access the Control Center, you need to use the following account details: Username: admin Password: admin_pass After you login, it will ask you to enter an application name and a unique application protocol hash (string) (see Figure 8.1). You can enter an application name that will allow you to identify your application. The application protocol hash is the same unique string which is used by the Badumna client to join the network. Make sure that you use the same string in both places. Please refer to the chapter 3 for details on how to specify the application protocol hash in the Badumna client. Once you enter this information and click submit, you will go to the main page for your application. At the top of the page, you will see the change password link (see Figure 8.2). Please change the password. The admin account will allow you to login to all the Control Centers that you may have running on a particular machine. 181 Chapter 8. The Control Center Figure 8.2: Control Center - Main page ! Please change the password to the admin account. When you login as admin, you can add users and give them permission to access the Control Center. If you have multiple applications deployed (being managed by multiple Control Centers) you can set the permissions for a user so that they have access to only certain applications. In order to manage users, click on the ‘Admin’ tab. To add a new user, click on ‘Create user’ link. You will see a screen as shown in Figure Figure 8.3. Enter the details for the new user as requested and then click the ‘Register’ button. Once you add a user, you need to give them permission to access the Control Center. This is done by assigning the role. Each application is identified by a role. You therefore need to create a role that corresponds with the application name. You can create a role by clicking on the ‘Manage or Create Role’ 182 Chapter 8. The Control Center Figure 8.3: Control Center - Account registration link. You will see a screen similar to Figure Figure 8.4. Enter the same name as the application name and click ‘Add Role’ button. You will notice a new role being added to the list. Now you can click on the ‘Manage’ link corresponding to the new role that you just created. You will see a list of all existing users including the user you just created. To give this user permission to access the Control Center, enable the corresponding radio-button as shown in Figure Figure 8.5. You have now successfully created a new user and given them permission to access the Control Center. In order to remove a user or change permissions, you can click on ‘Manage user’ link. You will see a screen similar to Figure Figure 8.6. To delete a user, click on the corresponding ‘Delete’ link next to that user. When you login as a normal user, you don’t have access to the ‘Admin’ tab. 8.5 Germ installation In order to access remote machines and start services you first need to install the Germ package on the remote machine. It is important that you perform this step only after you have started your Control Center. This ensures that the public key 183 Chapter 8. The Control Center Figure 8.4: Control Center - Manage role Figure 8.5: Control Center - Manage a specific role 184 Chapter 8. The Control Center Figure 8.6: Control Center - Manage user information specific to the Control Center is copied on the remote machine. To install and start a Germ on a remote machine, perform the following steps: 1. Go to the Germ directory under Control Center directory. Copy this directory to the remote machine that you want to use as a Badumna server. Make sure you have create a certificate by running the Control Center first (i.e. the publicKey.key is included in Germ directory). 2. To start the Germ, use the following command line: Ï LaunchGerm.exe The above command will start a Germ on that machine at it will listen at the default port 21253. If for some reason the default port (21253) is not available on that machine, you can start the Germ and have it listen on a different port number using the following command: Ï LaunchGerm.exe --port=1000 Vista users must start the program with administrator privileges. The above command will start the Germ process and it will listen on port number 1000. 185 Chapter 8. The Control Center 8.6 Main information page We will now explain the main information page of the Control Center. To go to the main information page, you can click on the first menu item which should show your application name. In Figure 8.2, the menu item with ‘MyApp’. As you can see from the figure, the main page is divided into four sections - Running Services, Germs Host, Global Settings and, Available Services. ‘Running Services’ lists all the services that are currently running as part of your application. If you have started the Control Center for the first time, there won’t be any services listed under this section. ‘Germs Host’ provides a list of remote machines that you have access to. These machines can be used to start new services specific to your application. ‘Global Settings’ section stores all the settings that are relevant to the entire application. ‘Available Services’ section lists all the services that are available for the application and can be started on remote machines. We will now explain these sections in details. 8.7 Germs host This section lists all the machines that can be used to start Badumna specific services. To add a machine to this list, click on the ‘Add Germ’ link. You will see a screen as shown in Figure 8.7 Enter the hostname or IP address of the machine that you want to add. Enter the port number that the Germ process is listening on. This is the port number that you specified when you started the Germ process on the machine (defaul port is 21253). Click on the ‘Submit’ button. This will take you back to the main information page. If the Control Center is able to establish connection with the remote machine (via the Germ process), it will show the details of the remote machine in the list of ‘Germs Host’. Along with the host name, the status of the machine is displayed (Online/Offline). This section also displays the CPU load and the available physical memory on this machine. If you click on the ‘View details’ link next to the Germ, you can get further information about your remote machine such as the total number of bytes sent and received per second. You will also see two graphs - one plots the CPU usage and memory available and the other plots the incoming and outgoing network traffic in kilo bytes per second (see Figure 8.8). 8.8 Global Settings The ‘Global Setting’ sections allows you to configure parameters that are applied to the entire application. The Global Setting section is divided into two modules - application setting and connectivity setting. If you click on the ‘Configure’ link next to ‘Application Setting’, you will see there is only one parameter that you can 186 Chapter 8. The Control Center Figure 8.7: Control Center - Adding a Germ configure (application name). This is the application protocol hash that is unique to your application. This string should match what is used in your client application (refer to section 3.1 for more details about the application protocol hash. The ‘Connectivity Settings’ allow you to configure all the parameters associated with network connectivity. Click on the ‘Configure’ link next to ‘Connectivity Settings’. There is only one parameter that you can configure as part of the basic settings (broadcast option). If you want your Badumna server processes to have broadcast enabled, then click on the radio button next to ‘Is broadcast enabled’. You need to specify a port number at which the relevant processes should broadcast. The default port number is 32864. You can use that port number or change it to a more appropriate port number if 32864 is not available. Connectivity Settings also provides advanced configuration options. These options are intended for advanced users only. It is recommended that you do not access these options unless you are an advanced user. Please refer to section 8.16 if you intend to make changes to the advanced connectivity options. 8.9 Available services This section lists all the services that are available for the application and are ready to be started. You will observe that there are four standard services that are available for all applications - Dei account management, Seed Peer, Overload peer, Http tunneling. These services are included as part of the installation and are ready to 187 Chapter 8. The Control Center Figure 8.8: Control Center - Germ details 188 Chapter 8. The Control Center Figure 8.9: Control Center - Dei Server Config be started. For more details on each service please refer to chapter 4. Apart from these four services, you can add custom services that are specific to your application such as an Arbitration Server that manages combat functionality in your application. We will now explain how to start the default services available. Please make sure that you have added at least one Germ host to your Control Center before you start any services. 8.9.1 Starting Dei Server If you are planning to use Dei server for user authentication then you will need to start a Dei server (Dei account management service). If you click on the ‘Start’ button next to Dei account management, it will start Dei server with default settings. It is a good idea to click on ‘Configure’ and make sure the settings are correct before starting any service. When you click on ‘Configure’ link next to Dei account management, you will see a screen as shown in Figure 8.9. The first option allows you to set the port number for Dei server. The default port number for Dei service is 21248. If for some reason, your remote machine does not allow using that port number, you can change it here. The second option allows you to specify if you want to use an SSL connection when communicating with Dei server. If you are using Unity3D (ver 2.6) for your game development then you cannot use SSL. This is because version 2.6 of Unity3D uses mono 1.2.5 which does not support SSL connections. If you are using a different game environment that 189 Chapter 8. The Control Center supports SSL connections, then you can select this option. The last option provides details about the Dei installation package. You are now ready to start Dei server. Click on ‘Start’ link. The first option allows you give a custom name to your Dei service (for e.g MyAppDeiService). In the second option, you have to pick the machine from the drop-down list that you want to start Dei server on. If you had enabled SSL connections, you will see two more options. These options allows you to specify which certificate to use (please refer to section 4.1 for more information on the different types of certificates that Dei supports). If you are using an Autogenerated certificate then select ‘Autogenerate certificate’ and click ‘Submit’. If you intend to use a custom certificate, then select ‘Custom certificate’. You will have to enter a passphrase for your custom certificate and then click ‘Submit’. If the Control Center is able to start Dei service, you will see a message at the bottom of the screen to that effect. If for some reason, the Control Center is unable to start Dei service, you will see a message as to why it was not able to start Dei server on the Germ host. If the service has started, you will also see an entry under the ‘Running Services’ section on the main page. The entry will display the service name, the germ host that the service is running on, the last time the machine was pinged and the response received. 8.9.2 Starting a Seed Peer Starting a Seed Peer from the Control Center is fairly easy. First you click on the ‘Configure’ link next to Seed Peer. You will see a screen as shown in Figure 8.10 The first option allows you to specify if you are using Dei authentication system as part of this application. If you are using Dei server, then select this option by clicking on the radio button. You will be asked to enter further details about your Dei Server such as the IP address, username/password and whether to use a SSL connection (please refer to subsection 4.1.4 for more information related to Dei setup). The second option allows you to specify if you are starting a new network or joining an existing game network. If this is a new application that you are starting and currently there are no users in the network then you should select this option by clicking on the radio button. However, if this is an application that has been running for some time and you want the Seed Peer to join the existing network then you should leave this option unchecked. The third option allows you to specify the listening port for the Seed Peer. This port number must match the port number that you will specify in the client configuration (see subsection 2.4.1 for more information on client configuration). The fourth option allows you to specify if you wish to monitor the service. Monitoring a service allows you to be notified if the service goes down for some reason. If you check the Monitor Service Performance button, you will be asked to enter the monitoring frequency in seconds. Please enter the frequency. Make sure that you do not enter a number that is very small as it will increase the network 190 Chapter 8. The Control Center Figure 8.10: Control Center - Seed Peer Config traffic. Monitoring the service performance every 5 minutes (300 seconds) is a good idea. The last option displays details of the Seed Peer package. You can now click on the ‘Start’ link to start the Seed Peer. You will see a screen as shown in Figure 8.11. You can give your service a custom name (for e.g. SeedPeer-A). Select the machine you want to start the service by selecting the Germ host from the drop down list. Now click on the ‘Submit’ button. The Control Center will start the service and display a message accordingly. You will also see the Seed Peer service listed under the ‘Running Services’ section. 8.9.3 Starting a Overload Peer To start an Overload Peer from the Control Center, you need to configure it first by clicking on the ‘Configure’ button. You will see a screen as shown in Figure 8.12. The first option allows you to specify if you are using Badumna’s distributed lookup option for service discovery (see section 4.5 for more details). Check this box if you are using the distributed lookup option. 191 Chapter 8. The Control Center Figure 8.11: Control Center - Start service Figure 8.12: Control Center - Overload Peer Config 192 Chapter 8. The Control Center Figure 8.13: Control Center - Http Tunnel Config The second option allows you to specify if you are using a Dei authentication service. If you are using Dei, then check the box, next to ‘Use Dei Authentication Server’. You will be asked to enter further details about your Dei Server such as the IP address, username/password and whether to use a SSL connection (please refer to subsection 4.1.4 for more information related to Dei setup). Unity3D users should leave this box unchecked as Unity 2.6 does not support SSL. The next option in the Overload peer configuration allows you to specify the port number for the Overload peer. The default port number is 2002. You can change this to a different port number if 2002 is not available on that machine. Monitor Service Performance option is exactly the same as for Seed Peer. It gives you an option to monitor the performance of the Overload Peer and make sure that it is running all the time. The last option ‘Package details’ provides details on the Overload Peer installation package. After completing the configuration, you can start the Overload Peer service by clicking on the ‘Start’ link. You will then see a pop-up window that will allow you to give your service a name (for e.g. Overload Peer - USA) and also select the machine to start the service from the drop down list. You can now click on ‘Submit’ to start the service. An appropriate message will be displayed and you will see the service name included in the ‘Running Services’ section. 8.9.4 Starting an Http tunnelling service To start an Http tunnelling service from the Control Center, you first configure the service by clicking on the ‘Configure’ link. You will see a screen as shown 193 Chapter 8. The Control Center in Figure 8.13. Enter the Http prefix for your tunnelling service (please refer to section 4.4 for more details on setting the prefix). Package details provides details on the installation package for the tunnelling server. Enter a name for your Http tunnelling service (for e.g. MyApp-Tunnel) and select the machine that you want to start the service. You can then click on the ‘Submit’ button to start the service. An appropriate message will be displayed and you will see the service name included in the ‘Running Services’ section. 8.10 Monitoring service performance Control Center allows you to monitor the performance of the services that you are running as part of your game network. You can even obtain detailed network status for certain services such as Seed Peer and Overload Peer. The Running Services section displays all the services that are running in your network along with details of the machine they are running on and the status of the last ping response. If you would like to ping your service you can click on the "Ping" link next to it. The Control Center will ping that service and display the response in the appropriate column. To obtain more details about a service, you can click on the ‘Show status’ link next to the service. Depending on the service, the Control Center will display relevant information. For Badumna specific services such as Seed Peer and Overload Peer, the Control Center will display connectivity information, the discovery status, the scene information (number of local/remote entities), and Dht information. The Dht details are specific to Badumna’s internal working and can be ignored. This page also displays a graph that plots the total network traffic to and from this process. Custom services and Dei server do not show such details. The only information available for these services is ping information (whether they are online and active). 8.11 Starting services on Windows Please note that when you are starting a service on a Windows machine for the first time, you will receive a security alert from Windows and you will have to manually unblock the program and permit the service to accept connections (Figure 8.15). Hence if your remote machine is running Windows OS, then you will have to unblock the program manually for the first time. Alternatively, you can configure the firewall settings on your remote windows machine so that it does not complain when a new program is trying to access the Internet when started. 194 Chapter 8. The Control Center Figure 8.14: Control Center - Custom service Figure 8.15: Windows Security Alert 195 Chapter 8. The Control Center 8.12 Custom services Control Center allows you to start any custom services that are specific to your application. In order to start a custom service you first need to build the service. You do that by clicking on the ‘Custom Service Builder’ menu at the top of the page. If this is the first time you have clicked Custom Service Builder, you will not have any applications listed under ‘Applications’. Click on ‘Add Service’ link to add a new service. You will be asked to enter a name for the service and choose whether its an ‘Arbitration service’ or a ‘Non-Badumna service’. If your new service is a customised Arbitration Server for your application, then you should select the type as ‘Arbitration service’. However if your service is some other application such as a Unity headless server process then you should select ‘Non-badumna service’. Make sure you enter a relevant name for your service (for e.g. Guest Book Arbitrator). Once you click on the ‘Create’ link, your service will appear in the list of Application in Custom Service Builder. Before you can start the service, you need to build your service installation package. Click on the ‘Configure’ link next to your service name. You will see a screen as shown in Figure 8.14 If this is the first time you are installing this particular package, then you should check both the options - ‘Include all contents’ and ‘Include package extraction tools’. The first option informs the Control Center that all the files in the package need to be uploaded on the remote machine as it is the first time the service is being installed. The second option informs the Control Center that since this is the first time you are building the service in the Control Center, it should include all the extraction tools as part of the installation. However, if you are installing an update to an already installed service, then you can choose not to include all contents. The Control Center will only upload the files that have been modified or newly added to this particular update. Also, for subsequent updates you don’t have to check the ‘Include package extraction tools’ option. As these tools have already been included as part of the base installation. This reduces the package size for the update and makes the installation process faster. You now have to select the package contents. In order to add files to the package, you should right-click on your service name as listed there. There are two ways to add files in the package. You can include all your package files inside a zip file and upload the zip file or you can add the files one after the other. Once you have included all the files that are necessary for the package, you need to tell the Control Center the executable file that starts your custom service. Right click on the executable file and select ‘Set as executable file’. You are now ready to build the package. Click on the ‘Build’ button. You will be asked to enter a short description for the service. The Control Center will then build the custom service and you will see the service listed in the list of ‘Available Services’ section on the main page. You can click on the ‘Configure’ link next to your new service. You will have the option to enter any command line arguments that are required to start the 196 Chapter 8. The Control Center Figure 8.16: Control Center - Email notification service. You can also view the package details. You can now start the service by clicking the ‘Start’ link on this page or you can click the ‘Start’ link next to the custom service on the main page. You will be asked to give the service a name (for e.g. Guestbook - EU Users) and select a remote machine to start the service. Click on the ‘Submit’ button. The Control Center will start the custom service and display a message accordingly. You will also see the custom service listed under the ‘Running Services’ section. 8.13 Notification If you want to be notified via email if any of the remote machines or services are down, you can configure that via the Notification menu item. Click on the ‘Notification’ menu item on the main page and then click on the ‘Notification Email’ 197 Chapter 8. The Control Center link. You will see a screen as shown in Figure 8.16 Check the box next to ‘Send Notification via email’. Fill the rest of the fields with the following information: Smtp server: Enter your Smtp server (for e.g. smtp.example.com). Smtp port: Enter your Smtp port number (for e.g. 25). Username: Enter the username if that is required by your Smtp server. Password: Enter a password if required by your Smtp server. From: Enter a name that will appear in the from field (for e.g. Control Center). To: Enter the recepient email address. Control Center will send the email to this email address. After you have entered all the detail, click on the‘Submit’ button. You will now see the message saying - (currently the notification via e-mail is enabled). You have successfully configured your Control Center’s email notification service. 8.14 Certificate update The Control Center uses a certificate based system to ensure that all the server processes are connected in a secure network and can only talk to their Control Center. When you start the Control Center for the first time, it will generate a unique certificate for your application. You are asked to enter a pass phrase during the certificate generation process. It is important that you enter a unique pass phrase and store it in a secure place. After the certificate is generated, the Control Center inserts the corresponding public key in the Germ folder. Hence, when you install Germs on remote machines, they have the public key required to communicate with the Control Center. The pass phrase for your certificate cannot be changed. To access the Control Center you don’t require the pass phrase (just a valid username and password). However, if you happen to restart the Control Center for some reason, then it will ask you to enter the pass phrase. If for some reason you forget the pass phrase then you have to perform the following steps to start the Control Center and get it reconnected with the application network. 1. Go to the Control Center folder and look for the Certificate folder. Inside this folder, you will find a file with this name - certificate.pfx. Delete this file. 2. Now start the Control Center (refer to section 8.2 for more information on starting the Control Center). At this stage the Control Center will not display any running services if you had any. This is because the Control Center has a 198 Chapter 8. The Control Center new certificate and is not able to communicate with any of the remote Germ processes. 3. If you have any Germs listed in your ‘Germs Host’ section, you have to remove them all (refer to section 8.5 for more information on removing a Germ). 4. Now you have to repeat the process of copying the Germ folder to all the remote machines and then restarting the Germ processes on all the remote machines. Please refer to section 8.5 for more information on starting a Germ process. Make sure that you stop the existing Germ process before you start the new Germ process. 5. Now you have to add all the remote machines using the ‘Add Germ’ link in the Control Center. 6. The next step is to restart all the running services. You will have to first manually stop all running services on the remote machines. 7. You can now start the services from the Control Center (please refer to section 8.9 for more information on starting new services). You have now setup the Control Center and reconnected to the existing network with a new certificate. 8.15 Using a different database application As you learnt in section 8.1, to access the Control Center you require a valid username and password. Control Center stores the user account information in a database. The default installation of Control Center uses MySQLite database. The Control Center installation includes the necessary database files that are required. However, if you want to use a different database application such as MySql or Sql Server for the Control Center user account storage you can configure the Control Center accordingly. We will provide instructions to configure the Control Center to use MySQL database application. We assume that you have already installed MySQL on the machine that will host the database. You will need to perform the following steps: 1. Install MySQL Connector on the machine that is running the Control Center. You can download this package from the MySQL website. This installation includes two dlls (MySql.data.dll and MySql.web.dll). Copy these two files in the bin folder inside the Control Center folder. 199 Chapter 8. The Control Center 2. The Control Center installation comes with a sql dump file. Use this file to generate the MySQL database for the Control Center. Lets call the database file controlcenter_data.sql. This file can be found under App_Data directory inside ControlCenter directory. Command line use to generate the database from sql file is as follow. Ï mysql -u user_id -p < controlcenter_data.sql 3. Edit the web.config file that is located in the Control Center folder. You will find the connectionStrings module in the file: <connectionStrings > <remove name = " LocalSQLite " /> <add name= " LocalSQLite " c o n n e c t i o n S t r i n g = " Data Source=" ; . / App_Data/P r o v i d e r . s q l i t e" ; ; Version = 3 ; " /> </ c o n n e c t i o n S t r i n g s > You will have to change this to the following: <connectionStrings > <remove name = " LocalMySqlServer " /> <add name= " LocalMySqlServer " c o n n e c t i o n S t r i n g = " Data Source= s e r v e r \_name ; user id=username ; password=password ; d at a b as e= c o n t r o l _ c e n t e r ; " providerName= " MySql . Data . MySqlClient " /> </ c o n n e c t i o n S t r i n g s > where server_name is the hostname or IP address of the machine that has MySQL installed, username is a valid username with admin privileges to access the database and password is the corresponding password for that username, and controlcenter_data.sql is the database file that was generated earlier. 4. There are three other sections that have to be updated in the web.config file. These sections are <profile>, <roleManager>, and <membership>. Go through these sections and replace : • SQLiteRoleProvider with MySQLRoleProvider, 200 Chapter 8. The Control Center Figure 8.17: Control Center - Advanced connectivity options • SQLiteMembershipProvider with MySQLMembershipProvider, • and SQLiteProfileProvider with MySQLProfileProvider. You have now configured Control Center to work with MySQL database. You can start the Control Center and use it as described in this section. The rest of the functionality should be the same. You can use the same steps to configure the Control Center to work with SQL server or any other SQL compliant database. 8.16 Advanced connectivity options Connectivity settings are applied to all Badumna services in your game network. There may be an occasion when you may have to change the default settings of certain parameters within Badumna’s connectivity module. This section describes those advanced options. Figure 8.17 shows a screen dump of the advanced connectivity options. Port forwarding is enabled by defaul in Badumna and it is recommended that you keep that enabled. Port forwarding ensures that the service peer obtains an open NAT connection if it happens to be behind a NAT device. However, if under certain special circumstances you want to disable port forwarding for your service, 201 Chapter 8. The Control Center you can disable port forwarding. Examples of when you would disable port forwarding is during testing or if you are making a specific build for users that are on a corporate proxy and have their UDP ports blocked. Stun is another option that is enabled by default. Stun allows Badumna to detect the type of NAT device a particular peer is connected and hence apply appropriate setting so that it is able to communicate with the rest of the users. If you happen to test your application on a private LAN (without internet connection) or if you are testing http tunnelling where UDP is blocked, you may choose to disable Stun. The Stun server list is a list of servers that Badumna uses during its Stun process. If you edit this list to add or remove stun servers if you have concrete information about such servers in the Internet. Once again, we don’t recommend that you modify this list unless you are certain of what you are doing. 8.17 User administration If you login to the Control Center with the admin account, you will notice an additional menu item at the top (Admin). This allows you to manage access permissions to the Control Center. If you click on the "Admin" tab, you will notice three links - Manage User, Create User, and Manage or Create Role. The Create User link allows you to add new users who can access the Control Center. The Manage or Create Role link allows you to add new roles and manage existing roles. The concept of role is important if you have multiple Control Centers that are running for different games. Each Control Center will be referred by a role. The name of the role must match the name of the application. Hence if your application name is MyApp, the corresponding role that identifies this Control Center will be called MyApp. A user can be permitted to access a Control Center (running application name MyApp) by assigning the role MyApp to the user. You can assign roles to a user by using the Manage User link. Therefore, it is important that you create at least one role with the name of your application. When you add new users who can access your Control Center, make sure that you include the role in their list of roles. As an administrator (when you use the admin account), you are allowed to login to any Control Center. 202 Appendix A Changes from Badumna 1.3 to Badumna 1.4 This appendix covers all the changes between the current release (version 1.4) and the previous release (version 1.3). This appendix is useful if you already have a game developed using Badumna 1.3 and you want to upgrade it to Badumna 1.4 to fully utilize the new features. A.1 Local spatial replicas In Badumna 1.3, each peer held replicas of all registered local spatial original entities. This has been changed in version 1.4. In Badumna 1.4, each peer only hold replicase for remote spatial entities. This means that the network status returned by GetNetworkStatus() may report fewer number of replicas compared to version 1.3. This change is completely transparent to existing games and requires no change to the game code. A.2 Initializing Badumna In Badumna 1.4, we have added a new method to initialize Badumna. public void Initialize(string appName) has been added to the NetworkFacade. This allows game developers to specify a unique application name that will become the name for the Badumna network for that game. Badumna peers from different games will then be unable to communicate with each other. The older method to initialize Badumna is still supported in this version and can be used by developers. 203 Appendix A. Changes from Badumna 1.3 to Badumna 1.4 A.3 UPnP port forwarding The default value for UPnP port forwarding is set to enabled. You can disable the UPnP port forwarding in the NetworkConfig.xml or by setting IsPortForwardingEnabled to false in ConfigurationOptions. A.4 GetNetworkStatus() The GetNetworkStatus() method has been updated and it now contains information on whether the UPnP port forwarding succeed or not. A.5 Presence information void ChangePresence(ChatChannelId channel, ChatStatus status) has been removed from IChatService. Badumna 1.4 no longer support setting different chat presences for different types of chat (proxmity or private chat). Each player will have a uniform presence status for both proximity and private chat. The same presence status will be displayed to all other users in private chat. A.6 Http tunnel In version 1.3, the suport for Http tunnelling was not automated. Developers had to provide an interface for the end users to manually select Http tunnelling in order to connect using the tunnel. In version 1.4, the support for Http tunnelling has been automated. If you have a Http tunnel server running, you just need to specify that in the network configuration. The client can automatically use the Http tunnel server if it is unable to connect to the network using UDP. Please refer to section 4.4 for more details on how to configure the Http tunnel. A.7 API calling order As a result of the automatic tunnelling feature, NetworkFacade.ConfigureFrom can only be called before NetworkFacade.Instance object is accessed. Hence, for most games, you will need to call NetworkFacade.ConfigureForm before you call NetworkFacade.Instance.Initialize() method. If you are a Unity3D user, there are two required changes that you will have to make. The first change is in the FixedUpdate function within Badumna’s NetworkInitialization.cs script. You will notice that we now an extra check for NetworkFacade.Instance.IsLoggedIn before we call ProcessNetworkState. Please refer to one of the Unity demo’s in chapter 5 for more details. 204 Appendix A. Changes from Badumna 1.3 to Badumna 1.4 The second change required is to move the network configuration set-up from the NetworkInitialization constructor into Unity’s Awake function. Please refer to the Unity demos in chapter 5 for more details. You will also notice in the Unity demos that the other Badumna classes such as LocalAvatar and RemoteAvatar now perform their initialization within the Awake function as opposed to their constructor. This change is optional but is considered to be optimal as these classes derive from MonoBehaviour. Refer to the Unity demos in chapter 5 for more details. A.8 Arbitration Server The Arbitration Server in version 1.4 is not backwards compatible with version 1.3. Therefore, if you have a game that uses the Arbitration Server, you will have to make a small change for it to work in the new version. We have added an extra function in version 1.4 that makes the Arbitration Server more reliable and robust under adverse network conditions. Please refer to section 4.2 for more details on how to use this new function. A.9 Decentralized Service Discovery Support In Badumna 1.3, the addresses of centralized servers, such as Arbitration and Overload server had to be specified in the client configuration. The Service Discovery feature introduced in Badumna 1.4 allows clients to locate such servers during runtime dynamically in a completely decentralized manner. To use this feature the only change required is in the client configuration and it is completely transparent to the existing game code. Please refer to section 4.5 for more details. A.10 Dei server Version 1.3 came with two different versions of the Dei server, one that supported MySql database and the other that supported SqLite database. In version 1.4 we have combined the two Dei server packages into one package. You specify the database in the configuration options for the Dei server. Apart from MySql and Sqlite, it also supports SqlServer. We have also included a simple web application along with the source code that allows you to add and manage users to the Dei server database. You can customise this program according to your applications requirements. There are no changes required in the client in terms of how you access the Dei server. In version 1.3, Dei server used an auto-generated certificate to secure the connection between the client and the server. However, in version 1.4, you have the option of using your custom certificate that is signed by a trusted authority. Please refer to section 4.1 for more details. 205 Appendix A. Changes from Badumna 1.3 to Badumna 1.4 A.11 Distributed non-player objects Version 1.4 provides a new method to support non-player characters (NPC) that can be hosted on client machines. A method called public string StartController<T>(string sceneName, uint max) has been added to NetworkFacade. This method allows you to run dynamic objects on clients machines. The NPCs automatically migrate from one client to another if a client goes offline. If you are developing a game that requires hundreds of NPCs in the game then you can use this functionality. Please refer to section 6.3 for more details about this feature. A.12 Unity and API Examples In Badumna 1.4, the API examples have been rearranged based on functionality and several new examples have been added. New examples include demonstrations for private chat, database access, and arbitration servers. Unity3D examples have also been rearranged to follow the same style as the API examples. The Unity3D examples in 1.3 used Unity tags to identify the different type of characters. However, tags have been removed in 1.4. The demos now use a simple enumeration list (Enumeration.cs) to store the list of player types. We have also added a comprehensive example on how to access a database from multiple arbitration servers. The example demonstrates how to selectively lock parts of the database so that you can access unlocked parts of the database from other remote servers. Please refer to section 4.2 for more details. A.13 Buddy list Badumna 1.4, includes support for Buddy lists. There is a Windows API example and a Unity example that demonstrates how to support Buddy lists when the information is stored in a database and accessed by Arbitration Server. A.14 Control Center Control Center now works on Windows, Mac and Linux operating systems (previous version only supported Windows). The Control Center interface has been redesigned to improve usability. It also comes with a user authentication system. You therefore require a valid username and password to access the Control Center making it more secure. The connection between the Control Center and the Germ host is now secured by the use of SSL. When you start the Control Center, it will generate a certificate for you. Please refer to chapter 8 for more details. 206 Appendix A. Changes from Badumna 1.3 to Badumna 1.4 A.15 Seed Peer Badumna 1.4 provides the ability to support multiple Seed Peers for a application. Multiple Seed Peers provide more reliability to the network. Having multiple Seed Peers ensures that if a Seed Peer goes down for a certain period, the network is still operational and the application continues to function as normal. A.16 Default port numbers Default port numbers for the different services such as Seed Peer and Dei server have been changed. This means that when you start these services in default mode, then you will have to change the port numbers in your client network configuration. Please refer to Appendix C for the list of port numbers that Badumna utilises for the different services. A.17 Bug fixes Apart from the new features, Badumna 1.4 includes a number of bug fixes. Some of them are listed here: 1. Timing: A bug in Environment.TickCount in the Mac version of Mono 1.2.5 led to a noticeable lag on Macs. 2. Replication: Bug in the replication module caused flashing of entities under some rare conditions. 3. Replication: Multiple scenes do not work correctly when there are multiple original entities registered on the same peer. 4. Replication: Resent updates are not always correctly delivered. 5. Connection table inconsistency: Connection table can become inconsistent when there are many peers on the same LAN. 6. UPnP: The UPnP module does not work in the Unity Web Player. 7. UPnP: The UPnP module does not work with some routers. 8. Chat: Chat messages will be recieved multiple times when there are multiple original entities on the same peer. 9. Chat Presence: The user presence state will not be updated when the remote user crashes. 10. DHT: Some objects stored on the DHT will never expire. 207 Appendix A. Changes from Badumna 1.3 to Badumna 1.4 11. Transport: The rate limiter can cause excessive CPU load when there are large number of connections. 12. Configuration: The verbosity level Information can not be set when using ConfigurationOptions. 208 Appendix B Game development on a residential network Badumna is able to handle different types of Network Address Translation (NAT) devices, including residential broadband routers. However, Badumna networks require at least one peer to have an open connection (i.e. all other peers should be able to communicate directly with it). The Seed Peer fulfils the role of having an open connection. This appendix explains how to set up a working development environment in a typical residential network environment. Please note that the set up steps are only required when you want to have your Badumna game development environment in a residential network. End users do not need to set up anything on their routers to play Badumna based games. This appendix assumes the development machine is behind a residential broadband router with build-in NAT and is assigned a private address. We first introduce how to use UPnP and port forwarding to start a Seed Peer with open connection. Then we will discuss the Lan test mode feature which allows the connectivity issues to be bypassed during development. B.1 Universal Plug and Play (UPnP) UPnP is enabled by default in Badumna 1.4. It will automatically try to set up a port forwarding entry on the NAT and make the Seed Peer appear to have an open connection to all other peers. If everything works as expected, when the verbose command line option is set, the Seed Peer will print out its NetworkStatus information on the standard output and that should contain the public address details as shown in B.1. In B.1, the public address is marked as a Full cone NAT type. Together with the Open NAT type, these two NAT types are regarded as open connections. 209 Appendix B. Game development on a residential network Figure B.1: Badumna - Network Status output B.2 Port Forwarding The majority of routers support UPnP (universal plug and play) feature. However, this is not 100% guaranteed as there may be defects in the router’s implementation of UPnP. It is also possible that UPnP is not supported or has been disabled in the router. Due to the different brands and models of routers, the exact procedure of manually setting up port forwarding on the router may be different. The 3rd party web site http://portforward.com maintains detailed steps on how to set up port forwarding on hundreds of different router models. Please refer to that web site for more details. The general idea is to map an external port, say X, to the internal port, Y, that the Seed Peer is going to use. This will ensure that all UDP traffic sent to the external port X will be redirected to port Y on the Seed Peer’s machine. Once the port forwarding is set up on the router, you can restart the Seed Peer and check whether the reported public address is of type Full Cone NAT. B.3 LAN Test Mode It also possible to bypass the connectivity issue during the development phase by using the LAN test mode. In the LAN test mode, Badumna assumes all peers are running on PCs within the same LAN and all peers can directly communicate with each other via the private IP addresses. Peers will find out each other through subnet broadcasting. Hence the Seed Peer is no longer required. The LAN test mode can be enabled by adding the following configuration into the NetworkConfig.xml file: <Module Name= " C o n n e c t i v i t y " > <PortRange >21300 ,21399 </ PortRange > < B r o a d c a s t Enabled= " t r u e " >21250</ Broadcast > <LanTestMode Enabled= " t r u e " /> </Module> 210 Appendix B. Game development on a residential network It can also be enabled by setting the IsLanTestModeEnabled property in ConfigurationOptions to be true. Please note, when running in the LAN test mode: 1. All regular peers and services must be configured to run in LAN test mode. 2. Peers will not be able to communicate with external peers on the Internet. 3. This feature is for testing purpose only. LAN test mode must be disabled in the release version of your products. 211 Appendix C Default port numbers Service Port HTTP Tunnel Server: 21247 (TCP) Dei Server: 21248 (TCP) Broadcast: 21250 (UDP) Seed Peer: 21251 (UDP) Overload Server: 21252 (UDP) Germ: 21253 (TCP) Control Center: 21254 (TCP) DeiAdministrationTool: 21255 (TCP) Arbitration Servers: 21260 - 21270 (UDP) Clients: 21300 - 21399 (UDP) Table C.1: Default port numbers 212 Appendix D Known issues in Badumna 1.4 This appendix lists all the known issues that exist in the current release of Badumna (ver 1.4.0). 1. Changing the system clock on Mac could stop Badumna when running with Unity 2.6. Due to a bug in the version of Mono shipped with Unity version 2.6, Badumna may stop working if the system clock is changed during a game session on Mac OS X. It will only affect the local machine. 213