1
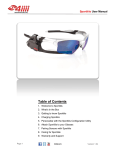
Sportiiiis User Manual
Table of Contents
1. Welcome to Sportiiiis
2. What’s in the Box
3. Getting to know Sportiiiis
4. Charging Sportiiiis
5. Personalize with the Sportiiiis Configuration Utility
6. Attach Sportiiiis to your Glasses
7. Pairing ANT+ Sensors with Sportiiiis
8. Caring for Sportiiiis
9. Warranty and Support
Page 1
Version 1.0 (01-31-12)
Sportiiiis User Manual
1
Welcome to Sportiiiis!
Thank you for purchasing Sportiiiis. Sportiiiis is a heads-up display that guides you to
your target range (zone) during running, cycling, and many other sports - while allowing
you to keep your eyes on the road and maintain form. It can pair with, and receive data
from any ANT+ enabled heart rate strap, foot pod, power or speed/cadence sensor.
When properly mounted to your glasses, the boom of the Sportiiiis unit will be in your
peripheral vision, so that its LEDs can tell you whether you are below, above, or in your
zone by their color and position.
Through the Sportiiiis software for Windows or Mac, you can set up Sportiiiis and
configure the zones for your individual needs.
2
What’s in the Box?
Sportiiiis Unit
(2) mounting
brackets
(10) mini tie-wraps
USB-USB micro
Charge/sync cable
Heart Rate Strap (Included with model SP100HR)
Page 2
Version 1.0 (01-31-12)
Sportiiiis User Manual
3
Getting to Know Sportiiiis
Multi-Function Button – The multi-function button is used to turn Sportiiiis on and off,
as well as control a variety of other functions. It is activated by touching and holding
your finger on the button until the desired function is triggered, based on the number of
beeps given by the unit.
* To adjust volume, tap and hold until you hear*the second set of 3 beeps, then continue
to hold. The volume will loop through 4 volume levels; release the button when the
desired volume is attained.
Page 3
Version 1.0 (01-31-12)
Sportiiiis User Manual
TipTap - Sportiiiis contains an accelerometer, which allows it to respond to taps on the
side of the unit.
1 Tap
Audio Feedback of currently displayed sensor
2 Taps
Switch to next paired sensor
3 Taps
Announce remaining battery power
For best results, hold the unit with your middle finger and tap sharply with
your index finger.
You can adjust the sensitivity of TipTap in the Sportiiiis Configuration Utility.
(See page 11 for more information)
4
Charging Sportiiiis
To charge Sportiiiis, uncover the micro-USB port on the bottom of the unit and plug in
the included USB 2.0 Charge/Sync Cable. Plug the other end of the cable into one of
your computer’s USB ports or a USB power adapter.
While the unit is connected to a power source, the LEDs will indicate the level of charge.
The LEDs will blink Red when the charge level is low then begin to “stream” to yellow as
the charge level increases; when two LEDs are solid and green the unit is fully charged.
Sportiiiis takes about 75 minutes to charge from a fully discharged state.
While using Sportiiiis, several factors will affect its battery life. These include LED
brightness, LED blink rate, and the volume and frequency of audio announcements. (To
configure these parameters go to page 8)
Sportiiiis battery life is approximately 8-9 hours under normal use.
Page 4
Version 1.0 (01-31-12)
Sportiiiis User Manual
5
Personalize Sportiiiis with the Configuration Utility
• Download and Install Software
Open a browser and go to: www.4iiii.com/support.html. Click on the “Downloads” tab
and select the Application Installer for your operating system (Windows or Mac)
Windows: As the installer downloads it will ask if you want to ”Run” or “Save” the
file. Select “Run”. Follow the on screen prompts and when complete you’ll see a
Sportiiiis icon on your desktop.
Mac: Depending on your version of Mac OS X, the installation may launch after
download, or you may have to launch it manually from your downloads folder.
Once launched, follow the on screen prompts to complete the installation. The
Sportiiiis application will be in your Applications folder. (You can drag the
Sportiiiis application icon to your dock for easy access)
• Launch the Sportiiiis Software Application
Connect Sportiiiis to your computer before launching the software
Windows: click the icon on the desktop
Mac: launch the program from the applications folder (or system dock if you have
copied a shortcut there).
Note: If a newer version of firmware is available for your Sportiiiis unit the “update
Firmware” dialog box will appear. Click “Flash new firmware” to continue.
Caution: do not disconnect Sportiiiis until the update is complete
• Software/Firmware Auto Updates
By default, the Sportiiiis Configuration Utility will automatically check for software and
firmware updates when the program launches. If an update is available it will be you will
be notified when it is ready to download and install.
Page 5
Version 1.0 (01-31-12)
Sportiiiis User Manual
• The Sportiiiis Software Interface
1) Main Navigation Tabs – The software is divided into three sections
• Profile – personal data
• Zones – configuration of the LEDs
• Setup – hardware setup such as volume, brightness, etc.
2) Upload Status Button - whenever you make a change in the Sportiiiis Software
Application, the Upload Status Button will indicate that it is “Ready to upload.”
Click this button to save the changes to Sportiiiis. When the upload is complete,
the Upload Status Button will indicate “OK to disconnect.”
3) Battery Status Indicator – indicates the approximate charge level of the battery
in Sportiiiis.
Page 6
Version 1.0 (01-31-12)
Sportiiiis User Manual
The Profile Tab
Enter your name, a “nickname” for your Sportiiiis unit, your email address, height,
weight, year of birth, and gender in the Profile screen.
Page 7
Version 1.0 (01-31-12)
Sportiiiis User Manual
• The Setup Tab
To set the preferences up for your Sportiiiis unit, click on the “Setup” tab in the left
column and choose the parameter you would like to configure (LEDs, Audio, Sensors,
TipTap) on the upper right.
Setup>LEDs
Max brightness – sets the maximum brightness of the LEDs. In most cases a
brightness level of 80 is appropriate for outdoor activity with the Sportiiiis boom located
on the inside of your eyewear.
Note: Sportiiiis features an ambient light detector to help balance the LED brightness for
changing conditions.
LED blink rate – This adjusts the blink rate of the target zone LED. Each LED further
from the target zone will automatically blink at a faster rate.
Configuration – Sportiiiis can be setup for left eye or right eye use.
NOTE: For increased safety while cycling, it is recommended that you use the eye furthest from
the road to view your Sportiiiis unit. Thus, in countries where you drive on the right side of the
roadway, it is recommended that you mount your Sportiiiis unit under your right eye, and in
countries where you drive on the left side of the roadway, you mount your Sportiiiis unit under
your left eye. This allows for unobstructed vision while looking over your shoulder for approaching
cars.
Flip LEDs – This option flips the “below” and “above” target LED’s position. (left to right
becomes right to left)
Page 8
Version 1.0 (01-31-12)
Sportiiiis User Manual
Setup>Audio
Volume – typically a level of approximately 80-85 is acceptable under normal
circumstances.
Auto-Announce – interval at which your Sportiiiis unit will announce the current data
from all paired sensors for which “Include in Auto-Announce” is selected (see Zones
tab). To turn auto-announce off, move the slider all the way to the left.
Personality – Choose a male or female voice for verbal updates
Page 9
Version 1.0 (01-31-12)
Sportiiiis User Manual
Setup>Sensors
Sensors that are currently paired with Sportiiiis will appear here, to delete a sensor click
the “X” on the sensor entry. If Sportiiiis is paired with a bike speed sensor you’ll see an
area to enter the wheel circumference, a footpod sensor will have an “adjustment factor”
entry.
Page 10
Version 1.0 (01-31-12)
Sportiiiis User Manual
Setup>TipTap
Two important features of Sportiiiis are controlled by simply tapping on the side of the
unit. A single tap will give you audio feedback of the current sensor being displayed and
two taps will switch to the next sensor (if more than one sensor is paired). The slider
adjusts the sensitivity of the TipTap function.
Sensitivity – “Normal” sensitivity is a good starting point for most applications.
Page 11
Version 1.0 (01-31-12)
Sportiiiis User Manual
• The Zones Tab
Overview
1) The Zone Adjustment widget - The Zone adjustment widget controls the 7 LEDs on
the Sportiiiis boom and each LED is represented by a colored diamond surrounded
by silver sliders. The center green diamond represents your target zone for the
current activity, and the LEDs to either side are set up to guide you to that target
zone. The color of each LED can be changed by dragging the LED diamond to the
corresponding colored line, the gray line will turn off the LED. The zones are
changed by dragging the silver sliders. (see example setup below)
2) Run / Bike selectors - You can setup zone profiles for Run and Bike sensors
separately, then change between them while using Sportiiiis. (go to page 3 for more
information)
3) Load / Save selector - The combination file requester will let you load, save or delete
zone profiles created for Bike or Run. All sensors are included in the saved file.
4)
“Include in Auto Announce” button - Sportiiiis can audibly update you on all
active sensors at regular intervals. Selecting this button will include the current
sensor in this announcement. (the interval is configured in the Setup>Audio section,
covered on page 9)
5) The Sensor Selectors - Select which sensor you want to configure. Sensors that
are paired with Sportiiiis are illuminated, those not paired are greyed out. Note: You
can still select and setup zones for sensors that are not currently paired. (go to page
16 for information on pairing sensors with Sportiiiis)
Page 12
Version 1.0 (01-31-12)
Sportiiiis User Manual
Example - Setting up a Zone workout:
In this example, we’ll set up Sportiiiis for a run with a target heart rate zone of
130-140 bpm.
a. Click and drag the Slider to the left of the target zone (center LED) and set the
value to 130. (the number above the slider will change as you move your
mouse) Repeat with the slider to the right of the target zone, setting this to 140.
(you’ll notice if the value of the slider you are controlling “bumps” into the value of
an adjacent slider, the adjacent slider’s value will automatically be changed)
b. Next, work your way out to the left and right of your target zone and create the
zones that will help guide you to your target. We recommend the first adjacent
zones be 10 bpm wide and the second, 20 bpm.
c. Click the “include in auto announce” button if you would like the current sensor
included in regular spoken updates (go to Setup > Audio to configure how often
these announcements occur).
d. When you are finished, click on the “Ready to Upload” button. This will upload
and save the values to the Sportiiiis unit.
e. Repeat this procedure for other sensors you’d like to configure by clicking on the
icons at the bottom of the screen.
Page 13
Version 1.0 (01-31-12)
Sportiiiis User Manual
• Speed/Pace Sensor Special Buttons
Pace/Speed Selector – use to choose whether you’d like to use pace
(minutes/mile(km)) or speed (miles(km)/hour) for footpods and bike speed sensors.
Imperial/Metric – selects Imperial (miles) or Metric (kilometers) units.
Page 14
Version 1.0 (01-31-12)
Sportiiiis User Manual
6
Attach Sportiiiis to Your Glasses
• Notes About Mounting Your Sportiiiis Unit
For increased safety while cycling, it is recommended that you use the eye furthest from
the road to view your Sportiiiis unit. Thus, in countries where you drive on the right side
of the roadway, it is recommended that you mount your Sportiiiis unit under your right
eye, and in countries where you drive on the left side of the roadway, that you mount
your Sportiiiis unit under your left eye.
Also, your Sportiiiis unit should be mounted under your line of sight so that its LEDs
appear in your peripheral vision. Please make sure that your Sportiiiis unit does not
obstruct your vision.
WARNING: Be very careful to mount the Sportiiiis unit securely to your eyewear to
ensure the boom will not come in contact with your eye during use.
Page 15
Version 1.0 (01-31-12)
Sportiiiis User Manual
• Sportiiiis Installation
Page 16
Version 1.0 (01-31-12)
Sportiiiis User Manual
7
Pairing ANT+ Sensors with Sportiiiis
• Pairing ANT+ Sensors
For best results perform pairing outside at least 30 feet away from any ANT+ devices
that you would not like to pair with your Sportiiiis unit.
1) Make sure that all ANT+ sensors that you would like to pair with are active* and
within range (< 6ft)
2) With Sportiiiis off, tap and hold the multifunction button on the unit until you hear
three beeps
3) Release the button and Sportiiiis say “Pairing”
4) Sportiiiis will enunciate all sensors that it finds and pairs with
• Unpairing Individual ANT+ Sensors
Within the Sensors tab of the Sportiiiis Configuration Utility, you may remove paired
sensors from Sportiiiis individually (for more info see page 10)
• Unpairing All ANT+ Sensors
To clear your Sportiiiis unit of all paired sensors and pair new sensors
1) Make sure that all ANT+ sensors that you would like to pair with are active*
2) With Sportiiiis off, tap and hold the multifunction button on the unit until you hear the
second set of three beeps
3) Release the button and Sportiiiis will say “Pairing” – its pairing memory will be
cleared and automatically pair with any active ANT+ devices nearby
4) Sportiiiis will enunciate all sensors that it finds and pairs with
*To activate a HR strap, put on the strap. For a bike speed/cadence sensor, spin your
wheel to activate your sensor. For a footpod, shake the footpod, or move your running
shoes if attached.
• Switching between Run and Bike mode
You can switch the zone profiles on-the-fly between Bike and Run as setup in the
Configuration Utility.
1) With Sportiiiis on, tap and hold the multifunction button on the unit until you hear
three beeps
2) Sportiiiis will switch modes and announce the current mode
Page 17
Version 1.0 (01-31-12)
Sportiiiis User Manual
8
Caring for Sportiiiis
Keep your Sportiiiis unit clean by wiping it off with a damp cloth after each use, and
make sure that, when you store it, the boom is protected from excessive bending (do not
store it on your glasses if folded up)
9
Warranty and Support
• Technical Support
Available from 4iiii by both phone and email from 9am-5pm Mountain time.
Phone: 1.800.218.3095 / 1.403.800.3095
Email: [email protected]
User Forum: forum.4iiii.com
• Warranty
4iiii Innovations Inc. ("4iiii") warrants this product to be free from defects in material and workmanship, under
normal use, for a period of one (1) year from the date of original purchase (the invoice date) to the original
purchaser. Defects that have resulted from improper or unreasonable use or maintenance, accident, excess
moisture, insects, improper or inadequate packing for shipment, lightning, power surges, or unauthorized
tampering, alteration or modification are not covered under the limited warranty. 4iiii will, at its sole
discretion, repair or replace the defective product with a comparable product, at no charge to the customer
for parts or labor, with the customer to be responsible for all shipping and handling costs [and with return
shipping and handling costs to be paid for by 4iii after the product has been repaired or replaced].
Replacement products may be new, refurbished or reconditioned and are warranted for the unexpired period
of the original purchase, or 60 days from the date of shipment, whichever is greater. Any products replaced
by 4iii shall be the property of 4iiii.
WHERE PERMITTED, THE PROVISIONS OF THIS LIMITED WARRANTY ARE TO SUPERCEDE AND
REPLACE ANY OTHER WRITTEN WARRANTY, WHETHER EXPRESS OR IMPLIED, WRITTEN OR
ORAL, INCLUDING ANY WARRANTY OF MERCHANTABILITY OR FITNESS FOR A PARTICULAR
PURPOSE.
IN NO EVENT SHALL 4iiii BE LIABLE FOR ANY DIRECT OR INDIRECT DAMAGES OR OTHER RELIEF
ARISING FROM ANY SPECIAL, INCIDENTAL OR CONSEQUENTIAL DAMAGES. To obtain warranty
service, contact 4iiii for shipping instructions and an RMA tracking number. Return your product, freight
prepaid, along with the original sales receipt as a required proof of purchase for warranty repairs, with the
RMA tracking number written on the outside of the package and mail to 4iiii.
WARNING: This limited warranty becomes null and void if the product is repaired by anyone other than an
authorized person of 4iiii.
Compliance
This device complies with Part 15 of the FCC Rules,. Operation is subject to the following two conditions: (1)
this device may not cause harmful interference, and (2) this device must accept any interference received,
including interference that may cause undesired operation.
Any changes or modifications of this product, not approved by manufacturer will void the user’s authority to
operate the equipment.
This device complies with Industry Canada licence-exempt RSS standard(s). Operation is subject to the
following two conditions: (1) this device may not cause interference, and (2) this device must accept any
interference, including interference that may cause undesired operation of the device.
Le présent appareil est conforme aux CNR d'Industrie Canada applicables aux appareils radio exempts de
licence. L'exploitation est autorisée aux deux conditions suivantes : (1) l'appareil ne doit pas produire de
brouillage, et (2) l'utilisateur de l'appareil doit accepter tout brouillage radioélectrique subi, même si le
brouillage est susceptible d'en compromettre le fonctionnement.
Page 18
Version 1.0 (01-31-12)