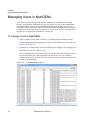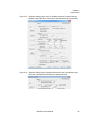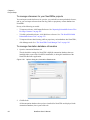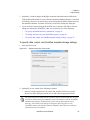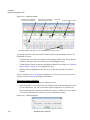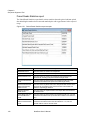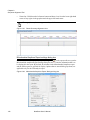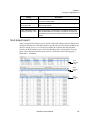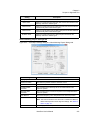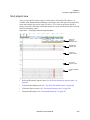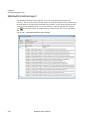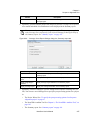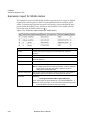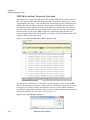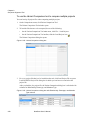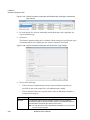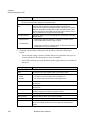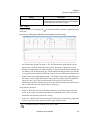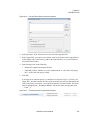
1
Release
Information
Copyright
Document Version Number
NextGENe-2.4.1-UG001
Software Version
2.4.1
Document Status
Final
© 2015. SoftGenetics, LLC, All rights reserved.
The information contained herein is proprietary and confidential and is the
exclusive property of SoftGenetics. It may not be copied, disclosed, used,
distributed, modified, or reproduced, in whole or in part, without the express
written permission of SoftGenetics, LLC.
Limit of Liability
SoftGenetics, LLC has used their best effort in preparing this guide.
SoftGenetics makes no representations or warranties with respect to the
accuracy or completeness of the contents of this guide and specifically
disclaims any implied warranties of merchantability or fitness for a particular
purpose. Information in this document is subject to change without notice and
does not represent a commitment on the part of SoftGenetics or any of its
affiliates.The accuracy and completeness of the information contained herein
and the opinions stated herein are not guaranteed or warranted to produce any
particular results, and the advice and strategies contained herein may not be
suitable for every user.
The software described herein is furnished under a license agreement or a
non-disclosure agreement. The software may be copied or used only in
accordance with the terms of the agreement. It is against the law to copy the
software on any medium except as specifically allowed in the license or the
non-disclosure agreement.
Trademarks
Customer
Support
The name “SoftGenetics,” the SoftGenetics logo, NextGENe, Mutation
Surveyor, Geneticist Assistant, the NextGENe Condensation Tool (covered by
US Patent No. 8,271,206), and the Floton/Floton-PE assembly methods are
trademarks or registered trademarks of SoftGenetics, LLC. All other products
and company names mentioned herein might be trademarks or registered
trademarks of their respective owners.
Customer support is available to organizations that purchase NextGENe and
that have an annual support agreement. Contact SoftGenetics at:
SoftGenetics, LLC
100 Oakwood Ave, Suite 350
State College, PA 16803
(814) 237-9340
(888) 791-1270 (US Only)
[email protected]
www.softgenetics.com
Table of Contents
Chapter 1: Getting Started with NextGENe ........................................... 21
NextGENe System Requirements ................................................................................. 23
Installing NextGENe....................................................................................................... 24
To install NextGENe .................................................................................................... 24
Starting NextGENe ........................................................................................................ 26
The NextGENe Main Window ........................................................................................ 27
Title bar........................................................................................................................ 28
Main menu ................................................................................................................... 28
Toolbar......................................................................................................................... 28
Viewing NextGENe License Information........................................................................ 30
Configuring User Management ...................................................................................... 31
To configure user management................................................................................... 31
To turn on user management .................................................................................... 35
To turn off user management ...................................................................................... 37
Managing Groups in NextGENe .................................................................................... 39
To manage groups in NextGENe................................................................................. 39
To add a new group................................................................................................... 41
To edit a group .......................................................................................................... 41
To delete a group ...................................................................................................... 42
Managing Users in NextGENe....................................................................................... 44
To manage users in NextGENe................................................................................... 44
To add a user ............................................................................................................ 46
To edit a user............................................................................................................. 47
To delete a user......................................................................................................... 48
Chapter 2: Project Setup ......................................................................... 49
Overview of the Project Wizard...................................................................................... 51
Setting up a New NextGENe Project ............................................................................. 53
NextGene User’s Manual
5
To specify data analysis information in the Project Wizard.......................................... 54
To load the sample data files ....................................................................................... 55
To load the reference files............................................................................................ 56
To load a GenBank or .fasta reference file (Reference < 250 Mbp) .......................... 57
To load a preloaded reference (Large genome reference) ........................................ 57
To set ROI regions from a BED or GBK file............................................................... 58
To specify the output file name and location................................................................ 59
To specify the values for the data analysis steps......................................................... 60
To specify the values for the Sequence Condensation step...................................... 60
To specify the values for the Sequence Assembly step ............................................ 63
To specify the values for the Sequence Alignment step ............................................ 64
To specify the post-processing options for a Sequence Alignment project.................. 67
To select the Mutation Report as a post-processing option....................................... 69
To select a report other than the Mutation report as a post-processing option.......... 70
To exported aligned sequences as a post-processing option.................................... 71
To export the project output to a BAM file.................................................................. 71
To export the project output to Geneticist Assistant .................................................. 72
To finish the project...................................................................................................... 74
To run multiple projects in a series using the Project Wizard .................................... 75
To carry out a secondary analysis ............................................................................. 75
Saving and Loading Project Settings ............................................................................. 77
To save project settings ............................................................................................... 78
To load project settings ................................................................................................ 78
Batch Processing of Project Files Using the Project Log ............................................... 79
Project Log and Project Wizard.................................................................................... 79
To use the Project Log to create multiple new projects ............................................... 80
To use the Project Log and Project Wizard to batch process multiple project files...... 82
To run a saved job file.................................................................................................. 83
6
NextGene User’s Manual
Specifying NextGENe Process Options......................................................................... 84
To specify NextGENe process options ........................................................................ 84
To specify Preloaded Reference information ............................................................ 85
To manage references for your NextGENe projects ................................................. 86
To manage Annotation database information............................................................ 86
To specify data, output, and AutoRun template storage settings .............................. 87
Chapter 3: File Format and Conversion................................................. 89
NextGENe’s Format Conversion Tool............................................................................ 91
To convert a sample file............................................................................................... 91
Trim or Reject Read While >= [x] Bases with Score <= [y]........................................ 96
Trim by Sequences.................................................................................................... 97
Trim by Sequences in the File ................................................................................... 97
Chapter 4: Sequence Condensation Tool.............................................. 99
Overview of the NextGENe Sequence Condensation Tool ......................................... 101
Illumina, SOLiD System and Ion Torrent data ........................................................... 101
Consolidation........................................................................................................... 102
Elongation................................................................................................................ 103
Error Correction ....................................................................................................... 103
Roche/454 data ......................................................................................................... 104
Sequence Condensation Tool - General Settings........................................................ 106
Merging Paired End Reads ..................................................................................... 109
Sequence Condensation Tool - Advanced Settings for Illumina Data, SOLiD System Data,
or Ion Torrent Data....................................................................................................... 110
Condensation Tool - Advanced Settings for Roche/454 Data ..................................... 116
Sequence Condensation Tool Output Files ................................................................. 117
Consolidation output files........................................................................................... 117
Elongation output files ............................................................................................... 118
Error Correction output files....................................................................................... 119
NextGene User’s Manual
7
Chapter 5: Sequence Assembly Tool ...................................................121
Sequence Assembly Settings....................................................................................... 123
General Assembly settings ........................................................................................ 124
De Bruijn assembly method for Illumina, SOLiD System, and Ion Torrent data ........ 124
Maximum Overlap assembly method for Illumina data .............................................. 125
Greedy assembly method for Roche/454 data........................................................... 125
Skeleton assembly method for Roche/454 data ........................................................ 126
PE assembly method for Roche/454, Illumina, and Ion Torrent data......................... 127
Floton/Floton-PE assembly method for Roche/454 and Ion Torrent data.................. 128
Sequence Assembly Output Files ................................................................................ 131
Chapter 6: Sequence Alignment Tool...................................................133
NextGENe Sequence Alignment Algorithms ................................................................ 135
Genomic regions or genomes smaller than 250 Mbp ................................................ 135
Preloaded Reference Alignment ................................................................................ 135
Sequence Alignment Settings ...................................................................................... 137
Alignment settings—.fasta or GenBank reference file ............................................... 137
Alignment settings—Preloaded reference file ............................................................ 138
BAM Sample Files settings ........................................................................................ 139
Sample Trim settings ................................................................................................. 140
Mutation Filter settings ............................................................................................... 140
Balance Ratio........................................................................................................... 141
File Type settings ....................................................................................................... 141
Other settings............................................................................................................. 142
NextGENe Viewer ....................................................................................................... 143
To load a sequence alignment project in the NextGENe Viewer ............................... 143
NextGENe Viewer layout and navigation ................................................................... 144
Title bar .................................................................................................................... 145
8
NextGene User’s Manual
Main menu............................................................................................................... 145
Save Optional Reference Info ............................................................................. 146
Exported BED file ................................................................................................ 147
Exported Gap.fasta file........................................................................................ 147
SAM/BAM Output ................................................................................................ 147
Export Project...................................................................................................... 149
Toolbar .................................................................................................................... 150
Tracks Display ......................................................................................................... 151
Whole Genome viewer ............................................................................................ 152
Alignment viewer ..................................................................................................... 153
Alignment viewer navigation ............................................................................... 154
Alignment viewer functions ................................................................................. 156
Segment Breakpoints .......................................................................................... 157
Paired Reads Alignment .............................................................................................. 159
Paired Reads viewer.................................................................................................. 159
Paired data/mate paired reports and functions.......................................................... 160
Paired Reads Gap Distribution report...................................................................... 161
Paired Reads Statistics report ................................................................................. 162
Opposite Direction Paired Reads report.................................................................. 163
Same Direction Paired Reads report....................................................................... 165
Single Reads report................................................................................................. 167
Paired Reads Graph report ..................................................................................... 169
Export SV Reads function ....................................................................................... 171
Transcriptome Alignment Project with Alternative Splicing.......................................... 172
Transcriptome with Alternative splicing alignment algorithm ..................................... 172
Transcriptome project with Alternative splicing alignment settings............................ 173
Transcriptome project with Alternative splicing view ................................................. 175
Transcript report ........................................................................................................ 177
NextGene User’s Manual
9
Transcript report settings ......................................................................................... 178
STR (Short Tandem Repeats) Analysis Project ........................................................... 180
STR analysis custom .fasta reference file.................................................................. 180
STR project alignment settings .................................................................................. 181
STR project report...................................................................................................... 181
STR report toolbar ................................................................................................... 184
STR Reads Histogram report .............................................................................. 184
STR Report Settings dialog box .......................................................................... 186
Mitochondrial Amplicon Analysis Project...................................................................... 189
Mitochondrial amplicon analysis data requirements .................................................. 189
Mitochondrial Amplicon report.................................................................................... 189
Mitochondrial Amplicon report toolbar ..................................................................... 191
Reads Summary Alignment view......................................................................... 191
Mitochondrial Amplicon Report settings dialog box ............................................. 192
HLA Project .................................................................................................................. 195
HLA analysis data requirements and project settings ................................................ 195
HLA project report ...................................................................................................... 197
HLA report toolbar.................................................................................................... 198
HLA Report Settings dialog box .......................................................................... 199
HLA (Summary Report) Settings tab............................................................... 199
Allele Matching Report Settings tab ................................................................ 201
Allele Coverage Report Settings tab ............................................................... 203
Output Settings tab.......................................................................................... 204
HLA project view ........................................................................................................ 205
Reference/Dictionary Sequence pane ..................................................................... 206
Top Allele Pair Matches pane .................................................................................. 206
Consensus Sequence panes ................................................................................... 206
Unmatched Reads pane .......................................................................................... 207
10
NextGene User’s Manual
Sequence Alignment Project Output Files ................................................................... 208
Sequence Alignment Project Mutation Report ............................................................. 210
Viewing the Edit history for a mutation ...................................................................... 213
Mutation Report settings............................................................................................ 214
Mutation Report Settings dialog box........................................................................ 214
Display tab, Annotation sub-tab .......................................................................... 216
Display tab, Statistics sub-tab ............................................................................. 219
Filter tab, Annotation sub-tab .............................................................................. 221
Filter tab, Score sub-tab ...................................................................................... 223
Ambiguous Gain penalty/Ambiguous Loss penalty......................................... 224
Filter tab, ROI sub-tab ......................................................................................... 225
Summary Report tab ........................................................................................... 226
Output tab ........................................................................................................... 227
Gene Tracks Settings dialog box............................................................................. 228
Variation Tracks Settings dialog box ....................................................................... 228
Functional Prediction tab..................................................................................... 231
Conservation tab ................................................................................................. 232
Population Frequency tab ................................................................................... 233
ClinVar tab .......................................................................................................... 234
Mutation Report functions.......................................................................................... 235
Save SIFT report ..................................................................................................... 235
Save VCF report (filtered)........................................................................................ 235
Save unfiltered VCF report ...................................................................................... 235
Mutation Report Summary....................................................................................... 236
Save consensus sequence...................................................................................... 236
Save SNP consensus sequence ............................................................................. 238
Fragment Output ..................................................................................................... 240
Seek Sample Position ............................................................................................. 240
NextGene User’s Manual
11
Sequence Alignment Project Reports .......................................................................... 241
Summary report ......................................................................................................... 241
To modify the Summary report view ........................................................................ 245
To customize the Summary report header............................................................... 246
Matched/Unmatched report........................................................................................ 248
Distribution report....................................................................................................... 249
Coverage Curve report............................................................................................... 253
Mismatched Base Numbers report............................................................................. 259
Expression Report...................................................................................................... 260
Expression report for SAGE studies .......................................................................... 266
Structural Variation report .......................................................................................... 267
Score Distribution report ............................................................................................ 270
NextGENe Viewer Tools .............................................................................................. 272
Export Sequences tool ............................................................................................... 272
Export Sequences to CSFASTA tool ......................................................................... 273
Advanced GBK Editor tool ......................................................................................... 274
GBK Editor tool - GenBank Tree File....................................................................... 275
GBK Editor window- Sequence View pane.............................................................. 276
Advanced GBK Editor tool - Auto Create ROI tool................................................... 278
Advanced GBK Editor tool Output Options .............................................................. 278
Advanced GBK Editor tool Save options ................................................................. 279
Peak Identification tool ............................................................................................... 279
Peak Identification report ......................................................................................... 280
Synthetic SAGE Data tool .......................................................................................... 282
Create SAGE Library from mRNA tool....................................................................... 283
Modify Titles for mRNA GenBank tool ....................................................................... 284
Resume Project and Load Project ............................................................................. 284
NextGENe Viewer Comparison Reports and Tools ..................................................... 285
12
NextGene User’s Manual
Expression Comparison report .................................................................................. 285
Variant Comparison tool ............................................................................................ 289
To use the Variant Comparison tool to compare multiple projects .......................... 290
To use the Variant Comparison Tool Top List function ........................................... 293
To use the Variant Comparison tool to analyze family data .................................... 297
To use the other Variant Comparison Tool functions .............................................. 300
Somatic Mutation Comparison tool............................................................................ 303
To generate the Somatic Mutation Comparison Tool report.................................... 304
CNV (Copy Number Variation) tool (Dispersion and HMM)....................................... 310
To generate the CNV Tool report (Dispersion and HMM) ....................................... 310
Block CNV report ................................................................................................ 319
CNV Graphs ....................................................................................................... 322
CNV (Copy Number Variation) tool (SNP-based Normalization with Smoothing) ..... 323
To generate the CNV Tool report (SNP-based Normalization with Smoothing)...... 324
Gene CNV report ................................................................................................ 331
Block CNV report ................................................................................................ 334
CNV Graphs ........................................................................................................ 337
Beta Batch CNV Tool................................................................................................. 338
Chapter 7: Specialized Applications .................................................... 341
Creating a Reference File with the Peak Identification tool ......................................... 343
To align sample files to peak identification reference file .......................................... 345
Chapter 8: NextGENe Tools .................................................................. 347
The NextGENe Barcode Sorting Tool.......................................................................... 349
Barcode/Primer File ................................................................................................... 349
To parse barcoded sample files................................................................................. 350
The NextGENe Sequence Operation Tool................................................................... 354
To use the NextGENe Sequence Operation tool....................................................... 354
NextGene User’s Manual
13
To merge files ............................................................................................................ 355
To split files ................................................................................................................ 356
To sequence trim reads ............................................................................................. 357
Trim by Sequences .................................................................................................. 358
Trim by Sequences in the File ................................................................................. 359
Advanced Settings ................................................................................................... 360
To arrange paired reads............................................................................................. 361
To remove duplicate reads......................................................................................... 361
To reverse complement sequences ........................................................................... 362
The NextGENe Reads Simulator Tool ......................................................................... 364
To use the NextGENe Reads Simulator Tool ............................................................ 364
The NextGENe Pseudo Paired Read Constructor Tool ............................................... 366
To use the NextGENe Pseudo Paired Read Constructor .......................................... 366
The NextGENe Condensation Results Filter Tool........................................................ 368
To use the NextGENe Condensation Results Filter tool ............................................ 368
The NextGENe Condensation Results Tool................................................................. 370
Condensed Reads pane ............................................................................................ 371
Index table.................................................................................................................. 371
The NextGENe Build Preloaded Reference Tool ......................................................... 372
To use the NextGENe Build Preloaded Reference tool with a BED file..................... 372
To use the NextGENe Build Preloaded Reference tool to create a new index .......... 374
The NextGENe GC Percentage Calculation Tool ........................................................ 377
To use the NextGENe GC Percentage Calculation tool............................................. 377
The NextGENe Overlap Merger Tool ........................................................................... 378
To use the NextGENe Overlap Merger tool ............................................................... 378
The NextGENe Long PE Assembly Mapping Tool....................................................... 381
To use the NextGENe Long PE Assembly Mapping tool ........................................... 381
The NextGENe File Preview Tool ................................................................................ 382
14
NextGene User’s Manual
To use the NextGENe File Preview tool .................................................................... 382
The NextGENe Track Manager Tool ........................................................................... 383
To use the NextGENe Track Manager tool to import data......................................... 383
To edit a track.......................................................................................................... 384
To import data from the dbNSFP database............................................................. 387
To import data from the COSMIC database ............................................................ 388
To import data from the ClinVar database or any other dbSNP files....................... 389
To import data from the dbscSNV database ........................................................... 390
To import data from other variation databases........................................................ 391
To import gene annotation tracks ............................................................................ 393
To load track data for previously run projects.......................................................... 393
Chapter 9: The NextGENe AutoRun Tool ............................................ 395
Batch Processing of Multiple Projects.......................................................................... 397
To create a new job file in the NextGENe AutoRun Tool........................................... 397
To specify preprocessing options ............................................................................ 402
To select report post-processing options................................................................. 404
To select the Mutation Report as a post-processing option ................................ 405
To select a report other than the Mutation report as a post-processing option ... 406
To export aligned sequences as a post-processing option ..................................... 407
To export the project output to a BAM file ............................................................... 408
To export the project output to Geneticist Assistant ................................................ 408
To group jobs........................................................................................................... 411
To modify an existing job file ..................................................................................... 413
To create a new job from an existing AutoRun template ........................................... 414
To specify the NextGENe AutoRun settings.............................................................. 416
Batch Processing of Previously Processed Sequence Alignment Projects to Export
Outputs ........................................................................................................................ 419
To create a single post-processing Settings file ........................................................ 419
NextGene User’s Manual
15
To load and run the projects ...................................................................................... 421
To specify the NextGENe AutoRun settings .............................................................. 423
Secondary Batch Analysis of Multiple Projects ............................................................ 426
Managing NextGENe AutoRun Templates................................................................... 428
To create a NextGENe AutoRun template ................................................................. 428
To modify a NextGENe AutoRun template ................................................................ 432
To delete an AutoRun template ................................................................................. 433
Working With NextGENe AutoRun Templates for RainDance ThunderBolts Panels... 435
To select the samples and reference for an AutoRun Template for a RainDance
ThunderBolts panel .................................................................................................... 435
To group jobs ........................................................................................................... 438
To specify the NextGENe AutoRun settings .............................................................. 440
To modify a NextGENe AutoRun template for a RainDance Thunderbolts panel...... 442
Appendix A: Preloaded Reference Files . . . . . . . . . . . . . . . . . . . . . . . 445
Importing Preloaded Reference Files For Large Genomes.......................................... 447
To download and import large genome reference files .............................................. 448
To confirm that MySQL is installed ............................................................................ 451
Appendix B: Mutation Report Scores . . . . . . . . . . . . . . . . . . . . . . . . . 455
Overall Mutation Score................................................................................................. 456
Coverage score ............................................................................................................ 457
Read Balance Score .................................................................................................... 458
Allele Balance Score .................................................................................................... 459
Homopolymer Score..................................................................................................... 460
Mismatch Score............................................................................................................ 461
Wrong Allele Score....................................................................................................... 462
Index . . . . . . . . . . . . . . . . . . . . . . . . . . . . . . . . . . . . . . . . . . . . . . . . . . . . 463
Glossary . . . . . . . . . . . . . . . . . . . . . . . . . . . . . . . . . . . . . . . . . . . . . . . . . 473
16
NextGene User’s Manual
Preface
Welcome to the NextGENe User’s Manual. The purpose of the NextGENe User’s Manual is
to answer your questions and guide you through the procedures necessary to use the
NextGENe application efficiently and effectively.
Using the manual
You will find the NextGENe User’s Manual easy to use. You can simply look up the topic
that you need in the table of contents or the index. Later, in this Preface, you will find a brief
discussion of each chapter to further assist you in locating the information that you need.
Special information about the manual
The NextGENe User’s Manual has a dual purpose design. It can be distributed electronically
and then printed on an as-needed basis, or it can be viewed online in its fully interactive
capacity. If you print the document, for best results, it is recommended that you print it on a
duplex printer; however, single-sided printing will also work. If you view the document
online, a standard set of bookmarks appears in a frame on the left side of the document
window for navigation through the document. For better viewing, decrease the size of the
bookmark frame and use the magnification box to increase the magnification of the
document to your viewing preference.
Conventions used in the manual
The NextGENe User’s Manual uses the following conventions:
•
Information that can vary in a command—variable information—is indicated by
alphanumeric characters enclosed in angle brackets; for example, <Project Name>. Do
not type the angle brackets when you specify the variable information.
•
A new term, or term that must be emphasized for clarity of procedures, is italicized.
•
Page numbering is “online friendly.” Pages are numbered from 1 to x, starting with the
cover and ending on the last page of the index.
Although numbering begins on the cover page, this number is not visible on the
cover page or front matter pages. Page numbers are visible beginning with the
first page of the table of contents.
NextGENe User’s Manual
17
Preface
•
This manual is intended for both print and online viewing.
•
If information appears in blue, it is a hyperlink. Table of Contents and Index entries
are also hyperlinks. Click the hyperlink to advance to the referenced information.
Assumptions for the manual
The NextGENe User’s Manual assumes that:
•
You are familiar with windows-based applications and basic Windows functions and
navigational elements.
•
References to any third party standards or third party software functions were current as
of the release of this version of NextGENe, and might have already changed.
Organization of the manual
In addition to this Preface, the NextGENe User’s Manual contains the following chapters and
appendices:
18
•
Chapter 1, “Getting Started with NextGENe,” on page 21 details the NextGENe
installation requirements, and the procedures for installing the application and activating
your account. It also explains how to launch the application and provides an overview of
the major navigational elements for the application. Finally, it details User Management
for your NextGENe instance, which requires that a user be authenticated before logging
in and using the application.
•
Chapter 2, “Project Setup,” on page 49 details the use of the NextGENe Project Wizard,
which you use to set up a project for analyzing your Next Generation sequencing data.
•
Chapter 3, “File Format and Conversion,” on page 89 details the NextGENe Format
Conversion tool which you use to convert a supplier’s format to a standard .fasta format
that NextGENe can read and to standardize the data and trim or remove low quality reads
before analysis.
•
Chapter 4, “Sequence Condensation Tool,” on page 99 details the Sequence
Condensation tool, which uses depth of coverage to correct sequence reads that contain
instrument base calling errors and to elongate reads, while merging identical reads or
maintaining read number as necessary for your project.
•
Chapter 5, “Sequence Assembly Tool,” on page 121 details the Sequence Assembly tool,
which assembles the reads that are generated by the Roche/454, Illumina, SOLiD System,
and Ion Torrent instruments into larger contigs.
•
Chapter 6, “Sequence Alignment Tool,” on page 133 details the Sequence Alignment
tool, which matches short sequence reads to a reference sequence. It also details the
Sequence Alignment Viewer, which is a viewing and editing tool that you can use to view
NextGENe User’s Manual
Preface
the results of the Sequence Alignment tool and produce a variety of interactive reports
that summarize the sequence alignment information.
•
Chapter 7, “Specialized Applications,” on page 341 details the procedure for creating a
reference file using the Peak Identification tool.
•
Chapter 8, “NextGENe Tools,” on page 347 details all the NextGENe tools (with the
exception of the NextGENe Format Conversion tool and the NextGENe AutoRun tool)
that you can use to optimize input data and export results.
•
Chapter 9, “The NextGENe AutoRun Tool,” on page 395 details the NextGENe AutoRun
tool, which a multi-functional tool that you can use for carrying out batch analysis of
multiple projects. You can also use the tool for creating and modifying templates for
facilitating job setup in the NextGENe AutoRun tool, including jobs for analysis of data
for RainDance Thunderbolt panels.
•
Appendix A, “Preloaded Reference Files,” on page 445 details the procedure for
installing a preloaded reference file for a whole large genome.
•
Appendix B, “Mutation Report Scores,” on page 455 provides a detailed explanation of
the Overall Mutation Score. It also provides a detailed description, including the
underlying algorithms, for each of the scores that are used in the calculation of the Overall
Mutation Score.
NextGENe User’s Manual
19
Preface
20
NextGENe User’s Manual
Chapter 1
Getting Started with NextGENe
The NextGENe software application is designed to enhance the power for discovery from
your Next Generation sequencing data. This software is ideal for the analysis of data from
the Illumina Genome Analyzer, the Roche Genome Sequencer FLX and FLX Titanium
Systems, and Life Technologies’s SOLiD System and Ion Torrent sequencer. This chapter
details the installation requirements, and the procedures for installing the application and
activating your account. It also explains how to launch the application and provides an
overview of the major navigational elements for the application, including the menu bar and
the toolbar. Finally, it details User Management for your NextGENe instance, which requires
that a user be authenticated before logging in and using the application.
This chapter covers the following topics:
•
“NextGENe System Requirements” on page 23.
•
“Installing NextGENe” on page 24.
•
“Starting NextGENe” on page 26.
•
“The NextGENe Main Window” on page 27.
•
“Viewing NextGENe License Information” on page 30.
•
“Configuring User Management” on page 31.
•
“Managing Groups in NextGENe” on page 39.
•
“Managing Users in NextGENe” on page 44.
NextGene User’s Manual
21
Chapter 1
Getting Started with NextGENe
22
NextGene User’s Manual
Chapter 1
Getting Started with NextGENe
NextGENe System Requirements
The following system requirements are for all data types other than Ion Torrent.
Ion Torrent does not have these restrictions.
NextGENe is currently available only for the Windows operating system. You must have
Administrator rights for the computer on which you are installing the NextGENe application.
NextGENe can function on Windows 32- or 64-bit systems with x86 architecture.
NextGENe is compatible with the Windows XP and Vista operating systems; however, for
optimum performance, you should run the NextGENe application on a Windows 7 or
Windows 8 operating system.
•
Windows 32-bit operating system: You can use NextGENe on a Windows 32-bit system
for viewing or editing projects that have already been processed. Using a 32-bit system to
process data is not recommended.
•
Windows 64-bit Operating System: For all instrument types other than Ion Torrent, a
Windows 64-bit system with dual quad processors and 12 GB RAM is required for data
processing. For some applications, additional RAM is required. The Ion Torrent
instrument type has no minimum processor requirements and minimum requirement of a
3 GB RAM. To align Ion Torrent data to a preloaded reference file such as the whole
human genome, at least 8GB RAM is required.
NextGene User’s Manual
23
Chapter 1
Getting Started with NextGENe
Installing NextGENe
NextGENe is licensed in three different ways, each of which follow slightly different
installation procedures—Validation, Local, and Network:
•
Validation license—The Validation license is a trial license that provides all of the
functionality of a purchased license. You can load data, create and save new files, analyze
and visualize data, and so on. The Validation license expires 30 calendar days from
installation.
You must contact SoftGenetics to receive a disc that contains a fully functional, 30
day trial of the software.
•
Local license—The Local license is designed for installation on a a single computer.
•
Network license—The Network license is for installation on multiple client computers
that are connected to a license server computer.
To install NextGENe
If another program other than a SoftGenetics application that uses MySQL or
Apache is already installed on the computer on which you are installing
NextGENe, contact [email protected] for assistance first.
For any version of NextGENe, the NextGENe Installation wizard guides you through the
steps that are necessary to install the NextGENe application on your computer. The default
installation location is:
C:\Program Files (x86)\SoftGenetics\NextGENe
When you are installing NextGENe, keep in mind the following:
Version
Comments
Validation
To use the preloaded reference alignment function, you must install the
Annotation database.
Local
• To use the preloaded reference alignment function, you must install
the Annotation database.
• You must complete the registration information exactly as supplied by
SoftGenetics.
24
NextGene User’s Manual
Chapter 1
Getting Started with NextGENe
Version
Network
Comments
• Server Setup
• You must install the License Server Manager before installing
NextGENe.
• To use the preloaded reference alignment function, you must
install the Annotation database.
• You must complete the registration information exactly as supplied
by SoftGenetics.
• Client Setup
• To use the preloaded reference alignment function, you must
install the Annotation database.
• You must NOT install the License Server Manager.
• You must complete the registration information exactly as supplied
by SoftGenetics.
NextGene User’s Manual
25
Chapter 1
Getting Started with NextGENe
Starting NextGENe
After NextGENe has been installed on your computer, a shortcut icon for the application is
placed on your desktop. An option for the application is also available from your Start menu.
You can double-click the desktop icon to launch the application, or you can select the option
from your Start menu (Start > All Programs > SoftGenetics > NextGENe).
Figure 1-1:
NextGENe desktop icon
Two results are possible:
•
If user management has been turned on for your instance of NextGENe, then you are
prompted to enter your user name and password to log into and open NextGENe. The
NextGENe Project Wizard then opens automatically in the NextGENe main window.
•
If user management has not been turned on then, the NextGENe Project Wizard opens
automatically in the NextGENe main window.
See “The NextGENe Main Window” on page 27.
Figure 1-2:
26
NextGENe Project Wizard in the NextGENe main window
NextGene User’s Manual
Chapter 1
Getting Started with NextGENe
The NextGENe Main Window
The NextGENe Project Wizard opens in the NextGENe main window when you launch the
NextGENe application.
Figure 1-3:
NextGENe Project Wizard in the NextGENe main window
The NextGENe main window is your starting point for the NextGENe application. The
window provides quick access to all of the NextGENe functions and system tools. The
NextGENe main window has three major components—the title bar, the main menu, and the
toolbar.
NextGene User’s Manual
27
Chapter 1
Getting Started with NextGENe
Title bar
The name “NextGENe” is displayed in the title bar at the top of the NextGENe main
window. If User Management has been turned on for your instance of NextGENe, then your
username is also displayed in the Title bar.
Figure 1-4:
Title bar
The version of NextGENe that you are running is not displayed in the Title bar.
You must use the Help > About option in the main menu to determine the version
number. See “Main menu” below.
Main menu
The main menu is set up in a standard Windows menu format with menu commands grouped
into menus (File, Process, Tools, and Help) across the menu bar. Some of these menu
commands are available in other areas of the application.
Figure 1-5:
Main menu
Toolbar
The toolbar provides quick access to all the NextGENe functions.
Figure 1-6:
Button
NextGENe toolbar
Function
NextGENe Project Wizard button - Opens the NextGENe Project Wizard.
Load File button - Opens the Load Data page in the NextGENe Project Wizard.
Condensation Settings page button - Opens the Condensation Settings page in the
NextGENe Project Wizard.
Assembly Settings page button - Opens the Assembly Settings page in the NextGENe
Project Wizard.
Alignment Settings page button - Opens the Alignment Settings page in the NextGENe
Project Wizard.
28
NextGene User’s Manual
Chapter 1
Getting Started with NextGENe
Button
Function
Run Project Wizard button - Runs the currently loaded projects in the NextGENe Project
Wizard.
Open NextGENe Viewer button - Opens the NextGENe Viewer.
Exit button - Immediately closes the NextGENe application.
All of the pages that are referenced above are pages in the NextGENe Project
Wizard. Typically, you open the wizard either by launching the NextGENe
application or by clicking the Project Wizard button on the NextGENe toolbar.
When you open the wizard using one of these two options, the wizard always opens
to the first page—the Applications Type page. You can also open the wizard by
clicking any of the page-specific buttons on the NextGENe toolbar. See Chapter 2,
“Project Setup,” on page 49 for detailed information about the NextGENe Project
Wizard.
NextGene User’s Manual
29
Chapter 1
Getting Started with NextGENe
Viewing NextGENe License Information
Your NextGENe license has both a type and an expiration date. You can view this
information for your NextGENe license on the NextGENe License dialog box. To open this
dialog box, on the NextGENe main menu, click Help > License Information. The NextGENe
License dialog box shows the license type (for example, Local) for your NextGENe
installation, and the number of days until the license expires from the current day’s date. You
can click OK to close the dialog box and return to NextGENe.
Figure 1-7:
30
NextGENe License dialog box
NextGene User’s Manual
Chapter 1
Getting Started with NextGENe
Configuring User Management
After NextGENe is installed, user management can be configured for both NextGENe and
the NextGENe Viewer. User management requires that a user be authenticated before
logging in and using the applications. You can configure user management independently for
each computer (localhost) on which NextGENe is installed. In this configuration, the
SoftGenetics Server service must be installed on each computer on which NextGENe is
installed. Because the same user management configuration is part of the installation process
for Geneticist Assistant, the steps that you must follow to install the SoftGenetics Server
service depend on whether Geneticist Assistant has already been installed on the localhost.
Alternatively, a single server can host the SoftGenetics Server service and you can configure
each NextGENe host to connect to this single server to verify user credentials. When you
configure user management, you must always configure the Administrator user account first.
Only the Administrator user has all the necessary privileges for managing other users. All
other users are standard users. After you configure user management, you must turn on user
management. You can also always turn off user management at any time without deleting
any of the user configuration information.
If you changed the directory for storing the MySQL information that NextGENe
uses from the default directory (C:\ProgramData\MySQL\MySQL Server
5.1\Data), then before configuring user management, you must contact
[email protected].
To configure user management
The following procedures details the configuration of user management
independently for each computer (localhost) on which NextGENe is installed. To
configure user management with a single server hosting the SoftGenetics Server
service, contact [email protected].
1. If Geneticist Assistant is already installed on the computer on which you are configuring
user management for NextGENe, go to “To turn on user management” on page
35;otherwise, do the following:
•
Log on to the host computer as a Windows user that is a local Administrator.
•
To avoid issues with User Account Control settings, right-click on the NextGENe
desktop shortcut and on the context menu that opens, select Run as administrator.
The NextGENe Project Wizard opens automatically in the NextGENe main window.
2. Close the NextGENe Project Wizard, and then on the NextGENe main menu, click Help
> User Management > Install Local Service.
The License page for the SoftGenetics Server Setup wizard opens. The page details the
license agreement for installing the SoftGenetics Server service. See Figure 1-8 on page
32.
NextGene User’s Manual
31
Chapter 1
Getting Started with NextGENe
Be patient. It might take a few minutes for the SoftGenetics Server Setup wizard to
open.
Figure 1-8:
SoftGenetics Server Setup wizard, License Agreement page
3. Click I Agree to accept the license agreement.
The Settings page for the SoftGenetics Server Setup wizard opens. By default, the page
is prepped for configuring the Administrator user.
Figure 1-9:
SoftGenetics Server Setup wizard, Settings page
4. Do the following:
•
Leave the user name set to Administrator, or modify it as needed.
•
In the Password field, enter the password for the Administrator user.
The only invalid character for the password is a space.There are no other special
requirements or restrictions for the Administrator password. It can adhere to your
organization’s standards and any other requirements as needed. If you forget or
lose this password, it is not recoverable.
32
NextGene User’s Manual
Chapter 1
Getting Started with NextGENe
•
In the Verify field, enter the Administrator password exactly as you entered it in the
Password field.
•
In the Email field, enter the email address for the Administrator user.
The current version of User Management does not support email notifications;
however, an email address is still required.
5. Click Next.
The Choose Components page for the SoftGenetics Server Setup wizard opens. A single
component, the Server, is listed on the page.
Figure 1-10:
SoftGenetics Server Setup wizard, Choose Components page
After you select the server, the space requirements for installing the SoftGenetics
Server service are displayed on the page. Make sure that you have sufficient space
on the computer to install this service.
6. Select Server, and then click Install.
The Installation page for the SoftGenetics Server Setup wizard opens. The page details
the components that are being installed and the status of the installation. See Figure 1-11
on page 34.
NextGene User’s Manual
33
Chapter 1
Getting Started with NextGENe
Figure 1-11:
SoftGenetics Server Setup wizard, Installation page
Note the following about the installation:
•
If MySQL has not already been installed on the localhost, then after installation of
MySQL is complete, click Close at the prompt; otherwise, the installation begins
with the installation of the other server components (Python, Django, and Apache).
•
During the installation of the other server components, you might receive Security
Alerts. The installation is set up to handle these alerts and with the exception of a
Windows Security Alert for Apache (see below), no special action is required.
•
After Apache is installed, a Windows Security Alert opens indicating that the
Windows Firewall has blocked some features of the installation. Click Unblock to
allow the Apache HTTP Server to operate correctly on the localhost.
Figure 1-12:
34
Windows Security Alert for Apache
NextGene User’s Manual
Chapter 1
Getting Started with NextGENe
After installation is complete, Completed is displayed at the top of the Installation page.
Figure 1-13:
SoftGenetics Server Setup wizard, Installation page for completed installation
7. Click Close.
The SoftGenetics Server Setup wizard closes. NextGENe remains open.
8. Continue to “To turn on user management” below.
To turn on user management
1. On the NextGENe main menu, click Help > User Management > Manage Settings.
The User Management Settings dialog box opens. The General tab is the open tab.
Figure 1-14:
User Management Settings dialog box, General tab
2. Leave Service host set to localhost.
NextGene User’s Manual
35
Chapter 1
Getting Started with NextGENe
3. Select Turn on user management.
Remember last user becomes available.
4. Leave Remember last user, or optionally, clear it.
If Remember last user is selected, then when a user logs into NextGENe, the
Username field on the Login dialog box is automatically populated with the user
name for the user who last logged into NextGENe.
5. Click OK.
The Administrator Verification dialog box opens. The dialog box indicates that
Administrator verification is required to apply the changes.
Figure 1-15:
Administrator Verification dialog box
6. In the Username field, leave the Administrator username as-is, or optionally, modify the
name as needed.
7. In the Password field, enter the password for the Administrator user.
8. Click OK.
A message opens, indicating that to apply the changes that NextGENe must be closed
and reopened and asking you if you want to close NextGENe now.
9. Click Yes.
The message closes.
36
NextGene User’s Manual
Chapter 1
Getting Started with NextGENe
10. Start NextGENe.
The Login dialog box opens.
Figure 1-16:
NextGENe Login dialog box
11. Enter the Administrator username and password, and then click OK.
The Login dialog box closes. The NextGENe Project Wizard opens automatically in the
NextGENe main window. Now, every time a user opens NextGENe, they are prompted
to enter a username and password before they can use the application.
If you are the Administrator user, you should now continue to setting up the
needed groups and users for your NextGENe instance. See “Managing Groups in
NextGENe” on page 39 and “Managing Users in NextGENe” on page 44.
To turn off user management
After configuring and turning on user management for your NextGENe instance, as the
Administrator user, you always have the option of turning off user management. This does
not delete any user configuration information. It simply means that users are not required to
be authenticated before they log in to and use NextGENe. You can always turn user
management back on.
1. Start NextGENe.
The Login dialog box opens.
Figure 1-17:
NextGENe Login dialog box
NextGene User’s Manual
37
Chapter 1
Getting Started with NextGENe
2. Enter the Administrator username and password, and then click OK.
The NextGENe Project Wizard opens automatically in the NextGENe main window.
3. Close the NextGENe Project wizard.
4. On the NextGENe main menu, click Help > User Management > Manage Settings.
The User Management dialog box opens. The General tab is the open tab. Turn on user
management is selected.
Figure 1-18:
User Management Settings dialog box, General tab
5. Clear Turn on user management.
6. Click OK.
A message opens, indicating that to apply the changes that NextGENe must be closed
and reopened and asking you if you want to close NextGENe now.
7. Click Yes.
The message and NextGENe close. Now, any user can start NextGENe without any
authentication. The user configuration information, however, is not deleted, so you can
always turn user management back on if needed.
38
NextGene User’s Manual
Chapter 1
Getting Started with NextGENe
Managing Groups in NextGENe
Users are the people who log into NextGENe, whether they are adding and reviewing
content, or just using the application in a read-only capacity. A group is a collection of users
that have the same permissions in NextGENe. As the Administrator user for NextGENe, you
are responsible for managing all the groups for your NextGENe instance and managing the
users for these groups to ensure that your users have the appropriate permissions available to
them in NextGENe. You can assign users to one of the four default groups that are installed
with every instance of NextGENe, or you can create your own groups with the needed
permissions, and then assign users to one of these groups.
NextGENe Default User Group
Reporter
Technician
Analyst
Supervisor
View Project
Y
Y
Y
Y
Export Results
Y
Y
Y
Y
Create and Run Project
N
Y
Y
Y
Re-run Project
N
N
Y
Y
Edit Sequence Data
N
N
Y
Y
Edit Variants
N
N
Y
Y
Edit Alignment
N
N
Y
Y
Edit Report Filters
N
N
Y
Y
Assigned Permissions
Manage Global Settings
N
N
N
Y
Manage Analysis Settings
N
N
N
Y
Manage Report Settings
N
N
N
Y
Managing groups for NextGENe consists of adding new groups, editing existing groups, and
deleting groups.
To manage groups in NextGENe
1. On the NextGENe main menu, click Help > User Management > Manage Settings.
The User Management Settings dialog box opens. The General tab is the open tab. See
Figure 1-18 on page 38.
2. Click the Groups tab to open it.
The tab lists the four default groups that are installed with every instance of NextGENe
as well any groups that have been configured for your NextGENe instance. If applicable,
it also lists any groups that have been configured for your Geneticist Assistant instance.
See Figure 1-19 on page 40.
NextGene User’s Manual
39
Chapter 1
Getting Started with NextGENe
Figure 1-19:
User Management Settings dialog box, Groups tab
3. Optionally, to view a list of all users that are currently assigned to a group, select the
group.
The users that are assigned to the selected group are displayed alphabetically by
username in the User list pane.
4. Continue to one of the following:
40
•
“To add a new group” on page 41.
•
“To edit a group” on page 41.
•
“To delete a group” on page 42.
NextGene User’s Manual
Chapter 1
Getting Started with NextGENe
To add a new group
1. Click Add Group.
The Add Group dialog box opens.
Figure 1-20:
Add Group dialog box
2. In the Group name field, enter the name for the new group.
3. On the Permissions list, select the permissions for the new group.
4. Click OK.
A message opens, indicating that the new group was successfully created.
5. Click OK.
The message closes. The Groups tab remain opens with the newly added group
displayed on the tab.
6. Click OK.
The User Management Settings dialog box closes.
To edit a group
Editing a group from the Group tab consists of modifying the permissions for the group. If
you want to edit a group by adding or deleting users, then you must do so from the Users tab.
(See “Managing Users in NextGENe” on page 44.) Also, you cannot edit a group name. If
you need to rename a group, you must delete the current group, and then create a new group
with the new name.
Although you can edit the permissions that are assigned to the NextGENe default
groups, SoftGenetics strongly recommends that you not do so. Instead, you should
create a new group with the appropriate permissions, and then assign users to the
new group.
NextGene User’s Manual
41
Chapter 1
Getting Started with NextGENe
1. Select the group for which you are modifying the permissions, and then click Edit
Group.
The Edit Group dialog box opens. The group name is displayed in the Group name field,
and you cannot edit it. The permissions that are currently assigned to the group are also
displayed.
Figure 1-21:
Edit Group dialog box
2. Modify the permissions for the group as needed.
3. Click OK.
A message opens, indicating that the group was successfully edited.
4. Click OK.
The message closes. The Groups tab remain opens.
5. Click OK.
The User Management Settings dialog box closes.
To delete a group
Although you can delete any of the NextGENe default groups, SoftGenetics
strongly recommends that you not do so. Instead, you should delete only those
custom groups that you have added for your NextGENe installation.
1. Select the group that you are deleting, and then click Delete Group.
A message opens, indicating that you are deleting the selected group and prompting you
to click OK to confirm the deletion.
2. Click OK.
The message closes, and a second message opens, indicating that you have successfully
deleted the selected group.
42
NextGene User’s Manual
Chapter 1
Getting Started with NextGENe
3. Click OK.
The second message closes. The entry for the group is removed from the Groups tab.The
Groups tab remains open.
4. Click OK.
The User Management Settings dialog box closes.
NextGene User’s Manual
43
Chapter 1
Getting Started with NextGENe
Managing Users in NextGENe
Users are the people who log into NextGENe, whether they are adding and reviewing
content, or just using the application in a read-only capacity. If you are the Administrator
user for NextGENe, then you are responsible for managing all the other users for your
NextGENe instance. Managing users for NextGENe consists of adding new users, editing
existing users, and deleting users. You can also view the activity for your NextGENe users
(logging in to or logging out of NextGENe) in a log file.
To manage users in NextGENe
1. On the NextGENe main menu, click Help > User Management > Manage Settings.
The User Management Settings dialog box opens. The General tab is the open tab. See
Figure 1-18 on page 38.
2. Optionally, to view the activity for your NextGENe users (logging in to or logging out of
NextGENe) in a log file, click View Log.
The User Management Log file opens onscreen. The file lists login and logout activity
for your NextGENe users, and if applicable, all the activities for your Geneticist
Assistant users as well. You can click Save to File to save the log file with a name and a
location of your choosing.
Figure 1-22:
44
User Management Log file
NextGene User’s Manual
Chapter 1
Getting Started with NextGENe
3. Click the Users tab to open it.
The tab lists all the user accounts that have been configured for your NextGENe
instance, and if applicable, any user accounts that have been configured for your
Geneticist Assistant instance.
Figure 1-23:
User Management Settings dialog box, Users tab
4. Continue to one of the following:
•
“To add a user” on page 46.
•
“To edit a user” on page 47.
•
“To delete a user” on page 48.
NextGene User’s Manual
45
Chapter 1
Getting Started with NextGENe
To add a user
1. Click Add User.
The Add User dialog box opens.
Figure 1-24:
Add User dialog box
2. Enter the information for the new user:
•
In the Username field, enter the appropriate user name.
•
In the Password field, enter the password for the user.
The only invalid character is a space. There are no other special requirements or
restrictions for the user password. It can adhere to your organization’s standards
and any other requirements as needed. If you forget or lose this password, it is not
recoverable.
•
In the Verify field, enter the user password exactly as you entered it in the Password
field.
•
Optionally, in the Email field, enter the email address for the user.
The current version of User Management does not support email notifications;
however, you can still enter an email address.
3. Assign the user to a selected group.
Assigning a user to a group assigns the user’s permissions for NextGENe. If the
appropriate group is not available, then you must add the group. See “Managing
Groups in NextGENe” on page 39.
4. Optionally, if the user is to be responsible for User Management in NextGENe
(managing groups and users), then select System administrator.
46
NextGene User’s Manual
Chapter 1
Getting Started with NextGENe
5. Click OK.
A message opens, indicating that the new user was created successfully.
6. Click OK.
The message closes. The entry for the new user is displayed on the Users tab. The Users
tab remains open.
7. Click OK.
The User Management Settings dialog box closes.
To edit a user
You can edit the password, the email address, and the groups for a user. For any user other
than the default Administrator user, you can edit the System administrator status. You cannot
edit the username for any user. To edit the username, you must delete the user, and then
create a new user with a different username. See “To delete a user” on page 48.
1. Select the user that you are editing, and then click Edit User.
The Edit User dialog box opens.
Figure 1-25:
Edit User dialog box
2. Edit the information for the user as needed:
•
To edit the password, select New password, and then do the following:
i.
In the Password field, enter the password for the user.
The only invalid character is a space. There are no other special requirements or
restrictions for the user password. It can adhere to your organization’s standards
and any other requirements as needed. If you forget or lose this password, it is not
recoverable.
ii. In the Verify field, enter the user password exactly as you entered it in the
Password field.
NextGene User’s Manual
47
Chapter 1
Getting Started with NextGENe
•
Enter an email address for the user, or edit the existing address as needed.
•
Select a different group for the user.
•
Select or clear the System administrator status for the user.
3. Click OK.
A message opens, indicating that the new user was updated successfully.
4. Click OK.
The message closes. The entry for the user is updated accordingly on the Users tab.
5. Click OK.
The User Management Settings dialog box closes.
To delete a user
You cannot delete the default Administrator user. To edit the name for a user, you must delete
the user, and then create a new user with a different user name. See “To add a user” on page
46.
1. Select the user that you are deleting, and then click Delete User.
A message opens, indicating that you are deleting the user and asking you to click OK to
continue.
2. Click OK.
The message closes, and a second message opens indicating that the selected user was
successfully deleted.
3. Click OK.
The second message closes. The entry for the user is removed from the Users tab. The
Users tab remains open.
4. Click OK.
The User Management Settings dialog box closes.
48
NextGene User’s Manual
Chapter 2
Project Setup
The NextGENe software application is designed to enhance the power for discovery from
your Next Generation sequencing data from four platforms—the Illumina Genome Analyzer,
the Roche Genome Sequencer FLX and FLX Titanium Systems, and Life Technologies’s
SOLiD System and Ion Torrent. Each platform can be used to generate data for a multitude
of applications. NextGENe is equipped with a Project Wizard that guides you through the
necessary steps for setting up a project for each possible instrument platform and application
combination.
This chapter covers the following topics:
•
“Overview of the Project Wizard” on page 51.
•
“Setting up a New NextGENe Project” on page 53.
•
“Saving and Loading Project Settings” on page 77.
•
“Batch Processing of Project Files Using the Project Log” on page 79.
•
“Specifying NextGENe Process Options” on page 84.
NextGene User’s Manual
49
Chapter 2
Project Setup
50
NextGene User’s Manual
Chapter 2
Project Setup
Overview of the Project Wizard
You use the NextGENe Project Wizard to set up a project for analyzing your Next
Generation sequencing data. The NextGENe Project Wizard opens automatically when you
launch the NextGENe application, or you can do one of the following:
•
Click the Project Wizard icon
on the application toolbar.
•
On the NextGENe main menu, click File > Open Project Wizard.
•
On the NextGENe main menu, click Process > Project Wizard.
The first page that opens is the Application Type page.
Figure 2-1:
NextGENe Project Wizard, Application Type page
The Project Wizard is a standard wizard consisting of multiple pages that are linked by Next
and Back buttons. After you complete the steps on a page, you click Next to move to the next
page. At any time, you can click Back as many times as needed and modify your selections
for a previously completed step or steps. In addition to the standard Next and Back buttons,
the Project Wizard has page-specific buttons that you can click to open the indicated page.
These buttons are listed in the left pane of the wizard in the same order in which the pages
open when you click Next. If a page is unavailable, then the page-specific button is dimmed.
NextGene User’s Manual
51
Chapter 2
Project Setup
For example, in Figure 2-1, the Application Type page is open. While on this page, you can
click Next to open the Load Data page, or you can click the Load Data button. In the same
figure, because Sequence Assembly is not a supported step for the SNP/Indel application
type, the Assembly button is dimmed.
You have a variety of options for processing a NextGENe project in the Project Wizard.
52
•
You can set up a new NextGENe project. See “Setting up a New NextGENe Project” on
page 53.
•
You can use the Save Settings function to save the settings from a project to a
configuration file, and then you can use the Load Settings function to load this
configuration file for use in another project. See “Saving and Loading Project Settings”
on page 77.
•
You can process a single project, or you can process multiple projects sequentially. See
“Batch Processing of Project Files Using the Project Log” on page 79.
NextGene User’s Manual
Chapter 2
Project Setup
Setting up a New NextGENe Project
Setting up a new NextGENe project consists of the following high-level steps:
•
Specifying the instrument type and the application type:
•
Four types of instrument systems produce data that NextGENe can analyze—the
Roche/454 instrument series, the Illumina Genome Analyzer, and Life
Technologies’s SOLiD System and Ion Torrent sequencer. You must specify the
instrument type that you used to produce the data that is being analyzed.
•
The application type determines how you are going to analyze the data—de novo
assembly, SNP/Indel Discovery, and so on. The application type that you specify, in
turn, determines the steps that are available to you for analyzing your data—Sequence
Condensation, Sequence Assembly, and Sequence Alignment. You must also specify
the method by which to analyze the data and the number of cores that are to be used
for processing the data.
See “To specify data analysis information in the Project Wizard” on page 54.
•
Loading the data files—The data files that are being analyzed must be in .fasta format or
BAM format. With the exception of the BAM format, if the files are not in .fasta format,
for example, .fastq, then you must use the NextGENe conversion tool to convert the files
before loading them. See “To load the sample data files” on page 55.
•
Loading the reference files—For all application types other than de novo Assembly, a
reference file is required for aligning reads. The reference file can be a .fasta file, a
GenBank file, a preloaded reference file that SoftGenetics supplies, or for STR analysis,
a custom .fasta file that you create. See “To load the reference files” on page 56.
•
Specifying the output location and saving the output file—You must specify the location
for the output folder and the name of the output folder. See “To specify the output file
name and location” on page 59.
•
Specifying the values for the analysis steps—You can accept the default values that
NextGENe generates, or you modify the values as needed. See “To specify the values for
the data analysis steps” on page 60.
•
Specifying post processing options for the project—Optionally, you can specify which
outputs (reports and sequences) to automatically generate and save after project analysis
for a sequence alignment project is completed. See “To specify the post-processing
options for a Sequence Alignment project” on page 67.
•
Run the project—You can process a single project, or you can process multiple projects
sequentially. You can also carry out a secondary analysis on a previously run project. See
“To finish the project” on page 74.
NextGene User’s Manual
53
Chapter 2
Project Setup
To specify data analysis information in the Project Wizard
1. On the Application Type page, in the Instrument Type pane, select the instrument type
that was used to produce that data.
Figure 2-2:
Specifying the instrument type
2. In the Application Type pane, select the method by which the data is to be analyzed.
(SNP/Indel Discovery is selected by default.)
Figure 2-3:
Specifying the application type
The Application Type that you select determines the sequencing steps that are available
for analyzing the data.
\
Application Type
54
Available Sequencing Steps
de novo Assembly
Condensation, Assembly
SNP/Indel Discovery
Condensation, Alignment
Transcriptome (including Alternative Splicing)
Alignment
ChIP-Seq
Condensation, Alignment
SAGE
Alignment
STR analysis
Condensation, Alignment
Mitochondrial amplicon
Condensation, Alignment
CNV-Seq
Condensation, Alignment
HLA
Alignment
Other
Condensation, Assembly, Alignment
NextGene User’s Manual
Chapter 2
Project Setup
3. In the Performance Settings pane, enter the number of cores that are to be used for
processing in the Project Wizard.
The default value is one less than the total number of available cores, which
allows you to review other projects and/or carry out any other needed project
activities while the current project is being processed.
4. Continue to “To load the sample data files” below.
To load the sample data files
You can load a data file as-is only if the data file is in BAM format or in .fasta format, which
includes Roche .fna files and SOLiD System .csfasta files. With the exception of the BAM
format, if the data file is not in .fasta format, you must convert the file to the .fasta format
before loading it. (See Chapter 3, “File Format and Conversion,” on page 89.) Also, if you
used barcoding or multiplexing, then you must sort the data before you can load it. (See “The
NextGENe Barcode Sorting Tool” on page 349.)
1. Click Next or Load Data.
The Load Data page opens.
Figure 2-4:
Project Wizard, Load Data page
NextGene User’s Manual
55
Chapter 2
Project Setup
2. In the Sample Files pane, click Load.
By default, .fasta is the selected file type. To process BAM files, you must select
BAM files as the file type.
3. In the Open dialog box, browse to and select the data file that you analyzing, and then
click Open to load the selected file in to the Project Wizard.
A data file in the .fasta format has a file extension of “.fasta,” “.fna,” or
“.csfasta.” The name of a data file that has been converted to the .fasta format by
NextGENe’s Format Conversion tool is appended with the phrase “_converted”
as shown in Figure 2-5 below.
You can load multiple data files for the same single sequence read project. If you
are using the Somatic Mutation Comparison tool to analyze your data, then
SoftGenetics recommends a minimum of four normal samples to create a single
pooled project. See “Somatic Mutation Comparison tool” on page 303.
Figure 2-5:
Example of a converted .fasta file
4. If you loaded a .fasta file or an unaligned BAM file, then go Step 5. If you loaded an
aligned BAM file, and you want to realign the data, then leave Realignment (below the
Output field) selected, and then go to Step 5; otherwise, if you do not want to realign the
data, then clear this option, and go to Step 5.
5. If you selected the de novo Assembly application type, continue to “To specify the
output file name and location” on page 59; otherwise, continue to “To load the reference
files” below.
To load the reference files
For all application types other than de novo Assembly, a reference is required for aligning the
reads of the data file that is being analyzed against a reference genome.
•
For all application types other than transcriptome, STR analysis, or Mitochondrial
amplicon analysis:
•
If you are aligning the data against a small genome (one that is less than or equal to
250 Mbp), then you can align data against a reference file that is in either .fasta format
or GenBank format. See “To load a GenBank or .fasta reference file (Reference < 250
Mbp)” on page 57.
You can download GenBank format references from the NCBI website
(http://www.ncbi.nlm.nih.gov/). For information about NextGENe’s alignment
algorithms, see “NextGENe Sequence Alignment Algorithms” on page 135.
56
NextGene User’s Manual
Chapter 2
Project Setup
•
If you are aligning the data against a large genome (one that is greater than 250 Mbp,
such as the whole human genome), then you must align the data against a preloaded
reference file that SoftGenetics supplies or a custom preloaded reference file that was
built using the NextGENe Build Preloaded Reference tool. See “To load a preloaded
reference (Large genome reference)” on page 57.
For detailed information about building a custom preloaded reference, see “The
NextGENe Build Preloaded Reference Tool” on page 372. For detailed
information about the algorithm that NextGENe uses to align reads to a preloaded
reference such as the human, mouse, or rat genome, see “NextGENe Sequence
Alignment Algorithms” on page 135.
•
The transcriptome application type always requires a preloaded reference that is created
from an annotated GenBank file or supplied by SoftGenetics. See “Transcriptome
Alignment Project with Alternative Splicing” on page 172.
•
The STR application type requires a custom .fasta reference file. See “STR (Short
Tandem Repeats) Analysis Project” on page 180.
•
The Mitochondrial amplicon application type requires the mitochondrial Genbank
reference file. You must also load a BED file that details the amplicon locations. See “To
set ROI regions from a BED or GBK file” on page 58.
To load a GenBank or .fasta reference file (Reference < 250 Mbp)
1. In the Reference Files pane, click Load.
2. In the Open dialog box, browse to and select the GenBank or .fasta reference file.
A data file in the .fasta format has a file extension of “.fasta.” A GenBank
reference file has a file extension of “.gbk” or “.gb.”
3. Continue to “To specify the output file name and location” on page 59.
To load a preloaded reference (Large genome reference)
1. In the Reference Files pane, click Preloaded.
The Select Preloaded Reference dialog box opens. This dialog box lists all the preloaded
references that have been imported into your NextGENe installation or custom built for
your NextGENe installation. See Figure 2-6 on page 58.
If the dialog box is blank, you can import the necessary reference files from the
Reference discs that are included with the NextGENe software or download them
from the SoftGenetics ftp site. See Appendix A, “Preloaded Reference Files,” on
page 445. You can also click Manage References > Build new reference to open
the NextGENe Build Preloaded Reference tool and build the necessary reference.
See “The NextGENe Build Preloaded Reference Tool” on page 372.
NextGene User’s Manual
57
Chapter 2
Project Setup
Figure 2-6:
Select Preloaded Reference dialog box
1. Select the appropriate preloaded reference.
2. Click OK.
The Select Preloaded Reference dialog box closes. The selected reference is displayed in
the Reference files pane.
3. Continue to “To specify the output file name and location” on page 59.
To set ROI regions from a BED or GBK file
If you select Mitochondrial amplicon analysis, then in addition to loading the GenBank
Mitochondrial reference file, you must load a BED file that includes the amplicon regions.
You can also select this option for targeted sequencing analysis to display bases that align
outside of the target regions or to primer regions as soft-clipped. In this case, ROIs can be
defined in either a BED file or GenBank file.
Figure 2-7:
58
Soft-clipped bases displayed in the NextGENe viewer
NextGene User’s Manual
Chapter 2
Project Setup
Setting regions from GBK files is applicable only if you load a GBK reference file.
You can download GenBank format references from the NCBI website
(http://www.ncbi.nlm.nih.gov/). If the GBK file does not have the necessary
information about the ROIs, then you can manually add the information to the file.
See “Advanced GBK Editor tool - Auto Create ROI tool” on page 278.
1. Load the reference file.
2. Select one of the following as appropriate—Set Amplicon BED file or Set ROIs from
GBK files.
For detailed information about the required format for a BED file, see “BED file”
on page 473.
3. Do one of the following:
•
If you selected Set Amplicon BED file, click Set to open a dialog box, and then
browse to and select the appropriate BED file.
•
If you selected Set ROIs from GBK files, no further action is required.
4. Continue to “To specify the output file name and location” below.
To specify the output file name and location
The Load Data page displays a single option for specifying the location of the saved output
file and by default, it is populated with the directory path for the first sample file that was
loaded.
Figure 2-8:
Output option
1. Do one of the following:
•
In the Output field, leave the default location for the output folder as-is, and then
continue to “To specify the values for the data analysis steps” on page 60.
•
Click Set to open a Save As dialog box to browse to and select a new location for the
output folder. The location can be a local drive or a network drive.
If the location is a network drive, then you can specify a Local Temp Directory
option to speed up the processing of the data. See “To specify data, output, and
AutoRun template storage settings” in “Specifying NextGENe Process Options”
on page 84.
NextGene User’s Manual
59
Chapter 2
Project Setup
The default Output folder name is based on the name of the data file that you
loaded and is appended with the phrase “_Output” as shown in Figure 2-9 on
page 60..
Figure 2-9:
Example of an Output folder
2. Continue to “To specify the values for the data analysis steps” below.
To specify the values for the data analysis steps
The application type that you select determines the steps that are available for analyzing the
data and the default values for each applicable analysis step. You can accept these default
values, or you can modify them as needed. See:
•
“To specify the values for the Sequence Condensation step” below.
•
“To specify the values for the Sequence Assembly step” on page 63.
•
“To specify the values for the Sequence Alignment step” on page 64.
To specify the values for the Sequence Condensation step
1. Click Next or Condensation.
The Condensation Settings page opens. The Reference Length options vary depending
on the selected Application Type—de novo Assembly (see Figure 2-10 below), or all
application types other than de novo Assembly. (See Figure 2-11 on page 61.)
For a detailed discussion of the Sequence Condensation tool and its settings, see
Chapter 4, “Sequence Condensation Tool,” on page 99.
Figure 2-10:
60
Condensation Settings page for de novo Assembly
NextGene User’s Manual
Chapter 2
Project Setup
Figure 2-11:
Condensation Settings page (for all application types other than de novo
Assembly)
2. On the Condensation Type dropdown list, for Illumina data, SOLiD System data, or Ion
Torrent data, select the condensation method that you are using (Consolidation,
Elongation, or Error Correction.)
For Roche/454 data, Error Correction is the only available method and the
Condensation Type field is automatically set to this value.
3. For for Illumina data, SOLiD System data, or Ion Torrent data, click Inspect Input Files.
For Roche data, go to Step 4.
The NextGENe Project Wizard scans your data file and sets a variety of default values
for the general sequence condensation settings. You can modify these values if needed.
See “Sequence Condensation Tool - General Settings” on page 106.
If you load multiple sample files for analysis, all of the data is evaluated as whole,
not by individual sample files.
NextGene User’s Manual
61
Chapter 2
Project Setup
4. Click Open Advanced Settings.
•
For the Roche/454 instrument type, the advanced settings are unique and are
populated with values that SoftGenetics has determined, from experience, are
appropriate for most datasets for the instrument. (See Figure 2-12 below and
“Condensation Tool - Advanced Settings for Roche/454 Data” on page 116.)
•
For the Illumina, SOLiD, and Ion Torrent instrument types, the available settings are
the same and the advanced settings are populated based on the Read Lengths and
Expected Depth of Coverage values that were set in Step 3. (See Figure 2-12 on page
62 and “Sequence Condensation Tool - Advanced Settings for Illumina Data, SOLiD
System Data, or Ion Torrent Data” on page 110.)
Figure 2-12:
62
Condensation Settings page, Advanced Settings for Roche instrument type
NextGene User’s Manual
Chapter 2
Project Setup
Figure 2-13:
Condensation Settings page, Advanced Settings for Illumina instrument type
5. Leave the default values as is, or make any changes as needed.
6. If applicable, continue to the next analysis step for the project; otherwise, if this is your
last analysis step, click Finish, and then continue to “To finish the project” on page 74.
To specify the values for the Sequence Assembly step
1. Click Next or Assembly.
The Assembly Settings page opens. See Figure 2-14 on page 64.
The assembly settings on this page vary depending on the selected instrument type
and, if applicable, the selected condensation options. For a detailed discussion of
the Sequence Assembly tool and its settings, see Chapter 5, “Sequence Assembly
Tool,” on page 121.
NextGene User’s Manual
63
Chapter 2
Project Setup
Figure 2-14:
Assembly Settings page (SOLiD System data, Other Application Type)
2. If applicable, continue to the next analysis step for the project; otherwise, if this is your
last analysis step, click Finish, and then continue to “To finish the project” on page 74.
To specify the values for the Sequence Alignment step
1. Click Next or Alignment.
The Alignment Settings page opens. The settings on this page vary, depending on the
type of reference file (.fasta, GenBank, or preloaded) that you loaded and the application
type. See:
•
Figure 2-15 on page 65.
•
Figure 2-16 on page 65.
•
Figure 2-17 on page 66.
For a detailed discussion of the Sequence Alignment tool and its settings, see
Chapter 6, “Sequence Alignment Tool,” on page 133.
64
NextGene User’s Manual
Chapter 2
Project Setup
Figure 2-15:
Alignment Settings page (.fasta or GenBank reference file loaded and any
application type other than Transcriptome with Alternative splicing selected)
Figure 2-16:
Alignment Settings page (Preloaded reference file and any application type
other than Transcriptome with Alternative splicing selected)
NextGene User’s Manual
65
Chapter 2
Project Setup
Figure 2-17:
Alignment Settings page (Transcriptome application type with Alternative
splicing and a preloaded reference file)
2. Leave the default values as is, or make any changes as needed.
3. Do one of the following:
66
•
To specify post-processing options for an alignment project with any application
type other than Transcriptome with Alternative splicing, continue to “To specify the
post-processing options for a Sequence Alignment project” on page 67.
•
To finish the project, click Finish, and then continue to “To finish the project” on
page 74.
NextGene User’s Manual
Chapter 2
Project Setup
To specify the post-processing options for a Sequence Alignment
project
Figure 2-18:
Post-processing page for a sequence alignment project
Optionally, you can specify post-processing options for a sequence alignment project.
•
Report post-processing options—If you specify report post-processing options, then
selected reports, including the Summary report, are generated automatically and saved for
the project after project analysis is completed. Each report is generated and saved based
on the settings that were specified in a saved Settings file (.ini file) for the report. You can
generate and save multiple versions of different reports, or multiple versions of the same
report as long as each report version uses a different Settings file. To specify
post-processing options for the first time, you must have previously saved a Settings file
for at least one of the following reports:
•
Mutation report (The general report settings and/or the variation tracks settings). See
“Mutation Report settings” on page 214.
To export the project output to Geneticist Assistant, you must select the Mutation
report as a post-processing option with a general Settings file that specifies that
the VCF output is to be saved. See “Output tab” on page 227.
NextGene User’s Manual
67
Chapter 2
Project Setup
•
Distribution report. See “Distribution report” on page 249.
•
Coverage Curve report. See “Coverage Curve report” on page 253.
•
Expression report. See “Expression Report” on page 260.
•
Structural Variation report. See “Structural Variation report” on page 267.
•
HLA report. See “HLA project report” on page 197.
The HLA report is available as a post-processing option only if HLA is selected as
the application type. See “HLA Project” on page 195.
•
Summary report. See “Summary report” on page 241.
Save Summary Report is available only after you select at least one other
post-processing report and its Settings file. The information that is contained in
the Summary report is relative to the post-processing reports that you select for
the project.
•
Export post-processing options—If you specify export post-processing options, then a
.fasta file that contains all the reads that aligned to a specific region in the reference
sequence is automatically generated after project analysis is completed. The sequence is
generated and saved based on the settings that were specified in a saved Settings file (.ini
file) for the sequence. To specify post-processing options for the first time, you must have
previously saved a Settings file for the sequence using the Export Sequences tool. (See
“Export Sequences tool” on page 272.)
You can also export the project output to just a BAM file, and you can export the project
output (BAM and VCF files) to Geneticist Assistant.
1. Click Post Processing.
The Post Processing page opens.
2. Select any of the post-processing options as needed. See:
68
•
“To select the Mutation Report as a post-processing option” on page 69.
•
“To select a report other than the Mutation report as a post-processing option” on
page 70.
•
“To exported aligned sequences as a post-processing option” on page 71.
•
“To export the project output to a BAM file” on page 71.
•
“To export the project output to Geneticist Assistant” on page 72.
NextGene User’s Manual
Chapter 2
Project Setup
To select the Mutation Report as a post-processing option
If you select the Mutation report as a post-processing option, two different Settings files are
available. The General Report Settings file contains all the general options for the Mutation
report. The Variation Tracks Settings file contains all the tracks settings for the Mutation
report based on the variation databases that were imported for the project.
For information about the various options for the Mutation report, see “Mutation
Report settings” on page 214. For information about importing variation
databases into NextGENe, see “The NextGENe Track Manager Tool” on page
383.
1. On the Report dropdown list, select Mutation Report.
A blank Settings field opens next to the selected report.
2. Next to the blank Settings field, click Set.
The Set Mutation Report Settings dialog box opens.
Figure 2-19:
Set Mutation Report Settings dialog box
3. Under General Report Settings click Set to display the Open dialog box, and then browse
to and select a saved Settings file (*.ini file) for the report.
4. Optionally, to specify display or filtering settings based on imported variation tracks,
under Variation Tracks Settings, click Set to display the Open dialog box, and then
browse to and select a saved Settings file (*.ini file) for the report.
5. Click OK.
The Set Mutation Report Settings dialog box closes. The Post-Processing page remains
opens.
6. Optionally, click Save Summary report to have a Summary report automatically
generated for the project as well.
Remember, Save Summary report is available only after you select at least one
other post-processing report and its Settings file. For information about the
Summary report, see “Summary report” on page 241.
NextGene User’s Manual
69
Chapter 2
Project Setup
7. If you are done with specifying the needed post-processing options, then Click Finish,
and continue to “To finish the project” on page 74; otherwise, continue specifying any
other needed post-processing options. See:
•
“To select a report other than the Mutation report as a post-processing option”
below.
•
“To exported aligned sequences as a post-processing option” on page 71.
•
“To export the project output to a BAM file” on page 71.
•
“To export the project output to Geneticist Assistant” on page 72.
To select a report other than the Mutation report as a
post-processing option
1. On the Report dropdown list, select the report that is to be automatically generated and
saved for the project after project analysis is complete.
A blank Settings field opens next to the selected report.
2. Next to the blank Settings field, click Set and then browse to and select a saved Settings
file (.ini file) for the report.
3. Repeat Step 1 and Step 2 until you have added all the needed reports and their Settings
files.
4. Optionally, click Save Summary report to have a Summary report automatically
generated for the project as well.
Remember, Save Summary report is available only after you select at least one
other post-processing report and its Settings file. For information about the
Summary report, see “Summary report” on page 241.
5. If you are done with specifying the needed post-processing options, then Click Finish,
and continue to “To finish the project” on page 74; otherwise, continue specifying any
other needed post-processing options. See:
70
•
“To select the Mutation Report as a post-processing option” on page 69.
•
“To exported aligned sequences as a post-processing option” on page 71.
•
“To export the project output to a BAM file” on page 71.
•
“To export the project output to Geneticist Assistant” on page 72.
NextGene User’s Manual
Chapter 2
Project Setup
To exported aligned sequences as a post-processing option
For information about generating and saving an export sequence Settings file, see
“Export Sequences tool” on page 272.
1. On the Export dropdown list, select Export Sequence.
A blank Settings field opens next to the Export Sequence option.
2. Next to the blank Settings field, click Set and then browse to and select a saved Settings
file (.ini file) for the sequence that is to be generated.
3. Repeat Step 1 and Step 2 until you have added all the needed sequences and their
Settings files.
4. If you are done with specifying the needed post-processing options, then Click Finish,
and continue to “To finish the project” on page 74; otherwise, continue specifying any
other needed post-processing options. See:
•
“To select the Mutation Report as a post-processing option” on page 69.
•
“To select a report other than the Mutation report as a post-processing option” on
page 70.
•
“To export the project output to a BAM file” below.
•
“To export the project output to Geneticist Assistant” on page 72.
To export the project output to a BAM file
If you export NextGENe sequence alignment project files to a BAM format, then the
standard index file, index.bai, that other alignment viewers require is also exported. If you do
not select this post-processing option, you always have the option of exporting the project
output to a BAM format from the File menu on the NextGENe viewer. (See “Main menu” on
page 145.)
1. Select Export BAM.
2. If you are done with specifying the needed post-processing options, then Click Finish,
and continue to “To finish the project” on page 74; otherwise, continue specifying any
other needed post-processing options. See:
•
“To select the Mutation Report as a post-processing option” on page 69.
•
“To select a report other than the Mutation report as a post-processing option” on
page 70.
•
“To exported aligned sequences as a post-processing option” on page 71.
•
“To export the project output to Geneticist Assistant” on page 72.
NextGene User’s Manual
71
Chapter 2
Project Setup
To export the project output to Geneticist Assistant
You can export the project output to Geneticist Assistant if both of the following conditions
are met:
•
The Mutation report is selected as a post-processing option with a general Settings file
(.ini file) that specifies that the VCF output is to be saved.
•
Export BAM is selected.
1. On the Report dropdown list, select Mutation Report, and then click Set to load a
mutation report general Settings (*.ini) file that specifies that the VCF output is to be
saved. (See “Output tab” on page 227.)
2. Select Export BAM.
Output to Geneticist Assistant becomes available.
3. Select Output to Geneticist Assistant.
GA Input becomes available.
4. Click GA Input.
The Geneticist Assistant Input Settings dialog box opens.
Figure 2-20:
72
Geneticist Assistant Input Settings dialog box
NextGene User’s Manual
Chapter 2
Project Setup
5. Specify the Geneticist Assistant input for the GA Service.
Setting
Description
GA
Program
The directory for the Geneticist Assistant application on the server. The default path is
C:\Program Files\SoftGenetics\Geneticist Assistant\ga_exe\geneticist_assistant.exe.
Host
The address for the Geneticist Assistant server. The default value is set to localhost,
which assumes that the server is installed on the same computer as NextGENe. If this
is correct, then leave the default value as-is; otherwise, modify the value accordingly.
Username
Enter a vallid login name for Geneticist Assistant
Password
Enter a valid password for the specified username.
6. Click Test Connection.
If you entered all the GA Service information correctly, then a Login Successful message
is displayed; otherwise, a Login failed message is displayed. You must correct any errors
and repeat this step before you can continue.
7. Click OK.
The Login Successful message closes and Connected replaces Test Connection. A series
of asterisks is displayed in the Password field to hide the login password. You can now
specify the Run variables for the running of the project output in Geneticist Assistant.
8. Specify the Geneticist Assistant Run variables.
Variable
Description
Run Name
The name of the run.
Run Time
The default value is the current day’s date and time, but you can modify either or
both values as needed.
Note: You must select each value that is to be changed one at a time.
VCF
Select the appropriate VCF file.
Note: Remember, to export the project output to Geneticist Assistant, you had to
select the Mutation report as a post-processing option with a Settings file
(.ini file) that specifies that the VCF output is to be saved. See “Output tab”
on page 227.
Reference
Select the reference for the run.
Panel
Select the panel for the run.
Chemistry
Select the chemistry for the run.
Instrument
Select the instrument for the run.
9. Click OK.
The Geneticist Assistant Input Settings dialog box closes.
10. If you are done with specifying the needed post-processing options, then Click Finish,
and continue to “To finish the project” on page 74; otherwise, continue specifying any
other needed post-processing options. See:
NextGene User’s Manual
73
Chapter 2
Project Setup
•
“To select the Mutation Report as a post-processing option” on page 69.
•
“To select a report other than the Mutation report as a post-processing option” on
page 70.
•
“To exported aligned sequences as a post-processing option” on page 71.
•
“To export the project output to a BAM file” on page 71.
To finish the project
After you click Finish, the NextGENe projects dialog box opens. This dialog box provides
options for immediately running this single project, running multiple projects in sequence,
running a secondary analysis on a previously run project, or exiting the wizard without
running any projects.
Figure 2-21:
NextGENe projects dialog box
Do one of the following:
•
To immediately run this single project, click Run NextGENe.
•
To exist the Project Wizard without running the project, click Exit Wizard.
Although you did not run a project, because the Project Wizard “remembers” the
settings from its last session, the next time that you open the wizard, you can run a
project using these settings.
74
•
To run multiple projects in sequence, see “To run multiple projects in a series using the
Project Wizard” on page 75.
•
To carry out a secondary analysis on the project that you just created, see “To carry out a
secondary analysis” on page 75.
NextGene User’s Manual
Chapter 2
Project Setup
To run multiple projects in a series using the Project Wizard
Because the Project Wizard “remembers” the settings from its last session, every time you
open the wizard, you can leave the settings as-is or modify them as needed. This means that
you can use this approach to swap out sample files and configure multiple projects as needed
with the same settings.
You can also run multiple projects in a series using the Project Log function. See
“Batch Processing of Project Files Using the Project Log” on page 79.
1. Click Create More Projects (New Project).
A new Project Wizard session opens for configuring a project.
2. Leave the settings from the last session as-is, or optionally, modify the settings as
needed.
3. After you configure your last project in the series, select Run NextGENe.
The projects are run individually in the order in which you created them.
To carry out a secondary analysis
You can use secondary analysis to set up a new project that is based on the output from a
previously created project that has yet to be processed. After the previously created project is
run, then the secondary analysis of its output files is automatically carried out.
You can also carry out a secondary analysis of a previously created project using
the NextGENe AutoRun tool. See Chapter 9, “The NextGENe AutoRun Tool,” on
page 395.
1. Click Create More Projects (Secondary Analysis).
The Project Wizard is opened again.
2. Select the application type for the secondary analysis, and then click Load Data.
The Load Data page opens. The sample files and reference files from the previously
created project remain loaded. The page now contains a Load Previous Run Result at the
top of the page.
Figure 2-22:
Project Wizard, Load Data page for a secondary analysis
NextGene User’s Manual
75
Chapter 2
Project Setup
3. Next to the Sample files pane, click Removal All.
All the previously loaded sample files are removed.
4. Click Load Previous Run Result.
The Load Previous Run Result dialog box opens. The availability of what you can select
for secondary analysis—Matched reads, Unmatched reads, Pseudo paired reads,
Exported reads, and Assembled sequences—is dependent on the settings for the previous
run.
Typically, Unmatched reads is always available for a secondary analysis.
Figure 2-23:
Load Previous Run Result dialog box
5. Select the data type for the secondary analysis.
The Previous run result (Original) list is updated with the appropriate output files from
the previous run.
6. Select the appropriate file or files (CTRL-click to select multiple files) in the Previous
run result (Original) list, and then click Add to List.
The selected output files are moved to the Previous run result (Added) list.
7. Click OK.
The Load Previous Run Result dialog box closes. You return to the Load Data page in
the Project Wizard. The added files are now displayed in the Sample files pane.
8. Modify any settings as needed and complete the running of the project in the wizard.
76
NextGene User’s Manual
Chapter 2
Project Setup
Saving and Loading Project Settings
Because NextGENe supports several instruments types and multiple applications, the
settings for the analysis steps can easily vary from project to project; however, if you have a
group of settings that you frequently use, and you do not want to recreate these settings every
time that you need to use them, then you can save these settings to a Configuration file.
Several pages in the Project Wizard contain a Save Settings button. When you click this
button, you are prompted to name and save a configuration file with an .ini extension. This
configuration file includes all of the settings for the Sequence Condensation step, the
Sequence Assembly step, and the Sequence Alignment step. On the same pages that have a
Save Settings button, you can click a Load Settings button to load this file for any new
project that uses the same data analysis steps and settings.
The Load Data information—the sample files, the reference files, and the output
settings—are not saved in this configuration file.
Figure 2-24: Example of Save Settings/Load Settings buttons on the Condensation Settings
page
NextGene User’s Manual
77
Chapter 2
Project Setup
To save project settings
1. Open the Project Wizard.
2. Select the application type, and confirm that your current settings for the data analysis
steps are as you want them.
3. Click Save Settings.
The Save As dialog box opens. By default, the file type is set to Configuration File (.ini)
as shown in Figure 2-25 below.
Figure 2-25:
Save as type default for project settings
4. Enter a filename, browse to the location in which you are saving the file, and then click
Save.
To load project settings
1. Open the Project Wizard.
2. Click Load Settings.
An Open dialog box opens.
3. Browse to and select the configuration file that contains the settings you want to load,
and then click Open.
You return to the Project Wizard with the saved project settings loaded for the opened
project.
Remember, the Load Data information—the sample files, the reference files, and
the output settings—are not saved in the configuration file. You must specify this
information for every Project Wizard project.
78
NextGene User’s Manual
Chapter 2
Project Setup
Batch Processing of Project Files Using the
Project Log
As discussed in “To finish the project” on page 74, the Project Wizard provides the Create
More Projects option which you can use to carry out the batch processing of a series of
projects in the Project Wizard. When you this option, batch jobs are set up so they can be run
to completion without manual intervention. Two other options that are available for the batch
processing of project files are the Project Log and manually created .ngjob files. You can use
the Project Log to quickly configure multiple projects, which is ideal if you have saved
project settings files or you have many projects that use identical configurations. The Project
Log also allows for manual intervention before you carry out batch processing. You can
rename projects, create new projects, duplicate projects, and even save and load project
settings. After you create multiple projects in the Project Log, you can then carry out batch
processing of the projects in the log.
Sample data files must be in either.fasta format (which includes Roche .fna files
and SOLiD System .csfasta files), or in .bam format. If the sample files are not in
.fasta or .bam format, you must first convert the files to one of these formats before
loading them. (See Chapter 3, “File Format and Conversion,” on page 89.) If you
used barcoding or multiplexing, then you must sort the data before you can load it.
(See “The NextGENe Barcode Sorting Tool” on page 349.) To batch process
project files without carrying out format conversion and/or barcode sorting
separately, see Chapter 9, “The NextGENe AutoRun Tool,” on page 395.
Project Log and Project Wizard
You can use the Project Log to quickly configure multiple new projects, or you can use the
Project Log in conjunction with the Project Wizard to configure multiple projects. When you
use the Project Wizard to create a project, the project information is automatically saved to
the Project Log in temporary runjob files. As a result, you have several options for using the
Project Log tool in conjunction with the Project Wizard to carry out batch processing of
multiple project files:
•
You can create a single project in the Project Wizard, use the Project Log functions to
duplicate and modify this single project to create multiple projects for analysis, and then
either run these projects from the Project Log immediately, or save the projects to a
NextGENe job file and run them at a later date. See “To use the Project Log to create
multiple new projects” on page 80.
•
You can create a series of projects in the Project Wizard. The Project Log contains
multiple tabs labeled Project1, Project2, Project3, and so on, which represent the projects
in the order in which you created them in the Project Wizard. You can run these projects
from the Project Log immediately, or save the projects to a NextGENe job file, and then
run them at a later date. See “To use the Project Log and Project Wizard to batch process
multiple project files” on page 82.
NextGene User’s Manual
79
Chapter 2
Project Setup
To use the Project Log to create multiple new projects
1. Do one of the following:
•
On the NextGENe main menu, click Process > Project Log Viewer.
•
Open the Project Wizard, and in the upper right corner of the wizard, click Show
Project Log.
The Log View window opens. If you opened the Log View window from the main menu,
then the Project Wizard also opens. If the Project Wizard does not contain a project, the
Log View window is blank; otherwise, the Log View window is populated with the
settings from the current/last run project in the Project Wizard.
Figure 2-26:
Project Wizard and Log View window
2. Optionally, click New to clear all of the settings from the current/last run project in the
Project Wizard.
3. Create a project:
80
•
In the Project field, enter a descriptive name for the project. (If you intend to run this
project at a later date, make sure that the name clearly identifies that project so that
you can easily locate the project when needed.)
•
In the Sample field, leave the current settings as is, or click Load to select a different
sample file.
•
In the Reference field, leave the current settings as is, or click Load or Preloaded as
appropriate to select a different reference file.
NextGene User’s Manual
Chapter 2
Project Setup
•
In the Configuration field, click Save As to save the current settings in the Project
Wizard to a configuration file and load this file for the project, or click Load to select
a different configuration file.
•
In the Output field, leave the current settings as is, or click Browse to select a
different output location.
4. Do one of the following to add more projects:
•
Click Add Project. A second blank tab labeled Project2 is added to the Log View
window.
•
Click Duplicate. A second tab labeled Project2 and populated with all of the
information from the Project1 tab is added to the Log View.
The project settings are duplicated for the project that is open when you click
Duplicate. For example, if you have created Project1 and Project2, and you want
to create Project3, you do so either by clicking Duplicate on the Project1 tab
(which duplicates the settings for Project1), or by clicking Duplicate on the
Project2 tab (which duplicates the settings for Project2).
5. Repeat Step 3 and Step 4 as needed to add all of your projects.
To remove a project in its entirety, open the project tab, and then in the PROJECT
pane, click Remove.
6. Do one of the following:
•
To run all of the projects immediately in the order in which you created them, click
Run.
•
To save all of the projects to a NextGENe job file that you can run at a later date,
click Save or Save As, and then go to “To run a saved job file” on page 83.
A NextGENe job file has an .ngjob extension as shown in Figure 2-27 below.
Figure 2-27:
Saving a NextGENe job file
NextGene User’s Manual
81
Chapter 2
Project Setup
To use the Project Log and Project Wizard to batch process
multiple project files
The NextGENe application provides multiple ways of working with the Project
Wizard and the Project Log to create multiple project files for batch processing.
For brevity and ease of use, this procedures describes only two of the available
approaches above; however, you can use whatever method best suits your working
needs.
1. Create one or more projects in the Project Wizard. See one of the following:
•
“Setting up a New NextGENe Project” on page 53.
•
“Saving and Loading Project Settings” on page 77.
2. Do one of the following:
•
On the NextGENe main menu, click Process > Project Log Viewer.
•
Open the Project Wizard, and in the upper right corner of the wizard, click Show
Project Log.
The Log View window opens, populated with the settings from the current project in the
Project Wizard.
Figure 2-28:
82
Log View open after creating a project in the Project Wizard
NextGene User’s Manual
Chapter 2
Project Setup
3. You now have a variety of options to create multiple projects, including:
•
In the Project Wizard, clicking Finish, and then on the NextGENe Projects dialog
box, clicking Create More Projects and then clicking OK.
A new wizard session opens for configuring a project. Because the wizard
“remembers” the settings from its last session, leave the settings as is or modify
them as needed. As you create a series of projects in the Project Wizard, the Project
Log is updated with multiple tabs labeled Project1, Project2, Project3, and so on,
which represent the projects in the order in which you created them in the Project
Wizard.
•
In the Project Log, using Add Project and Duplicate as needed to create multiple
projects. (See “To use the Project Log to create multiple new projects” on page 80.)
4. For either option, after you have created all of the needed projects, do one of the
following:
•
Click Run to run these projects from the Project Log immediately.
•
Click Save or Save As to save the projects to a NextGENe job file and run them at a
later date. See “To run a saved job file” below.
If you save the job file, it is saved with an .ngjob extension. See Figure 2-27 on
page 81.
To run a saved job file
This section describes running a saved NextGENe job file using options in the
Project Log. You can also use a text editor to manually create an .ngjob file. If you
want to use a text editor to create a job file, SoftGenetics recommends that you
first use the Project Log to create a file with a single project, which ensures that
the file will have the correct format. You can then open this file in a text editor and
copy the information for the existing project and modify it as needed to create
other projects. Contact SoftGenetics at [email protected] for
assistance.
1. On the NextGENe main menu, click File > Load Project Log file.
In the Open dialog box, browse to and select the job file that you are loading. The Log
View window and the Project Wizard open. The Log View window is populated with the
settings from the loaded job file.
Remember, a NextGENe job file has an .ngjob extension.
2. Click Run.
NextGene User’s Manual
83
Chapter 2
Project Setup
Specifying NextGENe Process Options
You use process options in NextGENe to specify the following:
•
The location of the Preloaded Reference directory.
•
Whether to save the reference annotation files in the project folder, or simply link to the
information, which greatly reduces the size of the output folder.
•
The connection values for the MySQL database, which is critical information that is
needed for retrieving annotation from the database.
•
Whether to save data in a temporary local folder if you are processing data on a network
location.
•
Whether to save post-processing outputs in a location other than the project output folder.
•
View the location of the Template root directory, which is the directory in which all
NextGENe AutoRun templates are saved.
For some of these process options, you must specify a value, while for other options, default
values are provided. Typically, these default values are the preferred values; however, if
needed, you can edit some of these values. You can also use the options that are available to
manage your references for your NextGENe projects.
To specify NextGENe process options
1. On the NextGENe main menu, click Process > Options.
The Options dialog box opens. By default, the Preloaded References tab is the open tab.
Figure 2-29:
84
Options dialog box, Preloaded References tab
NextGene User’s Manual
Chapter 2
Project Setup
2. Continue to one of the following:
•
“To specify Preloaded Reference information” below.
•
“To manage references for your NextGENe projects” on page 86.
•
“To manage Annotation database information” on page 86.
•
“To specify data, output, and AutoRun template storage settings” on page 87.
To specify Preloaded Reference information
1. By default, the directory for preloaded references is C:\Program Files
(x86)\SoftGenetics\NextGENe\References. You can leave this value as-is, or you can
click Set to open a Browse to Folder dialog box, and browse to and select a different
folder where your preloaded reference files are stored.
The directory that you specify here for preloaded references also sets the directory
for the Build Preloaded Reference tool (see “The NextGENe Build Preloaded
Reference Tool” on page 372) and the directory for preloaded references that you
import into NextGENe. (See “Importing Preloaded Reference Files For Large
Genomes” on page 447.)
2. By default, Save a copy of the annotation to the project folder is selected, which results
in the reference annotation information being saved to the project output folder. Do one
of the following:
•
Although this increases the size of the output folder, you should leave this option
selected if your projects are regularly copied to multiple computers for viewing.
•
Clear this option to simply link the reference annotation information to the project
output folder.
Although linking to the annotation information instead of saving it reduces the size
of your projects’ output folders, you should select this option only if your projects
are not regularly copied to multiple computers.
3. If you are done with specifying the NextGENe process options, click OK to close the
dialog box and return to NextGENe; otherwise, continue to one of the following:
•
“To manage references for your NextGENe projects” on page 86.
•
“To manage Annotation database information” on page 86.
•
“To specify data, output, and AutoRun template storage settings” on page 87.
NextGene User’s Manual
85
Chapter 2
Project Setup
To manage references for your NextGENe projects
You can import a needed reference for a project, you can build a custom preloaded reference,
and./or you can import reference data from any public or proprietary variant database into
NextGENe.
Do any of the following as needed:
•
To import a reference, click Import Reference. See “Importing Preloaded Reference Files
For Large Genomes” on page 447.
•
To build a preloaded reference, click Build new reference. See “The NextGENe Build
Preloaded Reference Tool” on page 372.
•
To import reference data from any public or proprietary variant database into NextGENe,
click Manage tracks. See “The NextGENe Track Manager Tool” on page 383.
To manage Annotation database information
1. Open the Annotation Database tab.
The tab details the settings for NextGENe’s MySQL (annotation) database that was
installed either as part of the NextGENe installation, or during the installation of the
NextGENe Reference application.
Figure 2-30:
Options dialog box, Annotation Database tab
2. Click Refresh.
All the annotation databases that you have installed for NextGENe are displayed in the
Annotation Database (lower) pane of the tab.
86
NextGene User’s Manual
Chapter 2
Project Setup
3. Optionally, if needed, change the MySQL connection information and click Refresh.
If the modified information is correct, then the Annotation Database ID pane is refreshed
accordingly; otherwise, an error message opens stating that NextGENe cannot connect to
the annotation database. You must correct any errors before closing the dialog box.
4. If you are done with specifying the NextGENe process options, click OK to close the
dialog box and return to NextGENe; otherwise, continue to one of the following:
•
“To specify Preloaded Reference information” on page 85.
•
“To manage references for your NextGENe projects” on page 86.
•
“To specify data, output, and AutoRun template storage settings” on page 87.
To specify data, output, and AutoRun template storage settings
1. Open the Process tab.
Figure 2-31:
Options dialog box, Process tab
2. Optionally, do one or both of the following as needed:
•
Select Use local temp directory for remote data, and then click Set to open the
Browse for folder dialog box, and browse to and select the appropriate folder.
You can use the Local Temp Directory option to process network data files on your
local drive without having to manually transfer the data files. Instead, NextGENe
automatically transfers the data files for processing to this temporary local
directory, which reduces the data processing time After the project is run,
NextGENe removes the data files from the temporary local directory and stores
them back on the network drive.
NextGene User’s Manual
87
Chapter 2
Project Setup
•
By default, post-processing outputs are saved to the project output folder. To also
save these outputs in a single global location, select Save copies of reports to
directory, and then click Set to open the Select copies of outputs folder dialog box,
and browse to and select the appropriate folder.
All NextGENe AutoRun templates are saved in the Template root directory. The
default value is C:\Users\Public\Documents\SoftGenetics\NextGENe\Templates\
and SoftGenetics strongly recommends that you do not modify this value.
3. If you are done with specifying the necessary NextGENe process options, click OK to
close the dialog box and return to the NextGENe application; otherwise, continue to one
of the following:
88
•
“To specify Preloaded Reference information” on page 85.
•
“To manage references for your NextGENe projects” on page 86.
•
“To manage Annotation database information” on page 86.
NextGene User’s Manual
Chapter 3
File Format and Conversion
The Roche Genome Sequencer FLX and FLX Titanium Systems, the Illumina Genome
Analyzer and Life Technologies’s SOLiD System or Ion Torrent sequencer generate millions
to hundreds of millions of the short sequence reads, and each instrument supplier has its own
format or formats for organizing the reads and assigning the quality scores. Before you use
NextGENe to analyze this data, you must use the NextGENe Format Conversion Tool to
convert the supplier’s format to a standard .fasta format that NextGENe can read. Optionally,
you can also use the tool to trim or remove low quality reads before analysis.
This chapter covers the following topics:
•
“NextGENe’s Format Conversion Tool” on page 91.
Although NextGENe provides many tools for optimizing input data and exporting
results, the Format Conversion Tool is the most commonly used of all the tools and
that is why it is afforded its own chapter. All other NextGENe tools, with the
exception of the NextGENe AutoRun tool are discussed in detail in Chapter 8,
“NextGENe Tools,” on page 347. The NextGENe AutoRun tool is discussed in
Chapter 9, “The NextGENe AutoRun Tool,” on page 395.
NextGene User’s Manual
89
Chapter 3
File Format and Conversion
90
NextGene User’s Manual
Chapter 3
File Format and Conversion
NextGENe’s Format Conversion Tool
The NextGENe Format Conversion tool converts the format that the instrument uses to
organize reads and assign quality scores to a standard .fasta format that NextGENe can read.
In .fasta format, comment lines are marked with the greater than (>) symbol. The comment
line contains the name that is assigned to a read. The sequence read base call line follows the
comment line.
Figure 3-1:
Example of a NextGENe .fasta file
Figure 3-1 above shows three of the reads in a .fasta file that is named is “s_5.fasta.” Each
sequence read contains 36 nucleotides, and the name assigned to each read (from top to
bottom, respectively) is: _0001_5_1_84_598, _0001_5_1_432_766, and
_0001_5_1_742_905. You can specify values for quality settings to trim or remove low
quality reads before you convert a supplier’s format to NextGENe’s .fasta format.
To convert a sample file
Before you begin the file conversion process, review the information in the table
below and make sure that you have correctly named your files or carried out any
other needed preparation before you load them in to the NextGENe Format
Conversion tool. In addition, before you convert the file, you can use the
NextGENe File Preview tool to preview some basic information about the file,
which can be helpful for determining settings for the File Conversion process. See
“The NextGENe File Preview Tool” on page 382.
File Format
Comments
SEQ/PRB
The file names do not need to be identical, but they must be
appended with the phrases “_seq” and “_prb” respectively. For
example, SRR01842a_seq.txt and SRR01842c_prb.txt.
FASTQ (merged pairs)
Select this option for paired end files in FASTQ format that contain
both reads in a pair in the same line in opposite orientation
(Read 1 -> <- Read2). NextGENe converts these files by splitting
each read in two. Two new files are created titled *_1.fasta and
*_2.fasta with read names >*/1 and >*/2. The second half of the
original read and the quality scores are reverse complemented. The
file is then converted to .fasta format and quality filtering is
implemented as with other FASTQ files.
• SCARF Numeric
Caution: Make sure to choose the correct quality score format—
either Numeric or ASCII.
• SCARF ASCII
NextGene User’s Manual
91
Chapter 3
File Format and Conversion
File Format
• CFASTA
Comments
The SOLiD System instrument produces color space sequence reads
in a .fasta format labeled as CSFASTA. If you select the CFASTA
option and choose FASTA as the output format type, then NextGENe
converts the reads from color space to base space.
Note: Errors in color space can lead to the propagation of errors
downstream within the read when converted to base-space, so
SoftGenetics recommends that you leave the reads in color
space.
You can select CSFASTA as the output format type to quality filter the
CSFASTA files without conversion. If you select this option, the output
file remains in color space. This option can be used to quality trim
reads while maintaining color-space.
Note: This is the preferred conversion option for SOLiD System data.
Note: You can quality trim reads using the .csfasta and .qual files only
if the file names are identical, for example, SRR01842.cfasta
and SRR01842_QV.qual.
92
FASTA
Select this option and choose CSFASTA as the output format type to
convert .fasta files in base space into .csfasta files in color space.
Mate-Pair SFF
Select this option for mate-pair files in SFF format that contain both
reads in a pair in the same line. NextGENe converts these files by
splitting each read in two. Two new files are created titled *_1.fna and
*_2.fna with read names >*/1 and >*/2. The file is then converted to
.fasta format and quality filtering is implemented as with other SFF
files.
Mate-Pair FASTQ
Select this option for mate-pair files in FASTQ format that contain both
reads in a pair in the same line. NextGENe converts these files by
splitting each read in two. Two new files are created titled *_1.fna and
*_2.fna with read names >*/1 and >*/2. The file is then converted to
.fasta format and quality filtering is implemented as with other FASTQ
files.
NextGene User’s Manual
Chapter 3
File Format and Conversion
1. Do one of the following:
•
On the NextGENe main menu, click Tools > Format Conversion.
•
In the Project Wizard, on the Load Data page, click Format Conversion.
The Format Conversion window opens.
Figure 3-2:
Format Conversion window
2. On the Instrument pane, select the instrument type.
3. In the Input pane, do the following:
•
Click Add to browse to and select the input data file.
After you load the file, NextGENe automatically selects the correct instrument/file
type option in the Instrument pane.
•
On the Input format type dropdown list, select the input format type, for example,
BAM.
NextGene User’s Manual
93
Chapter 3
File Format and Conversion
4. In the Output pane do the following:
•
On the Output format type dropdown list, select the output format type.
•
In the Output field, you can leave the default value for the location of the output files
as is (the default value is the directory path for the last input data file that you
selected), or you can click Set to select a different location.
5. Optionally, in the Settings pane, do one of the following:
•
Click Default Settings to automatically select the quality settings that SoftGenetics
has determined, from experience, are appropriate for the file type that is being
converted.
•
Select the options by which you want to filter and trim low quality reads.
Option
Description
Median Score Threshold >= [ ]
Select this option to remove entire reads from the sample
file when the median quality score is below the specified
threshold.
Max # of Uncalled Bases >= [ ]
Select this option to remove entire reads from the sample
file when the file contains more N calls than specified.
Called Base Number of Each Read
Select this option to remove entire reads from the sample
file when the total number of called bases is less than the
specified threshold.
Note: If Trimming is also selected, the called base number
that is used for this function is the number of bases
that remain after trimming.
Trim or Reject Read While >= [x]
Bases with Score <= [y]
Select this option to trim low quality bases from reads when
a consecutive number of bases (“x”) falls below the
specified quality score threshold (“y”).
Note: For additional information about how this option
works, see “Trim or Reject Read While >= [x] Bases
with Score <= [y]” on page 96.
Paired Reads
Select this option if you are converting a mate paired or
paired end files. NextGENe uses a placeholder “N” for reads
that are removed because of low quality, which is necessary
to maintain mate-paired or paired-end read information.
Trim By Sequences
Select this option to trim reads where the specified
sequence occurs.
Note: Select this option to remove primers or sequence
tags. See “Trim by Sequences” on page 97.
94
Trim by Sequences in the File
Selected by default. Load a tab-delimited text file that
contains the sequences by which the reads are to be
trimmed. See “Trim by Sequences in the File” on page 97.
Custom Linker
Applicable for mate-pair Roche data or mate-pair Ion Torrent
data where both pairs are located in the same read.
NextGENe automatically detects the standard linker
sequences. Select this option if you used a custom linker.
NextGene User’s Manual
Chapter 3
File Format and Conversion
Even if you select the options by which to filter and trim low quality reads, at any
time, you can click Default Settings to clear your options and replace them with
SoftGenetics’s preset values.
•
Click Load to browse to and select a Settings file (.ini file) to convert the files based
on the saved settings in the file.
6. Optionally, before you process the files, click Save to save the settings that you have
specified to a Settings file (.ini file).
You can always load this file at a later date and process other data files according
to the saved settings in the file.
7. Do one of the following:
•
Click Add Job to save this job, and open another tab for a file conversion. Repeat
this step to add all needed conversion jobs, and then click OK to run the jobs in the
order in which you created them. The converted files are saved in the directory that
you specified in Step 4.
•
Click OK to immediately run this job. The converted file is saved in the directory
that you specified in Step 4.
The following table lists the output files that are generated by the conversion.
File
*_converted.fasta
Description
A file that has been converted to .fasta format using the NextGENe Format
Conversion tool has the phrase “_converted” appended to its name. This file
contains the reads that meet or exceed any quality thresholds that you
specified in the conversion tool. If you did not specify any quality thresholds,
this file contains all of the reads that were converted from the selected format.
Note: If you selected CSFASTA as the output type for SOLiD sample files,
then the converted file has a .csfasta extension, for example,
*_converted.csfasta.
*_removed.fasta
If you specified filtering thresholds, then a removed.fasta file is generated.
This file contains all of the reads that did not meet the specified quality
thresholds. If you did not specify any quality thresholds, then this file is not
generated.
Note: Converted.qual and removed.qual files are also generated for any quality files that are used in
the conversion.
NextGene User’s Manual
95
Chapter 3
File Format and Conversion
File
*_convert.log
Description
A text file with a .log extension is generated for each run of the Format
Conversion tool. This file contains information about the *_converted.fasta
file, including:
• The total reads in the input files
• The counts of reads that were successfully converted
• The counts of reads and bases that were not included in the
*_converted.fasta file
• General statistics about the reads in the *_converted.fasta file
See Figure 3-4 below.
Figure 3-3:
Output files generated by the NextGENe Conversion tool
Figure 3-4:
Example of a .log file generated by the NextGENe Conversion tool
Trim or Reject Read While >= [x] Bases with Score <= [y]
With this option selected, the software inspects only the 3’ends of reads for consecutive low
quality base calls. For Illumina and SOLiD System reads, the second half of the read is
examined. NextGENe searches for the first base from the 3’end that has a quality value
above the threshold. If no such bases are found, the entire read is removed. If the software
finds a base that is above the threshold, it then searches the second half of the read from the
5’ end for at least “X” number of consecutive bases below the threshold. If this condition is
met, the read is trimmed from this point back to the 3’ end of the read.
For Roche reads, only the last 20% of the read is examined. The software starts at the 5’ end
of the last 20% of the read to find a base with a quality score above the threshold. When a
base is found with a score above the threshold, the software then searches for at least “X”
number of consecutive bases with scores below the threshold. When this condition is met,
the read is trimmed from this point back to the 3’ end of the read. Homopolymers are
ignored.
96
NextGene User’s Manual
Chapter 3
File Format and Conversion
Trim by Sequences
NextGENe allows for trimming by sequences in two cases—the sequence has an error in it
or only part of the sequence is present. In these situations, NextGENe breaks the input
sequence into smaller segments and checks the read for the small segments instead of the
whole sequence.
•
If the input sequence is >= 16 bp, then it is broken into small segments with a length of
12 bp.
•
If the input sequence is < 16 bp but > 7 bp, then it is broken into small segments with a
length of 8 bp.
•
If the input sequence is < 8 bp but > 3 bp, then it is broken into small segments with a
length of 4 bp.
No mismatches are allowed for an input sequence < 4 bp.
Trim by Sequences in the File
The file that contains the trimming sequences is a tab-delimited text file with up to four
fields:
Field
Description
1st
Name
2nd
5’ Trim Sequence
3rd
3’ Trim Sequence
4th
Option Code:
• E - Exact match
• L - Loose match
• P - Partial match
Loose match uses the method described in “Trim by Sequences” with the following caveat—
An input sequence with a length < 4 bp cannot be used for Loose match; however, the
sequence can be used for Partial match and miRNA trimming. (See “miRNA Trimming” on
page 360.)
In a Partial match, just a single base can be matched. Partial match allows for mismatches up
to 10% of the matched length. This means the following:
•
No mismatches are allowed if the adapter is < 10 bp in length or if only 10 bp of the
adapter are overlapped.
•
The adapter must be at the end of the read. 3’ sequences can only partially overlap at the
beginning of the sequence and the end of the read while 5’ sequences can only partially
overlap at the end of the sequence and the beginning of the read.
NextGene User’s Manual
97
Chapter 3
File Format and Conversion
Values for the first and fourth fields are always required. Because you are trimming by
sequence, you must have at least one sequence. This means that a trim sequence for either
the second or third fields is required. If you have a 5’ trim sequence (second field), then the
3’ trim sequence (third field) is optional. Conversely, if you have a 3’ trim sequence (third
field), then the 5’ trim sequence (second field) is optional. You still must use a placeholder if
you do not have values for an optional field. For example, if you have a 5’ trim sequence
(second field), but not a 3’ trim sequence (third field), then you must still enter a dash (-) in
the third field, which is used as a placeholder.
This option is backwards-compatible with older text formats. Loose match is
assumed for the Match Type.
If both 5’ and 3’ sequences are specified, then the 5’ sequences are checked first. If multiple
matches are found, then the best match for both the 5’ and 3’ ends are used for trimming.
98
NextGene User’s Manual
Chapter 4
Sequence Condensation Tool
The NextGENe Condensation Tool uses depth of coverage to correct sequence reads that
contain instrument base calling errors and to elongate reads, while merging identical reads or
maintaining read number as necessary for your project.
This chapter covers the following topics:
•
“Overview of the NextGENe Sequence Condensation Tool” on page 101.
•
“Sequence Condensation Tool - General Settings” on page 106.
•
“Sequence Condensation Tool - Advanced Settings for Illumina Data, SOLiD System
Data, or Ion Torrent Data” on page 110.
•
“Condensation Tool - Advanced Settings for Roche/454 Data” on page 116.
•
“Sequence Condensation Tool Output Files” on page 117.
NextGene User’s Manual
99
Chapter 4
Sequence Condensation Tool
100
NextGene User’s Manual
Chapter 4
Sequence Condensation Tool
Overview of the NextGENe Sequence
Condensation Tool
The NextGENe Condensation Tool uses depth of coverage to correct sequence reads that
contain instrument base calling errors and to elongate reads, while merging identical reads or
maintaining read number as necessary for your project. Three methods are available for
condensation—Consolidation, Elongation, and Error Correction. All three of the methods
correct low frequency instrument errors by generating a consensus sequence from clustered
reads. The type of data that you are analyzing—Illumina, SOLiD System, Ion Torrent, or
Roche/454— determines the available methods.
If you load multiple sample files for analysis, all of the data is evaluated as whole,
not by individual sample files.
Illumina, SOLiD System and Ion Torrent data
If you are analyzing Illumina data, SOLiD System data, or Ion Torrent data, then all three
condensation methods—Consolidation, Elongation, and Error Correction—are available and
all three methods use the same general method for clustering similar reads and generating a
consensus sequence. Reads are evaluated for common indices, or anchor sequences, that can
be found in multiple sequencing reads. All sequence reads that contain an identical 12 bp
anchor sequence form a group. Because this sequence might not be unique within the
genome, the groups are organized into separate subgroups based on the anchor’s flanking
shoulder sequences, which are the left and right bases that are immediately adjacent to the
anchor sequence. Reads that contain, at a minimum, both shoulder sequences are called
bridge reads. Bridge reads can also extend past or “bridge” both shoulder sequences. To
form a subgroup, a minimum number of bridge reads are required. By evaluating the
shoulder sequences on either side of the anchor sequence, a single group can be divided into
multiple subgroups with an identical anchor sequence and varying shoulder sequences.
Although reads contain an identical 12 bp anchor sequence, multiple subgroups might exist
because of a mutation or polymorphism within a shoulder sequence or a given 12 bp anchor
sequence might occur more than once in different regions of the genome.
Each subgroup can be used to generate a consensus sequence. For Illumina data, SOLiD
System data, and Ion Torrent data, it is assumed that the quality of bases that are at the 5’ end
of each read is higher than the Phred 20 quality scores and that the remainder of the read is of
lower quality, which results in the base calls that are on the 5’ end of the sequences having a
higher weight of accuracy. The consensus base calls are calculated by scoring each
nucleotide that is seen at a given position according to the following rules:
•
5’ sequences are assigned a higher weight than 3’ sequences.
•
Each 5’ read with a given nucleotide is assigned a score of 7.
•
Each 3’ read with the same given nucleotide is assigned a score of 2.
NextGene User’s Manual
101
Chapter 4
Sequence Condensation Tool
•
Scores for all the reads with the same nucleotide are summed to provide the score for the
nucleotide.
Score for Nucleotide “x” = (7 x No. of 5’ reads) + (2 x No. of 3’ reads)
For example, consider the case in which a position within a subgroup of reads includes some
reads that show a “T” at a given position while other reads show a “C” for the position. The
“T” nucleotide is seen in the 5’ end of two reads and in the 3’ end of six reads. The “C”
nucleotide is seen in the 5’ end of four reads and in the 3’ end of two reads. To determine the
consensus base call, quality scores are calculated for both the “T” and “C” nucleotides as
follows:
•
Score for the “T” nucleotide = (7 x 2) + (2 x 6) = 26
•
Score the for “C” nucleotide = (7 x 4) + (2 x 2) = 32
Because the score for the “C” nucleotide is greater than the score for the “T” nucleotide, the
consensus sequence includes a “C” nucleotide at this position.
Consolidation
When you use the Consolidation method of condensation for Illumina data, SOLiD System
data, or Ion Torrent data, overlapping sequences are merged and the consensus sequence is
used in place of all of the original reads that are in the subgroup. Information about the
original reads, however, is maintained so that the original coverage information is not lost.
The Consolidation method is recommended for datasets that have a high depth of coverage
in the raw reads. Figure 4-1 below is an example of the output from the Condensation Tool
when Consolidation is selected for the condensation method.
Figure 4-1:
102
Condensation Tool results using the Consolidation method
NextGene User’s Manual
Chapter 4
Sequence Condensation Tool
Figure 4-2 below is an example of the output consensus sequences and their read names,
which reflect the anchor sequence, shoulder sequences, and counts of forward and reverse
reads used.
Figure 4-2:
Output consensus sequences
For detailed information about viewing Condensation Tool results when
Consolidation is the selected method, see “The NextGENe Condensation Results
Tool” on page 370.
Elongation
When you use the Elongation method of condensation for Illumina data, SOLiD System
data, or Ion Torrent data, overlapping reads are not merged. Instead, a new elongated read
with errors corrected is created for each read in the subgroup. Because a given read is likely
to match more than one anchor sequence, all instances of a given read are pooled “as is” into
multiple subgroups. These corrected and elongated reads are then compared to each other to
produce a single consensus sequence. Reads that do not match any of the indices are not
removed as in consolidation, but instead, are kept in the output file.
The Elongation method is recommended for datasets that have low coverage in the
raw reads, and for paired end/mate paired data.
Error Correction
The Error Correction method is very similar to the Consolidation and Elongation methods.
Reads are clustered in the same fashion and low frequency errors are corrected; however,
read length is not extended and reads are not merged. Instead, each original read is
maintained at its original length with the instrument errors corrected.
Figure 4-3 on page 104 is an example of SNP discovery using the Condensation Tool. On the
left side of this figure, raw reads are aligned to the reference. Low frequency variations, most
likely errors, are highlighted in gray while mutation calls are highlighted in blue. On the
right of the figure, condensed reads are aligned to the reference. The likely errors were
eliminated while the true SNP was maintained.
NextGene User’s Manual
103
Chapter 4
Sequence Condensation Tool
Figure 4-3:
SNP discovery with the Condensation Tool
Roche/454 data
Roche/454 produces longer reads than Illumina or the SOLiD System; however, the reads
that are produced are fewer in number. As a result, when Roche/454 is selected as the
instrument type, the only condensation method that is available is an Error Correction
method that has been specifically designed to correct homopolymer errors and other base
calls errors that are produced by the pyrosequencing technique. Roche/454 Error Correction
works by parsing sequencing reads into shorter keywords and comparing the keywords
between the reads to help determine the correct bases at the ends of each keyword. Keywords
are produced by dividing the reads where a homopolymer is found and there are at least 16
bases between the homopolymers. Reads that include variations that are found at low
frequencies are corrected. You can set relative and absolute frequencies for acceptable
variations. Figure 4-4 on page 105 is an example of indel discovery using the Condensation
Tool. In this figure, a 13 bp deletion of “TGACCATACACCA” was detected at position
12243-12255.
104
NextGene User’s Manual
Chapter 4
Sequence Condensation Tool
Figure 4-4:
Indel discovery using the Condensation Tool
NextGene User’s Manual
105
Chapter 4
Sequence Condensation Tool
Sequence Condensation Tool - General Settings
Figure 4-5:
Condensation Settings page, General Settings
Setting
Description
Inspect Input Files
Available only if you are analyzing Illumina data, SOLiD System data, or
Ion Torrent data. Click this button to have the Condensation Tool scan
your data files and determine optimum settings on this page as well on
the Advanced Settings page.
Read Counts
The range that best describes the number of reads that are included in
your sample dataset. After you click Inspect Input Files, the value for
Illumina datasets, SOLiD System datasets, or Ion Torrent datasets is
automatically set but you can modify the value if needed.
Note: If multiple data files are being analyzed, this value is the total for
all files.
Read Lengths
106
The number that best represents the length of reads for your sample
dataset. After you click Inspect Input Files, the value for Illumina
datasets, SOLiD System datasets, or Ion Torrent datasets is
automatically set but you can modify the value if needed.
NextGene User’s Manual
Chapter 4
Sequence Condensation Tool
Setting
Reference Length
Description
The number that best represents the length of reads for the reference
sequence. When a reference file is loaded, after you click Inspect Input
Files, the value for Illumina datasets, SOLiD System datasets, or Ion
Torrent datasets is automatically set but you can modify the value if
needed. For preloaded reference files, you must manually enter the
value.
Note: For de novo Assembly, which does not include a reference file,
you can manually specify this value, which is used to estimate the
expected coverage.
Figure 4-6:
Expected Depth of
Coverage
Manually specifying the reference length for a de
novo Assembly
The range that best represents the expected depth of coverage for your
sample dataset. After you click Inspect Input Files, the value for Illumina
datasets, SOLiD System datasets, or Ion Torrent datasets is
automatically set to the total number of bases in sample files divided by
the number of bases in reference file. For identifying low frequency
variations, the Expected Depth of Coverage should be set to that of the
minor allele. You can modify the value if:
• There are many reference positions that will have no coverage.
• There are many bases of sample file that will not match to the
selected reference.
• The minor allele might be found at a depth of coverage lower than
what was calculated.
Condensation Type
For Illumina data, SOLiD System data, or Ion Torrent data, select one of
the following:
• Consolidation (to reduce read number)
• Elongation (to maintain read count)
• Error Correction (to reduce errors without reducing read count or
lengthening reads)
For Roche/454 data, the only available option is Error Correction.
NextGene User’s Manual
107
Chapter 4
Sequence Condensation Tool
Setting
Paired
Description
Available only if you select Elongation for Illumina data. Click this option
to open the Merge Overlapping Paired Reads dialog box.
Figure 4-7:
Merge Overlapping Paired Reads dialog box
On this dialog box, you can indicate that you want to merge overlapping
paired reads after elongation. You can also indicate if you want to ignore
low quality ends for non-overlapped pairs. You also have two options for
setting an acceptable length for the merged results
• Merged Length [ ] bp to [1000] bp
• Merged Length [70] bp to [130] % of the longer read length
You can select one or both options; however, if you select both options,
then the data must meet both criteria to be included in the results.
Note: The recommended value for the minimum number of bases that
must overlap so that paired reads are correctly merged is nine.
You can select a value that is less than nine, but this means that
there is less overlap that is required between the paired reads, so
your results might be less reliable. You can also select a value
that is greater than nine, but an increased value requires more
overlap for the reads to be merged, which might result in less
paired reads being merged. See “Merging Paired End Reads” on
page 109.
Save Score
108
Creates a .qual file that contains information about the number of reads
that are used in each subgroup for condensation.
NextGene User’s Manual
Chapter 4
Sequence Condensation Tool
Merging Paired End Reads
With NextGENe’s Paired End Merging functionality, you can merged paired end reads by
elongating the paired reads to the point that there is overlap between the two reads. The
paired reads can then be joined together to form one continuous, longer read.
Figure 4-8:
Merging overlapping paired end reads
The number of elongation cycles that is required depends on the read lengths and the library
size. Each condensation cycle generally increase the average read length to 1.6 the original
length for shorter (<=36 bp) reads and to 6 bases less than twice the original length for longer
(>36 bp) reads. These values might be reduced with an average depth of coverage less than
30x. For 75 bp reads from a 200 bp library, for example, a single cycle of elongation results
in the reads being elongated enough for the paired reads to overlap. For 35 bp reads from a
200 bp library, three cycles of elongation are needed. You should extend the reads until a
significant portion of the paired reads (roughly 15% of the elongated read length) are
expected to overlap.
Figure 4-9:
Average read lengths after elongation for varying original read lengths
The paired reads are merged only if the overlapping regions match between the reads. Errors
resulting from sequencing chemistry, basecalling, or the initial assembly by elongation will
not match with the paired read, so the pair would not be merged.
NextGene User’s Manual
109
Chapter 4
Sequence Condensation Tool
Sequence Condensation Tool - Advanced
Settings for Illumina Data, SOLiD System Data,
or Ion Torrent Data
For the Illumina, SOLiD System, and Ion Torrent instrument types, the available settings are
the same, and the default values for the advanced settings are populated based on the Read
Lengths and Expected Depth of Coverage values that were set in “Sequence Condensation
Tool - General Settings” on page 106. You can leave these settings as is, or you can modify
the settings. At any time, you can click Default Settings to automatically reset all of the
values to SoftGenetics’s default values.
Figure 4-10:
110
Condensation Settings page, Advanced Settings for Illumina data, SOLiD
System data, or Ion Torrent data
NextGene User’s Manual
Chapter 4
Sequence Condensation Tool
•
Number of Cycles—The default value is 1. After one cycle, many of the instrument’s base
call errors are corrected, which is ideal for applications such as SNP/Indel discovery.
Additional cycles help to remove some of the systematic instrument errors and low
frequency variations. Also, additional cycles further elongate the reads while correcting
some of the discrepant variations between the reads. Four cycles of condensation can
increase many reads from 35 bps to an excess of 150 bps, which is ideal for some
applications such as de novo assembly or the discovery of large indels.
If more than one condensation cycle is used, you can specify the values for the
advanced settings for each cycle independently.
•
Memory Ratio—Available only for 32-bit OSs. Because of memory constraints, the
Condensation Tool parses large sample datasets as needed and processes each partition
separately. When the Memory Ratio is set to 1.00, the software loads a pre-set number of
sequence reads. If you increase the value for the memory ratio, more reads are loaded into
memory, but this might result in limited computer resources and therefore, the inability
to use your computer for other functions.
•
View Condensation Results—Select this option to view the condensation results in the
Condensation Results tool when Consolidation is the selected method. See “The
NextGENe Condensation Results Tool” on page 370.
•
Minimum Read Length for Condensation—Excludes sequence reads that are less than the
specified value from the condensation. The minimum value allowed is 14 bp.
•
Range in Read to Index [x] Bases to Length minus [y] Bases—Ignores the lower quality bases
at the ends of reads during indexing. These bases are still used for the condensation but
they are not included as anchor sequences. For example, if x=1 and y=3, all bases from
the first base to the last three bases from the end are used for indexing. To allow indexing
of all bases, set x=1 and y=0.
•
Auto Indexing Based on Expected Coverage = [x]—Recommended only for high coverage
datasets (average coverage> 500). Set “x” equal to the expected average coverage. This
provides an alternative to individually specifying values for each of the next four
coverage settings. The Condensation Tool can then use the expected average coverage to
calculate appropriate coverage requirements.
The minimum allowable value for this setting is 500. With an expected coverage of
less than 500x, auto-indexing is less accurate and is not recommended.
•
Reads Required for Each Group in One Direction [x] to [y]—Prevents the indexing of
fragments that might have errors, repeats and redundancies. The number of reads with a
given anchor sequence in the same direction (either forward or reverse) must be within
this range. An anchor sequence is added to the index table and used to form a group when
the exact anchor sequence is found in a number of reads that have same direction and that
is greater than or equal to the lower limit and less than or equal to the upper limit.
NextGene User’s Manual
111
Chapter 4
Sequence Condensation Tool
For example, consider a case where the lower and upper indexing limits are set to 10 and
6000 respectively. In this case, the 12 base pair anchor sequence of ACCAGAAGTTTA
is added to the index table only if it is found in at least 10 forward reads or 10 reverse
reads but less than 6000 sequence reads in the same direction. If this index is found in
less than 10 reverse reads and less than 10 forward reads then it is considered noise and
is not needed in the index table. If the sequence is found in more than 6000 reads in the
same direction, then it is a fragment that is difficult to assemble (often because of a
repeat) and it also is not added to index table.
•
Reads Required for Each Group in Each Direction [x] to [y]—Specifies the number of reads
that are required to match an anchor sequence in both directions for it to be included in
the index table. The number of forward reads and the number of reverse reads that match
the anchor sequence must be within this range. For data that is either completely onedirectional or primarily one-directional. set this value to equal to -1.
•
Bridge Reads Required for Each Subgroup: [x] and [y%]—“x” indicates the minimum
count of bridge reads required to form a subgroup. “y” indicates the minimum percentage
of reads within the subgroup that must be bridge reads. For data that is either completely
one-directional or primarily one-directional, set both of these values equal to -1.
For example, consider this setting with values of 2 and 1%. For the ACCAGAAGTTTA
index, 1000 reads contain this anchor sequence. Of these 1000 reads, a total of 150 reads
match at least one of the shoulder sequences. Twenty reads out of these 150 reads
contain the same eight nucleotides of CGGATTCC to the left of the index and the same
eight nucleotides of TGCCATGC to the right side of this index. These shoulder
sequences are therefore are used to form a subgroup with these 150 reads because more
than two reads (20 in this example) and more than 1% (13% in this example) of the reads
are bridge reads.
•
Total Reads Required for Each Subgroup: [x] and [y%]—The number of reads that have
identical anchor sequence and that contain similar shoulder sequences must be within the
specified range to form a subgroup.
•
Recover Best SubGroup for Repeated Indices—Only the first instance (from the 5’ end) of
the repeat is indexed and only the unique shoulder sequence is used for repeat indices.
•
Forward and Reverse Balance—Sequencing artifacts produce significant imbalances
between the number of reads in each direction. If selected, false positives due to PCR bias
or other directional bias are reduced. Indices are checked for the number of forward reads
and the number of reverse reads that match the anchor sequence. Indices are excluded
from the index table if the ratio of the number of reads in either direction to the total
number of reads in the other direction is below a set threshold. clear this option for data
that is either completely one-directional or primarily one-directional.
For example, if an index contains 100 forward reads and 10 reverse reads, then the ratio
of reverse reads to forward reads is 0.1 If this option is set to a value of 0.2, then this
index is removed from the index table and no condensed read is produced for the index.
112
NextGene User’s Manual
Chapter 4
Sequence Condensation Tool
•
Remove Indices with PCR bias: Min. Ratio = [x] Min. Coverage = [y]—Amplification bias is
sequence dependent, which results in some anchor sequences containing a large number
of sequence reads in disproportionate levels. If selected, reads that meet or exceed the
specified threshold settings are not used for indexing.
•
Fixed Shoulder Length Sequence = [x] bases—Evaluates shoulder sequences of a set length.
All reads within a single group contain the identical 12 base pair index. Reads within the
group can vary within the shoulder sequences. Reads that are used to create a consensus
sequence must contain an identical (“x” + 12) bp sequence. For example, if this value is
set to 8, then the reads used for creating a consensus sequence must contain an identical
28 base anchor—8 bases to the right of index, a 12 base index, and 8 bases to the left of
index.
•
Fixed, then Extended Shoulder Length = [x] Bases and Score <= [y]—This option is useful for
assembling condensed reads that have been run through at least one condensation cycle.
The fixed shoulder length is checked first, and then is rescanned with some variation
being tolerated. If the shoulder bases are the same, then all corresponding bases between
the reads are checked. A score is calculated to determine the amount of variation among
the reads. A one base difference yields a score of 1 for the position if it is not at the end
of a read. The score for a difference in the 1st and last 3 bases is 1/2. The score must be
below the set threshold for the read to be used in the subgroup. If the score is set to 1.01
(the default value), then the tool condenses reads containing two differences at the ends
and just one difference for the middle bases.
•
Flexible Sequence Length = [x], [y], [z]—Sets less stringent criteria for shoulder sequence
length. Specify the values from largest to smallest, for example,“10, 8, 6.” Given these
settings, the Condensation Tool initially attempts to find sequences with 10 bp matching
shoulder sequences; however, it also looks for sequences that have 8 bp matching
shoulder sequences and then finally, 6 bp matching shoulder sequences.
•
Homopolymer Index Checking—Reduces the size of the index table that is generated for
condensation. Instead of indexing every 12 bp anchor sequence, only 12 bp sequences that
occur before and after homopolymers of three or more bases are used. The regions that
are adjacent to homopolymers are also used for shoulder sequences instead of the regions
that are directly adjacent to the anchor sequence.
•
Start Index at [x] (2 or 3) Homopolymers or [ ] AT, GC, ATT . . . Complements—Evaluates
anchor sequences starting at positions where a homopolymer of two or three bases (as
determined by the value set for [x]) is found. Anchor sequences will begin at the second
base of the homopolymer. For instance, where a sequence of “AACTGTC…” occurs, the
anchor sequence will begin as “ACTGTC…” To provide a sufficient number of anchor
sequences, combinations of “GC” “CG” “AT” and TA” are also used to indicate the start
of an anchor sequence. With both of these options selected, the condensation speed is
increased by using an average of 1/2 as many anchor sequences. To index only
homopolymers, clear the “AT, GC, ATT …Complements option. With only the Start
NextGene User’s Manual
113
Chapter 4
Sequence Condensation Tool
Index option selected, the condensation speed is increased by using an average of 1/4th
as many anchor sequences.
•
Use Only 5’ Bases for Consensus—Uses only the 5’ bases of reads to determine the
consensus base at each position.
Elongation starts from the center of the anchor and works outward.
•
Remove Low Quality Ends when Score <= [x]—Assigns a quality score to each base of each
read relative to the number of variations within the group of reads being condensed. For
the bases on both ends of a given condensed read (bases outside of the anchor and
shoulder sequences), if the score is less than the defined score, the end is regarded as low
quality and is trimmed from the read starting from the low quality base.
Quality scores for each base are calculated by comparing the number of reads that match
to the consensus sequence to the number of reads that differ from the consensus at the
given position. Reads that are aligned to the position on the 5’ end from the shoulder
sequence are given a higher weight than reads that align on the 3’ end from the shoulder
sequence. A score of seven is assigned to each read that aligns at the position on the 5’
end. A score of two is assigned to each that aligns at the position on the 3’ end. The value
is considered positive for all reads that match to the consensus base and negative for all
reads that differ from the consensus base. Additionally, for base calls that differ from the
consensus, the score is multiplied by a penalty value of 1.7, so the final calculation is one
of the following:
•
Number of reads with differing base calls x 7 x 1.7
•
Number of reads with differing base calls x 2 x 1.7
For example, consider a position where nine total reads are aligned. Three reads are
aligned at the 5’ end with a base call of “C,” four reads are aligned at the 3’ end with a
base call of “A,” and two reads are aligned at the 3’ end with a matching base call of
“C.” The score is calculated as: (3 x 7) + (2 x 2) – (4 x 2 x 1.7) = 12.8, where:
•
(3 x 7) represents the number of matching 5’ reads times the score of 7.
•
(2 x 2) represents the # of matching 3’ reads times the score of 2.
•
(4 x 2 x 1.7) represents the number of differing 3’ reads times the score of 2 times
the penalty of 1.7.
This setting can be very useful when using condensation to prepare reads for assembly
by removing low quality calls at the ends of reads. It also useful for low coverage
regions.When the minimum coverage of the data is around three or four reads, specify a
value of two or three. For a value of three, at least two reads are required to have the
same base call at the 3’ end. For higher coverage data, specify a larger value. For
example, if the minimum coverage is about 10 reads, and the average coverage is
approximately 50 reads, specify a value of 10.
114
NextGene User’s Manual
Chapter 4
Sequence Condensation Tool
•
Require Bridge Read Covering Middle [x%]—Requires for at least one read in the subgroup
that the total length of the “bridge” region —the extension beyond the left shoulder
sequence, the left shoulder sequence, the anchor sequence, the right shoulder sequence,
and the extension beyond the right shoulder sequence—must be at least x% of the total
read length. This setting is useful when multiple condensation cycles are used.
•
Index Error Correction if Frequency <= [x%] of Majority Index—This setting is useful for
transcriptome analysis or other types of analyses in which expression levels vary
drastically. For very highly expressed sequences, errors are found at a high frequency and
without using this setting, these errors would not be corrected and instead, could be used
as separate anchor sequences. This setting allows for reads with two different index
(anchor) sequences to be combined into one group. If two anchor sequences differ by only
one base and have identical shoulder sequences, they are clustered into one group if the
count for either of these anchor sequences is less than or equal to x% of the total reads in
the resulting group The majority index is the index that has a greater number of reads. The
minority index is the index that has the fewer number of reads. By “correcting” the minor
index to match to the major index, the minor sequence is prevented from being used as in
index.
NextGene User’s Manual
115
Chapter 4
Sequence Condensation Tool
Condensation Tool - Advanced Settings for
Roche/454 Data
For the Roche/454 instrument type, the advanced settings are populated with values that
SoftGenetics has determined, from experience, are appropriate for most datasets for the
instrument. You can leave these settings as is, or you can modify the settings. At any time,
you can click Default Settings to automatically reset all of the values to SoftGenetics’s
default values.
Figure 4-11:
Condensation Settings page, Advanced Settings for Roche/454 data
Setting
116
Description
Keyword Length [ ]
Bases
The minimum length for keywords. The default value is 16 bases.
Long Keyword >= [x]
Bases
When a keyword is long because of sequence region without a
homopolymer (three or more identical nucleotides), then the keyword
can be divided into a smaller size. If the keyword length exceeds the
specified value (60 bases is the default value), then it is parsed into
multiple keywords at locations with base sequences of AAT or ATT.
Frequency <= [x]
Counts and <= [y%] or
[z%]
Indicates the count and percentage at which a variation between reads
within a single cluster is corrected. If there are less than “x” reads and
less than y% of the reads show a variation, then the variation is
corrected. If there are more than “x” reads that contain the variation,
then the frequency of the variation must be below z% to be corrected.
Combine Both Forward
and Reverse
Allows the Error Correction Tool to use reverse complement sequences
to calculate variation frequencies. Selecting this option helps to
distinguish true SNPs from instrument errors.
NextGene User’s Manual
Chapter 4
Sequence Condensation Tool
Sequence Condensation Tool Output Files
After the condensation data analysis step is complete, output files are created that provide
detailed information about the analysis. The different methods each have different output
files with different information that is relevant for the method. See:
•
“Consolidation output files.”
•
“Elongation output files” on page 118.
•
“Error Correction output files” on page 119.
Consolidation output files
File
Description
_Condensed_Raw.fasta
This file contains all of the original reads that were used for the
condensation.
_Cycle#.fasta
A _cycle#.fasta file is created for each cycle of the condensation
that is carried out, where # is the cycle number. This file contains the
consensus reads that were produced by the condensation cycle.
_OrgSampleID.txt
This file saves the original sample IDs so that NextGENe can
reference them for further analysis, such as sequence alignment.
_Parameters.txt
This file contains information about the settings that were used for
the project. If condensation was carried out as a preliminary step
and then alignment or assembly was carried out as part of the same
project, then a _Parameters.txt file is created that contains the
settings for all of the project steps.
_StatInfo.txt
This file provides various statistics about the condensation process.
• The number of sequences that matched to indices
• The number of condensed reads that was produced
• The average condensed read length
• The average coverage within each condensed read
• The username for the user who ran the analysis if User
Management is turned on
_Uncondensed_Raw.fasta
This file contains all of the reads that were not used for
condensation.
TempViewDir.giv
You can use this file to graphically view the Consolidation results in
the NextGENe Condensation Results tool. See “The NextGENe
Condensation Results Tool” on page 370.
Note: This file is created only if “View Condensation Results” is
selected.
NextGene User’s Manual
117
Chapter 4
Sequence Condensation Tool
When Consolidation is the selected condensation method, each consensus read is assigned a
name that provides several key pieces of information about the read:
•
Each name begins with the “>” character to indicate the beginning of the read name.
•
A index number for the a 12 bp anchor sequence to which the sequence is matched.
•
The 12 bp anchor sequence.
Reads that match to the reverse complement for the reference show do not show
this 12 bp anchor sequence. Instead, the reverse complement sequence is shown.
•
A number that indicates the anchor sequence’s starting location in the consensus
sequence.
•
The left shoulder sequence.
•
The right shoulder sequence.
•
The number of forward reads that were used to generate the consensus sequence.
•
The number of reverse reads that were used to generate the consensus sequence.
For example, consider a read named as shown below:
>67059_TCCTGACTCCAC_19_GACGGATG_CCACACCC_42_67<
This read was generated from the 67059th index which contains the anchor sequence
“TCCTGACTCCAC.” The anchor sequence begins at position 19 of the consensus read,
with the sequence “GACGGATG” on its left and the sequence “CCACACCC” on its right.
42 forward and 67 reverse reads were used to generate the consensus sequence.
Elongation output files
File
Description
_Cycle#.fasta
A _cycle#.fasta file is created for each cycle of the condensation that is carried
out, where # is the cycle number. This file contains the consensus reads that
were produced by the condensation cycle.
_Parameters.txt
This file contains information about the settings that were used for the project. If
condensation was carried out as a preliminary step and then alignment or
assembly was carried out as part of the same project, then a _Parameters.txt file
is created that contains the settings for all of the project steps.
_StatInfo.txt
This file provides various statistics about the condensation process.
• The number of sequences that matched to indices
• The number of condensed reads that was produced
• The average condensed read length
• The average coverage within each condensed read
• The username for the user who ran the analysis if User Management is
turned on
118
NextGene User’s Manual
Chapter 4
Sequence Condensation Tool
Error Correction output files
File
Description
*_ErrorCorrected.fasta
This file contains all of the error corrected reads. You can use this
file as the sample file for all future projects and therefore, you do not
have to use the Error Correction method again.
_Parameters.txt
This file contains information about the settings that were used for
the project. If condensation was carried out as a preliminary step
and then alignment or assembly was carried out as part of the same
project, then a _Parameters.txt file is created that contains the
settings for all of the project steps.
_StatInfo.txt
This file provides various statistics about the error correction
process.
• The number of sequences that matched to indices
• The number of condensed reads that was produced
• The average condensed read length
• The average coverage within each condensed read
• The username for the user who ran the analysis if User
Management is turned on
NextGene User’s Manual
119
Chapter 4
Sequence Condensation Tool
120
NextGene User’s Manual
Chapter 5
Sequence Assembly Tool
Many applications require short reads to be assembled into large contigs. You use
NextGENe’s Sequence Assembly tool to assemble the reads that are generated by the
Roche/454, Illumina, SOLiD System, and Ion Torrent instruments into larger contigs. When
available, you can use paired end information. You can add the base/color-called reads from
any of these instruments directly into NextGENe for assembly, or you can use the Sequence
Condensation tool to polish and correct these reads prior to assembly.
This chapter covers the following topics:
•
“Sequence Assembly Settings” on page 123.
•
“Sequence Assembly Output Files” on page 131.
NextGene User’s Manual
121
Chapter 5
Sequence Assembly Tool
122
NextGene User’s Manual
Chapter 5
Sequence Assembly Tool
Sequence Assembly Settings
All assembly projects use the same General Assembly settings. The Final Assembly methods
that are available on the Assembly Settings page are based on the selected instrument type
and the selected Condensation method (Consolidation, Elongation, or Error Correction).
When you select an assembly method, the corresponding settings are automatically
populated with values that SoftGenetics has determined, from experience, are appropriate for
the selected method. You can leave these settings as-is, or you can modify the settings. At
any time, you can click Default Settings to automatically reset all of the values to
SoftGenetics’s default values.
Instrument Type
Final Assembly Methods that are Available
Roche/454
• Greedy
• PE Assembly
• Skeleton Assembly
• Floton/Floton-PE
Illumina
• Condensation (Elongation)
• De Bruijn (paired end options available if two sample files
loaded)
• Maximum Overlap
• PE Assembly
• Condensation (Error Correction)
• De Bruijn (paired end options available if two sample files
loaded)
• PE Assembly
• Condensation (Consolidation)
• De Bruijn (paired end options not available)
• Maximum Overlap
• Condensation deselected
• De Bruijn (paired end options available if two sample files
loaded)
• PE Assembly
SOLiD System
• Condensation (Elongation or Error Correction) or
Condensation deselected
• De Bruijn (paired end options available if two sample files
loaded)
• Condensation (Consolidation)
• De Bruijn (paired end options not available)
ION TORRENT
• Condensation (Elongation or Error Correction) or
Condensation deselected
• De Bruijn (paired end options available if two sample files
loaded)
• PE Assembly
• Floton/Floton-PE
• Condensation (Consolidation)
• De Bruijn (paired end options not available)
NextGene User’s Manual
123
Chapter 5
Sequence Assembly Tool
See:
•
“General Assembly settings” below.
•
“De Bruijn assembly method for Illumina, SOLiD System, and Ion Torrent data” below.
•
“Maximum Overlap assembly method for Illumina data” on page 125.
•
“Greedy assembly method for Roche/454 data” on page 125.
•
“Skeleton assembly method for Roche/454 data” on page 126.
•
“PE assembly method for Roche/454, Illumina, and Ion Torrent data” on page 127.
•
“Floton/Floton-PE assembly method for Roche/454 and Ion Torrent data” on page 128.
General Assembly settings
Setting
Description
View Assembly Results
in NextGENe Viewer
window
Creates a project (.pjt) file that shows how the reads aligned to the
assembled results —where each read aligns and where the reads are
mismatched. Select this option to view the assembly results immediately
after your data analysis is complete in the NextGENe Viewer window.
Note: The Ace file is the file that contains the displayed results. To
ensure that this Ace file can be displayed for the project, if View
Assembly Results in NextGENe Viewer window is selected, then
the “Save Ace File” option is also selected, but is unavailable.
Save the Original
Sequences with
Assembled Ones
Select this option for applications that must have original coverage
information retained. If this option is selected, then an
AssembledContigsWithOrg.fasta output file is created that stores both
the original sequence information and the assembled sequence
information, including information about which reads were used in the
assembly of which contigs. See “Sequence Assembly Output Files” on
page 131.
Note: This option is not available for the De Bruijn and PE Assembly
methods. If this option is selected for other assembly methods,
the processing time is increased.
Save Ace File
Creates an ACE (.ace) file that shows how the reads aligned to the
assembled results—where each read aligns and where the reads are
mismatched. NextGENe uses the information in this file to create the .pjt
file. In addition, other programs can use this ACE file directly.
De Bruijn assembly method for Illumina, SOLiD System, and Ion
Torrent data
The De Bruijn assembly method for Illumina, SOLiD System, and Ion Torrent data uses
short words instead of entire reads as indices to develop the De Bruijn graph, which reduces
redundancy. The software scans the reads for the first occurrence of each short word and
records the location of the short word in the read. After the location of each short word in the
reads is recorded, each read is represented by the short words that it contains and by its
124
NextGene User’s Manual
Chapter 5
Sequence Assembly Tool
overlaps with other reads to create an index table. Reads are then mapped as a path along the
graph with nodes representing overlaps and arcs between nodes representing links.
Setting
Index Size
Description
The length of the sequence (short word) that is used in the index table for
assembly. The value must be an odd integer in the 17 - 99 range. Shorter reads
require a smaller index size. For example, reads of 36 bp might work well with
an index size = 21.
Note: The smaller the index size, the more computer memory is required to
process the index.
Paired Reads Data - Available for datasets that were generated by paired reads.
• Library Size
• The size of the fragment that was generated for sequencing from both ends.
• Expected
Coverage
• The average depth of coverage in reads at any single position within the
reference.
Maximum Overlap assembly method for Illumina data
The Maximum Overlap assembly method is an alternative method of assembly for Illumina
data that is less memory intensive than the De Bruijn assembly method. In this assembly
method, which is suitable after multiple cycles of condensation, redundant/overlapping reads
are merged to elongate condensed reads to form long contigs.
Setting
Description
Minimum Read Length
= [ ] Bases
Sequence reads that contain less than this number of bases are not
used to generate the final assembly.
Read Count Required
for Indexing >= [x] and
<= [y]
The number of reads that contain a given anchor sequence must fall
within this range for the sequence to be used for indexing.
Minimum Length = 1/2
Avg Original Read
Length
With this option selected, the shortest contig that is produced is one half
the length of the average original read length. For example, if the
average length of the original reads is 36 bases, then the shortest contig
that is produced is 18 bases.
Minimum Contig Length
= [ ] bases
After assembly, contigs that contain less than this number of bases are
excluded from the Assembled Sequences output file.
Greedy assembly method for Roche/454 data
The Greedy assembly method looks for the maximum overlap between reads and extends the
overlaps to form large contigs. The Greedy assembly method is recommended for Roche/454
reads or any other long reads datasets with an average read length that is greater than or
equal to 70 bp.
NextGene User’s Manual
125
Chapter 5
Sequence Assembly Tool
Skeleton assembly method for Roche/454 data
The Skeleton assembly method uses seed keys, which are sequences between homopolymers
(three or more identical nucleotides), to look for overlap between reads. Although the
average distance between homopolymers is 16 bp, much longer stretches without
homopolymers can occur. (A read with a length of 256bp contains an average of 16
keywords.) When this is the case, seed keys are created between “AAT” or “TAA”
sequences. By comparing reads with homopolymer sequences or AAT or TAA sequences
instead of comparing at every base position, processing time is significantly decreased. The
Skeleton assembly method is recommended for Roche/454 reads or any other long reads
datasets with an average read length that is greater than or equal to 70 bp.
Setting
Description
Seed Key Length >= [x]
Bases, <= [y] Bases
Specifies the length range for seed key sequences. If the number of
bases between homopolymers is greater than “y,” then seed keys are
created between “AAT” or “TAA” sequences.
Seed Key Coverage >=
[x], <= [y]
The number of reads that match a seed key must fall within this range to
be used in the assembly.
Auto Estimate
Select this option to have the software estimate the seed key coverage
values.
Note: With this option selected, the above options are unavailable.
Instead, NextGENe automatically calculates these values.
Assembled Contig
Length to Output >= [x]
Bases
126
Specifies the minimum contig length that is to be included in the
Assembled Sequences output file. Any contigs that contain fewer than
this number of bases are saved in a shortContigs.fasta file.
NextGene User’s Manual
Chapter 5
Sequence Assembly Tool
PE assembly method for Roche/454, Illumina, and Ion Torrent data
The PE Assembly method is a novel paired end assembly algorithm developed by
SoftGenetics. This assembly method is designed to tolerate repeat regions smaller than the
paired end library size to produce accurate assembly results. The PE assembly method uses a
traditional scaffolding assembly algorithm. Short “words” within reads are used to find
overlaps to form the scaffold. This generates initial assemblies that stop at repetitive regions.
These initial assemblies are referred to as scaffold contigs. (NextGENe places these contigs
in the ScaffoldContigs.fasta file. You can use this file to manually select which scaffold
contigs are to be linked together. (See “The NextGENe Long PE Assembly Mapping Tool”
on page 381.) When paired reads are used, the paired information is used to continue the
assemblies past the repetitive regions to make larger contigs that otherwise could not be
assembled simply by scaffolding. Although you can use the PE assembly method for the
assembly of single sequence read data, it is most effective for paired reads with relatively
small library sizes, such as 200 bp library paired end Illumina reads.
Setting
Description
Paired End Data
Select this option if you are assembling paired end data.
• Library Size
• The size of the fragment that is being sequenced.
• Long Library Size (>
1000 Bases)
• If the library is greater than 1000 bases, then in addition to specifying
the library size, you must also select this option.
Section Size
Available only if Long Library is selected. Scaffold contigs are broken
into sections when they are being assembled so that the distance
between the contigs can be estimated. For the majority of datasets, the
default value of 400 is the recommended value.
Minimum Scaffold
Length
Available only if Long Library is selected. Any scaffold contigs that are
shorter than the specified Minimum Scaffold Length are discarded and
are not are used in the generation of the final contigs.
Word Length
The word length that is used for scaffolding. This value is determined by
the average depth of coverage for the data. The lower the average
depth of coverage for the data, the shorter this value should be.
Conversely, the higher the average depth of coverage for the data, the
longer this value should be. (Longer word lengths result in greater noise
reduction.) If coverage falls within the range of 20-30x, the
recommended word length is 23. If coverage is approximately 50x, the
recommended word length is 29. The maximum recommended value for
word length is 31.
High Coverage Limited:
Max Coverage = [x]
The maximum coverage that is to be used for assembly. For sequences
with higher coverage, reads up to the maximum coverage are used.
Additional reads with the sequence are ignored, which increases
processing speed.
Final Contig Merging
Merges any overlapping contigs that were found after scaffolding and
linking with the paired reads are complete.
NextGene User’s Manual
127
Chapter 5
Sequence Assembly Tool
Setting
Reduce Memory Usage
Description
When this option is selected, only the 5’ end of the read is used to
create “words” for indexing (to determine overlaps). The number of
bases used to index is determined according to the following:
(0.5+ (20/L))(L), where L = the average read length.
Note: The memory that is conserved by this method is more significant
for longer reads. For 36 bp reads, there is no difference in the
memory that is used.
Floton/Floton-PE assembly method for Roche/454 and Ion Torrent
data
The Floton assembly method developed by SoftGenetics reduces the number of
homopolymer errors, which is a common problem in flow-based sequencing technology. The
Floton assembly method converts the sequence into its original flows, which consist of the
nucleotide and the number of consecutive calls for the nucleotide.
The Floton-PE method is identical to the Floton assembly method, but it is used
solely for paired end data.
Figure 5-1:
Conversion of base calls into flow calls
By converting the sequence data into this format, the homopolymer indels that were difficult
to assemble become basically SNPs (in the base count), which allows for the correction of
most homopolymer errors.
In the Floton assembly method, reads are indexed with several flowmers. This information is
used during the first two steps of the three step assembly process:
1. Condensation—Reads that share flowmer indexes are compared and used to generate
high-quality consensus contigs. The same read can be used in multiple condensation
contigs.
2. Combination—An iterative process checks for condensation contigs that contain the
same reads for the purpose of discovering and merging overlaps.
3. Overlap Merging—The combination contigs are combined into the final assembly
contigs.
128
NextGene User’s Manual
Chapter 5
Sequence Assembly Tool
Setting
Description
Settings
Select the assembly type that applies to your data:
• Small Genome (< 10MB)
• Large Genome
• Sequence Repeats
• PCR/Haplo/HLA Typing
• Metagenomics
• Others
Coverage
Normalized to
[30] X
Normalizes coverage for the assembly. This decreases processing time by
ignoring reads where coverage is above the set threshold. The default value
is 30.
Pair Normalized
to [20]X
Available only for the Floton-PE assembly method. Automatically
implemented if Coverage Normalized is selected. The coverage of paired
reads is normalized to the value that you specify.
If you select Coverage Normalized, then you must select one of the following methods, which
determine which reads are kept and which reads are discarded.
• Method 1
(Selected)
• Method 2
(Random)
• This method checks keywords (sequences between homopolymers) in the
reads and preferentially keeps reads where one or more of the keywords
has low coverage.
Note: Method 1 increases processing time.
• This method randomly selects which reads are kept and which reads are
discarded.
Note: The following output files are specific to the Floton/Floton-PE assembly method. To view a list
of output files that are produced for any assembly method, see “Sequence Assembly Output
Files” on page 131.
Output
Condensation
Creates the *_CondensedSequences.fasta file, which is the output from the
Condensation step. This file lists the extended sequence for each original
read with the original data title and in the original data order.
Output
Combination
Creates the *CombinedSequences_.fasta file, which contains the results for
the Combination step.
Length Cut off
<= [ ] x Avg Read
Len or [300] bp
Rejects a contig that has length (number of base pairs) that is less than or
equal to the indicated threshold. You can specify the threshold in one of two
ways:
• A multiple of the average read length.
• A specific number of base pairs. The default value is 300 bps.
NextGene User’s Manual
129
Chapter 5
Sequence Assembly Tool
Setting
Description
Advanced
Automatic
Select this option to have NextGENe automatically determine the appropriate
values for the Index Length, Index Count, and Remove Low Frequency
options based on the loaded data. If you do not select Automatic, then you
can manually select the values for these options.
• Index: Length
[16] Flows
• Select a value to create an index of the indicated length that ends in a
homopolymer sequence. The default value is 16 bp.
• Index Count [4]
Per Read
• Select a value to create the indicated number of primary indices per read.
The default value is four primary indices per read.
The index number can be either one, or an even value (2, 4, and so on.)
NextGENe prioritizes the indices based on such factors as the
homopolymer length. For example, if the index number is set to four, then
the two indices that have the highest priority in the first half of the read and
the two indices that have the highest priority in the second half of the read
are selected as the indices. If the index number is set to one, then the
index with the highest priority is selected as the index, regardless of which
half of the read that it falls in.
Note: For reads with a higher average coverage per read, a smaller number of indices is
recommended. Conversely, for reads with a longer average read length, a larger number of
indices are recommended.
130
Remove Low
Frequency [ ] or [
]%
Rejects the entire contig if the coverage is less than or equal to the indicated
threshold or trims the end of the contig if the coverage of the ending bases is
less than or equal to the set percentage of the maximum coverage for the
contig.
Error Tolerate [ ]%
and Ignore [ ] bp
Combine two contigs only if the percent difference between the two contigs is
less than or equal to the indicated threshold, and when combining, ignore the
differences in the indicated number of base pairs at the end of each contig.
NextGene User’s Manual
Chapter 5
Sequence Assembly Tool
Sequence Assembly Output Files
After the assembly data analysis step is complete for any type of assembly method, the
following output files are created that provide detailed information about the analysis.
File
Description
_assembledsequences.fasta
This file contains all of the assembled reads in .fasta format.
This file can be used as sample input for alignment projects or
as a reference.
_assembledsequences.cfasta
In addition to the _assembledsequences.fasta file, this file is
produced for SOLiD System data. This file contains the
assembled reads in color space format. This file can also be
used as sample input for alignment projects.
AssembledContigsWithOrg.fasta
Created only if Save the Original Sequences with Assembled
Ones is selected for the General Assembly options. See
“General Assembly settings” on page 124.
shortcontigs.fasta
If you use the Skeleton Assembly method or Maximum
Overlap method, then you must specify the minimum contig
length that is to be included in the Assembled Sequences
output file. Any contigs that contain fewer than this number of
bases are saved in this .fasta file.
_Parameters.txt
This file contains information about the settings that were used
for the project. If condensation was carried out as a
preliminary step and then assembly was carried out as part of
the same project, then a _Parameters.txt file is created that
contains the settings for all of the project steps.
_StatInfo.txt
This file provides basic information and various statistics about
the assembly process.
• Basic information:
• The general steps that were used
• Process times
• Sample file names and output file names
• Statistical information:
• The assembled sequence count
• The average length of the assembled sequences
• The username for the user who ran the analysis if User
Management is turned on.
_Uncondensed_Raw.fasta
This file contains all of the reads that were not used for
assembly.
NextGene User’s Manual
131
Chapter 5
Sequence Assembly Tool
132
NextGene User’s Manual
Chapter 6
Sequence Alignment Tool
The NextGENe Sequence Alignment tool matches short sequence reads to a reference
sequence. The reference sequence can be a small genome or genomic region (250 Mbp or
less) or it can be a whole large genome reference such as the human, mouse, or rat genome.
The NextGENe application also has the NextGENe Viewer, which is a viewing and editing
tool that you can use to view the results of the Sequence Alignment tool and produce a
variety of interactive reports that summarize the sequence alignment information.
This chapter covers the following topics:
•
“NextGENe Sequence Alignment Algorithms” on page 135.
•
“Sequence Alignment Settings” on page 137.
•
“NextGENe Viewer” on page 143.
•
“Paired Reads Alignment” on page 159.
•
“Transcriptome Alignment Project with Alternative Splicing” on page 172.
•
“STR (Short Tandem Repeats) Analysis Project” on page 180.
•
“Mitochondrial Amplicon Analysis Project” on page 189.
•
“HLA Project” on page 195.
•
“Sequence Alignment Project Output Files” on page 208.
•
“Sequence Alignment Project Mutation Report” on page 210.
•
“Sequence Alignment Project Reports” on page 241.
•
“NextGENe Viewer Tools” on page 272.
•
“NextGENe Viewer Comparison Reports and Tools” on page 285.
NextGene User’s Manual
133
Chapter 6
Sequence Alignment Tool
134
NextGene User’s Manual
Chapter 6
Sequence Alignment Tool
NextGENe Sequence Alignment Algorithms
The NextGENe Sequence Alignment tool matches short sequence reads to a reference
sequence. For all application types other than de novo Assembly, a reference is required for
aligning the reads of the data file that is being analyzed against a reference genome. If you
are aligning the data against a small genome (one that is less than or equal to 250 Mbp), then
you must align data against a reference file that is either in .fasta format or GenBank (gbk or
gb) format. If you are aligning the data against a large genome (one that is greater than 250
Mbp, such as the whole human genome), then you must align the data against a preloaded
reference file that SoftGenetics supplies or a custom preloaded reference file that was built
using the NextGENe Build Preloaded Reference tool. (See “The NextGENe Build Preloaded
Reference Tool” on page 372.)
For SOLiD data, the alignment is done in color-space.
Genomic regions or genomes smaller than 250 Mbp
For genomic regions or genomes smaller than 250 Mbp, NextGENe uses an alignment
method that is similar to BLAT methodology to align sequence reads to the reference. The
reference file is first divided into an index table. Every 12 bases of each sequence read is
aligned to this table. The positions of alignment between the reads and the reference are
determined and the alignment is evaluated linearly. If they are in a line, the sample sequence
can be aligned to the reference target positions. (Jumps might exist in the line because of true
or false positive indels.) Reads can be matched to a single position, or they can be matched to
multiple positions. If a read matches exactly at more than one position, it can be aligned at
each exact match position when “Allow Ambiguous” is selected. (See “Allow Ambiguous
Mapping” on page 137.) If this option is set equal to one, the read is aligned to the first exact
match position from the beginning of the reference. If this option is set equal to zero, all
reads that match perfectly at more than one location are discarded
The Allow Ambiguous setting is not applicable for reads that include mismatches. Instead,
when reads match to more than one position with the same number of mismatches, the
Uniqueness score is used to determine the best position to which to align the read. The
uniqueness score is calculated according to the following, where “n” is the number of hits on
the reference:
The region with the greatest Uniqueness score is selected to align the read.
Preloaded Reference Alignment
For aligning reads to a preloaded reference file such as the human, mouse, or rat genome,
NextGENe uses a Preloaded Index Alignment algorithm. This algorithm employs a suffix
NextGene User’s Manual
135
Chapter 6
Sequence Alignment Tool
array that is represented by the Burrows-Wheeler Transform (BWT). A rank algorithm
allows the software to traverse the suffix array to find the best matching location for each
read. In addition to the BWT, the software maintains genome positions at every four base
pairs within the genome, which allows the software to monitor these locations while
traversing the reference genome.
Figure 6-1:
Example of the Burrows-Wheeler Transform algorithm
NextGENe first attempts to match the entire read exactly to the reference. Reads can be
matched to a single position, or they can be matched to multiple positions. To align reads that
match exactly at more than one position, set the Allowable Ambiguous Alignments setting to
a value that is greater than one, with 50 being the recommended value. (See “Allowable
Ambiguous Alignments” on page 138.) If this option is set to a value of one, the read is
aligned to the first exact match position from the beginning of the reference. If this option is
set to a value of zero, then all reads that match perfectly at more than one location are
discarded.
For reads that cannot be matched exactly, NextGENe tries to match the entire read with an
increasing number of mismatches, starting at one mismatch and continuing up to the
maximum number of allowable mismatches, as set by you. (See “Allowable Mismatched
Bases [ ]” on page 138.) For reads that can still not be matched, seeds that are smaller than
the read lengths are used to identify the best matching position within the genome. After
finding the best match, a dedicated NextGENe algorithm expands the alignment to align the
entire read which, in turn, allows the individual reads to be aligned with indels and
mismatches.
136
NextGene User’s Manual
Chapter 6
Sequence Alignment Tool
Sequence Alignment Settings
The Alignment Settings page is available by doing one of the following:
•
Clicking Alignment in the Project Wizard.
•
Clicking Process on the NextGENe viewer main menu. (See “Main menu” on page 145.)
•
Clicking the Alignment Settings icon
“Toolbar” on page 150.)
on the NextGENe viewer toolbar. (See
The alignment settings that are available on the Alignment Settings page for any application
type other than Transcriptome with alternative splicing, STR analysis, or HLA depend on
the type of reference file (.fasta, GenBank, or preloaded) that was loaded for the project.
For a detailed discussion of the settings for a transcriptome alignment project
with alternative splicing, see “Transcriptome Alignment Project with Alternative
Splicing” on page 172. For a detailed discussion of the settings for an STR
analysis project, see “STR (Short Tandem Repeats) Analysis Project” on page
180. For a detailed discussion of the settings for an HLA project, see “HLA
Project” on page 195.
Alignment settings—.fasta or GenBank reference file
The following settings are available for .fasta sample files and BAM files with the
Realignment option selected. If you have loaded aligned BAM sample files without the
Realignment option selected, then see “BAM Sample Files settings” on page 139.
Setting
Matching Requirement:
Base Number >= [x] and
Base percentage >= [y]
Description
“x” indicates the minimum number of bases in each read that must
match the reference sequence for the read to align with a specific
position in the reference sequence. “y” indicates the minimum
percentage of each sequence read that must match the reference
sequence for the read to align with a specific position in the reference
sequence.
Note: Both conditions must be met for the read to be aligned to the
position.
Allow Ambiguous
Mapping
Aligns the read to each exact match position if a read matches exactly at
more than one position in the reference. If this option is not selected, the
read is aligned to the first exact match position from the start of the
reference.
Remove Ambiguously
Mapped Reads
Removes reads that match exactly to more than one position in the
reference from the analysis.
NextGene User’s Manual
137
Chapter 6
Sequence Alignment Tool
Setting
Detect Large Indels
Description
After an initial alignment is carried out, a consensus sequence is
created and if an indel is found that occurs in at least 5% of the reads,
this indel in reflected in the consensus sequence. The reads are then
aligned again to this consensus sequence.
Note: This option helps to align reads that include indels towards the
end of the read, which in turn, allows allow for correctly calling the
mutation in the Mutation report. Processing time increases if this
option is selected.
Rigorous Alignment
When this option is selected, after the matching region is determined for
a read based on the matched bases and the uniqueness score, the
alignment of individual bases is then checked to determine the
alignment with the least mismatches. Consider the following simple
example:
AAAAAAAAAAGCTCGT
AAAAAAAAAACGT - without rigorous alignment
AAAAAAAAAA - - -CGT - with rigorous alignment
Note: This option also helps to align reads that include indels.
Read length over
reference length >
[80%]
Displayed only for STR analysis and selected by default for STR
analysis. The read must cover at least the indicate percentage of the
segment to which it is aligned, or it is not assigned to an allele. See
“STR (Short Tandem Repeats) Analysis Project” on page 180.
Note: This setting ensures that the read covers an entire repeat region.
Alignment settings—Preloaded reference file
The following settings are available for .fasta sample files and BAM files with the
Realignment option selected. If you have loaded aligned BAM sample files without
the Realignment option selected, then see “BAM Sample Files settings” on page
139.
Setting
Description
• Allowable
Mismatched Bases [ ]
• If a read does not align exactly to the reference, then the entire read
can still be aligned to the reference if the number of mismatched
bases does not exceed the indicated threshold. If the read cannot be
aligned with this number of mismatches, it might still be possible to
align the read using seed sequences.
• Allowable Ambiguous
Alignments
• Applies to reads that match perfectly to the reference sequence or to
reads that have a number of mismatches less than the threshold for
Allowable Mismatched Bases. For perfectly matched read, or a read
that has a number of mismatches, if multiple matching locations are
found, the read is aligned to the reference sequence up to the
specified number of ambiguous alignments that are allowed. If this
option is set to “1,” the read is aligned to the first matching position
from the start of the reference. If this option is set to “0,” then a read
that matches at multiple locations is not aligned to the reference.
Reads:
138
NextGene User’s Manual
Chapter 6
Sequence Alignment Tool
Setting
Description
Seed [x] Bases, Move
Step [y] Bases
“x” is the length of the seed that is used to determine the matching
positions in the reference genome. “y” is the number bases between
seed start positions.
Inspect Input Files
Click this option to have NextGENe automatically set the values for
Allowable Mismatched Bases, Seed Bases/Move Step Bases, and
Allowable Alignments.
Note: If multiple data files are being analyzed, each value is the total for
all files.
Allowable Alignments [ ]
If a seed matches more than this number of positions in the reference
genome, then the seed is ignored.
Overall Matching Base
Percentage >= [85]
The percentage of the read that must match to the reference genome
for the read to be aligned to the reference. Default value is 85.
Detect Large Indels
After an initial alignment is carried out, a consensus sequence is
created and if an indel is found that occurs in at least 5% of the reads,
this indel in reflected in the consensus sequence. The reads are then
aligned again to this consensus sequence.
Note: This option helps to align reads that include indels towards the
end of the read, which in turn, allows allow for correctly calling the
mutation in the Mutation report. Processing time increases if this
option is selected.
BAM Sample Files settings
The following settings are for aligned BAM sample files when the Realignment
option is not selected.
Setting
Description
Mapping Quality >=
The Map Quality for a read must exceed this threshold for the read to
map to a given location. The read can map to as many locations as
where the Map Quality is met.
Remove Ambiguous
Alignments
Removes all reads that match exactly to more than one position in the
reference from the analysis unless one or both of the following two
options are selected:
• If Mapping Quality is
<= [ ]
• Removes reads that match exactly to more than position only if the
mapping quality is less than or equal to the indicated threshold.
• Except for the
Highest Map Quality
Alignment
• Removes reads that match exactly to more than one position except
for the alignment that has the highest map quality.
Remove Paired Reads
that are not Properly
Paired
Removes reads that are flagged as not properly paired. The definition of
“properly paired” varies among the alignment program that you used,
but typically means that the both reads aligned in the correct orientation
and within the expected library size.
Match Reference
Click this option to match the reference that was used to create the BAM
file with the reference that was loaded during the Load Data step for the
project. See “To load the reference files” on page 56.
NextGene User’s Manual
139
Chapter 6
Sequence Alignment Tool
Sample Trim settings
Setting
Description
Select Sequence Range
From [x] Bases to [y]
Bases
Certain base pair ranges in the sequence reads can be masked. Select
this option to ensure that only this specified range of base pairs is
loaded for alignment and compared to the reference.
Hide Unmatched Ends
Hides the ends of reads that do not match to the reference, which can
reduce the false positive detection rate. NextGENe hides the
unmatched ends by checking for two mismatches in the last eight base
pairs, and then trimming to the mismatched base. It repeats this process
until eight base pairs are found without two mismatched ends.
Mutation Filter settings
Setting
Use original
Description
Applicable only when aligning condensed reads. If this option is selected,
then the mutation percentage refers to the original read numbers and not
the condensed read numbers. A variation that is detected must exceed
the specified percentage of original reads for it to be reported as a
mutation. Reads that align to the position that is at the end of the read
(outside of the anchor and shoulder sequences) are not included in the
count of aligned reads.
Note: This option is useful for eliminating false positives.
Except for
homozygous
Selected by default. The coverage requirement is ignored for mutations
that are homozygous.
Mutation percentage <
For the indicated variation type (SNP, Indel, or Homopolymer Indel), a
variation between the aligned reads and the reference sequence at a
given position of the reference must occur at a frequency that exceeds
this value, or a mutation is not called at the position.
SNP allele count <
For the indicated variation type (SNP, Indel, or Homopolymer Indel), the
total number of reads with the variant allele must meet or exceed the read
count, or a mutation is not called at the position.
Total coverage count
<
For the indicated variation type (SNP, Indel, or Homopolymer Indel), the
total number of reads at a given position must meet or exceed this
coverage, or a mutation is not called at the position.
Note: The values for the mutation percentage, the SNP allele count, and the total coverage count
must be met for an indicated variation type at a given position to be reported as a mutation. If
any criterion is not met, then the variation is filtered from the analysis and it is highlighted in
gray in the Alignment viewer.
Balance Ratios <=
[0.1] and Frequency
<= [80]%
140
For SNPs and Indels. Eliminates mutation calls that are likely false
positives. If the mutation occurs at a frequency that is less than the
indicated threshold, then the balance ratio is checked. If the balance ratio
falls below the set threshold, then the mutation is removed. See “Balance
Ratio” on page 141.
NextGene User’s Manual
Chapter 6
Sequence Alignment Tool
Setting
Balance Ratios <=
[0.8] and Frequency
<= [80]%
Description
For Homopolymer Indels. Homopolymers are defined as the reference is
> 2 bases and the reads are > 1 base. This means that CC>C is a
homopolymer deletion and C>CC is not a homopolymer insertion. If the
mutation occurs at a frequency that is less than the set threshold, then the
balance ratio is checked. If the balance ratio falls below the set threshold,
then the mutation is removed. See “Balance Ratio” below.
Balance Ratio
The Balance Ratio is the is the smaller of the two ratios:
•
#F/#R—The ratio of the number of forward reads with the variant to the number of
reverse reads with the variant.
•
#R/#F—The ratio of the number of reverse reads with the variant to the number of
forward reads with the variant.
The Balance Ratio is shown as the Read Balance in the Mutation report. See
“Display tab, Statistics sub-tab” on page 219.
File Type settings
Setting
Load Assembled
Results File
Description
The Assembly tool creates the assembledsequences.fasta file, which is
a file that contains information about each read that was used to create a
given assembled contig. You can load this file into the Sequence
Alignment tool for a more accurate representation of coverage.
Note: For SOLiD System data, you can load the
assembledsequences.csfasta file.
Load SAGE
Expression Data
If a SAGE library is loaded as a reference file and the expression levels
of each tag are needed, then select this option and set the values for
Extract Bases From and New Sequence Coverage accordingly.
Note: The alignment to the tag library is carried out only in the forward
direction. No reverse complementation is implemented.
• Extract Bases From:
[x] Bases to: [y]
Bases
• The sample reads might contain more bases per read than the
expression library. Specify the first base position and the last base
position of the tag in the sample reads.
• New Sequence
Coverage Minimum
[]
• Novel sequences that are found in the data and that are not contained
in the library can be added to the end of the reference file to provide
coverage for the sequences. Novel tags must be found in the data at a
rate that is above this minimum threshold or they are not added as a
new gene.
Load Paired Reads
Select this option to align paired end/mate pair data sets.
• Library Size
• The length of the DNA fragment that is used for sequencing pairs.
• 454 Sequences
• Enter the known sequence separating pairs for Roche/454 paired end
analyses in this field.
NextGene User’s Manual
141
Chapter 6
Sequence Alignment Tool
Other settings
Setting
Description
Save Matched Reads
Select this option to create the <sample file name>_matched. .fasta file,
which contains all of the reads that aligned to the reference.
Highlight Anchor
Sequence
Applicable only when aligning condensed reads. All of the anchor
sequences that were used for condensation are displayed in Bold type
in the Sequence Alignment window.
Ambiguous Gain/Loss
If this option is selected, NextGENe calculates the Ambiguous Gain
penalty and the Ambiguous Loss penalty for each mutation call. (See
“Ambiguous Gain penalty/Ambiguous Loss penalty” on page 224.)
Note: If this option is selected, processing time is increased.
Detect Structural
Variations Mismatch: [x]
Length or [y] Bases
If this option is selected, NextGENe detects locations of possible
structural rearrangements and automatically generates pseudo paired
reads for each sample read by using the 3’ end of the read “as is” and
reversing the 5’ end of the read. For a region to reported as a structural
variation, there must be at least one read aligned to the region with ([x] x
read length) number of mismatched bases or [y] number of mismatched
bases
Note: For reads with a length less than 76 bp, condensation is
recommended to lengthen the reads prior to generating the
pseudo paired reads.
142
NextGene User’s Manual
Chapter 6
Sequence Alignment Tool
NextGENe Viewer
You use the NextGENe Viewer to view and edit the results of alignment projects. When you
align a single project in NextGENe, the project is automatically opened in the default
alignment view in the NextGENe Viewer. You can also save and load projects for viewing
and editing at a later date.
To load a sequence alignment project in the NextGENe Viewer
When you view a project in the NextGENe Viewer that uses a preloaded reference, you can
use something other than the gene name to identify the genes. To do so, you must create a a
Alternate Gene Information text file. This file is a tab-delimited text file, with the first
column containing the gene name that is used in NextGENe and the second column
containing the alternate gene identifier.
For assistance with setting up this Alternate Gene Information file, contact
SoftGenetics at [email protected].
1. Do one of the following to open the NextGENe Viewer:
•
On the NextGENe main menu, click File > Open NextGENe viewer.
•
On the NextGENe toolbar, click the NextGENe Viewer icon
.
2. On the NextGENe Viewer main menu, click File > Load Project.
The Load Project dialog box opens.
Figure 6-2:
Load Project dialog box
3. Next to the Project Name field, click the Load File icon
to browse to and select the
alignment project file (Aligned Sequence Project (*.Pjt)) that you want to load.
4. Optionally, if you are using a preloaded reference file, and you want to use something
other than the gene name to identify the genes, select Load Alternate Gene Information,
and then click the Load File icon
this alternate gene information.
to browse to and select the text file that contains
NextGene User’s Manual
143
Chapter 6
Sequence Alignment Tool
5. Click OK.
If the project that you are loading does not contain reference information (for
example, the copy was copied from another computer and the reference
information for the project was simply linked to it), then a message opens
prompting you to select the appropriate reference. Click OK to close the message,
and then follow the prompts to select the reference.
The Load Project dialog box closes. The loaded project opens in the default alignment
view in the NextGENe Viewer. See “NextGENe Viewer layout and navigation” below.
Be patient. Depending on the size of the project, this step can take several minutes
to complete.
NextGENe Viewer layout and navigation
Figure 6-3:
NextGENe Viewer with opened project
The NextGENe Viewer has six major components:
144
•
The title bar
•
The main menu
•
The toolbar
•
The Tracks Display
•
The Whole Genome viewer
•
The Alignment viewer
NextGene User’s Manual
Chapter 6
Sequence Alignment Tool
A seventh component, the Paired Reads viewer is available when you analyze
paired end/mate paired data. See “Paired Reads Alignment” on page 159.
Title bar
The NextGENe Viewer title bar displays the name and full directory path for the alignment
project file that is being analyzed.
Figure 6-4:
NextGENe Viewer Window title bar
Main menu
The NextGENe Viewer main menu is set up in a standard Windows menu format with menu
commands grouped into menus (File, Process, Paired View, Report, Search, Tool, Mutation
Report, and Help) across the menu bar. Some of these menu commands are available in other
areas of the application.
Figure 6-5:
Main menu
Menu Option
File
Description
• Load Project - For loading an alignment project for analysis.
• Save Project - Saving the currently loaded alignment project.
• Save Optional Reference Info—If your Process Options are set to link the
reference annotation information to a project instead of exporting it to the project
output folder (see “Specifying NextGENe Process Options” on page 84), you can
use this option to save the information (Annotation.gbk and dbsnp.txt) to the
output folder. See “Save Optional Reference Info” on page 146.
Note: This option is useful in the event that a project needs to be copied to
another computer, and you must ensure that all the project output information is
copied.
• Export
• Bed file—Creates a BED file for a specified input sequence range. See
“Exported BED file” on page 147.
• Gap.fasta—Available only for very small projects (reference < 10Mbp). See
“Exported Gap.fasta file” on page 147.
• SAM/BAM Output—To export the NextGENe project file to a format (SAM or
BAM) that other alignment viewers can use. See “SAM/BAM Output” on page
147.
• Export Project—Saves the entire project folder to a location of your choice, for
example, a network folder. See “Export Project” on page 149.
• Show Open Reports—Brings any minimized alignment report to the front of the
application display again.
NextGene User’s Manual
145
Chapter 6
Sequence Alignment Tool
Menu Option
Process
Description
• Alignment Settings—Opens the Alignment Settings dialog box on which you can
view the settings for the currently loaded alignment project.
• Database Settings—Opens the Database Setting dialog box which you can use
to view and if necessary, modify the current settings for your mySQL database.
• Query Reference Tracks—Applicable only for Preloaded Reference file projects
and human GenBank files with NC-accession numbers. To use the Query
Reference Tracks option, you must first use the Track Manager tool to download
and import a database as a track into NextGENe. (See “To load track data for
previously run projects” on page 393.) You can then use the Query Reference
Tracks option to load data from the track for the project that is currently opened
in the viewer.
Note: Any new Preloaded Reference file projects that you create after you use the
Track Manager tool automatically load the track information. You do not need
to use the Query Reference Tracks option.
Paired View
Available when analyzing paired read (paired end/mate paired) data. See “Paired
Reads Alignment” on page 159.
Reports
Available reports for an alignment project. See “Sequence Alignment Project
Reports” on page 241.
Search
• Search the Alignment viewer. See “Alignment viewer” on page 153.
• Next Mutation - With the cursor placed in the Alignment Viewer pane, moves
forward to the next mutation call in the pane.
• Previous Mutation - With the cursor placed in the Alignment Viewer pane, moves
back to the previous mutation call in the pane.
Tools
See “NextGENe Viewer Tools” on page 272.
Comparisons
Contains options for various comparison tools and reports. See
• “Expression Comparison report” on page 285.
• “Variant Comparison tool” on page 289.
• “Somatic Mutation Comparison tool” on page 303.
• “CNV (Copy Number Variation) tool (Dispersion and HMM)” on page 310.
• “CNV (Copy Number Variation) tool (SNP-based Normalization with Smoothing)”
on page 323.
Save Optional Reference Info
If your Process Options are set to link the reference annotation information to a project
instead of exporting it to the project output folder (see “Specifying NextGENe Process
Options” on page 84), you can use this option to save the information (Annotation.gbk and
dbsnp.txt) to the output folder.
1. Click File > Save Optional Reference Info.
A message opens indicating the file size and asking you if you are sure that you want to
save the files.
2. Click OK in the message.
The message closes. The Annotation.gbk and dbsnp.txt files are saved in the <Project
Name>.files folder.
146
NextGene User’s Manual
Chapter 6
Sequence Alignment Tool
Exported BED file
In the NextGENe Viewer, to create a BED file for a specified input sequence range, click
select File > Export > BED. A BED file contains a line for each aligned read with the format
shown in Figure 6-6 below.
Figure 6-6:
Format of exported BED file
where:
•
Score—The percentage of the read that matched the reference sample (1000 = 100%, 750
= 75%, and so on.)
•
Direction—(+) for forward reads and (-) for reverse reads.
You can upload this file into specific Genome viewers. Contact SoftGenetics for
assistance.
Exported Gap.fasta file
In the NextGENe viewer, the File > Export > Gap.fasta file option is available only for very
small projects (reference less than 10Mbp). A .fasta file is created which shows the region of
the reference file to which each read is aligned. The file lists the following information:
•
The entire reference sequence.
•
Each aligned read, beginning with the first aligned read.
•
The read name is shown in the header line. The sequence lines include "*" , "-", "_" or ".")
to indicate empty base positions of the reference, followed by the sequence of the read.
For example, a read that aligns to the 2nd base of the reference is shown as "*ACTG. "
SAM/BAM Output
When you export NextGENe sequence alignment project files to a SAM or BAM format, the
standard index file, index.bai, that other alignment viewers require is also exported.
1. Click File > Export > SAM/BAM Output.
The SAM/BAM Output dialog box opens. See Figure 6-7 on page 148.
NextGene User’s Manual
147
Chapter 6
Sequence Alignment Tool
Figure 6-7:
SAM/BAM Output dialog box
2. Select the appropriate export format and specify the location for the exported file.
3. Optionally, to indicate which regions to include/exclude for the BAM or SAM file, select
Filter by ROI, and then to:
•
Indicate the regions that are to be included in the BAM or SAM file, click Add for
the Inclusion pane, and then select the appropriate BED file.
•
Indicate the regions that are to be excluded from the BAM or SAM file, click Add
for the Exclusion pane, and then select the appropriate BED file.
4. Optionally, click Select Chromosome.
The Select Chromosome dialog box opens.
Figure 6-8:
148
Select Chromosome dialog box
NextGene User’s Manual
Chapter 6
Sequence Alignment Tool
5. Specify the chromosomes to include in/exclude from the export file (by default, all
chromosomes are included), and then click OK. You can:
•
Select/deselect an individual chromosome.
•
Select/deselect All chromosomes in a single step.
•
Select/deselect all Unlocalized (sequences) in a single step, which are contigs that
are known to be part of a particular chromosome, but the locations within the
chromosome are not known.
•
Select/deselect all Unplaced (sequences) in a single step, which are contigs for
which the specific locations, including the chromosome, are not known.
6. Click OK.
The Select Chromosomes dialog box closes. You return to the SAM/BAM Output dialog
box.
7. Click OK.
The dialog box closes. The export is carried out.
Export Project
You use the Export Project option to export and save the entire project folder to a location of
your choice, for example, a network folder.
1. Click File > Export > Project.
The Export Project dialog box opens. The project name is selected in the Filename field.
Figure 6-9:
Export Project dialog box
2. Optionally, change the name of the project.
3. Select the location in which to save the project, and then click Save.
NextGene User’s Manual
149
Chapter 6
Sequence Alignment Tool
Toolbar
The NextGENe Viewer toolbar provides quick access to a variety of viewer functions.
Figure 6-10:
NextGENe Viewer toolbar
Icon
Function
Save Project icon - Saves the project that is currently opened in the
NextGENe Viewer.
Database Settings icon - Opens the Database Settings dialog box which
you can use to view and if necessary, modify the current settings for your
mySQL database.
Alignment Settings icon. Opens the Alignment Settings dialog box on
which you can view the settings for the currently loaded alignment
project. See one of the following:
• “Sequence Alignment Settings” on page 137
• “Transcriptome project with Alternative splicing alignment settings” on
page 173.
• “STR project alignment settings” on page 181.
• “HLA analysis data requirements and project settings” on page 195.
Zoom in icon - Reduces the viewing area of the Whole Genome viewer
pane.
Zoom out icon - Enlarges the viewing area of the Whole Genome viewer
pane.
Region Selection dropdown list—Used in conjunction with the Previous
icon and the Next icon. Available values are: Mutation Call, Covered
Region, ROI, CDS, mRNA, Gene, and Chromosome.
Previous icon - With the cursor placed in the Alignment Viewer pane,
moves back to the previous region/location as defined in the Region
Selection dropdown list.
Next icon - With the cursor placed in the Alignment Viewer pane, moves
forward to the next region/location as defined in the Region Selection
dropdown list.
Show/Hide Sequence icon - A toggle that shows or hides the view of
aligned reads in the NextGENe Viewer accordingly.
Show/Hide Report icon - In the default alignment view, click the arrow
next the icon to open a list of options for showing or hiding the Mutation
report or Summary report in the NextGENe Viewer. For other application
types, click the arrow to open a list of options for showing or hiding the
associated report.
150
NextGene User’s Manual
Chapter 6
Sequence Alignment Tool
Icon
Function
Report Settings icon - The dialog box that opens depends on the report
that is selected, and the available report options depend on the selected
application type.
Note: When the Mutation report is selected, by default, click this icon to
open the Mutation Report Settings dialog box.
Gene Tracks Settings dialog box icon - Opens the Gene Tracks Settings
dialog box. The Gene Tracks Settings dialog box displays the available
gene tracks settings for the Mutation report based on the gene tracks
that were imported for the project. See “Gene Tracks Settings dialog box”
on page 228.
Variation Tracks Settings icon - Opens the Variation Tracks Settings
dialog box. The Variation Tracks Settings dialog box displays the
available tracks settings for the Mutation report based on the variation
databases that were imported for the project. See “Variation Tracks
Settings dialog box” on page 228.
Note: After being imported into NextGENe, a variation database is
referred to as a track.
Font Size icon - You can manually enter a value, or you can use the Up/
Down arrows to change the font size for the entire NextGENe Viewer
display (gene name, all labels, the base symbols in the Alignment view,
numbering, and so on).
Zoom Bar - You can click the Zoom In (+) button and/or the Zoom Out (-)
button, or use the slider function on the Zoom Bar to zoom in or zoom out
the display of the Alignment viewer.
Note: You can zoom out to a greater degree in the Alignment viewer
using the Zoom Bar than if you use the manual zoom out function.
See “Alignment viewer navigation” on page 154.
Report Selection icon- A dropdown list that toggles the report that is
displayed in the viewer between available reports based on the selected
application type. The Mutation report is always an option. The Summary
report is available for any application type.
Tracks Display
If you have imported data from variant databases into NextGENe, then the NextGENe
Viewer window has a Tracks Display section. This section lists all the databases from which
data has been imported, or tracks, for the NextGENe installation, with a separate pane per
track. Tic marks indicate positions in each track for which there is information. The different
positions in the different tracks show different information, for example, the rs# for a dbSNP
variant.
Figure 6-11:
NextGENe Viewer window, Tracks Display
NextGene User’s Manual
151
Chapter 6
Sequence Alignment Tool
Whole Genome viewer
The Whole Genome viewer, which is the upper pane, shows the global view of the alignment
project. The following information is displayed for the entire reference genome in this pane:
•
Segment breakpoints (red vertical bars) and the biological information for each
breakpoint.
•
The coverage information (gray shading).
•
Mutation calls (purple and/or blue tick marks).
•
Gene locations (blue arrows)
•
CDS and mRNA locations (gold and green arrows, respectively).
•
The current position of the reads in the Alignment viewer (blue cross).
Figure 6-12:
Whole Genome viewer
Segment breakpoints
Alternating shading indicates chromosomes. Gray
shading indicates depth of coverage.
Current position of the reads in the Alignment viewer
Blue arrows show gene
locations.
Gold and green arrows
show CDSs and mRNA
locations.
Chromosome number
Blue and purple tick
marks show
mutations.
For detailed information about segment breakpoints, see “Segment Breakpoints”
on page 157.
You can easily navigate the Whole Genome viewer using some of the toolbar icons (see
“Toolbar” on page 150) or you can use your mouse and some keyboard hotkeys.
152
NextGene User’s Manual
Chapter 6
Sequence Alignment Tool
Navigation
Action
Zoom In
Hold down the left mouse button and draw a box from the upper left hand
corner of the pane towards the lower right hand corner. A box is formed
around the area that being reduced for viewing.
Zoom Out
Hold down the left mouse button and draw a box from the lower right hand
corner of the pane towards the upper left hand corner.
Note: The magnification for zooming out is always 100%.
Scroll
After zooming in on a region, click and drag the right mouse button in any
area of the pane to move the reference view horizontally.
Display Information
Place the cursor in the pane and then click and hold the [Ctrl] key to display
information for the segment/gene where the cursor is located. See Figure 613 on page 153.
Copy sequence or
image
Press and hold the [Shift] key and the [Ctrl] key and then click and hold the
left mouse button and draw a box around the region of the display
(sequence or image) that you want to copy. The selected region is filled with
black. Right-click and select Copy Sequence or Copy As Picture to copy the
sequence or image to your clipboard. Use standard keyboard commands or
menu commands to paste the copied sequence or image into an
application.
Figure 6-13:
Whole Genome Viewer display information
Alignment viewer
The Alignment viewer, which is the lower window pane, displays a view of all the reads as
they align to the reference sequence. See Figure 6-14 on page 154.
The NextGENe Viewer window can load a maximum of 100 million mutation calls.
If a project contains more than 100 million mutation calls, a Mutation Score is
calculated (MutationRatio*log(coverage)) and only the 100 million mutations
with the greatest scores are loaded in the window.
NextGene User’s Manual
153
Chapter 6
Sequence Alignment Tool
Figure 6-14:
Alignment Viewer
Reference and consensus
sequences for nucleotides
Reference and consensus
sequences for amino acids
Gene name
Coding sequence number
Highlighted mutation calls. Blue for novel variants. Purple for reported variants.
Any discrepancies that exist between the reference sequence and the sample sequence are
highlighted as follows:
•
Variations that occur below the mutation calling settings defined in the Project Wizard
(which are often the result of instrument error) are highlighted in gray.
•
Variants that are filtered out based on the Mutation Report Filter settings (see “Mutation
Report settings” on page 214) are highlighted in gray.
•
Mutation calls are highlighted in blue for novel variants and in purple for reported
variants.
You have multiple ways of navigating the Alignment viewer and you also have options for
working with and modifying the displayed information.
Alignment viewer navigation
You have multiple ways of navigating the Alignment viewer.
•
On the NextGENe Viewer main menu, click Search to open the Search dialog box, where
you can indicate how you want to search the displayed alignment—by Sequence, by
Position (chromosome, chromosome position (for example, 1, 20000)) or by Gene Name.
You can also click Option to search by a reverse complement sequence.
Figure 6-15:
154
Search dialog box
NextGene User’s Manual
Chapter 6
Sequence Alignment Tool
•
You can easily navigate the Alignment viewer using some of the toolbar icons (see
“Toolbar” on page 150) or your mouse and some keyboard hotkeys.
Navigation
Action
Zoom In
Hold down the left mouse button and draw a box from the upper left hand
corner of the pane towards the lower right hand corner. A box is formed
around the area that being reduced for viewing.
Zoom Out
Hold down the left mouse button and draw a box from the lower right hand
corner of the pane towards the upper left hand corner.
Note: The magnification for zooming out is always 100%.
Display sequence
read Information
Place the cursor in the pane and then click and hold the [Ctrl] key to display
the name and directional orientation of each sequence read.
Display variant
information
Place the cursor on a variant to display information about the variant (position,
coverage, and so on).
Copy sequence or
image
Press and hold the [Shift] key and the [Ctrl] key and then click and hold the left
mouse button and draw a box around the region of the display (sequence or
image) that you want to copy. The selected region is filled with black. Rightclick and select Copy Sequence or Copy As Picture to copy the sequence or
image to your clipboard. Use standard keyboard commands or menu
commands to paste the copied sequence or image into an application.
Mutation Calls
Place the cursor in the pane, click and hold the [Ctrl] key and then press:
• F to move forward to the next mutation call.
• B to move back to the previous mutation call.
Mutation report
Double-click a mutation in the Alignment Viewer to go to the position in the
Mutation report. See “Sequence Alignment Project Mutation Report” on page
210.
Figure 6-16:
Sequence read information
Figure 6-17:
Variant information
NextGene User’s Manual
155
Chapter 6
Sequence Alignment Tool
Alignment viewer functions
Right-click in the Alignment viewer to open a context menu that contains a list of options for
working with and modifying the information in the viewer.
Figure 6-18:
Alignment viewer context menu
Option
Add Mutation
Comment
Click this option to open the Add New Mutation dialog box and
specify a mutation call for a position.
Figure 6-19:
Add New Mutation dialog box
Note: To view a manually added mutation in the Mutation report, you
must select “Added manually” on the Filter tab on the Mutation
Report Settings dialog box. The Comment column displays
“Added Manually” for the mutation. See “Filter tab, Annotation
sub-tab” on page 221.
Delete Mutation
Click this option to remove a mutation call for a position. Although
the position is no longer called a mutation, the sequence of the
reads is not changed.
Note: To view a deleted mutation in the Mutation report, you must
select “Deleted” on the Filter tab on the Mutation Report.
Settings dialog box. The deleted mutations are highlighted in
gray and the Comments column displays “Deleted” for each
mutation. See “Filter tab, Annotation sub-tab” on page 221.
156
NextGene User’s Manual
Chapter 6
Sequence Alignment Tool
Option
Comment
Undo Deletion
Undoes a selected manual deletion. The position is again called a
mutation.
Confirm Mutation
Click this option to select mutations in which you have a high
confidence.
Note: To view a confirmed mutation in the Mutation report, you must
select “Confirmed” on the Filter tab on the Mutation Report
Settings dialog box. The confirmed mutations are displayed in
black text in the Mutation report and the Comments column
displays “Checked” for each mutation. See “Filter tab,
Annotation sub-tab” on page 221.
Undo Confirmation
Undoes the manual confirmation of a selected mutation.
Undo
Undo the last edit action that was carried out for a selected mutation.
View Edit History
Available only if User Management is turned (see “Configuring User
Management” on page 31) and only after at least one edit action (for
example, Deletion) has been carried out for the mutation call. Opens
the Edit History dialog box, which displays all the edit operations that
have been carried by all users for the selected mutation. See
“Viewing the Edit history for a mutation” on page 213.
Note: When using the Save Consensus Sequence function from the Mutation report menu, the
following three functions affect how the consensus sequence is output.See “Save consensus
sequence” on page 236.
Automatic Add Consensus
Break Point
Click this option to automatically add consensus sequence
breakpoints at positions where there is no coverage.
Add Consensus Break
Point
Click this option to manually add a consensus breakpoint at a
selected position.
Delete Consensus Break
Point
Click this option to remove a consensus breakpoint at a selected
position.
Go to Position in Mutation
Report
Click this option to go to the position in the Mutation report. See
“Sequence Alignment Project Mutation Report” on page 210.
Tracks
Displays the available tracks (panes) in the NextGENe Viewer
window. Click on a track (pane) as needed to toggle its display on
and off.
Note: Tracks is also available as a context menu option for the
Position pane, the Translation pane, and the Tracks Display
section.
Segment Breakpoints
When you align a sample file to a reference sequence that contains discontinuous segments,
such as transcripts or assembled contigs, the breakpoints between segments are indicated by
a vertical red line in the Whole Genome viewer and in the Alignment viewer. Because the
sequence from the end of one to segment to the beginning of the other is not continuous,
NextGENe highlights portions of the reads that align across the segment breakpoint.
Typically, one end of the read matches to the end of one of the segments and the other end of
the read is then mapped to the following segment, usually with low matching. The portion of
the read that matches poorly is shown in lowercase with a gray background. See Figure 6-20
on page 158.
NextGene User’s Manual
157
Chapter 6
Sequence Alignment Tool
Figure 6-20:
158
Reads aligned at segment breakpoints
NextGene User’s Manual
Chapter 6
Sequence Alignment Tool
Paired Reads Alignment
NextGENe can align paired end/mate paired data to a reference genome. When “Load Paired
Reads” is selected on the Alignment Settings page (see “Load Paired Reads” on page 141),
NextGENe first attempts to align the reads where the gap distance (the distance between the
two ends of the read in bps) falls within the expected gap distance (Library size - (2 x Read
Length)). If the pairs cannot be aligned within the expected gap distance, NextGENe then
aligns the reads to the best matching position. When aligning paired end/mate paired data,
five results are possible (with the first four listed below being the most common):
•
Both reads can be aligned to the reference and are oriented in opposite directions.
•
Both reads can be aligned to the reference and are oriented in the same directions.
•
One read in the pair can be aligned to the reference but the other read does not.
•
Neither read can be aligned to the reference.
•
Additionally, paired end/mate paired end samples often include some unpaired reads that
could be matched or unmatched to the reference.
NextGENe considers each of these possibilities and provides statistics for each when
aligning paired end/mate paired data.
When you load paired read sample files, NextGENe can identify the pairs only if one
character, the designating character, is different between the two files, for example, 1/2 or
F/R. For SOLiD system data, the designating character can also be 3/5. If NextGENe still
cannot recognize the pairs, try isolating the designating character with an underscore, for
example, _1_ and _2_.
When you align paired end/mate paired data, a third pane, the Paired Reads viewer, opens
between the Whole Genome viewer and the Alignment viewer in the NextGENe viewer.
Paired data/mate paired-specific reports and functions are also available.
Paired Reads viewer
When you align paired end/mate paired data, a third pane, the Paired Reads viewer, opens
between the Whole Genome viewer and the Alignment viewer in the NextGENe viewer.
Figure 6-21:
Paired Reads viewer
Paired
Reads
viewer
NextGene User’s Manual
159
Chapter 6
Sequence Alignment Tool
The Paired Reads viewer is a histogram that represents the average gap distances for each
region across the reference genome. Pairs that are oriented in the opposite direction are
shown with a blue bar while pairs that are oriented in the same direction are shown with a
green bar.
You can close the Paired Reads viewer in the NextGENe viewer. On the NextGENe
viewer main menu, click Paired View, and then on the Paired View menu, clear the
selection for the Paired Reads viewer, or simply click the Close (x) button.
Just as with the Whole Genome viewer and the Alignment viewer, you can easily navigate
the Paired Reads viewer using your mouse and some keyboard hotkeys.
Navigation
Zoom In
Action
Hold down the left mouse button and draw a box from the upper left
hand corner of the pane towards the lower right hand corner. A box is
formed around the area that being reduced for viewing.
Note: Zooming in allows for more accurate representations of the gap
distances within the smaller regions as less averaging is required
to represent the distances.
Zoom Out
Hold down the left mouse button and draw a box from the lower right
hand corner of the pane towards the upper left hand corner.
Note: The magnification for zooming out is always 100%
Paired data/mate paired reports and functions
When you complete an alignment project for paired end/mate paired data, in addition to the
standard alignment reports (see “Sequence Alignment Project Reports” on page 241), you
can also generate specialized Paired reports that list all the pairs that align to the reference
with a gap distance that is outside of the expected gap distance as determined by the
Sequence Alignment settings. You can also generate a Paired Reads Gap Distribution report
and a Paired Reads Statistics report and you can export specific information for your paired
read data, such as which reads in the pair were not matched, to a fasta file. All these reports
ands functions are available from the Paired View menu on the NextGENe Viewer main
menu. See:
160
•
“Paired Reads Gap Distribution report” on page 161.
•
“Paired Reads Statistics report” on page 162.
•
“Paired Reads Statistics report” on page 162.
•
“Opposite Direction Paired Reads report” on page 163.
•
“Same Direction Paired Reads report” on page 165.
•
“Single Reads report” on page 167.
•
“Paired Reads Graph report” on page 169.
•
“Export SV Reads function” on page 171.
NextGene User’s Manual
Chapter 6
Sequence Alignment Tool
For detailed information about the other alignment project reports that are
available for paired end/mate paired data, see “Sequence Alignment Project
Mutation Report” on page 210 and “Sequence Alignment Project Reports” on
page 241.
Paired Reads Gap Distribution report
The Paired Reads Gap Distribution report shows the number of pairs with continuous gap
sizes (every possible gap size, up to the maximum number of bps in the reference sample).
Figure 6-22:
Paired Reads Gap Distribution report
The report displays two charts. The top chart shows the gap sizes for pairs that are oriented in
opposite directions. The bottom chart shows the gap sizes for pairs that are oriented in the
same direction.
NextGene User’s Manual
161
Chapter 6
Sequence Alignment Tool
Paired Reads Statistics report
The Paired Reads Statistics report details various statistics about the paired end/mate paired
data including the matched read count and matched pairs with a gap distance in the expected
range.
Figure 6-23:
Paired Reads Statistics report example
Value
162
Description
Total Reads Count
The total number of reads in the sample files.
Unpaired Reads Count
The total number of reads in the sample files that do not have a mate.
Matched Reads Count
The total number of reads in the sample files that matched to the
reference file, including both paired reads and single reads.
Matched Paired Reads
Count
The total number of paired reads in the sample files with both reads
matched to the reference file. (Does not include single reads.)
Matched Paired Reads
within Expected Gap
Distance Count
The total number of paired reads in the sample files that matched to the
reference file at a distance from which their mate matched that was
within the expected gap distance.
Matched Unpaired
Reads Count
The total number of unpaired reads in the sample files that matched to
the reference file.
Paired Reads with Only
One Read Matched
Count
The total number of paired reads in the sample files with only one read
matched to the reference file. (The mate did not match to the reference
file.)
Paired Reads Matched
with the Same Direction
Count
The total number of paired reads in the sample files with both reads
matched to the reference file in the same direction—i.e., both are
forward reads or both are reverse reads.
NextGene User’s Manual
Chapter 6
Sequence Alignment Tool
Opposite Direction Paired Reads report
The Opposite Direction Paired Reads report lists all the pairs that aligned to the reference
genome in opposite directions and that have a gap distance that is outside of the expected
range. After you select the Opposite Direction Paired Reads report option, a Filter Settings
dialog box opens.
Figure 6-24:
Filter settings dialog box for specifying the range for the Opposite Direction
Paired Reads report
You must specify the range for which to generate the report in this dialog box.
Setting
• Input Region
Manually
• Entire Reference
Range
Comma-delimited text
file
Description
You must specify the starting position and the ending position, or you
can select Entire Reference Range to include the entire reference range
in the output.
There are no special requirements for uploading a comma-delimited text
file. If the input text file is a comma-delimited text file, it must contain one
of the following lists:
• A list of specific reference locations (position number) separated by
commas
• A list of reference ranges (start position number - end position
number) separated by commas
BED file
A BED file is a tab-delimited text file. You can upload a BED file only if
the reference sequence contains chromosome information, which
means that the reference sequence must be either a preloaded
reference file that NextGENe supplies, or a GenBank reference file that
contains chromosome information. Each row in the file contains a region
of the reference that is to be used for the report, and at a minimum, the
file must contain the following information:
• Field #1 - Chromosome number for the region
• Field #2 - Chromosome start position
• Field #3 - Chromosome end position
Note: Field #4, which is used for the Comment column, is optional.
NextGene User’s Manual
163
Chapter 6
Sequence Alignment Tool
Because the pairs being shown are oriented in the opposite direction, the pairs are
represented with a blue bar (just like the Paired Reads viewer).
Figure 6-25:
Opposite Direction Paired Reads report example
The report is interactive:
164
•
To show only the paired reads view (the histogram), click the Show Paired Reads View
icon. .
•
To show only the paired reads report (the table), click the Show Paired Reads Report icon
.
•
To sort the report results, double-click any column heading.
•
To view a position or region in the Alignment viewer, double-click any value in any
column.
•
To save the report to a text file, on the report toolbar, click the Save Report icon
.A
default name and location are provided for the file, but you can change both of these
values.
NextGene User’s Manual
Chapter 6
Sequence Alignment Tool
Same Direction Paired Reads report
The Same Direction Paired report lists all of the pairs that aligned to the reference genome in
the same direction and that have a gap distance that is outside of the expected range. After
you select the Same Direction Paired Reads report option, a Filter Settings dialog box opens.
Figure 6-26:
Filter settings dialog box for specifying the range for the Opposite Direction
Paired Reads report
You must specify the range for which to generate the report in this dialog box.
Setting
• Input Region
Manually
• Entire Reference
Range
Comma-delimited text
file
Description
You must specify the starting position and the ending position, or you
can select Entire Reference Range to include the entire reference range
in the output.
There are no special requirements for uploading a comma-delimited text
file. If the input text file is a comma-delimited text file, it must contain one
of the following lists:
• A list of specific reference locations (position number) separated by
commas
• A list of reference ranges (start position number - end position
number) separated by commas
BED file
A BED file is a tab-delimited text file. You can upload a BED file only if
the reference sequence contains chromosome information, which
means that the reference sequence must be either a preloaded
reference file that NextGENe supplies, or a GenBank reference file that
contains chromosome information. Each row in the file contains a region
of the reference that is to be used for the report, and at a minimum, the
file must contain the following information:
• Field #1 - Chromosome number for the region
• Field #2 - Chromosome start position
• Field #3 - Chromosome end position
Note: Field #4, which is used for the Comment column, is optional.
NextGene User’s Manual
165
Chapter 6
Sequence Alignment Tool
Because the pairs being shown are oriented in the same direction, the pairs are
represented with a green bar (just like the Paired Reads viewer).
Figure 6-27:
Same Direction Paired Reads report example
The report is interactive:
166
•
To show only the paired reads view (the histogram), click the Show Paired Reads View
icon. .
•
To show only the paired reads report (the table), click the Show Paired Reads Report icon
.
•
To sort the report results, double-click any column heading.
•
To view a position or region in the Alignment viewer, double-click any value in any
column.
•
To save the report to a text file, on the report toolbar, click the Save Report icon
.A
default name and location are provided for the file, but you can change both of these
values.
NextGene User’s Manual
Chapter 6
Sequence Alignment Tool
Single Reads report
The Single Reads paired is generated for all single aligned reads. This report provides the
name and the position of all reads that aligned to the reference genome without a mate. After
you select the Single Reads report option, a Filter Settings dialog box opens.
Figure 6-28:
Filter settings dialog box for specifying the range for the Opposite Direction
Paired Reads report
You must specify the range for which to generate the report in this dialog box.
Setting
• Input Region
Manually
• Entire Reference
Range
Comma-delimited text
file
Description
You must specify the starting position and the ending position, or you
can select Entire Reference Range to include the entire reference range
in the output.
There are no special requirements for uploading a comma-delimited text
file. If the input text file is a comma-delimited text file, it must contain one
of the following lists:
• A list of specific reference locations (position number) separated by
commas
• A list of reference ranges (start position number - end position
number) separated by commas
BED file
A BED file is a tab-delimited text file. You can upload a BED file only if
the reference sequence contains chromosome information, which
means that the reference sequence must be either a preloaded
reference file that NextGENe supplies, or a GenBank reference file that
contains chromosome information. Each row in the file contains a region
of the reference that is to be used for the report, and at a minimum, the
file must contain the following information:
• Field #1 - Chromosome number for the region
• Field #2 - Chromosome start position
• Field #3 - Chromosome end position
Note: Field #4, which is used for the Comment column, is optional.
NextGene User’s Manual
167
Chapter 6
Sequence Alignment Tool
Figure 6-29:
Single Reads report example
The report is interactive:
168
•
To sort the report results, double-click any column heading.
•
To view a position or region in the Alignment viewer, double-click any value in any
column.
•
To save the report to a text file, on the report toolbar, click the Save Report icon
.A
default name and location are provided for the file, but you can change both of these
values.
NextGene User’s Manual
Chapter 6
Sequence Alignment Tool
Paired Reads Graph report
The Paired Reads Graph report graphically displays where the mates aligned for paired reads
at a given reference position. The report also graphically displays the number of reads for
which the mate did not align to the reference sequence in either direction.
Figure 6-30:
Paired Reads Graph report
Approximately
1500 reads
From left to right, the graphs that are displayed on the report are the following:
•
Reverse Dir—The Reverse Dir graph shows where both reads be aligned to the reference
sequence in opposite directions.
•
Same Dir—The Same Dir graph shows where both reads aligned to the reference
sequence in the same direction.
•
Single—The Single graph shows the number of reads that aligned to the reference
sequence at a given position without a mate.
The data points in the Reverse Dir graph and in the Same Dir graph are color-coded (as
indicated in the Legend below the graphs). The color code indicates the number of reads that
aligned to the reference sequence and that had mates that aligned at the same position in
either the opposite direction (the Reverse Dir graph) or in the same direction (the Same Dir
graph). For example, in Figure 6-30 above, a red data point indicates that almost 1500 reads
aligned to the reference sequence at the indicated position and their mates aligned at the
same position in the opposite direction.
NextGene User’s Manual
169
Chapter 6
Sequence Alignment Tool
The report is interactive. You can use the buttons on the report toolbar, or you can manually
carry out some of the same actions.
The three graphs in the report are linked. Whenever you carry out one action for a
graph (for example, zooming in on a region of a graph), then the same action is
carried out for the other two graphs.
Figure 6-31:
Button
Paired Reads Graph report toolbar
Function
Zoom In button—Zoom in on a graph view. You can also hold down the left mouse
button and draw a box from the upper left hand corner of any region in the graph
towards the lower right hand corner. A box is formed around the area that being
reduced for viewing. After you zoom in on a position in a graph, you can use the Move
icons to navigate the display.
Zoom out button—Zoom out the graph view. You can also hold down the left mouse
button and draw a box from the lower right hand corner of any region in the graph
towards the upper left hand corner.
Note: The magnification for zooming out is always 100%.
Move Right button—Move the graphic display to the right.
Move Left button—Move the graphic display to the left.
Move Up icon—Move the graphic display up.
Move Down button—Move the graphic display down.
Show/Hide button—Toggles the legend display (on or off) at the bottom of the report.
Refresh button—Reset the report display to the display that is indicated by the range.
Note: You change the range of reads that are displayed in the graphs in the Set Read
Count Range area. The default value is 0 to the maximum value for the read
count range for the given dataset.
170
NextGene User’s Manual
Chapter 6
Sequence Alignment Tool
Export SV Reads function
The Export SV reads function can be used to export reads that could represent structural
variations in your data. Fasta files are saved with reads that fit the following criteria:
•
The paired reads where either one or both reads were not aligned.
•
The paired reads where both paired reads were aligned, but the distance between the
paired reads was not in the expected range of Library Size Range.
One fasta file is produced for each paired read file—projectname_SV_1.fasta and
projectname_SV_2.fasta. You can save the files to a location of your choosing, and you can
also change the names of the files.
NextGene User’s Manual
171
Chapter 6
Sequence Alignment Tool
Transcriptome Alignment Project with
Alternative Splicing
You select the Transcriptome application type and Alternative splicing if you are aligning
transcriptome (RNA-Seq) data and the transcriptome project must contain alternative
splicing information. When Alternative splicing is selected, NextGENe uses a proprietary
four step alignment algorithm to ensure that reads that span exon junctions can be aligned,
and then after alignment, transcripts are called. The settings that are available for a
transcriptome project with alternative splicing are very different from the alignment settings
for all other application types. If you open a project file for a Transcriptome project with
Alternative splicing, then the NextGENe Viewer has visualization options that are
application-specific. A Transcript report, which is an application-specific report, is also
available.
Transcriptome with Alternative splicing alignment algorithm
•
The first step is a basic alignment of the whole genome. An attempt is first made to align
entire reads to the reference sequence without any mismatches. Short seed sequences
within the reads are then used to align the reads to the reference sequence.
•
The second step is alignment to exon junctions using a reference sequence of exon-exon
junctions that was created using annotated genes. Any reads that could not be aligned to
the genomic reference sequence are aligned to this reference sequence of exon-exon
junctions. The positions are translated back to genomic reference positions. Reads are
more completely aligned, especially those reads in regions that are near the end of exons.
•
The third step is detecting and linking exons. Potential exon regions are recorded. A link
is recorded if two exons are at least partially covered by the same read. Several filtering
steps are carried out to remove false positives.
•
The fourth step is an alignment to the detected transcripts. A reference sequence of
mRNA transcripts (a reference without intron sequences) is generated based on the link
information. The original reads are aligned to this reference and the coordinates are
translated back to genomic positions.
After alignment is completed, regions (covered or annotated) and links are called and then
compared to known transcripts so that the regions and links be classified.
172
NextGene User’s Manual
Chapter 6
Sequence Alignment Tool
Transcriptome project with Alternative splicing alignment settings
The Transcriptome application type with Alternative splicing requires a preloaded
reference file that is created from an annotated GenBank file or that is supplied by
SoftGenetics. Contact [email protected] for assistance.
The settings that are available for a Transcriptome alignment project with Alternative
splicing are very different from the alignment settings for all other application types.
•
Analysis Options
Setting
Description
Auto Detect PE Library
Size
Available only if Paired Reads is selected. Select this option if you do
not want to manually specify the library size. Instead, NextGENe
automatically determines the library size.
Paired Reads
Select this option if you are analyzing paired reads.
Note: Processing paired read data for transcriptome analysis requires
at least 24GB of RAM, and takes significant processing time. If
your system does not have sufficient RAM, or paired end
information is not critical for your project, you can clear this option
to process the data as single reads.
•
Library Size: Min [ ] Max
[]
Available only if Paired Reads is selected and Auto Detect PE Library
Size is not selected. You must manually enter the size of the DNA
fragment that is being used for sequencing.
Match Reference
Applicable only if BAM sample files were loaded. Click this option to
match the reference that was used to create the BAM file with the
reference that was loaded during the Load Data step for the project. See
“To load the reference files” on page 56.
Parameters for Alternative Splicing Analysis
Setting
Description
Seed Length
The size of the seeds that should be used for the first step of the
Transcriptome Alignment algorithm.
Move Step
The distance in base pairs between the starting points for each seed.
• Min Coverage in
Annotated Region
Set the value to the coverage depth that is expected for the data. If the
experimental coverage for the region meets or exceeds this threshold,
then an exon is called in this region.
• Minimum Coverage
in Unannotated
Regions
Allowable Ambiguous
Number
Note: A higher minimum coverage value results in faster data processing,
and more specific, but less sensitive, results.
The maximum number of allowed matches for each seed. For example, if
you have a seed that matches to 100 positions in the reference sequence,
and the Allowable Ambiguous Number is set to 20, then only the first 20
matches are considered for analysis.
Note: The allowed range is 10-50.
Remove Non-Linked
Exons
Remove any exons that do not have a link.
Note: Removing these exons reduces the noise in the analysis.
NextGene User’s Manual
173
Chapter 6
Sequence Alignment Tool
Setting
Description
Single-Strand
Sequencing
Select this option if single strand sequencing was carried out on the
samples. Forward and reverse coverage information is also used to
separate overlapping transcripts.
Ignore Fusions
Between Similar
Genes
Select this option to improve the accurate detection of fusion genes.
Eliminates fusion calls between genes with similar names, for example,
ABCD1 and ABCD2.
Rigorous Fusion
Detection
Select the option to improve the accurate detection of fusion genes.
Ambiguous Alignment
for Similar Genes
By default, NextGENe checks for similarity between transcript calls. After
the initial alignment, it checks for transcripts that are 95% similar in their
calls, and then after the final alignment, it checks for transcripts that are
80% similar in their calls. NextGENe removes the called transcripts that
meet or exceed these similarity thresholds. Select this option to disable
this check and keep all called transcripts, regardless of similarity.
Note: In most cases, if you select this option, then the processing time
and the number of called transcripts are increased, but the number
of mapped reads is not significantly increased.
•
Parameters for New Gene Detection
Setting
Description
Exon Size Min [ ] Max [ ]
The range in bps for a region to be called an exon.
Average Coverage
The expected coverage for calling an exon, which is carried out in the
second alignment step. This value is used is similarly to the alternative
splicing's average coverage option of the first alignment step.
Note: The value that you enter here is not an absolute threshold. It is
used simply as an approximation when calling an exon.
•
Intron Size Min [ ]
Max [ ]
The expected range in bps for introns (the regions between called
exons).
Donor-Acceptor
Defines the beginning and ending base pairs for identifying a region that
can be called as an exon.
Parameters for Hash-Table Alignment
Setting
Matching Requirement:
Base Number >= [x] and
Base percentage >= [y]
Description
“x” indicates the minimum number of bases in each read that must
match the reference sequence for the read to align with a specific
position in the reference sequence. “y” indicates the minimum
percentage of each sequence read that must match the reference
sequence for the read to align with a specific position in the reference
sequence.
Note: Both conditions must be met for the read to be aligned to the
position.
Allow Ambiguous
Mapping
174
Aligns the read to each exact match position if a read matches exactly at
more than one position in the reference. If this option is not selected, the
read is aligned to the first exact match position from the start of the
reference.
NextGene User’s Manual
Chapter 6
Sequence Alignment Tool
Setting
Remove Ambiguously
Mapped Reads
•
Description
Removes reads that match exactly to more than one position in the
reference from the analysis.
Parameters for Mutation Detection
Setting
Description
Mutation Percentage <=
[]
A variation between the aligned reads and the reference sequence at a
given position of the reference must occur at a frequency that exceeds
this value or the variation is not reported as a mutation.
SNP Allele <= [ ]
If more than the specified number of reads has the SNP allele, then the
variation at a given position is reported as a mutation.
Total Coverage <= [ ]
The total number of reads at a given position must meet or exceed this
coverage threshold for a mutation to be called at the position.
Except for Homozygous
Selected by default. The coverage requirement is ignored for mutations
that are homozygous.
Note: The values for the mutation percentage, the coverage threshold, and the SNP allele must be
must be met for a variation at a given position to be reported as a mutation. If any criterion is
not met, the variation is filtered from the analysis and highlighted in gray in the Alignment
viewer.
Transcriptome project with Alternative splicing view
After you open a Transcriptome alignment project with Alternative splicing in the
NextGENe viewer, the TSC Show Transcript Report option is available on the Report
Selection icon. Select this option to open the Transcript report and to display the project in
the transcriptome project view. From top to bottom, the transcriptome project view has the
following visualization options that are specific for a transcriptome project—Global
coverage, Localized coverage, Identified transcripts with exon links, and Annotation.
Forward coverage is always shown in blue and reverse coverage is always shown in red in
the Localized Coverage pane.
Figure 6-32:
Transcriptome project view (Transcript report hidden)
Global Coverage
Localized Coverage
Identified transcripts
w/ exon links
Annotation
NextGene User’s Manual
175
Chapter 6
Sequence Alignment Tool
For detailed information about the Transcript report, see “Transcript report” on
page 177.
Links in the project view are color-coded to indicate the different types of links.
Link Color
Description
Purple
A link that matches the annotation for the gene. (Annotated link).
Blue
A link that is not represented by any annotation for the gene. (Novel link).
Black
A link that represents a gene fusion. (Fusion link).
Regions in the project view are also color-coded to indicate the different types of regions.
Region
Description
Purple
An exon that matches the annotation for the gene. (Annotated
region).
Blue
An exon that is not represented by any annotation for the gene.
(Novel region).
Red
Insertion and intron retention.
Pink
An exon that is found in the annotation for the gene, but was not
found in the data. (Exon skipping).
Orange
A start or end to an exon that differs from the annotation for the
gene. (Alternative splice site).
Gray
An alternative start for the first exon for the gene or an alternative
end for the last exon for the gene. (Alternative transcript start/stop).
If you zoom in on a local region for a Transcriptome project, the nucleotide sequence and the
amino acid sequence for the detected transcripts are displayed in blue. The annotated
transcripts are displayed in green below the nucleotide and amino acid sequences. The Y axis
indicates the localized coverage. You can manually adjust the scale for the axis.
Figure 6-33:
Zooming in on a local region for a transcriptome project
Y axis is localized coverage. You
can manually adjust the scale for
the axis.
Nucleotide and amino
acid sequences
Annotated transcripts
176
NextGene User’s Manual
Chapter 6
Sequence Alignment Tool
Transcript report
By default, when the Transcript report first opens in the NextGENe viewer, it is displayed on
the right side of the opened NextGENe viewer. You can click the Show/Hide Report icon
on the NextGENe Viewer toolbar to indicate where to display the report (to the side of
the viewer or below the viewer), or you can hide the report. Double-click any entry in this
report to update the display in the NextGENe viewer accordingly.
Figure 6-34:
Transcript report
Field
Description
Each entry (record) in the Transcript report represents a region or a link. Purple text indicates an
annotated record and blue text indicates a novel record.
Index
The numerical value that NextGENe assigns to the record.
Chr
The name of the chromosome where the record occurs.
Start
The base number that indicates where the record starts.
End
The base number that indicates where the record ends.
Length
The length (in base pairs) for the region, or the length between the two
ends of a link. N/A is displayed for fusion links.
Gene
The name of the gene where the record is found.
Exon(s)
One exon number is displayed in this column if the record is a region.
Two exon numbers are displayed in this column if the record is a link.
N/A is displayed in this column if there is not an annotated exon for the
record.
Link Number
Applicable only for link records. The number of reads that covered the
link. Displays N/A for region records.
PE Link Number
Applicable only for link records in paired end data. The number of pairs
where one read maps to either end of the link. Displays N/A for region
records and non-paired end data.
NextGene User’s Manual
177
Chapter 6
Sequence Alignment Tool
Field
Description
Avg Coverage
Applicable only for region records. The average coverage of the region.
N/A is displayed for link records.
<-Coverage
->Coverage
Applicable only for link records. Average coverage of the regions that
are linked. N/A is displayed for region records.
Type
The type of region or link.
Isoform
The NCBI accession number for the mRNA isoform.
Protein
The NCBI accession number for the protein.
Note: You can click any NCBI accession number to go to the NCBI website
You can click the Report Settings icon
on the NextGENe Viewer toolbar to open the
Transcript Report Settings dialog box, and specify what information is to be displayed in the
report.
Transcript report settings
The Region Type options on the Filter tab of the Transcript Report Settings dialog box are
different for an index that was not created from GenBank files versus an index that was
created from a GenBank file.
178
Figure 6-35:
Transcript Report Settings dialog box, Filter tab (non-GenBank index)
Figure 6-36:
Transcript Report Settings dialog box, Filter tab (GenBank index)
NextGene User’s Manual
Chapter 6
Sequence Alignment Tool
Setting
Description
Record Type
Link Type
Show the indicated link type.
Sequence Type
Show the indicated sequence type.
Filters
Display the link record in the report only if the link number (the number of reads that overlap the link)
meets the indicated threshold or display the region record in the report only if the number of reads
that cover the region meets the indicate threshold.
Figure 6-37:
Transcript Report Settings dialog box, Columns tab
You specify which columns are to be displayed in the Transcript report. By default, all
columns are selected.
You can use the Save Settings function to save the selected report settings to a
Settings file (.ini file), and you can use the Load Settings function to load this
Settings file for use in another project report.
NextGene User’s Manual
179
Chapter 6
Sequence Alignment Tool
STR (Short Tandem Repeats) Analysis Project
You select STR analysis if you are aligning data from STR sequencing to a reference file that
contains reference STR alleles. If you select STR analysis as the application type, then you
must create a custom reference file in .fasta format for the analysis. A specific alignment
setting is required for STR analysis. If you open a project file for an STR analysis project in
the NextGENe viewer, an STR report, which is an application-specific report, is available.
The report has visualization options that are specific for STR analysis. An STR Reads
Histogram report, which is a report that details all the read information for all the alleles that
were identified for a selected locus across all loci in the project, is also available.
STR analysis custom .fasta reference file
You must use a text editor to create a custom reference file in .fasta format to carry out STR
analysis. One reference .fasta file is required per locus, with one allele per .fasta line in the
file. The file name must be the same as the name of the locus, for example, D18S51.fasta. In
each .fasta file, each allele is identified by its name in the title line above the allele sequence
line. The allele sequence line contains three parts:
•
The pre-repeat flanking sequence.
•
The allele repeat sequence.
•
The post-repeat flanking sequence.
Figure 6-38:
STR analysis FASTA Reference file
Typically, the flanking sequences are identical for all the alleles for the locus but the repeat
sequence region is specific for each allele. Also, typically, there is a difference in the length
within the reference region for each allele, but there might be other differences as well such
as a SNP within the region for one of the alleles.
180
NextGene User’s Manual
Chapter 6
Sequence Alignment Tool
STR project alignment settings
In addition to the default sequence alignment project settings, a specific alignment setting—
Read length over reference length—is required for STR analysis.
Setting
Read length over
reference length >
[80%]
Description
Selected by default. The read must cover at least the indicated
percentage of the segment to which it is aligned, or it is not assigned to
an allele.
Note: This setting ensures that the read covers an entire repeat region.
Variants that do not pass the Mutation Filter thresholds are assumed to be
sequencing errors and they are ignored when assigning reads to alleles. See
“Mutation Filter settings” on page 140.
STR project report
After you open an STR analysis project in the NextGENe viewer, the STR Show STR Report
option is displayed on the Report Selection icon. Select this option to open the STR report in
addition to the Alignment view. The report has two sections. The top section is the Locus
report, which shows the different loci that were analyzed along with associated information
for each locus. The bottom section is the Allele report, which displays a row for each allele,
by name, that was identified in the sample for a selected locus. The information is relative to
the order of the alleles listed in the Allele Name column in the Locus report. Double-click
any entry in the Locus report to update the display in the NextGENe viewer and the Allele
report accordingly. You can also double-click any allele in the Allele report to change the
focus of the display to the selected allele.
Figure 6-39:
STR report
Locus report
Allele
report
NextGene User’s Manual
181
Chapter 6
Sequence Alignment Tool
Column
Description
Locus report
Locus
The name of the locus that was analyzed. Any loci that failed any
of the Filter settings for the report, are grouped into a row with
Unknown displayed in this column. See “STR Report Settings
dialog box” on page 186.
Locus Coverage
The total number of reads that were aligned to the locus.
Locus Percentage
Locus coverage/Total number of aligned reads.
Allele Number
The total number of alleles that were identified for the locus.
Allele Name
The names of the individual alleles that were identified for the
locus. If the locus is Unknown, then N/A is displayed in this
column.
Allele Frequency
The number of reads that were assigned to each allele out of the
number of reads that were assigned to all accepted alleles for the
locus. (Shown as a percentage.) The information is relative to the
order of the alleles listed in the Allele Name column.
Note: Depending on the Filter settings that were specified for the
report, these values might not be the same as the
Frequency values in the Allele report. See “STR Report
Settings dialog box” on page 186.
Allele Total Coverage
The total number of reads that are assigned to each allele. The
information is relative to the order of the alleles listed in the Allele
Name column.
Allele Percent Matched
The percentage of the sequence for the sample allele that
matches the sequence for the reference allele. The information is
relative to the order of the alleles listed in the Allele Name column.
• If the match is 100%, then the allele is considered to be a
Matched allele.
• If the match is less than 100%, then the allele is considered to
be a Possible allele.
Allele report
Sequence/Length
The default value is sequence, which shows the sequence for the
sample allele. You can change the report settings to show the
length, which is the length of the sample allele in base pairs based
on the consensus length of all the reads that were assigned to the
allele. See “STR Report Settings dialog box” on page 186.
Matched Allele Name
The reference allele name for the allele to which the sample data
is matched. Based on the allele name that was defined in the
custom FASTA reference file.
Status
• If the sample allele sequence matched 100% to the reference
allele sequence, then Matched is displayed for the status.
• If the sample allele sequence matched less than 100% to the
reference allele sequence, then Possible is displayed for the
status.
• If the allele’s locus is Unknown, then N/A is displayed for the
status.
Start
182
The start position of the allele within the reference.
NextGene User’s Manual
Chapter 6
Sequence Alignment Tool
Column
Description
End
The end position of the allele within the reference.
Frequency
The number of reads that were assigned to the allele out of the
total number of reads that were aligned to the locus. (Shown as a
percentage.)
Note: Depending on the Filter settings that were specified for the
report, these values might not be the same as the Allele
Frequency values in the Locus report. See “STR Report
Settings dialog box” on page 186.
Total Reads
The total number of reads that aligned to the allele.
Forward Reads
The number of reads that were assigned to the allele that were
forward reads.
Reverse Reads
The number of reads that were assigned to the allele that were
reverse reads.
Differences
The number of bases in the sample allele sequence that do not
match the reference allele sequence.
• For matched alleles, the difference = 0.
• For possible alleles, the difference > 0.
By default, when the STR report first opens in the NextGENe viewer, it is displayed on the
right side of the opened viewer, and the focus in the Alignment viewer is set to the first locus
in the list of analyzed loci. A blue cross centered in the Alignment viewer indicates the
position of the locus. The Allele report details the alleles that were identified for this first
locus. You can click the Show/Hide Report icon
on the NextGENe Viewer toolbar to
indicate where to display the STR report (to the side of the viewer or below the viewer), or
you can hide the report.
The STR report is interactive. You can:
•
Double-click on any locus to change the focus in the Alignment view to that of the
selected locus. The Allele report display is updated accordingly.
•
Double-click on any allele to change the focus in the Alignment viewer to that of the
selected allele. A blue cross is displayed in the Alignment viewer to indicate the position
of the selected allele on the locus.
Other options are available on the report toolbar. See “STR report toolbar” on page 184.
NextGene User’s Manual
183
Chapter 6
Sequence Alignment Tool
STR report toolbar
Icon
Action
Show Allele Sequence Report/Show Allele Length Report - Click this icon to toggle the
display for the Allele report between the Allele Sequence report (Sequence column) and
the Allele Length in base pairs (Length column).
Note: You can also change the Report type in the STR Report Settings dialog box to
toggle the display. See “STR Report Settings dialog box” on page 186.
STR Reads Histograms icon - Click this icon to open the STR Reads Histogram report,
which details the read counts for all the alleles that were identified for a given locus. See
“STR Reads Histogram report” on page 184.
Allow Possible Alleles/Check Matched Alleles Only icon - Click this icon to toggle
between reporting both Matched alleles and Possible alleles in the Allele report, or
reporting only Matched alleles.
Note: You can also use the Allow possible allele matches filter setting on the STR
Report Settings dialog box to toggle the reporting options. See “STR Report
Settings dialog box” on page 186.
STR Report Settings icon—Click this icon to open the STR Report Settings dialog box
and specify the information that is to be displayed in the report. See “STR Report
Settings dialog box” on page 186.
Show/Hide Locus Report icon - Click this icon to toggle the display of the Locus report in
the NextGENe viewer.
Show/Hide Allele report icon - Click this icon to toggle the display of the Allele report
(Sequence or Length) in the NextGENe viewer.
Save STR Reports icon—Click this icon to open the Save Report as Text File dialog
box, and save the STR Locus report and the Allele report as individual text (*.txt) files.
By default, the report name is the project name appended with STR and the report is
saved in the same location as the project output files, but you can change one or both of
these values.
Note: Before you save the report, make sure that the correct Allele report (Sequence or
Length) is displayed in the viewer.
STR Reads Histogram report
Click the STR Reads Histogram icon
on the STR report toolbar to open the STR Reads
Histogram report. This report details the coverage distribution for all the alleles that were
identified for a locus across all the loci in the project.
•
The number of forward reads and the number of reverse reads for matched alleles, with
the forward reads represented in dark blue and the reverse reads represented in red. The
reverse coverage is stacked on top of the forward coverage.
•
The number of forward reads and the number of reverse reads for possible alleles, with
the forward reads represented in light blue and the reverse reads represented in pink. The
reverse coverage is stacked on top of the forward coverage.
See Figure 6-40 on page 185.
184
NextGene User’s Manual
Chapter 6
Sequence Alignment Tool
Figure 6-40:
STR Reads Histogram report
The report is interactive. You can click one of the following to save the report as either a PDF
or PNG file, respectively.
•
File > Save as PDF
•
File > Save as PNG
You must specify the name and location for the saved report.
NextGene User’s Manual
185
Chapter 6
Sequence Alignment Tool
STR Report Settings dialog box
Click the STR Report Settings icon
on the report toolbar to open the STR Report
Settings dialog box and indicate the information that is to be displayed in the report. By
default, all columns for the Locus report and the Allele report are selected for display. Also
by default, the Allele Sequence report is displayed.
Figure 6-41:
STR Report Settings dialog box
Optionally, you can also do either one or both of the following:
• Click Load Settings and browse to and select a Settings file (.ini file) to generate
the STR report based on the saved settings in the file.
• Click Save Settings to save your settings for the report in a Settings file (.ini
file). You can use this saved Settings file to generate the STR report for another
project based on the settings in the file.
Setting
Description
Locus report display settings
186
Locus
The name of the locus that was analyzed.
Locus Coverage
The total number of reads that were aligned to the locus.
Locus Percentage
Locus coverage/Total number of aligned reads.
Allele Number
The total number of alleles that were identified for the locus.
Allele Name
The names of the individual alleles that were identified for the locus. If the
locus is Unknown, then N/A is displayed in this column.
Allele Frequency
The number of reads that were assigned to each allele out of the number
of reads that were assigned to all accepted alleles for the locus. (Shown
as a percentage.) The information is relative to the order of the alleles
listed in the Allele Name column.
NextGene User’s Manual
Chapter 6
Sequence Alignment Tool
Setting
Description
Allele Total Coverage
The total number of reads that are assigned to each allele. The
information is relative to the order of the alleles listed in the Allele Name
column.
Allele Percent
Matched
The percentage of the sequence for the sample allele that matches the
sequence for the reference allele. The information is relative to the order
of the alleles listed in the Allele Name column.
• If the match is 100%, then the allele is considered to be a Matched
allele.
• If the match is less than 100%, then the allele is considered to be a
Possible allele.
Allele sequence report display settings
Sequence/Length
The default value is Sequence, which shows the sequence for the sample
allele. If you select Allele length report for the report type, then report
display is changed to show the length, which is the length of the sample
allele in base pairs based on the consensus length of all the reads that
were assigned to the allele. See “Report type” on page 188.
Note: You can also click the Show Allele Sequence/Show Allele Length
Report icon to toggle the display of the Allele report. See “STR
report toolbar” on page 184.
Matched Allele Name
The name of the sample allele that was matched to the reference allele.
Based on the allele name that was defined in the custom FASTA
reference file.
Status
The status for the allele—Matched, Possible, or Unknown.
Start
The start position of the allele within the reference.
End
The end position of the allele within the reference.
Frequency
The number of reads that were assigned to the allele out of the total
number of reads that were aligned to the locus. (Shown as a percentage.)
Total Reads
The total number of reads that aligned to the allele.
Forward Reads
The number of reads that were assigned to the allele that were forward
reads.
Reverse Reads
The number of reads that were assigned to the allele that were reverse
reads.
Differences
The number of bases in the sample allele sequence that do not match the
reference allele sequence.
Filter settings
Allow possible allele
matches
If selected, report both matched and possible alleles, which contain one or
more mismatches. If not selected (the default value), then report only
matched alleles.
Note: You can also click the Allow Possible Alleles/Check Matched Alleles
Only icon on the report toolbar to toggle between reporting both
Matched alleles and Possible alleles in the STR report, or reporting
only Matched alleles. See “STR report toolbar” on page 184.
NextGene User’s Manual
187
Chapter 6
Sequence Alignment Tool
Setting
Description
Maximum differences
Available only if Allow possible allele matches is selected. If the number of
differences between the sample allele sequence and the reference allele
sequence exceeds the indicated value, then the allele is classified as
Unknown.
Minimum forward/
reverse balance
Indicates the balance for the #F/#R reads for the allele and vise-versa. For
example, if set to 5%, then if there were 100 reverse reads for the allele,
there must at least 5 forward reads for the allele, otherwise, the allele
would be classified as Unknown. The default value is zero, which means
that there is no requirement for the Forward/Reverse balance.
Note: Adjusting this setting can help reduce the rate of false positives.
Minimum count
The minimum number of reads that are required for an allele, otherwise,
the allele is classified as Unknown.
Minimum frequency
The minimum value (expressed as a percentage) for the ratio of the
number of reads for the allele to the total number of reads for the locus. If
the frequency for the allele is does not meet or exceed this threshold, then
the allele is classified as Unknown.
Report type
Allele sequence report
Selected by default. Display the allele sequence (Sequence column) in
the Allele report.
Allele length report
Display the allele length (Length column) in the Allele report.
Note: You can also click the Show Allele Sequence Report icon on the report toolbar to toggle the
display of the Allele report.
188
NextGene User’s Manual
Chapter 6
Sequence Alignment Tool
Mitochondrial Amplicon Analysis Project
You select Mitochondrial amplicon as the application type if you are identifying alleles for
specific amplicons in mitochondrial sequencing data. A Mitochondrial amplicon analysis
project has application-specific data requirements. If you open a project file for a
Mitochondrial amplicon analysis project in the NextGENe viewer, a Mitochrondrial
amplicon report, which is an application-specific report, is available. The report has
visualization options that are specific for Mitochondrial amplicon analysis. A Reads
Summary Alignment view, which is a view that details all the read information for all the
alleles that were identified for a selected amplicon across all amplicons in the project, is also
available.
Mitochondrial amplicon analysis data requirements
The Mitochondrial amplicon application type requires the mitochondrial Genbank reference
file. You must also load a BED file that details the amplicon locations. See “To set ROI
regions from a BED or GBK file” on page 58.
Mitochondrial Amplicon report
After you open a Mitochondrial amplicon analysis project in the NextGENe viewer, an MT
Show Mitochondrial Amplicon Report option is displayed on the Report Selection icon.
Select this option to open the Mitochondrial Amplicon report in addition to the Alignment
view. The report has two sections. The top section is the Amplicon report, which shows the
different amplicons that were analyzed along with associated information for each amplicon.
The bottom section is the Allele report, which displays a row for each allele, by name, that
was identified in the sample for a selected amplicon. Double-click any entry in the Amplicon
report to update the display in the NextGENe viewer and the Allele report accordingly. You
can also double-click any allele in the Allele report to change the focus of the display to the
selected allele.
Figure 6-42:
Mitochondrial Amplicon report
Amplicon
report
Allele report
NextGene User’s Manual
189
Chapter 6
Sequence Alignment Tool
Field
Description
Amplicon report
Amplicon
The name of the amplicon that was analyzed. Any amplicons that failed
any of the Filter settings for the report are grouped into a row with
Unknown displayed in this column. See “Mitochondrial Amplicon report”
on page 189.
Amplicon Coverage
The total number of reads that were aligned to the amplicon.
Amplicon Percentage
Amplicon coverage/Total number of aligned reads.
Allele Number
The total number of alleles that were identified for the amplicon.
Allele Frequency
The number of reads that were assigned to each allele out of the number
of reads that were assigned to all accepted alleles for the amplicon.
(Shown as a percentage.)
Note: Depending on the Filter settings that were specified for the report,
these values might not be the same as the Frequency values in the
Allele report. See “Mitochondrial Amplicon report” on page 189.
Allele Total Coverage
The total number of reads that are assigned to each allele.
Allele report
Sequence
The sequence for the sample allele.
Start
The start position of the allele within the reference.
End
The end position of the allele within the reference.
Frequency
The number of reads that were assigned to the allele out of the total
number of reads that were aligned to the amplicon. (Shown as a
percentage.)
Note: Depending on the Filter settings that were specified for the report,
these values might not be the same as the Allele Frequency values
in the Amplicon report. See “Mitochondrial Amplicon Report settings
dialog box” on page 192.
Total Reads
The total number of reads that aligned to the allele.
Forward Reads
The number of reads that were assigned to the allele that were forward
reads.
Reverse Reads
The number of reads that were assigned to the allele that were reverse
reads.
Differences
The number of bases in the sample allele sequence that do not match the
reference allele sequence.
By default, when the Mitochondrial Amplicon report first opens in the NextGENe viewer, it
is displayed on the right side of the opened viewer, and the focus in the Alignment viewer is
set to the first amplicon in the list of analyzed amplicons. A blue cross centered in the
Alignment viewer indicates the position of the amplicon. The Allele report details the alleles
that were identified for this first amplicon. You can click the Show/Hide Report icon
on
the NextGENe Viewer toolbar to indicate where to display the MT report (to the side of the
viewer or below the viewer), or you can hide the report.
190
NextGene User’s Manual
Chapter 6
Sequence Alignment Tool
The Mitochondrial Amplicon report is interactive. You can:
•
Double-click on any amplicon to change the focus in the Alignment view to that of the
selected amplicon. The Allele report display is updated accordingly.
•
Double-click on any allele to change the focus in the Alignment viewer to that of the
selected allele. A blue cross is displayed in the Alignment viewer to indicate the position
of the selected allele on the locus.
Other options are available on the report toolbar. See “Mitochondrial Amplicon report
toolbar” below.
Mitochondrial Amplicon report toolbar
Icon
Action
Display Reads Summary Alignment icon - Click this icon to open the Reads Summary
Alignment view, which shows the differences in the alignment of the consensus
sequences for all called alleles to the reference sequence for the selected amplicon.
See “Reads Summary Alignment view” below.
Mitochondrial Amplicon Report Settings icon—Click this icon to open the Mitochondrial
Amplicon Report Settings dialog box and specify the information that is to be displayed
in the report. See “Mitochondrial Amplicon Report settings dialog box” on page 192.
Show/Hide Amplicon Report icon - Click this icon to toggle the display of the
Mitochondrial Amplicon report in the NextGENe viewer.
Show/Hide Allele Report icon - Click this icon to toggle the display of the Allele report in
the NextGENe viewer.
Save Mitochondrial Amplicon Reports icon—Click this icon to open the Save Report as
Text File dialog box, and save the Mitochondrial Amplicon report as a text (*.txt) file. By
default, the report name is the project name appended with Mitochondrial and the report
is saved in the same location as the project, but you can change one or both of these
values.
Reads Summary Alignment view
Click the Reads Summary Alignment icon
to open the Reads Summary Alignment
report, which shows the differences in the alignment of the consensus sequences for all
called alleles to the reference sequence for the selected amplicon. An insertion is displayed
in green, a deletion is displayed in red, and the different nucleotide is displayed for SNPs.
(See Figure 6-43 on page 192.) The view is interactive:
•
Change the display - Click the Next Amplicon and Previous Amplicon icons
the top of the view window to move through each amplicon.
•
Zoom In - Hold down the left mouse button and draw a box from the upper left hand
corner of any region in a graph towards the lower right hand corner. A box is formed
around the area that being reduced for viewing.
NextGene User’s Manual
at
191
Chapter 6
Sequence Alignment Tool
•
Zoom Out - Hold down the left mouse button and draw a box from the lower right hand
corner of any region in the graph towards the upper left hand corner.
The magnification for zooming out is always 100%.
Figure 6-43:
Reads Summary Alignment view
Mitochondrial Amplicon Report settings dialog box
Click the Mitochondrial Amplicon Report Settings icon
on the report toolbar to open the
Mitochondrial Amplicon Report Settings dialog box and indicate the information that is to
be displayed in the report. By default, all columns for the Mitochondrial Amplicon report
and the Allele report are selected for display. Options that are unavailable (grayed-out) are
applicable only for the STR analysis report.
Figure 6-44:
192
Mitochondrial Amplicon Report Settings dialog box
NextGene User’s Manual
Chapter 6
Sequence Alignment Tool
Optionally, you can also do either one or both of the following:
• Click Load Settings and browse to and select a Settings file (.ini file) to generate
the Mitochondrial Amplicon report based on the saved settings in the file.
• Click Save Settings to save your settings for the report in a Settings file (.ini
file). You can use this saved Settings file to generate the Mitochondrial
Amplicon report for another project based on the settings in the file.
Setting
Description
Amplicon report display settings
Amplicon
The name of the amplicon that was analyzed.
Amplicon Coverage
The total number of reads that were aligned to the amplicon.
Amplicon Percentage
Amplicon coverage/Total number of aligned reads.
Allele Number
The total number of alleles that were identified for the amplicon.
Allele Frequency
The number of reads that were assigned to each allele out of the number
of reads that were assigned to all accepted alleles for the amplicon.
(Shown as a percentage.)
Allele Total Coverage
The total number of reads that are assigned to each allele.
Allele report display settings
Sequence/Length
The sequence for the sample allele.
Start
The start position of the allele within the reference.
End
The end position of the allele within the reference.
Frequency
The number of reads that were assigned to the allele out of the total
number of reads that were aligned to the amplicon. (Shown as a
percentage.)
Total Reads
The total number of reads that aligned to the allele.
Forward Reads
The number of reads that were assigned to the allele that were forward
reads.
Reverse Reads
The number of reads that were assigned to the allele that were reverse
reads.
Differences
The number of bases in the sample allele sequence that do not match the
reference allele sequence.
Filter settings
Maximum differences
If the number of differences between the sample allele sequence and the
reference allele sequence exceeds the indicated value, then the allele is
classified as Incomplete.
Minimum forward/
reverse balance
Indicates the balance for the #F/#R reads for the allele and vise-versa. For
example, if set to 5%, then if there were 100 reverse reads for the allele,
there must at least 5 forward reads for the allele, otherwise, the allele
would be classified as Incomplete. The default value is zero, which means
that there is no requirement for the Forward/Reverse balance.
Note: Adjusting this setting can help reduce the rate of false positives.
Minimum count
The minimum number of reads that are required for an allele, otherwise,
the allele is classified as Incomplete.
NextGene User’s Manual
193
Chapter 6
Sequence Alignment Tool
Setting
Minimum frequency
194
Description
The minimum value (expressed as a percentage) for the ratio of the
number of reads for the allele to the total number of reads for the locus. If
the frequency for the allele is does not meet or exceed this threshold, then
the allele is classified as Incomplete.
NextGene User’s Manual
Chapter 6
Sequence Alignment Tool
HLA Project
You select the HLA application type to analyze Human Leukocyte Antigen (HLA) data or
major histocompatibility complex (MHC) data from other organisms. You can also use the
application type to review Sanger sequencing data that has been previously analyzed in
Mutation Surveyor. An HLA analysis project has application-specific data requirements and
alignment settings. When you open an HLA project file in the NextGENe viewer, the HLA
report, which is an application-specific report is displayed. The viewer also has visualization
options that are application-specific.
HLA analysis data requirements and project settings
An HLA analysis project has the following application-specific project requirements and
settings:
•
Load Data requirements:
•
Loading reference files - The required reference files are the GenBank files for the
HLA genes that are being targeted in the project. You can load multiple reference
GenBank files for HLA genes.
•
Loading Sanger sequencing data - If you are loading Sanger sequencing data that has
been analyzed in Mutation Surveyor, then you must select Load MS HLA Mutation
Report.
Figure 6-45:
HLA analysis, Load Data requirements
If you are loading
Sanger sequencing
data that has been
analyzed in Mutation
Surveyor, then you
must select Load
MS HLA Mutation
Report.
The required reference files are the
GenBank files for the HLA genes that
are being targeted in the project. You
can load multiple reference GenBank
files for HLA genes.
NextGene User’s Manual
195
Chapter 6
Sequence Alignment Tool
•
Alignment settings:
Figure 6-46:
HLA analysis, Alignment Settings
Setting
Description
Load dictionary or load NCBI
XML
You must load one of the following three dictionary files, where XML
is the preferred format.
• Human - NCBI XML file for alleles.
You can download an NCBI XML for human alleles from the ncbi
database—
ftp://ftp.ncbi.nlm.nih.gov/pub/mhc/alleles/.
• Non-human primate - EBI XML or FASTA file for alleles.
You can download an XML or FASTA file for non-human primate
alleles from the MHC/NHP database—ftp://fftp.ebi.ac.uk/pub/
databases/ipd/mhc/nhp/.
• HLA Dictionary .fasta file.
You can download the HLA dictionary sequences from the IMGT/
HLA database—http://www.ebi.ac.uk/imgt/hla/.
Coverage Threshold - The coverage requirements to call alleles that are present in the sample data.
196
Minimum Coverage
The minimum number of reads that must cover an allele.
Percent coverage
The percentage of the gene that must be covered by reads for the
allele to be called in the gene. You should set this value based on
the region that is being targeted. For example, if you are targeting
just exons, then this value should be less than 50%. (An acceptable
value is 10%.) If you are targeting the whole gene, then this value
should be greater than 50%. (An acceptable value is 90%.)
NextGene User’s Manual
Chapter 6
Sequence Alignment Tool
Setting
Description
Minimum read length
Any read that does not meet or exceed the indicated threshold is
not used for calling alleles.
Align each sample file to
only reference file
Select this option if you load a separate sample file for each gene
that is being targeted.
Mutation filter
Check reads balance when
mutation percentage < 20%.
Selected by default. If the frequency of a variant is less than 20%,
then the Read Balance is checked. If the reads for the variant are
not balanced, then the variant is ignored and it is not used for allele
calling.
HLA project report
After you open an HLA analysis project, the HLA Show HLA Report option is displayed on
the Report Selection icon. Select this option to open the HLA-specific reports and display the
project in the HLA project view. From top to bottom, the report has the following three
sections: the HLA Summary report, the Allele Matching report, and the Allele Coverage
report. (For a description of these report sections, see the table on the following page.)
Figure 6-47:
HLA report
HLA
Summary
report
Allele
Matching
report
Allele
Coverage
report
NextGene User’s Manual
197
Chapter 6
Sequence Alignment Tool
Report Section
Description
HLA Summary
The HLA Summary report displays all the called alleles for the sample
data as well as summary information for the alleles. If the sample is called
as homozygous for the locus, then a pound sign (#) is displayed for the
second allele. Double-click any entry in the HLA Summary report to
update the display in the HLA project view and the two allele reports
accordingly.
Allele Matching report
The Allele Matching report shows the mismatches for the consensus
sequence for the sample data compared to the dictionary sequence for
the gene and allele pair that is selected in the HLA Summary report.
Double-click any position in the report to change the focus of the HLA
project view to the selected position.
Allele Coverage report
The Allele Coverage report shows the low coverage positions (as defined
in the Filter options in the report) for the gene and allele pair that is
selected in the HLA Summary report. The report also show additional
information about the alleles such as zygosity. Double-click any position in
the report to change the focus of the HLA project view to the selected
position.
The HLA report toolbar is interactive. The information that is displayed in the report sections
as well as some of the information that is displayed in the panes of the HLA project view is
determined by the settings that you have selected for the report. See “HLA report toolbar”
below and “HLA Report Settings dialog box” on page 199.
HLA report toolbar
Icon
Action
Show/Hide HLA Summary report icon - Click this icon to toggle the display of the HLA
Summary report in the NextGENe viewer.
Show/Hide Allele Matching report icon - Click this icon to toggle the display of the Allele
Matching report in the NextGENe viewer.
Show/Hide Allele Coverage report icon - Click this icon to toggle the display of the Allele
Coverage report in the NextGENe viewer.
HLA Summary Report Settings icon - Click this icon to open the HLA Report Settings
dialog box and specify the information that is to be displayed in the report. See “HLA
Report Settings dialog box” on page 199.
Save HLA Reports icon—Click this icon to open the Save Report as Text File dialog
box, and save the HLA report as a text (*.txt) file. By default, the report name is the
project name appended with HLA_Report and the report is saved in the same location
as the project, but you can change one or both of these values.
198
NextGene User’s Manual
Chapter 6
Sequence Alignment Tool
HLA Report Settings dialog box
Click the HLA Report Settings icon
on the report toolbar to open the HLA Report
Settings dialog box and indicate the information that is to be displayed in each of the report
sections as well as information that is displayed in some panes of the HLA project view. You
can also elect to save the different report sections as a text file. See:
•
“HLA (Summary Report) Settings tab” below.
•
“Allele Matching Report Settings tab” on page 201.
•
“Allele Coverage Report Settings tab” on page 203.
•
“Output Settings tab” on page 204.
Figure 6-48:
HLA Report Settings dialog box, HLA Settings tab
Optionally, you can also do either one or both of the following:
• Click Load Settings and browse to and select a Settings file (.ini file) to generate
the HLA report based on the saved settings in the file.
• Click Save Settings to save your settings for the report in a Settings file (.ini
file). You can use this saved Settings file to generate the HLA report for another
project based on the settings in the file.
HLA (Summary Report) Settings tab
Setting
Description
Summary display
Sample
The sample ID.
Locus
The HLA locus on which the alleles are located.
NextGene User’s Manual
199
Chapter 6
Sequence Alignment Tool
Setting
Description
Allele 1
HLA alleles for the reported genotype.
Allele 2
Note: The values that you have specified for the Type Precision
determine the naming scheme that is displayed for the alleles. See
Type Precision.
Score
The likelihood that the genotype for the two alleles is the correct
genotype.
Note: The closer that the score is to zero, the greater the likelihood that
the genotype is the correct one.
Coverage
The number of reads that mapped to the locus.
Poor Covered Position
Number of poor covered positions for the allele based on the Allele
Coverage report filter settings. See “Allele Coverage Report Settings tab”
on page 203.
Amino Acid Change
The number of mismatches in that are located in the coding regions that
result in an amino acid change.
Substitutions
The number of mismatches that are substitutions.
Indels
The number of mismatches that are indels.
Mismatches
The number of mismatches in the sample data as compared to the
dictionary sequence.
Mismatches in CDS
The number of mismatches that are located in the coding regions.
Mismatches in
Non-Coding Regions
The number of mismatches that are located in the non-coding regions.
Synonymous
Mismatches in CDS
The number of mismatches that are located in the coding regions that do
not result in an amino acid change.
Unmatched Read
counts
The number of reads that align to the gene but don’t match to the
consensus sequences for either of the selected alleles. Displayed in the
Unmatched Reads pane for the HLA project view. See “Unmatched
Reads pane” on page 207.
Type precision - Indicates how to display the allele names in the HLA Summary report. The name is
always the Gene Name followed by up to four separate codes, each of which are representative of
one of the following different allele characteristics/properties - Serotype, Amino Acid Differences,
Synonymous Differences, and Non-coding Differences.
Figure 6-49:
200
Type precision for allele naming
• 2 group result
• Show Gene, Serotype, and Amino Acid Differences.
• 3 group result
• Show Gene, Serotype, Amino Acid Differences, and Synonymous
Differences.
• 4 group result
• Show Gene, Serotype, Amino Acid Differences, Synonymous
Differences and Non-coding Differences.
NextGene User’s Manual
Chapter 6
Sequence Alignment Tool
Setting
Description
Allele pairs
• 1 allele result
Display the sample data (top allele pair) that was the best matched to the
dictionary data for the selected gene.
• 2 alleles result
Display the sample data (top two allele pairs) that was the best matched
to the dictionary data for the selected gene.
• 3 alleles result
Display the sample data (top three allele pairs) that was the best matched
to the dictionary data for the selected gene.
• All alleles result
Display the sample data (top four allele pairs) that matched to the
dictionary data for the selected gene.
Allele Matching Report Settings tab
Figure 6-50:
HLA Report Settings dialog box, Allele Matching Report Settings tab
Setting
Description
Display Options
Reference Position
The reference position where the mismatch occurs.
Reference Nucleotide
The nucleotide in the GenBank file at the reference position.
Predicated Allele
Nucleotide
The nucleotide in the dictionary file for the selected allele at the
reference position.
Observed Allele
Nucleotide
The nucleotide in the consensus sequence for the sample data at the
reference position.
Allele Balance
The variant frequency in the sample data at the reference position.
Read Balance
The read balance for the variant.
Note: This value is identical to the value that is calculated for Balance
Ratios and Frequencies in the Alignment settings. See “Balance
Ratio” on page 141.
Mutation Call
The change (mutation call) that occurs at the mutation position.
NextGene User’s Manual
201
Chapter 6
Sequence Alignment Tool
Setting
Description
A(#/F / #R), C(#/F / #R),
G(#/F / #R), T(#/F / #R)
The actual number of reads that show the indicated base at the
mutation location in the forward direction and the actual number of
reads that show the indicated base at the mutation location in the
reverse direction.
Deletion (#F / #R)
The actual number of reads that show a deletion at the mutation
location in the forward direction and the actual number of reads that
show a deletion at the mutation location in the reverse direction.
Insertion (#F / #R)
The actual number of reads that show an insertion at the mutation
location in the forward direction and the actual number of reads that
show an insertion in the reverse direction at the mutation location.
A(%), C(%), G(%), T(%)
The percentage of reads that show the indicated base at the mutation
location.
Deletion(%)
The percentage of reads that show a deletion at the mutation location.
Insertion(%)
The percentage of reads that show an insertion at the mutation
location.
A Score, C Score, G
Score, T Score
Essentially an allele balance score for each individual allele. It is
scaled to be similar to the Overall Mutation score, but it does not
contribute to the overall score.
• If the allele F/R ratio is > 3 x the F/R ratio for all the reads at the
indicated position, or is < 1/3 x the F/R ratio for all the reads at the
indicated position, then the score for the allele is zero.
• If the position has no calls that correspond to the indicated allele,
then the score for the allele is again zero.
• Otherwise, the score is calculated based on the F/R ratio for the
allele and the F/R ratio for all the reads at the indicated position. The
closer that these two values are, then higher the allele score. The
maximum allele score for any allele is 27.
Deletion Score
For deletion alleles. See the description for A Score, C Score, G Score,
T Score.
Insertion Score
For insertion alleles. See the description for A Score, C Score, G
Score, T Score.
Filter Options - All options are selected by default.
Note: If you change any value on this tab, at any time, you can click Default to return all values on
all tabs to their default values.
Display mismatches only
Display the mismatches for the consensus sequence for the sample
data compared to the dictionary sequence for the allele pair that is
selected in the HLA Summary report. Clear this option to show both
matches and mismatches.
Filter by statistics
• Allele Balance
• Read Balance
• The Allele Balance is identical to the Allele Frequency. (See “Allele
Frequency” on page 193.) Display only those alleles that have an
allele balance > the indicated threshold. The default value is 0.5.
• Display only those alleles that have a Read Balance > the indicated
threshold. The default value is 0.5.
202
NextGene User’s Manual
Chapter 6
Sequence Alignment Tool
Setting
Description
Filter by annotation
• Substitutions
•
•
•
•
Noncoding
Silent (in CDS)
Missense
Nonsense/No-stop
• Indels
• By default, show the mismatches for the consensus sequence for
the sample data compared to the dictionary sequence if the
mismatch occurs for a position that is annotated as the indicated
substitution type. Clear the options for the substitution types that are
not to be displayed in the report.
• By default, show the mismatches for the consensus sequence for
the sample data compared to the dictionary sequence if the
mismatch occurs for a position that is annotated an insertion or
deletion. Clear this option if indels are not to be displayed in the
report.
Allele Coverage Report Settings tab
Figure 6-51:
HLA Report Settings dialog box, Allele Coverage Report Settings tab
Setting
Description
Display Options
Reference Position
The reference position where the mismatch occurs.
Gene
The gene that is selected in the HLA Summary report.
Coverage
The number of reads that mapped to the locus in the sample data.
Zygosity
The zygosity of the alleles (heterozygous or homozygous) in the sample
data for the selected gene.
Reference Nucleotide
The nucleotide in the GenBank file at the reference position.
Mutation Call
The change (mutation call) that occurs at the mutation position.
Amino Acid Change
The number of mismatches in that are located in the coding regions that
result in an amino acid change.
NextGene User’s Manual
203
Chapter 6
Sequence Alignment Tool
Setting
Description
Filter Options
Note: If you change any value on this tab, at any time, you can click Default to return all values on
all tabs to their default values.
Coverage Display Threshold
Min Coverage
The minimum coverage required for a position to be called as a low
coverage position and included in the report.
Zygosity
The zygosity of the mutation at the reference position.
• Heterozygous
threshold
• The requirements for a location to be considered heterozygous. More
than one nucleotide must observed above the indicated threshold (the
default value is 20%) for the location to be considered heterozygous.
• Homozygous
• Display the mutations of the indicated zygosity in the report.
• Heterozygous
Output Settings tab
By default, all three sections of the HLA report are saved as text files in the project Output
folder. You must clear the options for the reports that you do not want to save.
Figure 6-52:
204
HLA Report Settings dialog box, Allele Coverage Report Settings tab
NextGene User’s Manual
Chapter 6
Sequence Alignment Tool
HLA project view
After you open an HLA analysis project, a third option—HLA Show HLA Report—is
available on the Mutation Report/Summary report toggle. Select this option to open the HLA
report and to display the project in the HLA project view. From top to bottom, the HLA
project view has the following visualization options for a gene and allele pair that is selected
in the HLA Summary report:
Figure 6-53:
HLA project view (HLA report hidden)
Reference/
Dictionary
Sequence pane
Top Allele Pair
Matches pane
Consensus
Sequence pane
Consensus
Sequence pane
Unmatched Reads
pane
•
Reference/Dictionary Sequence pane. See “Reference/Dictionary Sequence pane” on
page 206.
•
Top Allele Pair Matches pane. See “Top Allele Pair Matches pane” on page 206.
•
Consensus Sequence panes. See “Consensus Sequence panes” on page 206.
•
Unmatched Reads pane. See “Unmatched Reads pane” on page 207.
NextGene User’s Manual
205
Chapter 6
Sequence Alignment Tool
Reference/Dictionary Sequence pane
The Reference/Dictionary Sequence pane displays the reference sequence and its serologic
equivalents for the selected gene. Positions that are not conserved among the different alleles
are highlighted in yellow. Positions that are conserved among the different alleles are not
highlighted. IUPAC lettering is used for the variable positions.
Figure 6-54:
Reference/Dictionary Sequence pane
Top Allele Pair Matches pane
The Top Allele Pair Matches pane displays the sample data (allele pair) that was the best
matched to the dictionary data for the selected gene. The pane shows the name and the
dictionary sequence for each allele in the pair. The number of allele pairs that are displayed
in this pane is determined by the value (1, 2, 3, or All) that is specified for Allele pairs in the
HLA Report Settings dialog box. (See “HLA Report Settings dialog box” on page 199.)
Figure 6-55:
Top Allele Pair Matches pane
Consensus Sequence panes
The Consensus Sequence panes displays the consensus sequence for each allele in the gene
and allele pair that is selected in the HLA Summary report. The reads for each allele that
resulted in the consensus sequence are displayed below the consensus sequence.
Figure 6-56:
206
Consensus Sequence panes
NextGene User’s Manual
Chapter 6
Sequence Alignment Tool
Unmatched Reads pane
The Unmatched Reads pane displays the reads that were assigned to the selected gene, but
did not match to any of the consensus sequences that are displayed in the Consensus
Sequence pane.
Figure 6-57:
Unmatched pane
NextGene User’s Manual
207
Chapter 6
Sequence Alignment Tool
Sequence Alignment Project Output Files
When you complete an alignment project (either for single sequence reads, for paired end/
mate paired data. or transcriptome data), output files are created that provide detailed
information about the analysis.
File
Description
*.Pjt
This is the file that is loaded in the NextGENe Viewer when the
project is complete to allow review of the analysis results.
_Parameters.txt
This file contains information about the settings that were used for
the project. If condensation was carried out as preliminary step and
then alignment was carried out as part of the same project, then a
_Parameters.txt file is created that contains the settings for all of the
project steps.
_StatInfo.txt
This file provides basic information and various statistics about the
assembly process.
• Basic information:
• The general steps that were used
• Process times
• Sample file names and output file names
• Statistical information:
• The respective counts for matched and unmatched reads
• Average read length
• Coverage
• Total number of covered bases for the reference
• The username for the user who ran the analysis if User
Management is turned on
Note: The average coverage is calculated according to the following
(which therefore excludes zero coverage regions):
(No. of aligned bases)/(Total no. of covered bases)
unmatched.fasta
unmatched.csfasta
This file contains all the reads that did not match to the reference
file. You can use this file further analysis of your samples.
Paired Data output only
_Arranged.fasta
_Arranged.csfasta
When carrying out a paired read analysis, NextGENe first scans the
sample files to determine if the reads are arranged in the files. If the
reads are arranged, then no arranged files are created; otherwise,
NextGENe arranges the sample files so that the paired reads are in
a similar order in both files, and then saves these arranged reads in
an arranged file in either a .fasta format or a csfasta format. Going
forward, you can use these arranged files for analysis.
Note: The Sequence Operation Tool contains an option for
arranging paired read sample files. If you use this option to
arrange the reads in your sample files before you carry out the
alignment, then NextGENe skips the step of arranging the
sample files. See “The NextGENe Sequence Operation Tool”
on page 354.
208
NextGene User’s Manual
Chapter 6
Sequence Alignment Tool
File
Description
MateStatus.txt
Contains information that was gathered about the paired reads
during the arrangement of the reads.
unmatched_paired.fasta
Contains both unmatched reads and the pair to any unmatched
reads (whether matched or unmatched) to maintain the paired read
file structure.
NextGene User’s Manual
209
Chapter 6
Sequence Alignment Tool
Sequence Alignment Project Mutation Report
When you complete a sequence alignment project, (either single end sequence data, paired
reads/mate paired data, or transcriptome data), the Mutation report is automatically
generated for an alignment project but it is not automatically displayed. While in the default
alignment view, you must click the Show/Hide Report icon
to select the display
location for the report, (to the side of the viewer or below the viewer), or you can also use
this icon to hide the report in the viewer.
Figure 6-58:
Mutation Report displayed at the bottom of the NextGENe Viewer
The Mutation report lists each mutation in order of their sequence position. Purple text
indicates reported variants. Blue text indicates novel variants. Gray text indicates mutations
that were automatically or manually deleted. By default, the Mutation report provides the
following information for each mutation:
Column
210
Description
Index
The numerical value that NextGENe assigns to the mutation.
Chromosome Position
The nucleotide position in the chromosome where the mutation occurs.
Gene
Shows the gene name if it is provided in the GenBank reference file or
the preloaded reference file.
CDS
The CDS (coding sequence) number in the GenBank reference file or
the preloaded reference file.
Chr
The name of the chromosome where the mutation occurs.
Reference Nucleotide
The nucleotide that appears in the reference sequence at the SNP
location.
NextGene User’s Manual
Chapter 6
Sequence Alignment Tool
Column
Description
Coverage
The number of reads that are aligned at the SNP location.
Score
The Overall Mutation score, which is an empirical estimation of the
likelihood that a given SNP is real and not an artifact of sequencing or
alignment errors. See “Overall Mutation Score” on page 456.
A (#F,#R), C (#F,#R), G
(#F,#R), and T (#F,#R)
The actual number of reads that show the indicated base at the
mutation location in the forward direction and the actual number of
reads that show the indicated base at the mutation location in the
reverse direction.
Ins (#F,#R), Del (#F,#R)
The actual number of reads that show an insertion or deletion at the
mutation location in the forward direction and the actual number of
reads that show an insertion or deletion at the mutation location in the
reverse direction.
Mutation Call
The mutation call that occurs at the mutation position. Reported
according the Nomenclature option that you selected on the Display tab,
Annotation sub-tab for the Mutation Report Settings dialog box. See
“Display tab, Annotation sub-tab” on page 216.
Amino Acid Change
The change in the amino acid that is caused by the mutation. The
column contains information only if an annotated reference sequence (a
GenBank file or a preloaded reference file with annotation) is used and
only within regions of the reference where a coding sequence is
annotated. An “FS” is displayed for frameshift mutations (indels in the
coding sequence). “In-Frame” is displayed where an entire codon, or
multiple entire codons, are inserted or deleted.
Note: You can always change the information that is displayed in the Mutation report. See “Mutation
Report settings” on page 214.
The report is interactive.
•
Double-click a point in the report to move the Alignment Viewer to the corresponding
location where you can view the reads for the position.
•
Double-click a mutation call in the Alignment Viewer to move the report to the
corresponding location. The entire row for the mutation is highlighted in yellow in the
report.
•
Right-click a mutation call in the report to open a context menu that provides options for
deleting a mutation, for undoing a deletion, for confirming or mutation, for undoing a
confirmation, undoing the last editing action that was carried out for the mutation,
viewing the edit history for a mutation, or for copying mutation information that you can
then paste into another medium, such as a Word document. You can also click Search in
this context menu to open a Search dialog box in which you can enter options for
searching for specific information in the report. See Figure 6-59 on page 212.
NextGene User’s Manual
211
Chapter 6
Sequence Alignment Tool
Figure 6-59:
Context menu for a mutation call in the Mutation report
Option
Search
Comment
Opens a search dialog box with the field to search determined by the column
from which you selected the option. For example, if you opened the search
from the Gene column, then the Search Gene dialog box opens. If you open
the search from the Chr (chromosome) column, then the Search Chr dialog
box opens. Regardless of the dialog box that opens, the search criteria
(Options, Direction, and Scope) are always the same. You use the options on
this dialog box to search the Mutation report for the first occurrence of the
search string that meets all the search criteria. You use the Next button to
move through all the search results.
Figure 6-60:
Delete
Search Mutation Call dialog box
Click this option to remove a mutation call for a position. Although the
position is no longer called a mutation, the sequence of the reads is not
changed.
Note: To view a deleted mutation in the Mutation report, you must select
“Deleted” on the Filter tab on the Mutation Report Settings dialog box.
The deleted mutations are highlighted in gray and the Comments
column displays “Deleted” for each mutation. See “Filter tab,
Annotation sub-tab” on page 221.
Undo Deletion
212
Undoes a selected manual deletion. The position is again called a mutation.
NextGene User’s Manual
Chapter 6
Sequence Alignment Tool
Option
Confirm
Comment
Click this option to select mutations in which you have a high degree of
confidence.
Note: To view a confirmed mutation in the Mutation report, you must select
“Confirmed” on the Filter tab on the Mutation Report Settings dialog
box. The confirmed mutations are displayed in black text in the
Mutation report and the Comments column displays “Checked” for
each mutation. See “Filter tab, Annotation sub-tab” on page 221.
Undo Confirmation
Undoes the manual confirmation of a selected mutation.
Undo
Undo the last edit action that was carried out for the mutation.
View Edit History
Available only if User Management is turned (see “Configuring User
Management” on page 31) and only after at least one edit action (for
example, Deletion) has been carried out for the mutation call. Opens the Edit
History dialog box, which displays all the edit operations that have been
carried by all users for the selected mutation. See “Viewing the Edit history
for a mutation” on page 213.
Copy
Copies the selected text in the cell to your clipboard. To copy text in a range
of cells, click and hold the left mouse button and drag the mouse to select the
region that you want to copy. Use standard keyboard commands or menu
commands to paste the copied text into an application.
Note: You can also copy the Mutation report as an image. Press and hold
the [Shift] key and the [Ctrl] key and then click and hold the left mouse
button and draw a box around the region of the image that you want to
copy. The selected region is filled with black. Right-click and Copy as
Picture to copy the selected region as an image to your clipboard. Use
standard keyboard commands or menu commands to paste the
copied image into an application.
To save the Mutation report, on the NextGENe Viewer main menu, click Reports > Mutation
Report > Save Mutation Report. A dialog box opens in which you can specify both the
location and the name for the saved report. The report is saved as a tab-delimited text (*.txt)
file. After you save the Mutation report, the date and time that the report was saved as well as
your username are added to the audit trail for the project in the ReportEditHistory.log file.
This log file is saved in an AuditTrail folder in the <Project Name>.files folder for the
appropriate project; for example:
Illumina\Haloplex\Alignment\2.4.0.1\D_Output\D_Output.files\AuditTrail
Viewing the Edit history for a mutation
Any edit action (addition, deletion, or confirmation) that you carry out for a mutation is
reflected in the font color and the Comments column for the mutation in the Mutation report.
This action is also automatically added to the audit trail for the mutation. To view the edit
history for a mutation, right-click the mutation in the Alignment viewer or in the Mutation
report, and on the context menu that opens, click View Edit History to open the Edit History
dialog box. The lower half of the Edit History dialog box displays all the edit operations that
have been carried for the selected mutation. The date and time and the username for the user
who carried out the edit is displayed for each edit. When you select an edit entry in the lower
pane, a selected series of old and new values is displayed in the upper half of the dialog box.
NextGene User’s Manual
213
Chapter 6
Sequence Alignment Tool
If the edit resulted in a change for a mutation value, then the old and new values are
highlighted in red.
Figure 6-61:
Edit History dialog box
Mutation Report settings
While in the default alignment view, three options are available for specifying the
information that is to be displayed in the Mutation report.
•
General settings. See “Mutation Report Settings dialog box” below.
•
Gene tracks settings. See “Gene Tracks Settings dialog box” on page 228.
•
Variation tracks settings. See “Variation Tracks Settings dialog box” on page 228.
For information about importing variation databases and/or gene tracks into a
sequence alignment project, see “The NextGENe Track Manager Tool” on page
383.
Mutation Report Settings dialog box
The Mutation Report Settings dialog box contains the options for the general settings for the
Mutation report. To open the Mutation Report Settings dialog box, do one of the following:
•
On the NextGENe Viewer toolbar, click the Report Settings icon
.
•
On the NextGENe Viewer main menu, click Reports > Mutation Report > Mutation
Report Settings.
The dialog box contains four primary tabs—the Display tab, the Filter tab, the Summary
Report tab, and the Output tab. The Display tab is always the tab that is opened when the
dialog box opens. The Display tab and Filter tab both have associated sub-tabs. You can
specify the general settings for generating the Mutation report on these tabs and sub-tabs, or
you can click Load Settings to load any general Settings file that has been saved for a
Mutation report and generate the report according to the settings in the file. See Figure 6-62
on page 215.
214
NextGene User’s Manual
Chapter 6
Sequence Alignment Tool
Figure 6-62:
Mutation Report Settings dialog box, Display tab
Tab
Description
Display
The active tab when the Mutation Report Settings dialog box first opens. The
settings on the Display sub-tabs determine the numerous columns that can be
displayed in the Mutation report based on the information that is required for
the project and the information that is included in the reference sequence.
Filter
The settings on the Filter sub-tabs determine what kinds of mutations are
displayed in the report.
Summary Report
The settings on the Summary Report tab determine how the Mutation report is
displayed if it is included in the Summary report. (See “Summary report” on
page 241.)
Output
The settings on the Output tab determine the additional formats (SIFT and
VCF) in which the Mutation report can be saved and what type of consensus
sequence is to be saved.
After you specify the general settings on the various tabs for a Mutation report, you can click
Save Settings to save the general settings to a Settings (.ini) file. You can select this saved
general Settings file for post-processing options in:
•
The Project Wizard. See “To specify the post-processing options for a Sequence
Alignment project” on page 67.
•
The NextGENe AutoRun Tool. See Chapter 9, “The NextGENe AutoRun Tool,” on page
395.
•
The Summary report. See “Summary report” on page 241.
For a detailed discussion of the options that are available on each tab and sub-tab, see:
•
“Display tab, Annotation sub-tab” on page 216.
NextGene User’s Manual
215
Chapter 6
Sequence Alignment Tool
•
“Display tab, Statistics sub-tab” on page 219.
•
“Filter tab, Annotation sub-tab” on page 221.
•
“Filter tab, Score sub-tab” on page 223.
•
“Filter tab, ROI sub-tab” on page 225.
•
“Summary Report tab” on page 226.
•
“Output tab” on page 227.
Display tab, Annotation sub-tab
Figure 6-63:
Mutation Report Settings dialog box, Display tab, Annotation sub-tab
Setting
Description
Index
The numerical value that NextGENe assigns to the mutation.
Chr
The name of the chromosome where the mutation occurs.
Gene
Shows the gene name if it is provided in the GenBank reference file
or the a preloaded reference file.
mRNA
Shows the mRNA number in the GenBank reference file or the a
preloaded reference file.
CDS
Shows the CDS (coding sequence) number in the GenBank
reference file or the a preloaded reference file.
Segment Description
Segment Description—Identifies the segment where the SNP is
located.
Note: Applicable when the reference sequence is broken into
several segments, for example, into multiple contigs.
Reference Nucleotide
216
The nucleotide that appears in the reference sequence at the SNP
location.
NextGene User’s Manual
Chapter 6
Sequence Alignment Tool
Setting
Description
Mutation Call
Select this option to identify the change (mutation call) that occurs at
the mutation position.
• Relative to Strand
Direction
• Make the mutation call based on the positive strand.
• Relative to Gene
Direction
• Make the mutation call based on the gene orientation. To make a
mutation call for a gene on the reverse strand, a reverse
complement is generated.
Note: You can change the nomenclature for the call under
Nomenclature on this tab.
Genotype
The genotype for the aligned reads at this position. Indicates
whether the mutation is homozygous or heterozygous
Amino Acid Change
The change in the amino acid that is caused by the mutation.
The column contains information only if an annotated reference
sequence (a GenBank file or a preloaded reference file with
annotation) is used and only within regions of the reference where a
coding sequence is annotated. An “FS” is displayed for frameshift
mutations (indels in the coding sequence). “In-Frame” is displayed
where an entire codon, or multiple entire codons, are inserted or
deleted.
Zygosity
The zygosity (homozygous or heterozygous) of the variant. The
zygosity is based on the Mutation percentage threshold value,
which is specified in the Mutation Filter settings section for an
Alignment project in the Project Wizard. See “Mutation Filter
settings” on page 140.) If both alleles are found above the threshold
value, then the mutation is considered to be heterozygous. If only
one allele is found above this threshold value, then the mutation is
considered to be homozygous.
Reference Position
The nucleotide position in the reference sequence based on a
continuous count from the beginning to the end of the reference.
Chromosome Position
The nucleotide position in the chromosome where the mutation
occurs.
Gene Direction
Show the strand (plus or minus) on which the gene is found.
RNA Accession
Show the RNA accession for the gene from NCBI.
Protein Accession
Show the protein accession for the gene from NCBI.
Segment Position
The position within the segment where the mutation occurs.
Note: Applicable when the reference sequence is broken into
several segments, for example, into multiple contigs.
Gene Nucleotide
The nucleotide for the reference sequence at this position relative to
the gene direction. For a forward-oriented gene, this nucleotide is
the same as the reference nucleotide. For a reverse-oriented gene,
this nucleotide is the complement of the reference nucleotide.
Comments
Mutations that you have manually deleted or that the software has
deleted show “Deleted” in this column. Mutations that you have
added manually show “Added Manually” in this column. Mutations
that you have manually confirmed show “Checked” in this column.
NextGene User’s Manual
217
Chapter 6
Sequence Alignment Tool
Setting
Function
Description
The functional consequence of the variant. Possible values are:
• Non-coding
• Synonymous
• Missense
• Nonsense
• No-stop
• In-frame
• Frameshift
Nomenclature - You can pick one or more values. For a description about the HGVS nomenclature
options, see www.hgvs.org/mutnomen/.
• Genomic
• Lists mutation calls without positional information
• Relative to CDS
• Lists mutation calls relative to the CDS (coding sequence) region.
Mutation calls that occur in a coding region begin with a “c.#,”
where the number indicates mutation position in the coding
region. Mutation calls that occur outside of the coding regions
begin with “IVS” to indicate “intervening sequence” or the regions
that are in between coding sequences.
• Relative to mRNA
• Lists mutation call positions relative to the mRNA sequence.
• HGVS Genomic
• Lists mutation calls using the format that is recommended by the
Human Genome Variation Society relative to the genomic
position of the variant.
• HGVS Coding
• Lists mutation calls using the format that is recommended by the
Human Genome Variation Society relative to the coding base
number position of the variant.
• HGVS Protein
• Lists mutation calls using the format that is recommended by the
Human Genome Variation Society relative to the amino acid
position of the variant.
• Forensic
• Lists mutation calls based on the mitochondrial forensic
nomenclature as recommended by the Scientific Working Group
on DNA Analysis (SWGDAM).
Tags
SNP db_xref
The dbSNP identification. (The dbSNP ID from the NCBI for the
mutation.)
Note: This column shows only the information for known SNPs that
are annotated in the reference sequence. The column is
blank for all other mutation calls.
Note: If you click this cell for a reported SNP, a web page opens that
shows the dbSNP database information for the SNP.
Transcripts
Preferred Transcripts
218
Selected by default. NextGENe automatically selects the longest
transcript as the preferred transcript. Shows mutation calls based
only on the preferred transcript.
NextGene User’s Manual
Chapter 6
Sequence Alignment Tool
Setting
All Transcripts
Description
Show mutation calls based on multiple transcripts only if:
• There are overlapping genes.
• Different transcripts of the same gene result in different amino
acid changes. For example, if a variant is in the coding region in
one transcript and in an intron in a different transcript.
Display tab, Statistics sub-tab
Figure 6-64:
Mutation Report Settings dialog box, Display tab, Statistics sub-tab
Setting
Description
Statistic Type
• Condensed Sequence
• Original Sequence
Display statistics for condensed reads (where applicable) or the
original reads.
A(#/F / #R), C(#/F / #R),
G(#/F / #R), T(#/F / #R)
The actual number of reads that show the indicated base at the
mutation location in the forward direction and the actual number of
reads that show the indicated base at the mutation location in the
reverse direction.
Deletion (#F / #R)
The actual number of reads that show a deletion at the mutation
location in the forward direction and the actual number of reads that
show a deletion at the mutation location in the reverse direction.
Insertion (#F / #R)
The actual number of reads that show an insertion at the mutation
location in the forward direction and the actual number of reads that
show an insertion in the reverse direction at the mutation location.
A(%), C(%), G(%), T(%)
The percentage of reads that show the indicated base at the
mutation location.
NextGene User’s Manual
219
Chapter 6
Sequence Alignment Tool
Setting
Description
Deletion(%)
The percentage of reads that show a deletion at the mutation
location.
Insertion(%)
The percentage of reads that show an insertion at the mutation
location.
A Score, C Score, G Score,
T Score
Essentially an allele balance score for each individual allele. It is
scaled to be similar to the Overall Mutation score, but it does not
contribute to the overall score.
• If the allele F/R ratio is > 3 x the F/R ratio for all the reads at the
indicated position, or is < 1/3 x the F/R ratio for all the reads at
the indicated position, then the score for the allele is zero.
• If the position has no calls that correspond to the indicated allele,
then the score for the allele is again zero.
• Otherwise, the score is calculated based on the F/R ratio for the
allele and the F/R ratio for all the reads at the indicated position.
The closer that these two values are, then higher the allele score.
The maximum allele score for any allele is 27.
Deletion Score
For deletion alleles. See the description for A Score, C Score, G
Score, T Score.
Insertion Score
For insertion alleles. See the description for A Score, C Score, G
Score, T Score.
Mutant Allele Frequency(%)
Selected by default. Automatically calculates the mutant allele
frequency.
Check Allele Counts for
Negative Mutations
When negative mutations are included in the report, check the allele
frequencies for these positions.
Read Balance
The read balance for the variant.
Note: This value is identical to the value that is calculated for
Balance Ratios and Frequencies in the Alignment settings.
See “Balance Ratio” on page 141.
Coverage
The number of reads that are aligned at the SNP location.
Ambiguous Gain Penalty
Display the Ambiguous Gain penalty. See “Ambiguous Gain penalty/
Ambiguous Loss penalty” on page 224.
Ambiguous Loss Penalty
Display the Ambiguous Loss penalty. See “Ambiguous Gain penalty/
Ambiguous Loss penalty” on page 224.
Score
Display the Overall Mutation score. See “Overall Mutation Score” on
page 456.
Penalties for scoring system
220
Ignore read balance score
Ignore the Read Balance score when calculating the Overall
Mutation score. See “Read Balance Score” on page 458.
Ignore allele balance score
Ignore the Allele Balance score when calculating the Overall
Mutation score. See “Allele Balance Score” on page 459.
Ignore homopolymer score
Ignore the Homopolymer score when calculating the Overall
Mutation score. See “Homopolymer Score” on page 460.
Ignore mismatch score
Ignore the Mismatch score when calculating the Overall Mutation
score. See “Mismatch Score” on page 461.
NextGene User’s Manual
Chapter 6
Sequence Alignment Tool
Setting
Ignore wrong allele score
Description
Ignore the Wrong Allele score when calculating the Overall Mutation
score. See “Wrong Allele Score” on page 462.
Filter tab, Annotation sub-tab
Figure 6-65:
Mutation Report Settings dialog box, Filter tab, Annotation sub-tab
Setting
Description
CDS
Show mutations that occur only in the CDS of GenBank files or
preloaded and annotated reference files. “x” number of bases on either
end of the CDS can be shown as well.
mRNA
Show the mutations that occur only in mRNA regions of GenBank files or
preloaded and annotated reference files. “x” number of bases on either
end of the region can be shown as well.
ROI
Show only the mutations found in designated ROIs in GenBank files. “x”
number of bases on either end of the region can be shown as well.
Note: For more information about creating ROIs in a GenBank file, see
“Advanced GBK Editor tool” on page 274.
Splice Site
Show only the mutations that occur in the splice sites (exon/intron
junctions). “x” number of bases on either end of the splice site can be
shown as well.
• Substitutions
• By default, show substitutions of all types in the report. Clear the
options for the substitution types that are not to be displayed in the
report.
•
•
•
•
Noncoding
Silent (in CDS)
Missense
Nonsense/No-stop
NextGene User’s Manual
221
Chapter 6
Sequence Alignment Tool
Setting
• Indels
Description
• By default, show insertions and/or deletions. Clear this option if indels
are not to be displayed in the report.
Tags
dbSNP
• Reported
Show reported and/or unreported variations as annotated in the
reference file based on dbSNP.
• Unreported
Source
• Added automatically
• Include all mutations that NextGENe automatically identified.
• Added manually
• Include all mutations that you manually added using the Add Mutation
function in the Alignment viewer.
• Confirmed
• Include all mutations that you manually confirmed using the Confirm
Mutation function in the Alignment viewer.
• Deleted
• Include all mutations that NextGENe automatically deleted and all
mutations that you deleted using the Delete Mutation function in the
Alignment viewer.
• Negative
• Include the locations of reported SNPs (annotated in the reference
file) where the sample data does not display the mutation.
Note: For the source options listed above, see “Alignment viewer functions” on page 156.
• Homozygous
Show all mutations of the indicated type.
• Heterozygous
Note: Concordant and Discordant are displayed only if you are
accessing the Mutation Report Settings dialog box from the
Variant Comparison Tool. See “Variant Comparison tool” on page
289.
• Concordant
• Discordant
• Concordant—The same variant is shared among all the samples,
regardless of homozygosity or heterozygosity. For example, C >CG
and C >G are concordant positions.
• Discordant—The same variant is not shared among all the samples.
For example, C>G and C>C are discordant positions and C>G and
C>T are also discordant positions.
222
NextGene User’s Manual
Chapter 6
Sequence Alignment Tool
Filter tab, Score sub-tab
Figure 6-66:
Mutation Report Settings dialog box, Filter tab, Score sub-tab
A mutation must meet or exceed the threshold values for all selected scores to be
included in the Mutation report. For detailed descriptions about the score values
on this tab, see Appendix B, “Mutation Report Scores,” on page 455.
Setting
Description
Confidence score
• Overall score
• Show all mutations where the Overall Mutation score is greater than
or equal to the indicated threshold.
• Coverage score
• Show all mutations where the Coverage Score is greater than or
equal to the indicated threshold.
• Read balance
score
• Show all mutations where the Read Balance score is greater than or
equal to the indicated threshold.
• Allele balance
score
• Show all mutations where the Allele Balance score is greater than or
equal to the indicated threshold.
• Homopolymer
Score
• Show all mutations where the Homopolymer score is greater than or
equal to the indicated threshold.
• Mismatch score
• Show all mutations where the Mismatch score is greater than or
equal to the indicated threshold.
• Wrong allele score
• Show all mutations where the Wrong Allele score is greater than or
equal to the indicated threshold.
NextGene User’s Manual
223
Chapter 6
Sequence Alignment Tool
Setting
• Ambiguous gain
penalty
• Ambiguous loss
penalty
Description
Show all mutations where the Ambiguous Gain penalty and/or the
Ambiguous Loss penalty is less than or equal to the indicated threshold.
See “Ambiguous Gain penalty/Ambiguous Loss penalty” below.
Ambiguous Gain penalty/Ambiguous Loss penalty
Ambiguity at the position where a mutation is called can be the result of many factors,
including pseudo genes and other repetitive elements, and where the mutation is located—at
the 5’ end, at the 3’ end, or in a central location. The Ambiguous Gain penalty and
Ambiguous Loss penalty quantify the ambiguity relative to the region where a mutation is
called. To calculate these penalties, NextGENe first generates multiple, short synthetic reads
for every location at which a mutation was called. These synthetic reads are based on the
consensus sequence for the region where the mutation was called. The reads are generated in
both the forward and reverse directions, and are designed so that the mutation call is found in
the beginning of some the reads, at the end of some of the reads, and at several central
locations on other reads. NextGENe then aligns these reads with the reference sequence, and
determines the number of synthetic reads that can be aligned at each mutation position in the
reference sequence. The Ambiguous Gain/Loss penalties are calculated from the results of
these alignments. The Ambiguous Gain penalty has no set value, (the range is 0 - n), and the
Ambiguous Loss penalty has a range of (0-1). For both penalties, a value closer to zero
indicates that the region where the mutation was called has a more unique sequence (the
expected number of multiple synthetic reads were aligned to the position). Conversely, for
both penalties, a larger value indicates that the region where the mutation was called is not
unique. For the Ambiguous Gain penalty, a value closer to ten indicates that a greater number
of reads than expected aligned to the region where the mutation was called. For the
Ambiguous Loss penalty, a value closer to one indicates that fewer synthetic reads than
expected aligned to the region where the mutation was called.
For example, consider the scenario in which mutation calls were made at Positions A, B, and
C in a sample file and NextGENe generates 30 synthetic reads for each position. If after
aligning the synthetic reads, NextGENe determines that 30 reads aligned at Position A, 30
reads aligned at Position B, and 30 reads aligned at Position C, then both the Ambiguous
Gain and Loss penalties would have a value of zero for all positions; however, if after
aligning the synthetic reads, NextGENe determines that 60 reads aligned at Position A and
15 reads aligned at Position B, then the Ambiguous Gain penalty for Position A would be 2,
and the Ambiguous Loss penalty for Position B would be 0.5.
224
NextGene User’s Manual
Chapter 6
Sequence Alignment Tool
Filter tab, ROI sub-tab
Figure 6-67:
Mutation Report Settings dialog box, Filter tab, ROI sub-tab
Although NextGENe remembers any ROI files that you recently used for filtering,
you must select Filter by ROI to enable the options on this tab. If you do not select
this option, then filtering is not applied.
You can include or exclude mutations from the Mutation report display based on their
locations in a Region of Interest (ROI) in a GenBank reference file or a preloaded reference
file. You must specify the ROIs in a tab-delimited text file (a BED file), a comma-delimited
text file that specifies position or gene name, or a text file that adheres to the Variant Call
Format (VCF) specifications.
Click File Types to open the File Types dialog box which details the different
formats that are required for a BED file, a text file, or a VCF format file.
Setting
BED file
Description
A BED file is a tab-delimited text file. You can upload a BED file only if the
reference sequence contains chromosome information, which means that the
reference sequence must be either a preloaded reference file that NextGENe
supplies, or a GenBank reference file that contains chromosome information.
Each row in the file contains a region of the reference that is to be used for the
Mutation report, and at a minimum, the file must contain the following
information:
• Field #1 - Chromosome number for the region
• Field #2 - Chromosome start position
• Field #3 - Chromosome end position
Note: Field #4, which is used for the Description column, is optional.
NextGene User’s Manual
225
Chapter 6
Sequence Alignment Tool
Setting
Description
Text file
You can load a text file that is comma-delimited, semi-colon delimited, or
tab-delimited. The file must contain one of the following lists:
• TXT Region Format - Specific reference locations (position number or a
range of positions (start position number - end position number)).
• TXT Gene Format - A list of reference gene names.
VCF Format
See http://www.1000genomes.org for the conventions and extensions adopted
by the 1000 Genomes Project for reporting variants in the most recent VCF
format.
You can also select Include Negative Positions within ROI to list every position in every ROI
in the report, whether or not there is a mutation at the position.
Summary Report tab
Figure 6-68:
Mutation Report Settings dialog box, Summary Report tab
You use the options on the Summary Report tab to specify how the Mutation report is to be
displayed in the Summary report. You must save these settings in a Settings file (.ini file) for
the Mutation report. These settings are applied to the Mutation report if you select this
Settings file during the setup of the Summary report. See “Summary report” on page 241.
Setting
226
Description
Report Name
The name that is displayed for the Mutation report when it is included in
the Summary report.
Display mutation report
summary
Display the summary information for the Mutation report in the Summary
report.
Display mutation report
Display the Mutation report in the Summary report.
NextGene User’s Manual
Chapter 6
Sequence Alignment Tool
Output tab
The settings on this tab are applicable only for post-processing.
Figure 6-69:
Mutation Report Settings dialog box, Output tab
Setting
Description
Save SIFT report
Saves the Mutation Report as a SIFT report, which can be used in the third
party SIFT tool.
Save unfiltered
VCF Report
Selected by default. Saves the Mutation Report in a format that adheres to
Variant Call Format (VCF) specifications. The report contains all called
variants, including the variants that were initially filtered out based on the
Mutation Report settings. “flt” is displayed in the FILTER column for the filtered
variants.
Note: Also available as a Mutation Report function. See “Mutation Report
functions” on page 235.
Save VCF Report
(filtered)
Selected by default. Saves the Mutation Report in a format that adheres to
Variant Call Format (VCF) specifications. The report contains only those
variants that passed the Mutation Report Filter settings.
Note: Also available as a Mutation report function. See “Mutation Report
functions” below.
Save consensus
sequence
Saves the consensus sequence to a .fasta file. Click Edit Settings to specify
the settings for the saved file. See “Save consensus sequence” on page 236.
Save SNP
consensus
sequence
Saves the SNP consensus sequence to a .fasta file. Click Edit Settings to
specify the settings for the saved file. See “Save SNP consensus sequence”
on page 238.
NextGene User’s Manual
227
Chapter 6
Sequence Alignment Tool
Gene Tracks Settings dialog box
The Gene Tracks Settings dialog box contains the gene tracks settings for the Mutation
report based on the gene tracks that were imported for the project. (See “To import gene
annotation tracks” on page 393.) To open the Gene Tracks Settings dialog box, click the
Gene Tracks Settings icon
on the NextGENe Viewer toolbar. By default, the gene
annotations for the reference (Reference Build In Annotation) is selected. If other gene
annotation tracks have been imported for the project, then these tracks are listed
alphabetically by name below the Reference Build Annotation track. You can leave the
Reference Build In Annotation option selected to use just this information in the project, you
can select another gene annotation track, or you can select All to use the annotation
information from all the tracks in the project.
Figure 6-70:
Gene Tracks Settings dialog box
Variation Tracks Settings dialog box
The Variation Tracks Settings dialog box contains the tracks settings for the Mutation report
based on the variation databases that were imported for the project. (After being imported
into NextGENe, a variation database is referred to as a track. See “To import data from other
variation databases” on page 391.) You can select what information to display for the tracks
and you can filter the data that is displayed in the Mutation report based on the tracks, or you
can choose not to filter the data based on any of the tracks.
1. On the NextGENe Viewer toolbar, click the Variation Tracks Settings icon
.
The Variation Tracks Settings dialog box opens. The Tracks pane is the left pane of the
dialog box. The pane displays all the variation databases, or tracks, that were included
for the selected project. See Figure 6-71 on page 229.
228
NextGene User’s Manual
Chapter 6
Sequence Alignment Tool
Figure 6-71:
Variation Tracks Settings dialog box, Filter Settings pane
2. If you do not want to filter the data for the project based on any of the tracks, click Load
Settings > Clear all tracks, and then click OK; otherwise, go to Step 3.
3. In the Tracks pane, select a track, and then do the following:
a. Indicate the types of variants that are to be included in the Mutation report.
Option
Description
All
By default, all variants that meet all the filtering criteria are displayed in the Mutation
report, whether they are included in the selected track.
Reported
Select Reported to display only those variants that meet all the filtering criteria and
that are included in the selected track
Unreported
Select Unreported to display only those variants that meet all the filtering criteria but
are not included in the selected track.
b. Specify the filter settings for the track. See:
•
“Functional Prediction tab” on page 231.
•
“Conservation tab” on page 232.
•
“Population Frequency tab” on page 233.
•
“ClinVar tab” on page 234.
The available settings depend on the tracks that were imported. The Functional
Prediction tab, the Functional Conservation tab, and the Population Frequency
tab are displayed only if you have imported data from the dbNSFP database. If
you have imported data from another database that contains functional prediction
information, conservation information, and/or population frequency information,
then a tab that is specific for that database is displayed instead. The ClinVar tab is
displayed only if you have imported data from the ClinVar database.
NextGene User’s Manual
229
Chapter 6
Sequence Alignment Tool
c. Click Report Display to open the Report Display Settings pane, and then select the
columns that are to be included in the report, or click Select All to select all columns
in a single step.
The Report Display Settings pane lists all the display settings (columns) that can be
included in the Mutation report. By default, no columns are selected. The display
settings vary based on the track selected.
Figure 6-72:
Mutation Tracks Settings dialog box, Report Display Settings pane, dbNSFP
track
4. Click OK to close the Report Display Settings dialog box.
5. Do one of the following to save your settings and close the Variation Tracks Settings
dialog box:
•
Click OK.
Going forward, the Mutation report is generated according to these saved settings
until you change them.
•
Save Settings > Save User Defaults, and then click OK.
The settings that you have specified for all the tracks are saved as your (the logged in
user’s) default settings. Going forward, any new sequence alignment project that you
run in NextGENe uses these settings by default. If you change the settings for a
project and want to generate the Mutation report based on your default settings, then
you can click Load Settings > Load User Defaults to restore your default settings.
230
NextGene User’s Manual
Chapter 6
Sequence Alignment Tool
•
Save Settings > Save To File, and then click OK.
The settings that you have specified for all the tracks are saved to a Settings (.ini)
file. Going forward, you can click Load Settings > Load From File to load this saved
Settings file and generate the Mutation report according to the settings in the file.
Functional Prediction tab
Figure 6-73:
Variation Tracks Settings dialog box, Functional Prediction tab
Setting
Description
Filter Based on
Functional Prediction
Score
Select this option to filter the variants that are displayed in the Mutation
report based on the filtering settings for the available functional prediction
methods.
At least [ ] prediction
passed
The default value is one. A variant must pass the filtering settings for only
one of the available functional prediction scores to be displayed in the
Mutation report. Increase this value as needed.
Filtering Settings
The score threshold, which has a default value of < 0. You can modify this
value for each available functional prediction method. Optionally, you can
also specify classifications for the variant, for example, D-Deleterious,
N-Neutral, U-Unknown, and No Data for LRT scores.
Note: If you specify classifications for a variant, then the variant must
meet both the score threshold and the classification requirements to
be displayed in the Mutation report.
NextGene User’s Manual
231
Chapter 6
Sequence Alignment Tool
Conservation tab
Figure 6-74:
Variation Tracks Settings dialog box, Conservation tab
Setting
232
Description
Filter Based on
Conservation Score
Select this option to filter the variants that are displayed in the Mutation
report based on the filtering settings for the available conservation
methods.
At least [ ] prediction
passed
The default value is one. A variant must pass the filtering settings for
only one of the available conservation scores to be displayed in the
Mutation report. Increase this value as needed.
Filtering Settings
The score threshold, which has a default value of < 0. You can modify
this value for each available conservation method.
NextGene User’s Manual
Chapter 6
Sequence Alignment Tool
Population Frequency tab
Figure 6-75:
Variant Tracks Settings dialog box, Population Frequency tab
Setting
Description
Filter Based on
Population Frequency
Score
Select this option to filter the variants that are displayed in the Mutation
report based on the filtering settings for the available population
frequency values.
Filtering Settings
The score threshold, which has a default value of < 1. You can modify
this value for each available population frequency value.
NextGene User’s Manual
233
Chapter 6
Sequence Alignment Tool
ClinVar tab
Figure 6-76:
Variation Tracks Settings dialog box, ClinVar tab
Setting
234
Description
Filter using this track
Selected by default. Filters the variants that are displayed in the
Mutation report based on the filtering settings for the selected track.
At least [ ] prediction
satisfied
The default value is one. A variant must pass the filtering settings for
only one of the available clinical origin or clinical significance values to
be displayed in the Mutation report. Increase this value as needed.
Filtering Settings
Select the variants that are to be included in the Mutation report based
on clinical origin and/or clinical significance.
NextGene User’s Manual
Chapter 6
Sequence Alignment Tool
Mutation Report functions
A variety of functions are available for working with the information in the Mutation report.
All these functions, which are available under the Reports > Mutation Report option on the
NextGENe Viewer main menu, result in the generation of files or reports that contain
mutation information for the alignment project. You must specify a name and location for
these files and reports. See:
•
“Save SIFT report” below.
•
“Save VCF report (filtered)” below.
•
“Save unfiltered VCF report” below.
•
“Mutation Report Summary” on page 236.
•
“Save consensus sequence” on page 236.
•
“Save SNP consensus sequence” on page 238.
•
“Fragment Output” on page 240.
•
“Seek Sample Position” on page 240.
Save SIFT report
Click Save SIFT Report to save the Mutation report as a SIFT report, which can be used in
the third party SIFT tool.
Save VCF report (filtered)
Click Save VCF Report (filtered) to save the Mutation report in a format that adheres to
Variant Call Format (VCF) specifications. The report contains only those variants that passed
the Mutation Report filter settings.
Save unfiltered VCF report
Click Save unfiltered VCF Report to save the Mutation report in a format that adheres to
Variant Call Format (VCF) specifications. The unfiltered VCF report contains all called
variants, including the variants that were initially filtered out based on the Mutation Report
settings. “SGflt” is displayed in the FILTER column for the filtered variants.
NextGene User’s Manual
235
Chapter 6
Sequence Alignment Tool
Mutation Report Summary
Click Mutation Report Summary to open the Mutation Report Summary dialog box, which
displays key summarized information for the report.
Figure 6-77:
Mutation Report Summary dialog box
Save consensus sequence
Click Save Consensus Sequence to open the Save Consensus Sequence Options dialog box.
By default, the General tab is the open tab. The tab displays the options for specifying how
you want to save the consensus sequence.
Optionally, you can click Load Settings on the dialog box, and browse to and
select a Settings file (.ini file) to generate the Save Consensus Sequence report
based on the saved settings in the file.
Figure 6-78:
236
Save Consensus Sequence Options dialog box, General tab
NextGene User’s Manual
Chapter 6
Sequence Alignment Tool
Option
Description
Setting
All
Export all bases in the consensus sequence as one segment in a .fasta file. If
no reads align to a region in the reference genome, then the reference
sequence is exported for the region. Covered regions are exported as defined
by the Output Consensus Sequence settings below.
Covered
Export a consensus sequence that contains the consensus bases from only
the covered regions of the reference sequence. Multiple consensus segments
are generated and placed into a single .fasta file. Covered regions are
exported as defined by the Output Consensus Sequence settings below. If no
reads are aligned to a region in the reference sequence, then no consensus
sequence is output for the region.
Note: If any portion of a reference segment (contig) is covered, then the entire
segment is considered to be covered.
Uncovered
Export a consensus sequence that contains bases from only the uncovered
regions of the reference sequence. Multiple segments are generated and
placed into a single .fasta file. Regions of the reference sequence to which
sequence reads are aligned are not included in the output.
Note: To be considered uncovered, the entire reference segment (contig)
must be uncovered.
Specify the coverage region for which you want to save the consensus sequence. You can select
one of the following:
• Input Region
Manually
• Input the region manually. (You must specify the starting position and the
ending position.)
• Input Points of
Interest Text
File (*.txt)
• There are no special requirements for uploading a comma-delimited text
file. If the input text file is a comma-delimited text file, it must contain one of
the following lists:
• Specific reference locations (position number or a range of positions
(start position number - end position number)) separated by commas
• A list of reference gene names separated by commas
• Input Region of
Interest BED
File (*.bed)
• A BED file is a tab-delimited text file. You can upload a BED file only if the
reference sequence contains chromosome information, which means that
the reference sequence must be either a preloaded reference file that
NextGENe supplies, or a GenBank reference file that contains
chromosome information. Each row in the file contains a region of the
reference that is to be used for the report, and at a minimum, the file must
contain the following information:
• Field #1 - Chromosome number for the region
• Field #2 - Chromosome start position
• Field #3 - Chromosome end position
Note: Field #4, which is used for the Description column, is optional.
NextGene User’s Manual
237
Chapter 6
Sequence Alignment Tool
Option
Description
Output Consensus Sequence
• Relative to
Mutation
Report Filter
Replace a reference nucleotide with a variant nucleotide based on the settings
that are specified in the Mutation report. See “Mutation Report settings” on
page 214.
• Relative to
Custom Setting
• Homozygote(0%-100.0%)—The minium percentage of reads for an allele
to be considered homozygous; otherwise, the allele is considered
heterozygous and the consensus sequence shows a “K” (which is the
IUPAC symbol for G and T) at the location. For example, if this value is set
to 80% and 85% of reads aligned at the location identified as a SNP show a
“G” while 15% show a “T,” the position is considered homozygous and the
consensus sequence shows only a “G” at the location.
• IUPAC Heterozygote(0%-100.0%)—The requirements for a location to be
considered heterozygous. More than one nucleotide must observed above
the set percentage for the location to be considered heterozygous. For
example, if this value is set to 25% and 65% of reads aligned at the location
identified as a SNP show a “G” while 35% show a “T,” the allele is
considered to be heterozygous and the consensus sequence shows a “K”
(which is the IUPAC symbol for G and T) at the location.
• Homozygote Indel(20.00%-100%)—The percentage of reads that are
aligned at the mutation location that must contain the indel for the indel to
be included in the consensus sequence.
Save SNP consensus sequence
Click Save SNP consensus sequence to open the SNP Consensus Sequence Options dialog
box. The dialog box contains options for specifying how you want to save the SNP
consensus sequence.
Optionally, you can click Load Settings on the dialog box, and browse to and
select a Settings file (.ini file) to generate the Save SNP Consensus Sequence
report based on the saved settings in the file.
Figure 6-79:
238
Save SNP Consensus Sequence Options dialog box, General tab
NextGene User’s Manual
Chapter 6
Sequence Alignment Tool
Load SNP File
Select this option to load a tab-delimited text file that lists specific variant
positions that are to be used for saving the SNP consensus sequence. The first
line in the file is the Title line. The file has the following format, where the
backslash (\) indicates a tab: Chr\tChr Position\tRef_Allele\tSample_Allele\n
Example: 1\t100\tA\tG\n
• SNP
• Output a consensus sequence to a file that shows both alleles present at SNP
positions, where, for example:
• A/A indicates a homozygous change to A.
• A/C indicates a heterozygous change with both A and C found at the
position.
• Fasta
• Output a consensus sequence to a file that:
• Shows only a single allele present for a homozygous position. For example,
A indicates a homozygous change to A.
• Uses IUPAC characters for heterozygous positions. For example, M
indicates a heterozygous change with both A and C found at the position.
Note: For either selection, covered regions are exported as defined by the Output Consensus
Sequence settings below.
Before or After
SNP
Determines the number of bases on either side of each mutation that are to be
included in the SNP consensus sequence when it is generated.
Output Consensus Sequence
Homozygote(0
%-100.0%)
The minium percentage of reads that have an allele for the allele to be
considered homozygous. For example, if this value is set to 80% and 85% of
reads aligned at the location identified as a SNP show a “G” while 15% show a
“T,” the position is considered homozygous and the consensus sequence shows
a G/G at the location if SNP is selected and only a “G” at the location if the Fasta
option is selected.
IUPAC
Heterozygote(0
%-100.0%)
The requirements for a location to be considered heterozygous. More than one
nucleotide must observed above the set percentage for the location to be
considered heterozygous. For example, if this value is set to 25% and 65% of
reads aligned at the location identified as a SNP show a “G” while 35% show a
“T,” the location is considered heterozygous and the consensus sequence shows
a G/T at the location if the SNP is selected and only a “K” (which is the IUPAC
symbol for G and T) at the location if the Fasta option is selected.
Homozygote
Indel(20.00%100%)
The percentage of reads that are aligned at the mutation location that must
contain the indel for the indel to be included in the consensus sequence.
NextGene User’s Manual
239
Chapter 6
Sequence Alignment Tool
Fragment Output
Click Fragment Output to open the Fragment Output Options dialog box. The dialog box
contains options for specifying how you want to output fragments of the reference file.
Figure 6-80:
Fragment Output Options dialog box
•
Covered—Output covered fragments to a single .fasta file.
•
Uncovered—Output only uncovered fragments to a .fasta file.
Select both options to output both covered and uncovered fragments to a .fasta
file.
Seek Sample Position
You use the Seek Sample Position function to output information about points of interest
using a specific numbering scheme that you define.
Contact SoftGenetics for assistance with this function.
240
NextGene User’s Manual
Chapter 6
Sequence Alignment Tool
Sequence Alignment Project Reports
After you complete a sequence alignment project (either for single sequence reads or for
paired end/mate paired data), you can manually generate a variety of reports that provide
detailed information about matched/unmatched reads, coverage distribution, expression
levels, and so on. All the reports (with the exception of three) are available from the Reports
menu on the NextGENe Viewer main menu. See:
•
“Summary report” below.
•
“Matched/Unmatched report” on page 248.
•
“Distribution report” on page 249.
•
“Coverage Curve report” on page 253,
•
“Mismatched Base Numbers report” on page 259.
•
“Expression Report” on page 260.
•
“Expression report for SAGE studies” on page 266.
•
“Structural Variation report” on page 267.
•
“Score Distribution report” on page 270.
For information about the Expression report for SAGE studies, see “Expression
report for SAGE studies” on page 266. For information about the Expression
Comparison report, see “NextGENe Viewer Comparison Reports and Tools” on
page 285. For information about the Peak Identification report, see “Peak
Identification tool” on page 279.
Summary report
The Summary report displays the Run Statistics for a sequence alignment project and up to
six project reports (Mutation report, Expression report, Coverage Curve report, Structural
Variation report, and/or Distribution report) in a single view. After you select Summary
Report, the Summary Report Settings dialog box opens. If you have already selected
post-processing report options for the project, then these report options are displayed on the
dialog box; otherwise, it is blank. (See Figure 6-81 on page 242.) You can select additional
reports to be included in the Summary report (you must also select a Settings file for each
report), and, if applicable, you can remove reports, and then click OK to generate the report.
You can generate and save multiple versions of different reports, or multiple
versions of the same report as long as each report version uses a different Settings
file.
For information about selecting the Settings file for a report and/or selecting a
different reports, see “To modify the Summary report view” on page 245.
NextGene User’s Manual
241
Chapter 6
Sequence Alignment Tool
Figure 6-81:
Summary Report Settings dialog box
By default, when the Summary report first opens, it is displayed on the right side of the
opened NextGENe viewer. You can click the Show/Hide Report icon
on the NextGENe
Viewer toolbar to indicate where to display the report (to the side of the viewer or below the
viewer), or you can also hide the report. While in the default alignment view, you can click
the Report Selection icon
on the NextGENe Viewer toolbar to toggle between the
Summary report and the Mutation report.
Figure 6-82:
242
Summary report example
NextGene User’s Manual
Chapter 6
Sequence Alignment Tool
From top to bottom, the default Summary report view displays the following:
•
A Report toolbar that contains options for showing/hiding the various Summary report
sections (such as showing/hiding the Header pane, showing/hiding the Run Statistics pane
and so on), an option for saving the report that as a PDF, and an option for modifying the
Summary report settings.
Icon
Function
Show/Hide Summary Report Header icon - Show/hide the Header (top) pane.
Show/Hide Statistics Info icon - Show/hide the Run Statistics (second) pane.
Show/Hide Coverage Curve Report1 icon - Show/hide the Coverage Curve report
pane.
Show/Hide Expression Report1 icon - Show/hide the Expression report pane.
Show/Hide Structural Variation Report1 icon - Show/hide the Structural Variation report
pane.
Show/Hide Distribution Report1 icon - Show/hide the Distribution report pane.
Note: If you elected to generate more than one Mutation report, Expression report, Coverage Curve
report, Structural Variation report, and/or Distribution report for the project, then the
corresponding number of Show/Hide icons for the reports is displayed on the Report toolbar.
Save as PDF icon - Save the Summary report that is currently displayed in the
NextGENe viewer as a PDF.
Note: After you save the Summary report, the date and time that the report was saved
as well as your username are added to the audit trail for the project in the
ReportEditHistory.log file. This log file is saved in an AuditTrail folder in the
<Project Name>.files folder for the appropriate project; for example:
Illumina\Haloplex\Alignment\2.4.0.1\D_Output\D_Output.files\AuditTrail
Settings icon - Opens the Summary Report Settings dialog box. You use the options on
this dialog box to change the report view to better suit your working needs. See “To
modify the Summary report view” on page 245.
Refresh icon - Refreshes the Summary report display after you have changed the
Summary report settings, for example, you have added another report to the display.
NextGene User’s Manual
243
Chapter 6
Sequence Alignment Tool
•
A Header toolbar that contains options for customizing the information that is displayed
in the Header (top) pane of the Summary report as well as options for showing/hiding the
Custom header or the Default Header.
Icon
Description
Show/Hide Custom Header icon - A toggle that shows or hides the Custom header in the
Header pane of the report. When you first open the Summary report for a sequence
alignment project, by default, the Custom header is displayed in the Header pane.
Note: The Custom header displays the default information that is defined in the
DefaultHeader.ini file or custom information that you specify using the Edit Header
function.
Show/Hide Default Header icon - A toggle that shows or hides the Default header in the
Header pane of the report, which includes the following information about the project—
Project Name, Date Created, Date Modified, the NextGENe Version that was used to run
the analysis, and the NextGENe Viewer Version that was used to review the analysis.
Edit Header icon - Click this icon to open the Edit Header dialog box and customize the
information that is displayed in the Summary report header. See “To customize the
Summary report header” on page 246.
244
•
The Run Statistics pane, which displays the _StatInfo.txt file for the sequence alignment
project in its entirety. Use the pane’s scroll bar to view all the information that is displayed
in the pane. (See “_StatInfo.txt” on page 208.)
•
The Mutation report pane, which displays the Mutation report in its entirety for the
sequence alignment project. Use the pane’s scroll bar to view all of the report in the pane.
Use the Show/Hide icons at the top of the Mutation report pane to show/hide various
sections of the report, or the report itself.
•
The Coverage Curve report pane, which displays which displays the Coverage Curve
report in its entirety for the sequence alignment project. Use the pane’s scroll bar to view
all of the report in the pane. Use the Show/Hide icons at the top of the Coverage Curve
report pane to show/hide various sections of the report, or the report itself.
•
The Expression report pane, which displays which displays the Expression report in its
entirety for the sequence alignment project. Use the pane’s scroll bar to view all of the
report in the pane. Use the Show/Hide icons at the top of the report pane to show/hide
various sections of the Expression report or the report itself. Use the Show/Hide icons at
the top of the Expression report pane to show/hide various sections of the report, or the
report itself.
•
The Structural Variation report pane, which displays which displays the Structural
Variation report in its entirety for the sequence alignment project. Use the pane’s scroll
bar to view all of the report in the pane. Use the Show/Hide icons at the top of the
Structural Variation report pane to show/hide various sections of the report, or the report
itself.
NextGene User’s Manual
Chapter 6
Sequence Alignment Tool
•
The Distribution report pane, which displays which displays the distribution coverage
information for the sequence alignment project. Use the pane’s scroll bar to view all of
the information in the pane.
The order in which the various reports are displayed in the Summary report when
the report first opens is determined by the order in which you selected the reports
on the Summary Report Settings dialog box. Use the scroll bar on the viewer to
scroll through the reports. You can rearrange the order in which the reports are
displayed. See “To modify the Summary report view” below.
To modify the Summary report view
Figure 6-83:
Summary Report Settings dialog box
You can do the following on the Summary Report Settings dialog box to modify the
Summary report view:
•
Remove reports—To remove a report from the Summary report, click Remove for the
report. To remove all reports in a single step, click Remove All.
•
Load a different settings file—To load a different Settings file for a report, click Set to
open the Load Settings file dialog box, and then browse to and select a different Settings
file for the report.
•
Change the display order of the reports—To change the order in which the various reports
are displayed in the Summary report, you can change the selections on the report
dropdown lists, or you can use the Up and Down options for the reports.
If you change the order by changing the selections on the report dropdown lists,
you must also remember to load the correct settings file for the reports. See Load a
Different settings file above.
NextGene User’s Manual
245
Chapter 6
Sequence Alignment Tool
•
Add a report to the Summary report—To add a report to the Summary report, do the
following:
i.
Click Add to open a new report dropdown list on the Report Settings dialog box.
ii. Select the appropriate report on the dropdown list.
iii. Click Set to open the Load Settings file dialog box, and then browse to and select a
different settings file for the report.
You can generate and save multiple versions of different reports, or multiple
versions of the same report as long as each report version uses a different Settings
file.
•
Edit the settings file for a report—To edit the current settings file for a report, do the
following:
i.
Click Edit for the report to open the <Report> Settings dialog box, and then edit the
settings for the report as needed.
ii. Click Save Settings to save the modified settings to a new report settings file, or
overwrite the existing report settings file.
iii. Click Cancel to close the <Report> Settings dialog box.
iv. Click Set to open the Load Settings file dialog box, and then browse to and select the
report settings file that you just saved.
•
Define a custom report name—To define a custom name for a report that can be displayed
in lieu of the default report name (for example, Project A report instead of Mutation
report) in the Summary report view, do the following:
i.
Click Edit for the report to open the <Report> Settings dialog box, and then open the
Summary Report tab on the dialog box.
ii. In the Report Name field, enter the custom name for the report.
iii. Click Save Settings to save the modified settings file to a new report settings file, or
overwrite the existing report settings file.
iv. Click Cancel to close the <Report> Settings dialog box.
v. Click Set to open the Load Settings file dialog box, and then browse to and select the
report settings file that you just saved.
To customize the Summary report header
Two types of headers can be displayed in the Header pane for the Summary report—a
Custom header and Default header. The Custom header displays default information—
Software, Company, Address, Phone, Fax, Website, Email—that is defined in the
DefaultHeader.inf file or custom information that you can specify using the Edit Header
function. You typically customize the information that is displayed in a header to better
246
NextGene User’s Manual
Chapter 6
Sequence Alignment Tool
reflect your project, your business organization, and so on. The Default header displays the
following information about the project—Project Name, Date Created, Date Modified, the
NextGENe Version that was used to run the analysis, and the NextGENe Viewer Version that
was used to review the analysis.
1. Click the Edit Header icon.
The Edit Header dialog box opens.
Figure 6-84:
Edit Header dialog box
2. Do one of the following:
•
Modify any of the default information in either column.
•
Click Load to open an Open dialog box, and browse to and select an existing custom
header file to load. (A header file has a .inf extension.)
After you load a custom header file, you can modify the information as needed.
3. Optionally, add or delete rows of information as needed.
•
To delete a row from the header, right-click on the row, and then click Delete a Row.
•
To insert a row into the header, right-click on the row that is to be located below the
inserted row, and then click Insert a Row.
•
To add a row as the last row in the header, right-click on any row, and then click Add
a Row.
4. Do one of the following:
•
Click Save to save the header file as a custom .inf file.
•
Click OK to save the Default Header.inf file. The changes that you make will be
displayed by default in every header for every Summary report that you generate.
NextGene User’s Manual
247
Chapter 6
Sequence Alignment Tool
Matched/Unmatched report
The Matched/Unmatched report displays a list of all reads that did not match to the
reference. The report also shows the total number of reads that matched to the reference and
the total number of reads that did not match to the reference as well as the read title and the
sequence for all unmatched reads. To save the reads to a .fasta file, click the Save Report
icon
on the report toolbar. A default name is provided for the file, but you can change
this value.
Figure 6-85:
248
Matched/Unmatched report example
NextGene User’s Manual
Chapter 6
Sequence Alignment Tool
Distribution report
By default, the Distribution report shows the coverage distribution across the whole
reference sequence. If you are carrying out targeted sequencing and want to view the
coverage distribution for specific regions, then you can use the option to load a BED file.
To load a BED file, on the Distribution report menu, click File > Load BED file.
For detailed information about a BED file, see “BED file” on page 473.
The Distribution report provides four different charts that display coverage information for
the alignment project. All four charts display information for both forward and reverse reads,
with the forward reads represented in blue and the reverse reads represented in red. The
reverse coverage is stacked on top of the forward coverage.
Figure 6-86:
Distribution Report example
From top to bottom, the charts display the following unique information:
•
For projects that include condensation, the Original Coverage chart displays the coverage
distribution for the original reds that were used for condensation. For projects that did not
include condensation, the chart is not displayed.
•
The Directional Coverage chart displays the coverage of the reads across the reference
sequence.
NextGene User’s Manual
249
Chapter 6
Sequence Alignment Tool
•
The Sequence Starting Location chart displays the distribution of the sequence starting
points.
•
The Read Length Distribution chart shows the distribution by read lengths.
The report is interactive.
•
To change the view (which charts are displayed and which are not), on the report menu,
click View, and then on the View menu, clear the selections for the charts that you do
want to display.
The Original Coverage option is displayed on the View menu only if you are
viewing condensed data.
Figure 6-87:
•
To save the exact coverage information for any location or region, on the report menu,
click File > Save Coverage to open the Save Coverage Settings dialog box, and on the
General tab, specify how to save the coverage information. Optionally, you can click
Load Settings and browse to and select a Settings file (.ini file) to save the coverage
information based on the saved settings in the file.
Figure 6-88:
250
Distribution Report, View menu
Save Coverage Settings dialog box, General tab
NextGene User’s Manual
Chapter 6
Sequence Alignment Tool
Setting
• Condensed
• Original
Description
Available only if the project included condensation. Indicate to save
coverage for either condensed reads or original reads.
Specify the coverage region for which you want to save the coverage settings. You can select one
of the following:
• Input Region Manually
• Input the region manually. (You must specify the starting position
and the ending position.)
• Input Points of Interest
Text File (*.txt)
• There are no special requirements for uploading a comma-delimited
text file. If the input text file is a comma-delimited text file, it must
contain one of the following lists:
• Specific reference locations (position number or a range of
positions (start position number - end position number))
separated by commas
• A list of reference gene names separated by commas
• Input Region of
Interest BED File
(*.bed)
• A BED file is a tab-delimited text file. You can upload a BED file only
if the reference sequence contains chromosome information, which
means that the reference sequence must be either a preloaded
reference file that NextGENe supplies, or a GenBank reference file
that contains chromosome information. Each row in the file contains
a region of the reference that is to be used for the report, and at a
minimum, the file must contain the following information:
• Field #1 - Chromosome number for the region
• Field #2 - Chromosome start position
• Field #3 - Chromosome end position
Note: Field #4, which is used for the Description column, is optional.
• Save Coverage for
ROI
• Save the coverage information based on Regions of Interest as
defined in the GenBank reference file.
Note: For information about creating Regions of Interest in a GenBank
reference file, see “Advanced GBK Editor tool” on page 274.
• Save Coverage for
Entire Reference
Range
• If you select this option, then coverage is saved for the entire
region, which means that you do not need to manually specify a
range.
Ignore the Uncovered
Regions
Select this option to exclude uncovered regions from the Save
Coverage Settings report.
Step
You must set the Step value, which is the increment (for example, >1)
at which the coverage is to be measured.
• Average
Report the coverage as either the average value for a region or the
sum total of all covered bases across the region.
• Sum
Note: If Step =1, there is no difference between the two options
because the coverage for every base is reported.
NextGene User’s Manual
251
Chapter 6
Sequence Alignment Tool
•
Optionally, open the Summary Report tab and do one or both of the following as needed:
•
Specify an alternate name for the Distribution report when it is displayed in the
Summary report.
•
Clear the options for the sections of the Distribution report that are not to be included
in the Summary report.
Figure 6-89:
Save Coverage Settings dialog box, Summary Report tab
You must click Save Settings to save these settings in a Settings file (.ini file) .
These settings are applied to the Distribution report only if you select this Settings
file during the setup of the Summary report. See “Summary report” on page 241.
252
NextGene User’s Manual
Chapter 6
Sequence Alignment Tool
Coverage Curve report
The Coverage Curve displays the coverage distribution of sample reads along the reference
sequence without directional information and reports low coverage regions. The report is
useful for identifying regions that were not adequately sequenced because of low coverage.
If the project used condensation, then the report displays the condensed coverage
information. If you are carrying out targeted sequencing and want to view the coverage
distribution for specific regions, then you can use the option to load a BED file. If you used
PCR amplicons to obtain sequencing data, you can create and upload amplicon text files for
analysis.
The following procedure describes how to set up a new Coverage Curve report.
Optionally, you can click Load Settings to browse to and select a Settings file (.ini
file) to generate the report based on the saved settings in the file.
1. On the Reports menu, click Coverage Curve.
The Coverage Curve report opens. Two options are possible:
•
If post-processing options were not used to specify a Settings file for the report, then
by default, the first time that the report opens for a sequence alignment project, it
displays all the low coverage regions across the entire reference with a low coverage
threshold that is equal to the total coverage threshold that was specified in the
Mutation Filter settings for the project regions. (See “Mutation Filter settings” on
page 140.)
•
If post-processing options were used to specify a Settings file for the report, then by
default, the first time that the report opens for a sequence alignment project, the
settings that are specified in the loaded settings file are applied. If multiple Coverage
Curve reports were selected in the post-processing settings, then the first loaded
Settings file is applied.
After you change any of these default values for a project, NextGENe “remembers”
these values and generates the report accordingly. See “Coverage Curve report example”
on page 254.
NextGene User’s Manual
253
Chapter 6
Sequence Alignment Tool
Figure 6-90:
Coverage Curve report example
Reference sequence regions that are highlighted in red indicate regions where the
coverage falls below the user-set mutation filter coverage threshold. The
highlighted regions are useful for identifying large deletions or regions where
PCR failed. Detailed information for each highlighted region is displayed in the
report table below the graph.
2. On the report menu, click Settings > Settings.
The Coverage Curve Settings dialog box opens. The General tab is opened by default.
Figure 6-91:
254
Coverage Curve Settings dialog box, General tab
NextGene User’s Manual
Chapter 6
Sequence Alignment Tool
3. To define the regions of the reference that are to be used for reporting low coverage
regions, do one or both of the following as applicable:
Action
Step
Load an Amplicon Text file
for analysis
Select Input amplicon TEXT File (*.txt), and then click Add to
browse to and select the appropriate Amplicon text file. You can
load multiple Amplicon text files.
An Amplicon text file must be a tab-delimited text file with the
following format:
• From left to right, the column headings are: Amplicon ID, Start,
and End. Each column heading must be separated by a tab.
• Enter the values for each amplicon in a separate row, with a tab
between each value. Use reference positions for Start and End
fields.
• Save the file as a tab-delimited text file.
Figure 6-92:
Load Regions of Interest for
analysis
Amplicon text file example
Select Input Region of Interest, and then do one of the following:
• To load a BED file, select Use ROI Defined in BED Files, and
then click Set to browse to and select the appropriate BED file.
Note: For information about the required format for a BED file, see
“BED file” on page 473.
• To use Regions of Interest that are defined in GenBank reference
files, select Use ROI Defined in Reference Files.
• To use Regions of Interest that are relative to the contigs of the
reference, click Use contigs.
Note: This option is appropriate if you are using a reference that
was recreated from a BED file for custom amplicons.
4. Define the Coverage settings for the project.
Option
Description
Define the low coverage
threshold for including
regions in the report,
Enter the cut-off value in the Highlight Coverage field.
Use Original Coverage
Settings
Available only for Condensation projects. Select this option to use
original coverage values for generating the Coverage Curve report
instead of condensed reads coverage.
5. Optionally, open the Display tab and select the columns that are to be included in the
report (by default, all columns are included), or clear the options for the columns that are
not to be included. See Figure 6-93 on page 256.
NextGene User’s Manual
255
Chapter 6
Sequence Alignment Tool
Figure 6-93:
Coverage Curve Settings dialog box, Display tab
Column
Description
Length
The total length of the low coverage region.
Description
If this option is selected and you have loaded:
• A BED file, then, when available, information in Column 4 for the file
is displayed.
• An amplicon text file, any description that you have entered in the
amplicon text file is displayed.
256
Reference Position Start
The starting location for the low coverage region in the reference.
Chr
The name of the chromosome on which the low coverage region is
located.
Chr Position Start
The base number that indicates where the low coverage region starts in
the chromosome.
Gene Start
The name of the gene where the low coverage region starts.
CDS Start
The CDS number where the low coverage region starts.
HGVS Start
The HGVS nomenclature for the start of the low coverage region.
RNA Accession Start
The RNA accession from NCBI for the gene at the start of the low
coverage region.
Protein Accession Start
The protein accession from NCBI for the gene at the start of the low
coverage region.
Reference Position End
The ending location for the low coverage region in the reference.
Chr Position End
The base number that indicates where the low coverage region ends in
the chromosome.
Gene End
The name of the gene where the low coverage region ends.
CDS End
The CDS number where the low coverage region ends.
HGVS End
The HGVS nomenclature for the end of the low coverage region.
RNA Accession End
The RNA accession from NCBI for the gene at the end of the low
coverage region.
NextGene User’s Manual
Chapter 6
Sequence Alignment Tool
Column
Protein Accession End
Description
The protein accession from NCBI for the gene at the end of the low
coverage region.
6. Optionally, open the Summary Report tab and specify how the Coverage Curve report is
to be named and which of its information is to be displayed in the Summary report.
You must save these settings in a Settings file (.ini file). These settings are applied
to the Coverage Curve report only if you select this Settings file during the setup of
the Summary report. See “Summary report” on page 241.
Figure 6-94:
Coverage Curve Report Settings dialog box, Summary report tab
Setting
Description
Report Name
The name that is displayed for the Coverage Curve report in the
Summary report.
Display Coverage
Curve
Display the coverage curve in the Summary report.
Display Target Region
Statistics
Display the target region statistics in the Summary report.
Display Coverage report
Display the coverage information in the Summary report.
7. Optionally, click Save Settings to save the settings for this report in a Settings file (.ini
file). You can use a saved Settings file to specify the post processing options for a project
in:
•
The Project Wizard. See “To specify the post-processing options for a Sequence
Alignment project” on page 67.
•
The NextGENe AutoRun Tool. See Chapter 9, “The NextGENe AutoRun Tool,” on
page 395.
•
The Summary report. See “Summary report” on page 241.
NextGene User’s Manual
257
Chapter 6
Sequence Alignment Tool
8. Click OK to generate the report.
The report is interactive:
•
To zoom in the graph view, hold down the left mouse button and draw a box from the
upper left hand corner of any region in the graph towards the lower right hand corner. A
box is formed around the area that being reduced for viewing.
After you zoom in on a region, you can use the use right mouse button to scroll the
region.
•
To zoom out the graph view, hold down the left mouse button and draw a box from the
lower right hand corner of any region in the graph towards the upper left hand corner.
The magnification for zooming out is always 100%.
•
To save Low Coverage Region information to a text file, on the report toolbar, click the
Save Report icon
, or on the report menu, click File > Save Coverage Report. A
default name and location are provided for the file, but you can change both of these
values.
•
After you load a BED file and generate the Coverage Curve report for the file, you can
click the Target Region Statistics icon
on the report toolbar or you can click File >
Target Region Statistics on the report menu to open the Target Region Statistics dialog
box. This dialog box displays summary coverage information for the BED file regions.
You can click the Save Report icon
at the top of the dialog box, or you can click File
> Save Target Region Statistics to save the target region information to a text (*.txt) file.
Figure 6-95:
258
Target Region Statistics dialog box
NextGene User’s Manual
Chapter 6
Sequence Alignment Tool
•
To modify the report settings, on the report toolbar, click Settings > Settings to open the
Coverage Curve Settings dialog box and modify the report settings as needed. The report
display is dynamically updated after you save the modifications.
Mismatched Base Numbers report
The Mismatched Base Numbers report displays the counts of reads that aligned anywhere to
the reference sequence and that showed a given number of mismatches when aligned.
Figure 6-96:
Mismatched Base Numbers report example
The report is interactive.
•
To zoom in the graph view, hold down the left mouse button and draw a box from the
upper left hand corner of any region in the graph towards the lower right hand corner. A
box is formed around the area that being reduced for viewing.
After you zoom in on a region, you can use the use right mouse button to scroll the
region.
•
To zoom out the graph view, hold down the left mouse button and draw a box from the
lower right hand corner of any region in the graph towards the upper left hand corner.
The magnification for zooming out is always 100%.
NextGene User’s Manual
259
Chapter 6
Sequence Alignment Tool
Expression Report
The Expression report provides expression levels/coverage for different regions of the
reference genome, which is critical information that is needed for expression studies such as
small RNA analysis and transcriptome studies.
The following procedure describes how to set up a new Expression report.
Optionally, you can click Load Settings to browse to and select a Settings file (.ini
file) to generate the report based on the saved settings in the file.
1. On the Reports menu, click Expression Report to open the Expression Report Settings
dialog box. The General tab is opened by default.
Figure 6-97:
Expression Report Settings dialog box, General tab
2. Specify how you want to define the segments that are to be analyzed for the report:
•
You can use the segments as defined in the reference file.
Setting
Contig
Description
Report coverage levels for each contig.
Note: This option is appropriate if you are using a reference that was
recreated from a BED file for custom amplicons.
Gene
Report coverage levels for each gene region.
Continuous mRNA
Report coverage levels for the entire mRNA for a gene, one region per gene.
ROI
Enabled only if you have loaded a project with Regions of Interest defined in a
GenBank reference file. Report coverage levels based for each Region of
Interest in the reference file.
Note: For information about defining Regions of Interest in a GenBank
reference file, see “Advanced GBK Editor tool” on page 274.
260
NextGene User’s Manual
Chapter 6
Sequence Alignment Tool
Setting
Description
mRNA
Report coverage levels for each mRNA region. (Coding and non-coding
exons.)
Continuous CDS
Report coverage levels for the entire coding region for a gene, one region per
gene.
Amplicon
Available only if an amplicon BED file was loaded during the Load Data step
for the project. (See “To set ROI regions from a BED or GBK file” on page 58.)
Report coverage levels for each amplicon as defined in the loaded BED file.
For overlapping amplicons, each read is counted only for its intended
amplicon, where the intended amplicon is determined by the percentage of
the amplicon that the read covers. The amplicon with the higher coverage is
selected as the intended amplicon.
CDS
Report coverage levels for each coding region.
•
You can manually set the segment length, relative to either the reference positions in
the contig or the chromosome positions.
•
You can upload a Region of Interest file in a BED format.
For information about the required format for the BED file, see “BED file” on
page 473.
3. Optionally, select one or both Limit options and if needed, modify the default limits (200
bp) for reporting the coverage for only the first or last '”x” number of bases of the
selected segment type.
If any Limit option and CDS are selected, then the coverage levels for the first or
last “x” number of bases in each CDS region is reported.
4. Optionally, open the Display tab and select the columns that are to be included in the
report, or clear the options for the columns that are not to be included.
Figure 6-98:
Expression Report Settings dialog box, Display tab
NextGene User’s Manual
261
Chapter 6
Sequence Alignment Tool
Column
Index
Description
An ordered count of the segments that are used in the report.
Chr
• Name
• Number
• The name of the chromosome on which the segment is
located.
• The number of the chromosome on which the segment is
located.
Chr Position Start
The base number that indicates where the segment starts in the
chromosome.
Chr Position End
The base number that indicates where the segment ends in the
chromosome.
Gene
The gene name for the segment when the segment is the whole
gene or the name of the gene on which the segment is found.
CDS
The coding sequence number for the segment.
Description
Available if the reference file is a .fasta file with multiple segments.
Select this option to display the title line for each segment in the
Description column.
Contig
The contig that the segment is on. The contig is based on the
genome assembly from the NCBI.
Locus Tag
An alternate way to identify the gene.
Start
The starting location for the reference region.
End
The ending location for the reference region.
Length
The total length of the reference region, which provides for easy
identification of expressed regions by size (such as when locating
small RNA transcripts).
Min Coverage
The minimum number of reads that aligned at any single position
within the reference region.
Note: For projects that also used condensation, this column
shows the minimum number of condensed reads.
Max Coverage
The maximum number of reads that aligned at any single base
position within the reference region.
Note: For projects that also used condensation, this column
shows the maximum number of condensed reads.
Average Coverage
The average coverage for the reference region, which is
calculated according to the following:
Total Number of Bases Aligned to the Region/Region Length
Note: For projects that also used condensation, this calculation
uses the total number of bases in the condensed reads.
262
Minimum Forward Read
Coverage
The minimum number of forward reads that aligned at any single
position within the reference region.
Minimum Reverse Read
Coverage
The minimum number of reverse reads that aligned at any single
position within the reference region.
NextGene User’s Manual
Chapter 6
Sequence Alignment Tool
Column
Read Counts
Description
The total number of reads aligned to the indicated reference
region.
Note: The middle base of a read must be aligned to the region to
be counted. If only the end of the read is aligned to the
region, then the read is not counted.
Note: For projects that also used condensation, this is the total
number of condensed reads.
Forward Read Counts
The number of forward reads aligned to the indicated reference
region.
Note: The middle base of a read must be aligned to the region to
be counted. If only the end of the read is aligned to the
region, then the read is not counted.
RPKM
Reads per Kilobase Exon Model per Million mapped reads.
RPKM = 10^9 * R / (T*L)
where:
• R = Number of mapped reads in a region
• T = Total number of mapped reads.
• L = Length of the region.
Normalizes the expression levels based on the length of the
reference region and the total number of aligned reads.
RPK
Reads that mapped to the indicated segment divided by the total
number of mapped reads and then multiplied by 1000. Normalizes
the expression levels based on the total number of aligned reads.
FPKM
Applicable only if the project used paired end data. Fragments per
Kilobase of exon per Million mapped reads.
FPKM = 10^9 * F / (T*L)
where:
• F = Number of mapped fragments in a region and:
• A “fragment” corresponds to a pair of reads.
• Single reads are not counted.
• The position of a fragment is the location between the two 5’
ends of the pairs.
• T = Total number of mapped fragments.
• L = Length of the region.
Normalizes the expression levels for paired end data based on
the length of the reference region and the total number of aligned
reads.
Original Max Counts
Applicable only if the project also used condensation.
Original Average Counts
Applicable only if the project also used condensation.
Original Read Counts
Applicable only if the project also used condensation.
NextGene User’s Manual
263
Chapter 6
Sequence Alignment Tool
5. Optionally, open the Summary Report tab, and specify how the Expression report is to be
named and which of its information is to be displayed in the Summary report.
You must save these settings in a Settings file (.ini file). These settings are applied
to the Expression report only if you select this Settings file during the setup of the
Summary report. See “Summary report” on page 241.
Figure 6-99:
Expression Report Settings dialog box, Summary Report tab
Setting
Description
Report Name
The name that is displayed for the Expression report in the Summary
report.
Display Expression Report
Summary
Display the summary information for the Expression report in the
Summary report.
Display Expression Report
Display the expression information in the Summary report.
6. Optionally, click Save Settings to save the settings for this report in a Settings file (.ini
file). You can use a saved Settings file to specify the post processing options for a project
in:
•
The Project Wizard. See “To specify the post-processing options for a Sequence
Alignment project” on page 67.
•
The NextGENe AutoRun Tool. See Chapter 9, “The NextGENe AutoRun Tool,” on
page 395.
•
The Summary report. See “Summary report” on page 241.
7. Click OK to generate the report.
See Figure 6-100 on page 265.
264
NextGene User’s Manual
Chapter 6
Sequence Alignment Tool
Figure 6-100: Expression report example (not for SAGE studies)
The Expression report results for SAGE studies are different from the results for
other Expression reports. See “Expression report for SAGE studies” on page 266.
The report is interactive:
•
To sort the report results, double-click any column heading.
•
To view a position or region in the Alignment viewer, double-click any value in any
column.
•
To save the report to a text (*.txt) file, on the report toolbar, click the Save Report icon
or on the report menu, click File > Save. A default name and location are provided
for the file, but you can change both of these values.
•
To modify the report settings, on the report menu, click Settings > Settings to open the
Expression Report Settings dialog box and modify the report settings as needed. The
report display is dynamically updated after you save the modifications.
NextGene User’s Manual
265
Chapter 6
Sequence Alignment Tool
Expression report for SAGE studies
The Expression report for SAGE Studies provides expression levels/coverage for different
regions of the reference genome, which is critical information that is needed for SAGE
studies. To generate the Expression report for SAGE studies, you must load SAGE study
project into the NextGENe Viewer, and then on the NextGENe Viewer toolbar, click the
Expression report for SAGE studies icon
.
Figure 6-101: Expression report example (for SAGE studies)
Column
Description
Position
Position of the gene in the genome (as indicated in the reference
genome.)
Gene Name
The name of the gene that is represented by the tag.
Chromosome
The chromosome on which the gene is located (as indicated in the
reference genome.)
Sequence
The tag sequence.
Occurring Counts
The number of reads with the indicated tag.
Note: If multiple genes have the same tag sequence, a value is displayed
in this column for the first gene with the sequence. A zero is
displayed for all subsequent tags.
# of Gene Ambiguities
The number of genes that have this same tag sequence. The number in
parenthesis is the index number for the other genes with this tag.
Expression
Defined as:
Occurring Counts/Total number of genes with the tag
where: Total number of genes with the tag = (# of Gene Ambiguities + 1)
Note: If the Occurring Counts = 0, then the value for the Occurring Counts
for the first listed index with the same tag is used.
266
NextGene User’s Manual
Chapter 6
Sequence Alignment Tool
Structural Variation report
When a structural variation occurs, often the result is that reads that are aligned to a region
have a high number of mismatches in a localized region that is located to one side of the
variation. The Structural Variation report identifies and lists these areas of possible structural
variations across the entire reference sequence. The report lists a start position and an end
position for each local region that has a high number of mismatches. A position location is
provided that indicates where the variation might have occurred.
The following procedure describes how to set up a new Structural Variation
report. Optionally, you can click Load Settings to browse to and select a Settings
file (.ini file) to generate the report based on the saved settings in the file.
1. On the Reports menu, click Structural Variation to open the Structural Variation Report
Settings dialog box. The General tab is opened by default.
Figure 6-102: Structural Variation Report Settings dialog box, General tab
2. Indicate whether the data that is being analyzed consists of:
•
Short Reads (< 75 bp)
•
Long Reads (> 75 bp)
3. To modify the report so that the report displays only those structural variations that are
within “x” number of bases on either side of a coding region, select “In CDS Only +/-”
and then specify the number of bases.
4. If you are carrying out targeted sequencing, and want to view the possible structural
variations in specific regions, then select Input Region of Interest (*.bed), and then
browse to and select the appropriate BED file.
For information about the required format for the BED file, see“BED file” on
page 473.
NextGene User’s Manual
267
Chapter 6
Sequence Alignment Tool
5. Optionally, open the Display tab and select the columns that are to be included in the
report (by default, all columns are included), or clear the options for the columns that are
not to be included.
Figure 6-103: Structural Variation Report Settings dialog box, Display tab
Column
268
Description
Length
The number of bases that are mismatched to the reference sequence,
indicating a possible structural variation.
Avg. Count
The average number of reads that have the mismatches in them.
Sequence
The sequence of the mismatched bases that indicate a possible structural
variation.
Comments
If Long Reads is selected, and a region has a count of only one, then the
entry for the region in the report is dimmed/unavailable, and “Deleted” is
displayed in this column.
Ref Position Start
The position in the reference sequence where the structural variation
begins.
Ref Position End
The position in the reference sequence where the structural variation
ends.
Chr
The name of the chromosome where the structural variation is found.
Chr Position Start
The starting base number for where the structural variation starts on the
chromosome.
Chr Position End
The starting base number for where the structural variation ends on the
chromosome.
Gene Start
The name of the gene where the structural variation starts.
Gene End
The name of the gene where the structural variation ends.
Contig Start
The name of the contig where the structural variation starts. The contig is
based on the genome assembly from the NCBI.
Contig End
The name of the contig where the structural variation ends. The contig is
based on the genome assembly from the NCBI.
NextGene User’s Manual
Chapter 6
Sequence Alignment Tool
6. Optionally, open the Summary Report tab, and specify an alternate name for the
Structural Variation report when it is displayed in the Summary report.
You must save these settings in a Settings file (.ini file). These settings are applied
to the Structural Variation report only if you select this Settings file during the
setup of the Summary report. See “Summary report” on page 241.
Figure 6-104: Structural Variation Report Settings dialog box, Summary Report tab
7. Optionally, click Save Settings to save the settings for this report in a Settings file (.ini
file). You can use a saved Settings file to specify the post processing options for a project
in:
•
The Project Wizard. See “To specify the post-processing options for a Sequence
Alignment project” on page 67.
•
The NextGENe AutoRun Tool. See Chapter 9, “The NextGENe AutoRun Tool,” on
page 395.
•
The Summary report. See “Summary report” on page 241.
8. Click OK to generate the report.
Figure 6-105: Structural Variation report
NextGene User’s Manual
269
Chapter 6
Sequence Alignment Tool
For short reads, the Count column is blank. For long reads, regions where the
count is only one are shown in gray and regions where the count is greater than
one are shown in blue.
The report is interactive:
•
To view a position or region in the Alignment viewer, double-click any value in any
column.
•
To save the report to a text (*.txt0 file, on the report toolbar, click the Save Report icon
, or on the report menu, click File > Save. A default name and location are provided
for the file, but you can change both of these values.
•
To modify the report settings, on the report menu, click Settings > Settings to open the
Structural Variation Report Settings dialog box and modify the report settings as needed.
The report display is dynamically updated after you save the modifications.
Score Distribution report
The Score Distribution report is available from the NextGENe viewer any time after you
complete an alignment project. The report shows the number of mutations that have a
particular score—Overall Score, Coverage Score, Read Balance Score, Allele Balance
Score, Homopolymer Score, Mismatch Score, or Wrong Allele Score. The report is
applicable only for projects that were created in Version 2.0 or later of NextGENe.
Figure 6-106: Score Distribution report
270
NextGene User’s Manual
Chapter 6
Sequence Alignment Tool
By default, when the report first opens, Overall Score, Coverage Score, and Read Balance
Score are displayed. To change the scores that are displayed, on the report menu, click View,
and then select the score that is to be displayed, or clear a selected score to remove it from
the report display.
For a detailed discussion about each of the available scores, see “Overall
Mutation Score” on page 456.
NextGene User’s Manual
271
Chapter 6
Sequence Alignment Tool
NextGENe Viewer Tools
Several NextGENe Viewer tools are available that provide additional options for working
with the results of an alignment project. After you load a project in the viewer, almost all the
viewer tools are available from the Tools menu on the viewer main menu See:
•
“Export Sequences tool” on page 272.
•
“Export Sequences to CSFASTA tool” on page 273.
•
“Advanced GBK Editor tool” on page 274.
•
“Peak Identification tool” on page 279.
•
“Synthetic SAGE Data tool” on page 282.
•
“Create SAGE Library from mRNA tool” on page 283.
•
“Modify Titles for mRNA GenBank tool” on page 284.
•
“Resume Project and Load Project” on page 284.
For information about the NextGENe Viewer comparison reports and tools, see
“NextGENe Viewer Comparison Reports and Tools” on page 285.
Export Sequences tool
You use the Export Sequences tool to generate a .fasta file that contains all of the reads that
aligned to a specific region in the reference sequence.
Figure 6-107: Export Sequences Settings dialog box
You can manually set the region length (you must set the starting position and the ending
position), or you can upload a Comma-delimited text file or a tab-delimited text file that is in
a BED file format.
272
NextGene User’s Manual
Chapter 6
Sequence Alignment Tool
For more information about the format for a comma-delimited text file or a BED
file format, see “Comma-delimited text file” on page 473 or “BED file” on page
473.
Optionally, after you specify the settings for the Export Sequences tool, you can click Save
Settings to save the settings to a Settings (.ini) file. You can select this saved general Settings
file for post-processing options in:
•
The Project Wizard. See “To specify the post-processing options for a Sequence
Alignment project” on page 67.
•
The NextGENe AutoRun Tool. See Chapter 9, “The NextGENe AutoRun Tool,” on page
395.
•
The Summary report. See “Summary report” on page 241.
Export Sequences to CSFASTA tool
This tool is available only for SOLiD System data analysis.
You use the Export Sequence to CSFASTA tool to generate a csfasta file for SOLiD System
data that contains all of the aligned reads for a specified region in color-space format.
Figure 6-108: Export Sequences to CSFASTA Settings dialog box
You can manually set the region length (you must set the starting position and the ending
position), or you can upload a Comma-delimited text file or a tab-delimited text file that is in
a BED file format.
For more information about the format for a comma-delimited text file or a BED
file format, see “Comma-delimited text file” on page 473 or “BED file” on page
473.
NextGene User’s Manual
273
Chapter 6
Sequence Alignment Tool
Optionally, after you specify the settings for the Export Sequences to CSFASTA tool, you
can click Save Settings to save the settings to a Settings (.ini) file. You can select this saved
general Settings file for post-processing options in:
•
The Project Wizard. See “To specify the post-processing options for a Sequence
Alignment project” on page 67.
•
The NextGENe AutoRun Tool. See Chapter 9, “The NextGENe AutoRun Tool,” on page
395.
•
The Summary report. See “Summary report” on page 241.
Advanced GBK Editor tool
You use the Advanced GBK Editor tool to view, edit or annotate a GenBank reference file.
You can load a .gbk/.txt file which is a file that contains both the annotations and the
sequence or you can load the files separately. A .gbs file contains only the annotations (no
sequences) and the .fna file contains only the sequence (no annotations). To load the
GenBank file that is to be edited/annotated, do one of the following:
•
On the GBK Editor window main menu, click File > Open.
•
On the GBK Editor window toolbar, click the Load icon
Figure 6-109: Advanced GBK Editor window
Continue to the following:
274
•
“GBK Editor tool - GenBank Tree File” on page 275.
•
“GBK Editor window- Sequence View pane” on page 276.
NextGene User’s Manual
.
Chapter 6
Sequence Alignment Tool
GBK Editor tool - GenBank Tree File
The left pane in the GBK Editor window is the GenBank Tree File pane. This pane displays
all of the GenBank file information in a simple tree format. Click the plus (+) and minus (-)
symbols to expand and collapse the tree structure, respectively.
Figure 6-110: GenBank Tree File
The GenBank Tree File is interactive. You can:
•
Expand the Gene folder to view CDS and mRNA sequences that were identified in the
gene.
•
Expand the Variations folder to view all of the recorded SNPs for the gene. All known
variants are displayed in blue in the Sequence View window (the window on the right of
the GBK Editor tool).
•
Double-click a Variation SNP file to open the Variation Setting dialog box. The Variation
Setting dialog box provides detailed information about the selected SNP, including
varying alleles and position in the gene. You can do the following in this dialog box:
•
If you know the gene name, you can enter this value in the Gene Name field.
•
To edit the values in the Population ID and Allele fields, you can double-click a
displayed value to select it and then modify the value.
If you enter a gene name, or edit any values, you must click OK to save these edits.
Figure 6-111: Variation Setting dialog box
NextGene User’s Manual
275
Chapter 6
Sequence Alignment Tool
GBK Editor window- Sequence View pane
The Sequence View pane is the right pane in the Advanced GBK Editor window. It has two
tabs—the Sequence tab and the Basic Information tab. The Sequence tab provides a visual
representation of the gene. A color-coded bar chart representing the gene is displayed in the
middle pane of the tab. mRNA regions are shown in green and CDS regions are shown in
red. SNP locations are indicated by small vertical lines above the bar chart. These lines are
also color-coded according to the base change that they represent. The lower pane displays
the full sequence for the region. mRNA regions are again displayed in green and CDS
regions are again displayed in red. The amino acid sequence is also provided below the CDS
sequence. SNPs are displayed in blue.
Figure 6-112: Advanced GBK Editor window, Sequence tab
The Sequence tab is interactive. To search for a specific sequence, on the Advanced GBK
Editor Tool main menu, click Search > Find to open the Find Sequence dialog box. You enter
the sequence for which to search in this dialog box, and you can also indicate whether to
search by the complementary sequence. If the sequence is found, it is displayed in purple and
italics in the Sequence tab. (See Figure 6-114 on page 277.)
Figure 6-113: Find Sequence dialog box
276
NextGene User’s Manual
Chapter 6
Sequence Alignment Tool
Figure 6-114: Located sequence in Sequence tab
The Basic Information tab displays information about the gene sequence. The information
that is displayed on this tab depends on what option is selected in the GenBank Tree file—
the gene name, the CDS file name, the mRNA file name, or the Variations folder. If the gene
name is selected, then the gene name and region are displayed on this tab. The information
also indicates if the sequence is a reverse complement.
Figure 6-115: Advanced GBK Editor tool, Gene name selected
If the CDS file name is selected, and the Auto Create ROI tool is used, then the Region of
Interest row is populated with information that is based on the ROI settings. If the CDS file
name is selected, you can also add primer locations to further annotate the file and you can
also change the Codon Start position.
Figure 6-116: Advanced GBK Editor tool, CDS file name selected
Figure 6-117: Advanced GBK Editor tool, mRNA file name selected
If Variations is selected in the GenBank Tree file, then information about the known SNPs is
displayed on the Basic Information tab. This information includes the SNP position, the
number of alleles observed, the dbSNP identification and the gene name.
Figure 6-118: Advanced GBK Editor tool, Variations folder selected
NextGene User’s Manual
277
Chapter 6
Sequence Alignment Tool
You can annotate the information in the Frequency column by right-clicking on a cell in the
column and on the context menu that opens, selecting Modify Parameter. Options are also
available for adding a variation, deleting a variation, and copying a variation (which you can
annotate after copying).
Figure 6-119: Advanced GBK Editor tool, Context menu
Advanced GBK Editor tool - Auto Create ROI tool
You use the Auto Create ROI tool to select a particular region of the gene sequence for use as
a Region of Interest (ROI). You can use this ROI for generating reports. To open this tool, on
the Advanced GBK Editor Tool main menu, click Tools > Auto Create ROI to open the
Create ROI for CDSs dialog box. You define the region of interest by specifying the number
of bases on either side of the CDS.
Figure 6-120: Create ROI for CDSs dialog box
If you select the ROI Filter option for the Mutation Report settings on the Filter
tab, Annotation sub-tab, the Mutation report displays only those mutations that
are found in the ROIs that you define. See “Filter tab, Annotation sub-tab” on
page 221.
Advanced GBK Editor tool Output Options
278
•
mRNA for gbk—Output the mRNA sequence for the GenBank file. (Introns are not
included.)
•
Appointed Region—Output only a specified region of the GenBank file.
NextGene User’s Manual
Chapter 6
Sequence Alignment Tool
Advanced GBK Editor tool Save options
On the Advanced GBK Editor tool main menu, click File > Save As to open the Save As
dialog box.
Figure 6-121: Save As dialog box
•
Add SNPs from the Annotation database—Before saving the annotated GenBank file, add
the annotations to the GenBank file from the appropriate whole genome annotation
database.
•
Selected Gene, and Selected mRNA—Saves only the CDS/mRNA that is selected in the
GenBank Tree File as a GenBank file.
•
Current Section—Saves only the section that is currently selected and shown in the
sequence view.
•
All Sections—The default value. Saves all information in all sections of the GenBank file.
Peak Identification tool
You use the Peak Identification tool to identify a list of regions that satisfy the coverage level
requirements to be identified as a peak for any alignment project. This includes applications
such as ChIP-Seq and or miRNA detection (where you want to locate highly covered
regions) as well as any other application where you want to determine the location of regions
that occur above a set threshold.
When “ChIP-Seq” is selected as the Application Type, automatic peak detection is
applied during the initial processing and peak regions are indicated with brown
ticks in the NextGENe Alignment viewer upon project completion. (See Figure 6124 on page 282.) After automatic peak detection, you can then open the Peak
Identification tool and manually specify settings for peak identification as needed.
You can also use the Peak Identification tool to create a reference sequence. See
Chapter 7, “Specialized Applications,” on page 341.
You can specify that the software automatically identifies such regions, or you can manually
set the values for identification. See Figure 6-122 on page 280.
NextGene User’s Manual
279
Chapter 6
Sequence Alignment Tool
Figure 6-122: Peak Identification Settings dialog box for peak identification
Manual Setting
Coverage
Description
The coverage threshold for a position to be considered part of a peak.
Note: Although you can set the coverage level to any value, for
ChIP-Seq or miRNA analysis, SoftGenetics recommends a value
that is equal to twice the average coverage that is reported in
statinfo.txt file.
Gap
Maximum number of bases between regions that meet the coverage
threshold to be considered one continuous peak.
Set Baseline Noise
Used in conjunction with the Gap size to determine whether two nearby
regions each with a coverage that is above the Coverage threshold are
to be merged into one peak, or whether they are to remain as two
separate peaks.
• If the regions are separated by a distance that is less than the Gap
size and the coverage in this region exceeds the Set Baseline Noise,
then the two nearby regions are merged into a single peak.
• If the regions are separated by a distance that is less than the Gap
size but the coverage in this region does not exceed the Set Baseline
Noise, then the two nearby regions remain separated.
After the peaks have been identified in your data, a Peak Identification report is
automatically generated. See “Peak Identification report” below.
Peak Identification report
To view this report, on the NextGENe Viewer main menu, click Reports > Peak
Identification Report. This report shows all the peaks that were detected across the entire
reference sequence. (See Figure 6-123 on page 281.) If you are carrying out targeted
sequencing and want to view the peaks for specific regions, then you can use the File > Load
BED file option to load a BED file.
For information about the required format for the BED file, see “BED file” on
page 473.
280
NextGene User’s Manual
Chapter 6
Sequence Alignment Tool
Figure 6-123: Peak Identification report example
The report provides the following information:
Value
Description
Chr
The chromosome on which the peak region was found.
Reference Region
The beginning and ending bp for the region based on the overall
reference position.
Chromosome Region
The beginning and ending bp for the region based on the chromosome
position.
Length
The total length of the region in bp.
Coverage
The 75th percentile of coverage for the region.
Transcript Site
The central regions for peaks that are larger than 100 bp. Each peak
end is trimmed by 7.5% of the region length, for a total of 15% of the
region length.
Gene Distance
The location of the peak relative to the nearest gene.
• oIf a peak overlaps the start of a gene, the "Gene Distance" will be
listed as 0.
• oIf it occurs before a gene it will be a negative value measuring the
distance between the peak and the start of the gene.
• oIf it occurs within a gene it will be a positive value measuring the
distance between the peak and the start of the gene.
• oIf it isn't in a gene and the next start of a gene is more than 5,000 bp
away, the distance is listed as "None".
• oThe direction of genes is accounted for. For example, a peak is
"before" a gene if it occurs at an earlier position than a forward gene
or a later position than a reverse gene. Only the closest gene is
reported.
Gene Direction
Not displayed by default. The strand (plus or minus) on which the gene
is found.
Read Orientation
Not displayed by default. The percentage of reads that aligned to the
region in the forward direction / the percentage of reads that aligned to
the region in the reverse direction.
Sequence
The sequence for the peak region.
NextGene User’s Manual
281
Chapter 6
Sequence Alignment Tool
The report is interactive:
•
To save the report to a .fasta file, click the Save Report icon
on the report toolbar. A
default name and location are provided for the file, but you can change both of these
values.
•
To modify the report settings, on the report toolbar, click the Settings icon
, or on the
report menu, click Settings > Settings to open the Peak Identification Settings dialog box
and modify the report settings as needed. The report display is dynamically updated after
you save the modifications.
Figure 6-124: Sequence Alignment results with ChIP-Seq as the selected Application Type
Peak regions indicated
with brown ticks
Synthetic SAGE Data tool
You use the Synthetic SAGE Data tool to create to create SAGE data from sequence reads.
You must specify the first letter for each SAGE tag and the total tag length. The input data is
broken up into sequences of the specified length at each occurrence of the nucleotide that
was selected as the first letter for each SAGE tag.
Figure 6-125: Synthetic SAGE Data dialog box
282
NextGene User’s Manual
Chapter 6
Sequence Alignment Tool
Create SAGE Library from mRNA tool
You use the Create SAGE Library from mRNA tool to create a SAGE library from mRNA
sequence input files.
Figure 6-126: Create SAGE Library from mRNA dialog box
Setting
Description
Note: This section provides only a high-level description of the Synthetic SAGE Library from mRNA
tool. Contact SoftGenetics for assistance with this tool.
Only for PolyA Tail
If this option is selected, then the software checks the last 20 bps of the
mRNA sequence and if there are not seven consecutive “A” bases, the
sequence is not included in the output.
Supplementary
Character if Available
Sequence is too Short
“X” placeholders are automatically added if the tag sequence occurs
towards the end of an mRNA sequence read.
Only Output Segments
with Gene Names from
following file
If this option is selected, then the software compares the titles found in
the mRNA sequence input file to a user-defined text file that lists gene
names (one gene per line). If a title in the mRNA sequence file matches a
string (gene name) in the user-defined text file, then the segment is used
to create synthetic SAGE data.
Load mRNA into File
If this option is selected, then the software compares the titles found in
the mRNA sequence input file to a user-defined csv file that lists
sequence titles. The information in the csv file is used for naming the tags
in the output library and if the “Update Sequence Titles of Input Files with
mRNA Info File” is selected, to change the mRNA titles in the original file
NextGene User’s Manual
283
Chapter 6
Sequence Alignment Tool
Setting
Update Sequence
Titles of Input Files with
mRNA Info File
Description
Available only if “Load mRNA into File” is selected. If this option is
selected, then software uses the new titles to update the loaded mRNA
sequence files. (The files are saved as new files.)
Modify Titles for mRNA GenBank tool
You use the Modify Titles for mRNA GenBank tool to retain critical information in an
mRNA GenBank file. At times, critical information such as chromosome information and
gene name, are not contained in the first line of an mRNA GenBank file. Instead, this
information is found deeper in the file, in the file body. The NextGENe software uses the
first line of an mRNA file as the title for the GenBank reference file, so to ensure that this
information is retained, you must use this tool to modify the first line of the file to include
this critical information. Figure 6-127 below illustrates this.
Figure 6-127: Modifying Titles for mRNA GenBank tool
Resume Project and Load Project
If an error occurs when you are attempting to load a NextGENe Viewer report, you can select
this option to attempt to correct the error and allow the report to open. If this option does not
correct the error, then you must reload the project.
284
NextGene User’s Manual
Chapter 6
Sequence Alignment Tool
NextGENe Viewer Comparison Reports and
Tools
After you load a project in the NextGENe viewer, the following reports and tools available
(all from the Comparisons menu) for comparing selected information (for example, the
expression levels) between two or more projects that were aligned to the same reference
sequence.
•
The Expression Comparison report. See “Expression Comparison report” below.
•
The Variant Comparison Tool. See “Variant Comparison tool” on page 289.
•
The Somatic Mutation Comparison Tool. See “Somatic Mutation Comparison tool” on
page 303.
•
The CNV Tool. See one of the following:
•
•
“CNV (Copy Number Variation) tool (Dispersion and HMM)” on page 310.
•
“CNV (Copy Number Variation) tool (SNP-based Normalization with Smoothing)”
on page 323.
The Beta Batch CNV Tool. See “Beta Batch CNV Tool” on page 338.
Expression Comparison report
You use the Expression Comparison report to carry out parallel comparisons of expression
levels in multiple projects that were aligned independently to the same reference sequence.
The report details the variations in the depth of coverage per region between projects.
You can load a maximum of ten projects for comparison.
The following procedure describes how to set up a new Expression Comparison
report. Optionally, you can click Load Settings to browse to and select a Settings
file (.ini file) to generate the report based on the saved settings in the file.
1. On the Comparisons menu, click Expression Comparison Report.
The Expression Comparison Report Settings dialog box opens. The General tab is the
only tab. See Figure 6-128 on page 286.
NextGene User’s Manual
285
Chapter 6
Sequence Alignment Tool
Figure 6-128: Expression Comparison Report Settings dialog box, General tab
2. Specify how you want to define the segments that are to be analyzed for the report:
•
You can use the segments as defined in the reference file.
Setting
Description
Gene
Report coverage levels for each gene region.
mRNA
Report coverage levels for each mRNA region. (Coding and non-coding
exons.)
CDS
Report coverage levels for each coding region.
Continuous mRNA
Report coverage levels for the entire mRNA for a gene, one region per gene.
Continuous CDS
Report coverage levels for the entire coding region for a gene, one region per
gene.
ROI
Report coverage levels based on Regions of Interest that are defined in the
reference GenBank file.
Note: For information about defining ROIs in a GenBank reference file, see
“Advanced GBK Editor tool” on page 274.
•
You can manually set the segment length.
•
You can upload a Region of Interest file in a BED format.
For information about the required format for the BED file, see “BED file” on
page 473.
286
NextGene User’s Manual
Chapter 6
Sequence Alignment Tool
3. Optionally, select one or both Limit options and if needed, modify the default limits (200
bp) for reporting the coverage for only the first or last '”x” number of bases of the
selected segment type.
If any Limit option and CDS are selected, then the coverage levels for the first or
last “x” number of bases in each CDS region is reported.
4. Optionally, click Save Settings to save the settings for this report in a Settings file (.ini
file).
You can use a saved Settings file to generate the Expression Comparison report
for another project based on the settings in the file.
5. Click OK to open the Load Project Files dialog box.
Figure 6-129: Load Project Files dialog box
6. Click Set to browse to and uploading the reference project file (the control sample, for
instance).
You can leave this field blank to compare multiple samples without a control.
7. Click Add to browse to and select an alignment project file that is to be included in the
comparison. Repeat this step until you have added all of the necessary project files.
You can load a maximum of ten projects.
8. Click OK to close the Load Project Files dialog box and generate the report.
See Figure 6-130 on page 288.
NextGene User’s Manual
287
Chapter 6
Sequence Alignment Tool
Figure 6-130: Expression Comparison Report example
The report is interactive:
•
The report can display either the “Min Counts,” “Max Counts,” the “Average Counts,”
“Read Counts,” “Forward Read Counts,” “RPKM,” the “RPK,” or the “FPKM” for each
region. (The default view is “Max Counts.”) To change the view, on the report menu,
click View, and on the View menu, select a different viewing option.
FPKM is available only if paired end data was analyzed for the projects.
288
•
For projects that used condensation, the views are based on the condensed reads. To
change the view so that is based on the original reads, click Display Original Information
at the top of the report.
•
To save the report to a text (*.txt) file, on the report toolbar, click the Save Report icon
, or on the report menu, click File > Save. A default name and location are provided
for the file but you can change both of these values. The saved report is a table that lists
the gene name and description for each region as well as the actual expression values for
each region for every loaded project.
•
To modify the report settings, on the report menu, click Settings > Settings to open the
Expression Report Settings dialog box and modify the report settings as needed. The
report display is dynamically updated after you save the modifications.
NextGene User’s Manual
Chapter 6
Sequence Alignment Tool
Variant Comparison tool
You use the Variant Comparison tool to compare the mutation calls in two or more aligned
projects that use the same reference sequence. Typically, you use to the tool to simply
compare up to 20 multiple projects to show mutation calls that meet specific criteria, such as
mutation calls that are shared among all the projects and that meet a minimum coverage
requirement. For certain data sets, however, additional functionality is available.
•
If tumor/normal comparison data is available, you can use the Top List function to
analyze somatic mutations.
•
If family data (relationship and phenotype) is available, you can use specific family data
comparison options to help you to narrow the list of possible causative mutations.
Figure 6-131: Variant Comparison Tool window
See:
•
“To use the Variant Comparison tool to compare multiple projects” on page 290.
•
“To use the Variant Comparison Tool Top List function” on page 293.
•
“To use the Variant Comparison tool to analyze family data” on page 297.
NextGene User’s Manual
289
Chapter 6
Sequence Alignment Tool
To use the Variant Comparison tool to compare multiple projects
You can load up 20 project files when comparing multiple projects.
1. On the Comparisons menu, click Variant Comparison Tool.
The Variant Comparison Tool window opens.
2. To load the files that are to be compared, do one of the following:
•
On the Variant Comparison Tool main menu, click File > Load Projects.
•
On the Variant Comparison Tool toolbar, click the Load Projects icon
.
The Variant Comparison dialog box opens.
Figure 6-132: Variant Comparison dialog box
3. For every project file that is to be loaded into the tool, click Load Project File to open a
Load NextGENe Project File dialog box in which you can browse to and select the
project file.
After you load the first project file, the Variant Comparison dialog box is refreshed with
columns for Relationship, Phenotype, and Mutation Type.
Figure 6-133: Variant Comparison dialog box with Relationship, Phenotype, and Mutation
Type columns
290
NextGene User’s Manual
Chapter 6
Sequence Alignment Tool
4. Click Next.
The Variant Comparison dialog box is refreshed with the settings for specifying the types
of mutations that are to be displayed in the Variant Comparison Tool report.
Figure 6-134: Variant Comparison dialog box with Comparison Type settings
5. Specify the type of mutations that are to be displayed in the Variant Comparison Tool
report.
You can select only one filtering option—Show All, Show shared/different, Low
Coverage SNPs, or Gene Association.
Setting
Description
Comparison Type
• Show all
Show all mutations in all projects.
• Show shared/
different
Select showed shared/showed different, and then select one of the
following:
• Show shared
• Show only those mutations that are shared among all loaded projects.
• Show different
• Show only those mutations that are present in a single project when
comparing only two projects or only those mutations that are shared
among some, but not all the projects, when comparing more than two
projects.
NextGene User’s Manual
291
Chapter 6
Sequence Alignment Tool
Setting
Description
• Minimum coverage
• The minimum coverage threshold that is required in all samples for a
mutation to be included in the Variant Comparison Tool report.
• Percentage change
• The difference (in percentage) in the mutant allele frequency that is
required for mutations in two samples be categorized as “Different.” If
two samples have the same mutation that is found at frequencies with
a difference that is less than the indicated threshold, then the mutation
is categorized as “Shared” for the samples.
Exclude 0% mutations
Available only if Show shared is selected. Ignore the Percentage Change
threshold and always considers two samples as being different if a
mutation is called in one of the samples but it is not called in the other
sample and the variant allele is found at 0% in the other sample.
• Low coverage
SNPs
View all mutations in all projects that meet the indicated low coverage
requirements.
Note: If you select Low Coverage SNPs, then you can accept the default
value of 10 for Display Low Coverage SNPs, or you can modify this
value.
Gene association
At least “x” number of projects have a mutation in the same gene,
regardless of mutation type and/or location.
6. To specify the information that is to be displayed for each mutation, in the Filter and
Display Settings pane, click Mutation Report Filter/Display Settings.
Because the Variant Comparison Tool report settings are identical to those used in the
Sequence Alignment Mutation report, the Mutation Report Settings dialog box opens.
(See “Mutation Report settings” on page 214.)
7. Click OK on the Variant Comparison dialog box.
The Variant Comparison Tool report opens. Green indicates a negative mutation. “N/A”
is displayed for allele calls for negative mutations unless Check Allele Counts for
Negative Mutations was selected.
Figure 6-135: Variant Comparison Tool report example
8. Optionally, continue to “To use the other Variant Comparison Tool functions” on page
300.
292
NextGene User’s Manual
Chapter 6
Sequence Alignment Tool
To use the Variant Comparison Tool Top List function
You use the Top List function to analyze somatic mutations that can be found in a mutant
sample/normal sample comparison, or in a multiple sample similarity comparison. In a
mutant sample/normal sample comparison, such as a tumor/normal comparison, you can
load only two sample project files—the mutant sample project file and the normal sample
project file. The Top List function ranks the detected mutations in these two files and returns
the top 100 results for the following three types of mutations:
•
Gain in heterozygosity mutations, which are low frequency novel/somatic mutations in
the normal sample.
•
Loss of heterozygosity mutations, which are low frequency mutations in the mutant
sample.
•
Absolute change mutations, which are the mutations with the most significant allele
change and that are not low frequency in either the mutant sample or the normal sample.
In a multiple sample similarity comparison, you can load up to 20 sample project files. The
Top List function returns a list of mutations that have the highest rankings in all the files. The
mutations’ rankings are based on the three criteria—the number of samples that share the
mutation, the frequency at which the mutation occurs in each sample, and the size of the
standard deviation for the allele frequency between samples.
1. On the Comparisons menu, click Variant Comparison Tool.
The Variant Comparison Tool window opens.
2. To load the files that are to be compared, do one of the following:
•
On the Variant Comparison Tool main menu, click File > Load Projects.
•
On the Variant Comparison Tool toolbar, click the Load Projects icon
.
The Variant Comparison dialog box opens.
Figure 6-136: Variant Comparison dialog box
NextGene User’s Manual
293
Chapter 6
Sequence Alignment Tool
3. Do one of the following:
•
For a mutant sample/normal sample comparison, click Load Project File to open a
Load NextGENe Project File dialog box, and then browse to and select the mutant
project file, and then browse to and select the normal sample file.
For a mutant/normal sample comparison, you must load the mutant sample file
first, and the normal sample file second.
For either comparison type, after you load the first project file, the Variant Comparison
dialog box is refreshed with columns for Relationship, Phenotype, and Mutation Type.
Figure 6-137: Variant Comparison dialog box with Relationship, Phenotype, and Mutation
Type columns
4. Click Next.
The Variant Comparison dialog box is refreshed with the settings for specifying the types
of mutations that are to be displayed in the Variant Comparison Tool report.
Figure 6-138: Variant Comparison dialog box with Comparison Type settings
294
NextGene User’s Manual
Chapter 6
Sequence Alignment Tool
5. Do the following.
•
•
Select Show shared/different and then:
•
If you are carrying out a multiple sample comparison, select Show shared to
show only those mutations that are shared among all loaded projects.
•
If you are carrying out a tumor sample/normal sample comparison, Select Show
different to show only those mutations that are present in only one of the
projects.
Set a Minimum coverage and Percent change to filter out mutations if one sample
fails the coverage setting or if the difference in allele frequency is less than the
specified threshold.
6. To specify the information that is to be displayed for each mutation, in the Filter and
Display Settings pane, click Mutation Report Filter/Display Settings.
Because the Variant Comparison Tool report settings are identical to those used in the
Sequence Alignment Mutation report, the Mutation Report Settings dialog box opens.
(See “Mutation Report settings” on page 214.)
7. Click OK on the Variant Comparison dialog box.
The Variant Comparison Tool report opens. Green indicates a negative mutation.
Figure 6-139: Variant Comparison Tool report example, Before Top List function
NextGene User’s Manual
295
Chapter 6
Sequence Alignment Tool
8. Click the Top List
icon.
The mutations are ranked and sorted accordingly.
•
For a mutant/normal comparison project, two additional columns (Category and
Change) are displayed in the report, where Category indicates the mutation type (1 =
Gain of Heterozygosity, -1 = Loss of Heterozygosity, and 0 = Absolute Change), and
Change indicates the absolute change in allele frequency between the two samples.
•
For a multiple sample comparison project, one additional column, Similar, is
displayed in the report, where similar indicates the similarity in allele frequency
among all the different samples.
Figure 6-140: Variant Comparison Tool report, Top List function, mutant/normal comparison
Figure 6-141: Variant Comparison Tool report example, Top List function, multiple sample
comparison
9. Optionally, continue to “To use the other Variant Comparison Tool functions” on page
300.
296
NextGene User’s Manual
Chapter 6
Sequence Alignment Tool
To use the Variant Comparison tool to analyze family data
When you use the Variant Comparison tool and you have family data available, you have
three options for comparing samples. You can:
•
Manually specify the expected mutation types.
•
Specify the relationship and the phenotype for each sample, and then load an Inheritance
template to automatically adjust the expected mutation types.
•
Specify the relationship and the phenotype for each sample, and then carry out compound
heterozygous filtering and review the results of this filtering in the Compound
Heterozygous report.
1. On the Comparisons menu, click Variant Comparison Tool.
The Variant Comparison Tool window opens.
2. To load the files that are to be analyzed, do one of the following:
•
On the Variant Comparison Tool main menu, click File > Load Projects.
•
On the Variant Comparison Tool toolbar, click the Load Projects icon
.
The Load Projects dialog box opens.
Figure 6-142: Load Projects dialog box
3. For each family data project file that is to be analyzed, click Load Project File to open a
Load NextGENe Project File dialog box, and then browse to and select the file.
After you load the first family data project file, the Variant Comparison dialog box is
refreshed with columns for Relationship, Phenotype, and Mutation Type. See Figure 6143 on page 298.
NextGene User’s Manual
297
Chapter 6
Sequence Alignment Tool
Figure 6-143: Variant Comparison dialog box with Relationship, Phenotype, and Mutation
Type columns
4. For each sample file, select the relationship and the phenotype, and if applicable, the
expected mutation type.
5. Click Next.
The Variant Comparison dialog box is refreshed with the settings for specifying the types
of mutations that are to be displayed in the Variant Comparison Tool report.
Figure 6-144: Variant Comparison dialog box with Comparison Type settings
6. Do one of the following:
•
To show only those mutations that meet the expected mutation type that you
specified for each of the sample files, select Mutation type settings.
•
To show mutations that meet a specific pattern, select an Inheritance template or
Compound heterozygous.
Setting
Template
Description
Each template defines a specific inheritance pattern. Select a template to
automatically adjust the expected mutation types for the sample files based on
the relationships and phenotypes settings for the project.
Note: You can select from a pre-configured list of templates, or you can create
your own custom template.
298
NextGene User’s Manual
Chapter 6
Sequence Alignment Tool
Setting
Compound
heterozygous
•
Description
Select this option to carry out compound heterozygous filtering. The filtering
results are displayed in the Compound Heterozygous report, which shows all
possible combinations of two heterozygous mutations in a gene if the mutations
meet the relationship and phenotype settings for the project. For example, if a
Mother is Unaffected and a Father is Unaffected, but a Son is Affected, then one
heterozygous mutation must come from each parent.
Select Gene association, and then enter the minimum number of projects in which
the same gene must have a mutation (regardless of mutation type and/or location) to
report the gene in the output.
7. To specify the information that is to be displayed for each mutation, in the Filter and
Display Settings pane, click Mutation Report Filter/Display Settings.
Because the Variant Comparison Tool report settings are identical to those used in the
Sequence Alignment Mutation report, the Mutation Report Settings dialog box opens.
For detailed information about the available settings on each of the tabs on the
Mutation Report Settings dialog box, see “Mutation Report settings” on page 214.
8. Click OK on the Variant Comparison dialog box.
The Variant Comparison Tool report opens. Green indicates a negative mutation. “N/A”
is displayed for allele calls for negative mutations unless Check Allele Counts for
Negative Mutations was selected.
Figure 6-145: Variant Comparison Tool report example
9. If you selected Compound heterozygous filtering, on the toolbar, click the Show/Hide
Compound Heterozygous icon
to open the Compound Heterozygous report. See
Figure 6-146 on page 300.
NextGene User’s Manual
299
Chapter 6
Sequence Alignment Tool
Figure 6-146: Compound Heterozygous report example
Click the Show/Hide Compound Heterozygous report icon
report.
again to hide the
10. Optionally, continue to “To use the other Variant Comparison Tool functions” below.
To use the other Variant Comparison Tool functions
After the Variant Comparison Tool report is generated, several other Variant Comparison
tool functions become available from the report main menu.
•
To view alignments for selected projects, click View > Check Projects to View
Alignments, or on the report toolbar, click the Check Projects to View Alignments icon
.
The Sequence Display Settings dialog box opens. The dialog box displays all the
projects for which you can view the alignments. By default, the option to Mark Center
Lines (a green vertical line) in the alignment display is selected and there is an option to
change the font size of the bases (the Base Display Size with a default value of eight) in
the view.
Figure 6-147: Sequence Display Settings dialog box
300
NextGene User’s Manual
Chapter 6
Sequence Alignment Tool
At a minimum, you must select the projects for which you want to view the alignments.
You can also indicate whether to show the center lines in each alignment view and/or
you can change the font size for the base display. After you click OK to close the dialog
box, a window that is linked to the report table for the selected projects opens. You can
do the following in this window:
•
Double-click on a variant in the alignment view to change the focus of the report to
the selected variant.
•
Right-click on a variant in the alignment view, and on the context menu that opens,
select Go to position in Mutation report to change the focus of the report to the
selected variant.
•
Double-click on a variant in the Mutation report to change the focus in the
corresponding alignment view to the selected variant.
Figure 6-148: Variant Comparison Tool report showing individual projects
•
To automatically save the Sequence Display Settings that you selected, click View >
AutoSave Display Status. The next time you run a comparison in the Variant Comparison
tool, these setting are automatically applied for the display.
•
To search the displayed alignment, click Search > Sequence Search, or on the report
toolbar, click the Sequence Search icon
. The Search dialog box opens, where you can
indicate how you want to search the displayed alignment—by Sequence, by Position
(chromosome, chromosome position (for example., 1, 20000)) or by Gene Name. You can
also click Option to search by a reverse complement sequence. See Figure 6-149 on page
302.
NextGene User’s Manual
301
Chapter 6
Sequence Alignment Tool
The Search Sequence function is enabled only when the Check Projects to View
Alignments option is selected.
Figure 6-149: Search dialog box
•
To change the current Mutation report display, click Settings > Settings to open the
Mutation Report Settings dialog box. Select the Filter and Display options for the report.
For detailed information about the available settings on each of the tabs on the
Mutation Report Settings dialog box, see “Mutation Report settings” on page 214.
•
To change the display and filter settings for the tracks that are included with the projects,
click Settings > Tracks Settings to open the Tracks Settings dialog box. Select the Filter
and Display options for the report relative to the imported tracks.
For detailed information about the available settings on each of the tabs on the
Mutation Report Settings dialog box, see “Mutation Report settings” on page 214.
•
•
To change the current comparison settings, click Settings > Sample Settings to open the
Load Project(s) dialog box, and then do any of the following:
•
Select one or more sample files for deletion.
•
Add different sample files for analysis.
•
Modify settings for Relationship, Phenotype and/or Mutation Type for each sample.
•
Click Next, and then change the Comparison Type Settings.
To save the report and/or related information in a variety of formats, click the indicated
option on the File menu:
•
Save Report - To save the report to a tab-delimited text (*.txt) file.
A default name and location are provided for the file, but you can change both of
these values.
You can also click the Save Report icon
•
302
on the report toolbar.
Save VarMD Report - To save the report as a VarMD report, which is a format that
you can use in the third party VarMD tool.
NextGene User’s Manual
Chapter 6
Sequence Alignment Tool
•
Save as Project Link - To save all the information for the currently displayed
comparison (the samples, the comparison settings, and the report settings) click File
> Save as Project Link. The information is saved in an .ini file. You must specify the
file name. By default, the file link is saved in the project folder for the project that was
loaded last for the comparison, but you can always select a different location.
•
To load a project link - To load a previously saved comparison, click File > Load Project
Link, and then scroll to and select the appropriate project link. The comparison is loaded
into the Variant Comparison tool. The comparison display is determined by the
information (the samples, the comparison settings, and the report settings) that was saved
for the project link.
•
To save SNP Sequences - To save the consensus sequences for all the variants that are
displayed in the Variant Comparison tool report, click File > Save SNP Sequences. The
sequences are saved to a .fasta file in the project output folder for the first loaded project.
The default name for the file is based on the name of the first loaded project appended
with _SNP_Sequences, but you can change one or both of these values.
Somatic Mutation Comparison tool
You use the Somatic Mutation Comparison tool to generate a filtered variant report for
somatic variant detection. The tool is similar in both layout and function to the Variant
Comparison tool. The tool filters variants based on comparison with a matched normal
sample as well as a project with pooled normal samples to eliminate both non-somatic
variants and artifacts that are the result of library preparation or alignment. You must load
three different sequence alignment project (*.pjt) files that were aligned to the same
reference sequence:
•
The project file for a sequence alignment project for a cancerous tumor sample from a
patient.
•
The project file for the sequence alignment project for the matched normal sample, where
the matched normal sample (for example, a blood sample) is from the same patient.
•
The sequence alignment project file for the pool, where the pool consists of four to five
normal samples that were aligned together in a single alignment project in the Project
Wizard.
The tool then filters out the following variants based on your specified settings:
•
All the variants that were found in the tumor sample project that were also found in the
matched normal sample project.
•
All the variants that were found in the tumor sample project that were also found in the
pooled alignment project.
NextGene User’s Manual
303
Chapter 6
Sequence Alignment Tool
To generate the Somatic Mutation Comparison Tool report
1. On the Comparisons menu, select Somatic Mutation Comparison Tool.
The Somatic Mutation Comparison Tool window opens.
Figure 6-150: Somatic Mutation Comparison tool window
2. To load the files that are to be compared, do one of the following:
•
On the Somatic Mutation Comparison Tool main menu, click File > Load Projects.
•
On the Somatic Mutation Comparison Tool toolbar, click the Load Projects icon
The Load Projects dialog box opens.
Figure 6-151: Load Projects dialog box
304
NextGene User’s Manual
.
Chapter 6
Sequence Alignment Tool
3. For each project (Tumor, Matched Normal, and Pool), click the Load File icon
to
browse to and select the appropriate sequence alignment project file (Aligned Sequence
Project (*.Pjt)) for loading.
4. Specify your report settings.
Setting
Description
Maximum Contamination
This setting independently compares the normal sample to the tumor
sample to account for the possibility of the contamination of the normal
sample with tumor DNA. If the frequency of the variant in the matched
normal sample is less than the indicated threshold, then the variant is
not filtered from the tumor sample.
Number of Pooled
Samples
The number of samples that are included in the pool. Used in
conjunction with the Maximum contamination threshold to consider
possible contamination in the pool, such as low level tumor DNA. Sets
an acceptable low level frequency that determines if a variant should
be filtered out from the tumor sample. If the variant falls below this
frequency, then it is not filtered out from the tumor sample.
Note: Four to five samples is the recommended value for the pool.
Somatic Allele Count
The minimum coverage that is required for the variant in the tumor
sample to be included in the Somatic Mutation Tool report.
Relative Directional
Balance (T/N)
Selected by default. The ratio of the Read Balance for the variant in the
tumor sample to the Read Balance for the reference allele in the
normal sample.If the value for a variant falls below this ratio threshold,
then it is filtered out from the report.
Note: This option is useful for filtering out variants that are less
directionally balanced in the tumor sample than in the normal
sample.
Somatic Allele Frequency
(T/N)
The ratio of the frequency of the variant in the tumor sample to the
frequency of the variant in the normal sample. If the ratio is less than
the indicated threshold, then the variant is filtered out from the report.
Pooled Allele Count
Ratio (T/P)
The ratio of the number of reads with the variant in the tumor sample to
the number of reads with the variant for the pool.
5. Optionally, do any or all of the following as needed:
•
To generate a CNV (SNP-Based Normalization with Smoothing) report for the data,
select CNV report, and then click CNV Filter/Display Settings to open the and
specify the appropriate settings for the report. (See “CNV (Copy Number Variation)
tool (SNP-based Normalization with Smoothing)” on page 323.)
If you select this option, then the report is displayed on a CNV Table tab in the
report. You can toggle the report view between the SNP Table tab and the CNV
Table tab.
NextGene User’s Manual
305
Chapter 6
Sequence Alignment Tool
•
To further filter the variants that are displayed in the report, click one or both of the
following, and then specify the filter settings:
Setting
Description
Mutation Report Filter/Display
Settings
See:
• “Display tab, Annotation sub-tab” on page 216.
• “Display tab, Statistics sub-tab” on page 219.
• “Filter tab, Annotation sub-tab” on page 221.
• “Filter tab, Score sub-tab” on page 223.
• “Filter tab, ROI sub-tab” on page 225.
Tracks Filter/Display Settings
See “Variation Tracks Settings dialog box” on page 228.
6. Click OK.
The Somatic Mutation Comparison Tool report is generated. It is displayed on the SNP
Table tab.
Figure 6-152: Somatic Mutation Comparison Tool report
306
NextGene User’s Manual
Chapter 6
Sequence Alignment Tool
The Somatic Mutation Comparison Tool report is interactive.
•
To view alignments for selected projects, click View > Check Projects to View
Alignments, or on the report toolbar, click the Check Projects to View Alignments icon
.
The Sequence Display Settings dialog box opens. The dialog box displays all the
projects for which you can view the alignments. By default, the option to Mark Center
Lines (a green vertical line) in the alignment display is selected and there is an option to
change the font size of the bases (the Base Display Size with a default value of eight) in
the view.
Figure 6-153: Sequence Display Settings dialog box
At a minimum, you must select the projects for which you want to view the alignments.
You can also indicate whether to show the center lines in each alignment view and/or
you can change the font size for the base display. After you click OK to close the dialog
box, a window that is linked to the report table for the selected projects opens. You can
do the following in this window:
•
Double-click on a variant in the alignment view to change the focus of the report to
the selected variant.
•
Right-click on a variant in the alignment view, and on the context menu that opens,
select Go to position in Mutation report to change the focus of the report to the
selected variant.
•
Double-click on a variant in the Mutation report to change the focus in the
corresponding alignment view to the selected variant.
See Figure 6-154 on page 308.
NextGene User’s Manual
307
Chapter 6
Sequence Alignment Tool
Figure 6-154: Somatic Mutation Comparison Tool report showing individual projects
•
To automatically save the Sequence Display Settings that you selected, click View >
AutoSave Display Status. The next time you run a comparison in the Variant Comparison
tool, these setting are automatically applied for the display.
•
To search the displayed alignment, click Search > Sequence Search, or on the report
toolbar, click the Sequence Search icon
. The Search dialog box opens, where you can
indicate how you want to search the displayed alignment—by Sequence, by Position
(chromosome, chromosome position (for example, 1, 20000)) or by Gene Name. You can
also click Option to search by a reverse complement sequence.
The Search Sequence function is enabled only when the Check Projects to View
Alignments option is selected.
Figure 6-155: Search dialog box
308
NextGene User’s Manual
Chapter 6
Sequence Alignment Tool
•
To change the current Mutation report display, click Settings > Settings to open the
Mutation Report Settings dialog box. Select the options for filtering and displaying the
report.
For information about the available settings on each of the tabs on the Mutation
Report Settings dialog box, see “Mutation Report settings” on page 214.
•
To change the display and filter settings for the tracks that are included with the projects,
click Settings > Tracks Settings to open the Variation Tracks Settings dialog box. Select
the options for filtering and displaying the report relative to the tracks that were imported.
For information about the available settings on each of the tabs on the Tracks
Settings dialog box, see “Variation Tracks Settings dialog box” on page 228.
•
To save the report and/or related information in a variety of formats, click the indicated
option on the File menu:
•
Save Report - To save the report to a tab-delimited text (*.txt) file.
A default name and location are provided for the file, but you can change both of
these values.
You can also click the Save Report icon
on the report toolbar.
•
Save VarMD Report - To save the report as a VarMD report, which is a format that
you can use in the third party VarMD tool.
•
Save as Project Link - To save all the information for the currently displayed
comparison (the samples, the comparison settings, and the report settings) click File
> Save as Project Link. The information is saved in an .ini file. You must specify the
file name. By default, the file link is saved in the project folder for the project that was
loaded last for the comparison, but you can always select a different location.
•
To load a project link - To load a previously saved comparison, click File > Load Project
Link, and then scroll to and select the appropriate project link. The comparison is loaded
into the Variant Comparison tool. The comparison display is determined by the
information (the samples, the comparison settings, and the report settings) that was saved
for the project link.
•
To save SNP Sequences - To save the consensus sequences for all the variants that are
displayed in the Somatic Mutation tool report, click File > Save SNP Sequences. The
sequences are saved to a .fasta file in the project output folder for the first loaded project.
The default name for the file is based on the name of the first loaded project appended
with _SNP_Sequences, but you can change one or both of these values.
NextGene User’s Manual
309
Chapter 6
Sequence Alignment Tool
CNV (Copy Number Variation) tool (Dispersion and HMM)
You use the CNV tool to carry out parallel comparisons of the copy number variations in
projects that were aligned independently to the same reference sequence. One project file
must be the sample file and the other project file(s) must be the control. If Dispersion and
HMM is the selected method, then the CNV tool first calculates the coverage ratios for each
region. The tool then calculates the amount of dispersion (noise) for each region. (The noise
can be calculated automatically or manually.) Finally, a Hidden Markov Model (HMM) uses
the coverage ratio value and the amount of noise in each region to calculate a CNV
classification (Duplication, Normal, Deletion, or Uncalled) for each region. Two options are
available for calculating the coverage ratios:
•
Normalized counts—Selected by default. Ratios are based on read counts for each region
with both samples normalized by a size factor.
•
RPKM—Ratios are based on RPKM measurements, where the measurements are read
counts that are normalized by region length and the total number of reads.
For information about the SNP-based Normalization with Smoothing method for
the CNV tool, see “To generate the CNV Tool report (SNP-based Normalization
with Smoothing)” on page 324.
To generate the CNV Tool report (Dispersion and HMM)
The following procedure describes how to generate a new CNV Tool report.
Optionally, you can click Load Settings to browse to and select a Settings file (.ini
file) to generate the report based on the saved settings in the file. As you create a
new report, at any time, you can click Default to return all values on all tabs to
their default values.
1. On the Comparisons menu, select CNV Tool.
The CNV Tool window opens. The Method Selection tab is the active tab. See Figure 6156 on page 311.
310
NextGene User’s Manual
Chapter 6
Sequence Alignment Tool
Figure 6-156: CNV Tool window, Method Selection tab
2. Select the option for calculating the coverage ratios.
3. Open the Data Input tab.
Figure 6-157: CNV Tool window, Data Input tab
NextGene User’s Manual
311
Chapter 6
Sequence Alignment Tool
4. Load the Sample and Control project (*.pjt) files, and the do the following:
•
If you load only a single Control project file, select Single Control.
•
If you load multiple Control project files, select Multiple Controls, and then indicate
how the control values are to be determined:
Control
Description
Best Match
Select the single control project that has the best correlation to the sample
project when comparing coverage in each region as the control project.
Ignore the other projects.
Average Controls
Use the average coverage in each region across all control projects as the
control value.
Median Controls
Use the median coverage in each region across all control projects as the
control value.
5. Open the Basic Settings tab.
Figure 6-158: CNV Tool window, Basic Settings tab
6. Indicate how to define the segments that are to be analyzed and reported on by the tool.
•
You can use the segments as defined in the reference files.
Setting
312
Description
mRNA
Report coverage levels for each mRNA region. (Coding and non-coding
exons.)
CDS
Report coverage levels for each coding region.
Continuous mRNA
Report coverage levels for the entire mRNA for a gene, one region per gene.
NextGene User’s Manual
Chapter 6
Sequence Alignment Tool
Setting
Description
Continuous CDS
Report coverage levels for the entire coding region for a gene, one region
per gene.
ROI
Report coverage levels based on Regions of Interest that are defined in a
GenBank reference file.
Note: For information about defining Regions of Interest in a GenBank
reference file, see “Advanced GBK Editor tool” on page 274..
•
You can manually set the segment length.
•
You can upload a Region of Interest file in a BED format.
For information about the required format for the BED file, see “BED file” on
page 473.
7. Optionally, select the chromosomes that are to be excluded from the analysis.
8. Optionally, open the Advanced Settings tab, select the appropriate fitting method, and
then modify any of the default values as needed.
Figure 6-159: CNV Tool window, Advanced Settings tab
If you make a change to any of the values that are listed in the table below, then at
any time, you can click Default to return all values on all tabs on the dialog box
their default values.
NextGene User’s Manual
313
Chapter 6
Sequence Alignment Tool
Fitting Method
Auto fitting
Description
Selected by default. Automatic fitting is the recommended approach for large
panels (thousands of regions/exons) and whole exome sequencing. With this
method a line is automatically fit to the dispersion fitting points. Manual fitting is
recommended for small targeted panels (< hundreds of regions/exons),
especially if the data does not have a lot of noise. The number of points for
automatic fitting should be sufficient enough to have one fitting point accurately
reflect a sufficient number of raw data points. If Custom fitting point number is
not selected, then NextGENe automatically selects the appropriate number of
points based on the regions. If Custom fitting point number is selected, then
typically, the default value of 15 fitting points is acceptable for most data for
large panels; however, if you have a small number of raw data points, then the
rule of thumb is one fitting point for every 100 raw data points, so you can
decrease this value as needed. For example, if your data has 375 regions,
then you would set the number of points to three or four fitting points for Auto
fitting. Even with a smaller number of regions, the number of points for Auto
fitting should never be less than three.
Note: Typically, even if you know that a manual fitting or a manual dispersion
is the appropriate approach for your data, you should run an automatic
fitting first, and then view the resulting data so that you have an idea of
how to modify all the fitting settings for either method.
Manual fitting
For Manual fitting, "a" and "b" represent the values for the line that is fit to the
dispersion fitting points. These values are automatically populated after an
Automatic fitting. You must modify these values for a Manual fitting. The
Minimum Dispersion value is the minimum threshold for the dispersion of the
data, regardless of the value that is set for “a.” As with Auto fitting, the number
of points for manual fitting should be sufficient enough to have one fitting point
accurately reflect a sufficient number of raw data points. If Custom fitting point
number is not selected, then NextGENe automatically selects the appropriate
number of points based on the regions. If Custom fitting point number is
selected, then typically, the default value of 15 fitting points is acceptable for
most data for large panels; however, if you have a small number of raw data
points, then, again, the rule of thumb is one fitting point for every 100 raw data
points, so you can decrease this value as needed
Manual dispersion
value
Select this option to use a single dispersion value for all regions in lieu of fitting
a line to all the dispersion points. The manual dispersion value is automatically
adjusted after auto fitting is used. This automatically chosen value works well
in most cases, but you can modify this value as needed. As with the other
fitting methods, the number of points for manual dispersion should be sufficient
enough to have one fitting point accurately reflect a sufficient number of raw
data points. If Custom fitting point number is not selected, then NextGENe
automatically selects the appropriate number of points based on the regions. If
Custom fitting point number is selected, then typically, the default value of 15
fitting points is acceptable for most data for large panels; however, if you have
a small number of raw data points, then, again, the rule of thumb is one fitting
point for every 100 raw data points, so you can decrease this value as needed.
Note: The Manual dispersion option is useful for targeted panels where the
dispersion (noise) is relatively low.
314
NextGene User’s Manual
Chapter 6
Sequence Alignment Tool
9. Leave the default values for the other HMM settings as-is, or modify them as needed.
Setting
Description
Minimum RPKM
Regions with a total RPKM that are less than the indicated value are
identified as “uncalled.”
Minimum region
length
Minimum size of a region (in base pairs) for the region to be included in
the CNV Tool report.
Normalized ratios by
the median
Applicable only when the RPKM option is selected. Normalize the ratios
by the median value to ensure that the median ratio value is 0.5.
Expected CNV
Percentage [5.00]%
Indicates the percentage of regions in which CNV calls are expected to be
made.
Note: Typically, the default value of 5% is acceptable for most data. If the
data is confident (not noisy), then increasing this value does not
significantly increase the percentage of regions in which CNV calls
are made. If the data is not confident (noisy), then increasing this
value increases the percentage of regions in which CNV calls are
made.
Estimated sample
purity
If the sample is mixed, or it has possible contamination, then enter an
appropriate sample purity to adjust the calculations accordingly.
10. Optionally, open the Report Settings tab and do either or both of the following as
needed:
•
For the Display settings, select the columns that are to be included in the report, or
clear the options for the columns that are not to be included.
•
For the Filter settings, specify the thresholds for the regions that are to be included in
the report.
Figure 6-160: CNV Tool window, Report Settings tab
NextGene User’s Manual
315
Chapter 6
Sequence Alignment Tool
Setting
Description
Display Settings
Index
An ordered count of the segments that are used in the report.
Chr
• Name
• The name of the chromosome that the segment is on.
• Number
• The number of the chromosome that the segment is on.
Chr Position Start
The base number that indicates where the segment starts in the
chromosome.
Chr Position End
The ending base number that indicates where the segment ends in the
chromosome.
Gene
The gene name for the segment when the segment is the whole gene or the
name of the gene on which the segment is found.
CDS
The coding sequence number for the segment.
RNA Accession
Show the RNA accession for the gene from NCBI.
Protein Accession
Show the protein accession for the gene from NCBI.
Description
Available if the reference file is a .fasta file with multiple segments. Select
this option to display the title line for each segment in the Description column.
Contig
The contig that the segment is on. The contig is based on the genome
assembly from the NCBI.
Locus Tag
An alternate way to identify the gene.
Start
The starting location for the reference region.
End
The ending location for the reference region.
Length
The total length of the reference region, which provides for easy identification
of expressed regions by size (such as when locating small RNA transcripts).
Dispersion
The dispersion value for the region. N/A for Uncalled regions.
Normalized
Likelihoods
The normalized likelihood value for each potential CNV call (duplication,
deletion, or normal). A likelihood value closer to zero indicates an increased
likelihood for the call.
Display settings available with RPKM selected
RPKM
Reads per Kilobase Exon Model per Million mapped reads.
RPKM = 10^9 * R / (T*L)
where:
• R = Number of mapped reads in a region
• T = Total number of mapped reads.
• L = Length of the region.
Normalizes the expression levels based on the length of the reference region
and the total number of aligned reads.
316
NextGene User’s Manual
Chapter 6
Sequence Alignment Tool
Setting
FPKM
Description
Applicable only if the project used paired end data. Fragments per Kilobase
of exon per Million mapped reads.
FPKM = 10^9 * F / (T*L)
where:
• F = Number of mapped fragments in a region and:
• A “fragment” corresponds to a pair of reads.
• Single reads are not counted.
• The position of a fragment is the location between the two 5’ ends of
the pairs.
• T = Total number of mapped fragments.
• L = Length of the region.
Normalizes the expression levels for paired end data based on the length of
the reference region and the total number of aligned reads.
Ratio
The ratio of the sample RPKM to total RPKM for the region
Total RPKM
The sum of the Sample RPKM and the Control RPKM.
Display settings available with Normalized Counts selected
Ratio
The ratio of the sample RPKM to total RPKM for the region.
Total Read Counts
The sum of the Sample read counts and the Control read counts.
Filter Settings
Display Deletion
Selected by default. Show CNVs that are classified as Deletions. Clear this
option to hide this classification from the CNV Tool report.
Display Normal
Selected by default. Show regions that are classified as Normal (little
evidence of a CNV). Clear this option to hide this classification from the CVN
Tool report.
Display Duplication
Selected by default. Show CNVs that are classified as Duplications. Clear
this option to hide this classification from the CNV Tool report.
Display Uncalled
Selected by default. Show CNVs that are classified as Deletions. Clear this
option to hide this classification from the CNV Tool report.
Score
Filter the calls shown based on their respective scores. (Deletion, Normal,
and Duplication.)The default value is 1.000, which means that all calls with a
score > 1.000 are shown in the report. You can modify this value as needed.
11. Optionally, click Save Settings to save these settings to a Settings file (.ini file).
You can click Load Settings to select this Settings file at a later date and generate
the report according to the saved settings in the file.
NextGene User’s Manual
317
Chapter 6
Sequence Alignment Tool
12. Click OK.
The CNV Tool report is generated.
Figure 6-161: CNV Tool report example
The CNV Tool report is interactive:
318
•
To view the region of the genomic database in the Database of Genomic Variants (DGV)
for which the call was made, click the call type in the HMM Calls column.
•
To load different projects and/or change the project settings, on the report menu, click File
> Load Projects, or on the report toolbar, click the Load Projects icon
to open the
CNV Tool, and make the appropriate changes.
•
To modify the report settings, on the report toolbar, click the Settings icon
, or on the
report menu, click Settings > Settings to open the Settings dialog box and modify the
report settings as needed. The report display is dynamically updated after you save the
modifications.
•
To save the report to a text file, on the report toolbar, click the Save Report icon
, or
on the report menu, click File > Save Report. A default name and location are provided
for the file, but you can change both of these values.
•
To generate the Block CNV report, on the report toolbar, click the Block CNV report icon
. See “Block CNV report” on page 319.
•
To generate the graphical display of the data, on the report toolbar, click the CNV Graphs
icon
. See “CNV Graphs” on page 322.
NextGene User’s Manual
Chapter 6
Sequence Alignment Tool
Block CNV report
The Block CNV report groups together consecutive regions that have a CNV into a single
report line. Multiple genes can be included in the same block. You can use the Block CNV
Report to focus on consecutive regions that show evidence of a CNV.
Figure 6-162: Block CNV report example
The Block CNV report is interactive:
•
To view the region of the genomic database in the Database of Genomic Variants (DGV)
for which the call was made, click the call type in the HMM Calls column.
•
To modify the report settings, on the report toolbar, click the Settings icon
, or on the
report menu, click Settings > Settings to open the Block CNV Report Settings dialog box.
The dialog box has two tabs—Advanced Settings and Report Settings. The Advanced
Settings tab is the open tab. Modify the report settings on either tab or both tabs as needed.
The report display is dynamically updated after you save the modifications.
Figure 6-163: Block CNV Report Settings dialog box, Advanced Settings
NextGene User’s Manual
319
Chapter 6
Sequence Alignment Tool
Setting
Description
Advanced Settings
Ignore up to [0] regions when
merging
If there are “n” number of regions that are reported as
normal within a larger number of regions that show the
same CNV, then these normal regions are ignored and the
regions with the same CNV are merged to create blocks.
Note: Uncalled regions are automatically ignored.
Hide unplaced/unlocalized contigs
Selected by default.
Report Settings - Display Settings
Index
An ordered count of the segments that are used in the
report.
Chr
• Name
• Number
• The name of the chromosome on which the segment is
located.
• The number of the chromosome on which the segment
is located.
Chr Position Start
The base number that indicates where the segment starts
in the chromosome.
Chr Position End
The ending base number that indicates where the segment
ends in the chromosome.
Gene
The gene name for the segment when the segment is the
whole gene or the name of the gene on which the segment
is found.
Number of Regions
The number of consecutive regions that have a CNV and
that were grouped together as a result.
RNA Accession
Available only for the CNV report.
Protein Accession
Available only for the CNV report.
Description
Available if the reference file is a .fasta file with multiple
segments. Select this option to display the title line for
each segment in the Description column.
Contig
The contig on which the segment is located. The contig is
based on the genome assembly from the NCBI.
Locus Tag
Available only for the CNV report.
Start
The starting location for the reference region.
End
The ending location for the reference region.
Length
The total length of the reference region, which provides for
easy identification of expressed regions by size (such as
when locating small RNA transcripts).
Original Coverage
Available only for the CNV report.
Dispersion
The dispersion value for the segment.
Normalized Coverage
Available only for the CNV report.
Note: The following two Display settings are available only if RPKM is selected.
Ratio
320
The ratio of the sample RPKM to total RPKM for the region
NextGene User’s Manual
Chapter 6
Sequence Alignment Tool
Setting
Description
Total RPKM
The sum of the Sample RPKM and the Control RPKM.
Note: The following two Display settings are available only if Normalized Counts is selected.
Ratio
The ratio of the sample RPKM to total RPKM for the
region.
Total Read Counts
The sum of the Sample read counts and the Control read
counts.
Report Settings - Filter Settings
•
Display Deletion
Selected by default. Show CNVs that are classified as
Deletions. Clear this option to hide this classification from
the CNV Tool report.
Display Normal
Selected by default. Show regions that are classified as
Normal (little evidence of a CNV). Clear this option to hide
this classification from the CVN Tool report.
Display Duplication
Selected by default. Show CNVs that are classified as
Duplications. Clear this option to hide this classification
from the CNV Tool report.
Median Deletion Score > 1.000
The median deletion threshold across all the regions in the
block for the block to be included in the report.
Max Deletion Score > 1.000
The maximum deletion threshold across all the regions in
the block for the block to be included in the report.
Median Duplication Score > 1.000
The median duplication threshold across all the regions in
the block for the block to be included in the report.
Max Duplication Score > 1.000
The maximum duplication threshold across all the regions
in the block for the block to be included in the report.
To save the report to a text file, click the Save Report icon
on the report toolbar, or
on the report menu, click File > Save Report. A default name and location are provided
for the file, but you can change both of these values.
NextGene User’s Manual
321
Chapter 6
Sequence Alignment Tool
CNV Graphs
Click the click the CNV Graphs icon
of the data.
on the report toolbar to generate a graphical display
Figure 6-164: CNV graphs (Dispersion and HMM)
•
All Chromosomes graph—The All Chromosomes graph displays all the regions across all
the chromosomes in the project. Duplications are displayed in green. Deletions are
displayed in red. Normal regions, or regions where the data was insufficient for making a
call, are displayed in gray. The horizontal red and green lines represent the coverage ratios
for duplications and deletions, respectively, in an ideal project without noise.
•
Raw Data Dispersion graph—The Raw Data Dispersion graph displays the coverage
ratios for all the raw data points. The red lines indicate the confidence interval of the data
based on the expected CNV% for the data.
•
Filtering Points Dispersion graph—The Filtering Points Dispersion graph displays the
dispersion value for each filtering point at the indicated coverage level.
The graphs are interactive:
•
322
Zoom In - Hold down the left mouse button and draw a box from the upper left hand
corner of any region in a graph towards the lower right hand corner. A box is formed
around the area that being reduced for viewing.
NextGene User’s Manual
Chapter 6
Sequence Alignment Tool
•
Zoom Out - Hold down the left mouse button and draw a box from the lower right hand
corner of any region in the graph towards the upper left hand corner.
The magnification for zooming out is always 100%.
•
Highlight ROI - Click Select ROI to open the Regions of Interest dialog box that displays
all the chromosomes in the project on which ROIs are located. Select a chromosome, and
then click OK. The All Chromosomes graph is zoomed in on the selected ROI and all the
raw data points in the selected ROI are highlighted in purple in the Raw Data Dispersion
graph.
CNV (Copy Number Variation) tool (SNP-based Normalization with
Smoothing)
You use the CNV tool to carry out parallel comparisons of the copy number variations in
exactly two projects that were aligned independently to the same reference sequence. One of
the project files must be the sample file and the other project file must be the control file. The
SNP-based Normalization with Smoothing coverage option has three components—the
Log2 ratio calculated based on the perfect heterozygote SNP positions, the score, and the
Log2 ratio based on the SNP positions for adjacent (neighbor) regions.
•
Log2 ratio calculated based on the perfect heterozygote SNP positions—The CNV tool
checks the coverage for at least three positions in each region. Perfect heterozygote SNP
positions, which are positions with a user-specified mutation frequency in the selected
regions in at least one sample, are chosen first. If three perfect heterozygote SNP positions
are not found, the tool chooses positions every 100 bp, starting in the middle of the region.
If there are more than 100 bp without a Perfect heterozygote SNP position, the tool
chooses additional positions every 100 bp. The tool then calculates the median coverages
for these positions and normalizes the median coverage values relative to the global
coverage. The Log2 ratio of the normalized coverage values of the two samples is then
calculated.
•
Score—A Phred-scaled score is calculated for each potential call (duplication, deletion,
and normal) based on a binomial distribution that considers the coverage.
•
Log2 ratio for adjacent (neighbor) regions—Considers the Log2 ratio calculated based on
SNP positions for the three regions directly upstream and the three regions directly
downstream of the current region.
CNV calls are made according to the following:
Component Values
Call
Upstream and downstream neighbor log2 ratio and current log2 ratio = 0
Uncalled
Log2ratio > 20
Duplication
Log2ratio < -20
Deletion
NextGene User’s Manual
323
Chapter 6
Sequence Alignment Tool
Component Values
Call
Log2ratio > 2 and duplication score > 20
Duplication
Log2ratio < -2 and deletion score > 20
Deletion
Upstream and downstream neighbor log2 ratios > 0.4 and duplication score > 10
Duplication
Upstream and downstream neighbor log2 ratios < -0.5 and deletion score > 10
Deletion
Neighbor called as a duplication and upstream, downstream and current log2
ratios > 0.3
Duplication
Neighbor called as a Deletion and upstream, downstream and current log2 ratios <
-0.4
Deletion
Upstream, downstream, and current log2 ratios are > -0.5 and < 0.4
Normal
The median of upstream, downstream and current log2 ratios > 0.4 and duplication
score > 10
Duplication
The median of upstream, downstream and current log2 ratios < -0.5 and deletion
score > 10
Deletion
The median of upstream, downstream and current log2 ratios < 0.4 and > -0.5
Normal
Neighbor called as a Duplication and duplication score > 1
Duplication
Neighbor called as a Deletion and deletion score > 1
Deletion
Neighbor called as Normal and normal score > deletion score and > duplication
score
Normal
If none of the above criteria are met, then Uncalled, unless:
• If Uncalled and the coverage for the sample and the control > 1000x, the current
log2 ratio > 0.5, and the duplication score > 100
• Duplication
• If Uncalled and the coverage for the sample and the control > 1000x, the current
log2 ratio < -0.9 and the deletion score > 100
• Deletion
For information about the Dispersion and HMM method for the CNV tool, see “To
generate the CNV Tool report (Dispersion and HMM)” on page 310.
To generate the CNV Tool report (SNP-based Normalization with
Smoothing)
The following procedure describes how to generate a new CNV Tool report.
Optionally, you can click Load Settings to browse to and select a Settings file (.ini
file) to generate the report based on the saved settings in the file. As you create a
new report, at any time, you can click Default to return all values on all tabs to
their default values.
1. On the Comparisons menu, select CNV Tool.
The CNV Tool window opens. The Method Selection tab is the active tab. See Figure 6138 on page 294.
324
NextGene User’s Manual
Chapter 6
Sequence Alignment Tool
Figure 6-165: CNV Tool window, Method Selection tab
2. Select SNP-Based normalization with smoothing.
3. Open the Data Input tab.
Figure 6-166: CNV Tool window, Data Input tab
NextGene User’s Manual
325
Chapter 6
Sequence Alignment Tool
4. Load the Sample and Control project (*.pjt) files, and the do the following:
•
If you load only a single Control project file, select Single Control.
•
If you load multiple Control project files, select Multiple Controls, and then indicate
how the control values are to be determined:
Control
Description
Best Match
Select the single control project that has the best correlation to the sample
project when comparing coverage in each region as the control project.
Ignore the other projects.
Average Controls
Use the average coverage in each region across all control projects as the
control value.
Median Controls
Use the median coverage in each region across all control projects as the
control value.
5. Open the Basic Settings tab.
Figure 6-167: CNV Tool window, Basic Settings tab
6. Indicate how to define the segments that are to be analyzed and reported on by the tool.
To generate both the CNV report and the Gene CNV report, you must select Use
Segments as Defined in Reference Files or set the Incremental Segment Length.
326
NextGene User’s Manual
Chapter 6
Sequence Alignment Tool
•
You can use the segments as defined in the reference files.
Setting
Description
mRNA
Report coverage levels for each mRNA region. (Coding and non-coding
exons.)
CDS
Report coverage levels for each coding region.
Continuous mRNA
Report coverage levels for the entire mRNA for a gene, one region per gene.
Continuous CDS
Report coverage levels for the entire coding region for a gene, one region per
gene.
ROI
Report coverage levels based on Regions of Interest that are defined in a
GenBank reference file.
Note: For information about defining Regions of Interest in a GenBank
reference file, see “Advanced GBK Editor tool” on page 274..
•
You can manually set the segment length.
•
You can upload a Region of Interest file in a BED format.
For information about the required format for the BED file, see “BED file” on
page 473.
7. Optionally, select the chromosomes that are to be excluded from the comparison.
8. Optionally, open the Advanced Settings tab and modify any of the default values as
needed for the Neighbor ratio settings.
Figure 6-168: CNV Tool window, Advanced Settings tab
NextGene User’s Manual
327
Chapter 6
Sequence Alignment Tool
Setting
Description
Note: If you make a change to any of the values below, at any time, you can click Default to return
all values on all tabs on the dialog box their default values.
Perfect heterozygote
SNP
Indicates the frequency requirements for perfect heterozygote SNP
positions. Both the reference and variant allele must be found at
frequency that is above the specified threshold, or the SNP is not used to
determine the median coverage for the region. The default value is 40%,
which means that any variant that is found at a frequency between 40% to
60% is considered to be a perfect heterozygote SNP.
Smooth Log2Ratio
Selected by default. You can clear this option to omit the step of checking
Neighbor Ratios.
• High Resolution
• Optimizes the detection sensitivity to call CNVs for smaller regions,
such as CNVs that include only part of a gene.
• Low Resolution
• Optimizes the detection to call larger CNVs, such as CNVs that include
multiple genes or a whole chromosome.
9. Optionally, open the Report Settings tab and do either or both of the following as
needed:
•
For the Display settings, select the columns that are to be included in the report, or
clear the options for the columns that are not to be included.
•
For the Filter settings, specify the thresholds for the regions that are to be included in
the report.
Setting
Description
Display settings
Index
An ordered count of the segments that are used in the report.
Chr
328
• Name
• The name of the chromosome that the segment is on.
• Number
• The number of the chromosome that the segment is on.
Chr Position Start
The base number that indicates where the segment starts in the
chromosome.
Chr Position End
The ending base number that indicates where the segment ends in the
chromosome.
Gene
The gene name for the segment when the segment is the whole gene or
the name of the gene on which the segment is found.
CDS
The coding sequence number for the segment.
RNA Accession
Show the RNA accession for the gene from NCBI.
Protein Accession
Show the protein accession for the gene from NCBI.
Description
Available if the reference file is a .fasta file with multiple segments. Select
this option to display the title line for each segment in the Description
column.
NextGene User’s Manual
Chapter 6
Sequence Alignment Tool
Setting
Description
Contig
The contig that the segment is on. The contig is based on the genome
assembly from the NCBI.
Locus Tag
An alternate way to identify the gene.
Start
The starting location for the reference region.
End
The ending location for the reference region.
Length
The total length of the reference region, which provides for easy
identification of expressed regions by size (such as when locating small
RNA transcripts).
Position Selected
The median coverage position for the region. This position is used for the
calculation of the Log2 Ratio.
Normalized Coverage
The median coverage following global normalization for the region in each
sample.
Control Allele
Read count for the alleles at the Position Selected in the control project. If
there are more than two alleles, then only the two most frequent alleles
are reported.
Sample Allele
Read count for the alleles at the Position Selected in the sample project. If
there are more than two alleles, then only the two most frequent alleles
are reported.
Log2 Ratio
The Log2 of the ratio of the normalized coverages of the two sample files.
Neighbor ratios
The Log2 ratios for the current region followed by the Log2 ratios of the
neighbor regions.
Dispersion Hmm
Select this option to include the Dispersion hmm analysis in the report
results.
Note: Neighbor ratios must also be selected.
Filter settings
Log2 Ratio <= [-0.700]
or >= [0.700}
Display only those regions where the Log2 of the ratio of the normalized
coverages of the two sample files is above or below the set thresholds
Scores >= [3.000]
Show only regions where the Phred-scaled score for at least one potential
call (insertion, deletion, or normal) meets or exceeds the set threshold.
Minimum Coverage At
Least For One Project
>= [30]
Default value is 30. At least one project (sample file) must contain at least
the minimum read count in the selected regions, or the CNV calculations
are not carried out for the region and the region is not included in the
report.
Show Regions with
Low Coverage
Include regions that have coverage that fall below the indicated minimum
coverage in the report. N/A is displayed for the Log2 Ratio value for these
regions.
10. Optionally, click Save Settings to save these settings to a Settings file (.ini file).
You can click Load Settings to select this Settings file at a later date and generate
the report according to the saved settings in the file.
NextGene User’s Manual
329
Chapter 6
Sequence Alignment Tool
11. Click OK.
The CNV Tool report is generated.
Figure 6-169: CNV Tool report example
Percentile information for the normal distribution of the Log2 ratios is displayed above the
report columns. The delSigma value is one standard deviation below the 50th percentile. The
delSigma value represents the required value for the Log2 ratio to call a deletion for a given
region. The dupSigma value is one standard deviation above the 50th percentile. The
dupSigma value represents the required value for the Log2 ratio to call a duplication for a
given region. The other percentile values represent the required values for the Log2 ratios to
place a region in the indicated percentile. For example, 32percentile: -0.0529 means that the
Log2 ratio for a given region must equal -0.0529 for the region to be placed in the 32nd
percentile of all regions.
The CNV Tool report is interactive:
330
•
To view the region of the genomic database in the Database of Genomic Variants (DGV)
for which the call was made, click the call type in the Indel Calls column.
•
To load different projects and/or change the project settings, on the report menu, click File
> Load Projects, or on the report toolbar, click the Load Projects icon
to open the
CNV Tool, and make the appropriate changes.
•
To modify the report settings, on the report toolbar, click the Settings icon
, or on the
report menu, click Settings > Settings to open the CNV Settings dialog box and modify
the report settings as needed. The report display is dynamically updated after you save the
modifications.
NextGene User’s Manual
Chapter 6
Sequence Alignment Tool
•
To save the report to a text file, on the report toolbar, click the Save Report icon
, or
on the report menu, click File > Save Report. A default name and location are provided
for the file, but you can change both of these values.
•
To generate the Gene CNV report, on the report toolbar, click the Gene CNV report icon
. See “Gene CNV report” below.
•
To generate the Block CNV report, on the report toolbar, click the Block CNV report icon
. See “Block CNV report” on page 334.
•
To generate the graphical display of the data, on the report toolbar, click the CNV Graphs
icon
. See “CNV Graphs” on page 337.
Gene CNV report
The Gene CNV report groups together consecutive regions that have a CNV into a single
report line. Consecutive regions can be grouped up to a single gene. Regions are not grouped
across multiple genes. You can use the Gene CNV Report to focus on consecutive regions
that show evidence of a CNV. In general, individual regions are not included in the report,
unless their weighted ratios exceed the threshold that is defined. Smaller regions where the
number of consecutive regions is less than the threshold that is specified for the Show Gene
Exon Number setting can be included in the report based on their weighted ratios according
to the following:
Weighted Log2 Ratio = Log2 Ratio * NCR/Show Gene Exon Number
where NCR = Number of Consecutive Regions and Gene Exon Number is a filter setting for
the report.
Figure 6-170: Gene CNV report example
NextGene User’s Manual
331
Chapter 6
Sequence Alignment Tool
The Gene CNV report is interactive:
•
To modify the report settings, on the report toolbar, click the Settings icon
, or on the
report menu, click Settings > Settings to open the Gene CNV Report Settings dialog box
and modify the report settings as needed. (See Figure 6-171 on page 332.) The report
display is dynamically updated after you save the modifications.
•
For the Filter settings, specify the thresholds for the regions that are to be included in
the report.
•
For the Display settings, select the columns that are to be included in the report, or
clear the options for the columns that are not to be included.
Figure 6-171: Gene CNV Report Settings dialog box
Setting
Description
Filter settings
332
Log2 Ratio <= [-0.700]
or >= [0.700}
Display only those regions where the Log2 of the ratio of the normalized
coverages of the two sample files is above or below the set thresholds.
The Log2 ratio for each of the consecutive regions must fall above or
below the indicated thresholds.
Scores >= [3.000]
Show only regions where the Phred-scaled score for at least one
potential call (insertion, deletion, or normal) meets or exceeds the set
threshold. The score for each of the consecutive regions must meet or
exceed the indicated threshold.
Show Regions with Low
Coverage
Select this option to include the regions that do not meet the minimum
coverage threshold in the report.
Minimum Coverage >=
[10]
Include regions that meet or exceed the indicated coverage level in the
report.
NextGene User’s Manual
Chapter 6
Sequence Alignment Tool
Setting
Show Gene Exon
Number >= [1]
Description
The minimum number of consecutive regions where the Log2 ratios
exceed the defined thresholds for the regions to be included in the
report.
Display settings
Index
An ordered count of the segments that are used in the report.
Chr
• Name
• The name of the chromosome that the segment is on.
• Number
• The number of the chromosome that the segment is on.
Chr Position Start
The base number that indicates where the segment starts in the
chromosome.
Chr Position End
The ending base number that indicates where the segment ends in the
chromosome.
Gene
The gene name for the segment when the segment is the whole gene or
the name of the gene on which the segment is found.
CDS
The coding sequence number for the segment.
RNA Accession
Show the RNA accession for the gene from NCBI.
Protein Accession
Show the protein accession for the gene from NCBI.
Description
Available if the reference file is a .fasta file with multiple segments.
Select this option to display the title line for each segment in the
Description column.
Contig
The contig that the segment is on. The contig is based on the genome
assembly from the NCBI.
Locus Tag
An alternate way to identify the gene.
Start
The starting location for the reference region.
End
The ending location for the reference region.
Length
The total length of the reference region, which provides for easy
identification of expressed regions by size (such as when locating small
RNA transcripts).
Original Coverage
The actual median coverage for the region in each sample.
Normalized Coverage
The median coverage following global normalization for the region in
each sample.
Position Selected
The median coverage position for the region. This position is used for
the calculation of the Log2 Ratio.
Control Allele
Read count for the alleles at the Position Selected in the control project.
If there are more than two alleles, then only the two most frequent
alleles are reported.
Sample Allele
Read count for the alleles at the Position Selected in the sample project.
If there are more than two alleles, then only the two most frequent
alleles are reported.
Log2 Ratio
The Log2 of the ratio of the normalized coverages of the two sample
files.
Neighbor Ratio
The Log2 ratios for the current region followed by the Log2 ratios of the
neighbor regions.
NextGene User’s Manual
333
Chapter 6
Sequence Alignment Tool
•
To save the report to a text file, click the Save Report icon
on the report toolbar, or
on the report menu, click File > Save Report. A default name and location are provided
for the file, but you can change both of these values.
•
To generate the Block CNV report, on the report toolbar, click the Block CNV report icon
. See “Block CNV report” on page 334.
•
To generate the graphical display of the data, on the report toolbar, click the CNV Graphs
icon
. See “CNV Graphs” on page 337.
Block CNV report
The Block CNV report groups together consecutive regions that have a CNV into a single
report line. Multiple genes can be included in the same block. You can use the Block CNV
Report to focus on consecutive regions that show evidence of a CNV.
Figure 6-172: Block CNV report example
The Block CNV report is interactive:
334
•
To view the region of the genomic database in the Database of Genomic Variants (DGV)
for which the call was made, click the call type in the Indel Calls column.
•
To save the report to a text file, click the Save Report icon
on the report toolbar, or
on the report menu, click File > Save Report. A default name and location are provided
for the file, but you can change both of these values.
•
To modify the report settings, on the report toolbar, click the Settings icon
, or on the
report menu, click Settings > Settings to open the Block CNV Report Settings dialog box.
The dialog box has two tabs—Advanced Settings and Report Settings. The Advanced
Settings tab is the open tab. (See Figure 6-173 on page 335.) Modify the report settings
on either tab or both tabs as needed. The report display is dynamically updated after you
save the modifications.
NextGene User’s Manual
Chapter 6
Sequence Alignment Tool
Figure 6-173: \Block CNV Report Settings dialog box, Advanced Settings
Setting
Description
Advanced Settings
Ignore up to [0] regions when
merging
If there are “n” number of regions that are reported as
normal within a larger number of regions that show the
same CNV, then these normal regions are ignored and the
regions with the same CNV are merged to create blocks.
Note: Uncalled regions are automatically ignored.
Hide unplaced/unlocalized contigs
Selected by default.
Report Settings - Display Settings
Index
An ordered count of the segments that are used in the
report.
Chr
• Name
• Number
• The name of the chromosome on which the segment is
located.
• The number of the chromosome on which the segment
is located.
Chr Position Start
The base number that indicates where the segment starts
in the chromosome.
Chr Position End
The ending base number that indicates where the segment
ends in the chromosome.
Gene
The gene name for the segment when the segment is the
whole gene or the name of the gene on which the segment
is found.
Number of Regions
The number of consecutive regions that have a CNV and
that were grouped together as a result.
RNA Accession
Available only for the CNV report.
NextGene User’s Manual
335
Chapter 6
Sequence Alignment Tool
Setting
Description
Protein Accession
Available only for the CNV report.
Description
Available if the reference file is a .fasta file with multiple
segments. Select this option to display the title line for
each segment in the Description column.
Contig
The contig on which the segment is located. The contig is
based on the genome assembly from the NCBI.
Locus Tag
Available only for the CNV report.
Start
The starting location for the reference region.
End
The ending location for the reference region.
Length
The total length of the reference region, which provides for
easy identification of expressed regions by size (such as
when locating small RNA transcripts).
Original Coverage
The actual median coverage for the segment.
Position Selected
Available only for the CNV report.
Normalized Coverage
The median coverage following global normalization for
the segment.
Control Allele
Available only for the CNV report.
Sample Allele
Available only for the CNV report.
Log2 Ratio
The Log2 of the ratio of the normalized coverages of the
two sample files.
Report Settings - Filter Settings
336
Display Deletion
Selected by default. Show CNVs that are classified as
Deletions. Clear this option to hide this classification from
the CNV Tool report.
Display Normal
Selected by default. Show regions that are classified as
Normal (little evidence of a CNV). Clear this option to hide
this classification from the CVN Tool report.
Display Duplication
Selected by default. Show CNVs that are classified as
Duplications. Clear this option to hide this classification
from the CNV Tool report.
Display Uncalled
Selected by default. Show CNVs that are classified as
Uncalled. Clear this option to hide this classification from
the CNV Tool report.
Log2 Ratio <= [-0.700] or >= [0.700}
Display only those regions where the Log2 of the ratio of
the normalized coverages of the two sample files is above
or below the set thresholds.
Scores >= [3.000]
Show only regions where the Phred-scaled score for at
least one potential call (duplication, deletion, or normal)
meets or exceeds the set threshold.
Minimum Coverage At Least For One
Project >= [5]
At least one project (sample file) must contain at least the
minimum read count in the selected regions, or the CNV
calculations are not carried out for the region and the
region is not included in the report.
NextGene User’s Manual
Chapter 6
Sequence Alignment Tool
Setting
Description
Show Regions with Low Coverage
Include regions that have coverage that fall below the
indicated minimum coverage in the report. N/A is displayed
for the Log2 Ratio value for these regions.
CNV Graphs
Click the click the CNV Graphs icon
of the data.
on the report toolbar to generate a graphical display
Figure 6-174: CNV graphs (SNP-Based Normalization with Smoothing)
:
•
All Chromosomes graph (Top graph)—The All Chromosomes graph displays all the
regions across all the chromosomes in the project. Insertions are displayed in green.
Deletions are displayed in red. Normal regions, or regions where the data was insufficient
for making a call, are displayed in gray. The horizontal red and green lines represent the
coverage ratios for insertions and deletions, respectively, in an ideal project without noise.
•
Single Chromosome graph (Bottom graph)—The Single Chromosome graph displays all
the regions across a single chromosome in the project. By default, when the graph first
opens, the view is set to the first chromosome in the project. Use the Previous
Chromosome and Next Chromosome arrows below the All Chromosome graph to move
the view through each of the chromosomes in the project.
The graphs are interactive:
•
Zoom In - Hold down the left mouse button and draw a box from the upper left hand
corner of any region in a graph towards the lower right hand corner. A box is formed
around the area that being reduced for viewing.
•
Zoom Out - Hold down the left mouse button and draw a box from the lower right hand
corner of any region in the graph towards the upper left hand corner.
The magnification for zooming out is always 100%.
NextGene User’s Manual
337
Chapter 6
Sequence Alignment Tool
Beta Batch CNV Tool
You use the Beta Batch CNV Tool to load multiple sequence alignment projects that have
been aligned to the same reference and compare the projects to each other for coverage
levels in the ROIs. The tool calculates the coverage in the regions for each project as follows:
1. Obtain the coverage for every base in the BED file for each project.
2. For each project, divide the coverage at each position by the total coverage in the
sample.
3. For each position, divide the coverage in each project by the median value of all projects
in the BED region.
4. Report the median of these normalized values in each BED region.
As the name implies, the tool is currently in a Beta release for NextGENe 2.4.
Future releases of NextGENe will include modifications and enhancements to the
tool.
To use the Beta Batch CNV Tool:
1. On the Comparisons menu, select Beta Batch CNV tool.
The Beta Batch CNV Tool dialog box opens.
Figure 6-175: Beta Batch CNV Tool dialog box
2. Click Batch Add, and then browse to and select the folder that contains all the sequence
alignment projects that are to be compared.
3. Leave Normalization selected.
4. Click Set, and then browse to and select the BED file for the ROIs for the project.
338
NextGene User’s Manual
Chapter 6
Sequence Alignment Tool
5. Click OK.
The Beta Batch CNV report is generated. Each report column represents a different
sequence alignment project, and each report row represents a different region in the BED
file. The closer that a number is to one for a given project/region combination, the
greater the likelihood that the region does not contain a CNV relative to all the other
projects that were loaded.
Figure 6-176: Beta Batch CNV report
NextGene User’s Manual
339
Chapter 6
Sequence Alignment Tool
340
NextGene User’s Manual
Chapter 7
Specialized Applications
Typically, if you are aligning your data files against a small genome (one that is less than or
equal to 250 Mbp), then you align data against a reference file that is either in .fasta format
or GenBank format. If you are aligning the data against a large genome (one that is greater
than 250 Mbp, such as the whole human genome), then you align the data against a
preloaded reference file that SoftGenetics supplies or a custom preloaded reference file that
was built using the NextGENe Build Preloaded Reference tool. (See “The NextGENe Build
Preloaded Reference Tool” on page 372.) For special data application types, however, such
as ChIP-Seq or small RNA analysis, after you align your files to a reference genome, you
might then need to align your data files against a reference sequence that you create using
NextGENe’s Peak Identification tool.
This chapter covers the following topics:
•
“Creating a Reference File with the Peak Identification tool” on page 343.
NextGene User’s Manual
341
Chapter 7
Specialized Applications
342
NextGene User’s Manual
Chapter 7
Specialized Applications
Creating a Reference File with the Peak
Identification tool
In addition to using the Peak Identification tool to identify a list of regions that satisfy the
coverage level requirements to be identified as a peak, you can use the Peak Identification
tool to save these regions of the genome as a reference file and use them as a reference
sequence.
Figure 7-1:
Peak Identification Settings dialog box
Manual Setting
Coverage
Description
The coverage threshold for a position to be considered part of a peak.
Note: Although you can set the coverage level to any value, for
ChIP-Seq or miRNA analysis, SoftGenetics recommends a value
that is equal to twice the average coverage that is reported in
statinfo.txt file.
Gap
Maximum number of bases between regions that meet the coverage
threshold to be considered one continuous peak.
Set Baseline Noise
Used in conjunction with the Gap size to determine whether two nearby
regions each with a coverage that is above the Coverage threshold are
to be merged into one peak, or whether they are to remain as two
separate peaks.
• If the regions are separated by a distance that is less than the Gap
size and the coverage in this region exceeds the Set Baseline Noise,
then the two nearby regions are merged into a single peak.
• If the regions are separated by a distance that is less than the Gap
size but the coverage in this region does not exceed the Set Baseline
Noise, then the two nearby regions remain separated.
NextGene User’s Manual
343
Chapter 7
Specialized Applications
When you use the Peak Identification tool, the Peak Identification report contains
information about all regions of the reference that meet the coverage requirements.
Figure 7-2:
Peak Identification report example, transcript determination
For detailed information about the columns that are displayed in the Peak
Identification report, see “Peak Identification report” on page 280.
After peak identification, the results of the alignment project are displayed in the NextGENe
Viewer. Brown lines indicate the regions that meet the requirements to be considered a peak.
Figure 7-3:
Example of sequence alignment results for transcript determination
Brown lines indicate regions that
meet peak detection requirements
To save the report to a .fasta file, click the Save Report icon
on the report toolbar. A
default name and location are provided for the file, but you can change both of these values.
344
NextGene User’s Manual
Chapter 7
Specialized Applications
To align sample files to peak identification reference file
To align sample files to the peak identification reference file, you use the same general
procedure as when you are aligning sample files to the whole genome reference with one
notable exception—you must use the .fasta file created from the Peak Identification report,
which contains only the peak regions, as the reference file. After NextGENe completes the
alignment of the sample files to the peak identification reference file, the results are shown in
the NextGENe Viewer, which provides a graphic representation of expression levels for each
region. Red lines indicate region boundaries. Sequence reads that align with each region are
shown beneath where they align. Gray bars indicate coverage (expression level).
You can generate an Expression report to report on the coverage levels for each
peak. See “Expression Report” on page 130.
Figure 7-4:
Example of small RNA reads aligned to peak identification reference file
NextGene User’s Manual
345
Chapter 7
Specialized Applications
346
NextGene User’s Manual
Chapter 8
NextGENe Tools
NextGENe provides many tools for optimizing input data and exporting and analyzing
results. These include tools that you use to modify the structure of sample files and reference
files, tools that you use to use to calculate information about sample files, and tools that you
use to preview files.
This chapter covers the following topics:
•
“The NextGENe Barcode Sorting Tool” on page 349.
•
“The NextGENe Sequence Operation Tool” on page 354.
•
“The NextGENe Reads Simulator Tool” on page 364.
•
“The NextGENe Pseudo Paired Read Constructor Tool” on page 366.
•
“The NextGENe Condensation Results Filter Tool” on page 368.
•
“The NextGENe Condensation Results Tool” on page 370.
•
“The NextGENe Build Preloaded Reference Tool” on page 372.
•
“The NextGENe GC Percentage Calculation Tool” on page 377.
•
“The NextGENe Overlap Merger Tool” on page 378.
•
“The NextGENe Long PE Assembly Mapping Tool” on page 381.
•
“The NextGENe File Preview Tool” on page 382.
•
“The NextGENe Track Manager Tool” on page 383.
The NextGENe Format Conversion tool is discussed in Chapter 3, “File Format
and Conversion,” on page 89. The NextGENe AutoRun tool is discussed in
Chapter 9, “The NextGENe AutoRun Tool,” on page 395.
NextGene User’s Manual
347
Chapter 8
NextGENe Tools
348
NextGene User’s Manual
Chapter 8
NextGENe Tools
The NextGENe Barcode Sorting Tool
If your data files contain barcodes (also referred to as multiplexed data), you must use the
NextGENe Barcode Sorting tool to parse the barcoded read data into separate files prior to
analysis. NextGENe’s Barcode Sorting tool parses the barcoded sample files into separate
files according to sequence tags. You can use the Barcode Sorting tool for data files in which
the barcodes are included within the sequence reads, the barcodes are included in the read
names or the barcodes are contained in a separate file. Two options are available for
trimming the tags from the reads and parsing the reads according to the tags:
•
If all of the barcode details are known (barcode sequence tags and the sample ID that they
represent), you can create a Barcode/Primer file, which is a tab delimited text file, to
provide information to the NextGENe Barcode Sorting tool about the sample IDs, the
forward barcode/primer tags, and the reverse barcode/primer tags.
•
If some or all of the barcode details are not known, you can use the NextGENe Barcode
Sorting tool to automatically detect the barcode sequence tags and total tag count and then
create separate folders for each tag.
Barcode/Primer File
You can use a program such as Microsoft Excel to create a Barcode Primer File and save the
file as a tab-delimited text file. Each line in the file must include the sample ID and an entry
for each barcode tag in the sample. Figure 8-1 is a sample Barcode/Primer file with just two
tags for each sample. Each line in the file includes the sample ID (Sample_ID), the forward
barcode tag (Forward Tag) and the reverse barcode tag (Reverse Tag).
Figure 8-1:
Example of a Barcode/Primer file with two tags
If reverse tags are not used, you can leave the Reverse Tag column blank.
Figure 8-2 belowis a sample of a Barcode/Primer file with multiple tags for each sample.
Figure 8-2:
Example of a Barcode/Primer file with multiple tags
NextGene User’s Manual
349
Chapter 8
NextGENe Tools
To parse barcoded sample files
1. On the NextGENe main menu, click Tools > Barcode Sorting.
The Barcode Sorting window opens.
Figure 8-3:
Barcode Sorting window
2. Select the file type—Barcode in Sequence, Barcode in Read Name, or Barcode in
Separate File.
3. Click Add to browse to and select your sample files.
The sample files are listed by name in the Sample List pane. The name includes the full
directory path to each sample file.
350
NextGene User’s Manual
Chapter 8
NextGENe Tools
4. Select one of the following options:
Setting
Description
Import a Barcode/
Primer File
Select this option if you created a Barcode/Primer file with known barcode
information. Click Import to browse to and select the Barcode/Primer file that
you want to import, and then select one of the following:
• Perfect Match—If you select this option, the tag for a read must be an
identical match to the tag that is defined in the Barcode/Primer file, or the
read is not allocated to the tag.
• Loose Match—If you select this option, the tag for a read is divided into
three equal segments—the first half, the second half, and the middle
segment. Only one of these three segments must be an identical match to
the tag in the Barcode/Primer file for the read to be allocated to the tag.
Note: The Loose Match method is especially useful for longer tag sequences
where the likelihood of sequencing errors within the tag region is greater.
Determine
Automatically
Select this option if barcode information is not known and you want NextGENe
to automatically the detect barcode information, and then do the following:
• Indicate the barcode length. (Available only if you selected Barcode in
Sequence.)
• If you know the total number of true tags, select Total Number of Tags, and
then enter the value.
Note: When automatically detecting the number of true tags, the Barcode
Sorting tool includes only the most frequently observed sequences to
avoid parsing reads according tags that are the result of sequencing
errors.
5. If you are loading paired read data, then select Paired Reads.
6. If applicable, click Advanced Settings to open the Advanced Settings dialog box and
select the appropriate settings for your data; otherwise, go to Step 8.
Figure 8-4:
Advanced Settings dialog box
NextGene User’s Manual
351
Chapter 8
NextGENe Tools
Setting
Description
Dual Barcode
Select this option if your data uses the dual bar
code method.
Barcodes at 5’ End Only
Check for barcodes only at the 5’end of reads.
Check Reverse Complements of Barcodes
Selected by default. This option allows for any of
the following four tag combinations:
• Forward + Forward
• Reverse + Reverse
• Forward + Reverse
• Reverse + Forward
Clear this option if do not want NextGENe to
check for the reverse complements of barcodes.
454 Sample orientation estimation - Estimate
sample orientation before sorting
Applicable only for Roche/454 data and available
for selection only if the following two conditions
are met:
• Barcode in sequence is selected.
• Import file is selected.
After selecting this option, click Load to load a
.gbk or .fasta reference file, or click Preloaded to
select a preloaded reference. This results in the
alignment of the reads being carried out against
the reference before barcode sorting is carried
out.
7. Click OK.
The Advanced Settings dialog box closes and you return to the Barcode Sorting window.
8. In the Output pane, do the following:
•
If you selected Barcode in Sequence and you want the reads in the output file to
include the barcode sequences, select “Keep the Barcode in the Sequences.”
•
Leave the default value for the location of the output files as is (the default value is
the directory path for the input data file), or you can click Set to specify a folder for
storing the output files, a different location for the folder, or both.
9. Optionally, before you process the files, click Save to save the settings that you have
specified to a Settings file (.ini file).
You can always load this file at a later date and process other data files according
to the saved settings in the file.
352
NextGene User’s Manual
Chapter 8
NextGENe Tools
10. Click OK.
A message opens the process is completed. If you selected “Determine Automatically”
and you did not specify the total tag count, then two mutually exclusive criteria are used
to determine when sorting by true tag sequences is complete.
•
When the count of reads that contain a sample tag is less than 10% of the count for
the previous tag, the tag is not used and barcode sorting is complete.
•
After 95% of the sample reads have been parsed by barcode, one additional tag is
used for sorting and then sorting is completed.
The names of the separate data files that are produced by the parsing are appended with
the following information:
•
The tag information as shown (if “Determine Automatically” was selected).
•
The sample ID (if a Barcode/Primer file was used).
Figure 8-5:
Separate data files produced by NextGENe’s Barcode Sorting tool
NextGene User’s Manual
353
Chapter 8
NextGENe Tools
The NextGENe Sequence Operation Tool
You use the NextGENe Sequence Operation tool to modify the structure of sample files and
references files before you work with the files in the NextGENe application. You can use this
tool to merge multiple paired end/mate paired data files or multiple reference files into a
single .fasta file. The tool also provides options for splitting files, trimming reads, reverse
complementing sequences, arranging paired read files, and removing duplicate reads from
sample .fasta files. You can also use the Remove Duplicate Reads or Sequence Trim
functions on .fastq files.
To use the NextGENe Sequence Operation tool
1. On the NextGENe main menu, click Tools > Sequence Operation.
The Sequence Operation window opens.
Figure 8-6:
354
Sequence Operation window
NextGene User’s Manual
Chapter 8
NextGENe Tools
2. Do one of the following:
•
Select Merge Files, and then continue to “To merge files.”
•
Select Split Files, and then continue to “To split files.”
•
Select Sequence Trim, and then continue to “To sequence trim reads” on page 357.
•
Select Arrange Paired Reads, and then continue to “To arrange paired reads” on page
361.
•
Select Remove Duplicate Reads, and then continue to “To remove duplicate reads”
on page 361.
•
Select Reverse/Complement Seq, and then continue to “To reverse complement
sequences” on page 362.
Optionally, instead of manually selecting the settings for any of these operations,
you can click Load to browse to and select a Settings file (.ini file) to process the
files based on the saved settings in the file. You can click Save after you specify the
settings for any of these operations to save the settings to a Settings.ini file.
To merge files
You use the Merge Files option to merge multiple .fasta files into a single .fasta file. This is a
useful option for consolidating multiple gene reference files into a single file, which reduces
memory constraints on the application.
1. In the Input pane, click Add to browse to and select a file that is to be included in the
merged file. Repeat this step as needed to all of the files that are to be merged into a
single file.
2. In the Output field, you can leave the default value for the location of the output files as
is (the default value is the directory path for the first data file added), or you can click Set
to select a different location.
The default file name is merged.fasta. You can modify this name, if needed, but you
must leave the extension as .fasta.
3. Optionally, before you process the files, click Save to save the settings that you have
specified to a Settings file (.ini file).
You can always load this file at a later date and process other data files according
to the saved settings in the file.
4. Click OK.
A message opens when the process is completed.
NextGene User’s Manual
355
Chapter 8
NextGENe Tools
To split files
You use the Split Files option to split a single .fasta file into multiple .fasta files. This is a
useful option if a single sample file is taking considerable memory to analyze and you would
like to carry out a series of smaller and faster analyses.
1. In the Input pane, click Add to browse to and select the .fasta file that is to be split into
multiple files.
2. In the Settings field, enter the maximum acceptable size for each partition in MB.
3. In the Output field, you can leave the default value for the location of the output files as
is (the default value is the directory path for the input file), or you can click Set to select
a different location.
4. Optionally, before you process the files, click Save to save the settings that you have
specified to a Settings file (.ini file).
You can always load this file at a later date and process other data files according
to the saved settings in the file.
5. Click OK.
A message opens when the process is completed.
The single file is split into “x” number of equally sized partitions, with any remainder
contained in a smaller file. For example, for a 5.5 KB file with a partition size of 1 KB,
six files are produced—five 1 KB files and one 0.5 KB file. As shown in Figure 8-7
below, the name for each partition is based on the name of the split file and is appended
with the phrase “_part.” In addition, the partitions are numbered sequentially.
Figure 8-7:
356
Multiple .fasta files created by splitting a single .fasta file
NextGene User’s Manual
Chapter 8
NextGENe Tools
To sequence trim reads
You use the Sequence Trim function to trim sequence reads within a .fasta or .fastq file, with
or without using quality scores. For example, you can trim unwanted bases at the ends of
reads, such as the first color call of SOLiD System reads or barcode tags. You can also trim
reads relative to the number of “N” calls. Low quality reads can also be trimmed from a
sample if a specified number of bases at the 3’ end falls below a set threshold.
1. In the Input pane, click Add to browse to and select the .fasta file or .fastq for which the
sequence reads are being trimmed.
2. In the Output field, you can leave the default value for the location of the output files as
is (the default value is the directory path for the input file), or you can click Set to select
a different location.
3. Select the options for filtering and trimming low quality reads.
Setting
Description
Remove 5’ [ ] Bases and 3’ [ ] Bases
Select this option to remove a set number of nucleotides
from the 5’ end of a sequence, the 3’ end of a sequence, or
both ends of a sequence.
Max # of Uncalled Bases >=
Select this option to remove entire reads from the sample
file when the file contains more N calls than specified.
Called Base Number of Each Read
Select this option to remove entire reads from the sample
file when the total number of called bases is less than the
specified threshold.
Trim 3’ End while >= [ ] Base(s) with
Score <= [ ]
Select this option to trim the 3’ end of a read if the specified
number of consecutive bases falls below a set quality
threshold score.
Note: For additional information about how this option
works, see “Trim or Reject Read While >= [x] Bases
with Score <= [y]” on page 96.
Saved the Trimmed Reads/Qual in
One Line
Select this option to save trimmed files with each read in a
single line.
Note: This prevents longer reads being divided into multiple
lines.
Trim By Sequences
Select this option to trim reads where the specified
sequence occurs.
Note: Select this option to remove primers or sequence
tags. See “Trim by Sequences” below.
Trim by Sequences in the File
Selected by default. Load a text file that contains the
sequences by which the reads are to be trimmed. See “Trim
by Sequences in the File” on page 359.
NextGene User’s Manual
357
Chapter 8
NextGENe Tools
4. Optionally, if you selected Trim by Sequences or Trim by Sequences in the File, click
Advanced Settings to open the Advanced Settings dialog box and select the advanced
settings by which trim the sequences. See “Advanced Settings” on page 360.
Figure 8-8:
Advanced Settings dialog box
5. Optionally, before you process the files, click Save to save the settings that you have
specified to a Settings file (.ini file).
You can always load this file at a later date and process other data files according
to the saved settings in the file.
6. Click OK.
A message opens when the process is completed. Depending on the options that you
have selected, up to two files are produced—one with trimmed reads and one with
removed reads—as shown in Figure 8-9 below. In addition, if a .qual file was used, two
more files are produced—a trimmed .qual file and a removed .qual file.
Figure 8-9:
Sequence Trim files
Trim by Sequences
NextGENe allows for trimming by sequences in two cases—the sequence has an error in it
or only part of the sequence is present. In these situations, NextGENe breaks the input
sequence into smaller segments and checks the read for the small segments instead of the
whole sequence.
358
•
If the input sequence is >= 16 bp, then it is broken into small segments with a length of
12 bp.
•
If the input sequence is < 16 bp but > 7 bp, then it is broken into small segments with a
length of 8 bp.
•
If the input sequence is < 8 bp but > 3 bp, then it is broken into small segments with a
length of 4 bp.
NextGene User’s Manual
Chapter 8
NextGENe Tools
No mismatches are allowed for an input sequence < 4 bp.
Trim by Sequences in the File
The file that contains the trimming sequences is a tab-delimited text file with up to four
fields:
Field
Description
1st
Name
2nd
5’ Trim Sequence
3rd
3’ Trim Sequence
4th
Option Code:
• E - Exact match
• L - Loose match
• P - Partial match
Loose match uses the method described in “Trim by Sequences” with the following caveat—
An input sequence with a length < 4 bp cannot be used for Loose match; however, the
sequence can be used for Partial match and miRNA trimming. (See “miRNA Trimming” on
page 360.)
In a Partial match, just a single base can be matched. Partial match allows for mismatches up
to 10% of the matched length. This means the following:
•
No mismatches are allowed if the adapter is < 10 bp in length or if only 10 bp of the
adapter are overlapped.
•
The adapter must be at the end of the read. 3’ sequences can only partially overlap at the
beginning of the sequence and the end of the read while 5’ sequences can only partially
overlap at the end of the sequence and the beginning of the read.
Values for the first and fourth fields are always required. Because you are trimming by
sequence, you must have at least one sequence. This means that a trim sequence for either
the second or third fields is required. If you have a 5’ trim sequence (second field), then the
3’ trim sequence (third field) is optional. Conversely, if you have a 3’ trim sequence (third
field), then the 5’ trim sequence (second field) is optional. You still must use a placeholder if
you do not have values for an optional field. For example, if you have a 5’ trim sequence
(second field), but not a 3’ trim sequence (third field), then you must still enter a dash (-) in
the third field, which is used as a placeholder.
This option is backwards-compatible with older text formats. Loose match is
assumed for the Match Type.
If both 5’ and 3’ sequences are specified, then the 5’ sequences are checked first. If multiple
NextGene User’s Manual
359
Chapter 8
NextGENe Tools
matches are found, then the best match for both the 5’ and 3’ ends are used for trimming.
Advanced Settings
If you have selected Trim by Sequences (see “Trim by Sequences” on page 358) or Trim by
Sequences in the File (see “Trim by Sequences in the File” on page 359), then you can use
the Advanced Settings to modify the trimming method.
Setting
miRNA Trimming
Description
Select this option to trim miRNA reads. This function uses a trim by
sequence algorithm that was specifically designed for miRNA data. It
trims the input sequences only at the 3' ends of reads. It also allows for
trimming where only a portion of the input sequence is found.
• N/A if you have specified both 5’ and 3’ sequences in the text file
loaded for “Trim by Sequences in the File” on page 359.
• Option code of Exact, Loose, or Partial match can be specified. The
default is Loose.
• Exact—Must match the full primer exactly anywhere in the read.
• Loose—Can match as low as 80%.
• Partial—Can appear as a partial sequence at the 3’ end (only if not
found earlier in the read).
Check for Primer
Dimers/Trimers
Selected by default. Where the same sequence is repeated two or three
times in a row, all the sequences are trimmed. Clear this option to
always trim only the first sequence that is found.
• If this option is selected, and you specified the following option code,
then:
• Exact—Can occur up to 3x length inside read. Must match exactly.
Select farthest “inside” match.
• Loose—Can occur up to 3x length into the read. Minimum 80%
match. Select farthest “inside” match.
• Partial—N/A. Processed the same as not selecting this option.
• If this option is not selected, and you specified the following option
code, then:
• Exact—Must occur at the end of the read (5' or 3' end as
specified). Must match exactly.
• Loose—Can occur up to 1.5x length into the read. Minimum 80%
match. Select the farthest “outside” match.
• Partial—Must occur at the end of the read. Minimum 80% match. If
the full sequence is not found, checks shorter portions of the
sequence (end of 5' sequence or beginning of 3' sequence).
Selects the match with the largest number of matching positions.
As few as one bp can be found.
360
NextGene User’s Manual
Chapter 8
NextGENe Tools
To arrange paired reads
You use this option to arrange the reads in your sample files before you carry out sequence
alignment. (NextGENe skips the step of arranging the sample files when you load the
arranged files as the input files in the Project Wizard. See “Sequence Alignment Project
Output Files” on page 208.)
1. In the Input pane, click Add to browse to and select the paired read files that are to be
arranged.
2. In the Output field, you can leave the default value for the location of the output files as
is (the default value is the directory path for the input files), or you can click Set to select
a different location.
3. Optionally, before you process the files, click Save to save the settings that you have
specified to a Settings file (.ini file).
You can always load this file at a later date and process other data files according
to the saved settings in the file.
4. Click OK.
A message opens when the process is completed. Two output files that contain the
arranged reads are created, for example, sampleA_1_arranged.fasta and
sampleA_2_arranged..fasta.
To remove duplicate reads
If Remove Duplicate Reads is selected, then the Sequence Operation Tool uses an algorithm
that assigns a numerical value to every base in a read, where A = 0, C = 1, G = 2, and T = 3.
A hash value is then calculated for every read according to the following formula:
sum(Base’s code*(4^Base’s position))
where the starting base position is = 0. For example, for the sequence ATTC, the hash value
is calculated as:
0*(4^0) + 3*(4^1) + 3*(4^2) + 1*(4^3) = (0*1) +(3*4) + (3*16) + (1*64) = 124
If multiple reads have the same hash value, indicating identical sequences and identical
sequence length, then a single copy of this sequence is kept. For paired reads, if there are
multiple pairs where both forward reads have the same hash value, and both reverse reads
have the same hash value, indicating identical sequences and identical sequence lengths, then
only one pair of the reads is kept. For example, if Read 1F = Read 2F and Read 1R = Read
2R, then only one pair of reads is kept; however, if Read 1F = Read 2F, but Read 1R ≠ Read
2R, then both pairs of reads are kept.
1. In the Input pane, click Add to browse to and select the .fasta or .fastq files for which the
duplicate reads are to be removed.
2. Select the options for removing the duplicate reads.
NextGene User’s Manual
361
Chapter 8
NextGENe Tools
Setting
Description
Check 5’ End Only for Paired Reads
If this option is selected, then only the first 32 base pairs at
the 5’ end of both paired reads must be identical to be
considered duplicates.
Check After 1st Homopolymer
Available only if Check 5’ End Only for Paired Reads is
selected. Select this option to check for duplicate reads
based on the first 32 base pairs after the first homopolymer
sequence.
3. In the Output field, you can leave the default value for the location of the output files as
is (the default value is the directory path for the input file), or you can click Set to select
a different location.
4. Optionally, before you process the files, click Save to save the settings that you have
specified to a Settings file (.ini file).
You can always load this file at a later date and process other data files according
to the saved settings in the file.
5. Click OK.
A message opens when the process is completed.
Two data output files are created: _Duplicate.fasta, which contains duplicate reads that
were discarded for analysis, and _Unique.fasta, which contains a single copy of all
duplicated reads as well as all reads that were not duplicated. A log file,
RemoveDuplicates_Log.txt, is also created. The file contains information about the input
file, the reads (number of total reads, number of unique reads, and number of duplicate
reads), and the distribution of the reads and their counts.
To reverse complement sequences
1. In the Input pane, click Add to browse to and select the .fasta file for which the sequence
reads are being reverse complemented.
2. In the Output field, you can leave the default value for the location of the output files as
is (the default value is the directory path for the input file), or you can click Set to select
a different location.
3. Optionally, before you process the files, click Save to save the settings that you have
specified to a Settings file (.ini file).
You can always load this file at a later date and process other data files according
to the saved settings in the file.
4. Click OK.
362
NextGene User’s Manual
Chapter 8
NextGENe Tools
A message opens when the process is completed. A single file is produced and its name
is appended with the phrase “_complemented” as shown in Figure 8-10 below.
Figure 8-10:
Reverse Complemented file
NextGene User’s Manual
363
Chapter 8
NextGENe Tools
The NextGENe Reads Simulator Tool
Synthetic data can be a viable alternative to real data in many situations. For example, you
might need to explore the effects of certain data characteristics on your data models and need
to construct datasets exhibiting specific properties to test your data—for example, to verify
the accuracy of the NextGENe Alignment function or to test the NextGENe assembly
function. You can use the NextGENe Reads Simulator Tool to create synthetic read data,
including paired reads, from a .fasta reference file.
To use the NextGENe Reads Simulator Tool
1. On the NextGENe main menu, click Tools > Reads Simulator.
The Reads Simulator window opens.
Figure 8-11:
Reads Simulator window
2. In the Input pane, click Add to browse to and select the .fasta reference file from which
the synthetic data is being created.
3. In the Output field, you can leave the default value for the location of the output files as
is (the default value is the directory path for the input file), or you can click Set to select
a different location.
364
NextGene User’s Manual
Chapter 8
NextGENe Tools
4. Select the options for creating the synthetic data.
Setting
Description
SOLiD
Select this option to create reads in color-space.
Paired Reads
Select this option to create paired reads.
Both Directions
Select this option to create both forward and reverse reads, which by
definition, doubles the number of reads and total coverage. If you do not
select this option, then only forward reads are created.
Steps
The value that you enter for this option determines the number of
references bases that are between the start of each read. A lower value
results in more reads and therefore, greater coverage.
Error Rate
The Reads Simulator tool can incorporate errors into generated reads.
Enter a value in this field to incorporate randomly generated errors, or
set the value to “0” to have all of the generated reads be an exact match
to the reference genome.
Include Indels
Available only if the Error Rate is > 0. Select this option to include
insertion errors and deletion errors in the generated reads.
Library Size
Available only if Paired Reads is selected. The size of the DNA fragment
that is being simulated.
Random Library Size
Available only if Paired Reads is selected. Select this option to create
pairs with random distribution of sizes that are centered based on the
library size. For example, if the Library Size is set to 200, read pairs will
have a gap size between 100 and 300.
Note: If you do not select this option, all paired reads will have an
identical library size.
5. Click OK.
A message opens when the process is completed. A single .fasta file is produced and its
name is appended with the phrase “_SimulatedReads.” The file is stored in a folder of
the same name as shown in Figure 8-12 below.
Figure 8-12:
Simulated Reads output folder and file
6. Click OK to close the message and return to the Reads Simulator tool.
NextGene User’s Manual
365
Chapter 8
NextGENe Tools
The NextGENe Pseudo Paired Read
Constructor Tool
Paired reads are useful for detection of structural variations such as gene fusion, exon
skipping, or read-throughs for transcriptome analysis. The NextGENe Pseudo Paired Read
Constructor tool is another tool that you can use to construct paired reads. The NextGENe
Pseudo Paired Read Constructor tool creates paired reads from either a reference genome
(.fasta file) or sample files. For either file type, the Pseudo Paired Read Constructor tool
creates two “paired” reads based on the read length that you specify. You can break the read
in half using the entire read or you can specify that the new read length be less than half the
original, using only the ends of reads and not the middle. The 5’ end of the read is reversed to
form one of the paired reads while 3’ end is used directly as the other read in the pair.
Figure 8-13:
Construction of pseudo paired reads from single sequence reads
To use sample file reads, the reads should be at least 76 bp in length. If original
reads are less than 76 bp, you can use the Condensation Tool to increase read
length prior to constructing the pseudo paired reads. See Chapter 4, “Sequence
Condensation Tool,” on page 99.
The other option for creating paired reads is the NextGENe Reads Simulator tool.
See “The NextGENe Reads Simulator Tool” on page 364.
To use the NextGENe Pseudo Paired Read Constructor
1. On the NextGENe main menu, click Tools > Pseudo Paired Read Constructor.
The Pseudo Paired End Constructor window opens. See Figure 8-14 on page 367.
366
NextGene User’s Manual
Chapter 8
NextGENe Tools
Figure 8-14:
Pseudo Paired Read Constructor window
2. In the Input pane, click Add to browse to and select the input data files.
3. In the Output field, you can leave the default value for the location of the output files as
is (the default value is the directory path for the input data file), or you can click Set to
select a different location.
4. In the Settings pane, do the following:
•
Indicate the length of the output read files.
•
Optionally, indicate whether to reverse complement the 5’ ends of the read output,
the 3’ ends of the read output, or both.
5. Click OK.
A message opens when the process is completed. As shown in Figure 8-15 below, two
output files—one that contains all of the reads for the first pair and one that contains all
of the reads for the second pair—are created and stored in a common folder. The folder
name is appended with “_PseudoPairedReads” and the file names are appended with
“_1” and “_2.”
Figure 8-15:
Pseudo paired end output folder and files
NextGene User’s Manual
367
Chapter 8
NextGENe Tools
The NextGENe Condensation Results Filter
Tool
You use the Condensation Filter tool to filter contaminants such as foreign DNA or primers
from condensation reads or assembly results. The filtering is based on different
characteristics of condensed reads or assembled contigs. You can remove primer
contamination by selecting the Filter by Coverage option to remove very high coverage
regions. If foreign DNA contamination is a concern, you can use the Reads Simulator Tool to
break the genome and reassemble it with condensed reads. In this case, the option to Filter by
Length removes contamination as reads that are assembled with the genome are likely
contaminants. You use an Index Error Correction option for transcriptome analysis, where
expression levels vary greatly. This option allows indices that differ by only a one base, but
that have matching shoulder sequences, to be indexed together when the ratio of the
frequency of the minor index to the frequency of the whole group falls below a set threshold.
To use the NextGENe Condensation Results Filter tool
1. On the NextGENe main menu, click Tools > Condensation Results Filter.
The Condensation Results Filter window opens. The File Format section on the window
is an example of an output consensus sequence that is produced by the Condensation
Tool. The sequences are assigned read names that reflect, from left to right, the anchor
sequence, the shoulder sequences, and the counts of the forward and reserve reads that
were used to create the sequence.
Figure 8-16:
368
Condensation Results Filter window
NextGene User’s Manual
Chapter 8
NextGENe Tools
2. In the Input pane, do one of the following:
•
If you are not using paired reads data, then click Browse to browse to and select the
input data file that is to be filtered.
•
If you are using paired reads data:
•
Click Browse to browse to and select the first input data file that is to be filtered.
•
Click Paired Reads, and then click Browse to browse to and select the second
input data file that is to be filtered.
3. In the Output field, you can leave the default value for the location of the output files as
is (the default value is the directory path for the (first) input data file), or you can click
Set to select a different location.
4. In the Settings pane, select the appropriate options for your analysis. You can accept the
default values for the selected settings or you can change the values as needed.
5. Click OK.
A message opens when the process is finished. A number of output files are created
based on the options that you selected. The output files are appended with the phrase
“_Filter” as shown in Figure 8-17 below.
Figure 8-17:
Sample output files from the NextGENe Condensation Results Filter tool
NextGene User’s Manual
369
Chapter 8
NextGENe Tools
The NextGENe Condensation Results Tool
You use the NextGENe Condensation Results tool to view the results of the Condensation
data analysis step. You can use this tool in one of two ways—You can use this tool to view
the condensation results immediately after your data analysis is complete, or you can use the
tool to view the results at a later date.
•
To view the results immediately, when analyzing your data, you must select
“Consolidation” as the Condensation Type and you must also select “View Condensation
Results” on the Condensation Advanced Settings page. When data analysis is complete,
click Tools > Condensation Results on the NextGENe main menu.
•
To view the results at a later date, you must select “Consolidation” as the Condensation
Type and you must also select “View Condensation Results” on the Condensation
Advanced Settings page. At any time after data analysis is complete, click Tools >
Condensation Results on the NextGENe main menu, and then click Load to browse to and
select the TempViewDir.giv file, which is one of the output files that is created by the
Consolidation method. This file contains all of the consolidation results.
The Condensation Results window graphically displays the reads that were used for each
index and a table that shows the number of reads that were used in each direction for each
index.
Figure 8-18:
370
Condensation Results window
NextGene User’s Manual
Chapter 8
NextGENe Tools
Condensed Reads pane
The Condensed Reads pane is the top pane of the window. This pane shows a list of all of the
condensed reads for the index that is currently selected in the Index table. The first line in the
pane is the currently selected index. The remaining lines show all of the reads that were
clustered in the selected group. The middle pane shows the consensus sequences for the
subgroups. Reads that share a common anchor sequence can differ in the shoulder sequences
because the index is not unique in the genome. Also, indices might not meet the criteria for
any groups of reads to be created. As a result, the Condensed Reads pane can be blank, it can
have one condensed read, or it can have multiple condensed reads.
Index table
The Index table is located in the lower pane of the Condensation Results window. This table
lists of all indices, or anchor sequences, there were found in the sample reads and that met all
of your consolidation settings. From left to right, the columns in the table are:
•
Index—Lists the index number for each index.
•
Anchor—Lists the corresponding index, or anchor sequence.
•
Forward Number—Lists the number of forward reads for the index.
•
Reverse Number—Lists the number of reverse reads for the index.
NextGene User’s Manual
371
Chapter 8
NextGENe Tools
The NextGENe Build Preloaded Reference Tool
You use the NextGENe Build Preloaded Reference tool to index any large reference
sequence (> 250 Mbp), or shorter reference sequences that are to be used for the
Transcriptome with Alternative Splicing Application type. You can use a BED file to create
an index, or you can use any .fa, .fna, .fasta, GenBank, or pure sequence file to create the
index.
Be aware of the following:
• For Transcriptome analysis, you must use GenBank files so that annotation
information can be included.
• If you need assistance in building your own index, or if you would like
SoftGenetics to build an index for you, contact SoftGenetics directly.
To use the NextGENe Build Preloaded Reference tool with a BED
file
You can use a BED file to recreate a part of the index for an existing whole genome file, for
example, for exomes in a targeted region. You can use a BED file to recreate an index for any
valid data type such as Illumina data, SOLiD data, and so on; however, if you use SOLiD
data, you must explicitly indicate this.
1. On the NextGENe main menu, click Tools > Build Preloaded Reference.
The Build Preloaded Reference window opens.
Figure 8-19:
372
Build Preloaded Reference window
NextGene User’s Manual
Chapter 8
NextGENe Tools
2. In the Reference name field, enter the name that is to be used for the reference.
The reference is saved to the Reference directory that is specified in your
NextGENe process options. See “Specifying NextGENe Process Options” on page
84.
3. Select Create index based on BED file(s).
The Build Preloaded Reference window is refreshed with options for creating an index
using a BED file. A Merge Overlaps option is also displayed and selected by default.
Figure 8-20:
Build Preloaded Reference window BED file options
4. By default, Merge Overlaps is selected, which merges overlapping ROIs or amplicons
from the loaded BED file. To avoid merging these ROIs or amplicons, clear Merge
Overlaps.
5. If you are recreating an index using any data type other than SOLiD data, continue to
Step 6; otherwise, select SOLiD Index, and then continue to Step 6.
6. In the Load Data pane, do the following:
•
Select the reference that is to be recreated based on the BED file.
•
Click Add BEDs to browse to and select the BED files that are being used to recreate
the index.
7. Click Build Index.
The Output folder contains several output files, including the indexed reference file and
an Excel CSV file, that detail the information about each contig reference position. See
Figure 8-21 and Figure 8-22 below.
NextGene User’s Manual
373
Chapter 8
NextGENe Tools
Figure 8-21:
NextGENe Preloaded Reference tool output folder and files
Figure 8-22:
Sample contig reference position csv file
To use the NextGENe Build Preloaded Reference tool to create a
new index
1. On the NextGENe main menu, click Tools > Build Preloaded Reference.
The Build Preloaded Reference window opens.
Figure 8-23:
Build Preloaded Reference window
2. In the Reference name field, enter the name that is to be used for the reference.
374
NextGene User’s Manual
Chapter 8
NextGENe Tools
The reference is saved to the Reference directory that is specified in your
NextGENe process options. See “Specifying NextGENe Process Options” on page
84.
3. Do one or both of the following as appropriate:
•
To build an index to which you can align your SOLiD System data, select SOLiD
Index.
•
To build two separate indices—a “standard” genome index and an index where the
reference sequence is replaced with variant sequences based on variants reported in
dbSNP—select Dual Index.
NextGENe can align sample files to both indices simultaneously, which can
provide for faster data analysis.
4. In the Load Data pane, click Add Files to browse to and select the data files that are
being indexed.
5. To include annotation information from an existing reference database, click Query
database for annotation, and then select the appropriate database.
You can click Manage Database as needed to open the Process Options Settings
dialog box and confirm or edit the MySQL settings. See “Specifying NextGENe
Process Options” on page 84.
6. Click Build Index.
The Output folder contains several output files, including the indexed reference file and
an Excel CSV (see Figure 8-25 on page 376) file, that detail the information about each
contig reference position.
Figure 8-24:
NextGENe Build Preloaded Reference tool output folder and files
NextGene User’s Manual
375
Chapter 8
NextGENe Tools
Figure 8-25:
376
Sample contig reference position csv file
NextGene User’s Manual
Chapter 8
NextGENe Tools
The NextGENe GC Percentage Calculation Tool
A GC base pair has three intermolecular hydrogen bonds whereas an AT base pair has just
two intermolecular hydrogen bonds. Consequently, molecular regions with higher GC
content have a more stable secondary structure, which, in turn, can have an impact on PCR.
Higher GC content results in higher melting temperatures or specific reagents such as
DMSO to break up this secondary GC structure and as a result, GC-rich regions of a sample
might be underrepresented during data analysis. You use the NextGENe GC Percentage
Calculation tool to determine the GC content of regions in a sample data file.
To use the NextGENe GC Percentage Calculation tool
1. On the NextGENe main menu, click Tools > GC Percentage Calculation.
The GC Percentage Calculation window opens.
Figure 8-26:
GC Percentage Calculation window
2. In the Load File pane, click Set to browse to and select the input file for which the GC
content is being calculated.
3. In Output GC Percentage File pane, click Set to specify the name of the output file and
the location of the output file.
4. Click OK.
The output file is saved as a .txt file. It lists the GC content every 31 bp for the sample
data file.
Figure 8-27:
Sample output file from the GC Percentage Calculation tool
NextGene User’s Manual
377
Chapter 8
NextGENe Tools
The NextGENe Overlap Merger Tool
You use the NextGENe Overlap Merger Tool to merge overlapping contigs or reads. You can
merge overlapping contigs from assembled reads, or you can merge overlapping paired reads
after elongation. (In this application of the tool, only reads that are in the same pair that
overlap and the overlapping portions match are merged.) You can merge both .fasta and
.fastq files with this tool.
To look at quality scores, you must merge .fastq files.
To use the NextGENe Overlap Merger tool
1. On the NextGENe main menu, click Tools > Overlap Merger.
The Overlap Merger window opens.
Figure 8-28:
Overlap Merger window
2. In the Input files pane, click Add to browse to and select the input files that are being
merged.
3. In the Output field, you can leave the default value for the location of the output files as
is (the default value is the directory path for the first data file added), or you can click Set
to select a different location.
378
NextGene User’s Manual
Chapter 8
NextGENe Tools
4. Specify your settings as appropriate.
Setting
Description
Merge Overlapping Contigs
Applicable only for de novo assembly results. Select this
option to determine whether any of the contigs are
overlapping and can be merged further.
Merge Overlapping Paired Reads
Applicable only for raw paired reads that are overlapping.
Note: The library size and read length determine whether the
paired reads are overlapping or not.
Ion Floton
Available only if Merge Overlapping Paired Reads is
selected. Select the type of data that is being analyzed.
Illumina
Overlap Min Bases
The minimum number of bases that must overlap for the
contigs to be merged.
Ignore Low Quality Ends for
Non-Overlapped Pairs
Applicable only for elongated paired reads data. Nonoverlapped reads are saved in the unmatched.fasta files. If
elongated reads are used for merging, then lowercase letters,
which are used at the ends of elongated reads, are trimmed
from the non-overlapped reads before the file is saved.
Merged Length [ ] bp to [1000] bp
Applicable only for paired reads data. Set an acceptable
length for the merged results.
Merged Length [70] bp to [130] %
of the longer read length
Note: Both options can be selected. If both options are
selected, then the data must meet both criteria to be
included in the results.
If you add multiple input files and you select Merge Overlapping Contigs, then
both files are used for merging—for example, a contig from file A could be merged
with a contig from file B.
5. Click OK.
A folder is created for the output files. The default folder name is based on the name of
the files that were analyzed and is appended with the word “Merge” as shown in Figure
8-29 below. The folder contains several text files, which are detailed in the table below.
Figure 8-29:
NextGENe Overlap Merger output folder and files
File
Description
Merge Overlapping Contigs
input file name_ContigMerge..fasta
Contains the merged contigs.
statinfo.txt
Details various statistics about the merge.
NextGene User’s Manual
379
Chapter 8
NextGENe Tools
File
Description
Merge Overlapping Paired Reads
• File name 1_unmatched..fasta
Contain the reads that were not merged.
• File name 2_unmatched. .fasta
380
MergeLog.txt
Details various statistics about the merge.
PairMerge.fasta
Contains the merged reads.
NextGene User’s Manual
Chapter 8
NextGENe Tools
The NextGENe Long PE Assembly Mapping
Tool
In the PE Assembly method (see “PE assembly method for Roche/454, Illumina, and Ion
Torrent data” on page 127), NextGENe automatically decides which scaffold contigs are to
be linked together based on the paired read information. You can use the Long PE Assembly
Mapping tool to override these automatic selections and manually select the scaffold contigs
that are to be linked together.
The FinalContig_ScaffoldContig_Mapping.txt file shows the scaffold linking that
NextGENe automatically carried out. You must edit this file prior to using the
Long PE Assembler Mapping tool. For assistance with editing this file, contact
Technical Support at [email protected].
To use the NextGENe Long PE Assembly Mapping tool
1. On the NextGENe main menu, click Tools > Long PE Assembly Mapping.
The Long PE Assembly Mapping window opens.
Figure 8-30:
Long PE Assembly Mapping window
2. Next to the Scaffold Contigs Input field, click Browse to browse to and select the
ScaffoldContigs.fasta file.
3. Next to the Scaffold Contigs Mapping field, click Browse to browse to and select the
FinalContig_ScaffoldContig_Mapping.txt file that you have edited.
4. In the Output field, you can leave the default value for the location of the output files as
is (the default value is the directory path for the ScaffoldContigs.fasta file), or you can
click Set to select a different location.
5. Click OK.
A message opens when the process is completed. An output file named
AssemsbledSequences.fasta is generated.
NextGene User’s Manual
381
Chapter 8
NextGENe Tools
The NextGENe File Preview Tool
You use the NextGENe File Preview tool to view some basic information about a sample file
such as its format, typical read length, and possible patterns in quality scores. This
information can be helpful in determining file format conversion settings and in other areas
of the NextGENe application as well.
To use the NextGENe File Preview tool
1. On the NextGENe main menu, click Tools > File Preview.
The File Preview window opens.
Figure 8-31:
File Preview window
2. On the File menu, click Open to browse to and select the file for previewing.
382
NextGene User’s Manual
Chapter 8
NextGENe Tools
The NextGENe Track Manager Tool
You use the NextGENe Track Manager tool to import data from any public or proprietary
variant database into NextGENe. The imported data is referred to as a track in NextGENe.
You can import PolyPhen-2 scores, SIFT scores, Mutation Taster scores, LRT scores, PhyloP
Conservation scores, and 1000 Genomes frequencies from the dbNSFP database. You can
import coding and non-coding variant information from the COSMIC database. You can
import variant information with clinical significance values from the ClinVar database. You
can also use the Track Manager to import custom databases into NextGENe and to import
gene annotation tracks. Finally, you can use the Track Manager to load track data for
previously run projects.
To use the NextGENe Track Manager tool to import data
1. On the NextGENe main menu, click Tools > Track Manager.
The Track Manager window opens. This window lists the following information:
•
The directory that you selected for preloaded references.
•
The preloaded reference files that you have previously imported.
•
Any databases that you have previously imported. The Default Query status
indicates whether the track, by default, is queried for all projects for the selected
reference.
Figure 8-32:
Track Manager window
NextGene User’s Manual
383
Chapter 8
NextGENe Tools
2. Do the following:
•
Verify that the Reference Directory for preloaded reference files is correct;
otherwise, click Set to open the Browse to Folder dialog box, and then browse to and
select the correct directory.
•
On the Genome Build list, select the correct preloaded reference file.
3. Optionally, do any or all of the following as needed:
•
To edit the Default Query status for a track, right-click the track, and on the context
menu that opens, click Default Query, and then click Yes or No as appropriate.
•
To edit a track, continue to “To edit a track” below.
•
To import data from the dbNSFP database for the selected reference, continue to “To
import data from the dbNSFP database” on page 387.
•
To import data from the COSMIC database for the selected reference, continue to
“To import data from the COSMIC database” on page 388.
•
To import data from the ClinVar database for the selected reference, continue to “To
import data from the ClinVar database or any other dbSNP files” on page 389.
•
To import data from the dbscSNV database, continue to Chapter 8, “To import data
from the dbscSNV database,” on page 390.
•
To import data from other custom variation databases, continue to “To import data
from other variation databases” on page 391.
•
To import gene annotation tracks, continue to “To import gene annotation tracks” on
page 393.
To edit a track
To edit a track, you must load one or more files that specify the records that are to be
included for reporting purposes and/or files that specify the records that are to be excluded.
You can also edit the column property settings for the imported track. You must load the files
from the database that you are editing. For example, if you are editing records from the
COSMIC database, then you must load COSMIC database files.
1. Right-click on the track that you are editing, and then on the context menu that opens,
click Edit.
The Edit Track wizard opens. See Figure 8-33 on page 385.
384
NextGene User’s Manual
Chapter 8
NextGENe Tools
Figure 8-33:
Edit Track wizard
2. Click Include/Exclude Files.
The Include/Exclude Files page opens.
Figure 8-34:
Include/Exclude Files page
NextGene User’s Manual
385
Chapter 8
NextGENe Tools
3. Do one or both of the following:
•
For the Include pane, click Load, and then browse to and select the files that define
the records that are to be included for reporting purposes.
•
For the Exclude pane, click Load, and then browse to and select the files that define
the recorded that are to be excluded for reporting purposes.
4. Click Next.
The Column Properties Settings page opens.
Figure 8-35:
Column Properties Settings page
5. Optionally, select a field (CTRL-click to select multiple fields), and then do one or both
of the following as needed:
•
Select a different identifier on the dropdown list on the right side of the dialog box.
•
Select a different field data type (String, Integer, or Data).
Setting
386
Description
Skip
Ignore the information in the field.
Display Only
View the information in the Mutation report.
Display and Filtering
View the information and filter based on the information in the Mutation
report.
Chr
The chromosome number.
ChrPos
The chromosome position.
Chr&Pos
The chromosome number and position concatenated, for example:
1:69523.
Mutation Call
Mutation call at the indicated position.
WT_SEQ
The wild type sequence.
MUT_SEQ
The mutant sequence.
NextGene User’s Manual
Chapter 8
NextGENe Tools
6. Click Next.
The imported files are processed, and then an Import Completed message opens.
7. Click OK to close the message and return to the Edit Track wizard.
8. Click OK to close the Edit Track wizard and return to the Track Manager window.
9. Click OK to close the Track Manager window.
To import data from the dbNSFP database
1. Click Import dbNSFP.
The Import dbNSFP dialog box opens.
Figure 8-36:
Import dbNSFP dialog box
Optionally, click About to open a dialog box that provides a link to an article that
details the dbNSFP database.
2. Click Open dbNSFP website.
The dbNSFP website page opens.
3. Download the appropriate version of the database for your work.
4. Click Add to browse to and select the downloaded files.
5. In the Name field, enter the name or version number for the downloaded database.
6. Click OK.
The Import dbNSFP dialog box closes.
7. To set the Default Query to Yes for the database, right-click the track name in the Track
Manager window, and on the context menu that opens, select Default Query > Yes.
Initially, after importing a track, the Default Query is set to No. By setting the Default
Query to Yes, NextGENe can now automatically query the dbNSFP database for
alignments to the whole human genome reference and to the NC and NT accession
GenBank files.
NextGene User’s Manual
387
Chapter 8
NextGENe Tools
To load dbNSFP information for previously run projects, continue to “To load
track data for previously run projects” on page 393.
To import data from the COSMIC database
1. Click Import COSMIC.
The Import COSMIC dialog box opens.
Figure 8-37:
Import COSMIC dialog box
Optionally, click Guidelines on Use of COSMIC data to go to a web page provided
by Sanger with guidelines and information about the public use of COSMIC data.
2. To download the COSMIC database for coding or non-coding variants, click Open FTP
Folder for Download.
The Sanger COSMIC FTP site opens. This site contains all the COSMIC database files
that are available for downloading.
3. Do one or both of the following:
•
To download coding variant data, select the appropriate
CosmicCodingMuts_vXX_DDMMYYYY_noLimit.vcf.gz file.
•
To download non-coding variant data, select the appropriate
CosmicNonCodingMuts_vXX_DDMMYYYY_noLimit.vcf.gz file.
In either case, the exact file name changes with new versions of the database. At
the prompt to Open or Save the file, click Save to save the file to a location of your
choice.
4. Click Load File and select the files to load.
Both the coding and non-coding files can be loaded at the same time.
388
NextGene User’s Manual
Chapter 8
NextGENe Tools
5. In the Name field, enter the name or version number for the downloaded files.
If you loaded two files with different version numbers, you can label to indicate
this, for example, v58-v57.
6. Click OK.
The Import COSMIC dialog box closes.
7. To set the Default Query to Yes for the database, right-click the track name in the Track
Manager window, and on the context menu that opens, select Default Query > Yes.
Initially, after importing a track, the Default Query is set to No. By setting the Default
Query to Yes, NextGENe can now automatically query the COSMIC database files for
alignments to the whole human genome reference and to the NC and NT accession
GenBank files.
To load COSMIC tags for previously run projects, continue “To load track data
for previously run projects” on page 393.
To import data from the ClinVar database or any other dbSNP files
You can import data from a ClinVar database, or any other dbSNP files that are available
from NCBI. When you import a ClinVar database, the clinical significance value for each
variant is also automatically imported.
1. Click Import ClinVar/dbSNP.
The Import Clinvar/dbSNP dialog box opens.
Figure 8-38:
Import ClinVar/dbSNP dialog box
2. Choose the appropriate group—ClinVar or dbSNP for any other dbSNP database.
3. Click Open FTP Folder to Download VCF.
The NCBI FTP site opens. This site contains all the ClinVar or dbSNP database files that
are available for downloading.
NextGene User’s Manual
389
Chapter 8
NextGENe Tools
4. Download the appropriate version of the database.
5. Click Add to browse to and select the downloaded files.
6. In the Name field, enter the name or version number for the downloaded database.
7. Click OK.
The Import ClinVar/dbSNP dialog box closes.
8. To set the Default Query to Yes for the database, right-click the track name in the Track
Manager window, and on the context menu that opens, select Default Query > Yes.
Initially, after importing a track, the Default Query is set to No. By setting the Default
Query to Yes, NextGENe can now automatically query the ClinVar any other dbSNP
database files for alignments to the whole human genome reference and to the NC and
NT accession GenBank files.
To load ClinVar or other dbSNP information for previously run projects, continue
to “To load track data for previously run projects” below.
To import data from the dbscSNV database
1. Click Import dbscSNV.
The Import dbscSNV dialog box opens.
Figure 8-39:
Import dbscSNV dialog box
2. Click Open FTP folder to Download dbscSNV.
A dbNSFP website page that has options for downloading the database opens.
3. Download the appropriate version of the database for your work.
The dbscSNV database is a database of all potential human SNVs within splicing
consensus regions. It is listed as an Attached Database on the dbSNFP website.
4. Click Add to browse to and select the downloaded files.
390
NextGene User’s Manual
Chapter 8
NextGENe Tools
5. In the Name field, enter the name or version number for the downloaded database.
6. Click OK.
The Import dbscSNV dialog box closes.
7. To set the Default Query to Yes for the database, right-click the track name in the Track
Manager window, and on the context menu that opens, select Default Query > Yes.
Initially, after importing a track, the Default Query is set to No. By setting the Default
Query to Yes, NextGENe can now automatically query the dbNSFP database for
alignments to the whole human genome reference and to the NC and NT accession
GenBank files.
To load dbscSNV information for previously run projects, continue to “To load
track data for previously run projects” on page 393.
To import data from other variation databases
If you download data from variation databases other than dbNSFP, COSMIC, dbscSNV, or
ClinVar, you can also import this data into NextGENe.
1. Click Import Variation Tracks.
The first page for the Import Variation Tracks wizard opens.
Figure 8-40:
Import Variation Tracks wizard
2. Click Add to browse to and select the downloaded files.
3. In the Name field, enter the name or version number for the downloaded database.
4. Click Next.
The Column Properties Settings page opens. This page lists all the different fields in the
imported files, the information that is contained in each field, and the field data type
(String, Integer, or Data.) You can use this information that is displayed on this page to
verify that NextGENe is correctly identifying and reading the information in the fields.
When the page first opens, by default, the information is sorted alphabetically by Track
Title. You can click the column header for Track Title, Status, or Numeric to change the
sort order. See Figure 8-41 on page 392.
NextGene User’s Manual
391
Chapter 8
NextGENe Tools
Figure 8-41:
Import Variation Tracks wizard, Column Properties Settings page
You can select a field (CTRL-click to select multiple fields), and then you can select a
different identifier for the field on the dropdown list on the right side of the page, or you
can select the appropriate field data type (String, Integer, or Data). You can also use the
dropdown list to choose which fields to use for display, for display and filtering, and
which fields can be skipped for import.
Setting
Description
Skip
Ignore the information in the field.
Display Only
View the information in the Mutation report.
Display and Filtering
View the information and filter based on the information in the Mutation
report.
Chr
The chromosome number.
ChrPos
The chromosome position.
Chr&Pos
The chromosome number and position concatenated, for example:
1:69523.
Mutation Call
Mutation call at the indicated position.
WT_SEQ
The wild type sequence.
MUT_SEQ
The mutant sequence.
5. Click Next.
The selected database files are imported into NextGENe. The Import Variation Tracks
wizard closes. You return to the first page of the Import Variation Tracks wizard. The
dialog box displays the imported database files, or tracks.
392
NextGene User’s Manual
Chapter 8
NextGENe Tools
6. Click OK.
The Import Variation Tracks wizard closes.
To load variation information for previously run projects, continue to “To load
track data for previously run projects” on page 393.
To import gene annotation tracks
You can import gene tracks from a file that is in either a .gff format or a .gff3 format. You can
use this function to customize gene-level annotations such as gene names and transcripts.
1. Click Import Gene Tracks.
The Import Gene Tracks dialog box opens.
Figure 8-42:
Import Gene Tracks dialog box
2. Click Add to browse to and select the downloaded files.
3. In the Name field, enter the name or version number for the downloaded database.
4. Click OK.
The Import Gene Tracks dialog box closes.
To load track data for previously run projects
1. Load the project in the NextGENe Viewer. See “To load a sequence alignment project in
the NextGENe Viewer” on page 143.
2. On the Viewer main menu, click Process > Query Reference Tracks.
The Query Reference Tracks dialog box opens. The dialog box lists all the tracks that are
available for the reference. By default, all the tracks are selected. See Figure 8-43 on
page 394.
NextGene User’s Manual
393
Chapter 8
NextGENe Tools
Figure 8-43:
Query Reference Tracks dialog box
3. Verify that the correct directory for the Reference Root Directory is displayed.
.
This directory is specified on the Preloaded References tab on the Process Options
dialog box. If you need to change the directory, then you must change it in Process
Options. See “Specifying NextGENe Process Options” on page 84.
4. Select the appropriate whole genome build.
5. Leave all the available tracks selected, or clear the selections for the tracks that you do
not want to query for the project.
6. Optionally, if the track that is to be queried for the project is not available, then click Run
Track Manager to open the Track Manager tool and import the database. See “The
NextGENe Track Manager Tool” on page 383.
7. Click OK.
The Query Reference Tracks dialog box closes. The track information for the project is
modified accordingly. If new tracks have been added to the project, then the tracks are
loaded and the information from the tracks can be displayed in the Mutation Report in
the NextGENe Viewer.
See “Variation Tracks Settings dialog box” on page 228.
394
NextGene User’s Manual
Chapter 9
The NextGENe AutoRun Tool
NextGENe provides many tools for optimizing input data and exporting and analyzing
results. The NextGENe AutoRun tool is a multi-functional tool that you can use for the
following purposes:
•
To carry out the batch analysis of multiple projects, where each project is referred to as a
job, and jobs are contained in a single job file.
•
To carry out the batch processing of previously processed sequence alignment projects
and export outputs of your choosing.
•
To carry out a secondary batch analysis of multiple projects.
•
To create and modify templates for facilitating job setup in the NextGENe AutoRun tool,
including jobs for analysis of data for RainDance Thunderbolts panels.
This chapter covers the following topics:
•
“Batch Processing of Multiple Projects” on page 397.
•
“Batch Processing of Previously Processed Sequence Alignment Projects to Export
Outputs” on page 419.
•
“Secondary Batch Analysis of Multiple Projects” on page 426.
•
“Managing NextGENe AutoRun Templates” on page 428.
•
“Working With NextGENe AutoRun Templates for RainDance ThunderBolts Panels” on
page 435.
With the exception of the NextGENe AutoRun tool, you can open all the NextGENe
tools only from the Tools option on the NextGENe main menu. You can, however,
also open the NextGENe AutoRun tool independently of NextGENe through the
Start menu and that is why it is afforded its own chapter. The NextGENe Format
Conversion tool is discussed in Chapter 3, “File Format and Conversion,” on
page 89. All other NextGENe tools are discussed in Chapter 8, “NextGENe
Tools,” on page 347.
NextGene User’s Manual
395
Chapter 9
The NextGENe AutoRun Tool
396
NextGene User’s Manual
Chapter 9
The NextGENe AutoRun Tool
Batch Processing of Multiple Projects
You use the NextGENe AutoRun tool to carry out the batch analysis of multiple projects,
where each project is referred to as a job, and jobs are contained in a single job file. The tool
scans for queued job files at an interval that you set. When a job file is available for
processing, the NextGENe AutoRun tool automatically launches an instance of NextGENe
for analyzing the data in the job files. Sample files can be in pre-fasta format.
Using the NextGENe AutoRun function is a two-step process. First, you must create a job
file that specifies the parameters for processing the jobs (projects). To create a job file, you
can do one of the following:
•
You can create a new job file. You can use the options that are available on the Job File
Editor dialog box (included in the NextGENe AutoRun tool) to create this file, or you can
use a text editor.
If you want to use a text editor to create a job file, SoftGenetics recommends that
you first use the Job File Editor to create a file with a single job, which ensures
that the file has the correct format. You can then open this file in a text editor and
copy the information for the existing job and modify it as needed to create other
jobs. Contact SoftGenetics at [email protected] for assistance.
•
You can load an existing job file and modify it as needed.
•
You can create a job file from an existing AutoRun template.
Second, you must specify the settings for the AutoRun tool, which includes the job file
directory, the local work folder, and the time interval for detecting job files.
To create a new job file in the NextGENe AutoRun Tool
1. Do one of the following:
•
On the NextGENe main menu, click Tools > NextGENe AutoRun.
•
On the Start menu, select All Programs\SoftGenetics\NextGENe\NG_AutoRun.
The NextGENe AutoRun window opens. See Figure 9-1 on page 398.
NextGene User’s Manual
397
Chapter 9
The NextGENe AutoRun Tool
Figure 9-1:
NextGENe AutoRun window
2. On the NextGENe AutoRun main menu, click Tool > Job File Editor.
The Job File Editor dialog box opens. It contains a placeholder for creating a job, which
is identified with the default name of Job<#>, for example, Job1. The left pane is the Job
Information tree. The right pane is the Job Editing pane.
Figure 9-2:
398
Job File Editor dialog box
NextGene User’s Manual
Chapter 9
The NextGENe AutoRun Tool
3. For each sample file that is to be analyzed, click Load in the Sample File(s) pane to open
a dialog box, and then browse to and select the sample file.
The job name is automatically updated based on the file name of the first file loaded, but
you can modify as needed.
You can load multiple samples for analysis with the same job options and then use
the Group Jobs option to automatically group samples into separate jobs. The
same job options are applied to all the separate job files. See “To group jobs” on
page 411.
4. If your project sample files require preprocessing, then you must load the appropriate
Settings files (.ini files) to specify the required preprocessing options.
•
If the project sample files are not in .fasta or .bam format, then you must load a
Settings file that specifies the format conversion settings.
•
If the project sample files contain barcodes, then you must load a Settings file that
specifies the barcode sorting settings to demultiplex the data.
•
If the project sample files need to be modified further before analysis (for example,
trimming adapters), then you must load a Settings file that specifies the appropriate
sequence operation settings.
If applicable, for any of the above, go to “To specify preprocessing options” on page
402; otherwise, continue to Step 5.
5. In the Reference pane, do one of the following:
•
To select a GenBank or a .fasta reference file, click Add to open a dialog box in
which you can browse to and select the reference file.
•
To select a preloaded reference file, click Preloaded to open a Select Preloaded
dialog box in which you can select the preloaded reference file. (See “To load a
preloaded reference (Large genome reference)” on page 57.)
6. In the Settings File for Condensation/Assembly/Alignment pane, click Load to open a
dialog box, and then browse to and select a configuration file with the appropriately
saved settings for the condensation, assembly, and/or alignment steps. (See “Saving and
Loading Project Settings” on page 77.)
7. Optionally, consider the following; otherwise, continue to Step 11.
•
If the configuration file that you loaded in Step 6 does not contain post-processing
options, and you want to post-process the data:
or
•
If the configuration file that you loaded in Step 6 does contain post-processing
options, but you want to use different settings to post-process the data:
then click Edit Outputs to open the Outputs dialog box. See Figure 9-3 on page 400.
NextGene User’s Manual
399
Chapter 9
The NextGENe AutoRun Tool
Figure 9-3:
Outputs dialog box
8. Select the appropriate post-processing outputs and the corresponding Settings files (.ini
files) by which to post-process the data. See:
•
“To select report post-processing options” on page 404.
•
“To export aligned sequences as a post-processing option” on page 407.
•
“To export the project output to a BAM file” on page 408.
•
“To export the project output to Geneticist Assistant” on page 408.
9. Click OK on the Outputs dialog box.
The Outputs dialog box closes. A Warning message opens indicating that the settings
have changed, and asking you if you want to save the settings.
10. Click Yes.
The Warning message and the Outputs dialog box close. The Job File Editor dialog box
remains opens.
400
NextGene User’s Manual
Chapter 9
The NextGENe AutoRun Tool
11. Optionally, if a GenBank reference file is loaded, then to query the imported databases
(tracks) for the project, click Edit Tracks to open the Query Track dialog box and select
the appropriate preloaded reference.
Figure 9-4:
Query Track dialog box
12. Optionally, select one or both of the following as appropriate:
•
Use Inspect Input Files for Condensation—This option is identical to the Inspect
Input Files option on the Condensation page in the Project Wizard. (See “Inspect
Input Files” on page 106.) If you load a Configuration file that contains
condensation settings for Illumina data, SOLiD System data, or Ion Torrent data, and
you select this option, then NextGENe inspects the input files and adjusts the
condensation settings accordingly. If you select this option for Roche data, then
NextGENe simply ignores it.
•
Use Inspect Input Files for Preloaded Reference Alignment—This option is identical
to the Inspect Input Files option on the Alignment page for preloaded reference files
in the Project Wizard. (See “Inspect Input Files” on page 106.) If you load a
Configuration file that contains alignment settings, and you select this option, then
NextGENe inspects the input files and adjusts the alignment settings accordingly.
13. In the Output field, leave the default value for the location of the output files as is (the
directory path for the first data file added), or click Set to select a different location.
NextGene User’s Manual
401
Chapter 9
The NextGENe AutoRun Tool
14. Optionally, click any of the following as needed; otherwise, go to Step 15.
Setting
Description
Duplicate
Create a new job with options that are identical to options for the
current job.
Note: This is useful to create a new job that needs only minor
modifications.
Group Jobs
If you have loaded data from multiple samples, you might want to
group these samples into separate jobs. This option opens the
Group Jobs dialog box so that you can do this. The same job
options are applied to all the separate job files. See “To group jobs”
on page 411.
Save
Saves the information for all jobs in a NextGENe AutoRun job file.
You can specify a file name and location for the job file.
Note: The file has an extension of .ngjob and you cannot change
this.
Add New Job
Refreshes the Job File Editor dialog box with a placeholder for
another job. You must add the necessary information for each
additional job. After you have added all the necessary jobs, click
Save.
Add Secondary Analysis Job
Carry out the secondary batch analysis of multiple projects. See
“Secondary Batch Analysis of Multiple Projects” on page 426.
Delete
Deletes the currently displayed job in the Job Information tree in
reverse order of addition - that is, that last job added is the first job
to be deleted.
Refresh
Refreshes the display of the Job Information tree to show any new
options that you have selected.
15. Click OK.
If you have not already clicked Save to save the job file, then you are prompted to
specify a file name and location for the job file and after you save the file, the Job File
Editor dialog box closes; otherwise, the Job File Editor dialog box simply closes. You
have now created the necessary job files.
16. Continue to “To specify the NextGENe AutoRun settings” on page 416.
To specify preprocessing options
When you specify preprocessing options, you must select a previously saved Settings file
(.ini file). If the appropriate Settings file is not available, then you must create it. See:
402
•
For a Format Conversion Settings file, see “To convert a sample file” on page 91.
•
For a Barcode Sorting Settings file, see “To parse barcoded sample files” on page 350.
•
For a Sequence Operation Settings file, see “The NextGENe Sequence Operation Tool”
on page 354.
NextGene User’s Manual
Chapter 9
The NextGENe AutoRun Tool
1. Under the Sample File(s) pane, select Preprocessing, and then click Edit Preprocessing
steps.
The Preprocessing Steps dialog box opens.
Figure 9-5:
Preprocessing Steps dialog box
2. Click Format Conversion, Barcode Sorting, or Sequence Operations, as appropriate.
The Load Settings File dialog box opens.
3. Scroll to and select the appropriate Settings file (.ini file) for the project, and then click
Open.
The Load Settings dialog box closes. The selected Settings file is displayed in the
Preprocessing Steps dialog box with an Edit option next to it.
4. Repeat Step 2 and Step 3 as needed to add all the appropriate Settings files (.ini files).
5. Optionally, do any of the following as needed:
•
To change the order of a loaded Settings files, select then file, and then click Up or
Down as needed.
•
To remove a file, select the file, and then click Remove.
•
To remove all files in a single step, click Remove All.
•
To edit a loaded file, click Edit next to the file.
For detailed information about editing the settings for a:
• Format Conversion Settings file, see “To convert a sample file” on page 91.
• Barcode Sorting Settings file, see “To parse barcoded sample files” on page 350.
• Sequence Operation Settings file, see “The NextGENe Sequence Operation
Tool” on page 354.
NextGene User’s Manual
403
Chapter 9
The NextGENe AutoRun Tool
6. Click OK.
The Preprocessing Steps dialog box closes. The Job File Editor dialog box remain open.
7. Return to one of the following as appropriate:
•
Step 9 of “To create a new job file in the NextGENe AutoRun Tool” on page 397.
•
Step 5 of “To create a single post-processing Settings file” on page 419.
•
Step 7 of “To create a new job from an existing AutoRun template” on page 414.
•
Step 8 of “To create a NextGENe AutoRun template” on page 428.
•
Step 5 of “To modify a NextGENe AutoRun template” on page 432.
•
Step 8 of “To modify a NextGENe AutoRun template for a RainDance Thunderbolts
panel” on page 442.
To select report post-processing options
If you specify report post-processing options, then selected reports are automatically
generated and saved for the project after project analysis is completed. Each report is
generated and saved based on the settings that were specified in a saved Settings file (.ini
file) for the report. You can generate and save multiple versions of different reports, or
multiple versions of the same report as long as each report version uses a different Settings
file. To specify post-processing options for the first time, you must have previously saved a
Settings file for at least one of the following reports:
•
Mutation report (The general settings and/or the variation tracks settings). See “Mutation
Report settings” on page 214.
•
Distribution report. See “Distribution report” on page 249.
•
Coverage Curve report. See “Coverage Curve report” on page 253.
•
Expression report. See “Expression Report” on page 260.
•
Structural Variation report. See “Structural Variation report” on page 267.
•
HLA report. See “HLA project report” on page 197.
The HLA report is available as a post-processing option only if HLA was selected
as the application type for the project. See “HLA Project” on page 195.
•
Summary report. See “Summary report” on page 241.
The Summary report is available only after you select at least one other
post-processing report and its Settings file. The information that the report
contains is relative to the post-processing reports that you select for the project.
404
NextGene User’s Manual
Chapter 9
The NextGENe AutoRun Tool
Continue to one or both of the following as needed:
•
“To select the Mutation Report as a post-processing option” below.
•
“To select a report other than the Mutation report as a post-processing option” on page
406.
To select the Mutation Report as a post-processing option
If you select the Mutation report as a post-processing option, two different Settings files are
available. The General Report Settings file contains all the general options for the Mutation
report. The Variation Tracks Settings file contains all the tracks settings for the Mutation
report based on the variation databases that were imported for the project.
For
For information about the various options for the Mutation report, see “Mutation
Report settings” on page 214. For information about importing variation
databases into NextGENe, see “The NextGENe Track Manager Tool” on page
383.
1. On the Report dropdown list, select Mutation Report.
A blank Settings field opens next to the selected report.
2. Next to the blank Settings field, click Set.
The Set Mutation Report Settings dialog box opens.
Figure 9-6:
Set Mutation Report Settings dialog box
3. Under General Report Settings click Set to display the Open dialog box, and then browse
to and select a saved Settings file (*.ini file) for the report.
4. Optionally, to specify display or filtering settings based on imported variation tracks,
under Variation Tracks Settings, click Set to display the Open dialog box, and then
browse to and select a saved Settings file (*.ini file) for the report.
5. Click OK.
The Set Mutation Report Settings dialog box closes. The Outputs dialog box remains
opens.
6. Optionally, click Save Summary report to have a Summary report automatically
generated for the project as well.
NextGene User’s Manual
405
Chapter 9
The NextGENe AutoRun Tool
Remember, Save Summary report is available only after you select at least one
other post-processing report and its Settings file. For information about the
Summary report, see “Summary report” on page 241.
7. If you are done with specifying the needed post-processing options, then return to one of
the following as appropriate:
•
Step 9 of “To create a new job file in the NextGENe AutoRun Tool” on page 397.
•
Step 5 of “To create a single post-processing Settings file” on page 419.
•
Step 7 of “To create a new job from an existing AutoRun template” on page 414.
•
Step 8 of “To create a NextGENe AutoRun template” on page 428.
•
Step 5 of “To modify a NextGENe AutoRun template” on page 432.
•
Step 8 of “To modify a NextGENe AutoRun template for a RainDance Thunderbolts
panel” on page 442.
Otherwise, continue specifying any other needed post-processing options. See:
•
“To select a report other than the Mutation report as a post-processing option”
below.
•
“To export aligned sequences as a post-processing option” on page 407.
•
“To export the project output to a BAM file” on page 408.
•
“To export the project output to Geneticist Assistant” on page 408.
To select a report other than the Mutation report as a post-processing option
1. On the Report dropdown list, select the report that is to be automatically generated and
saved for the project after project analysis is complete.
A blank Settings field opens next to the selected report.
2. Next to the blank Settings field, click Set and then browse to and select a saved Settings
file (.ini file) for the report.
3. Repeat Step 1 and Step 2 until you have added all the needed reports and their Settings
files.
You must select a Settings file for each post-processing report that you specify.
4. Optionally, click Save Summary report to have a Summary report automatically
generated for the project as well.
Remember, Save Summary Report is available only after you select at least one
other post-processing report and its Settings file. For information about the
Summary report, see “Summary report” on page 241.
406
NextGene User’s Manual
Chapter 9
The NextGENe AutoRun Tool
5. If you are done with specifying the needed post-processing options, then return to one of
the following as appropriate:
•
Step 9 of “To create a new job file in the NextGENe AutoRun Tool” on page 397.
•
Step 5 of “To create a single post-processing Settings file” on page 419.
•
Step 7 of “To create a new job from an existing AutoRun template” on page 414.
•
Step 8 of “To create a NextGENe AutoRun template” on page 428.
•
Step 5 of “To modify a NextGENe AutoRun template” on page 432.
•
Step 8 of “To modify a NextGENe AutoRun template for a RainDance Thunderbolts
panel” on page 442.
Otherwise, continue specifying any other needed post-processing options. See:
•
“To select the Mutation Report as a post-processing option” on page 405.
•
“To export aligned sequences as a post-processing option” below.
•
“To export the project output to a BAM file” on page 408.
•
“To export the project output to Geneticist Assistant” on page 408.
To export aligned sequences as a post-processing option
For information about generating and saving an export sequence Settings file, see
“Export Sequences tool” on page 272.
1. On the Export dropdown list, select Export Sequence.
A blank Settings field opens next to the Export Sequence option.
2. Next to the blank Settings field, click Set, and then browse to and select a saved Settings
file (.ini file) for the sequence that is to be generated.
3. Repeat Step 1 and Step 2 until you have added all the needed sequences and their
Settings files.
4. If you are done with specifying the needed post-processing options, then return to one of
the following as appropriate:
•
Step 9 of “To create a new job file in the NextGENe AutoRun Tool” on page 397.
•
Step 5 of “To create a single post-processing Settings file” on page 419.
•
Step 7 of “To create a new job from an existing AutoRun template” on page 414.
•
Step 8 of “To create a NextGENe AutoRun template” on page 428.
•
Step 5 of “To modify a NextGENe AutoRun template” on page 432.
•
Step 8 of “To modify a NextGENe AutoRun template for a RainDance Thunderbolts
panel” on page 442.
NextGene User’s Manual
407
Chapter 9
The NextGENe AutoRun Tool
Otherwise, continue specifying any other needed post-processing options. See:
•
“To select the Mutation Report as a post-processing option” on page 405.
•
“To select a report other than the Mutation report as a post-processing option” on
page 406.
•
“To export the project output to a BAM file” on page 408.
•
“To export the project output to Geneticist Assistant” on page 408.
To export the project output to a BAM file
Select Export BAM on the Outputs dialog box to automatically generate a BAM file for the
alignment results for the project. If you export NextGENe sequence alignment project files
to a BAM format, then the standard index file, index.bai, that other alignment viewers
require is also exported. If you do not select this post-processing option, you always have the
option of exporting the project output to a BAM format from the File menu on the
NextGENe viewer. (See “Main menu” on page 145.) If Export BAM is the only needed
processing option, then return to one of the following as appropriate:
•
Step 9 of “To create a new job file in the NextGENe AutoRun Tool” on page 397.
•
Step 5 of “To create a single post-processing Settings file” on page 419.
•
Step 7 of “To create a new job from an existing AutoRun template” on page 414.
•
Step 8 of “To create a NextGENe AutoRun template” on page 428.
•
Step 5 of “To modify a NextGENe AutoRun template” on page 432.
•
Step 8 of “To modify a NextGENe AutoRun template for a RainDance Thunderbolts
panel” on page 442.
Otherwise, continue specifying any other needed post-processing options. See:
•
“To select the Mutation Report as a post-processing option” on page 405.
•
“To select a report other than the Mutation report as a post-processing option” on page
406.
•
“To export aligned sequences as a post-processing option” on page 407.
•
“To export the project output to Geneticist Assistant” below.
To export the project output to Geneticist Assistant
You can export the project output to Geneticist Assistant only if both of the following
conditions are met:
408
•
The Mutation report is selected as a post-processing option with a general Settings file
(.ini file) that specifies that the VCF output is to be saved. (See “Output tab” on page 227.)
•
Export BAM is selected.
NextGene User’s Manual
Chapter 9
The NextGENe AutoRun Tool
1. On the Report dropdown list, select Mutation Report, and then click Set to load a
mutation report general Settings (*.ini) file that specifies that the VCF output is to be
saved. (See “Output tab” on page 227.)
2. If needed, select Export BAM.
Output to Geneticist Assistant becomes available.
3. Select Output to Geneticist Assistant.
Geneticist Assistant Settings becomes available.
4. Click Geneticist Assistant Settings.
The Geneticist Assistant Input Settings dialog box opens.
Figure 9-7:
Geneticist Assistant Input Settings dialog box
5. Specify the Geneticist Assistant input for the GA Service.
Setting
Description
GA
Program
The directory for the Geneticist Assistant application on the server. The default path is
C:\Program Files\SoftGenetics\Geneticist Assistant\ga_exe\geneticist_assistant.exe.
Host
The address for the Geneticist Assistant server. The default value is set to localhost,
which assumes that the server is installed on the same computer as NextGENe. If
this is correct, then leave the default value as-is; otherwise, modify the value
accordingly.
Username
Enter a valid login name for Geneticist Assistant.
Password
Enter a valid password for the specified username.
NextGene User’s Manual
409
Chapter 9
The NextGENe AutoRun Tool
6. Click Test Connection.
If you entered all the GA Service information correctly, then a Login Successful message
is displayed; otherwise, a Login failed message is displayed. You must correct any errors
and repeat this step before you can continue.
7. Click OK.
The Login Successful message closes and Connected replaces Test Connection. A series
of asterisks is displayed in the Password field to hide the login password. You can now
specify the Run variables for the running of the project output in Geneticist Assistant.
8. Specify the Geneticist Assistant Run variables.
Variable
Description
Run Name
The name of the run.
Run Time
The default value is the current day’s date and time, but you can modify either or
both values as needed.
Note: You must select each value that is to be changed one at a time.
VCF
Select the appropriate VCF file.
Remember, to export the project output to Geneticist Assistant, you had to select
the Mutation report as a post-processing option with a Settings file (.ini file) that
specifies that the VCF output is to be saved. See “Output tab” on page 227.
Reference
Select the reference for the run.
Panel
Select the panel for the run.
Chemistry
Select the chemistry for the run.
Instrument
Select the instrument for the run.
9. Click OK.
The Geneticist Assistant Input Settings dialog box closes.
10. If you are done with specifying the needed post-processing options, then return to one of
the following as appropriate:
•
Step 9 of “To create a new job file in the NextGENe AutoRun Tool” on page 397.
•
Step 5 of “To create a single post-processing Settings file” on page 419.
•
Step 7 of “To create a new job from an existing AutoRun template” on page 414.
•
Step 8 of “To create a NextGENe AutoRun template” on page 428.
•
Step 5 of “To modify a NextGENe AutoRun template” on page 432.
•
Step 8 of “To modify a NextGENe AutoRun template for a RainDance Thunderbolts
panel” on page 442.
Otherwise, continue specifying any other needed post-processing options. See:
•
410
“To select the Mutation Report as a post-processing option” on page 405.
NextGene User’s Manual
Chapter 9
The NextGENe AutoRun Tool
•
“To select a report other than the Mutation report as a post-processing option” on
page 406.
•
“To export aligned sequences as a post-processing option” on page 407.
•
“To export the project output to a BAM file” on page 408.
To group jobs
You can load multiple samples for analysis with the same job options. You can then use the
Group Jobs option to automatically group the samples into separate jobs. The same job
options are applied to all the separate jobs.
1. Click Group Jobs.
The Group Jobs dialog box opens. The dialog box displays all the sample files that are
currently loaded in the NextGENe AutoRun tool.
Figure 9-8:
Group Jobs dialog box
2. Indicate how the jobs are to be grouped.
The grouping option that was last selected remains selected when the Group Jobs
dialog box opens.
Setting
Group by Sections
Description
Group the jobs based on a user-defined section in the sample file
names. The default values for delimiters are a dash (-), a period (.), and
an underscore (_). For example, a sample file named
F_R1_converted.fasta would have four sections based on the default
underscore and period delimiters:
• Section 1 = F
• Section 2 = R1
• Section 3 = converted
• Section 4 = fasta
NextGene User’s Manual
411
Chapter 9
The NextGENe AutoRun Tool
Setting
Description
Group by Fixed Position
Group by user-specified position or range of positions in the sample file
names.
Group by Order
Group the jobs based on the order in which the sample files were loaded
in to the NextGENe AutoRun tool.
3. By default, the Job ID for each group is automatically created based on how the jobs are
grouped. You do have the option of modifying some of the settings that affect how the
Job ID is created.
Job Grouping
By Sections
Default Group Name
The Group ID: section(s) indicates which section of the file name is used to
group the sample files. This section is also used for the Job ID. For example,
for the following six sample files with the Group ID: section(s) = 1 for grouping:
• F_R1_converted.fasta
• D_R1_converted.fasta
• E_R1_converted.fasta
• F_R2_converted.fasta
• D_R2_converted.fasta
• E_R2_converted.fasta
creates three jobs with two sample files each and each job identified by one of
the following three JOB IDs:
• F
• D
• E
By Fixed Position
The Job ID is based on the user-specified character (for example, 1) or range
of characters (for example, 1-4) in the file names that were used to group the
jobs. For example, considering the same sample files above, using Group ID:
character(s) = 1 for grouping creates three jobs with two sample files each and
each job identified by one of the following three Job IDs:
• F
• D
• E
Note: You can select Match Case to further refine the grouping and the Job
IDs.
By Order
By default, Group ID: the first item name is selected, which means that the ID
that is assigned to each job is based on the name of the first file in each group.
For example, considering the same sample files above, and using a Group
Size = 2, then three jobs would be created with two sample files per group and
each job identified by one of the following three Job IDs:
• F_R1_converted
• D_R1_converted
• E_R1_converted
Note: If you clear Group ID: the first item name, then the Job ID is a numeric
value and it is created based on the order in which they groups are listed
in the Group Jobs dialog box (e.g., 1, 2, 3, and so on).
412
NextGene User’s Manual
Chapter 9
The NextGENe AutoRun Tool
4. Optionally, build out the Job ID by assigning a prefix and/or suffix to the Group ID. For
example:
•
If the Group ID for three separate jobs is “D,” “E,” and “F,” then specifying Sample
in the first blank Build Job Name field results in Job IDs of “SampleD,” “SampleE,”
and “SampleF.”
•
If you specified another value in the second blank Build Job Name field (such as the
date of the job), then the job IDs would be “SampleD08062014,”
“SampleE08062014,” and “SampleF08062014.”
5. Return to Step 4 or Step 14 as appropriate in “To create a new job file in the NextGENe
AutoRun Tool” on page 397.
To modify an existing job file
When you modify a job file, you can modify the information for an existing job in the job
file, you can delete a job from the job file, and you can add a new job to the job file.
1. Do one of the following:
•
On the NextGENe main menu, click Tools > NextGENe AutoRun.
•
On the Start menu, select All Programs\SoftGenetics\NextGENe\NG_AutoRun.
The NextGENe AutoRun window opens. See Figure 9-1 on page 398.
2. On the NextGENe AutoRun main menu, click Tool > Job File Editor.
The Job File Editor dialog box opens. See Figure 9-2 on page 398.
3. On the Job File Editor main menu, click File > Load NGJOB.
An Open dialog box is displayed.
4. In Open dialog box, browse to and select the .ngjob file that you are modifying, and then
click Open.
The selected job file is loaded into the Job File Editor. The name of the loaded job file,
including its full directory path, is displayed in the title bar of the AutoRun window.
5. Do any of the following as needed:
•
•
To add another job to an existing job file, do either of the following:
•
Click Add New Job, and then specify the information for the new job. (You can
add multiple new jobs to an existing job file.)
•
Select a job in the Job Information tree, and then click Duplicate to duplicate
this job, and then modify the duplicated job as needed.
To delete a job, select a job in the Job Information tree, and then click Delete to
delete the job from the job file.
NextGene User’s Manual
413
Chapter 9
The NextGENe AutoRun Tool
•
To modify a job, select a job in the Job Information tree, and then modify any of the
settings for the job as needed, including adding and/or removing sample files, and
adding and/or removing reference files.
If
If you modify a setting for a job in the Job Editing pane, these changes are not
reflected in the Job Information tree until you click Refresh.
6. After you have modified the existing job file as needed, click OK.
You return to the NextGENe AutoRun window.
7. Do one of the following to save the modified job file:
•
On the File Editor main menu, click File > Save NGJOB.
•
On the File Editor main menu, click File > Save As.
•
On the Job File Editor dialog box, click Save.
8. Continue to “To specify the NextGENe AutoRun settings” on page 416.
To create a new job from an existing AutoRun template
If you use an existing AutoRun template to create a new job in the NextGENe AutoRun tool,
you must provide the sample files and specify the output directory folder. You can leave all
other settings the same, or you can modify the template as needed before you carry out the
run.
For information about creating a NextGENe AutoRun template, see “Managing
NextGENe AutoRun Templates” on page 428.
1. Do one of the following:
•
On the NextGENe main menu, click Tools > NextGENe AutoRun.
•
On the Start menu, select All Programs\SoftGenetics\NextGENe\NG_AutoRun.
The NextGENe AutoRun window opens. See Figure 9-1 on page 398.
2. On the NextGENe AutoRun main menu, click Tool > Job File Editor.
The Job File Editor dialog box opens. See Figure 9-2 on page 398.
3. On the Template dropdown list, select the appropriate AutoRun template.
The selected template is loaded into the Job File Editor.
4. Load the sample files.
5. Load the reference.
6. In the Output field, leave the default value for the location of the output files as is (the
directory path for the first data file added), or click Set to select a different location.
414
NextGene User’s Manual
Chapter 9
The NextGENe AutoRun Tool
7. Optionally, do one or both of the following as needed:
•
Click Manage > Edit to modify the template settings. See Step 4 through Step 12 of
“To create a new job file in the NextGENe AutoRun Tool” on page 397.
•
Click any of the following as needed; otherwise, go to Step 8.
Setting
Description
Duplicate
Create a new job with options that are identical to options for the
current job.
Note: This is useful to create a new job that needs only minor
modifications.
Group Jobs
If you have loaded data from multiple samples, you might want to
group these samples into separate jobs. This option opens the
Group Jobs dialog box so that you can do this. The same job
options are applied to all the separate job files. See “To group jobs”
on page 411.
Save
Saves the information for all jobs in a NextGENe AutoRun job file.
You can specify a file name and location for the job file.
Note: The file has an extension of .ngjob and you cannot change
this.
Add New Job
Refreshes the Job File Editor dialog box with a placeholder for
another job. You must add the necessary information for each
additional job. After you have added all the necessary jobs, click
Save.
Add Secondary Analysis Job
Carry out the secondary batch analysis of multiple projects. See
“Secondary Batch Analysis of Multiple Projects” on page 426.
Delete
Deletes the currently displayed job in the Job Information tree in
reverse order of addition - that is, that last job added is the first job
to be deleted.
Refresh
Refreshes the display of the Job Information tree to show any new
options that you have selected.
8. Do one of the following to save the new job file:
•
On the File Editor main menu, click File > Save NGJOB.
•
On the File Editor main menu, click File > Save As.
•
On the Job File Editor dialog box, click Save.
9. Continue to “To specify the NextGENe AutoRun settings” on page 416.
NextGene User’s Manual
415
Chapter 9
The NextGENe AutoRun Tool
To specify the NextGENe AutoRun settings
1. Do one of the following:
•
On the NextGENe main menu, click Tools > NextGENe AutoRun.
•
On the Start menu, select All Programs\SoftGenetics\NextGENe\NG_AutoRun.
The NextGENe AutoRun window opens.
Figure 9-9:
NextGENe AutoRun window
2. On the NextGENe AutoRun toolbar, click the Settings icon
The NextGENe AutoRun Settings dialog box opens.
Figure 9-10:
416
NextGENe AutoRun Settings dialog box
NextGene User’s Manual
.
Chapter 9
The NextGENe AutoRun Tool
3. Specify the Autorun settings.
Option
Description
Job File Detecting
Directory
The directory in which you saved the NextGENe AutoRun job file.
Time
• Detect Time Interval—The time interval between searches. (When
NextGENe searches for job files to process.)
• Start Detecting Time—The starting date and time for the search.
Note: At any time, you can manually launch the NextGENe AutoRun tool. You do not have to wait
for the application to start automatically based on these Time values. To manually launch the
tool, click the Detect icon
Max parallel jobs
on the AutoRun toolbar.
The maximum number of AutoRun jobs to run in a parallel (simultaneously).
The default value is one.
Note: To increase this value above the default value of one, the appropriate
number of concurrent NextGENe licenses are required. Also, before
you adjust this value, you should know that your client has ample RAM
to run parallel jobs. The RAM that is currently available per job is
always displayed on the dialog box, and the value is modified
accordingly if you select a different number of jobs to run in parallel.
You can use the RAM that was required for previously run jobs as a
guideline, or while a job is running, you can look at the RAM that is
being used through the Task Manager.
Minimize to
Taskbar
When the NextGENe AutoRun function starts, it opens NextGENe. Select this
option to automatically minimize the NextGENe window after it opens.
4. Click OK.
The NextGENe AutoRun Settings dialog box closes. You return the NextGENe
AutoRun window.
5. On the AutoRun window main menu, click File > Detect.
On the specified date and time, the AutoRun tool confirms that the job file is valid and
that all the files that are needed for processing the jobs in the job file are available.
•
If all the necessary files are available to process all the jobs in the job file,
NextGENe processes the project data according to the instructions that are detailed
in the job file and saves the data to the designated Output folder. The job file is
moved to the Completed Jobs folder.
•
If all the necessary files are available to process some, but not all, of the jobs in the
jobs file, NextGENe processes the project data for the jobs for which the necessary
files are available according to the instructions that are detailed in the job file. The
job file is moved to the Incomplete Jobs folder. The AutoRun tool continues to scan
the job file according to the specified time interval, for example, every ten minutes,
and as the necessary files become available, NextGENe processes the project data
for the appropriate jobs. After all the jobs are processed, the jobs file is moved to the
Completed Jobs folder.
NextGene User’s Manual
417
Chapter 9
The NextGENe AutoRun Tool
•
418
If none of necessary files are available for the jobs in the jobs file, the AutoRun tool
continues to scan the job file according to the specified time interval, for example,
every ten minutes, and as the necessary files become available, NextGENe processes
the project data for the appropriate jobs. After all the jobs are processed, the jobs file
is moved to the Completed Jobs folder.
NextGene User’s Manual
Chapter 9
The NextGENe AutoRun Tool
Batch Processing of Previously Processed
Sequence Alignment Projects to Export Outputs
You can use the NextGENe AutoRun tool to carry out the batch processing of previously
processed sequence alignment projects and export outputs of your choosing. This option is
particularly helpful in the event that you have multiple projects that have been run without
post-processing options as it prevents you from having to reprocess each project individually
or having to load each project in the NextGENe Viewer and manually adding the
post-processing options through the viewer. Batch processing previously processed projects
is a three step process. First, you must create the needed report Settings files (.ini files) and
then load all these files on the post-processing page of the Project Wizard to save a single
Settings file that contains all the settings for all the selected reports and outputs. Second, you
must load the projects and this single Settings file. Third, you must specify the settings to run
the job.
To create a single post-processing Settings file
1. Create and save the needed output Settings files. See:
•
“Mutation Report settings” on page 214.
Remember, you can create and save up to two different Settings files for the
Mutation report—the General Settings file and the Variation Tracks Settings file.
•
“Distribution report” on page 249.
•
“Coverage Curve report” on page 253.
•
“Expression Report” on page 260.
•
“Structural Variation report” on page 267.
•
“HLA project report” on page 197.
The HLA report is available as a post-processing option only if HLA was selected
as the application type for the project. See “HLA Project” on page 195.
•
Summary report. See “Summary report” on page 241.
The Summary report is available only after you select at least one other
post-processing report and its Settings file. The information that the report
contains is relative to the post-processing reports that you select for the project.
•
“Export Sequences tool” on page 272.
NextGene User’s Manual
419
Chapter 9
The NextGENe AutoRun Tool
2. Do one of the following to open the Project Wizard.
•
Click the Project Wizard icon
on the application toolbar.
•
On the NextGENe main menu, click File > Open Project Wizard.
•
On the NextGENe main menu, click Process > Project Wizard.
3. Click Post-Processing.
The Post-Processing page opens.
Figure 9-11:
Post-processing page for a sequence alignment project
4. Select the appropriate post-processing outputs and, if applicable, the corresponding
Settings files (.ini files) by which to post-process the data. See:
420
•
“To select report post-processing options” on page 404.
•
“To export aligned sequences as a post-processing option” on page 407.
•
“To export the project output to a BAM file” on page 408.
•
“To export the project output to Geneticist Assistant” on page 408.
NextGene User’s Manual
Chapter 9
The NextGENe AutoRun Tool
5. Click Save Settings, and then name the Settings file and save it to a location of your
choice.
This file is the single Settings file (.ini file) that contains all the settings for all the
post-processing outputs that you selected in Step 4.
6. Continue to “To load and run the projects” below.
To load and run the projects
1. Do one of the following:
•
On the NextGENe main menu, click Tools > NextGENe AutoRun.
•
On the Start menu, select All Programs\SoftGenetics\NextGENe\NG_AutoRun.
The NextGENe AutoRun window opens.
Figure 9-12:
NextGENe AutoRun window
2. On the NextGENe AutoRun main menu, click Tool > Job File Editor.
The Job File Editor dialog box opens. See Figure 9-13 on page 422.
NextGene User’s Manual
421
Chapter 9
The NextGENe AutoRun Tool
Figure 9-13:
Job File Editor dialog box
3. Click Load Processed Projects.
Only the pane in which you load the previously processed projects and the pane in which
you load the single Settings file (.ini file) remain available.
4. In the Job Name field, enter a name for the job (project) that you are creating.
5. For each previously processed project (.pjt file) that is to be post-processed, click Load
in the Project File(s) pane to open a dialog box, and then browse to and select the project.
6. In the Settings File for Condensation/Assembly/Alignment pane, click Load to open a
dialog box, and then browse to and select the single Settings file (.ini file) that you
created in “To create a single post-processing Settings file” on page 419.
You can load multiple projects for post-processing with the same Settings file. In
the next step, you can use the Group Jobs option to group the projects into
separate jobs. The same Settings file is applied to all the separate job files.
7. Optionally, click any of the following as needed; otherwise, go to Step 8.
Setting
Duplicate
Description
Create a new job with options that are identical to options for the current job.
Note: This is useful to create a new job that needs only minor modifications.
Group Jobs
422
If you have loaded multiple projects, then you can click this option to
automatically create an individual job for each project. The same job options are
applied to all the separate job files.
NextGene User’s Manual
Chapter 9
The NextGENe AutoRun Tool
Setting
Save
Description
Saves the information for all jobs in a NextGENe AutoRun job file. You can
specify a file name and location for the job file.
Note: The file has an extension of .ngjob and you cannot change this.
Add New Job
Refreshes the Job File Editor dialog box with a placeholder for another job. You
must add the necessary information for each additional job. After you have added
all the necessary jobs, click Save.
Delete
Deletes the currently displayed jobs in reverse order of addition - that is, that last
job added is the first to be deleted.
Refresh
Refreshes the display of the Job Information tree to show any new options that
you have selected.
8. Click OK.
If you have not saved the job file, then you are prompted to specify a file name and
location for the job file and after you save the file, the Job File Editor dialog box closes;
otherwise, the Job File Editor dialog box simply closes. You have now created the
necessary job files.
9. Continue to “To specify the NextGENe AutoRun settings” on page 416.
To specify the NextGENe AutoRun settings
1. Do one of the following:
•
On the NextGENe main menu, click Tools > NextGENe AutoRun.
•
On the Start menu, select All Programs\SoftGenetics\NextGENe\NG_AutoRun.
The NextGENe AutoRun window opens.
Figure 9-14:
NextGENe AutoRun window
NextGene User’s Manual
423
Chapter 9
The NextGENe AutoRun Tool
2. On the NextGENe AutoRun toolbar, click the Settings icon
.
The NextGENe AutoRun Settings dialog box opens.
Figure 9-15:
NextGENe AutoRun Settings dialog box
3. Specify the Autorun settings.
Option
Description
Job File Detecting
Directory
The directory in which you saved the NextGENe AutoRun job file.
Time
• Detect Time Interval—The time interval between searches. (When
NextGENe searches for job files to process.)
• Start Detecting Time—The starting date and time for the search.
Note: At any time, you can manually launch the NextGENe AutoRun tool. You do not have to wait
for the application to start automatically based on these Time values. To manually launch the
tool, click the Detect icon
Max parallel jobs
on the AutoRun toolbar.
The maximum number of AutoRun jobs to run in a parallel (simultaneously).
The default value is one.
Note: To increase this value above the default value of one, the appropriate
number of concurrent NextGENe licenses are required. Also, before
you adjust this value, you should know that your client has ample RAM
to run parallel jobs. The RAM that is currently available per job is
always displayed on the dialog box, and the value is modified
accordingly if you select a different number of jobs to run in parallel.
You can use the RAM that was required for previously run jobs as a
guideline, or while a job is running, you can look at the RAM that is
being used through the Task Manager.
Minimize to
Taskbar
424
When the NextGENe AutoRun function starts, it opens NextGENe. Select this
option to automatically minimize the NextGENe window after it opens.
NextGene User’s Manual
Chapter 9
The NextGENe AutoRun Tool
4. Click OK.
The NextGENe AutoRun Settings dialog box closes. You return the NextGENe
AutoRun window.
5. On the AutoRun window main menu, click File > Detect.
On the specified date and time, the AutoRun tool confirms that the job file is valid and
that all the files that are needed for processing the jobs in the job file are available.
•
If all the necessary files are available to process all the jobs in the job file,
NextGENe processes the project data according to the instructions that are detailed
in the job file and saves the data to the designated Output folder. The job file is
moved to the Completed Jobs folder.
•
If all the necessary files are available to process some, but not all, of the jobs in the
jobs file, NextGENe processes the project data for the jobs for which the necessary
files are available according to the instructions that are detailed in the job file. The
job file is moved to the Incomplete Jobs folder. The AutoRun tool continues to scan
the job file according to the specified time interval, for example, every ten minutes,
and as the necessary files become available, NextGENe processes the project data
for the appropriate jobs. After all the jobs are processed, the jobs file is moved to the
Completed Jobs folder.
•
If none of necessary files are available for the jobs in the jobs file, the AutoRun tool
continues to scan the job file according to the specified time interval, for example,
every ten minutes, and as the necessary files become available, NextGENe processes
the project data for the appropriate jobs. After all the jobs are processed, the jobs file
is moved to the Completed Jobs folder.
NextGene User’s Manual
425
Chapter 9
The NextGENe AutoRun Tool
Secondary Batch Analysis of Multiple Projects
You can use the NextGENe AutoRun tool to set up a new project, a secondary analysis
project, based on the output from a previously created project that has yet to be processed.
After the previously created project is processed, then the secondary analysis of its output
files is automatically carried out.
1. Set up the job for the primary analysis as needed in the Auto Run tool. See “To create a
new job file in the NextGENe AutoRun Tool” on page 397.
The Add Secondary Analysis Job option becomes available.
2. Click Add Secondary Analysis Job.
The NextGENe AutoRun window is refreshed and a placeholder (Job2) is created for the
secondary analysis job. Load Previous Run Result is available at the top of the window.
3. Click Load Previous Run Result.
The Load Previous Run Result dialog box opens. The availability of what you can select
for secondary analysis—Matched reads, Unmatched reads, Pseudo paired reads,
Exported reads, and Assembled sequences—is dependent on the settings for the previous
run.
Typically, Unmatched reads is always available for a secondary analysis.
Figure 9-16:
426
Load Previous Run Result dialog box
NextGene User’s Manual
Chapter 9
The NextGENe AutoRun Tool
4. Select the data type for the secondary analysis.
The Previous run result (Original) list is updated with placeholders for the anticipated
output files for the primary analysis. The files are automatically named based on the
selected secondary analysis. For example, if the names of the selected sample files for
the primary analysis are F_R1_converted.fasta and F_R2_converted.fasta, and you select
Unmatched reads for the secondary analysis type, then the placeholder files for the
secondary analysis are named F_R1_converted_unmatched.fasta and
F_R2_converted_unmatched.fasta accordingly.
5. Select the appropriate file or files (CTRL-click to select multiple files) in the Previous
run result (Original) list, and then click Add to List.
The selected output files are moved to the Previous run result (Added) list.
6. Click OK.
The Load Previous Run Result dialog box closes. You return to the Job File Editor dialog
box.
7. Continue with setting the job options for the secondary analysis in the NextGENe
AutoRun tool as needed.
8. Do one of the following to save the job file:
•
On the File Editor main menu, click File > Save NGJOB.
•
On the File Editor main menu, click File > Save As.
•
On the Job File Editor dialog box, click Save.
NextGene User’s Manual
427
Chapter 9
The NextGENe AutoRun Tool
Managing NextGENe AutoRun Templates
A NextGENe AutoRun template is a file that serves as a starting point for a new job in the
NextGENe AutoRun tool. With the exception of the sample files and the output directory
folder, an AutoRun template contains all the information and settings that are necessary for
an AutoRun job, including reference files, post-processing settings, and so on. Managing
NextGENe AutoRun templates consists of creating new AutoRun templates, modifying
existing AutoRun templates, and deleting AutoRun templates.
To create a NextGENe AutoRun template
1. Do one of the following:
•
On the NextGENe main menu, click Tools > NextGENe AutoRun.
•
On the Start menu, select All Programs\SoftGenetics\NextGENe\NG_AutoRun.
The NextGENe AutoRun window opens.
Figure 9-17:
NextGENe AutoRun window
2. On the NextGENe AutoRun main menu, click Tool > Job File Editor.
The Job File Editor dialog box opens. It contains a placeholder for creating a job, which
is identified with the default name of Job<#>, for example, Job1 in the Job name field.
The left pane is the Job Information tree. The right pane is the Job Editing pane. See
Figure 9-18 on page 429.
428
NextGene User’s Manual
Chapter 9
The NextGENe AutoRun Tool
Figure 9-18:
Job File Editor dialog box
3. If your project sample files require preprocessing, then you must load the appropriate
Settings files (.ini files) to specify the required preprocessing options.
•
If the project sample files are not in .fasta or .bam format, then you must load a
Settings file that specifies the format conversion settings.
•
If the project sample files contain barcodes, then you must load a Settings file that
specifies the barcode sorting settings to demultiplex the data.
•
If the project sample files need to be modified further before analysis (for example,
trimming adapters), then you must load a Settings file that specifies the appropriate
sequence operation settings.
If applicable, for any of the above, go to “To specify preprocessing options” on page
402; otherwise, continue to Step 4.
4. In the Reference pane, do one of the following:
•
To select a GenBank or a .fasta reference file, click Add to open a dialog box in
which you can browse to and select the reference file.
•
To select a preloaded reference file, click Preloaded to open a Select Preloaded
dialog box in which you can select the preloaded reference file. (See “To load a
preloaded reference (Large genome reference)” on page 57.)
5. In the Settings File for Condensation/Assembly/Alignment pane, click Load to open a
dialog box, and then browse to and select a configuration file with the appropriately
saved settings for the condensation, assembly, and/or alignment steps. (See “Saving and
Loading Project Settings” on page 77.)
NextGene User’s Manual
429
Chapter 9
The NextGENe AutoRun Tool
6. Optionally, consider the following; otherwise, continue to Step 10.
•
If the configuration file that you loaded in Step 5 does not contain post-processing
options, and you want to post-process the data:
or
•
If the configuration file that you loaded in Step 5 does contain post-processing
options, but you want to use different settings to post-process the data:
then click Edit Outputs to open the Outputs dialog box.
Figure 9-19:
Outputs dialog box
7. Select the appropriate post-processing outputs and, if applicable, the corresponding
Settings files (.ini files) by which to post-process the data. See:
•
“To select report post-processing options” on page 404.
•
“To export aligned sequences as a post-processing option” on page 407.
•
“To export the project output to a BAM file” on page 408.
•
“To export the project output to Geneticist Assistant” on page 408.
8. Click OK on the Outputs dialog box.
The Outputs dialog box closes. A Warning message opens indicating that the settings
have changed, and asking you if you want to save the settings.
9. Click Yes.
The Warning message and the Outputs dialog box close. The Job File Editor dialog box
remains opens.
430
NextGene User’s Manual
Chapter 9
The NextGENe AutoRun Tool
10. Optionally, if a GenBank reference file is loaded, then to query the imported databases
(tracks) for the project, click Edit Tracks to open the Query Track dialog box and select
the appropriate preloaded reference.
Figure 9-20:
Query Track dialog box
11. Optionally, select one or both of the following as appropriate:
•
Use Inspect Input Files for Condensation—This option is identical to the Inspect
Input Files option on the Condensation page in the Project Wizard. (See “Inspect
Input Files” on page 106.) If you load a Configuration file that contains
condensation settings for Illumina data, SOLiD System data, or Ion Torrent data, and
you select this option, then NextGENe inspects the input files and adjusts the
condensation settings accordingly. If you select this option for Roche data, then
NextGENe simply ignores it.
•
Use Inspect Input Files for Preloaded Reference Alignment—This option is identical
to the Inspect Input Files option on the Alignment page for preloaded reference files
in the Project Wizard. (See “Inspect Input Files” on page 106.) If you load a
Configuration file that contains alignment settings, and you select this option, then
NextGENe inspects the input files and adjusts the alignment settings accordingly.
12. Click Manage > Save As.
The Create a New Template dialog box opens.
Figure 9-21:
Create a New Template dialog box
NextGene User’s Manual
431
Chapter 9
The NextGENe AutoRun Tool
13. Enter a name for the template, and then click OK.
The Create a New Template dialog box closes, and a message opens indicating that the
template will be available in the Template last.
14. Click OK.
The message closes. The saved template remains loaded in the Job File Editor.
All NextGENe AutoRun templates are saved in the Template root directory, which
is specified in your NextGENe process options. See “Specifying NextGENe
Process Options” on page 84.
To modify a NextGENe AutoRun template
When you modify a NextGENe AutoRun template, you can modify the information for an
existing job in the template, you can add a new job to the template, and you can delete a job
from the template.
1. Do one of the following:
•
On the NextGENe main menu, click Tools > NextGENe AutoRun.
•
On the Start menu, select All Programs\SoftGenetics\NextGENe\NG_AutoRun.
The NextGENe AutoRun window opens. See Figure 9-17 on page 428.
2. On the NextGENe AutoRun main menu, click Tool > Job File Editor.
The Job File Editor dialog box opens. See Figure 9-18 on page 429.
3. On the Template dropdown list, select the appropriate template.
The selected template is loaded into the Job File Editor.
4. Click Manage > Edit.
The template settings become available for editing.
5. Do any of the following as needed to modify the template:
•
To modify the job settings, see Step 3 through Step 11 of “To create a NextGENe
AutoRun template” on page 428.
•
To add another job to the template, do either of the following:
•
432
•
Click Add New Job, and then specify the information for the new job. (You can
add multiple new jobs to an existing template.)
•
Select a job in the Job Information tree, and then click Duplicate to duplicate
this job, and then modify the job as needed.
To delete a job from the template, select a job in the Job Information tree, and then
click Delete to delete the job from the template.
NextGene User’s Manual
Chapter 9
The NextGENe AutoRun Tool
6. Click Manage > Save.
To delete an AutoRun template
When you delete an AutoRun template, any NextGENe jobs that were previously run using
this template are unaffected. Going forward, the template is simply not available for
selection.
1. Do one of the following:
•
On the NextGENe main menu, click Tools > NextGENe AutoRun.
•
On the Start menu, select All Programs\SoftGenetics\NextGENe\NG_AutoRun.
The NextGENe AutoRun window opens. See Figure 9-17 on page 428.
2. On the NextGENe AutoRun main menu, click Tool > Job File Editor.
The Job File Editor dialog box opens. See Figure 9-18 on page 429.
3. On the Template dropdown list, select the appropriate template.
The selected template is loaded into the Job File Editor.
4. Click Manage > Details.
The Template Details dialog box opens. The dialog box displays all the available \
AutoRun templates for your NextGENe installation. The AutoRun templates for
RainDance ThunderBolts panels are displayed alphabetically by name first, and then all
all other AutoRun templates are displayed alphabetically by name second. It also
displays the creation time, the date of last modification, and the template version for
each template, as well as the NextGENe version in which each template was created.
Figure 9-22:
Template Details dialog box
NextGene User’s Manual
433
Chapter 9
The NextGENe AutoRun Tool
5. Select the AutoRun template that is to be deleted.
The Delete option is not available for the AutoRun templates for RainDance
ThunderBolts panels.
A message opens, asking you if you are sure that you want to delete the selected
template.
6. Click OK.
The template is deleted and no longer displayed on the Template Details dialog box. The
Template Details dialog box remains open.
7. Click OK.
The Template Details dialog box closes. You return to a blank Job File Editor dialog box.
434
NextGene User’s Manual
Chapter 9
The NextGENe AutoRun Tool
Working With NextGENe AutoRun Templates
for RainDance ThunderBolts Panels
A NextGENe AutoRun template is a file that serves as a starting point for a new job in the
NextGENe AutoRun tool. Four pre-built AutoRun template—the RainDance Cancer Panel
template, the RainDance Myeloid Panel template, the RainDance Cancer Panel High
Sensitivity template and the RainDance Myeloid Panel High Sensitivity template—are
supplied with your NextGENe installation for the analysis of RainDance ThunderBolts
panels. All four templates include SoftGenetics’s recommended settings (adapter and primer
trimming, alignment and variant calling, and report settings) for Whole Genome Alignment
of samples from these panels. The mutation threshold settings for the RainDance Cancer
Panel template and the RainDance Myeloid Panel template are set to a sensitivity value of
5%. The mutation threshold settings for the RainDance Cancer Panel High Sensitivity
template and the RainDance Myeloid Panel High Sensitivity template are set to a high
sensitivity value of 1%. Unlike other NextGENe AutoRun templates, none of the templates
for the RainDance ThunderBolt panels specify the reference that is to be used for a project.
You cannot modify any of the settings for a template for a RainDance ThunderBolts panel.
You must use the template as-is. Using a NextGENe AutoRun template for a RainDance
ThunderBolts panel is a two-step process. First, you must select the sample files and
reference. Second, as with all other NextGENe AutoRun templates, you must then specify
the settings for the tool, which includes the job file directory, the local work folder, and the
time interval for detecting job files. To modify a template for a RainDance ThunderBolts
panel, you must save the template with a different name, and then you can modify any or all
of the settings as needed.
To select the samples and reference for an AutoRun Template for
a RainDance ThunderBolts panel
1. Do one of the following:
•
On the NextGENe main menu, click Tools > NextGENe AutoRun.
•
On the Start menu, select All Programs\SoftGenetics\NextGENe\NG_AutoRun.
The NextGENe AutoRun window opens. See Figure 9-23 on page 436.
NextGene User’s Manual
435
Chapter 9
The NextGENe AutoRun Tool
Figure 9-23:
NextGENe AutoRun window
2. On the NextGENe AutoRun main menu, click Tool > Job File Editor.
The Job File Editor dialog box opens. It contains a placeholder for creating a job, which
is identified with the default name of Job<#>, for example, Job1.
Figure 9-24:
436
Job File Editor dialog box
NextGene User’s Manual
Chapter 9
The NextGENe AutoRun Tool
3. On the Template dropdown list, select the appropriate template for your RainDance
panel.
All the Settings file are loaded for the selected template. The full path for the Alignment
Settings file is displayed in the Settings file field. You cannot edit any of these settings.
4. For each sample file that is to be analyzed, click Load in the Sample File(s) pane to open
a dialog box, and then browse to and select the sample file.
The job name is automatically updated based on the file name of the first file loaded, but
you can modify as needed.
You can load multiple samples for analysis with the same job options and then use
the Group Jobs option to automatically group samples into separate jobs. The
same job options are applied to all the separate job files. See “To group jobs” on
page 438.
5. In the Reference pane, click Preloaded to open the Select Preloaded dialog box, and then
select the appropriate preloaded reference file. (See “To load a preloaded reference
(Large genome reference)” on page 57.)
6. In the Output field, leave the default value for the location of the output files as is (the
directory path for the first data file added), or click Set to select a different location.
7. Optionally, click any of the following as needed; otherwise, go to Step 8.
Setting
Duplicate
Description
Create a new job with options that are identical to options for the
current job.
Note: This is useful to create a new job that needs only minor
modifications.
Group Jobs
If you have loaded data from multiple samples, you might want to
group these samples into separate jobs. This option opens the
Group Jobs dialog box so that you can do this. The same job
options are applied to all the separate job files. See “To group jobs”
on page 438.
Save
Saves the information for all jobs in a NextGENe AutoRun job file.
You can specify a file name and location for the job file.
Note: The file has an extension of .ngjob and you cannot change
this.
Add New Job
Refreshes the Job File Editor dialog box with a placeholder for
another job. You must add the necessary information for each
additional job. After you have added all the necessary jobs, click
Save.
Delete
Deletes the currently displayed job in the Job Information tree in
reverse order of addition - that is, that last job added is the first job
to be deleted.
Refresh
Refreshes the display of the Job Information tree to show any new
options that you have selected.
NextGene User’s Manual
437
Chapter 9
The NextGENe AutoRun Tool
8. Click OK.
If you have not already clicked Save to save the job file, then you are prompted to
specify a file name and location for the job file and after you save the file, the Job File
Editor dialog box closes; otherwise, the Job File Editor dialog box simply closes. You
have now created the necessary job files.
9. Continue to “To specify the NextGENe AutoRun settings” on page 416.
To group jobs
You can load multiple samples for analysis with the same job options. You can then use the
Group Jobs option to automatically group the samples into separate jobs. The same job
options are applied to all the separate jobs.
1. Click Group Jobs.
The Group Jobs dialog box opens. The dialog box displays all the sample files that are
currently loaded in the NextGENe AutoRun tool.
Figure 9-25:
Group Jobs dialog box
2. Indicate how the jobs are to be grouped.
The grouping option that was last selected remains selected when the Group Jobs
dialog box opens.
Setting
Group by Sections
Description
Group the jobs based on a user-defined section in the sample file
names. The default values for delimiters are a dash (-), a period (.), and
an underscore (_). For example, a sample file named
F_R1_converted.fasta would have four sections based on the default
underscore and period delimiters:
• Section 1 = F
• Section 2 = R1
• Section 3 = converted
• Section 4 = fasta
438
NextGene User’s Manual
Chapter 9
The NextGENe AutoRun Tool
Setting
Description
Group by Fixed Position
Group by user-specified position or range of positions in the sample file
names.
Group by Order
Group the jobs based on the order in which the sample files were loaded
in to the NextGENe AutoRun tool.
3. By default, the Job ID for each group is automatically created based on how the jobs are
grouped. You do have the option of modifying some of the settings that affect how the
Job ID is created.
Job Grouping
By Sections
Default Group Name
The Group ID: section(s) indicates which section of the file name is used to
group the sample files. This section is also used for the Job ID. For example,
for the following six sample files with the Group ID: section(s) = 1 for grouping:
• F_R1_converted.fasta
• D_R1_converted.fasta
• E_R1_converted.fasta
• F_R2_converted.fasta
• D_R2_converted.fasta
• E_R2_converted.fasta
creates three jobs with two sample files each and each job identified by one of
the following three JOB IDs:
• F
• D
• E
By Fixed Position
The Job ID is based on the user-specified character (for example, 1) or range
of characters (for example, 1-4) in the file names that were used to group the
jobs. For example, considering the same sample files above, using Group ID:
character(s) = 1 for grouping creates three jobs with two sample files each and
each job identified by one of the following three Job IDs:
• F
• D
• E
Note: You can select Match Case to further refine the grouping and the Job
IDs.
By Order
By default, Group ID: the first item name is selected, which means that the ID
that is assigned to each job is based on the name of the first file in each group.
For example, considering the same sample files above, and using a Group
Size = 2, then three jobs would be created with two sample files per group and
each job identified by one of the following three Job IDs:
• F_R1_converted
• D_R1_converted
• E_R1_converted
Note: If you clear Group ID: the first item name, then the Job ID is a numeric
value and it is created based on the order in which they groups are listed
in the Group Jobs dialog box (e.g., 1, 2, 3, and so on).
NextGene User’s Manual
439
Chapter 9
The NextGENe AutoRun Tool
4. Optionally, build out the Job ID by assigning a prefix and/or suffix to the Group ID. For
example:
•
If the Group ID for three separate jobs is “D,” “E,” and “F,” then specifying Sample
in the first blank Build Job Name field results in Job IDs of “SampleD,” “SampleE,”
and “SampleF.”
•
If you specified another value in the second blank Build Job Name field (such as the
date of the job), then the job IDs would be “SampleD08062014,”
“SampleE08062014,” and “SampleF08062014.”
5. Return to Step 4 or Step 7 as appropriate in “To modify a NextGENe AutoRun template
for a RainDance Thunderbolts panel” on page 442.
To specify the NextGENe AutoRun settings
1. Do one of the following:
•
On the NextGENe main menu, click Tools > NextGENe AutoRun.
•
On the Start menu, select All Programs\SoftGenetics\NextGENe\NG_AutoRun.
The NextGENe AutoRun window opens.
Figure 9-26:
NextGENe AutoRun window
2. On the NextGENe AutoRun toolbar, click the Settings icon
.
The NextGENe AutoRun Settings dialog box opens. See Figure 9-27 on page 441.
440
NextGene User’s Manual
Chapter 9
The NextGENe AutoRun Tool
Figure 9-27:
NextGENe AutoRun Settings dialog box
3. Specify the Autorun settings.
Option
Description
Job File Detecting
Directory
The directory in which you saved the NextGENe AutoRun job file.
Time
• Detect Time Interval—The time interval between searches. (When
NextGENe searches for job files to process.)
• Start Detecting Time—The starting date and time for the search.
Note: At any time, you can manually launch the NextGENe AutoRun tool. You do not have to wait
for the application to start automatically based on these Time values. To manually launch the
tool, click the Detect icon
Max parallel jobs
on the AutoRun toolbar.
The maximum number of AutoRun jobs to run in a parallel (simultaneously).
The default value is one.
Note: To increase this value above the default value of one, the appropriate
number of concurrent NextGENe licenses are required. Also, before
you adjust this value, you should know that your client has ample RAM
to run parallel jobs. The RAM that is currently available per job is
always displayed on the dialog box, and the value is modified
accordingly if you select a different number of jobs to run in parallel.
You can use the RAM that was required for previously run jobs as a
guideline, or while a job is running, you can look at the RAM that is
being used through the Task Manager.
Minimize to
Taskbar
When the NextGENe AutoRun function starts, it opens NextGENe. Select this
option to automatically minimize the NextGENe window after it opens.
4. Click OK.
The NextGENe AutoRun Settings dialog box closes. You return the NextGENe
AutoRun window.
NextGene User’s Manual
441
Chapter 9
The NextGENe AutoRun Tool
5. On the AutoRun window main menu, click File > Detect.
On the specified date and time, the AutoRun tool confirms that the job file is valid and
that all the files that are needed for processing the jobs in the job file are available.
•
If all the necessary files are available to process all the jobs in the job file,
NextGENe processes the project data according to the instructions that are detailed
in the job file and saves the data to the designated Output folder. The job file is
moved to the Completed Jobs folder.
•
If all the necessary files are available to process some, but not all, of the jobs in the
jobs file, NextGENe processes the project data for the jobs for which the necessary
files are available according to the instructions that are detailed in the job file. The
job file is moved to the Incomplete Jobs folder. The AutoRun tool continues to scan
the job file according to the specified time interval, for example, every ten minutes,
and as the necessary files become available, NextGENe processes the project data
for the appropriate jobs. After all the jobs are processed, the jobs file is moved to the
Completed Jobs folder.
•
If none of necessary files are available for the jobs in the jobs file, the AutoRun tool
continues to scan the job file according to the specified time interval, for example,
every ten minutes, and as the necessary files become available, NextGENe processes
the project data for the appropriate jobs. After all the jobs are processed, the jobs file
is moved to the Completed Jobs folder.
To modify a NextGENe AutoRun template for a RainDance
Thunderbolts panel
1. Do one of the following:
•
On the NextGENe main menu, click Tools > NextGENe AutoRun.
•
On the Start menu, select All Programs\SoftGenetics\NextGENe\NG_AutoRun.
The NextGENe AutoRun window opens. See Figure 9-23 on page 436.
2. On the NextGENe AutoRun main menu, click Tool > Job File Editor.
The Job File Editor dialog box opens. See Figure 9-24 on page 436.
3. On the Template dropdown list, select the appropriate template for your RainDance
panel.
All the Settings file are loaded for the selected template. The full path for the Alignment
Settings file is displayed in the Settings file field. You cannot edit any of these settings.
442
NextGene User’s Manual
Chapter 9
The NextGENe AutoRun Tool
4. Click Manage > Save As.
The Create a New Template dialog box opens.
Figure 9-28:
Create a New Template dialog box
5. Enter a name for the template, and then click OK.
The Create a New Template dialog box closes, and a message opens indicating that the
template will be available in the Template last.
6. Click OK.
The message closes. The saved template remains loaded in the Job File Editor.
All NextGENe AutoRun templates are saved in the Template Root directory, which
is specified in your NextGENe process options. See “Specifying NextGENe
Process Options” on page 84.
7. Click Manage > Edit.
The template settings are now editable. See To modify the job settings, see Step 3
through Step 11 of “To create a NextGENe AutoRun template” on page 428.
8. Click Manage > Save.
NextGene User’s Manual
443
Chapter 9
The NextGENe AutoRun Tool
444
NextGene User’s Manual
Appendix A
Preloaded Reference Files
The application types SNP/Indel Discovery, SAGE, Transcriptome, ChIP-Seq analysis, or
others that you specify require a reference file for aligning the reads of the data file that is
being analyzed against a reference genome. If you are aligning the data against a large
genome (one that is greater than 250 MBases, such as the whole human genome), then you
must do one of the following:
•
Align the data against a preloaded reference file that SoftGenetics supplies, either through
the SoftGenetics ftp site, or on a DVD.
•
Create a preloaded reference file using NextGENe's Build Preloaded Reference tool. (See
“The NextGENe Build Preloaded Reference Tool” on page 372.)
This appendix covers the following topics:
•
“Importing Preloaded Reference Files For Large Genomes” on page 447.
NextGene User’s Manual
445
Appendix A
Preloaded Reference Files
446
NextGene User’s Manual
Appendix A
Preloaded Reference Files
Importing Preloaded Reference Files For Large
Genomes
If you are aligning the data against a large genome (one that is greater than 250 Mbps such as
the whole human genome), then you must align the data against a preloaded reference file.
For access to a needed reference file, you have two options:
•
You can download preloaded reference files through SoftGenetics’s ftp server, and then
import the downloaded reference files into NextGENe.
•
You can import a preloaded reference file into NextGENe from a DVD that SoftGenetics
can send to you upon request.
See http://www.softgenetics.com/NextGENe_011.html for a list of preloaded
reference files that are available upon request on a DVD.
After you import all your needed reference files, you can select the appropriate reference file
when you are aligning your data against a large genome.
You cannot import and use preloaded reference files if you have not installed
MySQL. If you did not install MySQL when you installed NextGENe, then you can
use the NextGENe Reference Setup Wizard (discussed in this appendix) to do so.
If the genome you are interested in aligning to is not available on SoftGenetics’s
ftp site, or on a DVD, you can contact SoftGenetics and request a custom genome
or you can use NextGENe's Build Preloaded Reference tool to create a preloaded
reference file. See “The NextGENe Build Preloaded Reference Tool” on page
372.
NextGene User’s Manual
447
Appendix A
Preloaded Reference Files
To download and import large genome reference files
When you import large genome reference files, the Annotation database is also imported.
If you are importing a preloaded reference file from a DVD, then make sure to
insert the DVD into the client DVD/CD drive before you begin this procedure.
1. Launch NextGENe.
The Project Wizard opens.
2. Select SNP/Indel discovery for the Application type.
This selection simply ensures you that Preloaded will be an available option for
the upcoming steps.
3. Click Next.
The Load Data page opens.
4. In the Reference files pane, click Preloaded.
The Select Preloaded Reference dialog box opens.
Figure A-1:
Select Preloaded Reference dialog box
Before you import your first preloaded reference file, or if you select a directory in
which no preloaded reference files have previously been imported, then this dialog
box is blank.
448
NextGene User’s Manual
Appendix A
Preloaded Reference Files
5. Click Manage References.
The NextGENe Process Options dialog box opens. The Preloaded References tab is the
open tab.
For a complete description about all the options that are available on this dialog
box, see “Specifying NextGENe Process Options” on page 84.
Figure A-2:
NextGENe Process Options dialog box
6. Click Import Reference.
The NextGENe Reference Setup Wizard opens.
Figure A-3:
NextGENe Reference Setup Wizard
NextGene User’s Manual
449
Appendix A
Preloaded Reference Files
7. Click Next.
The Reference Selection page opens. If you have inserted a DVD into the client
DVD/CD drive, the reference file that is on the DVD is listed in the References on DVD
pane.
Figure A-4:
NextGENe Reference Setup Wizard, Reference Selection page
8. If you are downloading a preloaded reference file from SoftGenetics’s ftp site, continue
to Step 9; otherwise, if you are importing a preloaded reference file from a DVD,
continue to Step 11.
9. To view all the available reference genomes on SoftGenetics’s ftp server, click List.
The References on FTP pane is populated with a list of all the available reference
genomes.
Use the genomes that are appended with “_SOLID” or “_CS” strictly for SOLiD
System data. Use all other genomes for Illumina, Roche, or Ion Torrent data. If the
genome that you want to import is not available, you can contact SoftGenetics and
request a custom genome or you can use NextGENe's Build Preloaded Reference
tool to build a preloaded reference file. See “The NextGENe Build Preloaded
Reference Tool” on page 372.
10. The default installation directory for the preloaded reference files is:
C:\Program Files (x86)\SoftGenetics\NextGENe\References. You can leave this value
as-is, or you can click Browse to open a Browse to Folder dialog box, and browse to and
select a different installation directory.
The directory path that is initially displayed here is the directory path that is
specified in NextGENe process options. If you change the directory path here, then
confirm that the path is also correct for NextGENe process options. See
“Specifying NextGENe Process Options” on page 84.
450
NextGene User’s Manual
Appendix A
Preloaded Reference Files
11. Select the reference file that is to be imported, or CTRL-click to select multiple
non-continuous reference files, or SHIFT-click to select multiple continuous reference
files.
12. Continue to “To confirm that MySQL is installed” below.
To confirm that MySQL is installed
1. Click Next.
The MySQL Settings page opens. If MySQL has been installed correctly, and the
connection to the database is successful, then “MySQL installed” and “MySQL
connection successful. Ready to Import” are displayed on the page, and you can continue
to Step 3; otherwise, if either or both of these messages are not displayed, then continue
to Step 2.
Figure A-5:
NextGENe Reference Setup Wizard, MySQL Settings page
2. Do one or both of the following:
•
If “MySQL installed” is not displayed on the page, then click Install MySQL.
If MySQL cannot be installed successfully, contact [email protected].
•
If “MySQL installed” is displayed, but “MySQL connection successful. Ready to
Import” is not displayed, then click Check Connection.
If the message MySQL Connection Successful is displayed, then continue to Step 3;
otherwise, contact [email protected].
3. Click Install.
The Installing page opens. The page shows the status of downloading each referenced
index file. See Figure A-6 on page 452.
NextGene User’s Manual
451
Appendix A
Preloaded Reference Files
Figure A-6:
NextGENe Reference Setup Wizard, Installing page
After all the selected preloaded reference files have been successfully downloaded and
imported into NextGENe, the Installing page is updated with an Installation complete
message.
Figure A-7:
NextGENe Reference Setup Wizard, Installing page
If you encounter any problems during the downloading and importing of the
selected reference files, contact [email protected].
4. Click Close.
The NextGENe Reference Setup Wizard remains open. The preloaded reference files are
now available for use in NextGENe.
5. Repeat both “To download and import large genome reference files” on page 448 and
“To confirm that MySQL is installed” on page 451 as many times as needed to download
and import all your required preloaded reference files.
452
NextGene User’s Manual
Appendix A
Preloaded Reference Files
6. After you have downloaded and imported all your needed preloaded reference files, click
Cancel to close the NextGENe Reference Setup Wizard and continue with your work in
NextGENe.
NextGene User’s Manual
453
Appendix A
Preloaded Reference Files
454
NextGene User’s Manual
Appendix B
Mutation Report Scores
SoftGenetics developed the Overall Mutation score to provide an empirical estimation of the
likelihood that a given mutation call is real and not an artifact of sequencing or alignment
errors. Multiple different scores are used to calculate the Overall Mutation Score. This
appendix provides a detailed explanation of the Overall Mutation Score. It also provides a
detailed description, including the underlying algorithms, for each of the scores that are used
in the calculation of the Overall Mutation Score.
This appendix covers the following topics:
•
“Overall Mutation Score” on page 456.
•
“Coverage score” on page 457.
•
“Read Balance Score” on page 458.
•
“Allele Balance Score” on page 459.
•
“Homopolymer Score” on page 460.
•
“Mismatch Score” on page 461.
•
“Wrong Allele Score” on page 462.
NextGene User’s Manual
455
Appendix B
Mutation Report Scores
Overall Mutation Score
SoftGenetics developed the Overall Mutation score to provide an empirical estimation of the
likelihood that a given mutation call is real and not an artifact of sequencing or alignment
errors. This score is based on the concept of Phred scores, where quality scores are
logarithmically linked to error probabilities as shown in Figure B-1 below.
Figure B-1:
Phred scores and error probabilities
The Overall Mutation score is calculated according to the following equation:
Overall Mutation score = (Coverage Score) x (Five Optional Scores)
The Overall Mutation score does not have a set maximum value; however, its value does
depend on the coverage. For example, if all the optional scores are ignored for the
calculation (value = 1), then the Overall Mutation score would be as shown below:
Coverage
Score
10,000
32
1,000
24
100
16
If any of the optional scores is less than one, then the Overall Mutation score is reduced. A
low Overall Mutation score, however, does not mean that the mutation is more than likely a
false mutation. The low score implies only that the mutation cannot be called a true mutation
with absolute certainty. As a general guideline, if the coverage is high (500 to several
thousand reads) and the data is bi-directional, then scores that are 5 and lower indicate that
the mutation is most likely false, while scores of 25 and higher indicate that the mutation is
most likely true. Even true variants that occur in a high percentage of reads can have low
Overall Mutation scores if the coverage is low.
For detailed information about the scores that are used to calculate the Overall Mutation
Score, see the following:
456
•
“Coverage score” on page 457.
•
“Read Balance Score” on page 458.
•
“Allele Balance Score” on page 459.
•
“Homopolymer Score” on page 460.
•
“Mismatch Score” on page 461.
•
“Wrong Allele Score” on page 462.
NextGene User’s Manual
Appendix B
Mutation Report Scores
Coverage score
For elongated data, error-corrected data, or data sets in which condensation was not used, the
Coverage score is based on the adjusted coverage. Because reads near the 5’ end are more
accurate than reads at the 3’ end, mismatches that are found at the at the beginning of a read
are weighted more heavily than mismatches that are found in the 3’end of the read. As result,
adjusted coverage is calculated according to the following:
Adjusted Coverage = 1.2*(1st 1/3 mismatch) + (2nd 1/3 mismatch) + 0.7*(3rd 1/3 mismatch)
and the Coverage score is then calculated according to the following:
Coverage Score = 8log10(Adjusted Coverage)
For example, consider a nucleotide with 200x coverage that has 100 reads with a mismatch:
•
No mismatch = 100
•
1st 1/3 mismatch = 50
•
2nd 2/3 mismatch = 30
•
3rd mismatch = 20
•
Normal coverage - 100 + 50 + 30 + 20 = 200
•
Adjusted coverage = 100 +1.2(50) + 30 + 0.7(20) = 204x
For data sets in which consolidation was used, the Coverage score is based on the normal
coverage and is calculated according to the following:
Coverage Score = 8log10(Normal Coverage)
NextGene User’s Manual
457
Appendix B
Mutation Report Scores
Read Balance Score
If the sequencing data has reads in both the forward and reverse directions, then biasing
errors or systematic sequencing errors are greatly reduced and the data is more likely to be a
true sequence. If the ratio of the number of forward reads to the number of reverse reads is
within one, then value for the Read Balance score is set to one and no penalty is applied to
the Overall Mutation score; otherwise, the score is calculated according to the following
formula:
where:
458
•
#F = the number of forward reads
•
C = Coverage (forward reads + reverse reads)
NextGene User’s Manual
Appendix B
Mutation Report Scores
Allele Balance Score
The Allele Balance score penalizes variations that occur at different frequencies in the
forward and reverse directions because such variations are more likely to be the result of
sequencing errors or alignment errors. The score is based on a Yate's chi-square test which is
less likely than normal chi-square tests to reject the null hypothesis because of a lack of data,
which, in this case, would be low coverage. The following value is calculated first:
where:
•
#F = the number of forward reads
•
#R = the number of reverse reads
•
C = coverage
If this value is negative, then the value for Allele Balance score is set to one and no penalty is
applied to the Overall Mutation score; otherwise, the score is calculated according to the
following:
where:
•
#F = the number of forward reads
•
#R = the number of reverse reads
NextGene User’s Manual
459
Appendix B
Mutation Report Scores
Homopolymer Score
The Homopolymer score is applicable only for Roche/454 and Ion Torrent data. The
Homopolymer score penalizes indels that are found in homopolymer regions because such
indels are typically the result of sequencing errors. The penalty is higher for longer
homopolymer regions because the likelihood of sequencing errors in such regions is also
higher. The software first determines which length of homopolymer region is present more
often (A) and which length is present less often (B). If A or B is < 3, then the value for the
Homopolymer score set to one; otherwise, the score is calculated according to the following:
For example, deletion from four bases to three bases that occurs less than half of the time,
where A = 4 and B = 3 results in a score of 0.5, which reduces the Overall Mutation score.
460
NextGene User’s Manual
Appendix B
Mutation Report Scores
Mismatch Score
Several variations from the reference sequence that occur very close together often indicates
a region where mutation calls are less reliable. The Mismatch score penalizes a specific
mutation call if other mismatched bases are found nearby. The software first looks for
mismatches that occur in a minimum percentage of reads in the 10 bp region that is found on
either of side of the variant that is being scored. The number of mismatches is used to
calculate the score. If the number of nearby variations is < 3, then the Mismatch Score is set
to one and no penalty is applied; otherwise, the score is calculated according to the
following:
where N = the number of nearby mismatches.
NextGene User’s Manual
461
Appendix B
Mutation Report Scores
Wrong Allele Score
Mismatches that are different from the consensus are referred to as wrong mismatches. These
wrong mismatches most likely result from sequencing errors. For example, A, C insertions
and deletions would represent wrong mismatches when a G > T variant is called at a
position. The Wrong Allele score is calculated according to the following:
For elongated data, error-corrected data, or data sets in which condensation was not used,
both numbers are based on the adjusted coverage:
1.2*(1st 1/3 mismatch) + (2nd 1/3 mismatch) + 0.7*(3rd 1/3 mismatch)
For data sets in which consolidation was used, both numbers are based on the normal
coverage.
462
NextGene User’s Manual
Index
A
Advanced GBK Editor tool......... 274
Auto Create ROI tool .............. 278
GenBank Tree File.................. 275
output options ......................... 278
Save options ........................... 279
Sequence View pane.............. 276
advanced settings
sequence condensation (Illumina
data, SOLiD System, or Ion
Torrent data) ........................... 110
sequence condensation (Roche/
454 data)................................. 116
algorithms
for sequence alignment
projects ................................... 135
for transcriptome project with
alternative splicing .................. 172
algorithms for sequence alignment
projects
for a preloaded reference ....... 135
for genomic regions or genomes
smaller than 250 Mbp ............. 135
Alignment viewer
Ambiguous Loss penalty
calculating ...............................224
defined ....................................224
application type
specifying in the Project
Wizard.......................................53
assembly methods
De Bruijn for Illumina, SOLiD
System, and Ion Torrent
data .........................................124
Floton/Floton-PE for Roche/454
and Ion Torrent data ...............128
Greedy for Roche/454 data.....125
Maximum Overlap for Illumina
data .........................................125
PE for Roche/454, Illumina, and
Ion Torrent data ......................127
Skeleton for Roche/454 data ..126
Assumptions for the manual ........18
audit trail
viewing for the Mutation
report.......................................213
viewing for the Summary
report.......................................243
Auto Create ROI tool in the
Advanced GBK Editor tool .........278
in the NextGENe Viewer......... 153
functions ................................. 156
B
navigation of ........................... 154
segment breakpoints in........... 157
Allele Balance score
defined .................................... 459
alternative splicing analysis project
see transcriptome project with
alternative splicing
Ambiguous Gain penalty
calculating............................... 224
BAM output
exporting sequence alignment
project files to..........................147
barcoded sample files, parsing
see Barcode Sorting tool.........349
batch processing
previously processed sequence
alignment projects using the
NextGENe AutoRun tool .........419
project files in the Project
Wizard .......................................74
project files using the NextGENe
AutoRun tool ...........................397
project files using the Project
Log ............................................78
project files using the Project Log
and the Project Wizard..............81
BED file
creating for a specified input
sequence range for a sequence
alignment project.....................147
using to create an index
see Build Preloaded Reference
tool
Beta Batch CNV Tool.................338
Block CNV report
HMM and Dispersion...............319
SNP-Based Normalization with
Smoothing ...............................334
Build Preloaded Reference
tool .............................................372
output files (BED file) ..............373
output files (non BED files)......375
C
Barcode Sorting tool ..................349
Barcode/Primer file for ............349
output files...............................353
Barcode/Primer file
defined ....................................349
causative mutations, identifying in
family studies
see Variant Comparison tool
ClinVar database
importing into NextGENe ........383
defined .................................... 224
NextGene User’s Manual
463
CNV Graphs
COSMIC database
elongation
Dispersion and HMM ..............322
importing into NextGENe ........383
defined for Illumina data ......... 103
SNP-Based Normalization with
Smoothing...............................337
Coverage Curve report ..............253
defined for Ion Torrent data.... 103
Coverage score
defined for SOLiD System
data ........................................ 103
CNV tool
Dispersion and HMM ..............310
SNP-based Normalization with
Smoothing...............................323
Condensation Results Filter
tool .............................................368
defined ....................................457
Create SAGE Library from mRNA
tool .............................................283
customized header file
loading for a Summary
report.......................................246
output files...............................369
Condensation Results tool .........370
D
Condensed Reads pane .........371
Index table ..............................371
Condensed Reads pane in the
Condensation Results tool .........371
Consensus Sequence pane in the
HLA project view ........................206
consolidation
defined for Illumina data..........102
defined for Ion Torrent data ....102
defined for SOLiD System
data .........................................102
contaminants, filtering from sample
files
data requirements for a
Mitochondrial amplicon analysis
project ........................................189
database (custom variation)
importing into NextGENe ........383
dbNSFP database
importing into NextGENe ........383
dbscSNV database
importing into NextGENe ........383
dbSNP database
importing into NextGENe ........383
see Condensation Results Filter
tool
De Bruijn assembly method for
Illumina, SOLiD System, and Ion
Torrent data ...............................124
contigs, merging when overlapping
Distribution report.......................249
see Overlap Merger tool
Conventions used in the
manual .........................................17
Copy Number Variation tool
see CNV tool
core number
specifying in the Project
Wizard.......................................53
duplicate reads, removing from
sample files
see Sequence Operation tool
error correction
defined for Illumina data ......... 103
defined for Ion Torrent data.... 103
defined for Roche/454 data .... 104
defined for SOLID System
data ........................................ 103
expiration date
viewing for the NextGENe
license ...................................... 29
Export Sequences to CSFASTA
tool ............................................ 273
Export Sequences tool .............. 272
Export SV Reads function for paired
reads ......................................... 171
Expression Comparison report.. 285
Expression report ...................... 260
Expression Report for SAGE
studies....................................... 266
F
fa file, using to create an index
see Build Preloaded Reference
tool
family data, analyzing
see Variant Comparison tool
fasta files
E
creating a custom one for an STR
analysis project....................... 180
edit history
viewing for mutation from the
Alignment viewer.....................157
using to create an index
see Build Preloaded Reference
tool
File Format Conversion tool ........ 91
464
NextGene User’s Manual
File Preview tool ........................ 382
Filtered VCF Report................... 235
Floton/Floton-PE assembly method
Greedy assembly method for Roche/
454 data.....................................125
group
defined ......................................39
for Roche/454 and Ion Torrent
data......................................... 128
adding .......................................39
output files .............................. 129
deleting .....................................39
fna file, using to create an index
see Build Preloaded Reference
tool
editing .......................................39
data requirements ...................195
settings....................................195
HLA project view ........................205
Consensus Sequence pane....206
GC content, calculating for sample
files
Reference Sequence pane .....206
see GC Percentage Calculation
tool
Top Allele Pair Matches
pane ........................................206
GC Percentage Calculation
tool ............................................. 377
Unmatched Reads pane .........207
HLA report .................................197
output files .............................. 377
settings....................................199
GenBank reference file
toolbar .....................................198
Homopolymer score
see Build Preloaded Reference
tool
GenBank Tree File in the Advanced
GBK Editor tool .......................... 275
gene annotation track
importing into NextGENe ........ 383
Gene CNV report ....................... 331
general settings
sequence condensation
project ..................................... 106
Ion Torrent
De Bruijn assembly method for
data .........................................124
Gap.fasta file
see Advanced GBK Editor tool
specifying for a project in the
Project Wizard...........................53
HLA project
purpose ...................................195
viewing, editing, and/or annotating
instrument type
advanced settings for sequence
condensation...........................110
G
using to create an index
Index table in the Condensation
Results tool ................................371
H
Fragment Output ....................... 240
exporting sequence alignment
project files to.......................... 147
sequence condensation methods
explained for data....................101
defined ....................................460
Floton/Floton-PE assembly
method for data .......................128
PE assembly method for
data .........................................127
sequence condensation methods
explained for data....................101
L
license type
viewing for NextGENe...............29
log file
viewing for your NextGENe
users .........................................44
Long PE Assembly Mapping
tool .............................................381
output files...............................381
I
Illumina
advanced settings for sequence
condensation...........................110
De Bruijn assembly method for
data .........................................124
Maximum Overlap assembly
method for data.......................125
PE assembly method for
data .........................................127
NextGene User’s Manual
M
main menu
NextGENe main window ...........28
NextGENe Viewer ...................145
Matched/Unmatched report .......248
Maximum Overlap assembly method
for Illumina data .........................125
465
Mismatch score
general ..................................214
defined ....................................461
variation tracks......................228
Mismatched Base Numbers
report .........................................259
viewing the audit trail for .........213
Mitochondrial amplicon analysis
project
data requirements for..............189
purpose ...................................189
Reads Summary Alignment view
for............................................191
Mitochondrial Amplicon report ...189
settings....................................192
toolbar .....................................191
MySQL (annotation) database
confirming the settings for .........84
N
navigating
using to batch process previously
processed sequence alignment
projects................................... 419
using to batch process project
files ......................................... 397
NextGENe Reference Setup
application
using to import a reference file for
large genomes........................ 447
NextGENe tools
Alignment viewer.....................154
AutoRun tool........................... 395
Paired Reads viewer ...............160
Barcode Sorting tool
Whole Genome Viewer ...........152
NextGENe
Modify Titles for mRNA GBK
tool .............................................284
installing ....................................24
mutation .....................................211
main window
Barcode/Primer file for ......... 349
output files............................ 353
Build Preloaded Reference
tool.......................................... 372
output files (BED file) ........... 373
editing in the Alignment
viewer......................................156
main menu ..............................28
editing in the Mutation report ..211
toolbar .....................................28
Condensation Results Filter
tool.......................................... 368
viewing the edit history for from the
Alignment viewer............ 157, 213
starting ......................................24
output files............................ 369
system requirements.................22
Condensation Results tool ..... 370
viewing the edit history for from the
Mutation report........................213
title bar ....................................27
NextGENe AutoRun template
output files (non BED file) .... 375
Condensed Reads pane ...... 371
creating ...................................428
Index table............................ 371
defined ........................... 428, 435
File Format Conversion tool ..... 91
Fragment Output...................240
deleting....................................433
File Preview tool ..................... 382
Save Consensus
Sequence..............................236
for RainDance ThunderBolts
panels
GC Percentage Calculation
tool.......................................... 377
Mutation report...........................210
functions
Save Filtered VCF Report.....235
modifying...............................442
output files............................ 377
Save SIFT Report .................235
working with ..........................435
Save SNP Consensus
Sequence..............................238
modifying.................................432
Long PE Assembly Mapping
tool.......................................... 381
Save Unfiltered VCF
Report ...................................235
Seek Sample Position...........240
settings....................................214
Overlap Merger tool................ 378
NextGENe AutoRun tool ............395
output files............................ 379
using for secondary batch analysis
of multiple projects ..................426
Pseudo Paired Read Constructor
tool.......................................... 366
gene tracks ...........................228
466
output files............................ 381
viewing the location of the Root
template directory for ................84
output files............................ 367
NextGene User’s Manual
Reads Simulator tool .............. 364
NextGENe Viewer tools
output files
output files ............................ 365
Advanced GBK Editor tool ......274
arranged paired reads.............361
Sequence Operation tool ........ 354
Create ROI tool.....................278
condensation results filter .......369
output files (arranged paired
reads) ................................... 361
GenBank Tree File................275
for Floton/Floton-PE assembly
method ....................................129
output files (merged reads)... 355
output files (remove duplicate
reads) ................................... 362
output files (reverse
complemented reads) ........... 362
output files (sequence trimmed
reads) ................................... 358
output files (split reads) ........ 356
Track Manager tool................. 383
NextGENe Viewer
output options .......................278
Save options .........................279
Sequence View pane............276
Beta Batch CNV Tool..............338
CNV tool
Dispersion and HMM ............310
SNP-based Normalization with
Smoothing.............................323
Create SAGE Library from mRNA
tool ..........................................283
for manually linked scaffold
contigs.....................................381
GC calculation.........................377
indexed reference files (BED
file) ..........................................373
indexed reference files (non BED
file) ..........................................375
merged overlapping reads or
contigs.....................................379
merged reads ..........................355
Alignment viewer .................... 153
Export Sequences to CSFASTA
tool ..........................................273
parsed sample files (barcoded
files).........................................353
loading a sequence alignment
project in ................................. 143
Export Sequences tool............272
pseudo paired reads ...............367
main menu .............................. 145
Modify Titles for mRNA GBK
tool ..........................................284
remove duplicate reads...........362
Paired Reads viewer............... 159
reports
Gene CNV ............................ 331
title bar .................................... 145
toolbar..................................... 150
tracks display .......................... 151
Whole Genome viewer ........... 152
NextGENe Viewer CNV graphs
Dispersion and HMM .............. 322
SNP-Based Normalization with
Smoothing............................... 337
NextGENe Viewer reports
Block CNV
HMM and Dispersion ............ 319
SNP-Based Normalization with
Smoothing ............................ 334
Peak Identification tool............279
reverse complemented
reads .......................................362
Peak Identification report ......280
sequence alignment project ....208
Resume Project and Load
Project.....................................284
sequence assembly project.....131
Somatic Mutation Comparison
tool ..........................................303
Synthetic SAGE Data tool.......282
Variant Comparison tool .........289
sequence condensation
project .....................................117
sequence trimmed reads.........358
simulated reads.......................365
split reads................................356
O
output options
Opposite Direction Paired Reads
report .........................................163
Overall Mutation score
Organization of the manual..........18
output file name and location
specifying for a project in the
Project Wizard...........................59
Advanced GBK Editor tool ......278
calculating ...................... 455, 456
defined ....................................456
Overlap Merger tool ...................378
output files...............................379
overlapping contigs, merging
Expression Comparison
report ...................................... 285
see Overlap Merger tool
NextGene User’s Manual
467
overlapping reads, merging
see Overlap Merger tool
P
peak identification reference file
aligning sample files to............345
creating with the Peak
Identification tool .....................343
Peak Identification report ...........280
paired reads
arranging in sample files
see Sequence Operation
tool ........................................354
constructing
see Pseudo Paired Read
Constructor tool
Paired Reads alignment
defined ....................................159
functions..................................160
Export SV Reads ..................171
reports.....................................160
Opposite Direction Paired Reads
report ....................................163
Paired Reads Gap Distribution
report ....................................161
Paired Reads Graph report...169
Paired Reads Statistics
report ....................................162
Same Direction Paired Reads
report ....................................165
Single Reads report ..............167
Paired Reads Gap Distribution
report .........................................161
Peak Identification tool...............279
using to create a peak
identification reference file ......343
post processing options
specifying for a sequence
alignment project in the Project
Wizard .......................................66
post-processing output
specifying the directory in which to
save...........................................84
preloaded reference files
specifying the directory for ........84
process options
confirming for the MySQL
(annotation) database ...............84
saving and loading the settings
for ............................................. 76
setting up new in the Project
Wizard, overview of .................. 53
specifying the instrument type,
application type, and number of
cores for in the Project Wizard . 53
specifying the output file name and
location for in the Project
Wizard ...................................... 59
specifying the post-processing
options for in the Project
Wizard ...................................... 66
specifying the values for the
Sequence Alignment step in the
Project Wizard .......................... 64
specifying the values for the
Sequence Assembly step in the
Project Wizard .......................... 63
specifying the values for the
Sequence Condensation step in
the Project Wizard .................... 60
project files
directory for preloaded reference
files............................................84
batch processing in the Project
Wizard ...................................... 74
for processing network data ......84
batch processing using the
NextGENe AutoRun tool ........ 397
saving reference annotation
information in the project output
folder or linking to information ...84
project
carrying out a secondary analysis
on in the Project Wizard ............75
batch processing using the Project
Log ........................................... 78
batch processing using the Project
Log and the Project Wizard ...... 81
Project Log
Paired Reads Graph report........169
creating multiple new ones using
the Project Log ..........................79
defined...................................... 78
Paired Reads Statistics report ...162
finishing in the Project Wizard...74
using to batch process project
files ........................................... 78
Paired Reads viewer
loading reference files for in the
Project Wizard...........................56
using to create multiple new
projects..................................... 79
loading sample data files for in the
Project Wizard...........................55
using with the Project Wizard to
batch process project files........ 81
in the NextGENe Viewer .........159
navigating................................160
PE assembly method for Roche/454
data, Illumina, and Ion Torrent
data ............................................127
468
loading track data for when
previously run..........................393
project settings
saving and loading ................... 76
NextGene User’s Manual
Project Wizard
batch processing project files
in ............................................... 74
carrying out a secondary analysis
for a single project in................. 75
defined ...................................... 51
finishing a project in .................. 74
loading reference files............... 56
loading sample data files .......... 55
opening ..................................... 51
setting up a new project in,
overview of................................ 53
specifying instrument type,
application type, and number of
cores ......................................... 53
R
RainDance ThunderBolts panels
NextGENe AutoRun templates for
modifying ..............................442
working with ..........................435
Read Balance score
reports
Block CNV
HMM and Dispersion ............319
SNP-Based Normalization with
Smoothing.............................334
Reads Simulator tool .................364
Coverage Curve ......................253
output files...............................365
Distribution ..............................249
reads, merging when overlapping
see Overlap Merger tool
reference annotation information
exporting to the project output
folder when linked to a sequence
alignment project.....................146
specifying the output file name and
location ..................................... 59
saving to project output folder or
linking to the project ..................84
specifying values for sequence
assembly step........................... 63
managing for NextGENe projects
from the Process Options dialog
box ............................................84
defined ....................................458
specifying post processing options
for a sequence alignment
project ....................................... 66
specifying values for sequence
alignment step .......................... 64
references
reference files
creating custom .fasta files for an
STR analysis project ...............180
Expression ..............................260
Expression for SAGE
studies.....................................266
Filtered VCF ............................235
Gene CNV...............................331
HLA .........................................197
Matched/Unmatched ...............248
Mismatched Base Numbers ....259
Mitochondrial Amplicon ...........189
Mutation ..................................210
creating using the Peak
Identification tool .....................343
Opposite Direction Paired
Reads......................................163
using with the Project Log to batch
process project files .................. 81
importing for large genomes with
the NextGENe Reference Setup
application...............................447
Paired Reads Gap
Distribution ..............................161
Pseudo Paired Read Constructor
tool ............................................. 366
loading for a project in the Project
Wizard.......................................56
Paired Reads Statistics ...........162
merging
Same Direction Paired
Reads......................................165
specifying values for sequence
condensation step..................... 60
output files .............................. 367
pure sequence file, using to create
an index
see Build Preloaded Reference
tool
see Sequence Operation
tool ........................................354
Reference Sequence pane in the
HLA project view ........................206
reference sequence, indexing
Q
see Build Preloaded Reference
tool
Query Reference Tracks............ 393
Paired Reads Graph ...............169
Score Distribution....................270
SIFT ........................................235
Single Reads...........................167
STR .........................................181
STR Reads Histogram ............184
Structural Variation..................267
Summary.................................241
NextGene User’s Manual
469
Transcript ................................177
Unfiltered VCF ........................235
calculating GC content in
see GC Percentage Calculation
tool
Resume Project and Load Project
option .........................................284
converting..................................91
RNA-Seq data, aligning
filtering contaminants from
see transcriptome project with
alternative splicing
Roche/454
advanced settings for sequence
condensation...........................116
Floton/Floton-PE assembly
method for data.......................128
Greedy assembly method for
data .........................................125
PE assembly method for
data .........................................127
sequence condensation methods
explained for data ...................104
Skeleton assembly method for
data .........................................126
Root template directory
specifying for NextGENe AutoRun
templates ..................................84
S
SAGE studies
Expression report for...............266
SAM output
exporting sequence alignment
project files to..........................147
Same Direction Paired Reads
report .........................................165
sample files
see Condensation Results Filter
tool
loading in the Project Wizard ....55
merging
see Sequence Operation tool
parsing when barcoded
see Barcode Sorting tool
previewing
see File Preview tool
removing duplicate reads from
see Sequence Operation tool
reverse complementing
sequences
see Sequence Operation tool
splitting
see Sequence Operation tool
trimming sequence reads for
see Sequence Operation tool
Save Consensus Sequence
function ......................................236
Save options for Advanced GBK
Editor tool...................................279
Save SNP Consensus Sequence
function ......................................238
scaffold contigs, manually linking
together
see Long PE Assembly Mapping
tool
aligning to a peak identification
reference file ...........................345
Score Distribution report ............270
arranging paired reads in
secondary analysis
see Sequence Operation
tool ........................................354
470
carrying out for a project in the
Project Wizard...........................75
NextGene User’s Manual
carrying out in batch for multiple
projects using the NextGENe
AutoRun tool........................... 426
Seek Sample Position ............... 240
segment breakpoints in the
Alignment viewer....................... 157
sequence alignment project
algorithms for.......................... 135
genomic regions or genomes
smaller than 250 Mbp........... 135
preloaded reference ............. 135
batch processing when previously
processed using the NextGENe
AutoRun tool........................... 419
creating a BED file for a specified
input sequence range............. 147
exporting and saving to a location
of your choice ......................... 149
exporting linked reference
annotation information for to the
project output folder................ 146
exporting linked tracks for to the
project output folder................ 146
exporting project files for to a BAM
or SAM output ........................ 147
exporting project files for to a
Gap.fasta file .......................... 147
loading into the NextGENe
Viewer .................................... 143
loading track data for a previously
run project .............................. 393
output files .............................. 208
settings
for a transcriptome project with
alternative splicing................ 173
for an STR analysis.............. 181
for any application type other
than transcriptome with
alternative splicing................ 137
specifying the values for in the
Project Wizard........................ 64
sequence alignment project reports
sequence condensation methods
sequence reads, trimming for
sample files
Coverage Curve report ........... 253
Illumina data............................101
Distribution report ................... 249
consolidation.........................102
Expression report.................... 260
elongation .............................103
Expression report for SAGE
studies .................................... 266
error correction .....................103
Sequence View pane in the
Advanced GBK Editor tool .........276
Ion Torrent data ......................101
SIFT Report ...............................235
consolidation.........................102
Single Reads report ...................167
elongation .............................103
Skeleton assembly method for
Roche/454 data..........................126
Matched/Unmatched report .... 248
Mismatched Base Numbers
report ...................................... 259
Mutation report........................ 210
Score Distribution report ......... 270
Structural Variation report....... 267
Summary report ...................... 241
sequence assembly methods
De Bruijn assembly method for
Illumina, SOLiD System, and Ion
Torrent data ............................ 124
final assembly methods .......... 123
Floton/Floton-PE assembly
method for Roche/454 and Ion
Torrent data ............................ 128
general settings for any
method.................................... 124
Greedy assembly method for
Roche/454 data ...................... 125
Maximum Overlap assembly
method for Illumina data ......... 125
error correction .....................103
Roche/454 data
error correction .....................104
SOLiD System data ................101
consolidation.........................102
elongation .............................103
error correction .....................103
sequence condensation project
advanced settings for Illumina
data, SOLiD System data, or Ion
Torrent data ............................110
advanced settings for Roche/454
data .........................................116
general settings.......................106
output files...............................117
settings
see Sequence Operation
tool ..........................................354
SOLiD System
advanced settings for sequence
condensation...........................110
De Bruijn assembly method for
data .........................................124
sequence condensation methods
explained for data....................101
Somatic Mutation Comparison
tool .............................................303
somatic mutations, analyzing
see Variant Comparison tool or
Somatic Mutation Comparison tool
Special information about the
manual .........................................17
STR (Short Tandem Repeats)
analysis project
alignment settings ...................181
specifying the values for in the
Project Wizard ........................60
creating custom .fasta reference
files for.....................................180
PE assembly method for Roche/
454 data, Illumina, and Ion Torrent
data......................................... 127
Sequence Operation tool ...........354
purpose ...................................180
output files (arranged paired
reads)......................................361
STR Reads Histogram report.....184
Skeleton assembly method for
Roche/454 data ...................... 126
output files (merged reads) .....355
overview of.............................. 123
sequence assembly project
output files .............................. 131
settings
specifying the values for in the
Project Wizard ........................ 63
output files (remove duplicate
reads)......................................362
STR report ........................ 181, 184
settings....................................186
toolbar .....................................184
output files (reverse
complemented reads) .............362
Structural Variation report ..........267
output files (sequence trimmed
reads)......................................358
customizing the header for......246
Summary report .........................241
output files (split reads)...........356
NextGene User’s Manual
471
loading a customized header file
for............................................246
modifying the report view for...245
viewing the audit trail for .........243
transcriptome project view .........175
transcriptome project with
alternative splicing
algorithm for ............................172
synthetic read data, creating
alignment settings ...................173
see Reads Simulator tool
overview of ..............................172
Synthetic SAGE Data tool..........282
project view .............................175
system requirements for
NextGENe....................................22
purpose ...................................172
T
U
Unfiltered VCF Report................235
title bar
NextGENe main window ...........27
Unmatched Reads pane in the HLA
project view ................................207
NextGENe Viewer...................145
user
toolbar
adding .......................................44
NextGENe main window ...........28
deleting......................................44
NextGENe Viewer...................150
editing........................................44
Top Allele Pair Matches pane in the
HLA project view ........................206
viewing the activity for in a log
file..............................................44
Top List function
see Variant Comparison tool
track
user management
configuring.................................30
defined ......................................30
defined ....................................151
turning off ..................................37
exporting to the project output
folder when linked to a sequence
alignment project.....................146
turning on ..................................35
loading for a previously run
sequence alignment project ....393
track data
loading for previously run
projects ...................................383
Using the manual .........................17
V
Variant Comparison tool ............289
Track Manager tool ....................383
W
tracks display
Whole Genome viewer
NextGENe Viewer...................151
in the NextGENe Viewer .........152
Transcript report.........................177
navigating................................152
settings....................................178
472
NextGene User’s Manual
Wrong Allele score
defined.................................... 462
Glossary
BED file
Also known as Region of Interest (*.bed file). A BED file is a tab-delimited text file. You can
upload a BED file only if the reference sequence contains chromosome information, which
means that the reference sequence must be either a preloaded reference file that NextGENe
supplies, or a GenBank reference file that contains chromosome information. Each row in
the file contains a region of the reference that is to be used for the report, and at a minimum,
the file must contain the following information:
•
Field #1 - Chromosome number for the region
•
Field #2 - Chromosome start position
•
Field #3 - Chromosome end position
•
Field #4 - Optional description column
Comma-delimited text file
There are no special requirements for uploading a comma-delimited text file. If the input text
file is a comma-delimited text file, it must contain one of the following lists:
•
A list of specific reference locations (position number) separated by commas
•
A list of reference ranges (start position number - end position number) separated by
commas
473
474