1
Copyright © 2001-2014 The Omni Group. All rights reserved.
OmniGraffle, Graffle, the OmniGraffle icon/logo, OmniOutliner, the OmniOutliner icon/logo, and
the Omni logo are trademarks of The Omni Group. Apple, the Apple logo, Mac, the Mac logo,
and Multi-Touch are trademarks of Apple Inc.
2
Contents
What’s New in OmniGraffle 6
What's Extra in Pro?
7
9
Getting to Know OmniGraffle
11
The Resource Browser
15
The Toolbar
The Style Well
The Tool Palette
Persistent Tool Activation
Quick Access to Tools
Customizing the Toolbar
17
18
19
21
22
22
Using the Tools
Selecting, Moving, and Editing Objects with the Selection Tool
Selecting Objects
Moving Objects
Resizing Objects
Editing Points
Creating Shapes with the Shape Tool
Connecting Objects with the Line Tool
Creating and Editing Text with the Text Tool
Drawing Your Own Shapes with the Pen Tool
Expando-Collapso Technology
Rapidly Creating Structure with the Diagram Tool
Replicating Styles with the Style Brush Tool
Duplicating Objects with the Rubber Stamp Tool
Adding and Adjusting Connections with the Magnet Tool
Getting a Closer Look at the Canvas with the Zoom Tool
Moving the Canvas Around with the Hand Tool
Activating Scripted Objects with the Action Browse Tool
25
25
25
26
26
28
31
31
32
33
34
35
36
37
38
40
41
42
The Sidebar
Canvases
Creating and Positioning Guides on the Canvas
Working With Layers
45
46
48
49
3
Sharing Layers with Multiple Canvases (Pro)
Contents
List View
The Outline Editor
The Selection Matrix
52
53
54
55
57
Using the Canvas
Using Diagram Styles
59
60
The Inspectors (The Other Sidebar)
Using the Inspectors
Object Inspectors
Coloring Shapes with the Fill Inspector
The Stroke Inspector
Making Objects Cast Shadows with the Shadow Inspector
The Shapes Inspector
The Lines Inspector
Placing Graphics Inside a Shape with the Image Inspector
Changing Object Position and Size with the Geometry Inspector
Positioning Objects Neatly with the Alignment Inspector
Type Inspectors
The Font Inspector
Positioning and Styling Text with the Text Inspector
The Offsets Inspector (Pro)
Properties Inspectors (Pro)
Changing the Way Objects Connect with the Connections Inspector (Pro)
Adding Data to Objects with the Note Inspector (Pro)
Making Objects Interactive with the Action Inspector (Pro)
Canvas Inspectors
Changing the Canvas Size and Scale with the Canvas Size Inspector
The Canvas Fill Inspector
The Background Image Inspector
The Units Inspector
Units
Unit Scale
Canvas Origin Points
Setting up a Grid with the Grid Inspector
65
66
67
67
68
69
70
71
72
73
75
76
76
77
78
79
79
81
82
83
83
84
85
85
86
86
87
87
4
The Canvas Data Inspector (Pro)
Automatically Arranging Objects with the Diagram Layout Inspector
Document Inspectors
The Format Inspector
The Margins Inspector
Storing Information About your Document in the Data Inspector
Using Stencils to Keep and Share Commonly Used Objects
Using the Style Tray
Rulers and the Inspector Bar
Presentation Mode (Pro)
Creating and Managing Templates
A Note About Where Templates Are Stored
Preferences
General Preferences
Drawing Tools
Presentation Preferences (Pro)
Update Preferences
89
89
91
91
92
93
94
95
96
98
99
101
102
102
105
107
108
Drawing Basics
Creating Shapes
Selecting, Resizing, and Moving Objects
Connecting Objects with Lines
Editing Objects
Tables (Pro)
Subgraphs (Pro)
Smart Arrows
111
111
112
115
117
119
121
123
A Quick Tutorial
Tutorial 0: Let’s Get Started!
Tutorial 1: Creating Objects with the Outline View
Tutorial 2: Outline Hierarchy
Tutorial 3: Line Labels
Tutorial 4: Making More Connections
Tutorial 5: Styling Objects
Tutorial 6: Style Proliferation
Tutorial 7: More Selecting and Styling
Tutorial 8: Layers
125
125
128
131
133
134
136
141
142
143
5
Tutorial 9: Styling Lines and Labels
Tutorial 10: Adding a Title
Tutorial 11: Adding Text to a Curve
147
151
152
Reference
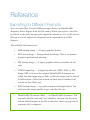
Exporting to Different Formats
Importing from Other Applications
AppleScript Support (Pro)
LinkBack
Licensing
Regular Expression Syntax
159
159
161
163
163
165
168
Every Single Menu Command
The OmniGraffle Menu
The File Menu
The Edit Menu
The View Menu
The Format Menu
The Arrange Menu
The Window Menu
The Help Menu
171
171
173
175
189
193
196
200
202
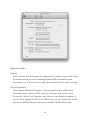
Getting Help
The OmniGraffle Website
Forums
Email Support
Release Notes
203
203
203
203
203
Importable DOT Commands
205
6
What’s New in
OmniGraffle 6
OmniGraffle 6 has new and re-designed features to
make graffling even easier. If you’ve been a long-time
OmniGraffle user, it won’t take long before you notice
some changes.
We’ve polished the interface and have integrated the sidebars, inspectors,
and the Stencil Library so OmniGraffle works better on different screen
sizes, especially in full screen mode, taking full advantage of your Retina
display.
Some additional changes we’ve made include (but certainly aren’t limited
to):
• OmniGraffle 6 offers a complete user interface redesign from the
ground up.
•
Easily find your latest projects, access stencils, templates, and any
styles you may have saved with the new Resource Browser.
•
OmniGraffle now runs in a Sandboxed environment, which means
your resources, such as Templates and Stencils, can now be fully
managed from within the app.
•
Improved and powerful controls have been added to edit and mask
images placed directly on the canvas.
•
New artistic Fill and Stroke styles, such as Freehand, Stipple, and
Marker.
•
Combined shapes can now be uncombined into their starting
component shapes.
•
A new and powerful Font Inspector.
•
Zoom levels have been increased to 6400 percent!
•
The color and position of manual Guides can now be set by hand,
and dragged from one canvas to another.
•
View your Stencils using the new List Mode in the refined Stencils
Library.
•
Line labels can be set to follow the path of a line, including Bézier
curves.
•
New controls have been added to specify which edge or center of
an object is reflected in the Geometry Inspector, along with the
ability to set the X and Y coordinates of a selected vertex point.
(Pro)
•
The Notes and Data Inspector now lets you assign unique naming
to individual objects. (Pro)
•
You can now set the display zoom level of 100 percent to reflect
one Apple point, one screen pixel, or one PostScript point for work
on Retina displays and true WYSIWYG work. (Pro)
•
Export OmniGraffle layers to Photoshop layers. (Pro)
•
Import and export Visio® files. (Pro)
These new features, combined with file synchronization with
OmniPresence and Omni Sync Server, make this an incredible update
worthy of a whole number.
8
What's Extra in Pro?
OmniGraffle 6 Pro, available via In-App Purchase includes a lot of advanced
features that might not be needed by everyone. OmniGraffle 6 Pro features
include:
• AppleScript support
• Geometry left-center-right
• Vertex Point Geometry
• Note tooltip preferences
• Canvas zoom options
• Import Xcode projects
• Share layers between canvases
• Combine shapes
• Add Notes and custom data
• Create tables
• Multiple editing windows
• Subgraph support
• Visio® Support
• Presentation Mode
• Pro export options
Throughout this guide, we’ll call attention to the features exclusive to
OmniGraffle 6 Pro in a little box like this one. All of the other features are
available in both the Standard and the Pro editions of OmniGraffle.
9
Getting to Know
OmniGraffle
Sure, it’s still the same great chart-drawing, prototyping, wireframing app
you’ve grown to love and adore, but we’ve pulled out the stops with
OmniGraffle 6. The biggest change you’ll notice is a new unified user
interface, so let’s dive in with a quick overview.
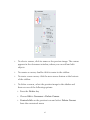
1.
The toolbar provides easy access to the controls of your choosing.
Choose View ▸ Customize Toolbar (or Control-click) on the
toolbar to arrange your favorite tools. Most importantly, the
toolbar is home to the Tool Palette which you’ll use to create
diagrams and such. To hide or show the toolbar, choose View ▸
Hide Toolbar or View ▸ Show Toolbar, respectively.
2.
The sidebar combines the Canvases and Outline sidebars from
OmniGraffle 5 into a single sidebar with Canvases at the top and
the Contents viewer below. You can resize these panes to suit your
needs, and the benefit for you is more space within the Canvas so
you can focus on your work.
3.
In the middle of the interface is the Canvas, which is where you do
all of your drawing. You can use the drawing tools to create shapes,
connect them with lines, drag and group objects, create tables, and
do way more stuff than we can mention here in this quick list of
features.
4.
Just above the Canvas is the Inspector Bar, which reveals all kinds
of details about an object you’ve selected on the Canvas.
5.
One of the more notable changes for OmniGraffle 6 is the absence
of the floating inspector palettes. Tired of searching for the Stencils
Library or wondering where you put that Type inspector? We’ve
combined the Inspectors and the Stencil Library into an ultrahandy Inspectors sidebar to the right of the canvas.
6.
Beneath the Inspector sidebar at the lower-right, you’ll find the
Style Tray. Much like the Inspector Bar, the Style Tray gives you a
graphical representation of all of the styles you’ve applied to an
object you’ve selected on the Canvas. To the left of the Style Tray,
you’ll see a Style Chit which combines all of the styles for the
selected object. You can drag and drop a Style Chit on other objects
to quickly apply a batch of styles in your project.
This self-contained approach to the interface makes it even easier for you
to jump to Full Screen mode without having to later gather all of your
windows and reorient yourself. One window. One vision. One
OmniGraffle.
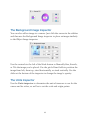
12
Now that you have a better understanding of how OmniGraffle is
organized visually, let’s dive in deeper and look at everything OmniGraffle
has to offer. If you haven’t launched OmniGraffle yet, now might be a good
time to do that.
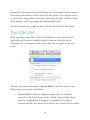
13
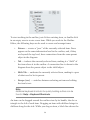
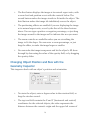
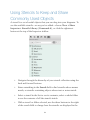
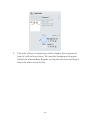
The Resource Browser
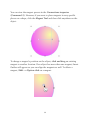
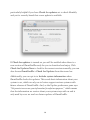
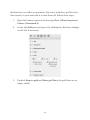
Depending on how you’ve set up your preferences, the first thing you’ll see
when you launch OmniGraffle is the new Resource Browser. The
Resource Browser (File ▸ Resource Browser or Shift-Command-N)
makes it easy for you to start out with a Template, load and edit one of
the Stencils, or you can choose from one of the Diagram Styles.
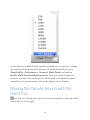
The sidebar on the left makes it easy for you to find Templates and
Stencils to use in your next project. At the very top, we’ve included a
Recents section, which remembers the Diagrams, Templates, and
Stencils you’ve used or created recently. When you select an item, the
sidebar on the right displays all kinds of details about the file you’ve
selected, including its name, size, the units of measurement, and whether
auto-layout and snap to grid are enabled.
Use the Action menu (the little gear
) to open or create new files,
templates, and stencils, reveal where a particular resource lives on your
Mac in the Finder, move an object to Trash, or set a particular template
that you’re fond of as the default. If you have used OmniGraffle in the
past, you can use the Restore option in the Action menu to restore older
templates and stencils on your Mac so they work with OmniGraffle 6.
The Resource Browser also has a Help button ( ), which you can click to
access the very same Help documentation you’re reading right now.
16
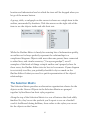
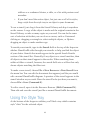
The Toolbar
Along the top of OmniGraffle’s window is the Toolbar. Packed with
buttons and a customizable Tool Palette featuring Expando-Collapso
Technology, the toolbar is where you’ll go for all your drawing needs.
As you can see, the toolbar is packed with the controls you need to help
you get your job done. From buttons to add new layers to a canvas—or an
entirely new canvas—to the tools you need for drawing and connecting
objects together.
On opposing ends of the toolbar you’ll find controls for hiding and
showing the left and right sidebars. On the left is the Canvases and
Contents sidebar, while on the right is the Inspectors sidebar which also
includes the Stencils Library. Above those, you’ll find the standard OS X
window controls for Closing, Hiding, and Expanding the window, and for
popping into Full Screen mode.
At the center of the toolbar along the top, you’ll see a Document Icon
which you might assume does nothing other than tell you what type of file
this is. But if you hold down the Command key (⌘) and click that icon,
you’ll get a contextual menu that shows you where the file is stored on
your Mac. This is sometimes handy for when you’re working on duplicated
files and you can’t remember where you saved the last revision. Next to
that is the filename, and if your OmniGraffle file has more than one
Canvas, the filename is appended by a colon (:) followed by the name of
the canvas you’re presently working on.
Beneath the Document icon and filename are buttons that let you interact
and control the behavior of the objects on the canvas. You can flip objects
to the back or bring them to the front, lock them in place (which is really,
really handy), and for grouping and ungrouping objects.
But the big tools are coming up next: The Style Well and The Tool Palette.
The Style Well
With the Shape, Line, Text, or Pen tool selected, a style menu for the
applicable tool becomes available from the button to the left of the
Selection tool. It contains various styles that you can apply to the tool
itself.
The very top item in the menu, Current Style, is the last style you set.
Other sections you may see include:
•
Canvas Styles, which is dependent upon the tool you have
selected in the Tool Palette, shows related styles for that object
type for everything on the canvas. For example, if you have
selected the Line tool in the Tool Palette, the Canvas Styles section
18
shows you the different styles for all of the lines you’ve drawn on
your canvas.
To use one of the Canvas Styles — First select one of the tools
in the Tool Palette, and then click the Style Well and choose one of
the available styles in the Canvas Styles section. The style you
have selected now becomes the default style for that drawing tool.
•
Favorite Styles, available with the upgrade to OmniGraffle Pro, is
your personalized list of styles you intend to reuse from one
project to another.
To create a Favorite Style, Control-click an object on the canvas
and select Add to Favorite Shape Styles from the contextual
menu. To remove a style from the Favorite Styles list, select any
object on the canvas, click on the Style Well icon in the toolbar,
and then Control-click on the style you would like to remove and
select Remove from Favorites from the contextual menu.
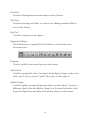
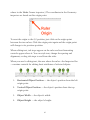
The Tool Palette
The Tool Palette contains all of the tools that you need to draw and
interact with objects on the Canvas. In its default state, the Tool Palette
contains the following tools:
Selection Tool (Arrow)
Used for selecting objects on the Canvas.
Shape Tool
Used for drawing shapes, such as squares, rectangles, and circles.
19
Line Tool
Used for drawing lines between objects on the Canvas.
Text Tool
Used for entering text labels to a Line or for adding a random blob of
text on the Canvas.
Pen Tool
Used for creating custom shapes.
Expando-Collapso
Click this button to expand the Tool Palette to reveal even more
awesome tools…
Diagram
Used to rapidly create new objects on the canvas.
Style Brush
Used for copying the style of an object (including its shape, stroke, text
style, and so on) so you can “paint” the style on other objects.
Rubber Stamp
Used for rapidly copying and pasting objects on the Canvas. To select a
different object when the Rubber Stamp is in Persistent Tool mode, hold
down the Option key and then click another object on the Canvas.
20
Magnet
Used to relocate the magnets that connect lines to objects.
Zoom Tool
Used to zoom in on the Canvas. When the Zoom Tool is in Persistent
Tool mode, hold down the Option key and click on the canvas to zoom
out.
Hand
Used to drag the canvas around.
Action Browse Tool (Pro)
Used to interact with an object if an Action has been set in the
Properties inspector.
See Using the Tools for in-depth coverage on each of the tools in the Tool
Palette.
Persistent Tool Activation
By default, clicking a tool once activates it for a single use; after that
one use the Selection tool becomes active again. When you select a tool in
the toolbar, the button takes on a light gray background to indicate that
the tool is active.
However, if you double-click on a tool, it becomes the permanently
active tool until you switch to another tool. The tool button takes on a
dark gray background to indicate that the tool is persistent.
You can change this behavior in the Drawing Tools preferences, so that
tools are always (or never) activated persistently.
21
Quick Access to Tools
With the mouse pointer hovering over the Canvas, you can quickly activate
any tool in the Tool Palette using a Hot Key. For example, if you press and
hold t, the mouse pointer changes to a text insertion tool; just click on the
Canvas and start entering some text. When you let go of the Hot Key, the
mouse pointer changes back to the Selection tool.
Similarly, you can press the number keys to activate tools. Each key from 1
to 0 corresponds to a tool in the palette, from left to right. (The only
exceptions are the Hand and Action Browse Tool, which don’t have a
number assigned; instead, use the Space Bar or b key, respectively.)
Pressing a number key twice makes that particular tool persistent.
You can configure each tool’s Hot Key in the Drawing Tools preferences.
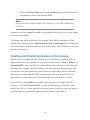
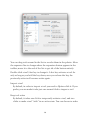
Customizing the Toolbar
As noted earlier, the Toolbar comes packed with a variety of tools by
default. However, you can customize the toolbar by adding additional
buttons or rearranging their order, to suit your needs.
To customize the toolbar, choose View ▸ Customize Toolbar or Controlclick on the toolbar and select Customize Toolbar. When you do, a sheet
slides down from under the toolbar, revealing a slew of function-related
buttons that you can drag up to the toolbar. For example, you could add
the Make Table or Start Presentation buttons to the toolbar if you’ve
purchased OmniGraffle 6 Professional.
22
If you don’t like the changes you’ve made, or if you ever want to reset the
toolbar to it’s default state, all you need to do is drag the bottom row up to
the toolbar. When you’ve finished making changes to the toolbar, click
Done.
23
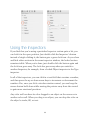
Using the Tools
As you discovered, the Tool Palette has a lot to offer, and we brushed over
them pretty lightly to just give you a glimpse of what was possible. Here
we’ll go into a bit more depth and walk through each of the buttons in the
Tool Palette so you can find the right tool for the job.
Selecting, Moving, and Editing Objects
with the Selection Tool
The selection tool is the most basic tool; it looks just like the ordinary
OS X mouse pointer.
Selecting Objects
Click an object on the canvas to select it.
When you select an object on the Canvas, the inspector sidebar switches
over to the Object inspector automatically. From there, you can use the
inspectors to change anything about the selected object.
To select several objects at once, click in an empty area of the canvas and
drag a box around the objects. If you hold Option, only objects entirely
inside the rectangle are selected. You can also Command- or Shift-click
an object to add it to or remove it from the selection.
To select a member of a group, table, or subgraph, click once to select the
group as a whole, then click again to select the member. The rest of the
canvas dims to show that you are in group editing mode. Click anywhere
outside the group to leave group editing mode.
Moving Objects
To move an object, use the Selection tool to click-and-drag the object to a
new location. If you want to move a line, you might have to detach its end
points from any objects they’re attached to. To move an object horizontally
or vertically, hold Shift as you drag. To rotate an object, Command-drag
one of its selection handles; you can also hold Shift to restrict the rotation
to 15-degree increments.
If you’re using a Mac with a touch-sensitive trackpad, you can use the
rotate gesture with two fingers to rotate the selected objects (be sure that
Multi-Touch gestures are enabled in OmniGraffle ▸ Preferences ▸
General ▸ Multi-Touch).
To move the selected object very precisely, press the Arrow keys. Hold
Option or Shift to move by larger steps.
With Smart Guides enabled (Arrange ▸ Guides ▸ Smart Alignment
Guides and Smart Distance Guides), you can line up objects and space
them on the Canvas precisely. Hold Command after you start dragging to
temporarily enable or disable Smart Guides.
To drag a copy of an object instead of the object itself, hold Option as you
drag.
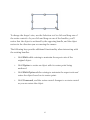
Resizing Objects
Any object (or group of objects) that can be resized has eight selection
handles.
26
To change the shape’s size, use the Selection tool to click and drag one of
the resize controls. As you click and drag on one of the handles, you’ll
notice that the object is anchored by the opposing handle, and the object
resizes in the direction you are moving the mouse.
The following keys provide additional functionality when interacting with
the resizing handles:
•
Hold Shift while resizing to maintain the aspect ratio of the
original object.
•
Hold Option to resize an object with its center point being
anchored.
•
Hold Shift-Option while resizing to maintain the aspect ratio and
resize the object based on its center point.
•
Hold Command, and the resize control changes to a rotate control
so you can rotate the object.
27
If you have objects of different sizes on the canvas, but would like them to
be the same size, first select the object that has the dimensions you'd like
the others to emulate, choose Arrange ▸ Size and then choose one of the
resizing options.
If you select a table, the edge handles look like little grids. You can drag
them to change the number of rows or columns in the table. Drag the
corner handles to resize the table normally.
Note
If you have Smart Guides enabled, they appear as you drag to
help you size objects equally. Hold Command after you start
dragging to temporarily enable or disable Smart Guides.
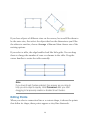
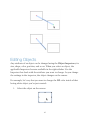
Editing Points
When you select a connection line or a custom shape, it shows the points
that define its shape; these points appear as tiny blue diamonds.
28
Any line (created with the Line tool) has two points: a red one at its
source and a green one at its destination. A line may also pass through any
number of blue midpoints. Drag one of the points to move it; by dragging
the source or destination point you can make the line connect to or
disconnect from other objects.
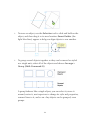
Custom shapes (created with the Pen tool) and Bézier-type lines have
control points at each vertex. Click a control point to select it; if a control
point is hiding behind a selection handle, Option-Command-click to
select it, or just select a different control point first to make the handles go
away. If a control point has Bézier handles, they appear when you select
the point:
•
Drag either of the two handles to adjust both, or Option-drag to
adjust them one at a time.
•
Shift-drag to constrain the handle’s angle to 45-degree
increments.
•
Command-drag a point to give it handles.
29
•
If you drag a handle close enough to the point itself, the handle
disappears entirely.
The default way to add points to an existing line is to double-click the line,
but this can be changed in the General preferences (OmniGraffle ▸
Preferences ▸ General).
To add a point to a custom shape, double-click somewhere along the
shape’s stroke.
To delete a point from a line or a custom shape, select it and then either
press the Delete key or select Edit ▸ Delete from the menu bar.
30
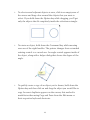
Creating Shapes with the Shape Tool
This tool is quite simple; use it to create shape objects—squares,
rectangles, circles, and so on—based on the shape you’ve selected in the
Shapes object inspector.
To create a shape:
•
Drag across the canvas until you get the size you want.
•
Hold Shift while dragging to make a shape of equal width and
height (a perfect square, a perfect circle, and so on).
Once you have created a shape, you can select it and change its attributes
with the Object, Type, and Properties inspectors.
Connecting Objects with the Line Tool
Use the Line tool to make logical connections between objects.
Connected objects stay connected unless you disconnect them, no matter
how much you move them around or change them.
To create a new line:
•
Click where you would like the source of the line; this can be an
object (to which the line will stay attached) or an empty spot on
the canvas (so the beginning of the line remains unattached).
•
Click as many empty spots on the canvas as you like to give the
line midpoints.
•
End the line at an object by clicking the object (to which the line
will stay attached), or end the line at an empty spot on the canvas
by double-clicking there; this can be changed in the Drawing Tools
preferences (OmniGraffle ▸ Preferences ▸ Drawing Tools ▸ Line
Editing).
31
Hold Shift while drawing a line to constrain the next point to angles at 45degree increments from the previous point. Hold Option while drawing a
line to prevent it from connecting to objects.
When two objects are connected by a line, the object at the source is
considered the parent of the object at the destination. This defines the
objects’ relationship in the outline view and when you use automatic
layout.
Lines can have line labels attached to them. Click a line with the Text tool
to create a new text label. Or, drag an existing blob of text to the line until
the line is highlighted, then drop it to attach it as a label.
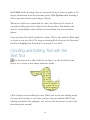
Creating and Editing Text with the
Text Tool
Use the text tool to add a label to an object, to edit the label on an
object, or to create a new shape with text inside.
Click a shape to start editing its text. While you are in text editing mode,
the top ruler becomes a text ruler, and you can use standard OS X text
editing commands (for example, you can use the arrow keys to move the
insertion point around).
32
Click or drag in an empty area of the canvas to create a new shape with
settings particularly suited to containing text. A single click creates an
object that expands horizontally to fit the text you enter; a drag creates an
object of a specific width. Remember that the objects you create in this
way are not fundamentally different from other shapes; they just start with
certain settings in the Text inspector which make them convenient for
containing text.
Click a connection line to add a new label to it. This label is just like the
object created when you click an empty area of the canvas, except it is
attached as a line label.
Text inside objects can be found by OS X’s Spotlight search feature, in case
you need to find your OmniGraffle diagrams that contain certain words.
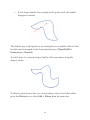
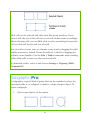
Drawing Your Own Shapes with the
Pen Tool
Use this tool to create custom shapes, such as the duck shown earlier.
We’ve included a lot of nice shapes in the Lines and Shapes inspector and
on the stencils, but perhaps you would like to draw your own.
To start a new shape, click anywhere on the canvas. Each subsequent click
adds a new point to the shape, until you double-click or press Return to
make the final point. At any step along the way, instead of just clicking,
click and drag to create a point with Bézier handles. While creating a
shape, you can press Delete to remove the last point you added.
Bézier handles can define any shape, once you get the hang of them. Each
point can have a handle facing the next point, and a handle facing the
previous point. The line between two points is defined by the first point’s
forward-facing handle and the second point’s backward-facing handle.
With no handles at all, you get a perfectly straight line. With handles, the
33
line between them is a curve that tries to compromise between the
handles’ length and direction. This is truly one of those things that makes
a ton more sense once you try it for yourself, so please do.
Once you have created a shape, you can select it with the Selection tool
and edit its points, adjust existing handles, add handles to points without
them, or change the shape’s attributes with the Object, Type, and
Properties inspectors.
Expando-Collapso Technology
OmniGraffle 6 includes advanced Expando-Collapso Technology. Okay,
it’s really just a button after the Pen tool, but you can use this to collapse
the tool palette down to just a core set of tools, or click it—Expando!— to
gain access to a bunch more tools. Collapso lets you save precious toolbar
space for other buttons, and Expando gives you the whole enchilada.
You can move the divider in the Drawing Tools preferences to change
which tools are available in the palette’s collapsed state, or get rid of the
Expando-Collapso button entirely.
34
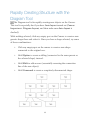
Rapidly Creating Structure with the
Diagram Tool
The Diagram tool is for rapidly creating new objects on the Canvas.
This tool is especially fun if you have Auto layout turned on (Canvas
Inspectors ▸ Diagram Layout, and then make sure Auto layout is
checked).
With nothing selected, click any empty spot on the Canvas to create a new
generic shape there and select it. Once you have a shape selected, try some
of these combinations:
•
Click any empty spot on the canvas to create a new shape
connected to the original one.
•
Hold Option to create a sibling (connected to the same parent as
the selected shape) instead.
•
Hold Shift to add an aunt (essentially reversing the connection
line of the new object).
•
Hold Command to create a completely disconnected shape.
35
If you already have an object on the Canvas, first select it with the
Selection Tool so that you can use it as a starting point for creating more
connected shapes, and then switch to the Diagram Tool by pressing and
holding the d key.
Once you get the hang of the modifier keys, you can create really complex
diagrams with just a few clicks.
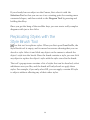
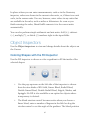
Replicating Styles with the
Style Brush Tool
Use this tool to replicate styles. When you first open OmniGraffle, the
Style Brush tool is empty, and its cursor has arrows showing that you can
absorb a style. Select it and click any object on the canvas to absorb the
object’s style into the brush. Once the brush contains a style, you can click
any object to replace the object’s style with the style stored in the brush.
The tool’s popup menu contains a list of styles that can be absorbed; select
whichever ones you like, and the brush will only absorb or apply those
styles. For example, if you only select Fill, you can apply a certain fill style
to objects without affecting any of their other styles.
36
To reset the contents of the brush, select Clear Contents from the Brush
tool’s popup menu; you can then absorb a new style. You can also Optionclick a different object to replace the brush’s contents.
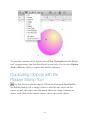
Duplicating Objects with the
Rubber Stamp Tool
Use this tool to replicate objects. When you first open OmniGraffle,
the Rubber Stamp tool is empty. Select it and click any object on the
canvas to grab the object into the stamp. Once the stamp contains an
object, each click on the canvas creates a new copy of the object.
37
If you hold the Shift key down, the Rubber Stamp tool will align the soonto-be-pasted object along the centerline (either horizontally or vertically)
of the original or previously pasted copy.
To reset the contents of the stamp, select Clear Contents from the tool’s
popup menu; you can then grab a new object. You can also Option-click a
different object to replace the stamp’s contents.
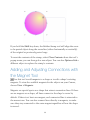
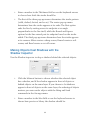
Adding and Adjusting Connections with
the Magnet Tool
Use this tool to add magnets to a shape or to edit a shape’s existing
magnets. To view the available magnets for the objects on your Canvas,
choose View ▸ Magnets.
Magnets are special spots on a shape that attract connection lines. If there
are no magnets on a shape, all lines connect to the shape’s center by
default. If there is at least one magnet, each connected line is attracted to
the nearest one. You can also connect lines directly to magnets, to make
sure they stay connected to the same magnet regardless of how the shape
is moved.
38
You can view the magnet presets in the Connections inspector
(Command–3). However, if you want to place magnets in very specific
places on a shape, click the Magnet Tool and then click anywhere on the
object.
To change a magnet’s position on the object, click and drag an existing
magnet to another location. If an object has more than one magnet, Smart
Guides will appear so you can align the magnets as well. To delete a
magnet, Shift- or Option-click on a magnet.
39
Getting a Closer Look at the Canvas
with the Zoom Tool
Use the Zoom tool to get a closer (or more distant) look at the Canvas.
Click anywhere on the canvas to center on that point and double the zoom
percentage. Option-click to zoom back out.
Click and drag a box across the canvas to specify the rectangle you would
like to zoom to; the shading shows the area that will be visible in the
window when you let go. If you Option-drag, the rectangle is centered on
the spot where you start dragging. While dragging, press and hold Shift to
move the zoom selection area around instead of resizing it.
Shift-click the zoom tool in the tool palette to return to 100 percent
zoom, or actual size.
You can always zoom to a specific percentage with the zoom menu in the
lower-right of the canvas window.
40
If your Mac has a Multi-Touch–capable trackpad, you can use it to change
the zoom level using the pinch gesture. To enable Multi-Touch, go to
OmniGraffle ▸ Preferences ▸ General ▸ Multi-Touch and turn on
Enable Multi-Touch trackpad gestures. Now you can pinch open to
zoom in, or pinch close to zoom out. Multi-Touch zoom makes it much
easier for you to zoom-in and -out on the objects on the Canvas.
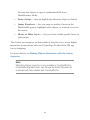
Moving the Canvas Around with the
Hand Tool
Use this tool to drag your view of the canvas around, to see part of the
canvas that is out of sight.
41
You’ll mostly use the Hand tool when you’re zoomed in on the canvas and
want to move to a different location. For this, use the Hand tool’s quick
access key, the Space Bar, to switch the mouse pointer to a hand, and then
click and drag to move the canvas around.
As you drag, you’ll notice that the open hand changes to a clutched fist to
indicate that you’re grabbing onto the Canvas.
Activating Scripted Objects with the
Action Browse Tool
Use the Browse tool to work with interactive OmniGraffle documents.
The secret here is that you assign actions to objects using the Action
properties inspector (Command–3), which is only available in
OmniGraffle Pro. First create and select an object on the Canvas, then
switch to the Action properties inspector. By default, an object Does
Nothing, which means it just sits there on the canvas looking pretty.
Other Actions you can bind to an object include:
•
Opens a URL — lets you assign a URL to open; when clicked, the
page opens in the user’s default web browser.
•
Opens a File — lets you assign a file to open; when clicked, the
file opens in the default app based on that file type’s preferences.
42
You can also choose to open a synchronized file in an
OmniPresence folder.
•
Runs a Script — runs an AppleScript when the object is clicked.
•
Jumps Elsewhere — lets you jump to another Canvas in the
OmniGraffle project, highlight other objects, or zoom in or out on
the canvas.
•
Shows or Hides Layers — lets you show or hide specific layers in
your project.
The Actions you assign to an object make it easy for you to create highly
interactive presentations and even UI mockups for that killer iOS app
you’re designing.
For more details, see Making Objects Interactive with the Action
Inspector.
Note
While the Actions inspector is only available in OmniGraffle Pro,
OmniGraffle Standard users can still use the Action Browse tool
to interact with files created with OmniGraffle Pro.
43
The Sidebar
On the left side of OmniGraffle’s window is the Sidebar. In earlier
versions of OmniGraffle, there were actually two sidebars on the left: one
for Canvases and another for Contents.
In OmniGraffle 6, however, these two sidebars were combined into one
that’s split in half with Canvases on top, and Contents below. This split-
level sidebar gives you more room to work with on the Canvas, while still
giving you access to your project’s canvases, layers, and the contents
editors in one convenient place. Hover over the sidebar just above the
Contents section and the pointer changes to a resize control; click and
drag up or down to make one
Tip
Need more space? Just hit Option-Command–1 to hide the
sidebar or to bring it back again.
Canvases
The Canvases sidebar is open by default, and lists all of the Canvases
available in your document. You have many options for hiding and
showing the sidebar:
•
Click the Hide/Show Sidebar button in the toolbar
•
Choose View ▸ Hide/Show Sidebar in the menu bar
•
Use the Option-Command–1 keyboard shortcut
To work on a Canvas, select the canvas by either clicking its name or the
preview icon in the sidebar. When you do, the preview icon takes on a
light blue highlight, and any objects appear on the working canvas in the
middle of OmniGraffle’s window.
Each Canvas has a title, a disclosure triangle for showing its layers, and a
preview image:
46
•
To select a canvas, click its name or the preview image. The canvas
appears in the document window, where you can add and edit
objects.
•
To rename a canvas, double-click its name in the sidebar.
•
To create a new canvas, click the new canvas button at the bottom
of the sidebar.
•
To delete a canvas, select the preview image in the sidebar and
then use one of the following options:
• Press the Delete key
• Choose Edit ▸ Canvases ▸ Delete Canvas
• Control-click on the preview icon and select Delete Canvas
from the contextual menu
47
• Choose Delete Canvas from the Action menu at the bottom of
the sidebar next to the Search field
Note
Any document needs at least one canvas, so you can’t delete the
last one.
Canvases can be dragged around to rearrange their order, or to copy them
between documents.
To change the style attributes of a canvas, first click its preview in the
sidebar, and then use the Canvas inspectors (Command–4) to change its
style and other attributes such as size, units, grid, and whether or not auto
layout is turned on.
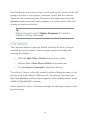
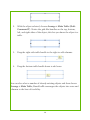
Creating and Positioning Guides on the Canvas
When you’re working on the Canvas, one of the more common ways to
align objects is to use guides. If you turn on the rulers (View ▸ Rulers, or
Command-R), you can click on either the horizontal or vertical ruler bar
and drag out a guide onto the canvas. For more precise positioning, you
can zoom in on the canvas for pixel-perfect positioning, which is handy
when you’re using OmniGraffle to prototype the user interface for an
application, or even laying out the floorplan for your home or office.
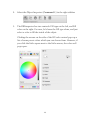
If you click on the Guides icon (the pink square to the right of each
canvas), you’ll find OmniGraffle 6’s new Guides pop-up. To add a new
guide, just click +; new guides are spaced apart evenly, or you can enter a
specific value to position the guide exactly where you need it.
48
Using any of the color wells, you can choose a default color for your
guides, or set their colors individually. This is particularly helpful when
you have a background image with varying colors (such as a gradient) that
might clash with an otherwise default guide color.
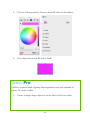
Using the icons in the upper-right corner of the Guides pop-up, you can
also toggle the guides’ visibility or lock them into position.
Working With Layers
Layers contain all of the fine details about your Canvases. Each Canvas
starts out with one layer, but you can add as many new layers as you need
to make it easy for you to keep track of certain objects or blocks of text.
49
By default, the layers are hidden beneath a disclosure triangle. To see all of
the layers in your Canvas, click the disclosure triangle to flip it open; click
it again to hide the layers.
Each layer in the list has a small Preview icon of its contents, a Title, and
a row of four icons underneath the title.
The layer you are currently editing has a Pencil icon to its left. To edit a
different layer, just click to the left of its preview and the pencil icon
moves there.
To make a layer visible or invisible, click its Eye icon. To set whether a
layer is printable, click the Printer icon. To lock or unlock a layer, click the
Lock icon; locking a layer prevents its contents from being changed.
50
You can rearrange layers by dragging them up or down in the list. You can
also drag a layer from one Canvas to another, or you can Option-drag a
layer to copy it instead. If you drag a layer to a different OmniGraffle
document, the layer is always copied.
To add a new layer:
•
Click the New Layer button in the toolbar
•
Choose Edit ▸ Layers ▸ New Layer
•
Choose New Layer from the Action Menu at the bottom of the
sidebar next to the Search field
To delete a layer:
•
Select it and then press the Delete key
•
Choose Delete Layer from the Action Menu at the bottom of the
sidebar
•
Control-click on a layer and select Delete Layer from the
contextual menu
•
Select the layer and choose Edit ▸ Delete
And remember, if you delete a layer by accident, you can always hit
Command-Z to restore the layer.
Note
A canvas must have at least one layer, so you can never delete
every single layer in a project.
51
Sharing Layers with Multiple Canvases (Pro)
You can share a layer between multiple canvases. That way, whenever you
change the layer, it affects every canvas that uses that layer.
To share a layer between canvases, select the layer and then:
•
Choose Edit ▸ Layer Settings ▸ Shared Layer
•
Under the layer’s title, click the Shared Layer icon
When a layer is shared, the title turns orange and an orange tint is added
to the layer’s preview image.
To create a new shared layer:
•
Choose New Shared Layer from the Action Menu at the bottom
of the canvases sidebar.
•
Choose Edit ▸ Layers ▸ New Shared Layer
After creating (or designating an existing layer as) a new shared layer:
•
Add and edit objects on the layer normally.
•
Any further changes you make to any copy of the layer are also
applied to all other copies of it.
Objects on shared layers, the corresponding items in the list sidebar, and
shared layer previews in the canvases sidebar all appear in the distinctive
shared layer color, to remind you that you could be affecting many
canvases if you edit them.
52
To delete a shared layer, select the shared layer and:
•
Press the Delete key
•
Choose Edit ▸ Delete from the menu Bar
•
Control-click on the shared layer and select Delete Layer in the
contextual menu
•
Select Delete Layer from the Action Menu at the bottom of the
sidebar
There is also a Delete [layer name] from All Canvases option that, when
chosen, removes that shared layer from every canvas in your project.
Contents
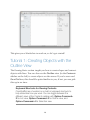
The Contents portion of the Sidebar offers three different ways to create,
view, and edit the objects in your projects: List View, Outline Editor, and
Selection Matrix.
To switch between the different sections of the Contents sidebar, you can
either click on the buttons in the header row for the Contents sidebar, or:
53
•
List View:
• Choose View ▸ Show Contents ▸ List View
• Use the Option-Command–2 keyboard shortcut
•
Outline Editor:
• Choose View ▸ Show Contents ▸ Outline Editor
• Use the Option-Command–3 keyboard shortcut
•
Selection Matrix:
• Choose View ▸ Show Contents ▸ Selection Matrix
• Use the Option-Command–4 keyboard shortcut
The layers in your project have like-named sections in the Contents
section as well. This makes it easy for you to keep track of different
elements of your project.
As you select an object in the Contents section, the Inspectors (see the
Inspectors section) change accordingly. This is particularly helpful for when
you are in the Selection Matrix and need to tweak the styles of similar
objects (for example, changing the font size for all of your labels at once or
adding a drop shadow to certain objects).
List View
List View shows you every object on every layer of the current canvas, in
front to back order.
54
Within that list, you can drag objects into different ordering or from one
layer to another.
In the General preferences, you can choose to display the object ID
numbers along with the items in List View, which can be useful for
scripting.
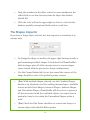
The Outline Editor
The Outline Editor gives you a quick way to enter lots of data, and an
alternate way to look at hierarchical diagrams. The outline shows any
shapes you’ve created on the canvas, arranged hierarchically according to
the lines that connect them. Likewise, as you enter text into the outline,
shapes are automatically created and connected on the canvas with
corresponding text.
55
To start working in the outline, just click an existing item, or double-click
in an empty area to create a new item. While you work in the Outline
Editor, the following keys can be used to create and arrange items:
•
Return — creates a “peer” of the currently selected item. Peers
appear on the same indentation level in the outline, and, if they
are beyond the top level, have connections from the same parent
object in the diagram.
•
Tab — indents the currently selected item, making it a “child” of
the item above it in the outline. A connection line is drawn in the
diagram from the parent object to the child object.
•
Shift-Tab — outdents the currently selected item, making it a peer
of what used to be its parent.
•
Escape (esc) — switches between selecting an item and editing
the item’s text.
Note
Additional keyboard shortcuts for quickly building outlines can be
found in Help ▸ Keyboard Shortcuts.
An item can be dragged around the outline view by its handle, the dot or
triangle to the left of each item. Dragging an item with children brings its
children along for the ride. While you drag an item, a black line shows the
56
location and indentation level at which the item will be dropped when you
let go of the mouse button.
A group, table, or subgraph on the canvas is shown as a single item in the
outline, surrounded by brackets. Click the arrows on the right side of the
item to see the objects inside and edit their text.
While the Outline Editor is handy for entering lots of information quickly,
an outline can’t always perfectly represent the relationships in a
complicated diagram. Objects with more than one parent, lines connected
to other lines, and circular ancestry (“I’m my own grandpa!”) are all
examples of the kinds of things a simple outline can’t properly show. In
these cases, the Outline Editor tries its best to be accurate. If your diagram
is not strictly tree-like, you probably shouldn’t rely too much on the
Outline Editor if what you need is a quick representation of the objects’
relationships.
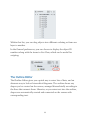
The Selection Matrix
The Selection Matrix provides an alternative organization scheme for the
objects on the Canvas. Objects in the Selection Matrix are grouped
together by kind based on their style properties.
Along the top of the Selection Matrix is a row of buttons that look oddly
familiar. No, they’re not the symbols you’d expect to see on a football
coach’s chalkboard during halftime, these relate to the styles you can set
for the objects on the Canvas.
57
All of these are on by default, and this gives you the finest level of
granularity when evaluating your objects. But as you turn one—or all—of
them off, you’ll notice that the previews in the Selection Matrix become
more compact.
Click on a class of objects in the matrix to select them all for
manipulation, or select them individually in the main view.
58
Using the Canvas
The Canvas is where you create, edit, and move objects around in your
project. By default, every OmniGraffle document contains at least one
canvas with one layer, and you can add as many Canvases as you’d like.
Canvases give you the flexibility to separate your work into distinct areas
in the same document. Not sure if you like the style of the diagram you’ve
been working on? Duplicate the canvas and apply a new set of styles so
you can see which one you like best.
For those times when all you want is to work on the Canvas and not be
distracted by the sidebars, remember that Option-Command–1 hides the
Sidebar on the left, and Shift-Command-I hides the Inspectors sidebar on
the right.
59
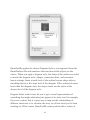
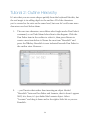
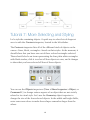
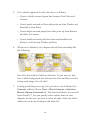
Using Diagram Styles
Diagram Styles are OmniGraffle documents that define an appearance
which you can apply to an outline or a diagram. There are infinite ways to
represent the same data; a diagram style helps you indicate just how you
want the data to be represented.
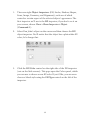
Diagram styles come in handy when you’re creating an outline with
OmniGraffle’s Outline Editor (View ▸ Show Contents ▸ Outline Editor,
or Option-Command–3). The Outline Editor is a great way to quickly
enter information and set up relationships for the objects in a diagram. To
quickly style all of the elements, choose Format ▸ Choose Diagram Style
to select and apply a style set to your diagram.
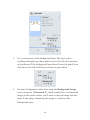
60
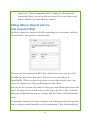
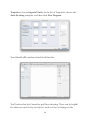
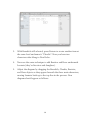
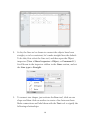
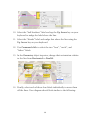
You can also import an OmniOutliner file and automatically apply a
Diagram Style in the Import Outline dialog. Use the pop-up menu at the
top of the dialog to select which Diagram Style to apply, select either New
Document to create a new document or New Canvas to add a new canvas
to your current OmniGraffle document, and then click OK.
61
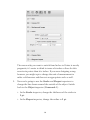
OmniGraffle applies the chosen Diagram Style to text imported from the
OmniOutliner file and translates that text into visible objects on the
canvas. When you apply a diagram style, the items of the outline are styled
to match the diagram style’s shapes, connection lines, and automatic
layout settings. Items at each level of the outline become shape objects,
matching objects at the same level of the diagram. If the outline has more
levels than the diagram style, the deeper items use the styles of the
deepest level of the diagram style.
Diagram Styles make it easy for you to get a visual representation of
something that might otherwise just appear to be static text. For example,
if you are a writer, this is a great way to map out the relationships of
different characters or to visualize the story arc of that novel you’ve been
working on. What’s more, OmniGraffle comes packed with a variety of
62
Diagram Styles, so if you don’t like one, you can always apply another by
choosing Format ▸ Choose Diagram Style and selecting a different style.
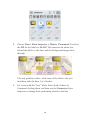
You can force manually styled objects to conform to the diagram style by
selecting them and choosing Format ▸ Restyle Selected Objects, or you
can force all objects on the canvas to conform by choosing Format ▸
Reapply Diagram Style.
63
The Inspectors
(The Other Sidebar)
Along the right side of the window, you’ll find the Inspectors sidebar. You
use the Inspectors to change the style attributes for the objects on the
Canvas, or set the properties of the Canvas itself. If you don’t see them,
click the Inspect button in the toolbar, or choose View ▸ Show
Inspectors (Shift-Command-I) from the menu bar.
The Inspectors sidebar contains five inspectors—Object, Type, Properties,
Canvas, and Document—and the Stencils Library, which used to have its
own floating palette in earlier versions of OmniGraffle. Inspectors are
grouped by the type of content they govern. You can browse the various
Inspector categories by clicking the icons along the top of the sidebar.
Within each Inspector, you’ll find multiple, collapsable inspectors for
changing the properties of an object.
To open an Inspector, hover over the title with the mouse, and then click
on the disclosure triangle to open and use the inspector. To open one
particular inspector (for example the Stroke inspector) and close any other
open inspectors, Shift-Option-click on the disclosure triangle. To open or
close all of the inspectors, Shift-Command-click on one of the disclosure
triangles.
Using the Inspectors
If you find that you’re using a particular Inspector section quite a bit, you
can lock it in the open position. Just double-click the Inspector’s button
instead of single-clicking it; the button gets a green lock icon. As you show
and hide other sections in the same inspector window, the locked section
remains visible. When you’re done, just double-click the button again and
the lock icon goes away. The lock also goes away when you switch to
another Inspector; for example, from a locked Object inspector to the Type
inspector.
In all of the inspectors, you can click in a text field that contains a number,
and then press the up or down arrow keys to increment or decrement the
number. Also, once you click a circular rotation control, you can keep the
mouse button held down while moving the pointer away from the control
to gain more rotational precision.
Any color well can have its color dragged to an object on the canvas or to
another color well. When you drag to an object, you can drop the color on
the object’s stroke, fill, or text.
66
In places where you can enter measurements, such as in the Geometry
inspector, values are shown in the current ruler units, or, if there is no unit
scale, in the canvas units. You can, however, enter values in any units that
are available in the ruler, such as miles or kilometers. As soon as you
finish entering the value, OmniGraffle converts it to the correct units
automatically.
You can also perform simple arithmetic and mix units. Add (+), subtract
(−), multiply (*), or divide (/) numbers right in the input fields.
Object Inspectors
Use the Object inspectors to view and change details about the objects on
the Canvas.
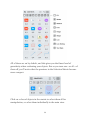
Coloring Shapes with the Fill Inspector
Use the Fill inspector to choose a color or gradient to fill the inside of the
selected shapes.
•
Use the pop-up menu on the left side of the inspector to choose
from the nine kinds of fill: Solid, Linear Blend, Radial Blend,
Double Linear Blend, Double Radial Blend, Stipple, Marker, and
Squiggle. No Fill is also available as an option for objects where
transparency is desired.
•
The blend rotation control becomes active when you choose a
linear blend; enter a number of degrees in the field or drag the
circular control to set the angle of the gradient. The blend position
67
control becomes active when you choose a radial gradient; drag its
crosshair to move the gradient’s center.
•
Click the color well to choose the color of the fill.
•
If you have chosen a two-color blend, you can click the swap
button to exchange the two colors.
•
If you choose a blend, two or three color wells become available.
Click them to choose the colors to blend together.
•
Drag the bias slider on the far right to shift a blend toward one
side or the other.
You can also edit the fill color of a canvas itself using the Canvas Fill
inspector.
(Pro) OmniGraffle Pro offers an extra section in the Color panel for
creating pattern fills.
The Stroke Inspector
Use the Stroke inspector to change the appearance of the selected
connection lines or of the line drawn around the edge of the selected
shapes.
•
Use the drop-down menu to choose a single stroke, double stroke,
freehand stroke, or no stroke at all.
•
Click the color well to choose a color for the stroke.
68
•
Enter a number in the Thickness field or use the keyboard arrows
to choose how thick the stroke should be.
•
The first of the three pop-up menus determines the stroke pattern
(solid, dashed, dotted, and so on). The center pop-up menu
determines how the stroke appears at its ends: The Butt option
ends the line by cutting across its endpoint at an angle
perpendicular to the line itself, while the Round and Square
options let the line extend past its endpoint based on the stroke
width. The third pop-up menu determines how the stroke appears
at its corners: Miter creates a sharp corner, Round creates a soft
corner, and Bevel creates a cut-off corner.
Making Objects Cast Shadows with the
Shadow Inspector
Use the Shadow inspector to drop a shadow behind the selected objects.
•
Click the leftmost button to choose whether the selected object
has a shadow, and if the shadow appears in front of objects or
behind objects on the same layer. If you choose to let shadows
appear in front of objects on the same layer, the ordering of objects
matters; you can reorder objects with the Bring and Send
commands in the Arrange menu.
•
Enter a number in the blur field or use the keyboard arrows to
choose how precise or blurry the shadow should be.
69
•
Drag the crosshair in the offset control or enter numbers in the
offset fields to set how far away from the object the shadow
should fall.
•
Click the color well in the upper-right to choose a color for the
shadow; partially transparent black tends to work best.
The Shapes Inspector
If you have a shape object selected, use this inspector to transform it in
various ways.
•
To change the shape to another, the upper right button provides a
grid containing available shapes. It includes all of OmniGraffle’s
built-in shapes plus all of the current canvas’s custom shapes
(ones created with the pen tool or shape combinations).
•
Use the Corner Radius field to set how round the corners of the
shape should be; enter 0 for perfectly pointy corners.
•
(Pro) With multiple shapes selected, use the Combine Shapes
button as an alternative tool for crafting custom shapes. Available
actions include Unite Shapes, Intersect Shapes, Subtract Shapes,
and Uncombine Shapes. OmniGraffle will do its best to preserve
all data associated with the combined objects, but some (text in
particular) may be lost when the Uncombine Shapes action is
used.
•
(Pro) Check the Edit Points checkbox to convert the shape to a
custom object with editable Bézier points.
70
The Lines Inspector
Use this inspector to configure the properties of a selected line.
•
The three pop-up menus determine the style of the tail, middle,
and head of the line. Use the tail and head menus to set the line
endings. Use the middle menu to set how the line travels from its
source to its destination: Straight for a line that takes the shortest
possible path between points, Curved for a line that turns
smoothly to pass through each point, Orthogonal for a line that
always travels horizontally or vertically, or Bézier for a line with
control points you can adjust with the selection tool.
•
Use the fields below the tail and head menus to change the line
ending sizes. Click the reverse button to swap the line’s source
and destination points.
•
Click Remove Midpoints to get rid of all points between the source
and destination points.
•
The Line Hops menu determines what the line should do when it
crosses other lines; choose one of the hop types to make the line
jump over or under other lines, or choose Ignore this line to
prevent other lines from hopping over or under it. The hops
depend on the ordering of the lines involved; you can reorder
objects with the Bring and Send commands in the Arrange menu.
71
Placing Graphics Inside a Shape with the
Image Inspector
You can use this inspector to position an image inside a shape. (Note that
instead of creating an object and then adding an image, you could also
simply drag an image file from another application straight onto the
canvas.)
•
Use the Image pop-up menu to set an image in the selected shape.
Once an image is set, a Remove Image command appears in the
menu.
•
When you browse for an image file, you have the option of
creating an alias (or “link”) to the image instead of adding the
image to the OmniGraffle file itself. If you do this, the
OmniGraffle document depends on the original image file; the
alias will not work if you delete the image file or open the
document on a different computer. If an object’s image comes
from an alias, some extra commands become available in the
Image pop-up menu: you can Open the original image file, Reveal
the original file in the Finder, or stop using the alias and Embed a
copy of the image in the OmniGraffle document.
•
Another way to set an image is just to drag an image file from
another application and drop it on the image well, or on the shape
object itself.
72
•
The first button displays the image at its natural aspect ratio, with
a zoom level and position as set with the controls below. The
second button makes the image stretch to fit inside the object. The
third button makes the image tile indefinitely across the object.
•
The positioning offsets are enabled if you are displaying the image
at its natural aspect ratio, as set by the first of the three buttons
above. You can type a positive or negative percentage, or just drag
the image around in the image well to indicate the area you want.
•
The zoom controls are available unless you are stretching the
image to fit the shape. You can enter a zoom percentage, or just
drag the slider, to make the image larger or smaller.
•
You can make the image transparent and let the object’s fill show
through by decreasing the value of the opacity field, or by dragging
the opacity slider.
Changing Object Position and Size with the
Geometry Inspector
This inspector deals with an object’s position and orientation.
•
To rotate the object, enter a degree value in the rotation field, or
drag the circular control.
•
The top two fields contain the X and Y (horizontal and vertical)
coordinates for the selected objects; the value represents the
distance between the canvas’s origin and the upper-left corner of
73
the object (which might not be obvious if the object is rotated or
flipped). If you have multiple objects selected, two hyphens (- -)
appear in the fields that have different values. Enter a new X or Y
value to move an object on the canvas.
•
The next two fields contain the Width and Height values for the
selected objects. If you have multiple objects selected, two
hyphens (- -) appear in the fields that have different values. Enter
a new width or height value to resize an object on the canvas.
•
Click the flip buttons to reverse the object horizontally or
vertically.
•
Next to the flip buttons is a pop-up menu with the following
options:
• No scaling — by default, the objects you draw on the canvas are
not scaled to any size or proportion.
• Maintain Aspect Ratio — the objects you draw or resize are
scaled proportionally. In addition, there are three additional
aspect-related options:
• Scale Stroke — scales the object’s stroke proportionally.
• Scale Font — scales any text inside the object proportionally.
• Scale Stroke and Font — scales the objects stroke and text
proportionally.
If you have selected a line label, two additional controls become active:
74
Use the pop-up menu to set how the label’s text appears in relation to the
line. Options include: Horizontal, Vertical, Parallel, Perpendicular,
Independent, and Follows Path. Use the slider next to the pop-up menu to
change the label’s position in relation to the line.
Positioning Objects Neatly with the
Alignment Inspector
Use this inspector to line up and space out objects uniformly.
•
The matrix of nine buttons on the left changes how the alignment
buttons work. It represents all of the combinations between
vertically aligning to the top, middle, or bottom, and horizontally
aligning to the left, center, or right. If you want, for example, to
align objects by their upper-right corners, click the upper-right
button in the matrix.
•
Next to the button matrix are the align buttons. Their icons
change to reflect the state of the button matrix. Click the
horizontal-align button to line up the selected objects horizontally.
Click the vertical-align button to line up the selected objects
vertically. The first object you selected stays where it is, and the
75
other selected objects move to align with it. These buttons are
only useful when you have at least two objects selected.
•
Next to the align buttons are two spread buttons. Click the
horizontal spread button to distribute the selected objects evenly
between the leftmost and rightmost objects. Click the vertical
spread button to distribute the selected objects evenly between the
top and bottom objects. These buttons are only useful when you
have at least three objects selected.
•
To the right are two fields and their associated spacing buttons.
Enter a value in the top field and click the horizontal spacing
button to put the specified amount of horizontal space between
the selected objects. Enter a value in the bottom field and click the
vertical spacing button to put the specified amount of vertical
space between the selected objects. These buttons are only useful
if you have at least two objects selected.
•
If Align to canvas is selected, the align and spread buttons
consider the canvas edges as “objects” when arranging the selected
objects. This makes it so that you can align objects to a canvas
edge, or space objects evenly between the canvas edges.
Type Inspectors
Manage the typography of selected objects.
The Font Inspector
Use this inspector to modify the font properties of the selected objects,
including style, size, and color.
76
Positioning and Styling Text with the Text Inspector
Use this inspector to control the positioning and appearance of the
selected shape’s text.
•
With the horizontal alignment buttons, you can align left, center,
align right, or justify the text.
•
Click the color well to choose a font color.
•
There are three buttons for controlling what happens when the
shape contains more text than can be contained within its bounds.
You can choose to let the text overflow outside of the shape, to
clip off the text that doesn’t fit inside the shape, or to resize the
shape to make the text fit. If you choose resize, the object will only
be manually resizable in the horizontal direction; it will resize
vertically according to its text. Select the Wrap to shape checkbox
to limit the text’s width to the limits set by the Text Offset
settings below.
•
There are three buttons for setting the vertical alignment of the
text; choose to align to the top, middle, or bottom of the shape.
77
•
On the right side are controls for setting the Kerning (automatic
character spacing for ideal balance), Tracking (manual character
spacing), Leading (distance between lines), and Margins (distance
between text and the edges of the text area). These controls
become enabled or disabled depending on other controls in the
inspector, or the amount of text in the object.
The Offsets Inspector (Pro)
This inspector contains the Text Offset and Text Rotation controls.
By default, the Use default offsets option is turned on. If you uncheck
this option, you can adjust the text’s position using the four input fields
above; these are:
Text Offset from Left
This adjusts the text’s position from the left edge of the object.
Text Offset from Top
This adjusts the text’s position from the top edge of the object.
Width
This adjusts the text box’s width.
Height
This adjusts the text box’s height.
78
Use the text’s rotation value to determine how the text appears when you
rotate the object. By default, Relative rotation is turned on, which means
that the text within an object will maintain its relative position when an
object is rotated. Turn this off to set the text’s rotation independent of its
bounding object. You can either enter a rotation value in the field or drag
the circular control to rotate the text.
Properties Inspectors (Pro)
Use the Properties inspectors, available only in OmniGraffle Pro, to
manage the advanced properties of selected objects.
Changing the Way Objects Connect with the
Connections Inspector (Pro)
Use this inspector to control how objects connect to one another.
•
Turn off Allow connections from lines to make it impossible for
connection lines to use the selected objects as sources or
destinations.
79
•
If you have a group or a table selected, you can choose whether
connection lines should be allowed to connect to objects in the
group or only to the group as a whole.
•
The pop-up menu contains a bunch of magnet presets you can
choose for the selected shape object. Magnets are points on a
shape object that attract connection lines. You can choose to have
no magnets, magnets placed according to cardinal directions
(North, South, East, and West), magnets on each vertex (corner),
or a certain number of magnets on each side of the shape.
Note
The Magnet options can be found in the Edit menu in the
standard edition of OmniGraffle 6.
•
If you select some number of magnets per side, then hold Shift
while opening the pop-up menu and selecting another number, the
two numbers are added together; you can get up to 10 magnets per
side in this way.
•
Of course, you can always use the Magnet tool to customize a
shape’s magnet arrangement.
•
If you have a line selected, the Lines checkboxes become available.
Deselect the Allow connections to other objects checkbox to make
it impossible for the line to have an object as its source or
destination. Deselect the Allow shapes to become labels checkbox
to make it impossible to drag a shape onto the line and make it a
line label; existing labels stay attached.
•
Use the Object Rank buttons to assign a hierarchical rank to the
selected objects. Default lets OmniGraffle decide the rank based
on connections, Minimum puts the objects at the top of the
hierarchy, Maximum puts the objects at the bottom of the
hierarchy, and Same makes sure that the objects end up on the
80
same level. These assignments don’t change the directions of
connection lines, so you can always select all of your objects and
choose Default to return them to normal.
Adding Data to Objects with the
Note Inspector (Pro)
The Note inspector contains a field for entering text to associate with the
selected object, and a table of custom data.
The note can be formatted as Rich Text, which means you can use all of
the different font styles and colors that you can use elsewhere in
OmniGraffle. When you put the pointer over an object with a note, the
note’s text appears in a help tag floating over the object.
You can use the custom data table to keep your own information about the
object. Custom data is stored as key/value pairs: the Key is like a label for
what type of information you are storing, and the Value is the information
itself.
For example, imagine you have a diagram of a computer network, and you
want to assign a model number to each component. Click the placeholder
81
row or the plus button to create a new key/value pair. In the Key column,
you would type Part Number, and in the Value field, you would type, say,
A1181. This data doesn’t have any effect on the way OmniGraffle works;
it’s just a way for you to store arbitrary data about objects in your diagram.
To delete a row of data, click the ‘x’ button on the right side of the row.
Notes can be found by OS X’s Spotlight search feature, in case you need to
find your OmniGraffle diagrams that contain certain words.
Making Objects Interactive with the
Action Inspector (Pro)
The Action inspector determines what should happen when someone
clicks the selected object with the Action Browse Tool in the toolbar.
The default action is Does Nothing. You can click the object all you want,
and nothing happens.
If you choose Opens a URL or Opens a File, you get a text field in which
you can enter a URL or file path, along with two buttons: Choose File and
Open. Click Choose File to browse your Mac’s hard drive for a file. Note
that file paths are relative: they start from the folder containing the
document you’re working on, not from the root of your hard drive. Click
Open button to try opening the file or URL that you’ve specified. When
the object is clicked, the file or URL is opened in the appropriate app.
82
If you choose Runs a Script, you get a text field for entering an
AppleScript. The script that you enter is run such that self refers to the
clicked object. Click Check Syntax to make sure that the AppleScript is
correct, and then click Run Script to try it out. In Presentation Mode
(Option-Command-P), the script runs when an actionable object is
clicked.
If you choose Jumps Elsewhere, you get another pop-up menu for
choosing where in the current document to jump. You can jump to a
specific canvas, the next or previous canvas, or a specific point or object on
any canvas. Some of these options offer a tiny canvas preview, in which
you can click or drag to indicate which object to highlight, which point to
center on, or where to zoom.
If you choose Shows or Hides Layers, you can indicate whether to show,
hide, or toggle the visibility of any layer of the current canvas.
Canvas Inspectors
Manage the appearance and properties of the current or selected canvases.
Changing the Canvas Size and Scale with the
Canvas Size Inspector
Use this inspector to change the size of the canvas, how the canvas fits
onto printed pages, or what kind of measurement units to use.
83
•
The Canvas Size fields control the width and height of the canvas.
You can use any of the units available in the Ruler, or enter a
number of pages.
•
Select Size is multiple of printer sheets to make the edges of the
canvas snap to the edges of pages. This prevents the canvas from
ending in the middle of a page.
•
If you select Auto-adjust the canvas size, the canvas will grow or
shrink to fit the objects you create.
•
When you print, if Print canvas on one printer sheet is selected,
the canvas gets scaled up or down to fit a single piece of paper
regardless of its size on the screen.
•
The Orientation of pages can be portrait (vertical), landscape
(horizontal), or can be taken from the settings in Page Setup.
•
(Pro) Set the desired representation of one “point” as displayed on
screen at 100% zoom to best fit your printing needs or screen
pixel density (one Apple point is the default).
The Canvas Fill Inspector
Select a canvas by clicking its preview in the sidebar to edit its background
fill properties. As with the Object Fill inspector you can choose from nine
fill styles and edit various parameters of each.
84
The Background Image Inspector
You can also add an image to a canvas. Just click the canvas in the sidebar
and then use the Background Image inspector to place an image similarly
to the Object Image inspector.
Use the controls to the left of the Mask button to Manually Size, Stretch,
or Tile the image you’ve placed. Use the grid of four fields to position the
image from left, from top, sized horizontally, or sized vertically. Use the
slider at the bottom of the inspector to change the image’s opacity.
The Units Inspector
Use the Units inspector to determine the unit of measure to use for the
canvas and its rulers, as well as to set the scale and origin points.
85
Units
The Units pop-up menu is where you set the type of measurement units
you’d like to use for the current canvas. All of OmniGraffle’s supported
units are listed, with their standard abbreviations.
The actual size of your diagram does not change when you change the
units; it is merely measured differently. The ruler and the inspectors
display measurements in whichever unit you select here.
Units marked with an asterisk (*) can be used as canvas units. This means
that when you set up a Unit Scale (see the next section), only these units
can be used on the left-side “actual size” part of the equation. Any kind of
units can be used on the right-side “theoretical size” part of the scale
equation.
Unit Scale
The Unit Scale pop-up menu can be used to interpret simple expressions
of scale. By default, the scale is based on the item you choose in the Units
pop-up. For example, if you set Units to feet (ft), the Scale pop-up reads
12 in = 1 ft.
If you choose Custom from the Scale pop-up, you can change the scale to
suit the project you’re currently working on. For example, if you enter 1
cm = 1 m, 1 cm on the ruler now becomes 1 meter, objects on the canvas
that were 2 cm wide are now 2 meters wide, and so on. The Units setting
changes to match the second value in the equation.
86
You can also enter a ratio. For example, if you set a Custom Scale to 1:12,
the ruler units stay the same, but objects on the canvas now claim to be 12
times larger than they were before you changed the scale.
If you already have a scale set up and you convert directly to a different
one, the objects change their actual size on the canvas to fit the new scale.
For example, imagine you are working in 1 cm = 1 m, and then you
convert the scale to 2 cm = 1 m. The marks on the ruler become twice as
far apart as they were, and the objects on the canvas, staying true to the
ruler, grow twice as large on the screen. You can get a new scale without
resizing the objects by choosing from the Reset Scale To: section of the
Unit scale pop-up menu.
Canvas Origin Points
By default, the very upper-left corner of a canvas is its origin (that is, the
point where the rulers’ measurements start from, where the coordinates
are 0,0). To change the origin, enter values in the two Origin fields. (You
can also drag the origin from the corner where the rulers meet.) The
coordinates in the Geometry inspector are based on this origin point.
Setting up a Grid with the Grid Inspector
Use this inspector to set up a grid on the canvas, so you can keep objects
lined up nicely.
The two fields at the top of the inspector are where you can set the values
for the Major and Minor Grid spacing, respectively:
87
•
The Major Grid Spacing field determines how large each square
of the main grid should be. Click the color well next to it to
choose a color for the major grid.
•
The Minor Grid Steps field determines how many minor grid
squares should fit across one major grid square. For example, if
your major grid squares are 100 pixels across, and you have 10
minor grid steps, your minor grid squares are 10 pixels across.
Click the color well next to it to choose a color for the minor grid.
The checkboxes beneath the Major and Minor Grid spacing fields provide
additional control over how the grid is used and its appearance:
•
While the Snap to grid checkbox is selected, all objects fit
themselves to the grid as you create or move them. (If you want to
snap objects already on the canvas, use the Align To Grid button
below.)
•
Select Grid in front to make the grid visible in front of objects on
the canvas.
•
Select Show grid lines to show the Minor Grid lines on the
canvas.
•
Select Show major to make the heavier Major Grid lines visible as
well.
•
Select Print grid to include the grid when printing.
Tip
Choose Arrange ▸ Grid ▸ Align Objects to Grid (OptionCommand-[) to make all of the selected objects line up to the
grid right away.
88
The Canvas Data Inspector (Pro)
You can also edit the note and other metadata of a canvas itself. Just click
the canvas in the sidebar and then use the Canvas Data inspector to add
metadata for the canvas.
As with the data added using the Properties Note inspector, this
information is used primarily for indexing and doesn’t affect the
appearance of your OmniGraffle document in any way.
Automatically Arranging Objects with the
Diagram Layout Inspector
Use this inspector to automatically lay out shapes based on the logical
relationships established by the connection lines between them.
Use the Fill Type pop-up (the big button on the left) to select from one of
four layout types: Hierarchical (the default), Force-directed, Circular, and
Radial. The various controls within the Diagram Layout inspector change
depending on which layout type you choose.
89
Hierarchical
The hierarchical layout creates layers of equally-ranked objects,
extending in one direction.
Force-directed
The force-directed layout grows in semi-random directions from the
center, rather than in one particular direction from the edge.
Circular
The circular layout tries to arrange sibling shapes in a circle around
their parent.
Radial
The radial layout tries to arrange sibling shapes in arcs around their
parent.
90
When you use a hierarchical layout:
•
The Direction buttons change where the top level objects start,
and which way to layer the lower level objects from there.
•
The Rank Separation field controls how far away each level of
objects should be from the next.
•
The Object Separation field controls how far away each object
should be from other objects on the same level.
When you use other layout methods:
•
Connection lines can stretch and compress, but you can adjust
their average length by dragging the Line Length slider.
•
The Shape Repulsion slider determines how strongly the shapes
try to avoid coming near one another. If the line length and shape
repulsion are small enough, shapes can be made to overlap.
Finally, you can turn on Auto layout to make OmniGraffle distribute the
objects on the canvas whenever the connections between them change.
Document Inspectors
Manage the properties of the document.
The Format Inspector
The pop-up menu determines whether to save your document as a flat file
or a file package:
91
Flat file
A flat file is a single file on the disk, with all of the attached images
embedded within.
File package
A file package is actually a folder disguised as a single file, with all of
the attached images rattling around loose inside.
In some technical cases, it might be desirable to use one type or the other;
if you don’t even know why this should matter, it’s safe to stick with the
Automatic setting.
Normally OmniGraffle documents are “property list”–based text files. If
you turn on Compress on disk, your file is instead saved in a binary
format that takes up less space on the disk but whose innards can’t be read
by scripts or text editors. If you don’t need to open an OmniGraffle
document with a text editor, just go ahead and compress your files. This
won’t hurt anything; it just makes the filesize a wee bit smaller.
The Margins Inspector
Here you can specify your own page margins, or choose Use printer
margins to default to the margins defined by your printer driver (or by any
custom settings you’ve made in File ▸ Page Setup).
92
Storing Information About your Document in the
Data Inspector
The Document Data inspector has fields for lots of information about your
document, in case you care to keep track of such things. The available
fields are Subject, Copyright, Version, Description, and Comments. The
pop-up menu includes options for adding information about the
document’s Authors, Organizations, Languages, Keywords, and Projects.
All of this data is made available to OS X’s Spotlight searching feature, to
help you find the diagram you’re looking for.
93
Using Stencils to Keep and Share
Commonly Used Objects
A stencil is a set of useful objects that you can drag into your diagrams. To
see the available stencils—or any you’ve added—choose View ▸ Show
Inspector ▸ Stencils Library (Command–6), or click the rightmost
button at the top of the Inspector sidebar.
•
Navigate through the hierarchy of your stencil collection using the
back and forward buttons.
•
Enter something in the Search field to find stencils whose names
match, or stencils containing objects whose text or notes match.
•
Select a stencil in the list to see its contents; select a whole folder
to see the contents of all the stencils inside.
•
With a stencil or folder selected, use the three buttons to the right
of the search field to change how the stencils are displayed in the
94
sidebar: as a condensed cluster, a table, or a list with previews and
metadata.
•
If you don’t need the entire object, but just one or all of its styles,
drag a style from the style tray to an object in your document.
To use a stencil, just drag it from the Stencil Library and drop it anywhere
on the canvas. A copy of the object is made and the original remains in the
Stencil Library, so take as many copies as you need. You can do the same
sort of selection tricks that you can do on a canvas, such as Commandclicking or -dragging a rectangle to select multiple objects, or Optiondragging an object to make another copy.
To search your stencils, type in the Search field at the top of the Inspector
sidebar. OmniGraffle sifts through your stencils to help you find the object
of your desire. Stencils that match appear in the special Search Results
section of the stencil list. Normally, if any object on a stencil matches, then
all objects on that stencil appear in the results. When searching from
within a folder or stencil, however, the search field acts as a filter that only
shows objects matching the filter text.
To make a new stencil, choose File ▸ New Resource ▸ New Stencil from
the menu bar. You can edit the document that appears just like you would
edit a normal OmniGraffle diagram. A preview of the stencil appears in the
stencil window as you work. Once the stencil looks just how you want it,
choose File ▸ Save (Command-S).
To edit a stencil, open it in the Resource Browser (Shift-Command-N).
Then edit and save the stencil just like a normal OmniGraffle document.
Using the Style Tray
At the bottom of the Inspector sidebar, you’ll find a tray which contains
style “chits” for the selected object.
95
The isolated chit on the left represents all of the styles applied to the
selected object, while the rest of the chits represent each of the styles
applied to the object, such as fill, stroke, image, shadow, shape, font, and
text position. Drag any of these chits to another object, to a group in the
Selection inspector, or to a tool in the tool palette, to copy the style there.
Note
The absence of a style—such as having no stroke, no fill, or no
shadow—also counts as a style. For instance, you can drag a “no
fill” chit to an object to remove its fill.
If you select more than one object, only the styles that those objects have
in common appear in the style tray.
Rulers and the Inspector Bar
In addition to the grid, which you can turn on in the Grid Canvas
inspector (Command–4), you can also turn on rulers (View ▸ Rulers, or
Command-R) to help you position objects on the canvas.
You can use a combination of ruler guides and OmniGraffle’s Smart
Guides to position and perfectly align objects on the canvas. To add a ruler
guide to your canvas, click and hold on either the top or left ruler bar and
then drag a guide onto the canvas. The guides you drag in are bright pink,
so they are easy to recognize. There’s no limit to the number of guides you
can drag onto the canvas, so don’t be shy.
By default, the very upper-left corner of a canvas is known as its origin
(that is, the point from which all ruler measurements originate, and the
coordinates are 0,0). To change the origin, click and drag the origin from
the corner where the rulers meet. (Alternatively, you can enter Origin
96
values in the Units Canvas inspector.) The coordinates in the Geometry
inspector are based on this origin point.
To reset the origin to the 0,0 position, just click on the origin point
between the two rulers. Click the origin point again and the origin point
will change to its previous position.
When editing text, tab stops appear on the ruler and text formatting
controls appear above it. You can style text, change the spacing and
alignment, or drag tab stops to and from the ruler.
When you aren’t editing text, the area above the ruler—the Inspector Bar
—contains controls for editing basic attributes of selected objects:
1.
Horizontal Object Position — the object’s position from the left
origin point.
2.
Vertical Object Position — the object’s position from the top
origin point.
3.
Object Width — the object’s width.
4.
Object Height — the object’s height.
97
5.
Shadow Casting Style — set the shadow style for the object; for
additional control over shadows, see the Shadow inspector.
6.
Shape Style — this pop-up lets you quickly select a shape style for
the selected object.
7.
Stroke — choose a stroke style for the selected object.
8.
Stroke Color — choose a color for the stroke.
9.
Stroke Thickness — set the width (or thickness) for a stroke.
Presentation Mode (Pro)
For those times when you need to make a presentation, say to show off the
new user interface for an app you’re developing or when you’re showing a
client how you plan to redesign their home, OmniGraffle Professional
offers Presentation mode. Available by choosing View ▸ Start
Presentation, OmniGraffle takes over your entire screen so you can easily
show off your work to everyone in the room.
Tip
To turn presentation mode on and off quickly, use OptionCommand-P. To leave presentation mode, press Escape or click
the × button that appears when you move the mouse pointer to
the bottom of the screen.
Each canvas acts as a slide; use the arrow keys to move between canvases.
You can also press Return or Enter, or click, to move to the next canvas. If
your Presentation preferences are set to highlight an object when you click
it, doing so won’t advance to the next canvas; you can still click an empty
area of the canvas to advance.
While in Presentation mode, you can get to the menu bar by moving your
mouse to the top of the screen. The menu bar goes back into hiding when
you move the mouse away. If you move the mouse to the bottom of the
98
screen, a navigation interface appears, with buttons for going forward or
back, exiting, or moving directly to a particular canvas.
You can highlight objects to draw attention to them during the
presentation. Use the Presentation preferences to control how highlighting
happens.
Actions set up in the Action inspector work while in presentation mode.
When you click an object that has an action assigned, it performs the
action as if you had clicked it with the Browse tool.
Creating and Managing Templates
OmniGraffle comes with several templates, and you can create your own if
you find that you’re creating the same kind of document over and over
again. A template is a document that acts as a starting point for new
documents.
To open a template, choose File ▸ Resource Browser (Shift-CommandN) and select one of the available Templates.
99
When you select a template in the Resource Browser, you’ll notice that the
right side of the window reveals a little more detail about the template. If
you find that you’re using a particular template often, click Make Default
to specify the selected template as the default.
After you set a default template, OmniGraffle bypasses the Resource
Browser and uses the default template for any new documents you create.
If you don’t want to use the default template, just open the Resource
Browser (Shift-Command-N) and choose something else.
You can also create a new template or edit a template that belongs to you.
When you create an OmniGraffle template, everything about it is
preserved, from the canvas size and grid layout, to layers, to visibility of
extras, to the automatic layout settings.
To create a template, choose File ▸ New Resource ▸ New Template from
the menu bar, and then choose an existing template to use as a starting
point. Set up the document exactly the way you want it, then save it to the
Templates folder that OmniGraffle has already set up on your Mac. Once
saved, your template is available in the Templates section of the Resource
Browser.
100
A Note About Where Templates Are Stored
Just in case you're wondering about where that Templates folder is, here's
how you can find it on your Mac:
1. Open a Finder window.
2. Hold down the Option key and then choose Go ▸ Library in the menu
bar. (Library only shows up if you're holding the Option key, so make
sure that you've got that pressed down.)
3. The Finder window puts you in your user account's Library folder
(~/Library for you Unix types). Now go through the following path to get
to the Templates folder:
• Containers
• com.omnigroup.OmniGraffle6 (or
com.omnigroup.OmniGraffle6.MacAppStore, if you've
purchased OmniGraffle 6 from the Mac App Store)
• Data
• Library
• Application Support
• The Omni Group
• OmniGraffle
• Templates
4. And again, for the Unix folks in the audience, that path is:
• Purchased from The Omni Group: ~/Library/Containers/
com.omnigroup.OmniGraffle6/
Data/Library/Application\ Support/The\ Omni\ Group/OmniGraffle/
Templates
• Purchased from the Mac App Store: ~/Library/Containers/
com.omnigroup.OmniGraffle6.MacAppStore/
Data/Library/Application\ Support/The\ Omni\ Group/OmniGraffle/
Templates
All templates end with a .gtemplate file extension.
101
Preferences
A standard feature among Mac apps, OmniGraffle’s preferences can be
accessed from the menu bar (OmniGraffle ▸ Preferences), or with the
Command-, keyboard shortcut.
Two features that all of the preference panes offer are the ability to Reset
(
) any changes you’ve made to the defaults settings, and quick
access to Help ( ) documentation for that pane.
General Preferences
The General preferences give you control over basic OmniGraffle settings,
such as what OmniGraffle does at startup, whether new documents open
with a blank canvas or you’re taken to the template chooser, and things
like text editing and selection behaviors. You can also turn on Multi-Touch
support for trackpad support, and opt for OmniGraffle to only show you
the inspectors you need when you’re working in the canvas.
102
Options include:
Startup
Select Create new document if nothing else is open to start with a new
document when you aren’t making OmniGraffle remember open
documents, or if there were no open documents the last time you quit.
New Documents
Select Open Resource Browser to be presented with a window for
choosing from a variety of file sources each time you create a new
document. Select Use Template, and choose your default template, if
you’d rather bypass the browser. Either way, you can always get to the
browser with the Resource Browser command in the File menu.
103
Text Editing
Decide how you would like the Return and Tab keys to behave while
you are editing an object’s text. Whichever way you choose, you can
hold Option while pressing the key to do the reverse instead.
Selection
Small objects get smaller versions of the handles that appear when you
select them; if you really like the small ones, you can click Always use
small selection handles to see them all the time.
When you click in the middle of a shape object that isn’t filled with an
image or color, you might want to select the object or you might want
to select whatever is behind it. Use the Click through objects with no
fill checkbox to indicate which you prefer.
Multi-Touch
If you’d like to use Multi-Touch gestures with a trackpad on a
compatible MacBook Pro or other device, click the checkbox here.
Help Tags
When you move or resize an object, a little help tag appears to let you
know the object’s new location and size exactly. That is, unless you find
it annoying and turn it off here.
(Pro) If you have OmniGraffle Pro, a second option is available for
displaying any notes and metadata you've assigned to an object when
you mouse over them.
Object ID Numbers (Pro)
If you’re accessing OmniGraffle objects with AppleScript, or you’re
otherwise endeared to unique IDs, you can select Show object
identification numbers to add a column to the list sidebar.
104
Full Screen
Choose whether to display the toolbar when in full screen mode.
Inspectors
Choose whether to hide inspectors that don’t apply to the currently
selected object.
Preferences Reset button
Each preference pane has a Reset button in the lower left. Clicking this
button returns all of the settings on the pane to their defaults. To reset
all settings on all preference panes, hold Option while clicking the
Reset button.
Drawing Tools
The Drawing Tools preferences provides you with another way to organize
the tools you see in OmniGraffle’s toolbar and set their Hot Keys. You can
also define how you interact with the tools, and set the behaviors for line
creation and editing.
105
You can drag tools around in the list to reorder them in the palette. Move
the separator line to change where the expansion button appears in the
toolbar; move it to the end of the list to get rid of the button entirely.
Double-click a tool’s hot key to change it. A hot key activates a tool for
only as long as you hold the key down; once you release the key, the
previously active tool becomes active again.
Inspect a tool
By default, in order to inspect a tool you need to Option-click it. If you
prefer, you can make it take just one normal click to inspect a tool.
Keep tool active
By default, it takes one click to temporarily activate a tool, and two
clicks to make a tool “stick” in an active state. You can choose to make
106
tools stick after only one click, or make it so that every tool selection is
temporary.
Line Creation
When you are creating a line, clicking an object will always connect the
line to the object and end the line. If you click in an empty area of the
canvas, though, you might want to end the line there or you might want
just to add a point there and continue creating the line. Use this
preference setting to indicate which you prefer.
Line Editing
When you double-click a line, you might prefer to add a new point to
the line, or you might prefer to add a label. Choose one; Option-doubleclick will do the other.
Presentation Preferences (Pro)
Available only in OmniGraffle Pro, use the Presentation preferences to
configure your settings for making presentations.
107
Highlight Behavior (Pro)
Choose whether to have an object become highlighted whenever you
put the pointer on it, whenever you click it, or never. You can also
choose to display a badge for objects that have actions set up in the
Action inspector.
Highlight Appearance (Pro)
Click the color well to choose a color for the highlight. Use the slider to
adjust the thickness of the highlight.
Tip
To always match OS X’s highlight color (set in your Mac’s
Appearance preferences), open the Colors palette and select the
third button, Color Palettes in the window’s toolbar. In the
Palette pop-up, choose Developer and then scroll down and
choose selectedControlColor from the list of options.
Update Preferences
If you've purchased your copy of OmniGraffle 6 (Pro or Standard) from
The Omni Group's website, OmniGraffle can automatically use your
Internet connection to check for new and updated versions.
Note
The Update Preferences panel doesn't exist if you have
purchased OmniGraffle 6 from the Mac App Store. When there's
a new version of OmniGraffle 6 available, the Mac App Store will
alert you to download and install that on your Mac.
You can specify whether OmniGraffle will automatically check for updates
Daily, Weekly, or Monthly, or if you’re really impatient, you can click
Check for Updates Now to see if we’ve issued a new release. This is
108
particularly helpful if you have Check for updates set to check Monthly
and you’ve recently heard that a new update is available.
If Check for updates is turned on, you will be notified when there is a
new version of OmniGraffle ready for you to download and enjoy. Click
Check for Updates Now to look for the newest version manually; you can
also choose OmniGraffle ▸ Check for Updates from the menu bar.
Additionally, you can opt in to Include system information when
OmniGraffle checks for updates. This sends basic information about your
system to us, which we only use to better support various systems with
future releases of OmniGraffle. And, as the Update preferences pane says:
“We promise to never use your information for nefarious purposes,” which means
that the information we receive about your system stays with us and is
only used by us as we work on future updates of OmniGraffle.
109
Drawing Basics
Everything you’ll do in OmniGraffle involves drawing. Whether you’re
creating the basic shapes for an organizational chart or prototyping a user
interface for your next iOS or Mac app, OmniGraffle is packed with tools
to feed your creativity.
Before you dive right in, though, take some time to learn some of the
basics of drawing in OmniGraffle. There are many tips and tricks here that
can help you master OmniGraffle in no time.
Creating Shapes
The most basic way to create a shape is with the Shape tool. Select the
Shape tool in the toolbar (note, this tool might look different if you have
changed its style).
With the Shape tool selected, drag across the canvas until you have a
shape that is the size you want. It doesn’t have to be perfect right now; to
set an exact size, use the Geometry object inspector (Command–1).
When you draw a shape, the mouse pointer changes to a set of crosshairs.
The shape you draw takes on the Current Style in the Style Well. The
default is a white-filled box with a simple black stroke. Click and drag to
draw the shape; as you do, you’ll see a little box appear that gives you the
dimensions of the object you’re drawing. Hold down the Shift key while
drawing to restrain the dimensions of the shape to get that perfect square
or circle you’ve been striving for.
Selecting, Resizing, and Moving
Objects
To select an object, first make sure you are using the Selection tool ( ),
and then click the object. When the object is highlighted—and if it can be
resized—you will see eight handles along its edges.
Once you have selected an object, you can modify it with the Inspectors
or use the menu commands to alter its appearance.
•
To resize an object, first select the object and then drag one of its
resizing handles until the object is the size you’d like.
•
To select or deselect more objects without losing the selection
you’ve already made, hold Command as you click other objects.
112
•
To select several adjacent objects at once, click in an empty area of
the canvas and drag a box around the objects that you want to
select. If you hold down the Option key while dragging, you’ll get
only the objects that fit completely inside the selection rectangle.
•
To rotate an object, hold down the Command key while mousing
over one of the eight handles. The pointer changes from a standard
resizing control to a curved one. An angle control appears inside of
the object, along with a helper dialog that shows the degree of the
angle.
•
To quickly create a copy of an object you’ve drawn, hold down the
Option key and then click on and drag the object you would like to
copy. An exact duplicate appears on the canvas; this method is
much faster than using Copy and Paste from the Edit menu or
their respective keyboard shortcuts.
113
•
To move an object, use the Selection tool to click and hold on the
object, and then drag it to its new location. Smart Guides (the
light blue lines) appear to help you align objects to one another.
•
To group several objects together so they can be moved or styled
as a single unit, select all of the objects and choose Arrange ▸
Group (Shift-Command-G).
A group behaves like a single object; you can select it, move it
around, resize it, use inspectors to change its style and properties,
connect lines to it, and so on. Any objects can be grouped, even
groups.
114
Click once to select the group as a whole, then click again to select
an individual member of the group. You can keep clicking to select
members of groups within groups.
To take a group apart, select it and choose Arrange ▸ Ungroup
(Shift-Command-U).
•
(Pro) To combine two or more objects—for example, a circle that
overlaps a rectangle—to create a unique shape, select the objects
and then use the Shapes Object inspector (Command–1) to
combine the shapes.
Connecting Objects with Lines
You can connect any two objects with the Line tool ( ).
1.
Select the Line tool. (Note, this tool might look different if you
change its style.)
2.
Click the first object you would like to connect; this object
becomes the source of the line.
115
3.
Click the second object you would like to connect; this object
becomes the destination of the line.
4.
When the objects are connected with a line, they stay connected no
matter how much you change or move them around. That means
the logical integrity of your diagram is preserved regardless of how
you choose to style the objects.
5.
You can disconnect a line from an object by selecting the line and
then dragging one of its end points. To delete the line, just select
the line and hit Delete.
116
Editing Objects
Any attribute of an object can be changed using the Object Inspectors; its
size, shape, color, position, and so on. When you select an object, the
applicable Inspectors become available in the right sidebar. Use the
Inspector that deals with the attribute you want to change. As you change
the settings in the inspector, the object changes on the canvas.
For example, let’s say that you want to change the Fill color inside of that
boring white object you’ve just created:
1.
Select the object on the canvas.
117
2.
Select the Object Inspector (Command–1) in the right sidebar.
3.
The Fill inspector has two controls: Fill type on the left, and Fill
color on the right. For now, let’s leave the Fill type alone, and just
select a color to fill the inside of the object.
Clicking the arrows on the side of the Fill color control pops up a
list of some preset colors which you can choose from. However, if
you click the little square next to the little arrows, the color well
pops open.
118
4.
Use the Colors panel to choose a new fill color for the object.
5.
Your object has a new fill color! Yeah!
Tables (Pro)
A table is a special kind of group that organizes rows and columns of
objects. To create a table:
1.
Create a single shape object to be the first cell of your table.
119
2.
With the object selected, choose Arrange ▸ Make Table (ShiftCommand-T). Notice the grid-like handles on the top, bottom,
left, and right sides of the object; this lets you know the object is a
table.
3.
Drag the right-side table handle to the right to add columns.
4.
Drag the bottom table handle down to add rows.
You can also select a number of already-existing objects and then choose
Arrange ▸ Make Table; OmniGraffle rearranges the objects into rows and
columns to the best of its ability.
120
Table cells can be selected and edited just like group members. If you
resize a cell, the rest of the cells in its row and column resize accordingly.
When selecting cells, you can Shift-click to select everything between the
cell you click and the last cell you selected.
You can add or remove rows or columns at any time by dragging the table
handles outward or inward. Resize the table as a whole by dragging the
ordinary corner handles. Use the Edit ▸ Tables commands when working
within table cells to insert or select rows and cells.
To dismantle a table, select it and choose Arrange ▸ Ungroup (ShiftCommand-U).
Subgraphs (Pro)
A subgraph is a special kind of group that can be expanded to show the
hierarchy inside it, or collapsed to make it a single compact object. To
create a subgraph:
1.
Select some objects on the canvas.
121
2.
With the objects selected, choose Arrange ▸ Group as Subgraph.
Your objects are enclosed by a subgraph rectangle.
3.
Style and label the enclosing rectangle however you like.
To collapse a subgraph, select it and then choose Arrange ▸ Collapse
Subgraph (or from the contextual menu that appears when you Controlclick the subgraph). The objects contained in the subgraph are hidden
away, and the subgraph becomes a single object. Any incoming or outgoing
connection lines belonging to objects in the subgraph become incoming or
outgoing lines of the collapsed object itself.
Subgraph members can be selected and edited just like group members:
click once to select the subgraph, then click again to select a member
inside.
122
You can resize the containing rectangle, as long as you don’t make it too
small to contain its member objects.
To disassemble a subgraph, select it and choose Arrange ▸ Ungroup
(Shift-Command-U).
Smart Arrows
Finally, the various arrow shapes in OmniGraffle 6 have some smart
behavior, whether they are connecting shapes or not. When you resize an
arrow shape, it tries to keep its arrowheads the same size, rather than
stretching them along with the rest of the shape. If you want to change the
size of the arrowheads or the thickness of the stem, click the blue handle
in the crook of the arrowhead and drag.
123
A Quick Tutorial
Now that you understand the basics of working with OmniGraffle, it’s
time for a quick tutorial. The purpose of this tutorial is two-fold. Our first
goal is to introduce you to everything that OmniGraffle can do, but the
ultimate goal of this tutorial is to help you master OmniGraffle as soon as
possible.
You’ll learn how to do all kinds of cool things, such as using Outline mode
to quickly create and connect objects, and how to make effective use of the
various inspectors. You’ll also learn how to use style chits to quickly
replicate every style you’ve applied to an object to other objects, and how
to create Bézier curves with text that conforms to the shape of the line.
And best of all, we’ll walk you through all of these steps so you can master
OmniGraffle in no time.
So hang on tight, grab your favorite beverage, put on some tunes in
iTunes, and let’s get to work!
Tutorial 0: Let’s Get Started!
OmniGraffle excels at clarifying complex relationships, and nothing says
“complex relationships” like a Shakespeare romantic comedy. Let’s try to
make some sense of Much Ado About Nothing, and learn a bit about
OmniGraffle in the process. Of course, this play is just a handy example; if
there’s another story you’re more familiar with, you can go ahead and use
it instead. The Tale of Genji, Steppenwolf, the cross-section between Sons of
Anarchy the movie Pacific Rim and other movies produced and directed by
Guillermo del Toro…whatever works best for you.
To get started, create a fresh document by selecting File ▸ Resource
Browser (Shift-Command-N). In the Resource Browser’s sidebar under
Templates, choose Imperial Units. In the list of Templates, choose the
Auto-Resizing template, and then click New Diagram.
Your OmniGraffle window should look like this:
You’ll notice that the Canvas has grid lines showing. These can be helpful
for when you need to lay out objects, such as if you’re laying out the
126
furniture for your office or apartment. You won’t need these grid lines for
this tutorial, so your next task is to turn them off. Follow these steps:
1.
Open the Canvas inspector by choosing View ▸ Show Inspector ▸
Canvas (Command-4).
2.
Locate the Grid pane and open it by clicking the disclosure triangle
on the left, if necessary.
3.
Uncheck Snap to grid and Show grid lines; the grid lines are no
longer visible.
127
This gives you a blank slate to work on, so let’s get started!
Tutorial 1: Creating Objects with the
Outline View
The Drawing Basics section taught you how to create shapes and connect
objects with lines. You can also use the Outline view (in the Contents
sidebar on the left) to create objects on the canvas. If you’ve ever used
OmniOutliner, this should be quite familiar to you; if not, you can pick
this up in no time.
Keyboard Shortcuts for Viewing Contents
OmniGraffle has a hundred or so built-in keyboard shortcuts to
help streamline how you work. You can toggle between the
different views of the Contents sidebar with Option-Command–
2 for List view, Option-Command–3 for Outline view, and
Option-Command–4 for Selection view.
128
1.
Use the keyboard shortcut, Option-Command–3, to switch to the
Outline view. In the Contents section, click on where it says “Click
to add a topic” to create your first object.
2.
A Topic item appears in the outline, and an object labeled Topic
appears on the canvas simultaneously.
3.
The item’s text is already highlighted, so you can just start typing
to rename it. This item represents our first character, so enter
“Don John”.
129
4.
Press Return to finish with this item and move on to the next one.
A new item appears below the first one in the Outline view, and a
new shape appears on the canvas; name this one “Don Pedro”.
5.
Press Return once more to create a third item, and name it
“Leonato”. Now you have three items in your outline and three
shapes on your canvas.
130
Tutorial 2: Outline Hierarchy
It’s nice that you can create shapes quickly from the keyboard like this, but
the real magic is in adding depth to the outline. All of the characters
you’ve created so far exist on the same level, but now let’s add some more
characters one level below them.
1.
The next two characters are soldiers who fought under Don Pedro’s
command, so we’ll add them below him in the diagram. Click the
Don Pedro item in the outline to select it, then press Return to
create a new item below it. Name the new item “Benedick” and
press the Tab key. Benedick is now indented beneath Don Pedro in
the outline view. However…
2.
…you’ll notice that rather than inserting an object labeled
“Benedick” between Don Pedro and Leonato, that it doesn’t appear.
Well, it is there, it’s just behind the Leonato object. Select
“Leonato” and drag it down and to the right a little bit so you see
Benedick.
131
3.
With Benedick still selected, press Return to create another item at
the same level and name it “Claudio”. Now you have two
characters who belong to Don Pedro.
4.
Now use the same technique to add Beatrice and Hero underneath
Leonato (they’re his niece and daughter).
5.
Adjust the diagram by dragging the Benedick, Claudio, Beatrice,
and Hero objects so they appear beneath the three main characters,
moving Leonato back up to the top line in the process. Your
diagram should appear as follows:
132
Tutorial 3: Line Labels
To clarify the relationships we have so far, let’s use the Text tool ( ) to
add labels to the connection lines. To get started, click anywhere on the
Canvas; just not on one of your objects.
1.
Select the Text tool; it’s the one with a letter A on it. Then click it
again so that it’ll stay active instead of reverting back to the
selection tool after you use it.
2.
Place the mouse pointer over the line between Don Pedro and
Claudio so that the line glows and then click it to make a label
appear. Type “boss” into the label’s text to show that Claudio
works for Don Pedro.
133
3.
Add labels to the three remaining lines in the same way, indicating
that Don Pedro is also Benedick’s “boss”, and that Leonato is
Hero’s “father” and Beatrice’s “uncle”.
Tutorial 4: Making More Connections
By now, you’ve already got a fine diagram, but sometimes you want to
diagram relationships that are not strictly tree-like. Let’s manually add
some more connections.
1.
Before you start connecting things together manually, it’s a good
idea to turn off the automatic layout feature. Choose View ▸ Show
Inspector ▸ Canvas (Command–4), and then scroll down in the
inspectors sidebar to the Diagram Layout section and make sure
that Auto layout is unchecked.
134
2.
So far, the lines we’ve drawn to connect the objects have been
straight, so to be consistent, let’s make straight lines the default.
To do this, first select the Line tool, and then open the Object
inspector (View ▸ Show Inspector ▸ Object, or Command–1).
Scroll down in the inspector sidebar to the Lines section, and set
the Line type to Straight.
3.
To connect two shapes, just activate the Line tool, click on one
shape and then click on another to create a line between them.
Make connections and label them with the Text tool to signify the
following relationships:
135
• Don John and Don Pedro are half-brothers
• Don Pedro and Leonato are friends
• Benedick and Beatrice are (eventually) in love
• Claudio and Hero are in love
4.
As you do this, feel free to use the Selection tool to move shapes
into more comfortable locations.
Tutorial 5: Styling Objects
Look at your work so far—no literary minutia can escape your
organizational prowess! Okay, so, the diagram makes sense, but it’s not
particularly attractive. Let’s pretty up those objects with some style
attributes.
In Tutorial 4, we introduced you to the Diagram Layout inspector, but now
we’re going to start using the inspectors in earnest. They’re convenient
and full of controls that you can use to modify any object on the canvas, or
the canvas itself.
136
1.
There are eight Object Inspectors (Fill, Stroke, Shadow, Shapes,
Lines, Image, Geometry, and Alignment), each one of which
controls a certain aspect of the selected objects’ appearance. The
first inspector we’ll use is the Fill inspector; if you don’t see it on
your screen, choose View ▸ Show Inspector ▸ Object
(Command–1).
2.
Select Don John’s object on the canvas and then choose the Fill
object inspector. You’ll notice that the object has a plain white fill
color; let’s change that.
3.
Click the Fill Color control on the right side of the Fill inspector
(not on the little arrows). This pops open the Colors panel, which
you can use to choose a new fill color. If you’d like, you can even
choose a blend style using the Fill Type control on the left of the
inspector.
137
4.
Before moving on to the next step, let’s first change the unit of
measurement used from Inches to Points. Choose View ▸ Show
Inspector ▸ Canvas (Command–4), and then scroll down in the
inspectors sidebar to the Units section; change the Units popup
from Inches to Points.
138
The reason why you want to switch from Inches to Points is mostly
pragmatic; it’s easier to think in terms of strokes or lines for this
exercise in points than it is inches. If you were designing a map,
however, you might opt to change the unit of measurement to
miles or kilometers and then set an appropriate scale as well.
5.
Now we’re going to use the Stroke and Shapes inspectors to
change the line drawn around the outside of the object. Switch
back to the Object inspector (Command–1).
• In the Stroke inspector, change the thickness of the stroke to
2 pt.
• In the Shapes inspector, change the radius to 5 pt.
139
• This makes for a nice, heavy, rounded stroke around the object.
You can zoom in so you can see the progress you’ve made!
6.
Switch to the Text inspector (View ▸ Show Inspector ▸ Text, or
Command–2), and in the Font section, choose a nice font, then
click the color well next to the Font button and choose a color to
contrast the fill. Now you should have one quite charming shape
object.
140
Tutorial 6: Style Proliferation
Now you can apply the same styles to your other shapes without having to
repeat every step for each one.
With Don John still selected, look at the bottom of the main window for
the style tray. It contains all of the style attributes for the currently
selected object, each one represented by a little square “style chit”. Try
dragging the “All Styles” chit (the isolated one on the far left of the style
tray) and dropping it onto the Don Pedro shape in the diagram.
Whoa! That’s pretty easy. Do the same thing to Leonato so that all of the
elder generation characters have a consistent appearance.
141
Tutorial 7: More Selecting and Styling
Let’s style the remaining objects. A quick way to select lots of shapes at
once is with the Contents inspector, located in the left sidebar.
The Contents inspector lists all of the different kinds of objects on the
canvas—lines, labels, rectangles—based on their styles. At the moment, it
should show that you have one out of three colored rectangles selected.
There should also be an item representing the four plain white rectangles
with black strokes; click it to select all four objects at once, and it changes
to show that you have selected all four of those objects.
You can use the Objects inspectors (View ▸ Show Inspector ▸ Object, or
Command–1) to change various aspects of an object that are not strictly
related to its visual style. Let’s use the Geometry object inspector to
change the size of the four selected objects. In the width and height fields,
enter some new values to make these shapes somewhat larger than the
others.
142
Use the Style inspectors to simultaneously style all four shapes in in a way
that differentiates them from the others. Here we’ve chosen a different
color, a slightly thicker stroke, and a larger font.
Tutorial 8: Layers
Layers contain different sets of objects on the same canvas. We’ll place a
background image on a new layer to keep it separate from the character
diagram.
1.
In the toolbar, click New Layer to add another one to the canvas.
A new layer is born. You can name it if you like; something like
“Background” should suffice.
143
2.
The order of layers is important; stuff on higher layers appears in
front of stuff on lower layers. We want the background to appear
behind our relationships diagram, so drag the new layer and drop it
below the other one in the list.
144
3.
Let’s concentrate on the background layer. The layer you’re
working with right now has a pencil icon to the left of its preview
in the drawer. If the background layer doesn’t have the pencil icon,
click just to the left of the layer preview to put it there.
4.
For your background, rather than using the Background Image
canvas inspector (Command–4), which would place a background
image on the entire canvas, you’ll want to drag an image onto the
layer. A new shape containing the image is created on the
Background layer.
145
5.
Use the controls in the Image object inspector (Command–1) to
change the size and scaling or the opacity of the image to suit your
liking.
Now you have an attractive, informative diagram. You know how to use
the outline view to create objects, how to label and connect them, and how
to add styles. You know how to propagate styles around to many objects.
You know how to use multiple layers. At this point, you’re pretty much
unstoppable!
146
Tutorial 9: Styling Lines and Labels
So far, we’ve focused on styling the object blocks and giving the diagram a
nice background. But if you look at the previous image, you can see that
there’s still some work to do, particularly with the lines and labels.
Here we want the lines to help people visualize the relationships between
the characters, and do to more than just show a simple connection. So let’s
address the lines first, and then you’ll see how to remove the fill from a
label.
1.
Choose View ▸ Show Inspector ▸ Object (Command–1) to open
the Object Inspector on the right, and then open the Stroke and
Lines object inspectors.
2.
Select the line between Don John and Don Pedro.
3.
In the Stroke inspector, set the stroke width to 1.5 pt, and change
the line’s color to a nice shade of blue.
4.
With the line still selected, go to the Lines inspector and give the
line arrows at both the left and right sides. Your diagram and
inspectors should look something like this:
147
5.
Use a similar approach for the other lines, as follows:
• Create a double-arrowed green line between Don Pedro and
Leonato
• Create single-arrowed red lines that point up from Claudio and
Benedick to Don Pedro
• Create single-arrowed purple lines that point up from Beatrice
and Hero to Leonato
• Create double-arrowed pink lines between Benedick and
Beatrice, and between Claudio and Hero
6.
When you’ve finished, your diagram should look something like
the following:
Now let’s deal with the labels on the lines. As you can see, they
have a white background that obscures the lines and blots out the
background image. Let’s fix that!
7.
To help speed this process up, let’s go back to our old friend, the
Contents sidebar. Choose View ▸ Show Contents ▸ Selection
Matrix (Option-Command–4). The Selection Matrix, if you recall
from Tutorial # 7, lets you quickly select similar items in your
diagram. In this case, we want to select all eight of the text labels,
which you can do by clicking on the label chit.
148
8.
Choose View ▸ Show Inspector ▸ Objects (Command–1) and set
the Fill for the labels to No Fill. This removes the white box
behind the labels so the lines and the background image show
through.
The only problem is that—with some of the labels—the text
interferes with the lines. Let’s fix that.
9.
Let’s start with the “love” labels. Select both of those by
Command-clicking them, and then use the Geometry object
inspector to change their positioning related to the line.
149
10. Select the “half-brothers” label and tap the Up Arrow key on your
keyboard to nudge the label above the line.
11. Select the “friends” label and nudge that above the line using the
Up Arrow key on your keyboard.
12. Use Command-click to select the two “boss”, “uncle”, and
“father” labels.
13. In the Geometry object inspector, change their orientation relative
to the line from Horizontal to Parallel.
14. Finally, select each of those four labels individually to move them
off the lines. Your diagram should look similar to the following:
150
Tutorial 10: Adding a Title
Now it’s time for you to take a little bit of a breather. You’ve been going at
this pretty hard now, so we’ll make this one simple. All you need to do is
add a title to the diagram. For this, you’ll use the Text tool to place the
title, Much Ado About Nothing along the top, and then style it however you’d
like.
Use this as an opportunity to get acquainted with some of the other object
inspectors that you might not have used so far. At the least, you’ll use the
Type inspectors (Command–2) to change the Font, its size and style. You
can also use the the Object inspectors (Command–1) to change the type’s
appearance.
151
Tutorial 11: Adding Text to a Curve
Congratulations! You’ve made it to the end of the tutorial, and you’ve
done a fine job so far. You’ve learned how to use the Outline Editor
(Option-Command–3) to quickly add new blocks to the diagram, and
how to use the Selection Matrix (Option-Command–4) to quickly edit
and apply styles to multiple blocks and lines simultaneously. We also
showed you how to add a background image to a new layer and how to
style and adjust the positioning of labels using the Object inspectors.
But now, now we’re going to show you something really cool: Adding text
to a curved line. This is a new feature for OmniGraffle 6, and is something
that many of you have asked for, so here goes…
1.
Create a new layer by either clicking the New Layer button in the
toolbar, or with Edit ▸ Layers ▸ New Layer).
2.
Name the layer “Much Ado Quote”, and press Return to accept the
name for the new layer. This new layer should be the active layer
(as noted by the pencil on the left).
152
3.
Next up, turn off Background layer by clicking its Eye icon to hide
its visibility. This makes it easier for you to use the Line tool to
draw your line.
4.
In the toolbar, double-click the Line tool so that it remains active;
the mouse pointer changes to a set of crosshairs.
5.
Click the Style Well and select the Bézier, Stroke:Obsidian style.
153
6.
Click somewhere beneath the diagram and create a curved line.
The easiest way to do this is to click at a starting point of your
choice, and then somewhere in the middle of where you want the
line, click and drag; this creates a curve at the midpoint of your
line. To end the line, double-click in another location on the
canvas. Command-double–clicking terminates the line.
If you haven’t worked with Bézier curves before, you can use the
curve’s handles to change the shape of the curve. Drag the handles
toward the center for a sharper curve, or further out to widen the
arc. You can also drag the midpoint of the curve around to adjust
the line’s positioning. To add another point to the curve, just click
and drag anywhere on the line to add another Bézier point.
154
7.
Next, add a label to the line you’ve just drawn. In the toolbar,
select the Text tool and then click anywhere on the line.
8.
Now, choose your favorite quote from Much Ado About Nothing
and type that in as the label. For example, we’ll use this line from
Beatrice: “Alas poor heart, if you spite it for my sake, I will spite it
for yours, for I will never love that which my friend hates.”
9.
Next, use the Geometry object inspector to make it so the text
follows the path of the line.
155
10. Depending on the length of the quote you use, you may notice that
some of the text doesn’t appear. You’ll see a light blue bounding
box that clips off a portion of the text. If you see this, try dragging
the handles on the box so that all of your text appears on the line.
You may need to play around with the top slider in the Geometry
object inspector for adjusting the position of the label along the
line. Moving this slider to the left moves the text toward the
beginning of the line; moving the slider to the right moves the text
toward the end.
11. Once all of your text is viewable along the path, go back to the
Type inspector (Command–2) and change the Font from Helvetica
to Zapfino. Reduce the type size and readjust the text box, if
necessary, so that the entire quote shows up along the path.
12. Switch to the Object inspector and under Stroke, set the stroke’s
width to 0 pt, and change the stroke style to No Stroke. This gives
you an “invisible” path that you can add text to.
13. In the Fill inspector, set the label’s fill to No Fill. This clears out
the white background, similar to the changes you made to the
other labels earlier.
14. In the Canvases sidebar, go back to the Background layer and click
on the Eye icon again to make the background layer visible.
In the end, your project should look similar to the following:
156
Take some time now to experiment with OmniGraffle a little more. The
more you use OmniGraffle, the more comfortable you’ll become with all of
its abilities. Don’t worry about “messing” anything up; just remember that
you can always hit Command-Z to undo any recent changes you’ve made.
157
Reference
Exporting to Different Formats
You can create files of several different types from your OmniGraffle
diagrams. Select Export from the File menu. When you export, a new file
is written to the disk, leaving your original document as it is on the screen.
Of course, not all aspects of a diagram can be represented in all file
formats.
The available file formats are:
•
BMP bitmap image — A legacy graphics format.
•
EPS vector image — Encapsulated PostScript. This is a common
format in professional printing.
•
GIF bitmap image — A legacy graphics format prevalent on the
web.
•
HTML Image Map — A hypertext file and a JPEG, PNG, or GIF
image. URL actions in the original OmniGraffle document are
coded into the image map as links so that the image can be clicked
to follow them. (Note that actions on lines aren’t included, but
actions on line labels are)
•
JPEG bitmap image — a popular compressed image format. You
can lower the image quality to get a smaller file size.
•
OmniGraffle Document (Pro) — an OmniGraffle document. You
can make the file read-only (not editable), and you can choose to
include linked images in the file so that they show up properly on
someone else’s computer.
•
OmniGraffle Stencil, OmniGraffle Template — Resources for
OmniGraffle.
•
OmniOutliner 3 — Represent the diagram as a text outline, using
the connection lines between shapes to create a hierarchy. This
doesn’t work as well for diagrams that don’t have strictly tree-like
structures.
•
PDF vector image — Portable Document Format. This is a nice
cross-platform format that has good support for both vector
components and bitmaps.
•
PNG bitmap image — Portable Network Graphics, a popular
format for the Web. This format uses lossless compression to
retain the details of an image while decreasing its file size. It
supports transparency.
•
TIFF bitmap image — Tagged Image File Format. This format
supports transparency.
•
Photoshop® image (Pro) — Exports a layered .psd file that can be
opened in Adobe Photoshop, or other graphics apps that can
interpret a .psd file.
•
SVG vector drawing (Pro) — An open Internet standard that uses
XML.
•
Visio® XML document (Pro) — The XML-based file format for the
Microsoft® diagramming application.
Depending on the file format you choose, you have different options. Most
offer an Export Area option, with which you can choose how much of the
document to export.
160
•
Current Selection — Only export the objects that are selected right
now.
•
All Objects — Export all of the objects on the canvas, but not the
empty areas.
•
Region — Specify a precise region of the canvas to export.
•
Current Canvas — Export the entire canvas.
•
Whole Document — Export everything, creating one image file for
each canvas.
Depending on the format you choose, you can also choose a scale for
exporting smaller or larger than actual size, the resolution, the
compression level, and whether to make the background transparent.
Importing from Other Applications
Several different file formats can be understood by OmniGraffle. You can
import these files by opening them just as you would open a normal
OmniGraffle file.
(Pro) Microsoft® Visio® documents, templates, and stencils
(.vsd, .vdx, .vst, .vtx, .vss, .vsx)
• Documents saved by Microsoft® Visio® diagramming software in
its XML-based file format (and now even in its original binary file
format! Yeah!) can be read by OmniGraffle Pro. Note that while
you can open the binary format, you can’t export to it; you’ll have
to save as an OmniGraffle diagram or export to the XML format.
Also note that graphics in the Microsoft® Enhanced Metafile
(EMF) format can’t be imported.
161
DOT files (.dot)
• OmniGraffle understands a subset of the DOT language used by
Graphviz. This isn’t a full implementation of DOT, but it can be
quite useful.
Diagram! 2 documents (.diagram2 and .dpalette2)
• Diagram is a NeXTSTEP/OPENSTEP application similar to
OmniGraffle. OmniGraffle can import the objects in a Diagram
file, but not attached EPS images, sounds, or links.
OmniOutliner documents (.ooutline and .oo3)
• When you open an OmniOutliner file, the items of the outline are
interpreted as a diagram. A dialog appears; use it to indicate
exactly how to interpret the outline:
•
Use the pop-up list to choose a diagram style.
•
(Pro) Use the table to assign objects in the diagram style to
columns in the outline. If you want to show multiple columns of
information for each item, use a diagram style that has grouped
objects. You can also assign a column to the objects’ notes.
•
(Pro) Choose whether to put the outline in a completely new
document or in a new canvas on the open document.
(Pro) Xcode projects (.xcode), Project Builder projects (.pbproj), and
frameworks (.framework)
• OmniGraffle uses the Objective-C headers to construct a diagram
of the inheritance, protocol, and category relationships.
(Pro) Interface Builder nib files (.nib)
• OmniGraffle graphs the connections in the nib file for easy
visualization.
162
EOModeler files (.eomodeld)
• OmniGraffle creates a diagram of the database relationships
described by the file.
Folder structures
• Drag a folder from the Finder and drop it on OmniGraffle’s
application icon to map out the folder’s contents as a diagram.
AppleScript Support (Pro)
OmniGraffle has extensive AppleScript support, making it easy for you to
automate tasks within or to create entirely new OmniGraffle projects. To
find out more about how OmniGraffle’s AppleScript object model and
commands, launch AppleScript Editor (/Applications/Utilities, or use ShiftCommand-U while in the Finder), choose File ▸ Open Dictionary, and
then choose your version of OmniGraffle from the Open Dictionary dialog.
You can store AppleScripts in OmniGraffle’s scripts folder, for easy access
from the Scripts menu. You can also attach scripts to individual objects on
a canvas, using the Action inspector. When you activate the Browse tool,
then click an object with a script attached, the script runs.
If you select some objects and then choose Edit ▸ Copy As ▸ AppleScript
from the menu bar, you get the exact lines of AppleScript necessary to
create those objects. This is a great way to learn how OmniGraffle’s
AppleScript support works, or to add specific objects to your own scripts.
LinkBack
LinkBack is a way of embedding content between applications in such a
way that you can always go back and edit the content with the software
used to create it originally.
163
For lots of information about LinkBack, and a list of applications that
support it, check the website at www.linkbackproject.org.
To embed OmniGraffle content in another LinkBack application, just copy
and paste the content like you would normally. The same goes for
embedding other applications’ content in OmniGraffle diagrams.
To embed OmniGraffle content inside a single object in OmniGraffle,
select all of the objects on your canvas (Command-A), choose Edit ▸
Copy As ▸ PDF from the menu bar, and then Paste (Command-V). The
objects you copied become a single image; double-clicking the object opens
a new OmniGraffle window in which you can edit the objects to your
heart’s content.
To edit OmniGraffle content embedded in another application:
•
Double-click the OmniGraffle content in the other application’s
document; an OmniGraffle window appears containing the
content.
•
Edit the content in the OmniGraffle window, just as you normally
would.
•
In OmniGraffle, choose File ▸ Save; the content in the other
application updates automatically.
•
To edit other LinkBack applications’ content embedded in an
OmniGraffle diagram, just double-click it. When you save in the
other application, the content in the OmniGraffle diagram
updates.
164
Licensing
From the menu bar, choose OmniGraffle ▸ Licenses to see the Licenses
dialog. From here you can review and edit your OmniGraffle licenses,
which verify that you’ve actually paid for the software. (Thanks!)
To purchase a license:
•
Click Buy Licenses and you will find yourself magically
transported to the Omni Store, where you can purchase a license
for the Mac versions of our software. (Naturally, this only works if
you have an Internet connection.)
To add a new license:
1.
From the menu bar, choose OmniGraffle ▸ Licenses to see the
Licenses dialog.
2.
Click Add License.
3.
If you have a license key in an email message, copy and paste both
the Owner name and the License Key into the appropriate fields.
If you can’t copy and paste the information, you’ll have to type it
in; make sure you enter everything exactly as it appears in your
license message, including the dashes. Also, double-check that the
license you’re entering really is a license for OmniGraffle 6, and
that it is for the correct edition (Pro or Standard); licenses for other
Omni products or earlier versions of OmniGraffle won’t work.
4.
The Type drop-down menu is grayed out by default, which limits
the license type to Personal for the current user account on your
Mac. OmniGraffle has two different types of licenses:
• Personal: This license is for your personal use, and will only be
available on this computer when you are logged in as the user
who installed the license. You can install this license on more
165
than one computer, but only for your personal use. You should
not use the software on two different computers at the same
time with this kind of license. If a personal license is available,
the application will always use it.
• Computer: You can use this license on this computer, and so
can any other user of this computer. However, you should not
install this license on more computers than it has license seats
for.
5.
If there is more than one user account on your Mac, and you’d like
everyone on your Mac to discover the awesomeness that is
OmniGraffle, you'll need to jump through a couple of hoops
(thanks to Apple’s mandated app sandboxing for OS X 10.7 and
above). To set up a Computer license, follow these steps:
1.
Quit OmniGraffle 6.
2.
Open a new Finder window.
3.
Switch the Finder’s view settings to Column, by choosing
View ▸ as Columns (or use Command-3. This will make it
easier for you to traverse the folder hierarchy on your Mac.
4.
Choose Go ▸ Computer.
5.
Choose your Mac’s hard drive (if you haven't renamed it, it
should be named Macintosh HD), and then traverse through
the following folders:
• Library
• Application Support
6.
In the Application Support folder, create a new folder (choose
File ▸ New Folder, or use Shift-Command-N) and name it
166
Omni Group. You will need to enter your admin password to
create a new folder at this level.
6.
7.
In the Omni Group folder, create a new folder and name it
Software Licenses.
8.
Open OmniGraffle 6 again, and then choose OmniGraffle ▸
Licenses.
9.
Click Add License.
When you click Add License, you’ll notice that the Type dropdown menu is no longer grayed out, and the Computer option is
available for selection. Now just enter the Owner and License Key
information you received from us, click Save, and you should be
set.
To remove a license:
1.
Select the license you want to remove.
2.
Click Delete License.
To move a license from one Mac to another:
1.
First, find the license file on the old computer. OmniGraffle license
files are located in the folder Library/Application Support/Omni Group/
Software Licenses, where Library is either at the top level of your
system disk (for computer licenses), or in your Home folder (for
personal licenses). The file you are looking for has a name such as
omnigraffle–123456.omnilicense. Move this file to the new computer.
2.
On the new computer, choose OmniGraffle ▸ Licenses from the
menu bar and then click Add License.
3.
On the sheet that appears, click Import License File.
4.
Locate and select the license file that you want to import.
167
5.
Click Open. If the license file is compatible—meaning, it is for the
same version of OmniGraffle—the license will be added to
OmniGraffle on your other system.
Again, the thing to remember here is that license keys are version-specific;
the license key you have for OmniGraffle 5 is not compatible with
OmniGraffle 6 (and vice versa).
Note
You can disregard the Licensing section if you've purchased your
copy of OmniGraffle (Standard or Pro) from the Mac App Store.
Licensing is only an issue if you've purchased your copy of
OmniGraffle direct from The Omni Group's website.
Regular Expression Syntax
OmniGraffle’s Find dialog supports the use of some simple regular
expressions. A regular expression is a single string that represents a whole
set of strings. The following syntax is used:
•
a* — zero or more instances of a (matches the longest string
possible)
•
a*? — zero or more instances of a (matches the shortest string
possible)
•
a+ — one or more instances of a (matches the longest string
possible)
•
a+? — one or more instances of a (matches the shortest string
possible)
•
a? — zero or one instance of a
•
^ — beginning of a line
168
•
$ — end of a line
•
. — any character
•
[a-z] — all characters between a and z
•
[abc-] — a, b, c, or -
•
(abc) — matches abc and stores it as a group. Use the Select or
Replace pop-up menu in the Find dialog to select or replace only
one of these groups rather than the whole expression.
•
\1 — text of first matched group
•
a|b — a or b
•
\n — newline
•
\r — carriage return
•
\t — tab character
•
\d — digit
•
\D — non-digit
•
\w — word character (alphanumeric or underscore)
•
\W — non-word character
•
\s — whitespace
•
\S — non-whitespace
•
\ — escape the next character
Regular expressions are very popular, so you should be able to find plenty
of information about them on the internet or in a good library or
bookstore. Here are a few examples to get you started:
169
•
\s*$ — matches whitespace at the end of a line.
•
<.*?> — matches strings that begin with < and end with >, such
as XML tags.
•
\S+@\S+ — very liberally matches things that resemble email
addresses (anything@anything).
•
(19|20)\d\d-\d\d?-\d\d? — matches dates in the format
YYYY-MM-DD, between 1900 and 2099.
170
Every Single Menu
Command
Now, you could spend the next couple hours, kicked back in your comfy
chair cruising through all of the menus in OmniGraffle to see what’s new
or where your favorite command went to. Or, you could just read through
this section and see everything in one convenient—and easy to search—
place.
The OmniGraffle Menu
About OmniGraffle
Find out about the particular version of OmniGraffle you are using.
Check for Updates
Normally, OmniGraffle checks for updated versions of itself regularly
based on the Update preferences. Use this command to check once
right now. If there is an updated version of the software, you are
prompted to download it.
Preferences (Command-,)
Open OmniGraffle’s preferences window; you can use it to customize
the application’s behavior to your liking.
Licenses
Show the Licenses dialog, where you can review your OmniGraffle
software licenses. For more information about how licenses work, check
Licensing section.
171
Services
The Services menu is a collection of system-wide services offered by
other apps on your Mac. OmniGraffle plays rather well with OS X, so
you should be able to use your standard services from within the
application.
Hide OmniGraffle (Command-H)
Leave OmniGraffle open, but temporarily put away its windows while
you work in another application.
Hide Others (Option-Command-H)
Hide all windows of other applications you have open, so that you can
concentrate on OmniGraffle.
Show All
Show all of the windows in all applications you’ve hidden using the
Hide commands.
Quit OmniGraffle (Command-Q)
Choose this if you really must part with OmniGraffle for now. If you
have unsaved documents open, you are prompted to save or discard
your changes.
Note
The Check for Updates and Licenses menu options are not
available on versions of OmniGraffle purchased through the Mac
App Store. Those menu options only pertain to direct purchases
of OmniGraffle from The Omni Group’s website.
172
The File Menu
New (Command-N)
If you have a default template, this creates a new document based on it.
If you don’t have a default template, this opens the template chooser.
New Resource
Create a new OmniGraffle stencil, template, or diagram style, starting
from the template of your choice.
Resource Browser (Shift-Command-N)
Open the new Resource Browser, where you can pick which template
you’d like to use for a new document.
Open (Command-O)
Browse for a document to open. You can open any OmniGraffle
document, or a file in one of the formats OmniGraffle knows how to
import.
Open Recent
Open a document you’ve recently worked on. Choose Clear Menu to
remove the list of recent documents, so no one knows you’ve been
working on Surprise Party Invitation.graffle.
Close (Command-W)
Close the frontmost window you have open. If you have unsaved
changes, you are prompted to save or discard them.
Save (Command-S)
Write all of your hard work in the frontmost document onto the disk for
safekeeping. If you have already saved the document once, the new
version replaces the old one. If it’s the first time you’re saving this
173
document, you are prompted to browse to a location on the disk and
enter a file name.
Duplicate (Shift-Command-S)
Make a duplicate copy of the current document. The duplicated file uses
the same filename as the file you’re working on, but tacks on copy to the
filename so you know which one is the clone.
Note
The Duplicate command changes to Save As when you hold
down the Option key while in the File menu. You can also quickly
invoke Save As with the Option-Shift-Command-S keyboard
shortcut. Save As is sort of like Duplicate, except you have the
option to rename the file immediately after issuing the command,
whereas with Duplicate, you have to explicitly rename the file
afterward.
Rename
Whether you have used File ▸ Duplicate (Shift-Command-S) to make
a copy of a file, or if you’ve decided that you don’t like the filename
you’ve given to your current project, select this menu item to rename
the current file.
Move To
Move the file to another location on your Mac’s hard drive.
Move to Trash
Be careful with this one; it moves the file you are currently working on
into the Trash. This comes in particularly handy when you’re working
on multiple duplicated files as you tweak and compare styles. With the
dupes you don’t want, just choose File ▸ Move to Trash and then close
the window (Command-W).
174
Revert To
When revisions don’t really work out like you had planned, choose this
to go back to the version of the file that’s on the disk; it’s kind of like a
mass-Undo. If you open a file that had some changes in an automatic
backup, you can choose this command to go back to the last explicitly
saved version.
Place Image
Browse for an image file; a shape containing the image is created on the
canvas at the last place you clicked with the Selection tool.
Export (Option-Command-E)
This creates a new file, in a file type of your choice, from some portion
of the data in your OmniGraffle document. Exported files are
approximations of the OmniGraffle document in a different format, not
perfect replicas. Check the exporting section for more information.
Page Setup (Shift-Command-P)
Show the standard OS X Page Setup sheet. This sheet contains several
panes of settings for how to represent your document on pages.
Print (Command-P)
Show the standard OS X Print sheet. In addition to the settings in Page
Setup, you have a lot of printing-specific options you can set here.
Print Canvas(es)
Show the Print sheet, but only include the selected canvases.
The Edit Menu
Undo (Command-Z)
OmniGraffle remembers a list of changes you make to a document.
Choose this command to move one step backwards in the list, as if you
175
hadn’t done the last thing in the list. Keep choosing it to keep stepping
backwards in time.
Redo (Shift-Command-Z)
If the last thing you did was to Undo something, you can step forward
and do it again, effectively Undoing the Undo.
Cut (Command-X)
Remove the current selection and put it on the clipboard, so you can
paste it somewhere else.
Copy (Command-C)
Copy the current selection to the clipboard.
Copy As
Copy to the clipboard the current selection as one of the following
formats:
PDF
Put a PDF copy of the current selection on the clipboard for pasting
into any app that accepts PDF files for viewing, editing, or sending. If
the app you paste into also supports LinkBack (this includes
OmniGraffle itself), you can even go back and edit the pasted
content in OmniGraffle.
PNG
Put a PNG copy of the current selection on the clipboard for pasting
into any app that accepts PNG image files.
TIFF
Put a TIFF copy of the current selection on the clipboard for pasting
into any app that accepts TIFF image files.
176
AppleScript (Pro)
Put an AppleScript representation of the selected objects on the
clipboard. You can paste the result into AppleScript Editor
(/Applications/Utilities) or into the Action inspector of another object
to make a script that recreates the objects. The output is also useful
just for studying how OmniGraffle’s AppleScript support works.
Paste (Command-V)
Place the contents of the clipboard on the canvas, at the last place you
clicked with the Selection tool. (Or insert text from the clipboard if you
are editing an object’s text.) If there is an image or some text in the
clipboard, a new shape object containing the image or text is created.
Paste in Place (Shift-Command-V)
If you copy an item on your canvas with Command-C and then use
Paste in Place (Shift-Command-V), you will paste in the contents of
the clipboard directly on top of the item you copied. This is particularly
helpful when you want to copy an item on one layer and then paste in
another copy on another layer that’s higher up in the stack.
Paste and Match Style (Option-Shift-Command-V)
When you are editing text, you can use this command to paste in some
text without bringing along the style it had in the application you
copied it from. Instead, it matches the style of the text you already have,
as if you had typed it there yourself.
Duplicate Selection (Command-D)
Make a copy of the current selection and place it on the canvas, without
using the clipboard. This command has a special feature:
177
•
Select something on the canvas and Duplicate it.
•
Use the Selection tool to move the copy; OmniGraffle learns the
distance and direction of the copy in relation to the original.
•
Duplicate again as many times as you like; each new copy is the
same distance and direction from the previous copy.
Delete
Obliterate the current selection, forever banishing it from this plane of
existence (unless you Undo).
Select All (Command-A)
Select everything selectable on the canvas. Remember that objects on
locked layers can’t be selected. If you are editing the text of an object,
this instead selects all of the object’s text.
Select
This menu offers you different options for selecting objects, either
based on their style, how they’re connected, and based on their
relationships:
Similar Objects
Select all of the objects on the canvas that have the same style
attributes as the currently selected objects.
Connected Objects
Select all shapes that are directly or indirectly connected by lines to
the currently selected objects, and all of the lines between.
Ancestor
Select all of the ancestors of the currently selected objects, based on
the hierarchy established by connection lines.
178
Descendants
Select all of the descendants of the currently selected objects, based
on the hierarchy established by connection lines.
Outlining
These commands are only available when you are working in the
Outline Editor (Option-Command–3):
•
Add Child (Command-})
•
Add Sibling (Option-Command-’)
•
Add Aunt (Command-{)
•
Add Parent (Option-Command-;)
•
Add Spouse (Option-Command-/)
•
Indent
•
Outdent
Navigation (Standard)
Mouseless Editing (Pro)
These commands are most useful when you invoke their keyboard
shortcuts; you can do a whole lot without even touching the mouse:
•
Select Shape Left (Command-Left Arrow)
•
Select Shape Right (Command-Right Arrow)
•
Select Shape Above (Command-Up Arrow)
•
Select Shape Below (Command-Down Arrow)
•
(Pro) Create Connected Shape Left (Control-Command-Left
Arrow)
179
•
(Pro) Create Connected Shape Right (Control-Command-Right
Arrow)
•
(Pro) Create Connected Shape Above (Control-Command-Up
Arrow)
•
(Pro) Create Connected Shape Below (Control-Command-Down
Arrow)
Canvases
Commands for working with Canvases:
New Canvas (Option-Command-N)
Add a new canvas to the document.
Duplicate Canvas
Add a new canvas, identical to the current canvas, to the document.
Delete Canvas
Get rid of the current canvas completely.
Layers
Commands for working with layers:
New Layer
Add a new layer to the current canvas.
New Shared Layer
Add a new shared layer to the current canvas.
Duplicate Layer
Add a new layer, identical to the selected layer, to the canvas.
Merge Layer Down
180
Move everything on the selected layer to the next layer down, then
delete the selected layer.
Delete Layer
Get rid of the current layer completely. You can’t delete the last layer
in a canvas.
Delete All Copies
This command is only available when you select a shared layer. It
deletes all instances of the shared layer on any canvas throughout
the document.
Layer Settings
Commands for defining a layer’s properties:
Visible
shows or hides objects on the layer
Printable
controls whether objects on the layer should be included when
printing
Unlocked
controls whether objects on the layer can be selected or edited
Shared Layer
specifies a layer that can be shared with other layers
Select All in Layer
Select all of the objects on the selected layer.
Move Selection to Layer
Move all selected objects to the selected layer.
181
Tables (Pro)
Commands for working with tables:
Insert Row (Command-Return)
When you have one cell of a table selected, choose this command to
add a new row of cells to the table. The new row appears
immediately before the row containing the selected cell.
Insert Column (Option-Command-Return)
When you have one cell of a table selected, choose this command to
add a new column of cells to the table. The new row appears
immediately before the row containing the selected cell.
Select Row
When you have one cell of a table selected, choose this command to
select the entire row that contains the cell.
Select Column
When you have one cell of a table selected, choose this command to
select the entire column that contains the cell.
Magnets
Commands for working with Magnets:
Copy Magnets
Put the magnet arrangement of the selected object onto the
clipboard, so that you can paste them to a different object.
Paste Magnets
If there is a magnet arrangement on the clipboard, apply it to the
selected object. Any existing magnets are replaced by the new ones.
182
Delete Magnets
Get rid of all the magnets on the selected objects.
Positions
In addition to these options, magnet positions can also be set in the
Connections properties inspector (Command–3) in the Other
Connections tab:
• No Magnets
• Cardinal Points:
• 4 Magnets: N, S, E, W
• 2 Magnets: N, S
• 2 Magnets: E, W
• 4 Magnets: NE, NW, SE, SW
• 8 Magnets
• Per Segment:
• On Each Vertex
• 1 Magnet Per Side
• 2 Magnets Per Side
• 3 Magnets Per Side
• 4 Magnets Per Side
• 5 Magnets Per Side
183
Shapes (Pro)
Commands for working with Shapes:
Unite Shapes
Combine two or more selected shapes, eliminating internal lines to
make a single, solid shape.
Intersect Shapes
Create a shape from the overlapping areas of the selected shapes.
Subtract Shapes
Take the selected shapes and use the front shapes to punch a hole in
the back-most shape. You can reorder shapes with the Bring/Send
commands in the Arrange menu.
Uncombine Shapes
Separates combined shapes, restoring them to their original state.
Make editable/uneditable
Toggles whether a shape can or cannot be edited.
Mask Image
Resize or rotate an image object on the canvas. Hold Shift to scale the
image, and hold Command while hovering over one of the image
handles to rotate an image. Holding Shift-Command lets you rotate
the image in 15 degree increments. Press Return or choose Edit ▸ End
Masking when finished to accept any masking changes you’ve made to
the image.
Insert Variable
While you are editing a shape object’s text, choose one of these
commands to insert a special tag. When you finish editing the text, the
184
tag changes to represent some aspect of the object itself, the canvas, the
page, or the document. If the data that the tag refers to changes, the tag
automatically updates itself. Some variables, such as Page Number, are
useful for putting on a shared layer and then sharing that layer with
every canvas.
If you are using one of the date variables, you can customize the format
of the date using Cocoa’s date formatting tokens. For example, to get
a date such as “2013 - 10 - 05 08:37”, you could type this:
<%date %Y - %m - %d %H:%M %>
Canvas Name
the name of the canvas the object inhabits.
Layer Name
the name of the layer.
Document Name
the name of the document the object inhabits.
Current Date
just what it says; this option inserts the current date. This
particularly handy when you want to “stamp” a document you’re
printing with today’s date.
Document Creation Date
the date that the document was originally created, according to
OS X’s filesystem.
Document Modification Date
the date that the document was last saved, according to OS X’s
filesystem.
185
Creator
the name of the user who created the file, according to OS X’s
filesystem.
Modifier
the name of the user who last saved the file, according to OS X’s
filesystem.
Page Number
the number of the page that the object inhabits, based on settings in
the Canvas Size inspector and the Page Setup panel.
Total Pages
the number of pages in the whole document. Use this with the Page
Number tag to get results like “Page 2 of 5”.
Canvas Number
if you have multiple canvases in your project, you can reference them
by number.
X Position
the object’s horizontal distance from the origin, just like in the
Geometry inspector.
Y Position
the object’s vertical distance from the origin, just like in the
Geometry inspector.
Width
the object’s horizontal size, just like in the Geometry inspector.
Height
the object’s vertical size, just like in the Geometry inspector.
186
Line Length
This tag is somewhat unique. If the shape containing the tag is a line
label, it shows the line’s length. It’s not useful if the shape object is
not attached to a line.
Find
Commands for searching within your OmniGraffle document:
Find (Command-F)
This summons OmniGraffle’s Find panel. You can search for a
specific string of text, or you can use a regular expression to match a
whole class of strings. When searching for a specific string, select
Ignore Case to match letters regardless of whether they are
uppercase or lowercase; select Whole Word to avoid matching
portions of a word. If you use groups in a regular expression, you
might want to select (or replace) the whole expression, or just one of
the groups; use the pop-up menu to indicate which.
Find Next (Command-G)
Choose this to find the next occurrence of the text you last entered
in the Find panel, as if you had just clicked its Next button.
Find Previous (Shift-Command-D)
Choose this to find the previous occurrence of the string you last
entered in the Find panel, as if you had just clicked its Previous
button.
Enter Selection (Command-E)
Select some text in an object, then choose this command to put the
selected text into the Find panel, replacing whatever was there
before. Then you can use the Find Next and Find Previous
commands to search for other occurrences of the text.
187
Scroll to Selection (Command-J)
Move the view so that the selected objects are visible.
Note
For the purposes of Previous and Next, OmniGraffle considers
objects in left-to-right, top-to-bottom order.
Spelling and Grammar
Commands for checking the spelling and grammar within your
document:
Show Spelling and Grammar (Command-:)
Opens the Spelling and Grammar dialog. Since the colon (:) is on the
upper part of semicolon (;) key, you will also need to use the Shift
key to option this dialog (Shift-Command-;).
Check Document Now (Command-;)
Checks the spelling in your current document and stops at the first
misspelled word it finds.
Check Spelling While Typing
This option is enabled by default, but can be turned off by selecting
this option in the menu.
Check Grammar With Spelling
This option also checks your grammar as it checks spelling. This
option comes in particularly handy when you’re entering a lot of
text.
Note
For the purposes of Previous and Next, OmniGraffle considers
objects in left-to-right, top-to-bottom order.
188
Edit in LinkBack App
If you have pasted LinkBack content from another app, select the object
and use this command to open the content in the original app.
Start Dictation (fn-fn)
Press the fn key twice to start dictation.
Special Characters (Option-Command-T)
Summon the standard OS X Character Palette.
The View Menu
Start Presentation (Pro) (Option-Command-P)
Enter presentation mode with the frontmost document.
Zoom
These menu options let you zoom in and out on the canvas, and are
helpful for when you need fine-grained control over where objects are
placed:
Zoom In (Command->)
Move up to the next closest zoom level, making the canvas appear
larger.
Zoom Out (Command-<)
Move down to the next farthest zoom level, making the canvas
appear smaller.
Zoom to Actual Size (Option-Command–0)
Move to 100 percent zoom, so that the canvas appears as large as it
actually is according to the canvas units.
189
Zoom to Selection (Option-Command-J)
Zoom to a level and position that fills the view with the currently
selected objects.
Previous Zoom
Return to the previous zoom level you had before the current one.
Fit in Window
Zoom to a level and position that keep every object on the canvas
visible as you work.
Extras
There are several things on the canvas (other than the objects
themselves) that you might want to see; choose something from this
list to show or hide it.
Actions
Any object with an action assigned to it in the Action inspector gets an
action tag near its upper-right corner.
Grid Lines (Command-\)
This is the grid as defined in the Grid inspector. Note that you can snap
to the grid whether it’s visible or not.
Guide Lines
These are the manual guides that you set up for aligning objects on the
canvas.
Magnets
Choose this to see all objects’ magnets, all the time.
190
Notes
Any object with a note in the Note inspector gets a note tag near its
upper-right corner.
Origin
This is the crosshair that represents the canvas origin.
Page Breaks
These are the lines that represent borders between pages.
Rulers (Command-R)
The rulers help you size objects on the canvas, and include an inspector
bar for common object editing.
Show/Hide Sidebar (Option-Command–1)
Toggle the visibility of the left sidebar which contains Canvases and
Contents.
Show Contents
Use these options to toggle between:
List View (Option-Command–2)
This option provides you with a detailed list of every single item in
your diagram, from boxes to lines to text labels and images—
everything in your project is listed here.
Outline Editor (Option-Command–3)
The Outline Editor makes it easy for you to quickly enter—and edit
—objects in a project. This provides you with a hierarchical view of
the objects in your project so you can quickly assess their
relationships.
191
Selection Matrix (Option-Command–4)
This option groups similarly-styled objects—blocks, labels, lines,
images, you name it!—together so you can quickly select objects
based on their style.
Show/Hide Inspectors (Command-I)
Toggles the Inspectors sidebar to the right of the Canvas.
Show Inspector
Menu options for quick access to the Inspectors and the Stencils
Library:
Object (Command-1)
opens the Object inspector
Type (Command-2)
opens the Type inspector
Properties (Command–3)
opens the Properties inspector
Canvas (Command-4)
opens the Canvas inspector
Document (Command-5)
opens the Document inspector
Stencils (Command-6)
opens the Stencils Library
192
Display Canvas
These options make it easy for you to switch between the different
canvases in your project:
Next Canvas (Command-])
Switch to the canvas after the one you are currently editing.
Previous Canvas (Command-[)
Switch to the canvas before the one you are currently editing.
Customize Toolbar
Conjure up a sheet of controls that you can drag to your toolbar, as in
other Mac apps.
Show/Hide Toolbar
Set the visibility of the document window’s toolbar.
Enter/Exit Full Screen (Control-Command-F)
Enter full screen mode.
The Format Menu
Show Fonts (Command-T)
Opens the standard Font panel.
Show Colors (Shift-Command-C)
Opens the standard Color panel.
Font
Use this submenu to set a font and style to the selected text.
Bold (Command-B)
Make the selected text bold.
193
Italic (Command-I)
Make the selected text italic.
Underline (Command-U)
Underline the selected text.
Outline
Places an outline around the selected text.
Bigger (Command-+)
Make the selected text bigger.
Smaller (Command-–)
Make the selected text smaller.
Kern
Change the spacing between characters; options include:
• Use Default
• Use None
• Tighten
• Loosen
Ligature
Change the spacing between lines; options include:
• Use Default
• Use None
• Use All
194
Baseline
Alter the text’s baseline; options include:
• Use Default
• Superscript
• Subscript
• Raise
• Lower
Text
These options give you control over the selected text’s properties,
including:
•
Align Left (Control-Command-{)
•
Center (Control-Command-|)
•
Justify
•
Align Right (Control-Command-})
•
Align Top (Option-Command-{)
•
Center Vertically (Option-Command-|)
•
Align Bottom (Option-Command-{)
•
Center Horizontally & Vertically
•
Allow Hyphenation
Most of the functionality here is also available in the Type inspector
(Command–2).
195
Copy Object Style (Control-Command-C)
Put the styles of the selected object on the clipboard, where they can be
pasted onto other objects.
Paste Object Style (Control-Command-V)
If there are object styles on the clipboard, apply them to the selected
objects.
Choose Diagram Style
Opens the diagram style chooser for applying a consistent style to all
objects on the canvas.
Reapply Diagram Style
Applies the current diagram style again, to catch any differently-styled
objects that might have shown up since the last time it was applied.
Restyle Selected Objects
Reapplies the current diagram style to just the selected objects.
The Arrange Menu
Bring to Front (Shift-Command-F)
Bring Forward (Option-Command-F)
Objects on the same layer have an order to them: newly created objects
appear in front of objects that already existed. Choose Bring to Front to
move the selected objects in front of all other objects on the layer. Hold
Option to change this command to Bring Forward, which moves the
selected objects forward one step in the ordering.
Send to Back (Shift-Command-B)
Send Backward (Option-Command-B)
Similar to Bring to Front, except it moves the selected objects behind
all other objects on the layer. Hold Option to change this command to
196
Send Backward, which moves the selected objects backward one step
in the ordering.
Lock (Command-L)
Lock the selected objects. A locked object can’t be moved or edited.
When you try to select a locked object, it shows X marks instead of
selection handles. Basically, the only thing you can do with a locked
object is unlock it; the exception is that you can change an object’s label
and hierarchical position in the outline view. Locking is useful for
making sure you don’t accidentally change something you have set up
just right.
Unlock (Option-Command-L)
Unlock the selected objects so that they can be moved or edited.
Group (Shift-Command-G)
Use this command with at least two objects selected to turn them into a
group, making them behave like a single object.
Ungroup (Shift-Command-U)
Use this command with a group selected to separate it back into its
component objects.
Make Table (Pro) (Shift-Command-T)
Use this command with one object selected to turn the object into a
1 × 1 table, to which you can then add rows and columns.
Group as Subgraph (Pro)
Turn the selected objects into a self-contained subgraph that you can
subsequently collapse to a single object.
197
Collapse Subgraph (Pro)
Change the selected subgraph into a single object, retaining all of the
connection lines coming in or out of it.
Expand Subgraph (Pro)
Return a collapsed subgraph to its fully expanded majesty.
Guides
OmniGraffle offers Smart Guides and manual guides. Smart guides are
little blue lines that appear as you move, resize, or rotate objects, to
help you keep things aligned and spaced evenly.
Manual guides are canvas-spanning magenta lines that you place
yourself; you can make as many as you like, use them to align objects,
and show or hide them from the View menu.
Enable/Disable Smart Alignment Guides
These are the Smart Guides that appear to help you line up objects’
edges or centers. They also help you match objects’ rotation when
you Command-drag an object’s selection handles.
Enable/Disable Smart Distance Guides
These are the Smart Guides that help you space out objects evenly.
Lock/Unlock Guides
As long as the manual guides are locked, you won’t be able to move
them.
New Horizontal/Vertical Guide
This puts a guide across the canvas; if the guides are not locked you
can use the Selection tool to drag it into position wherever you like.
As you drag an object near a guide, its edges or center snap into
198
place along the guide. You can also drag new guides out from the
vertical and horizontal rulers.
Clear Manual Guides
Remove all of the manual guides from the canvas. If you just want to
temporarily hide them, you can do so from the View menu.
Align
These commands replicate the functionality of buttons in the
Alignment object inspector (Command–1), lining up objects’ edges and
centers, or spacing objects out evenly. Options include:
•
Align Left Edges
•
Align Right Edges
•
Align Top Edges
•
Align Bottom Edges
•
Align Vertical Centers
•
Align Horizontal Centers
•
Make Centered Row
•
Make Centered Column
Grid
Snap to Grid and Align Objects to Grid work just like they do on the
Grid inspector; Size Objects to Grid resizes objects to make their edges
follow the nearest grid lines. Options include:
•
Snap to Grid (Option-Command-\)
•
Align Objects to Grid (Option-Command-[)
199
Diagram Layout
These commands lay out objects, either all objects on the canvas or the
selected objects, according to the settings in the Diagram Layout
inspector. Options include:
•
Lay Out Entire Canvas
•
Lay Out Selection
Size
If you have objects of different sizes on the canvas, but would like them
to be the same size, first select the object that has the dimensions you'd
like the others to emulate, choose Arrange ▸ Size, and then choose one
of the resizing options:
•
Make Same Width
•
Make Same Height
•
Make Same Size
•
Make Natural Size
•
Size to Fit Image
Make Natural Size makes an object’s height and width equal. For
objects with an image placed in the Image inspector, Size to Fit Image
makes the object just big enough to show the whole image at its
original size.
The Window Menu
Minimize (Command-M)
Shrink the frontmost window into the Dock.
200
Zoom
Size the window to fit its contents, or return to the previous window
size.
New Window on Document
You can look at the same document in several different windows; Zoom
and scroll each window however you like.
Workspaces (Pro)
Use Workspaces to set default states for the Inspectors. For example,
you could create a new Workspace that opens the Canvas inspector with
only the Background Image inspector open.
Edit Workspaces
Open the Workspaces window, where you can save your favorite
arrangements of inspectors. Each workspace you save appears at the
bottom of this submenu and has a function key assigned to it.
Default Workspace (F2)
This workspace returns the inspectors back to their original state.
For example, in the Objects inspector, all of the object inspectors are
open.
Note
Since most of the function keys (for example, F1, F2, F3, and so
on) are already assigned by the system to function with your Mac
hardware, you will need to press the fn key and then press the
applicable function key. For example, for the Default Workspace,
you will need to press fn-F2.
Bring All to Front
Put all of OmniGraffle’s windows in front of all other app windows.
201
The Help Menu
OmniGraffle Help
This summons the onscreen help you’re reading right now. Howdy!
Thanks for being the kind of person who reads the documentation.
Getting Started
This opens OmniGraffle 6’s Welcome document. This document—
created in OmniGraffle 6!—highlights the new features of OmniGraffle
6.
Keyboard Shortcuts
See a document that lists all of the keyboard shortcuts available in
OmniGraffle 6, so that you can eschew that mouse thingy.
What’s New in 6
This command opens the Help file, What's New in OmniGraffle, which
explains all of the new features in OmniGraffle 6 along with the lifeaffirming benefits of upgrading to OmniGraffle Pro 6.
Release Notes
This pops open a window that includes lots of information from our
engineering team about the things they’ve fixed, updated, or have
added to OmniGraffle. This document changes whenever we issue an
update of OmniGraffle, so be sure to read this after updating to the
latest and greatest build to see what’s changed.
Send Feedback
Choose this to start an email message to the OmniGraffle support folks.
This is the best way to get in touch with us; your version number and
license information are automatically entered in the subject field, which
helps us help you help yourself. Or something.
202
Getting Help
When you’re in need of help—whether you’re trying to figure out how
layers work, or if you’re having some other issue with OmniGraffle—it’s
good to know that the Support Humans at The Omni Group are always
available to lend you a hand.
The OmniGraffle Website
The OmniGraffle website is always a good place to find the latest
information about OmniGraffle.
Forums
The Omni Group maintains online forums for all of our products, and
you’re invited! Come share your questions and ideas with other users and
Omni staff.
Email Support
If you’re stuck, if you have a good idea for the next version of OmniGraffle,
or if you just want to let us know how we’re doing, go ahead and send us
an email. Choose Help ▸ Send Feedback from the menu bar to conjure up
a message addressed to us, or just send us an email with your thoughts.
We take support pretty seriously, so you can expect a prompt response
actually typed by human hands.
Release Notes
For really meticulously detailed information about what has changed in
each minor version of OmniGraffle, check out Help ▸ Release Notes from
the menu bar.
203
204
Importable DOT
Commands
OmniGraffle can import documents using a subset of the Graphviz DOT
file format.
Command
Entity Types
URL (not on graphs)
edge/line, node/shape
arrowhead
edge/line
arrowtail
edge/line
color
edge/line, node/shape
dir
edge/line
fillcolor
node/shape
fixedsize
node/shape
fontcolor
edge/line, node/shape
fontname
edge/line, node/shape
fontsize
edge/line, node/shape
headlabel
edge/line
label
edge/line, node/shape
labelfontcolor
edge/line
labelfontname
edge/line
labelfontsize
edge/line
orientation
node/shape
rank
node/shape
Command
Entity Types
rankdir
graph/page
shape
node/shape
style
edge/line, node/shape
taillabel
edge/line
width
node/shape
All arrowhead types are supported, but a few do not correspond exactly to
OmniGraffle arrow types. The inv, invdot, invodot, and invempty arrow
types are replaced with the closest available OmniGraffle line ending.
206