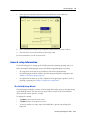
1
CHAPTER 10 The Field-IQ Plugin In this chapter: Introduction Installing the Field-IQ hardware Field-IQ master switch box functions Field-IQ 12-section switch box (optional) Setting up the Field-IQ system for Planting Setting up the Field-IQ system for Air Seeding Setting up the Field-IQ system for Spraying Setting up the Field-IQ system for Spreading Setting up the Field-IQ system for Anhydrous Using the Diagnostics tab 10 This chapter describes how to calibrate, configure, and operate the Field-IQ™ crop input control system with the FmX integrated display. FmX Integrated Display User Guide 223 10 The Field-IQ Plugin Introduction When the Field-IQ plugin is installed, the FmX integrated display can control planters, sprayers, air seeders, liquid strip-till tool-bars, and spinner spreaders. It can perform automatic section control using Tru Count air clutches, boom valves, LiquiBlock, and various section control devices while also controlling rates using a prescription with Rawson drives, servo valves, PWM valves, and various flow control devices. This chapter explains how to configure and use the Field-IQ plugin. Different functions of the plugin can be configured and controlled by Field-IQ as follows: Application Main functions Planter • • • • Seed Section Control of up to 48 individual rows (Field-IQ section control module(s) needed) using Tru Count air clutches. Seed Rate Control using up to 4 Rawson drives to change seed population (Field-IQ Rawson Control Module(s) needed). Liquid Fertilizer Control of up to 48 individual liquid nozzles (Field-IQ section control module(s) needed) using Tru Count LiquiBlock valves. Variety tracking. Sprayer • • Liquid Rate Control, using either a PWM or Servo control valve. Liquid Section Control of up to 48 individual spray nozzles (Field-IQ Section Control Module(s) needed) using existing boom shutoff valves or Tru Count LiquiBlock valves. Strip-till (liquid) • Liquid Section Control of up to 48 sections or individual sections (Field-IQ Section Control Module(s) needed) using Tru Count LiquiBlock valves. Liquid Rate Control using up to 2 Rawson drives connected to fixed displacement pumps, such as CDS-John Blue piston pumps, to change liquid rate (Field-IQ Rawson Control Module(s) needed). Liquid Rate Control using either a PWM or Servo control valve and flow meter. • • Spreading • • Air seeder • • • • Spreading Rate Control using a Rawson Drive (Field-IQ Rawson Control Module(s) needed). Spreading Rate Control using either a PWM or Servo control valve and application rate sensor. Section Control of up to 96 rows of blockage sensors. Section Control of up to 6 materials simultaneously with manual rate or prescription. Control existing PWM, linear actuators, or servo systems. Auxiliary sensors can read fan speed, bin level, air pressure, and implement switches. Definitions Term Definition Material A product that is controlled by a PWM valve, Servo valve, or Rawson drive. You can use a planter (seed), liquid, granular seed and granular fertilizer, all of which have different setup parameters. Section A number of rows or spray nozzles that are controlled by existing shut-off valve, Tru Count air clutches, or Tru Count LiquiBlock valves. A section can have either a single row/nozzle or multiple rows/nozzles depending on how the system is set up. Row The individual row unit which seed comes from on the planter. This can be controlled individually as a single row section, or as a group with other rows in a multiple row section. 2 24 FmX Integrated Display User Guide The Field-IQ Plugin 10 Units of measure Type Unit Symbol Description Seed Metric US/Imperial kS/ha kS/a Thousands of seeds per hectare Thousands of seeds per acre Granular seed Metric US/Imperial kg/ha lbs/a Kilograms of seed per hectare Pounds of seed per acre Liquid application Metric US/Imperial L/ha Gal/a Liters per hectare Gallons per acre Granular fertilizer Metric US/Imperial kg/ha lbs/a Kilograms of fertilizer per hectare Pounds of fertilizer per acre Installing the Field-IQ hardware For information on installing the Field-IQ crop input control system on your implement, refer to: • Field-IQ Platform Installation Instructions • Tru Count Air Clutch Installation Instructions • Rawson Installation Instructions For the latest versions of these documents, go to www.trimble.com/agriculture. Note – When using Rawson drives and when using more than one material, you must have a separate Section Control Module (SCM) for materials using Rawson drives. FmX Integrated Display User Guide 225 10 The Field-IQ Plugin Field-IQ master switch box functions 5a 5b 5c c d e Vf g Feature Function c Increment/decrement switch Increases the applied amount by a set amount (the amount is set in the Setup screen, Rate tab). d Rate switch Choose to use preset Rate 1, preset Rate 2, or Manual rate. e LED indicator Red: Unit is powered but not communicating with the FmX integrated display. Green: Unit is powered and communicating with the FmX integrated display. Yellow: Unit is initializing communications with the FmX integrated display. f Automatic/Manual section switch Automatic mode: The FmX integrated display automatically opens and closes sections when entering areas of overlap, non-apply zones, or crossing boundaries. Manual mode: The sections are controlled by the user using the Field-IQ system. B g Master switch • • • Tip – You can switch from Automatic to Manual mode while traveling. 5a: Jump start position. The same functions as in Master On are active, plus the system is overridden to use a preset control speed (the speed is set in the Setup screen, Override tab). 5b: On position. The sections and rate are ready to be commanded by the FmX integrated display. 5c: Off position. Sections are closed and rate is set to zero. Note – When you use Lock in Last Postion (see page 272 ), the valve is locked and the rate is controlled by an auxiliary master valve or section. B Tip – Use the jump start function if you lose a GPS signal or you want to start applying before your implement is up to speed. Note – All systems must have a Field-IQ master switch box. 2 26 FmX Integrated Display User Guide 10 The Field-IQ Plugin Field-IQ 12-section switch box (optional) Only one section switch box can be used on each system. Each section switch is automatically assigned to the corresponding section. The sections are read from left to right. For example, switch 1 assigns to the section furthest on the left when standing behind the implement. For more information, see the Hardware tab in Setup screen of the Field-IQ plugin. The section switches have different functions, depending upon the status of the master Automatic/Manual section control switch on the master switch box. When the Automatic/Manual section control switch is in the Automatic position: • If the section switch is in the on/up position the section(s) assigned to it are commanded automatically by the FmX integrated display. • If the section switch is in the off/down position the section(s) assigned to it are commanded to be off. When the Automatic/Manual section control switch is in the Manual position: • If the section switch is in the on/up position, the section(s) assigned to it are commanded to be on. This overrides the FmX integrated display and coverage logging is ignored. • If the section switch is in the off/down position, the section(s) assigned to it are commanded to be off. This overrides the FmX integrated display and coverage logging is ignored. The LED has the following status indicators: • Green – The unit is powered and is communicating with the FmX integrated display. • Yellow – The unit is initializing communications with the FmX integrated display. • Red – The unit is powered but not communicating with the FmX integrated display. Field-IQ Run screen The Field-IQ Run screen has three pages: • Page 1—shows current information about an event and allows you to manipulate the materials and sections. • Page 2—shows additional information on the current event. • Page 3—shows row details. Click the arrow key to move between the pages. FmX Integrated Display User Guide 227 10 The Field-IQ Plugin The following shows the Field-IQ run screen with the main plugin screen: c d e h i f g Feature Description c Materials list Up to 6 materials are listed. The current Target and Actual rates are shown for each material. Tap a material to show details of that material (see following page). d Field-IQ Plugin icon e Mapping Information tab Change the mapping information that appears on your screen. See Mapping information tab, page 48. f Row Status Indicator tab There are various shades of green, yellow, and red. These shades reflect how far off target the rows are applying. Green: Rows are applying on target. Red: Rows are applying off target. Black: Rows have been manually turned off. White: Rows have been turned off automatically by the system. g Field-IQ Status tab Shows the engage status of each row on the implement: Green: Engaged. Gray: Section closed due to overlap. Red: Not engaged or section manually turned off. Tap the blue arrows to toggle between the Row Status Indicator tab f and the Field-IQ Status tab. h Engage button Green: Auto guidance engaged. Gray: Auto guidance can be engaged. Red: Auto guidance cannot be engaged. 2 28 FmX Integrated Display User Guide 10 The Field-IQ Plugin i Feature Description Logging button Green: Logging enabled. Red: Logging. Tap a material (in this example, Corn) to view more details: Page 2 of the plugin tab Page 1 of the plugin tab c e d g i f l h j k m j k i Row Details tab n Please check the placement of the callouts in page 2. Wild guess on my part. o p Description c The name of the material you are viewing. d Tap to turn the material on or off. e Tap to turn auto-section control on or off. f Current information about the event. FmX Integrated Display User Guide 229 10 The Field-IQ Plugin Description g Target rate. Tap the button to select if Target 1 or Target 2 is shown, or to select Manual to turn the Targt rate off. h Tap the - button to decrease the Target rate by 1; tap the + button to increase the Target rate by 1. i Tap to go to page 1 or to page 2 of the plugin tab. j Tap to return to the main plugin tab. k Tap to go to the Row Details tab. l Current sensor status. m Depending on the material, the following buttons appear: Bin: Tap to go to the Virtual Bin / Tank Setup screen where you can adjust the bin setting. Seed Disc: Tap to fill the seed disk. Arm Pump: Tap to enable Field-IQ to control the pump. Gate Setup: Tap to go to the Gate Setup screen. Density: Tap to go to the Density screen where you can enter the density of the current product. n There ar various shades of green, yellow, and red. These shades reflect how far off target the rows ar applying. Green: Rows are applying on target. Red: Rows are applying off target. Black: Rows have been manually turned off. White: Rows have been turned off automatically by the system. o Tap the arrows to view more row numbers. p Tap to return to the previous plugin screen. Linking Materials The Field-IQ system can link primary and secondary materials, where the secondary material uses the output of the primary material. For example, LiquiBlock valves can be linked to use the output of Tru Count Air Clutch systems. When planting, seeding, or strip-tilling, you can link the following together: • Liquid • Granular seed • Granular fertilizer Anhydrous cannot be linked. When the system is in diagnostics mode, the secondary material is not functional. When the system is in diagnostics mode, you can only operate a linked material when you also open the sections of the primary material. 2 30 FmX Integrated Display User Guide 10 The Field-IQ Plugin 1. In the Section Control tab, in the Section Control field select Link to Material: 2. In the Linked Material field, select the primary material that you want to link to. 3. Select the Rate Control tab and then set that up as usual. For more information, see the sections below. General setup information Do the following prior to setting up the Field-IQ system for planting, spraying, and so on. Before starting the Field-IQ plugin setup on the FmX integrated display, ensure that: • all components of the system are installed on the vehicle and implement. • the Field-IQ plugin has been added to the FmX integrated display configuration. See Adding or removing a plugin, page 172. • the implement has been set up and configured for the appropriate operation, such as planting or spraying. See Chapter 7, Implement Configuration. The Field-IQ Setup Wizard The FmX integrated display contains a Field-IQ Setup Wizard that steps you through setting up the Field-IQ system. You must enter accurate values on each screen of the wizard to ensure that the system operates correctly. To navigate the wizard: • Tap Next to proceed to the next screen. • Tap Back to return to the previous screen. • To enter a number or a name, tap in the blank field to open the virtual keypad or keyboard. FmX Integrated Display User Guide 231 10 The Field-IQ Plugin Note – When you have completed the setup wizard once, the Next button is replaced with OK. You can then view each tab by tapping it on the screen. To access the Field-IQ setup wizard: 1. In the Configuration screen, select the Field-IQ plugin and then tap Setup. The Material Overview screen appears: The Material Overview screen displays the materials that are currently set up to be applied with the Field-IQ system. 2. 3. 2 32 Do the following: Tap… To… Add add and set up a new material Edit view or edit the details of an existing material Delete delete an existing material When you tap Add or Edit, the Field-IQ Setup Wizard appears. The wizard contains seven tabs. The information that appears on each tab depends on the operation you are setting up. Enter accurate information into each field of the wizard. FmX Integrated Display User Guide The Field-IQ Plugin 10 Setting up the Field-IQ system for Planting Make sure that you have set your implement to Planter, and that you have configured the implement, see Configuring the display, page 75. In the Material Overview screen, tap New to open the Field-IQ Setup Wizard. The Wizard contains the following seven tabs: For information on this tab… See… Material page 233 Layout page 234 Section Control page 236 Rate Control page 238 Row Monitoring page 241 Sensors page 242 Operation page 243 Material tab Enter information about the material you want to set up. Setting Material Type Description Select your Field-IQ application type: Note – If spraying chemicals, use the liquid fertilizer setting. • • • • • Row Crop Seed Liquid Granular Seed Granular Fertilizer Anhydrous Material Name Use the virtual keyboard to enter a name for the material. Material Details Tap Setup to open the Hybrid Setup screen. See Logging varieties, page 65. FmX Integrated Display User Guide 233 10 The Field-IQ Plugin Setting Description Application Rate Rates tab Adjust the following Rate settings: • Target Rate: This setting controls the volume that the implement supplies when the Rate switch is in position 1. • Target Rate 2: This setting controls the volume that the implement supplies when the Rate switch is in position 2. • Rate Increment: When the Rate switch is in the Rate 1 or Rate 2 position, the current application rate increases or decreases by this amount each time you press the Rate adjustment (increment/decrement) switch on your master switch box. • Manual Rate Increment: When the Rate switch is in the Manual position, the current application rate increases or decreases by this amount each time you press the Rate adjustment (increment/decrement) switch on your master switch box. • Minimum Rate: This setting is the minimum rate that will be applied. • Maximum Rate: This setting is the maximum rate that will be applied Units tab Adjust the following Unit settings: • Seeds Per Pound: Enter the number of seeds per pound of the current material. • Target Rate Units: Choose what units your target rate will apply. • Bushel Weight: Enter the bushel weight of the current material. Rate Alarms Tap Setup to set alarm thresholds and adjust the way seed statistics are calculated: • High Alarm: Triggers when the rate reaches the selected percentage above the target for longer than the delay setting. • Low Alarm: Triggers when the rate drops the below the target for longer than the delay setting for the selected percentage. • Singulation Low: Triggers when singulation reaches a percentage lower than 100% for longer than the delay setting. • Seeds When Off: Triggers when this percentage of seeds is detected while the sections are off for longer than the delay setting. • No Seeds When On: Triggers when this percentage of seeds is not detected for longer than the delay setting. • Blockage Sensitivity/Alarm: When less than this amount of material is sensed for the number of seconds given. • When no pulses are sensed for this amount of time the alarm triggers. • Multiples Threshold: If two seeds fall within this percentage of seed spacing it is considered a double. Lowering this number requires seeds to be closer together to be reported as a double. • Skips Threshold: If two seeds fall outside of this percentage of seed spacing it is considered a skip. Raising this number requires seeds to be further apart to be a skip. • Averaging Sample Size: This is the number of seeds used to calculate the average. Increasing this amount makes the response slower but more stable. • Misplaced Seeds Threshold: If a seed falls outside this percentage of seed spacing then it’s considered misplaced and reduces the spacing quality. Layout tab 2 34 FmX Integrated Display User Guide The Field-IQ Plugin 10 Enter information about the implement that will be used to apply the material. Setting Description Bin/Tank Setup Allows the system to track how much material is left in the bin/tank, and provides a warning when the bin/tank needs to be refilled. Adjust the settings for: • Status: On: The system will track the bin/tank level and provide warnings. Off: The system will not track the bin/tank level or provide warnings. • Capacity Units: Select Default Units or Bushels. Default units will vary according to the type of material that is being applied. • Bin Capacity: The amount the tank/bin holds when full. Note – Markings on tank/bin may not be accurate. • • • • • Current Volume: Current volume of the product in the tank. Partial Refill: The amount of material that will be added to the bin/tank during a partial refill. Warning Level: A warning will appear on your screen when your bin/tank reaches a set threshold. Refill Tank/Bin: Refills the tank/bin to capacity. Partial Refill Tank/Bin: Refills the tank/bin to the amount specified in the Partial Refill field. FmX Integrated Display User Guide 235 10 The Field-IQ Plugin Setting Description Row Offset Setup Row Offset Setup provides additional tuning by detailing where the material will be applied in relation to the vehicle. Increase coverage accuracy by selecting one or two offsets. Row offsets are measured from the Application Offset that is entered in the Measurements tab of the Implement Configuration wizard. See Implement Configuration, Measurements, page 165. • Number of row offsets: Use 1 row offset when coverage is applied at a single location. Use two row offsets when planting singulated seed with staggered implements. • Row Offset (1 row offset): Enter the distance between the Application Offset and the row. • Rear Row Offset (2 row offset): Enter the distance between the Application Offset and the rear row. • Front Row Offset (2 row offset): Enter the distance between the Application Offset and the front row. Section Control tab Adjust the section control settings. Setting Description Section Control On: Enable section control for the current material. Off: Disable section control for the current material. Rate as Section: When a rate controller turns on or off, the section turns on or off. Link to Material: See Linking Materials, page 230. 2 36 FmX Integrated Display User Guide The Field-IQ Plugin 10 Setting Description Section Control Module Setup Tap Setup to configure the section control module(s), their location on the implement, and the number of sections they will control. Assign the Field-IQ module to the correct location to ensure it controls the correct section. • Number of Modules: Enter the number of Field-IQ section control modules you will use. • Module: Select the module number that corresponds to each section. • Number of Sections: Assign the number of sections that each module will control. • Section Grouping: Assign the rows that are in each section. • Advanced Wire Assignment: Every section is controlled by a specific wire on each Field-IQ module. Use this setting to specify which module each section is wired to. Section Control Tap Setup to adjust settings for each section control module. • Section Control Type: Select the type of section control for each module. • Off When Stopped: When set to Yes the control valve will close when ground speed reaches 0 with the master switch position in On. When set to No the control valve will hold its last position when the master switch is shut off and ground speed reaches 0—if the vehicle is a clutch-operated planter, set this option to No so that you can continue planting when the vehicle is stopped. Otherwise, select Yes. • On Latency: By default, this is set to 0.0 seconds. Use this setting unless you are experiencing a long response time from your clutch or valve (this can happen on larger systems). In this case, increase the On Latency value to compensate the delay, and the system will turn on in advance. • Off Latency: By default, this is set to 0.0 seconds. Use this setting unless you are experiencing a long response time from your clutch or valve (this can happen on larger systems). In this case, increase the Off Latency value to compensate for the delay, and the sytem will turn off after the set number of seconds. • Start Overlap: Enter the distance of intentional swath overlap when entering a previously applied area. The higher the number, the greater the overlapped area. • End Overlap: Enter the distance of intentional swath overlap when exiting a previously applied area. The higher the number, the greater the overlapped area. • Coverage Switching Overlap: Enter the percentage of the section width for intentional swath overlap. The higher the number, the greater the overlapped area before the section is turned off. • Boundary Switching Overlap: Enter the percentage of the section width for intentional overlap of a boundary. The higher the number, the greater the overlapped area into the boundary area. FmX Integrated Display User Guide 237 10 The Field-IQ Plugin Rate Control tab Adjust the rate control settings. Setting Description Rate Control On: The system sets the target rate. Off: Section switching only Rate Control Module Location Tap Setup to configure the rate control module(s), their location on the implement, and the width they will control. Drive Setup When you tap Drive Setup, a screen appears with the following tabs: • Valve Setup • Feedback Setup • Advanced The tabs are explained in more detail on the following pages. 2 38 FmX Integrated Display User Guide 10 The Field-IQ Plugin Drive Setup Valve Setup tab Setting Description Valve Type Servo: 2-wire standard servo valve Fast Servo: 4-wire servo valve PWM: 2-wire PWM valve (commonly used to control hydraulic flow to the pump) Hardi % Bypass: Used on Hardi sprayers equipped with 3-way section valves that return flow to the tank when the boom section is off. Pump Servo: commonly used for anhydrous application. Linear Actuator: A valve that creates a linear motion (as opposed to a rotary motion). Electric over Hydraulic: A valve that uses electric current to power the solenoid. FmX Integrated Display User Guide 239 10 The Field-IQ Plugin Feedback Setup tab Setting Description Flow Meter Type Select the type of flow meter that is connected. Flowmeter Calibration Enter the number from the flow meter tag. Min Flow Enter the required minimum flow rate for the system. Use this setting to keep the control valve and flow meter above the minimum operating level. 2 40 FmX Integrated Display User Guide The Field-IQ Plugin 10 Row Monitoring tab Setting Description Row Monitoring Disabled: Row monitoring is turned off. Blockage: Select this option when using an air seeder or when applying granular material. Seed Count: Select this option for precision seeding. Setup Row Sensor Enable: Turn individual row sensors on or off. Row Sensor Wiring: Select which wire each row sensor is wired to. FmX Integrated Display User Guide 241 10 The Field-IQ Plugin Sensors tab Add or edit sensor settings. Setting Description Add Sensor Add a new sensor. Edit Sensor Edit or view the settings for an existing sensor. Remove Sensor Delete an existing sensor. When adding or editing a sensor, enter the following information: Setting Description Sensor Type Select from: • Air pressure/vacuum • Liquid pressure • NH3 pressure • Bin level • RPM • Gate Height Name Use the virtual keyboard to enter a name for the sensor. Sensor Setup Field-IQ module: Select the Field-IQ module that is controlling this sensor. Input location: Specify which wire is controlling the sensor. 2 42 FmX Integrated Display User Guide 10 The Field-IQ Plugin Operation tab Setting Jump Start Speed This setting controls the speed to be used when the Field-IQ master switchbox Master switch is put in the jump start position. This manual override option can be used to operate the system when the vehicle is stationary. Jump start is also used when GPS has become unavailable. Shutoff Speed This setting controls when to shut the system down if the implement drops below the specified speed. Minimum Override Speed This setting maintains the application rate when the implement's actual speed drops below the value entered. It is used to ensure consistent material flow during slow speeds. When Outside Field Boundary Switch off: The system will not apply outside the boundary area. Operate: The system will apply outside the boundary area. Material Controlled By Enabled: The material is tied to the Master Switch Box and cannot be controlled individually. Disabled: The Material is not tied to the Master Switch box and is controlled by virtual buttons on the Run screen. Rate Snapping Enabled: Shows the applied rate the same as the target rate, if the applied rate is within 10% of the target rate. Disabled: Shows the actual applied value. Material Setup Complete screen When you have completed setting up a new material, the Material Setup Complete screen appears. You can select: • Add another material: You are returned to the start of the Field-IQ Setup Wizard. • Finish Setup: You are returned to the Material Overview screen. FmX Integrated Display User Guide 243 10 The Field-IQ Plugin Calibrating the modules Calibrate the modules to ensure that your system performs at the level you require. The Field-IQ Calibrate option only appears on the Configuration screen if you have at least one Field-IQ Rawson control module or Rate control module set up to control the rate. 1. From the Configuration screen, select the Field-IQ plugin and then tap Calibrate. 2. From the Field-IQ Calibration screen, select the operation under the Module that you would like to calibrate. The message Not calibrated appears at the end of the modules that need calibration. Note – If you have an implement lift switch, calibrate it first. See Calibrating the implement lift switch, page 248. 3. Select the first module to calibrate and then tap OK. The Planter Calibration screen appears. 2 44 FmX Integrated Display User Guide The Field-IQ Plugin 10 4. In the Seeds Per Disk field, enter a value. This is the number of seeds each seed disk holds: 5. Enter a value in the Gear Ratio field or tap Calculate. If you tap Calculate, the following screen appears: 6. Use the Gear Ratio Calculator to determine the planter drive gear ratio and then tap OK. The Calibration Constant field contains a calculated value that the system determines during calibration. This field allows adjustment for inconsistencies in the seed meters. To start out, Trimble recommends that you leave the value at 1.000. After the calibration test, the system may adjust this number. FmX Integrated Display User Guide 245 10 The Field-IQ Plugin 7. C Place a clean empty container under the rows that contain seeds to capture the seeds dispensed during the calibration. CAUTION – Moving parts during this operation. Ensure the implement is safe to operate. 8. 9. Tap Test: a. The system asks if you would like to prime the system. Tap Yes. To to ensure that the seed disk is full, the system turns the seed disks one revolution. b. Turn on the master switch to prime the system and then when prompted onscreen, turn off the master switch. c. In the Number of Seed Meter Revolutions, enter a value and then tap Start. The higher the number of revolutions the more accurate the calibration. Trimble recommends 5 to 10 revolutions. d. Follow the on-screen prompts of operating the master switch. After the system turns the specified number of revolutions, enter the number of seeds dispensed per row and then tap Continue. e. The next screen shows the minimum and maximum speeds for the target rate specified. Tap OK and then either press Test to repeat the calibration or tap OK to continue. Select the Limits tab to show an overview of the limits that are set: 10. Tap OK. 11. Repeat Step 1 through Step 10 for other Rawson Control Modules that need calibration. 2 46 FmX Integrated Display User Guide The Field-IQ Plugin 10 Hydraulic test The purpose of this test is to exercise the hydraulics to establish whether there is sufficient oil flow to run the system. 1. C From the Field-IQ Calibration screen tap Hydraulic Test. CAUTION – Moving parts during this operation. Ensure the implement is safe to operate. 2. Tap Next. 3. Enter the initial motor RPM. The default setting is 300. Trimble also recommends that you test the motor RPM at 100 to ensure that the drive runs smoothly at slow speeds. 4. Tap Start. 5. The next screen provides the status of each motor: No Error : The test was successful. Motor Stalled: The motors did not have sufficient oil flow; ensure the correct orifice size is installed for each motor. For more information, refer to the Rawson System Installation Instructions. Disconnected: The Rawson Control Module cannot communicate with the motor. 6. Tap Stop to return to the Field-IQ Calibration screen. FmX Integrated Display User Guide 247 10 The Field-IQ Plugin Calibrating the implement lift switch 1. From the Field-IQ Calibration screen, select the Implement Lift option. 2. Raise the implement and then tap Next. 3. Lower the implement and then tap Next. 4. Tap OK to return to the Field-IQ Calibration screen. Operating in the field 1. From the Home screen, tap . 2. From the Current Configurations screen, configure the display/vehicle/ implement settings and then tap OK. 3. From the Field Selection screen, select the required client/farm/field/event settings and then tap OK. Setting up the Field-IQ system for Air Seeding Make sure that you have set your implement to Seeder, and that you have configured the implement, see Configuring the display, page 75. In the Material Overview screen, tap New to open the Field-IQ Setup Wizard. The Wizard contains the following seven tabs: 2 48 For information on this tab… See… Material page 233 Layout page 234 Section Control page 236 Rate Control page 238 Row Monitoring page 241 Sensors page 242 Operation page 243 FmX Integrated Display User Guide The Field-IQ Plugin 10 Material tab Enter information about the material you want to set up. Setting Material Type Description Select your Field-IQ application type: Note – If spraying chemicals, use the liquid fertilizer setting. • • • • • Row Crop Seed Liquid Granular Seed Granular Fertilizer Anhydrous Material Name Use the virtual keyboard to enter a name for the material. Material Details Tap Setup to open the Hybrid Setup screen. See Logging varieties, page 65. FmX Integrated Display User Guide 249 10 The Field-IQ Plugin Setting Description Application Rate Rates tab Adjust the following Rate settings: • Target Rate: This setting controls the volume that the implement supplies when the Rate switch is in position 1. • Target Rate 2: This setting controls the volume that the implement supplies when the Rate switch is in position 2. • Rate Increment: When the Rate switch is in the Rate 1 or Rate 2 position, the current application rate increases or decreases by this amount each time you press the Rate adjustment (increment/decrement) switch on your master switch box. • Manual Rate Increment: When the Rate switch is in the Manual position, the current application rate increases or decreases by this amount each time you press the Rate adjustment (increment/decrement) switch on your master switch box. • Minimum Rate: This setting is the minimum rate that will be applied. • Maximum Rate: This setting is the maximum rate that will be applied Units tab Adjust the following Unit settings: • Seeds Per Pound: Enter the number of seeds per pound of the current material. • Target Rate Units: Choose what units your target rate will apply. • Bushel Weight: Enter the bushel weight of the current material. Rate Alarms 2 50 Tap Setup to set alarm thresholds and adjust the way seed statistics are calculated: • Blockage Sensitivity/Alarm: When less than this amount of material is sensed for the number of seconds given. FmX Integrated Display User Guide The Field-IQ Plugin 10 Layout tab Enter information about the implement that will be used to apply the material. Setting Description Bin/Tank Setup Allows the system to track how much material is left in the bin/tank, and provides a warning when the bin/tank needs to be refilled. Adjust the settings for: • Status: On: The system will track the bin/tank level and provide warnings. Off: The system will not track the bin/tank level or provide warnings. • Capacity Units: Select Default Units or Bushels. Default units will vary according to the type of material that is being applied. • Bin Capacity: The amount the tank/bin holds when full. Note – Markings on tank/bin may not be accurate. • • • • • Current Volume: Current volume of the product in the tank. Partial Refill: The amount of material that will be added to the bin/tank during a partial refill. Warning Level: A warning will appear on your screen when your bin/tank reaches a set threshold. Refill Tank/Bin: Refills the tank/bin to capacity. Partial Refill Tank/Bin: Refills the tank/bin to the amount specified in the Partial Refill field. FmX Integrated Display User Guide 251 10 The Field-IQ Plugin Setting Description Row Offset Setup Row Offset Setup provides additional tuning by detailing where the material will be applied in relation to the vehicle. Increase coverage accuracy by selecting one or two offsets. Row offsets are measured from the Application Offset that is entered in the Measurements tab of the Implement Configuration wizard. See Implement Configuration, Measurements, page 165. • Number of row offsets: Use 1 row offset when coverage is applied at a single location. Use two row offsets when planting singulated seed with staggered implements. • Row Offset (1 row offset): Enter the distance between the Application Offset and the row. • Rear Row Offset (2 row offset): Enter the distance between the Application Offset and the rear row. • Front Row Offset (2 row offset): Enter the distance between the Application Offset and the front row. Section Control tab Adjust the section control settings. Setting Description Section Control On: Enable section control for the current material. Off: Disable section control for the current material. Rate as Section: When a rate controller turns on or off, the section turns on or off. Link to Material: See Linking Materials, page 230. 2 52 FmX Integrated Display User Guide The Field-IQ Plugin 10 Setting Description Section Control Module Setup Tap Setup to configure the section control module(s), their location on the implement, and the number of sections they will control. Assign the Field-IQ module to the correct location to ensure it controls the correct section. • Number of Modules: Enter the number of Field-IQ section control modules you will use. • Module: Select the module number that corresponds to each section. • Number of Sections: Assign the number of sections that each module will control. • Section Grouping: Assign the rows that are in each section. • Advanced Wire Assignment: Every section is controlled by a specific wire on each Field-IQ module. Use this setting to specify which module each section is wired to. Section Control Tap Setup to adjust settings for each section control module. • Section Control Type: Select the type of section control for each module. • Off When Stopped: When set to Yes the control valve will close when ground speed reaches 0 with the master switch position in On. When set to No the control valve will hold its last position when the master switch is shut off and ground speed reaches 0—if the vehicle is a clutch-operated planter, set this option to No so that you can continue planting when the vehicle is stopped. Otherwise, select Yes. • On Latency: By default, this is set to 0.0 seconds. Use this setting unless you are experiencing a long response time from your clutch or valve (this can happen on larger systems). In this case, increase the On Latency value to compensate the delay, and the system will turn on in advance. • Off Latency: By default, this is set to 0.0 seconds. Use this setting unless you are experiencing a long response time from your clutch or valve (this can happen on larger systems). In this case, increase the Off Latency value to compensate for the delay, and the sytem will turn off after the set number of seconds. • Start Overlap: Enter the distance of intentional swath overlap when entering a previously applied area. The higher the number, the greater the overlapped area. • End Overlap: Enter the distance of intentional swath overlap when exiting a previously applied area. The higher the number, the greater the overlapped area. • Coverage Switching Overlap: Enter the percentage of the section width for intentional swath overlap. The higher the number, the greater the overlapped area before the section is turned off. • Boundary Switching Overlap: Enter the percentage of the section width for intentional overlap of a boundary. The higher the number, the greater the overlapped area into the boundary area. FmX Integrated Display User Guide 253 10 The Field-IQ Plugin Rate Control tab Adjust the rate control settings. Setting Description Rate Control On: The system sets the target rate. Off: Section switching only Rate Control Module Location Tap Setup to configure the rate control module(s), their location on the implement, and the width they will control. Drive Setup When you tap Drive Setup, a screen appears with the following tabs: • Valve Setup • Feedback Setup The tabs are explained in more detail on the following pages. 2 54 FmX Integrated Display User Guide The Field-IQ Plugin 10 Drive Setup Valve Setup tab Setting Description Valve Type Servo: 2-wire standard servo valve Fast Servo: 4-wire servo valve PWM: 2-wire PWM valve (commonly used to control hydraulic flow to the pump) Hardi % Bypass: Used on Hardi sprayers equipped with 3-way section valves that return flow to the tank when the boom section is off. Pump Servo: Servo valve (commonly used to control hydraulic flow to the pump). Linear Actuator: A valve that creates a linear motion (as opposed to a rotary motion). Electric over Hydraulic: A valve that uses electric current to control the hydraulic valve output. FmX Integrated Display User Guide 255 10 The Field-IQ Plugin Feedback Setup tab Setting Description Flow Meter Type Select the type of flow meter that is connected. Flowmeter Calibration Enter the number from the flow meter tag. Min Flow Enter the required minimum flow rate for the system. Use this setting to keep the control valve and flow meter above the minimum operating level. 2 56 FmX Integrated Display User Guide The Field-IQ Plugin 10 Row Monitoring tab Setting Description Row Monitoring Disabled: Turn row monitoring off. Blockage: Select this option for air seeding or when applying granular material. Seed Count: Select this option for precision seeding when planting. Setup Row Sensor Enable: Turn individual row sensors on or off. Row Sensor Wiring: Select which wire each row sensor is wired to. FmX Integrated Display User Guide 257 10 The Field-IQ Plugin Sensors tab Add or edit sensor settings. Setting Description Add Sensor Add a new sensor. Edit Sensor Edit or view the settings for an existing sensor. Remove Sensor Delete an existing sensor. When adding or editing a sensor, enter the following information: Setting Description Sensor Type Select from: • Air pressure/vacuum • Liquid pressure • NH3 pressure • Bin level • RPM • Gate Height Name Use the virtual keyboard to enter a name for the sensor. Sensor Setup Field-IQ module: Select the Field-IQ module that is controlling this sensor. Input location: Specify which wire is controlling the sensor. 2 58 FmX Integrated Display User Guide 10 The Field-IQ Plugin Operation tab Setting Jump Start Speed This setting controls the speed to be used when the Field-IQ master switchbox Master switch is put in the jump start position. This manual override option can be used to operate the system when the vehicle is stationary. Jump start is also used when GPS has become unavailable. Shutoff Speed This setting controls when to shut the system down if the implement drops below the specified speed. Minimum Override Speed This setting maintains the application rate when the implement's actual speed drops below the value entered. It is used to ensure consistent material flow during slow speeds. When Outside Field Boundary Switch off: The system will not apply outside the boundary area. Operate: The system will apply outside the boundary area. Material Controlled By Enabled: The material is tied to the Master Switch Box and cannot be controlled individually. Disabled: The Material is not tied to the Master Switch box and is controlled by virtual buttons on the Run screen. Rate Snapping Enabled: Shows the applied rate the same as the target rate, if the applied rate is within 10% of the target rate. Disabled: Shows the actual applied value. Material Setup Complete screen When you have completed setting up a new material, the Material Setup Complete screen appears. You can select: • Add another material . You are returned to the start of the Field-IQ Setup Wizard. • Finish Setup. You are returned to the Material Overview screen. FmX Integrated Display User Guide 259 10 The Field-IQ Plugin Calibrating the modules Calibrate the modules to ensure that your system performs at the level you require. The Field-IQ Calibrate option only appears on the Configuration screen if you have at least one Field-IQ Rawson control module or Rate control module set up to control the rate. 1. From the Configuration screen, select the Field-IQ plugin and then tap Calibrate. 2. From the Field-IQ Calibration screen, select the operation under the Module that you would like to calibrate. The message Not calibrated appears at the end of the modules that need calibration. Note – Calibration screens will vary slightly if you are using a linear actuator. Note – Before priming the system, the Automatic / Manual Switch on the master switch box must be in the manual position. Note – If you have an impelement lift switch, calibrate it first. See Calibrating the implement lift switch, page 248. 3. Select Drive Calibration and then tap OK. The Drive Calibration screen appears. The Drive Calibration screen has four tabs: Tab Description Drive Limits Enter the minimum and maximum flow values. Auto-Tuning C CAUTION – Moving parts during this operation. Ensure the implement is safe to operate. Follow the on-screen instructions to auto tune the system. Note – Do not perform the auto-tuning function if you have loaded a preset configuration file. Use the predefined configuration settings appropriate for your vehicle. Drive Settings Turn the master switch on and vary the rates. Adjust values if needed. Info Shows the results and drive limits of your calibration. 2 60 FmX Integrated Display User Guide 10 The Field-IQ Plugin C 4. Select Flow Calibration and then tap OK. The Flow Calibration screen appears. 5. In the Rate and Section Control Flow Calibration screen, enter the Flow Meter type, the Flow Meter Calibration, and the Minimum Flow: 6. Tap Run Calibration and then follow the on-screen instructions: CAUTION – Moving parts during this operation. Ensure the implement is safe to operate. FmX Integrated Display User Guide 261 10 The Field-IQ Plugin Calibrating the implement lift switch 1. From the Field-IQ Calibration screen, select the Implement Lift option. 2. Raise the implement and then tap Next. 3. Lower the implement and then tap Next. 4. Tap OK to return to the Field-IQ Calibration screen. Operating in the field 1. From the Home screen, tap . 2. From the Current Configurations screen, configure the display/vehicle/ implement settings and then tap OK. 3. From the Field Selection screen, select the required client/farm/field/event settings and then tap OK. Setting up the Field-IQ system for Spraying Make sure that you have set your implement to Sprayer, and that you have configured the implement, see Configuring the display, page 75. In the Material Overview screen, tap New to open the Field-IQ Setup Wizard. The Wizard contains the following seven tabs: 2 62 For information on this tab… See… Material page 233 Layout page 234 Section Control page 236 Rate Control page 238 Row Monitoring page 241 Sensors page 242 Operation page 243 FmX Integrated Display User Guide The Field-IQ Plugin 10 Material tab Enter information about the material you want to set up. Setting Material Type Description Select your Field-IQ application type: Note – If spraying chemicals, use the liquid fertilizer setting. • • • • • Row Crop Seed Liquid Granular Seed Granular Fertilizer Anhydrous Material Name Use the virtual keyboard to enter a name for the material. Application Rate Rates tab Adjust the following Rate settings: • Target Rate: This setting controls the volume that the implement supplies when the Rate switch is in position 1. • Target Rate 2: This setting controls the volume that the implement supplies when the Rate switch is in position 2. • Rate Increment: When the Rate switch is in the Rate 1 or Rate 2 position, the current application rate increases or decreases by this amount each time you press the Rate adjustment (increment/decrement) switch on your master switch box. • Manual Rate Increment: When the Rate switch is in the Manual position, the current application rate increases or decreases by this amount each time you press the Rate adjustment (increment/decrement) switch on your master switch box. • Minimum Rate: This setting is the minimum rate that will be applied. • Maximum Rate: This setting is the maximum rate that will be applied Units tab Adjust the following Unit settings: • Seeds Per Pound: Enter the number of seeds per pound of the current material. • Target Rate Units: Choose what units your target rate will apply. • Bushel Weight: Enter the bushel weight of the current material. FmX Integrated Display User Guide 263 10 The Field-IQ Plugin Layout tab Enter information about the implement that will be used to apply the material. Setting Description Bin/Tank Setup Allows the system to track how much material is left in the bin/tank, and provides a warning when the bin/tank needs to be refilled. Adjust the settings for: • Status: On: The system will track the bin/tank level and provide warnings. Off: The system will not track the bin/tank level or provide warnings. • Capacity Units: Select Default Units or Bushels. Default units will vary according to the type of material that is being applied. • Bin Capacity: The amount the tank/bin holds when full. Note – Markings on tank/bin may not be accurate. • • • • • 2 64 Current Volume: Current volume of the product in the tank. Partial Refill: The amount of material that will be added to the bin/tank during a partial refill. Warning Level: A warning will appear on your screen when your bin/tank reaches a set threshold. Refill Tank/Bin: Refills the tank/bin to capacity. Partial Refill Tank/Bin: Refills the tank/bin to the amount specified in the Partial Refill field. FmX Integrated Display User Guide The Field-IQ Plugin 10 Setting Description Row Offset Setup Row Offset Setup provides additional tuning by detailing where the material will be applied in relation to the vehicle. Increase coverage accuracy by selecting one or two offsets. Row offsets are measured from the Application Offset that is entered in the Measurements tab of the Implement Configuration wizard. See Implement Configuration, Measurements, page 165. • Number of row offsets: Use 1 row offset when coverage is applied at a single location. Use two row offsets when planting singulated seed with staggered implements. • Row Offset (1 row offset): Enter the distance between the Application Offset and the row. • Rear Row Offset (2 row offset): Enter the distance between the Application Offset and the rear row. • Front Row Offset (2 row offset): Enter the distance between the Application Offset and the front row. Section Control tab Adjust the section control settings. Setting Description Section Control On: Enable section control for the current material. Off: Disable section control for the current material. Rate as Section: When a rate controller turns on or off, the section turns on or off. Link to Material: See Linking Materials, page 230. FmX Integrated Display User Guide 265 10 The Field-IQ Plugin Setting Description Section Control Module Setup Tap Setup to configure the section control module(s), their location on the implement, and the number of sections they will control. Assign the Field-IQ module to the correct location to ensure it controls the correct section. • Number of Modules: Enter the number of Field-IQ section control modules you will use. • Module: Select the module number that corresponds to each section. • Number of Sections: Assign the number of sections that each module will control. • Section Grouping: Assign the rows that are in each section. • Advanced Wire Assignment: Every section is controlled by a specific wire on each Field-IQ module. Use this setting to specify which module each section is wired to. Section Control Tap Setup to adjust settings for each section control module. • Section Control Type: Select the type of section control for each module. • Off When Stopped: When set to Yes the control valve will close when ground speed reaches 0 with the master switch position in On. When set to No the control valve will hold its last position when the master switch is shut off and ground speed reaches 0—if the vehicle is a clutch-operated planter, set this option to No so that you can continue planting when the vehicle is stopped. Otherwise, select Yes. • On Latency: By default, this is set to 0.0 seconds. Use this setting unless you are experiencing a long response time from your clutch or valve (this can happen on larger systems). In this case, increase the On Latency value to compensate the delay, and the system will turn on in advance. • Off Latency: By default, this is set to 0.0 seconds. Use this setting unless you are experiencing a long response time from your clutch or valve (this can happen on larger systems). In this case, increase the Off Latency value to compensate for the delay, and the sytem will turn off after the set number of seconds. • Start Overlap: Enter the distance of intentional swath overlap when entering a previously applied area. The higher the number, the greater the overlapped area. • End Overlap: Enter the distance of intentional swath overlap when exiting a previously applied area. The higher the number, the greater the overlapped area. • Coverage Switching Overlap: Enter the percentage of the section width for intentional swath overlap. The higher the number, the greater the overlapped area before the section is turned off. • Boundary Switching Overlap: Enter the percentage of the section width for intentional overlap of a boundary. The higher the number, the greater the overlapped area into the boundary area. Fence Nozzles Many setups require a left fence nozzle to be configured, even when there is no left fence nozzle. For more information, refer to your sprayer installation instructions. Right Nozzle Wiring In you are using an EZ-Boom replacement harness, select the EZ-Boom setting. Otherwise, select the Field-IQ setting. 2 66 FmX Integrated Display User Guide The Field-IQ Plugin 10 Rate Control tab Adjust the rate control settings. Setting Description Rate Control On: The system sets the target rate. Off: Section switching only Rate Control Module Location Tap Setup to configure the rate control module(s), their location on the implement, and the width they will control. Drive Setup When you tap Drive Setup, a screen appears with the following tabs: • Valve Setup • Feedback Setup The tabs are explained in more detail on the following pages. Number of Nozzles Enter the number of spray nozzles on the sprayer. FmX Integrated Display User Guide 267 10 The Field-IQ Plugin Drive Setup Valve Setup tab Setting Description Valve Type Servo: 2-wire standard servo valve Fast Servo: 4-wire servo valve PWM: 2-wire PWM valve (commonly used to control hydraulic flow to the pump) Hardi % Bypass: Used on Hardi sprayers equipped with 3-way section valves that return flow to the tank when the boom section is off. Pump Servo: Servo valve (commonly used to control hydraulic flow to the pump). Linear Actuator: A valve that creates a linear motion (as opposed to a rotary motion). Electric over Hydraulic: A valve that uses electric current to control the hydraulic valve output. 2 68 FmX Integrated Display User Guide The Field-IQ Plugin 10 Feedback Setup tab Setting Description Flow Meter Type Select the type of flow meter that is connected. Flowmeter Calibration Enter the number from the flow meter tag. Min Flow Enter the required minimum flow rate for the system. Use this setting to keep the control valve and flow meter above the minimum operating level. FmX Integrated Display User Guide 269 10 The Field-IQ Plugin Sensors tab Add or edit sensor settings. Setting Description Add Sensor Add a new sensor. Edit Sensor Edit or view the settings for an existing sensor. Remove Sensor Delete an existing sensor. When adding or editing a sensor, enter the following information: Setting Description Sensor Type Select from: • Air pressure/vacuum • Liquid pressure • NH3 pressure • Bin level • RPM • Gate Height Name Use the virtual keyboard to enter a name for the sensor. Sensor Setup Field-IQ module: Select the Field-IQ module that is controlling this sensor. Input location: Specify which wire is controlling the sensor. 2 70 FmX Integrated Display User Guide 10 The Field-IQ Plugin Operation tab Setting Jump Start Speed This setting controls the speed to be used when the Field-IQ master switchbox Master switch is put in the jump start position. This manual override option can be used to operate the system when the vehicle is stationary. Jump start is also used when GPS has become unavailable. Shutoff Speed This setting controls when to shut the system down if the implement drops below the specified speed. Minimum Override Speed This setting maintains the application rate when the implement's actual speed drops below the value entered. It is used to ensure consistent material flow during slow speeds. When Outside Field Boundary Switch off: The system will not apply outside the boundary area. Operate: The system will apply outside the boundary area. Material Controlled By Enabled: The material is tied to the Master Switch Box and cannot be controlled individually. Disabled: The Material is not tied to the Master Switch box and is controlled by virtual buttons on the Run screen. Rate Snapping Enabled: Shows the applied rate the same as the target rate, if the applied rate is within 10% of the target rate. Disabled: Shows the actual applied value. Material Setup Complete screen When you have completed setting up a new material, the Material Setup Complete screen appears. You can select: • Add another material . You are returned to the start of the Field-IQ Setup Wizard. • Finish Setup. You are returned to the Material Overview screen. FmX Integrated Display User Guide 271 10 The Field-IQ Plugin Calibrating the spraying modules The Field-IQ Calibrate option only appears on the Configuration screen if you have at least one Field-IQ Rate and Section control module installed. 1. From the Configuration screen, select the Field-IQ plugin and then tap Calibrate. 2. From the Field-IQ Calibration screen, select the Rate and Section Control Module to be calibrated. The message Not calibrated appears at the end of the modules that need calibration. 3. Tap Valve Calibration. The following screen appears: 4. Select the Valve tab, and then select the appropriate value for each field: For this field ... Select one of the following options ... Valve Type Pump Servo: The Pump Servo setting controls an electric motor which actuates a hydraulic valve. As the valve actuates, it adjusts the hydraulic flow to the pump. This valve adjusts the application rate indirectly. PWM: The PWM pump setting controls an electric solenoid valve which adjusts the hydraulic flow to the pump. This valve adjusts the application rate indirectly. Fast Servo: 4 wire electric motor turns a ball or butterfly valve to increase or decrease flow, for example, a DICKEY-john servo, Mid-Tech servo, or Raven Fast Valve Servo: 2 wire electric motor turns a ball or butterfly valve to increase or decrease flow, for example, a Raven standard servo. Hardi % bypass scenario: Most commonly used on Hardi sprayers equipped with 3 way section valves that return flow to tank when the boom section is off. Plumbing Inline: Valve is in the solution line going to the boom. The valve opens to increase application rate. Bypass: Valve is in the Return to Tank line. The valve closes to increase the application rate. Valve Behavior on Sections Closed 2 72 Close: When all sections are off, the control valve returns to the closed position. Lock in Last Position: When all sections are off, the control valve remains in the last position. This setting allows the system to return to the target rate faster. FmX Integrated Display User Guide 10 The Field-IQ Plugin For this field ... Select one of the following options ... Auxiliary Valve If you have an Auxiliary Valve installed, select one of the following: Master: Valve closes when the system is turned off. Dump: Pump Disarming Switch 5. Valve opens to dump flow to return line when the system is turned off. Enable: Select this option if you have a Pump Disarming Switch installed. Select the Control tab. Enter a value for each of the following: – Allowable Error – Gain – Minimum Response Note – For information about the appropriate values for your sprayer, see the Getting Started Guide 6. C Tap OK to return to the main calibration screen, and then tap Flow Calibration. The following screen appears: CAUTION – Moving parts during this operation. Ensure the implement is safe to operate. 7. 8. Tap OK. Enter a value for each of the following: – Flow Meter Type: select an option from the drop-down list. – Flowmeter Calibration: enter the number from the flow meter tag – MinFlow: enter the required minimum flow rate for the system. Use this setting to keep the control valve and flow meter above the minimum operating level. Tap Run Calibration, and then follow the on-screen instructions. FmX Integrated Display User Guide 273 10 The Field-IQ Plugin 9. If used, select the connector that the pressure sensor is connected to, and then enable the sensor. 10. Tap Run Calibration, and then follow the on-screen instructions. 11. Tap OK to return to the Configuration screen. 12. Select the Field-IQ plugin tab and then tap Diagnostics. The following screen appears: 13. To enable the sections, tap the numbered section tabs above each of the section icons. 14. Enter a value for each of the following: 2 74 – Target Rate: The required rate for the rate switch – Speed FmX Integrated Display User Guide The Field-IQ Plugin 10 15. Operate the sprayer, and check value shown for the Applied Rate. If necessary, adjust the Aggressiveness setting to achieve the desired rate. FmX Integrated Display User Guide 275 10 The Field-IQ Plugin Calibrating the implement lift switch 1. From the Field-IQ Calibration screen, select the Implement Lift option. 2. Raise the implement and then tap Next. 3. Lower the implement and then tap Next. 4. Tap OK to return to the Field-IQ Calibration screen. Operating in the field 1. From the Home screen, tap . 2. From the Current Configurations screen, configure the display/vehicle/ implement settings and then tap OK. 3. From the Field Selection screen, select the required client/farm/field/event settings and then tap OK. Setting up the Field-IQ system for Spreading Make sure that you have set your implement to Spreading, and that you have configured the implement, see Configuring the display, page 75. In the Material Overview screen, tap New to open the Field-IQ Setup Wizard. The Wizard contains the following seven tabs: For information on this tab… See… Material page 233 Layout page 234 Section Control page 236 Rate Control page 238 Row Monitoring page 241 Sensors page 242 Operation page 243 Material tab 2 76 FmX Integrated Display User Guide The Field-IQ Plugin 10 Enter information about the material you want to set up. Setting Material Type Description Select your Field-IQ application type: Note – If spraying chemicals, use the liquid fertilizer setting. • • • • • Row Crop Seed Liquid Granular Seed Granular Fertilizer Anhydrous Material Name Use the virtual keyboard to enter a name for the material. Application Rate Rates tab Adjust the following Rate settings: • Target Rate: This setting controls the volume that the implement supplies when the Rate switch is in position 1. • Target Rate 2: This setting controls the volume that the implement supplies when the Rate switch is in position 2. • Rate Increment: When the Rate switch is in the Rate 1 or Rate 2 position, the current application rate increases or decreases by this amount each time you press the Rate adjustment (increment/decrement) switch on your master switch box. • Manual Rate Increment: When the Rate switch is in the Manual position, the current application rate increases or decreases by this amount each time you press the Rate adjustment (increment/decrement) switch on your master switch box. • Minimum Rate: This setting is the minimum rate that will be applied. • Maximum Rate: This setting is the maximum rate that will be applied Units tab Adjust the following Unit settings: • Seeds Per Pound: Enter the number of seeds per pound of the current material. • Target Rate Units: Choose what units your target rate will apply. • Bushel Weight: Enter the bushel weight of the current material. FmX Integrated Display User Guide 277 10 The Field-IQ Plugin Layout tab Enter information about the implement that will be used to apply the material. Setting Description Bin/Tank Setup Allows the system to track how much material is left in the bin/tank, and provides a warning when the bin/tank needs to be refilled. Adjust the settings for: • Status: On: The system will track the bin/tank level and provide warnings. Off: The system will not track the bin/tank level or provide warnings. • Capacity Units: Select Default Units or Bushels. Default units will vary according to the type of material that is being applied. • Bin Capacity: The amount the tank/bin holds when full. Note – Markings on tank/bin may not be accurate. • • • • • 2 78 Current Volume: Current volume of the product in the tank. Partial Refill: The amount of material that will be added to the bin/tank during a partial refill. Warning Level: A warning will appear on your screen when your bin/tank reaches a set threshold. Refill Tank/Bin: Refills the tank/bin to capacity. Partial Refill Tank/Bin: Refills the tank/bin to the amount specified in the Partial Refill field. FmX Integrated Display User Guide The Field-IQ Plugin 10 Setting Description Row Offset Setup Row Offset Setup provides additional tuning by detailing where the material will be applied in relation to the vehicle. Increase coverage accuracy by selecting one or two offsets. Row offsets are measured from the Application Offset that is entered in the Measurements tab of the Implement Configuration wizard. See Implement Configuration, Measurements, page 165. • Number of row offsets: Use 1 row offset when coverage is applied at a single location. Use two row offsets when planting singulated seed with staggered implements. • Row Offset (1 row offset): Enter the distance between the Application Offset and the row. • Rear Row Offset (2 row offset): Enter the distance between the Application Offset and the rear row. • Front Row Offset (2 row offset): Enter the distance between the Application Offset and the front row. Gate Setup Enter the following measurements: • Gate Height • Gate Width • Drag chain length per turn of the drag shaft Section Control tab Adjust the section control settings. Setting Description Section Control On: Enable section control for the current material. Off: Disable section control for the current material. Rate as Section: When a rate controller turns on or off, the section turns on or off. Link to Material: See Linking Materials, page 230. FmX Integrated Display User Guide 279 10 The Field-IQ Plugin Setting Description Section Control Module Setup Tap Setup to configure the section control module(s), their location on the implement, and the number of sections they will control. Assign the Field-IQ module to the correct location to ensure it controls the correct section. • Number of Modules: Enter the number of Field-IQ section control modules you will use. • Module: Select the module number that corresponds to each section. • Number of Sections: Assign the number of sections that each module will control. • Section Grouping: Assign the rows that are in each section. • Advanced Wire Assignment: Every section is controlled by a specific wire on each Field-IQ module. Use this setting to specify which module each section is wired to. Section Control Tap Setup to adjust settings for each section control module. • Section Control Type: Select the type of section control for each module. • Off When Stopped: When set to Yes the control valve will close when ground speed reaches 0 with the master switch position in On. When set to No the control valve will hold its last position when the master switch is shut off and ground speed reaches 0—if the vehicle is a clutch-operated planter, set this option to No so that you can continue planting when the vehicle is stopped. Otherwise, select Yes. • On Latency: By default, this is set to 0.0 seconds. Use this setting unless you are experiencing a long response time from your clutch or valve (this can happen on larger systems). In this case, increase the On Latency value to compensate the delay, and the system will turn on in advance. • Off Latency: By default, this is set to 0.0 seconds. Use this setting unless you are experiencing a long response time from your clutch or valve (this can happen on larger systems). In this case, increase the Off Latency value to compensate for the delay, and the sytem will turn off after the set number of seconds. • Start Overlap: Enter the distance of intentional swath overlap when entering a previously applied area. The higher the number, the greater the overlapped area. • End Overlap: Enter the distance of intentional swath overlap when exiting a previously applied area. The higher the number, the greater the overlapped area. • Coverage Switching Overlap: Enter the percentage of the section width for intentional swath overlap. The higher the number, the greater the overlapped area before the section is turned off. • Boundary Switching Overlap: Enter the percentage of the section width for intentional overlap of a boundary. The higher the number, the greater the overlapped area into the boundary area. 2 80 FmX Integrated Display User Guide 10 The Field-IQ Plugin Drive Setup Valve Setup tab Setting Description Valve Type Servo: 2-wire standard servo valve Fast Servo: 4-wire servo valve PWM: 2-wire PWM valve (commonly used to control hydraulic flow to the pump) Hardi % Bypass: Used on Hardi sprayers equipped with 3-way section valves that return flow to the tank when the boom section is off. Pump Servo: commonly used for anhydrous application. Linear Actuator: A valve that creates a linear motion (as opposed to a rotary motion). Electric over Hydraulic: A valve that uses electric current to power the solenoid. FmX Integrated Display User Guide 281 10 The Field-IQ Plugin Feedback Setup tab Setting Description Flow Meter Type Select the type of flow meter that is connected. Flowmeter Calibration Enter the number from the flow meter tag. Min Flow Enter the required minimum flow rate for the system. Use this setting to keep the control valve and flow meter above the minimum operating level. 2 82 FmX Integrated Display User Guide The Field-IQ Plugin 10 Row Monitoring tab Setting Description Row Monitoring Disabled: Row monitoring is turned off. Blockage: Select this option when using an air seeder or when applying granular material. Seed Count: Select this option for precision seeding. Setup Row Sensor Enable: Turn individual row sensors on or off. Row Sensor Wiring: Select which wire each row sensor is wired to. FmX Integrated Display User Guide 283 10 The Field-IQ Plugin Sensors tab Add or edit sensor settings. Setting Description Add Sensor Add a new sensor. Edit Sensor Edit or view the settings for an existing sensor. Remove Sensor Delete an existing sensor. When adding or editing a sensor, enter the following information: Setting Description Sensor Type Select from: • Air pressure/vacuum • Liquid pressure • NH3 pressure • Bin level • RPM • Gate Height Name Use the virtual keyboard to enter a name for the sensor. Sensor Setup Field-IQ module: Select the Field-IQ module that is controlling this sensor. Input location: Specify which wire is controlling the sensor. 2 84 FmX Integrated Display User Guide 10 The Field-IQ Plugin Operation tab Setting Jump Start Speed This setting controls the speed to be used when the Field-IQ master switchbox Master switch is put in the jump start position. This manual override option can be used to operate the system when the vehicle is stationary. Jump start is also used when GPS has become unavailable. Shutoff Speed This setting controls when to shut the system down if the implement drops below the specified speed. Minimum Override Speed This setting maintains the application rate when the implement's actual speed drops below the value entered. It is used to ensure consistent material flow during slow speeds. When Outside Field Boundary Switch off: The system will not apply outside the boundary area. Operate: The system will apply outside the boundary area. Material Controlled By Enabled: The material is tied to the Master Switch Box and cannot be controlled individually. Disabled: The Material is not tied to the Master Switch box and is controlled by virtual buttons on the Run screen. Rate Snapping Enabled: Shows the applied rate the same as the target rate, if the applied rate is within 10% of the target rate. Disabled: Shows the actual applied value. Material Setup Complete screen When you have completed setting up a new material, the Material Setup Complete screen appears. You can select: • Add another material . You are returned to the start of the Field-IQ Setup Wizard. • Finish Setup. You are returned to the Material Overview screen. FmX Integrated Display User Guide 285 10 The Field-IQ Plugin Calibrating the modules The Field-IQ Calibration option only appears on the Configuration screen if you have at least one Field-IQ Rate and Section control module installed. 2 86 1. From the Configuration screen, select the Field-IQ plugin and then tap Calibrate. 2. From the Field-IQ Calibration screen, select the Rate and Section Control Module to be calibrated. (The message Not calibrated appears at the end of the modules that need calibration.) The following screen appears: 3. Tap Valve Calibration. The following screen appears: FmX Integrated Display User Guide 10 The Field-IQ Plugin 4. Select the Valve tab and then select the appropriate value for each field: For this field ... Select one of the following options ... Valve Type Pump Servo: The Pump Servo setting controls an electric motor which actuates a hydraulic valve. As the valve actuates, it adjusts the hydraulic flow to the pump. This valve adjusts the application rate indirectly. PWM: The PWM pump setting controls an electric solenoid valve which adjusts the hydraulic flow to the pump. This valve adjusts the application rate indirectly. Fast Servo: A 4 wire electric motor turns a ball or butterfly valve to increase or decrease flow, for example a DICKEY-john servo, Mid-Tech servo, or Raven Fast Valve. Servo: A 2 wire electric motor turns a ball or butterfly valve to increase or decrease flow, for example a Raven standard servo. Hardi % bypass scenario: Most commonly used on Hardi sprayers equipped with 3 way section valves that return flow to tank when the boom section is off. Plumbing Inline: Valve is in the solution line going to the boom. The valve opens to increase application rate. Bypass: Valve is in the Return to Tank line. The valve closes to increase the application rate. Valve Behavior on Sections Closed Auxiliary Valve Close: When all sections are off, the control valve returns to the closed position. Lock in Last Position: When all sections are off, the control valve remains in the last position. This setting allows the system to return to the target rate faster. If you have an Auxiliary Valve installed, select one of the following: Master: Valve closes when the system is turned off. Dump: Pump Disarming Switch 5. Valve opens to dump flow to return line when the system is turned off. Enable: Select this option if you have a Pump Disarming Switch installed. Select the Control tab: FmX Integrated Display User Guide 287 10 The Field-IQ Plugin 6. Enter the following values: – Allowable Error – Gain – Minimum Response. Note – For information about the appropriate values for your sprayer, see the Support Note Field-IQ Crop Input Control System: For Sprayers and Spreaders. 7. Tap OK to return to the main calibration screen, and then tap Flow Calibration. The following screen appears: 8. Enter the following values: – Gate Height Setting Note – If you entered a gate height measurement during setup, you must also enter a measurement here. – 2 88 Shaft Encoder Constant FmX Integrated Display User Guide The Field-IQ Plugin 9. 10 To calculate the calibration constant, tap Calculate. The following dialog appears. 10. Enter the Gate Width and Drag Chain Distance Per Rev. The system calculates the Calibration Constant. 11. Tap OK to return to the Granular Calibration Screen. 12. Place a clean empty container under the spreader to capture the material dispensed during the calibration, and then tap Calibrate. C CAUTION – Moving parts during this operation. Ensure the implement is safe to operate. 13. The Granular Calibration screen appears: FmX Integrated Display User Guide 289 10 The Field-IQ Plugin 14. Enter the following values: – Amount of Material to be Dispensed: This is the amount dispensed during the calibration. – Target Rate – Target Speed 15. To begin the calibration, tap Start, and then follow the on-screen instructions. 16. Select the Limits tab: 17. Enter the following values: 2 90 – Minimum RPM – Maximum RPM FmX Integrated Display User Guide The Field-IQ Plugin 10 18. Select the Info tab to view the system’s operational limits (based on the RPM limits, target rates, and application width): 19. Tap OK. Calibrating the implement lift switch 1. From the Field-IQ Calibration screen, select the Implement Lift option. 2. Raise the implement and then tap Next. 3. Lower the implement and then tap Next. 4. Tap OK to return to the Field-IQ Calibration screen. Operating in the field 1. From the Home screen, tap . 2. From the Current Configurations screen, configure the display/vehicle/ implement settings and then tap OK. 3. From the Field Selection screen, select the required client/farm/field/event settings and then tap OK. FmX Integrated Display User Guide 291 10 The Field-IQ Plugin Setting up the Field-IQ system for Anhydrous C WARNING – When you tap the liquid flow calibration Start button, the machine will become operational. Take all necessary precautions to ensure user safety. Failure to do so may result in serious injury or death. Make sure that you have set your implement to Tillage or Spraying, and that you have configured the implement, see Configuring the display, page 75. In the Material Overview screen, tap New to open the Field-IQ Setup Wizard. The Wizard contains the following seven tabs: 2 92 For information on this tab… See… Material page 233 Layout page 234 Section Control page 236 Rate Control page 238 Row Monitoring page 241 Sensors page 242 Operation page 243 FmX Integrated Display User Guide The Field-IQ Plugin 10 Material tab Enter information about the material you want to set up. Setting Material Type Description Select your Field-IQ application type: Note – If spraying chemicals, use the liquid fertilizer setting. • • • • • Row Crop Seed Liquid Granular Seed Granular Fertilizer Anhydrous Material Name Use the virtual keyboard to enter a name for the material. Anydrous Units Select the unit of measure: • Lbs actual N: Pounds (kg) of nitrogen per acre (hectare) • Lbs NH3: Pounds (kg) of anhydrous per acre (hectare) FmX Integrated Display User Guide 293 10 The Field-IQ Plugin Setting Description Application Rate Rates tab Adjust the following Rate settings: • Target Rate: This setting controls the volume that the implement supplies when the Rate switch is in position 1. • Target Rate 2: This setting controls the volume that the implement supplies when the Rate switch is in position 2. • Rate Increment: When the Rate switch is in the Rate 1 or Rate 2 position, the current application rate increases or decreases by this amount each time you press the Rate adjustment (increment/decrement) switch on your master switch box. • Manual Rate Increment: When the Rate switch is in the Manual position, the current application rate increases or decreases by this amount each time you press the Rate adjustment (increment/decrement) switch on your master switch box. • Minimum Rate: This setting is the minimum rate that will be applied. • Maximum Rate: This setting is the maximum rate that will be applied Units tab Adjust the following Unit settings: • Seeds Per Pound: Enter the number of seeds per pound of the current material. • Target Rate Units: Choose what units your target rate will apply. • Bushel Weight: Enter the bushel weight of the current material. 2 94 FmX Integrated Display User Guide The Field-IQ Plugin 10 Layout tab Enter information about the implement that will be used to apply the material. Setting Description Bin/Tank Setup Allows the system to track how much material is left in the bin/tank, and provides a warning when the bin/tank needs to be refilled. Adjust the settings for: • Status: On: The system will track the bin/tank level and provide warnings. Off: The system will not track the bin/tank level or provide warnings. • Capacity Units: Select Default Units or Bushels. Default units will vary according to the type of material that is being applied. • Bin Capacity: The amount the tank/bin holds when full. Note – Markings on tank/bin may not be accurate. • • • • • Current Volume: Current volume of the product in the tank. Partial Refill: The amount of material that will be added to the bin/tank during a partial refill. Warning Level: A warning will appear on your screen when your bin/tank reaches a set threshold. Refill Tank/Bin: Refills the tank/bin to capacity. Partial Refill Tank/Bin: Refills the tank/bin to the amount specified in the Partial Refill field. FmX Integrated Display User Guide 295 10 The Field-IQ Plugin Setting Description Row Offset Setup Row Offset Setup provides additional tuning by detailing where the material will be applied in relation to the vehicle. Increase coverage accuracy by selecting one or two offsets. Row offsets are measured from the Application Offset that is entered in the Measurements tab of the Implement Configuration wizard. See Implement Configuration, Measurements, page 165. • Number of row offsets: Use 1 row offset when coverage is applied at a single location. Use two row offsets when planting singulated seed with staggered implements. • Row Offset (1 row offset): Enter the distance between the Application Offset and the row. • Rear Row Offset (2 row offset): Enter the distance between the Application Offset and the rear row. • Front Row Offset (2 row offset): Enter the distance between the Application Offset and the front row. Section Control tab Adjust the section control settings. Setting Description Section Control On: Enable section control for the current material. Off: Disable section control for the current material. Rate as Section: When a rate controller turns on or off, the section turns on or off. Link to Material: See Linking Materials, page 230. 2 96 FmX Integrated Display User Guide The Field-IQ Plugin 10 Setting Description Section Control Module Setup Tap Setup to configure the section control module(s), their location on the implement, and the number of sections they will control. Assign the Field-IQ module to the correct location to ensure it controls the correct section. • Number of Modules: Enter the number of Field-IQ section control modules you will use. • Module: Select the module number that corresponds to each section. • Number of Sections: Assign the number of sections that each module will control. • Section Grouping: Assign the rows that are in each section. • Advanced Wire Assignment: Every section is controlled by a specific wire on each Field-IQ module. Use this setting to specify which module each section is wired to. Section Control Tap Setup to adjust settings for each section control module. • Section Control Type: Select the type of section control for each module. • Off When Stopped: When set to Yes the control valve will close when ground speed reaches 0 with the master switch position in On. When set to No the control valve will hold its last position when the master switch is shut off and ground speed reaches 0—if the vehicle is a clutch-operated planter, set this option to No so that you can continue planting when the vehicle is stopped. Otherwise, select Yes. • On Latency: By default, this is set to 0.0 seconds. Use this setting unless you are experiencing a long response time from your clutch or valve (this can happen on larger systems). In this case, increase the On Latency value to compensate the delay, and the system will turn on in advance. • Off Latency: By default, this is set to 0.0 seconds. Use this setting unless you are experiencing a long response time from your clutch or valve (this can happen on larger systems). In this case, increase the Off Latency value to compensate for the delay, and the sytem will turn off after the set number of seconds. • Start Overlap: Enter the distance of intentional swath overlap when entering a previously applied area. The higher the number, the greater the overlapped area. • End Overlap: Enter the distance of intentional swath overlap when exiting a previously applied area. The higher the number, the greater the overlapped area. • Coverage Switching Overlap: Enter the percentage of the section width for intentional swath overlap. The higher the number, the greater the overlapped area before the section is turned off. • Boundary Switching Overlap: Enter the percentage of the section width for intentional overlap of a boundary. The higher the number, the greater the overlapped area into the boundary area. FmX Integrated Display User Guide 297 10 The Field-IQ Plugin Rate Control tab Adjust the rate control settings. Setting Description Rate Control On: The system sets the target rate. Off: Section switching only Rate Control Module Location Tap Setup to configure the rate control module(s), their location on the implement, and the width they will control. Drive Setup When you tap Drive Setup, a screen appears with the following tabs: • Valve Setup • Feedback Setup • Advanced The tabs are explained in more detail on the following pages. Number of Nozzles Enter the number of spray nozzles on the sprayer. 2 98 FmX Integrated Display User Guide 10 The Field-IQ Plugin Drive Setup Valve Setup tab Setting Description Valve Type Servo: 2-wire standard servo valve Fast Servo: 4-wire servo valve PWM: 2-wire PWM valve (commonly used to control hydraulic flow to the pump) FmX Integrated Display User Guide 299 10 The Field-IQ Plugin Feedback Setup tab Setting Description Flow Meter Type Select the type of flow meter that is connected. Flowmeter Calibration Enter the number from the flow meter tag. Min Flow Enter the required minimum flow rate for the system. Use this setting to keep the control valve and flow meter above the minimum operating level. 3 00 FmX Integrated Display User Guide The Field-IQ Plugin 10 Sensors tab Add or edit sensor settings. Setting Description Add Sensor Add a new sensor. Edit Sensor Edit or view the settings for an existing sensor. Remove Sensor Delete an existing sensor. When adding or editing a sensor, enter the following information: Setting Description Sensor Type Select from: • Air pressure/vacuum • Liquid pressure • NH3 pressure • Bin level • RPM • Gate Height Name Use the virtual keyboard to enter a name for the sensor. Sensor Setup Field-IQ module: Select the Field-IQ module that is controlling this sensor. Input location: Specify which wire is controlling the sensor. FmX Integrated Display User Guide 301 10 The Field-IQ Plugin Operation tab Setting Jump Start Speed This setting controls the speed to be used when the Field-IQ master switchbox Master switch is put in the jump start position. This manual override option can be used to operate the system when the vehicle is stationary. Jump start is also used when GPS has become unavailable. Shutoff Speed This setting controls when to shut the system down if the implement drops below the specified speed. Minimum Override Speed This setting maintains the application rate when the implement's actual speed drops below the value entered. It is used to ensure consistent material flow during slow speeds. When Outside Field Boundary Switch off: The system will not apply outside the boundary area. Operate: The system will apply outside the boundary area. Material Controlled By Enabled: The material is tied to the Master Switch Box and cannot be controlled individually. Disabled: The Material is not tied to the Master Switch box and is controlled by virtual buttons on the Run screen. Rate Snapping Enabled: Shows the applied rate the same as the target rate, if the applied rate is within 10% of the target rate. Disabled: Shows the actual applied value. Material Setup Complete screen When you have completed setting up a new material, the Material Setup Complete screen appears. You can select: 3 02 • Add another material . You are returned to the start of the Field-IQ Setup Wizard. • Finish Setup. You are returned to the Material Overview screen. FmX Integrated Display User Guide 10 The Field-IQ Plugin Calibrating the modules Calibrate the modules to ensure that your system performs at the level you require. The Field-IQ Calibrate option only appears on the Configuration screen if you have at least one Field-IQ Rawson control module or Rate control module set up to control the rate. 1. From the Configuration screen, select the Field-IQ plugin and then tap Calibrate. 2. From the Field-IQ Calibration screen, select the operation under the Module that you would like to calibrate. The message Not calibrated appears at the end of the modules that need calibration. Note – If you have an implement lift switch, calibrate it first. See Calibrating the implement lift switch, page 248. 3. Select Drive Calibration and then tap OK. The Drive Calibration screen appears. The Drive Calibration screen has four tabs: Tab Description Drive Limits Enter the minimum and maximum flow values. Auto-Tuning C CAUTION – Moving parts during this operation. Ensure the implement is safe to operate. Follow the on-screen instructions to auto tune the system. Note – Do not perform the auto-tuning function if you have loaded a preset configuration file. Use the predefined configuration settings appropriate for your vehicle. Drive Settings Turn the master switch on and vary the rates. Adjust values if needed. Info Shows the results and drive limits of your calibration. 4. Select Flow Calibration and then tap OK. The Flow Calibration screen appears. FmX Integrated Display User Guide 303 10 3 04 The Field-IQ Plugin 5. In the Rate and Section Control Flow Calibration screen, enter the Flow Meter type, the Flow Meter Calibration, and the Minimum Flow: 6. Tap Run Calibration and then follow the on-screen instructions: FmX Integrated Display User Guide The Field-IQ Plugin 10 Calibrating the implement lift switch 1. From the Field-IQ Calibration screen, select the Implement Lift option. 2. Raise the implement and then tap Next. 3. Lower the implement and then tap Next. 4. Tap OK to return to the Field-IQ Calibration screen. Operating in the field 1. From the Home screen, tap . 2. From the Current Configurations screen, configure the display/vehicle/ implement settings and then tap OK. 3. From the Field Selection screen, select the required client/farm/field/event settings and then tap OK. Using the Diagnostics tab From the Configuration screen, select the Field-IQ plugin and then tap Diagnostics: The Operations tab displays the current status of: • Control Mode (Auto or Manual) • Rate Switch Mode (Manual, Rate 1, or Rate 2) • Master Switch (Off, On, or Jump Start) This screen also enables you to manually adjust: • Bin Level: Enter a new value or select Refill Tank. FmX Integrated Display User Guide 305 10 The Field-IQ Plugin • Target Rate: Decrease or increase. • Speed: Decrease or increase. • Switches: If you are using the optional Field-IQ individual section switch box, this screen indicates which switches have been assigned to each section. To test this, flip each switch in the section switch box. The section it is assigned to appears gray. • View Error Log: Shows all the errors that have occurred since the error log was cleared. • Section Test: The system begins a sequence of engaging each section and groups of sections. The Hardware tab displays the connected Field-IQ CAN modules and the following attributes: 3 06 • Serial number • Position on the implement • Firmware version • Status of CAN connection • Tx/Rx number of packets • Errors associated with the module FmX Integrated Display User Guide