1
orreLog
TM
Security Correlation Server
Quick Installation Guide
This guide provides brief information on how to install the CorreLog Server
system on a Microsoft Windows platform. This information can also be found in
Section 2 of the "CorreLog Sigma Web Framework User Manual", and Section 2
of the "CorreLog Security Correlation Server User Reference Manual", both of
which are included as part of the standard installation package.
The CorreLog Server is usually delivered as a self-extracting WinZip file, either
downloaded from the Internet, or delivered on a CDROM. This guide applies to
all versions of the program.
Server System Installation Requirements
CorreLog Server is specifically designed for fast and easy installation. The
system does not scatter DLL or other files into system directories. All files reside
in the CorreLog root directory, by default the directory C:\CorreLog. Specific
system requirements of the CorreLog Framework system are described below.
•
Operating System. The system can be installed on Windows XP, Vista, 7
as well as Windows NT 200X systems. CorreLog does not require Java, or
.NET to be installed on the platform.
•
Disk Space. The CorreLog Server, by itself, has a small footprint of less
than 20 Mbytes, but the actual disk space may vary depending upon the
particular applications installed (or which might later be installed) as part
of the framework.
•
CPU Requirements. The system makes minimal use of CPU. It can easily
co-exist with other server components and applications. Typically, on a
normal machine, the CPU usage of the CorreLog program will be under
20%.
•
TCP Connectivity. The system is a web server and web-based
application. It cannot be installed on a platform that does not have TCP
connectivity. For best results the host platform should have a permanent
IP address, and DNS services.
•
TCP Service Ports. The system requires control of a single TCP service
port, normally port 80, but possibly any other port selected by the user,
during the install process. The installer attempts to auto-detect a free
service port. Port blocking and virus protection programs (in particular
McAfee Virus Scan) may interfere with this.
•
UDP Service Ports. The system requires control of two UDP service
ports: port 514 is used for listening for Syslog messages, and port 162 is
used for listening for SNMP Trap messages. These two service ports must
be free at the time of installation, or the program will not operate properly.
To insure proper installation of the program, the user should close all windows,
and temporarily disable any port blocking or virus scan software on the system.
Any errors, detected during the installation process, stop further progress of the
installation program with an error dialog that should be addressed prior to the
continued execution of the program. Reboot, after installation, is not required.
Software Installation Procedure
1. Obtain the CorreLog installation package, in WinZip format. This file will
be named "co-n-n-n.exe". This package can be downloaded from the web,
or obtained from the installation CDROM.
2. Login to the target Windows platform with an "Administrator" type login.
3. Disable any firewall and virus scan software during the installation. The
Syslog port number (UDP port 514) and the SNMP Trap port number
(UDP port 162) should be available for use.
4. Execute the self-extracting WinZip file, and extract files to the target
directory, by default the directory C:\CorreLog.
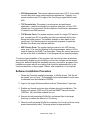
5. When the self-extracting WinZip file completes, the CorreLog Server setup
wizard automatically starts. The setup wizard is depicted below.
Install Guide, Page - 2
6. Follow the wizard prompts. You can usually use all defaults during the
installation. When the installation dialog finishes, the "CO-syslog.exe" and
"CO-Systrap.exe" programs will be running on the platform, awaiting
messages.
No other steps are needed to install the program.
Logging Into the System
To login to the CorreLog system, the user clicks the CorreLog desktop shortcut to
launch a web browser. (Note that the desktop shortcut appears ONLY on the
desktop of the specific user that installed the software.)
As an alternative, the user launches a web browser on any machine that has
access to the CorreLog Server, and then enters the URL of the program. (This
URL includes the port number, if other than the standard port 80.)
To access the CorreLog Server, the user's web browser may require special
configuration, via the "Tools > Internet Options > Connections > LAN Settings >
Advanced" dialog in order to access the Internet Explorer "Proxy Settings" dialog.
Install Guide, Page - 3
The default username and password for the system is username "admin",
password "admin". The user should enter this value into the HTTP authentication
dialog of the browser. This will permit access to the "Home" screen of the
CorreLog Server system, and other screens.
Modifying the CorreLog System Password File
If internal security is a concern at your site, one of the first activities after
installation of the software should be to modify the program login and password.
The procedure for adding and modifying program logins is as follows:
1. At a web browser, access the CorreLog system URL, and login to the
CorreLog web interface, as described previously.
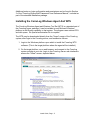
2. After successful logon to CorreLog, click on the "System" tab, and then
click the "Logins" tab to access. Initially, this screen has two user logins,
which are usernames "admin" and "operations". This screen is depicted
below.
3. On the "Logins" screen, click the "AddNew>" button to add a new user
login. On the AddNew screen, enter a new username, password, and
other information, and then click "Commit" to save the data.
4. To modify or delete an existing login, click the "# Edit" button next to the
target login to be modified.
Install Guide, Page - 4
Additional notes on login configuration and permissions can be found in Section
3 of the "CorreLog Sigma Web Framework User Reference Manual", included as
part of the standard installation package.
Installing the CorreLog Windows Agent And WTS
The CorreLog Windows Agent and Windows Tool Set (WTS) is a standard part of
the CorreLog server package. It can be installed on any Microsoft Windows
platform to add Syslog capability to that system. The program uses minimal CPU
and disk space. No special authorization file is required.
The WTS may be downloaded directly from the "Home" screen of the CorreLog
system, after login to the CorreLog server, and installed as follows:
1. Login to the Windows platform upon which to install the CorreLog WTS
software. (This is the target platform where the agent will be installed.)
2. On the target platform, run a web browser, and connect to the CorreLog
system running at your site. Login to the CorreLog Server web interface to
access the "Home" screen, depicted below.
Install Guide, Page - 5
3. On the CorreLog Server "Home" screen, click on the link "Download
Windows Agent And Tool Set Here…" (towards the middle of the page) to
download the CorreLog WTS software. (If you are using Windows
Explorer or a compatible browser, you may click "Open" to execute the
program.)
4. After downloading and executing the WTS package on the target Windows
platform, the WinZip self-extractor starts. Extract files to the desired
location, by default C:\CorreLog.
5. After files are extracted, the installer program automatically starts. The
program requires a single argument, which is the location of the main
CorreLog server that will receive Syslog messages.
6. Run the install wizard to completion. After the wizard finishes, the
CorreLog System Message Service will be started. You do not have to
reboot the platform. You should see a "Startup" message logged at the
CorreLog server system, indicating that the remote process has
successfully started.
Detailed documentation on the CorreLog WTS software, including how to further
configure and refine the installation, is provided on the "Home" screen of the
CorreLog Server System.
Configuring UNIX Syslog Messages
Virtually all types and versions UNIX platforms, including (but not limited to)
Linux, AIX, Solaris, and HP-UX systems, support the sending of Syslog
messages to the CorreLog Server program. The Syslog protocol, documented in
detail within Appendix B of the "CorreLog User Reference Manual", is originally a
UNIX application protocol. Hence, it is common to find Syslog installed and
running for any UNIX platform, unless the UNIX administrator has manually
disabled or uninstalled this process.
The UNIX process that is responsible for sending Syslog messages is the
"syslogd" daemon, which should be executing on the UNIX platform, and should
be visible if the user issues a "ps" command. The root user can edit the
"/etc/syslog.conf" file and insert directives indicating that the syslog process
should send messages to a destination hostname or IP address.
Small variations may exist depending upon the UNIX platform type and version.
The specific methods of configuring Syslog for a particular UNIX platform are
usually documented in the UNIX "man" pages. Type "man syslogd" and "man
syslog.conf" at a UNIX platform shell prompt for information on the specific
configuration for the UNIX Syslog process.
Install Guide, Page - 6
Configuring Linux and other BSD Type UNIX Systems
1. Log into the UNIX platform with a "root" type login, and edit the
"/etc/syslog.conf" file with a text editor, such as the "vi" editor.
2. Append the following line to the bottom of the "/etc/syslog.conf" file.
*.*
@(ipaddr)
The value of (ipaddr) is the IP address of the CorreLog server program
The "*.*" directive indicates that messages of facilities and all severities
should be sent to the CorreLog server. (This value can be modified to
limit the range of facilities and severities that are actually sent.)
3. When finished with the edits, stop and restart the "syslogd" process, such
as with a "kill -HUP" command. You should see a "Startup" message
logged at the CorreLog server system, indicating that the platform's
"syslogd" process has successfully started.
Configuring Solaris and other SYS5 Type UNIX Systems
1. Log into the UNIX platform with a "root" type login and edit the "/etc/hosts"
file. Add the "correlog-server" name to the "/etc/hosts" file. (The
syslog.conf file requires the use of a hostname rather than an IP address,
and this is a necessary step.)
2. Edit the "/etc/syslog.conf" file, and append the following lines eight lines to
bottom of the file. Make sure you use a tab to delimit fields, and not a
space.
*.debug
*.info
*.notice
*.warning
*.err
*.crit
*.alert
*.emerg
@correlog-server
@correlog-server
@correlog-server
@correlog-server
@correlog-server
@correlog-server
@correlog-server
@correlog-server
3. When finished with the edits, stop and restart the "syslogd" process, such
as with a "kill -HUP" command. You should see a "Startup" message
logged at the CorreLog server system, indicating that the platform's
"syslogd" process has successfully started.
Install Guide, Page - 7
Configuring UNIX Syslog-NG Systems
CorreLog supports Syslog-NG protocol over UDP exactly the same as ordinary
Syslog. (Generally, there is no significant difference between the actual message
protocols, but only in the details of their implementation.)
The configuration of Syslog-NG is somewhat system dependent. Various
versions of the Syslog-NG implementation exist, each with different types of
configuration data and specific configuration file directives. In some cases, the
configuration data may initially appear quite daunting and cryptic.
The basic procedure may vary depending upon a particular implementation, but
the general steps to configure Syslog-NG are as follows:
1. Log into the UNIX platform with a "root" type login, and edit the
"/etc/syslog-ng.conf" file with a text editor, such as the "vi" editor. (The
precise location of the file may be something else, depending upon the
particular Syslog-NG implementation.)
2. Append the following lines to the bottom of the configuration file:
# Define the CorreLog destination:
destination correlog {udp("(ipaddr)" port(514));};
# Send all messages to this destination:
log {source(s_all); destination(correlog);};
The value of (ipaddr) above is the IP address of the CorreLog server
program, in standard dot notation. Note that the specified protocol MUST
be udp. (See notes below.)
3. When finished with the edits, stop and restart the "syslogd-ng" process,
such as with a "kill -HUP" command. You should see a "Startup" message
logged at the CorreLog server system, followed by other messages.
The user should consult the man pages for Syslog-NG for any specific
implementation considerations. Note that, while Syslog-NG supports both TCP
and UDP protocol, CorreLog only supports UDP protocol. (Using Syslog-NG can
result in serious performance problems, and should always be avoided.) To
transport data over an encrypted tunnel, use the CorreLog “CO-tsend.exe”
process, documented elsewhere. This will ensure both encryption and reliability
without sacrificing performance.
Install Guide, Page - 8
Configuring Cisco IOS and Catalyst Syslog Messages
Virtually all Cisco devices and Cisco operating systems include some form of
Syslog capability, and can be configured to send messages to the CorreLog
Server program. Due to the extensive variety of Cisco devices, the procedure to
enable and configure Syslog is and configuration of Syslog needs to be assessed
for each Cisco device type.
For a Cisco IOS type device, issue the following command sequence using a
privileged login to the device:
logging on
no logging console
no logging monitor
logging (ipaddr)
logging trap debug
logging console debug
logging monitor debug
For a Cisco Catalyst type device, issue the following command sequence using a
privileged login to the device:
set
set
set
set
logging
logging
logging
logging
server enable
server (ipaddr)
level all 7
server severity 7
In the above command sequences, the value of "(ipaddr)" should be replaced
with the IP address of the CorreLog server. Note that the above procedure will
need to be modified for Cisco PIX Firewall devices, Cisco CSS devices, Cisco
WAP, and other specific models. The user must consult the specific
documentation for the Cisco device and model number for an accurate
procedure.
Configuring Other Devices And Applications
The above procedures deal with only a few of the most common network
devices, and are a small subset of the devices that CorreLog supports. Other
popular devices supported by CorreLog include (but are not limited to) Juniper,
Nortel, 3Com, Netscreen, Snort and others equipment and software vendors, all
of which provide syslog capability with their produces.
On Windows platforms, the user can configure the Windows Agent log file
monitor capability (documented in detail within the "CorreLog WTS Users
Manual") to "tail" any arbitrary streaming log file. This provides special application
Install Guide, Page - 9
for monitoring such applications as Windows VPN, and Windows IIS.
Additionally, many Windows applications can be configured to report status and
error information to the Windows "Application" log, which is then relayed to
CorreLog by the Windows Agent like any other event log message. These
applications include IIS, MS Exchange, McAfee, Oracle, and MS SQL.
On UNIX platforms, the user can configure a simple Perl script to tail streaming
log files, such as the Apache server logs. An example of such a Perl script is
available under the "Resources" section of the CorreLog website. Additionally,
the "cron" facility can be configured to send Syslog messages in response to
certain periodic system tests configured by a "root" administrator.
Finally, note that CorreLog receives SNMP trap information in addition to Syslog
information. The user can configure the SNMP agent of any capable device to
send SNMP traps to the CorreLog server at port 162. These traps will appear as
regular Syslog messages within CorreLog, and processed exactly like any other
received message.
SNMP traps are (by default) assigned a facility of "Network" and are assigned a
severity as dictated by the CorreLog SNMP Trap configuration file, documented
in the CorreLog User Reference Manual. Refer to other CorreLog documentation
for more specific and advanced configuration procedures related to SNMP traps.
Uninstalling the CorreLog Software
The CorreLog Server and CorreLog WTS is uninstalled via the “Add / Remove
Programs” Windows facility. (This is called the "Program Features" facility on
Vista platforms.) The user navigates to this screen (via the Windows Control
Panel) and clicks on the “CorreLog Framework” entry to execute the Uninstall
program. The user follows the instructions of the dialog to uninstall the CorreLog
Framework system.
Note that, unlike most uninstall programs, the CorreLog Framework files are left
intact on the disk. Following the uninstall procedure, the user must physically
remove these files, such as by dragging the CorreLog root directory to the
Microsoft Windows “Recycle Bin”. This extra step safeguards any accidental
removal of data on the system.
After running the uninstall procedure, but before manually removing the CorreLog
files manually, an administrator can re-execute the CorreLog setup wizard
program to re-install the registry keys other configuration components, as
described previously.
Install Guide, Page - 10
For More Technical Assistance…
CorreLog is committed to delivering the industry’s best combination of log
management and multi-platform security correlation. We are pleased to offer
support for both evaluation and licensed versions of our product. If you have any
difficulty with the CorreLog server installation or operation, we would like to assist
you. Please contact us using the information below
CorreLog, Inc.
http://www.CorreLog.com
mailto:[email protected]
Copyright © 2010. All rights reserved.
Install Guide, Page - 11