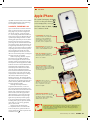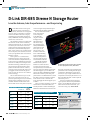
1
CD PC PC Hardware PC HACKS 22 Incredible Applications and Utilities to Install Today! IDE S N I MINIMUM BS • OCTOBER 2009 NETBOOK UPGRADES p. 36 Killer Do-It-Yourself Projects That Anyone Can Do! p. 22 • ADD MORE RAM! • UPGRADE THE HARD DRIVE! • SWITCH TO A BETTER NETBOOK OS! Convert a netbook to a digital photo frame Build a portable USB device charger Supercharge your digital camera PLUS 6 MORE! WE SHOW YOU HOW! HOW TO: Customize and Add Widgets to Your Desktop! REVIEWED: Seagate’s 2TB Speed Demon! 2325V 20V 00V BIOS GUIDE: Every Setting Explained! Tweak Without Fear! ed Disabl Auto Auto Auto Unleash your PC’s Potential… Try Each issue of Maximum PC features: ■ Brutally honest product reviews ■ Hard-hitting editorials ■ Tips to blast your machine’s performance ■ Insightful and innovative How-To’s 2 FRl IsEsuEes Tria ■ A CD loaded with new software, utility and game demos Reserve your 2 FREE Trial Issues today! There’s no obligation. To order, head to: www.maximumpc.com/archive WHERE WE PUT STUFF CONTENTS OCTOBER FEATURES 22 Hardware Hacks Nine DIY projects that will open new possibilities for your old hardware 36 Netbook Empowerment Your netbook can do so much more than when you bought it, with these easy upgrades 46 Befriend Your BIOS We introduce you to every screen and every feature DEPARTMENTS QuickStart 08 NEWS Which version of Windows 7 is right for you? 14 THE LIST Eight obscure computing laws R &D 60 WHITE PAPER The skinny on DirectX 11 61 AUTOPSY The original Apple iPhone 63 HOW TO Make custom desktop widgets; sync your files, email, and bookmarks 46 In the Lab 73 REVIEWS 92 LAB NOTES 96 BEST OF THE BEST LETTERS 16 DOCTOR 94 COMMENTS www.maximumpc.com | OCT 09 | MAXIM MAXIMU XIMUM UM PC P | 05 MAXIMUMPC A THING OR TWO ABOUT A THING OR TWO EDITORIAL EDITOR IN CHIEF Will Smith DEPUTY EDITOR Katherine Stevenson SENIOR EDITOR Gordon Mah Ung ONLINE EDITOR Norman Chan ASSOCIATE EDITOR Nathan Edwards ASSOCIATE ONLINE EDITOR Alex Castle EDITOR AT LARGE Michael Brown EDITORIAL ASSISTANT Florence Ion CONTRIBUTING WRITERS John Brandon, Tom Halfhill, Evan Lahti, Paul Lilly, Thomas McDonald, Quinn Norton, Andy Salisbury PODCAST PRODUCER Andy Bauman EDITOR EMERITUS Andrew Sanchez On the Cusp of an Augmented Reality Revolution ART ART DIRECTOR Natalie Jeday CONTRIBUTING ART DIRECTOR Katrin Auch PHOTO EDITOR Mark Madeo ASSOCIATE PHOTOGRAPHER Samantha Berg BUSINESS VP/PUBLISHING DIRECTOR Stacey Levy 650-238-2319, [email protected] GROUP SALES DIRECTOR Gabe Rogol 650-238-2409, [email protected] SENIOR REGIONAL SALES DIRECTOR Dave Lynn 949-360-4443, [email protected] REGIONAL SALES DIRECTOR David White 650-238-2502, [email protected] SALES MANAGER Aida Rodriguez 708-562-0686, [email protected] INTEGRATED SALES DIRECTOR Joe Pomparelli 323-342-1888, [email protected] SENIOR MARKETING MANAGER Andrea Recio-Ang 650-238-2548, [email protected] MARKETING COORDINATOR Allyson Kardel 650-238-2312, [email protected] ADVERTISING COORDINATOR Jose Urrutia 650-238-2498, [email protected] PRODUCTION PRODUCTION DIRECTOR Richie Lesovoy PRODUCTION COORDINATOR Dan Mallory PRINT ORDER COORDINATOR Jennifer Lim CONSUMER MARKETING DIRECTOR CONSUMER MARKETING Rich McCarthy CIRCULATION DIRECTOR Crystal Hudson NEWSSTAND DIRECTOR Bill Shewey CONSUMER MARKETING OPERATIONS DIRECTOR Lisa Radler RENEWAL AND BILLING MANAGER Mike Hill BUSINESS MANAGER Elliot Kiger SR. ONLINE CONSUMER MARKETING DIRECTOR Jennifer Trinker CUSTOMER SERVICE MANAGER Mike Frassica FUTURE US, INC 4000 Shoreline Court, Suite 400, South San Francisco, CA 94080 www.futureus-inc.com PRESIDENT Jonathan Simpson-Bint VP/CFO John Sutton VP INTERNET DEVELOPMENT Tyson Daugherty GENERAL COUNSEL Charlotte Falla EDITORIAL DIRECTOR GAMES GROUP Stephen Pierce EDITORIAL DIRECTOR MUSIC Brad Tolinski EDITORIAL DIRECTOR TECHNOLOGY & LIFESTYLE Jon Phillips DIRECTOR OF HUMAN RESOURCES Nancy DuBois Future US, Inc. is part of Future plc. Future produces carefully targeted special-interest magazines, websites and events for people who share a passion. We aim to satisfy that passion by creating titles offering value for money, reliable information, smart buying advice and which are a pleasure to read or visit. Today we publish more than 150 magazines, 65 websites and a growing number of events in the US, UK, France and Italy. Over 100 international editions of our magazines are also published in 30 other countries across the world. Future plc is a public company quoted on the London Stock Exchange (symbol: FUTR). FUTURE plc 30 Monmouth St., Bath, Avon, BA1 2BW, England www.futureplc.com Tel +44 1225 442244 ED WORD Y ou may not have heard of it before, but “augmented reality” is coming, and it’s more than just cool tech—it will change the world. Augmented reality has been a Hollywood staple for the last 30 years— although it’s more commonly associated with robots and cyborgs than people or PC enthusiasts. Put simply, it’s a technology that overlays a real-world scene with relevant contextual information, directly from a computer. In Robocop and Terminator, augmented reality was used by the movie’s eponymous characters to overlay friend or foe info. In Minority Report, it was used to display targeted ads, unique to each individual, as they walked through a city landscape. More recently in the real world, augmented reality has been used in advertisements, rendering 3D animations attached to 2D surfaces you hold up in front of a webcam. (Check these sites for demos: http:// bit.ly/v4FCu and http://bit.ly/mlM9p). The Mini-Cooper ad is especially neat, because you can explore a 3D rendering of a car using a 2D ad and your PC. To date, the applications of augmented reality Canon Rebel T1i tech have been cool, but not particularly useful. page 87 That’s about to change. Armed with GPS sensors, accelerometers, and compasses, many smartphones—like the iPhone 3GS Netbook Upgrades and Google Android phones—have the hardware required to depage 36 termine your position and orientation in the world. With that info, your phone will be able to display a HUD, overlaying info from the DirectX 11 Internet atop a direct feed from your phone’s camera. White Paper The first of these apps is likely to be acrossair’s Nearest New page 60 York Subway app for the iPhone. The videos we’ve seen of the app are amazing—hold the phone parallel to the ground and you see a traditional 2D map of NYC’s subway system, complete with your location. When you hold the phone perpendicular, the camera turns on. As you rotate, it displays icons revealing the direction to and the key info for the nearest subway stations over a live feed from the camera. (To see the video, go to http://bit.ly/aToJf.) As computing becomes more integrated with our day-to-day life, it becomes easy to envision ever-more-interesting use cases. I’d love a presence app—like Loopt or Google Latitude—that lets me see public profile information of people who share my coordinates in meatspace. Right now, I have no way of knowing that the guy standing next to me on the bus is my college roommate’s brother-in-law. But if my phone played a quick game of Seven Degrees of Kevin Bacon with his Facebook profile, I might end up talking about something more interesting than the Giants’ game on our shared bus ride. In fact, with a large enough social circle, I may never meet another stranger again. I can’t help but think that that would enrich my life. Isn’t that what technology is for? AUGMENTED AWESOME NON-EXECUTIVE CHAIRMAN Roger Parry CHIEF EXECUTIVE Stevie Spring GROUP FINANCE DIRECTOR John Bowman Tel +44 1225 442244 www.futureplc.com REPRINTS For reprints, contact Marshall Boomer, Reprint Operations Specialist, 717.399.1900 ext. 123 or email: [email protected] SUBSCRIPTION QUERIES www.maximumpc.com/customerservice Maximum PC ISSN: 1522-4279 LETTERS POLICY Please send comments, questions, and Sweet Tarts to [email protected]. Include your full name, city of residence, and phone number with your correspondence. Unfortunately, Will is unable to respond personally to all queries. www.maximumpc.com | OCT 09 | MAXIM MAXIMU XIMUM UM PC P | 07 QUICKSTART THE BEGINNING OF THE MAGAZINE, WHERE ARTICLES ARE SMALL THE NEWS Upgrading to Windows 7 Amid all the positive press surrounding Microsoft’s promotional upgrade pricing, some details have been obscured –JUSTIN KERR W hen Microsoft revealed that Windows 7 upgrade editions would start at a mere $50, Apple fan boys were sent scrambling for their EpiPens to stave off the shock induced by the unbelievable news. Sure, Leopard users will be able to upgrade their OS for just $30, but Macs who skipped the last upgrade cycle in 2007 are looking at a whopping $130—and non-Intel hardware need not apply. Windows XP users, on the other hand, who purchased a copy at launch in 2001 will have enjoyed more than eight years with their OS license, and for this crowd, a $50 upgrade fee sounds quite reasonable. Pre-orders of the Windows 7 upgrade editions are rumored to have sold extremely well, but the entire process was shrouded in ambiguity. Microsoft did a fantastic job of finding a popular price point with consumers, but it’s fair to say the vast majority of those who pre-ordered had no idea what they were getting and in some cases still don’t. The alphabet soup of product editions brought back the version anxiety that began with Vista, and the upgrade requirements were extremely vague. For those who are still on the fence about what version to buy, it’s important Windows 7 upgrade editions seem like a great deal, but having to reinstall and activate a previous version each time could prove to be more hassle than it’s worth. should probably let go of anyway. Features missing from the Home Premium edition can be easily duplicated with free third-party applications, which tend to be more flexible, anyway. It’s easy to get caught up in the Maximum PC spirit that only Ultimate will do, but if you really are a home user, better tools exist to do pretty much everything found in the higher editions. Once you have decided on a version, the next challenge is to determine if you will need an upgrade, OEM, or full retail copy of Windows 7. Upgrade editions will require a copy of 2000, XP, Vista, or the Windows 7 RC to be installed, with Vista being the only approved OS for “in place” upgrades. OEM editions might also seem tempting because of their discounted price, but the licenses will be keyed to your hardware, making activations painful for those who upgrade often. Full retail FEATURES MISSING FROM HOME PREMIUM CAN BE EASILY DUPLICATED WITH FREE THIRD-PARTY APPS to remember that Home Premium actually does deliver almost everything non-business users will need. The Professional edition offers up domain support used by large corporations and Windows XP mode might sound useful, but it only really allows you to run 2D applications that home users 08 | MAXIM MAXIMU XIMUM UM PC P | OCT 09 | www.maximumpc.com editions carry the highest price tag, but also contain the fewest hassles. Activations rarely require a follow-up call to Microsoft and you can migrate your copy endlessly when you upgrade. For those of you who own a previous version of Windows, upgrade editions are the natural choice. They reward existing customers and come with a hardy discount. This time, however, we caught wind of an interesting requirement that might make you think twice. Microsoft has been slowly creeping up the previous-version authentication that started with a disc-check in XP, but which now appears to require an installed and activated version of Windows to be present every time. If you’re the type who likes to reinstall often to get that fresh PC feel, you might not appreciate the extra work a double install entails. Microsoft has yet to comment on this little caveat and certainly anything can happen between now and October 22. QUICKSTART FAST FORWARD THE BEGINNING OF THE MAGAZINE, WHERE ARTICLES ARE SMALL Music Pandora Raises Radio Ruckus Internet radio webcaster demands that AM/FM pay fair share A fter at last reaching an agreement with artists and record labels over royalties, Bay Area–based radio webcaster Pandora is causing a stir by suggesting that AM/FM radio begin paying comparable royalties to rights holders, arguing that Internet radio shouldn’t have to pay higher fees. Pandora has asked that Internet radio fans call House Majority Leader Nancy Pelosi’s office to request her support on the Performance Rights Act, which would force conventional radio to pay royalties to record companies and artists (in addition to the songwriters, who are currently compensated), just as Internet stations do. Pandora is not alone in its efforts. With waning revenues from music sales, many record labels have begun focusing their attention on commercial radio stations in the United States for increased revenue. Radio stations insist that they’re simply promoters of music and that their goal is to drive interest in the artists that they play, which in turn leads to album and ticket sales, as well as publicity opportunities. Pandora could argue the same thing; each time a listener sets a station, the probability that he or she listens to a new artist or Chrome Won’t Shine I Pandora Internet Radio asks you to pick a song, artist, or genre, then delivers you a full-blown personalized radio station. group increases with every click, and links to download the song from either iTunes or the Amazon Music Store promote music sales through individual song purchases. In the agreement Pandora reached with rights holders, the webcaster will pay either 25 percent of its yearly U.S. revenue or a per-song-per-listener rate, whichever is higher. To meet this obligation, Pandora will now charge users who exceed 40 hours of listening a month $0.99 for unlimited use. Those listeners will still be presented with advertisements and limited to how many songs they can skip. Pandora expects this to affect only 10 percent of its user base. –FI GOOGLE OS ON THE WAY Company challenges Microsoft with a minimalist web-based approach G TOM HALFHILL oogle set tongues wagging when it announced plans to release a Chrome operating system, which reportedly will be a natural extension of the Google Chrome browser. According to a post on Google’s blog: “Speed, simplicity, and security are the key aspects of Google Chrome OS. We’re designing the OS to be fast and lightweight, to start up and get you onto the web in a few seconds. The user interface is minimal to stay out of the way, and most of the user experience takes place on the web.” The bare-bones approach isn’t surprising, considering that Google’s Chrome browser follows the same philosophy. Essentially, Google is tweaking the Chrome code base to run within a new windowing system piggybacked on a Linux kernel. It will run on both x86 and ARM chips, and Google has already put the wheels in motion with various OEMs to bring several Chrome-based netbooks to market in the second half of 2010. While Google Chrome OS is still a year away from shipping, Google said it will have more updates this fall. –PL f there were such a thing as post-traumatic stress disorder for weary veterans of OS wars, I’d have it. Frightening flashbacks of MS-DOS vs. CP/M... Windows 3.0 vs. Apple System 6... OS/2 vs. Windows NT... Windows vs. Mac again... then Linux vs. Windows vs. Mac. And that’s not counting the smaller conflicts that engaged OS-9, CP/M-86, AmigaDOS, and others too numerous to mention. Now Google’s Chrome OS is challenging Windows? Please. Look, I’ve railed at Microsoft as much as anyone, sometimes in these very pages. And my other computer is an iMac. But one thing I’ve learned is that a new OS needs a strategic advantage before it can defeat a deeply entrenched OS. MS-DOS overwhelmed CP/M in the 1980s because Microsoft’s OS was basically free with the 16-bit IBM PC, which was more powerful than 8-bit CP/M machines and legitimized personal computers in corporate America. The Mac’s graphical OS debuted in 1984 with a huge advantage in usability over the primitive MS-DOS command line, but Apple’s reluctance to license Mac clones allowed Microsoft to retaliate with Windows and win 90 percent market share. Chrome OS isn’t totally outgunned. With Google’s resources, Chrome OS could become, in effect, the leading Linux distro. A united front would help Linux, which suffers from the same dispersal of forces that weakened Unix. Also, the trend toward cloud computing favors a secure, nimble OS designed to run network-based software. And Microsoft’s adoption of an XML-based format for Office allows challengers to offer file compatibility with the world’s most popular productivity suite. Unfortunately for Google, Windows 7 looks like a worthy atonement for Vista. The widespread rejection of Linux-based netbooks shows that people still expect a PC to run their familiar Windows software. Although the success of Apple’s App Store proves that a newcomer can build a software library faster than ever before, most iPhone apps are toys, not replacements for serious desktop programs. To fight Windows, Chrome OS needs heavier artillery or a faster transition to the cloud-computing battlefield than I anticipate. A smarter strategy is a flank attack on Microsoft. Google’s Android OS can capture the new high ground of smartphones and other next-generation computing gadgets. Tom Halfhill was formerly a senior editor for Byte magazine and is now an analyst for Microprocessor Report. www.maximumpc.com | OCT 09 | MAXIM MAXIMU XIMUM UM PC P | 09 QUICKSTART GAME THEORY THE BEGINNING OF THE MAGAZINE, WHERE ARTICLES ARE SMALL Kindle Faces Competition Borders, Barnes & Noble enter ebook fray Now that Amazon.com’s Kindle ebook reader has made a serious business out of digital bookselling— the company is expected to make $310 million off the device this year alone—other major industry players are looking to get in on the action. In July, Borders U.K. introduced its own ebook reader called Elonex. The Elonex sells for £189 (approximately $300), supports ePub and proprietary Acrobat formats, and is compatible with the 45,000 or so ebooks that Borders sells through its website. Signs are that Barnes & Noble is also working on an electronic reading device. In the spring, the book chain purchased Fictionwise, owner of the eReader platform and online bookstore. Already, Barnes & Noble has leveraged that purchase to launch a free ebook reader application for BlackBerrys, but it seems likely that a full-fledged competitor to the Kindle is on the way. –KS Traditional booksellers have seen the future and it looks like this. Firefox to Get More Stable, Secure Mozilla just launched a new project, named Electrolysis, that will bring multiprocess browsing to Firefox. And according to Mozilla, the result will be improved performance, security, and stability. Project developers have already put together a prototype that’s able to render a page in a separate process from the interface shell it’s displayed in. Firefox developers got serious about multiprocess browsing once Google and Microsoft used it in Chrome and IE8 browsers. Chrome’s multiprocess architecture allows it to fill in security holes and prevents pagespecific glitches from crashing the entire browser. It’s unknown whether multiprocess browsing will be ready for the next release of Firefox, but the work will be done separately so as not to interfere with the development process. –AS THOMAS MCDONALD Project Natal T wo years after dismissing, and even mocking, the Wii Remote, Microsoft has had a change of heart about motion control. Project Natal is an attempt to get rid of the controller altogether, replacing it with a tool that combines an “RGB camera, depth sensor, multiarray microphone, and custom processor running proprietary software.” All of this provides full-body 3D motion capture, facial recognition, and voice recognition, then converts that information into real-time game control. The figures onscreen respond to your movements and even react to emotions based on facial expressions. You know Microsoft is serious when it wheels out the big guns to deliver the overstatement. Such as when Steven Spielberg was asked for his thoughts on Project Natal at this year’s E3: “This is a pivotal moment that will carry with it a wave of change, the ripples of which will reach far beyond video games” Although the E3 demos focused on Xbox 360, Bill Gates has revealed that he sees Natal coming to PCs, with motion control not only for gaming, but for apps and media management. The demos are impressive, with people fighting martial arts opponents by flailing their limbs; driving a car by miming drivey kinds of hand posi- Side-by-Side Search A website lets you directly compare Google and Bing results tions; kicking soccer balls; etc. If Microsoft didn’t want people to immediately file Project Natal under “yeah, right,” it probably shouldn’t have relied on self-promoting, semiautomated broken-promise dispenser Peter Molyneaux to hype the technology with his demo of Milo, a creepy virtual boy who reacted to and interacted with a woman in response to her gestures, movements, and facial expressions. There are a lot of potential pitfalls with Project Natal, which still lacks a release date, price, and other important details. Anyone with experience in voice recognition, face recognition, and motion capture will be familiar with the vast challenges of making it all work, consistently, with a diverse array of users and environmental variables. At one end, we have the slick interfaces from the movie Minority Report, which would be cool. At the other, we have the PlayStation Eye, which would not. Which do you think we’ll get? The best way to know whether Google or Bing offers the most relevant links to a query is to enter your query on www.bing-vs-google.com, where side-by-side results are displayed either vertically or horizontally on the same page. Brilliant! -KS 10 | MAXIM MAXIMU XIMUM UM PC P | OCT 09 | www.maximumpc.com Thomas L. McDonald has been covering games for 17 years. He is an editor at large for Games magazine. QUICKSTART BYTE RIGHTS THE BEGINNING OF THE MAGAZINE, WHERE ARTICLES ARE SMALL Belkin TuneBase Direct C ar adapters for the iPhone are a dime a dozen, but the TuneBase Direct ($70, www.belkin.com) is noteworthy for its tight integration with the iPhone. Besides piping tunes through your car’s stereo using its line input, the TuneBase also converts your stereo into a speakerphone. The quality’s not great, but its saves you from having to fumble for your headset. You can even tap its button to fire up the iPhone 3GS’s Voice Control feature. –WS QUINN NORTON GEEK TESTED & I Graphics Sales Slump GPU market experiences worst year ever A s the economy struggles to regain its footing, so too does the PC industry. The latest sign of this is in the graphics market, which recorded anemic sales of graphics chips in 2009, the worst year ever, according to Jon Peddie Research Even scarier, Peddie says that graphics chip shipments are a leading market indicator since a big portion of chip sales goes to original design manufacturers (ODMs) and original equipment manufacturers (OEMs). But it’s not all gloom and doom. Peddie expects to see signs of a recovery in the third quarter. Moreover, Q3 will mark the beginning of major architectural changes and products from Intel, Nvidia, and AMD/ATI, as each continues to develop GPGPU products. –PL Netflix Courts Rumors July was a busy month for talk of a Netflix acquisition. First, word was that Amazon might purchase the DVD rental service, sending Netflix’s stock price up five percent. But speculation later turned to Microsoft when various business commentators raised doubts that Amazon would want the sales tax obligation of Netflix’s multistate operation, and further noted the success of Microsoft’s partnership with Netflix on the Xbox 360. A third possibility is that Netflix will simply stay put. –KS For s ale? 12 | MAXIM MAXIMU XIMUM UM PC P | OCT 09 | www.maximumpc.com Breakin’ the Law Intel Ups Netbook Pixels? Is Intel increasing the allowable screen resolution in netbooks using Atom N-series chipsets from 1024x600 to 1366x768? Sony’s recently announced VAIO W netbook, which features the higher screen res, suggests so. As it stands, in order to use the higher-resolution panels, companies have to choose from Intel’s Z-series Atom chips or forgo the preferential N-series pricing. Intel’s reasoning for this has been to clearly distinguish between a netbook and notebook, but perhaps the company is now content to let physical screen size separate the two segments. –PL often get questions in email, or at conferences or parties, about points of IP law. I try to explain that I Am Not A Lawyer or that, dang, this is a party, but most people’s questions about what’s illegal are easy to answer (ripping DVDs: yes; ripping audio CDs: no; drunkenly singing “Happy Birthday” through a bullhorn at a wedding: yes; making a mashup song: depends what state you’re in). But I’ve realized that’s not really what people are asking me, because there’s a big difference between telling you what’s illegal and telling you what not to do. Unlike much of law, copyright law requires that the rights holder go to the trouble of suing. If they don’t want to, you can claim their masterwork as your own and do a rendition in armpit farts on national TV, make a mint selling the recording, and never have a spot of trouble with the authorities. This is understandably confusing for most people. We like to think of our laws as moral, vital to a functional society. Current copyright law, like all unreasonable law, undermines this. The normal ways people use computers these days involves enough copyright violations that all the lawyers ever born couldn’t pursue them all. Almost nothing you do in your own home is ever going to be findable by the RIAA or the MPAA, which don’t have the time and energy to care anyway. The unspeakable truth is, for the most part, no one cares if you break the law. This is not an answer lawyers can give you, but I can. Give songs to friends, Xerox library books, do terrible mashups of the Top 40—no one is coming for you. The good news is that most of us are more sensible and moral than the law. We can tell what’s harmful, and won’t do it, though we all get confused in the grey zones. The real answer to your copyright questions is, ignore the law when it doesn’t matter, and obey it when it does. But how can you tell? You can’t! Isn’t this fun? Quinn Norton writes about copyright for Wired News and other publications. Her work has ranged from legal journalism to the inner life of pirate organizations. QUICKSTART THE BEGINNING OF THE MAGAZINE, WHERE ARTICLES ARE SMALL THE LIST 8 Computing Laws You’ve Probably Never Heard Of 8 MOORE’S SECOND LAW AS CPU TRANSISTOR COUNTS GROW GEOMETRICALLY, SO DOES THE COST OF MANUFACTURING. 6 7 ASIMOV’S THREE LAWS OF ROBOTICS PROTECT, OBEY, AND DON’T INJURE US. THOMAS MCDONALD COLE’S LAW COLONEL COLE POSITED THAT CABBAGE AND MAYO MUST BE MIXED WITH VINEGAR. 5AMDAHL’S LAW Multiple CPU cores are only as fast as the slowest serialized code. 4METCALFE’S LAW A network’s worth grows proportionally to its number of users squared. MYTHICAL 3THE MAN-MONTH Adding more programmers to an alreadylate project will only make it later. 2PAGE’S LAW Software gets twice as slow every 18 months. 1 # CARGILL’S NINETYNINETY CODING LAW The first 90 percent of code takes 90 percent of the time. The last 10 percent accounts for the final 90 percent of the time. 14 | MAXIM MAXIMU XIMUM UM PC P | OCT 09 | www.maximumpc.com DOCTOR IMPROVING YOUR PC EXPERIENCE ONE STEP AT A TIME This month the Doctor tackles... DRAM DRAM Demystified Drive Drive Access Boot, Baby, Boot! (Please?) DRAM Demystified Could you please explain the many ways DDR3 speed ratings are stated? –Tom Ellison DDR3 is commonly referred to in two different ways: by the “module name,” which denotes the module’s theoretical bandwidth, and by the effective clock speed at which it runs. For example, a common performance DIMM is a PC3/12800 module, which gives it a theoretical bandwidth of about 12,800MB/s. The same module can also be referred to as a DDR3/1600 DIMM which means it has an effective clock rate of 1,600MHz. Why the two naming conventions? Politics and marketing. The module name actually goes back to the days when DDR was competing with Direct RDRAM. A PC-800 RIMM had an effective clock speed of 800MHz and a theoretical transfer rate of 1,600MB/s per module, with dual-channel offering 3,200MB/s transfer rates. Since the initial single-channel-only DDR/266 modules didn’t sound as impressive as a PC-800 module, the competing SDRAM industry decided to name it PC-2100 for its theoretical bandwidth of 2,100MB/s—a much bigger number than 800. Outputting Outlook I am starting to back up all my files to CD in anticipation of buying a new computer 16 | MAXIM MAXIMU XIMUM UM PC P | OCT 09 | www.maximumpc.com Right-click cmd.exe and select “Run as administrator” to open an administrator command prompt. this fall when Windows 7 becomes available. I have a Windows 98SE system using Office 2000 and I cannot find my Outlook 2000 .pst files so I can save them to CD and then move them to the new system when it arrives. I have searched the entire disk for “*.pst” and the only thing it shows is the “default.pst” file which is way too small (300KB) to be the file I want. Also, is there a way to save my Outlook settings so they can be moved to the new Outlook? –Allan Kjeldsen Allan, Microsoft’s Knowledge Base article 196492 (http:// bit.ly/4aQiSU) gives instructions on exporting your .pst files and settings. Briefly, to find your .pst files, rightclick Outlook Today and hit Properties, then Advanced. The Path box should show your .pst file location; the default is C:\Windows\ Application Data\Microsoft\ Outlook\Outlook.pst. The Knowledge Base article also includes instructions for backing up your Outlook 2000 settings, rules, contacts, calendars, and tasks so you can export them to newer versions of Outlook. Defragging in Vista In your “Better, Faster, Stronger” article (July 2009), one of the tricks you recommend is to defrag my computer. I have Vista and I am trying to do a full defrag through the command line. It will not allow it without an “administrator command prompt.” What is an administrator command prompt? I am the only user and my account is an administrator account. Any advice? –Jed Carter Jed, for security reasons, Vista’s User Account Control won’t run programs with administrator permissions by default, even if you’re the only user. To run an administrator command prompt, use the search bar in the Start menu and search for cmd.exe. When it shows up, right-click it and select “Run as administrator.” Alternately, you can just search for cmd.exe and hit Ctrl-Shift-Enter to open an administrator command prompt. Access Denied I decided to do some cleaning of unwanted files on my PC, which has had occasional stretches of non-use. I now get an “access denied” message on my D: drive. I have all the latest drivers and updates for Vista Ultimate 64-bit. I poked around the Properties menu and am getting confused about how to regain access permissions. The creator is not listed. I don’t even remember what’s on the drive; it could possibly belong to my old user/admin account before a restore or reinstall. I cannot get ownership of the drive to open it. Any suggestions? –Rick Smith Vista doesn’t automatically give administrators full access to folders and files from other installations or users, even if the username and password are the same. To regain ownership of the drive and its contents, right-click it and select Properties. Click the Security tab, then the Advanced button. Go to the Owner tab, and Edit it to give ownership to your computer’s administrator/primary user. Be sure to include subcontainers and files. Now click OK. Go back to the Security tab, highlight the Administrator you just gave ownership to, and hit Edit, then give Full Control permissions for that drive. You should be able to fully access everything on the disk. Dust to Dust I have a roughly year-old refurbished computer, and for the past few months the fan has been rather loud, and more recently the computer has been shutting down on its own, especially when I’m playing games, or even when I’m just on AIM or surfing the Internet. I believe the computer might be overheating from dust caught in the fans, but I’m not entirely sure. If that is the case, how do you recommend I clean the computer? I’m quite comfortable working on the computer, but unfortunately I have very little experience working on the insides of my machine, so I have some fears about actually opening up my PC and accidentally breaking something or damaging it. Any advice, Doc? –Michael H. ever suffered any ill effects, it is still a good idea to properly ground yourself before performing any maintenance inside a PC.” Wise words. Of course, that might not be the problem at all. You may have a faulty power supply or other hardware. Check out the Doctor’s answer to J.P. Allen on page 18 and start testing your It’s important to keep your computer clean and free of dust, pet hair, and other debris. The best way we’ve found to clean out a computer without endangering any of our precious components is to clean it with a can of compressed air. Unplug your computer and remove the side panels. Then hold the can upright (to prevent spraying cold liquid) and clean the case with short bursts of air. It’s important to prevent fans from spinning out of control, so use a pencil or your finger to block them. Or you can buy a microcleaning attachment for your vacuum cleaner, as reader Kevin Fields points out: “Shop-Vac makes the 1.25inch Micro Cleaning Kit for around $12. It’s available from Shopvac.com, Amazon.com, Wal-Mart, and other retailers. I have used this kit myself for several years. Although neither I nor any of my equipment has Missing RAM Static Prevention If I wear latex gloves to handle PC components like videocards, processors, memory, and hard drives, do I still have to worry about static electricity? –Reggie Wong Merely wearing gloves won’t necessarily help prevent static I HAVE SOME FEARS ABOUT 0PENING UP MY PC AND ACCIDENTALLY DAMAGING IT hardware piece by piece, if you feel comfortable doing so. Otherwise it might be time to take it to the shop. I am running 64-bit Windows 7 RC1, and can access only 3GB of my 4GB of RAM! I’m running an Asus P5B Deluxe with BIOS v. 8.00.12, a Core2 Duo E6600, and four 1GB DDR2 DIMMs. Asus’s website says that my motherboard can go up to 8GB of RAM, so why does it say only 3GB is used? I have taken out all the DIMMs and tested them individually and they all seem to work fine by themselves. –Joshua Tolhurst First, you’ll want to make sure that memory remapping is enabled in the BIOS. If that does not correct your problem, you may want to update the BIOS. It looks like your BIOS is a couple of years out of date. Asus has released numerous “beta” BIOSes for the P5B Deluxe that address memory issues like the one you’re having. SUBMIT YOUR QUESTION Are flames shooting out of the back of your rig? First, grab a fire extinguisher and douse the flames. Once the pyrotechnic display has fizzled, email the doctor at [email protected] for advice on how to solve your technological woes. shock—a big static charge can build across the thin latex of the glove. It’s essential to properly ground yourself while you work on your computer to prevent static buildup. Consider wearing an anti-static wrist strap. And don’t forget: Always unplug your computer when you’re working on it. Resizing OS Partition I am getting an HP TouchSmart tx2z Tablet PC in the next couple of weeks for college. However, I need to install Windows XP on it, as it’s a requirement for the engineering software I will be using. Is it possible to repartition the hard drive and still keep the copy of Vista that comes preinstalled? If so, how would I do it? I don’t want to pay for a laptop with Vista on it, just to lose it for XP. Especially with Windows 7 right around the corner. –Andrew Muscha Andrew, if your school requires XP, you’d better get a different computer. HP’s support site doesn’t have any XP drivers for the TouchSmart tx2z. But the company may have a similar tablet with XP support—you should call HP and see. Once you get a computer www.maximumpc.com | OCT 09 | MAXIM MAXIMU XIMUM UM PC P | 17 DOCTOR IMPROVING YOUR PC EXPERIENCE ONE STEP AT A TIME that supports XP, you can shrink your hard drive partition and install Windows XP in the free space. Vista’s Partition Manager can do that, as can third-party apps like EASEUS Partition Master (www.partition-tool.com). When you’ve got the space, boot from your XP install disc and install it to the empty partition. Use your Vista repair disc afterward to restore your boot manager, and you’ll be dual-booting in no time! Boot, Baby, Boot! (Please?) Lately I’ve been having an issue on startup with my PC. During POST, my system will hang and fail to load past the Asus splash screen. My keyboard stops responding altogether, so I cannot hit Tab to see the POST messages. (I’ve changed keyboards and the issue persists.) When it does load past POST, it hangs just before the GRUB boot loader. When this happens, I usually have to hit the reset button and go through the process three times before I can load an OS. Other than the keyboard swap, I’ve made no major changes to my system that I think would prevent my PC from POSTing and I run everything at stock clocks. When I do load into an OS, everything is rock-solid and stable with no issues. I have an Athlon 64 X2 4600+ on an Asus M2-N32 SLI Deluxe motherboard, 3GB DDR2 RAM, and an XFX 8800 GT. My keyboard is a Logitech G15. My PSU is a Cooler Master 600W eXtreme Power Duo. My bet is on the PSU, but I really don’t have an easy way or the cash at the moment to test this. Please let me know if I’m on the right track. –J.P. Allen 18 | MAXIM MAXIMU XIMUM UM PC P | OCT 09 | www.maximumpc.com Double-clicking a drive brings up a search box? There’s a registry fix for that. While it seems like the power supply is always the culprit, the Doc actually suspects it may be somewhere else down the line. If the power supply were indeed going bad, you should experience instability elsewhere when the system is under a heavier load and when the PSU is warmed up. Since you changed keyboards and the Logitech G15 is a USB keyboard, the motherboard may be balking at some USB device in the chain, the builtin hub in the G15, or the actual keyboard itself. First, disconnect all nonessential USB devices including the front-panel USB ports and card readers plugged directly into the motherboard. Now with just the keyboard plugged in, try to reproduce the error by rebooting numerous times. If you cannot reproduce the problem, at least the keyboard is fine. You should now try plugging in one device at a time to see if the problem crop ups. If the problem leads you away from USB, you should consider pulling individual components from the machine to try to reproduce the problem. Since it’s happening so early in the boot process, it sounds like a bad piece of hardware is involved. If all of that fails, then it may be time to consider swapping out the PSU for another unit, but the Doc would not spend money until the “free” fixes are cleared first. Stop Searchin’ A week ago I opened up My Computer to go exploring my second hard drive. However, when I doubleclicked the drive to open it, the Windows Search function started up and opened a new window. When I rightclick either drive, the Search option is the default. This is really annoying. Many times I forget about this issue and double-click, only to have the computer slow down a bit and open a new box for the search. Is there a way to modify the default option for a double-click? –Dave Neto According to Microsoft, this can start happening if you’ve recently edited the file-type dialog box for Drives or Folders. There are two ways of fixing this: According to Knowledge Base article 321186 (http://bit.ly/WeR7t), which discusses this problem, it can be done with a registry edit. Open regedt32.exe, and go to HKEY_CLASSES_ROOT\ Drive\shell, hit Modify in the Edit menu, then type “none” (sans quotes) in the Value Data box and click OK. Others on the web say it can be solved by entering regsvr32 /i shell32.dll in the Run command in your Start menu. 22 | MAXIM MAXIMU XIMUM UM PC P | OCT 09 | www.maximumpc.com Get Your Hack On These 9 amazing DIY projects will give new meaning to your old hardware By ALEX CASTLE, NORMAN CHAN, AND FLORENCE ION Techies are too often tempted by the lure of new technology, leaving perfectly good hardware drifting in the wake of compulsive upgrading. And while we love getting new gadgets as much as the next geek, we also like how a new purchase gives us the opportunity to take apart and tinker with our older gear in the Lab. Whether it’s by soldering circuit boards or loading opensource firmware, we pride ourselves on being able to stretch the lifespan of older electronics by performing undocumented (and sometimes warranty-breaking) hardware hacks. The projects we’ve included here range from relatively safe software tweaks to more challenging technical exercises. You’ll learn how to bend USB connections to your will and imbue home routers and digital cameras with robust new features. We’ve also taken some inspiration from projects we’ve seen online, including building a blue laser gun and making a digital picture frame you can mount on the wall of your office. These hacks will help you showcase your craftiness and give you a better understanding of how your electronics work. And the best part is that your old hardware will be faster, cooler, and more awesome afterward. So, let’s get hacking! www.maximumpc.com | OCT 09 | MAXIM MAXIMU XIMUM UM PC P | 23 HARDWARE HACKS Power Everything with USB A B C A simple first modification for budding do-it-yourselfers is to alter a non-USB gadget so that it can be run off of USB power from your computer. This mod is fairly easy to perform and is an important part of many more-complicated DIY projects, such as the USB charger on the next page. Here, we show you how to use USB to power a desk fan and book-light lamp. First, a quick primer on USB power. Any USB cable (2.0 or 1.0) is composed of four wires—two for data and two for electricity. The power is delivered across the outer two pins—a +5-volt wire and a ground. USB connectors are configured to provide 100 milliamps of current through these pins when in “low-power” mode or 500 milliamps in “high-power” mode. Although some USB connectors will provide maximum power without any questions asked, most won’t unless the USB device requests high power using the proper protocols. Most USB hacks aren’t that sophisticated, and are therefore limited to about 100-200 milliamps of current. One last warning: An improper USB mod that results in a short circuit can fry your USB port or even your motherboard. So make absolutely sure that all wires are spliced correctly and that any exposed copper is covered with electrical tape or heat-shrink tubing. CASE-FAN DESK-FAN Our first project is to turn a case fan into one we can use on our desk to keep us cool as we work. All that’s needed is a 5-volt case fan (preferably with grill) and an unused USB cable. First, you’ll have to expose the four internal wires in your old USB cable, so snip it near the end furthest from the connector for the PC, and use a razor blade or other sharp knife to cut back the outer, rubber coating. Pull back the foil insulation, and locate the four wires inside. You should see red, black, white, and green wires inside (image A). Using a knife or wire strippers, expose the ends of the red and black wires. Your case fan should have two wires—one red and one black—terminating in a Molex power connector. Snip and strip the wires (image B). Following convention, the red wire is positive, and the black is ground—just like in the USB cable. Simply twist the exposed ends of the red wires together, solder, and cover with electrical tape or heatshrink tubing to prevent the wires from shorting (Image C). Do the same for the black wires. Just like that, you have a USB-powered fan for your desk. If you want to get fancy, make a fan stand out of a bent coat hanger. D 24 | MAXIM MAXIMU XIMUUM M PPCC | OCT 09 | www.maximumpc.com BOOK-LIGHT CASE-LIGHT Using very much the same procedure as above, you can convert an old battery-powered reading light into a USB-powered lamp to illuminate the back of your case. All you need to do is find an LED reading lamp that uses around 5 volts (the equivalent of about three AAA batteries) and open it up with a screwdriver. Under the battery compartment, you should find a red and black wire (image D). Splice the two wires to the wires in a USB cable, just like with the fan, then put the battery cover back on the lamp, chipping out a hole big enough to feed the USB cable through. Slap a strip of poster tape on the bottom, plant it on the back of your case, and plug it in. Create a Battery-Powered USB Charger Nothing can ruin a nerd outing faster than a catastrophic battery failure in one of your vital gadgets. Fortunately, although you may not always have access to an outlet and a wall-wart to recharge, it’s possible to create an emergency backup battery that fits inside a common Altoids tin and can power your toys for at least a few extra minutes—all for just a couple of bucks. GATHER THE PARTS First, you’ll need to find a suitable casing for your USB charger. A perennial favorite of amateur gadgeteers: Altoids-style tin boxes. They’re cheap, sturdy, and relatively attractive. The traditional tin, about as big as a deck of cards, provides ample room for the components we’ll be using, but if you’re ambitious, it’s also possible to cram them into the newer, small Altoids tins. In addition to the tin, you’ll also need the following parts. The total cost of parts (sans tools) should be only a few dollars, but you’ll either have to do some scavenging or place an order online to get some of the components. A 9V battery clip A +5V voltage regulator A female USB connector A 9v battery Insulated copper wire Soldering equipment A Dremel tool A B CUT THE ALTOIDS TIN Vin Vout Ground 9 Volt Battery - To start, we need to make a hole in the side of the tin big enough to hold the female USB connector (image A). When done, this is where you’ll plug in your gadgets; it will be the only visible difference between your charger and a runof-the-mill Altoids tin. Make the hole on one of the narrow ends of the tin, a little to the left or right of center. We used a Dremel to make our hole, though you can also do it with a drill or a hand file. Try to make the hole just big enough for the connector to fit into, and no bigger. Voltage Regulator USB Connector WIRE THE CIRCUIT COMPLETE THE PACKAGE Next, we’ll need to put together the circuit that will allow us to charge USB devices (which need about 5 volts) with a 9-volt battery. If electrical engineering sends you into a cold sweat, don’t worry; this is about as simple as a circuit can get. We’ll be connecting the positive (red) wire from the battery clip to the Vin pin on the voltage regulator, and the Vout pin to the +5V pin on the USB connector. We’ll also connect the ground wire from the battery clip to the ground pin on the regulator and the USB connector. Confused? Just solder everything together according to the diagram (image B). After you’re done soldering, wrap the connections in electrical tape so they don’t short out as we install the circuit in the tin casing. Since both the battery clip and voltage regulator are smaller than the USB connector, you should be able to feed them through the hole first, and then fit the USB connector into it so that the lip of the connector rests on the edge of the hole. Once you’ve got everything tucked neatly into the case, with the voltage regulator sitting beside the connector, use some hot glue or epoxy to hold the wires in place. www.maximumpc.com | OCT 09 | MAXIM MAXIMU XIMUM UM PC P | 25 HARDWARE HACKS Get Stereoscopic 3D with Your Existing Hardware Stereoscopic 3D is the Next Big Thing™ for PC gaming, at least if you believe Nvidia’s marketing department. But not everyone has $200 to spend on Nvidia’s 3D Vision kit, let alone a new 120Hz LCD monitor required to display it. Thankfully, there’s a way for you to play your games in 3D without buying any expensive new hardware. Nvidia’s 3D Vision drivers actually include an anaglyph mode so you can experience 3D gaming with red/cyan 3D glasses. The one caveat: This method only works if you have an Nvidia GPU and are running Windows Vista or Windows 7. Here’s how to get anaglyph 3D up and running in less than 10 minutes. DOWNLOAD THE DRIVERS First, you need to download Nvidia’s 3D Vision drivers. Head over to the download page (http://bit.ly/YZsm) and select 3D Vision as the product type, along with your operating system. If you aren’t running Nvidia’s latest GeForce videocard drivers (version 186.18 at press time), you’ll have to download and install those, as well. TURN ON 3D VISION ENABLE ANAGLYPH MODE In the following pop-up window, click “Enable 3D Vision Discover.” This is the option that switches Nvidia’s 3D Vision settings from 120Hz shutter-based 3D to anaglyph (red/cyan) that can run on any normal 60Hz monitor. ROCK THE RETRO 3D GLASSES The next time you launch a 3D Vision–compatible game, you’ll be able to play it in 3D with any pair of generic red/cyan glasses— the set Intel gave away for viewing this year’s 3D ads during Super Bowl works perfectly, for example. You can also purchase a pair for less than $2 online (http://bit.ly/ONYgK). During gameplay, you can toggle anaglyph view with the Ctrl+T shortcut. Since anaglyph 3D is based on color filters, games can lose a bit of their vibrancy when you’re playing in this 3D mode. Left 4 Dead, for example, works wonderfully, but games with lots of red and blue color tones (like Team Fortress 2) do not. We recommend adjusting the 3D depth with Ctrl+F3 and Ctrl+F4 to find the best level of comfort for you. After you’ve installed the 3D Vision drivers, launch the Nvidia Control Panel from the Windows Control Panel menu. You should see a section labeled Stereoscopic 3D. Expand that menu and click “Enable Stereoscopic 3D.” Control Your PC with a Wii Remote While some of us who jumped on the Wii bandwagon have a great time with Super Mario Galaxy and Cooking Mama, there are undoubtedly a few regretful gamers who just can’t get the hang of Nintendo’s waggle-based gaming console. But there’s no need to chuck that Wii out the window yet—you can use the Wii Remote as a wireless pointer for your PC! button in the Wii Remote’s battery compartment. Your PC should detect it as Nintendo RVL-CNT-01. No Bluetooth passkey should be required. FIND A COMPATIBLE BLUETOOTH ADAPTER RUN WIINREMOTE SOFTWARE The Wii Remote uses Bluetooth to connect to the Wii, but Windows will also recognize it as a Human Interface Device. To connect the Wii Remote to your PC, you’ll need a compatible Bluetooth receiver. Most new laptops have integrated Bluetooth, but you can also purchase a USB Bluetooth receiver online for less than $25. Check the Wii Brew wiki (http://bit.ly/oO7et) for a list of compatible adapters. PAIR THE WII REMOTE WITH YOUR PC We paired the Wii Remote with our Dell laptop using the “Add Bluetooth Device” option in the Windows Control Panel. For the laptop to recognize the controller, we also had to press the red sync 26 | MAXIM MAXIMU XIMUM UM PC P | OCT 09 | www.maximumpc.com Now, download and launch the latest version of WiinRemote (http://bit.ly/181NVV). If you successfully paired your Wii Remote, the program will let you calibrate the motion sensor and assign buttons. By default, the program uses the controller’s gyroscope to control your mouse cursor. The Wii Nunchuck peripheral’s analog stick will also control mouse movement. You can achieve more accurate control by activating the IR sensor, but you’ll need to mount two infrared light sources above your monitor for this to work. The Wii’s IR light bar is suitable, and we powered it by splicing its proprietary plug into a USB cable. HARDWARE HACKS Add DSLR Features to Your Canon Point-and-Shoot Digicam We love point-and-shoot pocket cameras for their small size and ease of use, but we lament their relatively paltry feature sets when compared to more expensive DSLR models. The good news, for owners of the popular Canon PowerShot cameras, is that your consumer-grade gadget can be upgraded with custom software to endow it with professional features like RAW image recording and live histogram feedback. CHDK (Canon Hack Development Kit, http://bit.ly/VXbz) is an easy-to-install software package created by a savvy group of programmers to supercharge the Canon PowerShot. We show you how to safely install and configure this free firmware add-on with no risk to your camera. FIND THE RIGHT SOFTWARE Download the version of CHDK software that’s appropriate for your Canon PowerShot. CHDK only works with a camera using Canon’s Digic II or newer image sensor—any PowerShot made after 2005 should work. To find the right download, you’ll have to first find your existing firmware version number. Using Notepad or any other text-editing tool, create and save an empty file named ver.req. You’ll have to disable the “Hide extensions for known file types” setting under Windows Explorer’s Folder Options in order to change the file extension to .req. Using a USB card reader, drop this file into the root directory of your SD card (not while the card is in the camera). Put the card back in your camera, turn on the camera under playback mode, and press the “set” and “disp.” buttons together. If done properly, the camera should display the firmware version number, i.e., Firmware Ver GM1.00C. Next, head over to the CHDK download site (http://bit. ly/mscif) and find your camera model and firmware version. Download the corresponding Zip file under the column labeled Complete. LOAD CHDK With your SD card back in a card reader and connected to your PC, extract the entire contents of the software package into the root directory of the card. Now you’re ready to run the CHDK software. Put the card back in your camera again and turn on your camera under playback mode (the lens should be retracted). Hit the Menu button, and scroll down to the bottom of the first menu tab. You should see an option for “firm update.” Select this and choose Yes when prompted. This is an entirely safe process since CHDK installs additional software instead of replacing the existing firmware in your camera. CHDK should automatically load in a few seconds and display its logo. You can now switch the camera to capture mode to begin using the new features. Keep in mind that since your core firmware hasn’t actually been modified, CHDK will be disabled every time you turn off your camera, and you’ll have to manually enable it with every boot. We’ll go over how to make CHDK automatically boot later. 28 | MAXIM MAXIMU XIMUM UM PC P | OCT 09 | www.maximumpc.com CONFIGURE THE NEW FEATURES The first thing you’ll notice with CHDK enabled is that the onscreen display (OSD) shows new information, including the remaining battery life as a percentage, focus distance in meters, and a digital clock. To enter the special CHDK menu, you need to enter Alt mode by pressing the Shortcut button on your camera (this button is later configurable). When in Alt mode, you’ll see an <ALT> indicator at the bottom of the OSD. Pressing the Menu button will bring up the CHDK menu, where you can enable a live histogram, zebra stripes (to indicate overexposure), and turn on RAW recording mode. The available feature set depends on your PowerShot model, so check the official CHDK wiki (http://bit.ly/Ge2ck) for more information. BOOT CHDK AT STARTUP If you don’t want to manually load CHDK every time you use your camera, you can set it to auto-load, as long as your SD card is smaller than 2GB and not formatted for FAT32 (most aren’t by default). From the same Zip file you downloaded earlier, copy the PS.fir and DISKBOOT.bin files to the root directory of your SD card. Enter the CHDK menu using Alt mode and navigate to Miscellaneous Stuff. Select “Make Card Bootable” and hit the set button. Take out the SD card and slide its physical locking mechanism into the “lock” position. The next time you turn on the camera, CHDK should automatically start up as well. HARDWARE HACKS Make a Working Laser Phaser As a kid, did you ever run around your back yard waving a plastic toy gun around and making “pew pew” noises? Did you ever wish that toy gun could shoot an actual laser beam? Well, you’re a grown up now, and it’s time to make your dreams come true. We’re going to show you how to implant a real, high-powered blue laser into a plastic Star Trek Phaser. But before we tell you how to make it, we need to stress that this how-to is showing you how to take a perfectly good toy and turn it into something that is absolutely, unequivocally NOT A TOY. The blue laser used in this guide can burn electrical tape and pop balloons, which means that it’s also strong enough to do some extreme This is a long exposure shot in a dark room Your results may vary. eye damage to anyone unlucky enough to catch a stray reflection. Because of this, always wear proper eye protection while using the laser, and NEVER point REPLACE THE INTERNALS the laser at another person. Next, remove the light bulb from its black plastic clip, and grind down the clip so that the side opposite the two prongs is totally flat. If you remove the metal cap that covers the acrylic laser GET A LASER lens, the laser will fit perfectly into the hole in the clip. Now hot There are two ways you can get the blue laser you’ll need for glue the black plastic clip into the “barrel” of the phaser, and your phaser—you can buy one on the Internet for about $30, grind out anything in the front of the phaser that would keep or you can salvage one from an old Blu-ray or HD DVD player. the laser housing from fitting in behind it. Connect the laser to If you opt for the scavenged laser, be forewarned: You’ll have the battery so it turns on, align it so that it’s straight, and glue it to build your own driver circuit, a task that’s pretty easy by into position. circuit-building standards, but not for someone who doesn’t Finally, fix your switch into the trigger hole of the phaser, know his way around a soldering iron. and use wires to complete the circuit between the battery, the switch, and the driver circuit. Use a little hot glue to stick everyPREPARE THE PHASER thing in place, and reconnect the two halves of the phaser. The You’ll need a plastic gun to put the laser in. We bought a retro laser will burn many dark-colored items, including electrical Star Trek phaser on eBay for $30, but there’s no reason you tape and some black plastic, and it can also pop balloons. Blue couldn’t do basically the same thing to a different toy. To prelasers are hard to see in the air, even at high power, so if you pare the toy phaser, you’ll need to make a couple of easy modiwant to see the beam, use some sort of particles in the air, such fications using pliers and a rotary tool, such as a Dremel. First, as smoke or fog. Have fun, and remember to be safe. widen the battery compartment so it can fit a 9-volt battery, instead of two AAs. Do this by pulling out the battery contacts with your pliers, then using the rotary tool to grind away all of the plastic protrusions inside the battery case. Also drill a hole that you can feed the wires from the 9V battery clip through. 30 | MAXIM MAXIMU XIMUM UM PC P | OCT 09 | www.maximumpc.com HARDWARE HACKS Upgrade Your Router to Manage Home Network Traffic Third-party router software has been around for a while, but we can’t help but keep recommending it to users who want to add undocumented features to their home network. Our favorite router firmware package is still Tomato (http://bit.ly/ nTxhh), which we favor for its compatibility with a wide range of router brands and models, user-friendly interface, and powerful feature set. We’ll show you how to upgrade your router’s firmware to the newest version of Tomato and then configure the Quality of Service settings to manage your network traffic. A INSTALL TOMATO FIRMWARE First, you need to make sure your router is supported by Tomato. The Linksys WRT54G-series routers work best, but some Buffalo and Asus routers also work. Check the Tomato FAQ (http://bit.ly/nrfnY) to see if your router model and version number is supported. Download the latest firmware package (version 1.25 at press time) and extract its files with 7-Zip (www.7-zip.org). Access your router’s administration page with its gateway address (default is 192.168.1.1) and find the Firmware Upgrade section. Choose the firmware .bin file that matches your router and begin the upgrade process. Tomato will automatically transfer your router settings over so you don’t have to reconfigure the basic settings (image A). B CONFIGURE QUALITY OF SERVICE Quality of Service lets you manage the different types of data packets as they are routed around your home network and to your service provider. Internet surfing, gaming, VoIP, and BitTorrent traffic can all be prioritized so you can run web services simultaneously without clogging your bandwidth. There’s no one set of settings that will work for everyone, but we’ll give you the basics for you to get started. QoS works by classifying network traffic types and then ordering those classes for bandwidth prioritization. First, you have to determine your connection’s maximum uplink bandwidth (since upload traffic is the source of most connection clutter). We used Speedtest.net to find our upload cap, and put that bitrate number under Max Bandwidth (image B). Next, you’ll have to configure the upper and lower bandwidth bounds for each class of packet. By default, the “Highest” class has a range of 80 to 100 percent. This means that packets ranked in this class will always claim at least 80 percent of your bandwidth. The “Lowest” class, on the other hand, has a range of 2 to 95 percent. This means packets under this class will at most claim 95 percent of your bandwidth, if it’s available. Higher ranked classes should be reserved for services that require steady connections, like gaming and VoIP, while lower priority classes should be reserved for normal web surfing, downloads, and peer to peer networks like BitTorrent. Under the Classification menu, you’ll have to assign specific services to class rankings (image C). You can identify services based on their network protocol type, port, or packet size. You can even use MAC addresses and local IPs to relegate one user on your home network to a specific prioritization class. This is 32 | MAXIM MAXIMU XIMUM UM PC P | OCT 09 | www.maximumpc.com C where trial and error will help, and we recommend that you utilize Tomato’s Graphs feature to show you what effect your configuration has on your current traffic. We also recommend referencing the Tomato wiki (http://bit.ly/aAu73) for further clarification on all of the firmware’s varied settings. Turn Your iPod into a Mini-PDA For most people, an MP3 player serves a pretty narrow purpose: It plays music, maybe a video here or there if you’ve got a newer model, and might have a handful of applications. All in all, though, MP3 players are rarely treated as anything more than tiny, portable jukeboxes, which is a shame, because as gadgets they’ve got the potential for so much more. That’s why we’re going to show you how to install custom Rockbox firmware—to add support for new codecs, gapless playback, and even Doom on your MP3 player. Rockbox is open-source replacement firmware for MP3 players. It supports a wide range of players, including many (but not all) players from Apple, Archos, Cowon, iRiver, Olympus, SanDisk, and Toshiba. Before reading any further, check out the chart at the top of the Rockbox homepage (www.rockbox.org) to see whether your specific model is supported. If it’s not, you are sadly out of luck, for the time being. INSTALL ROCKBOX First, you’ll need to go to the Rockbox website and download the Rockbox utility (http://bit.ly/K8Eat), which includes an automatic installer tool that works with any of the supported MP3 players. Simply run the utility, and it will automatically detect that this is the first time it’s been run and ask if you want to install Rockbox on a new device. Plug your device into your computer, then select whichever drive letter has been assigned to it, and specify what model it is (image A). Click OK. The Rockbox utility will now allow you to customize your Rockbox installation. Generally, clicking Complete Installation is advisable, as it will also install the full set of extra plugins to allow you to get the most out of your hacked MP3 player. Sit tight for a bit while the installation completes, then select whichever theme you want installed on your MP3 player (image B). You’ve now got a hacked MP3 player. You can change your theme whenever you want to, using the Rockbox utility. Read the Rockbox documentation for your player to find out how you can customize it using the extensive options menu. A B OPTIONS Rockbox’s Notable Features ADVANCED MEDIA PLAYBACK Rockbox allows you to expand the functionality of your MP3 player box install includes in several core ways. For instance, with Rockbox firmware, an old a bunch of apps and iPod Photo (the one before the iPod Video) is actually capable of games, including clas- playing .mpeg video files. Many players can play music and video sics like Minesweeper in more formats and containers than are supported by default, and Sudoku. such as FLAC and Matroska. Additionally, Rockbox can add voice to menus, and supports voice recognition, to make it easier for DOOM people with impaired vision to use an MP3 player. Did we mention that you can play Doom? On a funky, old-school iPod? Sure, trying to APPS, APPS, APPS play Doom on a grayscale iPod screen is enough to make your With Rockbox, you get access to an enormous catalog of apps (most eyes commit ritual seppuku, but the novelty factor alone is sure to of them written by hobbyists) that you can load onto your player for keep you blasting demons with a click-wheel for a few minutes at added functionality or just to have some fun. The standard Rock least. Remember that nerd-cred thing? This is how you get it. www.maximumpc.com | OCT 09 | MAXIM MAXIMU XIMUM UM PC P | 33 HARDWARE HACKS Build a Netbook Picture Frame Considering that netbooks get outdated by model refreshes every few months, it’s quite likely you’ll find yourself with an old netbook lying around the house, catching dust. But there’s no need to let it go to waste. Instead, turn it into a Wi-Fi-enabled digital picture frame! We used an old Acer Aspire One for this project, but it should work with most netbooks. DISASSEMBLE THE NETBOOK The disassembly process will be different for each netbook model, but generally, you need to remove all the screws on the netbook’s underside (which are sometimes hidden under rubber pads) to free the motherboard from its plastic shell. Be careful not to cut any wires, and make note of where you disconnect cables. The important components to extract intact are the motherboard, hard drive, Wi-Fi card, and LCD screen, of course. We also kept the small daughterboard, which houses two extra USB ports and the power button (image A). CHOOSE A FRAME It took us quite a bit of time to decide on where to purchase a frame and how the LCD would be fitted inside. We unsuccessfully searched for a premade shadowbox frame that matched the dimensions of our netbook’s 8x4.5-inch LCD panel, an unorthodox size for picture frames. You may have more luck 34 | MAXIM MAXIMU XIMUM UM PC P | OCT 09 | www.maximumpc.com with your own netbook (check http://bit.ly/oUgwv for cheap shadow box frames), but we had to have our frame custom made at a local shop for $100. After a week, we had a custom-made frame with the LCD in place. We ordered a glassless, simple black frame with about three inches of allowance in the back for whatever hardware tweaking was necessary. The frame specialists were kind enough to seal in the LCD panel with a piece of cardboard, while making sure the LCD ribbon was still accessible (image B). ASSEMBLE THE FRAME With a well-made, well-measured frame, the actual assembly of the photo frame shouldn’t be much of a challenge. First, make sure all of the motherboard cables are attached, including the LCD ribbon, the HDD SATA cable, the connection to the I/O board (if there is one), and the power cable. To mount the motherboard into the case, you’ll need to create some small spacers so that it doesn’t sit directly on the LCD screen’s backing. You can use whatever’s handy; we cut ours out of dense packing foam. With a netbook motherboard, heat shouldn’t be much of an issue, but just in case try to place the spacers under screw holes near the corners, away from the CPU. To fix everything in place permanently, glue the spacers to the frame and use pins through the screw holes to hold the motherboard down. A The Wi-Fi card attached to your motherboard should have two wires attached to it. The card needs these antenna wires to function, so make sure they’re secured inside the frame, with the ends taped down at least six inches apart. You can use additional foam spacers on the corners of the motherboard to hold the I/O board and HDD in place, or you can screw them to the back edge of the frame (image C). SET UP THE SLIDE SHOW SOFTWARE To configure your picture frame, plug a USB keyboard and mouse into the motherboard (alternately, you could do your entire software configuration on the netbook before you take it apart). Remove any unnecessary software, such as image editors, office suites, and antivirus applications, and sweep your hard drive. You’ll also need to download and install a slide show application to display photos you have stored on either your hard drive or USB thumb drive, or accessed via an RSS feed. We used Flickr as our photo storing service; we chose this service because you can update your feed remotely, from almost any Internet-capable device that can send picture attachments. There are actually several programs that can run a Flickr slide show, though we picked Google Photo Screensaver (http://bit.ly/11q4dx). Once you’ve downloaded and installed the screensaver, either run the application straight from the installer or rightclick your Desktop and select Properties. Then, under the Screen Saver tab, choose Google Photos Screensaver and go into Settings. From here, you can configure whether to stream your photos from a list of RSS feeds, Picasa, or a specific folder on your computer. To run the screensaver from Flickr, go to your photo stream (flickr.com/photos/yourusername), scroll down to the bottom of the page, and find the RSS icon. Copy the RSS address and paste it under the Configure option in your Google Photos Screensaver preferences. Click OK, and you’re all set up. In addition to the slide show, you can set your frame up as a digital wall clock, have it stream daily headlines from a news RSS feed, or hook it up to a set of speakers and run an Internet radio portal. To control the frame, you can hook up a wireless keyboard and mouse. Our netbook had Bluetooth capabilities, so we used Bluetooth peripherals, including the Wii Remote! B C www.maximumpc.com | OCT 09 | MAXIM MAXIMU XIMUM UM PC P | 35 I am powerful 36 | MAXIM MAXIMU XIMUM UM PC P | OCT 09 | www.maximumpc.com and I can fly Your Upgrade Path to Netbook Self-Realization BY NATHAN EDWARDS There’s no denying that netbooks possess many positive attributes, as evidenced by their meteoric rise in popularity. But all the attention garnered by their portability and low cost can’t mask the deep and troubling performance that netbooks suffer. The fact is, there are undeniable trade-offs inherent to a sub-$400 computer. You’re just not going to get the same performance from a netbook as from something that costs three times as much. Slow single-core Atom processors; middling hard drives; pokey, undersized SSDs; and only 1GB of RAM rob the netbook of its potential. But there is hope. Whether you have an old Eee PC with a 12GB SSD or a new netbook with an Atom N280 chip and a 160GB hard drive, you can make substantial improvements without forking over too much dough. We’ll show you first-hand how netbooks can overcome their humble beginnings. We’ll upgrade a typical older netbook—an Eee PC 901 with a 4GB SSD soldered on the mobo and an 8GB PCI-E SSD—as well as a brand-new Toshiba NB205, to show how every netbook, from bottom-of-the-barrel to top-of-the-line, can benefit from upgrades. Consider this your guide on the journey to netbook empowerment. www.maximumpc.com | OCT 09 | MAXIM MAXIMU XIMUM UM PC P | 37 NE TBOOK UPGR ADES Uplift Your Memory Pep up your load times and app performance with more RAM We used a 2GB DDR2/667 SODIMM from Corsair for our upgrades. It costs less than the Twilight Bluray release. Adding more RAM is nearly always the cheapest and easiest way to upgrade your netbook. In order to get netbook pricing for Windows, manufacturers limit them to 1GB of RAM. Fortunately, most netbooks have easily accessible RAM slots and use standard 200-pin DDR2 SODIMMs. For less than $25 online, you can buy a 2GB DDR2 SODIMM to replace the 1GB in your netbook—most have a single SODIMM slot, so you can’t just add another 1GB, and the Atom platform is limited to 2GB of RAM. We bought a 2GB Corsair ValueSelect DDR2/667 (PC2-5300) module—the Atom N280 platform in new netbooks has a 667MHz front-side bus; older netbooks with the N270 chip have a 533MHz FSB and will underclock the RAM. In nearly all netbooks, replacing the RAM will take less than five minutes. First, power down your netbook and remove the battery. On the bottom of the chassis will be one or more panels that can be removed to reveal the RAM and/or hard drive, usually fastened with Philips-head screws. Open the panel and find the SODIMM. Release the clasps that hold it in, and the module should pop up slightly. Remove it and line up the 2GB SODIMM and slide it into place, then close the panel, replace the battery, and boot your netbook. Press F2 during setup to go into the BIOS and make sure the BENCHMARKS Photoshop CS3 (sec) Eee 901 w/1GB RAM Eee 901 w/2GB RAM Toshiba NB205 w/1GB RAM Toshiba NB205 w/2GB RAM 1,441 1,163 673 660 Scores obtained using our standard Photoshop CS3 benchmark. On the Toshiba NB205, the RAM slot is easily accessible from the bottom of the netbook’s chassis. RAM registers, then boot your computer normally. We upgraded the RAM in an older Asus Eee 901 and a brand-new Toshiba NB205 netbook and immediately saw the difference. The improvement was particularly noteworthy on the 901, which, thanks to its anemic low-cost solid state drives, has been the slowest netbook we’ve tested to date. Before the RAM upgrade, it took the 901 1,441 seconds to run through our Photoshop benchmark, compared with the 673 seconds it took the Toshiba NB205. But with 2GB of RAM, the 901 plowed through in a (comparatively) zippy 1,163 seconds— that’s nearly a 24 percent improvement. The NB205, on the other hand, dropped just 13 seconds with its RAM upgrade, due to its faster standard hard drive. UPGRADABILITY Accessing Your Inner Hardware So what makes a netbook a good candidate for an upgrade? Easy Some netbooks, however, make swapping out parts more dif- access to the parts you’ll be replacing, of course. Most netbook manu- ficult, if not impossible. Toshiba’s NB205 has easy-to-remove panels, facturers know that just because their customers bought a computer but the hard drive panel is secured with TORX-6 screws, not Phillips- with just 1GB of RAM doesn’t mean that they’re going to keep it at 1GB, head. MSI’s Wind U123 is upgradeable, but you’ll have to take off the and so most netbook models come with easy-to-remove RAM and hard entire bottom of the netbook, held in by 10 screws. The Eee 1005HA drive panels. Often all you’ll need is a Phillips screwdriver and a few has a panel for the RAM, but no hard drive access (or removable battery). minutes of your time. But not always. Easy-upgrade candidates include the Asus Eee 901, 1000, And some models are downright evil: The first Acer Aspire One, the Eee 1008HA, and current-model Seashell Eee PCs require a full 1000HA/HE models, Lenovo’s S10 series, and newer Acer Aspire One- tear-down, including keyboard and motherboard removal, to get to the series netbooks, as well as most Samsung, HP, and Dell netbooks. RAM and hard drive. Avoid these if you ever want to upgrade. 38 | MAXIM MAXIMU XIMUUM M PPCC | OCT 09 | www.maximumpc.com NE TBOOK UPGR ADES Transform Your SATA Hard Disk Drive Why settle for stock when you can have greater speed and/or capacity? Seagate’s Momentus 7200.4 is speedy, roomy, and only drains the battery a tad faster than a 5,400rpm drive. Although early netbooks shipped with slow, low-capacity Mini PCI-E solid state drives, the vast majority now come with standard 2.5-inch SATA drives—usually 5,400rpm magnetic hard drives with 120GB to 160GB of storage. And that means that you have plenty of options: You can trade for a faster, higher-capacity hard drive, or a much faster solid state drive. Because solid state drives have no moving parts, they are sturdier and less prone to shock failure than standard hard drives and typically use less power. Unless you want to spend an arm and a leg on a high-capacity SSD, though, you’ll probably have to sacrifice storage space for speed. We took our brand-new Toshiba NB205 (with a 2GB RAM upgrade in place) and tested it first with the stock Toshiba 160GB 5,400rpm drive, and then with a 64GB RunCore Pro IV SATA SSD ($250, www.runcore.com), as well as a 500GB Seagate Momentus 7200.4 HDD ($130, www.seagate.com). However, any standard 2.5-inch drive will also work. BENCHMARKS Toshiba 160GB HDD RunCore 64GB SSD Seagate 500GB HDD Photoshop CS3 (sec) 660 614 636 PCMark05 HDD 4,278 20,339 5,167 HDTach Avg Read (MB/s) 47.5 103.4 80.3 HDTach Burst (MB/s) 109.6 105.1 106 HDTach CPU Utilization 11% 12% 11% HDTach random access (ms) 18.1 0.3 17.3 Battery Life (hr:min) 6:27 6:31 6:10 Best scores are bolded. All tests performed on a Toshiba NB205 netbook with 2GB Corsair DDR2 RAM running Windows XP SP3; configurations only differed in hard drive choice. Photoshop scores obtained using our standard Photoshop CS3 benchmark. PCMark subscore obtained using PCMark05’s HDD benchmark tests. HDTach scores obtained using HDTach 3.0.1.0. Battery life obtained using our standard full-screen DVD-quality video battery-rundown test with screen brightness and volume at 50 percent and all radios off. RunCore’s Pro IV SSD ships with an external USB-to-SATA enclosure; for drives that don’t, enclosures are easy enough to find online. Replacing your hard drive, provided you can access it, is easy. All you need is a 2.5-inch external USB-toSATA enclosure and a trial version of Acronis True Image Home 2009. Put the new drive into the enclosure, plug it into your computer’s USB ports, and then image the drive (see sidebar below for more details on this). Adding the 500GB Seagate Momentus 7200.4 drive to our netbook gave us a big boost in capacity, modest gains in performance, and a minor drop in battery life. With the Seagate, our netbook’s Photoshop benchmark time improved five percent, and its PCMark05 HDD subscore went from 4,268 to 5,167. Read speeds increased from 47MB/s to more than 80MB/s, while we lost around 20 minutes of battery life—from 6:30 (hr:min) to 6:10. The RunCore drive’s gains were more impressive. RunCore’s Pro IV SSD uses the same Indilinx controller as the blazing-fast Patriot Torqx drive we tested in September. It also gets bonus points for coming with an external SATAto-USB enclosure. With 2GB of RAM and the RunCore SSD, the NB205’s Photoshop benchmark time improved by eight percent, while the PCMark05 HDD subscore shot from 4,268 to a whopping 20,339. And no wonder; the RunCore’s average sustained read speed exceeded 100MB/s—more than twice the speed of the original drive. Random-access time plummeted from 18.1ms to 0.3ms. We didn’t see as much battery life improvement as we expected, though: In our battery rundown test, the RunCoreequipped NB205 bested the standard loadout by a mere four minutes. Similar SSDs will offer similar results. DATA MIGRATION Affirm Your (Drive) Image So you’re all ready to swap out your netbook’s old hard drive and your computer. Refer to the “Transform Your Hard Disk Drive” replace it with something better. But reinstalling your operating and “Empower Your Mini PCI-E SSD” sections of the main article system, programs, and files can be a real pain in the ass, espe- to determine your specific path. cially since you don’t have an optical drive. Rather than messing Once your new drive is connected, you can use the free with all of that nonsense, we’ll show you how to use a drive trial of Acronis True Image (www.acronis.com) to clone your imaging program to make an exact clone of your netbook hard old hard drive to it. The trial is fully functional for 15 days; the drive. It’s easy and cheap, and you can be ready to go as soon as full version is $50. Download and install the trial, then run it the new drive is installed in your computer. and hit Utilities in the left-hand menu. Click “Clone disk,” then First you’re going to need a way to connect the new drive to 40 | MAXIM MAXIMU XIMUUM M PPCC | OCT 09 | www.maximumpc.com select the Manual radio button. You’ll be prompted to select Empower Your Mini PCI-E SSD Huge performance increases await you So, you were a netbook early adopter. You grabbed a netbook with a tiny Mini PCI-E SSD, like the Asus Eee 901 we reviewed in December 2008. You don’t mind the tiny keyboard, and you love the battery life. But gosh, having just 12GB of molasses-slow storage is painful, and there’s no room for a 2.5-inch SATA drive. Fortunately, several manufacturers make netbook-specific Mini PCI-E SSDs. We swapped out our Eee 901’s original drive with two aftermarket Mini PCI-E SSDs to see if we could wring some more performance out of the machine. In both cases, we left in the 2GB RAM upgrade from the beginning of the article—it’s such a cheap and easy upgrade that we recommend every netbook owner do that first. Both RunCore and Super Talent make Mini PCI-E SSDs specifically for 900-series Eee PCs. We tested RunCore’s 64GB Pro SATA Mini PCI-E SSD ($220, www.runcore.com), and Super Talent’s Mini PCI-E 64GB MLC SSD ($205, www. supertalent.com). If you have a different Mini PCI-E netbook, both vendors sell find aftermarket SSDs for devices. Cloning your C: drive to a Mini PCI-E drive can be tricky. The RunCore drive has a USB port on it, making cloning easy, but the Super Talent doesn’t. Eee 901 users are in luck, however; though you’ll eventually use your new SSD as your C: drive, you’re actually replacing the 8GB D: drive—the C: drive is non-removable. Power down the machine and remove the battery, then unscrew and remove the access panel on the bottom of the chassis, and unscrew the two Phillips-head screws holding the SSD in place. Remove the old drive, then slot the new SSD into place, and boot Windows normally, then follow the drive imaging instructions in the sidebar below. The cloning process will make your new SSD the active drive, but it wouldn’t hurt to verify the boot order in the BIOS first. Both solid state drives offered much better performance than the pitiful SSD the 901 ships with. How much better? Try nearly 100MB/s reads compared to just 30MB/s pre-upgrade. Both SSDs halved the time it took the 901 to complete our Photoshop benchmark, even after the RAM upgrade, making it (finally) competitive with other netbooks. The Super Talent performed slightly better than the RunCore on this test, but The only tricky part is making sure you don’t lose or strip out the screws holding the drive in. the RunCore drive scored higher in PCMark05’s hard drive subscore: 9,912 PCMarks to the Super Talent’s 7,514. Both far outstripped the stock SSD’s measly 1,879 PCMarks. Surprisingly, battery life actually increased by about 40 minutes when using either upgrade drive. Either drive is a must-have addition to your Eee 901, and they’re comparably priced. If we had to choose, we’d go with the RunCore. It’s slightly faster, and the USB port makes it easier to use. BENCHMARKS Stock 12GB SSD RunCore 64GB Super Talent 64GB Photoshop CS3 (sec) 1,163 648 630 PCMark05 HDD 1,849 9,912 7,614 HDTach Avg Read (MB/s) 30.7 97.6 96.6 HDTach Burst (MB/s) 33.7 116.8 111 HDTach CPU Utilization 3% 8% 7% HDTach random access (ms) 0.5 0.2 0.3 Battery Life (hr:min) 4:50 5:30 5:30 Best scores are bolded. All tests performed on an Asus Eee PC 901 with 2GB Corsair DDR2 RAM running Windows XP SP3; configurations only differed in hard drive choice. Photoshop scores obtained using our standard Photoshop CS3 benchmark. PCMark subscore obtained using PCMark05’s HDD benchmark tests. HDTach scores obtained using HDTach 3.0.1.0. Battery life obtained using our standard full-screen DVD-quality video battery rundown test with screen brightness and volume at 50 percent and all radios off. Cloning your old drive directly to the new one is the fastest way to upgrade your netbook’s storage. your source disk, then your destination disk, then the method of cloning. We stuck with Proportional, but you can also do As-is or Manual, and then resize your partitions later with a partition manager like EASEUS Partition Master (www.partition-tool. com). After you confirm your choices and start the imaging, you’ll be prompted to reboot. After the reboot, Acronis will continue working and notify you when your drive is ready. Then just swap it for your old drive and go! Acronis even clones the boot sector for you, so you’ll boot into Windows automatically. www.maximumpc.com | OCT 09 | MAXIM MAXIMU XIMUUM M PPCC | 41 N NE E TT B BO OO OK KU UP PG GR RA AD DE ES S Open Your Mind to a New OS After you’ve upgraded your netbook’s hardware, give it some souped-up software BY JOHN BRANDON Chances are that your netbook came bundled with Windows XP. While this is a perfectly fine operating system, it was designed for desktop use, so it probably has more overhead than you need for your netbook. You should be running lightweight productivity applications on your netbook, not memory-hogging design suites. Windows 7 and several specialized Linux distros are better suited for light mobile computing, and upgrading to these alternatives is fairly easy. You just download the installation disc image, mount it on a CD or USB key, and boot the install wizard from your netbook’s BIOS. Some of these operating systems even have a Live CD option, which lets you try the OS without partitioning or overwriting your existing software. We take a look at some popular Windows XP alternatives for netbooks. While there are pros and cons to each, you might find an OS among them that better suits your needs, or at least piques your interest in experimentation. WINDOWS 7 RC It’s nice that netbook users have a choice of using Microsoft’s newest OS, but it can feel a little oversized on a small screen. While Vista is simply not an option for netbooks, Windows 7 is. Microsoft’s newest OS is essentially a root-level fix for Vista, solving some of the most common complaints, such as User Account Control and boot speed. That said, the customization options are similar to what you find in Vista. Windows 7 has features designed for the current era of mobile computing. Netbook users will probably want to use the Basic or Home Premium editions when the full release is available on October 22. As is, we found that the UI design in Windows 7 isn’t optimal for netbook use. At 1200x600 resolution, the buttons and menus take up too much screen real estate. While we can’t say Windows 7 is a memory hog (in fact, it’s quite snappy with just one or two apps running), it is overkill for a netbook. At its core, it’s still designed to support a robust selection of applications, such as Adobe 42 | MAXIM MAXIMU XIMUM UM PC P | OCT 09 | www.maximumpc.com Ubuntu Netbook Remix offers a scaled-down UI that’s suitable for netbook screens, but retains all the functionality of the full Linux distro. Photoshop and ProTools. It’s a multitasking behemoth that taps in quite well to the processing power of Intel’s multicore CPUs, and is far heavier in terms of disc-space usage than some of the alternatives. In tests over several days with Windows 7, memory problems became an issue—you’ll definitely want more than 1GB of RAM if you plan on using it. But Microsoft’s OS does have one huge advantage over Linux alternatives—you won’t find better software compatibility than with Windows. UBUNTU NETBOOK REMIX Ubuntu Netbook Remix (http://bit.ly/179eOh) is a variant on the popular Linux distro, but sports a new UI design and runs without some of the overhead of big brother Ubuntu 9.04, such heavy-duty built-in apps meant more for desktop than mobile use. Ubuntu Netbook Remix is remarkably easy to use. The main interface places all common functions and tools on one screen, a stark departure from the relatively blank desktop of Ubuntu 9 and Windows (or OS X, for that matter). We were impressed with Ubuntu Netbook Remix and its ability to run all open apps smoothly, even on machines with just 1GB of RAM. However, Ubuntu doesn’t come with any applications that aren’t Open Source. As such, several very common formats aren’t supported out of the box, including MP3, MPEG2, and Flash video. If you want to enable these formats in Ubuntu’s included media players, you can do so in one fell swoop by installing the package ubunturestricted-extras using your package manager. We love this OS because it works well with many apps open, has some of the best UI features (such as a main screen designed for folks who are unfamiliar with Linux), loads and boots quickly, and looks simple and elegant. NE TBOOK UPGR ADES MOBLIN Moblin (http://moblin.org) is the new netbook operating system originally developed by Intel and now part of the Linux Foundation. Moblin’s main claim to fame is that it’s designed to facilitate access to Web 2.0 sites such as Last.fm and Twitter (with built-in controls right on the taskbar). The OS uses a zone concept, which organizes apps in special areas based on typical uses making it easy to switch between them quickly. During our test, it became clear that Moblin is still in the development stage. We had lots of problems getting the distro to work correctly—it occasionally crashed when we started to the browser. Fortunately, crashes do not freeze the entire system; you just see a pop-up dialog box that asks you to send in feedback. The interface is slick, but requires some adjustment for Windows users. The toolbar drops down from the top of the screen, and there are icons for browser, status update, zones, applications, and IM. What is refreshing—and unusual—is that Moblin doesn’t really look like an OS, instead it mimics the look and feel of a website. The extra features for Twitter updates and IM are great, and there are plenty of extra apps including calculators, schedulers, and a media player. What Moblin lacks are full word processing apps— and there’s no clear way to add one. (In our tests, the Moblin library for adding apps did not let us install OpenOffice.) As an early beta, Moblin has a raft of problems, including a lack of USB key support (we tried about six of them) and problems playing even basic MP3 files. Moblin does not pretend to be a full-featured OS, but that is also what makes it attractive to netbook owners who crave speed and don’t mind sacrificing extra features. As such, the customization options are few—you can change wallpapers and themes, but Moblin lacks the depth of interface tweaks found in Windows or Ubuntu. We’re optimistic about Moblin’s prospects, but the nascent OS needs work before we’ll be willing to permanently If you can maneuver your way around the KDE environment, you’ll like Slax for its tiny footprint and speedy applications. commit to it. Ubuntu Netbook Remix has the leg up, but we do prefer the Moblin look and feel to the other contenders. SLAX Slax (www.slax.org) is a light Linux distro that’s suitable for netbooks, but has a few weak spots that need to be ironed out before it’s ready for prime time. Visually, Slax looks like a traditional KDE-based Linux distribution. For personalization, Slax includes a theme manager and the ability to change colors, but most of the work involved with customizing the UI falls to the end user, who must wade through a lot of options to get the right look and feel. We prefer the easier theme controls in Windows 7. In many ways, the controls for personalization in Slax are a throwback to older Linux distros; they’re just not as slick or user-friendly as those in more modern distros. Functionally, we were disappointed by the lack of native support for PDF documents and Flash movie files, a sign that the OS has fallen behind other options. However, there are plenty of apps included with the distro, including OpenOffice tools and the Evolution mail client. JOLICLOUD Intel’s Moblin has lots of potential, but its streamlined interface is hindered by minor development bugs. 44 | MAXIM MAXIMU XIMUM UM PC P | OCT 09 | www.maximumpc.com A final option is Jolicloud (www. jolicloud.com), a hybrid OS from the creator of the Netvibes.com web aggregator. Based on the Ubuntu Netbook Remix distro, the OS offers some truly innovative features, but for the most part works almost exactly like Ubuntu. The idea behind Jolicloud is that it is a consolidated and streamlined gateway for accessing open-source and web applications. Jolicloud’s lets you install free software like Skype and Dropbox in much the same way you would on an iPhone or with Google Android. Compatible apps are listed in a dashboard—which also reports the latest Jolicloud news and support forum info—with an Install button. When you click Install, a small progress bar appears. The idea is that you can click this option and then perform other tasks, although in the beta we tested, as soon as we left the dashboard the install would stop. Still, it’s a novel idea because new users don’t have to figure out the relatively complex process of installing applications—a big barrier for new Linux users. Jolicloud also lets you create links to common web services, such as Facebook and Twitter. It would have been much more impressive if Jolicloud actually included custom apps for the sites—similar to those you find on modern smartphones. Once you close the Jolicloud dashboard, the OS operates exactly the same as Ubuntu—there are no discernible differences in terms of the interface, speed results, or apps you can load. Jolicloud shows promise, and you can try it out by signing up to get a beta invite at Jolicloud.com. As its name implies, Jolicloud relies heavily on cloud-based applications, so its best utilized when you’re connected to the Internet. FOR FUN Netbook Gaming: Yes, You Can! Plants vs. Zombies is a wildly popular and whimsical towerdefense game that happens to run great on your netbook. Sure, puny screens, single-core processors, integrated graphics, and the lack of an optical drive make netbooks incapable of running today’s—or even last year’s—blockbuster games. But not all great games are graphics hogs, and there are plenty of masterpieces, today’s or yesteryear’s, that will run just fine on a netbook. Digital distribution is your friend. Steam (http://store. steampowered.com) and Good Old Games (www.gog.com) are just two ways to download delicious netbook-capable games directly to your drive on the cheap. One note: Some games might not support netbook resolution (1024x600) without some manual configuration editing. Like casual games? Great news! PopCap’s casual-blockbusters Plants vs. Zombies and Peggle run great on netbooks and are has the Game of the Year edition of Deus Ex for just $10. both available on Steam. Plants vs. Zombies is $10 and Peggle If you have old copies of Blizzard games like Diablo II and Complete is just $15. Indie physics puzzler World of Goo is also Warcraft III, you can enter your CD keys into your Battle.net ac- on Steam for $20. count and download them, or pay $20 for a fresh digital copy of Your new netbook is also a perfect excuse to revisit the great games of yore. Good Old Games has a huge collection—from the either (www.blizzard.com). If you’re itching for some twitchy multiplayer frag fests, original Fallout and Fallout 2 to Duke Nukem 3D ($6 each). And Quake Live (www.quakelive.com), a free-to-play browser version LucasArts has begun releasing its enormous back catalog of ad- of Quake III, runs great on nearly any netbook. venture games on Steam—at press time, that included LOOM, The Dig, and Indiana Jones & the Fate of Atlantis ($5 each). Steam also You won’t be playing Crysis, but there’s plenty of gaming action to be had on a netbook. –NE www.maximumpc.com | OCT 09 | MAXIM MAXIMU XIMUUM M PPCC | 45 BIOS FEAR NOT THE It might look freaking scary, but your PC’s BIOS actually offers a world of wonder and possibility if you dare to dive in Power users routinely punch into their PC’s BIOS in order to fine-tune system settings, but it can be an intimidating place to explore if you haven’t ever burrowed beneath the surface. And just as in real life, poking around in unknown places can be dangerous if you don’t know what you’re doing or where you’re going. On the other hand, once you understand the inner workings of your PC’s control center, a whole world of overclocking and troubleshooting suddenly opens up. But what exactly is the BIOS? Every modern motherboard comes with an embedded flash EEPROM module, otherwise known as the BIOS chip. Short for Basic Input/Output System, the BIOS is the first bit of code executed when you boot your PC. It stores all kinds of essential information about your system, such as your CPU’s clock speed, the size and type of RAM you’re running, the boot order of your media, what onboard devices are present, and much, much more. An improperly configured BIOS can prevent Windows (or Linux) from loading, while a finely tuned BIOS has the potential to significantly improve performance over a similarly spec’d machine. Whatever your goal, this is your go-to guide for everything you’ve ever wanted to know about the BIOS. We cover every setting—even the obscure ones—so you’ll never feel lost or out of your element, no matter what motherboard you’re rocking under the hood. BY PAUL LILLY PHOTOGRAPHY BY MARK MADEO 46 | MAXIM MAXIMU XIMUM UM PC P | OCT 09 | www.maximumpc.com www.maximumpc.com | OCT 09 | MAXIM MAXIMU XIMUM UM PC P | 47 FEAR NOT THE BIOS The BIOS Demystified While every BIOS has its unique properties, once you’ve delved deeply into one, all the others begin to make sense Whether from a cold boot or a reboot, getting into your BIOS is as easy as hitting the DEL key as soon as your system starts to POST. You might even see a splash screen instructing you to hit DEL, but this isn’t always the case. If mashing the DEL key doesn’t do the trick (some OEM setups, notebooks, and older PCs use a different key), try punching F1, F10, or the ESC key. For really old PCs, you might even need to hit a combination of keystrokes, in which case your best bet is to consult your user manual or the modernday oracle known as Google for the correct sequence. The overall layout will vary depending on your specific motherboard model and BIOS type, but every modern BIOS shares the same basic settings. We’re going to cover those now, using a Gigabyte X58 motherboard as our test platform. Standard CMOS Features Exactly as the name implies, this is where the standard settings are located, including the date, time, and drive configuration IDE Channels Technically, this refers to the hard drives that connect to your PC using the fat ribbon cables of yesteryear, and which require that multiple drives on the same channel be configured as “Master” and “Slave.” But in our motherboard’s BIOS, the list also includes any SATA drives. Because each SATA drive operates on its own channel, Master and Slave settings are irrelevant. Drive A Refers to the type (if any) of floppy drive you have installed, or plan to install. The most common today is 1.44M, 3.5 inches. You can also set this to Disabled if you’re not planning to use a floppy. Floppy 3 Mode Support Designates a special type of floppy drive that supports three different types of floppies. These were mainly used in Japan and never 48 | MAXIM MAXIMU XIMUM UM PC P | OCT 09 | www.maximumpc.com gained any major footing in the U.S. Halt On Configure this setting to tell your BIOS which errors to ignore during POST. FEAR NOT THE BIOS Advanced BIOS Features In the Advanced menu, you’ll begin to delve beneath the surface and configure how various parts of your system operate. This might also be where you set the boot priority, though some motherboards—like those offered by Asus—dedicate a separate submenu to this task. Hard Disk Priority When you have multiple hard drives installed, this setting tells your BIOS which order it should attempt to boot them. This can be handy for dual-booting OSes, with each OS—say, Windows and Linux—installed on separate drives. First and Subsequent Boot Device This is where you’ll determine what order your system should attempt to boot from. If installing Windows, for example, you’ll want to designate your CD/DVD drive as the first boot device before your hard drive. Password Check If you set a password, you can instruct your BIOS to ask for it either when booting the PC or when attempting to enter the BIOS. HDD S.M.A.R.T. Monitor Short for Smart Monitoring Analysis and Reporting Technology, S.M.A.R.T. serves as a preventative diagnostic to help predict imminent hard drive failures. When enabled, supported hard drives will report any problems that could ultimately lead to outright failures. Limit CPUID Max. to 3 The only folks who should have this setting enabled are those running a legacy OS with a Pentium 4 processor or higher. CPUID instructions are used to identify the type of processor installed, and the higher the number, the more information can be shared with the OS. Operating systems released before the Pentium 4 had trouble handling the additional CPUID parameters, which is where this limit comes into play. Vista, XP, and Windows 7 users can safely leave this option Disabled. No-Execute Memory Protect This safeguard prevents buffer overflow attacks; both AMD and Intel support this feature, it’s just labeled differently. When enabled, certain areas of memory will be marked as non-executable, preventing the processor from executing potentially dangerous code in those areas. Delay for HDD (Secs) Also known as a Hard Disk Pre-Delay, this feature mostly applies to older IDE hard drives. In some cases, older, slower HDDs were incapable of spinning up in time to be initialized, rendering them undetectable. To resolve this, motherboard makers introduced a way for users to manually force a delay before this happens. Full Screen Logo Rather than display a drab— 50 | MAXIM MAXIMU XIMUM UM PC P | OCT 09 | www.maximumpc.com and sometimes cryptic—POST screen, enabling this setting will instead display the motherboard manufacturer’s boot logo or splash screen, if one is included. More than just window dressing, these splash screens often display helpful tips, such as which button to press to get into the BIOS (most often the DEL key) and how to initialize the motherboard’s BIOS update utility. Init Display First In ancient times, somewhere around the year 9 B.T. (before Twitter), gamers evolved from using PCI-based videocards to those built for the then-emerging AGP standard. This setting allowed users to tell their systems which type of card they were using—configured improperly, it could lead to a blank screen. This was mainly relevant when running two types of videocards in the same machine. Today’s gamers get their groove on with PCI Express–based videocards. Most modern motherboards give you the option of selecting PEG, which is your PCI Express graphics port, or PCI. The latter comes in handy when troubleshooting a potentially bad videocard by sticking a PCI card in your system—if it’s not automatically detected, change this setting to PCI. FEAR NOT THE BIOS Integrated Peripherals Every motherboard comes with at least a handful of embedded features. When installing a third-party peripheral—such as a Creative X-Fi soundcard—your first order of business should be to disable your motherboard’s onboard equivalent to prevent any conflicts. The Integrated Peripheral screen is where you’ll find those options. The other school of thought here is that by disabling unused peripherals and ports, you can recover additional resources for improved performance. For a time, this might have been true. However, now that 2GB or more of memory has become standard, you’re not likely to gain any significant advantages by disabling unused LAN and other dormant ports. In fact, you run the risk of forgetting you disabled a previously unused port in the BIOS and later thinking you have a bad mobo when that port is needed. Keep that in mind before you go disabling everything in sight. SATA RAID /AHCI Mode Depending on the layout of your mobo, you might not find this setting under Integrated Peripherals, and it could be labeled slightly differently, but the options are the same. Here are your three possible choices. ›IDE Oftentimes the default option, this sets up your system so that your SATA drives run in IDE mode. ›AHCI Short for Advanced Host Controller Interface, AHCI takes better advantage of SATA drives by enabling hot swapping and NCQ, but there’s a caveat: If you’ve already installed Windows, suddenly switching from IDE mode to AHCI will quickly muck things up. ›RAID/IDE As the name implies, choose this when you plan to run one or more drives in RAID using your motherboard’s built-in RAID controller. USB Mouse Function Enables USB mouse support for use with OSes that don’t support it natively. SATA Port 0-3 Native Mode The most common solution, configuring SATA drives in native IDE mode, is also the easiest, as it sports the most compatibility and a “driverless” install, at least in terms of not needing to go through the F6 dance. Disabling this option puts the SATA ports in Legacy IDE mode, which is used for pre-XP OSes such as Win 9x/ME. Legacy USB Storage Detect Some very old OSes—like DOS—don’t play nice with USB storage devices. Enabling this setting can help through emulation. USB 1.0 Controller We don’t know why anyone would choose to disable their motherboard’s onboard USB controllers, but this would be the place to do it. USB 2.0 Controller Also known as EHCI, or Enhanced Host Controller Interface, you’ll need to enable this setting to take full advantage of your motherboard’s USB 2.0 ports and high-speed USB devices. USB Keyboard Function If you don’t have this option enabled, it will be difficult (read: impossible) to get into your motherboard’s BIOS without a legacy PS/2 keyboard. 52 | MAXIM MAXIMU XIMUM UM PC P | OCT 09 | www.maximumpc.com Azalia Codec Several onboard audio solutions exist, and depending on which one your motherboard manufacture has chosen, finding this setting might be obvious (Onboard Audio) or a bit obscure (Azalia Codec, AC97). Enable this if you plan to use the included audio chip, and disable this setting if you plan to get your groove on with a discrete soundcard. Onboard H/W 1394 Refers to your motherboard’s FireWire port(s). Onboard H/W LAN Depending on how many LAN ports your motherboard comes with, you may see one or several different entries (LAN1, LAN2, etc.). Keep these enabled if you plan to do any kind of wired networking, including connecting your PC to a DSL or cable modem. Green LAN A power-saving feature, enabling this option tells your motherboard to disable the network socket and onboard LAN chip when it doesn’t detect a connection. SMART LAN Performs a diagnostic on your motherboard’s integrated LAN ports. Onboard LAN Boot ROM This setting doesn’t refer to booting your PC remotely via the LAN port. Instead, this is intended for newer Gigabit LAN ports to operate at their full 1Gb/s speed when using an older OS by loading the LAN controller’s boot ROM during boot. you’ll tell your motherboard to operate its SATA ports in IDE, AHCI, or RAID mode, as outlined above (see SATA RAID/AHCI Mode). Onboard SATA/IDE Device Enables your motherboard’s SATA ports. Go figure! Onboard Serial Port This setting allocates an address and IRQ for your motherboard’s serial port. Unless you’re experiencing any IRQ conflicts, you should leave this setting on Auto (if it’s an option), or however it comes configured by default (typically 3F8/IRQ4). If you don’t plan on using the serial port, you can safely disable this setting, freeing up an IRQ in the process. Onboard SATA/IDE Ctrl Mode This is where Onboard Parallel Port Same as above, use this setting to configure your parallel port, otherwise known as LPT1. Or better yet, retire that crusty dot matrix printer and finally make the jump to a USB-based inkjet printer and never bother with a parallel port again. Parallel Port Mode Settings here include SPP (Standard Parallel Port), EPP (Enhanced Parallel Port), and ECP (Extended Capabilities Port). EPP adds bidirectional communications support between the PC and connected devices, resulting in faster transfers and lower CPU usage. ECP supports even faster transfers and is useful for daisy-chaining multiple parallel port devices. Power Management With the recent push toward reducing carbon footprints and going green, power-management schemes have started garnering a lot of attention. Some basic power-saving features have been included on most motherboards for some time now, and this is where you’ll find them. ACPI Suspend Type Short for Advanced Configuration and Power Interface, this setting dictates which power-saving state your system goes into. ACPI replaces the older Advanced Power Management (APM) scheme and requires a compatible OS, such as Windows 98 and up, along with several Linux distributions. ›S1(POS) In an S1 state, the CPU stops processing cycles but it, along with the RAM, are still fed power. ›S3(STR) Also referred to as Suspend to RAM, this option saves the data to RAM before putting the PC into a sleep state. In most cases, fans and all other devices will be powered down, so it appears as though the PC is actually turned off. Soft-Off by PWR-BTTN This lets you adjust how long you need to press the power button before your system turns off. Options are Instant Off and Delay 4 Sec. With the latter option enabled, pressing the power button (as opposed to holding it for four seconds) puts the PC in a suspend state, feeding a small amount of power to the system. www.maximumpc.com | OCT 09 | MAXIM MAXIMU XIMUM UM PC P | 53 FEAR NOT THE BIOS PME Event Wake Up Short for Power Management Event, this redundantly named entry is usually the culprit when you find that your PC has turned on during the middle the night even though you remember turning it off before going to bed. Also referred to as Wake on LAN (WoL), network activity or a stray electrical signal tells your PC to fire up if you have this setting enabled. Power on by Ring You might also see this entry labeled Wake/Power Up on Ext. Modem. Enabling this setting tells the PC to turn itself on when a call comes in on a phone line connected to the modem. Resume by Alarm Used to specify a time and date of the month (or every day) for the PC to turn on automatically. Some ITs find this handy for ensuring PCs are up and running on Microsoft’s Patch Tuesday, and businesses find it useful for making sure PCs are up and running when employees start arriving in the morning. You might also see this entry labeled Resume by RTC (Real Time Clock) Alarm. HPET Support Short for High Precision Event Timer, Microsoft describes this as a “new system timer that is needed in chipsets to replace legacy timers and to meet the needs of time-sensitive applications.” By enabling this feature, the company claims system performance is improved. HPET Mode You can set this to either 32-bit or 64-bit, depending on your operating system. If you’re rolling with a 64-bit OS, choose the latter to take full advantage of HPET’s 64-bit registers. Power on by Mouse Enables turning on the system with a double-click. Power on by Keyboard Enables turning on the system by pressing your keyboard’s Power key. Additionally, some BIOSes allow you to set up a short password instead of pressing the Power button. If setting up a password, you’ll need to mash the Enter key afterward. AC Back Function Also referred to as AC Power Loss Restart, this setting dictates how your PC responds to an unexpected power loss once the power is restored. ›Soft-Off Leaves the PC turned off, even if it was 54 | MAXIM MAXIMU XIMUM UM PC P | OCT 09 | www.maximumpc.com turned on prior to losing power. ›Full-On Turns the PC back on following a power loss. ›Memory If the PC was turned on prior to losing power, it will boot back up once power is restored. But if the PC was off to begin with, it will remain turned off. Advanced CPU Features Gigabyte’s latest boards clump these entries together in a handy submenu, but depending on your make and model, you may find these settings spread out in different sections of your BIOS. CPU Clock Ratio Otherwise known as the multiplier, this number multiplied by your CPU’s base frequency determines your processors clock speed. Intel Turbo Boost Tech New to Nehalem (Core i7), enabling this feature will temporarily boost processor cores to run faster than their stock frequency depending on the given power, current, and temperature levels. CPU Cores Enabled Allows you to enable all or just some of your processor’s cores. CPU Multi-Threading Enable this option to take advantage of Intel’s HyperThreading technology. CPU Enhanced Halt (C1E) A power-saving feature in Intel chips, enabling C1E will allow the operating system to send a halt command to the CPU when inactive. This halt state reduces both the processor’s voltage and multiplier so that it consumes less power and runs cooler. This doesn’t affect performance, though some power users have noted better overclocking headroom when disabling this setting. C3/C6/C7 State Support Essentially a revised version of C1E, these highernumbered halt states put the processor into an even lower power state when idle. Again, overclocking results may vary, but performance does not. CPU Thermal Monitor First introduced with the Pentium 4, current iterations take a somewhat different approach by dropping down the core clock speed and voltage when things get a bit too hot under the collar. CPU EIST Function Short for Enhanced Intel SpeedStep, this power-saving setting allows Intel chips to dynamically change frequency and voltage levels in small increments based on need. Virtualization Technology Enabling this feature allows virtualization programs like VMWare and Virtual PC to tap into your processor’s hardware virtualization support. Bi-Directional PROCHOT Enabling this setting sends a bidirectional signal that indicates if the processor has exceeded its maximum temperature and whether or not it should activate the Thermal Control Circuit (TCC). www.maximumpc.com | OCT 09 | MAXIM MAXIMU XIMUM UM PC P | 55 FEAR NOT THE BIOS PnP/PCI Configurations This is the section of the BIOS that deals with the PCI bus and Plug-and-Play settings, most notably IRQ mapping. Unless you’re attempting to run legacy hardware or are running into troubleshooting issues with your PCI peripherals, you won’t be spending much time, if any, in this section. PCI1 and PCI2 IRQ Assignment This lets you configure whether your PC will dole out IRQ PC Health Status On most Asus boards, this section will come labeled as a Hardware Monitor submenu in the Power section. MSI boards usually call this H/W Monitor accessible through the BIOS’s main menu. In each case, this is where you’ll find system vitals, such as current system and CPU temperatures, fan speeds, and various voltage levels. This is helpful when troubleshooting overheating or power issues (such as random reboots), but treat this as a starting point before digging deeper. Overheating due to a poorly installed heatsink, for example, might not manifest itself until you boot into Windows and encode a DVD, or otherwise stress your CPU. Recent Case Open Status Only of use with compatible cases, this security feature can detect if your case has been opened and then reset the status at the next boot. CPU Warning Temperature Sounds an alarm when a certain CPU temperature threshold is reached. Fan Fail Warnings Enabling a fan-fail warning—whether it’s for the CPU Fan, the Power Fan, the System Fan1, etc.,—will sound an alarm when the fan plugged into that designated fan power header stops running. CPU Smart Fan Control Disabling this setting allows the CPU heatsink’s fan to run at full bore all the time. Enabling this setting will vary the fan speed depending on CPU temperature. CPU Smart Fan Mode If you enable CPU Smart Fan Control, you can then set the mode to Auto (controlled by the BIOS), Voltage (for use with three-pin fans), or PWM (for use with four-pin fans). 56 | MAXIM MAXIMU XIMUM UM PC P | OCT 09 | www.maximumpc.com resources automatically or you will configure them manually. Unless you’re dealing with older hardware or niggling IRQ conflicts that are not resolved by moving PCI cards to different PCI slots, you should leave this one on Auto. FEAR NOT THE BIOS Advanced DRAM Features If your motherboard allows you to manually tweak your RAM’s latency timings, you’ll find them in the overclocking section. This will most often be labeled as MB Intelligent Tweaker (Gigabyte), Cell Menu (MSI), Advanced Chipset (Asus), or Genie BIOS Setting (DFI). Performance Enhance Applicable to Gigabyte boards, this section tells the BIOS how aggressively to auto-tune your RAM’s settings. Extreme Memory Profile (X.M.P.) X.M.P.compatible RAM contains additional, preprogrammed settings tuned for both performance and overclocking. System Memory Multiplier Left on Auto, your BIOS will determine the safest multiplier, or FSB:DRAM ratio, and resulting memory frequency for your RAM based on its preprogrammed SPD settings. If overclocking or tuning for additional performance, you can manually set the multiplier. DRAM Timing Selectable You may see the letters SPD in this section. This stands for Serial Presence Detect and refers to the information programmed into your memory modules by the manufacturer, which tells the BIOS which latencies and voltage to use at any given clock speed to ensure compatibility. If left on Auto, your RAM will run at its preprogrammed SPD settings when overclocking. Otherwise, you can change this to Manual (or Disabled) to set your own latency timings. Channel A/B/C Timing Settings Refers to your RAM’s timings or latencies, separated by memory channel. ›CAS Latency Time Short for Column Address Strobe, this number dictates the number of clock cycles that pass before data can be read or written to where it’s stored in a column address. The lower the number, the faster this takes place. When shopping for memory modules, the CAS latency is typically the first of a set of four numbers (for example, 8-8-8-24). ›tRCD Also referred to as DRAM RAS# to CAS# Delay, this number represents the clock cycles it takes between finding the row of a location in memory and finding the column. The lower the number, the faster this takes place. When shopping for memory modules, RAS# to CAS# is typically the second number in the set of four. ›tRP Also referred to as DRAM RAS# Precharge, this is how long it takes for the memory to stop accessing one row, build up a charge, and access another. The lower the number, the fast this takes place. When shopping for memory modules, RAS# Precharge is typically the third number in the set of four. ›tRAS Also referred to as Precharge Delay, this number represents the minimum number of cycles that pass between an active and precharge command. The lower the number, the faster the performance. The Precharge Delay is typically represented by the last (and highest) number in the set of four. ›Command Rate (CMD) The Command Rate is the delay, in clock cycles, from when a memory chip is selected and when the first active command can be sent. A 1T command rate offers better performance than 2T, but if you experience instability, you’ll want to change this to 2T. Channel A/B/C Turnaround Settings These submenus control the read and write delay settings, again separated by channel. LEARN MORE AT MAXIMUMPC.com http://bit.ly/43mEh6 58 | MAXIM MAXIMU XIMUM UM PC P | OCT 09 | www.maximumpc.com When and Why to Update the BIOS Flashing your motherboard’s firmware offers benefits, as long as you do it properly Updating or flashing the BIOS carries a certain amount of risk, but the potential rewards make it worth the effort. Motherboard makers are constantly enhancing the BIOS firmware and the result can be significantly improved performance, less buggy behavior, additional functionality, improved overclocking performance, and much more. BIOS updates can also be minor and address only a specific function, such as adding native support for higher-frequency RAM or a new CPU stepping. If the added Gigabyte’s Q-Flash utility walks you through the process of updating your BIOS. functionality isn’t something that affects your setup, you HOW TO UPDATE needn’t worry about updating your BIOS. We recommend There are several methods for updating a BIOS, the checking your vendor’s website every few months to see if simplest being from a USB key. Some motherboard any new BIOS versions have been manufacturers implement a built-in utility for updating released and what changes they bring. the BIOS during POST. Gigabyte boards, for example, come PRECAUTIONS with a Q-Flash utility. To use it, you would first go to your motherboard’s product page and download the latest BIOS While BIOS flashes have become far easier and less risky file (when updating a BIOS, you don’t need to go in order— in recent years, the one time you attempt to update your you can skip straight to the latest BIOS version) and copy it BIOS unprepared will inevitably be the time something to your USB key. Next, reboot your PC and hit the End key goes wrong. during POST, or F8 from within the BIOS. This brings up Standard housekeeping applies: Back up any important the Q-Flash utility. Follow the GUI prompts to locate and data. A BIOS flash won’t nuke your hard drive, but if done load the BIOS on your USB key and sit back while the new incorrectly, it could kill your motherboard. firmware is written. Be sure not to power down or reset Next, tune your system for stability. If you’re overclocking, revert to default clock speeds and voltage levels. your system. If you own an older or proprietary system, you may This prevents any underlying instability issue—even one need to kick it old-school and update your BIOS with a you’re not aware of—from causing your system to sud- floppy disk using one of several utilities. Reference your denly reboot during the middle of a BIOS flash, which could motherboard maker’s website to see which utilities your corrupt your BIOS chip and render your mobo a rather motherboard supports. bulky keychain. Finally, make a note of any pertinent BIOS settings you’ve changed from their default values. Sometimes when updating the BIOS, all settings are reverted back to default. Did you disable onboard sound? You may need to do so again. WINDOWS BIOS UPDATE UTILITIES Most motherboard manufacturers offer some kind of handy Windows utility with a snazzy GUI for updating your BIOS. If at all possible, avoid using these, particularly if you’re updating your BIOS because of instability. Should your Windows installation suddenly freeze or restart, you could be in a world of hurt. | 59 R&D EXAMINING TECHNOLOGY AND PUTTING IT TO USE WHITE DirectX 11 PAPER You thought DX10 brought big changes? Get a load of DX11! –MICHAEL BROWN D irectX 10 marked a radical departure from DirectX 9: In order to be compatible, a graphics processor must feature a unified architecture in which each shader unit is capable of executing pixel-, vertex-, and geometry-shader instructions. The changes in DirectX 11 aren’t quite as fundamental, but they could have just as big an impact—and not only with games. DirectX 11 is a superset of DirectX 10, so everything in DirectX 10 is included in the new collection of APIs. In addition, DX11 offers several new features and three additional stages to the Direct3D rendering pipeline: the Hull Shader, the Tessellator, and the Domain Shader. And in an effort to deliver cross-hardware support for general-purpose computing on graphics processors, Microsoft has come up with a new Compute Shader. DirectX 11 will be compatible with both Vista and Windows 7, but many of its graphics features will be available on GPUs designed for previous iterations of Direct3D. Tapping into the Tessellator’s power, however, will require a GPU with transistors dedicated to the task (in this sense, DX11 marks a slight departure from DX10’s vision of a unified architecture). Let’s explore the concept of tessellation now. MEET TESS The three new pipeline stages we mentioned earlier are all related to tessellation. They reside in the geometry-processing stage, between the Vertex Shader and the Geometry Shader. Tessellation can rapidly create the primitive elements that go into the creation of a complex three-dimensional object by subdividing just a few at a time. In this case, the primitives are called patches, which are defined by control points (visualize Photoshop’s pen tool, except that DX11’s control points manipulate a surface instead of a line). Patches replace the triangles used in previous versions of DirectX. Each subsequent subdivision creates more primitives, with each group being smaller than the last. Increasing the number of primitives in a model makes that model look more realistic. The Tessellator can also reshape these primitives by adjusting the control points to form more complex geometry. While it’s very easy for GPUs to produce coarse objects like cubes, they have a much harder time creating objects with smooth curves. By tessellating a coarse object, a cube, for example—a GPU can transform that object into something that does have smooth curves, such as a sphere—and the kicker is that this process requires relatively little GPU horsepower and graphics memory. Here’s a broad overview of how tessellation works: The Vertex Shader outputs patches, which then travel down the pipeline to the Hull Shader. The Hull Shader analyzes the patches’ control points to determine how the Tessellator should be configured (generating so-called “tessellation factors”) and then sends the patches on to the Tessellator. The Tessellator, in turn, subdivides the patches and feeds a stream of points to the Domain Shader. The Domain Shader manipulates these points to form the appropriate geometry and sends the resulting vertices to the Geometry Shader. Hardware tessellation isn’t a new concept. Animators at Pixar began using tessellation to create their highly detailed characters beginning with A Bug’s Life, and they’re still using it today. The GPU that AMD designed for Microsoft’s Xbox 360 gaming console features a tessellation unit, and AMD integrated something similar in its Radeon GPUs for the PC, beginning with the Radeon HD 2000 series. This led many to predict that Microsoft would expose tessellation in DirectX 10. But that didn’t happen, and DirectX 11 won’t be able to HOW IT WORKS Shader Model 5.0 Pipeline Input Assembler Performs transform and lighting functions Hull Shader Tessellator Analyzes Subdivides patches’ control patches and points produces a stream of control points Shader Model 5.0 adds three new stages to the Direct3D pipeline in order to perform tessellation. The new Compute Shader will be a boon to the general-purpose GPU initiative, which aims to harness the parallel processing power that modern graphics processors have in such abundance. 60 | MAXIM MAXIMU XIMUM UM PC P | OCT 09 | www.maximumpc.com Domain Shader Manipulates control points and sends resulting vertices to Geometry Shader Geometry Shader Stream Output Primitives (patches) enter the pipeline Vertex Shader Works on entire primitive; can also create entirely new vertices Rasterizer Breaks down the 3D object into pixels Pixel Shader Assigns color Produces the final image and depth values to individual pixels. Can also pass data structures to the Compute Shader Data Structure The previous stage’s results can be output to a memory buffer and then circulated back into the pipeline Output Merger Data structures can include algorithms for image processing, physics computations, artificial intelligence routines, and much more Compute Shader The Compute Shader’s results can be passed back to the Direct3D pipeline for additional rendering AUTOPSY Apple iPhone tap AMD’s tessellator, either, because AMD’s original implementation of the technology isn’t compatible with Microsoft’s. I COMPUTE, THEREFORE I AM If you’ve followed the evolution of modern GPUs, you know that they’ve moved from being single-core processors designed for one specific purpose—processing graphics—to massively parallel devices with hundreds of processing cores. Modern GPUs are capable of performing more than a trillion floating-point operations per second, which has been a boon for the types of graphics processing and real-time animation needed for computer gaming. But this hardware can be tapped to perform other types of computations, too; the concept is known as GPGPU computing (the acronym stands for generalpurpose graphics processing unit). Most software applications, however, as well as the tools used to develop them, are designed for serial execution, not parallel. GPGPU computing, therefore, requires brand-new tools, and AMD and Nvidia have invested significant amounts of time and effort to both create them and spur the development of GPGPU applications. AMD’s initiative is known as Stream SDK (Software Development Kit) and Nvidia’s is called CUDA (Compute Unified Device Architecture). The growth of GPGPU computing, however, has been hindered by the fact that each company’s tools work with only that company’s GPU. Microsoft hopes to change that with the addition of the Compute Shader to DirectX 11. The Compute Shader will enable developers to write GPGPU code that will run on any graphics processor, be it Nvidia’s GeForce platform, AMD’s Radeon, or Intel’s upcoming Larabee. Although the Compute Shader is integrated with DirectX 11, it’s not actually a stage in the Direct3D pipeline. It can, however, take data structures from the Pixel Shader stage, manipulate them using the GPU’s resources, and then apply them to the final image in a post-processing stage. Microsoft has identified a range of target applications specifically related to graphics processing that should improve games, including effects physics (particles, smoke, water, cloth, etc.), ray tracing, gameplay physics, and even AI. Analysts expect the first DirectX 11–compatible GPUs to reach the market in the fourth quarter; games that take advantage of DirectX 11 aren’t expected until sometime in 2010. We couldn’t find anyone willing to sacrifice a shiny new iPhone 3GS to the autopsy knife, so we put an OG iPhone under the blade, instead. Here’s what we found. FLASH MEMORY This Toshiba chip contains the bulk of this 16GB iPhone’s storage in the form of NAND flash memory. While the Numonyx chip stores the phone’s OS, this is where your music, movies, and photos live. RF TRANSCEIVER This Infineon chip contains the radio for the phone, which connects to 2G GSM/EDGE networks. RAM + OS STORAGE This Numonyx chip contains 128MB of RAM plus flash memory that’s used to store the iPhone’s core software. CPU [NOT PICTURED] The original iPhone was powered by a speedy Samsung ARM-based CPU, rated to run at 600MHz, although it runs at 412MHz for batteryconservation purposes. SCREEN The iPhone’s 3.5-inch, 320x480-res screen sits just on the other side of this protective cover. It uses a capacitive sensor that’s multitouch-capable. SPEAKERS AND ANTENNA The lower portion of the iPhone’s case contains the microphone, speakers, and antennas required for the phones Wi-Fi, cellular, and Bluetooth connections. SUBMIT YOUR IDEA Ever wonder what the inside of a power supply looks like? Don’t take a chance on destroying your own rig; instead, let us do the dirty work. Tell us what we should crack open for a future autopsy by writing to [email protected]. www.maximumpc.com | OCT 09 | MAXIM MAXIMU XIMUM UM PC P | 61 R&D HOW TOGuides to Step-by-Step Improving Your PC THIS MONTH WINDOWS TIP OF THE MONTH 64 MAKE CUSTOM DESKTOP WIDGETS 67 SYNC YOUR FILES, EMAIL, AND BOOKMARKS FASTEST BOOT IN THE WEST F or this month’s Hardware Hacks feature (page 22), I spent some time looking for a lightweight operating system to load onto our netbook pictureframe project. Windows NORMAN CHAN XP (the OS we ended ONLINE EDITOR up using) was functionally sufficient, but we wanted to find an OS that could load faster. One idea we had was to hack a copy of the Splashtop operating system onto our hard drive. Splashtop, the “instant-on” Linux-based OS that’s built into Asus motherboards, was an attractive option for its quick boot time, but we found it very difficult to extract the system files required to mount onto a bootable drive. The alternative that worked was xPUD, another Linux variant that takes just 50MB of disk space. Using the UNetbootin utility (http:// bit.ly/2UcbwV), we easily downloaded xPUD directly onto a blank USB key, which was then bootable on our PC at startup. While a little underpowered, xPUD clocked in at an amazing 10 seconds to boot, which makes it definitely worth trying if you want to keep a portable operating system on you at all times. Even More Keyboard Shortcuts Save more time by using these reader-submitted Windows keyboard shortcuts: Win+L: lock your PC; Ctrl+Shift+Esc: open Task Manager; Win+R: bring up the Run dialog; Win+M: minimize all windows; Win+E: launch Windows Explorer. Got any more? Keep sending your keyboard shortcuts to [email protected]. SUBMIT YOUR IDEA Have a great idea for a How To project? Tell us about it by writing to [email protected]. www.maximumpc.com | OCT 09 | MAXIM MAXIMU XIMUM UM PC P | 63 R&D EXAMINING TECHNOLOGY AND PUTTING IT TO USE Add Custom Widgets to Your Desktop One of the best ways to set your computer apart from the pack is to customize your desktop. There are numerous ways to do this that range in difficulty from as easy as changing your wallpaper to as involved as a full-blown shell replacement. Somewhere in between, there’s Samurize. Samurize is a program that lets you create and run custom desktop widgets, most commonly used for system monitoring. Because Samurize is extremely customizable, it’s a favorite tool of desktop modders who use it in conjunction with tailor-made wallpapers to create truly awesome personal desktops. Learning Samurize can be a fun project, because although there’s a lot of depth to the program and it takes practice and an artistic eye to make top-notch widgets, you can get started right away building simple meters and displays. Here we explain the basics of Samurize, including what you need to know to build your first simple custom widget. –ALEX CASTLE 1 GETTING STARTED To get started on your first custom desktop, you’re going to need to download the latest Serious Samurize release, which you can find at http://bit.ly/ YT7fj. Grab the most recent client installer. Once you’ve installed the program, you have the option of running Samurize or the Config tool. Samurize is what you’ll eventually use to display your custom desktops, but for now, start the Config tool. Configs define the widgets that Samurize places on your desktop, and can include meters (which represent any of a number of system parameters) and graphics. By combining informative meters, sharp graphics, and a matching wallpaper, you can create a desktop that’s both useful and impressive. That’s the goal, at least. But you’ve got to learn to walk before you can run, so this article will explain how to use Samurize to create a basic config with CPU and RAM usage monitors as well as a gauge for either your laptop battery or hard disk space. It might not be the sexiest feature set in the world, but by learning how to make this simple config, you’ll familiarize yourself 64 | MAXIM MAXIMU XIMUM UM PC P | OCT 09 | www.maximumpc.com with the basics of Samurize, allowing you to design more complicated and impressive desktops in the future. 2 CPU AND RAM MONITORS We’ll add meters to our config to graph our CPU and RAM usage over time. Of the two, the RAM monitor is slightly more straightforward, so we’ll add that first. In the right-hand side of the Samurize Config Editor, make sure the Edit Meters tab is selected. Since you should be staring at a blank config, the only thing visible in the Edit Meters column should be a box that says Standard Tasks with a button labeled Add Meter. As you might expect, this button presents you with a list of customizable meters that you can add to your config. A little less than halfway down the Add Meter list is the Add Memory button. Press this to add a memory monitor to your config. At first, the meter will appear as a simple textual display of free memory. You should note that meters in the Config Editor use example values and do not actually represent your Once you’ve specified what you want Perfmon to monitor, it behaves pretty much the same as the memory monitor. Change its draw type to graph, give it a unique name, make it look the same as your memory meter, and you’ll be ready to move on. 3 system’s status; you have to actually load the config with Samurize in order for the meters to synch with your system. Now, plain text isn’t quite what we want for our memory meter, so click it and look at the right side of the Config Editor, where you can customize your meters. First, give the meter a more memorable name than “Meter 0.” This will make it easier to identify which meter you want to edit when you’ve got several meters in the config. Once you’ve changed the name, click the drop-down list under Draw Type and select Graph. Doing this will transform the memory meter into a line graph. Next, we’ll make sure the graph is displaying exactly the information we want it to display, so click the Source tab. Since we want the graph to show how much memory we’re using rather than how much we have available, click the drop-down list under Select Return Value and choose Used Mem. Also, change the unit to %, which will save us the trouble of assigning a minimum or maximum value for the chart. You can fine-tune the appearance of the meter in the Display tab, which contains fields for customizing the look of the graph, including the scale, color, alpha, mirroring, and more. If you select a different type of meter in the Draw Type field of the first tab, the fields in the Display tab will be different. You can make yours look however you like—we chose a nice Matrix-green look for ours. Resize it into a square by entering a value of 100 into the Width and Height fields under the General tab. Now, we’ll add the CPU graph. Click Add Meter again, but this time select Add Perfmon… from the drop-down menu. The Perfmon object is a much more flexible meter, which allows you to monitor nearly every aspect of every piece of hardware in your PC. By default, Perfmon is set up to act as a CPU monitor, but you can adjust it to monitor other hardware by changing the Performance Object and Counters fields. Don’t feel bad if you can’t figure out the purpose for each individual counter (DPCs Queued/sec, for instance); you can always click the Explain button to see a brief and (generally) helpful description of what the counter does. NOTEBOOK BATTERY-LIFE METER Next, we’ll show you how to create an analog needle-style meter, like the type you’d find in a car dashboard. Since we happen to be on a laptop, we made ours a battery-life meter, by selecting Add Laptop Battery from the Add Meter drop-down, but if you’re on a desktop, you can make it a hard-disk-space meter by selecting Add Drive Space from the drop-down menu, then selecting the drive you want to monitor. To make the monitor into an analog meter, simply select Analog from the Draw Type drop-down list. In the Display tab, you can make sure the meter looks the way you want it to by adjusting the type of pointer, how wide the sweep is, and more. To make it look more like a car speedometer, set the www.maximumpc.com | OCT 09 | MAXIM MAXIMU XIMUM UM PC P | 65 R&D EXAMINING TECHNOLOGY AND PUTTING IT TO USE both graphs combined. Click and drag the meter so that it sits behind the two graphs. Now click Add Background Object again and make another rectangle. Make this one large enough to sit behind all three meters. To choose which graphical elements are in front, click them and press the up or down arrows at the top of the window. This will move the selected graphic to the front or the back, respectively. You can use a simple text meter to label your graphs. And that’s how you make a very simple system monitor panel for your desktop. To load your widget, save your config to the default directory, then run the Samurize program. Right-click the Samurize icon in the taskbar and mouse over Select Config, and find your config file. You can also refresh your config quickly if you make changes to it by saving and selecting Reload Config. Offset % to around -20, which moves the pivot point a little toward the center. In the Display tab you can also choose a start and end color; the pointer will shift between these values as it moves. This allows you to, for instance, set it so the pin will shift from yellow to red as your battery gets closer to being empty. Finally, to make your widget something more than just a bunch of floating meters, you’ll need to add some graphics. This is material for an entire how-to of its own, though, so for now we’re only going to cover the simplest graphical elements. Let’s add a black background for our two line graphs. To do that, click the Edit Graphics tab and click Add Background Object. From the drop-down list, select Add Rectangle. Unlike meters, graphics have only one panel, which determines their appearance. Set your rectangle’s color to black, and make it as tall as your line graphs, and as wide as This how-to guide has only scratched the surface of Samurize, though, so look out for future articles on MaximumPC.com explaining how to make more sophisticated kinds of widgets, and how to use graphics and a custom wallpaper to make your widgets look awesome. 66 | MAXIM MAXIMU XIMUM UM PC P | OCT 09 | www.maximumpc.com Sync Your PC and Mobile Devices Keeping your mobile life in sync is becoming an increasingly difficult task these days, since many of us use multiple desktop PCs, notebooks, and smartphones. Maintaining these devices becomes even more complicated when you start mixing and matching platforms that have conflicting file systems and format support. On the bright side, there has never been a better time to automate the process, allowing you to keep every aspect of your digital life in sync. This guide will educate you on the best ways to sync files, browser bookmarks, emails, and even your contacts/calendars to any platform or device you may have. We dive deep into the major sync technologies being offered today, showing you step by step how they work, so you can decide for yourself which solution will work best for you. –JUSTIN KERR SYNC FILES WITH LIVE MESH Live Mesh, a service from Microsoft, is easily one of the most innovative and ambitious sync concepts on the market. Live Mesh enables users on Windows, Macs, and Windows Mobile phones to keep updated versions of folders, both online and locally, across as many devices as they choose. Microsoft’s servers take care of distributing updated copies of your files to all machines as they come online, or if you’re using a device with limited storage, such as a netbook or a phone, you can choose to access it solely from the cloud. Using Live Mesh with your documents folder, for example, ensures that you always have updated copies of your work, which can then be automatically distributed to all your devices the next time they connect. The primary innovation behind Live Mesh is the “Virtual Desktop.” This allows you to access a copy of any file contained within your synced folders without any extra software. This is useful if you’re constantly moving around to different machines and need to access the content from anywhere. Now that we’ve got you all excited, here’s the downside. Live Mesh only works as designed with less than 5GB of total data, and dragging and dropping files into the online storage only works in Internet Explorer using ActiveX. As a result, Linux users will be able to view and download files on the virtual desktop, but cannot upload changes. Macs are able to participate fully with the assistance of the desktop client software. 1 ADD DEVICES, INSTALL CLIENT SOFTWARE To get started, head over to Mesh HQ (www.mesh.com), and click the big orange Sign In button on the greeting page. Once you have done this, you will need to log in using your Windows Live I.D. (an Xbox Live or Hotmail account will also work). Once you’re past the login screen you will be greeted with a diagram of your Mesh. You will need to add all your desired devices to this Mesh. Click the large orange + button, select your operating system, then download and install the client on each machine you wish to include. Once the installer is finished, it will automatically launch and prompt you to enter your Windows Live I.D. again. After clicking Next you will need to pick the name you will use to identify your computer within the Mesh. Be specific so you don’t confuse your devices later on; but if you make a mistake, you can change it later. Here you can also decide if you will allow remote desktop connections to this machine. 2 ADD FOLDERS TO SYNC Adding a directory to Live Mesh is as simple as right-clicking the folder and selecting Add Folder to Live Mesh. After doing so, you will see the configuration screen, which will allow you to decide if these files should be stored within your 5GB online storage queue or only shared between certain devices. If this was a massive folder full of photos and video for example, you might want to select “Never with this device” as your Live Desktop option. For other computers you may wish to select “When files are added or modified” if you want each device to keep www.maximumpc.com | OCT 09 | MAXIM MAXIMU XIMUM UM PC P | 67 R&D EXAMINING TECHNOLOGY AND PUTTING IT TO USE a local copy. Use your Live Desktop space wisely, 5GB goes by pretty fast, and unfortunately, Microsoft doesn’t offer the ability to purchase additional space. Files and folders will automatically begin to sync on the devices you specified, and using the tray icon or the Live Desktop browser interface, you can get an overview of the changes being made by reviewing the News section. You can now interact with the files on any device within your Mesh, and any modification you make will sync instantly across your devices. Machines that are offline will pick up updated versions from the Live Desktop as they come online. SYNC BOOKMARKS WITH XMARKS Xmarks, formerly known as Foxmarks, is our favorite way of keeping our browser bookmarks in sync. Your first step will be to download the Xmarks plugin for your browser of choice at www. xmarks.com. Currently, only Firefox, Internet Explorer, and Safari for the Mac are supported. If you’re torn over which version to grab, it’s worth noting that only the Firefox version supports encrypted password sync. iPhone users should also keep in mind that only the Safari for Mac plugin will allow two-way syncing. We’ll be using the Firefox version for this guide. Once you have installed the Firefox plugin, restart your browser and the Xmarks setup wizard will automatically launch, allowing you to make an account or login. If you’re creating a new account, or if you haven’t enabled password sync in the past, Xmarks will supply a dialog box allowing you to opt in or out of the service. For those of you who are worried about security, let us put your mind at ease. Passwords are stored on the Xmarks servers using very strong AES encryption. All of your passwords will be encrypted before transmission to the Xmark server, and can only be decrypted using the pin number you selected as a master password. You can rest easy knowing that not even Xmarks will be able to decrypt your passwords (assuming you picked a strong pin code). If you’re installing Xmarks on a second machine, you’ll be presented with the dialogue box asking how you would like to deal with the bookmarks already stored on your machine versus what is on the server. You can merge the two databases or throw away either. Once you’ve synchronized, you can also access your list of bookmarks from any browser, no plugin required. Simply navigate to the website and log in. You can also access a stripped-down interface intended for mobile phones at http://mobile. xmarks.com. 68 | MAXIM MAXIMU XIMUM UM PC P | OCT 09 | www.maximumpc.com SYNC MAIL AND CALENDARS WITH GOOGLE You probably hear us talk about Gmail a bit more often than its competition for one simple reason: It really is better than the rest. Gmail has a lot going for it these days. The web interface is lightening fast, Google Labs allows you to enable tons of great plugins, and one feature in particular makes it stand out from the crowd: IMAP. Internet Message Access Protocol is a vastly superior solution to the traditional POP-based email supplied to you by your ISP. It will allow you to access your mail from any email client, the web, or both at the same time, all while keeping your sessions in sync. You can read, delete, edit, and save drafts, all while knowing that changes will ripple across your desktop clients. It’s so good in fact, that many folks have abandoned dedicated email clients almost entirely. Gmail is one of the few free IMAP options available right now, but it’s important to know that IMAP is not enabled by default. To get started, simply surf over to the Gmail homepage, sign up for a Google account, and head into your new (or existing) mailbox. Once in, scan along the top-right for a link called Settings, followed by Forwarding and POP/IMAP. Once here, you can enable the IMAP service and access the Configuration Instructions if you’re planning on still using a desktop mail client. Once you’re up and running with your mail client, you might even feel like dragging and dropping messages stored on your machine over to Gmail. This will allow you to search, view, or access any message across all of your machines. You can also use a mail client to drag mail from Hotmail or other services over to your new email account. In addition to keeping your email sessions in sync, Gmail offers an innovative service called Mail Fetcher (http://bit.ly/3ijT2). If you head back over to the Settings link, you can then click Accounts followed by Add a Mail Account You Own. Simply enter your email address and set up the rules regarding incoming messages. You can tell Google to leave a copy on the POP server for safe keeping, or to automatically redirect incoming messages to a dedicated folder, making your email easy to sort. Using any webmail-based service is the ultimate way to keep all your email, contacts, and calendars in sync. However, for a certain percentage of the population, Outlook is a safety blanket they simply refuse to live without. If you fall into this category, it’s OK, you still have options. Google Calendar Sync allows you to manage your calendar both through Gmail’s web interface and using Outlook. Calendar Sync is currently compatible with Windows XP, Vista, and 7, and is designed for use with Outlook 2003 or 2007. Your first step will be to download Google Calendar Sync Client (http://bit.ly/ g6nb0) and run the installer. Once this is complete, you will see the above configuration screen, which will allow you to input your Gmail Account details, and if you want one-way or two-way sync. When making your decision, we recommend that you pick the option that most realistically matches your usage scenario. Calendar sync works well, but you can further remove the odds of conflicts or corruptions if you select one-way sync. You can also configure the time between sync sessions—the minimum selectable is 10 minutes. www.maximumpc.com | OCT 09 | MAXIM MAXIMU XIMUM UM PC P | 69 REVIEWS OF THE LATEST HARDWARE AND SOFTWARE REVIEWS Tested. Reviewed. IN THE LAB Verdictized INSIDE 74 DIGITAL STORM 950SI 75 SEAGATE BARRACUDA LP 2TB 76 COOLER MASTER HAF 922 78 TOSHIBA PORTÉGÉ A605 80 VANTEC EZSHARE ADAPTER 82 APPLE IPHONE 3GS 84 ZALMAN CNPS 10X EXTREME 86 LINKSYS DIRECTOR WIRELESS-N 87 CANON EOS REBEL T1I 500D 88 DLINK DIR-685 XTREME N STORAGE ROUTER 90 NERO LIQUIDTV 91 ARMA II ONLINE EVEN MORE REVIEWS! BEST OF THE BEST EDITORS’ BLOGS THE NO BS PODCAST www.maximumpc.com | OCT 09 | MAXIM MAXIMU XIMUM UM PC P | 73 IN THE LAB REVIEWS OF THE LATEST HARDWARE AND SOFTWARE Digital Storm 950Si This sleek black rig brings quad SLI and Core i7 goodness I f you doubt the existence of mirror universes that are almost the same except for minor changes, Digital Storm’s 950Si rig could make a believer out of you. The 950Si is that similar to Maingear’s Kick Ass Award–winning ePhex that we reviewed in August, albeit with some slight differences. For instance, the ePhex’s all-white enclosure was a Silverstone TJ10, while the 950Si uses a nearly all-black TJ09. In graphics, the 950Si features dual EVGA GeForce GTX 295 cards while Maingear opted for three GeForce GTX 285 cards. Both rigs sport Intel’s top proc—the Core i7 975 Extreme Edition at 4GHz—but get there differently. Digital Storm does a straight multiplier overclock of 31x133MHz base clock to get to 4.1GHz. Maingear preferred a 21x multiplier with a 160MHz base clock to get to 4GHz. Even in SSDs there’s a similar-but-different feel. Maingear tapped two Intel 80GB X-25M drives; Digital Storm opted for two of Corsair’s 64GB M64 SSDs. Our performance tests yielded a few surprises. The water-cooled 4.1GHz Core i7 runs circles, squares, and heptagons around our now-ancient Core 2 Quad zero-point. But good against a Core 2 is one thing; good against another Core i7, that’s something else. When compared with Maingear’s ePhex, the 950Si was able to grab two benchmark crowns by nudging the ePhex aside in the multithread-lovin’ Main Concept Reference and ProShow Producer tests. But then things got a little odd. Despite its slightly higher clocks (4.1GHz vs. 4GHz), the 950Si actually fell to the ePhex in Photoshop CS3 and Premiere Pro CS3 by about eight percent and 10 percent, respectively. We’re not sure why, but perhaps it’s the result of the higher QPI from the bclock overclock versus the straight multiplier overclock. Or perhaps it’s the RAM. Although we have not known this to impact performance, the ePhex packed 12GB of Kingston DDR3/1600 while the 950Si loads up with a lean 6GB of Mushkin DDR/1600. The clash of the titans came in gaming, where it was the 950Si’s quad SLI (two dual-GPU GTX 295 cards) against the ePhex’s tri SLI (three GTX 285s). The winner? Tri SLI by a decision. While the ePhex hammered out a stunning 70fps in Crysis, the 950Si’s 65fps is nothing to sneeze at, either. Why wouldn’t four GPUs— albeit clocked lower—beat three? Crysis doesn’t really stress more than three GPUs, so the fourth is there for a ride. There’s also some overhead to having four GPUs, slightly more than there is even with three. The real oddity was in Unreal Tournament 3. Instead of the 200fps that we expected, the 950Si spit out a puzzling 115fps. That’s way off the mark for this much hardware. What’s the problem? We’re not sure, but as a sanity check, we also ran 3DMark Vantage’s GPU test on the “extreme” setting and found the 950Si on par with the ePhex, so we’re not too worried about the UT3 performance. However, one final test using Far Cry 2 on Ultra High settings showed the 950Si running about 27 percent slower than the ePhex. Mind you, that still amounts to an excellent 87fps at 1920x1200, but the Maingear rig was clearly the faster of the two. VISTA 64-BIT BENCHMARKS The 950Si is surprisingly quiet for the amount of hardware packed inside. One area where the 950Si clearly wins, though, is in price. At nearly $2,000 less than the ePhex, the 950Si is more than 30 percent cheaper. But is that really what a buyer who steps into this class of hardware is looking for? In today’s economy, perhaps. Still, the 950Si is a respectable machine, it’s just not the fastest thing out there. –GORDON MAH UNG VERDICT DIGITAL STORM 950SI + TOS SPOCK - Nearly flawless paint job and quiet for this much hardware. Somewhat disappointing in gaming benchmarks. 2009 SPOCK $6,310, www.digitalstorm.com SPECIFICATIONS ZERO POINT 519 (143 %) Premiere Pro CS3 1,260 sec Photoshop CS3 169 sec ProShow 1,206 sec 433 (227%) MainConcept 2,049 sec 845 (122%) CRYSIS 26 fps Unreal Tournament 3 83 fps 78 (92%) 65 (150%) Processor Intel 3.33GHz Core i7 975 @ 4.1GHz Mobo EVGA Classified RAM 6GB Mushkin DDR3/1600 Videocard EVGA GeForce GTX 295 in tri-SLI Soundcard Asus Xonar D2X Storage Two 64GB Corsair M64 SSD in RAID 0, Western Digital 2TB Caviar Green Optical OptiArc BC-5100S Case/PSU Silverstone TJ-09 / PC Enermax Galaxy EVO 1200 watt 111 (34%) 0 8 10% 20% 30% 40% 50% 60% 70% 80% 90% 100% Our current desktop test bed consists of a quad-core 2.66GHz Intel Core 2 Quad Q6700, 2GB of Corsair DDR2/800 RAM on an EVGA 680 SLI motherboard. We are running two EVGA GeForce 8800 GTX cards in SLI mode, a Western Digital 150GB Raptor and a 500GB Caviar hard drive, an LG GGC-H20L, Sound Blaster X-Fi, and PC Power and Cooling Silencer 750 Quad. OS is Windows Vista Home Premium 64-bit. 74 | MAXIM MAXIMU XIMUM UM PC P | OCT 09 | www.maximumpc.com The Seagate Barracuda LP 2TB will restore the Barracuda name to users’ good graces. Seagate Barracuda LP 2TB Barracudas eat Caviar for breakfast W e haven’t seen a new two-terabyte drive on the market in a while—not since we reviewed the Western Digital Caviar Green in May, in fact—but Seagate has finally added a 2TB drive to its Barracuda LP line of desktop drives. The LP (or low-power) line is Seagate’s “green” offering, equivalent to Western Digital’s GreenPower and Samsung’s EcoDrives. With an unusual 5,900rpm rotational speed—down from the 7,200rpm offered by the rest of the Barracuda line—the LP series trades performance for power savings and reduced heat output. Thankfully, it doesn’t sacrifice much speed in the process. Unlike the performance-oriented Barracuda 7200.11 and 7200.12 series, the LP focuses on low power consumption, at both idle and full-spin states. We praised the low power consumption of Western Digital’s 2TB drive compared to the 1.5TB Barracuda 7200.11, but the LP series evens the playing field. On our test rig, the 2TB Barracuda drew around 4W at idle, slightly lower than the 2TB Caviar Green’s 5W, and 8W while operating, while the Caviar operated at around 9W. Both drives draw less power than the Barracudas of yore. The 5,900rpm Barracuda LP handily outpaces the Caviar Green, which has a spindle speed somewhere between 5,400rpm and 7,200rpm. In our h2benchw tests, the 2TB Barracuda LP’s sustained average reads and writes were 20 percent faster than the Caviar Green’s—around 91MB/s compared to the WD drive’s 76MB/s. In fact, those times are more comparable to Seagate’s speedy 1.5TB Barracuda 7200.11—the 2TB drive’s read speeds are slightly lower, and its write speeds BENCHMARKS Seagate Barracuda LP 2TB WD Caviar Green 2TB h2benchw Average Sustained Transfer Rate Read (MB/s) 205.4 175.1 h2benchw Average Sustained Transfer Rate Write (MB/s) 175.1 150.1 h2benchw Random Access Read (ms) 0.11 0.16 h2benchw Random Access Write (ms) 0.31 0.12 HDTach Burst Read (MB/s) 674 945 PCMark Vantage Overall Score 21,247 14,088 Best scores are bolded. Our test bed uses a 2.66GHz Intel Core 2 Quad Q6700, 2GB of Corsair DDR2/800 RAM on an EVGA 680 SLI motherboard, one EVGA GeForce 8800 GTX card, a Western Digital 500GB Caviar hard drive, and a PC Power and Cooling Turbo Cool PSU. Scores for h2benchw and HDTach were generated in Windows XP Professional with SP2. PCMark Vantage scores were run in Windows Vista Home Premium 32-bit. slightly higher than the smaller drive’s. Random-access times for the ’Cuda were a few milliseconds slower than those of the Caviar, at 13.2ms random read and 10.06ms random write latency. Its HDTach burst speed was 10 percent lower than the Caviar’s, at 196MB/s versus the Western Digital drive’s 218MB/s. With even “green” drives catching up to the WD VelociRaptor in performance (random-access times aside) while offering eight times the storage for the price, it’s now both possible and easy to add colossal amounts of storage to your rig without compromising performance. Next year’s high-powered rigs will almost certainly have solid state drives for their operating systems, but they’ll still need high-capacity drives for the grunt work. And at $240 for 2TB of decently fast, low-power-draw storage, the Barracuda LP will find a home in many a PC. –NATHAN EDWARDS VERDICT SEAGATE BARRACUDA LP 2TB + LOVE Among the fastest reads and writes of any high-capacity drive; low power consumption; competitively priced. - 8 BORON You can get two 1TB Barracuda 7200.12s for less than the price of one of these—and they’ll be faster. $240, www.seagate.com www.maximumpc.com | OCT 09 | MAXIMUMPC | 75 IN THE LAB REVIEWS OF THE LATEST HARDWARE AND SOFTWARE Cooler Master HAF 922 And now for something rather similar C ooler Master wowed us last year with its full-tower HAF 932, which garnered Maximum PC’s coveted Kick Ass Award (November 2008). Now we’ve gotten our hands on the midtower version of the HAF, the 922, and it looks awfully familiar. Superficially, the HAF 922 is like a cross between the full-tower HAF 932 and last month’s CM Storm Sniper. In fact, HAF 922’s interior is virtually identical to the Sniper’s— it has the same fixed motherboard tray with the CPU backplate cutout, cable tie-downs, and cable-routing holes. The five 5.25-inch drive bays use the same toolless retaining mechanism, and the five 3.5-inch hard drive bays use the same slide-out toolless trays. But where the Sniper had toolless PCI locking mechanisms, the HAF opts for more-traditional thumbscrews. And the interior of the HAF, unlike the Sniper’s, is unpainted metal (although the Sniper’s motherboard tray isn’t painted, either). Inside, the case is roomy, with plenty of space for all your parts and plenty of tie-downs for cables, though the side panels don’t bow out as much as the Sniper’s, so there’s less room behind them. Building in the HAF was a dream—in addition to the standard seven card expansion slots, Cooler Master has added an extra backplate connector on the case for installing supplemantal USB, eSATA, or audio jacks. Also like the Sniper, the HAF comes standard with three fans: A 20cm LED front intake fan, a 20cm top fan, and a 12cm back fan. There are mounting holes for another 20cm fan on the left-side panel, and you can add a 12cm or 14cm fan to the bottom of the case, or swap the 20cm top fan for two 12cm ones. Just like in the Sniper. The only difference is that the HAF’s top fan doesn’t have LEDs and the front fan’s are red like the full-tower HAF’s, not blue like the Sniper’s. The side panels and frame of the 19.7x22x10-inch HAF are black-painted steel, with a chunky plastic front-panel and It’s not quite as pretty as the Storm Sniper, but the HAF 922 is nearly as good, and $50 cheaper. mesh bezels. Front-panel connectors include two USB ports, eSATA, and audio. A front switch lets you turn off the fan’s LEDs. Like the Storm Sniper, the HAF 922 has a mesh side window; the HAF logo is printed in black-on-black on the left panel. The top panel seems a little sparse and unfinished, but there’s room there to mount an external radiator for a water-cooling setup. Though it lacks some of the features we’ve grown used to, like removable dust filters, and seems at times like a budget version of the Sniper, the HAF 922 is still an excellent case with plenty of airflow and room to add more fans. And because it’s $50 cheaper than the Sniper, you can buy more fans with the money you save. We HAF to recommend it. –NATHAN EDWARDS VERDICT COOLER MASTER HAF 922 Although the guts of the HAF 922 are solid, we wish Cooler Master had painted the interior. 76 | MAXIM MAXIMU XIMUM UM PC P | OCT 09 | www.maximumpc.com 8 + HAVA NAGILA - Roomy; great airflow; prettier than its predecessor; good value. We could use more LEDs; interior is unpainted; a side fan would be nice. GILA MONSTER $130, www.coolermaster-usa.com IN THE LAB REVIEWS OF THE LATEST HARDWARE AND SOFTWARE Toshiba Portégé A605 A top-of-the-line ultraportable in lower-rent wrapping I n our August 2009 ultraportable notebook roundup we fell hard for Toshiba’s Portégé R600—the lightest, sleekest ultraportable notebook we’d ever tested. At $2,150, however, that notebook isn’t cheap. This month we tested Toshiba’s more affordable ultraportable, the Portégé A605, to see how this consumer-class model compares with its fancier business-class kin. In looks, the two machines are quite different. While the R600 wowed us with its silver, svelte stylishness, the A605 looks more commonplace. Inside and out, it’s adorned with that shiny black plastic you see everywhere these days, which looks really good… until you smudge it. Its keyboard, thankfully, has the same fingerprint-proof silver coating as the R600’s, and more importantly, sports the same full-size dimensions that make typing on it easy. The A605, which measures 11.3x8.8x1.2 inches, is close in size to the R600, just not as wafer-thin, and it’s a noticeable threequarters of a pound heavier. Like the R600, the A605 offers a generous selection of ports and expandability options, including a USB/eSATA port (in addition to two standard USB ports), an ExpressCard slot, and an SD media reader. Inside, the R600 and A605 sport the same ultra-low-voltage 1.4GHz Intel Mobile Core 2 honor goes to HP’s 2530p and Lenovo’s X200s (both also reviewed in August), which featured 1.86GHz Core 2 Duo procs. The R600 overcame this deficit with its near-weightlessness. The less-expensive A605 doesn’t have this special quality. It does, however, have respectable performance, a strong feature set, and a damn good price. –KATHERINE STEVENSON Duo proc, the same 3GB of DDR2/667 RAM, the same Intel GS45 chipset, and nearly the same DVD burner (the R600’s has a slimmer profile). Besides all that, the A605’s 320GB hard drive is double the capacity of the R600’s. Not surprisingly, the two machines perform similarly, although the R600 did ever-so-slightly edge out the A605 in our benchmarks. Photoshop and ProShow are mostly CPU-bound, so it’s hard to explain the small gap in those scores. Perhaps the A605’s larger hard drive plays a part, or maybe extra baggage in Vista Home Premium (vs. Vista Business) is at fault. Other variables could explain why the A605’s battery pooped out just shy of four hours in our video rundown test while the R600’s lasted almost a half-hour longer. Neither the R600 nor the A605 are the bestperforming ultraportables we’ve tested. That VERDICT TOSHIBA PORTÉGÉ A605 + - FERRARI Great price, loads of features, wellrounded capabilities. 8 FIAT Unimpressive fit and finish; middle-of-thepack performance. $1,400, www.toshiba.com BENCHMARKS ZERO POINT 309 (-6.1%) Photoshop CS3 290 sec Proshow Producer 3,114 sec 3,263 (-4.6%) Quake III Arena 86.7 fps 86.4 (-0.3%) Battery Life 257 sec 232 (-9.7%) 0 10% 20% 30% 40% 50% 60% 70% 80% 90% Our zero-point ultraportable is a Toshiba Portégé R600 with a 1.4GHz Intel Mobile Core 2 Duo, 3GB of DDR2/667 RAM, integrated graphics, a 160GB 5,400rpm hard drive, and Windows Vista Business 32-bit. SPECIFICATIONS CPU 1.4GHz Intel Mobile Core 2 Duo SU9400 RAM 3GB DDR2/667 Chipset GS45 Storage Hitachi 320GB 5,400rpm (HTS543232L9SA00) Optical Matshita DVD-RAM UJ862ES Screen 12.1 inch, 1280x800 Ports Ethernet, two USB 2.0, USB/eSATA, VGA, ExpressCard/54, SD, Lap/Carry 3 lbs, 2 oz / 3 lbs, 12.1 oz One of the few features the A605 doesn’t share with the elite Portégé R600 is a transflective screen. This one is still serviceable outdoors, however. 78 | MAXIMUMPC | OCT 09 | www.maximumpc.com 100% IN THE LAB REVIEWS OF THE LATEST HARDWARE AND SOFTWARE Vantec ezShare Adapter This is the Air Jordan sneaker of sneakernets D on’t be fooled by the Vantec ezShare’s unassuming looks. This simple sixfoot white cable with its Type A USB plugs on either end is actually one of the easiest ways to quickly moves files between two computers. Just plug one end into an available USB port on a box running Windows (XP and up), and plug the other end into the second box. A Windows Explorer–like app will autolaunch on each machine, letting you drag and drop folders and files between the two PCs. If this sounds an awful lot like Data Drive Thru’s Tornado (reviewed November 2007), that’s because the two products are pretty similar. The file-explorer UI and software functionality of both products are virtually the same. It’s close enough that we have a pretty strong suspicion that the underlying chipsets and software come from the same factory in China. There are a few key differences, though. The first is the construction. The Tornado has auto-retracting cables, making it a nice portable package. On the other hand, the ezShare works with Macs. That’s right, by plugging one side into a PC and the other side into a Mac (10.4 or greater), you get the same Windows Explorer–like view and ability to drag and drop files between the two machines. That’ll make it even easier to switch from OS X to Windows 7 this fall! We compared our original Tornado with the ezShare by copying files between a Win XP ThinkPad T60 Core Duo notebook and our midrange Core i7 Dream Machine running Windows 7 64-bit. It was virtually a tie, with both transfer cables taking about 530 seconds to move a 9GB file from the notebook to the desktop. Actually, we’re happy to report that we could even move the large file; after we 80 | MAXIM MAXIMU XIMUM UM PC P | OCT 09 | www.maximumpc.com A simple Windows Explorer–like interface pops up on both machines when copying files. published our review of the Tornado in 2007, some people reported problems moving files larger than 4GB, and we even subsequently experienced occasional issues when using Windows XP 64-bit. Data Drive Thru was never able to replicate the problem, however. It now seems likely that the culprit was some obscure configuration of the OS, as we didn’t experience any such conflicts with Windows 7. We also tested the ezShare with smaller transfers and moved about 1.34GB of image files in 96 seconds—top-notch performance for USB 2.0 transfers. So what’s not to like? The ezShare’s presentation doesn’t exactly impress. While the Tornado makes for a tidy package, the ezShare looks like a plain, run-ofthe-mill cable. But at $27 vs. $50 for the Tornado, we’ll live with the ugly cable. And with Mac compatibility thrown in to boot, the ezShare is an obvious winner. Now all it needs to win a Kick Ass is Linux support. –GORDON MAH UNG VERDICT VANTEC EZSHARE ADAPTER 9 + FILE SHARING - Cross-platform support; low price; good performance. Has all the style and grace of a plain white USB cable. $27, www.vantecusa.com NEEDLE SHARING IN THE LAB REVIEWS OF THE LATEST HARDWARE AND SOFTWARE The iPhone 3GS brings a faster CPU, more memory, and faster download speeds to Apple’s do-everything wonder-phone. Apple iPhone 3GS Finally, a no-compromises smartphone suitable for mass consumption O nce upon a time, I dismissed the iPhone as a wannabe smartphone, lacking the key features that truly warranted that label. Since I wrote that column about two years ago, Apple has gone on a feature-adding rampage—adding push email, support for Exchange servers, thirdparty applications, and a veritable alphabet soup of new acronyms (GPS, MMS, and 3G, for starters). Two years into the iPhone era, the device is so much more than a phone with an iPod attached— it’s an instant-on, alwaysconnected, pocket-sized computer. On paper, the 3GS doesn’t seem like a major upgrade from the previous-generation iPhone, especially when you consider that many of the bullet points on the 3GS’s feature list came to older iPhones in the form of the 3.0 firmware release. And at first glance, even the new 3GS-exclusive features—a faster CPU, more memory, a more capable GPU, faster network connectivity, a higher-resolution camera that can finally shoot video, voice control for key features, and a compass— seem like a mixture of unsexy, incremental, shoulda-been-there-already features, and just plain meh. Worse, some of the features require carrier support, so things like MMS messages, higher-speed HSPDA support, and tethering won’t be available in the United States until AT&T deigns to support them. 82 | MAXIMUMPC | OCT 09 | www.maximumpc.com But when you actually sit down and use the phone, the seemingly minor hardware tweaks bring a substantial performance boost to the phone. The OS is snappier, apps load noticeably faster, and the out-ofmemory crashes that plagued Safari with earlier versions of the iPhone seem to be a thing of the past. The 3GS nearly halved the load times for some particularly slowloading apps in my side-by-side testing with the 3G version. Depending on the way you use your phone and the apps you use, you could experience a substantial performance boost. I even find myself wiping finger grease off the phone less frequently, thanks to the new fingerprint-resistant coating that Apple uses on the phone’s glass touch screen. While many of the new software features are also available to owners of older iPhones, I’d be remiss not to mention them. On the software front, the 3GS offers all the goodness of the 3.0 software update— phone-wide search, push notifications for apps, the voice recorder app, and a bunch of other smaller improvements. In my admittedly unscientific battery-life tests, the iPhone 3GS seemed to have a shorter run than the first iPhone in common usage, although it still outperformed the 3G. The 3GS has real battery-life problems when you run CPU-intensive apps, like the video camera or most games. In the gaming test, the 3GS battery drained faster than a 3G. I have yet to run out of juice before the end of the day, but this is definitely a phone that requires a recharge after a full day of use. Where does that leave the iPhone 3GS? For users of the original iPhone, it’s a great upgrade. Owners of the 3G should probably wait and see what Apple has planned for next year before they make the upgrade. And even if you have a moral objection to Apple, you have to be excited that the iPhone’s success has forced formerly moribund carriers and hardware manufacturers to innovate again, which is good news for anyone with a cell phone. –WILL SMITH VERDICT APPLE IPHONE 3GS + FUJI Faster everything; improved camera is great; it’s got a compass! - 9 GRANNY SMITH Battery life could be better; still can’t change some alert tones. $300 (32MB version w/contract), www.apple.com IN THE LAB REVIEWS OF THE LATEST HARDWARE AND SOFTWARE Zalman CNPS 10X Extreme The radial-copper-finned stalwart tries something new T he Zalman CNPS line (especially the long-lived 9000 series) is known for its distinctive copper-finned air coolers, which are nearly always organized in a circular pattern around the fan. This arrangement worked well for a long time, with the CNPS9700 and 9900 garnering rave reviews in these pages. But all the top-performing coolers we’ve tested recently (July’s Thermalright U120-eXtreme and August’s Noctua U12P) have had one thing in common: a skyscraper formfactor, whereby a tall stack of closely packed cooling fins jut upward, with one or more 12cm fans strapped to the side. Now, Zalman is getting in on the game with its latest CNPS cooler, the 10X Extreme, which takes the skyscraper-and-12cm-fan design and adds variable-speed fan control. The Zalman CNPS 10X Extreme sports five heat pipes running through a closely packed array of black nickel-plated fins. It’s a great look, and proves that Zalman doesn’t just do copper well. The fan remote can be slotted into the plastic cowl at the top of the heatsink or, more usefully, be routed to the outside of your case with the included extension wire. The fan has three autospeed settings: low (up to 1,500rpm), mid (up to 1,950rpm) and high (up to 2,150rpm), and one manual dial, for fine-tuning between 1,000rpm and 2,150rpm. Like similar coolers, in order to mount the heatsink to your motherboard, you have to remove the cooler’s fan. But unlike the Thermalright and the Noctua, which use clips, the Zalman’s fan is screwed on, making installation difficult. Worse, the fan’s (very short) four-pin connector is routed behind the fan inside the cowl, which makes it very painful to install. Aside from the fan issue, mounting the Zalman on a Socket 775 motherboard is easier than installing most of its peers. There’s no backplate, and the mounting bracket attaches with a pin mechanism that is quite sturdy. The retention mechanism is the same as on Zalman’s previous coolers and attaches with four spring screws. Unfortunately, though the Zalman 10X’s form matches that of the category’s top coolers, its performance does not. In our tests, the Zalman (at maximum fan speed) couldn’t match our current champion, the Thermalright U120, with one fan. Idle temperatures from the Zalman were within two 84 | MAXIM MAXIMU XIMUM UM PC P | OCT 09 | www.maximumpc.com degrees Celsius of the U120, but temperatures at The Zalman full CPU burn were CNPS10X is even four degrees C higher than with bigger than its similarly shaped peers. the Thermalright cooler. The 10X is even bigger than its peers, too: At 5.3 inches tall, 4 inches deep, and 6.3 inches wide, it’s slightly larger And we really wish manufacturers in every dimension than the Noctua U12P, would stop calling their coolers “Extreme.” and it weighs more than two pounds. The 10X –NATHAN EDWARDS comes dangerously close to being too large— some orientations just don’t work because the heat pipes bump capacitors or the VERDICT northbridge heatsinks. Both the Noctua and Thermalright coolers can mount additional ZALMAN CNPS 10X EXTREME fans—the Zalman doesn’t have that option, nor (because of its fan-connector placement) + ZOMBO - ZOMBIE can you easily replace the included fan with Good looks, variableBigger, more expena higher-performing one, as many air-cooling speed fan controller. sive, and not quite as effective as its peers. users prefer. No multi-fan support. We appreciate Zalman’s efforts to hit a higher performance mark with its products, $80, www.zalman.com and we like the CNPS 10X’s looks BENCHMARKS and fan control. Zalman also Zalman CNPS Thermalright gets points for including mount10X (high) U120-eXtreme Stock Cooler ing brackets for Core i7, Core i5, Idle (C) 27.75 26.25 42 and AMD motherboards. But the performance isn’t quite at the 100% Burn (C) 46.5 42.5 72.25 level of our slightly smaller, more- Best scores are bolded. Idle temperatures were measured after an hour of inactivity; load temperawere measured after an hour’s worth of CPU Burn-In (four instances). Test system consists of customizable champions, and the tures a stock-clock Q6700 processor on an EVGA 680i motherboard inside a Cooler Master ATCS 840 case with stock fans. price is higher. 7 IN THE LAB REVIEWS OF THE LATEST HARDWARE AND SOFTWARE Cisco Director Wireless-N Music Player It’s no Sonos (or Squeezebox, for that matter) B y launching a full line of musicstreaming products, including the Director DMC250 reviewed here, Cisco clearly has the Sonos Digital Music System in its sights; unfortunately, it’s fallen well short of the target. Our biggest complaint has to do with the convoluted setup process, which includes installing Cisco’s LELA (Linksys EasyLink Advisor) on at least one PC. LELA isn’t a bad utility—if you’re completely terrified by the prospect of setting up a home network. If you’re an old hand, it’s a waste of computer resources. The default installation also forces you to set up a user account on Cisco’s website. A spokesperson tells us this is because Cisco needs to act as an intermediary between you and Rhapsody. Really? What if you already have an account with Rhapsody? What if you decide you don’t want anything to do with it? There’s apparently some way of installing the Cisco media server software without LELA or divulging your email address to Cisco, but the documentation doesn’t mention it. Our second biggest complaint is that it takes the Director a mind-blowing 74 seconds to start up from the time you push its power button to the time it’s ready to play a note. That’s a full minute and 14 seconds. We’ve listened to songs that were shorter than a minute and 14 seconds. When we asked the product manager if our experience was typical, he sheepishly replied, “Yeah, we’re working on that.” The Director has a luscious 3.5-inch display, so it’s too bad it won’t consistently display album art. Cisco’s media server insists on pulling album art from the AMG online database instead of simply looking in the album folder or parsing the track’s existing metadata. If your track’s metadata isn’t mapped exactly the way it is in AMG’s database, you’ll get placeholder art. You can connect the Director to your network with or without an Ethernet cable (the device is outfitted with a dual-band 2.4/5.0GHz 802.11n radio but can fall back to 802.11b/g mode). There’s an integrated amp that puts 50 watts per channel into a four-ohm load or 40 watts per channel into an eight-ohm load. Cisco uses springloaded binding posts, so forget about using banana plugs. We auditioned the amp playing Paul Thorn’s “Lucky Seven Ranch” through a pair of TBI Audio’s Majestic Diamond IR monitors and were not at all impressed. Low and midrange frequencies sounded as though they were passing through a wall of mud while the highs sounded paradoxically shrill. Very odd. We had a better experience when we used the Director’s line-level outputs to connect the player to TBI’s Millennia amp. As with the Sonos system, you can also plug an analog source (a cassette deck or a turntable with an integrated pre-amp, for instance) into the Director and stream its audio over your network. You can also stream music from a host of free Internet radio stations (but not from LastFM, Pandora, or Slacker). Cisco does top Sonos in device connectivity: The Director is capable of hosting both a USB storage device and an iPod (using an optional dock). –MICHAEL BROWN VERDICT LINKSYS DIRECTOR MUSIC PLAYER The Linksys Director comes with a good remote control, but you can also navigate its menus using the buttons arrayed around its display. + BATON - Dual-band 802.11n radio; DLNA compliant; supports FLAC. Crappy integrated amp; glacial start-up; won’t display embedded album art. $450, www.linksys.com 86 | MAXIM MAXIMU XIMUM UM PC P | OCT 09 | www.maximumpc.com 6 BILLY CLUB Canon EOS Rebel T1i 500D DRebel, you’ve come a long way, baby C anon’s original Digital Rebel 300D lit the fuse that started the sub-$1,000 digital-SLR war. With the “DRebel” now in its fifth iteration, it’s hard to believe just how far this camera has come. The original DRebel sported a dustsensitive 6.3MP CMOS sensor and a pathetic four-shot JPEG buffer. The new EOS Rebel T1i 500D ups the megapixels to 15.1 and features a massive 170-shot JPEG buffer at 3.4fps. Dust cleaning, once rare in DSLRs, is featured, as is Live View, or the ability to use the LCD screen to focus and frame a shot. The three-inch screen is a gorgeous 920K pixels and makes smaller and lowerres screens seem antiquated. The real eyebrow-raising feature of the SPECIFICATIONS Megapixels / Max Resolution 15.1 / 4752x3168 Image Sensor 22.3mm x 14.9mm (APS-C) CMOS 3:2 ratio with self cleaning; 1.6 FOV Autofocus 9-point TTL-CT-SIR Shutter Speeds 1/4000 to 30 sec; X-sync at 1/200 sec Shooting Buffer 170 large / fine JPEG, 9 RAW Rebel T1i, though, is its support for 720p and 1080p video modes. While we once believed that DSLRs would never do video, it’s now the top checkbox on newer models. The T1i supports 720p at 30fps, but at 1080p resolution the frame rate drops to a nearly unbearable 20fps. Video is compressed using H.264 and is stored in a QuickTime .MOV container. We found the video quality to be mixed. The low-light performance was surprisingly noisy considering the T1i’s relatively large CMOS sensor. It’s not terrible, and it’s better than the majority of pocket HD cams, but we were hoping, perhaps foolishly, that the T1i’s low-light video would rival that of the superb and pricey EOS 5D Mk II. Sadly, audio is only mono and there’s no provision for mic-in. The trigger for the video is also poorly placed. The low-light capability of the still images was far more satisfying. Although we’ve heard complaints of noise issues at high ISOs with the EOS 50D sensor that the T1i is based on, we felt the noise control was quite good. And when compared to an older-generation body, such as the 10MP EOS 40D, the T1i has the advantage. The T1i’s 3200 ISO is on par with the 40D at a lower 1600 ISO, which is quite a feat when you consider how many pixels Canon has jammed onto the APS-C sensor format in the Rebel. Generally, as the pixel density increases on an imaging sensor so does noise. The maker can increase the sensor’s size, but that adds cost. Today, the APS-C size is all budget consumers are going to get. Is the T1i the perfect budget DSLR? Certainly not, but it is hard to ask for more in a body at this price. Sure, we’d love to see 24fps 1080p, a mic-in jack, and perhaps a higherperformance autofocus system (as is, it’s fine for the majority of folks), but for $900 those wishes are unrealistic. Of course, there was a time when our wishes for a large buffer, video mode, and a high-resolution screen in a sub$1,000 body were unrealistic, too. Overall, the T1i is the pinnacle of the sub-$1K DSLRs—it will make anyone looking for a step-up from a point-and-shoot grin from ear to ear. –GORDON MAH UNG VERDICT CANON EOS REBEL T1I 500D + KODACHROME Video Mode 720p 1280x720 @ 30fps; 1080p 1920x1080 @ 20fps; VGA 640x480 @ 30fps; max single file size 4GB Good low-light performance and HD Video in a sub-$1K body. Storage SD, SDHC $900, www.canon.com Rated Battery Life 500 shots (without flash) per charge or 400 (using 50% flash) - 9 CHROMED RIMS HD video is slightly noisy and audio is mono-only. HD Video comes to budget photography. www.maximumpc.com | OCT 09 | MAXIMUMPC | 87 IN THE LAB REVIEWS OF THE LATEST HARDWARE AND SOFTWARE D-Link DIR-685 Xtreme N Storage Router Love the features; hate the performance—and the price tag D -Link’s DIR-685 Wi-Fi router generated a lot of buzz at CES this past January. And when we took a gander at its spec sheet, we thought it a contender for Best of the Best in the router category; something that would finally displace the Linksys WRT600N, which is becoming hard to find. Alas, ’twas not to be. The problem certainly isn’t with the DIR685’s feature set: This router is absolutely loaded with goodies. The 3.2-inch color LCD can inform you of the router’s status and configuration; present digital photos from Flickr, Picasa, and Facebook; display RSS feeds, such as sports scores, weather reports, and stock quotes; and a lot more (this is one router your significant other won’t insist be hidden in a closet). Next up, there’s a 2.5-inch internal SATA hard drive bay, which can turn the router into a NAS box (complemented by a built-in FTP server and BitTorrent software). There are two USB ports featuring D-Link’s SharePort technology, which allows you to plug in both an external hard drive and a printer and share these devices with any computer on the network. The router’s fourport gigabit switch automatically powers down any ports not in use to save a modest amount of energy. The rest of the features are just as valuable, if not as unusual. You can set up a password-protected guest zone, for instance, with the option of limiting access to a set schedule. And there’s both a UPnP server and an iTunes server. Lastly, there’s a Quality BENCHMARKS (TCP/IP THROUGHPUT) D-Link DIR-685 Linksys WRT310N Kitchen (20 feet) Mb/s 45.4 98.9 Bedroom (60 feet) Mb/s 16.4 63.6 Media Room (35 feet) Mb/s 4.54 14.8 Enclosed Patio (38 feet) Mb/s 29.5 70.0 Outdoors A (90 feet) Mb/s No Connection 2.52 Outdoors B (85 feet) Mb/s 0.25 0.60 Best scores are bolded. Additional test criteria available at http://bit.ly/PQmtv. 88 | MAXIM MAXIMU XIMUM UM PC P | OCT 09 | www.maximumpc.com of Service engine to help eliminate lag for VoIP and media-streaming applications. But our enthusiasm over all those whiz-bang features is tempered by the DIR-685’s slug-slow wireless throughput and NAS performance. We’ve been using the aforementioned Linksys WRT600N for comparison for more than a year, but we always retest its performance within a few hours of benchmarking a new contender, just to make sure both products are tested under the same environmental conditions. The DIR-685 lagged far behind the Linksys in our Kitchen test, where the client is 20 feet away from the router and separated by an insulated wall and a set of plywood cabinets: It delivered TCP/IP throughput of just 45.4Mb/s compared to the Linksys WRT600N’s 98.9Mb/s. The D-Link turned in a particularly poor performance in our Media Room test, where the client is located in a double-insulated room-within-a-room 35 feet from the router, managing TCP/IP throughput of just 4.54Mb/s. The 2.5-inch drive bay limits your choice of hard drives to notebook models, and D-Link provided us with an 80GB Seagate Momentus 5400.5 hard drive for this evalu- You won’t find a prettier wireless router, but you’ll encounter plenty that are much, much better. ation. But we find the router’s lethargic NAS performance more troubling than this physical limitation: The DIR-685 took a full 8:53 (min:sec) to copy a single 3GB file from a PC. Compare that to the Qnap TS-209 Pro II—our Best of the Best NAS pick—which copied the same file in just 2:27. We won’t complain about a high price tag if a product’s features and performance justify it, but the DIR-685’s $300 price tag— which doesn’t include a hard drive—just rubs us the wrong way. –MICHAEL BROWN BENCHMARKS (NAS PERFORMANCE) VERDICT 7 D-Link DIR-685 QNAP TS-109 Pro PC to NAS, small (min:sec) 2:54 0:36 PC to NAS large (min:sec) D-LINK DIR-685 XTREME N STORAGE ROUTER 8:53 2:27 + GOLDSCHLAGER - LCD; internal harddrive bay; built-in FTP and BitTorrent software. Expensive; slow wireless and NAS throughput; hard-drive bay limited to 2.5-inch drives. NAS to PC small (min:sec) 1:06 0:39 NAS to PC large (min:sec) 5:52 2:44 Best scores are bolded. We used the contents of Maximum PC’s November 2007 CD for the small-file testing, and a single 2.79GB file for the large-file testing. All scores are an average of three transfer trials. $300, www.dlink.com IRON PYRITE IN THE LAB REVIEWS OF THE LATEST HARDWARE AND SOFTWARE Nero LiquidTV It’s not like TiVo for your PC, it is TiVo for your PC T o long-term TiVo users, most other personal video recording solutions, whether they’re PC-based or provided by your cable or satellite provider, just fall short. TiVo takes a complex task—recording your favorite TV shows for later playback on-demand—and makes it simple, easy, and even fun. As officially licensed TiVo software for your PC, LiquidTV delivers all the TiVo features you know and love in a PC-friendly software package. The LiquidTV package comes with the software, a year of complimentary TiVo service (the annual fee thereafter is $40), a standard TiVo remote, a TiVo IR receiver/ blaster combo, and a Hauppauge USB ATSC/ NTSC/QAM combo TV tuner. The software requires a relatively unobtrusive activation process, although if you want to move it to another machine after you’ve activated, you’ll probably need to make a phone call. While the package came with only a single tuner, you can use up to four tuners with the software. Setup was relatively simple, and unlike other PVR software we’ve tested, the TiVo software allows you to easily configure multiple sources with different channel information. For example, we set up the USB Hauppauge tuner with local over-the-air HD channels, then connected a cable box to an ATI TV Wonder 650, using the IR blaster to change channels. We had no problems getting the software working Nero’s TiVo-in-a-box includes a TiVo remote, a USB TV tuner, an IR receiver/blaster, and the software you’ll need to get TiVo on your PC! with over-the-air HD or connecting the PC to our cable box, but we couldn’t get the unencrypted QAM support, which our cable provider says is not supported for our area. All the standard TiVo functionality is present, and shows that you record on other networked Series 2 or higher TiVos in your home can be shared with each other. The LiquidTV software also adds features that users of dedicated TiVo boxes might not be familiar with—auto-convert for portable devices and record-to-DVD. In the options for every show you watch, you can choose to automatically convert recorded programs to versions for your PSP, iPod, or other portable media player after the show is finished recording. For obsessive archivists or frequent travelers, this feature can be a real boon. As with other PVR software, the big problem for home users is high-def content. Viewing over-the-air ATSC HD content is easy and free, but the HD equivalent for cable, QAM, is Longtime TiVo users will find the Liquid TV interface eerily familiar. 90 | MAXIM MAXIMU XIMUM UM PC P | OCT 09 | www.maximumpc.com poorly supported and works only for basic cable stations. There’s no way for end-users to get HD signals from their cable or satellite providers into their PVR box. Beyond that, the software includes all the limitations of dedicated TiVo boxes. Content from certain channels is “protected” from transcoding or burning to DVD. Currently, the only affected channel is HBO. As the TiVo service for set-top boxes costs around $12 a month, $100 for Liquid TV is a great deal, especially if you have a dedicated PVR or home server machine running that you can install it on. (We’d love to pair this software with an always-on Home Server machine, but the Home Server OS isn’t officially supported.) We love the TiVo service, which makes this our new favorite PVR software solution for the PC. –WILL SMITH VERDICT NERO LIQUIDTV 9 + ATSC - Super-slick TiVo software for your PC. Works well with multiple tuners and multiple TiVos. No HD for premium cable channels; “protected” channels; QAM support is spotty nationwide. $100, www.nero.com NTSC ARMA 2 Pilot any plane, shoot any rifle, get blown up by real tanks T o the shooter enthusiast who laments auto-aim, refuses regenerating health, tires of over-protective cover systems, balks at recoilless rocket launchers, and rolls his eyes at infinite respawns, ARMA 2 is a love letter perfumed in cordite. You’re a member of Razor Team, a Marine squad deployed by the United States to assist the Chernorussian government against a well-armed insurgency. Your fire team hits the ground with weapons and equipment modeled after real-life counterparts, tackling objectives with patient tactics as the conflict evolves into a full civil war. But narrative (even if it’s more of an asset to ARMA 2 than its predecessor) isn’t the draw. For gamers who grew up with titles like Comanche, the original Rainbow Six games, and Operation Flashpoint (which was also created by developer Bohemia Interactive), ARMA 2 is a platform of comprehensive war realism that appeases those who value complexity, don’t mind obscure keyboard shortcuts (hit Enter on your Num Pad to change between first/third person), appreciate accurate audio modeling (if a tank explodes a mile away, you’ll hear it five seconds after it actually blows up), and know that an M-16 can’t kill someone from three miles away (hello, Call of Duty). The “ultimate military simulator” tagline isn’t far off, but it does come with some wellattached strings. Namely, buggy code that can’t always keep up with ARMA 2’s ambitious attempt at realism. For every moment of accurate weapon physics and war atmosphere, there’s a corresponding miscue of brainless AI or broken mission scripting. You can fly teammates over a war zone in a C-130 transport plane to execute a tactical air drop, but sit Pull up! For newcomers to simulation games, piloting this UH-1Y and other aircraft takes practice. puzzled when parachuting 10 feet from the ground lets you land unharmed. Realistic ballistics modeling will have you compensating for bullet-drop and recoil during firefights—but if you’re shot, your AI teammates usually leave you writhing on the ground because they forget to heal you. Fighting against unscripted AI in an unrestricted, 225-squarekilometer slice of fictional Russia means you apply the tactics you want to, but strategy won’t count when an enemy rifleman ignores the bulky shrubs you’re lying prone in and snipes you from a half-mile away. Call out targets with a fully voiced (in Russian, no less) command system, but cringe when your war buddies shout like a Speak & Spell running on dying batteries. Whether or not these incongruent bits of design break the game or just distract you from the fun at hand depends on your patience. And as most of them are AI-related, it’s fortunate that the prime moments still exist in co-op mode. Loading into aircraft with a few buddies, laser-marking an APC while a teammate drops a bomb toward the target, calling out military jargon over voice chat—ARMA 2 thrives on these emergent war scenes; it’s at its best when your actions, and not the game itself, are scripting the battle. That openness-of-experience extends to a deep mission editor that will delight modders. And graphically, ARMA 2 has system-busting credibility. Explosions feel organic and the motion blur and first-person head-bob when you sprint is incredibly immersive, but for all but owners of the beefiest systems, the unscripted AI means the frame rate dips as more objects and action enter play. If looking down the barrel of dozens of nuanced firearms, unpredictable warfare, and plugging in a flight stick float your gamer boat, ARMA 2 is a refreshing shift from mainstream gun games that suits the PC’s complexity, even with a few bugs. –EVAN LAHTI VERDICT ARMA 2 Disciplined tactics and squad maneuvers are key to getting ahead in ARMA 2. Ramboing into a war zone won’t get you very far. 8 + F-22 - Comprehensive realism; complex, open warplay; unique and intense co-op experience. Schizophrenic allied and enemy AI; some unintuitive controls. .22 $50, www.arma2.com, ESRB: M www.maximumpc.com | OCT 09 | MAXIM MAXIMU XIMUM UM PC P | 91 IN THE LAB HANDS ON WITH THE LATEST HARDWARE AND SOFTWARE LAB NOTES Cooking up New Benchmarks Newer, faster hardware requires a new yardstick for measuring performance I ’ve been working on revamping our system benchmarks with the hope of putting them in service before the end of the year. As always, we will stick with real-world applications to measure how fast a system performs as much as we possibly can. Photodex’s ProShow Producer and Main Concept Reference will likely make a return, but with updated source material and app updates to stress today’s hardware. I’m also closely examining Sony Vegas 9 Pro as a substitute for Premiere Pro CS3. I like Vegas’s ability to natively handle RED formats—even 4K material—as well as EOS 5D Mark II H.264 files. We may also replace the venerable Photoshop GORDON MAH UNG CS3 test script with SENIOR EDITOR Photoshop Lightroom 2. Why? Who really waits for Photoshop to do anything anymore? The real chip busters are RAW workloads, which we’re hoping Lightroom 2 will be an accurate predicator of. Finally, in gaming, we’ll likely stick with Crysis and roll out a new Far Cry 2 benchmark. WILL SMITH KATHERINE STEVENSON NATHAN EDWARDS ALEX CASTLE EDITOR-IN-CHIEF DEPUTY EDITOR ASSOCIATE EDITOR ASSOCIATE ONLINE EDITOR With light 3D acceleration in the latest versions of VirtualBox, my favorite virtual machine app, I killed my trusty Ubuntu partition in favor of an infinitely more accessible virtual machine. I’ll gladly suffer the slight performance penalty, because I find myself using Linux more frequently when I don’t have to reboot in order to fire up the OS. Word that Amazon just purchased Zappos has me wondering whether this will change the online shoe seller for better or worse. I’ve recently come to appreciate Zappos’s superb customer service more than ever after nightmarish dealings with one of its competitors. I would hate to see it degraded by Amazon’s acquisition. After assembling, disassembling, and re-assembling so many netbooks, I’m pretty sure I should start my own upgrading business. I’d toyed with the idea of putting an SSD in my own Asus Eee 1000HE, but it wasn’t until I tested netbook upgrades this month that I realized what a difference it could make. This month, I learned a valuable lesson: Although it is fun to spray compressed air upside down, and it might seem like a good idea to do so in order to see a laser mid-air, this is actually a miscalculation. Turns out, the bittering agent in the spray will cause you, Norm, and everyone in the photo studio to feel like vomiting all afternoon. 92 | MAXIM MAXIMU XIMUM UM PC P | OCT 09 | www.maximumpc.com NORMAN CHAN ONLINE EDITOR This month, I was able to check out some new PC games at ComicCon. One of the games that impressed me the most was Avatar, a tie-in with James Cameron’s upcoming movie. Ubisoft is developing the game with 3D play in mind, just as Cameron shot his film with proprietary 3D camera technology. The results are quite stunning! COMMENTS YOU WRITE, WE RESPOND We tackle tough reader questions on... Finding Finding the .Bin File CM Centurian 534 Dream Machine Matters Bin There, Done That In your “Which DVD Drive is the Fastest Disc Ripper?” article (April), you discuss hacking the firmware of a Samsung SH-S223. I thought I would try this but have been unable to locate a .bin copy of the Samsung firmware. Instead all I have been able to locate is an .exe version, which is a selfinstalling firmware update, put out by Samsung. The Codeguys.RPC1 program that you mention in your article requires a .bin file to operate; I was hoping someone on your staff might know where to locate one. –Robert Morley Deputy Editor Katherine Stevenson responds: After obtaining the appropriate .exe firmware file from Samsung’s website, you need to open that file—we used the free 7-Zip app (www.7-zip.org)—to get at the .bin file. Then use the Patch_Utility_Samsung.exe (from codeguys.rpc1.org) to modify the .bin file, which is straightforward. The Case that Launched 1,000 Emails Your August cover has a tower case that is just beautiful, minus the lightning bolts, of course. Who makes that case and where can I get one? I looked all through the magazine and couldn’t find any details on that bad boy. – Kevin Associate Editor Nathan Edwards Responds: We’ve received a surprisingly large number of inquiries about that particular case. It’s a Cooler Master Centurion 534. Although the design is more than three years old at this point, the Centurion 534 has proven so popular that it’s still sold today, and you can get it for less than 60 bucks. Playing It Safe I’ve noticed the magazine pushing Norton Internet Security 2009 quite a bit lately, and I’m wondering if I should try it. I currently use the free Avira Antivir, Spybot Search & Destroy, Spyware Blaster, ThreatFire, and Windows Defender apps. Would it be safe to uninstall all of those and just run Norton Internet Security 2009? –Kevin Turcotte Contributing Writer Paul Lilly Responds: By investing in an all-in-one security suite like Norton Internet Security 2009, you’re paying for the convenience of streamlining your security into a single, manageable app. But you have to be careful—many NOW ONLINE The History of 3D Graphics It’s not uncommon for PC builders to spend upwards of $400 on Nvidia or ATI’s latest videocards, but without the killer games to utilize them, they’d have no reason to get excited about cutting-edge GPUs. The 3D CUTCOPYPASTE game engine has been a big driving force in In a caption for our high-end Dream Machine (the Stimulus Package), we identified the GPUs as being GTX 295 cards, but they were actually GTX 285 cards, as stated in the price list. the advancement of PC hardware, and we 94 | MAXIMUMPC | OCT 09 | www.maximumpc.com celebrate the landmark engines like Doom and Unreal that have pushed graphics technology: http://bit.ly/N3D4m. security suites spread themselves too thin by trying to do too much. We didn’t find that to be the case with either NIS 2009 or ESET Smart Security 4, both of which earned high marks in our most recent antivirus roundup (http://bit. ly/1M48Fi). If you install either of these suites, you can safely uninstall or disable the freebie antimalware apps you mentioned, and you absolutely should avoid running more than one antivirus program at the same time. Because antivirus apps root themselves deep into your OS, running more than one can actually cause conflicts. The same generally isn’t true for multiple antispyware programs. NEXT MONTH TC-5600, Why Aren’t You at Your Post? I need some help locating a product that’s mentioned in the “Build Your Own Dream Machine” article in the September 2009 issue. You say that Dow Corning TC-5600 thermal paste was used but I cannot find mention of TC-5600 on the Dow Corning website or when searching the web. Is TC-5600 the correct part number? Can you please tell me where I might purchase this product? Thanks again for an excellent magazine! –Robert Thomas Senior Editor Gordon Mah Ung Responds: That is the correct name. TC-5600 is a brand-new formulation from Dow Corning that, from what I am told, just made it past the lawyers and is now getting out to vendors. You should expect to see TC-5600 offered from various vendors in the next few months. You can also expect to see an upcoming comparison we’ll conduct to determine the most effective thermal grease formulation out there. Why Win 7 RC1? I was just reading the Dream Machine story in your September issue and have a problem with your decision to recommend Win 7 RC1 as the OS. I’m not sure including a beta OS is a wise decision in the first place. I currently have Win 7 RC1 installed and definitely find it to be a good OS, but I have run into several issues. The most significant is the fact that Punkbuster does not support beta OSes. The Call of Duty franchise, for instance, uses Punkbuster, and to my knowledge Punkbuster does not plan on supporting Windows 7 until its release date. That could be disappointing to any wouldbe gamers who build with these specs. –Ramsay Bohm Editor-in-Chief Will Smith Responds: In fairness, we recommended a release candidate OS, not a beta OS, though I appreciate your concern. While I wouldn’t recommend running a RC operating system in a production environment, I have fewer reservations about recommending it to the home enthusiasts who read Maximum PC than I would encouraging readers to spend their hard-earned money on Vista or XP this close to the Windows 7 launch. Incidentally, a COD4 fix can be found here: http://bit.ly/4jo.WRT. Deficit PC Spending I took particular interest in the “Recession Special” rig in your September Dream Machine 2009 story. I cross-referenced the prices you quoted with various web stores and I beat your pricing on all but one item: the Antec 900 case. You listed a price of $77, but I could not find it for less than $107. Even so, I still beat your total price by $14! I’d be lying if I said I wasn’t bragging, but when you’re on a budget that’s as tight as mine, you’ll dig for the rock-bottom price. Still, the question remains, where did you find the case for $77? –Kevin R. Slagle Senior Editor Gordon Mah Geithner responds: Such is the nature of Internet buying— prices fluctuate day-to-day, if not hour-by-hour. Most of our pricing was based on what the product sold for at the time without the rebate. An editor here did locate the Antec 900 for $77, but unfortunately did not note the store’s name. I managed to find the case for $79 from Buy.com, but that was for a refurbished case (which really should not matter since it’s a case). I suspect that if you kept checking weekly, you would find the Antec 900 at or near $80. Thanks, but No Thanks Regarding your “9 Ways to Disaster-Proof Your PC” article (August), I felt compelled to comment on you router configuration tips. The ones included were great but two important ones were missing: Disable your SSID broadcast. You’re less likely to be hacked if a hacker doesn’t know your network exists. Enable MAC filtering. Only allow MAC addresses of PCs in your network to join the network. –Matt Menard Editor-in-Chief Will Smith Responds: We didn’t mention those tips in the article because they don’t improve your wireless network’s security. While hiding your SSID will prevent your network from showing up in the “Connect to a wireless network” dialog in Windows and OS X, any decent Wi-Fi sniffer will still find your “hidden” network in a matter of moments. MAC address filtering is snake oil, too. With the right tools, it’s simple to sniff out the MAC addresses in use on a Wi-Fi network and clone one for your own use. LETTERS POLICY Please send your questions and comments to comments@ [email protected]. mumpc.com. Include Include your your full name, full name, city ofcity residence, of residence, and phone and phone number number with your correspondence. with your correspondence. Letters may Letters be edited may for be edited space and for space clarity.and Due clarity. to theDue amount to theof mail we of amount receive, mail we wereceive, are unable we are to respond unable to personally respond personally to all queries. to all queries. COMING IN MAXIMUMPC’s Follow Us on Twitter NOV ISSUE Home Server How-To Data backup, media streaming, and file sharing is easier than ever with a centralized PC. We’ll show you how to build, configure, and tweak your own Windows Home Server. Top-Secret Hardware! For now we’re sworn to secrecy, but expect to get all the details on a very high-profile product, including benchmarks. Clean Your PC Make your machine neat and tidy with our piece-by-piece cleaning guide. www.maximumpc.com | XXX OCT 09 | MAXIM MAXIMU XIMUUM M MPPPCC | 95 xx Unleash your PC’s Potential… Try Each issue of Maximum PC features: ■ Brutally honest product reviews ■ Hard-hitting editorials ■ Tips to blast your machine’s performance ■ Insightful and innovative How-To’s 2 FRl IsEsuEes Tria ■ A CD loaded with new software, utility and game demos Reserve your 2 FREE Trial Issues today! There’s no obligation. To order, head to: www.maximumpc.com/archive BEST OF THE BEST A PAR T- B Y - PA R T G UIDE TO B UIL DIN G A B ETTER P C AIR COOLER Thermalright Ultra-120 eXtreme A s tired as we are of the “extreme” moniker, we can make an exception here: Thermalright’s Ultra-120 eXtreme is worthy of the name. Like all the top-performing air coolers we’ve tested recently, the Ultra-120 uses a skyscraper-like configuration of cooling fins rising high above the heatsink, and features a 12cm fan clipped to the front. Make no mistake, the Ultra-120 is big. It’s heavy, and installation is tricky, but once it’s on, it works like a charm. When compared to our previous champion, the Zalman CNPS9900, the Ultra-120 produced full-burn temperatures that were an average of 8 C lower. It tested 25 C lower than an Intel stock cooler. Since we put it through its paces, the Thermalright Ultra-120 has bested every air cooler we’ve thrown at it. Not bad for $60. www.thermalright.com THE REST OF THE BEST Budget Processor Phenom II X4 940 www.amd.com ■ LGA 1366 Motherboard MSI Eclipse SLI www.msicomputer.com ■ Socket 775 Motherboard Asus Striker II Extreme www.asus.com ■ Socket AM2 Motherboard MSI K9A2 Platinum www.msicomputer.com ■ ■ ■ ■ ■ $500 Videocard Nvidia GeForce GTX 295 www.nvidia.com $250 Videocard Nvidia GeForce GTX 275 www.nvidia.com $150 Videocard ATI Radeon 4870 www.ati.com DVD Burner Samsung SH-S223 www.samsung.com ■ Solid State Drive Patriot Torqx 128GB www.patriotmemory.com Capacity Storage Seagate Barracuda 7200.11 1.5TB www.seagate.com Performance Hard Drive Western Digital VelociRaptor www.wdc.com ■ Blu-ray Drive Pioneer BDR-2203 www.pioneerelectronics.com ■ Full-Tower Case Cooler Master ATCS 840 www.coolermaster.com ■ Mid-Tower Case Silverstone Fortress www.silverstonetek.com ■ Gaming Mouse Logitech G9x Laser Mouse www.logitech.com Games We’re Playing ARMA 2 www.arma2.com ■ ■ Gaming Keyboard Logitech G19 Keyboard www.logitech.com Street Fighter IV www.streetfighter.com ■ Demigod demigodthegame.com ■ ■ Wi-Fi Router Linksys WRT600N www.linksys.com ■ Last Night on Earth (board game) www.flyingfrog.net/ lastnightonearth ■ ■ For even more Best of the Best entries, such as speakers and budget components, go to http://www.maximumpc.com/best-of-the-best MAXIMUM PC (ISSN 1522-4279) is published 13 times a year, monthly plus Holiday issue following December issue. Future US, Inc., 4000 Shoreline Court, Suite 400, South San Francisco, CA 94080. Phone: (650) 872-1642. Fax: (650) 872-2207. Website: www.futureus. com. Periodicals postage paid in South San Francisco, CA and at additional mailing offices. Newsstand distribution is handled by Time Warner Retail. Basic subscription rates: one year (12 issues) US: $20; Canada: $26; Foreign: $42. Basic subscription rates including monthly CD, one year (13 issues/13 CD-ROMs) US: $30; Canada: $40; Foreign: $56. US funds only. Canadian price includes postage and GST (#R128220688). POSTMASTER: Send 96 | MAXIM MAXIMU XIMUM UM PC P | OCT 09 | www.maximumpc.com changes of address to Maximum PC, PO Box 5159, Harlan, IA 51593-0659. Standard Mail enclosure in the following edition: None. Ride-Along enclosure in the following editions: B1, C1, C2, C3, C4. Canada Post PMA #40612608. Returns: Bleuchip International, PO Box 25542, London, ON N6C 6B2, Canada. Future US, Inc. also publishes Guitar World, Mac|Life, Nintendo Power, PC Gamer, PlayStation: The Official Magazine, Pregnancy, Revolver, Windows Vista: The Official Magazine, The Official Xbox Magazine and others. Entire contents copyright 2009 Future US. Printed in the USA. All rights reserved. Reproduction in whole or in part without permission is prohibited. Reproduction on the Internet of the articles and pictures in this magazine is illegal without the prior written consent of Maximum PC. Products named in the pages of Maximum PC are trademarks of their respective companies. Future US, Inc. is not affiliated with the companies or products advertised or covered in Maximum PC. CUSTOMER SERVICE: Maximum PC Customer Care, PO Box 5159, Harlan, IA 515930659. Phone: 1-800-274-3421. Web: www.maximumpc.com/customerservice. Email: [email protected]. Back issues can be purchased by calling 1-800-865-7240. REPRINTS: Reprint Management Service. Phone: 717-399-1900 ext. 100.