1
Installation Manual WebCCTV Let’s make things safer! WebCCTV Installation Manual 2 Contents CONTENTS ....................................................................................................................................................................................................... 2 1 INTRODUCTION.................................................................................................................................................................................. 4 2 GETTING STARTED ........................................................................................................................................................................... 6 2.1 2.1.1 2.1.2 2.1.3 2.2 2.2.1 2.4 2.4.1 2.4.2 2.4.3 2.5 2.5.1 2.5.2 2.5.3 EQUIPMENT CHECKLIST ........................................................................................................................................................................ 6 Hardware ..................................................................................................................................................................................... 6 Software…………………………………………………………….. ..................................................................................................... 6 Documentation ............................................................................................................................................................................. 6 STARTING UP FOR THE FIRST TIME ........................................................................................................................................................ 7 Turning power on/off.................................................................................................................................................................... 7 2.2.1.1 Turning power on ................................................................................................................................................................. 7 2.2.1.2 Turning power off or restarting ............................................................................................................................................ 8 Logging on to the XPe system ...................................................................................................................................................... 8 Desktop icons overview................................................................................................................................................................ 9 Changing password.................................................................................................................................................................... 10 Setting time................................................................................................................................................................................. 12 2.2.5.1 Through WebCCTV Web Application ............................................................................................................................... 12 2.2.5.2 Through XPe OS ................................................................................................................................................................ 13 2.2.5.2.1 Changing time zone........................................................................................................................................................ 13 2.2.5.2.2 Time synchronization ..................................................................................................................................................... 13 Changing keyboard settings ....................................................................................................................................................... 14 Adjusting screen resolution ........................................................................................................................................................ 16 WEBCCTV IN THE NETWORK ............................................................................................................................................................. 17 Network overview....................................................................................................................................................................... 17 Connecting WebCCTV to the local network ............................................................................................................................... 18 Assigning IP address.................................................................................................................................................................. 19 Firewall configuration ............................................................................................................................................................... 19 Connecting a client .................................................................................................................................................................... 22 2.3.5.1 Minimum client requirements............................................................................................................................................. 22 2.3.5.2 Client configuration............................................................................................................................................................ 22 Connecting WebCCTV to the Internet ........................................................................................................................................ 25 2.3.6.1 Creating a network connection ........................................................................................................................................... 25 2.3.6.2 Router and firewall ............................................................................................................................................................. 26 2.3.6.2.1 Configuring router .......................................................................................................................................................... 26 2.3.6.2.2 Configuring firewall ....................................................................................................................................................... 28 TESTING WEBCCTV .......................................................................................................................................................................... 30 Local client test .......................................................................................................................................................................... 30 Connection test........................................................................................................................................................................... 30 Remote client test ....................................................................................................................................................................... 31 OPERATOR MODE ............................................................................................................................................................................... 32 Locking WebCCTV..................................................................................................................................................................... 32 Switching to Operator mode....................................................................................................................................................... 32 Automatic logon as Operator ..................................................................................................................................................... 33 3 UPGRADING AND RESTORING WEBCCTV................................................................................................................................ 34 2.2.2 2.2.3 2.2.4 2.2.5 2.2.6 2.2.7 2.3 2.3.1 2.3.2 2.3.3 2.3.4 2.3.5 2.3.6 3.1 3.2 3.3 UPGRADING WEBCCTV SOFTWARE ................................................................................................................................................... 34 SAVING & RESTORING CONFIGURATION ............................................................................................................................................. 34 RESTORING PREINSTALLED SOFTWARE ............................................................................................................................................... 34 4 ADVANCED TOPICS ......................................................................................................................................................................... 36 4.1 4.1.1 4.1.2 EXTENDING STORAGE SPACE .............................................................................................................................................................. 36 Adding hard disk ........................................................................................................................................................................ 36 Configuring added hard disk...................................................................................................................................................... 37 4.1.2.1 Multiple Logical Disks ....................................................................................................................................................... 39 4.1.2.2 Single Disk Extension ........................................................................................................................................................ 41 Version 4.4 Series © Quadrox 1997 – 2005 WebCCTV Installation Manual 4.2 4.3 4.3.1 4.3.2 4.3.3 4.4 4.5 5 5.1 5.2 5.2.1 5.2.2 5.2.3 5.2.4 5.2.5 6 3 VIDEO CLIENT COMPONENT (ACTIVEX)............................................................................................................................................. 46 CHANGING NETWORK PORTS .............................................................................................................................................................. 48 Changing WebCCTV video ports ............................................................................................................................................... 48 Changing TCP port .................................................................................................................................................................... 48 Changing remote desktop port ................................................................................................................................................... 49 WEBCCTV POWER ON AFTER POWER FAILURE .................................................................................................................................. 49 CONFIGURING AUDIO OVER THE INTERNET......................................................................................................................................... 49 STORAGE / BANDWIDTH CONSIDERATIONS ........................................................................................................................... 51 TERMINOLOGY AND BASIC VIDEO TECHNOLOGY ................................................................................................................................ 51 FACTORS THAT INFLUENCE BIT RATE AND VIDEO QUALITY ................................................................................................................ 53 Compression technique (codec).................................................................................................................................................. 53 Resolution .................................................................................................................................................................................. 54 Frame rate ................................................................................................................................................................................. 55 “Differential” live streaming ..................................................................................................................................................... 56 Activity detection for storage...................................................................................................................................................... 56 SECURITY POLICY .......................................................................................................................................................................... 57 6.1 6.2 6.2.1 6.2.2 6.2.3 6.2.4 PROPER USE OF WEBCCTV ................................................................................................................................................................ 58 SECURITY POLICY ............................................................................................................................................................................... 59 Password policy ......................................................................................................................................................................... 59 Operator mode ........................................................................................................................................................................... 61 Windows security updates .......................................................................................................................................................... 61 Network security ........................................................................................................................................................................ 61 6.2.4.1 Dedicated network versus integration with the corporate network ..................................................................................... 62 6.2.4.2 Internet Connection ............................................................................................................................................................ 62 6.2.4.3 Limiting the number of protocols ....................................................................................................................................... 62 6.2.4.4 Firewall .............................................................................................................................................................................. 63 6.2.4.5 Allowing only known clients.............................................................................................................................................. 63 6.2.4.6 Securing the applications.................................................................................................................................................... 63 6.2.4.7 VPN.................................................................................................................................................................................... 64 6.2.5 Other types of access.................................................................................................................................................................. 64 6.2.6 3rd party security tools................................................................................................................................................................ 64 6.3 ERROR RECOVERY MECHANISMS ........................................................................................................................................................ 65 7 7.1 7.1.1 7.1.2 7.2 7.2.1 7.2.2 7.2.3 7.2.4 7.2.5 7.2.6 7.3 7.3.1 7.3.2 7.3.3 7.3.4 8 TROUBLESHOOTING ...................................................................................................................................................................... 66 PROBLEM SOLVING PROCESS .............................................................................................................................................................. 66 Preliminary checklist.................................................................................................................................................................. 66 Analyzing the problem................................................................................................................................................................ 67 SOLUTIONS FOR COMMON PROBLEMS ................................................................................................................................................. 68 Start up problems ....................................................................................................................................................................... 68 Monitor problems....................................................................................................................................................................... 70 Windows logon problems ........................................................................................................................................................... 70 Remote connection problems...................................................................................................................................................... 71 Camera problems....................................................................................................................................................................... 72 WebCCTV software problems .................................................................................................................................................... 72 IF YOU NEED FURTHER ASSISTANCE .................................................................................................................................................... 74 Before you call ........................................................................................................................................................................... 74 Collecting the necessary information ......................................................................................................................................... 74 How to contact Quadrox ............................................................................................................................................................ 75 How to allow remotely access to your WebCCTV by Quadrox support...................................................................................... 75 APPENDICES...................................................................................................................................................................................... 76 Version 4.4 Series WebCCTV Installation Manual 4 1 Introduction WebCCTV is a unique digital video surveillance solution, which combines three major functions in one Network Video Recorder (NVR) or Digital Video Recorder (DVR): local digital recording, multiplexing and simultaneous transmission of the video via existing networks (TCP/IP). To a standard WebCCTV, up to 20 cameras can be permanently recorded while multiple operators at different locations on the network are accessing the WebCCTV device. Being a networked device, WebCCTV utilizes two basic principles of the Internet/Intranet technology: WebCCTV works over the TCP/IP network protocol, which provides maximum connectivity. This means that the existing computer network infrastructure can be used eliminating extra installation expenses. WebCCTV uses a web-based user interface to view live images, recordings, etc. More specific it uses Microsoft Internet Explorer. Remote and Local Monitoring To remotely monitor the connected cameras, the WebCCTV uses Web Browser technology. To locally monitor video, the WebCCTV also provides a local interface via a PC monitor directly connected to the WebCCTV. This local interface allows an operator to see live video from the connected cameras without the need for additional client computers on a network. Continuous Activity-Based Recording By default, a WebCCTV continuously records all images from all the connected cameras based on activity detection. In this case, only movement is recorded. If there is no movement, no recording takes place. If necessary, the WebCCTV can be set to record continuously. Intelligent Storage Option WebCCTV uses a first-in/first-out (FIFO) overwrite principle. Once the disk is full, the oldest images are overwritten. Semi-Continuous recording (recording based on activity detection) allows a WebCCTV to store pre- and post-alarm video. Pre- and Post-alarm images are often more important than the images at the time of the alarm event itself. Up to 5 minutes of pre- and post-alarm video can be stored per event. Version 4.4 Series WebCCTV Installation Manual 5 WebCCTV makes a distinction between common activity recordings and pre/post alarm recordings. In the way that, alarm recordings have a higher storage priority and will not be overwritten by non-alarm recordings. The WebCCTV is operational even when no live monitoring occurs. While the WebCCTV continuously records images from all the cameras, video is transmitted from the server to the client only when an Internet browser is connected to WebCCTV and someone is live-viewing images from one or more cameras. Version 4.4 Series WebCCTV Installation Manual 6 2 Getting started This chapter provides basic information to get you started installing and using your WebCCTV. 2.1 Equipment checklist Carefully unpack your WebCCTV and check for the presence of all items listed below. 2.1.1 Hardware Check to make sure you have all following items: 1 x WebCCTV 1 x Power cord 1 x WebCCTV Recovery DVD 1 x empty DVD for “Save Settings” 1 x USB or PS/2 mouse 1 x Keyboard If you want more specific information about your server hardware, please contact your installer/distributor. It is possible to add extra hard disks to the unit if requested to extend the storage space. Contact your installer/distributor. 2.1.2 Software The following software is preinstalled: Microsoft Windows XP Embedded Operating system WebCCTV4 Video security software suite Adobe Acrobat Reader 8.0 or higher 2.1.3 Documentation WebCCTV Installation manual in PDF format WebCCTV User manual in PDF format Alarm Component Installation manual in PDF format Quadrox POS Printer manual in PDF format Remote POS Monitor manual in PDF format WebCCTV NVS400 Guide WebCCTV NVS1000/2000/4000 Guide Version 4.4 Series WebCCTV Installation Manual 7 2.2 Starting up for the first time This chapter provides information on the following procedures: Turning the power on and off Logging on to the XPe system Desktop icons overview Changing the password Setting the time Changing keyboard language Adjust screen resolution Connect monitor, keyboard and mouse before turning on the power and configuring WebCCTV. 2.2.1 Turning power on/off 2.2.1.1 Turning power on To turn the power on, follow the steps below: 1. On the front side of your WebCCTV, you’ll find an On/Off button. This is a one-touch button. When pressing it briefly, WebCCTV will begin its start-up procedure. You can verify the correct start-up sequence by checking the following: The fans are turning and make a humming noise. The power indicator is illuminated. The hard disk indicator is flashing. 2. When you have a monitor connected, you can see that: First it lists all the hardware components. Second it starts loading the Windows XPe operating system 3. After about 1.5 to 2 minutes, the WebCCTV should be fully started. The first time you turn on the power of your WebCCTV, its initial screen will be the Windows XPe logon screen. WebCCTV does not logon automatically by default. Version 4.4 Series WebCCTV Installation Manual 8 2.2.1.2 Turning power off or restarting Before shutting down or restarting a WebCCTV, there are some important precautions to make note of. Because a WebCCTV is constantly recording (24h) activity video on the disk, the hard disk is used very frequently. If a user shuts down the WebCCTV while it is writing to the hard disk, there is always a danger of damaging the hard disk. This may result in having an unbootable WebCCTV afterwards. There are two options: Restart or shutdown WebCCTV through the normal Windows interface: 1. On the taskbar at the bottom of your screen, click the Start button in the lower left corner. 2. On the start menu, in the lower right corner, click Shut Down. 3. On the Shut Down Windows dialog box, select the Restart or Shut Down tab. 4. Click OK to shutdown or restart. 5. Wait until the WebCCTV completely has shut down before unplugging the power cord. Restart or shutdown WebCCTV by using the shutdown button on the unit itself: 1. On the front of the unit there is a button to shut down the WebCCTV. 2. Because our WebCCTV is ACPI enabled, clicking this button once for a brief moment will initiate a graceful shutdown. This is handled by the MS Windows XP embedded Operating System, because it detects the click on the shutdown button and will shutdown automatically. 3. Please be patient because it can take nearly a minute before the WebCCTV actually shuts down completely. The WebCCTV has stopped when the green power indicator has gone out. 4. Wait until the WebCCTV completely has shut down before unplugging the power cord. 2.2.2 Logging on to the XPe system For access to the WebCCTV’s operating system, you have to specify a Username and Password. The first time you turn on the power of a WebCCTV, after its boot sequence (see above) has completed, its initial screen will be the Windows XPe logon prompt: The default Administrative username is: Administrator The default Administrative password is: webcctvnvr It is highly recommended to change the Administrative password as soon as possible. If you use an ‘AZERTY’ keyboard, this becomes zebcctvnvr. See Chapter 2.3.6 how to change this to Azerty settings. Version 4.4 Series WebCCTV Installation Manual 9 2.2.3 Desktop icons overview WebCCTV’s Desktop Screen My Computer. By double-clicking this icon, the user can see an overview of all configured disk drives/partitions on the WebCCTV. My Network Places. By double-clicking this icon, the user can see an overview of all Network places visited. By right clicking and then choosing ‘Properties’, the user can see an overview of all network connections possible and can adjust the TCP/IP settings of the WebCCTV. Recycle Bin. Temporarily stores all deleted files and folders prior to permanent deletion. Start Video Server. By double-clicking this icon, the user can start the WebCCTV’s video server. If the video server is already started, double-clicking doesn’t change anything. Stop Video Server. By double-clicking this icon, the user can stop the WebCCTV’s video server. If the video server is already stopped, double-clicking doesn’t change anything. Video Browser. By double-clicking this icon, the user starts the WebCCTV webapplication on the local WebCCTV. Version 4.4 Series WebCCTV Installation Manual 10 Video Manager. By double-clicking this icon, the user starts WebCCTV webapplication on the local WebCCTV. The system can be managed and configured here Optional Components. This folder contains links to the setup files for the Alarm Component, Remote POS monitor, etc. Support. A folder that contains a few support tools to administer the WebCCTV server application such as the Event Viewer, Registry editor, etc. Operator mode toggle. This switch enables the user to switch back and forth between Operator mode (a restricted operational mode where only the local interface is present) and Administrator mode (a non-restricted mode where all system manipulations are allowed). On screen keyboard. This on screen keyboard can be used as a virtual keyboard when no physical keyboard is present and connected to the WebCCTV. Windows Explorer. The user can use this application to browse through the contents of the local hard disks. 2.2.4 Changing password To change the Administrative password, follow the steps below: Go to Start->Control Panel. When in Control Panel, select User Accounts from the right-hand list. User Accounts Screen In the User Accounts screen, select the Administrator user. Version 4.4 Series WebCCTV Installation Manual 11 Click Change my password link. Changing Password Screen Enter your current password. The default Administrator password is webcctvnvr. Enter a new password and confirm it. Click Change Password button to save new Administrator account password. When you change the Administrator password in Windows, the Administrator password of the WebCCTV application is automatically changed to this password. This means also that when you change your password in the WebCCTV application, that your Windows password will be changed automatically! Version 4.4 Series WebCCTV Installation Manual 12 2.2.5 Setting time For the WebCCTV to function properly, it is very important to use the applicable Time Zone setting. This can be done in two ways, or by the WebCCTV application configuration (See WebCCTV User Manual Chapter 3.3.10 Time Synchronisation), or by the Windows XPe OS configuration. We strongly advise you to use the WebCCTV application way as this is the easiest way to configure your time settings. 2.2.5.1 Through WebCCTV Web Application Time synchronization allows you to synchronize time on all devices connected to your unit (e.g. cameras) and synchronize your server with a specific time server. This can be done by going to the Settings menu in the Video Manager Web Application and selecting the Time Synchronisation link in the top bar Time Synchronization Screen There are three options: Use video server as a (proxy) time server – The unit will synchronize with an external time server if configured in the bottom part of the screen. If empty, the unit will act as a time server for itself and the connected devices (e.g. cameras). Synchronize all devices with an external time server – The unit and all the connected devices (e.g. cameras) will be synchronized with an external time server. Configure the IP address or DNS name of the external time server in the bottom part of the screen. Manually configure time synchronization on each device separately (not recommended) – No synchronization at all is performed, neither for the unit nor for the connected devices (e.g. cameras) If your unit is part of a domain, this menu will not be available. The unit and connected devices (e.g. cameras) will be synchronized automatically with the Active Directory of the domain. Click Apply to save the settings. Version 4.4 Series WebCCTV Installation Manual 13 2.2.5.2 Through XPe OS 2.2.5.2.1 Changing time zone To change the time zone, follow the steps below: In Control Panel, in the left upper corner click the link ‘Switch to Classic view’. When in classic view, select Date & Time from the right-hand list. On the Date and Time properties dialog, select the tab ‘Time Zone’ When on the ‘Time Zone’ tab, select the correct time zone. Click OK to save the ‘Date and Time’ changes. To adjust the Date and time manually follow the steps below: In the Control Panel, in the left upper corner click the ‘Switch to Classic view’ link. When in classic view, select Date & Time from the right-hand list. On the Date and Time properties dialog, select the ‘Date & Time’ tab. When on the ‘Date & Time’ tab, set the correct date and time. Click OK to save the ‘Date and Time’ changes. 2.2.5.2.2 Time synchronization Synchronize your computer time with the atomic clock on the Internet for the best time accuracy. Optionally the installer/user can configure a WebCCTV to synchronize its time and date automatically on a regular basis using a so-called ‘Time Server’. These special servers exist often on bigger corporate networks or on the Internet. To set this up, follow the steps below: Click Settings -> Control panel. In Control Panel, in the left upper corner click the ‘Switch to Classic view’ link. When in classic view, select Date & Time from the right-hand list. On the Date and Time properties dialog, select the tab ‘Internet Time’. You’ll see the following screen: Internet Time Screen Version 4.4 Series WebCCTV Installation Manual 14 Check the box ‘Automatically synchronize with an Internet time server’. Enter the name or IP-address of a known time server into the 'Server' edit box. Note that when using a name in the IP-address settings of the WebCCTV server, a correct DNS IP-address should be supplied. Otherwise this name will never be resolved/found. If you use an IP-address there is no need to provide a DNS server. Click OK to save the ‘Internet Time’ changes. The default Internet Time Server is time.windows.com; however you can use other time servers for synchronization, such as those provided below: time.nist.gov (IP-address: 192.43.244.18) utcnist.colorado.edu (IP-address: 128.138.140.44) Make sure that there is no computer in the network with the same IP address. 2.2.6 Changing keyboard settings Open the Support folder on the desktop. Double click on the desired keyboard icon and follow the instructions. Once completed, your keyboard settings are changed. The following keyboard layout icons can be found in the support folder: Dutch (Belgium) Dutch English French (Belgium) French German Italian Russian Spanish Ukrainian If you don’t find an icon for your desired keyboard layout (Language), follow the steps below: In Control Panel, in the left upper corner click the link ‘Switch to Classic view’. When in classic view, select Regional and Language Options from the right-hand list. In the Regional and Language Options dialog, select the ‘Languages’ tab. When on the ‘Languages’ tab, click the ‘Details’ button. The following window appears: Keyboard Settings Screen Version 4.4 Series WebCCTV Installation Manual In the Text services and Input languages dialog, add the desired keyboard layout. After adding the new keyboard layout, delete the other keyboard layouts. Use the ‘Default Input Language’ combo box to select the keyboard layout you added. Click OK to change the keyboard layout. In the Regional and Language Options dialog, select the ‘Advanced’ tab. Select your language in the upper list box and enable the check box for Default user account settings. Click OK or Yes for all pop ups. It’s possible that your computer will restart if this is necessary to apply the changes 15 Click OK to save the ‘Regional and Language Options’ changes. Version 4.4 Series WebCCTV Installation Manual 16 2.2.7 Adjusting screen resolution To adjust the screen resolution, follow the steps below: Click Start-> Settings-> Control panel-> Display. On the Settings tab, under Screen resolution, drag the slider, and then click Apply. When prompted to apply the settings, click OK. Your screen will turn black for a moment. Once your screen resolution changes, you have 15 seconds to confirm the change. Click Yes to confirm the change; click No or do nothing to revert to your previous setting. Display Properties Screen A higher screen resolution reduces the size of the items on your screen and increases the relative space on your desktop. Your monitor and video adapter determine how high you can change your screen resolution. You may not be able to increase the resolution beyond a certain point. Changes to screen resolution affect all users that log on to the computer. Only the recommended screen resolutions are listed. For additional settings, click the Advanced button on the Settings tab, click the Adapter tab, and then click List all Modes. Select the resolution, colour level, and refresh rate you want. Version 4.4 Series WebCCTV Installation Manual 17 2.3 WebCCTV in the network 2.3.1 Network overview This chapter gives the schematic representation of the network camera and WebCCTV NVS connections. To connect your network camera and NVS properly look at the following figure: Connecting Network Camera and WebCCTV NVS Scheme Screen To configure your network camera, please refer to the manufacturer’s manual supplied with the network camera. To add a network camera to WebCCTV, refer to the Camera Wizard chapter in the WebCCTV User manual. Please note that a list of all supported cameras may be found in Appendix C. Analogue cameras can also be connected directly to the WebCCTV when a digitizer card is present on the WebCCTV. Version 4.4 Series WebCCTV Installation Manual 18 2.3.2 Connecting WebCCTV to the local network When you start your WebCCTV, Windows XPe detects your network adapter and automatically starts the local area connection. Unlike other types of connections, the local area connection is created automatically, and you do not have to click the local area connection in order to start. A local area connection is the only type of connection that is automatically created and activated. To establish connections of another type follow the steps below: 1. Click Start -> Settings -> Control panel -> Network connections 2. In the Network connections window click File-> New connection. You’ll see the following window: Network Connection Wizard Screen Follow the prompts the network connection wizard provides to define your unit in the network. For obtaining more detailed information about your network settings, please contact your system administrator. Version 4.4 Series WebCCTV Installation Manual 19 2.3.3 Assigning IP address If you cannot use DHCP or APIPA for IP address and subnet assignment, the IP address for the Windows XPe–based client must be manually configured. The required values include the following: An IP address for each network adapter installed on the computer. The Subnet mask corresponding to each network adapter's local network. In order to facilitate remote connections to WebCCTV, it is recommended you use a static IP-address. To manually configure an IP address, follow the steps below: Click Start->Settings->Control Panel. In Control Panel, select Network and Internet Connections. On the Network and Internet Connections sheet, select Network Connections. In Network Connections, right-click the local area connection that you want to modify. Select Properties. On the General tab of the Properties sheet, select Internet Protocol (TCP/IP). Click Properties. On the General tab of the TCP/IP Properties sheet, select the Use the following IP address option. Enter the IP address, subnet mask, and default gateway for the selected adapter in their respective text boxes. The network administrator must provide these values for individual users, based on the IP addressing scheme for your site. The value in the IP Address text box identifies the IP address for this network adapter. The value in the Subnet Mask text box is used to identify the network ID for the selected network adapter. If needed, the DNS server address can be entered also. Click OK to save the IP addressing information. Click OK to save the connection properties. 2.3.4 Firewall configuration The following ports need to be opened for connections going towards the WebCCTV: 1. 2. 3. 4. TCP Port 80: Web application TCP Port 1518: Control connection UDP Ports 4096 till 4223: Video streaming TCP Port 3389: Remote Desktop connection (Optional). Frequently asked by support when you have an issue) 5. TCP Port 5666: Q-Monitor Service. RTP uses two UDP ports per stream (versus one in the old streaming format in versions prior to V4.0.0.0), one for RTP (the video stream itself) and one for RTCP (QoS signal stream), limiting the software to a maximum of 64 concurrent streams. This number can be limited (e.g. for security purposes) or extended using the Settings Version 4.4 Series WebCCTV Installation Manual 20 > Network settings page. In that case, Quadrox recommends you to open a number of spare ports to avoid switching issues, e.g. 4 ports extra. The first port in the range should be even. Like all applications which communicate over networks, WebCCTV uses communication channels to pass data (commands, video, web-pages, etc …) back and forth. The network language that the WebCCTV uses is called TCP/IP. This is not a unique language but a family of related network languages, called network protocols. These TCP/IP protocols are the network protocols used on the Internet and on most networks throughout the world today. WebCCTV uses two protocols specifically: TCP and UDP. A communication channel on a TCP/IP network can be represented as a tunnel with two endpoints. The two programs communicating with one another are each said to be at each endpoint. These endpoints are called ports. When the two programs communicating with one another are not located on the same corporate network (like most communication between a program on a client PC and a program running on another computer on the Internet), often there is some kind of guardian device in between them. These guardian devices are called Firewalls. Their job is to guard all network communication between the corporate network and the Internet and block certain unwanted communications while allowing the desired communication to pass. There are several levels on which a firewall can guard network communication. The most common way is to allow or disallow certain ports to be used, depending on which applications are allowed to communicate. A firewall guards a port in a certain direction. Communication that is initiated from the Internet towards the corporate network is called incoming traffic, while communication from the corporate network towards the Internet is called outgoing traffic. Note that the initiation of the communication is important: once a connection is made, data can be transferred in both directions. Let’s apply this principle to WebCCTV network communication. The WebCCTV client (the ActiveX component embedded in Internet Explorer at the client machine) will try to create network connections to the WebCCTV server. The eventual result of these connections will be video data streaming from the WebCCTV server to the WebCCTV client, but since the WebCCTV client initiates them, they are referred to as connections towards the WebCCTV. From the client perspective, it is outgoing traffic, while for the server it is incoming traffic. In order for the WebCCTV to function correctly, the appropriate ports need to be opened for communication towards the WebCCTV. There are three port configurations to perform: 1. TCP Port 80: to allow external users to see the web interface (HTTP traffic). This port is usually opened by default. Some ISPs block port 80. Please inform yourself. Version 4.4 Series WebCCTV Installation Manual 21 2. TCP Port 1518: to allow external users to receive alarms, control PTZ cameras, send commands, etc. This is called the WebCCTV control signal. 3. UDP Ports 4096 thru 4223: By default the WebCCTV uses a range of UDP ports to transport video streams. These UDP ports are not listening all the time. The WebCCTV software enables them at random to enhance security. Typically when the UDP ports are not opened correctly, the user only sees the webinterface but no live images. To allow Quadrox support personnel to get remote access to the WebCCTV, TCP Port 3389 needs to be opened for Remote Desktop Connection. If the Video Server is monitored by the Quadrox Monitoring Department, TCP Port 5666 needs to be opened. A firewall can be placed on several positions in the network. The most common place is at the edge of the corporate network, or in other words between the corporate network and the Internet. Recently it also became popular to place a firewall to protect the network traffic from a single computer. A firewall that is placed between the computer and the network is referred to as a ‘Personal Firewall’ application. In practice, a corporate network firewall is often integrated with the router connecting the LAN and the internet. For more information on routers, see the section on connecting the WebCCTV to the internet. A personal firewall is software running on the computer that it protects. Personal firewall applications can be installed separately but are also included in the Windows XP operating system (Service Pack 2) and in many virus protection software packages. There are several scenarios where firewall configuration is necessary: 1. A user on a corporate network or at home behind a broadband router wants to access a WebCCTV on the Internet 2. A user on the Internet wants to access a WebCCTV on a corporate network. These situations are explained in more detail in the section on how to connect your WebCCTV to the internet. If a user on a corporate network wants to connect to a WebCCTV on another network, a logical combination of these two situations can be applied. 1. A user with a personal firewall application on his computer wants to access a WebCCTV on the corporate network or on the Internet. 2. There is a personal firewall application installed on the WebCCTV. Version 4.4 Series WebCCTV Installation Manual 22 2.3.5 Connecting a client 2.3.5.1 Minimum client requirements Operating system Windows XP SP3 Windows Vista Windows 7 64-bit Operating Systems are supported. Hardware Intel Dual Core or higher 1024 MB RAM 128 MB RAM on the video card Software Internet Explorer 7 or higher DirectX 9.0c VC++ 8.0 runtime library Media players and codecs Windows Media Player 11 Windows Media Formats 11 Some useful downloads are available in the System Downloads menu. See the User Manual for more information. In case you are using WebCCTV Network Video Servers (NVS) or have IP cameras that stream in MPEG or H.264, a codec also needs to be installed. We advice you to install the Quadrox Codec Pack which can be found in the System Downloads menu (See User Manual for more information) or on the support pages of www.webcctv.com. 2.3.5.2 Client configuration Hardware video acceleration In order to enjoy all the features of WebCCTV, the hardware acceleration of your video card needs to be enabled. 1. Right click on the desktop and choose properties. 2. Select the Settings tab and click the Advanced button. Version 4.4 Series WebCCTV Installation Manual Display Properties Screen 3. Choose the Troubleshooting tab and put the hardware acceleration to Full. Troubleshooting Tab Screen Version 4.4 Series 23 WebCCTV Installation Manual 24 Sometimes the support department will ask you to put this setting to None in order to customize your system for particular use scenarios. Firewall If you have a personal firewall, configure it according to section 2.4.4. The ports for outgoing connections should be opened. A personal firewall is included in Windows XP Service Pack 2 and also in some virus scanners. Separate firewall software exists as well. The personal firewall in Windows XP Service Pack 2 has all outgoing and necessary incoming connections open by default. No extra configuration is necessary in this case. Internet Explorer settings Make sure that Internet Explorer allows the installation and execution of signed ActiveX components. 1. 2. 3. 4. 5. 6. 7. 8. 9. Make sure you are logged on to Windows as an Administrator. Go to the Tools Menu. Choose Internet Options. Go to the Security Tab. Click the Sites button, deselect the https checkbox and add your WebCCTV to the trusted sites list. Click OK. Click the Custom level button at the bottom. Set the following options to ‘enable’ or ‘prompt’: Download signed ActiveX controls (prompt) Run ActiveX controls and plug-ins (enable) Script ActiveX controls marked as safe (enable) Adding your WebCCTV to the trusted sites is required to guarantee that all necessary communication can be established with the WebCCTV server! Anti-virus and anti-spyware/malware software Make sure that your anti-virus and anti-spyware/malware software is set to... 1. Allow the WebCCTV ActiveX component to install and execute. (See also Internet explorer settings) 2. Allow scripts to be executed. The web application of the WebCCTV relies heavily on both issues. Version 4.4 Series WebCCTV Installation Manual 25 2.3.6 Connecting WebCCTV to the Internet 2.3.6.1 Creating a network connection When you start your WebCCTV, Windows XPe detects your network adapter and automatically starts the local area connection. Unlike other types of connections, the local area connection is created automatically, and you do not have to click the local area connection in order to start. A local area connection is the only type of connection that is automatically created and activated. To establish connections of another type follow the steps below: Click Settings -> Control panel -> Network and Internet connections In the Network and Internet connections window click File-> New connection. You’ll see the following window: Network Connection Wizard Screen Follow the prompts the Network connection wizard provides to define your unit in the network. For obtaining more detailed information about your network settings please contact your system administrator. Version 4.4 Series WebCCTV Installation Manual 26 2.3.6.2 Router and firewall To fully understand this section it is important to know what the difference between a router and a firewall is. A firewall is the piece of software that takes care of guarding the network communications. Sometimes the term ‘firewall’ refers to the machine performing firewall tasks. This is confusing and in fact incorrect: normally a firewall is not a piece of hardware, but a program running on that hardware. A router is a piece of hardware that embodies the physical connection between two different networks (e.g. your local network and the Internet). It redirects (“routes”) data so that it arrives at the correct place. A router is a hardware device, but its functionality is controlled by software that runs on the router. Sometimes the routing functionality is provided by a proxy server, bridge or gateway. While these are not the same as routers, they can be considered as such for the discussion in this document. Router software can have firewall capabilities. In other words, the router software can have, apart from its normal capability to connect two networks and redirect data, the capabilities of inspecting, allowing, and denying certain network communication. As an example, most broadband routers (ADSL, SDSL, cable modems, etc) nowadays have firewall capabilities and are also being used as such. In the following schemes the firewall and the router are depicted as two different entities (nodes on the network), but know that they could be one and the same node in practical cases. 2.3.6.2.1 Configuring router The router that forms the connection between the corporate network and the Internet needs to know which internal machine it has to send network traffic to. For example, a client machine on the internet requests a connection on port 1518 (the port for WebCCTV video commands), using the public IP address of the router. The router then needs to know to which device on the corporate network it needs to send this connection request, in this case the WebCCTV. So the router needs to know the local IP address on the corporate network of the WebCCTV. Configurations for different brands and models of routers in the field can be found in: Web Resource for Router Configuration and Setup: http://www.portforward.com/routers.htm Networking Tips: http://www.portforward.com/network.htm If you don’t already have a router you will need to purchase one and configure it as part of you network. Useful commands Version 4.4 Series WebCCTV Installation Manual 27 ipconfig – utility to see computer IP properties ipconfig /release – release the current IP address – need DHCP enabled ipconfig /renew – renew the IP address by telling the router that it needs DHCP enabled ipconfig /all – show all IP config properties ipconfig /? – show help on IP config ping – utility to test the connection with other IP address ping 192.168.123.254 – attempt to ping IP address by sending a small packet ping –t 192.168.123.254 – continually ping IP address until you close command window or hit Ctrl+C. DHCP – Dynamically assign IP address to requesting devices (e.g., computer, camera). This means when you connect a computer to the router the computer will automatically negotiate an IP address from the router. Port Mapping – Section on router where you specify which port will be mapped to which device. With a router you are sharing a single Internet connection with multiple devices and for the cameras you need to have each camera on a separate port if you want to access the camera from outside the router (i.e., Internet). Version 4.4 Series WebCCTV Installation Manual 2.3.6.2.2 28 Configuring firewall General information about firewalls and their configuration is given in a previous section. The most important notes are: The following ports need to be opened for connections going towards the WebCCTV: 1. 2. 3. 4. TCP Port 80: Web application TCP Port 1518: Control connection UDP Ports 4096 till 4223: Video streaming TCP Port 3389: Remote Desktop Connection (Optional). Frequently asked by support when you have an issue). 5. TCP Port 5666: Q-Monitor service RTP uses two UDP ports per stream (versus one in the old streaming format), one for RTP (the video stream itself) and one for RTCP (QoS signal stream), limiting the software to a maximum of 64 concurrent streams. This number can be limited (e.g. for security purposes) or extended using the Settings > Network settings page. In that case, Quadrox advises to open a number of spare ports to avoid switching issues, e.g. 4 ports extra. The first port in the range should be even. Let’s apply this to the two situations in which a WebCCTV is accessed over the Internet. The blue, yellow and red arrows in the following diagrams indicate the direction of the initial network connection request, and thus the direction in which the ports should be opened in the firewall. Situation 1 – A user on a corporate network or at home behind a broadband router wants to access a WebCCTV on the Internet The user on a corporate network wants to access WebCCTV on the Internet. The main concern is: will the corporate firewall allow the WebCCTV network traffic? Version 4.4 Series WebCCTV Installation Manual 29 The client computer makes the initial connection to the WebCCTV server. The firewall should allow data going out of the corporate network to the WebCCTV. The appropriate ports should thus be opened for outgoing data. Note that not all of the UDP ports are used all the time. However, since the WebCCTV software assigns them randomly, the exact ports cannot be known beforehand. The network administrator should open the full range of UDP ports. Situation 2 – A user on the Internet wants to access a WebCCTV on a corporate network The user is connected to the internet and wants to access a WebCCTV, which is located on a corporate LAN (Local Area Network). The main concern is: will the corporate firewall allow the incoming WebCCTV network traffic? The client computer makes the initial connection to the WebCCTV server. The firewall should allow data coming in to the corporate network to the WebCCTV. The appropriate ports should thus be opened for incoming data. Version 4.4 Series WebCCTV Installation Manual 30 2.4 Testing WebCCTV 2.4.1 Local client test A local client test is very useful, to test whether the video server is running correctly on its own. Because we don’t use any external network facility, no configuration in that direction can cause a live-viewing problem. Perform this test first of all to check the stand-alone operation of the WebCCTV video server. For local client testing, follow the steps below. 1. On the desktop of a WebCCTV, you’ll find an icon ‘Video Browser’. Double-clicking this icon will open a Microsoft Internet Explorer window. 2. The IP address (e.g.: http://192.168.100.1) to where this Internet Explorer has to connect looks like ‘http://localhost/webcctv/browser’. This is a standard way of telling Internet Explorer to connect to the webserver on the same WebCCTV, so not going over the network but staying within the boundaries of its own Operating System. 3. When accessing the WebCCTV video server application from a client PC for the first time, Internet Explorer will ask you to install and run an ActiveX component (Video Client Component). Follow the on screen instructions to install the component. If you have problems installing the ActiveX, please make sure first that you have added the server to the trusted site list of Internet Explorer. 4. A welcome screen should now appear. Normally you would be prompted for a login and password but because you’ve already authenticated to get access to the Windows XPe Operating System, and you will not be prompted again for a Login and Password. 5. By default the live-view pages are opened and the user can verify whether all the cameras are transmitting a good image. 2.4.2 Connection test Open a command prompt window by clicking Start, select Run, and type CMD. Once the MS DOS window is open, type ping WebCCTV. If you see the text ‘Reply from XXX.XXX.XXX.XXX’ (as shown in Picture A), the network connection is fine. If you see the text ‘Ping request could not find host WebCCTV. Please check the name and try again.’, there is a physical network connection problem. Contact your Network Administrator. If you see the text ‘Request Timed Out’, there is a physical network connection problem. Contact your Network Administrator. If you see the text ‘Destination host unreachable’, the IP address settings of either the client computer or the WebCCTV, is inconsistent (different subnets). Contact your Network Administrator. Version 4.4 Series WebCCTV Installation Manual 31 Checking Physical Connection Screen 2.4.3 Remote client test For remote client testing, follow the steps below: 1. Open a Microsoft Internet Explorer window. 2. Fill in the IP address (e.g.: http://192.168.100.1) or domain name (e.g.: http://webcctv.mycompany.com) in the address bar. 3. When accessing the WebCCTV from a specific client computer for the first time, Internet Explorer will ask you to install and run an ActiveX component (Video Viewer Component). Follow the on screen instructions to install the component. If you have problems installing the ActiveX, please make sure first that you have added the server to the trusted site list of Internet Explorer. 4. A welcome screen should now appear, and you will be prompted for a Login and Password. After filling in Logon and Password you should be logged on to the WebCCTV Web Application. ‘http://192.168.100.1/’ is the factory default IP-address for the EU version of WebCCTV. For US customers the factory default IP-address is http://192.168.0.199/. Please note that your installer could have changed it to fit the specifications of your own network. Version 4.4 Series WebCCTV Installation Manual 32 2.5 Operator Mode 2.5.1 Locking WebCCTV As stated before, a WebCCTV uses Microsoft Windows XP embedded as the operating system. Because the WebCCTV video server software is very tightly integrated with this Operating system, the security and locking modes are based on Microsoft Windows standards. By default there are two users configured inside the Microsoft Windows XP embedded Operating System: ‘Administrator’ and ‘Operator’. When logging on as: ‘Administrator’: The installer/user has full control over all configurations of a WebCCTV. There is an icon on the desktop that enables an installer/user to switch the WebCCTV into Operator (restricted) mode (see below). 1. ‘Operator’: The installer/user has a very restricted access. He can view local live images and popup a virtual keyboard. There is also only one extra button to be able to switch back to operator mode. This is the preferred mode in which a WebCCTV should be left by the installer. This mode we call the locked mode. 2.5.2 Switching to Operator mode Since the Administrator mode provides full functionality, it is recommended that the installer sets the WebCCTV in an Operator mode that provides restricted rights after the installing and configuration process. To set WebCCTV to the Operator mode, follow the steps below: 1. Find the Operator mode shortcut on the desktop and click it. 2. Specify Password. 3. Click OK. The default Operator user name is: Operator The default Operator password is: quadrox Operator Mode Screen Version 4.4 Series WebCCTV Installation Manual 33 2.5.3 Automatic logon as Operator In an installation where you are going to leave the configured WebCCTV unit in Operator mode, make sure that after restarting the WebCCTV it returns to the Operator mode automatically. To do this, follow the steps below: 1. Logon to the Operator mode using Operator Mode icon that resides on the desktop. 2. Once you are in the Operator mode, configure the Local Interface. 3. Don’t logout of the Operator mode. Press the Power button to shutdown the machine and power it on again. 4. Check that WebCCTV server is restarting in the Operator mode. To make sure that your WebCCTV server restores to the prior state after a power failure see 4.4 Power On after power failure chapter. By default the WebCCTV unit restarts every Monday night at 4:20 AM. Version 4.4 Series WebCCTV Installation Manual 34 3 Upgrading and Restoring WebCCTV 3.1 Upgrading WebCCTV software The WebCCTV software (and related installed components: Alarm, POS, SHS) can be upgraded at all times when a new version is available and this without losing your settings and recordings. This is done by the the ProductUpdate tool and works for version 4.0.4.0 and higher. The ProductUpdate is a standalone InstallShield-based application that updates the currently installed WebCCTV application to the most recent version. You can request this tool for free by contacting [email protected]. 3.2 Saving & restoring configuration It is advisable to save the settings after the configuration process on the blank DVD that is supplied with WebCCTV (in the case) for backup purposes. When performing an upgrade or a complete system restore, you can use this configuration file saved on the “Save settings DVD” disk to restore the WebCCTV configuration quickly and easily. You can restore any version starting from version 4.0.4.0. To save or restore configuration settings, please read the User Manual. 3.3 Restoring preinstalled software Restoring the preinstalled software is something that should be used in the following circumstances: 1. The hard disk has crashed and is physically replaced by a new one 2. The WebCCTV doesn’t start anymore or gives constant errors while trying to boot. 3. The WebCCTV has been infected (although this is not likely) by one or more advanced viruses. If this were to happen, it is best to start from a clean system rather than to try to get rid of all of them without any damage to your system. 4. You received a new DVD with an updated WebCCTV software version and want to upgrade both OS and software. If you only want to upgrade the software, see Chapter 3.1. When restoring the preinstalled software, you will lose all of your movies if you don’t backup them first. For the installation of the WebCCTV software, insert the proper Recovery DVD into the unit’s DVD-ROM and restart the machine. If by mistake you insert the Recovery DVD into the Client PC CD/DVD-ROM, the autorun program will notify you and provide some help actions like – read manual, install Acrobat Reader, etc... Version 4.4 Series WebCCTV Installation Manual 35 After restart, the WebCCTV unit boots from the Recovery DVD – you can easily recognize this by special Quadrox logo on the screen, which contains the red line Recovery DVD. After the WebCCTV is fully booted from the Recovery DVD, you will see a menu installation menu with two buttons – Install and Reboot will appear: 1. Press the Install button to begin the installation process. A standard looking Wizard page will appear and guide you through the initial configuration parameters. Here you can define your WebCCTV name, network setting, time zone and enter the Activation Code if you have already obtained it. You cannot request and Activation code at this stage as the Recovery DVD can’t generate an Authentication Request code. You can request an Activation Code later. 2. Go through the Wizard pages and start the installation process. 3. After the first part of the installation has been completed, the machine starts to emit sounds (beeps). 4. Press the OK button to reboot machine. The CD/DVD-Rom tray will eject. Remove the Recovery DVD from the CD/DVD-ROM. The tray will close automatically and the system will reboot. Now the machine boots for the first time and performs the self-configuration procedure. The self-configured procedure takes 10-20 minutes and it’s considered finished when the initial logon prompt appears. The default password is webcctvnvr. The default password becomes zebcctvnvr if you have an ‘AZERTY’ keyboard. See Chapter 2.3.6 how to change this to Azerty settings. 5. Wait until the machine finishes its self-configuration. 6. Use the “Save Settings DVD” to reinstall settings. If the settings are not saved on this CD or on a USB stick or comparable storage device, they will have to be configured manually. Check the User Manual for more information about restoring settings. 7. Configure the IP address and users. Version 4.4 Series WebCCTV Installation Manual 36 4 Advanced topics 4.1 Extending storage space A standard WebCCTV is delivered with one hard disk. This hard disk can have different sizes, depending on the models available on the market at time of purchase. (See technical specs for the types and models). Enhancing the storage space afterwards or even increasing it at the time of purchase, can be done by adding a second hard disk (and even more… inside or outside the WebCCTV case. The following two sections describe how to first physically and after that logically add new storage space. The example focuses on adding one extra hard disk inside a WebCCTV. Other configurations are similar. 4.1.1 Adding hard disk In order to add a hard disk to the WebCCTV, follow the steps below: 1. Make sure the WebCCTV is turned off completely by removing the power cable from the power supply at the back of the WebCCTV. 2. Pull the black handle to an upward position and the top cover will move a bit. 3. Remove the top cover. 4. Place the additional hard disk near the old one in the special tray. 5. Connect one side of a flat IDE cable to the second hard disk and the other side to the second IDE slot on the motherboard. In case of SATA, the procedure is similar. 6. Connect power cable to the hard disk. 7. Check the proper setting of the hard disk jumper. Both hard disks have to be configured as master when connected to two different IDE cables. If they are connected to the same IDE slot the main hard disk is a Master, the additional hard disk should be Slave. Please set the jumper to the Slave position. This step can be skipped if you use SATA. To correctly configure the jumper settings, please visit the web site of the respective Hard Disk manufacturer: HITACHI: www.ghst.com MAXTOR: www.maxtor.com SAMSUNG: www.samsung.com SEAGATE: www.seagate.com WESTERN DIGITAL: www.westerndigital.com 8. Close the top cover. 9. Turn on the power of the WebCCTV and make sure that the message that a new hard disk drive is detected appears. You will be asked to press F1 to save the settings. Version 4.4 Series WebCCTV Installation Manual 37 4.1.2 Configuring added hard disk Adding a hard disk to the Windows Operating System can be done in multiple ways. We will discuss the two most used scenarios when speaking about WebCCTV: Single Disk Extension: Two or more disks are merged to one disk for the Operating System. Multiple Logical Disks: Every hard disk is recognized as a separate disk on the Operating System. The table below gives an overview of some advantages and disadvantages for each scenario. It’s up to you to decide which scenario fits your needs the best. Optimized recording space Optimized recording performance Video Manager configuration Installation procedure on Operating System Single Disk Extension Yes No Practically none Hard Multiple Logical Disks No Yes Add volumes in storage manager menu Easy In order to configure the Windows Operating System to add more storage for recordings, follow the steps below: 1. Make sure you followed all steps described in 4.1.1. 2. Logon as ‘Administrator’ at the logon screen, so eventually you’ll be in Administrative mode. If you are already logged on as ‘Operator’, use the button Administrator to go to Administrative mode. 3. Go to Start->Administrative Tools->Computer Management. Administrative Tools Menu Screen 4. On the Computer Management window, select Disk Management in the left pane. In the right pane, you see the original disk Disk 0 with 2 partitions, Bootable and Storage Version 4.4 Series WebCCTV Installation Manual 38 and the new disk Disk 1 which is Unallocated and still Unknown. In case the disk is not yet initialized (see screenshot), initialize the disk by clicking right on Disk 1 and selecting Initi. Computer Management Screen 5. In case the disk is not yet initialized (see screenshot above), initialize the disk by clicking right on Disk 1 and selecting Initialize Disk. 6. Your screen looks now similar to the following screen. If you want to add your hard disk as: Separate Logical Disk Go to chapter 4.1.2.1 Multiple Logical Disks Extended Disk Go to chapter 4.1.2.2 Single Disk extension Version 4.4 Series WebCCTV Installation Manual 39 4.1.2.1 Multiple Logical Disks Before proceeding, make sure you followed all steps from chapter 4.1.2. Configuring added hard disk. Please follow now the steps below: 1. Right click on the unallocated section and select New Partition… 2. Follow the wizard and select Primary partition. 3. Choose the partition size (by default it takes all available space) and assign a drive letter. Version 4.4 Series WebCCTV Installation Manual 40 4. Select Perform a quick format and assign a Volume Label. Then click Finish. Your hard disk was added. If everything went fine, you will see a screen similar to the one below. To add this new volume in the WebCCTV application, check 3.3.4 Storage Manager in the User Manual. Version 4.4 Series WebCCTV Installation Manual 41 4.1.2.2 Single Disk Extension Before proceeding, make sure you followed all steps from chapter 4.1.2. Configuring added hard disk. Please follow now the steps below: 1. Right-click Disk 0 and select ‘Convert to Dynamic Disk …’ from the popup menu. Computer Management Screen 2. In the Convert to Dynamic Disk window, select both disks to be converted. Click OK. Convert to Dynamic Disk Window Screen Version 4.4 Series WebCCTV Installation Manual 42 3. In the Disks to Convert window, you see an overview of what has been selected. Click Convert to confirm. Choosing Disk to Convert Window Screen 4. In the Disk Management window, click Yes to confirm again. 5. In the Convert Disk to Dynamic window, click Yes to confirm again. 6. After the conversion, the system requires a restart. Version 4.4 Series WebCCTV Installation Manual 43 7. After the WebCCTV has restarted, logon again as Administrator and open the Computer Management application again. Select Disk Management from the left pane. In the right pane, right click Storage (D:) and select ‘Extended Volume…’ on the popup menu. Extending Hard Disk Volume Screen During this step, it is possible that instead of the graphic shown above, that you may get a graphic that displays: Bootable (C); Bootable (F); Bootable (D); Bootable (G). You will need to remove everything from Drive 2 before you start the expansion. To do this, click on the bottom pane of the Disk Manager on each of the F and G partitions and select Delete Partition. When you have no partitions on Disk 2 you may proceed to Step 12. 8. The Extended Volume Wizard opens. Click Next >. Extend Volume Wizard Screen Version 4.4 Series WebCCTV Installation Manual 44 9. In the Extended Volume Wizard, select Disk 1 in the Available listbox. Click Add >. Extend Volume Wizard Screen 10. In the Extended Volume Wizard, Disk 1 has moved to the Selected list box. Click Next > to continue. Extend Volume Wizard Screen 11. In the Extended Volume Wizard, click Finish to confirm Extend Volume Wizard Screen Version 4.4 Series WebCCTV Installation Manual 45 12. Eventually the Computer Management windows should look like this picture. Note that the capacity of Storage (D:) is now the sum of a part of physical Disk 0 and the whole physical Disk 1. Computer Management Screen Version 4.4 Series WebCCTV Installation Manual 46 4.2 Video Client Component (ActiveX) Having a correct installation of the Video Client component is an essential part of a successful WebCCTV installation. Problems like black images appearing, no images appearing at all and errors in Internet Explorer can be the result of an incorrect Video Client Component installation. This Video Client Component is based on ActiveX technology. ActiveX is an architecture that lets a program (the ActiveX control) interact with other programs over a network (such as the Internet). In our case the Video Client Component communicates with the WebCCTV and shows video images. An ActiveX control can be integrated into various environments like a web page. When an ActiveX is integrated into a web page as in the WebCCTV web application, the first time a client machine accesses this web page with Internet Explorer the ActiveX needs to be downloaded and installed on the client machine. At this stage there are several potential problems for the installer to be aware of: The Windows user account under which this web page is accessed doesn’t have enough rights to install the ActiveX component on the client system. This results in not seeing images at all. The security settings of Internet Explorer prohibit the installation of the ActiveX. Add the site to the Trusted sites before installing the ActiveX. Spyware blockers or anti-virus programs don’t allow the installation of an ActiveX on the client machine. The Video Viewer ActiveX utilizes various other Windows System components. If any of these system components are incorrectly installed or not present, at all the ActiveX will fail to install or work incorrectly. It is important that the ActiveX installation is monitored carefully. This has to be performed only once during the first time that the WebCCTV web application is accessed. If something goes wrong during this installation, a user can end up with an incomplete installation of ActiveX. Version 4.4 Series WebCCTV Installation Manual 47 The installation of the Video Client Component is (semi) automated. When connecting the first time to WebCCTV, a special screen will be shown. Please follow the instructions: ActiveX Installation Screen If necessary, the installation manual and setup of the component can be found in the support section of www.webcctv.com. For version 4.4.0.0 and higher, VC++ 8.0 runtime libraries are required. In case you don’t have these, use the standalone video client component. Version 4.4 Series WebCCTV Installation Manual 48 4.3 Changing network ports This chapter explains how to change different network ports, which are used by a WebCCTV system. 4.3.1 Changing WebCCTV video ports WebCCTV ships with the default UDP port range set to 4096 – 4223, which are used for video streaming. You may either decrease or increase this range, for that purpose you should change the amount of opened UDP port on your router, firewall and on WebCCTV itself. To change WebCCTV UDP ports go to Settings->Network Settings. The amount of UDP opened ports have to correspond to number of camera streams you want to have simultaneously. For instance, you have WebCCTV with 4 connected cameras, if you launch two WebCCTV clients of WebCCTV simultaneously 16 camera streams will be created (i.e. 4 camera streams for each client) and this doubled because of RTP streaming method. So you have to open 16 UDP ports. You have to use even numbers for the start and end port of the UDP port range. 4.3.2 Changing TCP port WebCCTV ships with the default TCP port set to 80. By maintaining the default setting, WebCCTV may be accessed remotely by simply entering either the local LAN address (if accessed from within the network) or the static IP address if accessed from outside the network. If this port needs to be changed, follow the steps below. 1. Logon as Administrator. 2. Double Click the Support folder from the Windows desktop and select Internet Information Services by double clicking. 3. Proceed through the following path WebCCTV (local computer)->Websites and right click WebCCTV Control Site. Select Properties. 4. Under the Web Site tab you will find a section Web Site Identification. Change the TCP port to the desired value and click OK to confirm. When you make a change to a TCP port other than port 80, there are some implications that must be taken into account. When you access WebCCTV locally by selecting Video Browser from the desktop, the link http://localhost/WebCCTV/browser is launched. This link with have to be renamed as follows if a value other than port 80 is used: http://localhost:xx/WebCCTV/browser where xx is the value that you selected. When you access WebCCTV from Internet Explorer remotely you would do so by selecting http://xx.xx.xx.xx which is your static IP or internal IP address assuming you Version 4.4 Series WebCCTV Installation Manual 49 are using port 80 as the default. When you change to a new value, you must now enter http://xx.xx.xx.xx:yy where yy is the new TCP port setting. 4.3.3 Changing remote desktop port WebCCTV ships with the default remote port set to 3389 that should be forwarded in your router in order to be able to access the unit via remote desktop. If this port needs to be changed, follow the steps below. 1. Logon as Administrator. 2. Double Click the Support folder from the Windows desktop and select RegEdit by double clicking. 3. Proceed through the following path HKey_Local_Machine->System->Current Control Set->Control->Terminal Server->Winstations->RDP-TCP Select RDPTCP. 4. After selecting RDP-TCP, scroll down the list in the right pane until you come to Port Number. Double click Port Number to Edit. 5. On the pop up screen select Decimal under Base and then enter the desired value in the Value box. 6. Click OK to confirm. 7. Be sure to enter this value in the port forwarding section of your router. A system reboot is typically required after making registry changes. Check also your firewall settings. The new port must be added to the exception list. 4.4 WebCCTV power on after power failure To adjust the WebCCTV server to power on again automatically after the power failure follow the steps below: 1. Enter the BIOS settings by pressing F10 button during the initial stage of machine booting. 2. Go to Advanced-> Power-On Options. 3. Find After Power Loss item and select Previous State value for it. 4. Exit BIOS so that the changes are saved. By default, your WebCCTV is preconfigured to power on automatically after power failure. 4.5 Configuring audio over the Internet WebCCTV supports specific audio functions for the following brands: Axis – Listen in and speak: o M1031-W, M1054 Version 4.4 Series WebCCTV Installation Manual 50 o P1311, P1343(-E), P1344(-E), P1346(-E), P3301(-V), P3304(-V), P3343(V/VE), P3344(-V/VE), P5534 o Q1755, Q1910(-E), Q7401 By default, audio is supported only for Q7401. For the other models mentioned above, contact support as a small extra configuration is needed. Panasonic – Listen in. No recorded audio: o BB-HCM311(A), BB-HCM331(A), BB-HCM371(A), BB-HCM381(A), BB--HCM403(A), BB-HCM511(A), BB-HCM515(A), BB-HCM527(A), BBHCM531(A), BB-HCM547(A), BB-HCM581(A), BB-HCM581A-W, BBHCM701(A), BB-HCM705(A), BB-HCM715(A), BB-HCM735(A) o KX-HCM110(A) o BB-HCE481(A) o BL-C111(A), BL-C131(A), BL-C210(A), BL-C230(A). If the installation has a LAN connection, WebCCTV connects to a camera for audio grabbing via the internal address you specified in a camera wizard. If you want to have audio from the camera over the Internet you need to make additional router configuration. Audio is disabled by default if you add a camera. To enable audio, read the User manual. The following ports should be opened on the router, if not already opened: TCP Port 80: Web Application TCP Port 1518: Control connection UDP Ports 4096 thru 4223: Video streaming The ports mentioned above are used by WebCCTV ActiveX controls. Since the audio feature operates through the camera’s native ActiveX controls (which are installed during the first switching to the camera in Live view) and not the WebCCTV ActiveX and is grabbed from the camera directly a new port for the camera ActiveX controls should be configured as follows: Assume that 192.168.1.1 is the camera internal ip-address; Assume that 64.160.1.1 is the router external/public ip-address; Assume that 6000 port is any free port on your router; Assume that 80 port is opened on the camera; Based on the assumptions above the addressing should be as follows: 64.160.1.1:6000 should be addressed to 192.168.1.1:80 When the router configuration is complete go to the Camera Wizard to add/edit the camera(s) with audio feature, add external IP-address and port you configured as shown on the picture: Version 4.4 Series WebCCTV Installation Manual 51 Camera Wizard Connection Screen 5 Storage / Bandwidth considerations Digital video that captures several days or weeks comprises a massive amount of data. If you want to store this data or stream the video over a network, there is a need to reduce the size, because storage devices (hard disks) and networks are limited in capacity. The size reduction of digital video data is called compression: it is a mathematical algorithm (called a codec) that is applied to the data. The algorithm carefully removes information that is less important for a human viewer. Because information is lost, inevitably the quality of the videosdf is affected. There is a trade off between the quality of the video and performance of the system on the one hand, and data size, the compression technique and its parameter on the other hand. The explanation below will help you to make the best choices depending on your specific needs and situation. 5.1 Terminology and basic video technology This section provides an overview of the terms used in the following sections and the basic underlying technology. It is important that you understand these concepts in order to understand the influence of different factors on quality and size. A digital image consists of an array of image points, called pixels. The amount of points in horizontal and vertical directions is the image resolution. Each image point has a certain colour and brightness attached to it, and is represented inside the computer as a number. If there are more points in an image (higher resolution), more detail will be preserved in the image, but also the necessary space or bandwidth increases. Digital video consists of series of digital images displayed one after the other. Each image is called a frame, and the speed at which images are displayed is called the frame rate. This number is indicated in frames per second (fps). If more frames are displayed (higher frame rate), objects in the video will move smoother, but also the necessary space or bandwidth increases. Each number in a computer is represented by a number of 1’s or 0’s, called bits. The amount of data that a digital video contains per second is called the bit rate. This is usually expressed in kilobits (1024 bits) per second (kbps). Version 4.4 Series WebCCTV Installation Manual 52 For uncompressed video, the bit rate is calculated as: Resolution x frame rate x colour depth (amount of bits per pixel) Example: 5 fps of full D1 PAL video: Bit rate = 768 x 576 pixels/frame x 5 frames/second x 24 bits/pixel = 53084160 bits/second = 50,6 Mbps To illustrate the amount of data that this figure represents, let’s see how much uncompressed video we can record on a standard machine with a 250 GB hard disk. Recording time = 250 Gigabyte x 8 bits/byte x 1024 Megabit/Gigabit / 50,6 Mbps = 40474 seconds = 11,2 hours This number needs to be divided by the number of sources (cameras) that we want to record on 1 system. This is of course unacceptable for a modern video surveillance recorder, which is why we need video compression. When we stream live video, the video data has to be transported over the network. The capacity of the network to transport data is called bandwidth. It is also expressed in kilobit per second (kbps). For network streaming, the rate at which video is transported is more important than the total amount. When storing video on a hard disk or other storage device, the total storage time is limited by the capacity of the disk. This capacity is determined by the total amount of data that a disk can contain. This is expressed in megabyte or gigabyte. Please note that for streaming we use kilobit while for storage we use megabyte. Version 4.4 Series WebCCTV Installation Manual 53 5.2 Factors that influence bit rate and video quality There are several factors that have an influence on the amount of data (bit rate), the quality of the video and the performance of the video recorder. The most important factors are explained in this section. 5.2.1 Compression technique (codec) The biggest influence on quality and data reduction comes from the algorithm that is used to compress the video. Over the years, many algorithms have been conceived, but they can be roughly categorized into two groups: 1. Intra-fame coding: each frame is compressed independently of the other frames (e.g. MJPEG). 2. Inter-frame coding: since frames are usually very similar, this information is used to further reduce the video size (e.g. WMV, MPEG, H.264) Inter-frame MPEG-like coding can lead to a bigger compression (typically up to 10 times more video for the same size), resulting in more storage or less bandwidth requirements for the same quality. However, the calculations are more complex, so the performance of the encoding machine will be lower (less streams, more CPU usage). In general, there is a big difference in performance between doing the compression on the recording device and doing it on the camera or any other specific compression hardware (e.g. a network video server). The latter is highly recommended. When choosing a particular compression technique, there may be other considerations. For instance, WMV video can be played on any PC running the Windows operating system and on most other devices with video capabilities (e.g. PDA, phone, etc). Quadrox recommends: 1. For analogue cameras connected to an internal capture board: use WMV7. 2. For network cameras and network video servers: use the native format in which the device streams (no recompression on the recorder). The chosen compression technique also has an influence on the following discussion. 1. For intra-frame codecs (MJPEG, H.264), the quality is usually set by a parameter. As a consequence, frame rate and resolution have a direct influence on the resulting bit rate. 2. For inter-frame codecs, the bit rate is usually a parameter. As a consequence, frame rate and resolution don’t have a direct influence on storage and bandwidth requirements, although they might have an influence on the quality of the resulting video. This means that when the bit rate increases, the resolution will decrease as well as the frame rate. All these parameters together produce a better image quality. Version 4.4 Series WebCCTV Installation Manual 54 5.2.2 Resolution When the compression technique is based on JPEG images, a second big factor in data size reduction is the resolution. As mentioned before, compression works by selectively reducing the amount of information in the image. One way to do that is to reduce the size of the image. Example: A VHS quality image (PAL) of 384x288 pixels can be considered as a SVHS+ image of 768x576 pixels where you throw away every other pixel in either direction. This reduces the data size by a factor of 4. Of course, this influences the quality of the image. Especially fine details are more likely to get lost, like face characteristics or details of clothing. The resolutions that are mentioned, except for the mega-pixel, are for the PAL standard. NTSC images and pure digital images might have a slightly different resolution, but in general the same steps/magnitude apply. Postage stamp format (192x122). This resolution is offered by some of Quadrox competitors. At this image size however, most of the information in the image is lost. At best, one would be able to count the number of people in the image, but there is no hope for e.g. identifying faces. VHS quality (384x288). Small and thus favourable for storage and transmission, this resolution gives a good quality in most cases. SVHS quality (768x288). In this image format, only half of the image is lost. The image is only decimated in the vertical direction. For analogue based cameras, this is the maximum resolution possible without motion artefacts (see below). Best choice for an analogue camera. Notice that this resolution doesn’t have the classical 4:3 proportions. This can be compensated for, but some media players might display a “squished” image. SVHS+ quality (768x576): This is the maximum resolution for all analogue and most network cameras currently in the market. Most detail is preserved. This resolution has a big disadvantage though. Because of the video sensor technology inside the camera (interlacing), the image shows horizontal lines at the edges of moving objects. This makes the object (e.g. a face) unrecognizable in most cases and as such seriously diminishes the usability of the camera. For more detailed technical explanation about interlacing and its consequences, please contact Quadrox support. Megapixel quality (1280x960 and higher): Network cameras with more than a million pixels are becoming the new type of camera’s in today's marketplace. Because of their high pixel count, they can preserve much more detail than a regular camera, making them useful in many circumstances. This comes at a very considerable storage and network bandwidth cost! As a final remark on resolution, we should reiterate that resolution has quite a different effect when using inter-frame codecs for compression (MPEG, WMV). In these cases, choosing a smaller resolution means less quality (as above), but not less data, since the bit rate is fixed. Version 4.4 Series WebCCTV Installation Manual 55 For a fixed bit rate, a higher resolution means that information has to be removed in other ways, reducing the image quality. Keep in mind that choosing a higher resolution also means putting a higher load on your WebCCTV and may reduce its performance. Bigger images need more internal resources like memory and processing time. 5.2.3 Frame rate When choosing a resolution, we reduce the amount of data by reducing the size of an image. Similarly, we reduce the amount of data by simply storing or streaming fewer images. Frame rate is a third big factor in compression. This factor is potentially big, since the difference in frame rates can range from 30 fps to one image every 3 seconds, a factor of 100! When reducing the frame rate, the loss of quality creates video that is not “smooth”. The human eye needs a certain frame rate to perceive a sequence of images as smooth motion. When reducing the frame rate to a number below this amount, the image “shocks”. However, while being less pleasant to look at, the quality of the individual images is not affected, so all detail is preserved. The threshold of the human eye for perceiving a sequence of images as smooth motion lies at about 15 images per second, depending on the person. Although the broadcast industry (television, DVDs, film, etc) take a substantial margin on this with streams at about 25 fps, this is not absolutely necessary for smooth motion. Because of this, streaming at more than 15 fps is almost never useful and mostly serves to increase your bandwidth requirements. In most cases, even 10 or 12 fps suffice for a satisfactory viewing experience. For recording, frame rate is usually reduced further, since nothing much occurs in the time period of 1/15th of a second. A storage frame rate of 3 to 6 fps is enough for most practical applications. Similar remarks about the relation between compression technology and frame rate hold as they did for resolution. When using (M)JPEG, frame rate has a direct influence on bit rate since each image is compressed separately. When using MPEG, H.264 or WMV, the bit rate is set, so frame rate potentially has an influence on quality rather then on data size. Version 4.4 Series WebCCTV Installation Manual 56 5.2.4 “Differential” live streaming In order to further reduce the bandwidth requirements for live streaming, Quadrox engineers have devised an extra algorithm that can improve the JPEG streaming for analogue cameras. When using differential live streaming, only the parts of the image that actually change visually are transmitted to the viewing component. At the receiver side, the parts of the image are recombined into a full image. In terms of quality, this form of data size reduction can hardly be noticed, but the bandwidth is reduced drastically. This allows us to stream high quality video over a lower quality bandwidth. If you want to remotely access the WebCCTV video server over the Internet, it is highly recommended to use differential streaming. Another possibility is using Low Bandwidth streaming. More info can be found in the User Manual. This feature is not available for network cameras. Low Bandwidth streaming is available for both analogue and network camera’s. 5.2.5 Activity detection for storage For storage, we can apply a similar principle. Only the images that have meaningful activity in them need to be stored. When nothing is happening, recording can be suspended. To better distinguish meaningful activity from “background movement” (e.g. a street nearby, a moving tree), masking can be applied to take only certain parts of the image into account. This technique not only reduces the storage requirement, but also makes it much easier to trace important events in the recordings afterwards, saving you both money (hardware) and time. Using activity detection is highly recommended in almost all cases. Typically, it allows you to increase storage time up to 400%. For cameras with little motion, e.g. in an empty hallway in an industrial facility, it can even reduce the storage space to about 1% of the original volume! Version 4.4 Series WebCCTV Installation Manual 57 6 Security Policy This chapter describes guidelines for proper use and a security policy, which are designed to ensure the proper functioning of a WebCCTV video recorder and to provide a guideline for protection against hackers, viruses, malware and other forms of electronic attacks. Quadrox will not support any problems that arise from not complying with the guidelines and policies in this chapter. This chapter is structured in three major parts. First, the guidelines for proper use of WebCCTV are explained. WebCCTV is a dedicated system that should be used solely for the purpose of video recording and surveillance. Secondly, the details of the security policy are outlined. To sum it up in a single sentence, the policy amounts to this: We will lock down WebCCTV as much as possible, leaving as few places as possible where an attack could occur, and securing the remaining places as much as possible. We will provide you with information about how we lock the machine and how you can open it if necessary. As mentioned above, Quadrox will not support this any further. Thirdly, some additional ways to recover from errors are explained for your convenience. Version 4.4 Series WebCCTV Installation Manual 58 6.1 Proper use of WebCCTV WebCCTV is a dedicated system that should be used solely for the purpose of video recording and surveillance. Since WebCCTV has Windows XP Embedded as its operating system, it can be accessed locally and used as a normal PC. This should be avoided as much as possible, as it might prevent proper operation of the WebCCTV. The following uses of WebCCTV are normal: Accessing WebCCTV in operator mode and using the local interface. Accessing WebCCTV in administrator mode and viewing images of the local machine through the web interface in a surveillance context. Accessing WebCCTV in administrator mode to do administration of the local and/or remote WebCCTV’s, comprising configuration of the operating system and the WebCCTV application. Any other use of WebCCTV is considered to be improper use! Examples of improper use are (not exhaustive): Accessing the web application of other WebCCTV’s to watch live or recorded images in a surveillance context. Surfing to any other website on your corporate network or the Internet, when this is not necessary for the administration of the machine. Using the machine for file storage. Using the machine for any other purposes than video surveillance and recording. Examples include word processing, business tools, chatting through IM, etc. Installing any 3rd party software on the machine. There are two exceptions: o Dynamic DNS software required for the machine to be accessible from the Internet. o Tools that heighten the security of WebCCTV (e.g. virus scanners), under the conditions mentioned elsewhere in this document. The restriction put here will help to increase the security and ensure proper functioning of WebCCTV throughout its lifetime. They prevent an additional load on the machine, which could hinder a proper working (including video quality) and could shorten the lifetime of WebCCTV. They prevent the attraction of viruses, spyware, adware, malware and other forms of software that form a threat against the health of WebCCTV. They prevent interference between WebCCTV software and 3rd party software that might cause WebCCTV to malfunction. Version 4.4 Series WebCCTV Installation Manual 59 6.2 Security policy At the start of this section, let’s reiterate the basic premise of the WebCCTV security policy: We will lock down WebCCTV as much as possible, leaving as few places as possible where an attack could occur, and securing the remaining places as much as possible. “Locking down” the machine means that we will try to prevent malicious attacks on WebCCTV by not giving attackers (hackers, viruses, etc) the possibility to exploit weaknesses in the system. WebCCTV uses the Microsoft Windows XP Embedded operating system. Like any other operating system including Linux and other Unix variants – or any software for that matter – this operating system is not perfect. It contains certain weaknesses that could be used to get unauthorized access to the machine. Generally speaking, Windows XP (Embedded) is a very safe operating system when administered correctly. There are several ways outlined in this section to increase security. Have secure passwords. Leave WebCCTV in operator mode as much as possible. Keep the system up to date via Windows Update. Secure the network access. Make sure that any other access doesn’t cause problems. Contrary to popular belief, most attacks on computer systems are not brute-force attacks by extremely skilled people on a weak operating system. Instead, most attacks exploit vulnerabilities that were created “from the inside”. This implies that you have control over the situation and can prevent attacks by rigorously securing the machine and being careful when handling it. In the next paragraphs, you can find out how to do this. 6.2.1 Password policy The very first thing that you should do when unpacking WebCCTV, is to change the Administrator password! The default password for Administrator account on new WebCCTV units is “webcctvnvr” and for Operator is “quadrox” (lower case letters). Default passwords should be changed as soon as possible, preferably even before WebCCTV is put on the network. Otherwise attackers can gain access to the system using easily retrievable passwords. It’s like locking the door, but leaving the key in the lock. To avoid passwords leaking out of the organization or being retrieved otherwise, follow these guidelines: Publish passwords to as few people as possible. The fewer people knowing the password, the less chance of it ending up in the wrong hands. Version 4.4 Series WebCCTV Installation Manual 60 Don’t keep passwords in written form in places that might be accessible by malicious people. This includes paper documents that might get lost, websites, mail and IM messages. Restrict the number of Administrators to a minimum. Since users have fewer rights, a user password leaking has fewer severe consequences. It is even advisable to have an extra user account for each administrator, which should be used for regular viewing. Choose strong passwords. A strong password is a password that is hard to guess by attackers (people and software). This helps to secure the product against brute force attacks (trying all passwords). Use the following guidelines: o o o o The password should be at least 8 characters long. Longer is better. Use both CAPTIAL and small letters (at least one of each). Use both letters and figures or other characters (at least one of each). There should be no connection whatsoever between the username and the password. This includes copying parts of the username or having a semantically relevant meaning (e.g. the password is the name of the user’s wife). Preferably, the password should have no “human” meaning at all. One of the prime ways for hackers to retrieve passwords is simply asking for it. A hacker would pretend to be e.g. a support technician and ask you for the password. In order to prevent this kind of attack, we outline here the procedure for Quadrox support people regarding passwords of customers. First of all, by default Quadrox does not know any passwords of machines in the field. Since we use the operating system for authentication, there is no way in which we can retrieve a password, for any reason. The only way for us to know a password is if the customer voluntarily tells us. If it is necessary for Quadrox support to have the password in order to give assistance, the support technician will ask the customer explicitly. When you have the slightest doubt about the authenticity of the support person, the requested way of communicating the password or the telephone number given to call, please don’t hesitate to call Quadrox support on the following number: +32 (0)16 58 25 85. In the USA, please call 1-888-QUADROX The Quadrox support personnel will not save or keep passwords in any way. For optimal security you should change the password after a support call, or in general after revealing the password to anyone who normally doesn’t have access. Version 4.4 Series WebCCTV Installation Manual 61 6.2.2 Operator mode When logging in to the machine in Operator mode (Windows login, not the WebCCTV user interface), the user can only see the local interface of WebCCTV. All other direct interaction with the system is disabled. Nothing changes for remote access to WebCCTV. Always leave WebCCTV in Operator mode, when not performing system administration. Leaving WebCCTV in Operator mode is a strong protection against improper use of the machine. Naturally it increases security and helps the system to perform its job, as explained above. There is no valid reason to leave the machine in Administrator mode. 6.2.3 Windows security updates To keep your system secure, it is important that you keep it up to date. This will prevent an attacker from using vulnerabilities that have already been removed by Microsoft. All installations that do not have Windows XPe Service Pack 3 are insecure and should be re-installed. It is the responsibility of the installer to keep WebCCTV up to date with the latest security patches. Quadrox is not responsible for keeping the installed WebCCTV’s up to date. This is the responsibility of the installer. Quadrox is not responsible for problems that originate from not keeping the machine up to date (patches until the last release applied). If such a problem occurs (e.g. a virus), Quadrox recommends a full re-installation. 6.2.4 Network security The network is the main interface of WebCCTV, through which an attack can occur. That’s why it is important to pay special attention to its security. In accordance with our general security policy, we will try as much as possible to limit the way in which the network can be used, while not interfering with WebCCTV functionality. There are several ways to limit the network: Physical limitation (dedicated network) Limiting the number of connections (LAN versus Internet) Using only one network protocol (TCP/IP) Allowing only traffic on the necessary network ports (Firewall) Allowing only known clients Limiting the functionality of the web server (securing IIS) Version 4.4 Series WebCCTV Installation Manual 62 6.2.4.1 Dedicated network versus integration with the corporate network Having a dedicated network for video surveillance, adds an intrinsic level of security by physically eliminating access points for attacks. This way, you can easily have a safe and robust system. The network becomes a safe entity in itself, while if WebCCTV is incorporated in a more general network, security should be built around the unit. A dedicated network also ensures that the video traffic doesn’t interfere with other general data. This potentially increases the performance of both WebCCTV and other applications on the network. On the other hand, integrating the video network with the corporate network can potentially reduce the costs of installation and administration. Both solutions are possible and endorsed by Quadrox. The choice depends on your performance, cost and security needs. 6.2.4.2 Internet Connection When WebCCTV is in a LAN, the number of network nodes from which an attack can originate is at most a couple of hundred. When WebCCTV is connected to the Internet, this number rises to millions. Connecting WebCCTV to the Internet dramatically increases the chance on an attack. The decision to put a unit on the Internet depends on the needs of the end user. If you do so, please pay extra attention to the security issues mentioned in this document. 6.2.4.3 Limiting the number of protocols By default, the Windows operating system supports multiple network protocols. An example is NetBios which is, among other things, the protocol used to share folders across the network. To increase security these protocols are disabled in WebCCTV. Only one protocol is enabled: TCP/IP. This is the main protocol used on most of the current networks, including the Internet, and the only one needed for WebCCTV functionality. Disabling other protocols prevents attacks that use them and it is in that sense a good measure to increase security. Furthermore it prevents the unit from broadcasting, or in other words constantly yelling its position to the rest of the network. This makes it more difficult for an attacker to find the unit on the network, which again increases security. In some exceptional cases it might be necessary to enable these protocols again, e.g. to backup video through shares. This is technically possible: the protocols are disabled, not removed. However, Quadrox strongly advises against this practice and will not give support on this functionality or any problems that originate from it. Version 4.4 Series WebCCTV Installation Manual 63 6.2.4.4 Firewall A critical element in WebCCTV security is the firewall. A firewall is a piece of software that basically allows only a limited number of applications to use the network. WebCCTV uses Microsoft firewall, which is enabled by default in the operating system. It is a basic firewall with limited functionality, but non the less effective for our goals. By default, only the following applications are allowed: Web server needed for the web application (IIS, TCP port 80) WebCCTV video server software (OPServer and OPVWSYS, TCP port 1518 and UDP ports 4096-4223) Remote desktop needed for remote administration and support This is only valid for connections that are made to WebCCTV. For outgoing connections (connections made from WebCCTV to another machine) there is no restriction. However, please follow the guidelines for proper use to prevent problems. For support issues where Quadrox support technicians take remote control to the WebCCTV TCP port 3389 must be opened. For Q-Monitor service TCP port 5666 has to be open. In some exceptional cases it might be necessary to allow more applications (open more ports). This is technically possible; however, Quadrox strongly advises against this practice and will not give support on this functionality or any problems that originate from it. 6.2.4.5 Allowing only known clients If you have a set-up with a fixed number of known clients, there is a possibility to only allow these clients, based on their IP address. No other clients will be allowed to access WebCCTV. This would further limit the number of possible connection points and thus increase security. This is only usable in a limited number of scenarios and can give rise to a number of logical problems. Please contact Quadrox support for more information. 6.2.4.6 Securing the applications When applying the restriction on applications with the firewall as explained above, the attackable points are effectively limited to those applications. In the next step we should make sure that those applications themselves are secure. Remote desktop doesn’t have ways of automation. This implies that only a human operator can use it, not a piece of software like a virus. The risk of a human operator performing malicious actions is limited to the access he has. The security of this falls back to the security of the passwords, for which a policy is outlined above. The WebCCTV server is an unlikely point of attack, since it is not a wide spread application like a web server. This means that very few people would be interested in designing an attack Version 4.4 Series WebCCTV Installation Manual 64 on this software. Those people would have to know a lot about the internal workings of the server, which is difficult. This being said, Quadrox engineers are working hard to keep the number of possible security risks to an absolute minimum. Only one application remains, namely the web server (IIS). Quadrox uses tools issued by Microsoft like urlscan and lock-down to block any action that is not related to WebCCTV functionality. To ensure security of IIS, please make sure that all necessary security updates are applied (see above). 6.2.4.7 VPN Setting up a virtual private network (VPN) can potentially increase security, similar to having a dedicated network or limiting the clients on IP address. It uses encryption of data that goes over the network to achieve this goal. Setting up a VPN for your video surveillance equipment is outside the scope of Quadrox support. Be aware that the encryption process can cause delays that might affect the performance of the video system. 6.2.5 Other types of access Apart from the network, there are several other ways in which a malicious piece of software can end up on WebCCTV. These ways include all information carriers that can be connected to WebCCTV, like CDs, floppies and USB memory drives. When connecting these information carriers to WebCCTV, pay special attention to security. Make sure that they are scanned for viruses and malware before connecting them. You should also pay extra attention when you introduce foreign objects in a shielded environment, e.g. a technician's laptop in a dedicated video network. 6.2.6 3rd party security tools When the machine is locked down like described above, it should be resistant against the majority of threats. The limited increase in security that would be achieved by pre-emptively introducing additional security tools probably does not justify the additional cost of licenses and efforts for installation and maintenance. Furthermore, this software might interfere with the functionality of WebCCTV. Such tools include virus scanners, malware/spyware/adware removal tools, additional pop-up blockers, firewalls with extended functionalities, script blockers, etc. None of these software products are installed on WebCCTV by default for the reasons mentioned. If the situation forces an installation of such tools, the installer will be responsible for the proper working of the system. Quadrox cannot give support on such non-standard installations, unless otherwise agreed. Version 4.4 Series WebCCTV Installation Manual 65 As a general guideline, script blocking should be disabled at all times, since WebCCTV uses scripts to implement its functionality. The 3rd party tools also need to allow the proper installation and execution of signed ActiveX components. 6.3 Error recovery mechanisms WebCCTV has the ability to automatically recover from common problems like crashes, overheating, etc. This is achieved by System Health Service (SHS). System Health Service is software running on WebCCTV as a service. It monitors the hardware and some vital processes on the machine, like the WebCCTV server and IIS. If something happens (e.g. a crash) to any of these processes, the SHS will try to recover by – depending on the seriousness of the situation – restarting the process or rebooting the PC. Version 4.4 Series WebCCTV Installation Manual 66 7 Troubleshooting WebCCTV is a reliable system and is designed and tested for durability. However, problems may occur, following procedures in this chapter can help to determine the cause. You should become familiar with this chapter. Knowing what might go wrong can help prevent problems from occurring. 7.1 Problem solving process Resolving problems will be much easier if you observe the following guidelines: Stop immediately when you recognize a problem exists. Further action may result in data loss or damage. You may destroy valuable problem-related information that can help solve the problem. Observe what is happening. Write down what the system is doing and what actions you performed immediately before the problem occurred. The questions and procedures offered in this chapter are meant as a guide, they are not definitive problem solving techniques. Many problems can be solved simply, but a few may require help from your installer. If you find you need to consult your dealer or other consulting person, be prepared to describe the problem in as much detail as possible. 7.1.1 Preliminary checklist Consider the simplest solution first. The items in this section are easy to fix and yet can cause what appears to be a serious problem. Make sure you turn on all peripheral devices. This includes your printer and any other external device you are using. Before you attach an external (none USB) device shut down the WebCCTV. When you turn the WebCCTV back on it recognizes the new device. Make sure all options are set properly in the corresponding setup program. Check all cables. Are they correctly and firmly attached? Loose cables can cause signal errors. Inspect all connecting cables for loose wires and all connectors for loose pins. Check that your CD/DVD-ROM is correctly inserted. Version 4.4 Series WebCCTV Installation Manual 67 7.1.2 Analyzing the problem Sometimes the system gives clues that can help you to identify why it is malfunctioning. Keep the following questions in mind: Which part of the system is not operating properly: keyboard, hard disk drive, optical media drive, or display? Each device produces different symptoms. Is the system configuration set properly? Check configuration options. Do any indicators light? Which ones? What colour are they? Do they stay on or blink? Write down what you see. Do you hear any beeps? How many? Are they long or short? Are they high pitched or low? Is the WebCCTV making any unusual noises? Write down what you hear. Record your observations so you can describe them to your dealer. Version 4.4 Series WebCCTV Installation Manual 68 7.2 Solutions for common problems 7.2.1 Start up problems Problem Possible causes and resolutions Nothing shows up on the • monitor when you try to o start WebCCTV • o Monitor problem Check the section on monitor problems Boot problem Check the rest of this section WebCCTV doesn’t This is probably caused by a lack of power. switch on (AC IN Cable not connected or damaged indicator doesn’t glow • o Make sure that the power cable is firmly green) connected to the WebCCTV power supply and to a working power outlet. o If the cable is frayed or damaged, replace it. o If the cable connectors are dirty, wipe them with cotton or a clean cloth. • Power outlet isn’t operational o Contact the building manager. • Power outlet doesn’t have the correct voltage o Adapt the jumper switch on the power supply to match the power outlet voltage. • Power supply is in safety mode because the WebCCTV overheated o Let the unit cool down and try again. Locate the source of the overheating and eliminate it • Power supply is broken o Contact HP or the WebCCTV distributor WebCCTV boots from another storage device then the hard disk (e.g. CD-ROM) Version 4.4 Series • The BIOS settings are not appropriate o Remove the storage device (e.g. take the CDROM out of the CD-ROM drive) o Adapt the BIOS settings to boot from the hard disk first WebCCTV Installation Manual “No system displayed disk” 69 is The WebCCTV doesn’t find a suitable storage device to boot from. • No operating system is installed on the hard disk o Try to re-install the WebCCTV software (see chapter 3) • The hard disk malfunctions o Check the cables which connect the hard disk to the motherboard o Contact HP or the WebCCTV distributor WebCCTV doesn’t boot A hardware device malfunctioned. and emits beep sounds • The RAM memory malfunctions o Check if the RAM memory is correctly inserted o Replace damaged RAM memory o Replace any RAM memory that is not compatible with the WebCCTV o Contact HP or the WebCCTV distributor • Another component malfunctions o Contact HP or the WebCCTV distributor The keyboard or mouse a) The lights (LED) on the input device don’t function. doesn’t function • Cables not properly connected o Make sure that the mouse or keyboard cable is firmly connected to the WebCCTV • Input device broken o Check the mouse or keyboard on another PC b) The lights (LED) on the input device function, but there is no reaction on movement. • o • o Version 4.4 Series Input device connected by PS/2 Reboot the unit Input device connected by USB Disconnect the device and connect it again WebCCTV Installation Manual 70 7.2.2 Monitor problems Problem Possible causes and resolutions The monitor is completely black • Monitor switched off o Turn on the monitor • Cable not connected or damaged o Make sure that the power cable is firmly connected to the monitor a working power outlet. o If the cable is frayed or damaged, replace it. o If the cable connectors are dirty, wipe them with cotton or a clean cloth. • Monitor set up to complete darkness o Try to adapt the brightness and contrast settings of the monitor • Monitor broken o Try another monitor The monitor displays an error (e.g. “No signal”) • Monitor cable not properly connected o Make sure that the monitor cable is firmly connected to the WebCCTV and to the monitor The monitor doesn’t display correct colours • Monitor cable not properly connected o Make sure that the monitor cable is firmly connected to the WebCCTV and to the monitor • Monitor set up incorrectly o Try to adapt the brightness and contrast settings of the monitor For other problems, please check the documentation of the monitor manufacturer. 7.2.3 Windows logon problems Problem Possible causes and resolutions You forgot the password of a User • Log in as Administrator, reset the Operator’s password through the web application You forgot the password of the Administrator • Re-install the WebCCTV Since Quadrox uses the Windows Operating System for authentication, there is no back door to retrieving or resetting the password. Version 4.4 Series WebCCTV Installation Manual The password is not accepted 71 • Incorrect spelling o Type the password again o Pay special attention to capital letters, the password is case sensitive! • Incorrect keyboard settings o Type Ctrl-Shift to switch your keyboard settings, if you have set up multiple keyboard configurations o Use an appropriate keyboard 7.2.4 Remote connection problems Problem Possible causes and resolutions Internet Explorer shows • IP address or domain name incorrect (spelling mistake) HTTP error 404 “The o Correct the spelling and try again page cannot be found” • No physical connection to the WebCCTV You can test this by performing a ping test o Check if the network cable of the WebCCTV is properly connected to the NVR and to the switch, hub or router o Make sure the switch, hub or router is turned on and working o Try to connect the WebCCTV to a different port on the switch or hub • A 3rd party application (e.g. a virus scanner) is preventing the page from being displayed o Disable the 3rd party software and try again • IIS (Internet Information Service) is not running properly o Contact Quadrox support The Welcome screen • Scripts are blocked appears, but the logon o Disable any script blockers, including script screen doesn’t blocking functionalities of anti-virus software o Make sure port 1518 is opened. A message pops up: “Your security settings prohibit running ActiveX controls on this page. As a result the page may not display correctly.” • Internet explorer blocks the installation of the ActiveX component o Configure Internet Explorer to allow the installation and execution of signed ActiveX controls o Add your WebCCTV to the trusted sites list. Browser returns • Internet Explorer has a proxy server enabled in the 'connection refused'-like Internet Options, which blocks URLs like 'localhost' message o Remove the proxy server from the Internet options: Tools > Internet Options > Connections > LAN Settings. Version 4.4 Series WebCCTV Installation Manual 72 A message pops up: “The • Your firewall blocks WebCCTV signals connection was actively o Check whether all firewalls (server and client refused by the side) are correctly configured. WebCCTV server. ” 7.2.5 Camera problems Problem Possible causes and resolutions No or unstable images • Camera not properly connected o Check the connections (network, coax cable) o If the cable or connectors are damaged, replace the cable. o In case of analogue cameras, check whether the cable is under voltage • Camera is turned off o Connect the camera to a working power outlet o Turn on the camera The image is out of focus • Lens is not properly adjusted or trembles o Try to adjust the camera to show more a focused picture. • Camera not properly connected o See above for resolutions For other problems, please check the documentation of the camera manufacturer. 7.2.6 WebCCTV software problems Problem Possible causes and resolutions The buttons of the web • Internet Explorer hangs up application don’t work o Close the browser and try again • WebCCTV server malfunctions o Restart the server with the icons on the WebCCTV desktop o If the problem persists, reboot the WebCCTV o If the problem persists, contact Quadrox support Version 4.4 Series WebCCTV Installation Manual A black image is shown 73 • DirectX not installed or outdated Check by Start > Run, type “dxdiag”. The DirectX version should be at least 9.0b o Download and install the latest DirectX version from http://microsoft.com/directx • Video drivers of the client computer are outdated o Download the latest video drivers from the website of the client computer manufacturer • Firewall blocks image transfer o Check whether all firewalls (server and client side) are correctly configured. No grid is displayed in • Video card has less than 16 MB of video memory. the activity detection Go to the Display settings, go to the Settings tab, click screen. Advanced. A new window appears, click the Adapter tab. Check that Memory Size is at least 16 MB. • DirectX 9.0b or higher is missing o Download and install the latest DirectX version from http://microsoft.com/directx • Not enough hardware acceleration o See the section on client configuration Very bad image quality • The color depth in the display settings isn't set to 24 or (image shows big planes 32 bits of the same color) o Change the color depth to 24(32) bits instead of 16 bits in the display properties. Right click on the Desktop, choose Properties. Go to the Settings tab, and set the color depth to 24(32) bits. • Wrong combination of graphics controllers and/or drivers o Contact Quadrox support PTZ supporting camera • Problem with camera configuration (source numbering) doesn't have PTZ o Delete all IP devices. Add them again using the Camera Wizard. Make sure to add the cameras per brand and per type, not alternating different brands or types! The WebCCTV reboots This problem occurs mostly during installation with a XEON spontaneously build. • Watchdog prematurely reboots the unit o Unplug the power from the Watchdog unit and try installation again. Don't forget to plug power cable back to the Watchdog unit after install. Version 4.4 Series WebCCTV Installation Manual 74 7.3 If you need further assistance If you require any additional help using your WebCCTV or if you are having problems operating the WebCCTV, you may need to contact Quadrox for additional technical assistance. 7.3.1 Before you call Some problems you experience may be related to software other than WebCCTV or the operating system. It is important to investigate other sources of assistance first. Before contacting Quadrox try following: Review troubleshooting sections in the documentation for other software and peripheral devices. If a problem occurs when you are running other applications, consult the documentation for that software for troubleshooting suggestions. Consult the dealer you purchased software from. This way is the best source for current information and support. 7.3.2 Collecting the necessary information When you contact Quadrox for technical support, you will be asked to provide the following information. Please have this information ready before you call and include it in every email that you send. This will help the support people to handle your problem in the most efficient way. All information is obligatory. All this information can be gathered by one simple click in the Video Manager Info -> Generate System report. Save the file and send it to support. Check the User Manual for more information about this topic. What is the type of product? Possible types are WebCCTV, Guard, Enterprise… installation. The type matches the name in the Windows Start menu. How many units are showing the problem? How many video sources are connected to each unit? Make a distinction between the different types (brands) of network cameras and network video servers. You can find this information in the web application. Log in as Administrator and go to the “System” menu. There you will find a list of the connected sources. What is the version of the operating system? What is the version of your WebCCTV software? This information can be found in the web application. Log in as Administrator, go to the “System” menu and select “System info”. The numbers that you need to provide are “XPe build version” and “Setup version”. Version 4.4 Series WebCCTV Installation Manual 75 What is the problem? Please make sure that you have the relevant information concerning your problem. What is going wrong? What were you expecting? A good problem description can help the support person to handle your question more efficiently. 7.3.3 How to contact Quadrox If you are still unable to solve the problems and suspect that it is related to the WebCCTV products, contact Quadrox as described in the Appendix B Contact Us. USA: E-mail: Telephone: [email protected] +1 888 QUADROX Europe: E-mail: Telephone: Fax: [email protected] +32 (0) 16 58-25-85 +32 (0) 16 58-25-86 7.3.4 How to allow remotely access to your WebCCTV by Quadrox support Sometimes to fix a problem with your WebCCTV unit the easiest way for Quadrox support is to take remote control of your WebCCTV. Quadrox support will only attempt this after having been in contact with you through phone or email. Remote Access to the WebCCTV is established with the help of the Quadrox Remote Assistence Tool, VNC, RDC, Logmein or CoPilot (www.copilot.com). Version 4.4 Series WebCCTV Installation Manual 8 Appendices Version 4.4 Series 76 WebCCTV Installation Manual 77 Appendix A WebCCTV installation checklist Please check that you performed all steps listed below: Hardware connections: 1. Connecting the power outlets to the WebCCTV, cameras and the network switches. 2. Establishing a network connection between all of the devices by connecting each of them to a network switch using UTP network cables Configuring the WebCCTV’s IP-address Configure the cameras by: 1. Giving all cameras a static IP address using the Camera Setup CD-ROM. 2. Giving all cameras a user name and password. 3. Adding all the cameras to the WebCCTV Web Application using the correct static IP address, user name and password assigned in the steps above. 4. Setting all the camera parameters, such as the camera quality (resolution), recorded frames per second and compression type. 5. Setting the activity detection level & masking correctly. Checking for the presence of recordings for all connected cameras in the D:/movies folder. Verifying the combined CPU consumption of the WebCCTV is not higher than 55% when all connected cameras are simultaneously recording. Changing the default passwords into strong passwords. The passwords are changed in the User management of the WebCCTV application. Checking access to the WebCCTV from a remote unit of the network. Saving the WebCCTV settings using the Save Configuration feature in the System info screen. Burning the settings to the blank CD-RW supplied with WebCCTV. Make sure that CD-RW with saved settings is placed back into the pouch. After you leave the site, the pouch in the unit should contain 2CD’s: The Recovery CD containing the full version The CD with latest settings Setting WebCCTV to the Operator mode. Configuring a router (not needed when the WebCCTV is not accessed from an external location) Opening TCP ports 1518 and 80. Opening the UDP port range 4096 ~ 4223 Opening the TCP port 3389for outgoing (optional) Opening the TCP 5666 if your server is monitored by the Quadrox Q-Monitor Service. Forwarding all of the above ports to the internal IP address of the WebCCTV Above are the default ports. Note that these ports change when the default ports are changed in the WebCCTV settings Checking the Internet connection. Version 4.4 Series WebCCTV Installation Manual 78 Appendix B Contact Us Quadrox is a leading provider of Digital Video Internet infrastructure management solutions, enabling companies to leverage the Internet to deliver better physical security and more powerful and cost-effective Digital Video applications and services to their customers, employees and business partners. The Quadrox WebCCTV product family provides an efficient and reliable infrastructure by which enterprises can distribute, update and manage video sources and content over corporate intranets, extranets and the Internet. Corporate headquarters Belgium: Address: Telephone: Fax: E-mail: Quadrox tsov., Duigemhofstraat 101, 3020 Herent, Belgium +32 (0) 16 58-25-85 +32 (0) 16 58-25-86 [email protected] USA: Address: Telephone: Toll Free: Fax: E-mail: Quadrox US 900 Warm Springs Road, Ste. C102 Henderson, Nevada 89011 (+1) 702-564-6340 (+1) 888-564-6340 (+1) 702-564-6341 [email protected] Technical support Quadrox is committed to providing you with the best overall product experience. This includes intuitive technical products and flexible options to fit your support needs. Our products are designed with superior quality and ease of use in mind, but we understand that issues do arise from time to time that need the backing of our support resources. USA: E-mail: Telephone: [email protected] +1 888 QUADROX Europe: E-mail: Telephone: Fax: [email protected] +32 (0) 16 58-25-85 +32 (0) 16 58-25-86 Version 4.4 Series WebCCTV Installation Manual 79 Hardware support WebCCTV system is based on the HP business desktop PC of DC8000 models or better. The following contacts are for the hardware support only. USA: Telephone: 800-HP invent or 800-474-6836 UK: Telephone: 0870 842 2339 Belgium (Dutch): Telephone: 078 600 600 Belgium (French): Telephone: 078 600 600 Netherlands: Telephone: 0900 - 117 0000 France: Telephone: 0826 10 49 49 Germany: Telephone: 01805 25 81 43 Spain: Telephone: 02 92607330 For more information about hardware support and hardware support in other countries please refer to the following link: http://welcome.hp.com/country/us/en/wwcontact.html Version 4.4 Series WebCCTV Installation Manual 80 Appendix C Version 4.4 Series WebCCTV Installation Manual Version 4.4 Series 81 WebCCTV Installation Manual Version 4.4 Series 82 WebCCTV Installation Manual Version 4.4 Series 83 WebCCTV Installation Manual Version 4.4 Series 84


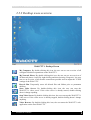

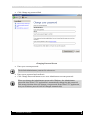
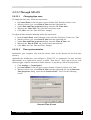
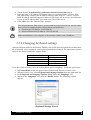


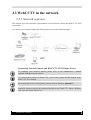


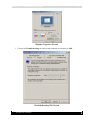
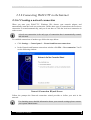
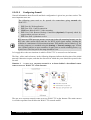


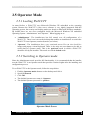


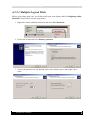
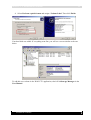


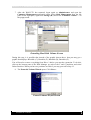


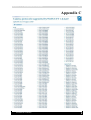
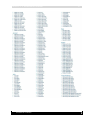
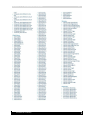
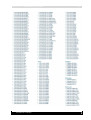
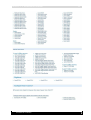
![[MANUAL] GuardNVR Installation Manual 4.4.0.0](http://vs1.manualzilla.com/store/data/005799040_1-22ffd5d438f0b0c95843f8ff9431bc2d-150x150.png)
![[MANUAL] WebCCTV User Manual 4.4.0.0](http://vs1.manualzilla.com/store/data/005886634_1-9e25e0c8c7fa6f72c2b69bbb4cc67aa8-150x150.png)