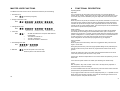
1
3 ? > D 1 3 D * 1 4 4 B 5 C C * D 5 < * 9> C D 1 < < 1 D 9? > 3 ? = @ 1 > I * ADDRESS: CONTACT: TEL: INSTALLATION COMPANY: B < 2 < ? ( # 9 c c e U # CD1DEC;5I* 5-5>DBI5H9D1-1335CC9-9==5491D5?-?=9DD54 5 4 1 D 5 C 5 B F 93 1 3 D 9? > 5 4 1 D 5 C 5 B F 93 5 > 1 2 < 5 4 1 3 D 9? > = 9 > C 5 4 1 D 5 C 5 B F 93 > 4 1 D 5 9> C D 1 < < 1 D 9? 3 2 C 1 2 C 2 5 < < ? E D @ E D C 5 3 C > _ 5 5 > D B I 5 H 9D D 9= & 2 5 < < D 9 = 5 % $ @ 9B < 5 4 c # 4 9C 1 2< 54 " C 6 5 E D < < B??= ! C @ 5 1 D B D J?>5 J?>5 J?>5 J?>5 J?>5 J?>5 C @ 5 1 D B D ® 1 3 D 9? > C @ 5 1 D B D 5 5 > 7 9 > 5 5 B > 1 = &J?>5@B?7B1==9>7CD1DEC<125< PYRONIX LIMITED ® ® JULY 2000 RINS 154 Issue-1 USER INSTRUCTIONS ® PARAGON PLUS USER INSTRUCTIONS ® 3\URQL[/LPLWHG 3\URQL[+RXVH %UDLWKZHOO:D\ +HOODE\5RWKHUKDP 64<(1*/$1' 7HO )D[ 7HFKQLFDOKHOSOLQH8.RQO\ 7KLVLVDSUHPLXPUDWHOLQHZKHUHFDOOVDUHFKDUJHGDWSSHUPLQXWH HPDLO XNVDOHV#S\URQL[FRP H[SRUWVDOHV#S\URQL[FRP PDUNHWLQJ#S\URQL[FRP WHFKQLFDOVXSSRUW#S\URQL[FRP ZHEVLWHZZZS\URQL[FRP RINS 154 ISSUE-1 19 CONTENTS 1. INTRODUCTION 2. ACCESS LEVELS 3. FEATURES 4. FUNCTIONAL DESCRIPTION 5. ZONES 6. CONTROLS AND FUNCTIONS 7. LIMITED USER FACILITIES 8. MASTER USER FACILITIES 9. TROUBLESHOOTING 3 4 4 5 6 7 8 10 12 QUICK REFERENCE GUIDES: LIMITED USER FUNCTIONS. MASTER FUNCTIONS. 1 15 16 INTRODUCTION The Paragon Plus is a full featured intruder alarm control panel, based around a microprocessor with 6 fully programmable zones and 3 dedicated '24-hour' zones (Fire alarm, Personal Attack alarm and a System-Tamper alarm.). It is operated via either a 16-key onboard keypad or up to 5 additional remote keypads (Paragon RKPs) situated at convenient points around the premises. Each keypad has an arrangement of 8 LEDs to show the status of the system, and a 7-segment display to show programming data and events held in the event-log memory. All features are fully programmable and there are three levels of access to the system. These are: Limited User, Master user & Engineer The Limited User gives access to the basic functions needed for everyday setting and unsetting of the system. The Master User level gives access to all setting and unsetting faciliities, but also allows the changing of code numbers and testing of the system. The Engineer level gives total access to the system including the ability to reconfigure the system and reset the system's event-log memory. (See 'Access Levels' below). 18 RINS 154 ISSUE-1 3 2 ACCESS LEVELS Limited User level enables: 1. Panel setting and unsetting with a unique pass code. 2. Setting and unsetting of the door chime facility. 3. Event log viewing. Master User level enables: 1. All Limited User facilities. 2. Alteration of both Limited User and Master codes. 3. Walk test facility for all four set modes. 4. Clearing of event log (if allowed by the Engineer). 5. LED / Strobe / Bell / Internal Speaker test facility. 3 FEATURES - 3 Access-Level Codes, all programmable - Easy-set facility - 6 Programmable alarm zones - 4 Set / Part Set modes - Fire alarm zone with unique alarm sound - Personal Attack alarm zone - Tamper zone - 16 key backlit keypad - Dedicated Personal Attack key on keypad - Dedicated Fire alarm key on keypad - 18 Event Memory Log with forward and backward scroll - Selectable Master or Engineer Log reset - 7 Segment LED display for reading Event Log and zone programming - 8 LEDs for immediate indication of panel status - Independent Walk Test facilities for each Set / Part set mode - System Test Function - Built in sounder with volume control and software override - Optional remote keypads with internal sounders - Programmable from any remote keypad - Separate Bell and Strobe lamp outputs - Zone omit facility on exit - Auto re-arm after bell time out with automatic zone omit - Non volatile memory (NVM) for backup of codes and system programming - 1 Amp power supply - 6 Amp-hour battery supply NB Your Installation Engineer will have programmed all the system features to ensure easy and convenient day-to-day use of your system. (See section 5 `Engineer Programmable Zones) 4 RINS 154 ISSUE-1 17 MASTER USER FUNCTIONS 4 The Master User has access to all the Limited User functions plus the following: 1. Clear Event Log. Enter (If allowed by Engineer) 2. Change Limited User Code. Enter < < Master User Code < New Limited User Code New Limited User Code 3. Change Master code. Enter < 4. Test mode. Enter < Master User Code < New Master User Code < All LEDs are switched on except the fault LED and < < < backlight LED. The strobe is switched on. The bell is switched on. The internal sounder is switched on. 5. Clear flashing alarm LED. Enter or Master User Code 6. Walk test New Master User Code Limited User Code Then set the panel in the normal way. Unset the panel to exit walk-test mode. FUNCTIONAL DESCRIPTION Operating Modes Day Mode This is the state of the panel when unset (not armed). Fire, Personal Attack and Tamper inputs, however, remain active 24 hours a day. (These are referred to as 24 hour zones). Day mode is identified by the green Day LED on the front of the panel. Set Modes When the panel is set (armed) an activation of any Access, Immediate or 24 hour zone will cause an alarm condition. When an alarm is generated the internal and external sounders will operate for the length of time programmed and the tone of the internal sounder will be two notes repeated rapidly. The strobe lamp will also be activated and will continue to operate until the panel is reset. Fullset / Partset At the time of setting the control panel, any one of four set modes can be selected. This allows part of a building to be monitored whilst another part is occupied. For example, the ground floor of a house could be armed whilst the occupants are asleep upstairs. Configuration 0 is used by default if a part set mode is not selected and this is used as the 'full' set. The other three set modes are for use as 'part' sets. These configurations will have been pre-programmed by your Engineer. Entry / Exit Mode 1) Entry: When the panel is set and an Entry / Exit zone is triggered the Entry / Exit timer will begin to count down. During this period an Entry / Exit tone (single repeated bleep) will be produced by the internal sounder and any zones which are programmed as Access zones will be ignored. If either the limited user code or the master code are entered before the end of the count down period the panel will return to day mode. If the timer is allowed to elapse before a user code is entered the panel will go into an alarm state. In this case the system needs to be 'Unset' (See 'Unsetting The Panel' below). 2) Exit: With the panel in 'day' mode, if either a user code or an Easy-set key sequence is entered the Entry / Exit timer will begin. If all the immediate zones are clear, then the Entry / Exit tone will be heard. Leave the protected area by the predetermined Entry / Exit route. 16 As you trigger Access zones the tone will change temporarily to a repeated low tone. When all the zones are clear, the Entry / Exit tone will continue again until the end of the time-out period. The panel will then be set. 5 The panel will not set if the Entry / Exit tone is not heard. In this case, re-enter the building via the Entry / Exit route and enter your Limited or Master user code. QUICK REFERENCE GUIDES LIMITED USER FUNCTIONS Read the event log and then clear or omit the relevant zone. (See 'Omitting One or More Zones', Page 9) 1. Unsetting. Enter After setting, if any of the immediate zones are not clear, the alarm light will begin to flash and a fault state will be indicated by a loud repeated low tone. 2. Full set. Enter Clear the relevant zone or omit it on exit as above. (See 'Omitting One or More Zones', Page 9) 5 3. Part set. ZONES This is a zone which, on setting the panel, allows access to the Entry / Exit Zone. However, if the panel is set and an Access zone is triggered before an Entry / Exit zone then an alarm will be generated immediately. Immediate This is a zone which will, when entered, go into alarm when the panel is set. Omitted If a zone is programmed as an Omitted zone by the Engineer, then it is ignored by the panel. Primarily used for Part set options. It also allows the user to continue to use the alarm system even if a fault has been discovered on one or more zones. 24 hour zones Personal Attack Zone Triggering of the Personal Attack zone will always cause a full alarm activation regardless of whether or not the panel is set. Tamper Fire 6 (Max Tone Volume) Enter or (Low Tone Volume) Enter or (Low Tone Volume) Enter (Low Tone Volume) 4. Clear flashing Alarm LED. 5. Zone omit on exit. Enter (Limited User Code) Enter Zone number(s) 6. Instant Fire Alarm. Enter 7. Instant Panic Alarm. Enter 8. Chime on/off. 9. Read Log. Enter Enter. To scroll forward: . To scroll back: . Symbols stored in the log and their meaning: Entry/Exit zone activation.The panel was not unset before the end of the entry time period, or User did not leave in time. to Activation of a programmable zone. This shows that a zone was omitted and refers to the A tamper zone activation will only generate an internal alarm, if the panel is in Day mode. If a tamper fault is present and the panel is then set, the system will give a second internal alarm. Triggering of a tamper zone when the panel is set will always give an external as well as internal alarm. Triggering of the fire zone will only operate the internal sounder. A fire alarm is identified by a three note rising sound which is easily distinguished from all other tones. (Low Tone Volume) or Engineer Programmable Zones Entry / Exit This is a zone which allows limited-time access to the premises in order to set or unset the system. Access (Limited User Code) number which precedes it in the log. Tamper fault or sabotage. Personal attack activation. Fire alarm activation. Leaving read-log function. RINS 154 ISSUE-1 Enter 15 9. Panel unset / Day mode. Fault light is on. Day light is on at the control panel only (NOT at remote keypad). Supply light is on. This indicates a Fuse fault and you should contact 9 6 CONTROLS AND FUNCTIONS Volume Control This is only accessible when the front cover has been removed and will only affect the volume of the internal sounder together with any extension speakers. The volume control is overridden when the panel is in an alarm state, and should only be adjusted by the Engineer. A reduced volume tone can be obtained when setting the panel, by using the Easy-Set functions. The volume will be determined by the Engineer when setting up the system, by adjusting the volume pot. your installation company. 10.Panel unset / Day mode. Supply light is on and Day light is flashing This indicates that you have started a command but not finished the sequence. The panel is waiting for further commands. Enter to escape from command and return to Day mode. 11. Panel unset / Day mode. Chime light is flashing, indicating that the panel is in Walk-test mode. Enter - Chime Light will flash Set panel to set mode (Full, 1, 2 or 3) that you wish to test. Walk Test circuits. Enter (Master Code) to exit. 12. Panel unset / Day mode. Chime light is on, indicating that the panel is in Chime mode. Enter - Chime Light will stay on. Chime Chime function applies to day mode only and if selected will cause the panel to generate a three-note sound when an entry/exit zone is triggered. This feature is to inform the occupants of the building that someone has entered. Latch The latch facility is designed to be used with intruder detectors fitted with a latch memory. This feature is very useful when more than one detector has to be wired to a particular zone as it will show which detectors were triggered if an alarm was generated. If there has been an alarm and latch memory is used, then when the panel is reset an LED indication will be given at the relevant detector(s). Resetting of latch memory requires the panel to be set again for not less than 5 seconds, and then unset. Event Log The Paragon Plus control panel incorporates a memory log of the last 18 alarm events and is accessible to both Master and Limited Users and Engineer. It will record Fire, Intruder, Personal Attack and Tamper alarms and also show if any of the 6 alarm zones have been triggered or omitted. The Engineer can set the clearing of the log for either Engineer-only or both Master User and Engineer. Auto Rearm After an alarm the panel will automatically reset itself when the bell timer has expired. Any zones which still remain triggered at that time will be omitted automatically. Walk test The walk test function allows each of the fullset / partset modes to be checked in order to verify that all the intruder detectors on the alarm system are functioning correctly. If the panel is set to either Full set or any of the Part-set modes, then only the non-omitted zones in that particular set mode will activate the walk test chime. The Paragon Plus will remember its last Set Mode (Full, 1, 2 or 3). Any zone programmed as Entry / Exit will chime when triggered. Enter 14 to terminate feature and clear Chime light. RINS 154 ISSUE-1 7 7 LIMITED USER FACILITIES 5. Panel Unset / Day mode. Alarm and Fire Lights flashing, This event will take place under two conditions. i.e: 1. If 2. If any smoke detectors, connected to the system, have been triggered. To stop audible alarm and clear LEDs : Six keys on the keypad are marked with symbols. These symbols are shown below followed by how they will be referred to in the following text. Shift Easy-set Fire Enter P.A Down arrow 6. Panel unset / Day mode Alarm and Tamper lights flashing, indicating that a Tamper alarm has taken place. To stop audible alarm and clear LEDs : 1) Full Setting the panel Enter Enter Limited User Code (Factory set to 5 6 7 8) Limited User Code Now try setting the system. If the system goes straight into an alarm condition contact your installation company. or By using this method, Entry / Exit Tone volume will be reduced. 2) Part setting the panel The Entry/Exit tone volume will be reduced for any part setting Part set 1 (e.g. downstairs only armed): or Master User code By using this method, maximum volume will be heard. 7. or Panel unset / Day mode. Fault light flashing, indicating that the panel is in Engineer's Mode. To exit Engineer's Mode, Enter Part set 2 (e.g. upstairs only armed): Enter or Master User code Limited User Code Up arrow Enter has been entered. (Instant Fire Alarm) Engineer code or Part set 3 (e.g. whole house armed except garage): Enter 3) Unsetting the panel The panel can be unset by entering the building via the entry exit route and then keying either of the two User codes. 4) Activating the personal Attack Alarm (PA) To activate the Personal Attack Alarm enter 8. Panel unset / Day mode. Fault and Day lights are on, indicating that a mains failure has taken place. Check that there is mains power elsewhere on the premises. If not, wait for mains power to return. If there is mains power, contact your installation company. 8 5) Activating the Fire Alarm To activate the Fire Alarm 8 RINS 154 ISSUE-1 13 9 TROUBLESHOOTING 1. Panel set /on Supply light on, all others extinguished. 6) Turning Chime On and Off Panel must be in day mode Enter The status of the chime facility is indicated by the Chime LED on the front of the control panel. When the chime mode is selected a two tone chime will be produced by the internal sounder and any extension speakers when an Entry / Exit zone is activated. The same key sequence can be used to turn off the chime facility. 7) Reading Event Log Panel must be in day mode Enter 2. Panel unset / off Supply and Day light on, (Referred to as Day mode) The Day led will flash and the most recent event stored in the log will be displayed. If the up arrow key is pressed the previous log entry will be displayed. Similarly if the down arrow key is pressed the next most recent entry will be displayed. The event log can be scrolled backwards and forwards using the up and down arrow keys to allow the last 18 events to be viewed. To leave this function press the key. An error tone will be produced if an attempt is made to scroll outside either end of the event memory. 3. Panel unset / Day mode Alarm light flashing, indicating an alarm has taken place. To view log, enter - Last event will appear The table below shows the symbols stored in the event log and their meanings. Symbol Meaning Entry/Exit zone activation. The panel was not unset before the end of the entry time period. to on 7 segment display. Make a note of zone number or symbol. Check premises for anything different. i.e an open door or window. If alarm continues to go off for no apparant reason contact your alarm company. This shows the next event in the log has triggered the alarm system. This shows that a zone was omitted and refers to the number which precedes it in the log. Tamper fault or sabotage. To clear display, enter Personal attack activation. To clear alarm light, enter Fire alarm activation. (Master or Limited User code) 4. Panel unset / Day mode. Alarm and Personal Attack lights flashing, indicating a Personal Attack alarm has taken place. To clear the Audible Alarm, enter (Master or Limited User code) This will also clear the LEDs. If additional Personal Attack buttons are fitted on the system, reset these immediately. 12 Activation of a programmable zone. 8) Omitting one or more zones If one or more immediate zones are triggered whilst in exit mode a low pitched error tone will be produced.. If this occurs return the panel to DAY mode by entering either the Master User or Limited User code. If the log is then viewed any faulty zones will be displayed as above. First check for any obvious reason for these zones to have been activated. This may simply be due to a monitored door or window being left open or a pet being left in a protected area. If the fault cannot be rectified it is possible to omit faulty zones but this should only be used as a last resort if the building is to be left unoccupied RINS 154 ISSUE-1 9 Example: 3) Changing Master Code Set panel (error tone will be heard). Unset panel (alarm LED will be flashing). View log to see which zones are faulty and investigate fault(s) if possible. Set panel, then or Enter then Enter then If no error tone heard, exit via normal route. If error tone heard: Fault tone will stop and Day LED will flash. Enter number(s) of zones to be omitted (1 to 6 ) Max of 5 zones. Entry / Exit timer will start again. Exit tone will continue. Exit building by normal route. Enter then Master User code, - 2 Bleeps (Factory set as 1234) then New Master User code, - 2 Bleeps then New Master User code. - 2 Bleeps Errors tones as in 2) above. 4) System Test Mode Enter This function performs a number of tests which are listed below. The next test is selected by pressing any numeric key. To exit test mode press the Shift key again. N.B If an Entry / Exit zone has to be omitted and your alarm system includes Walkthrough or Access zones, then the panel cannot be unset without first activating the alarm. If a zone has been omitted because a fault persists then call engineer. Test 8 5) Walk Test Mode MASTER USER FACILITIES The Master User has access to all the Limited User facilities as well as those listed below. **The Paragon Plus control panel has to be in day mode after resetting with the Master code for these additional features to be accessed.** 1) 2) 3) 4) All LEDs are switched on except the fault LED. The strobe is switched on. The bell is switched on The internal sounder is switched on Enter When the walk test mode is enabled the chime LED will flash. If the panel is then full set or part set each active zone will cause a chime when triggered. This enables all the zone configurations to be walk tested individually. The walk test mode is cleared when the panel is unset. 1) Resetting alarm LED after an Activation To clear flashing Alarm LED Enter Master User (Factory set as 1234) or Limited User (Factory set as 5678) 2) Changing Limited User Code Enter then Master User code - 2 Bleeps (Factory set as 1234) then New Limited user code - 2 Bleeps then New Limited user code again - 2 Bleeps The day led will flash when this function is entered and an acknowledge tone will be sounded after each code has been entered. If an incorrect key is entered an error tone will be given and the function ended. 10 RINS 154 ISSUE-1 11