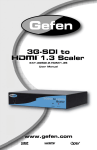
1
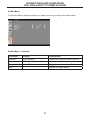
®
VGA Audio
to
HDMI Scaler
EXT-VGAAUD-2-HDMIS
User Manual
www.gefen.com
ASKING FOR ASSISTANCE
Technical Support:
Telephone
(818) 772-9100
(800) 545-6900
Fax
(818) 772-9120
Technical Support Hours:
8:00 AM to 5:00 PM PST Monday thru Friday PST
Write To:
Gefen LLC
c/o Customer Service
20600 Nordhoff St
Chatsworth, CA 91311
www.gefen.com
[email protected]
Notice
Gefen, LLC reserves the right to make changes in the hardware, packaging, and
any accompanying documentation without prior written notice.
VGA Audio to HDMI Scaler is a trademark of Gefen LLC
© 2011 Gefen, LLC. All rights reserved.
All trademarks are the property of their respective owners.
Rev A7
CONTENTS
1
Introduction
2
Features
3
Panel Layout
4
Panel Description
5
Connecting And Operating The VGA Audio To HDMI Scaler
6
Navigating The OSD
7
PC Menu
8
Color Menu
9
Output Menu
10 OSD Menu
11 Audio Menu
12 Information Menu
13 Specifications
14 Warranty
INTRODUCTION
Congratulations on your purchase of the VGA Audio to HDMI Scaler. Your
complete satisfaction is very important to us.
Gefen
Gefen delivers innovative, progressive computer and electronics add-on solutions
that enhance integration, extension, distribution and conversion technologies.
Gefen’s reliable, plug-and-play products supplement cross-platform computer
systems, professional audio/video environments and HDTV systems of all sizes
with hard-working solutions that are easy to implement and simple to operate.
The Gefen VGA Audio to HDMI Scaler
Convert PC audio/video to full-screen HDMI with simultaneous analog & digital
audio output.
Upscale an analog video signal from a computer or VGA source to a high quality
digital HD display. The Gefen VGA Audio to HDMI Scaler supports a range of
video resolutions up to 1080p. Also, it will take digital TOSLINK or analog 3.5mm
mini-Stereo audio as input, and simultaneously output the audio signal in the
same format. A comprehensive on-screen display (OSD) menu allows intuitive
control over a range of A/V operations.
How It Works
Connect a VGA source to the Scaler input with a VGA cable. Next, connect
the analog or digital audio input/output ports using 3.5mm mini-Stereo cable.
Connect TOSLINK output from a digital audio source to TOSLINK input on the
Scaler using TOSLINK cable. Finally, connect an HDMI-compliant display to the
the HDMI output port. Audio signals pass to the amplifier from the Scaler through
the audio cables, taking either analog or digital audio and embedding it into the
HDMI output.
Power up the Scaler by plugging in the 5V DC line from the power supply. A clear
picture will be displayed on the display.
1
FEATURES
Features
•
Scales any PC resolution (VGA ~ WUXGA) to SD / HD HDMI (480i ~ 1080p)
•
Automatically detects and matches the native resolution of the connected
display
•
Provides output picture adjustment of many parameters including contrast,
brightness, hue, saturation, sharpness, RGB (color tone) level and aspect
ratio.
•
Supports analog stereo and multi-channel audio up to 6 channels (digital
only)
Package Includes
(1) VGA Audio to HDMI Scaler
(1) 6 ft Mini Stereo Audio Cable
(1) 6 ft SVGA to SVGA Cable (M-F)
(1) 5V DC Power Supply Adaptor
(1) User’s Manual
NOTE: The number of audio channels that are output by the VGA Audio to
HDMI with Scaler depends on the audio that is input. In the case of an analog
signal, stereo input passes through unmodified to the 3.5mm mini-stereo output,
converted to 2-channel LPCM digital audio on the HDMI and TOSLINK output
connectors. In the case of digital Multi-channel audio input formats, such as
Dolby Digital 5.1/AC3 and Bitstream Audio these are passed unmodified to the
TOSLINK and HDMI outputs, and not to the 3.5mm analog output.
2
PANEL LAYOUT
Front Panel
1
2
3
4
5
6
Back Panel
8
9
11
10
3
12
7
PANEL DESCRIPTION
1
I/R Port
Use this port as the focus point for the Remote Control
2
L/R Stereo Analog Audio Output
Connect the PC 3.5mm phone jack output port to the analog audio input port of
your equipment
3
Optical (TOSLINK) Output
Connect the optical output port to the digital audio input port of your amplifier
4
HDMI Output
Connect the HDMI output port to the HDMI input port of your display such like
HDTV
5
Menu Button
Press the MENU button to bring up OSD operation menu
6
Decrease Button
On the first tier of OSD menu, use the – button to move down the highlighted
item for selection. (Use + and – buttons to toggle between setting values.)
7
Increase Button
On the first tier of OSD menu, use the + button to move up the highlighted item
for selection. (Use + and – buttons to toggle between setting values.)
8
Power LED
When the LED is lit it shows that the unit is powered
9
5V DC Power Receptacle
Plug the 5V DC power supply into the unit here
10 VGA Input
Connect this PC input D-Sub (15-pin VGA) port to the VGA output port of the
source equipment such as a PC
11 Optical (TOSLINK) Input
Connect the optical input port to the digital audio output port of your source
equipment
12 L/R Stereo Analog Audio Input
Connect the PC 3.5mm phone jack input port to the analog audio output port of
your source equipment
4
CONNECTING AND OPERATING
THE VGA AUDIO TO HDMI SCALER
How to Connect the VGA Audio to HDMI Scaler
1. Connect the video source via a DE-15 connector (VGA) to the VGA input on
the back of the VGA Audio to HDMI Scaler.
2. Connect the HDMI output from the VGA Audio to HDMI Scaler to a Hi Def TV
3. Connect the 3.5mm stereo analog audio input to the analog audio output port of
the audio source.
4. Optionally connect a TOSLINK cable from the optical input of the VGA Audio to
HDMI Scaler to the output of the audio source.
5. Connect the included 5V DC power adapter to the power receptacle on the
VGA Audio to HDMI Scaler.
6. The LED on the front of the unit should light and a clear picture should
appear on the display with audio.
How to Operate the VGA Audio to HDMI Scaler
The VGA Audio to HDMI Scaler provides an On-Screen Display (OSD), allowing
you to navigate through the various functions.
NOTE: If a VGA input signal is not detected, a “No Signal” message will be
displayed on the screen. In order to view the OSD, a source must be connected
to the VGA port.
Button MENU Display / Hide Menu (OSD)
Item Selection / Enter
Holding down MENU button during power-on
will reset the scaler to the Native resolution of the display.
+
Move Menu cursor DOWN in submenus
Increase parameter values
-
Move Menu cursor UP in submenus
Decrease parameter values
*Auto-adjust function: Hold down - button to optimize display settings.
Function
5
CONNECTING AND OPERATING
THE VGA AUDIO TO HDMI SCALER
Navigating the OSD (On-Screen Display)
Once the VGA Audio to HDMI Scaler is connected and video is being displayed,
press the MENU button on the front panel to bring up the OSD. The OSD is
comprised of six menus, each identified by an icon on the left-hand side. As
each menu is selected, a highlighted box will appear around the menu icon. The
first of these menus is the PC Menu:
Each time the OSD is displayed by pressing the MENU button, the PC Menu icon
will be the first icon to be highlighted. Use the + and - buttons on the front of the VGA Audio to HDMI Scaler to highlight
the desired menu icon. In order to select the available functions within a menu,
press the MENU button again. After the MENU button is pressed, the first
function in the list will be selected:
6
CONNECTING AND OPERATING
THE VGA AUDIO TO HDMI SCALER
To access the function parameters in order to change the values, press the
MENU button a third time:
Use the + or - button on the front panel of the VGA Audio to HDMI Scaler to
change the value of each parameter. The - button will decrease values or move
backward through a list of options. Pressing the + button will increase parameter
values or move forward through a list of options. PC Menu - Options
Function
Range
Description
Contrast
0 - 100
Adjust picture contrast
Brightness
0 - 100
Adjust picture brightness
H-Position
0 - 100
Adjusts the horizonal position of the picture
V-Position
0 - 100
Adjusts the vertical position of the picture
Clock
0 - 100
Clock adjustment for focus
Phase
0 - 100
Phase adjustment for focus
Scale
Full, Overscan,
Underscan,
Pan Scan
Image control - see details below
Exit
Full:
-
Return to PC Menu
Stretches the image to fill the screen.
Overscan:
Stretches the image to just beyond the border of the output resolution (a portion of the image may be cropped).
Underscan:
Stretches the image to just within the border of the output resolution (a black border will appear around the outside edges).
Pan Scan:
Stretches the image to 4:3 aspect ratio without underscan.
7
CONNECTING AND OPERATING
THE VGA AUDIO TO HDMI SCALER
Color Menu
The Color Menu allows for adjustment of Color Temperature. Color Temperature
will shift the color levels in the picture to a cooler color (blue-shifted) or a warmer
color (red-shifted). Normal setting is the default setting.
Individual Red, Green, and Blue values can also be adjusted. In order to access
individual RGB values, set the Color Temperature function to User.
Color Menu - Options
Function
Range
Description
Color Temp.
Warm, Cool, Normal, User
Set predefined color temperature
profiles
Red
0 - 100
Adjust Red color saturation
Green
0 - 100
Adjust Blue color saturation
Blue
0 - 100
Adjust Green color saturation
Exit
--
Return to Color Menu
8
CONNECTING AND OPERATING
THE VGA AUDIO TO HDMI SCALER
Output Menu
The Output Menu allows the output resolution to be adjusted. The default output
resolution of the VGA Audio to HDMI Scaler is NATIVE mode. In NATIVE mode,
the scaler’s HDMI output will be identical to the native mode of your display.
What Is Native Mode?
The Native Mode of a display is a single fixed resolution. This resolution
represents the optimal display quality at which a display can display a picture.
This can only occur when the input matches the Native Resolution of the display.
Note that in order to view the scaled output, the display must be able to support
that resolution. If the display does not support the output resolution, the display
will go blank. If this happens, unplug the VGA Audio to HDMI Scaler, press
and hold the Menu button while applying power to the unit. This procedure will
restore the scaler to NATIVE mode.
Output Menu - Options: Output Resolutions / Equivalent Timings
VGA
640x480
576i
720x576
SVGA
800x600
576p
720x576
XGA
1024x768
720p50
1280x720
SXGA
1280x1024
1080i50
1920x1080
UXGA
1600x1200
1080p60
1920x1080
SXGA+
1400x1050
NATIVE
(DISPLAY)
480i
720x480
WXGA
1280x800
480p
720x480
WSXGA
1680x1050
720p
1280x720
WUXGA
1920x1200
1080i
1920x1080
2K
2048x1080
1080p
1920x1080
9
CONNECTING AND OPERATING
THE VGA AUDIO TO HDMI SCALER
OSD Menu
It is possible to change the way the OSD is displayed on the screen through the
OSD Menu. OSD tranparency, I/R channel, OSD delay and positioning can be
managed through this menu.
OSD Menu - Options
Function
Range
Description
H-Position
0 - 100
Adjust the horizontal position of the OSD Menu.
V-Position
0 - 100
Adjust the vertical position of the OSD Menu.
TimeOut
0 - 100
How long the OSD will be displayed (in seconds)
after pressing the MENU button.
Background
0 - 100
OSD Transparency setting. 0 represents highest
tranparency. A background setting of 100 will
display the OSD as opaque.
Remote
Channel
0-3
I/R Channel setting. NOTE: This setting must
match the I/R setting of the remote (not included).
Exit
--
Return to OSD Menu
10
CONNECTING AND OPERATING
THE VGA AUDIO TO HDMI SCALER
Audio Menu
The Audio Menu allows selection of audio sources, muting and audio delay.
Audio Menu - Options
Function
Range
Description
Source
L/R, Optical
Select the external audio source.
Delay
Off, 40ms, 110ms, 150ms
Sets the audio delay.
Sound
On, Off
Toggles sound on and off.
Exit
--
Return to Audio Menu.
11
CONNECTING AND OPERATING
THE VGA AUDIO TO HDMI SCALER
Information Menu
The Information Menu provides details on input and output video formats in
addition to the firmware version. Note that there are no adjustable functions in
this menu.
Information Menu
Function
Range
Description
Source
--
Displays the source type.
Input
--
Displays the current input resolution.
Output
--
Displays the current output resolution.
Version
--
Displays the current version of firmware used
by the VGA Audio to HDMI Scaler.
NOTE: In order to close the OSD before the timeout (see page 10), navigate to
this screen and press the Menu button on the VGA Audio to HDMI Scaler.
Alternately, use the Up and Down buttons on the VGA Audio to HDMI Scaler to
navigate to another menu.
12
SPECIFICATIONS
Video Bandwidth......................................................................................165 MHz
Video Input Connector..........................................................DE-15F type, 15-pin
Audio Input Connector (analog).....................1 x 3.5mm Mini-Stereo phone jack
Audio Format.................................................2-channel PCM and bitsream audio
Audio Input Connector (digital).................................1 x TOSLINK (optical fiber)
Audio/Video Output Connector..................................1 x HDMI Type ‘’A’’, 19-pin
Audio Output Connector (analog)..................1 x 3.5mm Mini-Stereo phone jack
Audio Output Connector (digital)..............................1 x TOSLINK (optical fiber)
Power Supply...............................................................................................5V DC
Power Consumption.......................................................................................13W
Dimensions............................................................................3.9’’ W x 1’’ H x 6’’ D
Shipping Weight..........................................................................................2.0 lbs
13
WARRANTY
Gefen warrants the equipment it manufactures to be free from defects in material
and workmanship.
If equipment fails because of such defects and Gefen is notified within two (2)
years from the date of shipment, Gefen will, at its option, repair or replace the
equipment, provided that the equipment has not been subjected to mechanical,
electrical, or other abuse or modifications. Equipment that fails under conditions
other than those covered will be repaired at the current price of parts and labor in
effect at the time of repair. Such repairs are warranted for ninety (90) days from
the day of reshipment to the Buyer.
This warranty is in lieu of all other warranties expressed or implied, including
without limitation, any implied warranty or merchantability or fitness for any
particular purpose, all of which are expressly disclaimed.
1. Proof of sale may be required in order to claim warranty.
2. Customers outside the US are responsible for shipping charges to and from
Gefen.
3. Copper cables are limited to a 30 day warranty and cables must be in their
original condition.
The information in this manual has been carefully checked and is believed to
be accurate. However, Gefen assumes no responsibility for any inaccuracies
that may be contained in this manual. In no event will Gefen be liable for
direct, indirect, special, incidental, or consequential damages resulting from
any defect or omission in this manual, even if advised of the possibility of such
damages. The technical information contained herein regarding the features and
specifications is subject to change without notice.
For the latest warranty coverage information, refer to the Warranty and Return
Policy under the Support section of the Gefen Web site at www.gefen.com.
PRODUCT REGISTRATION
Please register your product online by visiting the Register Product page
under the Support section of the Gefen Web site.
14
Rev A7
20600 Nordhoff St., Chatsworth CA 91311
1-800-545-6900
818-772-9100
www.gefen.com
Pb
This product uses UL listed power supplies.
fax: 818-772-9120
[email protected]