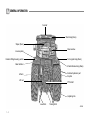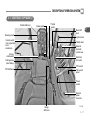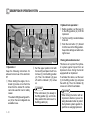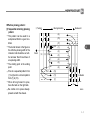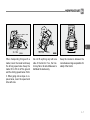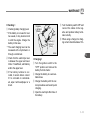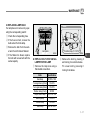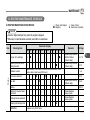
1
FOREWORD FOReWoRD Thank you very much for purchasing our tractor, which, we feel sure, will give you many years of trouble free service. The introduction in this manual sets out the correct manner of operating, maintaining and checking the tractor to ensure long-term durability. Please ensure correct operation of the tractor as incorrect operation can cause substantial mechanical damage as well as cause accidents with the associated injuries. Please note that in some cases differences can exist between this manual and your tractor due to the manufacture’s policy of constant product improvement. In the event that you encounter a problem not covered by this manual please contact your nearest dealer who will assist you in resolving your problem. CALIFORNIA Proposition 65 Warning WARNING The Engine Exhaust from this product contains chemicals known to the state of California to cause cancer, birth defects or other reproductive harm. WARNING SIGNS IN THIS MANUAL The following warning signs in this manual draw additional attention to items of importance for the safe and correct operation of the tractor. SIGN MEANING OF THE SIGN DANGER This indicates that a condition may result in harm, serious injury or death to you or other persons if the warning is not heeded. Follow the advice provided with the warning. WARNING Hazard or unsafe practice that can lead to severe injury or death. CAUTION Hazard or unsafe practice that can lead in injury or death. IMPORTANT Instructions for the correct operation of the machine which, if followed, will ensure that it performs at it’s best. All information, illustrations and specifications in this manual are based on latest information available at the time of publication. The right is reserved to make changes at any time without notice. SAFETY PRECAUTIONS 1. TRACTOR IDENTIFICATION The engine number is stamped on the left hand side of the engine block. The chassis number is shown on the left hand side of the tractor as shown in the drawing. Carved position of the Engine type or Number WARRANTY OF THE PRODUCT The manufacturer warrants this product and full details of the warranty are provided on a separate warranty schedule. SERVICE Service is available from any TYM dealer in the country. PARTS T75O101A Carved position of the chassis number To obtain spare parts please contact your nearest dealer and give him the details listed below. Tractor model Tractor serial number Tractor engine number Part number and description Quantity required - SAFETY PRECAUTIONS 2. ABOUT THIS MANUAL This manual has been prepared to assist you in following/adopting the correct procedure for running-in operation and maintenance of your new Tong Yang Moolsan CO., LTD (Here in after refer to TYM) tractor. Your tractor has been designed and built to give maximum performance, with good fuel economy and ease of operation under a wide variety of operating conditions. Prior to delivery, The tractor was carefully inspected, both at the factory and by your TYM Dealer/Distributor, to ensure that it reaches you in optimum conditions .To maintain this condition and ensure trouble free performance. it is important that the routine services, as specified in this manual, are carried out at the recommended intervals. - Read this Manual carefully and keep it in a convenient place for future reference. If at any time you require advice concerning your tractor, do not hesitate to contact your Authorized TYM dealer/Distributor. He has trained personnel, genuine parts and necessary equipments to undertake all your service requirements. Manufacturer’s policy is one of continuous improvement, and the right to change prices, specifications or equipments at any time without notice is reserved. All data given in this book is subject to production variations. Dimensions & weight are approximate only and the illustrations do not necessarily show tractors in standard condition. For exact information about any particular tractor, please consult your TYM dealer/Distributor. SAFETY PRECAUTIONS 3. INTRODUCTION & DESCRIPTION TRACTOR AN INTRODUCTION The word, ’tractor’ has been derived from ‘traction’ which means pulling. A tractor is required to pull or haul an equipment, implement or trolley which are coupled to the tractor body through suitable linkage. A tractor can also be used as a prime mover as it has a power outlet source which is also called Power Take or PTO shaft. In this book the operating, maintenance and storage instructions for all models of TYM Diesel tractors has been complied. This material has been prepared in detail to help you in the better understanding of maintenance and efficient operation of the machine. If you need any information not given in this manual, or require the services of a trained mechanic, please get in touch with the TYM Dealer/ Distributor in your locality. Dealer/ Distributors are kept informed of the latest methods of servicing tractors. They stock genuine spare parts and are backed by the Company’s full support. Through this manual. The use of the terms LEFT, RIGHT, FRONT and REAR must be understood, to avoid any confusion when following the introductions. The LEFT and RIGHT means left and right sides of the tractor when facing forward in the driver’s seat, Reference to the FRONT indicates the radiator end of the tractor, while the REAR, indicates the drawbar end. When spare parts are required, always specify the tractor and engine serial number when ordering these parts. (See illustration A).This will facilitate faster delivery and help ensure that the correct parts for your particular tractor is received. The tractor serial number is punched on a plate attached to the left hand side of the engine body (Illust. A), For easy reference, we suggest you to write the number in the space provided in the owner’s personal data. Right turn (Clockwise) Left turn (Counterclockwise) Right Rear Front Left J10O207A - SAFETY PRECAUTIONS DESCRIPTION ▶General construction The transmission case, Clutch, Clutch housing, Engine and Front Axle Support are bolted together to form a rigid unit. ▶Front Axle & Wheels The 4WD front axle is a center-pivot, reverse Eliot type. The front wheel drive mechanism is incorporated as a part of the axle. The front wheel drive power is taken off the rear transmission and transmitted to the differential in the front axle where the power is divided into right and left and to the respective final cases. In the final cases, the transmitted revolution is reduced by the level gears to drive the front wheel. The 4WD mechanism with level gears provides wider steering and greater durability. - ▶Engine The tractors are fitted with fuel efficient Turbo charged engines with 4cylinders of T854/T954/T1054 designed by DOOSAN INFRACORE Engines Company. ▶Clutch and Transmission A Torsional damper is used on these tractors. Tractor with IPTO(Independent Power Take Off) are fitted with hydraulic Clutch Assy. • The transmission Gear box has T854/T954/T1054(SP) – Thirty two Forward, Thirty two Reverse. Twenty speeds of with high-low selector lever. Presently, TYM Tractors are fitted with partial synchro mesh type gears. • The transmission Gear box has T954/T1054(SC) TYM Twelve(12) Forward, and Reverse. Presently, TYM Tractors are fitted with partial synchro mesh type gears. ▶BRAKES TYM tractors are provided with independent disc brakes operated by two road travel. Hand brake lever is fitted for parking. ▶REAR AXLE & WHEELS This is mounted on ball bearings and is enclosed in removable housing which are bolted to the transmission case. The rim & Disc fitted with Rear tires are bolted to the outer flange of Rear Axle. ▶HYDRAULIC SYSTEM & LINKAGES TYM tractors are fitted with Live (i.e. system is in operation even when clutch is disengaged.) independent, very touch of hydraulic System. Three point Linkages can be used for category 2 type of implements. SAFETY PRECAUTIONS ▶STEERING It consists of Hydrostatic Power steering system, which has a hydraulic cylinder and tandem type hydraulic pump. ▶ELECTRICAL SYSTEM A 12 Volt Lead Acid Propylene Battery is used to activate the Engine through the Starter Motor and the Electrical system comprising Horn, Head Lamp. Side indicator Lamps, Plough Lamp, Brake Light, Gauge lamp, Hazard Lamp. Generator or Alternator, Fuse box also from part of the Electrical system. WARNING When operating the tractor at High speed, Do not attempt to make sharp turns by using the brakes. This may result in overturning of the tractor causing serious injury or DEATH. 4. OWNER ASSISTANCE We at TYM CO.,LTD and your TYM Dealer/Distributor wants you to be completely satisfied with your investment. Normally any problems with your equipment will be handled by your Dealer/Distributor’s Service Departments, however, misunderstanding can occur. If you feel that your problem has not been handled to your satisfaction, we suggest the following. Contact the owner or General Manager of the Dealership, explain the problem, and request assistance. When additional assistance is needed, Your Dealer/Distributor has direct access to your office. If you cannot obtain satisfaction by doing this, contact the TYM CO.,LTD. Office and provide them with; Your name, address and telephone number Model and tractor serial number Dealer/Distributor Name & Address Machine purchase date and Hours used Nature of problem Before contacting TYM CO.,LTD office, be aware that your problem will likely to be resolved in the Dealership using the Dealer’s/Distributor’ s facilities, equipment and personnel. So it is important that your initial contact be with the Dealer/Distributor. - SAFETY PRECAUTIONS 5. ROPS (Roll Over Protective Structures) ROLL OVER PROTECTIVE STRUCTURES (ROPS) TYM tractors are equipped with a frame for the protection of operators. In the case of cab tractors the frame is incorporated in the cab structure. The objective of the frame or cab structure is to protect the operator in the event of a roll over and they are designed to support the entire weight of the tractor in that event. Each TYM ROPS frame or cab structure is designed and has been tested to meet industry and or government standards. Included in these tests were all mounting bases and bolts or other fasteners. DANGER • For ROPS frames to be effec- tive and protect the operator, the seat belt provided must be worn in order to keep operators within the ROPS protected area in the event of a roll over. Failure to use the seat belt can still cause serious injury or death. On some models the ROPS frame has a fold down feature, which can be used to enter low buildings etc. Take care when lowering the upper section of the ROPS frame and take extreme care while driving the tractor with the ROPS frame lowered. Do not wear the seat belt with the ROPS lowered and please remember that the fold down facility is for special circumstances only and must not be lowered for general use. - USE OF THE TRACTOR WITH THE ROPS LOWERED CAN CAUSE FATAL INJURIES As the ROPS frame or cab together with the seat belt was designed to meet certain standards, they must be maintained in good order and condition. To achieve this objective, both the structure and the seat belt should be inspected on a regular basis. (Every time the tractor is serviced) In the event that the seat belt is damaged or frayed, it should be replaced and in the event that the ROPS frame or any part of the mounting structure is damaged or cracked, the faulty component must be replaced with a new unit. Such a unit must meet all of the test criteria of the original unit. Fitment of an inferior item or items affects the certification of the entire ROPS structure and the effectiveness of the structure in the event of an accident. Drilling or welding of the ROPS structure is forbidden. SAFETY PRECAUTIONS DAMAGE OF THE ROPS SEAT SLIDING WARNING T75O103A If the tractor has rolled over or the ROPS has damaged (such as striking an overhead object during transport), It must be replaced to provide the original protection. After an accident, check for damages to the 1.ROPS. 2.Seat. 3.seat belt & seat mountings. Before you operate a tractor, replace all damaged parts. WARNING WARNING Never attach chains, ropes to the ROPS for pulling purposes; this will cause the tractor to tip backwards. Always pull from the tractor drawbar. Be careful when driving through door opening or under low overhead objects. Make sure there is sufficient overhead clearance for the ROPS fatal injuries. Do not weld, drill or straighten the ROPS. If the ROPS is removed or replaced, make certain that the proper hardware is used to replace the ROPS and the recommended torque values are applied to the attaching bolts. WARNING Always wear your seat belt if the tractor is equipped with ROPS. Seat Belt Forward / Backward adjustment lever J10O101A Before operating a tractor it is important to adjust the seat to the most comfortable position & check whether it is properly locked in its position. NOTE Do not use solvents to clean the seat. Use warm water with a little detergent added. CAUTION Do not put a hand between the seat and the slides when adjusting the seat position. You can get injured unexpectedly. - SAFETY PRECAUTIONS SEAT BACK RECLINING To select Seat position, move Adjusting lever and slide Seat closer to or away from Dash panel and controls. CUSHION STRENGTH ADJUSTMENT Seat Belt Seat Belt Knob for weight adjustment DANGER • Check whether the seat properly locked in its position before driving the tractor. DANGER • Always use the seat belt when the ROPS is installed. Do not use the seat belt if a foldable ROPS is down or there is no ROPS. Check the seat belt regularly and replace if frayed or damaged. - 10 Seat back angle adjustment lever J10O102A To change the seatback angle, raise The lever on the left of the seat. Then, adjust the seatback angle with The lever pulled. Release the lever After adjustment . Make sure that the Lever is returned and the seat is firmly fixed after adjustment. T72O107A The seat cushion can be adjusted According to the weight of the driver. Turning the cushion adjustment lever Counterclockwise to the 50kg position Makes the cushion lighter, and turning the lever clockwise to the 130kg position makes the cushion heavier. SAFETY PRECAUTIONS 1. SAFETY INSTRUCTIONS RECOGNIZE SAFETY INFORMATION SIGNAL WORDS READ SAFETY INSTRUCTION DANGER WARNING CAUTION T74O201A This symbol means ATTENTION! YOUR SAFETY IS INVOLVED. The message that follows the symbol contains important information about safety. Carefully read the message. T74O202B A signal word "DANGER, WARNING OR CAUTION" is used with safety alert symbol. DANGER identifies the most serious hazards. Safety signs with signal Word "DANGER OR WARNING" are typically near specific hazards. General precautions are listed on CAUTION safety signs. T72O203A Carefully read all safety instructions given in this manual for your safety. Tempering with any of the safety devices can cause serious injuries or death. Keep all safety signs in good condition. Replace missing or damaged safety signs. Keep your tractor in proper condition and do not allow any unauthorized modifications to be carried out on the tractor, which may impair the function/safety and affect tractor life. - 11 SAFETY PRECAUTIONS PROTECTION CHILDREN T72O204A Keep children and others away from the tractor while operating. BEFORE YOU REVERSE: Look behind tractor for children. Do not let children to ride on tractor or any implement. - 12 USE OF ROPS AND SEAT BELT T72O205A The Roll Over Protective Structure (ROPS) has been certified to industry and/or government standards. Any damage or alternation to the ROPS, mounting hard-ware, or seat belt voids the certification and will reduce or eliminate protection for the operator in the event of a roll-over. The ROPS, mounting hardware, and seat belt should be checked after the first 100 hours of tractor and every 500 hours there- after for any evidence of damage, wear or cracks. In the event of damage or alteration, the ROPS must be replaced prior to further operation of the tractor. The seat belt must be worn during machine operation when the machine is equipped with a certified ROPS. Failure to do so will reduce or eliminate protection for the operator in the event of a roll over. SAFETY PRECAUTIONS PRECAUTION TO AVOID TIPPING T72O206A Do not drive where the tractor could slip or tip. Stay alert for holes and rocks in the terrain, and other hidden hazards. Slow down before you make a sharp turn. Driving forward out of a ditch or mired condition could cause tractor to tip over backward. Back out of these situations if possible. PARK TRACTOR SAFELY T72O207A Before working on the tractor; Lower all equipment to the ground. Stop the engine and remove the key. KEEP RIDERS OFF TRACTOR T72O208A Do not allow riders on the tractor. Riders on tractor are subject to injury such as being stuck by foreign objects and being thrown off of the tractor. - 13 SAFETY PRECAUTIONS HANDLE FUEL SAFELY AVOID FIRES T72O209A Handle fuel with care; it is highly flammable. Do not refuel the tractor while smoking or near open flame or sparks. Always stop engine before refueling tractors. Always keep your tractor clean of accumulated grease, and debris. Always clean up spilled fuel. - 14 STAY CLEAR OF ROTATING SHAFTS T72O210A Entanglement in rotating shaft can cause serious injury or death. Keep PTO shield in place at all times. Wear close fitting clothing. Stop the engine and be sure PTO drive is stopped before making adjustments, connections, or cleaning out PTO driven equipment. ALWAYS USE SAFETY LIGHTS AND DEVICES T72O211A Use of hazard warning lights and turn signals are recommended when towing equipment on public roads unless prohibited by state or local regulations. Use slow moving vehicle (SMV) sign when driving on public road during both day & night time, unless prohibited by law. SAFETY PRECAUTIONS PRACTICE SAFE MAINTENANCE T72O212A Understand service procedure before doing work. Keep the surrounding area of the tractor clean and dry. Do not attempt to service tractor when it is in motion. Keep body and clothing away from rotating shafts. Always lower equipment to the ground. Stop the engine. Remove the key. Allow tractor to cool before any work repair is caused on it. AVOID HIGH-PRESSURE FLUIDS Securely support any tractor elements that must be raised for service work. Keep all parts in good condition and properly installed. Replace worn or broken parts. Replace damage/missing decals. Remove any buildup of grease or oil from the tractor. Disconnect battery ground cable(-) before making adjustments on electrical systems or welding on tractor. T72O213A Escaping fluid under pressure can penetrate the skin causing serious injury. Keep hands and body away from pinholes and nozzles, which eject fluids under high pressure. If any fluid is injected into the skin. Consult your doctor immediately. - 15 SAFETY PRECAUTIONS PREVENT BATTERY EXPLOSIONS PREVENT ACID BURNS If you spill acid on yourself; 1. Flush your skin with water. 2. Flush your eyes with water for 10-15 minutes. Get medical attention immediately. T72O214A Keep sparks, lighted matches, and open flame away from the top of battery. Battery gas can explode. Never check battery charge by placing a metal object across the poles. - 16 T72O215A Sulfuric acid in battery electrolyte is poisonous. It is strong enough to burn skin, cause holes in clothing and cause blindness if found entry into eyes. For adequate safety always; 1. Fill batteries in a well-ventilated area. 2. Wear eye protection and acid proof hand gloves. 3. Avoid breathing direct fumes when electrolyte is added. 4. Do not add water to electrolyte as it may splash off causing severe burns. SAFETY PRECAUTIONS BATTERY DISCONNECT SERVICE TRACTOR SAFELY T74O224A 1.When working with your tractors electrical components you must first disconnect the battery cables. 2.To ensure that there are no accidents from sparks you must first disconnect the negative battery cable. T72O216A Do not wear a necktie, scarf or loose clothing when you work near moving parts. If these items were to get caught, severe injury could result. Remove rings and other jeweler to prevent electrical shorts and entanglement in moving parts. WORK IN VENTILATED AREA T72O217A Do not start the tractor in an enclosed building unless the doors & windows are open for proper ventilation, as tractor fumes can cause sickness or death. If it is necessary to run an engine in an enclosed area remove the exhaust fumes by connecting exhaust pipe extension. - 17 SAFETY PRECAUTIONS TRACTOR RUNAWAY SAFETY STARTER SWITCH Emergency exits 1. The tractor can start even if the transmission is engaged position causing tractor to runaway and serious injury to the people standing nearby the tractor. 2. For additional safety keep the pull to stop knob (Fuel shut off control) in fully pulled out position. Transmission in neutral position, Foot brake engaged and PTO lever in disengaged position while attending to Safety Starter Switch or any other work on tractor. 1. Clutch operated safety switch is provided on all tractors which allow the starting system to become operational only when the Clutch pedal is fully pressed. 2. Do not By-pass this safety starter switch or work on it. Only Authorized Dealers are recommended to work on safety starter switch. 3. On some models Safety Starter switch is provided on transmission High-low shifter lever and in PTO shifter lever. The tractor can be started only if High-low shifter lever is in neutral position. If exit from the cab side doors is blocked (following an accident or vehicle overturn) the alternative safety exits are indicated by decals. CAUTION • Safety Starter Switch is to be replaced after every 2,000 hours/4 years, whichever is earlier. - 18 T74O223A The possible safety exits are: • Rear window hatch (All tractors) • Front window (for versions with openable front window). SAFETY PRECAUTIONS Safety precautions when using the loader T74O225A Never let anyone get in the loader and use the loader as a workbench. Otherwise, it may lead to a fatal injury or even death. T74O226A Do not stand under the lifted loader or get close to it. Also, lower the loader arm onto the ground before leaving the tractor. Otherwise, it may lead to a fatal injury or even death. T74O227A When attaching or detaching the loader, fix all parts which are connected to the bucket and boom. The bucket or boom can be accidentally dropped down, leading to an injury or even death. - 19 SAFETY PRECAUTIONS T74O228A IMPORTANT ROPS (Roll Over Protective Structure), sun canopy or cabin are not a FOPS (Falling Object Protective Structure). It never can protect the riders against falling objects. Avoid driving the vehicle into a dangerous area such as falling rocks zone. - 20 T74O229A Do not allow loader arms or attachment to contact electrical power lines. Electrocution will cause serious injury or death. T74O230A Never carry a big object with the loader unless a proper implement is attached. Keep a carried object low during driving. Otherwise, it may lead to an injury or even death. SAFETY PRECAUTIONS SAFE OPERATION OF YOUR TRACTOR T74O231A When attaching or detaching the loader, fix all parts which are connected to the bucket and boom. The bucket or boom can be accidentally dropped down, leading to an injury or even death. The manufacturer of your tractor has made every effort to make it as safe as is humanly possible. Beyond this point it is the responsibility of the operator to avoid accidents and we ask that you read and implement our suggestions for your safety. Ensure that only trained and competent operators use this tractor and ensure that they are fully conversant with the machine and aware of all it’ s control and safety features. Operators should not operate the tractor or associated machinery while tired or untrained. To avoid accidents please ensure that the operator wears clothing which will not get entangled in the moving parts of the tractor or machine and protect him or her from the elements. When spraying or using chemicals, please ensure that clothing and protective equipment is worn which prevents respiratory or skin problems. For full details consult the manufacturer of the chemicals. To avoid lengthy exposure to noise ensure that ear protection is worn. If adjustment to the tractor or machinery need to be made ensure the tractor or machine are turned off beforehand. Use of certified Roll Over Protection Structure (ROPS) is a must while operating a tractor. Use of seat belt is a must while operating a tractor. In summary, ensure at all times that the safety of the operator and any other worker is paramount. Ensure no one is between the tractor and a towed vehicle (trailer or implement). - 21 SAFETY PRECAUTIONS SAFETY TIPS DURING MAINTENANCE 1. At least on a daily basis check all oil levels. Water level in the radiator and electrolyte level in the battery and perform services according to the service schedule. 2. Ensure tire pressure are even and the correct pressure for the job being done is maintained. 3. Check to ensure that the all controls and preventative mechanisms of the tractor and implement work correctly and effectively. 4. Ensure that an adequate set of the correct tools is available for maintenance and minor repairs. 5. Ensure that all service work and repairs are carried out on a flat area with a concrete or similar floor. Do not carry out service work on a tractor until it is switched off, and the parking brake applied and wheels choked. - 22 Where a tractor is started in a confined area, ensure that the area is well ventilated as exhaust gases are very harmful, and can cause death. 6. Do not work under raised implements. 7. When changing wheels or tires ensure that a suitable wheel stand is placed under the axle prior to removing the wheel and the wheels are chocked. 8. Where guards or shields need to be removed to perform a service or repair, ensure that the guard or shield is correctly reinstalled before starting the tractor. 9. Never refuel near a naked flame or with an overheated engine. Ensure to turn off Engine before refueling. 10.The cooling system operates under pressure, take care when removing the radiator cap on a hot engine to prevent being scalded by steam or hot water. Do not add water in the radiator when the engine is hot. Add water to the radiator only after the engine cools down completely. 11.To prevent fires keep the tractor including the engine clean and free from inflammable material and well away from fuels and other inflammable material. SAFETY PRECAUTIONS MOUNTING AND DEMOUNTING IMPLEMENTS 1. Ensure that all mounting and removal of implements is done on safe flat ground. Ensure no one is between the tractor and implement and do not get under the implement to avoid accidental injuries. 2. After mounting the implement, ensure that all sway chains are correctly adjusted and, where PTO shafts are used that the shaft is fitted and secured correctly. 3. Where heavy implements are used, ensure that the combination is well balanced or use proper ballast to achieve balance. 4. Before leaving the tractor at any time, lower the implement, stop the PTO shaft where applicable, set the parking brake and switch off the engine. 5. While operating the implements with the PTO keep all bystanders away from any moving parts and do not attempt to make adjustments while the machine is running. 6. Only the driver should ride on the tractor with the ROPS frame fitted and with the seat belt properly fastened. 7. Where young children are present, particular care should be taken and the tractor should not be moved until the whereabouts of all children is known. 8. Only trained operators should operate the tractor and so taking care to ensure that other workers are not injured. In particular they should take care during dusty operations, which will reduce visibility substantially. 9. Never start the tractor unless the transmission is out of gear, the operator is in the seat and all round safety has been checked. 10. Only operate the tractor seated in the drivers seat and never turn or brake suddenly at high speed as this can cause a roll-over and serious injury or death. 11. When traveling on a public road ensure that the tractor and driver both meet all laws relating to safety and licensing. When traveling with wide implements use red flags on the extremities and observe all legal including escort requirements. 12. When operating under adverse conditions, hilly terrain or on bad ground adjust the speed of the tractor to suit the conditions, safety comes first. Never drive down hill at high speed or with the transmission in neutral. Use of the braking capacity of the engine as well as the service brakes. Do not try to change gear going up or down a steep slope, select the correct gear before starting. 13. Take care when traveling uphill with a heavy implement to ensure that it does not overbalance and tip up the front end. - 23 SAFETY PRECAUTIONS 14. Never remove or modify the seat belt. 15. Never remove, modify or repair the ROPS frame. Please remember that a little bit of extra care can prevent serious injury or teath and avoid damage to your tractor. - 24 ▶The following precautions are suggested to help prevent accidents A careful operator is the best operator. Most accidents can be avoided by observing certain precautions. Read and take the following precautions before operating the tractor to prevent accidents. Tractor should be operated only by those who are responsible and properly trained to do so. 4. Fiberglass canopy does not give any protection. 5. To prevent falls, keep steps and platform clear of mud and oil. 6. Do not permit anyone but the operator to ride on the tractor. There is no safety place for extra riders. 7. Replace all missing, illegible or damaged safety signs. 8. Keep safety signs clean of dirt and grease. <THE TRACTOR> 1. Read the operator’s manual carefully before using the tractor. Lack of operating knowledge can lead to accidents. 2. Use an approved rollover bar and seat belt for safe operation. Overturning of a tractor without a rollover bar can result in death or injury. 3. Do not remove ROPS (Roll Over Protective Structure). Always use the seat belt. <servicing the Tractor> 1. keep the tractor in good operating condition for your safety. An improperly maintained tractor can be hazardous. 2. Stop the engine before performing any service on the tractor. 3. The cooling system operates under pressure, which is controlled by the radiator cap. It is dangerous to remove the cap while the system is hot. First turn the cap slowly to stop and allow the SAFETY PRECAUTIONS 4. 5. 6. 7. pressure to escape before removing the cap entirely. Do not smoke while the refueling the tractor. Keep away any type of open flame. The fuel in the injection system is under high pressure and can penetrate the skin. Unqualified persons should not remove or attempt to adjust a pump, injector, nozzle or any part of the fuel injection system. Failure to follow these instructions can result in serious injury. Keep open flame away from battery or cold weather starting aids to prevent fire or explosions. Do not modify or alter or permit anyone else to modify or alter this tractor or any of its components or any tractor functions. <Operating the tractor> 1. Before starting the tractor apply the parking brake, place the PTO (Power Take Off) lever in the “OFF” position, the hydraulic control levers in the downward position, the remote control valve levers in the neutral position(If fitted) and the transmission in neutral. 2. Do not start the engine or controls while standing besides the tractor. Always sit on the tractor seat when the engine or operating controls. 3. Safety starter switch. In order to prevent the accidental starting of the tractor, a safety switch has been provided. The starting system of the tractor is connected through this switch, which becomes operative only when the clutch pedal is depressed. On some models shuttle shifter lever and PTO button should also be in neutral position for completing the starting circuit. Do not bypass the safety starter switch. Consult your TYM tractor Dealer/Distributor if safety- starting switch malfunctions. 4. Avoid accidental contact with the gear shifter lever while the engine is running. Unexpected tractor movement can result from such contact. 5. Do not get off or climb the tractor while it is in motion. 6. Shut off the engine, remove the key and apply the parking brake before getting off the tractor. 7. Do not operate the tractor in an enclosed building without adequate ventilation. Exhaust fumes can cause death. 8. Do not park the tractor on a steep slope. 9. If power steering or Engine seizes to operate, stop the tractor immediately. - 25 SAFETY PRECAUTIONS 10. Pull only from the swinging draw bar or the lower link drawbar in the down position. Use only a drawbar pin that locks in place. Pulling from the tractor rear axle carriers or any point above the rear axle may cause the tractor’ s front end to lift. 11. If the front end of the tractor tends to rise when heavy implements are attached to the threepoint linkage, install front end or front wheel weights. Do not operate the tractor with a light front end. 12. Always use hydraulic position control lever when attaching equipments/implement and when transporting equipment. Be sure that the hydraulic couplers are properly mounted and will disconnect safely in case of accidental detachment of implement. 13. Do not leave equipment/implement in the raised position. - 26 14. Use the flasher/ Turn signal lights and Slow Moving Vehicle (SMV) signs when driving on public roads during both day and night time, unless prohibited by law. 15. Dim tractor lights when meeting a vehicle at night. Be sure the lights are adjusted to prevent the blinding on the eyes of coming vehicle operator. 16. Emergency stopping instruction; If tractor fails to stop even after application of brakes. Pull the knob of fuel shut off control rod. <DRIVING THE TRACTOR> 1. Watch where you are going especially at row ends, on roads, around trees and low hanging obstacles. 2. To avoid upsets, drive the tractor with care and at speeds compatible with safety, especially when operating over rough ground, crossing ditches or slopes, and when turning at corners. 3. Lock the tractor brake pedals together when transporting on roads to provide proper wheel braking. 4. Keep the tractor in the same gear when going downhill as used when going uphill. Do not coast or free wheel down hills. 5. Any towed vehicle and/or trailer whose total weight exceeds that of the towing tractor, must be equipped with its own brakes for safe operation. 6. When the tractor is stuck or tires are frozen to the ground, back out to prevent upset. 7. Always check overhead clearance, especially when transporting the tractor. SAFETY PRECAUTIONS <OPERATING THE PTO> 1. When operating PTO driven equipment, shut off the engine and wait until the PTO stops before getting off the tractor and disconnecting the equipment. 2. Do not wear loose clothing when operating the power take-off or near rotating equipment. 3. When operating stationery PTO driven equipment, always apply the tractor parking brake and block the rear wheels from front and rear side. 4. To avoid injury, always move down flip part of PTO. Do not clean, adjust or service PTO driven equipment when the tractor engine is running. 5. Make sure the PTO master shield is installed at all times and always replace the PTO shield cap when the PTO is not in use. <Diesel fuel> 1. Keep the equipment clean and properly maintained. 2. Under no circumstances should gasoline, alcohol or blended fuels be added to diesel fire or explosive hazard. Such blends are more explosive than pure gasoline. In a closed container, such as a fuel tank. DO NOT USE THESE BLENDS. 3. Never remove the fuel cap or refuel the tractor with the engine running. 4. Do not smoke while refueling or when standing near fuel. 5. Maintain control of the fuel filler pipe when filling the tank. 6. Do not fill the fuel tank to capacity. Allow room for expansion. 7. Wipe up spilled fuel immediately. 8. Always tighten the fuel cap securely. 9. If the original fuel tank cap is lost, replace it with genuine cap. A none approved cap may not be safe. 10. Do not drive equipment near open fire. 11. Never use fuel for cleaning purpose. 12. Arrange fuel purchases so that winter grade fuel are not held over and used in the spring. 13. USE ultra low sulfur fuel only. ※N.B: I t is suggested that after repairs if any of the Safety Decal/sign is peeled/ defaced, the same may be replaced immediately in interest of your safety. - 27 SAFETY PRECAUTIONS 2. DO’S AND DON’T’S DO’S-For Better performance DO - Ensure that safety shields are in place and in good condition. DO - Read all operating instructions before commencing to operate tractor. DO - Carry out all maintenance tasks without fail. DO - Keep the air cleaner clean. DO - Ensure that the correct grade of lubricating oils is used and that they are replenished and changed at the recommended intervals. DO - Fit new sealing rings when the filter elements are changed. DO - Watch the oil pressure gauge or warning light and investigate any abnormality immediately. - 28 DO - Keep the radiator filled with clean water and in cold weather use anti-freeze mixture. Drain the system only in an emergency and fill before starting the engine. DO - Ensure that the transmission is in neutral before starting the engine. DO - Keep all fuel in clean storage and use a filter when filling the tank. DO - Attend to minor adjustments and repairs as soon as necessity is apparent. DO - Allow the engine to cool before removing the radiator filler cap and adding water, remove the radiator cap slowly. DO - Shift into low gear when driving down steeps hills. DO - Latch the brake pedals together when driving on a highway. DO - Keep draft control lever fully down when not in use. SAFETY PRECAUTIONS Don’ts-For safe operation DON’T - Run the engine with the air cleaner disconnected. DON’T - Start the tractor in an enclosed building unless the doors and windows are open for proper ventilation. DON’T - Operate the tractor or engine while lubricating or cleaning. DON’T - Allow the tractor to run out of diesel fuel otherwise it will be necessary to vent the system. DON’T - Temper the fuel injection pump, If seal is broken the warranty becomes void. DON’T - Allow the engine to run idle for a long period. DON’T - Run the engine if it is not firing on all cylinders. DON’T - Ride the brake or clutch pedal. This will result in excessive wear of the brake lining, clutch driven member and clutch release bearing. DON’T - Use the independent brakes for making turns on the highway or at high speeds. DON’T - Refuel the tractor with the engine running. DON’T - Mount or dismount from the right side of the tractor. DON’T - Temper the hydraulic control levers’ upper limit stops. DON’T - Use draft control lever for lifting of implements. DON’T - Start the engine with the PTO engaged. DON’T - Use the governor Control Lever (Hand throttle) while driving on roads. DON’T - Move the hydraulic levers rearward. - 29 MEMO INDEX GENERAL INFORMATION 1 DESCRIPTION OF OPERATING SYSTEM 2 OPERATION 3 WORK PROCEDURE 4 MAINTENANCE 5 STORAGE AND DISPOSAL 6 TROUBLESHOOTING 7 SAFETY STANDARD FOR FARM WORK 8 APPENDIX 9 index 10 WARRANTY 11 TABLE OF CONTENTS GENERAL INFORMATION 1 1. Components............................................... 1-2 2. Safety decals........................................... 1-5 3. Use of the machine............................... 1-10 4. Supply term for service parts....... 1-10 5. Regarding the direction terms of machine...............................................1-11 DESCRIPTION OF OPERATING SYSTEM 2 1. Switches and instrument panel........ 2-2 2-1. Controls (SP model)......................... 2-17 2-2. Controls (SC model)......................... 2-18 3. Implement lift system and towing hitch.......................................................... 2-39 4. CABIN............................................................... 2- OPERATION 3 1. Engine starting........................................ 3-2 2. Engine Stopping....................................... 3-3 3. Engine idling.............................................. 3-4 4. Running-in period.................................... 3-4 5. Starting off, shifting and driving.... 3-5 6. Turning in field...................................... 3-6 7. Stopping and parking........................... 3-6 8. Driving on slope.................................... 3-7 9. Cautions for driving into / out of field........................................... 3-8 10. L oading to / Unloading from truck.... 3-8 11. Cautions for driving on road.......... 3-8 12. Operation check during driving..... 3-9 13. Power connector for trailer...... 3-10 WORK PROCEDURE 4 1. Precautions for handling implement..... 4-2 2. General implement................................. 4-2 3. Types of Work by speed table............ 4-8 MAINTENANCE 5 1. Opening covers........................................ 5-2 2. Inspection items....................................... 5-3 3. Inspecting and changing coolant... 5-4 4. Checking and changing oils and fluids......................................................... 5-5 5. Replacing filter and cartridge...... 5-10 6. Checking fuel system and replacing fuel filter........................5-11 TABLE OF CONTENTS 7. Urea tank................................................ 5-14 8 Checking and cleaning air cleaner... 5-19 9. Adjusting tread................................... 5-20 10. Greasing................................................. 5-21 11. Checking hoses.................................... 5-22 12. Checking electric system............... 5-22 13. Checking and adjusting each part.....5-28 14. Routine maintenance schedule..... 5-31 15. Inspecting electrohydraulic systeM (SP model)............................................. 5-34 STORAGE AND DISPOSAL 6 1. Tractor storage..................................... 6-2 2. Usage and disposal................................. 6-3 SAFETY STANDARD FOR FARM WORK 8 APPENDIX 9 1-1. Major specifications (SP model).... 9- 2 1-2. Major specifications (SC model).... 9- 3 2. Standard parts....................................... 9- 6 3. Major consumables.............................. 9- 7 INDEX 1. index........................................................... 10-2 WARRANTY TROUBLESHOOTING 7 1. Engine system........................................... 7-2 2. Clutch system.......................................... 7-5 3. Brake system............................................ 7-5 4. Steering system...................................... 7-6 5. Hydraulic system.................................... 7-7 6. Electric system....................................... 7-8 7. A/C / heater system.................................. 7-9 10 11 1. WARRANTY...................................................11-2 MEMO 1 General information 1. Components.......................................................... 1-2 2. Safety decals...................................................... 1-5 3. Use of the machine.......................................... 1-10 4. Supply term for service parts.................. 1-10 5. Regarding the direction terms of mVachine....................................................... 1-11 A- GENERAL INFORMATION 1. Components Figures in this manual are based on the model T1054SP. Roof Wiper (Front) Work lamp (Front) Side window Outside rearview mirror Muffler Door Tire (Rear) Step Tire (Front) J10O212A 1- GENERAL INFORMATION 1 Windshield (Upper) Steering wheel Hood Side window (LH) Turn signal/position lamp (Front) Door (LH) Headlamp Windshield Grill Fuel tank Mudguard J10O213A 1- GENERAL INFORMATION Sunroof Work lamp (Rear) Wiper (Rear) Rear window License plate External lifting/lowering switch Turn signal lamp (Rear) Rear reflector Position/brake lamp (Rear) External hydraulic port Top link Lift arm Lift rod PTO shaft Adjusting link Lower link 1- Towing hitch J10O203A GENERAL INFORMATION 2. Safety decals • • 1 In order to work with the machine safely, safety decals are placed on the machine. Make sure to read and follow the directions. ■ Keep the warning labels clean and not damaged at all times. If a decal on the machine is dirty, wash it with soapy water and wipe it off with a soft cloth. Never use solution such as thinner or acetone because these can erase characters or pictures. ■ If washed with high-pressured water, a decal may be peeled off. Do not apply high-pressured water directly onto decals. ■ If a safety decal is damaged or lost, order a new one immediately and place it on the machine. When putting a new decal, wipe off the place to post the decal thoroughly and wait till it is dried. Then post the decal. Each decal has a part number on the bottom. ■ When replacing a part attached with a decal with a new part, replace the decal as well. 1- GENERAL INFORMATION # 1. Stay clear of raised boom and bucket 2. Joystick button must always be locked for safty when not using implement. Always set the knob to lock when 1. Traveling on the road 2. Replacing blades on an implement 3. Making adjustment to an implement Sudden dropping of an implement can cause serious injury or death ZDUQLQJ POSITION OF FUSE & RELAY ① ⑤ ⑥ ⑧ ⑨ ③ ⑩ ④ ⑪ ⑫ ② ⑦ 1. FUSE, HEATING TUBE 30A 2. FUSE, FUEL HEATER 50A 3. FUSE, CABIN 60A 4. FUSE MAIN 60A 5. RELAY, UREA HEATING TUBE1 6. RELAY, UREA HEATING TUBE2 7. FUSE BOX 8. RELAY, ECU 9. RELAY, FUEL HEATER 10. RELAY, STARTER 11. ECU 12. DCU J10O212A 1- GENERAL INFORMATION GDQJHU 1 GDQJHU EPA REGULATION USE ULTRA LOW SULFUR FUEL ONLY J10O213A 1- GENERAL INFORMATION 7LOW+DQGOH WARNING GDQJHU Do not adjust the tilt handle when traveling. J10O205A 1- GENERAL INFORMATION • The tractor model and manufacturer's serial number are marked. 1 Tractor model and manufacturer's serial number J10O206D 1- GENERAL INFORMATION 3. Use of the machine Use this tractor only for its intended use. Using this machine for any other purpose beside the specified use of this machine or modifying the machine will expire the warranty permanently. WARNING • Do not modify the machine. If modified, the functions and performance of machine might be badly affected and it may also lead to an accident. Use for works other than the • specified can cause mechanical failure and injuries. The manufacturer will not hold responsibility for any injury occurred by misuse of the tractor. 1 - 10 4. Supply term for service parts The service parts of this machine will be available until 12 years after the production of this model is stopped. However, when it comes to order the special parts even during the service term, please consult your dealer for the lead time beforehand. As a rule, supplying service parts expires at the above mentioned supply term ends. However, when it is necessary to order the service parts even after the term expires, please consult about the lead time and the price. GENERAL INFORMATION 5. Regarding the direction terms of machine 1 Terms such as front/back, left/right, left turn, right turn used in this manual is shown in the figure. Right turn (Clockwise) Left turn (Counterclockwise) Right Rear Front Left J10O207A 1 - 11 MEMO DESCRIPTION OF OPERATION SYSTEM 1. Switches and instrument panel.................. 2-2 2-1. Controls (SP model).................................... 2-17 2-2. Controls (SC model).................................... 2-18 3. Implement lift system and towing hitch...... 2-39 4. CABIN...................................................................... 2-43 2 DESCRIPTION OF OPERATION SYSTEM 1. Switches and instrument panel Shuttle shift lever Instrument cluster Column switch lever · Turn signal lamp · Horn · Headlamp DeSOx regeneration switch Main switch (Ignition switch) Hazard flasher J10O301A 2- DESCRIPTION OF OPERATION SYSTEM • Main switch J10O302A ► Main switch It is used to start and stop the engine. • OFF position Initial position. The ignition key can be inserted and removed in this position. If this switch is turned to this "OFF" position during driving, the engine stops and the key can be removed from the switch. • ON position Engine running position. The electric circuit is activated. START position Engine starting position. When releasing the key, the switch is returned to the "ON" position. 2 Forced DeSOx operation ON Forced DeSOx operation OFF NOTE • To start the engine, set the PTO switch in the OFF position, the shuttle shift lever in the neutral position and depress the clutch pedal fully in advance. J10O707B J10O361A ►DeSOx SWITCH AND OPERATING DESCRIPTION 1) When the Forced DeSOx switch is set in the neutral position, the DeSOx operation is automatically performed for every 200 hours. While the DeSOx operation is automatically performed, on the instrument panel is illuminated. 2- DESCRIPTION OF OPERATION SYSTEM 2) Forced DeSOx operation OFF When the DeSOx operation is performed, the exhaust gas temperature rises to a high level. Therefore, set the Forced DeSOx switch to the OFF position when working in a greenhouse or an enclosed area or work to be performed needs high power. Thenon the instrument cluster is illuminated. 3) Forced DeSOx operation ON This position can be used only while indicator blinks. The following prerequisite conditions should be satisfied to use this switch position: Prerequisite condition 1: Warm up (rev up) the engine for 3 minutes to increase the coolant temperature. Prerequisite condition 2: Idle the engine for 15 seconds. 2- Prerequisite condition 3: Apply the parking brake. Then, the parking brake indicator on the instrument cluster comes on. Prerequisite condition 4: Press and hold the Forced DeSOx operation switch for 2.5 seconds and release it. When the forced DeSOx operation is activated, indicator on the instrument cluster comes on and the engine speed automatically increases. This process is performed for approx. 20 minutes. If the pedal position is higher than 5% during the service DeSOx, it will be stopped for safety reason. • If the driver press the service DeSOx switch at normal machine condition(Pedal poisition > 5%), the service DeSOx is not started. • If the driver want to stop the service DeSOx, just increased the pedal position over 5%. • • If the driver want to operate the machine during the service DeSOx, it could be possible to work with torque derate and less than pedal position 5%. The fault and torque derate will be cleared after completion of the forced DeSOx CAUTION Operating DeSOx 1. When DeSOx lamp is on, DeSOx has to be done while the tractor is completely stopped (Neutral Position) 2. Do not stop the engine while DeSOx is in progress 3. Make sure enough idling time after the completion of DeSOx. 4. N ot following the instruction above, it may cause damage to the engine (Please refer to the operator's manual for details) DESCRIPTION OF OPERATION SYSTEM NO. 1 STATUS DESCRIPTION DeSOx operation (Passive or Forced) < Automatic DeSOx operation (Automatically activated for every 200 hours)> Automatic DeSOx operation activated or Exhaust gas temp. > 600 degrees 2 Forced DeSOx operation required 3 DeSOx operation inhibited by pressing switch SYMBOL INDICATOR 2 ON Hazard flasher Forced DeSOx operation ON DeSOx needed or Forced DeSOx switch pressed Blinking DeSOx inhibit ON J10O303A ► Hazard flasher Press the hazard flasher switch in emergency to warn other vehicles in order to prevent an accident. The hazard flasher is operated regardless of the position of the main switch. Also, the turn signal lamp function is disabled while the hazard flasher is activated. • Position A - OFF • Position B - The hazard flasher is activated and the turn signal indicators on the instrument cluster blink as well. 2- DESCRIPTION OF OPERATION SYSTEM NOTE • Use it only when necessary as it can discharge the battery and obstruct other drivers' view. WARNING A • Before starting the engine, set the shuttle shift lever in the neutral position and depress the clutch pedal fully to avoid an accident by abrupt starting off. 1 B NOTE J10O304A ► Shuttle shift lever This device is used to select the driving direction between the forward and reverse directions. • Set it in the neutral position unless driving. • With the lever 1 pulled up slightly (Feeling a slight spring tension), push it forward (A) to select forward driving and pull it backward (B) to select reverse driving. 2- • The shuttle shift lever consists of electric components, so forcible operation can damage the lever. NOTE • Poor fuel quality can damage the engine. Make sure to use only the specified genuine Diesel fuel. • Use fuel for winter season in winter to enhance engine starting performance. DESCRIPTION OF OPERATION SYSTEM 2 A A 2 1 A 2 1 3 B J10O305A ► Column switch lever (1) Lamp selection lever • This lever is to operate the headlamps, horn and turn signal lamps. • Position lamp Turn the lever (A) from the position (1) to (2). • Horn Press the tip of the lever in the arrow direction. J10O306A <Headlamp> • Low beam • Turn the lever (A) from the position (2) to (3). High beam Push the lever down with the High beam activated. WARNING • The high beam can obstruct the view of other drivers coming in the opposite direction on a road, leading to an unexpected accident. J10O308A (2) Turn signal lamp operation The turn signal lamps can be operated with the main switch in the "ON" position regardless of the position of the column lever. • Left turn - Pull the lever 1 in the direction "B" • Right turn - Pull the lever 1 in the direction "A" CAUTION • This lever is not automatically re- turned to the neutral position. Therefore, set it back to the neutral position after turn. 2- DESCRIPTION OF OPERATION SYSTEM ► Instrument cluster 1 2 5 (1) Tachometer (2) Hourmeter (3) Speedometer (4) Error Display (5) Fuel Gauge (6) Coolant Temperature Gauge (7) Left Turn Signal Indicator (8) Right Turn Signal Indicator (9) High Gear Indicator (10) Low Gear Indicator (11) Charge Warning Lamp (12) Differential Lock Indicator (13) Parking Indicator 2- 7 20 8 32 9 3 10 34 4 11 12 13 14 15 16 17 18 19 24,25 21 22 23 26 27 28 29 30 35 (14) Reverse Driving-lifting Indicator (15) Turning-lifting Indicator (16) Preheat Indicator (17) High beam Indicator (18) DeSOx Activation Indicator (19) DeSOx Deactivation Indicator (20) Engine warning lamp (21) PTO Indicator (22) Fuel Level Warning Lamp (23) Trailer Brake Indicator (Spare) (24) 1st Trailer Turn Signal Indicator (Spare) (25) 2nd Trailer Turn Signal Indicator (Spare) (26) 4wd Indicator 33 31 6 J10O309C (27) Quick Turn Indicator (Optional) (28) Engine Oil Pressure Warning Lamp (29) H ydraulic Clutch Low Pressure Warning Lamp/strainer Clogging Warning Lamp (30) Air Cleaner Clogging Warning Lamp (31) Urea Level Lamp (32) Urea Level Warning Lamp (33) SCR Warning Lamp (34) Automatic DeSOx activated or Exhaust gas Warning Lamp (35) Water in Fuel Warning Lamp DESCRIPTION OF OPERATION SYSTEM Speedometer Tachometer 993C011a J10O310A (1) Tachometer It indicates the engine RPM (Rotation Per Minute), The green arrow indicates the engine speed at the standard 540 RPM speed of the PTO. NOTE • The engine can be damaged if in- (2) Hourmeter It indicates the total time of use. • Black digits - Whole number for hours of use • Red digit - Decimal place for hours of use creasing its speed too fast. J10O311A (3) Speedometer It indicates the driving speed (km/ h) of the tractor. There are 6 digits for the hour meter. The last digit indicates one tenth hours. Example) The time of use illustrated above is 234 hours and 30 minutes. 2- 2 DESCRIPTION OF OPERATION SYSTEM Fuel gauge 993C013a (4) Error display This indicates malfunction of the tractor. When an error code is shown on the display, stop driving and perform repair or service accordingly. J10O312A (5) Fuel gauge This indicates the amount of fuel while the main switch is in the "ON" position. F: Full E: Empty NOTE • Poor fuel quality can damage the engine. Make sure to use only the specified genuine Diesel fuel. • Use fuel for winter season in winter to enhance engine starting performance. 2 - 10 Coolant temperature gauge J10O313A (6) Coolant temperature gauge This indicates the temperature of coolant while the main switch is in the "ON" position. C: Cold H: Hot If the needle is in the red "H" zone during driving, the coolant is overheated. In this case, stop driving and take any necessary action according to the troubleshooting instructions. DESCRIPTION OF OPERATION SYSTEM 7 speed gear is selected (2nd gear power shift). (10) Low gear indicator This comes on when the low speed gear is selected (2nd gear power shift). 8 9 10 Parking indicator J10O316A (7) Tractor left turn signal indicator (green) This indicates the turn signal lamp operation with the column lever. This blinks along with the left turn signal lamp. (8) Tractor right turn signal indicator (Green) This indicates the turn signal lamp operation with the column lever. This blinks along with the right turn signal lamp. (9) High gear indicator This comes on when the high (12) Differential lock indicator This comes on while the differential lock is in use. Charge warning lamp Differential lock indicator (11) Charge warning lamp This comes on when the main switch is turned to the "ON" position and goes off as soon as the engine is started. Reverse drivinglifting indicator (13) Parking indicator This comes on when the parking brake is applied. (14) Reverse driving-lifting Indicator This comes on when the reverse driving-lifting function is selected with its button. NOTE • If the charge warning lamp comes on while driving, the battery is not properly charged. Therefore, turn off any unnecessary electrical devices and have your vehicle checked by your workshop immediately. 2 - 11 2 DESCRIPTION OF OPERATION SYSTEM CHECK Turning-lifting indicator Preheat indicator (15) Turning-lifting indicator This comes on when the turninglifting function is selected with its button. (16) Preheat indicator This comes on while the engine preheating function is activated. DeSOx activation indicator DeSOx deactivation indicator (18) DeSOx activation indicator This lamp illuminates when the DeSOx switch is pressed. It blinks when the DeSOx process is required. (19) DeSOx deactivation indicator This lamp illuminates when the DeSOx inhibit switch is pressed. Engine warning lamp (20) Engine warning lamp It comes on when the engine is malfunctioning. PTO indicator Headlamp high beam indicator (17) Headlamp indicator This comes on with the high beam activated and goes off with the low beam activated. 2 - 12 Fuel level warning lamp (21) PTO indicator This indicates the operating condition of the PTO shaft. (22) Fuel level warning lamp This comes on when the fuel amount in the fuel tank is less than approx. 14 liters. DESCRIPTION OF OPERATION SYSTEM 2 Trailer brake indicator (Spare) 1st trailer turn signal indicator (Spare) (23) Trailer brake indicator (Spare) This comes on when the brake is operated with the tractor brake during driving. (24) 1st trailer turn signal indicator (Spare) This comes on when the trailer is connected and the tractor turn signal lamp is activated. • • • ON - The PTO shaft is rotating. OFF - The PTO shaft is stopped. Flashing - The PTO shaft is temporarily stopped. 2nd trailer turn signal indicator (Spare) (25) 2nd trailer turn signal indicator (Spare) This comes on when the trailer is connected and the tractor turn signal lamp is activated. 4WD indicator Quick turn indicator (optional) (26) 4WD indicator This comes on when the 4WD is activated. (27) Quick turn indicator (Optional) This comes on while the quick turn function is in use. WARNING • If lowering an implement or releas- ing the driving clutch pedal with the PTO indicator blinking, the rotating PTO shaft can cause a dangerous situation. Make sure that no one comes within the turning radius of the tractor. 2 - 13 DESCRIPTION OF OPERATION SYSTEM Engine oil pressure warning lamp Hydraulic clutch low pressure warning lamp/strainer clogging warning lamp (28) E ngine oil pressure warning lamp This is illuminated when the engine oil pressure or oil amount is insufficient during driving. This may come on during engine warming up. NOTE • When the oil pressure warning lamp comes on, this indicates malfunction of the lubrication system. Check the engine oil immediately and have your vehicle serviced by your workshop as necessary. 2 - 14 (29) Hydraulic clutch low pressure warning lamp/strainer clogging warning lamp This comes on when the pressure of the hydraulic clutch is excessively low or the clutch oil level is low. Also, it is illuminated when the strainer is clogged by foreign materials. If this comes on during driving, contact your dealer. This lamp may come on for a while after the engine is started. If it keeps illuminated, contact your dealer. NOTE • When the oil pressure warning lamp comes on, this indicates malfunction of the hydraulic system. Check the oil immediately and have your vehicle serviced by your workshop as necessary. • If driving with the warning lamp illuminated, the transmission can be damaged. Air cleaner filter contamination warning lamp (30) Air cleaner filter contamination warning lamp This comes on when the air cleaner is clogged by foreign materials. When this comes on, open the cover and clean the inside of the cleaner. Also, blow air through the filter in the opposite direction of air flow to clean it or replace the filter with a new one. NOTE • If keeping driving with this warning lamp illuminated, the engine power can be dropped. DESCRIPTION OF OPERATION SYSTEM UREA level lamp Urea level warning lamp J10O363A (31) UREA level lamp This indicates the amount of urea while the main switch is in the "ON" position. • 4 green lamps ON: 75% - 100% of urea in tank • 3 green lamps ON: 50% - 75% of urea in tank • 2 green lamps ON: 25% - 50% of urea in tank • 1 green lamp ON: 25% of urea in tank • Yellow lamp ON: 10% of urea in tank • Red lamp ON: 5% of urea in tank • Red lamp blinking: 2.5% of urea in tank SCR (Selective CatalyticReduction) Warnig Lamp (32) Urea level warning lamp This comes on when the urea level in the tank is below 25%. (33) S CR (Selective Catalytic Reduction) warning lamp SCR(Selective Catalytic Reduction) related part malfunctions. In this case, contact your workshop. (34) A utomatic DeSOx activated or Exhaust gas warning lamp. Automatic DeSOx operation activated or Exhaust gas temp. 600 degrees. (35) water in fuel warning lamp When a certain amount of water is collected in the fuel filter, this lamp comes on. In this case, stop the engine immediately and drain water from the fuel filter. (See page 5-12) 2 - 15 2 DESCRIPTION OF OPERATION SYSTEM No. 1 Item Urealevel Status - Warning Status ON ON Blinking slowly Blinking fast - Reducing torque to 25% - ON Reducing torque to 50% and RPM to 60% - Blinking slowly Low Idle - Blinking fast Warning Level 1 < 25% < 10% - Level 2 < 5% - Final < 2.5% - Low Idle Warning Error 30 minutes or more 2 hours or more (2.5 hours) Immediately 7 minutes or more 18 minutes or more (25 minutes) Level 2 Final 2 - 16 SCR warning lamp Values Level 1 2 Urea level warning lamp Warning levels (U.S.) 1 hours or more (3.5 hours) Time Engine Warning Reducing torque to 25% Reducing torque to 50% and RPM to 60% ON DESCRIPTION OF OPERATION SYSTEM 2-1. Controls (SP model) Shuttle shift lever Brake pedal Steering wheel Column switch •Turn signal lamp •Horn •Head lamp Throttle pedal Main shift lever Joystick lever Throttle lever External hydraulic control lever Driving clutch pedal Electronic lift control Parking brake (hand brake) PTO switch PTO Shift lever TCU switch panel Power socket External power connector Range shift lever j10o314a 2 - 17 2 DESCRIPTION OF OPERATION SYSTEM 2-2. Controls (SC model) Brake pedal Throttle pedal Main shift lever Steering wheel Joystick lever Throttle Lever External hydraulic control lever Tilt lever Differential lock pedal Driving clutch pedal Position lever Draft control lever PTO switch Parking brake (hand brake) 4WD selection switch PTO automatic operation PTO Shift lever J10O369A Range shift lever 2 - 18 DESCRIPTION OF OPERATION SYSTEM 2 Steering wheel Driving clutch pedal Connect Disconnect Engaging hook J10O317A (1) Steering wheel (2) Driving clutch pedal Depressing the clutch pedal disengages the clutch. With the clutch pedal depressed, move the main, range or shuttle shift lever into the desired position and release the pedal. Then, the clutch is engaged. 993C020a J10O318A (3) Brake pedal The brake is to stop the machine forcibly. Unlike general automobiles, this tractor is equipped with left and right brake pedals. Each brake pedal brakes only one rear wheel on the corresponding side. CAUTION • At a low speed, the rotating force of the axle acts greatly, so depressing the brake pedal strongly with the clutch pedal released cannot brake the vehicle. To stop the vehicle, disengage the clutch first and depress the brake pedals. There is an engaging hook for connecting the left and right brake pedals. • Driving on road - Engage (Both brake pedals operated together) • Working in field - Disengage (One side brake pedal operated) WARNING • Connect the left and right brake pedals while driving on a road, loading/unloading the tractor or driving into/out of a field to avoid rollover and collision. • Inspect the brake pedals periodically so that they can be operated simultaneously without any problem. 2 - 19 DESCRIPTION OF OPERATION SYSTEM NOTE Parking brake lever Throttle pedal J10O319A (4) Throttle (Accelerator) pedal It has the same function to the throttle lever to control the engine speed. • Depressing - The engine speed is increased. • Releasing - The engine idles. the engine and apply the parking brake. Also, chock the wheels if parking on a steep slope. J10O320A (5) Parking brake lever Pull the parking brake lever upward to apply the parking brake. To release the parking brake, press the button at the tip of the lever. ① ② Main shift lever X Z Y [ CAUTION • The tractor does not move with buzzer sound when operating the shuttle shift lever with the parking brake applied. In this case, release the parking brake with the shuttle shift lever in the neutral position. 2 - 20 • Make sure to park the tractor, stop J10O321A (6) Main shift lever The lever can be shifted among 4 speed positions. There are two buttons next to the lever for the SP model. DESCRIPTION OF OPERATION SYSTEM < Power shift button (SP model) > The transmission can be shifted to the high speed or low speed gear with the power shift button pressed even when the clutch pedal is released. Button 1: High speed Button 2: Low speed (7) Range shift lever Shifting operation can be performed in combination with the shuttle shift lever, main shift lever and range shift lever. (T954, T1054) SP model: 32 forward driving speeds and 32 reverse driving speeds SC model: 12 forward driving speeds and 12 reverse driving speeds NOTE • To operate the range shift lever, depress the clutch pedal and wait till the tractor is completely stopped. If operating the lever during driving, it can damage the gears. • The main shift lever can be moved as long as the clutch pedal is fully depressed during driving as it is a synchromesh type. WARNING • Do not drive backward with the range shift lever placed in the H position as driving backward with fast speed can lead to a dangerous situation NOTE Cautions for position C of range shift lever • When the range shift lever is in the position C, rotating force of the axle acts greatly. Therefore, misuse can lead to damage of gears and other parts. Be careful with the followings: Types of work appropriate for creep speed gear - Cultivating deeply at short intervals with rotavator - Cultivating with rotavator, but hard to work at standard speed due to firm ground - Transplanting - Loading/Unloading - Working with trencher • Types of work inappropriate for creep speed gear - Escaping from wet field - Draft (trailer) work - Working with front loader - Construction work - Working with front snow plow 2 - 21 2 DESCRIPTION OF OPERATION SYSTEM < Joystick lever operating direction > NOTE • When shifting the range shift lever to the H position or the main shift lever to the 3rd or 4th gear position during starting off or with the driving speed of 3.8 km/h or slower, the warning buzzer sounds and the shuttle shift operation is disabled. Bucket up Bucket down NOTE • Do not operate the boom cylinder and bucket cylinder simultaneously. Their simultaneous operation can lead to a lack of hydraulic oil, resulting in abnormal operation of the loader. ⓑ ⓒ Boom down Boom up ⓓ J10O322A < Joystick lever safety device > There is a switch to lock the operation of the joystick lever. Pushing it to the left locks the lever while pushing it to the right unlocks the lever. NOTE • A implement can be dropped sudⓐ 993C025a (8) Joystick lever operating direction This lever is used to control a loader (when equipped). 2 - 22 denly by operating the joystick lever accidentally. Therefore, lock it in position with its lock switch when it is not in use. DESCRIPTION OF OPERATION SYSTEM 1 Throttle lever 2 3 High speed Low speed < Loader valve and joystick lever > The loader valve is installed under the step on the right side and the joystick lever is installed on the right from the driver's seat in the cabin for easy installation and operation of a loader. WARNING • Abnormal operation of a loader can lead to an accident. Therefore, when connecting the hydraulic pipes, set the valve connection according to the operating directions specified on the label attached to the joystick lever. J10O325A J10O324A J10O323A (9) Throttle lever Like the throttle pedal, it is used to control the engine speed. This lever is operated with a hand and can be used to fix the engine speed to a certain level. Pushing: High speed, Pulling: Low speed WARNING • Avoid using it on a road as it can cause an accident by high speed driving. (10) External hydraulic control lever When using an attachment for an implement (rotavator, hydraulic plow, etc.), connect its hose to the proper port among the port A, B and C according to its use. Lever 1 operation → Hydraulic oil applied to valve port 1 Lever 2 operation → Hydraulic oil applied to valve port 2 Lever 3 operation → Hydraulic oil applied to valve port 3 2 - 23 2 DESCRIPTION OF OPERATION SYSTEM 3 2 1 Drain port J10O326A < Remote hydraulic valve coupler > 1) How to connect coupler ① Clean the couplers on the tractor and implement thoroughly. ② Remove the dust cover from the tractor side. Then, fit the male coupler on the implement side while moving its external ring backward slightly. ③ Pull the male coupler on the implement side backward slightly to check its firm engagement. 2 - 24 2) How to disconnect coupler ① Lower the implement on the ground to release pressure in the hydraulic hose. ② Stop the engine and operate the remote hydraulic lever for 2 to 3 times to remove any residual pressure in the hose. ③ Disconnect the male coupler on the implement side while pulling the external ring of the coupler on the tractor side backward slightly. ④ Wipe oil and dust from the coupler and plug the dust cover. WARNING • To prevent a burn and skin dam- age, make sure to stop the engine before connecting or disconnecting the coupler. • Do not use your hands to check for oil leakage. PTO shift lever 750 rpm - Neutral - 1000 rpm - Neutral - 540 rpm (SP) 1000rpm - Neutral - 540rpm (SC) J10O327A (11) PTO Shift lever This lever is used to select the PTO speed. Refer to the page B-30 as its operation is coupled with the PTO (AUTO) switch. < PTO speed selection > ① Stop the PTO. ② With the PTO switch set in the OFF position, place the PTO lever into the desired speed position. (540 RPM, 750 RPM or 1000 RPM) DESCRIPTION OF OPERATION SYSTEM [SP MODEL] 2 Electronic lift system control panel TCU switch panel PTO switch J10O329A 2 - 25 DESCRIPTION OF OPERATION SYSTEM [SC MODEL] Position lever 4WD shift button PTO automatic operation Draft control lever J10O370A 2 - 26 DESCRIPTION OF OPERATION SYSTEM PTO ON PTO OFF J10O330A (12) PTO button This is the PTO ON/OFF switch. To use the independent PTO, pull up the knob. PTO activation - Turning it counterclockwise with pressing PTO deactivation - Pressing or turning it clockwise (13) E lectronic lift system control panel < Overview > The electronically controlled lift system can provide various functions through simple switch operations, unlike the mechanical type, to enhance the driver's convenience and efficiency. This system has the following three control modes and each mode can be selected and mixed with their corresponding control knobs for optimum working condition. - Position control - Draft control - Floating function WARNING • Before operating the control unit, make sure that the knobs are adjusted to the desired positions. • Never stop and leave the tractor with an implement lifted. • The control unit is equipped with the self-diagnosis function which triggers the alarm for any found fault in the system. WARNING • Keep the button pushed in when the PTO is not in use in order to prevent an accident by the suddenly rotating PTO shaft. 2 - 27 2 DESCRIPTION OF OPERATION SYSTEM CAUTION To prevent damage to electronic components, keep the following instructions when arc welding the tractor equipped with the electronic lift or an attached implement. • Separate an implement or part to be welded from the tractor if possible. • Disconnect the two battery cables. • Set the welding machine's ground clamp as close as possible to the point to be welded. • Remove the control unit first if the welding spot is within 1 m from the unit. • Make sure that the cable is not close to or over any electric or electronic lead while welding. 2 - 28 1 11 2 10 3 9 < Electronic lift control > 1 Control lever (Lifting/Lowering) 2 Attenuation function ON button 3 Attenuation function ON indicator 4 Diagnosis indicator 5 Lift arm upper position limit control knob 4 8 5 7 6 J10O331A 6 Lift arm lowering speed control knob 7 Position/Draft sensitivity control knob 8 Working depth control knob 9 Arm lifting indicator 10 Arm lowering indicator 11 Arm lifting indicator DESCRIPTION OF OPERATION SYSTEM 1 11 D A B C < Operation of interior controls > 1. Control lever A. Lift lift arm B. Stop C. Lower lift arm D. Lower to ground rapidly When releasing the knob in this position, the knob is automatically returned to the position B. 2. Lift arm upper position limit control knob - Turning it clockwise decreases the 5 8 7 4. Position/Draft control knob - Turning it counterclockwise sets the draft control with higher priority. - Turning it clockwise sets the position control with higher priority. 5. Working depth control knob - Turning it clockwise increases the height of the lift arm. - Turning it counterclockwise decreases the height of the lift arm. 6 J10O332A upper position limit of the lift arm. - Turning it counterclockwise increases the upper position limit of the lift arm. 3. Lift arm lowering speed control knob - Turning the knob toward the rabbit symbol increases the lift arm lowering speed. - Turning the knob toward the tortoise symbol decreases the lift arm lowering speed. External lifting/lowering switch operation These switches are installed to the left and right mudguards on the back of the vehicle and can be used to lift and lower an implement. 2 - 29 2 DESCRIPTION OF OPERATION SYSTEM 1 2 11 A 3 10 < Operation > Keep the following instructions for safe and correct use of the electronic lift: ① When starting the engine, the indicator (4) comes on to inform the driver that the interior lift controls cannot be used for now for safety reason. The exterior lifting/lowering switches (12) on the rear mudguards are available to use. 2 - 30 4 8 5 7 6 < Hydraulic lock operation > ① Before operation, set the lever (1) to the lifting position (A) to lift the implement. ② Turn the knob (6) counterclockwise to its end. ③ Push the lock button (11) forward to fix the lever in the lifting position. Keep other settings as before locking the lever. 12 J10O333A ② Set the upper position limit with the knob (5) and place the lift control lever (1) into the lifting position (A). Then, the indicator (4) goes off and the indicator (10) comes on. CAUTION • If the control lever (1) is already in the lifting position (A), set it to the Stop position first and move it to the lifting position (A). < Swing attenuation device > This device is to protect the hydraulic system against impact from an implement when driving the tractor equipped with an implement. To activate this device, set the lever (1) to the lifting position (A) and press the switch (2). Then, the indicator (3) comes on to inform its activation. CAUTION • When driving the tractor with an implement attached, press the swing attenuation button to protect the hydraulic system against impact from an swinging implement. DESCRIPTION OF OPERATION SYSTEM 1 6 11 C < Operation > There are three control modes for an 3P implement: - Position control - Draft control - Floating mode • Draft control ① Turning the position/draft sensitivity control knob (7) counterclockwise increases the priority of the draft control. Turning it counter- 8 7 J10O334A clockwise to its end activates only the draft control. ② Place the lever (1) into the lowering position (C) and then use the knob (8) to set the desired working depth. Turning it counterclockwise lowers an implement while turning it clockwise lifts an implement. To lift or lower an implement at once, use the lever (1). When the working depth in a field with an implement changes greatly, turn the position/draft sensitivity control knob (7) clockwise slowly to narrow the gap. • Position control ① Turning the position/draft sensitivity control knob (7) clockwise increases the priority of the position control. Turning it clockwise to its end activates only the position control. ② Lower the implement with the lever (1) and adjust the lowering speed with the knob (6). Then, set the desired working depth with the knob (8). When lowering or lifting an implement, use the lever (1) only to keep the settings. • Floating mode Turn the knob (8) counterclockwise completely to allow swinging motion of the arm in order to use the lift in the floating mode. 2 - 31 2 DESCRIPTION OF OPERATION SYSTEM (14) TCU switch panel 1 2 4 3 5 1. Rear wheel differential lock button 2. 4WD (automatic) button 3. 4WD button 4. Reverse driving-lifting button 5. Turning-lifting button 6. PTO automatic operation button 6 993C039B 2 - 32 DESCRIPTION OF OPERATION SYSTEM < Differential lock > The differential lock is designed to lock the differential system in order to rotate the left and right wheels at the same speed. Use this device when the rear wheels slip or one wheel spins with no traction. WARNING • Never use the differential lock when driving on a road. A collision or rollover can occur. • Make sure to deactivate the function before turning. Otherwise, it can lead to an injury or accident. NOTE • When using the differential lock, run the engine at a low speed. 2 Manual differential lock mode ① Manual mode It is possible to control the differential manually by a driver for easier operation. Pressing the button once turns on the lamp and activates the manual mode. Pressing it once again turns off the lamp and deactivates the manual mode. Differential lock pedal J10O365A ► Differential lock pedal (SC model) The differential lock pedal is designed to lock the differential system in order to rotate the left and right wheels at the same speed. This pedal can be used when the rear wheels slip or one wheel spins. • • Engagement - Depressing pedal Disengagement - Releasing pedal 2 - 33 DESCRIPTION OF OPERATION SYSTEM • Examples of useful conditions of differential lock ① One wheel slips or tractor cannot be driven forward when moving into/out of a field. ② A wheel slips during work requiring traction, such as plowing. ③ One wheel is stuck into a soft field and can't escape. NOTE • The differential lock is disengaged when depressing the brake pedal. • The differential lock is disengaged when the vehicle speed exceeds 15 km/h. < 4WD > The 4WD function can be operated in any gear during driving (forward/ reverse driving). 2 - 34 < SP model > Automatic 4WD Manual 4WD ① Automatic mode The 4WD function is automatically deactivated when the angle of one of the front wheels is over 20 degrees or the vehicle speed exceeds 15 km/h. Pressing the button once turns on the lamp and activates the automatic mode. Pressing it once again turns off the lamp and deactivates the automatic mode. ② Manual mode It is possible to control the 4WD function manually by a driver for easier operation. Pressing the button once turns on the lamp and activates the manual mode. Pressing it once again turns off the lamp and deactivates the manual mode. < SC model > 4WD shift button J10O530A ► 4WD shift button • ON - The 4WD function is activated when pressing the upper portion of the shift button. • OFF - The 4WD function is deactivated when pressing the lower portion of the shift button. DESCRIPTION OF OPERATION SYSTEM • Examples of useful conditions of 4WD The 4WD can be useful under the following conditions: ① When cultivating in a field ② When traction is required on a slope, in a wet field or for towing a trailer ③ When working in a wet or sandy field ④ When cultivating on firm soil with a rotavator to prevent the tractor from being pushed forward ⑤ When driving into/out of a field or going over a field bank NOTE • Avoid using the 4WD on a road or hard soil. The tires can be worn excessively. • If stopping the engine while the 4WD is engaged, starting the engine again automatically engages the 4WD. NOTE • Do not activate the reverse driving-lifting function or turning-lifting function while driving on a road. Reverse driving-lifting Turning-lifting ⑤ Reverse driving-lifting This function is to lift the implement automatically when the vehicle is driven backward. Pressing the button once turns on the lamp and activates the reverse driving-lifting function. Pressing it once again turns off the lamp and deactivates the function. ⑥ Turning-lifting This function is to lift the implement automatically when the vehicle is being turned. Pressing the button once turns on the lamp and activates the turning-lifting function. Pressing it once again turns off the lamp and deactivates the function. PTO rotation ⑦ PTO (AUTO) The PTO shaft is automatically stopped for safety when the implement is lifted to the preset height. Also, the PTO shaft is automatically stopped when depressing the clutch pedal. Pressing the button once turns on the lamp and activates the automatic PTO function. Pressing it once again turns off the lamp and deactivates the function. 2 - 35 2 DESCRIPTION OF OPERATION SYSTEM PTO OperaImplement Driving tion indicaHeight Clutch pedal tor PTO Switch PTO Auto Switch ON Manual N/A N/A ON Rotated ON Automatic High N/A Blinking Stopped ON Automatic High Released ON Rotated Depressed Blinking Stopped OFF N/A PTO Shaft Stopped CAUTION • The PTO shaft is not stopped when depressing the driv ing clutch pedal while the PTO (AUTO) button is pressed OFF. Set the PTO button into the OFF position when working on hard soil with a rotavator. Otherwise, the tractor may spring up, leading to a dangerous situation. 2 - 36 PTO switch J10O364A ► Automatic PTO control Automatic - When the implement is lifted to the preset height, the PTO shaft is automatically stopped. The PTO shaft is also stopped when depressing the driving clutch pedal fully. DESCRIPTION OF OPERATION SYSTEM < SC MODEL > Position lever Draft control lever < Operation > • <Lifting> - Pull the lever back to lift the implement. • <Lowering> - Push the lever forward to lower the implement. • Stopper bolt - It is used to fix the lever into the desired position to maintain a constant working position (Depth). WARNING J10O363A ► I mplement lifting control system (1) Position lever This lever is used to lift and lower an implement to a certain working height freely and maintain it. • When leaving the tractor, make sure to lower the implement and stop the engine. • Others may operate one of the controls, leading to a dangerous situation. (2) Draft control lever This lever is used to protect an implement and ensure safe operation when using a draft implement, such as a plow, by attaching it to the 3-point link. < Operating principle > If draft resistance is excessive during draft work, such as plowing, the engine may be stopped or the implement can be damaged. To prevent this, the implement is automatically lifted to protect devices and implement when the draft resistance reaches the preset load level. < Operation > The amount of load applied to an implement is determined by the position of the lever. It is possible to select the desired amount of load in the range from the lowest position (1) up to the highest position (4). Higher position means lower load amount. In other words, the higher the lever is positioned, the less draft load an implement is instantly lifted with. Likewise, the lower the lever is positioned, the higher draft load an implement is lifted with. 2 - 37 2 DESCRIPTION OF OPERATION SYSTEM ► Operating tips for power steering wheel (1)Operate the power steering wheel only while the engine is running. You may feel the steering wheel heavier with a low engine speed. (2)When an implement, such as a loader, is attached to the front, the steering wheel may be felt heavy with the tractor stopped. If so, operate the steering wheel while driving the tractor at a low speed. (3)When the steering wheel is completely turned to one end, the safety valve is activated to output the audible signal (relief sound). When this sounds, avoid using the steering wheel. (O.K. only for a short time). Also, never turn the steering wheel completely continuously. 2 - 38 (4) Turning the steering wheel to its end unnecessarily (with the tractor stopped) can wear tires rapidly. (5) In winter, warm up the engine sufficiently before use. Lifting Lowering (6)When repairing components, such as a pipe, make sure that no foreign material enters the system. (7)The steering wheel can be operated with a small amount of force. Therefore, operate it with care and keep your hands on it at all times. WARNING • Releasing the steering wheel during driving can result in a collision and rollover. Never release the steering wheel during driving J10O335A ► E xternal lifting/lowering switch (SP model) Use this switch to lift and lower an implement from the outside of the cabin when a rotary tiller is attached as an implement. DESCRIPTION OF OPERATION SYSTEM 3. Implement lift system and towing hitch 2 Top link Upper link bracket Lift arm Lift rod Adjusting link Lower link Towing hitch J10O336D 2 - 39 DESCRIPTION OF OPERATION SYSTEM Lift rod adjusting handle Top link fixing bar and adjusting handle Adjusting link J10O337A ► Top link adjustment (1) The angle of an implement can be adjusted by extending or retracting the top link. (2) After adjustment, fix the adjusting handle so that the link does not become loose. (3) The mounting location of the top link is different by the type of an implement. The 1st and 2nd holes from the top are generally used. 2 - 40 Lower link connecting hole Adjusting handle J10O338A ► Lift rod adjustment (left/ right) Turn the handle clockwise to extend the rod and turn it counterclockwise to retract the rod. Adjust the length of the lift rod to keep the implement in balance. (1) To adjust the height, lift the adjusting handle. After adjustment, lower the handle and fix it. (2) Adjust the length according to the type of an implement. D C J10O339A ► Lower link connecting hole C: for rotary tiller and other types of implements D: for rotary tiller ► Adjusting link The adjusting link can be adjusted to relieve vibration and shock. DESCRIPTION OF OPERATION SYSTEM 2 Lift rod mounting hole ① Towing hitch J10O340A ► Lower link An implement can be attached to this. The installation type is Category Il. (Implement mounting hole diameter: 25.4 ㎜) NOTE • When no implement is attached, fix the lower links with the left and right check links so that they do not touch the rear wheels. • Engage the top link with the hook. J10O341A ► Towing hitch Install only an implement applicable to this tractor. WARNING • Make sure to use the towing hitch for towing to avoid rollover. Never tow anything by connecting a rope to the top link bracket, axle or safety frame. • When using a rotavator that draws power through the universal joint from the PTO shaft, remove the towing hitch from the tractor. Otherwise, the universal joint hits and damages the towing hitch, leading to an accident. J10O342A ► Drawbar adjustment Adjust the drawbar as follows: • Use the fixing pin (1) to prevent any lateral sway. • To adjust the distance between the PTO and drawbar, move the fixing pin to another hole in the drawbar. 2 - 41 DESCRIPTION OF OPERATION SYSTEM ! DANGER • PTO shaft cap J10O343A ► PTO shaft cap When the PTO shaft is not in use, apply grease and place its cap to it. CAUTION • It is dangerous to use an imple- ment at a high speed if it is designed to be operated at a low speed. • Before using an implement, make sure to read its owner's manual. 2 - 42 If caught by the PTO shaft, a severe injury or even death can occur. • Stay out of the PTO shaft while it is rotating. • When the PTO shaft is not in use, fit a cap to it. • Also, never remove the PTO safety cover. DESCRIPTION OF OPERATION SYSTEM 4. CABIN 2 Work lamp Side window handle Outside rearview mirror Turn signal/position lamp (front) Door lever J10O213A 2 - 43 DESCRIPTION OF OPERATION SYSTEM Sunroof Work light (Rear) Wiper (Rear) Rear window Turn signal lamp (Rear) Rear window lock lever Position/brake lamp (Rear) J10O344A 2 - 44 DESCRIPTION OF OPERATION SYSTEM 2 Rear window lever J10O345C 993C054a J10O347A J10O346A (1) Door lever Press the button on the lever to open the door from outside. Push the lever down to open the door from inside. (2) Rear window lever To open the window, push the lever on the center of the rear window in the cabin gently. To close the window, hold the lever and pull it gently. NOTE • The rear window may not be able (3) Side window handle Hold the handle and push it outward to open the window. CAUTION • When opening and closing the side window, be careful not to get caught by the handle edge or in the window. to be opened depending on the type of an attached implement. Make sure to check it in advance. • Avoid driving at a high speed or driving on a bumpy road with the window open. The window may be broken. 2 - 45 DESCRIPTION OF OPERATION SYSTEM Front work lamp WARNING • Do not turn on the work lamps at nighttime while driving on a road. They can obstruct other drivers' view. Rear work lamp J10O348C (4) Front/Rear work lamp There are 4 work lamps installed on the front and back of the cabin roof. They can be operated by the buttons on the panel on the right side in the cabin. 2 - 46 6 7 8 J10O350A Outside rearview mirror J10O349C (5) Outside rearview mirror To avoid a collision with an obstacle outside, adjust their positions to suit the driver. The switches for the windshield/rear wipers/washers and work lamps are located on the right side from the driver's seat. (6) Windshield/Rear wiper switches - Only the wiper is operated when turned ON. - The wiper is not operated when turned OFF. (7) Windshield/Rear washer switches When pressing this switch, washer fluid is sprayed and the wiper is operated. DESCRIPTION OF OPERATION SYSTEM (8) Front/Rear work lamp switch Pressing this switch turns on the LED and work lamps for work at nighttime. Pressing it again turns off the work lamps. 2 Hanger (9) Hanger Clothes and small bag can be hung on it. (10) 12-V socket (optional) It is possible to use a 12-V 120-W accessory by connecting it to the power socket. 2 - 47 DESCRIPTION OF OPERATION SYSTEM WARNING • Never place any part of your body, such as your filter, or a conductive object into the power socket. You can get a shock or a fire can break out. • Use it only while the engine is running. After use, remove the plug from the socket. If using it with the engine stopped or plugging an electric device to it for an extended period of time, the battery can be discharged. • Close its cover when it is not in use. 2 - 48 J10O351A (11) Sun visor Use this to protect the driver's view from sunlight. Pull down the handle of the sun visor and release it at the desired position. Then, it is automatically fixed to that point. To retract it, press the rewind button on the right top of it. DESCRIPTION OF OPERATION SYSTEM [SP MODEL] 2 Interior air inlet Interior air inlet Air conditioner/heater control panel Interior lamp Stereo Air conditioner/heater vent J10O352A 2 - 49 DESCRIPTION OF OPERATION SYSTEM Radiator Fan Air conditioner/ heater vent Sunroof Exterior air Inlet J10O353A (12) Sunroof - Use it to ventilate the cabin. - To open the sunroof, turn the lever clockwise and push it up. - To close the sunroof, hold the lever, pull it down and turn it counterclockwise. Temperature control dial 993C062a (13) Fan speed control dial The fan speed can be adjusted in four steps for the air conditioner and heater. 993C063a Heater operation (winter) < Heater > How to use ① To use the heater, turn the temperature control dial clockwise. ② Operate the fan speed control dial (1st to 4th step). ③ Warm air can be provided when the engine coolant is sufficiently warm. Cautions for using heater ① Make sure to use antifreeze for the winter season in winter. General engine antifreeze can freeze in winter. ② Check the heater hose before use. 2 - 50 DESCRIPTION OF OPERATION SYSTEM ② When adding refrigerant, add compressor oil as well. ③ When repair or adjustment is needed, contact your workshop. ④ Do not disconnect the A/C hose or pipe connection or apply excessive force to it. Air conditioner dial Fan speed control dial Temperature control dial 993C064a Air conditioner operation (summer) < Air conditioner > How to use ① To use the A/C, turn the temperature control dial counterclockwise. ② Operate the fan speed control dial (1st to 4th step). ③ Turn the air conditioner dial to the "ON" position. Cautions for using air conditioner ① This air conditioner uses new refrigerant, R134-a. Make sure to check the refrigerant type before adding it. fan Evaporator unit Air conditioner/ heater vent Condenser Compressor Exterior air Inlet 993C065a WARNING • Ventilate the cabin periodically when working in the cabin with the A/C or heater ON for an extended period of time to avoid suffocation. • Never sleep in the cabin. • If refrigerant gets on your skin, you can get burnt severely. Therefore, any system service should be performed by qualified technicians. 2 - 51 2 DESCRIPTION OF OPERATION SYSTEM NOTE • If operating the A/C without refrig- erant, the compressor is not sufficiently lubricated, resulting in mechanical failure. Make sure to check the refrigerant level frequently. • Avoid using the A/C for an extended period of time with the tractor stopped. The compressor can be overloaded. • If refrigerant gets on your skin, you can get burnt severely. Therefore, any system service should be performed by qualified technicians. • For superior cooling performance, keep the engine speed over 1,000 RPM. 2 - 52 Stereo J10O354A (14) Stereo (SP model) Refer to the stereo's user manual. j10o352a (15) Fresh air suction filter When using the A/C or heater in the fresh air mode, fresh air is drawn into the cabin through the filters installed on the left and right sides of the roof. DESCRIPTION OF OPERATION SYSTEM NOTE 2 • The fresh air suction filter can re- move dust in air, but not chemicals in pesticides. Misuse of such chemicals can harm driver and others' health. Make sure to follow dust inhalation safety instruction, personal hygiene guidance and other precautions from the manufacturers of the tractor and chemicals. WARNING • If the cabin needs to be ventilated, select the fresh air mode. Then, fresh air is drawn into the cabin from outside through the filter. • The air suction filter can be clogged by dirt and foreign materials during work. • Clean it periodically and replace it when necessary. Air conditioner/ heater vent (4 EA) J10O355A (16) Fresh air mode and recirculation mode There are two circulation modes for the A/C and heater operation: fresh air mode and recirculation mode. < Fresh air/recirculation mode selection > The fresh air mode or recirculation mode can be selected by opening or closing four vents on the roof in the cabin. • Open - Recirculation mode • Closed - Fresh air mode 2 - 53 DESCRIPTION OF OPERATION SYSTEM ⑤ ④ ③ ② Tray ① Cup holder (17) Driver's seat ① Seat sliding The seat position can be slid forward or backward with the lever in front of it pushed to the left. After adjustment, make sure that the seat is firmly secured. ② Seat cushion adjustment Turn the lever on the front of the seat to adjust the cushion properly according to the driver's weight. Driver's seat J10O356A 2 - 54 993C070a DESCRIPTION OF OPERATION SYSTEM ③ Seatback reclining The angle of the seatback can be adjusted by pulling up the angle control lever. ④ Seat belt Before driving, adjust the length of the seat belt properly and fit its tongue into the receptacle until it clicks. ⑤ Headrest The headrest position can be adjusted to fit to the driver. Its height can be adjusted by pressing the lock on the seatback and headrest mounting section. WARNING • Make sure to fasten your seat belt to protect yourself in case of rollover or collision. • Never adjust the seat during driving. 2 993C075a ⑥ Seat height adjustment Pull up or push down the height adjustment lever to adjust the seat height in 4 steps. Suitability of each position is as follows: ⓐ Standard position ⓑ When working while observing the back ⓒ When working while observing the front area near the vehicle. ⓓ When the seat is too low for the driver 993C076A • Lifting seat - In the position (a) with the seat empty, push down the height adjustment lever. Then, the front section of the seat is lifted, setting the seat into the position (b). 2 - 55 DESCRIPTION OF OPERATION SYSTEM - In the position (a) with the seat empty, pull up the height adjustment lever. Then, the rear section of the seat is lifted, setting the seat into the position (c). - When trying to adjust the seat from the position (b) to the position (c) or vice versa, the seat is returned to the position (d). • Lowering seat - With the height adjustment lever lifted in the position (d), press the rear section of the seat to lower the rear section, setting the seat in the position (b). - With the height adjustment lever pushed down in the position (d), press the front section of the seat to lower the front section, setting the seat in the position (c). - When trying to adjust the seat from the position (b) to the position (c) or vice versa, the seat is returned to the position (a). 2 - 56 WARNING • Adjust the position of the steering only when the tractor is stationary. Adjusting it during driving can cause an accident. ① J10O357A (18) Steering wheel adjusting lever (tilt lever) he angle of the steering T wheel can be adjusted to suit the driver. The tilt lever is installed under the steering wheel. Use this lever (1) to adjust the position. To fix the position, push down the lever. • Pushing down the lever (1) fixes the steering wheel into the position. • Pulling up the lever (1) enables the steering wheel to be adjusted. (19) Secondary seat • The secondary seat is only for an instructor or inspector. ! DANGER • No one, except the driver, should ride the tractor while moving or driving on a road. • When anyone, other than the driver, rides the tractor, he/she cannot be protected in the cabin in case of rollover, leading to a severe accident and injury. DESCRIPTION OF OPERATION SYSTEM ►intake/exhaust system < General Information > • General Information Our new engine applies all applicable advanced technologies to satisfy the tightened restrictions exhaust, while also improving fuel efficiency and reducing exhaust gas. The exhaust reduction system features a diesel oxidation catalyst (DOC) device to reduce soot particles and an exhaust gas recirculation (EGR) system and (SCR) system to reduce the nitrogen oxide (NOx) from the engine exhaust gas. (1)The EGR system is a device that recirculates exhaust gas to reduce NOx emissions. (2)The muffler has a diesel oxidation catalyst (DOC) device in it. -T his DOC device reduces HC and CO emissions in exhaust gas with reduction catalysts. (3)SCR is used to reduce NOx in emissions by spraying urea into the SCR catalyst. 2 2 - 57 DESCRIPTION OF OPERATION SYSTEM J10O211A (1) Diesel Engine (2) Dosing Module with Injector (3) Temperature sensor (4) SCR Catalyst (5) Temperature sensor (6) Filter (7) AdBlue Supply module (8) AdBlue tank Note) SCR; Selective Catalytic Reduction 2 - 58 (9) AdBlue Temperature sensor (10) Ad Blue level sensor (11) Dosing control unit (12) Actuators (13) Sensors (14) Engine CAN (15) Diagnostic CAN OPERATION 1. Engine starting................................................... 3-2 2. Engine Stopping.................................................. 3-3 3. Engine idling......................................................... 3-4 4. Running-in period............................................... 3-4 5. Starting off, shifting and driving.............. 3-5 6. Turning in field................................................... 3-6 7. Stopping and parking....................................... 3-6 8. Driving on slope................................................. 3-7 9. C autions for driving into / out of field... 3-8 10. Loading to / Unloading from truck......... 3-8 11. C autions for driving on road.................... 3-8 12. Operation check during driving............... 3-9 13. Power connector for trailer................. 3-10 3 OPERATION 1. Engine starting ► How to start engine ① Make sure that there is no obstacle around the tractor. ② Seat on the driver's seat and confirm that the parking brake is applied. ③ Check that each shift lever and PTO switch are in the neutral position. ④ Pull the throttle lever halfway. ⑤ Depress the clutch pedal. The safety switch is activated. ⑥ Insert the key into the main switch and turn the switch to the "ON" position. Check that the engine oil lamp and charge warning lamp come on. ⑦ Tu r n t h e m a i n s w i t c h t o t h e "START" position. When the engine is started, release the switch. ⑧ Confirm that all monitoring lamps go off after the engine is started. 3- WARNING • Never start the engine by connecting the start motor terminal or safety switch directly. The tractor may move suddenly and cause an accident. NOTE • Do not turn the main switch to the "START" position while the engine is running. • Avoid running the start motor over 10 seconds. It consumes a lot of current. • If the engine cannot be started within 10 seconds, wait for 30 seconds and try it again. * ENGINE STARTING CONDITION 1. The engine can be started when operating the ignition switch with the shuttle shift lever in the neutral position, PTO switch in the OFF position and clutch pedal depressed. 2. I f a n y o f t h e a b o v e t h e e conditions is not satisfied, the engine cannot be started. OPERATION 2. Engine Stopping NOTE STOP J10O401B ► Operating principle of preheating system When the main switch is left in the "ON" position, the engine is automatically preheated as necessary. Then, the preheat indicator Lamp on. As soon as the preheating operation is completed, the indicator goes off. The engine can be started while the preheating operation is in progress. • Do not stop the engine at a high speed. • If the engine has been running for an extended period of time, stop the engine only after idling it for 5 to 10 minutes. J10O402B ► Stopping ① Idle the engine. ② Tu r n t h e m a i n s w i t c h t o t h e "OFF" position. ③ Remove the key from the switch. 3- 3 OPERATION 3. Engine idling ► General engine idling After starting the engine, idle the engine for 5 to 10 minutes so that oil is delivered to each part of the engine. NOTE • If the engine is loaded right after it is started, it may cause engine stalling and failure. Make sure to idle the engine first. • If neglecting to idle the engine, it can cause: - seizure of the hydraulic pump - Filure in the hydraulic system. WARNING • Make sure to apply the parking brake while idling the engine. • Never idle the engine in a poorly ventilated area. It can cause carbon monoxide poisoning by emissions. 3- 4. Running-in period ► Engine idling in cold condition Hydraulic oil in this vehicle is also used as transmission fluid. If the temperature drops in winter so oil gets cold, its viscosity rises and the hydraulic pump cannot suck oil in, causing malfunction. Make sure to idle the engine in winter according to the following instructions. Temperature Idling time 0°C or higher At least 10 min 0 ~ -10°C 10 ~ 20 min. -10 ~ -20°C 20 ~ 30 min. -20°C or less At least 30 min. Make sure to keep the following instructions for the initial 50-hour use. (1) Avoid abrupt starting and abrupt stopping. (2) Do not use excessive speed or load. (3) Drive the tractor only when the engine is sufficiently warm. (4) Do not idle the engine at the maximum speed. (5) Check each part and change oil and fluid after 50-hour use. (6) Refer to the section Maintenance for adding and changing engine oil. OPERATION 5. Starting off, shifting and driving Connect Brake J10O403A ► Starting off ① Confirm that the left and right brake pedals are interlocked. Make sure to interlock the left and right brake pedals unless working in a field. ② Lift an implement. ③ Place the main shift lever, range shift lever and shuttle shift lever into the desired positions. ④ Depress the brake pedal to release the parking brake. ⑤ Release the clutch pedal slowly while depressing the throttle pedal to increase the engine speed. ► Shifting and driving To shift during driving, depress the clutch pedal to stop the vehicle in advance. Depressing pedal - It cuts off power. Releasing pedal - It delivers power. However, the 1st, 2nd, 3rd and 4th gears in the main shift system are a synchromesh type, so it is possible to shift with the main shift lever during driving. Make sure to depress the clutch pedal firmly during shifting. WARNING • The driving speed in the reverse direction is almost the same to the speed in the forward direction. Make sure to check the surroundings carefully when driving backward. • Especially, never drive backwards with the range shift lever in the position H. The driving speed becomes faster and it can cause an accident. WARNING • Engage the left and right brake pedals when driving on a road. • Be careful with shoulders while driving in a rural area. • When driving with a large implement attached, be careful with the surroundings. • Never let anyone, except yourself as a driver, ride the tractor. 3- 3 OPERATION 6. Turning in field 7. Stopping and parking WARNING • Avoid turning at a high speed. The Connect Brake J10O403A ① To turn in a field, release the hook for the left and right brake pedals. ② Turn the steering wheel and depress the brake pedal for the desired direction. ③ While turning, keep the engine speed low and turn slowly. 3- tractor can fall on its side. • When the tractor is installed with an implement, its overall length becomes large. Be extra care with other people and objects around when turning. • Connect the left and right brake pedals when it is about to drive ① Operate the throttle lever to set the engine at a low speed. ② Depress the clutch pedal and brake pedal simultaneously. ③ When the vehicle is completely stopped, set the shift lever in the neutral position. ④ Apply the parking brake. ⑤ If an implement is attached to the vehicle, lower it. ⑥ Remove the key from the switch after parking vehicle. ☞ Refer to the page 2-20 for operation of the parking brake. OPERATION 8. Driving on slope ► Starting off on steep slope J10O404A WARNING • After parking, make sure to apply the parking brake. • Avoid parking on a slope if possible. If it is absolutely necessary to park on a slope, chock the rear wheels. ① Depress the brake pedals. ② Depress the clutch pedal to disengage the clutch. ③ Place each shift lever in the low speed position. ④ Set the engine at the mid speed with the throttle lever. ⑤ Release the clutch pedal slowly and keep it depressed halfway. ⑥ Release the brake pedal slowly at the same time. ⑦ Pull the throttle lever again to rev up the engine. Then, release the brake and clutch pedals together to start off. ► Tips for driving on slope (1)Set the main shift lever in the low speed position on a slope to prevent the engine from stopping. (2)Keep the driving speed low on a downhill road. (3)Do not set the main shift lever in the neutral position depress the clutch pedal on a downhill road. WARNING • On a downhill road, never depress the clutch pedal, but use the engine brake. Otherwise, it can cause an accident. 3- 3 OPERATION 9. Cautions for driving into / out of field (1) Check that the left and right brake pedals are connected. (2) It is dangerous to drive into/out of a field if the field is deep from its bank. Use ramps. (3) Move in the perpendicular direction to the bank. (4) When driving out of the field, lower the implement so that the front wheels cannot be lifted. (5) It is recommended to drive into a field backward to utilize full power. WARNING • Be careful to keep the tractor's balance when working on a slope. The tractor may become out of balance and roll over. • It is very dangerous to ride a person as a front weight. 11. Cautions for driving on road (1) When changing the direction on a road, use the turn signal lamp to inform other drivers. (2) Use the low beam when there is any vehicle coming on the other side at nighttime. (3)C heck that the left and right brake pedals are connected. (4) Keep the work lamps off when driving at night. (5) Follow any applicable laws and keep safe driving. (6) Never let anyone ride the tractor, except yourself as a driver. WARNING 10. Loading to / Unloading from truck (1) When loading the tractor onto a truck, drive backward. (2) Be extra careful when using ramps. (3) If the engine stops on ramps, depress the brake pedals immediately and release them slowly to move onto the ground. Then, start the engine again to climb the ramps again. 3- • If driving on a road with an implement attached, the front side of the tractor tends to be lifted and vehicle may not be steered properly. OPERATION 12. Operation check during driving Observe that every part is properly operated during driving. ► Engine oil pressure If the engine oil level warning lamp comes on during driving, the lubrication system may malfunction. Check the engine oil immediately and have your vehicle checked by your workshop. 3 ► Charging If the battery charge warning lamp comes on during driving, the battery is not properly charged. In this case, check the battery condition, and if necessary, have it checked by your workshop. ► Low fuel level warning lamp If the low fuel level warning lamp comes on during driving, fuel is insufficient. Add fuel immediately. ► Engine coolant If the needle of the coolant gauge points at "H," stop the engine and check the followings: • Radiator coolant • Radiator fin for clogging • Fan belt for looseness If necessary, have your machine checked by your workshop. 3- OPERATION 13. Power connector for trailer Power connector for trailer External power supply terminal J10O405A When driving the tractor attached with a trailer, make sure to connect the power connector to the trailer for proper operation of lamps on the trailer. WARNING • When driving on a road with a trailer attached, be sure to connect the power connector to the trailer to inform drivers behind with the moving direction in order to avoid a collision. 3 - 10 External power supply terminal J10O408A ► E xternal power supply terminal It supplies necessary power to an implement • 12V (25A,5A) Work Procedure 1. Precautions for handling implement....... 4-2 2. General implement............................................ 4-2 4 3. Types of Work by speed table..................... 4-8 라- WORK PROCEDURE 1. Precautions for handling implement (1)When driving the tractor to attach or detach an implement, make sure that there is no one in between or around the tractor and implement. (2)Install and remove the implement only on safe and level ground. (3)When installing a heavy implement, install weight on the front to keep balance. (4)When adjusting an implement, apply the parking brake, stop the engine and set the PTO switch in the OFF position in advance. (5)To tow anything, use the towing hitch only. (6)When working with a front loader, install an implement to the back to keep balance (if necessary). 4- WARNING • Read instructions on warning decals on each implement thoroughly before work. • To avoid an injury due to mishandling of an implement, read the user's manual of the implement thoroughly and work safely and precisely with caution. • Installation of an improper implement can lead to an injury. Install only implements specified by the Manufacturer. 2. General implement ► Rotavator <Safety precautions for rotavator> • • • • • • Never remove the safety cover of the rotavator. Do not remove the PTO shaft cover and safety cover on the universal joint. When adjusting each part, disengage the PTO and stop the engine in advance. When driving on a road, keep the PTO disengaged. Also, keep the rotavator lowered on a road as long as it does not hit the ground. For the universal joint, its inner shaft and outer shaft should be overlapped at least 15 cm. Check that the universal joint is firmly fixed to the tractor and rotavator shaft. WORK PROCEDURE <Effective plowing pattern> (1) Sequential returning plowing pattern • This pattern can be useful in a well-planned field in a good condition. • The border shown in the figure is the effective plowing width of the rotavator and should be set a little narrower than three times of one plowing width. • The starting point is the ending point. • Plow in a sequential pattern from (1) to (6) and in a circular pattern from (7) to (18). • When driving forward to plow, have the bank on the right side. • Be careful not to press alreadyplowed soil with the wheels. ⊙ Turning: Moving direction Backword (9) (13) (17) Start Finish 4 (1) (2) (10) (14) (18) (3) (4) (5) (16) (12) (8) (6) (15) A: Border (11) (7) A 995E001a 4- WORK PROCEDURE (2) Alternating returning plowing pattern • This pattern is useful for narrow or short fields or poorly planned fields in which are not easy to turn. • In the figure, the plowing width for (1), (2), (3) and (4) should be overlapped with the one for (5), (6) and (7) for approx. 10 cm. • For the sections (1) to (7), perform plowing in an alternating pattern. For the sections (8) to (19), plow in a circular pattern. • Refer to the sequential returning pattern for other details. ⊙ Turning: Moving direction Start (9) (13) (17) (18) (14) (10) Backward (8) (12) (16) (1) (7) (2) (6) (3) (5) (4) (19) (15) (11) Finish A: Border A 995E002a 4- WORK PROCEDURE (3) Land leveling pattern • The land leveling work may be performed after crushing soil or not. • The vehicle speed can be set faster when performing the land leveling work with soil crushed already. • When working in a wet field, fill the field with a sufficient amount of water so that the trace of plowing cannot be seen. • The border shown in the figure should be set a little narrower than two times of one plowing width. • Refer to the alternating returning pattern for other details. ⊙ Turning: Moving direction Backward (14) (10) 4 (4) (5) (3) (6) (2) (7) Finish (15) (11) (1) (9) (13) Start (8) A: Border (12) A 995E003a 4- WORK PROCEDURE NOTE ※ Cautions for plowing • If it is hard to steer the tractor for plowing as the front wheels are lifted, install additional weight to the front (if no loader is installed) Rear weight Loader valve J10O406A ► Loader WARNING • When connecting the hydraulic pipes, set them according to the operating directions specified on the label attached to the side of the joystick lever. Abnormal operation of a loader can lead to an accident. 4- 993E005a < For safe loader work > Keep the balance between the front and rear by installing a weight to the back of the tractor or attaching a weight or implement using the 3-point link. WORK PROCEDURE Secure view 4 30~50㎝ 993E006a When transporting things with a loader, lower the loader and keep the driving speed slow. Keep the loader 30 to 50 cm off the ground and the driving speed below 5 km/ h. When going onto a slope or unpaved area, lower the speed and drive with care. 993E008a 993E007a Do not lift anything only with one side of the tractor. If so, the tractor may fall on its side. Make sure to distribute the load evenly. Keep the clearance between the rear wheels as large as possible for safety of the tractor. 4- WORK PROCEDURE 3. Types of Work by speed table The tractor speeds specified in the table on the right side are recommended by types of work for optimum efficiency. Increase or decrease the tractor speed according to the soil and work conditions. 993E009a WARNING • Do not let anyone ride a loader for work, such as spreading fertilizer. He/she may fall off the loader, leading to an injury or even death. 4- NOTE • This chapter only provides brief descriptions and instructions for a rotavator and loader. Therefore, for detailed operational instructions and other descriptions, refer to the user's manual of each implement. Speed table for T1054SP J10O407A MAINTENANCE 1. Opening covers................................................... 5-2 2. Inspection items.................................................. 5-3 3. Inspecting and changing coolant............. 5-4 4. Checking and changing oils and fluids..... 5-5 5. Replacing filter and cartridge................ 5-10 6. Checking fuel system and replacing fuel filter........................................................ 5-11 7. Urea tank............................................................. 5-14 8 Checking and cleaning air cleaner......... 5-19 9. Adjusting tread............................................... 5-20 10. Greasing............................................................ 5-21 11. Checking hoses............................................... 5-22 12. Checking electric system.......................... 5-22 13. Checking and adjusting each part........ 5-28 14. Routine maintenance schedule............... 5-31 15. Inspecting electrohydraulic system (SP model)......................................... 5-34 5 MAINTENANCE 1. Opening covers J10O501A ► Opening hood ① Push the hood opening handle under the hood front grill to the left as shown in the figure to unlock the hood. 5- J10O502A ② Lift the hood with hands slightly. Then, the hood is automatically opened by its damper. MAINTENANCE 2. Inspection items To prevent any possible failure, some items should be checked daily. Make sure to perform inspection before driving. ► Inspection items Inspect each part in the following order: ① Check the items that were faulty yesterday ② Go around the tractor and check: - L amps for proper illumination and damage - Tires for inflation pressure, crack, damage and wear - R otating parts, including tires, for loose bolts and nuts - Transmission fluid level - Implement attachment status - Pre-cleaner for cleanness ③ Open the hood and check: - Engine oil level - Coolant level - Fan belt for looseness and damage - A /C belt for looseness and damage ④ Sit on the driver's seat, turn the main switch to the "ON" position and check: - Fuel gauge for proper operation - Fuel level - UREA Level gauge - Engine oil and charge warning lamps for blinking operation - Turn signal lamp - Horn operation - Brake pedal free play - Clutch pedal play ⑤ Start the engine, drive the tractor slowly and check: - Emission color - Brake pedal operation - One brake pedal operation - H eaviness and vibration of steering wheel - Coolant gauge operation - H y d r a u l i c o p e r a t i o n o f 3-point link 5- 5 MAINTENANCE 3. Inspecting and changing coolant Coolant drain plug J10O531A ► Inspecting and changing engine coolant (1) Inspection Open the Coolant cap and check if coolant is filled up to the filler neck. If not, add more coolant to the radiator. WARNING • Do not open the cap when the en- gine is hot. Otherwise, hot steam can burn you seriously. Wait until the engine is sufficiently cooled down. 5- J10O504A (2) Change ① To drain coolant rapidly, open the drain cock and remove the radiator cap simultaneously. At this time, set the heater cock to the Open position to drain coolant. ② Flush the inside of the radiator with clean water thoroughly. ③ Fit the drain cock and add coolant. ④ Start and idle the engine for approx. 5 minutes and check the coolant level in the reservoir tank. Add more coolant as necessary. (3) Antifreeze If coolant freezes, the engine can be damaged. • Clean the radiator thoroughly before adding antifreeze. • The mixture ratio of antifreeze is different by manufacturers and temperature. Refer to the manufacturer's manual. • Mix antifreeze with water sufficiently before adding it. • Adding antifreeze - If evaporated: Add water for the reduced amount. - If leaked: Add mixture of antifreeze and water with the same mixture ratio. CAUTION • If engine coolant gets on your skin, it can irritate the skin and cause a skin condition. Make sure to clean your skin with soap and water or hand cleaner thoroughly. MAINTENANCE 4. Checking and changing oils and fluids 1 Radiator screen Opening lever 1 J10O505A ► C leaning radiator grill and condenser grill When working in a grassy field or working at night, the radiator or condenser grille may be clogged by grass, straws or bugs, reducing cooling performance. Clean the grill in this case. If dust is stuck between the fin and tube, flush the area with clean water. J10O506A ► C l eanin g con d en s e r grill and oil cooler Turn the opening lever to access to the condenser and oil cooler. Clean them with clean water. Remove the grill by unscrewing the pin (1) and moving it in the arrow direction. Oil filling hole Engine oil dipstick J10O507A ► C hecking and changing engine oil (1) Inspection ① Pull out the dipstick, wipe its tip and insert it again. Then, pull it out and check that the oil level is between the upper and lower limits. ② If the level is below the lower limit, add oil. NOTE Do not clean the radiator fin with water jet. It can deform the fin. Upper limit Lower limit 993F007a 5- 5 MAINTENANCE NOTE • Do not add engine oil over the up- Engine oil Drain plug J10O508A (2) Changing • Unscrew the drain plug on the lower section of the engine to drain contaminated engine oil. Since hot oil flows out of the engine first, be careful not to get burnt. • After draining oil, tighten the engine oil drain plug. • Add the specified amount of the specified engine oil through the filler hole. * There is one engine oil drain hole on each side of the engine. 5- per limit level. • Check the engine oil before starting the engine or at least in 5 minutes after the engine is stopped. • When trying to use new oil from a different manufacturer or oil with different viscosity, drain used oil completely before adding new oil. (3) Oil specification Change oil with API classification grade cJ4 When changing engine oil, replace the filter cartridge as well. CAUTION • If engine oil gets on your skin, it can irritate the skin and cause a skin condition. Make sure to clean your skin with soap and water or hand cleaner thoroughly. Transmission fluid filler hole J10O509A ► C hecking and changing transmission fluid (1) Inspection Perform inspection while the engine is stopped. ① Pull out the dipstick, wipe its tip and insert it again. Then, pull it out and check that the oil level is between the upper and lower limits. ② If the level is below the lower limit, add fluid. MAINTENANCE NOTE • Do not add fluid over the upper Upper limit Lower limit J10O510A NOTE • The transmission is already filled with transmission fluid properly. • When using a hydraulic implement, add more fluid for the amount of the implement. Transmission fluid drain plug J10O511A (2) Changing ① Unscrew the drain plug on the lower section of the transmission to drain contaminated transmission fluid. As hot fluid flows out of the transmission first, be careful not to get burnt. ② After draining fluid, tighten the transmission fluid drain plug. ③ Pour the specified amount of the specified transmission fluid through the filler hole. limit level. • Check the fluid before starting the engine or at least in 5 minutes after the engine is stopped. • When trying to use new fluid from a different manufacturer or fluid with different viscosity, drain used fluid completely before adding new fluid. • This tractor uses transmission fluid as hydraulic oil. • Therefore, keep the oil change interval. 5- 5 MAINTENANCE (3) Oil specification Dongyang genuine oil THF 500 Front axle oil gauge CAUTION If transmission fluid gets on your skin, it can irritate the skin and cause a skin condition. Make sure to clean your skin with soap and water or hand cleaner thoroughly. J10O512A J10O514A Front axle oil drain hole J10O513A 5- Front axle oil filler hole ► Inspecting and changing front axle oil (1) Inspection ① Pull out the dipstick, wipe its tip and insert it again. Then, pull it out and check that the oil level is between the upper and lower limits. ② If insufficient, add oil. (2) Changing ① Unscrew the drain plugs from the bottom of the axle and left/ right final cases to drain contaminated engine oil. Since hot fluid flows out of the engine first, be careful not to get burnt. ② After draining oil, tighten the oil drain plug. ③ Add the specified amount of the specified oil through the filler hole. MAINTENANCE NOTE • Do not add front axle oil over the upper limit level. • Check the front axle oil before starting the engine or at least in 5 minutes after the engine is stopped. • When trying to use new fluid from a different manufacturer or fluid with different viscosity, drain used fluid completely before adding new fluid. (3) Oil specification Gear oil SAE 90W (API GL-4 grade or higher) CAUTION • If oil gets on your skin, it can ir- ritate the skin and cause a skin condition. Make sure to clean your skin with soap and water or hand cleaner thoroughly. Upper limit ② If air is mixed in the pre-filter or main filter, unscrew its bleeding bolt (2), shown in the figure, and turn the main switch to run the start motor. Then, air in the fuel filter is bled through the bleeding bolt as shown in the figure above. CAUTION • Avoid to run the start motor for over 5 consecutive seconds, but run it several times at shorter intervals. NOTE If filling the port with fuel before installing the fuel port, it is not necessary to bleed the filter. Lower limit J10O515A ① Make sure that the amount of fuel in the fuel tank is sufficient. 5- 5 MAINTENANCE 5. Replacing filter and cartridge Hydraulic oil filter Indicator J10O516A ► Replacing transmission hydraulic oil filter ① Remove the hydraulic oil filter element by turning it counterclockwise with a wrench. ② Apply a thin film of oil to the O-ring of a new cartridge and install the new cartridge by tightening it with a hand. When its packing touches the sealing surface, turn it approx. 2/3 turns further with a wrench. ③ Add the specified amount of hydraulic oil. ④ Check the oil level with the dipstick again. If still insufficient, add more. 5 - 10 High-pressure filter J10O517A ► Replacing and servicing high-pressure filter ① When the indicator is turned on in red after the engine is started, the element needs to be replaced. ② Stop the engine and turn the cover counterclockwise with a spanner to remove it. ③ Pull down the cartridge to remove it. ④ Replace the element. ⑤ Apply a thin film of oil to the O-ring and push it up to fit it. ⑥ Wash the removed cover with hydraulic oil and install it with a spanner. ⑦ Start the engine and confirm that the indicator is turned on in green. Engine oil filter cartridge J10O518A ► Replacing engine oil filter cartridge ① Remove the engine oil filter cartridge by turning it counterclockwise with a wrench. ② Apply a thin film of oil to the O-ring of a new cartridge and install the new cartridge by tightening it with a hand. When its packing touches the sealing surface, turn it approx. 2/3 turns further with a wrench. ③ Add the specified amount of engine oil. MAINTENANCE 6. Checking fuel system and replacing fuel filter ④ Run the engine for approx. 5 minutes and check for proper operation through the engine oil warning lamp on the instrument cluster. Then, stop the engine. (This warning lamp should be turned off while the engine is running.) ⑤ Check the oil level with the dipstick again. If still insufficient, add more. Connector Fuel filler port Priming pump J10O519A ► Fuel Use only low sulfur or ultra low sulfur diesel fuel. (1) Fuel filler port DANGER • When checking the fuel system or fueling, keep flammable items, such as a lit cigarette, away from the tractor. • The tractor may catch fire. J10O520A (2) How to bleed fuel system It is necessary to bleed the system under the following conditions: - The engine is stopped due to the empty fuel tank. - The filter or pipe is removed. Bleed the system according to the following procedures: ① Disconnect the connector. ② Press the priming pump repeatedly to bleed the system. 5 - 11 5 MAINTENANCE CAUTION • Periodically check the fuel filter J10O535A ► fuel filter draining (1) Loosen the drain valve ① Loosen the drain valve (A) at the bottom of the fuel filter. CAUTION • Do not use tools to loosen the drain valve. Use of tools may damage the drain valve. 5 - 12 J10O536A (2) Drain the fuel filter ① Discharge water from the fuel filter through the drain valve (A) for about 10 seconds. and drain the water from it. Otherwise, moisture may flow into the fuel unit of the engine, resulting in critical faults in the fuel injection pump, the fuel injection pipe, the common rail, and injectors. In addition, the performance of the fuel filter may be degraded or damaged. • Fuel may be drained when water is drained from the fuel filter. Fuel is highly inflammable. Fire may occur when you smoke or use fire near the engine when draining water from the fuel filter. MAINTENANCE CAUTION • Use clean, specified, and quali- fied fuel only. Using irregular or unspecified fuel may result in more water in the fuel filter. • Drain the water from the fuel filter if the fuel filter alarm lamp is turned on. Otherwise, moisture may flow into the fuel unit, causing the engine to stop. J10O537A (3) Tighten the drain valve ① Tighten the drain valve (A) at the bottom of the fuel filter. ► Cleaning fuel filter Drain water and remove foreign materials from the fuel filter at every 100 hours of operation. ① Remove the plug (1) on the bottom of the filter. It can be removed by unscrewing it. ② Drain water and remove foreign materials completely. Then, fit the plug. ③ Then, run the engine to bleed the system. CAUTION • Do not use tools to loosen the drain valve. Use of tools may damage the drain valve. 5 - 13 5 MAINTENANCE 7. Urea tank CAUTION • The engine power is limited when Urea tank filler port 2 1 J10O522A ► Replacing fuel filter element ① Open the drain plug (1) to drain fuel in the filter. ② Unscrew the filter (2) from the filter head. ③ Push and turn the element in the filter counterclockwise to remove it from the filter body. ④ Screw in a new O-ring and element into the filter body. ⑤ Turn the filter until the filter body touches the filter head. 5 - 14 J10O529A ► Urea tank filler port When the urea amount in the tank is below 25%, the urea level warning lamp comes on. In this case, add more urea into the tank. ① Stop the engine and remove the urea filler cap. ② Pour urea through the filler port until the urea level reaches the mark on the gauge which is located on the right side of the cap. ③ Turn the filler cap clockwise completely. ※ The urea level gauge is located on the multi-display. driving only with 10% of the full urea capacity. • Never add any fluid, such as diesel fuel, gasoline and alcohol, into the urea tank other than the recommended urea (complying with ISO22241 or DIN70070). • Do not add urea over the middle mark in the tank gauge. The tank may overflow. • Also, the tank can be frozen and broken in winter. • The urea tank gauge is designed to prevent overflow of the tank. It is not designed to be used as a level gauge. • The urea level in the tank can be checked on the multi-display screen. MAINTENANCE CAUTION • If using poor-quality urea or flu- id other than the recommended, it can damage the after-treatment system and other parts in the vehicle. • If using poor-quality fuel, foreign materials are collected in the SCR catalyst, leading to piling up and breaking of the catalyst. J10O550A J10O538A ► Urea filter replacement J10O539A ① Remove the filter cover. • required Tool : 27mm Wrench with 20 + 5N·m Torque 5 - 15 5 MAINTENANCE J10O540A J10O542A J10O543A ③ Insert the tool till it clips on guide. J10O541A ② Remove the equalizing element 5 - 16 J10O544A ④ Then ratate in clockwise direction as shown in front view. MAINTENANCE Pull out Position J10O545A J10O545A • J10O545A ⑤ When no futher rotation possible (after ca. 45°), then pull out the filter Insert Position J10O548A istance of the tool from SM D when in pull out position : ca.27mm. J10O549A ⑥ Distance of the tool edge from SM when filter is completely demounted : ca. 140.7mm. ⑦ Install a new filter, new equalizing element. 5 - 17 5 MAINTENANCE Ingredient Unit Item MIN. MAX. Test method 31.8 33.2 kg/m 1,087 1,093 ISO 22241-2 Annex Bc ISO 22241-2 Annex Cc ISO 3675 or ISO 12185 - 1.3814 1.3843 ISO 22241 2 Annex C %(m/m)b - 0.2 ISO 22241 2 Annex D Biuret %(m/m)b - 0.3 ISO 22241 2 Annex E Urea concentrationa Density (at 20°Cd) Refractive index (at 20°Ce) Ammonia alkalinity %(m/m) b 3 Aldehyde mg/kg - 5 ISO 22241 2 Annex F Insoluble matter mg/kg - 20 ISO 22241 2 Annex G Phosphate (PO4) mg/kg - 0.5 ISO 22241 2 Annex H Calcium mg/kg - 0.5 Iron mg/kg - 0.5 Copper mg/kg - 0.2 Zinc mg/kg - 0.2 Chromium mg/kg - 0.2 Nickel mg/kg - 0.2 Aluminum mg/kg - 0.5 Magnesium mg/kg - 0.5 Sodium mg/kg - 0.5 Potassium mg/kg - 0.5 Identical equation - 5 - 18 Identical ISO 22241 2 Annex I ISO 22241 2 Annex J a Standard: 32.5%(m/m). b The unit "%(m/m)" is used to indicate mass fraction of matter according to the international standard. c. Calculated without excluding ammonia nitrogen e. Standard: 1.3829 d. Standard: 1,090 kg/m 3 MAINTENANCE It is necessary to add a tracer element to AUS 32. Make sure that the SCR system is not damaged by the quality of AUS 32 specified in the table and tracer element. 8 Checking and cleaning air cleaner (3)Make sure to install it securely so that foreign materials do not enter the cover. (4)Never drive the vehicle with the element removed. Element (inner/outer) NOTE • The condition of ISO 4259 within the range should be applied in between the maximum and minimum values. Also, the minimum difference of 4 x R (R = reproducibility of test method) should be considered. However, in order to keep the quality high, 4 x R is not considered for the urea concentration. • Values for the urea concentration, density and refractive index are actual values. (Refer to ISO 4259 for actual values.) • The AUS 32 manufacturer produces products based on the values for the annotation a, d and e. • It is necessary to check if urea is satisfied with the required specifications. The ISO 4259 conditions should be applied. Vacuum valve J10O533A Check and clean the air cleaner periodically as follows: ► Cleaning vacuum valve Pull out the valve with a hand and remove dust from its inside. If it is dirty or watery, wipe it with a dry rag thoroughly before fitting it again. < Precautions for inspection and service of air cleaner > (1)Use only standard elements and do not apply oil on it. (2)Foreign materials in the cover should be removed thoroughly as well. ► Cleaning element Blow compressed air from the inside toward the outside of the element. Keep proper distance between the air nozzle and element. ► Replacing element After cleaning the element 5 times or if it is damaged, replace it with a new one. ► Cleaning cover Undo the clip and remove the cover to wash it thoroughly with water. 5 - 19 5 MAINTENANCE 9. Adjusting tread ► A djusting front wheel tread The tread can be adjusted by switching the rims and discs on the left and right sides. ► A d j u s tin g r ea r w h ee l tread The tread can be adjusted by switching the rims and discs on the left and right sides. WARNING • For safety, have tread adjustment performed by your dealer or workshop. • Never remove tires if there is no safe supporting device. The tractor can roll over. 5 - 20 Possible combination of rear wheel with front wheel table Rear Wheel A A B A C A D B E D F F Front Wheel B B C E G C C D F D E G F G MAINTENANCE 10. Greasing ■ Standard ► Greasing points For general greasing points, refer to the fuel, oil and fluid specification chart. (See page 5-33.) However, add grease before work if the tractor is to be used in a wet field. Tightening torque 1,600 - 1,800 ㎏·㎝ 5 Tightening torque 3,200 - 3,400 ㎏·㎝ Unit: mm The value marked with * is the tread value at factory. 993F023a 5 - 21 MAINTENANCE 11. Checking hoses Rubber parts, such as the fuel hose and radiator hose, are aged by time even when the tractor is not in use. Therefore, such parts should be replaced with their tightening bands every 2 years or when they are damaged. WARNING • If any fuel hose is damaged, fuel leaks and it can catch fire. Make sure to check the fuel hose and take a necessary action. 5 - 22 12. Checking electric system ► C hecking and charging battery Charge indicator DANGER • When charging the battery after removing it from the tractor, it produces hydrogen gas, presenting a fire risk. Charge the battery only in a well-ventilated area. • The battery produces highly flammable hydrogen gas which can explode. Keep flammable items and spark away from the battery. • The battery electrolyte is sulfuric acid so can burn your skin and eyes. Be careful not to spill any. • If the battery electrolyte gets on your eyes, skin, clothes or object, rinse it with water thoroughly. If you swallowed it, drink a lot of water. Also, get medical attention immediately if acid contacts your eye or is swallowed. • If keeping using or charging the battery with its electrolyte level below the "LOWER LEVEL" mark, it can lead to battery damage or even explosion. 993F025a The battery has the charge indicator: • Green - Fully charged • Red - Charging required • White - Insufficient electrolyte MAINTENANCE < Checking > ① Checking battery charging level • If the battery is not used for over two weeks, it may become hard to start the engine. Charge the battery in this case. • The exact charging level can be measured with a hydrometer or through a certain test. ② Check that the electrolyte level is between the upper and lower limits. If insufficient, add battery acid to the upper level. ③ If the battery terminal is corroded, it cannot deliver current. If it is corroded or contaminated, wipe it with sandpaper or a brush. Negative (-) terminal (Black) Positive (+) terminal (Red) ⑤ Turn the battery switch OFF and connect the cables to the negative and positive battery terminals correctly. ⑥ When using a charger, its charging current should be below 10 A. 993F026a 5 < Charging > ① Turn the ignition switch to the "OFF" position and remove the battery from the tractor. ② Charge the battery in a well-ventilated area. ③ Charge the battery with the normal procedures and avoid quick charging. ④ Open the electrolyte filler hole of the battery. 5 - 23 MAINTENANCE 993F027a ► Jump start ① Turn off all electric devices. ② Connect the positive terminal of the normal battery to the positive terminal of the discharged battery with the jump cable. ③ Connect the negative terminal of the normal battery to the engine body of the tractor for the discharged battery with the jump cable. 5 - 24 ④ Firstly, start the engine of the vehicle with the normal battery. Then, start the engine of the tractor with the discharged battery. ⑤ After the engine is started, disconnect the negative cable first. Then, disconnect the positive cable. ⑥ Charge the discharged battery for approx. 30 minutes after the engine is started. WARNING • Make sure to connect the positive terminal first and connect the negative terminal to the engine body of the tractor with the discharged battery. ► Checking electric wiring (1)L o o s e w i r i n g t e r m i n a l s c a n cause contact failure and damaged wirings can lead to performance deterioration of electric devices, short circuit and fire. Replace or repair aged and damaged wirings. (2)If wiring sheath is peeled off, wrap wiring with insulating plastic tape. (3)If fasteners or bands to fix wirings are damaged, fix wirings with clamps. (4)Have wirings checked by your workshop once a year regularly to avoid fire. MAINTENANCE ① J10O531A ► Disconnecting battery The function of the battery disconnect switch is to disconnect the power supply to the electrical system by interrupting the connection to the battery. This has benefits for tractor safety and operation, in particular: (1)Protects the electrical system against short circuit; (2)Reduces battery self-discharge when the tractor is left idling for prolonged periods; (3)Allows maintenance and repairs to be carried out in conditions of safety. Turn the knob to “OFF” to disconnect the battery and back to “ON” to resume normal operation. The battery disconnect knob (1) is located on the bracket to the right of the battery. The battery disconnect knob may be removed for safety purposes in the manner described below. < Removal of the knob > (1)Turn the knob to the “off” position; the knob cannot be removed in this position. (2)Press the knob in and continue to turn it counter-clockwise as far as it will go. (3)Remove the knob. < Refitting the knob > (1)Refit the knob. (2)Press and turn the knob clockwise, positioning it at 45°. Body fuse box J10O523A Normal Open circuit 993F029a ► Checking and replacing fuse (1) Body fuse box Fuses are installed in this tractor to prevent any possible accident in case of wiring circuit malfunction. If the electric system is malfunctioning during driving, check for any blown fuse. 5 - 25 5 MAINTENANCE ① Remove the cover of the fuse box. ② Remove the blown fuse. ③ Fit a new fuse with the same capacity. ④ The function and capacity of each fuse are indicated on the cover of the fuse box. WARNING • If using fuses other than the specified, wirings can be overheated, leading to a fire. Never use a fuse with different capacity. Also, never use a steel wire or foil instead of a fuse. 5 - 26 J10O524A (2) Fuse This tractor has 5 slow-blow fuses installed to its wirings (1 for battery positive terminal). These fuses are blown to cut current to the electric circuit in order to protect wirings. Find the cause for blown fuses and replace them with the specified genuine parts. 993F032a ► Cabin relay box This supplies power to the cabin control panel and cabin electric devices. If any cabin electric device is not operating properly, check this part. If defect is found, replace it with a new one. (The cabin relay box is installed in the roof.) MAINTENANCE ► Replacing lamp bulb If a lamp does not come on by operating the corresponding switch: ① Check the corresponding fuse. ② If the fuse is intact, remove the bulb socket from the lamp. ③ Remove the bulb from the socket and check for blown filament. ④ If the filament is blown, replace the bulb with a new bulb with the same capacity. Lamp lens 993F033a ► Replacing turn signal lamp/position lamp ① Remove the lamp lens using a flat-bladed screwdriver. Bulb Specifications Handlamp 12V55W / 55W Trun signal lamp (Front) 12V 21W Turn signal lamp (Rear) 12V 21W Position lamp (Front) 12V 8W Stop/Position lamp 12V 21W / 5W Backup lamp 12V 21W Interior lamp 12V 10W Work lamp H3 12V 35W Position lamp (12 V 8 W) 993F034a ② Remove the bulb by pressing it and turning it counterclockwise. Fit a new bulb by pressing it turning it clockwise. 5 - 27 5 MAINTENANCE 13. Checking and adjusting each part WARNING • If the tractor moves slowly with the clutch pedal depressed, have the inching cable adjusted by your dealer or workshop. • Never adjust the inching cable by yourself. Cover 993F035a ③ Install the lamp lens by pressing it against the cover from one side. 993F036a ► Adjusting clutch pedal inching cable After prolonged use of the clutch pedal, play of its inching cable can become excessive. ► A djusting clutch pedal play Adjust and fix the cable play so that the main valve inching spool stroke is 12 mm when the clutch pedal is fully depressed. For precise adjustment, have your system checked by your dealer. 5 - 28 MAINTENANCE Bolt Adjusting bolt Adjusting bolt Adjusting bolt Bolt 7 - 9 mm J10O525A ► C hecking and adjusting water pump belt ① Unscrew the Water pump mounting bolts slightly and move the Water pump to adjust the tension of the belt. ② Check the belt tension. Press the center of the belt. If it is deflected for 7 - 9 mm, it is normal. 7 - 9 mm J10O526A ► C hecking and adjusting A/C compressor belt Check and adjust the tension of the A/C compressor belt regularly. ① Unscrew the tension adjusting bolt of the compressor belt. ② Pull the bolt to adjust the tension. Then, tighten the bolt. ③ Press the center of the belt with a filter. If it is deflected for 7 - 9 mm, the tension is proper. J10O377A ► C hecking and adjusting fan belt ① Unscrew the alternator mounting bolts slightly and move the alternator to adjust the tension of the belt. ② Check the belt tension. Press the center of the belt. If it is deflected for 7 - 9 mm, it is normal. 5 - 29 5 MAINTENANCE Excessive pressure Standard Insufficient pressure Ground contact 993F039a ► Tire inflation pressur Check if the inflation pressure of the front and rear tires is correct. If not, adjust it to the specification. Model T854, T954 T1054 5 - 30 Item Specifications Inflation pressure (kg/cm2) Front wheel 13.6-24 6PR 1.6 Rear wheel 16.9-34 8PR 1.6 Front wheel 13.6-24 6PR 1.6 Rear wheel 18.4-34 10PR 1.6 MAINTENANCE 14. Routine maintenance schedule ○ : Check, Add, Adjust ● : Replace ► Routine maintenance schedule △ : Clean, Wash ★ : Service by workshop CAUTION • Check or adjust each part only when the engine is stopped. • When any hot part should be serviced, wait until it is cooled down. Item Checking Item Hourmeter display daily 50 100 150 200 250 300 350 400 450 500 550 600 Engine oil & cartridge ○ Cleaning fuel filter and replacing element ○ Radiator coolant Engine ● ● Replace every 1,200 hours(To maintain the concentration of antifreeze, check coolant every 500 hours.) Air cleaner element Fan belt ● △ ○ ● △ ● △ Remarks Replace every 500hours After first 50hours (Check daily) Replace every 500hours (Check daily) 5-12 5-15 Replace every 200hours (Check daily) Battery 5-25 5-18,21 Radiator, Air cleaner hoses and bands ○ ○ Checking fuel hose and band ○ ○ Cleaning turbocharger inlet UREA filter 5-5, 10 5-4 ● ● Ref. Page ★ Replace every 3000 hours Hoses Replace every 2years Hoses Replace every 2years 5 - 31 5 MAINTENANCE ○ : Check, Add, Adjust ● : Replace Item Checking Item Hourmeter display 50 100 150 200 250 300 350 400 450 500 550 600 Transmission fluid Hydraulic oil filter ● ● △ ● High-pressure filter ○ ○ Toe-in ● ○ 5-6 Every 200 hours 5-10 Add every 50 hours, daily if working in watery field Inching valve stroke Check frequently before driving Tightness of Front / Rear wheels Check frequently before driving ○ - ○ ○ 5-21 ○ ○ ○ 0 - 4 mm Stroke 10 mm ○ Rubber hoses 5-8 ★ Greasing each part Checking wirings Ref. Page Every 550 hours ○ ★ Adjusting throttle system 5 - 32 ● Remarks Replace when indicator is in red Front axle oil Body Standard ● △ : Clean, Wash ★ : Service by workshop ○ Every year - MAINTENANCE ► Fuel, oil and fluid specification chart No. 1 Engine oil Transmission check hole fluid check hole Transmission fluid drain hole Engine oil filler hole Front axle filler hole & check hole Front axle Drain hole Engine 3 Transmission fluid 4 Front axle 5 Fuel tank 6 ⊙ Filler hole 8 Engine oil drain hole Coolant 2 7 Transmission fluid drain hole Fluid type Lift rod, Check link Front axle tie rod Urea Specifications Capacity (ℓ) Anti-freeze API class CJ4 grade or higher Engine oil Genuine Dongyang oil THF500 Gear oil API GL-4 SAE 90W or higher Diesel fuel Grease Grease ISO22241 or DIN70070 16 15 75 17.5 110 Sufficient amount Sufficient amount 18 993F040a ● Grease nipple ▲ Drain hole ■ Check hole 5 - 33 5 MAINTENANCE 15. Inspecting electrohydraulic system (SP model) Status LED External hitch lifting button Control mode Set point 2 Set point 1 J10O527A ► Calibration for replacement of position sensor/ EHR-B (Bosch ECU) Step 1:Start the engine. Step 2:Set the dial to the control mode on the Bosch control panel as shown in the figure. Step 3:Set the dial to the set point 1 as shown in the figure. Step 4:Press the external hitch lifting button to lift the 3-point hitch. 5 - 34 External hitch lowering button Step 5:Press and hold the external hitch lifting button even after the 3-point hitch is fully lifted. Step 6:Hold the external hitch lifting button until the status LED on the Bosch control panel blinks and then stops. Step 7:When the LED on the Bosch control panel stops blinking, release the external hitch lifting button. Step 8:Set the dial to the set point 2. Step 9:Press the external hitch lowering button to lower the 3-point hitch. Step 10: Press and hold the external hitch lowering button even after the 3-point hitch is fully lowered. Step 11: Hold the external hitch lowering button until the status LED on the Bosch control panel blinks and then stops. Step 12: W h e n t h e L E D o n t h e Bosch control panel stops blinking, release the external hitch lowering button. Step 13: Stop the engine, wait for 5 seconds and turn the ignition switch to the "ON" position for 5 seconds. MAINTENANCE ► E rror code display for hydraulic system If an error is occurred in the hydraulic lifting/lowering system: ① The type of the error is displayed by blinking of the status LED on the control panel. ② The error code is displayed through the indicator on the meter panel simultaneously. Status LED (indicator (1)) J10O528A ► E rror code display of control panel status LED When there is an electric or electronic fault, the indicator (1) blinks according to the setting in the system to inform the type of the fault. To read the error code properly, observe the number and sequence of blinking of the indicator (1) carefully. Read an error code according to the following steps: Step 1:The LED on the control panel stops for approx. 2 seconds before indicating a code. Step 2:After a brief stop, it blinks for the number of the first digit of the error code at a short interval. Step 3:After delivering the first digit, it stops blinking for approx. 1 second. Step 4:After a brief stop, it blinks for the number of the second digit of the error code at a short interval. The control panel LED displays one error code with the highest priority (severe fault) at one time. To check for any other error codes, this code with the highest priority should be cleared. Then, the control panel LED displays another error code if there is any. CAUTION • Errors, that prevents the lift controls from operation, has the highest priority. 5 - 35 5 MAINTENANCE ► LED blinking by error code If there is an error in the system, the status LED indicates this error by blinking in the specified setting. ● : ON ○ : OFF Faults 1phase 2 phase 3 Phase code 2 sec. First digit 1 sec. 4 Phase Second digit ○ ● ○ ○ ● ○ ●● ○ ● ○ ●●● 14 ○ ● ○ ●●●● 15 ○ ● ○ ●●●●● 16 ○ ● ○ ●●●●●● ○ ●● ○ ○ ○ 11 12 13 17 22 23 24 28 31 32 33 34 36 44 5 - 36 ○ ● ● ○ : Pause ● : Flash Indicates Circuit Fault of the Lift Arm solenoid for Raising Indicates Circuit Fault of the Lift Arm solenoid for Lowering Indicates Short Fault of the Lift Solenoid for Raising/Lowerring Indicates Connecting Fault of the Exterior (Raise and Lower) control button for Raising Indicates Connecting fFault of the Exterior (Raise and Lower) control button for Lowering Indicates power Supply Fault of the Lift Arm controller (In short Circuit to +10V) ○ ●●●●●●● ●● ○ ●●● ●● ○ ●●●● ○ ●● ○ ●●●●●●●● ○ ●●● ○ ● Indicates Left Draft Sensor Fault ○ ●●● ○ ●● Indicates Left Draft Sensor Fault ○ ●●● ○ ●●● ○ ●●● ○ ●●●● ○ ●●● ○ ●●●●●● ○ ●●●● ○ ●●●● ●● Description Indicates power Supply Fault of the Lift Arm controller (In short Circuit to +10V) Indicates Position Sensor Fault Indicates Setpoint knob fault Indicates Upper limit knob fault Indicates Control Lever(Lift / stop / lowering) Switch fault Indicates Low battery voltage fault (below+8v) Indicates Lowering speed control knob fault Indicates Position / Draft sensitivity control knob fault Indicates Position Sensor needs calibration MAINTENANCE ► The error code is displayed through the indicator on the meter panel simultaneously. Error codes are displayed for 3P device and other devices' failure. Find the cause and take any necessary action. Fault code Description 11 Indicates Circuit Fault of the Lift Arm solenoid for Raising 12 Indicates Circuit Fault of the Lift Arm solenoid for Lowering 13 Indicates Short Fault of the Lift Solenoid for Raising/Lowering 14 Indicates Connecting Fault of the Exterior (raise and Lower) control button for Raising 15 Indicates Connecting Fault of the Exterior (raise and Lower) Control Button for Lowering 16 Indicate Power Supply Fault of the Lift Arm Controller (In short Circuit to +10V) 17 Indicate Power Supply Fault of the Lift Arm Controller (In short Circuit over +16V) 22 Indicates Position Sensor Fault 31 Indicates Right Daft Sensor Fault 32 Indicates Left Daft Sensor Fault 1301 Pressure too low at Hydraulic Clutch 1402 Short or Connecting fault at 4WD drive Solenoid 1403 Short or Connecting fault at Power shift (High/Low speed) Solenoid 1405 Short or Connecting fault at Forward Drive Terminal Solenoid 1406 Short or Connecting fault at Reverse Drive Terminal Solenoid 2301 Short or Connecting fault at Shuttle S/W 2302 Short or Connecting fault at strainer 5 5 - 37 MEMO STORAGE AND DISPOSAL 1. Tractor storage............................................... 6-2 2. Usage and disposal........................................... 6-3 6 STORAGE AND DISPOSAL 1. Tractor storage ► Daily storage (1)Store the tractor after cleaning it. Especially, clean it thoroughly after harrowing or working in a wet field. (2)Make sure to lower an implement. (3)Store the tractor indoors if possible. (4)If storing the tractor outside, cover it. (5)For better startability, it is recommended to remove the battery from the tractor and keep it indoors in winter. (6)If the outside temperature is below 0℃, add antifreeze or drain coolant completely to prevent the engine from freezing and bursting. (7)Remove the key and store it separately. 6- ► Long-term storage Clean the tractor thoroughly and store it as follows: (1)Change engine oil with new oil and run the engine for 5 minutes to distribute oil to each part evenly. (2)Drain coolant from the radiator. Then, make a label indicating "No Coolant" and fix it onto the steering wheel. If antifreeze is already added, it is not necessary to drain coolant. (3)Add oil, fluid and fuel to each part according to the maintenance chart. (4)Apply a thin film of grease of oil to body parts that are apt to rust. (5)Check each bolt and nut for looseness and tighten any loose bolt and nut. (6)Set the tire inflation pressure a little higher than the specification. (7)Remove a weight. Detach or lower an implement. (8)Chock the rear wheels. (9) Remove the battery or disconnect the negative battery cable. (10) Disengage the clutch with the cut-off arm. If not, the clutch disc can be stuck to the flywheel after long period time. (11) P lace wood blocks under the tires to protect them. (12) C harge the battery every 2 months during long-term storage. (13) Store it in a dry place to avoid rain or snow and cover the body. STORAGE AND DISPOSAL 2. Usage and disposal ► Use after long-term storage Keep the following instructions when using the tractor after its long-term storage. (1)Inspect the tractor thoroughly before driving it. (2)To keep performance and life of the engine, idle the engine for approx. 30 minutes after starting it. NOTE • For engine lubrication, run the engine at 1,500 - 2,000 RPM for 5 to 10 minutes once a month. • Remove the key from the tractor and store it separately. CAUTION • If the battery is not to be removed, disconnect its negative terminal at least. • If wiring is damaged by rodents, its short circuit can start a fire. It is recommended to keep the followings to protect the environment: (1)Avoid overloading work as it can lead to incomplete combustion and emissions that can pollute the air. (2)When changing oil, including engine oil, transmission fluid, hydraulic oil and coolant, be careful not to spill it and discard used oil according to the applicable law. Used oil should be treated with care and discarded properly as it can contaminate soil and water. (3)When this or other machine's life is expired, do not neglect or discard it on your own, but contact your dealer so that the approved service provider can discard the machine according to the laws. 6 6- MEMO TROUBLESHOOTING 1. Engine system...................................................... 7-2 2. Clutch system..................................................... 7-5 3. Brake system....................................................... 7-5 4. Steering system................................................. 7-6 5. Hydraulic system............................................... 7-7 6. Electric system.................................................. 7-8 7. A/C / heater system............................................ 7-9 7 TROUBLESHOOTING 1. Engine system TROUBLE Engine system ACTION • Clutch pedal released • PTO ON/OFF switch set in ON • Depress the clutch pedal • Set the PTO ON/OFF switch into the OFF position • Defective safety switch • Battery discharged • Loose terminal • Have it repaired or replaced by workshop • Charge the battery • Check for looseness and corrosion. Clean, tighten and • Faulty switch • Defective start motor • Have it repaired or replaced by workshop • Have it repaired or replaced by workshop The start motor runs but its speed cannot be increased • Weak battery • Poor ground • Incorrect viscosity of engine oil • Charge the battery • Clean the contact and connect the ground firmly • Change engine oil with proper viscosity The start motor runs but the engine cannot be started • Air in fuel system • Clogged fuel filter • No fuel supply • Defective engine • Defective key stop unit • Bleed the system • Clean or replace the filter • Open the cock and add fuel • Have it repaired by workshop • Have it repaired by workshop • Air in fuel system • Clogged fuel filter • Clogged injection nozzle • Fuel leak from pipe • Bleed the system • Clean or replace the filter • Have it repaired by workshop • Tighten the clamp, replace the pipe or machine the • Poor fuel injection • Have it repaired by workshop The start motor does not rotate when the main switch is turned The engine runs irregularly 7- CAUSE position apply grease surface of the copper washer before installation TROUBLESHOOTING TROUBLE Engine stops at low speed Engine system The engine overruns The engine stalls suddenly CAUSE ACTION • Defective injection pump • Incorrect engine valve clearance • Low idle speed • Faulty nozzle • Have it repaired by workshop • Have it repaired by workshop • Adjust the speed to the rated speed • Have it repaired by workshop • Clogged governor by foreign • Have it repaired by workshop materials or dust • Oil increase • Insufficient fuel • Faulty nozzle • Engine seizure by insufficient oil or poor lubrication • Have it repaired by workshop • Add more fuel and bleed the system • Have it replaced by workshop • Have it repaired by workshop • Pull the fan belt. If the crank pulley is moved, it may indicate insufficient fuel and faulty nozzle. The engine is overheated • Insufficient coolant amount • Loose or damaged fan belt • Clogged radiator • Insufficient engine oil • Add coolant • Adjust the belt tension or replace it • Clean • Inspect or Replenish The engine produces white smoke • Clogged air cleaner • Excessive engine oil amount • Insufficient fuel delivery amount • Clean the element • Check and set the proper amount • Have it repaired by workshop The engine produces black smoke • Low quality fuel • Excessive fuel amount delivery • Insufficient nozzle pressure • Add the specified fuel • Have it repaired by workshop • Have it repaired by workshop 7 7- TROUBLESHOOTING TROUBLE CAUSE • Clogged or carbon on nozzle tip • Insufficient compression or gas Engine system leak from valve seat • Have it repaired by workshop • Check the fuel system • Incorrectly adjusted valve clearance • Clean the element The engine power is insufficient • Incorrect injection timing • Insufficient fuel • Clogged air cleaner • UREA supply shortage The oil warning lamp comes on during driving The charge warning lamp comes on during driving 7- ACTION • Low engine oil level • Low viscosity of engine oil • Faulty pressure switch • Defective oil pump • Oil filter element clogged • Add to the specified level • Change oil with proper viscosity • Replace the switch • Have it repaired by workshop • Replace the element • Defective wiring • Check for loose or missing terminal, short circuit and • Defective alternator • Defective battery or insufficient • Have it repaired by workshop • Replace the battery or add distilled water • Loose or damaged fan belt • Adjust the tension or replace the belt distilled water poor ground and repair as necessary TROUBLESHOOTING 2. Clutch system Clutch TROUBLE CAUSE ACTION The clutch slips • Poorly adjusted pedal • Worn or seized clutch lining • Adjust the pedal free play • Have it repaired or replaced by workshop The clutch cannot be disengaged • Corroded clutch lining • Poorly adjusted pedal • Have it repaired by workshop • Adjust the pedal free play 3. Brake system Brake TROUBLE CAUSE The brake does not operate. Or the brake on one side operates only • Excessive brake pedal free play • Worn or seized liner • Different play of left and right The brake pedal does not return to its original position properly • Damaged brake return spring • No grease on sliding part pedals ACTION 7 • Adjust the free play • Have it repaired by workshop • Set the left and right play to the same • Replace the spring • Remove rust and apply grease 7- TROUBLESHOOTING 4. Steering system Steering system TROUBLE 7- The steering wheel feels heavy The steering wheel vibrates The free movement of the steering wheel is excessive CAUSE ACTION • Improper toe-in • Incorrect tire inflation pressure • Adjust • Set the left and right tires to the same specified • Vibration from each connection • Tighten or replace connection • Worn steering wheel shaft • Worn metal parts • Free play from each connection • Have it repaired by workshop • Have it repaired by workshop • Tighten pressure TROUBLESHOOTING 5. Hydraulic system TROUBLE Hydraulic system Oil leaks from the pipe or hose The hydraulic pressure won't be decreased The hydraulic pressure won't be increased CAUSE ACTION • Loose clamp • Cracked pipe • Tighten • Have it replaced by workshop • Lowering speed control lever • Set it to the lowering position fixed • Defective valve • Damaged cylinder • Damaged and seized lift shaft rotating part • Have it repaired by workshop • Have it repaired by workshop • Have it repaired by workshop • Insufficient engine RPM • Insufficient transmission fluid • Air sucked into suction pipe • Set the speed to 1000 to 1500 RPM • Add to the specified level • Tighten the connection. If any pipe or hose is • Clogged oil filter • Defective hydraulic pump • Defective valve • Damaged cylinder • Clean • Have it repaired by workshop • Have it repaired by workshop • Have it repaired by workshop cracked or O-ring is damaged, replace it 7 7- TROUBLESHOOTING 6. Electric system TROUBLE Electric system ACTION • Blown fusible link • Defective wiring • Check the wiring and replace the fusible link • Check for loose or missing terminal, short circuit and • Defective alternator • Loose or damaged fan belt • Defective battery function • Have it repaired by workshop • Adjust the tension or replace the belt • Check for loose or corroded terminal and insufficient The headlamp does not produce enough light • Low charging level of battery • Contact failure in wiring • Charge • Check, clean and re-tighten the ground and terminal The headlamp does not come on • Blown bulb • Blown fuse • Contact failure • Replace the bulb • Check the wiring and replace the fuse • Check and clean the ground and terminal The horn does not operate • Defective horn switch • Defective wiring • Damaged horn • Replace • Repair • Repair or replace The turn signal lamp does not blink • Blown bulb • Defective flasher unit • Poor contact • Replace the bulb • Replace • Check and clean the ground and terminal The work lamp does not come on • Blown bulb • Contact failure • Replace the bulb • Check and clean the ground and termina The battery won't be charged 7- CAUSE poor ground and repair as necessary electrolyte and take any necessary action TROUBLESHOOTING 7. A/C / heater system TROUBLE CAUSE ACTION It produces abnormal noise • Abnormal noise from inside • Abnormal noise from outside • Insufficient lubricant • Loose belt • Loose bracket • Faulty clutch • Add lubricant • Adjust • Tighten the bolt • Check • Damaged internal part • Clutch slipping • No lubricant • Loose belt • Check and replace • Check and replace • Replenish • Adjust • Damaged sealing washer • Loose mounting bolt • Replace • Tighten the bolt • Improper refrigerant amount • Defective compressor • Adjust • Replace Compressor It rotates abnormally • Internal cause • External cause Refrigerant or oil leaks 7 Abnormal pressure is produced • Abnormal condition for low pressure at high temperature 7- TROUBLESHOOTING TROUBLE CAUSE ACTION The blower speed is too slow or there is no speed at all • Normal motor Motor • Abnormal motor • Air leak • Clogged air inlet • Defective blower speed control dial • Defective motor • Open wiring • Leakage from duct • Remove • Replace the switch • Replace • Check the wiring and fuse • Check and tighten • Defective blower speed control dial • Defective motor • Replace the switch • Replace • Interference with pulley • Adjust the compressor's direction • Defective wiring • Excessive clutch clearance • Low voltage • Internal failure • Check the wiring • Adjust • Check the battery • Replace • Low voltage • Oil on clutch disc • Internal failure • Check the battery • Clean • Replace The blower speed cannot be adjusted • Normal motor • Abnormal motor It produces abnormal noise • Regular noise • Irregular rattling noise Compressor clutch It won't operate 7 - 10 • It is operated at some point • It is operated when pushing it with hands • There is no wiring defect It slips • Slipping when rotating Safety standard for agricultural work To ensure safe agricultural work, safety precautions for use of agricultural machinery are set by the National Institute of Agricultural Engineering. Read this information thoroughly along wit h t h e user manual to ensure safe work. 8 SAFETY STANDARD FOR AGRICULTURAL WORK 1. Instruction before use SAFETY MARK • • Always make sure to check the operating condition of the safety lamps (such as turn signal lamps) before operating the machine. ※ If any lighting system is removed ※ • It may lead to an unexpected accident because it is not possible to give signals to people or machine nearby. • • 8- • An operator must attend his/her health and should get enough rest. Before using the machine, check it and repair if there is a malfunction. - Check if the assembly of front and rear wheels is okay. - Check the tightening of bolts and nuts in each unit. Do not drive if you are mentally unstable, drunk, under the age of 16, not trained, overworked, sick, under the influence of drugs, and any other reason that may affect normal operation of the machine. Please wear the appropriate working clothing. - Put on a hard hat to protect your head. - Put on a hat and a working clothes, to prevent an injury such as being twined into the machine. - Protective measures to prevent any injury on foot or slipping - Put on an appropriate non-slippery shoes to prevent a fall from the machine, scattering soil, and slippery surface. - Measures against dust and toxic gas. - Wear an appropriate protective gear. - Measures against the herbicide - wear protective gear to protect respiratory system, eyes and skin. SAFETY STANDARD FOR AGRICULTURAL WORK 2. Checkup list before operation - Measures against noise - wear a protective gear to protect your ears. - Handling protective gear - Do neither let children get on the machine nor get close to the machine. • • • • • • If it is not possible to park the agricultural machine on a road either due to a breakdown or any other reason, operator must take an action such as moving the equipment to a place other than a road. Also, put a signal that there is a broken car, 100 m behind (200 m at night) in accordance with Automobile Regulation Article 23. When starting to drive, make sure to check around carefully. - Do not let anyone such as a child get close to the machine, keep them away and then drive the machine. • Before using the machine, check it and repair if there is a malfunction. • Check engine oil. - Pull out the dipstick, wipe off any fuel leak, put it back in, and pull it out again to see if the oil level is between the upper and lower limits. • Before any operation, check for any foreign materials caught on the engine, muffler, battery, and fuel tank. Remove them immediately. • Covers that are removed during the maintenance work should be reinstalled to their original positions. - Attach the cover correctly and firmly. Do not load flammable, explosive material (diesel, gasoline, etc.) on the machine. When getting on and off a truck, have a helper give you signal and follow his/her lead. Refer to chapter 1 in user’s manual regarding the decals on the machine. 8- 8 SAFETY STANDARD FOR AGRICULTURAL WORK 3. Cautions during work • • • • • • Do not load anything that can interfere driving. - Always keep the driver’s seat clean. Always buckle up when driving. Opening the radiator cap when heated can spring out the steam to have the operator burned. Open the cap after it is sufficiently cooled down. Do not drive with depressing the differential gear pedal. Prohibit anyone to get on the machine. - Prohibit anyone to get on the machine other than the designated place. - Even thought there are some designated place, do not let people more than capacity get on the machine. - N ever let any passenger mount on the machine. Also, do not put any object on the machine. Keep people away from the machine. - Do not jump on/off the operating machine except for emergency. Be cautious not to let anyone touch the belt. Always check the connected area of belt. 8- • • When two people are working collaboratively, exchange signals each other. Prevent injury - Do not touch power transmission gear, rotating unit, and other dangerous parts. - Pay special attention if you are working with the machine with blade or sharp projection - Be careful not to injure from the work where soils and stones are scattered around. • Safety in inspection, adjustment, etc. - Make sure to stop the motor and carry out the work in a safe environment. - When leaving the machine for a break, or other reason, leave the machine in a safe place and descend the working unit to keep them in a safe stopped state. • Removing and installing should be carried out in a safe place and with a safe method. Do neither stay nor insert foot under the working units. • SAFETY STANDARD FOR AGRICULTURAL WORK 4. Cautions when driving on farm road • • Driving on roads - Drive safely observing the relevant regulation. - Drive at safe speed. - Be careful not to disturb other drivers. - When driving a machine with sharp blade or bump, put on a warning sign or detach in advance to prevent any injury. - Do not drive fast particularly on winding roads with projecting rocks. - When driving at night, do not detach lighting device. (Headlight, turn indicator, work light, brake light, etc.) - Do not drive fast, abrupt starting, abrupt acceleration, sudden stop, and quick turning. - W hen driving at high speed, do not slam on the brake. Never slam on the brake especially when turning at high speed. • When entering paved road - Use a ramp to cross a ditch or a bank. - Make sure to use a ramp to enter/exit a high footpath. Be careful with fall and not to overturn. - C heck the safety around the surrounding before starting to drive. • When driving on a slope - Drive at the minimum speed, lower the operating machine as low as possible and low the center position. - Place the key clutch in neutral position or do not depress the key clutch pedal. 8 When loading/unloading the machine - Choose a place with a leveled and safe ground. - Drive at low speed. - Use a ramp with anti-slippery. 8- SAFETY STANDARD FOR AGRICULTURAL WORK 5. Instruction after use • - Remove straws, dirt, etc. and clean around the engine, silencer, and fuel tank. • When the work is completed, stop the engine on a leveled ground, check the machine to clean. (remove any foreign materials) • • Lay a cover on the body (equipment) after the muffler and engine cool down. Get a regular inspection after the season is over. 6. Cautions for inspection and maintenance • Do not refuel either when the engine is still hot or while driving. • Measures against a fire: Every working place with a risk of fire should be provided with a fire extinguisher. Prevent a fire by taking measures such as making a smoking area. • • • Always wipe off the leaked fuel. Be seated in the cab when starting the engine. After refueling, tighten the fuel cap and check if there is any fuel leakage from tank or pipe. - When discarding a part (battery, oil, etc.) or scrap a machine, consult to a dealer and proceed accordingly. • For long-term storage, remove the battery from the machine and store it or disconnect the negative battery cable. When opening a cap to supply water to radiator, be careful because steam or boiling water may spray due to overheating. • When getting off the cab, turn off the engine, lock the parking brake and remove the ignition key. • • • If it is inevitable to park on a slope, choke the wheels. 8- Park on a leveled and safe ground safely. Check if the wiring code is in contact with other parts, peeled, loose or having spacing. SAFETY STANDARD FOR AGRICULTURAL WORK 7. Tractor • • • • PTO management - Stop PTO before stopping the engine. - Do not remove the PTO protective cover or implement protective panel for operating machine. - Do not use PTO adaptor in order to extend the PTO coupler or universal joint to outside of the PTO protective cover. To repair, secure the wheel width, or change the wheel under either tractor or trailer, with the tractor or trailer raised, choke the wheels that are on the ground. Do not use a hydraulic jack for operating machine or tractor. Instead, use a block or stand. Safety frame - Do neither weld nor drill a hole on the attached safety frame. Also do not modify it. - Replace the damaged safety frame with a new one. - I f the safety frame was removed for specialized work, restore it immediately. • Be careful to touch dangerous area such as power transmission gear, rotating unit, etc. Put on a protective cover. • Do neither modify nor remove the safety device. • When checking and replacing the blade to plow the ground - Stop the engine. - Prevent the rotary from falling by turning the fall adjusting handle to stop hydraulic pressure. - Apply the parking brake. - Do not stand between the tractor and rotary. • When working with rotary - Do not put your hands near the rotating part such as blade axle and universal joint. - Do not ride on the rotary. - When driving backward or turning quickly with the rotary raised up, make sure to check behind the machine. - Adjust the rear cover. 8- 8 SAFETY STANDARD FOR AGRICULTURAL WORK 8. Other precautions • The following items can affect the tractor performance and safety. Therefore, these items' repair should be done by your workshop. - Injection pump, nozzle, engine valve clearance, hydraulic valve, hydraulic pump and evaporator 8- Appendix 1-1. Major specifications (SP model).............. 9-2 1-2. Major specifications (SC model).............. 9-3 2. Standard parts................................................... 9-6 3. Major consumables......................................... 9-7 9 APPENDIX 1-1. Major specifications (SP model) Type Dimensions Engine Overall length Overall width Overall height Ground clearance Weight Manufacturer Model number Total displacement Power/rotation speed Operating fuel Fuel tank capacity Tires Rear wheel Driving system Clutch (Damper) Braking Transmission type Gears Driving speed Forward (km/h) Reverse PTO Revolution Implement Control type Draft system 9- (mm) (mm) (mm) (mm) (kgf) (cc) (Kw/rpm) (ℓ) T854 T954 T1054 4,500 2,470 2,740 465 3,941 DOOSAN INFRACORE DL03-LEA06 3,409 63.4/2,300 Diesel fuel 110 13.6 - 24 16.9 - 34 Dry Hydraulic Power shuttle, power shift F32/ R32 0.4 - 36.00 4,500 2,470 2,740 465 3,941 DOOSAN INFRACORE DL03-LEA05 3,409 70.9 / 2,300 Diesel fuel 110 13.6 - 24 16.9 - 34 Dry Hydraulic Power shuttle, power shift F32/ R32 0.4 - 36.00 4,500 2,517 2,740 465 3,941 DOOSAN INFRACORE DL03-LEA04 3,409 78.3 / 2,300 Diesel fuel 110 13.6 - 24 18.4 - 34 Dry Hydraulic Power shuttle, power shift F32/ R32 0.4 - 37.02 0.4 - 35.80 (rpm) 0.4 - 35.80 540 / 750 / 1000 Electronically controlled - position/draft Swing drawbar 0.4 - 37.00 APPENDIX 1-2. Major specifications (SC model) Type Dimensions Engine Overall length Overall width Overall height Ground clearance Weight Manufacturer Model number Total displacement Power/rotation speed (mm) (mm) (mm) (mm) (kgf) (cc) (Kw/rpm) Operating fuel Fuel tank capacity Tires (ℓ) Rear wheel Clutch (Damper) Driving system Braking Transmission type Gears Driving speed (km/h) PTO Revolution Implement Control type Draft system Forward Reverse (rpm) T954 T1054 4,500 2,470 2,740 465 3,941 DOOSAN INFRACORE DL03-LEA05 3,409 4,500 2,470 2,740 465 3,941 DOOSAN INFRACORE DL03-LEA04 3,409 70.9 / 2,300 78.3 / 2,300 Diesel fuel 110 13.6 - 24 16.9 - 34 Dry Diesel fuel 110 13.6 - 24 18.4 - 34 Dry Hydraulic Power shuttle F12/ R12 1.2 - 30.2 1.2 - 30.1 Hydraulic Power shuttle F12/ R12 1.3 - 31.2 1.3 - 31.1 9 540 / 1000 position/draft Swing drawbar 9- APPENDIX ► Driving speed (SP Model) ■ 1054SP (km/hr) Range shift Main shift Forward Reverse C L M H 1 2 3 4 1 2 3 4 1 2 3 4 1 2 3 4 0.42 0.56 0.79 1.02 1.27 1.70 2.38 3.10 3.78 5.05 7.08 9.21 12.81 17.14 24.02 31.24 High 0.50 0.67 0.94 1.22 1.51 2.02 2.83 3.69 4.50 6.02 8.43 10.97 15.24 20.40 28.59 37.18 Low 0.42 0.56 0.78 1.02 1.26 1.69 2.37 3.08 3.76 5.03 7.05 9.17 12.74 17.05 23.90 31.09 High 0.48 0.65 0.90 1.18 1.46 1.95 2.74 3.56 4.35 5.81 8.15 10.60 14.74 19.72 27.64 35.94 Low ■ 854/954SP Forward Reverse C 1 2 L 3 4 1 2 M 3 4 1 2 H 3 Low 0.41 0.54 0.76 0.99 1.23 1.64 2.30 3.00 3.65 4.89 6.85 4 1 2 3 4 8.91 12.39 16.58 23.24 30.23 Max RPM High 0.48 0.65 0.91 1.18 1.46 1.96 2.74 3.57 4.35 5.82 8.16 10.61 14.75 19.73 27.66 35.98 38.32 Low 0.40 0.54 0.76 0.98 1.22 1.64 2.29 2.98 3.64 4.87 6.82 8.87 12.33 16.50 23.13 30.08 High 0.47 0.62 0.88 1.14 1.41 1.89 2.65 3.45 4.20 5.63 7.89 10.26 14.26 19.08 26.74 34.78 ※ The above driving speed table is based on the engine speed at 2,300 RPM. ※ The specifications are subject to change for the purpose of improvement without notice. 9- 39.61 (km/hr) Range shift Main shift Max RPM APPENDIX ► Driving speed (sc model) ■ 1054SC (km/hr) Range shift L M H Main shift 1 2 3 4 1 2 3 4 1 2 3 4 Forward 1.27 1.70 2.38 3.10 3.78 5.05 7.08 9.21 12.81 17.14 24.02 31.24 Reverse 1.26 1.69 2.37 3.08 3.76 5.03 7.05 9.17 12.74 17.05 23.90 31.09 ■ 954SC (km/hr) Range shift L M H Main shift 1 2 3 4 1 2 3 4 1 2 3 4 Forward 1.23 1.64 2.30 3.00 3.65 4.89 6.85 8.91 12.39 16.58 23.24 30.23 Reverse 1.22 1.64 2.29 2.98 3.64 4.87 6.82 8.87 12.33 16.50 23.13 30.08 ※ The above driving speed table is based on the engine speed at 2,300 RPM. ※ The specifications are subject to change for the purpose of improvement without notice. 9I- 9 APPENDIX 2. Standard parts No. 3 8 4 5 6 7 1 2 12 9 10 11 User's manual 15 16 14 13 993J001a 9- Item 1 Ring spanner 2 Pliers 3 Specification Quantity 1 150 1 Double open ended spanner 8 × 12 1 4 Double open ended spanner 12 × 14 1 5 Double open ended spanner 13 × 17 1 6 Double open ended spanner 19 × 22 1 7 Double open ended spanner 24 × 27 1 8 Grease pump 350 cc 1 9 Phillips screwdriver 6 × 100 1 10 Screwdriver 6 × 100 1 11 User's manual 1 12 Link pin 2 13 Tool bag 1 14 Wheel nut wrench (22) 1 15 Cartridge 16 Ball bushing Hydraulic oil element 1 2 APPENDIX 3. Major consumables Fuel filter element J10O705A J10O703A J10O701A Engine oil filter Hydraulic oil filter cartridge 9 Adjusting bolt J10O377A Fan belt J10O704A A/C belt J10O706A High-pressure filter element 9- APPENDIX No. Component Applicable item Quantity Fuel 1 Engine oil 1 Hydraulic oil 2 1 Fuel filter element 2 Engine oil filter 3 Hydraulic oil filter cartridge 4 Fan belt Engine 1 5 A/C belt A/C 1 6 High-pressure filter element Hydraulic oil 1 9- Remarks INDEX 1. INDEX.........................................................10-2 10 INDEX NUMERIC 4WD SHIFT BUTTON...........................................................2-34 A A/C / HEATER SYSTEM.........................................................7-9 ADJUSTING CLUTCH PEDAL INCHING CABLE.................5-28 ADJUSTING CLUTCH PEDAL PLAY....................................5-28 ADJUSTING FRONT WHEEL TREAD..................................5-20 ADJUSTING LINK.................................................................2-40 ADJUSTING REAR WHEEL TREAD....................................5-20 ADJUSTING TREAD.............................................................5-20 APPENDIX..............................................................................9-1 AUTOMATIC PTO CONTROL...............................................2-36 CHARGING.............................................................................3-9 CHECKING AND ADJUSTING A/C COMPRESSOR BELT.......5-29 CHECKING AND ADJUSTING EACH PART.........................5-28 CHECKING AND ADJUSTING FAN BELT............................5-29 CHECKING AND ADJUSTING WATER PUMP BELT...........5-29 CHECKING AND CHANGING ENGINE OIL...........................5-5 CHECKING AND CHANGING OILS AND FLUIDS.................5-5 CHECKING AND CHANGING TRANSMISSION FLUID.........5-6 CHECKING AND CHARGING BATTERY..............................5-22 CHECKING AND CLEANING AIR CLEANER.......................5-19 CHECKING AND REPLACING FUSE...................................5-25 CHECKING ELECTRIC SYSTEM.........................................5-22 CHECKING ELECTRIC WIRING..........................................5-24 B CHECKING FUEL SYSTEM AND REPLACING FUEL FILTER..................................................................... 5-11 BRAKE SYSTEM....................................................................7-5 CHECKING HOSES..............................................................5-22 CLEANING CONDENSER GRILL AND OIL COOLER............5-5 C CLEANING COVER..............................................................5-19 CABIN...................................................................................2-43 CLEANING ELEMENT..........................................................5-19 CABIN RELAY BOX..............................................................5-26 CLEANING FUEL FILTER.....................................................5-13 CALIBRATION FOR REPLACEMENT OF POSITION SENSOR/EHR-B (BOSCH ECU).......................................5-34 CLEANING RADIATOR GRILL AND CONDENSER GRILL.......5-5 CAUTIONS FOR DRIVING INTO / OUT OF FIELD................3-8 CLUTCH SYSTEM..................................................................7-5 CAUTIONS FOR DRIVING ON ROAD....................................3-8 10 - CLEANING VACUUM VALVE................................................5-19 COLUMN SWITCH LEVER.....................................................2-7 INDEX COMPONENTS.......................................................................1-2 CONTROLS (SC MODEL)....................................................2-18 CONTROLS (SP MODEL).....................................................2-17 D DAILY STORAGE....................................................................6-2 DESCRIPTION OF OPERATION SYSTEM............................2-1 DIFFERENTIAL LOCK PEDAL (SC MODEL).......................2-33 DISCONNECTING BATTERY...............................................5-25 DRAWBAR ADJUSTMENT...................................................2-41 DRIVING ON SLOPE..............................................................3-7 DRIVING SPEED (SC MODEL)..............................................9-5 ERROR CODE DISPLAY OF CONTROL PANEL STATUS LED . ...................................................................5-35 EXTERNAL LIFTING/LOWERING SWITCH (SP MODEL)......2-38 EXTERNAL POWER SUPPLY TERMINAL...........................3-10 F FUEL..................................................................................... 5-11 FUEL FILTER DRAINING......................................................5-12 FUEL, OIL AND FLUID SPECIFICATION CHART................5-33 G GENERAL ENGINE IDLING....................................................3-4 DRIVING SPEED (SP MODEL)..............................................9-4 GENERAL IMPLEMENT.........................................................4-2 E GREASING...........................................................................5-21 ELECTRIC SYSTEM...............................................................7-8 ENGINE COOLANT................................................................3-9 ENGINE IDLING......................................................................3-4 ENGINE IDLING IN COLD CONDITION.................................3-4 ENGINE OIL PRESSURE.......................................................3-9 ENGINE STARTING................................................................3-2 ENGINE STOPPING...............................................................3-3 ENGINE SYSTEM...................................................................7-2 ERROR CODE DISPLAY FOR HYDRAULIC SYSTEM........5-35 GENERAL INFORMATION......................................................1-1 GREASING POINTS.............................................................5-21 H HAZARD FLASHER................................................................2-5 HOW TO START ENGINE.......................................................3-2 HYDRAULIC SYSTEM............................................................7-7 I IMPLEMENT LIFT SYSTEM AND TOWING HITCH.............2-39 10 - 10 INDEX I M IMPLEMENT LIFTING CONTROL SYSTEM.........................2-37 MAIN SWITCH........................................................................2-3 INDEX...................................................................................10-1 MAINTENANCE......................................................................5-1 INSPECTING AND CHANGING COOLANT...........................5-4 MAJOR CONSUMABLES.......................................................9-7 INSPECTING AND CHANGING ENGINE COOLANT.............5-4 MAJOR SPECIFICATIONS (SC MODEL)...............................9-3 INSPECTING AND CHANGING FRONT AXLE OIL................5-8 MAJOR SPECIFICATIONS (SP MODEL)...............................9-2 INSPECTING ELECTROHYDRAULIC SYSTEM (SP MODEL).......................................................................5-34 O INSPECTION ITEMS...............................................................5-3 INSPECTION ITEMS...............................................................5-3 INSTRUMENT CLUSTER.......................................................2-8 INTAKE/EXHAUST SYSTEM................................................2-57 J JUMP START........................................................................5-24 L LED BLINKING BY ERROR CODE.......................................5-36 LIFT ROD ADJUSTMENT (LEFT/RIGHT).............................2-40 LOADER..................................................................................4-6 LOADING TO / UNLOADING FROM TRUCK.........................3-8 LONG-TERM STORAGE........................................................6-2 LOW FUEL LEVEL WARNING LAMP.....................................3-9 LOWER LINK........................................................................2-41 LOWER LINK CONNECTING HOLE....................................2-40 10 - OPENING COVERS................................................................5-2 OPENING HOOD....................................................................5-2 OPERATING PRINCIPLE OF PREHEATING SYSTEM..........3-3 OPERATING TIPS FOR POWER STEERING WHEEL........2-38 OPERATION............................................................................3-1 OPERATION CHECK DURING DRIVING...............................3-9 P POWER CONNECTOR FOR TRAILER................................3-10 PRECAUTIONS FOR HANDLING IMPLEMENT....................4-2 PTO SHAFT CAP..................................................................2-42 R REGARDING THE DIRECTION TERMS OF MVACHINE..... 1-11 REPLACING AND SERVICING HIGH-PRESSURE FILTER.....5-10 REPLACING ELEMENT........................................................5-19 REPLACING ENGINE OIL FILTER CARTRIDGE.................5-10 INDEX REPLACING FILTER AND CARTRIDGE..............................5-10 T REPLACING FUEL FILTER ELEMENT.................................5-14 REPLACING LAMP BULB.....................................................5-27 THE ERROR CODE IS DISPLAYED THROUGH THE INDICATOR ON THE METER PANEL SIMULTANEOUSLY.....5-37 REPLACING TRANSMISSION HYDRAULIC OIL FILTER....5-10 TIPS FOR DRIVING ON SLOPE.............................................3-7 REPLACING TURN SIGNAL LAMP/POSITION LAMP.........5-27 TIRE INFLATION PRESSUR................................................5-30 ROTAVATOR...........................................................................4-2 TOP LINK ADJUSTMENT.....................................................2-40 ROUTINE MAINTENANCE SCHEDULE...............................5-31 TOWING HITCH....................................................................2-41 ROUTINE MAINTENANCE SCHEDULE...............................5-31 TRACTOR STORAGE.............................................................6-2 RUNNING-IN PERIOD............................................................3-4 TROUBLESHOOTING............................................................7-1 TURNING IN FIELD................................................................3-6 S TYPES OF WORK BY SPEED TABLE...................................4-8 SAFETY DECALS...................................................................1-5 SAFETY STANDARD FOR AGRICULTURAL WORK.............8-1 U SHIFTING AND DRIVING.......................................................3-5 UREA FILTER REPLACEMENT............................................5-15 SHUTTLE SHIFT LEVER .......................................................2-6 UREA TANK..........................................................................5-14 STANDARD PARTS................................................................9-6 UREA TANK FILLER PORT..................................................5-14 STARTING OFF......................................................................3-5 USAGE AND DISPOSAL.........................................................6-3 STARTING OFF ON STEEP SLOPE......................................3-7 USE AFTER LONG-TERM STORAGE...................................6-3 STARTING OFF, SHIFTING AND DRIVING............................3-5 USE OF THE MACHINE.......................................................1-10 STEERING SYSTEM..............................................................7-6 STOPPING..............................................................................3-3 W STOPPING AND PARKING.....................................................3-6 WARRANTY.......................................................................... 11-1 STORAGE AND DISPOSAL....................................................6-1 WORK PROCEDURE.............................................................4-1 SUPPLY TERM FOR SERVICE PARTS...............................1-10 SWITCHES AND INSTRUMENT PANEL................................2-2 10 - 10 MEMO WARRANTY 1. WARRANTY................................................11-2 11 자- WARRANTY DOOSAN INFRACORE FEDERAL & CALIFORNIA EMISSION CONTROL SYSTEMS LIMITED WARRANTY for NON-ROAD ENGINES (CI) (Engine for an agriculture) OWNER’S WARRANTY RIGHTS AND OBLIGATIONS The U.S. Environmental Protection Agency (EPA), the California Air Resources Board (ARB), and DOOSAN INFRACORE are pleased to explain the Federal and California Emission Control System Warranty on your 2015MY to 2017MY non-road engine. DOOSAN INFRACORE has designed, built and equipped the engine so as to conform at the time of sale with all applicable regulations of the EPA and of the California ARB. In California, new heavy-duty off-road engines must be designed, built and equipped to meet the State’s stringent anti-smog standards. 11 - DOOSAN INFRACORE must warrant to the initial owner, and each subsequent owner, the emission control system on your engine for the periods of time listed below provided there has been no abuse, neglect, improper maintenance or unapproved modifications of your engine. Your emission control system may include those parts listed below: 1. Fuel Metering System Fuel Supply Pump (HP Pump), Injector, Common Rail, Air heater 2. Air-Induction System Intake Manifold, Turbocharger System 3. E x h a u s t G a s R e c i r c u l a t i o n (EGR) System EGR Valve, EGR Cooler 4. Catalyst or Thermal Reactor System Diesel Oxidation Catalyst (DOC), Exhaust Manifold, SCR System, Catalyst, NOx Sensor 5. Positive Crankcase Ventilation (PCV) System PCV valve 6. Electronic Control System ECU, Cam/ Crank Sensor, Coolant Temperature Sensor, MAF Sensor, MAP Sensor (Manifold Pressure Sensor), Inlet Boost Temperature Sensor, Fuel Temperature Sensor, Common Rail Pressure Sensor 7. Miscellaneous Items Used In Above Systems Vacuum, temperature and time sensitive valve and switches, Electronic control units, sensors, solenoids and wiring harnesses, Hoses, clamps, fittings and tubing Pulleys, belts and idlers, Emission control information labels Where a warrantable condition exists, DOOSAN INFRACORE CONSTRUCTION EQUIPMENT AMERICA (hereafter “DICEA”) will repair WARRANTY your heavy-duty off-road engine at no cost to you including diagnosis, parts, and labor. MANUFACTURER'S WARRANTY COVERAGE The 2015MY to 2017MY heavy-duty off-road engines are warranted for five years or 3,000 hours of operation, whichever occurs first. If any emission-related part on your engine is defective, the part will be repaired or replaced by DICEA. The warranty period shall begin on the date the machine is delivered to the first retail customer. OWNER’S WARRANTY RESPONSIBILITIES As the heavy-duty off-road engine owner, you are responsible for the performance of the required maintenance listed in the Operation and Maintenance Manual. DOOSAN INFRACORE and DICEA recommends that you retain all receipts covering maintenance on your heavy-duty off-road engine, but DOOSAN INFRACORE and DICEA cannot deny warranty solely for the lack of receipts or for your failure to ensure the performance of all scheduled maintenance. As the heavy-duty off-road engine owner, you should however be aware that DOOSAN INFRACORE and DICEA may deny you warranty coverage if your heavy-duty offroad engine or a part has failed due to abuse, neglect, improper maintenance or unapproved modifications. Your engine is designed to oper- ate on Ultra Low Sulfur Diesel Fuel Only. Use of any other fuel may result in your engine no longer operating in compliance with the EPA’s emissions requirements. You are responsible for initiating the warranty process. The EPA and California ARB suggest that you present your heavy-duty off-road engine to a DICEA dealer as soon as a problem exists. The warranty repairs should be completed by the dealer as expeditiously as possible. If you have any questions regarding your warranty rights and responsibilities, you should contact your nearest authorized DICEA dealer or contact DICEA at Doosan Infracore Construction Equipment North America 2905 Shawnee Industrial Way Suwanee, GA 30024 USA 1-800-743-4340 11 - 11 WARRANTY DOOSAN INFRACORE FEDERAL & CALIFORNIA EMISSION CONTROL SYSTEMS LIMITED WARRANTY for NON-ROAD ENGINES (CI) (Engine for a forklift) OWNER’S WARRANTY RIGHTS AND OBLIGATIONS The U.S. Environmental Protection Agency (EPA), the California Air Resources Board (ARB), and DOOSAN INFRACORE are pleased to explain the Federal and California Emission Control System Warranty on your 2015 to 2017MY non-road engine. DOOSAN INFRACORE warrants the engine was designed, built and equipped so as to conform at the time of sale with all applicable regulations of the EPA and of the California ARB. In California, new heavy-duty off-road engines must be designed, built and equipped to meet the State’s stringent anti-smog standards. 11 - DOOSAN INFRACORE must warrant to the initial owner, and each subsequent owner, the emission control system on your engine for the periods of time listed below provided there has been no abuse, neglect, improper maintenance or unapproved modifications of your engine. Your emission control system may include those parts listed below: 1. Fuel Metering System Fuel Supply Pump (HP Pump), Injector, Common Rail, Air heater 2. Air-Induction System Intake Manifold, Turbocharger System 3. E x h a u s t G a s R e c i r c u l a t i o n (EGR) System EGR Valve, EGR Cooler 4. Catalyst or Thermal Reactor System Diesel Oxidation Catalyst (DOC), Exhaust Manifold, SCR System, Catalyst, NOx Sensor 5. Positive Crankcase Ventilation (PCV) System PCV valve 6. Electronic Control System ECU, Cam/ Crank Sensor, Coolant Temperature Sensor, MAF Sensor, MAP Sensor (Manifold Pressure Sensor), Inlet Boost Temperature Sensor, Fuel Temperature Sensor, Common Rail Pressure Sensor 7. Miscellaneous Items Used In Above Systems Vacuum, temperature and time sensitive valve and switches, Electronic control units, sensors, solenoids and wiring harnesses, Hoses, clamps, fittings and tubing, Pulleys, belts and idlers, Emission control information labels Where a warrantable condition exists, DOOSAN Industrial Vehicle America Corporation (hereafter “DIVAC”) will repair your heavy-duty WARRANTY off-road engine at no cost to you including diagnosis, parts, and labor. MANUFACTURER'S WARRANTY COVERAGE The 2015 to 2017MY heavy-duty off-road engines are warranted for five years or 3,000 hours of operation, whichever occurs first. If any emission-related part on your engine is defective, the part will be repaired or replaced by DIVAC. The warranty period shall begin on the date the machine is delivered to the first retail customer. OWNER’S WARRANTY RESPONSIBILITIES As the heavy-duty off-road engine owner, you are responsible for the performance of the required maintenance listed in the Operation and Maintenance Manual. DOOSAN INFRACORE and DIVAC recommend that you retain all receipts covering maintenance on your heavy-duty off-road engine, but DOOSAN INFRACORE and DIVAC cannot deny warranty solely for the lack of receipts or for your failure to ensure the performance of all scheduled maintenance. As the heavy-duty off-road engine owner, you should however be aware that DOOSAN INFRACORE and DIVAC may deny you warranty coverage if your heavy-duty offroad engine or a part has failed due to abuse, neglect, improper maintenance or unapproved modifications. Your engine is designed to operate on Ultra Low Sulfur Diesel Fuel Only. Use of any other fuel may result in your engine no longer operating in compliance with the EPA’s emissions requirements. You are responsible for initiating the warranty process. The EPA and ARB suggest that you present your heavyduty off-road engine to a DOOSAN INFRACORE dealer as soon as a problem exists. The warranty repairs should be completed by the dealer as expeditiously as possible. If you have any questions regarding your warranty rights and responsibilities, you should contact your nearest authorized DIVAC dealer or call DIVAC at 216-595-5650. 11 11 - WARRANTY WARRANTY POLICY 1. Tong yang product Limited Warranty TYM warrants that each TYM product is free from defects in both material and workmanship, and that TYM will repair or replace, at TYM's sole option, any parts which are determined by TYM to be defective in material or workmanship. BASIC Warranty: (24 months), (1,000)Hours. This Limited warranty will cover the period from the date of delivery to the original purchaser from an authorized TYM dealer for a term of (24 month) or (1,000) operating hours, whichever comes first. Coverage This Limited warranty is limited to TYM repairing or replacing, at TYM's option, warranted parts by an authorized TYM dealer at no charge for either the parts or services. Parts replaced under this Limited Warranty are only warranted for the balance of the warranty period. 11 - WARRANTY 1. TYM shall have no obligation or liability under this warranty. (1) for normal maintenance or operation services for Products, including but not limited to, providing lubricants, fuel, tune-up inspection or adjustments. (2) for any consumable parts when such parts are replaced as a part of normal maintenance or operating services. (3) to any exclusions and limitations contained in the Limited Warranty. 2.Options, accessories, attachments installed by Dealers which are not manufactured by TYM will not be warranted in any way by TYM. For information about the warranty or to obtain warranty service on such parts, Dealers should contact the manufacturer directly 3. The Limited Warranty is exclusive and in lieu of all other warranties, whether written, Oral, express or implied, including any warranty of merchantability or fitness for particular purpose. The liability of TYM under this warranty is expressly limited to the provlsions in the Limited Warranty and in no event shall TYM incur any Iiability(including liability for general, special, incidental or consequential damages, or economic or moral loss, arising out of any failure of the Products) which is not expressly assumed by TYM under this warranty. 11 11 - WARRANTY Warranty Information • • In order to work with the machine safely, safety decals are placed on the machine. Make sure to read and follow the directions. ■ Keep the alert decals clean and not damaged at all times. If a safety decal on the machine is dirty, wash it with soapy water and wipe it off with a soft cloth. Never use solution as thinner or acetone because these can erase characters or pictures. ■ If washed with high-pressured water, a decal Do not apply high-pressured water directly onto decals. may be peeled off. ■If 11 - a safety decal is damaged or lost, order a new one immediately and place it on the machine. When putting a new decal, wipe off the place to post the decal thoroughly and wait till it is dried. Then post the decal. Each decal has a part number on the bottom. ■ When replacing a part attached with a decal with a new part, replace the decal as well.