1
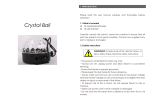
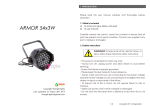
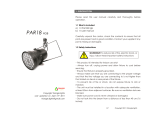
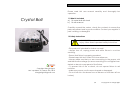
1. INTRODUCTION
Please read this user manual carefully and thoroughly before
operation.
Crystal Ball
1.1 What is Included
a) 1X crystal ball with lead
b) 1X user manual
Carefully unpack the carton, check the contents to ensure that all
parts are present and in good condition. Contact your supplier if any
part is missing or damaged.
1.2 Safety Instructions
WARNING!!! To reduce risk of fire, electric shock, or
injury, follow these important safety instructions
Copyright triAngle lights
Last updated on Mach 28th 2012
[email protected]
▪ This product is intended for indoor use only!
▪ Always turn off, unplug power and allow fixture to cool before
servicing.
▪ Ensure that fixture is properly grounded.
▪ Please keep this User Guide for future reference.
▪ Always make sure that you are connecting to the proper voltage
and that the line voltage you are connecting to is not higher than that
stated on decal or rear panel of the fixture.
▪ To prevent risk of fire or shock, do not expose fixture to rain or
moisture.
▪ Make sure power cord is never crimped or damaged.
▪ Do not look into the beam from a distance of less than 40 cm (16
inches).
1/8
Copyright 2011 triAngle lights
1.3 Product Features
2. SET UP
▪ Super bright 6X3W RGBW leds
▪ 4 modes: Sound, Auto, DMX, Master/Slave
▪ DMX 6CH
2.1 Mounting
With adjustable mounting double brackets, this unit may be wall
mounted, free standing, or clamp mounted.
IMPORTANT!!! Safety cables must always be used. The safety
cable must be capable of holding 10 times the weight of the
fixture.
2.2 Fixture Linking
To run your light shows of one or more fixtures using a DMX-512 controller
or to run synchronized shows on two or more fixtures in master/slave
operating mode, you need DMX cables to link the units from DMX IN to
DMX OUT.
2.3 AC Power
The fixture is designed to work on 100V-240V 50/60Hz.
Warning!!! All fixtures must be connected to circuits
with a suitable Earth Ground.
2/8
Copyright 2011 triAngle lights
3/8
Copyright 2011 triAngle lights
Dmx Table:
3 OPERATION INSTRUCTIONS
3.1 Menu Map
Display
A001-A511
Function
Ch1
0-255
Strobe from slow to fast
CH2
0-255
Red dimmer
Ch3
0-255
Green dimmer
Ch4
0-255
Blue dimmer
0-127
Pan position
128-191
Clockwise rotation slow to fast
192-255
Counter clockwise rotation slow to fast
0-255
Auto run and sound mode settings
Dmx Address A001-A512
Slave Mode please set address to A001
A1
Red Color
A2
Green Color
A3
Blue Color
A4
RGB Step mode
A5
RGB CMYW 7 color mode
A6
Color Slow change mode
A7
Strobe mode
S1
Sound mode
S2
Sound and color step mode
Ch5
CH6
3.4 Master/Slave Mode
In this mode, multiple units can be linked together as one system and
run in sync. Maximum 31pcs can be linked in a daisy chain as
Master/Slave system.
3.2 Auto Mode
In this mode, you can set the unit to run in static colors, strobe, or do
color changing without a dmx controller.
1. Press MENU button until display reads: A1 to A7.
2. Press Enter to run in different auto run modes
1. Use DMX cable to link your Armor pars together from DMX OUT to DMX
IN connector.
2. One of the fixtures is to be set as Master and this Master unit needs to
work under Auto , Static Color mode. Others are to be set Slave mode
(A001).
3. Operate the Master fixture to run the whole system.
3.3 Dmx Mode
In DMX mode, you can control the fixture with a DMX controller.
1. Press MENU button until display reads: “ A001-A511 ”.
2. Then press Enter button to reach “A xxx” and use Use Up/Down button
to set DMX address for the fixture.
4/8
Copyright 2011 triAngle lights
5/8
Copyright 2011 triAngle lights
4.SERVICING
5.TECHNICAL SPECIFICATIONS
4.1 Fuse Replacement
WEIGHT&DIMENSIONS
1. Unscrew the fuse holder and remove the damaged fuse.
2. Replace with exact same type fuse and screw the fuse holder back in
its place.
Length
17cm
Depth
17cm
Height
15cm
Weight
1.3kg
4.2 Cleaning
POWER
To maintain optimum performance fixtures should be cleaned
frequently.
Unplug fixture from power and allow the fixture to cool down. Use a
vacuum or air compressor and a soft brush to remove dust collected on
the plastic cover or lens.
4.3 Trouble Shooting
1. Unit does not respond to DMX:
Check that the DMX cables are connected properly and are wired
correctly (pin 3 is “hot”; on some other DMX devices pin 2 may be ‘hot’).
It does matter which way the inputs and outputs are connected.
Disconnect from mains before servicing.
AC Power
AC110-240V
Power Consumption
50/60Hz
25w MAX.
Fuse
LIGHT SOURCE
6x3W rgb leds
Red
6
Green
6
Blue
6
IMPORTANT INFORMATION!
In order to optimize the recovery and recycling of the materials that
old appliances contain and reduce the impact on human health
and the environment, ensure that this product is recycled at the
end of its life.
N INTRODUCTIO
6/8
Copyright 2011 triAngle lights
7/8
Copyright 2011 triAngle lights