1
User Manual
User's Manual
welcome to use our CPS navigator
.We resefre lhe fioal expldation right on lhis User,s Milual.
.Specrlicaffons ile subject to chaoge without notice. Sorry lor my inconvenience
.prse make a copy oi the imporonr data. We asume no responiibiliry for the daLacauscd!
. I hls mdual hs beeD carefullv checled Please conlacr our ieruice cenler when mylossrypirg mistake
is found-
.Please read *re optrating iNmction carefijlly Md use lhe rccessories
only prouded bv lhe orisinal
ynexpecled dmage. No wumry wiil be execured it-ybu ae not foilowing"rhe
comshng with t_he incompatible accessories. we assume no responsibility for ai,y loss
and dmage caused hqeby
dara may be not in confomiry wirh the actuat tsansponing meks due ro
.."1:"J:-"T:]."_ri:iCarion
ue
mnc consmchon de!elopment. please be sure rc comply with rhe real road coolidoo
md follow
me mmc rules. (rperatmg ild vtewing tle GpS during driving ma, causc se\se hamc
W company wtil nol be respomible for oy loss caued by thi unexpecEd accrdent. accidenl.
.users can updale md upgrade softstre from website at hjs/ber oorion.
.r{ny discrepmcy between the pictues with real products hereioahii. the real one prevails.
y:?-]:-^y9,1 -y
rnsrucuon or
Chapter
One
Product introduction
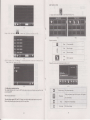
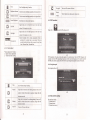
l. I htroduction
lo us the GPS navigator. whicb^is mainly.used for navigaling md also has lhe oplionai
:V€lcome
tuchon
ot udeo ptaying. audio playing. Blueroorh hilds fiee. FM, Blietooth. photo r iewing.
ad
b-ljook etc.
I H igh^perfommce. low-power consumplion Media tek MTIJ5 I CpU;
aComfonable user interface: simple. easy lo opemte:
t) Powm mmagement: keep tbe pioducr ri work lonser md more steadilv:
aData trmsmitting: commicare \uth @mputer lhriush USB cahle: '
oExcellent in receirirg signal: accurare posirion fixing-prcvides you rhe sarisfied naviBa,ints
seruice;
OCompatible with Bluetoorh mobrle: the navigator cai ilso be uiea foi maLlog ana miwering caI
with haods-fiee (Optional );
aEnknalnment: MPI md MP4 liudion cm relieve vou farioe:
..UpS ,
You can use irvhen driving. walking. riding. or wait'rg lor a fieeting; the
Derlect
enlemnmenf tunctron cil make vou life ed work more splendid.1.2 Package
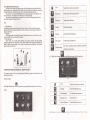
Tbe packing box contaiN tbe lollowing accessories. please
I. GPS navigalor
2.
3.
4.
5.
6.
7.
8.
confim:
TravelChege(Optioml)
Carchtrger
MINI USB cable
Earphone
User's mmual
Protecting cover
Ca bracket
For rhe items listed above. please onfim tbe (Ml Droducts. If mv dmase_
Ple6e contact wilh the disributor or the agent as soon o possible. '
"
ItrstructioD
P-lw
GPS
read flis usq's mmud caefiIly to be familitr with all tbe opqation details and
to make the
mvisabr rErfoms well:
Thi irsmcdon relares to Lhe theme;
IRmkf
IRelative infomarionl. The extending iriomaion relates to rhe theme:
Note I: l'be noles and wmings relate to the theme. please value ind
follow these notes. othe*ise
I
I
it will possibly bdng damage to you md oth6.
This user mmual oily adapts to ou GPS navigalor
Chapter
Tiyo
Storage humidity
godr{r
Amospheric
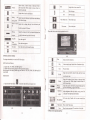
Features aod specificatiotrs
pressure
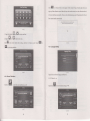
2.1 Main features
aOperatiq system: Mioosoft Windows CE 6.0;
O4.3" TFT LCD displa) with resolulion o[480*272 pixels;
tlHi-Fi stereo earpho0e md built-in Hi-Fi speaket volme adjustable:
aButtotr md touch-screen operationi
aBuilt-in sensitive GPS mtema!
iThe navigating softwde could m the SD cdd directly:
aVideo fomat supported: ASF,AVI,WMV3GP,MP4,FLVT
aPhoto fomat suppofred: BMP, JPG PNG:
O E-book fomat suppofted : TXT:
a Ml'l\ I L SB poa,
aBuilt-in rechegeable Li-battery which cm be powered by travel md
LCD display
'lbuch-screen
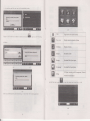
ChapterThree M.nu.llnstruction
ctr chtrger
MediaTek MT3351
64/128 MBytes
64 MBvtes
or
)
It I
LLD
.lanpCAG1-r7rn/\
Hrsh-accmcv. endmble touch-sffed
slot,
the
mdlmu
capactty
of SD Cad
sunnofred reaches to 8GB
Audio
A: tsullt-m hgtr lrdelrty spe*s
R. gioh fid;l;tu.tere^ F,mh^ne
GPS
Lolo sBn: <4zs
Hot start: <3s(inthe open d@)
Brttery
Built-in rechegeabte Li-battery
5.8ery
Otsplay.
n
SD / MMC
SD
u/-* -+-*.
86KPa to 106KPa
This chapter will give an introductiotr ofthe apptrent components and baic function
of-the GPS Navigator ard it witl help you to be fmilie with the boic operation quickly.
2.3 Product appearance
2.2 Specification
CPU
Ilash memory
EMS memon
30% to 90%RH
-1<"
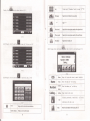
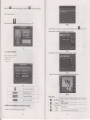
3.1 Power supply aDd charge
Ifthis navigator is fust used, please use AV adaptor to fully chage it.
3.1.1 Power strpply
Thqe de three t,?es ofsupplying powei: battery adaptor, USB cable.
GPS wigator uses the Li-battery to supply powq whetr it is not comected with adaptor The
mark lm&q on the up right of interfrce indicate the curent electric volme.
GPS navigator uses the extemal power when it is comected with fte adaptor
GPS Davjgator uses the USB cable to supply power when the GPS comects to the PC.
( Remakl This machine adopt built-in, miliaigeable Lithim battery. At tromal conditioo (if the
back light is not so bright). the actual supply hou cm be different because ofthe different way 6itrg
the navigator. Some function (audio plafng, video plalng bright back light) will consume a lage
oower. which will reduce the usrno hour.
'(NoreI Thismachineadoptsbuiitin,unchmgeableLithimbatteryInordertoavoidfreand
bming.
please do nor poke. bmp or take it apm or rhrow ir inlo fire or warer.
3.1,2 Use the travel charger to supply power(Optional)
When the GPS navigator is first used, please Ne the AC adaptor to chage it.
I.
Comect the DC part of the adaptor with the power itrterface at rhe left side of the mit (The
power interface is sme as USB interface );
2. The orher pai comect to the power socket. it supplies power while chuging.
( RemilkI 'Red LED indrcaiei ifs being chtrgedi i,lea; wait util it is 6llichaged md don't putl
out the adaptor while chegitrg. When it is fi.rlly-chtrged, the LED will tum to Blue. Iflow battery or
Do banery- ple6e chtrge it imedialely.
3.1.2 Use the car charger to supply power
'l . Connect the DC part ofthe adaptor with the power interface;
2. The other part comect to the power socket, it supplies power while chaging.
Ulargrng DC 5V port
AC Charser
Car Chrrser
Status ol tIe LUl,
lioht
Operating SYstem
Navrganotr
I00/210V chdeer. 5V,/ l.5A
DC9.24V5VlI5A
when chagmg,
fre rd xght ls on; when
ffni<hed thP htre l;Ght i<
^n
Microsoft Windows CE 5.0
charge
SD card
video Player
ASEAVI,WMV,3GP, MP4,FLVI
Audio Player
MP3 and WMA
Photo viewer
E-Album, JPQ, GIF, BMP, PNG
EBook Viewer
TXT
Temperature
l>creen aolusrmenrj lueraur sl [\ollc.I
lPowr'l lBacl<liohtl ITime an.l Daipl lI anqraoel tSrs InfoI
Uperatmg lemperature : 01j to 60L
worKng numorry
45% to 80o/.RH
System setting
[rM rransmEerl
Storase
TmDoatue ,
lNoreI
Please insert the
elecficity collisiotr.
3.2 Porer on/off
-20"C to 60"C
cr
adapror after
mirg
cd
so as trot to dmnage the machine
by
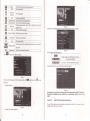
Poser on/off is controlled.
3.2.1 Power on:
Pleoe check: The battery is etrough, or it is comected to extemal power souce;
ofrhe uit to boot.
one place to eothq place, please boot mrit it adapts to the
envfuoment. Big humidity fluchration will make the mahftare short circuiled.
Please press the butron on the lop
(Notel If bring the mit fom
3.2.2 Power
off
3
Press the button on the top of the uit to tum off, the unit will enter the power saving mode md
maintain the last operation status when boot trext time3,3 Reset system
If the system cmot woik, you can reset the system by the following way;
Click the reset key on the right palt ofthe machine to reset the system by using the stylus.
Irelative infomationl: it cm be no response in the following condition:
l. The shift bemeen pictues is delayed or stopped.
2. The progmm select fimction cmot work nomally, such as long time to cmy out or cannot be
activated.
I
Theoowerbutton cmnot work
be lost
[ttotel tlre usaved dau will
After comectitrg, the screen will display the interface
4.
Please
pull out the MINI USB cable after you finished
rctum
Lo rhe
as
belowl
!
1
6
you reset the system when the system has no response.
I
Please copy the data every other time.
3.4 Use bracket to fix travigalor
When use GPS in th9 cr, you should
lhe bracket.
3.
fix the device to the pm ofwindow besides the pmel by using
{
pre-operation inlerface.
)o[
operation, the GPS navigator
will
[NoteI Datasecuity:Pleasecopythedatatotheouterstomgedeviceeveiytimebeforeyouupdate
your system data. Ow company takes no responsibility to any loss ofdata.
I Remmk I The GPS navigator will stop the operation when it is connected with computer
(Notel In the prdcess of communication, the following operations will break offthe comectiotr with
computet the mfinished data will be lost.
1.
2.
3.
Chapter
(Notel When use the bracket, please ake cde ofthe position. Please don't fix the naligator to the
position qhere rhe driver's sightls being influenced. Pleale do not la) it aside heelyl do nol fix il to
ihe air bag, do not lay ir on lhe expand rmge ofthe air bag.
1.5 Stylus
The stlus is the tool for you to use your navigator' Please keep it carefully
Pulloutthe MINIUSBcablei
Poweroff
Reset the system by using reset button or
Four
electic switch
Primary function
4.1 The main interface and lhe luoctiotr
4.I.1. Maitr menu
I. Singleclick:
2.
3,
Sirgly click rhe screen with $e stylus poinl.
Double click,
Double click the screen with the stylus point.
DBwing:
Click one point md hold to move on the screen.
(NoteI Anibroken
stylus, ball pen or
my acute and harsh object will destroy the LCD ifyou
use
it
to opemte the device.
3.6 SD/MMC card
The attached SD,4VIMC crd contains the navigation softwtre, map dah md media file. Please
insd the ced corectlv when use it.
I Note ) Please do noi take out the SD,&IMC card when the syster is navigating or playing-
lNoteI
l. Don't stress or cwe the SDMMC cdd, avoid loss and bulge.
2. Avoid high tempemture or high hmidity when use and stole the ctrd don'i erpor the ctrd
directly to su light, let the cdd fd away fiom liquid and conosive material
3 . Please pay tttmtion to the heading when insefr the SD,MMC cild. [f ].-ou iarn the crd
improperly, you will damage the card.
3-7 Contrect with computer
The device cm be connected with the computer throug}l tie \tL\-I [-SB E .6 left Pan. You cm
copy the docment betweetr navigator atrd computer or copl the dJa trffi CPS navigator to
co;puter so as to recover the data in GPS when you ee in ned ofdtu
l. Please confm the GPS navigator is power on;
2. Comect the MINI end [ ! ] ofUSB cable qi$ lh€ LSB fe. m e lei Fan ofGPS device
and :he troma1 end I n
] with the Host port on coi0+luld
4.1.2 Function
introduction
Navigation
Bhretooth
Video player
E-hook
Audio player
Provide navigation service
'l'hrs devrce can answer md m*e phone after comectmg wrm moblle
nhone via Bhetooth
Support ASl, AVl, WMV, JGP, MP4 dd ILV tomat. Suppofr progess
,dirrst
nause and
hrFvi^rr./nPYf
Game
Setting
firll
screen olav
Suppofr JPG, ftMP md PNU lomat. Support photo rohte, enldge/sm
ni.hrres ,iltomatic nlav and so on
Iext iomat: txt.
Srrnnof nase selection
Audlo playng lomat: WMA, MPJ.
Suppofr random playing, sequential playing, repeat playing, pause,
wdt,ile
Support game
Brightness, Volume, LangMges, Powet Time, System, Default, GPS Intb
navlgatlon
4,2 Nayigation functiotrs atrd features
According to you choice ofnavigation system, the GPS navigator can make position by GPS
satellite signal receiver md display on the navigation map. The system cm calculate a best route after
setting the destination, which cm help users to mive the destination safely and rapidly.
The system can let you enjoy the individual chm md erjoy your trip by mmy different ways
such as vision map, vivid eimation, voice indication, md words indication.
The specific navigatiotr fimctioN oe depetrded oo you choice ofnavigating softwtre. Please
refer rc the Navigation Softwtre lnskuctioD.
Notes
l. Map inlomation
It is Fobably that the elec&otric travigation data is not cotrsistent with the real traffrc hstructions
because ofthe haffc constructiotr development. Plede do comply with the highway condition and
the actual trafiic rules.
2.
Navigatior
The navigator offers the route for the reference; detemine lhe route by yourself, the driver may
be more familiar with the rcute than GPS travigator
3. Receiving signal
Mmy factors such as high, dense buildings (in the tumel, beMeen the high building,
undergromd paking, undq tle trestle), vrious weather condition, md closue of the satellite will
affect the ability to receive signal so as to result in itraccuate position, inefficiency of navigation
opemtion md system fmction.
X
g
E
K
B
a
m
CIose
Single click to close the cMent interface
Phone book
Display contact list of paired cell phone
Call history
Display curent call history
Dial pad
Phone number
Message
Dowlload SMS ofpaired phone
File manager
DoMload files of paired phone
Cell phone seaching, profile megemetrt,
Bluetooth
Bluetooth setting
switched on and discomect
Single click the bufton
4.3 Bluetoolh setting and lnstructions (Optional Function)
dialing
Bluetooth sening
a
tbe following
pictue:
:
This chapter intoduces how to use this travigator's Bluetooth to comect with cell phone for call
making ud mswering.
Operation method
4.3.1 Single click the
pictue:
brno" 6l
in main menu to opetr the Bluetooth intqtace
s
the following
a
fl
K
Close
Searching
Seech for Bluetooth devices
File mdagemenl
File and ring tones oanagement
Bluetooth
m
Single click to close curent hterface
oi,/off
Comect/ Disconnecl
4.3.3 sinele click botton m
Bluetooth
on/off
Comect{Disconnect
r", vill get the following
Bluetooth
two
pictures: the
one
is in
sr:arching and the next one
Sclt$hgfoa nsbltc
.ffi....
..
phoncs,
is the
searching result
plee
TY.::l..:.:,. ,, ..lxc*tas*;il .
..,
t4
4-5
Single click the devlce you s,ant to connect und
pictures
pair
"ll"k S&8to
as the follorving
l
Close
Single click to close current interface
Phone bool
Display contact list ofpaired cell phone
Call history
Display call history
m
Dial pad
Dial phonc nmber
m
Message
Download SMS ofpaired pho[€
ffi
F'ile manager
Download files ofpaired phone
m
Seting
&X
m
K
Cffidng
d.-.
rcbile pbae, de@
4.3.4 click
48
successful pairlng and cor,necting,
it
*i11 shor the fo1lotring picture
Cell phone sedching, profile management, Bluetooth
switched on and discomect
Lhe button
m
a.
open the phone book
intcrfacc as 1
10
Single click &.*
enter phone book as 4
1.4.1*
!&l*la.
11
key
It
Backspace
Single click
&
&
&
4.3.5 Singie click the nu,aon K
toopen
calI history
as 4
made up
of
10 numbers
from 0 to g and "4"
"t
will delete the last number
input "
Phone book
Single click to select photre
nmber from phone book
Phone record
Single click to select phone
nuber ftom
Dial phone
Single click to make call
12
call history
)
4.3.7 Sirgl..li,^
hp urUon
ffi-a
rhpn
ir sill be in dia iig
ds
4
14
Name: Unknown
Number: 10086
Calling...
{-t,,4
4.3.6 sinele click the
brtt", m
to
open
dial
pad as 4
13
E
Name
Number
Calling.
W
4-13
K
Close
Single click to close the
Number display
Display cwetrt number inpul
t0
cment interface
&
Retm
Name
Nmber
Keep
-'.,
--!t
call state
Shov the name
and
return to Ealn interfac
you' re dialing
Shov the nunber you'
re dialing
display
Callirg
Show
crrrrent call starc
Including extension, sound shift, call shift
Dial
conference
Mute
call
and so on.
Mute the miqophone while keeping the call
rs
Volume
-
Single click to decrease the volume gradmlly;
k:
iluhber:
Volume +
Hang up
Single click and hmg up
4.3.8 If there is an inconi
4-16
4.3,
EI
Retm
l(epp
call sratp and Tplurn ro oain'n,prfaco
l{ame
Calls ID
Show
caller
Nmber display
Show
the inconing call
Answer call
Single click to answer the call
Number
&
&
Mute
Volme
&
click
10 Single ciick the llrr.on&u" , ,,
417
TD
nunber
Mute the microphone while keeping the call
-
*
4.3,9 Sirgle
075529025737
Single click to increoe the volume gladually;
&
ffi
Unknom
Single click to deqease the
volme gadually;
Single click to iocrede the
volme gradually;
Volme +
M
m
m
m
Dial extension nunber
Single click to shift the voice to ce11
phone
Not aval1ab1e currentl
Not available currentlv
)i
ofpaired phone
Single click to reject the call
Reject
d
ffi
und U
*,,,
U*Olay comected. You
ce talk with
each other as 4-16
.ww
4.4.2 Opemtion method
t.
."3frY
Singlc cl rk rhe bulron fr
r. pnrer (he [o.low rs inrprlace as 4
[9
Single click the
bur",
m
to enter Music file list as 4-21
4_21
Function instructiotr
a
il
Close
Close
cwent file
Iist
Show
l6t
nexl
Show next page;
page
Song
4.3.12
Single
click
from paired cel1
Show song name
419
as420
on the main
Bluetooth interface to dowload
fi
name
1es
Choose the song to enter the playing inteface
as
4-22
420
4.4Audio player operation interface
This chapter inhoduces how to use the GPS video player to play you favorite music, and let it be
you personal MP3.
4.4.1 FMctions md
featres
The audio ptayer supports MP3 ed WAV fomat, you could set the playing sequence as you wish.
Before using the audio playet please copy the files to my folder
m
m
tr
IN
IL
Prcvious song
Play the previous song:
To play and pause, sitrgle click to pause, click again to
Play/pause
play conlinuousl):
stop
Single click to stop
Next song
Play the trext song!
plafire;
x
It shows volme is decreased when it
shift towed left. While volme is increase whm it is
Adjust volume.
m
EEg==
Volume
shifted towed risht.
&
Close
rrt
a
Settitrg
B
E3I
@
n
Single click to close the audio player;
the
playing mode
Open tlle play
list
t_a
EI
-*
EI
Suppon sequencial playing, loop playing, repeat playing
md rmdom playing.
Single click to disptay the play list, md choose you
Playing
AdjNt the progess by slide the progress-displayitrg btr;
progrcss
go left for backwads, go right for
Song title
Show the song title
r&ffi
EEE
Total time
n
Ei
Show the time progress
fomtrds;
1
Single click to close cunetrt file
Lasl
Show last page
nexl
Show nextpage
Video folder name
Video name
Iril
favorite m pichre 4-22 shows;
l lme
Close
Choose the video to enter the playing interface
as
Video folder name
Show video
nme
4-26
l
;
Show the total time for playing the song;
Homepage
4.5 Video operation lnterface
This chapter inhoduced how to use the GPS video player
E
4.5,1 Functions and features
1.
2.
Suppofr ASF, AVI,
Suppon full-screen
wlvw, 3cP,
MP4 md FLV
progress choosing and file selecrion;
plafngBeforeusingtheVideoplayer,pleasecopyyourvideofile (ASF,A\T,WMV,3Gp,Mp4andFLV)
to any foldel
ffiffi
Single click the ViO"o
O.oor B
to enter the video file list
as
the picture 4-24
m
It shows stop playitrg. Single click will continue to play.
m
Next
Play next video.
l!=l
1
tI
Click to close the video listi
Play
r.=t
4,5.2 Operation
1.
Close
;:r
EE:!!!!
iE83il
N&
Single click and shift to video fi1e list, and then choose
File list
you favorite video.
Single click volume.
Volume
It shows volume is decreased when
it shift towed left. Wlile volme is
increase whetr
it
is
shifted toward ilght.
Playmg
Brighhess
adjust
AdJust the progress by slide the prcgiess-displaying bar;
Eo Iefi for h,cfrvard( oo riohr far fnnvard<.
Adjust brighhess with stylus while movitrg towdd left
md right. Tum dght meam tum brighter
Full screen play. Double click to retum nomal play
Play interface
stafus.
EIIE
Video trame
@
Time
Show current Video
nme
Show ihe time consmed / The total time of the video
operation
t7
This chapter introduces how to use the photo viewer to browse pictues.
,1.6.1 Function
1.
2.
E
featues:
\^I
Supports JPG, BMPandPNG
Support pictue rotate, picture enltrge/shrint md automatic play.
Before using the photo viewer, please copy your photos to any folder
E
ll=l
Prcvious
Show the previous picture
Nexl
Show the next picturc
Single click and shiff to video file list, and then choose
File list
you favoite pictme
4.6,2 Operation method
l.
bunon
Single click lhe
ffi
X!
to open the phoro lrst
as
picue
'N
EI
4-2?
Rotate
Click to rotate the picture by 90 degree
Automatic Play
Play all the pictues circuldly on
full
cment pictue
@
Photo name and
nme
Show the photo
fomat
atrd
fomal
4.7 E-book reader interface and operation
This chapter inhoduces how to use GPS to read e-book.
4.7.1Function
1. Suppofr TXT
K
r!
t!
2.
Close
Click to close the photo list;
Suppofi tuming over page, page browse, and file choosing.
Before using e-book f,rnction, please copy you TXT file md save it to any folder
Last page
Show the last page
4.7.2oper^tion
Next page
Show the next page
File
Single click to enter the photo
Choose the picture to enter play interface
as
file;
l.
srngle click
m
bunon \ .f
&
qT
p
Shrink
Enlarge
as
4-10
4-29
K
Close
to eorer Ebook lisr
r!
tt
ll
Click to close the viewer
Shrink
cmert picture
itr
propoltion
Enlarge curent pictEe in propoftion
18
g
CIose
Click to close cment file
Last page
Show the last page;
Next page
Show the next page;
Name of
file
Show name
offile
screen
from the
2.
Choose file name to enter e-book reader
as
4-32
ia,am
Single click and close e-book reader
@E
mtrI
Single click to enter Ebook list to choose favorite book
Set color
T
K
RGB
Choose backgroud colot, font color or set backglound color
Choose backgrcmd
colot font color or
set
backgroud color with
rcverse order or sequential order
Color review
Retum to e-book homepage
It needs open e-book md choose TXT.
4-35
r
wfill
@
K
E
r
Set fotrt as
Set
font
as
bold
nomal
Decrease font size
Fotrt size indicator
lncrease font size
il
n
@
4.8 Game interface and operation
Sitrgle click and choose book
Retm e-book interface
Rolling book mak list
Retm e-book homepage
Showing cuilent reading mtio
mdk
EI
Single
click
EE
ro choose
diflerenl games
as
4-J6
m
m
Backlight
Adjust the scrcen backlight;
Backlight tm off time idterval mder baftery power supply
Backlight trm off time itrteryal uder extemal power supply
Volume
Adjust the volume;
FM
Tm on/offFM
function.
Trmsmitter
Set the received
fiequency
Im
KT
m
on / off "screen click tone"
Navigation
Set navigation path
path
H
Time and date
Time set
Date set
4.9 Tool
Time zone set
Singte
click
Gl,o
"ooor"
o,u".enttools s4 -37
m
m
m
Calibrate
Calibrate the soeen
scrcen
xil
Ct"k
&U
to enter "setting" menu, then you cm set the relevmt tunctiotrs. There de
4. 10.
I
Single
click
Language
Select the lmguage for the system
Default set
Retm the default seftings
GPS info
Display GPS receiving signals data
System info
m
4.10 System setting lnterfa@ and operation
the
Show the system veNion and serial
Backlight setting
K
,o
"nr".
ou"olight setting hte,face
backlights, volume, lmguages, FM, time, calibntion, system info md default etc.
439
23
as
4-98
nmber etc.
w
KI
r
w
Close
Exit "backlight setting" interface;
Brightness decrease
Click to derease backlight gadually to the lowest level;
Brightness increase
CLck to increase backlight gradually lo lhe htgiest level
Presetrt Brighmess
Red blank shows the present brighmess
KI
Shift left
x
Shift right
Siqle click
and
it will shift left,
and
tr
it will shift right
Tum on/ off the screen click tone;
Present
volme
Ycllow bleks shows the presetrt volme level;
4-I0.3 FM Transmitter
it will
show lasl
will
show lasr
column. This display is in circle.
Single click md
T@ righl
and it
Sinste
ctick
81"
**, *. t\r se.ins
as 4-41
colum. This display is in circle.
EEAM
System backlight
Time interval
will
be closed automatically when no
several time inteFal choice for you: never, 3 min, 2min,
lmin- 3osecond later I0second later
4. 10. 2 Volume adjust
"Volume adjustment" includes:
1.
2.
Speaker
volme adiustment
441
FM Trmsmifter will send out the audio signal to the radio devices. Take 86-7MHZ fiequercy for
exmple, both the GPS trmsmitting ftequency and the received frequency of the radio should be
86.7MH2, then all the sounds oftie CPS will be itrput tkough the amplifier system ofthe radio.
"Soeen click totre" setting
4.10.4 NavigatioD path
Set navigation path as
&
Close
Volume
Exit "volume setting" itrtsface;
-
Single click to decrease the volule gmdually; there are l0
KI
ranks for volume
r
decrece one rank.
K
4:22
Volume +
fiom mute to mdimum. Single click will
Single click to itrcrease the volme gradually; there are l0
ranks for volme ftom mute to maximum. Single click will
irmease one rank
Tum lefl
Tum on/ off screen click tone;
4.10.5 Date
and time setting:
Date and time include:
1. System time set;
System date set:
System time zone set.
2.
3.
EB
CLck
ight
up
it will move from in the
till the calibmtion
succeed, then
to the main interface automatically.
sequence
ofthe centet Ieft up, left down, right dom ed
click any where on the scrcen to save the calibratiotr and exit
Iftrot
save the
infomatiotr, please wait 30 seconds and it will exit
ftom curent interface automatically.
h# sqLs !n b€ cBrbr of be tiEt.
R+eil d th ldet mv6 dil.d the {Een.
Frcs ad h ery
+
L srngle clrck bumon
E! r, M
A or E
Kto exit cment
2.sr"gb
Click
30
ro ser
lme md
dare.
tochoosetimeaea.
interface after setting, and then
to exit cment interface.
it will
show as4-44. Choo."
trE
o.
4-46
4.10.7
Language Setting
Single click
4,10.6
you favorite language md then exil
Screen Calibration
4. 10.8 Default set
cli"k
th" m
to enter the s@en calibration as 4-45
single click
R
to
"rt"r
t"
a"fault setting
6
4-48
Single
click
IEI
.".tor" th" default settings, singte click
to
Eil
Single click the button
uoo
"n,".
o"S infomation
GE
to exit the default settings.
interface as 4-49
Figure I
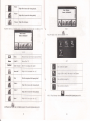
TV chamels
Click "Continue"
broadcast interface.
th."
settings interface. The channel
4. 10. 10 System information
Click the button " scan
"
Figure
to enter the scaminq
"1i.15
hilfton to
enter
2
chMels interface
as
fisre
3
System infonnation includes
1. Firm*are vetsion,
2.
3.
APP
versionl
System ID.
Figure 3
Select the TV chamel you search for to entq th9 blg4gql! lnlgrface as figwe 4
4-50
I
Exit
system information
E@@
Show ROM version
@
Show the APP version;
Ht!t!'
Show
4.11 ISDBT lnstruction(Optional:
the systen
Figure 4
Click to switch to the foldq interfee, select yru favorite
ID.
only for Brazil and Japan)
Click the "TV' icon in Fmcrion Menu to enter llgue
I
qli"rl9g9l93'"!ry$9Ly9lgE,s9"l!r4
Volume
Click to decreme the system volume one level
click to oDen Mute
Mute
T
il
Volme size
9 levels altogether
instuction
ofT
Record
&
Click to
Indicate proglm pause
/
r
play, click to continue to play, click
asain to Dause
E
E
Next channel
E
Time
Figue
Click "general" on
Click to stoo
Previous channel
E'
offISDBT
Record curent hro,d.,<fino
E
Play/Pause
Stop
ffi
rst
tm
7
interface to enter the General
as
figure 8
Click to play previous channel
Click to play next chamel
renl ume
Broadcast picture
Full-screen play mode, double-click the screetr to retum to
nomal
play mode
Sima
ls tren
button
gth
Displav sisnal strensth infonnation
Figure
8
file list as figue 5
Main
Audio,
Sub
Click "about" to enter the version information interface
Select your favorite
progrm to enter broadcast interface,
clicl8to
exit file list, click
E
as
Audio and Dual three optioN
figue
9
to enter
ESG menu
1.
Displaychannellist
Figure 9
Note: please be sure !o pull out the whip antenna of body whetr using the digital Tv function !
This function is optional, and some models haye no such functiotr. Please refer to the real
subject!
Chapter
Five
Simple Problem shooting and maintenance
lF you GPS nevigator camot work nomally, piease check it as follows.
2,
Figure 6
Display your favorite
chmel list
problem, please contact our seryice center.
lf
you
cmor el\e
the
Uan not tum on
the
navisator
lhc
devrce hrm
oil
Lack ofpower
Chdge the battery
Low battery
Chtrge the battery
lhe back hght is
lhe back lisht has
No
tesponse
whefl
clickins fhe hrrton
not
heen
l'he touch-scrcen is not
Calibate
^oliL--+-:
'l'he volume is at the
lowest condition
Without soutrd
uil
not comulcate
Adjust the backlighl
Click the LCD; the screen will
lhe
earphone
ts
tm
the touch-screen
Increase the volume
not
connected well
the USIJ cable N not
Com{t
the earphone
with comnuter
Comect USB cable
'fhe signal is veak, it need more than
No signal
1
The map data is lost
Contact your agent or distributor
-i-,,1--
r^ --^-i,-
}L- -:-^l
Maintenance of CPS travigator
GPS navigator will be a reliable navigation fld entertaiment companion if protected by right
methods. Please follow the instructions below to €nsur€ your GPS m smoothly for a long time.
Protect screen: Don't press the screen with srength or you will destroy it. Ple6e use the stylus
to opemte the travigator and spray a little glass cleano on the soll cloth to clem the screen, don't
spray on the screen dircctly.
(NoteI Be sure to tm off the CPS navigator before cleming.
J Drop or strike will cause damage to high-precisiotr componenls.
INoteI Accidenlal damge is beyond ow responsibiliries.
J Don't use it under such enviroment: Temperature chmge abruptly (high lempeBhre above 60' ,
low temperatue under-lo' ), high voltage, dusty, electrostatic interfermce, avoid my corosive
liquid and dip into my liquid.
J Avoid radiated interference: The radiated interference Aom other elecaonic produc€ will affect
the display and it will be nomal after suppressing the interfqence souce.
INoteI Ifyou cary the mit by air, please put the GPS together nith you luggage to p6s the X-ray
detection systern. Avoid scmning by the mgnetic head detector (at d1e pdsage Bed for passing) or
the magnetic bd (held by the security checker), or it will destroy the system date in the uit. We will
lake no responsrbiliry for iL.
Avoid direct, intense light: Dof,'t use the OPS navigator in high light and ulhviolet radiarion in order
to increase the using life.