1
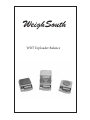
WeighSouth
WBT Toploader Balance
Part List
Balance .....................................................................................1 pc.
Weighing Pan .........................................................................1 pc.
Draft Shield (Model WBT-100 only) ................................1 pc.
Calibration Weight .................................. WBT-100, WBT-602
AC Adapter..............................................................................1 pc.
Instruction Manual...............................................................1 pc.
Unpacking
Carefully unpack the balance and remove it from its
styrofoam supports. You may want to keep the original box
and packing materials for storing the balance when not in use.
If the balance is damaged contact the supplier immediately.
Keep all packing materials as they were when you received them.
Setting up the Balance
Place the balance on a level surface, free of vibration.
In order to keep you balance functioning at its best we suggest
thay you do the following:
•
•
•
•
•
•
•
•
•
Avoid Extremes of temperature.
Do not place in direct sunlight or near air conditioning
vents.
Make sure the balance is located on a strong table and
free from vibration.
Avoid unstable power sources.
Do not use near large users of electricity such as welding
equipment or large motors.
Keep free from vibration. Do not place near heavy or
vibrating machinery.
Avoid high humidity that might cause condensation
Keep away from direct contact with water. Do not spray
or immerse the balance in water.
Do not place near open windows, air-conditioning vents
or fans that may cause a draft and unstable readings.
Technical Specifications
Model
WBT-100
WBT-602
WBT-5001
Capacity (g)
100 g
600 g
5000 g
Readability (g)
0.001
0.01
0.1
Weighing units
g, kg, oz, ct, lb, t, ozt, dwt, GN
Zero range
To capacity by subtraction
Stabilization time
3.5 seconds
2.5 seconds
Optimum operating
temp.
64°-77°F / 18°-25°C
Power requirements
8-AA alkaline batteries (included) or AC adapter
(included)
Calibration
User calibration from keypad
Display (in/mm)
LCD (0.75”)
Pan size L x W (in/cm)
3” dia
Dimensions H x W x L 9.5” (H) x 7.5”
(in/cm)
(W) x 10.5” (L)
5” dia
7” x 6”
3” (H) x 7.5” (W) x 10.5” (L)
Draft Shield
6.5” x 6.5” x 6”
Optional
NA
Net Weight (lb/kg)
9 lb
6 lb
5.06 lb
Model
Gram (g)
Kilogram (kg)
Decimal Ounce (oz)
Carat (ct)
Decimal Pound (lb)
Troy Ounce (ozt)
Pennyweight (dwt)
Grain Unit (GN)
WBT-602
600 x 0.01
0.6 x 0.00001
21.2 x 0.0001
3000 x 0.05
1.3 x 0.00001
19.3 x 0.0001
385.8 x 0.01
9259.4 x 0.1
WBT-5001
5000 x 0.1
5 x 0.0001
176 x 0.001
25000 x 0.5
11 x 0.0001
160 x 0.001
3215 x 0.1
77161.7 x 1
WBT-100
100 x 0.001
0.1 x 0.000001
3.52 x 0.00002
500 x 0.005
0.22 x 0.00001
3.2 x 0.00002
64.3 x 0.001
1543.2 x 0.01
Turning on the Balance and Self-testing
1. Connect the AC adapter to an available wall socket
and plug the other end of the cable into the balance.
2. Press the ON / OFF key to turn the scale on. A display
test will be performed (5 seconds).
3. Once the display shows “0.0g” the balance is ready to
use.
4. To turn the scale off, press the ON / OFF key
Sample Weighing
1. Press TARE / ZERO to make the balance return to zero.
2. Load the sample onto the scale pan.
3. The weight is stable when g (depending on which
weighing unit is active) appears on the display.
Weighing with Container
Sometimes it is necessary to weigh an object (such as a
liquid) using a container. To display just the weight of the
contents (net weight) and not the whole combined weight
(gross weight), the TARE button is used.
1. Place an empty container on the weighing pan.
2. Once the weight stabilizes, press the TARE / ZERO key
briefly. The display will return to zero.
3. Add the sample to the container.
4. The weight is stable when “o” appears in the top right
corner of the display.
Unit Switching
This balance has 10 possible weighing units. They are
gram (g), carat (ct), pound (lb), ounce (oz), troy ounce (oz),
grain (GN), pennyweight (dwt), Newton (N), Tola (T), and
T/A/R. Follow these instructions to change the weighing
unit:
1. Press the UNIT button.
2. The weighing unit will cycle between the different
weighing units with each press of the button.
Parts Counting
With items of uniform weight (ie. all the pieces are of
equal weight value) it is possible to use this scales parts
counting feature to quickly and accurately obtain a piece
count. To use the parts counting feature, follow these
instructions:
1. Press the MODE key until the display shows “pcs” to
indicate parts counting mode.
2. The display will show “10 pcs” to indicate that you
should place a sample quantity of 10 pieces onto the
platform. You may change the sample size by pressing the “CAL” button. Possible sample sizes are 10, 20,
50, 100, 150, 200, 250, and 500.
3. Press MODE again once you have selected the sample quantity placed on the platform.
4. You can now add any number of pieces to the
platform (or container) and the display will show a
count.
5. To exit counting mode press the MODE key.
Notes: The larger the sample size used, the more accurate
the count will be. Tare can be used in this mode.
Calibrating the Balance
The balance may need to be calibrated in certain situations
such as:
Before weighing for the first time
After the balance has not been used for some time
If the balance location has changed
If ambient temperatures have changed greatly
1. Clear the weighing pan and press TARE to re-zero the
balance.
2. When the balance is stabilized press and hold the CAL
button for 5 seconds.
3. The display will show “-CAL-” then the required weight
will flash on the display.
4. Place the calibration weight onto the center of the platform and wait for the display to stop flashing.
5. You may now remove the weight. The scale will return to
normal weighing mode
Linear Calibration
Linear calibration adjusts the balance at two or more points,
rather than just one. To enter linear calibration, follow these
steps:
1. Clean the weighing pan and press TARE to re-zero the
balance.
2. When the balance is stabilized, press and hold the CAL
button for 5 seconds.
3. The display will show “-CAL-”, then the standard calibration weight will flash on the display.
4. At this point, press and hold the MODE button for 5 seconds.
5. The display will flash the first required calibration weight
for linear calibration. Place the required weight onto the
center of the platform.
6. Once the weight is accepted, the display will flash the
next required calibration weight. Place the required
weight onto the center of the platform. The weights
value will be displayed when it is accepted.
Care & Maintenance
Please read all operating instructions carefully before
use. Scales are precision instruments and should always be
handled with proper care. To ensure years of reliable service,
keep these simple tips in mind:
•
•
•
•
•
•
•
•
•
Do not exceed the scales maximum capacity. Overloading your scale can permanently damage it!
Avoid exposure to extreme heat or cold. Scales perform
best at normal room temperature. If temperatures have
changed dramatically, recalibration may be necessary.
Allow your scale to warm up for three hours before performing initial calibration.
Store your scale in a clean, dry location. Dust, dirt, and
moisture can accumulate on the weighing sensors and
electronics causing inaccuracy or malfunction.
Avoid static electricity sources, as they can have an adverse effect on the weighing sensors.
Always weigh on a flat and level surface, free from vibrations and drafts. The corner of a room is usually the most
stable.
Gently apply all items to be weighed. Do not drop items
onto the weighing platform.
Avoid dropping your scale. The warranty does not cover
damage due to rough treatment or overload.
Keep the weighing pan clean using a soft cloth. Do not
use harsh chemicals.
The Manufacturer warrants each product to be free from defects in
materials and workmanship, and to conform to its published product
specific cautions under normal use and service for the period of one
year commencing from the date of purchase.
The foregoing warranty is extended only to the first purchaser and
applies only to product failures due to defective materials and/or
workmanship. Without limiting the generality of the foregoing, the
foregoing warranty will not apply if, upon inspection, it is found that
the product was: misused or abused; used for a purpose for which it
was not designed; mishandled; placed in an improper environment;
repaired by unauthorized personnel; or improperly installed or adjusted.
The sole and exclusive remedy in the event of any breach of the foregoing warranty shall be for the original purchaser to return the product to The Manufacturer, freight and insurance prepaid, for repair,
replacement or credit, at The Manufacturer option. Any product
repaired or replaced under the foregoing warranty shall be shipped
back to customer freight and insurance prepaid.
IN NO EVENT SHALL THE MANUFACTURER BE LIABLE FOR
ANY LOSS, INCONVENIENCE, OR DAMAGE, INCLUDING
WITHOUT LIMITATION DIRECT, OR INDIRECT, SPECIAL,
INCIDENTAL OR CONSEQUENTIAL DAMAGES, RESULTING
FROM OR RELATED TO THE USE OR INABILITY TO USE A
PRODUCT, WHETHER RESULTING FROM BREACH OF WARRANTY OR ANY OTHER LEGAL THEORY, EVEN IF THE MANUFACTURER HAS BEEN ADVISED OF THE POSSIBILITY OF
SUCH INCONVENIENCE, DAMAGE OR LOSS.