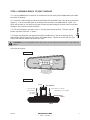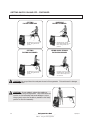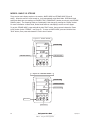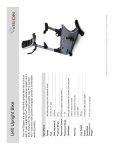
1
USER’S MANUAL PART 1 - Assembly .................................................. 2 Parts List and Parts Descriptions ............................. 2-3 Assembly Instructions .......................................... 4-10 Monitor Installation .............................................11-16 Post-Assembly Safety Checklist ................................ 17 Recording Order Information ................................... 18 PART 2 – Using the Vasa Ergometer ..................... 19 Safety Review .....................................................19-22 Resistance Settings ............................................23-25 Using the Vasa Monitor........................................26-37 Monitor Summary of Functions................................. 38 PART 3 – Technique & Form .................................. 39 Swim Stroke Technique .......................................40-44 Surf Paddling Technique ......................................45-46 Kayak & Canoe Paddling Technique ......................47-48 Nordic Poling Technique ......................................49-50 Other Exercises ...................................................51-52 PART 4 – Swim Training Tips & Workouts ............ 53 High Elbow and Pulling Path .................................... 53 Drills for Improving Swim Technique.....................54-58 Stroke Rates of Olympic Swimmers .......................... 59 Training Videos ....................................................... 59 Workouts & Tips from Coach Richard Shoulberg ........ 60 Workouts: General .............................................61-63 Workouts: Triathlon/Open Water Swim ................64-67 Training Log ........................................................... 68 Racing: Vasa Challenge & World Rankings ...........69-70 Training Notes ........................................................ 71 PART 5 - Maintenance & Troubleshooting ............ 72 Maintenance Instructions.....................................72-77 Troubleshooting ..................................................78-79 Guarantee & Warranty Information.......................80-81 PART 6 - Vasa Extras ............................................. 82 Accessories & Replacement Parts .........................82-83 VASA, INC. 1 ALLEN MARTIN DRIVE ESSEX JUNCTION, VERMONT USA 05452 TEL: 802.872.7101 FAX: 802.872.7104 EMAIL: [email protected] WEB: www.vasatrainer.com PART 1 - ASSEMBLY 1.1 - VASA ERGOMETER - PARTS DESCRIPTIONS V A S A V A PART NAME ¡ 1. 2. 3. 4. 5. 6. 7. 8. 9. PART NUMBER Front Assembly ...........................VE-1 Monorail .......................................16AL-E Bench ..........................................4P Seat Carriage ...............................3-VT0796 Tether Cord .................................VE-TETHER Rear Stanchion ............................VE-2 Monitor ........................................VM-1 Damper Door ...............................VE1-DD Caster Wheel ...............................23PS Kayak Parts 11 (Swim paddles, exercise handles not shown) If KAYAK Ergometer, also includes these parts (see inset): 10. Monitor mount bracket .............VE-K-MMB 11. Foot Bracket .............................VE-K-FB 12. FB Mounting bracket .................VE-K-FP-C 10 (Exercise handles, kayak shaft not shown) 12 Please READ entire assembly section before beginning assembly. The parts for your Vasa Ergometer are packed in three boxes (four if you upgraded to an XL bench). Please unpack and assemble your new Vasa Ergometer in the SPECIFIC ORDER outlined on the following pages. We recommend unpacking and assembling the parts from Box 1 and Box 2 (and 4 if applicable), and then unpacking and attaching WKHIURQWDVVHPEO\IURP%R[7KLVVSHFL¿FRUGHULVWRDYRLGDQ\GDPDJHWRWKHIURQW assembly. IMPORTANT: Please save Box 3 and its inner packaging. Box 3 and its packaging LVVSHFL¿FDOO\GHVLJQHGWRSURWHFWWKHIURQWDVVHPEO\,QWKHXQOLNHO\HYHQWWKDW you would need to ship the Vasa Ergometer, we recommend using Box 3 and its packaging to ship the front assembly. 2 Vasa Ergometer User’s Manual PART 1 - Assembly 07/01/11 S A VASA ERGOMETER - PARTS LIST BOX 1 CONTENTS (measuring 36”x16”x9” ) PART NAME PART # REAR STANCHION ASSEMBLY STANDARD BENCH (or XL Bench) SEAT CARRIAGE ASSEMBLY TETHER CORDS (M, H) INSTRUCTION MANUAL HARDWARE BAG button head screw - 2 1/2” hex jam nut hex cap screw - 1” (yellow zinc) lock washer ÀDWZDVKHU hex key allen wrench - 3/16” hex key allen wrench - 5/32” wrench - 7/16” wrench - combo 9/16” & 1/2” screwdriver VE-2 4P (XL UPGR) 3-VT0796 VE-TETHER IM (see below) 11P 18PS 14SC 14A-P 3 12A-PS 12B-PS 14B-PS 14D-PS VE-1-SDR QUANTITY 1 1 1 2 1 1 bag 2 2 4 4 1 1 1 1 1 LOCATION BOX 1 BOX 1 (BOX 4) BOX 1 SMALL BOX INSIDE BOX 1 SMALL BOX INSIDE BOX 1 SMALL BOX INSIDE BOX 1 If you ordered the SWIM ERGOMETER, you will receive these additional items: EXERCISE HANDLES POWER PADDLES 8M-WHD PWR PPAD 2 1 pair SMALL BOX INSIDE BOX 1 SMALL BOX INSIDE BOX 1 BOX 2 CONTENTS (measuring 89”x3”x3”) MONORAIL 16AL-E 1 BOX 2 1 1 BOX 3 SMALL BOX INSIDE BOX 3 BOX 3 CONTENTS (measuring 35”x29”x18”) FRONT ERGOMETER ASSEMBLY MONITOR (with 2 “AA” batteries) VE-1-FF VM-1 If you ordered the KAYAK ERGOMETER, you will receive these additional items: KAYAK ERG FOOT BRACE FOOT BRACE MOUNTING BRACKET CONNECTING HARDWARE KAYAK SHAFT ASSEMBLY MONITOR MOUNT BRACKET ASSEMBLY 3M DUAL LOCK VELCRO STRIP VE-K-FB VE-K-FP-C 1 1 (see instructions sheet with foot brace) VE-K-SHAFT 1 (2 sections) VE-K-MMB VE-K-DLV 1 2 NOTE: Look for the KAYAK SYMBOL throughout the manual (shown here VSHFL¿FWRWKH.D\DN.LW BOX BOX BOX BOX BOX BOX 3 3 3 3 3 3 ) for key instructions SAVE ALL PACKAGING Box & inner packaging for Box #3 07/01/11 Vasa Ergometer User’s Manual PART 1 - Assembly 3 1.2 - ASSEMBLING YOUR VASA ERGOMETER 8QSDFNDQGDVVHPEOH\RXUQHZ9DVD(UJRPHWHULQWKHVSHFL¿FRUGHURXWOLQHGEHORZXQSDFNDQG assemble the parts from Box 1 and Box 2 as instructed, then you will unpack and attach the front DVVHPEO\IURP%R[7KLVVSHFL¿FRUGHULVWRDYRLGDQ\GDPDJHWRWKHIURQWDVVHPEO\ IMPORTANT: Please save Box 3 and its inner packaging for the unlikely event that you would need WRVKLSWKH9DVD(UJRPHWHU%R[DQGLWVSDFNDJLQJLVVSHFL¿FDOO\GHVLJQHGWRSURWHFWWKHIURQW assembly. STEP 1: UNPACK BOX 1 AND BOX 2 (DO NOT UNPACK BOX 3 YET) 8QSDFN%R[DQG%R[DQGOD\WKHFRQWHQWVRXWRQWKHÀRRU NOTE: DO NOT UNPACK BOX 3. Once the monorail, bench and rear stanchion are assembled, you will slide the front assembly out of Box 3 and attach it directly to the monorail. BOX #1 HARDWARE BAG INCLUDES: REAR STANCHION (VE2) R V A S A R Choice of World Champions STANDARD BENCH (4P) XL BENCH IN BOX #4 V A S A hex jam nut (2) 5/32” hex key allen wrench (1) 1” hex cap screw (4) 7/16” wrench (1) lock washer (4) 9/16”-1/2” combo wrench (1) ÁDWZDVKHU SEAT CARRIAGE (3-VT0796) IN BOX #1 - SWIM VERSION screwdriver (1) BOX #2 V A POWER PADDLES (PWR PPAD) 3/16” hex key allen wrench (1) 2 1/2” button head screw (2) TETHER CORDS (VE-TETHER) EXERCISE HANDLES (8M-WHD) BOX #3 S A MONORAIL (16AL-E) IN BOX #3 - KAYAK VERSION FRONT END ASSEMBLY METERS /100M SPM WATTS Setup Review Display Shift PERFORMANCE MONITOR (VM-1) LOCATED WITHIN INTERNAL BOX FOOT BRACE (VE-K-FB) & BRACKET (VE-K-FMB) MONITOR MOUNTING L-BRACKET (VE-K-MMB) DUAL LOCK VELCRO (VE-K-DLV) KAYAK SHAFT 2 PIECES (VE-K-SHAFT) 4 Vasa Ergometer User’s Manual PART 1 - Assembly 07/01/11 STEP 2: ASSEMBLE BENCH TO SEAT CARRIAGE /D\WKHSDGGHGEHQFKRQWKHÀRRUVRWKHVLGHZLWKWKHIRXUKROHVZLWKWKUHDGHGPHWDOQXWVLQVLGH the bench) is facing up. 2.2. Position the seat carriage so that the metal bracket with the drilled holes is face down on the bench (Figure A). Line up the middle holes of the bracket with the holes in the padded bench. NOTE: The bench will be wider on one end than the other. Position the seat carriage so that the U-bolt on the seat carriage is at the narrower end of the bench. 3XWRQHORFNZDVKHURQWRHDFKRIIRXU´KH[FDSVFUHZVEUDVVFRORUHG7KHQSXWRQHÀDW washer onto each of the four 1” screws. 2.4. Thread one screw with both washers through the middle hole on the corner brackets of the seat carriage (Figure B) and into the holes in the padded bench. Tighten the screws with the 7/16” wrench until the lock washer and the bolt are snug. CAUTION: Do not over tighten the hex cap screws, as this could pull out the metal T-nuts inside the bench. rolling too far forward. NARROW END UNDER SIDE OF BENCH SEAT CARRIAGE U-BOLT WIDE END Figure A insert hex cap screws with washers through the middle hole of each corner bracket Figure B U-BOLT SEAT CARRIAGE tighten with 7/16” wrench 1” hex cap screw (brass colored) CAUTION: do not over tighten lock washer ÁDWZDVKHU BOTTOM SIDE OF BENCH BENCH 07/01/11 Vasa Ergometer User’s Manual PART 1 - Assembly 5 STEP 3: PADDED BENCH ASSEMBLY ONTO MONORAIL 3.1. /D\WKHEHQFKDVVHPEO\ZLWKWKHVHDWFDUULDJHXSRQWKHÀRRUQH[WWRWKHPRQRUDLO CAUTION: To prevent damaging seat rollers when installing the monorail, carefully and slowly feed the PRQRUDLOLQWRWKH¿UVWVHWRIUROOHUV'R127IRUFHWKURXJKUROOHUV+ROGWKHPRQRUDLOOHYHOGXULQJWKH installation. .HHSWKHPRQRUDLOOHYHOZLWKWKH7VORWFKDQQHOIDFLQJXS6ORZO\IHHGWKHPRQRUDLOEHWZHHQWKH¿UVWVHW of rollers (Figure A). 3.3. Gradually guide the monorail through to the second set of rollers (Figure B), continuing to keep it level. DO NOT FORCE through, so as not to damage the rollers. 3.4. After installing the rail through the seat carriage, it should look like Figure C. Figure A Figure B T-slot UP KEEP MONORAIL LEVEL & DO NOT FORCE carefully & slowly feed the monorail through 2nd set of rollers Figure C U-BOLT REAR FRONT NOTE:<RXPD\¿QGWKDWWKHVHDWFDUULDJHVHHPV³WLJKW´RQWKHPRQRUDLOUROOLQJZLWKVRPHUHVLVWDQFH This is normal, since the rollers need to conform to the monorail. You’ll need to do about 25 - 100 repetitions on your Vasa Trainer before the rollers wear and conform to the monorail and roll smoothly. As the rollers wear, they’ll leave some residue on the monorail which needs to be wiped off regularly with a ScotchBrite pad, or a non-abrasive or cloth rag. Any dust or residue accumulation on the monorail will inhibit optimal functioning of the rollers. See maintenance section of this manual for instructions on how to clean your monorail. 6 Vasa Ergometer User’s Manual PART 1 - Assembly 07/01/11 STEP 4: MONORAIL INTO THE REAR STANCHION ASSEMBLY 4.1. Loosen the socket set screw on the corner of the rear stanchion head (Figure A) using the 3/16” hex key Allen wrench. 4.2. Hold the rear stanchion assembly upside down and slide the bracket over the rear section of the monorail (Figure B). 4.3 Align the holes and insert a 2 1/2” button head screw through bracket and monorail. Thread the hex jam nut on the end of bolt. Tighten to secure with a 5/32” Allen wrench and 7/16” wrench (Figure C). 4.4 Tighten the socket set screw against monorail using the 3/16” hex key Allen wrench. This will secure the monorail to the inside of the sleeve so that it won’t loosen or rattle while in use (Figure C). $I¿[DWHWKHUFRUGWRWKHUHDUVWDQFKLRQ'ULQJDQGWKH8EROWRQWKHVHDWFDUULDJH)LJXUH' Figure A Figure B REAR STANCHION ASSEMBLY U-BOLT REAR loosen the socket set screw FRONT slide the bracket on to the REAR of the monorail. NOTE: The U-bolt is closer to front Figure C Figure D attach cord 1. insert and tighten 2 1/2” button head screw and hex jam nut. attach the tether cord to the seat carriage U-bolt and the rear stanchion D-ring 2. tighten socket set screw with 3/16” hex key wrench 07/01/11 Vasa Ergometer User’s Manual PART 1 - Assembly 7 STEP 5: UNPACKING FRONT ERGOMETER ASSEMBLY (BOX #3) 5.1. Carefully lay the box down on the side marked “SIDE 1”. V A 2SHQWKHERWWRPRIWKHER[)LJXUH$<RXZLOO¿QGDQ “Instruction Sheet” inside. IMPORTANT: DO NOT OPEN THE TOP END OF BOX - YOU MUST OPEN THE BOTTOM END. S A Completed assembly of Steps 1-4: Rear Stanchion, Bench, and Monorail 5.3. After opening the bottom of the box, remove the cardboard and foam padding that were protecting the assembly (open end only). Set the cardboard insert aside. Place the foam padding in front of the box opening (Figure B). The foam padding will act as a cushion to prevent surface scratches upon removal. SAVE BOX #3 AND ALL PACKAGING MATERIAL. IMPORTANT: Before continuing, have the parts in STEP 1-4 (from the User’s Manual) preassembled and close at hand. You will need to attach the front assembly to the monorail. CAUTION: DO NOT LET GO OF THE FRONT ASSEMBLY. It will not stand securely by itself. Hold securely until it is attached to the monorail in STEP 6. 5.4. Slide the entire front assembly out of the box (Figure C). Hold the top bar and lift to an upright position (Figure D). Set the Inner Box (containing the Monitor) aside until Step 9. 5.5. Tilt the front assembly so that the wheels engage, allowing for easy transport (Figure C). Be sure to have a secure hold on the frame so it does not fall over. 5.6. Wheel over to the monorail / rear stanchion assembly. In your User’s Manual, follow STEP 6 to attach to monorail. NOTE: have the 3/16” hex key wrench available in case you need to loosen the set screw on the front assembly in the next step. Figure A Figure B Remove packaging inserts. Set cardboard insert aside. Place foam in front of box opening to protect front assembly. BOX #3 OPEN BOTTOM SIDE 1 down CARDBOARD INSERT FOAM PADDING (under cardboard) CARDBOARD INSERT position foam padding in front of open box open BOTTOM END of box Figure C Figure D lift toward monorail (monorail will insert here) carefully slide assembly onto foam padding lift up to engage the wheels for transport SAVE ALL PACKAGING Box & inner packaging WHEELS 8 Vasa Ergometer User’s Manual PART 1 - Assembly 07/01/11 KAYAK EQUIPMENT - SUPPLEMENTAL INSTRUCTIONS REQUIRED If you have purchased a KAYAK ERGOMETER or KAYAK KIT, please locate the separate instruction sheet packaged with the Kayak Foot Brace (part #VE-K-FB). <RXZLOOQHHGWRLQVWDOOND\DNVSHFL¿F parts at this point prior to continuing with your assembly. STEP 6: ATTACH FRONT ERGOMETER ASSEMBLY TO MONORAIL 6.1. Hold the front Ergometer assembly upright in one hand. Lift the front end of the monorail up to the height of the front stanchion sleeve (on the Ergometer assembly). Insert the monorail into the sleeve until the holes in the sleeve line up with the holes in the monorail (Figure B). NOTE: If the monorail will not slide all the way into the front stanchion sleeve, loosen the socket set screw on the corner of the front Ergometer assembly (Figure A) using the 3/16” hex key allen wrench. Do not removeWKHVRFNHWVHWVFUHZ-XVWORRVHQHQRXJKVRWKHPRQRUDLOFDQ¿WLQVLGHWKHVOHHYH 6.2. Insert one 2 1/2” button head screw through the sleeve and the monorail (Figure C). Thread and tighten one hex jam nut (Figure C). Tighten with 5/32” allen wrench and 7/16” wrench. 6.3. Tighten the socket set screw against monorail using the 3/16” allen wrench. This will secure the monorail to the inside of the sleeve so that it won’t loosen or rattle while in use (Figure C). Figure A monorail into slide front stanchion sleeve MONORAIL FRONT ERGOMETER ASSEMBLY FRONT STANCHION SLEEVE V A S A Figure B if necessary, loosen the socket set screw with 3/16” hex key wrench REAR STANCHION socket set screw INSTALLATION TIP hex jam nut Figure C ,IWKHµEROWLVGLϞFXOWWRLQVWDOO press the rear cover in so it provides more clearance for the 2 1/2” screw (see photo right). In some cases, it might be necessary to remove the front FRYHUÀUVWWRDOORZPRUHURRPWRSXVKLQ the rear cover. V A S A THUMB IS PUSHING COVER IN and tighten insert 2 1/2” button head screw and hex jam nut 07/01/11 tighten socket set screw with 3/16” hex key wrench Vasa Ergometer User’s Manual PART 1 - Assembly 9 STEP 7: ATTACHING PADDLES OR HANDLES TO DRIVE CORD 7.1. Choose which attachment you would like to use for your workout: swim paddles, exercise handles, kayak shaft or canoe paddle. 7.2. Take the drive cord clip (Figure A) on each end of the drive cords, and snap desired attachment into the connection loop/ring (Figure B). NOTE: The Kayak Shaft is shipped in two sections. You must pre-assemble the kayak shaft before attaching it to the drive cords. Assembly of Kayak Shaft shown below (Figure C). Figure A V A DRIVE CORD CLIP S A Figure B SWIM PADDLES Attach the clip to bail on paddle EXERCISE HANDLES Attach the clip to metal D-ring on handle KAYAK or CANOE PADDLE SHAFT Attach the clip to cord loop on paddle shaft SNAP PIN Figure C Join the two snap pin sections of the Paddle Shaft together. SNAP PIN HOLE 10 Vasa Ergometer User’s Manual PART 1 - Assembly 07/01/11 PERFORMANCE MONITOR INSTALLATION OVERVIEW The following steps will walk you through the proper installation of the Performance Monitor. The “Monitor Location” section will review the various monitor locations. Select the location that will provide the best visibility for your training needs. 6WHSVFRYHU %DWWHU\,QVWDOODWLRQ $WWDFKLQJWKH&DEOHV 0RQLWRU/RFDWLRQ2SWLRQV 0RQLWRU,QVWDOODWLRQDQG$GMXVWPHQW Performance monitor operation will be covered in Part 2 of this manual. METERS /100M SPM WATTS Setup Review Display Shift CAUTION: The monitor is a sensitive unit. Please handle with care at all times. STEP 8: INSTALLING BATTERIES IN THE PERFORMANCE MONITOR 8.1. Locate the performance monitor in the small box packed inside BOX 3. 8.2. Insert the two “AA” batteries (included) into the battery compartment on the back side of the monitor. IMPORTANT: REMOVE THE BATTERIES if the Vasa Ergometer will be idol for 3 months or more. STEP 9: ATTACHING THE CABLES TO THE PERFORMANCE MONITOR NOTE: Step 9 is informational only at this time. Do NOT connect the monitor to connection cables until directed to in Step 10. 9.1. The back of the monitor has three connection ports: X, R, and L (Figure A). You will only be using the ports labeled “R” and “L”. Do NOT use the port labeled “X” . 9.2. Locate the two cables extending from rear cover. The cables will be exiting from either: 1) the cable channel above the damper door (Figure B); or 2) through a 5/8” hole below the monorail bracket of the front frame (Figure C) 9.3. One of the cables will have a BLACK STRIPE at the end of the cable next to the connection end. Connect the BLACK cable into the L port on the back of the monitor (Figure D). Connect the remaining unmarked cable into the R port. IMPORTANT: Always power the monitor OFF after you connect the cables to reset. Vasa Inc. www.vasatrainer.com 1(800)488-VASA Vasa Inc. www.vasatrainer.com 1(800)488-VASA NO PORT HERE CONNECTION PORTS Figure A Use L and R labeled ports only. Do NOT use X port. 07/01/11 BLACK STRIPE ON CABLE Figure B Figure C Cables extending through cable channel ABOVE damper door. Cables extending through hole ABOVE cable channel. Vasa Ergometer User’s Manual PART 1 - Assembly Figure D Connect cable with the BLACK STRIPE to “L” port. Connect the other cable to “R” port. DO NOT USE “X” PORT. 11 STEP 10: POSITIONING THE PERFORMANCE MONITOR There are four mounting options based on the type of training you will be doing on your Vasa Ergometer. 5HYLHZDOOWKHPRXQWLQJRSWLRQVEHORZWRGHFLGHZKLFKZLOOEHWKHEHVWORFDWLRQIRU\RXUVSHFL¿FWUDLQLQJ QHHGV6SHFL¿FLQVWDOODWLRQLQVWUXFWLRQVRQWKHIROORZLQJSDJHV A) SWIM - LOW MOUNT (Standard) BEST LOCATION FOR: Swimmers & Surfers. Ideal for workouts lying on the bench. NOTE: Install on stem so the monitor can be adjusted (tilted) and secured for best viewing angle. 1) SWIM LOCATION Mounted Low on Stem Installation Instructions for SWIM MOUNT: See STEP 10-A B) KAYAK - HIGH MOUNT BEST LOCATION FOR: Kayak & Canoe paddlers. Ideal for workouts sitting on the bench. NOTE: Install on stem so the monitor can be adjusted (tilted) and secured for best viewing angle. 2) KAYAK LOCATION Mounted High on Rail Stem Installation Instructions for KAYAK MOUNT: See STEP 10-B CAUTION: Do NOT USE THIS MOUNT when performing workouts while lying on the bench. As the bench travels up the rail, you could damage the monitor or injure yourself. Can Alternate between these two mounts C) MULTI-PURPOSE - ALTERNATING HIGH/LOW MOUNT BEST LOCATION FOR: Various workouts (exaple: Swim & Kayak) Ideal for a variety of workouts requiring both lying or sitting on the bench. NOTE: Easily switch from High (Rail) Mount to Low Mount in seconds. Both locations allow for securing set angle for best viewing. Installation Instructions for MULTI-ALTERNATING: See STEP 10-C 3) MULTI/ALTERNATING LOCATION Mount either High or Low (both on Stems) D) MULTI-PURPOSE - FIXED MOUNT BEST LOCATION FOR: Multiuser(s) with different needs. Stationary/Fixed position that does not require any set-up. NOTE: Least desirable location$QJOHRIWKHPRQLWRULV¿[HGZKLFKZLOO127 allow you to adjust the tilt. Installation Instructions for MULTI-FIXED: See STEP 10-D 4) MULTI - FIXED POSITION Mounted Middle on Velcro Detailed instruction for each monitor location to follow. 12 Vasa Ergometer User’s Manual PART 1 - Assembly 07/01/11 STEP 10-A: LOW POSITION MONITOR MOUNT Best viewing angle for exercises done lying on the bench. (Swim, Surf Paddling, etc.) You will be attaching the monitor to the monitor mounting stem located just above the damper door on the front ergometer assembly (Figure A). Cable wires should be coming out of cable channel above the damper door. 10A.1. First, attach the cables to the monitor as described in STEP 9. NOTE: The monitor may automatically turn ON when the cables are connected. Before beginning your workout, turn the monitor OFF and wait a second or two until you hear a beep. Push the ON button to power back on and begin your workout. 10A.2. Next, you will attach the mounting ball (on back of monitor) to the mounting socket located just above the damper door. Before you attach the mounting ball, make sure the hose clamp is located on the neck of the mounting stem and not on the prongs of the socket (as in Figure B). Line up the mounting ball with the socket and push gently so that the two snap together. Figure A Best position for Swimming, 6XUÀQJHWFO\LQJRQWKHEHQFK cable channel mounting ball 10A.3. To secure the position of the monitor, bring the hose clamp over the socket prongs and tighten with your screw driver (Figure C). This step ensures the monitor will not move out of position while machine is in use. You may need to tighten periodically if the monitor is adjusted frequently. socket (prongs) mounting stem 10A.4. The monitor mounting stem is designed to allow for customized viewing. To adjust the ANGLE (tilted up and down, tilted right and left), use the ball and socket (Figure D). To move the POSITION (right side or left side), be sure to use the stem to slide the monitor right or left (Figure E). hose clamp Figure B Join mounting ball and socket together IMPORTANT: Do NOT slide the monitor to adjust Left and Right position. You will NOT have to loosen the Hose Clamp for any of these adjustments. SLIDE STEM ONLY Do NOT use monitor to slide left to right Figure C Tighten hose clamp by turning “clockwise” 07/01/11 Figure D - adjusting ANGLE adjust ANGLE by rotating on ball and socket. Do NOT slide left and right, use stem to slide Vasa Ergometer User’s Manual PART 1 - Assembly Figure E - adjusting POSITION adjust POSITION of monitor by sliding stem Left & Right 13 STEP 10-B: HIGH POSITION MONITOR MOUNT Best viewing angle for exercises done from seated or kneeling on bench. (Kayak, Canoe, Nordic Poling, Physical Therapy) You will be attaching the monitor to the L-bracket that will be mounted to the monorail (Figure A). Cable wires must be routed through the center hole located 2 inches below the monorail bracket. This will provide optimal viewing of the monitor during kayak or canoe paddling workouts. 10B.1. Place the L-Bracket on the monorail 6 inches from the metal monorail bracket (Figure B) with the mounting socket facing the bench. 10B.2. Wrap the Velcro cinch stap around the monorail, feed the Velcro through WKHEXFNOHHQGSXOOWRWLJKWHQDQGSUHVV9HOFURGRZQWR¿[/EUDFNHWLQSODFH (Figure C). Figure A Best position for Kayaking, Canoeing, etc. (sitting on the bench) Position 6” from bracket to bracket 10B.3. Attach the cables to the monitor as described in STEP 9. The cables will be on each side of the rail for this mounting system. NOTE: The monitor may automatically turn ON when the cables are connected. Before beginning your workout, turn the monitor OFF and wait a second or two until you hear a BEEP. Push the ON button to power back on and begin your workout. L-bracket rail mount <-- front of Ergometer monorail monorail bracket 10B.4. Next, you will attach the mounting ball (on back of monitor) to the mounting socket on the L-bracket. Before you attach the mounting ball, make sure the hose clamp is located on the neck of the mounting stem and not on the prongs of the socket (as in Figure D). Line up the mounting ball with the socket and push gently so that the two snap together. Figure B Attach L-bracket to monorail. Cinch down Velcro strap to secure in place. 10B.5. To secure the position of the monitor, bring the hose clamp over the socket prongs and tighten with the provided screw driver (Figure E). You may need to tighten periodically if frequently adjusted. 10B.6. The monitor mounting stem is designed to allow for customized viewing. To adjust the ANGLE (tilted up and down, tilted right and left), use the ball and socket (Figure F). Figure C L-bracket attached to monorail. hose clamp mounting ball mounting socket (prongs) connection cables (one on each side of rail) Figure D Join mounting ball and socket together 14 Figure E Slide hose clamp over prongs & tighten clamp by turning “clockwise” Vasa Ergometer User’s Manual PART 1 - Assembly Figure F - adjusting ANGLE Adjust ANGLE by tilting position of monitor. Clamp will hold desired angle. 07/01/11 STEP 10-C: MULTI-POSITION MONITOR MOUNT Best if you need to alternate between LOW and HIGH mounted positions frequently. You will be attaching the monitor with either the L-bracket that is be mounted to the monorail (see STEP 10B) or a slight variation of the lower monitor stem mount (shown in STEP 10A). The cable wires be routed through the center hole located 2 inches below the monorail bracket. This will provide optimal viewing of the monitor for athletes looking to use their Vasa Ergometer for a variety of workouts. 10C.1. Follow all of the directions on the previous page (STEP 10B) for the installation of the L-Bracket and high monitor mount. 10C.2. To move the monitor location to the Low Mount, simply disconnect one cable, loosen the hose clamp, remove the monitor, move the monitor under the monorail. From that point, follow the rest of the directions in STEP 10A.2 on. You will now be able to quickly alternate the monitor between the higher and ORZHUORFDWLRQVEDVHGRQ\RXUVSRUWVSHFL¿FZRUNRXW Monitor mounted on monorail (high mount). Best viewing for Kayak & Canoe workouts. 07/01/11 Monitor mounted above damper door (low mount). Best viewing for Swim & Surf workouts. Vasa Ergometer User’s Manual PART 1 - Assembly 15 STEP 10-D: MIDDLE POSITION MONITOR MOUNT Best viewing angle for exercises done from seated or kneeling on bench. (Kayak, Canoe, Nordic Poling, Physical Therapy) CAUTION: Vasa, Inc. does not recommend this mounting location for commercial use. Inexperienced users are more likely to cause damage to the monitor by accidentally letting go of the handles/paddles during a workout which could easily hit the monitor. The monitor is not warranted against damage caused by impact of any kind. You will be attaching the monitor directly to the rear plastic cover of the Front Assembly (Figure A). Cable wires will need to be routed through the center hole located 2 inches below the monorail bracket. Figure A Multi-purpose use. Monitor stays in DVWDWLRQDU\À[HGSRVLWLRQ 10D.1. Locate the battery hatch on the back of the monitor. Take one piece of the provided Velcro strip and remove the tape liner exposing the adhesive. Apply the adhesive side of the Velcro to the battery hatch. (Figure B). Press Velcro ¿UPO\WREDWWHU\KDWFKVRDGKHVLYHPDNHVVROLGFRQWDFW IMPORTANT: Do NOT allow the Velcro strip to extend beyond the door as the adhesive is very aggressive and could prevent the battery hatch from opening. 10D.2. Next measure & mark the EXACT location on the rear cover of the Front End Assembly as shown in Figure C below. Remove the adhesive lining on the VHFRQG9HOFURVWULSDQGDSSO\LWWRWKHPDUNHGORFDWLRQ3UHVV9HOFUR¿UPO\WR cover so adhesive makes solid contact. 10D. 3. Allow adhesive to bond to cover for 30 minutes before next step. Velcro Figure B Attach Velcro strip to monitor battery door region. Do NOT cover any moving region of the door. 10D. 4. Connect both cable connections to the monitor ports as described in STEP 9. 10D. 5. Join the two pieces of Velcro together by lining them up to one another DQGSXVKLQJWKHPWRJHWKHU¿UPO\7KH\ZLOOVQDSLQWRSODFH)LJXUH' 3” Velcro 2” Indentation Line Indentation Line Figure C Figure D Multi-purpose use. Monitor stays in DVWDWLRQDU\À[HGSRVLWLRQ Top right corner of Velcro is positioned 2” UP and 3” RIGHT from the indentation lines on the Front End Assembly. 16 Vasa Ergometer User’s Manual PART 1 - Assembly 07/01/11 1-3. POST ASSEMBLY SAFETY CHECKLIST Please review the steps below to assure that your Vasa Ergometer is assembled correctly and ready for safe use (check if complete). FRONT 1. ____ Button head screw and nut are assembled on front stanchion head and monorail. 2. ____ Socket set screw on front stanchion head is tightened against the monorail. REAR (CHECK IF COMPLETE) 3. ____ Button head screw and nut are assembled on rear stanchion head and monorail. 4. ____ Socket set screw on rear stanchion head is tightened against the monorail. BENCH / SEAT CARRIAGE (CHECK IF COMPLETE) 5. ____ U-bolt on the seat carriage is towards the front assembly. 6. ____ Narrower end of the bench is towards the front assembly. 7. ____ Tether cord is attached between rear stanchion and U-bolt on underside of seat carriage. MONITOR (CHECK IF COMPLETE) 8. ____ Mounting location of the monitor provides optimal viewing for your workout needs. 9. ____ Connection cables are attached correctly to “R” and “L” labeled ports on the monitor. 10. ____ Hose Clamp is tightened around socket prongs (if applicable). 11. ____ Monitor is adjusted for best viewing (ANGLE and POSITION). KAYAK KIT (OPTIONAL ACCESSORY) 13. ___ Foot Brace is locked securely in place and in the desired position on the monorail for comfort. head screw and nut are button assembled on stanchion head and monorail set screw socket is tight 13 foot brace is positioned for comfort & locked in place. (optional accessory) narrow end of bench is towards front V A monitor is mounted in best position for viewing (High, Low, or Middle options) are attached correctly to ¡ cables “R” & “L” labeled ports. 11 monitor angle & position adjusted S A head button screw and nut are assembled on stanchion head and monorail is U-bolt towards front set screw socket is tight tether cord attached 10 07/01/11 hose clamp is tightened around socket prongs and secures monitor mounting ball Vasa Ergometer User’s Manual PART 1 - Assembly 17 1.4 - RECORD ORDER INFORMATION Now that you have completed the assembly, please take a minute to record some information found on your Vasa Invoice. This will allow us to service you better in the future. Please record: INVOICE NUMBER: ____________ DATE OF INVOICE: ____________ If you have any questions at this point with the assembly, please contact us. US customers, please call us toll-free at: 1 (800) 488-VASA International customers, please call us at:: 1 (802) 872-7101 E-Mail: [email protected] 18 Vasa Ergometer User’s Manual PART 1 - Assembly 07/01/11 PART 2 – USING THE VASA ERGOMETER The following sections contain guidelines and tips for using your Vasa Ergometer, the performance monitor, and adjusting the resistance. 2.1. SAFE OPERATION GETTING SAFELY ON AND OFF Getting safely on and off your Vasa Ergometer is an important part of your program. Please follow the guidelines below. CAUTION: Do not suddenly release the paddles or handles while using the Ergometer. They could strike the monitor or front assembly and cause damage or injury. Always gently return the handles or paddles to the ready position on the front assembly. SWIM POSITION - Lying prone on the bench using swim paddles or exercise handles 1) Place your hands in the handles or paddles, then pull handles/paddles to engage the drive cord. 2) Walk towards bench, placing your hands at the top of bench. /LHRQWKHEHQFKVRWKDW\RXUFKHVWLVHYHQZLWKWKHIURQWRIWKHEHQFKNHHSRQHIRRWRQÀRRUXQWLO you are positioned comfortably. %ULQJ\RXUIRRWRIIWKHÀRRUWKHQEULQJKDQGVLQWRVWDUWSRVLWLRQ Place hands in handles or paddles. Pull handles/paddles to engage drive cord and place hands on front edge of bench. Lie on bench and keep RQHIRRWRQÁRRUWR\RXU adjust position on bench. %ULQJIRRWRϝÁRRUDQG bring hands into start position. KAYAK POSITION - Sitting on the bench facing forward, using the kayak shaft NOTE: position the bench & seat carriage so it touches the rear stanchion. Be sure the foot brace has been installed. For Kayak Set-up Instructions (see page 10). 1) Take the kayak paddle shaft in both hands and walk back to the bench. 2) While holding the paddle shaft, place your hands on the front of the bench holding the bench steady. Swing one leg over the bench and sit down just behind the Vasa logo located on the front part of the bench (middle of bench). 3) Bring one foot up and place it in the locked foot brace. Adjust your leg position by sliding forward or backward on the bench so you are comfortable. 4) Bring your second foot up into position and bring the kayak shaft into position. Your hands should be shoulder width apart. Holding kayak shaft, walk back to end of bench. 07/01/11 While holding the paddle shaft, place hands on front edge of bench as swing leg over. Sit just behind Vasa logo. Place one foot in foot brace. Adjust seated position for comfort. Vasa Ergometer User’s Manual PART 2 - Using the Vasa Ergometer Bring other foot up to foot brace and bring kayak shaft into start position. 19 GETTING SAFELY ON AND OFF - CONTINUED OTHER POSITIONS - using handles or ankle straps SITTING FACING FORWARD KNEELING FACING FORWARD Straddle bench, then sit on bench. Bring hands into position. SITTING FACING BACKWARD Straddle bench, steady bench with knuckles as you kneel. Bring hands into position. USING ANKLE STRAPS FACING BACKWARD Straddle bench, then sit on bench. Bring hands into position. Pull drive cord, then straddle bench, attach drive cord to ankle straps, then sit on bench. CAUTION: Do not pull the drive cord past the end of the ergometer. This could result in damage to the Ergometer. CAUTION: Do not suddenly release the paddles or handles while using the Ergometer. They could strike the monitor or front assembly and cause damage or injury. Always gently return the handles or paddles to the ready position on the front assembly. 20 Vasa Ergometer User’s Manual PART 2 - Using the Vasa Ergometer 07/01/11 SAFETY REMINDERS It’s very important to use common sense and adhere to these safety guidelines in order to avoid injury to yourself or damage to your Vasa Ergometer. The next few pages review several areas of safety. 7KHIROORZLQJLVD³SUHÀLJKW´VDIHW\FKHFN\RXVKRXOGGREHIRUHXVLQJ\RXU9DVD(UJRPHWHU DO NOT LET GO OF THE HANDLES, SWIM PADDLES OR PADDLE SHAFT while the drive cords are extended - they could hit and damage your monitor which is NOT covered under warranty. Always return the handles or paddles slowly to the ready position on the front assembly. )ROORZLQVWUXFWLRQVRQWKHSUHYLRXVSDJHIRUVDIHO\JHWWLQJRQDQGRIIWKH9DVD(UJRPHWHU $OZD\VLQVWUXFWE\VWDQGHUVHVSHFLDOO\FKLOGUHQWRNHHSWRWDOO\FOHDUZKLOH(UJRPHWHULVLQXVHHVSHFLDOO\ RIWKHPRYLQJVHDWFDUULDJHGULYHFRUGVDQGÀ\ZKHHO$YRLGZHDULQJORRVHRUVOLSSHU\FORWKLQJ$OZD\V tie up long hair so it’s clear of moving parts on the machine. .HHSH\HVDQGKDQGVFOHDURIWKHDLURXWOHWEHORZWKHGDPSHUGRRU7RDYRLGEORZLQJGXVWLQWRWKHDLU eyes or into the electronics, do not operate in a dusty area. 'RQRWRSHUDWHLIWKHSODVWLFFRYHUVRQWKHIURQWDVVHPEO\DUHUHPRYHG 'RQRWSXOOWKHGULYHFRUGVSDVWWKHHQGRIWKH9DVD(UJRPHWHU,IWKHGULYHFRUGVEHFRPHVGLI¿FXOWWR pull (like the cord is stuck), do not continue to pull as this may damage your Ergometer. 3HUIRUPSURSHUPDLQWHQDQFHRQ\RXU9DVD(UJRPHWHUDVUHFRPPHQGHGLQ³3DUW0DLQWHQDQFH Troubleshooting”. IMPORTANT: Do not release the paddles or handles while using the Ergometer. They could strike the monitor or front assembly and cause damage or injury. Always return the handles or paddles slowly to the ready position on the front assembly. Keep hands, clothing and loose hair free of moving seat, drive FRUGDQGÁ\ZKHHO IMPORTANT: Do NOT pull the drive cord past the end of the ergometer. It could damage the machine. AIR INLET DRIVE CORD & DRIVE CORD CLIP Do not operate with plastic covers removed V A S A MONITOR Do not release handles or paddles while using the Ergometer. They could strike and damage the monitor. Do not force the monitor when adjusting it side to side or up and down. If necessary, loosen the clamp a bit before adjusting. DAMPER DOOR Keep eyes and hands clear of air outlet. AIR OUTLET Do not put anything through the holes of the perforation in the air inlet and air outlet. Be sure to remove fastpin with blue handle before adjusting the damper door. 07/01/11 Vasa Ergometer User’s Manual PART 2 - Using the Vasa Ergometer 21 SUPERVISING CHILDREN We recommend supervising children at all times while using the Vasa Ergometer. Please review the Safety Reminders and Getting On and Off Safely in this section with all children who will use the Vasa Ergometer. In particular, we recommend the following: 1. Children should train with or be instructed by a parent or coach whenever possible. This will help reduce the chance of injury. It also can be more motivating and fun. 2. Instruct user’s, especially children, to NEVER LET GO OF THE HANDLES SWIM PADDLES, OR KAYAK SHAFT while using the Vasa Ergometer to protect the monitor from being damaged. Keep hands on the handles, swim paddles or kayak shaft until the workout is complete. Return the handles/ paddles/shaft slowly to the ready position on the front assembly (see page 22). 3. Instruct all bystanders to stay clear of the Ergometer while in use, especially of the moving seat carriage, drive cords and tether cords. Avoid wearing loose clothing and always tie up long hair. 4. Keep eyes and hands clear of the air outlet below the damper door. To avoid blowing dust into the air or into the electronics, do not operate in a dusty area. 5. Do not pull the drive cords past the end of the Vasa Ergometer. If the drive cords stops pulling, do not continue to pull as this will damage your Ergometer. SECURING YOUR VASA ERGOMETER IN A PUBLIC SETTING If your Vasa Ergometer is left in a public area, you may wish to “secure or vandal-proof” it to avoid unauthorized use. We recommend the following: 1. Remove any drive cord attachment (swim paddles, handles, or kayak shaft) and tether cords. Store these and any other accessories in a secure place. 2. To deter unwanted use and protect your investment, keep your Vasa Ergometer covered when not in use. Vasa Ergometer Covers are available at www.vasatrainer.com and in the back of this manual. 3. You may wish to unplug and remove the electronic monitor for safe keeping. See “Part 1 - Step 8” and follow instructions in reverse order to detach. 4. Use a cable and lock between the D-ring on the rear stanchion head and the U-bolt on the underVLGHRIWKHVHDWFDUULDJH7KLVZLOOORFNWKHEHQFKLQD¿[HGSRVLWLRQ 5. Store the Vasa Ergometer in a dry, secure room or closet. Avoid storing the Vasa Ergometer in a humid, chlorine or salt-air environment. MEDICAL CLEARANCE - See your Doctor before beginning any exercise program. CAUTION: Before exercising with the Vasa Ergometer or any other form of exercise, please check ZLWK\RXUSK\VLFLDQ¿UVW7KLVLVHVSHFLDOO\LPSRUWDQWLI\RXDUHRYHUZHLJKWLI\RXKDYHEHHQLQDFWLYH for awhile, if you have injuries, or if you have any history of heart disease in your family. If you are RYHULW¶VDJRRGLGHDWRSHUIRUPDQH[HUFLVHVWUHVVWHVWZLWKDTXDOL¿HGSK\VLFLDQEHIRUH\RXEHJLQ training. Training with the Vasa Ergometer can be vigorous and demanding. We suggest that you be in good health to achieve the best results. 22 Vasa Ergometer User’s Manual PART 2 - Using the Vasa Ergometer 07/01/11 2.2. SETTING THE RESISTANCE ON THE VASA ERGOMETER 7KHÀ\ZKHHODQGWKHGDPSHUGRRUZRUNLQFRQFHUWWRDIIHFWWKHUHVLVWDQFH\RXZLOOIHHOXVLQJWKH9DVD Ergometer. Tether cords are used to restrict the distance the bench travels on the monorail, and are not intended as resistance cords. FLYWHEEL 7KHDLUÀRZUHVLVWDQFHRIWKHÀ\ZKHHOVLPXODWHVWKHUHVLVWDQFHRIZDWHUWKHKDUGHU\RXSXOOWKHPRUH resistance you feel. DAMPER DOOR <RXFDQDGMXVWWKHDLUÀRZUHVLVWDQFHE\FKDQJLQJWKHRSHQLQJRIWKH damper door on the front of your Vasa Ergometer. The lowest setting “1” (door fully closed) provides the least resistance and setting “7” (door fully open) provides the most resistance. Setting #1 is similar to going WITH the current and Setting #7 is similar to going AGAINST a strong current. OPTIONAL: The blue fastpin locks the damper door at the chosen setting (Figure B). This is optional as the damper door will not move when the fastpin is not inserted. Figure A To adjust the damper door, pull/push the bottom of damper door to the desired setting (1-7) indicated in the window on the top of the door (Figure A). The ratchet hinge will keep the damper door in place. SETTING #7 (door open) Highest/Hardest SETTING #1 (door closed) Lowest/Easiest Figure B 2 SETTING 'DPSHUGRRUVHWWLQJLGHQWLÀFDWLRQ window 07/01/11 OPTIONAL: you may wish to use the blue fastpin on top right of damper door. This pin will lock the damper door at desired setting but is not requireed. Vasa Ergometer User’s Manual PART 2 - Using the Vasa Ergometer 23 DAMPER DOOR SETTINGS RELATING TO POWER AND FORCE OUTPUT At high settings (5, 6, 7) it feels like swimming against a current. At low settings (1 & 2) it feels more like swimming with a current. So if you select a setting of 1, you will have to move your arms faster than your normal speed in still water to generate the same power (faster stroke rate). If the you select a setting of 7, you will have to move your arms slower than your normal speed in still water to generate the same power (slower stroke rate). Mathematically, this is expressed by the equation Power = Force x Velocity. The fan resistance determines the force (a higher setting is a higher force) and the hand speed is the velocity. So the same power can be achieved with either a high resistance setting combined with a low hand speed or a low resistance setting combined with a high hand speed. As you would expect, there will be a setting where an individual can SURGXFHWKHPD[LPXPSRZHUGXHWRSK\VLRORJLFDODQGELRPHFKDQLFDOHI¿FLHQF\DQGWKLVVHWWLQJZLOOOLNHO\ be different depending on the individual’s body and training. The monitor calculates power by sampling the force and hand speed many times per second throughout the stroke. Therefore it calculates power produced & distance swam precisely regardless of the damper door setting. This allows users to choose a damper door setting according to personal preference. It is important to remember that the damper door setting is subjective, depending on body type, conditioning level, and stroke technique. We think that most distance swimmers excel at the low to mid range damper settings (either 2, 3 or 4). Suggestion: once per week for one month do a 500 meter or a 1000 meter time trial at race pace & race stroke rate. On week one, set the damper at 2, for week 2, set it at 3 and so on. You’ll discover the damper door setting that allows you to perform your best for that distance. Measure your heart rate, watts, and WLPH0RQLWRULQJWKHVHZLOOKHOS\RXDUULYHDWWKHPRVWHI¿FLHQWVWURNHUDWHWHFKQLTXHDQGKHDUWUDWHWR sustain the power and pace you need to improve. NOTE: Use the “Audible Stroke Rate Tempo Beeper” to help swim at your desired stroke rate. For full details on the Audible Tempo Beeper, continue to the section on Monitor Operation. TETHER CORDS The tether cords that come with your Vasa Ergometer are designed to prevent the seat from rolling too far forward. The user will be able to complete a full range of motion without their hands hitting the front pulley brackets. Tether cords come in 2 types: medium and hard (thicker). Which tether cord you choose depends on the amount of power you will generate and the damper door setting you select. In general, as you increase the setting on the damper door, you would attach a thicker cord. NOTE: allowing the bench to roll freely on the monorail can provide a useful “treadmill affect”, where by the user will notice a drop in average power because the bench will roll backwards. ANCHOR BENCH TO PREVENT MOVEMENT If you prefer to keep the bench from rolling on the monorail, you can use a range of motion knob (Figure A) or by using a locking strap to anchor to rear stanchion (Figure B). NOTE: The ROM KNOB KIT is an additional accessory (part# ROM KNOB KIT). Locking straps are available at most hardware stores. Figure A ROM KNOB KIT $10 + shipping Figure B LOCKING STRAPS Available at most hardware stores. May only be installed on aluminum monorails. 24 Vasa Ergometer User’s Manual Typical tie down strap found at mostPART 2 - Using the Vasa Ergometer hardware stores or by contacting Vasa, Inc. 07/01/11 2.3. VASA ERGOMETER MONITOR OPERATION The monitor gives you the opportunity to get instant feedback on your performance. You can measure time, distance, pace, stroke rate, stroke power (watts), and applied force for each arm (Figure A). Having this information allows you to: Figure A monitor your progress create repeatable performance testing & training set up workouts based on time & distance perform intervals or distance training simulate races analyze force for right and left arms A A ELAPSED TIME METERS PACE / 100M(SWIM) / 500M*(KAYAK) /100M STROKES PER MINUTE 6SHFL¿FVRQKRZWKHPRQLWRUFDOFXODWHVWKLVGDWDFDQEHIRXQGDWWKHHQGRIWKLVVHFWLRQ ACCUMULATED DISTANCE SPM ON/OFF button WATTS Setup Review Display STROKE POWER Shift GETTING STARTED The monitor will need to obtain a signal from the Load Cells (located on the inside of the machine) each time it is turned on. The monitor will then use that data to establish a “zero” force level for that workout. If you install the connection cables when the monitor is “ON”, make sure to RESET the monitor so it can calibrate correctly. To RESET the monitor, power it OFF by pushing the ON/OFF button. When you turn it back on, again using the ON/OFF button, it will now be calibrated to the Load Cells. As soon as you pull on the drive cords, the monitor will automatically turn on and begin monitoring your performance. You can reset the monitor using the ON/OFF button (Figure A). Figure B VIEWING OPTIONS: SWIM VS. KAYAK There are two main views you can choose from on the monitor each providing data relative to that sport. The two views are: SWIM VIEW KAYAK VIEW Swim Display is blank here A A METERS /100M SPM The upper left corner of the top screen (elapsed time) will denote which VIEW you are in. If it is in Swim View, that area will be blank (Figure B). If it is Kayak View, you will see a “K” displayed in the upper left corner (Figure C). WATTS Setup Review Display Shift The monitor can be changed between these two different views using this simple sequence: Kayak Display shows “K” here Step 1: Begin with the monitor OFF. Step 2: Hold the SHIFT button and then press the ON/OFF button. 5HOHDVHEXWWRQVDQGZDLWIRU/&'WHVWVHTXHQFHWR¿QLVK Step 3: Hold the SHIFT and then press the ON/OFF button again so the monitor will display load cell parameters (for Vasa use). Release buttons. Step 4: Hold the SHIFT and press SETUP button. Release buttons and the display will turn off (you will hear a short beep). Step 5: Turn ON for the new view. Figure C 2 48:40 8000 3:00 30 95 4,;,9: 4 :74 >(;;: Setup The monitor will remain in the selected view (Swim or Kayak) for all future workouts until you change it back. Repeat the sequence above if you want to change to the other view. Review Display Shift *PACING NOTE: In the Kayak View, the monitor will calculate PACE/500M. Swim View is always displayed in PACE/100M. 07/01/11 Vasa Ergometer User’s Manual PART 2 - Using the Vasa Ergometer 25 MODES: BASIC VS. STROKE There are two main display modes on the monitor: BASIC MODE and STROKE MODE (Figure D DQG(:KHQWKHPRQLWRULV¿UVWWXUQHGRQLWZLOODXWRPDWLFDOO\HQWHU%DVLF0RGH%RWK%DVLF0RGH and Stroke Mode give you readings on ELAPSED TIME, STROKE RATE (strokes per minute), and STROKE POWER (watts)7KHUHPDLQLQJ¿HOGVDUH³VXEGLVSOD\V´WKDWFKDQJHE\SUHVVLQJWKH³'LVSOD\´EXWWRQ For more information on Basic Mode, Stroke Mode and their sub-displays, see the next two pages. To get into STROKE MODE, press and hold the blue “Shift” button, then press and release the “Down Arrow” button (below “STROKE” - see Figure E). To return to BASIC MODE, press and hold the blue “Shift” button, then press and release the “Down Arrow” button. Figure D - BASIC MODE ELAPSED TIME METERS /100M SPM STROKES / MINUTE WATTS Setup Review STROKE POWER Display Shift Figure E - STROKE MODE ELAPSED TIME SPM WATTS STROKES / MINUTE STROKE POWER FORCE Setup shift button Review Display Shift down arrow 26 Vasa Ergometer User’s Manual PART 2 - Using the Vasa Ergometer 07/01/11 BASIC MODE Basic Mode has three sub-displays PACE, POWER, and CALORIES. These sub-displays give you more VSHFL¿FLQIRUPDWLRQDERXW\RXUSDFH\RXUDYHUDJHSRZHUDQGWKHFDORULHVEXUQHG<RXFDQFKRRVHWKHVH sub-modes by pressing the “Display” button (Figure D) on the monitor keypad. Each time the Display button is pressed the display changes to the next mode. This can be done at any time without affecting the operation of the monitor. 7KHWRSDQGERWWRP¿HOGVZLOODOZD\VGLVSOD\WKHVDPHLQIRUPDWLRQLQDOORIWKHWKUHHVXEGLVSOD\V7KH WZRPLGGOH¿HOGVZLOOFKDQJHDV\RXSUHVVWKH³'LVSOD\´EXWWRQ7KHWRS¿HOGLV(/$36('7,0(WKH ERWWRPOHIW¿HOGLVSTROKE RATELQVWURNHVSHUPLQXWHDQGWKHERWWRPULJKW¿HOGLVSTROKE POWER (in watts) for the last stroke (Figure D). Figure D A A ELAPSED TIME METERS /100M SPM STROKES / MINUTE ON/OFF button NOTE: The PACE will always show “/100M” in both Swim View & Kayak View, however the pace number for Kayak View is calculated as /500M. WATTS Setup Review Display Shift STROKE POWER Display push “display” to get into sub-mode NOTE: If the monitor senses the fan wheel is idol for 10 seconds, the monitor will “power down” and you will loose your workout data. If you choose to PRE-SET YOUR TIME or DISTANCE, the monitor will continue to retain data (see page 32 for full details). 07/01/11 Vasa Ergometer User’s Manual PART 2 - Using the Vasa Ergometer 27 BASIC MODE SUB-DISPLAYS (pace, power, calorie) Note: In all of the sub-displays, the top, bottom left and bottom ULJKW¿HOGVDOZD\VGLVSOD\WKHVDPHLQIRUPDWLRQ2QO\WKHWZR PLGGOH¿HOGVZLOOFKDQJHDV\RXSUHVVWKH³'LVSOD\´EXWWRQ BASIC MODE > PACE BASIC MODE > PACE (Figure E) ,QWKHSDFHGLVSOD\WKH¿HOGVDUHDVIROORZV Top: ELAPSED TIME since start of workout Second: TOTAL METERS since start of workout Third: PACE per 100 METERS* for the last stroke (Swim) Bottom Right: STROKE POWER (watts) for the last stroke Bottom Left: STROKE RATE in strokes per minute i6:40 i000 I:40 30 65 Figure E ELAPSED TIME METERS /100M SPM * IN KAYAK VIEW: the monitor will calculate PACE /500M even though it is denotes it as /100M on the screen. TOTAL METERS PACE / 100M WATTS Setup Review Display STROKE POWER STROKES / MINUTE Shift BASIC MODE > POWER BASIC MODE > POWER (Figure F) /100M SPM AVERAGE POWER PACE / 100M WATTS Setup * IN KAYAK VIEW: the monitor will calculate PACE /500M even though it is denotes it as /100M on the screen. ELAPSED TIME AVG WATTS ,QWKHSRZHUGLVSOD\WKH¿HOGVDUHDVIROORZV Top: ELAPSED TIME since start of workout Second: AVERAGE POWER in watts since start Third: PACE per 100 METERS* for the last stroke Bottom Right: STROKE POWER (watts) for the last stroke Bottom Left: STROKE RATE in strokes per minute i6:40 63 I:40 30 65 Figure F Review Display STROKE POWER STROKES / MINUTE Shift BASIC MODE > CALORIE BASIC MODE > CALORIE (Figure G) ,QWKHFDORULHGLVSOD\WKH¿HOGVDUHDVIROORZV i6:40 366 i320 30 65 Figure G ELAPSED TIME CAL Top: ELAPSED TIME since start of workout Second: TOTAL CALORIES since start of workout Third: AVG CAL / HOUR for the last stroke Bottom Right: STROKE POWER (watts) for the last stroke Bottom Left: STROKE RATE in strokes per minute CAL/HR SPM this section. 28 AVG CAL / HR WATTS Setup *For more information on meters and pace, see the end of TOTAL CALORIES Review Display STROKE POWER STROKES / MINUTE Shift Vasa Ergometer User’s Manual PART 2 - Using the Vasa Ergometer 07/01/11 STROKE MODE 6WURNH0RGHJLYHV\RXPRUHVSHFL¿FLQIRUPDWLRQDERXWHDFKVWURNHDQGVKRZVLQIRUPDWLRQIRUWKHOHIWDQG right strokes separately. To get into STROKE MODE, press and hold the blue “Shift” button, then press and release the “Stroke” (down arrow) button (Figure H). Stroke Mode has three sub-displays: AVERAGE FORCE, MAXIMUM FORCE, and STROKE LENGTH. You can choose these sub-modes by pressing the “Display” button on the monitor keypad (make sure you DUHLQVWURNHPRGH¿UVWVHHDERYH(DFKWLPHWKH'LVSOD\EXWWRQLVSUHVVHGWKHGLVSOD\FKDQJHVWRWKH next mode. This can be done at any time without affecting the operation of the monitor. :KHQLQ6WURNH0RGHWKHWRSWKUHH¿HOGVDOZD\VGLVSOD\WKHVDPHLQIRUPDWLRQWKHERWWRPOHIWDQG ULJKW¿HOGVZLOOFKDQJHDV\RXSUHVVWKH³'LVSOD\´EXWWRQ7KHWRS¿HOGLVWKH(/$36('7,0(VLQFHWKH VWDUWRIH[HUFLVHWKHVHFRQG¿HOGLVWKHSTROKE RATELQVWURNHVSHUPLQXWHDQGWKHWKLUG¿HOGLVWKH STROKE POWER (in watts) for the last stroke (Figure H). Figure H i6:40 30 65 43 49 ELAPSED TIME SPM WATTS STROKES / MINUTE STROKE POWER FORCE RQRϝEXWWRQ Setup Review Display push “display” to get into sub-mode Shift Shift Display + press and hold “shift” then press “stroke” (down arrow) 07/01/11 Vasa Ergometer User’s Manual PART 2 - Using the Vasa Ergometer 29 STROKE MODE SUB-DISPLAYS (average force, max force, stroke length) 1RWH,QDOORIWKHVWURNHPRGHVXEGLVSOD\VWKHWRSWKUHH¿HOGVDOZD\VGLVSOD\WKHVDPHLQIRUPDWLRQ 2QO\WKHERWWRPOHIWDQGULJKW¿HOGVZLOOFKDQJHDV\RXSUHVVWKH³'LVSOD\´EXWWRQ STROKE MODE > AVERAGE FORCE (Figure I) STROKE MODE > AVERAGE FORCE i6:40 30 65 43 49 ,QWKHDYHUDJHIRUFHGLVSOD\WKH¿HOGVDUHDVIROORZV Figure I ELAPSED TIME SPM Top: ELAPSED TIME since start of workout Second: STROKE RATE in strokes per minute Third: STROKE POWER (watts) for the last stroke Bottom Right: AVERAGE FORCE1 for right side Bottom Left: AVERAGE FORCE1 for left side WATTS STROKES / MIN STROKE POWER FORCE AVG FORCE RIGHT AVG FORCE LEFT AVERAGE FORCE: measures the force applied during the power portion of each stroke. The force is displayed in units of Newtons: (1 LB = 4.45 Newtons; 1 Newton = 0.225 LBs). 1 Setup Review Display Shift STROKE MODE > MAX FORCE i6:40 30 65 50 55 STROKE MODE > MAX FORCE (Figure J) Figure J ELAPSED TIME SPM ,QWKHPD[IRUFHGLVSOD\WKH¿HOGVDUHDVIROORZV Top: ELAPSED TIME since start of workout Second: STROKE RATE in strokes per minute Third: STROKE POWER (watts) for the last stroke Bottom Right: MAX FORCE2 for right side Bottom Left: MAX FORCE2 for left side WATTS STROKES / MIN STROKE POWER MAX FORCE MAX FORCE RIGHT MAX FORCE LEFT Setup MAX FORCE: measures the maximum force applied at any instant during each stroke. The force is displayed in units of Newtons: (1 LB = 4.45 Newtons; 1 Newton = 0.225 LBs). Review Display Shift 2 STROKE MODE > STROKE LENGTH i6:40 30 65 ii0 ii2 STROKE MODE > STROKE LENGTH (Figure K) ,QWKHVWURNHOHQJWKGLVSOD\WKH¿HOGVDUHDVIROORZV Figure K ELAPSED TIME SPM Top: ELAPSED TIME since start of workout Second: STROKE RATE in strokes per minute Third: STROKE POWER (watts) for the last stroke Bottom Right: STROKE LENGTH3 for right side Bottom Left: STROKE LENGTH3 for left side WATTS STROKES / MIN STROKE POWER SL STROKE LENGTH R STROKE LENGTH L Setup STROKE LENGTH is measured in centimeters. 3 Review Display Shift 30 Vasa Ergometer User’s Manual PART 2 - Using the Vasa Ergometer 07/01/11 VM MONITOR - SPECIAL FUNCTIONS SETTING UP A PRE-SET WORKOUT DISTANCE You can pre-set a distance (in meters) for your workout, and the VM monitor will countdown the distance and display the total time to achieve that distance. To set the desired distance, push the “SETUP” button (you must be in BASIC MODE). The left most QXPEHUZLOOEHÀDVKLQJ)LJXUH$8VHWKHXS or down DUURZVWRFKDQJHWKHÀDVKLQJQXPEHU7R move to the next number, use the right arrow. Once you have set the desired distance, press “SETUP” to exit. The monitor will then wait until you begin your workout to start counting (Figure B). When the pre-set distance is completed, the monitor will freeze so you can record the data (Figure C). (After 5 minutes of inactivity, the monitor will auto shut off.) To begin again or to reset the distance, press “SETUP” twice. NOTE: The monitor will default to BASIC > Pace Mode. To change to BASIC > Calorie, or BASIC > Power, press the “Display” button. Figure A Figure B METERS Figure C :00 i000 0:00 0 0 METERS I6:40.0 I000 I:40 METERS /100M /100M SPM SETUP BUTTON Setup Review WATTS Setup Display Review SPM WATTS Setup Display Review Display Setup Shift Shift Shift “setup” topush set desired distance use arrows to set desired distance, then push “setup” to exit after setting your distance, the monitor will stay ready until you start your workout after completing the distance, the monitor will freeze so you can view and record the data USING THE MONITOR CLOCK FOR INTERVAL TRAINING, RACE SIMULATIONS AND TIMED PIECES You can use the VM monitor to do interval training, race simulation and set distance workouts. Set your GHVLUHGLQWHUYDOGLVWDQFHDVGHVFULEHGDERYH,PPHGLDWHO\DIWHU\RXKDYHFRPSOHWHGWKH¿UVWVHWSUHVV WKHVHWXSEXWWRQWZLFHWKHÀ\ZKHHOPXVWVWLOOEHVSLQQLQJ<RXFDQWKHQZDWFKWKHFORFNIRU\RXU desired recovery or rest period. When you are ready for the next set, press the setup button twice to begin timing your next interval. (Of course, you can always use your own watch or pace clock to time rest periods between intervals.) 07/01/11 Vasa Ergometer User’s Manual PART 2 - Using the Vasa Ergometer 31 SETTING UP WORKOUT INTERVALS: preset distance or time with rest interval for interval training, race simulations and distance workouts You can use the VM monitor to do interval training, race simulation and pre-set distance workouts. You can pre-set a DISTANCE (in meters) or a TIME (in minutes/seconds) for your workout. For interval training you can pre-set a REST INTERVAL between your exercise intervals. The VM monitor will countdown the distance or time and rest intervals. When the workout is complete, the VM monitor will display the total time and distance covered. If you want to pre-set SPLITS and REVIEW each interval, see “Setting Split Times” and “Workout Review” on page 33. INTERVAL TRAINING: pre-set distance with rest interval 7RVHWWKHGHVLUHGGLVWDQFHSUHVVWKH³6(783´EXWWRQ7KH¿UVWGLVSOD\ZLOOEH',67$1&()LJXUH$ With DISTANCE in the display (Figure A), use the up down and right arrows to change the ÀDVKLQJQXPEHUWRWKHGHVLUHGGLVWDQFH Note: you must be in BASIC MODE to program intervals. After pressing “SETUP”, press “DISPLAY” to toggle between DISTANCE, REST TIME for distance intervals, TIME, and REST TIME for time intervals. After setting the desired distance, press “DISPLAY” to set the REST interval. With REST in the display (Figure B), use the arrows to set the desired rest time. Once you have set the desired workout, press “SETUP” to exit. As soon as you pull on the drive cords the monitor will start counting down the distance (Figure C). :KHQWKH¿UVWGLVWDQFHLQWHUYDOLVFRPSOHWHGWKHPRQLWRUZLOOFRXQWGRZQWKHUHVWLQWHUYDO)LJXUH' When the rest interval is complete, the monitor will stay ready for the next distance interval (Figure C). When you have completed your workout, you can review all intervals by pressing “REVIEW” (see “Workout Review” on p. 35). Press the up/down arrows to see the next interval. NOTE: To pre-set splits for your interval workout, see “Setting Split Times / Distances” on p. 35. Figure B Figure C REST /100M SPM SETUP BUTTON Review Display Shift :00 i00 0:00 0 0 METERS Setup Figure D Setup Review Setup Display Shift WATTS Review DISTANCE Figure A REST SPM REST INTERVAL WATTS Setup Display Shift i:22.3 i00 :30 27 68 METERS Review Display Shift Setup push “setup” then use arrows to set distance press “display” to set rest interval 32 Display 1 DISTANCE Display Display 2 REST INTERVAL Setup after programing distance and rest interval, press setup to exit the monitor will stay ready until you begin your workout -----once you pull on the drive cords, it will begin counting down the distance Vasa Ergometer User’s Manual PART 2 - Using the Vasa Ergometer after completing the distance, the monitor will count down the rest interval and display results from recent interval workout 07/01/11 INTERVAL TRAINING: pre-set time with rest interval To set the desired time, press the “SETUP” button, then press “DISPLAY” (twice) until time is displayed LQWKHWRS¿HOG)LJXUH$8VHWKHDUURZVWRFKDQJHWKHÀDVKLQJQXPEHUWRWKHGHVLUHGWLPH Note: you must be in BASIC MODE to program intervals. After pressing “SETUP”, press “DISPLAY” to toggle between DISTANCE, REST TIME for distance intervals, TIME, and REST TIME for time intervals. After setting the desired time, press “DISPLAY” (once) to set the REST interval. With REST in the display (Figure B), use the arrows to set the desired rest interval. Once you have set the desired workout, press “SETUP” to exit. As soon as you pull on the drive cords the monitor will start counting down the time (Figure C). When WKH¿UVWLQWHUYDOLVFRPSOHWHGWKHPRQLWRUZLOOFRXQWGRZQWKHUHVWLQWHUYDO)LJXUH':KHQWKHUHVW interval is complete, the monitor will stay ready for the next time interval (Figure C). When you have completed your workout, you can review all intervals by pressing “REVIEW” (see “Workout Review” on p. 35). Press the up/down arrows to see the next interval. NOTE: To pre-set splits for your interval workout, see “Setting Split Times / Distances” on p. 35. Figure A Figure B Figure C Figure D METERS REST SPM Setup push “setup” then “display” until time DSSHDUVLQWRSÀHOG then use arrows to set numbers press “display”to set rest interval Setup Review Display Shift Review Display Review Display 4 REST INTERVAL Setup the monitor will stay ready until you begin your workout -----once you pull on the drive cords, it will begin counting down the time Vasa Ergometer User’s Manual PART 2 - Using the Vasa Ergometer SPM WATTS Setup Display Shift after programing time and rest interval, press setup to exit 07/01/11 WATTS Setup Display Shift Display 3 TIME Setup REST /100M SETUP BUTTON 5:00 409 I:00 30 65 METERS Review Display Shift after completing the time interval, the monitor will count down the rest interval 33 SETTING SPLIT TIMES / DISTANCES Default split times are pre-set at 50 meters and 30 seconds. If want to change the defaults, press ³6(783´WKHQ³5(9,(:´7KHGLVWDQFHVSOLWLQWHUYDOLVVKRZQ¿UVW)LJXUH$3UHVV³',63/$<´WRVKRZ the time split interval (Figure B). Use the arrow buttons to select a different split interval. NOTE: The split times will reset back to the defaults when the monitor is turned off. Figure A Split Distances: 25M 50M (default) 100M 200M 1000M Figure B METERS KHD Setup Setup Review KHD Review Setup Display Shift push “setup” then “review” to change defaults Review Display Split Times: :30 sec (default) 1:00 min 2:00 min 3:00 min 4:00 min 5:00 min 10:00 min Shift DISTANCE TIME use arrows to set desired splits press “display”to toggle between distance and time splits WORKOUT REVIEW The VM Monitor contains a workout review feature that will store up to 20 splits +/or intervals. After you complete your workout, the monitor will display (Figure C) your TIME, DISTANCE, AVERAGE PACE* and STROKES / MINUTE for the most recent interval. Figure C * Pace is dependent on which view (Swim vs. Kayak) you are in. Swim view will display pace /100M while Kayak view will display pace /500M 2:06.5 i00 2:06 29 METERS To review the information for each split, press the “REVIEW” button. To review next split, press the UP and DOWN arrows. The split information shown is (Figure D): /100M SPM Top: TIME of the interval Second: DISTANCE of the interval Third: AVERAGE PACE / 100M (or /500M) for the interval Bottom Left: INTERVAL number Setup Review Display Shift Note: After 5 minutes of inactivity, the monitor will auto shut off and clear your workout data. METERS Figure D 52.0 25 2.28 I METERS /100M Example of a 100M workout with 25M splits. Setup Review Shift METERS /100M Setup Display Review Shift Split #1 34 i:i7.0 50 i:40 2 i:4i.5 75 i:38 3 /100M Setup Display Review Shift Split #2 METERS 2:06.5 i00 i:40 4 /100M Setup Display Review Display Shift Split #3 Vasa Ergometer User’s Manual PART 2 - Using the Vasa Ergometer Split #4 07/01/11 AUDIBLE STROKE RATE TEMPO BEEPER The VM monitor contains an audible stroke rate tempo beeper, which allows you to set a desired stroke rate (strokes per minute) and keep pace by listening to the beeper tone tempo. To set the tempo beeper, press and hold “SHIFT”, then press “TEMPO” (up arrow ) (Figure D). Set the desired stroke rate per minute using the up , down and right arrow keys. To exit, press and hold “SHIFT”, then press “TEMPO” (up arrow ). The VM monitor will beep every cycle, according to the STROKE RATE (SPM) you set. To turn the beeper sound off, press and hold “SHIFT”, then press the horn button ( right arrow ) (Figure E). The beeper will automatically turn off when the VM is turned off. Figure D Figure E METERS /100M SPM SPM Setup Review Setup Display Shift Shift + and hold SHIFT, press then press TEMPO (up arrow) WATTS Review Display Shift use arrows to set desired stroke rate Shift + WRWXUQWKHEHHSHURQDQGRϝ press and hold SHIFT, then press (right arrow) SOFTWARE VERSION 0I23 F6C6 You can display the software version of your monitor to check if you have the most current version of the software. While the power is OFF, press and hold “SHIFT”, then press “POWER”. All LCD segments will display for DPRPHQWWKHQWKHYHUVLRQQXPEHUZLOOEHGLVSOD\HGLQWKHWRS¿HOG Shift + and hold SHIFT, press then press POWER 07/01/11 Vasa Ergometer User’s Manual PART 2 - Using the Vasa Ergometer Setup Review Display Shift 35 BATTERY REPLACEMENT The batteries in your Vasa Ergometer Monitor should last about 600 KRXUV:KHQ\RXVHH³/2:&(//6´LQWKHWRSWZR¿HOGVRI\RXU monitor, the batteries should be changed. To change the batteries, open the battery compartment on the back of the monitor (Figure A). The monitor takes two “AA” batteries DONDOLQHDUH¿QH IMPORTANT: PLEASE REMOVE THE BATTERIES from the monitor if it will not be used for 3+ months. BATTERY SAVE FEATURE There is a 5 minute timeout feature on your monitor. If there is no “activity” the monitor will power down after 5 minutes (“activity” includes inputs from pulling on the drive cord, pushing buttons, or serial communications with a computer). Any workout information will be cleared from the memory as soon as the monitor shuts off. RE-ZERO MONITOR ONCE CONNECTED TO CABLES You should RE-ZERO the monitor every time the monitor is reconnected to the connection cables (i.e. batteries replaced, removed from machine, etc.). To RE-ZERO (calibrate) the monitor, please follow these simple steps: 1. 2. 3. 4. 5. Plug in the cables to the monitor and make sure they are seated correctly into the jacks; Next, turn the monitor OFF until you hear a short “beep”; Next, turn the monitor ON by pressing the ON/OFF button. DO NOT PULL on the cords. Next, turn the monitor OFF again (wait for short “beep”). The monitor is ready to use. You may start by pressing ON/OFF or just exercising. REMOVING THE MONITOR It is NOT recommended that you remove the monitor from the Vasa Ergometer on a regular basis. If you need to remove the monitor, it is suggested that you remove the batteries. When you reconnect the monitor make sure to follow the RE-ZERO procedures stated above. NOTE: Prior to disconnecting the connection cables, power the monitor OFF and wait for the delayed “beep” to ensure the computer has properly shut down. Disconnecting prior to this can cause the monitor to display irregular data. ODOMETER The odometer function allows you to track total swim distance, total kayak distance, time in seconds and left and right arm strokes on your Vasa Ergometer. A To display the odometer, press and hold “SHIFT”, then press “DISPLAY”. Use the “DISPLAY” button to cycle through the various totals: Setup Display Display Display Display Display Display Display 36 #0 #1 #2 #3 #4 #5 #6 Total Total Total Total Total Total Total SWIM METERS KAYAK METERS SECONDS IN OPERATION STROKES / LEFT SIDE STROKES / RIGHT SIDE TACKS # LEFT (Vasa use only) TACKS # RIGHT (Vasa use only) Vasa Ergometer User’s Manual PART 2 - Using the Vasa Ergometer Review Display Shift Press and hold SHIFT and DISPLAY to activate the odometer. Then cycle through all totals by pressing DISPLAY. Shift + Display Display 07/01/11 METERS AND PACE CALCULATIONS IN THE MONITOR The Vasa Ergometer Monitor simulates the performance of the athlete by measuring the force (many times per second) during a stroke and powering a model through the water using that information. During each increment the monitor calculates the distance covered (swimmer/kayaker depending on ZKLFKPRGH\RXDUHLQLQWKDWLQFUHPHQWDQGDGGVWKDWWRWKHWRWDOGLVWDQFH7KH0(7(56GLVSOD\¿HOG shows that total distance. The monitor also keeps track of the distance and time at the start of each stroke and uses this information to calculate the average pace during that stroke. Pace is displayed in the 0¿HOGZLWKLQ6ZLP9LHZDQG0ZLWKLQ.D\DN9LHZ NOTE: Pace and distance accumulated are calculated to approximate the pace and distance. For swimmers it is calculated without a start or turns, while “pulling” with a pullbuoy (similar to open water swimming). DEFINITION OF STROKE 7KH9DVD(UJRPHWHU0RQLWRUGH¿QHVD³VWURNH´DVWKHFRPSOHWLRQRIRQHDUPSDGGOHF\FOH ALTERNATING ARM STROKES (freestyle, nordic single poling, surf paddling, kayak/ canoe padding). One stroke would be the complete of one cycle of both the left and right arms. 7KHPRQLWRUZLOOVWDUWFROOHFWLQJGDWDRQZKLFKHYHUVLGH\RXVWDUWWKH¿UVWSXOOOHIWRUULJKW ALTERNATING ARM: ONE STROKE CYCLE ENTRY MID-STROKE FINISH RECOVERY CYCLE COMPLETE SIMULTANEOUS ARM STROKESEXWWHUÁ\EUHDVWVWURNHQRUGLFGRXEOHSROLQJ One stroke would be the completion of one cycle, from entry through recovery with both arms SIMULTANEOUS ARM: ONE STROKE CYCLE ENTRY MID-STROKE FINISH RECOVERY CYCLE COMPLETE NOTE: If you change they type of stroke during a workout (from double arm to alternating arms, or vice versa), the monitor will auto detect the change and adjust the stroke data within 2 or 3 stroke cycles. 07/01/11 Vasa Ergometer User’s Manual PART 2 - Using the Vasa Ergometer 37 MONITOR - SUMMARY OF FUNCTIONS AUTO START: As soon as you pull on the drive cords, the monitor will automatically turn on and begin monitoring your performance. It will automatically enter Basic Mode > Pace (see chart below). You can reset the monitor using the ON/OFF button. IMPORTANT: PLEASE REMOVE THE BATTERIES from the monitor if it will not be used for 3+ months. VIEWING OPTIONS: SWIM vs. KAYAK (p. 26): SWIM VIEW is the default viewing mode. If you are in KAYAK VIEW there will be a “K” in the upper left corner of the top screen. No notation is displayed while in SWIM VIEW. If you wish to change to the KAYAK VIEW follow the steps listed on page 26. *PLEASE NOTE: Pace is relevant to the view: SWIM VIEW= pace/100M while KAYAK VIEW= pace/500M. BASIC MODE (p. 28): Basic Mode has three sub-displays: PACE*, POWER, and CALORIES. Choose sub-modes by pressing the “Display” button. BASIC MODE VM Field: BASIC > PACE TOP SECOND BASIC > POWER BASIC > CALORIE ELAPSED TIME since start ELAPSED TIME since start ELAPSED TIME since start TOTAL METERS since start AVERAGE POWER since start TOTAL CALORIES since start PACE /100M* for last stroke PACE / 100M* for last stroke AVG CAL / HOUR for last stroke BOTTOM Right POWER (watts) for last stroke POWER (watts) for last stroke POWER (watts) for last stroke BOTTOM Left STROKE RATE in strokes / min STROKE RATE in strokes / min STROKE RATE in strokes / min THIRD STROKE MODE (p. 30): To get into STROKE MODE, press and hold the blue “Shift” button, then press and release the “Down Arrow” button. Stroke Mode has three sub-displays: AVERAGE FORCE, MAXIMUM FORCE, and STROKE LENGTH. Choose sub-modes by pressing the “Display” button. STROKE MODE VM Field: STROKE > AVG FORCE STROKE > MAX FORCE STROKE > STROKE LENGTH ELAPSED TIME since start ELAPSED TIME since start ELAPSED TIME since start SECOND STROKE RATE in strokes / min STROKE RATE in strokes / min STROKE RATE in strokes / min THIRD POWER (watts) for last stroke POWER (watts) for last stroke POWER (watts) for last stroke AVG FORCE for right side MAX FORCE for right side STROKE LENGTH for right side AVG FORCE for left side MAX FORCE for left side STROKE LENGTH for left side TOP BOTTOM Right BOTTOM Left INTERVAL TRAINING (p. 32): To pre-set a desired distance, time, and rest interval push the “SETUP” button (you must be in BASIC MODE). Pressing “DISPLAY” will toggle between DISTANCE, REST TIME for distance intervals, 7,0(DQG5(677,0(IRUWLPHLQWHUYDOV8VHWKHDUURZVWRFKDQJHWKHÀDVKLQJQXPEHU2QFH\RXKDYHVHWWKH desired workout press “SETUP” to exit. SETTING SPLIT TIMES / DISTANCE (p. 35): Default split times are pre-set at 50m and 30 sec. If want to change the defaults, press “SETUP” then “REVIEW” (Figure C). Use the arrow buttons to change the defaults. Press “DISPLAY” to toggle between DISTANCE splits and TIME splits. WORKOUT REVIEW (p. 35): The VM Monitor contains a workout review feature that will store up to 20 splits. After you complete your workout, the monitor will freeze. To review the information for each split, press the “REVIEW” button. Then, to review each split, press the UP and DOWN arrows. AUDIBLE STROKE RATE TEMPO COUNTER (p. 36): To set the tempo beeper, press and hold “SHIFT”, then press “TEMPO” (up arrow ). Set the desired STROKE RATE (SPM) using the arrow keys. To exit, press and hold “SHIFT”, then press “TEMPO”. RE-ZERO MONITOR (p. 36): RE-ZERO the monitor if the connection cables have been disconnected for any reason. Connect cables, turn POWER OFF and wait for delayed beep. Turn POWER ON (do not pull on cords). Power back OFF and wait for delayed beep. Complete and ready for use. 38 Vasa Ergometer User’s Manual PART 2 - Using the Vasa Ergometer 07/01/11 PART 3 – TECHNIQUE & FORM The following section contains several exercises you can do with your Vasa Ergometer. There are many PRUHH[HUFLVHVSRVVLEOHHVSHFLDOO\H[HUFLVHVWKDWWDUJHWVSHFL¿FPXVFOHJURXSVEDFNFKHVWOHJV shoulders). Many of the exercises you can do on the Vasa Trainer are also adaptable for the Ergometer. 7RJHWLGHDVDQGVHHDFRPSOHWHOLVWRIWKHVHH[HUFLVHVRUDGGLWLRQDOZRUNRXWVJRWRRXUZHEVLWH www.vasatrainer.com EXERCISE TIPS HANDLES VS. PADDLES Most exercises will be more comfortable performed with the handles rather than the swim paddles. You PD\SUHIHUWRXVHWKHSDGGOHVIRUH[HUFLVHVWKDWVLPXODWHVZLPRUVXUISDGGLQJVWURNHV6ZLP&RDFKHV feel that using the paddles force the athlete to engage the many muscles of the hand that you use while swimming or paddling in the water, resulting in stronger hands and better technique. WARM UP AND STRETCHING Always warm up with 5-10 minutes of light intensity aerobic activity before training with the Vasa (UJRPHWHU)UHHVW\OH(QGXUDQFHLVDQH[FHOOHQWH[HUFLVHIRUZDUPLQJXS6WUHWFKLQJDIWHUZDUPXSDQG FRROGRZQDIWHUFRPSOHWLQJ\RXUZRUNRXWLVUHFRPPHQGHG SAFETY $OZD\VSUDFWLFHVWULFWVDIHW\ZKHQXVLQJWKH9DVD(UJRPHWHU6HH3$57³6DIHW\DQGWKH9DVD (UJRPHWHU´IRUJXLGHOLQHVRQKRZWRXVHWKH9DVD(UJRPHWHUVDIHO\DVZHOODVWLSVIRUZRUNLQJZLWK children. For tips on how to safely get on and off the Vasa Ergometer for different positions, see the instructions on the next page. PROPER BREATHING $OZD\VEUHDWKHUK\WKPLFDOO\GXULQJH[HUFLVH+ROGLQJ\RXUEUHDWKFDQEHGDQJHURXVEHFDXVHLWVWRSV WKHEORRGÀRZWR\RXUEUDLQDQGFRXOGPDNH\RXOLJKWKHDGHGRUIDLQW %UHDWKHLQDQGRXWWKURXJKERWK\RXUQRVHDQG\RXUPRXWKLQRUGHUWRJHWHQRXJKR[\JHQGXULQJ each breath. ([KDOHZKHQWKHH[HUFLVHLVWKHKDUGHVWDQGLQKDOHZKHQWKHH[HUFLVHLVWKHHDVLHVW 6ZLPPHUVFDQSUDFWLFH³LQZDWHU´EUHDWKLQJUK\WKPWRVLPXODWHWKDWDVSHFWRIWKHVWURNH PROPER FORM AND TECHNIQUE Follow the directions in this manual for performing each exercise in a correct, safe manner. For exercises \RXGRZKLOHO\LQJRQ\RXUEDFNSUHVV\RXUORZHUEDFNLQWRWKHSDGGHGEHQFKDQGWXFN\RXUFKLQWR\RXU FKHVW7KLVZLOOSUHYHQWORZHUEDFNVWUDLQDQGZLOODOVRJLYH\RXUDEGRPLQDOPXVFOHVDEHWWHUZRUNRXW )RUDQ\H[HUFLVHVWKDWDUHODEHOHG$'9$1&('VWDUWVORZO\XQWLO\RXIHHOFRPIRUWDEOHZLWKWKHPRWLRQDQG follow the tips for safety and stability. CHART YOUR PROGRESS 7UDFNLQJ\RXULPSURYHPHQWVRQWKH9DVD(UJRPHWHUDVLQDOOWUDLQLQJZLOOEHDNH\LQUHDFKLQJ\RXU JRDOV2QHRIWKHPRVWHIIHFWLYHPHWKRGVIRUPRQLWRULQJSURJUHVVLVWRNHHSDQDFFXUDWHWUDLQLQJORJ $JRRGORJFDQVHUYHWRKHOS\RXPRQLWRUWKHHIIHFWVRIHDFKZRUNRXWDQGWKHVWUHVVHVDVVRFLDWHGZLWK WUDLQLQJ6HHWKHVDPSOH9DVDWUDLQLQJORJLQWKHHQGRIWKH³:RUNRXW´VHFWLRQ7KLVFDQVHUYHDVDJXLGH IRUWUDFNLQJWKHVHFRPSRQHQWVLQ\RXUWUDLQLQJSURJUDP<RXDUHPRUHOLNHO\WREHVDWLV¿HGZLWK\RXU H[HUFLVHSURJUDPLI\RXNHHSDQHIIHFWLYHORJ 07/01/11 Vasa Ergometer User’s Manual PART 3 - Technique & Form 39 SWIMMING TECHNIQUE 7KHUHDUHWZRSDUWVWRWKHEDVLFVWURNHWKHSURSXOVLYHVWURNHDQGWKHUHFRYHU\7KHPRYHPHQWV DUHEOHQGHGWRJHWKHUVLQFHWKHHQWLUHVWURNHLVVPRRWKDQGFRQWLQXRXV7KHUHLVQRQHHGWRVWRSDWDQ\ SRLQWRIWKHVWURNHXQOHVV\RXDUHLVRODWLQJDFHUWDLQSDUWRIWKHVWURNHRULI\RXDUHZRUNLQJRQWHFKQLTXHDVSHFWVRIWKHVWURNH&RPSOHWHWKHVWURNHVHTXHQFHFRPSDULQJ\RXUKDQGDUPHOERZDQGERG\ position to those shown in the pictures on the following pages. Improper technique can result in injury or poor results. Ideally, have a coach observe your technique too. You can also use a mirror or video FDPHUDPRQLWRUVHWXSLQIURQWRI\RXWRYLHZ\RXUVWURNH KEY POINTS TO REMEMBER %HFHUWDLQ\RXUKDQGSRVLWLRQLQWKHSDGGOHVRUKDQGOHVLVFRPIRUWDEOHDQGVWDEOH .HHS\RXUHOERZVKLJKDWWKHFDWFKDQGWKURXJKRXWWKHVWURNH&RQFHQWUDWHRQVLPXODWLQJSHUIHFW VWURNHWHFKQLTXH 8VHDFRQWLQXRXVÀXLGPRWLRQWKURXJKRXWWKHVWURNH 7RDYRLGEXPSLQJ\RXUIHHWRQWKHUHDUVWDQFKLRQDVWKHVHDWUROOHUIRUZDUGNHHS\RXUIHHW inches apart so that they straddle the monorail as you glide forward. *HWWLQJVDIHO\RQDQGRII\RXU9DVD(UJRPHWHULVDQLPSRUWDQWSDUWRI\RXUSURJUDP3OHDVH IROORZWKHJXLGHOLQHVEHORZIRUWKHEDVLFVZLPPLQJVWURNH)RURWKHUSRVLWLRQVSOHDVHUHIHUWR ³3$579DVD(UJRPHWHU([HUFLVHV´ 'RQRWUHOHDVHWKHSDGGOHVRUKDQGOHVZKLOHGULYHFRUGVDUHH[WHQGHG7KH\FRXOGVWULNHWKH monitor or front assembly and cause damage or injury. Always manually return the handles or paddles to the ready position on the front assembly. 'XULQJWKHEDVLFVZLPPLQJRUSDGGOLQJVWURNHV\RXUDUPKDQGDQGERG\SRVLWLRQQHHGWR VLPXODWHSURSHUVWURNHWHFKQLTXHDVFORVHO\DVSRVVLEOH$VN\RXUFRDFKRUDIULHQGZKRNQRZV SURSHUVWURNHWHFKQLTXHWRREVHUYHDQGSRLQWRXWDUHDVWKDWQHHGFRUUHFWLRQ<RXFDQDOVRSODFH DPLUURULQIURQWRI\RXDQGEHVLGH\RXLISRVVLEOHWRZDWFK\RXUWHFKQLTXHRUVHWXSDYLGHR FDPHUDDQG¿OP\RXUZRUNRXWLQRUGHUWRDQDO\]HVWURNHWHFKQLTXH 1) Place hands in handles or paddles. 2) Pull handles/paddles to engage drive cord and place hands on front edge of bench. 3) Lie on bench and keep one foot %ULQJIRRWRϝÁRRUDQGEULQJKDQGV RQÁRRUWRDGMXVW\RXUSRVLWLRQRQ into start position. bench. SAFETY NOTE: Do not release the paddles or handles ZKLOHWKHGULYHFRUGVDUHH[WHQGHG7KH\FRXOGVWULNHWKH monitor or front assembly and cause damage or injury. Always manually return the handles/paddles slowly to the UHDG\SRVLWLRQRQWKHIURQWDVVHPEO\DVVKRZQLQOHIW insert). 40 Vasa Ergometer User’s Manual PART 3 - Technique & Form 07/01/11 FREESTYLE ENTRY (the catch) 6WDUWWKHSXOOZLWK\RXUOHIWKDQGWKXPE¿UVWUHDFKLQJ IRUZDUGDQGODWHUDOO\RXWWR³FDWFK´WKHZDWHU 7RKHOSZLWKWKH³FDWFK´GURS\RXUOHIWVKRXOGHUVOLJKWO\ when reaching. 'ULYHWKHRSSRVLWHKLSLQWRWKHEHQFKDWWKHVDPHWLPH \RXFDWFKDQGSXOO8VHWKHFRUHDEGRPLQDOPXVFOHVWR initiate the hip drive. ENTRY (catch) MID-STROKE 2XWVZHHS3UHVVWKHKDQGODWHUDOO\WRWKHERG\ZLWK RQO\VOLJKWHOERZÀH[LRQDQGEHJLQWRURWDWHWKHKDQG at the wrist medially. ,QVZHHS3UHVVWKHKDQGWRZDUGVWKHKLSVWKURXJK IXUWKHUÀH[LRQRIWKHHOERZDQGZULVW .HHS\RXUHOERZVLQDKLJKSRVLWLRQ,IWKHUHZHUHDQ H\HRQ\RXUHOERZLWZRXOGEHORRNLQJWRWKHVLGHLQD direction perpendicular to the monorail. MID-STROKE FINISH :LWKWKHKDQGDWWKHKLSDQGSDOPIDFLQJWRZDUGVWKH IHHWSUHVVEDFNE\H[WHQGLQJWKHDUPWRDSSUR[LPDWHO\ 90% of full extension. .HHS\RXUDUPLQOLQHZLWK\RXUERG\WRUHGXFHGUDJ )LQLVKVWURQJO\ZLWKD¿QDOSXVKRIWKHKDQG FINISH RECOVERY (OERZOHDGVZLWKKDQGUHOD[HGGLUHFWO\XQGHUWKH HOERZWUDLOLQJ¿QJHUVWKHQUHDFKIRUZDUGVWRWKHHQWU\ position. 127(6LQFH\RXUERG\FDQQRWURWDWHDVPXFKDVLQ WKHZDWHUZHUHFRPPHQGWKDW\RXNHHSWKHUHFRYHU\ hand & forearm below the level of the monorail to avoid impingement of the shoulder area. RECOVERY TIPS ,ILWVHHPV³WRRHDV\´RSHQWKHGDPSHUGRRUWRDKLJKHUVHWWLQJ ,IWKHVHDWUROOVWRRIDUIRUZDUGDWWDFKDKDUGHUWHWKHUFRUG +DYHVRPHRQHZDWFK\RXWRKHOS\RXPDWFK\RXUERG\SRVLWLRQVWRWKRVHVKRZQRUVHWXSDPLUURURU YLGHRFDPHUDWRZDWFK\RXUVWURNH 8VHDVPRRWKDQGFRQWLQXRXVVWURNHWKURXJKRXWWKHVWURNH 07/01/11 Vasa Ergometer User’s Manual PART 3 - Technique & Form 41 BUTTERFLY ENTRY (the catch) )XOO\H[WHQG\RXUDUPVLQWKHVWDUWDQGSRVLWLRQ)LQJHUVHQWHU WKHZDWHU¿UVWWKXPEVOHDGLQJVOLJKWO\&XSDQGFDWFKWKH paddle with both arms simultaneously in preparation for the out sweep. ,PDJLQH\RXUDUPVDUHH[WHQGHGRYHUDELJEDOO ENTRY MID-STROKE 2XWVZHHS7RJHWKHUWKHDUPVSUHVVODWHUDOO\DQGWKHDUP EHJLQVWRÀH[DWWKHHOERZ ,QVZHHS$VWKHDUPVFRQWLQXHWRÀH[WKHKDQGVWXUQPHGLally and press towards the body. .HHS\RXUHOERZVLQDKLJKSRVLWLRQ,IWKHUHZHUHDQH\H RQ\RXUHOERZLWZRXOGEHORRNLQJWRWKHVLGHLQDGLUHFWLRQ perpendicular to the monorail. Also, imagine that your arms are still over the ball. This helps internal rotation. MID-STROKE FINISH As the hands come close to the body, they then press towards the feet, fully extending the arms at the elbow in preparation IRUWKHTXLFNµÀLFN¶RXWRIWKHZDWHUIRUUHFRYHU\ 3UHVVWKH¿QLVKZLWKWKHKHHOVRI\RXUKDQGV'RQ¶WÀLFN\RXU ZULVWVNHHSZULVWVÀH[HGDWGHJUHHV FINISH RECOVERY %RWKDUPVUHWXUQVLPXOWDQHRXVO\KDQGDQGIRUHDUPV¿UVWWKH DUPVVZLQJRXWZDUGVHOERZVVOLJKWO\ÀH[HGDVWKH\ERWKFRQtinue to swing around and meet forward of the head, thumb DQG¿QJHUV¿UVW .HHS\RXUHOERZVVOLJKWO\KLJKHUWKDQ\RXUVKRXOGHUV<RXU hands will be rotating during the return so that will be in SRVLWLRQIRU³HQWU\´SKDVHRIVWURNH RETURN TIPS ,ILWVHHPV³WRRHDV\´RSHQWKHGDPSHUGRRUWRDKLJKHU setting. ,IWKHVHDWUROOVWRRIDUIRUZDUGDWWDFKDKDUGHUWHWKHUFRUG +DYHVRPHRQHZDWFK\RXWRKHOS\RXPDWFK\RXUERG\ positions to those shown, or set up a mirror or video camera WRZDWFK\RXUVWURNH 8VHDVPRRWKDQGFRQWLQXRXVVWURNHWKURXJKRXWWKHVWURNH Vasa Ergometer User’s Manual PART 3 - Technique & Form PRE-LOAD 07/01/11 BREASTSTROKE - stroke segment training %UHDVWVWURNHWUDLQLQJRQWKH9DVD(UJRPHWHUFDQEHSHUIRUPHGLQWZRZD\V $6WURNH6HJPHQW7UDLQLQJ,QDSURQHSRVLWLRQ\RXFDQSUDFWLFHVHJPHQWVRIWKHEUHDVWVWURNHIRU conditioning and injury prevention. %$OWHUQDWLYH6XSLQH3RVLWLRQ/LHRQ\RXUEDFNDQGVLPXODWHWKHFRPSOHWHDUPF\FOH SETUP - PRONE POSITION &URVVWKHGULYHFRUGunder the monorail and put the left paddle in the right hand, and the right paddle in the left hand. BREASTSTROKE ARM CYCLE SEGMENTS 1. REACH & GLIDE %RWKKDQGVWKXPEVWRJHWKHUUHDFKIRUZDUGIXOO\H[WHQGLQJWKHDUPDWWKHHOERZ 2. OUT SWEEP 7KHKDQGVURWDWHODWHUDOO\DQGSUHVVODWHUDOO\ZLWKVOLJKWÀH[LRQRIWKHDUPDWWKHHOERZ 3. IN SWEEP 7KHDUPVFRQWLQXHWRÀH[DWWKHHOERZDVWKHSUHVVRQWKHSDGGOHLVQRZWXUQHGPHGLDOO\ towards the chest. IN SWEEP OUT SWEEP 07/01/11 Vasa Ergometer User’s Manual PART 3 - Technique & Form 43 BREASTSTROKE KICK SETUP AND GETTING SAFELY ON AND OFF $WWDFKDQNOHVWUDSVWRERWKOHJVDGMXVWLQJWKHDQNOH VWUDSVRWKH'ULQJLVLQEDFN *UDVSERWKGULYHFRUGVRQWKHIURQWHUJRPHWHUDVVHPEO\ 6WUDGGOHWKHEHQFKIDFLQJIRUZDUG $WWDFKWKHGULYHFRUGWRHDFKDQNOHVWUDS OHIWFRUGWROHIWDQNOHULJKWFRUGWRULJKWDQNOH +ROGLQJWKHIURQWRUVLGHRIWKHEHQFKZLWK\RXUFKHVWDW WKHIURQWHGJHRIWKHEHQFK+ROGRQWRIURQWRUVLGHVRI EHQFKZLWKKDQGVDQGEHQG\RXUNQHHVVHH67$57 START hold front or sides of bench START %ULQJ\RXUIHHWXSVR\RXUNQHHVDUHEHQWGHJUHHV 7KHKHHOVVKRXOGEHGUDZQXSWRZDUGWKHKLSVDQGWKH toes are turned outward to initiate the propulsive phase. KICK 6WUDLJKWHQOHJVE\SXVKLQJKHHOVWRZDUGUHDUDQG VLPXODWLQJEUHDVWVWURNHNLFNLQJPRWLRQ 7KHKHHOVVKRXOGFRQWLQXHWREHWKHOHDGHUVDQGZLWK WKHKHHOVLQDSRVLWLRQRXWVLGHRIWKHNQHHVSURSXOVLRQ EHJLQV7KHKHHOVWDNHDQHOOLSWLFDOSDWKDVWKHOHJVDUH extended-pressure maintained on the bottom of the feet. FINISH 5HWXUQWRVWDUWSRVLWLRQE\ÀH[LQJNQHHVWRGHJUHHV $WIXOOH[WHQVLRQWKHKHHOVFRPHWRJHWKHUDQGWKH FRPSOHWLRQRIWKHNLFNRFFXUVDVWKHWRHVDUHH[WHQGHGWR PD[LPL]HWKHVWUHDPOLQHGSRVLWLRQ KICK FINISH NOTE::KHQGRLQJWKLVH[HUFLVH'2127WHWKHUWKH bench so that your legs extend beyond the rear stanchion WKHEHQFKVKRXOGEHIUHHPRYLQJ7KLVFRXOGH[WHQGWKHGULYHFRUG beyond its intended length and damage your Ergometer. TIPS ,ILWVHHPV³WRRHDV\´RSHQWKHGDPSHUGRRUWRDKLJKHUVHWWLQJ ,IWKHVHDWUROOVWRRIDUIRUZDUGDWWDFKDKDUGHUWHWKHUFRUG +DYHVRPHRQHZDWFK\RXWRKHOS\RXPDWFK\RXUERG\SRVLWLRQVWRWKRVHVKRZQRUVHWXSDPLUURURU YLGHRFDPHUDWRZDWFK\RXUVWURNH 8VHDVPRRWKDQGFRQWLQXRXVVWURNHWKURXJKRXWWKHVWURNH 44 Vasa Ergometer User’s Manual PART 3 - Technique & Form 07/01/11 SURF PADDLING ENTRY (the catch) 6WDUWWKHSXOOZLWK\RXUOHIWKDQGWKXPE¿UVWUHDFKLQJ IRUZDUGDQGODWHUDOO\RXWWR³FDWFK´WKHZDWHU 7RKHOSZLWKWKH³FDWFK´GURS\RXUOHIWVKRXOGHUVOLJKWO\ when reaching. MID-STROKE 2XWVZHHS3UHVVWKHKDQGODWHUDOO\WRWKHERG\ZLWKRQO\ VOLJKWHOERZÀH[LRQDQGEHJLQWRURWDWHWKHKDQGDWWKH wrist medially. ,QVZHHS3UHVVWKHKDQGWRZDUGVWKHKLSVWKURXJKIXUWKHU ÀH[LRQRIWKHHOERZDQGZULVW .HHS\RXUHOERZVLQDKLJKSRVLWLRQ,IWKHUHZHUHDQ H\HRQ\RXUHOERZLWZRXOGEHORRNLQJWRWKHVLGHLQD direction perpendicular to the monorail. FINISH :LWKWKHKDQGDWWKHKLSDQGSDOPIDFLQJWRZDUGVWKHIHHW SUHVVEDFNE\H[WHQGLQJWKHDUPWRDSSUR[LPDWHO\RI full extension. .HHS\RXUDUPLQOLQHZLWK\RXUERG\WRUHGXFHGUDJ )LQLVKVWURQJO\ZLWKD¿QDOSXVKRIWKHKDQG ENTRY (catch) MID-STROKE RECOVERY (OERZOHDGVZLWKKDQGUHOD[HGGLUHFWO\XQGHUWKHHOERZ WUDLOLQJ¿QJHUVWKHQUHDFKIRUZDUGVWRWKHHQWU\SRVLWLRQ TIPS <RXFDQDOVRGRWKLVH[HUFLVHLQDNQHHOLQJSRVLWLRQWR simulate paddleboarding, or the ready position to catch WKDWNLOOHUZDYH6HHQH[WSDJH ,ILWVHHPV³WRRHDV\´RSHQWKHGDPSHUGRRUWRDKLJKHU setting. ,IWKHVHDWUROOVWRRIDUIRUZDUGDWWDFKDKDUGHUWHWKHU cord. +DYHVRPHRQHZDWFK\RXWRKHOS\RXPDWFK\RXUERG\ positions to those shown, or set up a mirror or video FDPHUDWRZDWFK\RXUVWURNH 8VHDVPRRWKDQGFRQWLQXRXVVWURNHWKURXJKRXWWKH VWURNH <RXPD\FKRRVHD³IHHWXS´RU³IHHWGRZQ´SRVLWLRQ whichever is more comfortable. 07/01/11 Vasa Ergometer User’s Manual PART 3 - Technique & Form FINISH )((7'2:1 )((783 45 SURF PADDLING KNEELING (PADDLE BOARDING) CAUTION: 7KLVLVDQDGYDQFHGH[HUFLVH%HVXUHWRKRRN\RXULQVWHSRYHUWKHEHQFKDQGHQJDJH\RXU DEGRPLQDOVIRUVWDELOLW\6WDUWVORZO\XQWLO\RXIHHOFRPIRUWDEOHZLWKWKHPRWLRQDQG\RXUVWDELOLW\ ----- DOUBLE ARM ----- ----- SINGLE ARM ----- ENTRY (catch) ENTRY (catch) MID-STROKE MID-STROKE FINISH FINISH Vasa Ergometer User’s Manual PART 3 - Technique & Form 07/01/11 KAYAK PADDLING SET-UP ,QVWDOOWKHIRRWEUDFHDQGSRVLWLRQLWIRURSWLPDOIRUPDQGNQHHEHQGDVQRWHGRQSDJH,WZLOOEH easiest to change your seat position on the bench by setting the foot brace and then sliding your seat on the bench). &RQQHFWWKHND\DNSDGGOHHQGORRSVWRWKHGULYHFRUGVULJKWFRUGWRULJKWHQGRISDGGOHOHIWFRUGWR left end of paddle). +ROGWKHSDGGOHVKDIWZLWK\RXUKDQGVVOLJKWO\ZLGHUWKDQVKRXOGHUZLGWKDSDUW7KHDUPVZLOOPDLQWDLQ a nearly straight position throughout the paddle motion. 6LWRQWKHEHQFKDQGSRVLWLRQ\RXUIHHWVRWKH\DUHFRPIRUWDEOHRQWKH IRRWEUDFH7KHOHJVZLOOKDYHDVOLJKWEHQGDWWKHNQHH7KHVKRXOGHUV will be slightly ahead of the hips. CATCH 6WDUWE\URWDWLQJWKHWUXQNDQGVKRXOGHUVWREULQJWKHERWWRPDUPIRUZDUG DQGWKHXSSHUDUPWRFKLQOHYHOVHHSKRWRRQULJKW 7KHORZHUSDGGOHVLGHVKRXOG³FDWFK´DWWKHVDPHOHYHODVWKHIRRW CATCH MID-STROKE 7KHSDGGOLQJPRWLRQLVJHQHUDWHGE\WKHURWDWLRQRIWKHWRUVRDQG not solely by the pushing or pulling action of the arms. The arms will remain in a nearly straight position transferring power to the paddle as the body rotates. 7KHOHJRQWKHVDPHVLGHDVWKHVWURNHZLOOH[WHQGZKLOHWKHRIIVLGH OHJZLOOÀH[FUHDWLQJEHWWHUWRUVRURWDWLRQ FINISH 7KHSDGGOHVKRXOG³H[LWWKHZDWHU´ZKHQWKHKDQGUHDFKHVWKHKLS MID-STORKE TIPS ,IUHVLVWDQFHVHHPVWRROLJKWRSHQWKHGDPSHUGRRUWRDKLJKHUVHWWLQJ 8VHDVPRRWKDQGFRQWLQXRXVVWURNH 9DU\WHPSRIRUGLIIHUHQWWUDLQLQJHIIHFWV<RXFDQSUHVHWWKHVWURNH rate with the audible tempo beeper on the monitor as described in 3DUWRIWKH,QVWUXFWLRQ0DQXDO FINISH 07/01/11 Vasa Ergometer User’s Manual PART 3 - Technique & Form 47 CANOE PADDLING SET-UP ,QVWDOOWKHIRRWEUDFHDQGDGMXVWLWWRWKHFRUUHFWGLVWDQFHIRUWKHOHJV,WZLOOEHHDVLHVWWRFKDQJH your seat position on the bench by setting the foot brace and then sliding your seat on the bench). &RQQHFWWKHFDQRHSDGGOHHQGORRSWRWKHGULYHFRUGRQWKHVLGH\RXZLVKWRSDGGOH¿UVW *UDVSWKHWRSJULSZLWKWKHWRSKDQGDQGWKHORZHUVKDIWZLWKWKHRWKHUKDQG 6WUDGGOHWKHEHQFKWKHQVLWRQEHQFKIDFLQJIRUZDUG 6LWRQWKHEHQFKDQGSRVLWLRQ\RXUIHHWVRWKH\DUHFRPIRUWDEOHRQWKHIRRWEUDFH7KHOHJVZLOOKDYH DVOLJKWEHQGDWWKHNQHH7KHVKRXOGHUVZLOOEHVOLJKWO\DKHDGRIWKHKLSV CATCH 6WDUWE\URWDWLQJWKHWUXQNDQGVKRXOGHUVWREULQJWKHERWWRPDUPIRUward and the top arm either over the bottom hand or in the center of the ERG\%RWKDUPVVKRXOGUHPDLQQHDUO\VWUDLJKWWKURXJKRXWWKHVWURNH 7KHSDGGOHVKRXOG³FDWFK´DWWKHVDPHOHYHODVWKHIRRWDVVKRZQLQ photo to the right. CATCH MID-STROKE 7KHSDGGOLQJPRWLRQLVJHQHUDWHGE\WKHURWDWLRQRIWKHWRUVRDQGnot solely by the pulling action of the arms. The arms will remain in a nearly straight position transferring power to the paddle as the body rotates. 7KHIHHWZLOOEUDFHWKHERG\GXULQJURWDWLRQ FINISH 7KHSDGGOHVKRXOG³H[LWWKHZDWHU´ZKHQWKHORZHUKDQGUHDFKHVWKH mid-thigh or hip. MID-STORKE TIPS ,IUHVLVWDQFHVHHPVWRROLJKWRSHQWKHGDPSHUGRRUWRDKLJKHUVHWWLQJ 8VHDVPRRWKDQGFRQWLQXRXVVWURNH 9DU\WHPSRIRUGLIIHUHQWWUDLQLQJHIIHFWV SWITCHING SIDES - OPTION FINISH 1. ONE PADDLE SHAFT 'LVFRQQHFWWKHSDGGOHHQGORRSIURPWKHGULYHFRUGFOLS 5HFRQQHFWWKHSDGGOHHQGORRSWRWKHRWKHUGULYHFRUGFOLS 127(:HGRQRWUHFRPPHQG\RXSDGGOHRQWKHRSSRVLWHVLGHRIWKHGULYHFRUGFRQQHFWLRQ'RLQJVR will cause increased wear of the drive cord due to rubbing on the monorail and potentially the monitor. 2. TWO PADDLE SHAFTS &RQQHFWRQHSDGGOHWRHDFKRIWKHGULYHFRUGFOLSVRQHRQOHIWVLGHDQGRQHRQULJKWVLGH 5HVWWKHKDQGOHRIRQHSDGGOHLQWKHPLGGOHSRUWLRQRIWKHIRRWEUDFHDQGXVHWKHRWKHUSDGGOHWR VWDUW\RXUZRUNRXW 6ZLWFKSDGGOHVZKHQ\RXZDQWWRVZLWFKVLGHV Vasa Ergometer User’s Manual PART 3 - Technique & Form 07/01/11 NORDIC SINGLE POLING CAUTION: 7KLVLVDQDGYDQFHGH[HUFLVH%HVXUHWRKRRN\RXULQVWHSRYHUWKHEHQFKDQGHQJDJH\RXU DEGRPLQDOVIRUVWDELOLW\6WDUWVORZO\XQWLO\RXIHHOFRPIRUWDEOHZLWKWKHPRWLRQDQG\RXUVWDELOLW\ &RQQHFWWKHKDQGOHVWRWKHGULYHFRUG3XOOKDQGOHVWRHQJDJHGULYHFRUGDQGSODFHKDQGVRQIURQWRI EHQFK6WUDGGOHWKHEHQFKWKHQNQHHORQEHQFKIDFLQJIRUZDUG+RRNLQVWHSRYHUEDFNRIEHQFK 6WDUWZLWKRQHDUPH[WHQGHGLQIURQWDQGWKHRWKHUDUPH[WHQGHGWRWKHUHDUSDOPVIDFLQJLQDVLI holding pole grips. 6LPXODWHWKHVLQJOHSROLQJPRWLRQE\LQLWLDWLQJWKHSXOOZLWKWKHDEGRPHQ3XOORQHDUPEDFNZDUGDV DV\RXUHFRYHUZLWKWKHRWKHUDUPIRUZDUG.HHSDFRQVLVWHQWFDGHQFHWKURXJKRXWWKHPRWLRQIXOO\ H[WHQGLQJDUPVWRZDUGKLSVLQWKH),1,6+SRVLWLRQ START FINISH TIPS ,ILWVHHPV³WRRHDV\´RSHQWKHGDPSHUGRRUWRDKLJKHUVHWWLQJ ,IWKHVHDWUROOVWRRIDUIRUZDUGDWWDFKDKDUGHUWHWKHUFRUG 8VHDVPRRWKDQGFRQWLQXRXVVWURNH 9DU\WHPSRIRUGLIIHUHQWWUDLQLQJHIIHFWV 07/01/11 Vasa Ergometer User’s Manual PART 3 - Technique & Form 49 NORDIC DOUBLE POLING CAUTION: 7KLVLVDQDGYDQFHGH[HUFLVH%HVXUHWRKRRN\RXULQVWHSRYHUWKHEHQFKDQGHQJDJH\RXU DEGRPLQDOVIRUVWDELOLW\6WDUWVORZO\XQWLO\RXIHHOFRPIRUWDEOHZLWKWKHPRWLRQDQG\RXUVWDELOLW\ &RQQHFWWKHKDQGOHVWRWKHGULYHFRUG3XOOKDQGOHVWRHQJDJHGULYHFRUGDQGSODFHKDQGVRQIURQWRI EHQFK6WUDGGOHWKHEHQFKWKHQNQHHORQEHQFKIDFLQJIRUZDUG+RRNLQVWHSRYHUEDFNRIEHQFK 6WDUWZLWKDUPVH[WHQGHGLQIURQWKROGLQJKDQGOHVSDOPVIDFLQJLQ 6LPXODWHWKHSROLQJPRWLRQE\LQLWLDWLQJWKHSXOOZLWKWKHDEGRPHQ3XOOZLWKERWKDUPVDWWKHVDPH WLPHIXOO\H[WHQGLQJDUPVWRZDUGKLSV6ORZO\UHWXUQWRVWDUWLQJSRVLWLRQ START FINISH TIPS ,ILWVHHPV³WRRHDV\´RSHQWKHGDPSHUGRRUWRDKLJKHUVHWWLQJ ,IWKHVHDWUROOVWRRIDUIRUZDUGDWWDFKDKDUGHUWHWKHUFRUG 8VHDVPRRWKDQGFRQWLQXRXVVWURNH 9DU\WHPSRIRUGLIIHUHQWWUDLQLQJHIIHFWV 50 Vasa Ergometer User’s Manual PART 3 - Technique & Form 07/01/11 FUNCTIONAL TRAINING EXERCISES 7KHIROORZLQJLVDVDPSOLQJRIPDQ\RWKHUH[HUFLVHVSRVVLEOHWRGRRQWKH9DVD(UJRPHWHUIRU5HKDE (QGXUDQFHDQG&LUFXLW7UDLQLQJ6HHRXUZHEVLWHIRUIXOOOLVWLQJDQGXSGDWHV ASYMMETRIC EXTENSION (ADVANCED) START FINISH CAUTION: 7KLVLVDQDGYDQFHGH[HUFLVHWKDWUHTXLUHVDVWURQJFRUHDQGH[FHOOHQWEDODQFH6WDUW slowly until you feel comfortable with the motion and your stability. +ROGERWKKDQGOHVDQGNQHHORQWKHEHQFKIDFLQJIRUZDUG+RRNLQVWHSRYHUEDFNHGJHRIEHQFK for stability. 6WDUWZLWK\RXUDUPVH[WHQGHGLQIURQWVKRXOGHUZLGWKDSDUW.HHSEDFNVWUDLJKWDQGKLSVVWDEOH 6LPXOWDQHRXVO\UDLVHRQHDUPWRZDUGFHLOLQJZKLOHWKHRSSRVLWHDUPSXOOVVWUDLJKWGRZQDQGEDFN )XOO\H[WHQGERWKDUPV5HYHUVHWKHPRWLRQUDLVLQJWKHRSSRVLWHDUPVXSDQGEDFN '2)XOO\H[WHQGERWKDUPV.HHSDQXSULJKWSRVWXUHDQGKLSVVWDEOH '21¶7'RQRWWLJKWHQQHFNPXVFOHVRUDOORZKLSVWRPRYHIRUZDUGRUEDFNZDUG 7$5*(7('086&/(67ULFHSV'HOWRLGV6KRXOGHUV/DWLVVLPXV8SSHU%DFN&RUH6WDELOL]HUV CHEST PRESS - PUNCHING START FINISH +ROGERWKKDQGOHVIDFLQJEDFNZDUGVSXOORQKDQGOHWRHQJDJHGULYHFRUGDQGZDONWRWKHEHQFK 6WUDGGOHWKHEHQFKIDFLQJWKHEDFNRIWKH9DVD(UJRPHWHUWKHQVLWRQWKHEHQFKZLWK\RXUNQHHV bent 90 degrees. The bench should be fully supporting your upper legs. 6WDUWZLWKXSSHUDUPVDW\RXUVLGHDQGHOERZVEHQWGHJUHHVSDOPVIDFLQJGRZQ ([WHQG\RXUULJKWDUPRXWLQIURQWRI\RXUFKHVWXQWLO\RXUDUPLVIXOO\H[WHQGHGSXQFKLQJPRWLRQ $V\RXUHWXUQ\RXUULJKWDUPEDFNWRWKHVWDUWSRVLWLRQH[WHQG\RXUOHIWDUPRXW 5HSHDWWKLVVHTXHQFH '23DXVHEULHÀ\LQWKH),1,6+SRVLWLRQDQGÀH[ the pectorals for an extra contraction. '21¶7'RQRWWZLVWXSSHUERG\GXULQJWKHSUHVV0RYHPHQWVKRXOGEHIURPWKHSHFWRUDOV 7$5*(7('086&/(62XWHU3HFWRUDOV 07/01/11 Vasa Ergometer User’s Manual PART 3 - Technique & Form 51 CROSS CABLE REVERSE FLY START FINISH &URVVWKHFDEOHVE\WDNLQJWKHULJKWKDQGOHZLWKOHIWKDQGWKHOHIWKDQGOHZLWKULJKWKDQG +ROGKDQGOHVDV\RXVLWRQWKHEHQFKIDFLQJIRUZDUGZLWKNQHHVEHQWRYHUWKHIURQWRIWKHEHQFK 6WDUWZLWKDUPVIXOO\H[WHQGHGLQIURQWRI\RXZLWK\RXUSDOPVIDFLQJLQRUGRZQ ,QDVZHHSLQJPRWLRQSXOOWKHKDQGOHVRXWZDUGDQGEDFN 5HYHUVHPRWLRQWRUHWXUQWRVWDUWLQJSRVLWLRQ '2&RQWUDFWFRUHPXVFOHVDWDOOWLPHV)HHOVOLNH³SLQFKLQJ´VKRXOGHUEODGHVWRJHWKHU '21¶7'RQRWDUFKFXUYHEDFN 7$5*(7('086&/(65HDU'HOWRLGV5HDU6KRXOGHUV LEG EXTENSIONS START FINISH $WWDFKDQNOHVWUDSVDURXQG\RXUDQNOHV7DNLQJWKHGULYHFRUGFOLSVLQRSSRVLWHKDQGVOHIWFRUGLQ ULJKWKDQGULJKWFRUGLQOHIWKDQGVWUDGGOHWKHEHQFKIDFLQJWKHUHDU&OLSWKHGULYHFRUGVRQWRWKH DQNOHVWUDSVVRFRUGLVRQVDPHVLGHRIPRQRUDLO6LWRQWKHEHQFKZLWK\RXUOHJVEHQWRYHUWKHHQG of the bench. Grasp sides of bench for stability. ([WHQGRQHOHJXQWLOLWLVVWUDLJKW$V\RXEULQJRQHOHJEDFNWRVWDUWSRVLWLRQEULQJWKHRWKHUOHJ WRZDUGV¿QLVKSRVLWLRQVROHJVDUHFRQWLQXRXVO\PRYLQJ '2&RQWUDFWWKHTXDGULFHSVPXVFOHVZKHQWKHOHJVDUHIXOO\H[WHQGHG '21¶7'RQRWDOORZWKHNQHHWRJREH\RQGDGHJUHHDQJOH ZKHQLQWKHVWDUWSRVLWLRQ7KLVZLOOSXWH[FHVVLYHVWUHVVRQWKHNQHH 7$5*(7('086&/(64XDGULFHSV NOTE::KHQGRLQJWKLVH[HUFLVH'2127WHWKHUWKHEHQFKVRWKDW\RXUOHJVH[WHQGEH\RQGWKHUHDU VWDQFKLRQWKHEHQFKVKRXOGEHIUHHPRYLQJ7KLVFRXOGH[WHQGWKHGULYHFRUGEH\RQGLWVLQWHQGHG length and damage your Ergometer. Vasa Ergometer User’s Manual PART 3 - Technique & Form 07/01/11 PART 4 – SWIM TRAINING TIPS & WORKOUTS 4.1. EXAMPLE OF AN EXCELLENT HIGH ELBOW CATCH & PULLING PATH 7KHIROORZLQJDQDO\VLVZDVSURYLGHGE\+D\GQ:RROOH\RI)XWXUH'UHDPV6ZLPPLQJ ZZZIXWXUHGUHDPVFRQ]DQGE\&RDFK$O/\PDQRI3XUVXLW)LWQHVVZZZSXUVXLW¿WQHVVFRP HIGH ELBOW CATCH *UDQW+DFNHWW¶VVWURNHDWPHWHUVRIKLVPJROGPHGDOUDFHDWWKH3DQ3DFL¿F&KDPSLRQVKLSV )XNXRND-DSDQ 7. NOTES D7KHFDWFKLQWKLVH[DPSOHLV³OLWHUDOO\´D&$7&+7KHVZLPPHUKDV effectively trapped and held the point he has just reached out to - note that WKHUHLV12PRYHPHQWRIWKHKDQGEDFNZDUGV E(YHQWKRXJKWKHKDQGKDVQRWPRYHGEDFNZDUGVWKHERG\KDV continued to move forwards by the degree indicated by the arrow. 9. PULLING PATH *UDQW+DFNHWW¶VVWURNHDWPHWHUVRIKLVPVLOYHUPHGDOIUHHVW\OHUDFHDWWKH3HUWK:RUOG &KDPSLRQVKLSV NOTES D7KHPRVWLPSRUWDQWIHDWXUHRIWKLVSXOOLQJ³SDWK´LVWKDWLWGRHVQRW ³FURVV´WKHFHQWHUOLQHGUDZQGRZQWKHPLGGOHRIWKHVZLPPHUVERG\ That is, the right-arm will stay on the right hand side of this imaginary center line for the entire pull movement. E$QRWKHULPSRUWDQWIHDWXUHLVWKHLPPHGLDWHSUHVV³RXWZDUGV´WRLQLWLDWH WKH&DWFKSKDVHWKLVNHHSVWKHKDQGKROGLQJZDWHURQWKHRXWVLGHRIWKH line for the entire pull. 07/01/11 Vasa Ergometer User’s Manual PART 4 - Swim Training & Workouts 53 4.2 - DRILLS FOR IMPROVING SWIM TECHNIQUE 7KH9DVD(UJRPHWHUFDQKHOS\RXWREHWWHUVHHDQGFRUUHFWÀDZVLQ\RXUVWURNH+HUHDUHDIHZGULOOVWR KHOSVRPHFRPPRQSUREOHPVDQGZHDNQHVVHV GOAL: ELIMINATE CROSSOVER 3UREOHP+DQGFURVVHVWKHPLGOLQHRIWKHERG\DWWKHFDWFKSKDVHRIVWURNH7KLVPRWLRQZLOO create excessive strain on your shoulders and possible injury. It will also slow you down by the VLGHWRVLGH¿VKWDLODFWLRQ\RXFUHDWHZLWK\RXUERG\7KLVZLOOTXLFNO\LQFUHDVH\RXUGUDJLQWKH water. DRILL: WIDE CATCH 6WURNH 'LVWDQFH 'DPSHU $WWDFKPHQW 3DFH )UHHVW\OH PHWHUV[UHSHDWV /HYHO 3DGGOHV %HORZ5DFH3DFH 'HVFULSWLRQ8VLQJD³&DWFK8S´RU³6LQJOH$UP´VW\OHGULOOIRFXVRQPDNLQJZLGHH[DJJHUDWHG FDWFKHV&RQFHQWUDWHRQNHHSLQJ\RXUKDQGLQOLQHZLWK\RXUVKRXOGHUVDWWKHFDWFK3D\FORVH DWWHQWLRQWRPDNHVXUH\RXDUHQRWFURVVLQJWKHPLGOLQHRI\RXUERG\RUKLWWLQJWKHPRQRUDLO Once you have success at the slower pace, gradually increase your speed to normal race pace. 6ZLPZLWK\RXUKHDGGRZQLQDQHXWUDOVWUHDPOLQHGSRVLWLRQIXOO\H[WHQGHGIURP\RXUKDQGWR WRHV0RQLWRU\RXUKDQGSRVLWLRQE\ORRNLQJXSHYHU\IHZVWURNHV0DNHVXUH\RXUFDWFKHVDUH engaging above your shoulders. 2SWLRQDO7RROV$LGV 8VHDYLGHRFDPHUDWRVHH\RXUVWURNHSDWWHUQ6HWXSWKHFDPHUDVRLWLVHLWKHUDWWKHIURQW RUWKHEDFNRIWKH9DVD(UJRPHWHUVR\RXFDQEHVWVHH\RXUFDWFK /D\DORQJPLUURUXQGHUQHDWKWKH9DVD(UJRPHWHUVR\RXFDQPRQLWRU\RXUFDWFK $VNDFRDFKRUIULHQGWRFULWLTXH\RXUVWURNH $VVHVVPHQW 7LPHVLQWKHZDWHUVKRXOGEHLPSURYLQJGXHWRPRUHHI¿FLHQWVWURNHPHFKDQLFVDQGOHVVGUDJ 54 Vasa Ergometer User’s Manual PART 4 - Swim Training & Workouts 07/01/11 GOAL: CORRECT STRAIGHT-ARM PULL 3UREOHP,QWKHDWWHPSWWRLQFUHDVHVWURNHUDWHWKHKDQGHQWHUVWKHZDWHUWRRHDUO\ZKLFKFDQ cause the arm to go down instead of the preferred extension. This downward motion will create a straight-arm pull which will greatly reduce power output and increase drag. DRILL : CATCH-UP WITH FULL EXTENSION 6WURNH 'LVWDQFH 'DPSHU $WWDFKPHQW 3DFH )UHHVW\OH PHWHUV[UHSHDWV /HYHO 3DGGOHV %HORZ5DFH3DFH 'HVFULSWLRQ6WDUWE\H[WHQGLQJERWKKDQGVRXWLQIURQWRQHLWKHUVLGHRIWKHPRQRUDLO7DNH\RXU ¿UVWVWURNHZLWKRQHDUPDV\RXNHHS\RXURWKHUDUPLQDIXOO\H[WHQGHGSRVLWLRQ&RPSOHWHWKH VWURNHZLWKDIXOO¿QLVKDQGUHFRYHU\UHWXUQLQJWRWKHVWDUWLQJSRVLWLRQ7DNH\RXUQH[WVWURNH ZLWKWKHRWKHUDUPOHDYLQJWKH¿UVWDUPH[WHQGHGRXWLQIURQW5HSHDWWKLVVHTXHQFHIRFXVLQJRQ ORQJH[WHQVLRQVEDFNWRWKHVWDUWSRVLWLRQ 9DULDWLRQ 'RWKLVGULOOZKLOHURWDWLQJ\RXUKLSVZLWKHDFKVWURNH6HHQH[WSDJHIRUGHWDLOV 2SWLRQDO7RROV$LGV 8VHDYLGHRFDPHUDWRLGHQWLI\WKHOHQJWKRI\RXUVWURNH6HWXSWKHFDPHUDDWWKHVLGHRIWKH 9DVD(UJRPHWHUWRDQDO\]H\RXUUHDFK 3ODFHDSLHFHRIWDSHRQWKHUDLODVDWDUJHWWRUHDFKIXOOH[WHQVLRQ,I\RXSUHIHU\RXFDQWLH WKHEHQFKWRWKHUHDUVWDQFKLRQVRWKHEHQFKLVVWDWLRQDU\QRW³ÀRDWLQJ´RQWKHUDLO $VVHVVPHQW 7LPHVLQWKHZDWHUVKRXOGLPSURYHGXHWRDPRUHSRZHUIXOVWURNHZLWKOHVVHIIRUWUHTXLUHG 127(<RXFDQYLHZ\RXUDFWXDOVWURNHOHQJWKLQFHQWLPHWHUV)RUIXOOGHWDLOVRQVHWWLQJWKLVXSRQ WKH900RQLWRUJRWRWKH6WURNH0RGHGHVFULSWLRQLQ6HFWLRQRIWKLVPDQXDO 07/01/11 Vasa Ergometer User’s Manual PART 4 - Swim Training & Workouts 55 GOAL: IMPROVED HIP ROTATION 3UREOHP7KHVZLPPHUKDVSRRURUZHDNKLSURWDWLRQZKLFKFUHDWHVD³ÀDW´VZLP7KHFRUHPXVFOHV need to be activated to initiate the hip roll. DRILL: HIP DRIVE 6WURNH 'LVWDQFH 'DPSHU $WWDFKPHQW 3DFH DRIVE Right Hip down )UHHVW\OH PHWHUV[UHSHDWV /HYHO 3DGGOHVRU+DQGOHV %HORZ5DFH3DFH 'HVFULSWLRQ7KHVZLPPHUVLPXOWDQHRXVO\GULYHVWKHRSSRVLWHKLS LQWRWKHSDGGHGEHQFKMXVWDWWKHFDWFK7KLVZRQ¶WJLYH\RXWKH complete hip roll, but it will activate the same muscles in the core used to initiate the hip roll, which transfers energy and force into the VWURNLQJDUP,WFDQDOVRKHOSZLWKWLPLQJDQGJHWWLQJDVHQVHRIJOLGH EHWZHHQVWURNHV HIGH ELBOW CATCH Left Side 127(DOOIUHHVW\OHVZLPWUDLQLQJRQWKH(UJRPHWHULGHDOO\ZRXOGEHGRQHWKLVZD\WRPD[LPL]HWKH FRQGLWLRQLQJDQGQHXURPXVFXODUEHQH¿WV 2SWLRQDO7RROV$LGV 7RGHFUHDVHVWDELOL]DWLRQOD\RQDUROOHGXSPDWRUWRZHOSODFHGOHQJWKZLVHRQWRSRIWKH9DVD SDGGHGEHQFK7KLVGHVWDELOL]DWLRQZLOOFUHDWHDQHYHQJUHDWHUGHPDQGIRUDFWLYDWLRQRIFRUH muscles. $GYDQFHGVZLPPHUVWU\LWHPVVXFKDVDORQJ$HURPDWSDGRUDIRDPKDOIURXQGSDGVKRZQ below. $VVHVVPHQW Typically, the energy cost for the Freestyle will increase when hip roll is initiated. Times will improve GXHWRDORQJHUPRUHSRZHUIXOVWURNHZLWKGHFUHDVHGGUDJ Rolled up Mat (or towel) AeroMat Foam Half-Round <RXFDQSXUFKDVHWKH$HURPDWEHDPVIRDPKDOIURXQGVDQG¿WQHVVPDWVDWPRVWRQOLQH¿WQHVVVXSSO\VWRUHV 2U\RXFDQVWDUWE\XVLQJDUROOHGXSEDWKWRZHOIURP\RXUOLQHQFORVHW Vasa Ergometer User’s Manual PART 4 - Swim Training & Workouts 07/01/11 GOAL: IMPROVE ON YOUR HIGH ELBOW CATCH 3UREOHP7KHHOERZVGURSGXULQJWKHFDWFKWKHUHE\JUHDWO\UHGXFLQJ³SXOOLQJ´SRZHUDQGLQFUHDVLQJ drag. DRILL: FOREARM PULL 6WURNH 'LVWDQFH 'DPSHU $WWDFKPHQW 3DFH )UHHVW\OHRU%XWWHUÀ\ PHWHUV5HSHDWGULOOXSWRWLPHV /HYHO +DQGOHV %HORZ5DFH3DFH 'HVFULSWLRQ.HHS\RXUKHDGGRZQLQDQHXWUDOSRVLWLRQZKLOHPDNLQJ\RXUERG\ORQJKHDGWR WRHWKURXJKRXWWKHGULOO$IWHU\RXPDNH\RXUFDWFKIRFXVRQLQLWLDWLQJWKHSXOOZLWK\RXUIRUHDUP%HVXUHWRNHHS\RXUelbow highDVLI\RXUDUPQHHGVWR¿WDURXQGDEDUUHORUWKHUHDUH H\HVRQ\RXUHOERZVORRNLQJRXWWRWKHVLGHVSHUSHQGLFXODUWRWKHPRQRUDLO)LQLVKDOOWKHZD\WR \RXUKLSVZLWK\RXU¿QJHUVSRLQWHGGRZQ $IWHU\RXIHHO\RXKDYHSHUIRUPHGWKLVZLWKSUR¿FLHQF\JUDGXDOO\EXLOG\RXUVSHHGXSWRUDFH pace continuing to focus on the high elbow catch. 2SWLRQDO7RROV$LGV 8VHDYLGHRFDPHUDWRVHH\RXUHOERZSRVLWLRQ6HWXSWKHFDPHUDDWWKHEDFNRIWKH9DVD Ergometer so you can see if your elbows are dropping. 3ODFHDQREMHFWOLNHDODUJHSK\VLREDOORUODUJHER[XQGHUWKHPRQRUDLOWRSURYLGHDYLVXDO and physical barrier. The object should provide enough clearance for a proper, high elbow catch & pull, however not so much room it allows for a straight arm pull. The largest box your (UJRPHWHUZDVVKLSSHGLQPD\ZRUNZHOOGHSHQGLQJRQ\RXUVL]HDQGUHDFK $VVHVVPHQW 7LPHVLQWKHZDWHUVKRXOGLPSURYHGXHWRDPRUHHI¿FLHQWVWURNHZLWKDPRUHSRZHUIXOSXOO 07/01/11 Vasa Ergometer User’s Manual PART 4 - Swim Training & Workouts 57 GOAL: RECOVERY STROKE 3UREOHP7KHUHFRYHU\VWURNHEUHDNVGRZQWKXVFUHDWLQJDVKRUWHUDQGZHDNHUVWURNH DRILL: RECOVERY 6WURNH 'LVWDQFH 'DPSHU $WWDFKPHQW 3DFH )UHHVW\OHRU%XWWHUÀ\ VWURNHVVHWV /HYHOIRU(QGXUDQFH/HYHOIRU6WUHQJWK 3DGGOHVRU+DQGOHV %HORZRU(TXDOWR5DFH3DFH 'HVFULSWLRQ/LHRQWKHEHQFKIDFLQJEDFNZDUGVWRZRUN RQWKH³UHFRYHU\´SRUWLRQRIWKHVWURNH5HSOLFDWHDIUHHVW\OHRUDEXWWHUÀ\UHFRYHU\ 2SWLRQDO7RROV$LGV 8VHDYLGHRFDPHUDWRVHH\RXUVWURNHSDWWHUQ6HW XSWKHFDPHUDVRLWLVHLWKHUDWWKHIURQWRUWKHEDFNRI the Vasa Ergometer so you can best see your form. /D\DORQJPLUURUXQGHUQHDWKWKH9DVD(UJRPHWHUVR you can monitor your form. $VVHVVPHQW7LPHVLQWKHZDWHUVKRXOGLPSURYHGXHWRLQcreased shoulder strength & endurance. Vasa Ergometer User’s Manual PART 4 - Swim Training & Workouts 07/01/11 4.3 - STROKE RATES OF OLYMPIC SWIMMERS 7KLVFKDUWUHSUHVHQWVWKHVWURNHUDWHV65RIWRS VZLPPHUVLQYDULRXVVWURNHV 4.4 - TRAINING VIDEOS +HUHDUHVRPHRIWKHWUDLQLQJDQGZRUNRXWYLGHRV available. To view all available videos, visit www.vasatrainer.com. FREESTYLE BACKSTROKE BREASTSTROKE BUTTERFLY MEN WOMEN Better Technique + More Power = Faster Swimming: /HDUQKRZWRLQWHJUDWH WUDLQLQJZLWKWKH9DVD(UJRPHWHUWRDFKLHYHGUDPDWLFLPSURYHPHQWVLQVWURNHWHFKQLTXH VXVWDLQHGVWURNHSRZHUVSHHGDQGVWDPLQD±VR\RXFDQVZLPIDVWHUWKDQHYHUEHIRUH 3UHVHQWHGE\VZLPPLQJ&RDFK.DUO\Q3LSHV1HLOVHQDORQJZLWK7ULDWKORQFRDFKHV7LP &URZOH\DQG$O/\PDQ3DUW'9'%7 Go Swim Freestyle DVD with Karlyn Pipes-Neilsen: .DUO\QVKDUHVKHUVL[IUHHstyle focus points for every level of swimmer -- novice to elite. The extraordinary swimPLQJIRRWDJHRI.DUO\QFRPELQHGZLWKFOHDUVWHSE\VWHSLQVWUXFWLRQZLOOKHOSWDNH\RXU IUHHVW\OHWRWKHQH[WOHYHO6SHFLDOODPLQDWHG6WURNH*XLGHKHOSV\RXUHPHPEHUHDFKIRFDO SRLQW%RQXVVHFWLRQLQFOXGHVVWDUWVEUHDNRXWVÀLSWXUQVRSHQZDWHUVLJKWLQJLQV DQGRXWVXVLQJ¿QVIRUWUDLQLQJEUHDWKLQJWHFKQLTXHVDUPUHFRYHU\VORZPRWLRQ footage. 3DUW.31'9' Go Swim Open Water Swimming with Fran Crippen: ,Q*R6ZLP2SHQ:DWHU WLPH86$QDWLRQDOFKDPSLRQDQG:RUOG&KDPSLRQVKLSPHGDOLVW)UDQ&ULSSHQVKDUHVKLV NH\WHFKQLTXH³VHFUHWV´IRUIDVWIUHHVW\OHDQGH[SODLQVKRZWRPDVWHUWKHVNLOOV\RXQHHG when swimming in open water. 3DUW)&'9' SWIMerVAL: 1.0 Freestyle Mania: )HDWXUHVWZR9DVD(UJRPHWHUZRUNRXWVWKDWWUDLQ different energy systems. All competitive swimmers need to develop their anaerobic HQHUJ\V\VWHPVWUHQJWKDQGWHPSRDQGWKHLU$73&3V\VWHPH[SORVLYHSRZHUVSHHG DQGWKDW¶VZKDW6ZLPHUYDOVZRUNRXWVDQGGRUHVSHFWLYHO\7UDLQLQJZLWKDFRDFK¶V instruction and seeing others train along with you tends to be much more motivating than VLPSO\WUDLQLQJRQ\RXURZQ3DUW6:,0(59$/ 07/01/11 Vasa Ergometer User’s Manual PART 4 - Swim Training & Workouts 59 4.5 - COACH RICHARD SHOULBERG’S VASA ERGOMETER WORKOUT &RDFK5LFKDUG6KRXOEHUJLVWKHKHDGFRDFKDW*HUPDQWRZQ$FDGHP\D IRUPHU861DWLRQDO:RPHQ¶V&RDFKDQG2O\PSLF&RDFK ³:KHQHYHU\RXLPSURYHVWUHQJWKLQDQDWKOHWHWKHSRLQWRIWKH9$6$ LWWUDQVIHUVWRVWURNHWHFKQLTXH9DVDHTXLSPHQWFDQSURYLGHDVWUHQJWK LQFUHDVHWKDWWKHZDWHUFDQQRW7KLVWUDQVIHUVWRVWURNHSRZHUDQGHQGXUDQFH:HXVHWKH9DVD(UJRPHWHUGD\VDZHHNIRUPLQXWHV7KLV depends on the individuals, their events and prime events for us to GHWHUPLQHWKHLUZRUNRXWV³ VASA ERGOMETER WORKOUT ³(DFKRIP\VZLPPHUVUHFRUGVKLVRUKHULQIRUPDWLRQIURPHYHU\ZRUNRXWRQWKH9DVD(UJRPHWHU 8VH9DVD7UDLQLQJ/RJLQ3DUWRIWKH8VHU¶V0DQXDORUFUHDWH\RXURZQ´ MONDAY: :DUPXS :RUNRXW &RROGRZQ MULTI STROKE 6ZLPPLQXWHVRIHDFKVWURNHLQ,0RUGHU 6ZLPPLQXWHVRIHDFKVWURNHLQ,0RUGHU1RUHVWEHWZHHQVWURNHV6ZLPIRUPLQXWHV 5HFRUGWRWDOPHWHUVDQGDYHUDJHZDWWVWRFRPSDUHWRQH[WZRUNRXW (DV\6ZLPIRUPLQXWHVWREULQJGRZQKHDUWUDWH6WUHWFKDIWHU WEDNESDAY: :DUPXS :RUNRXW &RROGRZQ 2 MINUTE INTERVALS 6ZLPPLQXWHVRIGHVLUHGVWURNH 6ZLPGHVLUHGVWURNHIRUPLQXWHVDWUDFHLQWHQVLW\5HVWIRUPLQXWHDFWLYHUHVWHDV\VZLP PLQJ5HSHDWXSWRVHWV5HFRUGWRWDOPHWHUVDYHUDJHZDWWVWRFRPSDUHWRQH[WZRUNRXW (DV\6ZLPIRUPLQXWHVWREULQJGRZQKHDUWUDWH6WUHWFKDIWHU FRIDAY: :DUPXS :RUNRXW &RROGRZQ POWER INTERVALS - ALTERNATING SWIMMING AND LEG DRILLS 'RDPLQXWHELNHRUUXQIROORZHGLPPHGLDWHO\E\DPLQXWHVVZLPRIGHVLUHGVWURNH 6ZLPGHVLUHGVWURNHIRUPLQXWHDOORXWHIIRUW6ZLWFKWR/HJGULOOVHHEHORZIRUPLQXWHV 5HSHDWXSWRVHWV5HFRUGWRWDOPHWHUVDYHUDJHZDWWVWRFRPSDUHWRQH[WZRUNRXW (DV\6ZLPIRUPLQXWHVWREULQJGRZQKHDUWUDWH6WUHWFKDIWHU /HJGULOOH[DPSOHV/HJH[WHQVLRQVRQWKH9DVD(UJRPHWHU %UHDVWVWURNHNLFNRQWKH9DVD(UJRPHWHU 3O\RPHWULF3XVK2IIVRQ9DVD7UDLQHU 6WDWLRQDU\%LNH 6WHS8SV6WHSSLQJXSDQGGRZQRQDVWDEOHEHQFKRUEORFN OTHER EXERCISES &RQWLQXRXV6ZLP³,KDYHP\DWKOHWHVVZLPRQWKH9DVD(UJRPHWHUDOORXWIRUPLQXWHVWRJHW WKHLUKHDUWUDWHXS7KH\FDQXVXDOO\JHWWKHLUKHDUWUDWHXSWRDERXW%30´ 5HFRYHU\'ULOO³,XVHWKH9DVD(UJRPHWHUWRIRFXVRQWKH UHFRYHU\PXVFOHJURXSV,¶YHIRXQGWKDWLIWKHUHFRYHU\LV ZHDNWKHZKROHVWURNHWHQGVWREHZHDN´ Vasa Ergometer User’s Manual PART 4 - Swim Training & Workouts 07/01/11 4.6 - VASA ERGOMETER WORKOUTS 7KLVVHFWLRQKDVH[DPSOHVRIGLIIHUHQWW\SHVRIZRUNRXWVWKDWFDQEHSHUIRUPHGRQWKH9DVD(UJRPHWHU 8VHWKHEXLOWLQIHDWXUHVRIWKHPRQLWRUWRKHOSPRQLWRU\RXUWUDLQLQJSURJUHVV<RXFDQXVHDQ\RIWKHVH ZRUNRXWVDQGDGMXVWWKHPDFFRUGLQJWR\RXUJRDOGLVWDQFH 5(0(0%(57KH9DVD(UJRPHWHUZLOOWDNHVRPHWLPHWRJHWDGMXVWHGWR,WLVDQH[FHOOHQWWRRODQGZLOO LPSURYH\RXUSHUIRUPDQFHEXWLWLVLPSRUWDQWWRUHPHPEHUWKHLULVDQDGMXVWPHQWSHULRG8VHWKHWLSV below to increase the rate of your success. KEY TO SUCCESS FOR FIRST WORKOUTS 1. 6HWGDPSHUGRRUWRFORVHG 3ODQWRXVHVDPHWHPSRRUVWURNHUDWHDVHDV\VZLPPLQJIRU¿UVWZHHNV 3. Always remember that techniqueLVNH\)RFXVRQDFKLHYLQJD+LJK(OERZ&DWFKRU(DUO\9HUWLFDO )RUHDUP(9)DQGGRQRWDSSO\PXFKSUHVVXUHRQWKHSDGGOHVXQWLO\RXUIRUHDUPLVQHDUYHUWLFDO RUSHUSHQGLFXODUWRPRQRUDLO7KHQDSSO\SUHVVXUHXQWLODUPLVIXOO\H[WHQGHGWRKLS 4. /HW\RXUKDQG³H[LWWKHZDWHU´LQDQHXWUDOSRVLWLRQ'RQRW³ÀLFN´\RXUZULVWDWHQGRIVWURNH +,*+(/%2:&$7&+($5/<9(57,&$/)25($507,36,PDJLQH\RXDUHSDGGOLQJDVXUIERDUGZLWKWKH UDLOVRIWKHVXUIERDUGIRUFLQJ\RXWRVWURNHVRWKHFUHDVHVRQWKHLQVLGHVRIWKHHOERZVSDVVWKHRXWVLGHRI the surfboard rails without touching the rails. If you imagine your elbow as an eyeball, then be sure that H\HEDOOLVORRNLQJRXWSHUSHQGLFXODUWRWKHPRQRUDLODOOWKHWLPH7KLVVHWVWKHDUPLQWRDKLJKHOERZRU EVF position. +,3'5,9(2QFHWKHDERYHLVEXLOWLQWKHPXVFOHPHPRU\\RXFDQDGGWKHHOHPHQWRIKLSGULYH7KLV is done by to driving your opposite hip into the padded bench when you apply pressure to paddles with HDFKVWURNH:KHQ\RXH[WHQGIRUZDUGZLWKULJKWDUPVHWWKDWDUPLQWR(9)WKHQDV\RXDSSO\SUHVVXUH to paddle you drive left hip bone into bench at same time, thus transferring core muscle energy into the hand and arm. Suggestions for athletes and coaches using the Vasa Ergometer: Improving stroke technique:8VHDORQJPLUURURQWKHÀRRURURQWKHVLGHVR\RXFDQZDWFK \RXUIRUPIRFXVLQJRQDKLJKHOERZSXOODQGUHFRYHU\&DSWXULQJ\RXU(UJZRUNRXWRQYLGHR IURQWVLGHFDQDOVRSURYLGHH[FHOOHQWIHHGEDFN Endurance: Do longer sustained sets of 15 minutes and longer swimming at a power output DURXQGRI\RXUµVHFPD[SRZHU¶ Anaerobic power & speed: Do shorter efforts, 5-15 seconds in duration, between 95-100% of \RXUPD[LPDOHIIRUWVZLWKDOPRVWIXOOUHFRYHU\PLQXWHV Motivation: 0L[XS\RXUZRUNRXWVDQGGRLQJDOWHUQDWLYHVWURNHVLQDGGLWLRQWRIUHHVW\OHOLNH EXWWHUÀ\EUHDVWVWURNHDQGUHFRYHU\VWURNHV 07/01/11 Vasa Ergometer User’s Manual PART 4 - Swim Training & Workouts ANAEROBIC POWER INTERVALS 6HWGLVWDQFHLQWHUYDOVDWDQLQWHQVLW\RUDSDFHMXVWEHORZ\RXUUDFHSDFHZLWKDPLQXWHHDV\VZLP RUUHVWEHWZHHQVHWV8VHWKHVWURNHRI\RXUFKRLFH7ULDWKOHWHVXVHIUHHVW\OH,0VZLPPHUVFDQ YDU\VWURNHVZLWKHDFKVHW :$5083 10-15 minutes of freestyle :25.287 6SULQWVZLP[0MXVWEHORZUDFHSDFH5HVWIRUPLQXWHEHWZHHQVHWV 0LGGOHVZLP[0MXVWEHORZUDFHSDFH5HVWIRUPLQXWHEHWZHHQVHWV 'LVWDQFHVZLP[0MXVWEHORZUDFHSDFH5HVWIRUPLQXWHEHWZHHQVHWV &22/'2:1 Easy swim for 5-15 minutes followed by stretching. TIME TRIAL AT RACE INTENSITY 6ZLPDVHWGLVWDQFHZKLOH\RXPDLQWDLQDVSHFL¿FWDUJHWSDFHRULQWHQVLW\5HFRUGDQGORJ\RXUWLPH WRHYDOXDWHLPSURYHPHQW127(<RXFDQXVHWKH³$XGLEOH6WURNH5DWH7HPSR%HHSHU´WRKHOSVZLP DW\RXUGHVLUHGVWURNHUDWH'HWDLOVRQVHWWLQJWKH$XGLEOH7HPSR%HHSHUJRWR6HFWLRQRQ90 monitor operation. :$5083 10-15 minutes of freestyle :25.287 6SULQWVZLP0DWUDFHSDFH5HFRYHUZLWKHDV\VZLPIRUPLQXWHV 5HSHDWWLPHV 0LGGOHVZLP0DWUDFHSDFH5HFRYHUZLWKHDV\VZLPIRUPLQXWHV 5HSHDWWLPH 'LVWDQFHVZLP00DWUDFHSDFH &22/'2:1(DV\VZLPRIFKRLFHVWURNHIRUPLQXWHVIROORZHGE\VWUHWFKLQJ 127(7275,$7+/(7(623(1:$7(56:,00(56FKRRVHDWLPHWULDOGLVWDQFHWKDWLVDSSURSULDWH for your current training phase & relative to your race distance. INCREASE STAMINA (AEROBIC ENDURANCE) 6ZLPDWDQLQWHQVLW\RIIRUDORQJHUGXUDWLRQ :$5083 10-15 minutes of freestyle :25.287 6ZLPIRUPLQXWHVDWDVWHDG\SDFH 6WULYHWRPDLQWDLQDFRQVWDQWSRZHURXWSXWZDWWV &22/'2:1(DV\VZLPRIFKRLFHVWURNHIRUPLQXWHVIROORZHGE\VWUHWFKLQJ ASCENDING OR DESCENDING TIMED INTERVAL WORKOUT 6ZLPDVHWRILQWHUYDOVLQFUHDVLQJWKHZRUNGXUDWLRQIRUHDFKLQWHUYDO8VH³5DFH3DFH´LQWHQVLW\DSSURSULDWHIRU\RXUFXUUHQWWUDLQLQJSKDVHDQG¿WQHVVOHYHO :$5083 10 - 15 minutes of freestyle :25.287 6ZLPPLQUHVWPLQ 6ZLPPLQUHVWPLQ 6ZLPPLQUHVWPLQ 6ZLPPLQUHVWPLQ 6ZLPPLQUHVWRUHDV\VZLPIRUPLQXWHV 'HVFHQGWKLVVHULHVGHSHQGLQJRQ\RXU¿WQHVVOHYHOUDFHGLVWDQFHJRDOV <RXPD\UHSHDWWKLVDVFHQGGHVFHQGVHULHVWLPHV &22/'2:1(DV\VZLPRIFKRLFHVWURNHIRUPLQXWHVIROORZHGE\VWUHWFKLQJ Vasa Ergometer User’s Manual PART 4 - Swim Training & Workouts 07/01/11 SPEED WORKOUT FOR FREESTYLE 6ZLPDVHWRILQWHUYDOVLQFUHDVLQJWKHZRUNGXUDWLRQIRUHDFKLQWHUYDO 127(7275,$7+/(7(6YDU\VWURNHUDWHVWRVLPXODWHWHPSRVXVHGDWUDFHSDFHVWDUWVXUJHVDQG steady state. :$5083 :25.287 10-15 minutes of freestyle PHWHUVDERYHUDFHSDFHPLQXWHUHVW PHWHUVDWUDFHSDFHVHFRQGVUHVW PHWHUVEHORZUDFHSDFHPLQXWHUHVW PHWHUVDERYHUDFHSDFHPLQXWHUHVW [PHWHUVDWUDFHSDFHVHFRQGVUHVW 100 meters - below race pace. If feeling good... %21866(76ZLPDQRWKHU[PHWHUVDERYHUDFHSDFHVHFUHVW &22/'2:1(DV\VZLPRIFKRLFHVWURNHIRUPLQXWHVIROORZHGE\VWUHWFKLQJ MINI INDOOR TRIATHLON 8VLQJ\RXU9DVD(UJRPHWHULQGRRUELNHWUDLQHUDQGWUHDGPLOO\RXFDQNHHS\RXUZRUNRXWVIXQ PRWLYDWLRQDODQGHIIHFWLYH7KLVDOVRVHUYHVDVDJUHDWZD\WRSUDFWLFHWUDQVLWLRQ77<RX¶OO EHFRPHDFFXVWRPWRWKHIHHOLQJRIJRLQJIURPVZLPWRELNHDQGELNHWRUXQDVZHOODVLPSURYLQJ RQWUDQVLWLRQWLPHV+HUH¶VDPLQLWULDWKORQZRUNRXWWRJHW\RXVWDUWHG.HHSDORJWRPRQLWRU\RXU SURJUHVV+DYHIXQ :$5083 6:,0PLQXWHVDWDQHDV\VWHDG\SDFH RIPD[7UDQVLWLRQLPPHGLDWHO\WRELNH %,.(PLQXWHVDWDQHDV\VWHDG\SDFH RIPD[USPV7UDQVLWLRQLPPHGLDWHO\WRUXQ 581PLQXWHVDWDQHDV\VWHDG\SDFH RIPD[ :25.287 6:,0PLQXWHVRIPD[IRUPLQRQPLQUHVW WUDQVLWLRQTXLFNO\WRELNH %,.(PLQXWHVRIPD[IRUPLQRQPLQUHVW WUDQVLWLRQTXLFNO\WRUXQ 581PLQXWHVRIPD[IRUPLQRQPLQUHVW &22/'2:1*HQWOHFRROGRZQRIVZLPELNHRUUXQIRUPLQXWHVWRORZHU\RXUKHDUWUDWH 07/01/11 Vasa Ergometer User’s Manual PART 4 - Swim Training & Workouts 4.7 - TESTING PROTCOLS & WORKOUTS FOR TRIATHLETES 6HFWLRQ³7HVWLQJSURWRFROVDQGZRUNRXWVIRU7ULDWKOHWHV´ZDVZULWWHQE\WULDWKORQFRDFK$O/\PDQ &6&6RI3XUVXLW)LWQHVV&RDFK$OLVFHUWL¿HGE\86$7ULDWKORQ86$&\FOLQJDQGWKH1DWLRQDO6WUHQJWK DQG&RQGLWLRQLQJ$VVRFLDWLRQDQGLVDPHPEHURIWKH$PHULFDQ6ZLP&RDFKHV$VVRFLDWLRQ)RUPRUH LQIRUPDWLRQJRWRZZZFRDFKDOFRP INDIVIDUALIZED BASELINE TESTING IRU,QWHUPHGLDWH$GYDQFHG6ZLPPHUV 7KHSXUSRVHRIEDVHOLQHWHVWLQJERWKVWHDG\VWDWHDQGWLPHWULDOLVWRHVWDEOLVKDOHYHOIRUEHVWDYHUDJH SDFHSRZHUVWURNHUDWHDQGHIIRUW53(WKDW\RXIHHOUHSUHVHQWV\RXUFXUUHQW¿WQHVVOHYHO2QFH\RX NQRZZKHUH\RXDUH\RXWKHQKDYHDQLGHDRIZKHUH\RXDUHJRLQJ 1K “STEADY STATE” 1K TIME TRIAL 'RQHDWSUHIHUUHGSRZHUSDFHVWURNHUDWH65 $SSUR[RIPD[RUDERXWKDOI,0LQWHQVLW\ $YRLGVFRPSURPLVLQJWHFKQLTXHIRUPRUHSRZHU 0D[LPXPHIIRUW %HVWSRZHUSDFHIRUWKHGXUDWLRQ 3UHIHUUHG65 8VHEHVWWHFKQLTXHWKURXJKRXW $OZD\VZDUPXSSULRUWRDZRUNRXWRUDEDVHOLQHWHVW([DPSOHZDUPXSVZLPPDWDGRRU OHYHORI6WDUWHDVLO\DQGJHQWO\7KHQPRYHWRDGRRUVHWWLQJRIDQGGR [PEXLOGLQJZHDFKHDFKPIDVWHUWKDQWKHSUHYLRXV#´QRQDFWLYHUHFRYHU\WKHQ PHDV\WKHQ [PEXLOGLQJZHDFK#´QRQDFWLYHUHFRYHU\ 5HVWIRUDSSUR[PLQWKHQZKHQ\RXDUHUHDG\EHJLQWKH7(67 1RWH/RRNLQJIRUDPHWHUVRIVWUDLJKWHIIRUWDWWKHVDPHGRRUOHYHORIRUZKDW<28IHHOLV WKHPRVWOLNH³UHDO´RSHQZDWHUVZLPPLQJLQDYHUDJHFRQGLWLRQV SAMPLE PROGRESSIONS - NOVICE 7KHSULPDU\JRDORIHDUO\GHYHORSPHQWDOVHVVLRQVIRUQRYLFHVLVWRSUDFWLFHJRRGIRUPEXLOGVSHFL¿F swimming coordination and low levels of functional strength in gradually increasing durations. 7KHKLJKHVWSULRULW\LVWRIRFXV),567RQexcellent formLQDOOPRYHPHQWV.HHSDOOHIIRUWVHDV\WRVWHDG\ DQGFRPSOHWHO\DHURELFZLWKGDPSHUGRRUDWOHYHO:LWKLPSURYHGVWUHQJWKDQGFRRUGLQDWLRQ\RXPD\ vary and/or slightly increase intensity and resistance and continue the gradual progression of reps and sets as outlined in the examples. )RUH[DPSOH:RUNRXWEHORZLQGLFDWHV[DWVHFRQGVRIQRQDFWLYHUHVWQDU7KHQH[W VWHSLQWKHSURJUHVVLRQZRXOGEHWR 1. shorten the recovery portion from 30” to 10-15”, or LQFUHDVHWKHGLVWDQFHRIWKHUHSHWLWLRQVWRZLWKWKHVDPHQRQDFWLYHUHFRYHU\ %HVXUHWRFKDOOHQJH\RXUVHOIEXWEHSDWLHQWDQGnever let form deteriorate in exchange for either GLVWDQFHRULQWHQVLW\ $OOEHORZLQFOXGHDVHFRQGQRQDFWLYHUHFRYHU\QDUEHWZHHQHDFKVHW 'ULOOVDQG)XQFWLRQDOVWUHQJWK5&ZRUNDUHLQDGGLWLRQWRWKHZRUNRXWVEHORZ [#´QDUUHSHDW7RWDOP [#´QDUUHSHDW7RWDOP [#´QDUUHSHDW7RWDOP [#´QDUUHSHDW7RWDOP [#´QDUUHSHDW7RWDOP [#´QDUUHSHDW7RWDOP [#´QDUUHSHDW7RWDOP [#´QDUUHSHDW7RWDOP [#´QDUUHSHDW7RWDOP [#´QDUUHSHDW7RWDOP Vasa Ergometer User’s Manual PART 4 - Swim Training & Workouts 07/01/11 SAMPLE SESSIONS - EXPERIENCED GENERAL NOTES: 8VXDOO\XSWRNUDUHO\DERYH±RQDYHUDJHN 7DUJHWIRUPRVWTXDOLW\VHVVLRQVSHUZHHNGXULQJEXLOG )UHTXHQWO\XVHPDVSUHOXGHWRELNHUXQVHVVLRQV /RQJLQGRRUELNHGD\VURWDWH9$6$DQGELNHWUDLQHU ,QFRUSRUDWH5RWDU&XIIVKRXOGHUVIXQFWLRQDOVWUHQJWKH[HUFLVHVSJ $VELNHUXQWDSHULQFUHDVH9$6$IUHTXHQF\YROXPHLQFUHDVH 0LUURUYLGHRWDSHZDWFKDQGHQVXUHSHUIHFWHOERZSRVLWLRQ ,QFRUSRUDWHVOLJKW+,3UROOURWDWLRQWLPHGZLWKVKRXOGHUURWDWLRQ TECHNIQUE / MUSCULAR CUES: :KHUHLVWLJKWQHVVRUVRUHQHVV" ,I7ULFHSVLQQHUHOERZGHHSVKRXOGHUV GURSSLQJWKHHOERZ ,I8SSHU3HFV/DWV8SSHU$EV proper technique on! COACH LYMAN WORKOUT #1 :$5083 PHDV\GRRUDW65 ZDWWV 0$,16(7 [PKROGLQJ\RXU77WHVWZDWWVSDFH $OWGRRUVHWWLQJVWKLVZD\± 6ZLPD9(5<($6<GRRUUHFRYHU\IRUPEHWZHHQHDFKUHS +ROGWKHVDPHZDWWVWKURXJKWKHHQWLUHµVHW¶EXWYDU\UHVLVWDQFH2QWKHGRRUVHWWLQJV65VKRXOGEH KLJKHJLQWKHUDQJHIRFXVLQJRQperfect form... &22/'2:1 PYHU\HDV\ COACH LYMAN WORKOUT #2 :$5083 PHDV\GRRUDW '5,//6 [PLQDOWHUQDWLQJRQHDUPRQO\GULOOZLWKVWHDG\VZLP7DNH´QRQDFWLYH UHVWEHWZHHQHDFK¶HIIRUW 0$,16(7 [PZGRRUDWOLNHWKLV DW((LQWHQVLW\DQGWKHQDW8773WKHQ &22/'2:1 &KDQJHIURPSDGGOHVWRKDQGOHVIRU5(&29(5<VWURNHHJÀLSRYHUVRWKDW\RXUOHJVDUH XSQHDUWKHWRSRI(UJDQGGR[´RI³UHFRYHU\VZLPPLQJ´Z´RIQRQDFWLYHUHFRYHU\WKHQUHWXUQWR DQRUPDOSRVLWLRQNHHSKDQGOHVLQSODFHIRU¶RIHDV\FRROGRZQVZLPPLQJWKHQVWUHWFK 07/01/11 Vasa Ergometer User’s Manual PART 4 - Swim Training & Workouts COACH LYMAN WORKOUT #3 :$5083 HDV\ 1RWHVWDUWFRQVHUYDWLYHO\IRUWKH0DLQ6HW'HFUHDVHWLPHVIRUHDFKDQGHJVWDUW VOLJKWO\HDVLHUWKDQ\RXIHHO\RXFDQKROGWKHQ¿QLVKDWRUDURXQGWKUHVKROGLQWHQVLW\'RRUDW 0$,16(7 [´QRQDFWLYHUHFRYHU\ [´QRQDFWLYHUHFRYHU\ [GRDQHDV\EHWZHHQHDFKIRUUHFRYHU\ &22/'2:1 HDV\\RXUFKRLFH COACH LYMAN WORKOUT #4 :$5083 PHDV\GRRUDW 0$,16(7 [PDW\RXUµVWHDG\VWDWH¶SDFHGRRUDW 0$,16(7 [PDW87VUQRQDFWLYHZKLOH\RXDGMXVWGRRUVHWWLQJ GRRUDW GRRUDW GRRUDW GRRUDW 1RWH±JRDOIRUWKLVVHWKROGDWOHDVW\RXUN77SDFHDQGHYHQXSWRDERXWZDERYHWHVW7KHVH VKRXOGEHJRRGDQGKDUG\HWFRQWUROOHGHIIRUWV 0$,16(7 [PRQVHF*RDOVSULQWSDFH+LJKHVWZDWWVZLWKRXWVWURNHGHWHULRUDWLRQ &22/'2:1 HDV\GRRUDQGWKHQVWUHWFK COACH LYMAN WORKOUT #5 :$5083 GRRUDVIUHHÀ\EUHDVWÀ\EUHDVWIUHH 0$,16(7 P 1RWH6WDUWDWGRRUIRUWKH¿UVWDQGWKHQLQFUHDVHWRGRRURQWKH$VWKHZRUNRXW HYROYHVLQFUHDVHLQWHQVLW\JUDGXDOO\DVZHOODVUHVLVWDQFHRQWKHDQG)RUWKHPDNHWKLVD 77W\SHHIIRUWGRRUDW6KRRWIRU\RXUEHVWZLWKRQHIRFXVDQGWKDWLV3(5)(&7IRUP'R127 VDFUL¿FHIRUPLQRUGHUWRJRIDVWHU &22/'2:1 $IWHUWKHGRYHU\HDV\DQGWKHQVWUHWFK COACH LYMAN WORKOUT #6 :$5083 0$,16(7 0$,16(7 &22/'2:1 P5HOD[HGSHUIHFWIRUPGRRUDW [PRQHQRXJKWLPHWRFKDQJHWKHGRRUVHWWLQJ 2''5(3673DQGFKRLFH65 (9(15(3687ZLWKKLJK65 GRRUGRRU GRRUGRRU GRRUGRRU GRRUGRRU GRRUGRRU GRRUGRRU PDWVWHDG\87GDPSHUGRRU )2&86ORQJHOERZRYHUKDQGSXOOVIURPDSHUIHFWFDWFK *2$/SHUIHFWWHFKQLTXHZKHQIDWLJXHG PHDV\GRRUDW Vasa Ergometer User’s Manual PART 4 - Swim Training & Workouts 07/01/11 INTEGRATING “TOTAL BODY” CONDITIONING :$5083 0$,16(7 PDOOGDPSHUGRRUDVIUHHÀ\EUHDVWÀ\EUHDVWIUHH SRZHUZKHHOUROORXWV$PLQVELF\FOHNLFNVZLWKOEPHGEDOORYHUKHDGLQD ODWSXOOGRZQPRWLRQ%PLQVÀXWWHUDQGRUVFLVVRUNLFNV& PGRRUWDUJHWLQJ!65DQG!Z 3. repeat 1 PGRRUWDUJHWLQJ!65DQG!Z 5. repeat 1 UHSHDW 7. repeat 1 UHSHDW &22/'2:1 PGRRUYHU\HDV\ZZLWKSHUIHFWIRUP 3XUVXLW)LWQHVVWULDWKOHWH6FRWW-RKQVRQGHPRQVWUDWHVWKHWKUHHH[HUFLVHVUHFRPPHQGHG ARM MOTION (back & forth) A) Power Wheel Roll Outs Roll back and forth %%LF\FOH.LFNVZLWK0HGLFLQH%DOO Arms pull-down motion while legs SHUIRUPELF\FOHNLFNV &)OXWWHU.LFNV Legs alternate up & down in a scissor kick motion RACE PREP MUSCULAR ENDURANCE SESSION FOR EXPERIENCED :$5083 0$,16(7 &22/'2:1 07/01/11 PDOOGRRUFKRLFHVWURNHDQGGULOOV GDPSHUGRRU 6WDUWDWN±EXLOGWRNZHHNVRXWIURPJRDOHYHQW ,QWHQVLW\%HJLQDWEHVWDYHUDJH³VWHDG\´WHVWZDWWV 6XUJHWRVSULQWSDFHHYHU\WRVLPXODWHMXPSLQJDSDFN PGRRUYHU\HDV\ZZLWKSHUIHFWIRUP Vasa Ergometer User’s Manual PART 4 - Swim Training & Workouts DOaO3`U][SbS`B`OW\W\U:]U 0RQGD\ 7XHVGD\ :HGQHVGD\ 7KXUVGD\ )ULGD\ 6DWXUGD\ 6XQGD\ Date PURPOSE (Endurance, Power, Intervals, Time Trial) Total Time Total Meters Heart Rate Work Time or Work Distance Rest Time (intervals) Damper Setting Tether Cords PACE Strokes / Minute Pace / 100M POWER Max Watts Average Watts CALORIES Total Calories Avg Calories / HR FORCE Avg Force Left Avg Force Right Max Force Left Max Force Right STROKE LENGTH (cm) Stroke Length Left Stroke Length Right TOTALS THIS WEEK Comments: Vasa Ergometer User’s Manual PART 4 - Swim Training & Workouts 07/01/11 4.8. - RACING: VASA CHALLENGE & WORLD RANKINGS EPbP4aV^\TcTaF^a[SAP]ZX]V BW[Sg]c`aSZTT]`;";&;]`#;T`SSabgZS]\bVSDOaO3`U][SbS`O\RaSSV]eg]cabO\Rc^b]bVS`Sab]TbVSe]`ZR 53BB7<5AB/@B32DOaOE]`ZR@O\YW\U AB3>(E/@;C> 2]OeO`[c^]TSOagT`SSabgZS]`PcbbS`ÀgT]`ObZSOab#[W\cbSa AB3> eO`[c^ AB3> (A3B@3A7AB/<13:3D3: /RXcabbVSRO[^S`R]]`b]bVSZSdSZ%bVObTSSZa`WUVbT]`Q][^ZSbW\UbVSQVOZZS\USRWabO\QS g]cO`S`OQW\U :00 I00 0:00 0 0 4,;,9: AB3>!(A3BB63;=<7B=@B=1=C<B2=E<G=C@27AB/<13 CaW\UbVSaSbc^W\ab`cQbW]\a]\bVS\Sfb^OUSaSbbVSD;;]\Wb]`b]aeW["]` #[SbS`abVS\^`SaaµA3BC>¶b]SfWbBVS[]\Wb]`eWZZ`S[OW\`SORgT]`g]cb]PSUW\bVS QVOZZS\US/aa]]\Oag]c^cZZ]\bVSR`WdSQ]`RabVS[]\Wb]`eWZZPSUW\Q]c\bW\U BW^(7bVSZ^ab]VOdSO\]bVS`^S`a]\aSbc^bVS[]\Wb]` AB3> ORXcabRO[^S`R]]` 4 :74 >(;;: Setup Review Display Shift AB3>! aSbbVS[]\Wb]` AB3>"(53BG=C@A3:47<>=A7B7=< >ZOQSg]c`VO\RaW\bVS^ORRZSaVO\RZSaO\R^]aWbW]\g]c`aSZT]\bVS^ORRSRPS\QVO`[aSfbS\RSRO\R`SORgb]abO`b AB3>#(@3/2GA3B5= AbO`bg]c``OQSBVS[]\Wb]`eWZZPSUW\Q]c\bW\UR]e\bVSRWabO\QSO\RQ]c\bW\Uc^g]c`bW[S Oaa]]\Oag]cPSUW\^cZZW\U]\bVSR`WdSQ]`RaBW^(>OQSg]c`aSZTAeW[[S`aaV]cZRSf^SQb bW[SRWa^ZOgSRb]Q][^O`SeWbVµ^cZZW\U¶caW\UO^cZZPc]g\]abO`b\]^caVbc`\aZ]\U Q]c`aS[SbS`a AB3># aeW[g]c``OQS AB3>" USbW\^]aWbW]\ 4,;,9: I:30.3 I00 I:30 4 :74 AB3>$(@31=@2G=C@B7;3 EVS\g]cQ][^ZSbSg]c`RWabO\QSbVS[]\Wb]`eWZZT`SShSa]g]cQO\`SQ]`Rg]c`bW[S]\bVS=T¿QWOZ@OQS3\b`g4]`[]\\Sfb ^OUSG]cQO\acP[Wbg]c`bW[S]\ZW\SObeeedOaOb`OW\S`Q][e]`ZR`O\YW\U]`TOfg]c``SacZbab]caOb& &% %" >(;;: Setup Review Display Shift AB3>$ `SQ]`Rg]c`bW[S A3BC>B7>A( ES`SQ][[S\RVOdW\UO\]bVS`^S`a]\aSbc^bVS[]\Wb]`a]g]cQO\PSW\bVSµ`SORg^]aWbW]\¶eWbV]cb[]dW\UbVSR`WdSQ]`Ra6]eSdS`WTg]ceWaVb] R]bVSaSbc^]\g]c`]e\YSS^]\ST]]b]\bVSÀ]]`bVS\^`SaaµA3BC>¶]\bVS[]\Wb]`bVS\5=/aa]]\Oag]c^cZZ]\bVSR`WdSQ]`RabVS[]\Wb]`eWZZPSUW\ Q]c\bW\U B]PSUW\bVS`OQSOUOW\]`b]`SaSbbVSRWabO\QS^`SaabVSµA3BC>¶Pcbb]\beWQS DOaOE]`ZR@O\YW\U@cZSa( G]cQO\R]e\Z]OR`cZSaO\R]T¿QWOZS\b`gT]`[PgU]W\Ub]( B]S\ac`SQ][^O`OPZSbW[Sag]c[cabcaSO^`]^S`T`SSabgZSaeW[ab`]YST]`bVS`OQS eeedOaOb`OW\S`Q][e]`ZR`O\YW\U @OQSRWabO\QS]^bW]\aO`S([SbS`a"[SbS`a[SbS`a]`#[SbS`a !G]cQO\aSbbVSRO[^S`R]]`ObO\gaSbbW\UeS`SQ][[S\ROaSbbW\U]T ]`! "7\]`RS`b]YSS^bVSW\bSU`Wbg]T]c`e]`ZR`O\YW\UaeS`S_cSab]\S]TbVST]ZZ]eW\Ub]R]Qc[S\b/::e]`ZR`SQ]`Ra />V]b]]TbVS[]\Wb]`eWbVe]`ZR`SQ]`RbW[S 0EWb\Saab]g]c`e]`ZR`SQ]`RbW[S 7Tg]cR]\¸bVOdSO^V]b]]Tg]c`]`WUW\OZe]`ZR`SQ]`RbW[Sg]cQO\aeW[O\]bVS`aSbO\RacP[WbO^V]b]eWbVOaW[WZO`bW[S 7Tg]cO`Sc\RS`&bVSeWb\Saa[cabPSO^O`S\b]`Q]OQV 07/01/11 Vasa Ergometer User’s Manual PART 4 - Swim Training & Workouts A3BB7<5B63;=<7B=@B=1=C<B2=E<G=C@@/1327AB/<13"]`#;3B3@A B]aSbbVSD;;]\Wb]`T]`bVSDOaO1VOZZS\USbc`\bVS[]\Wb]`]\bVS\^caVbVSµA3BC>¶Pcbb]\BVSZSTb[]ab\c[PS`eWZZPS ÀOaVW\U4WUc`S/ ;]dSb]bVS\Sfb\c[PS`PgaSZSQbW\UbVS`WUVb O``]eASbg]c`RSaW`SRRWabO\QS("]`#[SbS`a>`SaabVSc^ O\RR]e\ O``]eab]QVO\USbVSÀOaVW\U\c[PS` !=\QSg]cVOdSaSbg]c`RSaW`SRRWabO\QS^`SaaµA3BC>¶b]SfWbBVS[]\Wb]`eWZZS\bS`0/A71,>OQS;]RS7beWZZ`S[OW\`SORgc\bWZg]c PSUW\4WU0 "/aa]]\Oag]c^cZZ]\bVSR`WdSQ]`RabVS[]\Wb]`eWZZPSUW\b]Q]c\bR]e\bVSRWabO\QSO\RQ]c\bc^bVSSZO^aSRbW[SBVS []\Wb]`eWZZRWa^ZOg(SZO^aSRbW[S[SbS`aZSTbb]U]^OQS[SbS`aab`]YSa^S`[W\cbSA>;O\ROdS`OUSeObba #EVS\bVS^`SaSbRWabO\QSWaQ][^ZSbSRbVS[]\Wb]`eWZZT`SShSa]g]cQO\`SQ]`RbVSRObO4WUc`S1B]PSUW\OUOW\]`b]`SaSbbVS RWabO\QS^`SaaµA3BC>¶beWQS/TbS`#[W\cbSa]TW\OQbWdWbgbVS[]\Wb]`eWZZbc`\]TTOcb][ObWQOZZg 4WUc`S/ 4WUc`S0 METERS 4WUc`S1 :00 I00 0:00 0 0 4,;,9: 4,;,9: A3BC>0CBB=< Setup Review 4 :74 >(;;: Setup Display Review I:30.3 I00 I:30 4 :74 G]c` @OQS BW[S >(;;: Setup Display Review Display Setup Shift ^caVµaSbc^¶ b]aSbRSaW`SR RWabO\QS Shift caSO``]eab]aSbRSaW`SR RWabO\QSbVS\^caVµaSbc^¶ b]SfWb OTbS`aSbbW\UbVS;RWabO\QS bVS[]\Wb]`eWZZabOg`SORgc\bWZ g]cabO`bg]c`e]`Y]cb Shift OTbS`Q][^ZSbW\U;RWabO\QSbVS []\Wb]`eWZZT`SShSa]g]cQO\dWSe O\R`SQ]`RbVSRObO DOaOE]`ZR@O\YW\U=T¿QWOZ3\b`g4]`[ @OQS`¸a<O[S(MMMMMMMMMMMMMMMMMMMMMMMMMMMMMMMMMMMMMMMMMMMMMMMMMMM>V]\S(MMMMMMMMMMMMMMMMMMMMMMMMMMMMMM ;OWZW\U/RR`Saa(MMMMMMMMMMMMMMMMMMMMMMMMMMMMMMMMMMMMM1Wbg(MMMMMMMMMMMMMMMMMMAbObS(MMMMMMMMM1]c\b`g(MMMMMMMMMMM 3[OWZORR`Saa(MMMMMMMMMMMMMMMMMMMMMMMMMMMMMMMMMMMMMMMMMMM:]QObW]\]T@OQS(MMMMMMMMMMMMMMMMMMMMMMMMMMMMMMMMMMM >`W[O`gA^]`b(RAeW[[W\URB`WObVZ]\RAc`¿\UR5S\S`OZ4Wb\SaaR=bVS`^ZSOaSZWab(MMMMMMMMMMMMMMMMMMMMMMMMM 2ObS]T0W`bV(MMMMMMMMM 5S\RS`(MMMMMMMMM@OQS2WabO\QSaSZSQb]\Zg]\S(R[R"[R[R#[ BaVW`bAWhSORcZbaWhSa]\Zg(RA;/::R;327C;R:/@53RF:/@53 @OQSBW[SEWb\SaaSRPg(MMMMMMMMMMMMMMMMMMMMMMMMMMMMMMM2ObS]T@OQS(MMMMMMMMMMMMMMMMM@OQSBW[S( 00:00.0 [W\cbSa(aSQ]\RabS\bV <=B3(7\]`RS`b]YSS^bVSW\bSU`Wbg]T]c`e]`ZR`O\YW\UaeS`S_cW`SE]`ZR@SQ]`RaSbbW\UbW[Sab]PSeWb\SaaSR]`R]Qc[S\bSRb]PS]T¿QWOZG]c[OgOZa]R]Qc[S\bg]c`bW[SPg aS\RW\UO^WQbc`S]Tg]c`[]\Wb]`eWbVg]c`e]`ZR`O\YW\UbW[Sb](e]`ZR`O\YW\U.dOaOb`OW\S`Q][ >ZSOaSQ][^ZSbSO\RacP[Wbb]DOaOPg4/F3;/7:]`;/7:BW[Sa[OgOZa]PSS\bS`SR]\ZW\SOb(eeedOaOb`OW\S`Q][e]`ZR`O\YW\U 4]`_cSabW]\aQOZZcaOb&"&&& % 7\bS`\ObW]\OZQOZZS`acaS& &% % 4/F(& &% %"3;/7:(e]`ZR`O\YW\U.dOaOb`OW\S`Q][E30(eeedOaOb`OW\S`Q][e]`ZR`O\YW\U;/7:(DOaO7\Q/ZZS\;O`bW\2`3aaSf8c\QbW]\DB#"# CA/ 70 Vasa Ergometer User’s Manual PART 4 - Swim Training & Workouts 07/01/11 TRAINING NOTES 07/01/11 Vasa Ergometer User’s Manual 71 PART 5 - MAINTENANCE & TROUBLESHOOTING MAINTENANCE OF YOUR VASA ERGOMETER 5HJXODUPDLQWHQDQFHRI\RXU9DVD(UJRPHWHULVDQLPSRUWDQWFRPSRQHQWRI\HDUVRIHQMR\DEOHIXQFWLRQDO and safe use of your machine. Maintenance requirements will vary considerably depending on how much XVH\RXU9DVD(UJRPHWHUJHWV3OHDVHUHDGWKHIROORZLQJJXLGHOLQHVFDUHIXOO\DVWKHVHUHFRPPHQGDWLRQV are made to help you maintain your Vasa Ergometer most effectively. Follow the maintenance steps suggested on the next page based on the amount of use. HIGH CHLORINE & HIGH HUMIDITY = HIGH MAINTENANCE 8QIRUWXQDWHO\VWHHOGRHVQRWIDUHZHOOLQKXPLGKLJKO\FKORULQDWHGHQYLURQPHQWVDWSRROVLGHRURXWVLGHLQ humid, salty ocean air. If your Vasa Ergometer is located in such inhospitable environments, it is extremely important for you to perform the maintenance steps on the next page at least once each month. ,I\RXXVH\RXU9DVD(UJRPHWHURQWKHGHFNRIDSRROEHVXUHWRSODFHDUXEEHUPDWXQGHUWKHPDFKLQH to prevent it from slipping and to prevent contact with water from the pool. DO NOT use the Ergometer GLUHFWO\RQWKHFRQFUHWHVXUIDFHRIDSRROGHFNZLWKRXWDUXEEHUPDWEHWZHHQWKHPDFKLQHDQGWKH FRQFUHWHÀRRU 6756 6C;727BG 16:=@7<3 =13/< /7@ CD :756B WARNING 8VHRIWKH9DVD(UJRPHWHU in humid, chlorinated, or salt air environments will void the lifetime guarantee. STORAGE OF YOUR VASA ERGOMETER :HUHFRPPHQGVWRULQJ\RXU(UJRPHWHULQDGU\LQGRRUHQYLURQPHQWDZD\IURPDKXPLGDQGRU chlorinated climate. The Vasa Ergometer is not designed to be left outdoors in the elements of direct sunlight, rain, or ocean air. If you must leave your Vasa Ergometer outdoors, either cover completely with a waterproof cover* or remove the monitor, padded bench and seat carriage assembly, the paddles/ KDQGOHVDQGWKHWHWKHUFRUGVDQGWDNHWKHPLQVLGH&RYHUWKHUHVWRIWKHPDFKLQHZLWKDZDWHUSURRI FRYHURUWDUSWRPLQLPL]HPRLVWXUHFROOHFWLRQRQWKHPHWDOSDUWV 9DVD(UJRPHWHUFRYHUVDUHVKRZQRQWKH$FFHVVRU\SDJHORFDWHGLQWKHEDFNRIWKLVPDQXDO or online at www.vasatrainer.com. SECURING THE VASA ERGOMETER IN SCHOOLS AND PUBLIC FACILITIES 6FKRROVDQGWHDPVPD\ZDQWWRNHHSWKHLU9DVD(UJRPHWHUVVHWXSLQWKHJ\PRUWUDLQLQJIDFLOLW\\HWZLOO QRWZDQWWRULVNLQMXU\WRVWXGHQWVYDQGDOLVPRUWKHIWRINH\SDUWV:HVXJJHVWWKDW\RXUHPRYHWKHPRQLWRUSDGGHGEHQFKDQGVHDWFDUULDJHDVVHPEO\WKHSDGGOHVKDQGOHVDQGWKHWHWKHUFRUGVDQGORFNWKHVHLQ DVDIHSODFHEHWZHHQWUDLQLQJVHVVLRQV$FRYHUDOVRZRUNVZHOOWRGHWHUXQDXWKRUL]HGXVH6HH3$57 IRUPRUHLQIRUPDWLRQRQKRZWRPDNH\RXU9DVD(UJRPHWHUWDPSHUUHVLVWDQW Vasa Ergometer User’s Manual PART 5 - Maintenance & Troubleshooting 07/01/11 GETTING TO KNOW YOUR VASA ERGOMETER LGOHUSXOOH\ drive cord & drive cord clip front/inlet cover V A S A seat carriage (holds seat rollers) rear/outlet cover damper door tether cord rewind cassette (contains rewind shock cord) IURQWHQGDVVHPEO\ front (inlet) cover removed front cover mounting bracket monitor connection cable (part of the load cell) drive cord drive spool (black spool & white spool) load cell fan housing load cell mounting bracket rewind shock cord CAUTION: Do NOT attempt to remove the cord or RCA without proper instruction. The rewind cord is under tension. front cover mounting bracket front end frame weldment UHZLQGFDVVHWWHDVVHPEO\5&$ (internal component) 07/01/11 Vasa Ergometer User’s Manual PART 4 - Swim Training & Workouts 73 VASA ERGOMETER - MAINTENANCE SCHEDULE 7RNHHS\RXU9DVD(UJRPHWHUZRUNLQJDWLWVEHVWSOHDVHIROORZWKHVXJJHVWHGPDLQWHQDQFHVFKHGXOH7KH chart below outlines a general plan based on hours of use. The following pages will provide more details on each step. 5HSODFHPHQWSDUWVFDQEHSXUFKDVHGDWwww.vasatrainer.comRUE\FDOOLQJXVGLUHFWO\DW 86RQO\,QWHUQDWLRQDOFXVWRPHUVSOHDVHFDOO TEAM / CLUB USE KRXUVSHUZHHN +HDY\8VH DAILY WEEKLY MONTHLY &OHDQPRQRUDLO N/A &OHDQHQWLUHPDFKLQH ,QVSHFWSDGGOHVKDQGOHV ,QVSHFWWHWKHUFRUGVWXELQJDQGFOLSV 4. Apply Armoral or similar rubber protectant to tether cords. &OHDQPRQRUDLO 5HSHDW:((./<VWHSV &KHFNWKHVHDWUROOHUVIRUGLUWEXLOGXS 3. Monitor dust/dirt buildup in air inlet & outlet areas. Vacuum as needed. &OHDQHQWLUHPDFKLQH ,QVSHFWSDGGOHVKDQGOHV ,QVSHFWWHWKHUFRUGVWXELQJDQGFOLSV 4. Apply Armoral or similar rubber protectant to tether cords. 4. Monitor drive shaft & lubricate with lithium grease as needed. 3 MONTHS PERSONAL / HOME USE /HVVWKHQKRXUVSHUZHHN /LJKWWR0RGHUDWH8VH 5HSHDW0217+/<PDLQWHQDQFH ,QVSHFWGULYHFRUGFOLSVIRUZHDU 5HSODFHDVQHHGHG ,QVSHFWUHZLQGVKRFNFRUGIRUZHDU 5HSODFHDVQHHGHG - IN HARSH or HUMID ENVIRONMENTS - 5HSHDW0217+/<PDLQWHQDQFH &KHFNWKHVHDWUROOHUVIRUGLUWEXLOGXS 3. Monitor dust/dirt buildup in air inlet & outlet areas. Vacuum as needed. 4. Monitor drive shaft & lubricate with lithium grease as needed. 4. Apply lithium grease to screw threads on all nuts & bolts. This will help prevent corrosion and rust. 6 MONTHS 74 5HSHDW0217+/<DQG0217+ maintenance. 5HSODFHWZR$$EDWWHULHVLQPRQLWRU Vasa Ergometer User’s Manual PART 5 - Maintenance & Troubleshooting 5HSHDW0217+/<DQG0217+ maintenance. ,QVSHFWGULYHFRUGFOLSVIRUZHDU 5HSODFHDVQHHGHG ,QVSHFWUHZLQGVKRFNFRUGIRUZHDU 5HSODFHDVQHHGHG 07/01/11 VASA ERGOMETER - MAINTENANCE DETAILS CLEAN MONORAIL - To remove dust and particles for a smoother ride of the seat carriage, and to H[WHQGWKHOLIHRIWKHVHDWFDUULDJHUROOHUV&OHDQZLWKPLOGVRDSZDWHUDQGDFOHDQUDJGR127XVH abrasive detergents). Mineral spirits can be used for grease and stain spots, then wash with clean water. )RUGHHSVWDLQHVXVHDPLOG6FRWFK%ULWHSDG Caution: Do not use an abrasive detergent to clean the the monorail. CLEANING THE ENTIRE MACHINE - Thoroughly clean entire machine with a rag or hand towel and PXOWLSXUSRVHFOHDQHU&OHDQWKHPRQRUDLODVGHWDLOHGDERYHGR127XVHDEUDVLYHFOHDQHU PADDLES & HANDLE WEAR,QVSHFWSDGGOHVVZLPRUND\DNRUFDQRHDQGH[HUFLVHKDQGOHVIRU wear on connection joints. If signs of wear, replace immediately. TETHER CORD WEAR - Inspect tether cords for wear on cord or plastic clips. Treat tether cords with $UPRUDOOW\SHSURWHFWDQWZKHQWXEHVORRNGU\RUGLVFRORUHG5LQVHZLWKIUHVKZDWHULIWKH\KDYHEHHQLQ contact with chlorinated water. SEAT ROLLER CLEANING &KHFNWKHUROOHUVIRUDEXLOGXSRIGLUW,I\RXVHHEODFNVSHFVRQWKHUROOHUV KROGDGDPSUDJRUUDJZLWKDOOSXUSRVHFOHDQHUXSDJDLQVWWKHUROOHUVDV\RXVORZO\UROOWKHEHQFKEDFN and forth. This will rotate the rollers against the pad, removing the dirt. If you are unable to remove all WKHGLUW\RXFDQXVHD6FRWFK%ULWHSDGLQVWHDGRIDGDPSUDJ SEAT ROLLER INSTALLATION & ROTATION &KHFNWKHWRSVHDWUROOHUVIRUZHDU,IWRSUROOHUV appear to be wearing more than bottom rollers, rotate the top rollers with the bottom rollers. Detailed instructions on page 75. CLEANING AIR INLET/OUTLET SCREENS - Monitor the dust build-up on air inlet and outlet areas SHUIRUDWHGPHWDOORFDWHGRQWKHIURQWDVVHPEO\FRYHUDQGXQGHUWKHGDPSHUGRRUFRYHU9DFXXPDV needed. 'LDJUDPVDQGGHWDLOHGLQVWUXFWLRQRQSDJH DRIVE SHAFT LUBRICATION - Apply a layer of lithium grease along the entire surface of the Drive 6KDIWWRSUHYHQWFRUURVLRQUXVW'LDJUDPVDQGGHWDLOHGLQVWUXFWLRQRQSDJH DRIVE CORD REPLACEMENT -:RUQGULYHFRUGVKRXOGEHUHSODFHGZLWKQHZFRUG6LJQVRIZHDU LQFOXGHIUD\LQJWKUHDGVRUDQ\FXWVLQWKHFRUG,WLVUHFRPPHQGHGWRUHSODFHWKH'ULYH&RUG&OLSVDQG 5HZLQG6KRFN&RUGDWWKHVDPHWLPH DRIVE CORD CLIP REPLACEMENT -5HSODFHPHQWRIWKHGULYHFRUGFOLSVLVQHHGHGZKHQWKHFOLSVDUH EURNHQ,WLVDOVR+,*+/<UHFRPPHQGHGZKHQ\RXUHSODFHWKH'ULYH&RUG REWIND SHOCK CORD REPLACEMENT -7KHUHZLQGVKRFNFRUGVKRXOGEHUHSODFHGZLWKQHZFRUG when it shows signs of wear or has lost its elastic properties. Inspect the cord by removing the front DVVHPEO\FRYHU7KHUHZLQGFRUGLVWKHEODFNRUEOXHFRUGWKDWLVZUDSSHGDURXQGWKH'ULYH6SRROV,WLV UHFRPPHQGHGWRUHSODFHWKH'ULYH&RUGVDQG'ULYH&RUG&OLSVDWWKHVDPHWLPHDVDSUHYHQWDWLYHVWHS LUBRICATION OF HARDWARE -$SSO\OLWKLXPJUHDVHRUWKLFNRLOWRDOOVFUHZWKUHDGVRQDOOQXWV bolts. This will help prevent corrosion and rust. 07/01/11 Vasa Ergometer User’s Manual PART 5 - Maintenance & Troubleshooting 75 SEAT ROLLER INSTALLATION AND ROTATION 1.5HPRYHWKHUHDUVWDQFKLRQIURPWKHPRQRUDLO a. 5HPRYHDQ\WHWKHUFRUGV\RXPD\KDYHDWWDFKHG b. /RRVHQWKHVRFNHWVHWVFUHZRQWKHFRUQHURIWKHUHDUVWDQFKLRQVOHHYHXVLQJWKH´KH[NH\DOOHQ wrench. c./RRVHQDQGUHPRYHWKHPRQRUDLOVFUHZDQGQXW´EXWWRQKHDGVFUHZ d3XOOWKHPRQRUDLORXWRIWKHUHDUVWDQFKLRQDQG6/2:/<ORZHUWKHPRQRUDLODQGWKHUHDUVWDQFKLRQ to the ground. CAUTION:7KHVHDWFDUULDJHDQGEHQFKZLOOUROOIRUZDUGPDNHVXUHWRORZHUWKHPRQRUDLO slowly to avoid pinching your hands. 2.+ROGWKHPRQRUDLOLQRQHKDQGDQGKROGWKHPLGGOHXQGHUVLGHRIWKHVHDWFDUULDJHDQGUHPRYHWKH assembly from the monorail. 3.3ODFHWKHSDGGHGEHQFKVHDWFDUULDJHDVVHPEO\XSVLGHGRZQVRWKHUROOHUVDUHYLVLEOH 4.8VHWZR´ZUHQFKHVRUDGMXVWDEOHZUHQFKHVWRORRVHQWKHQXWDQGVFUHZZKLFKKROGVHDFK of the four seat carriage rollers in place. IMPORTANT1RWHWKHSRVLWLRQRIWKHVSDFHUVDQGUXEEHU ZDVKHUVIRUUHDVVHPEO\6HHGUDZLQJEHORZ 5.,QVWDOOWKHQHZUROOHUVURWDWHWKHUROOHUVRUPRYHWKHUROOHUVIRUDWLJKWHURUORRVHU¿WPDNLQJFHUWDLQ WKDWWKHVSDFHUVDQGZDVKHUVDUHSRVLWLRQHGH[DFWO\DVWKH\ZHUHEHIRUHUHPRYLQJWKHPVHHGUDZLQJ below). Tighten the nuts until you see the rubber washer just begin to compress. NOTE$YRLGRYHUWLJKWHQLQJDVWKLVZLOOSODFHVLGHSUHVVXUHRQWKHEHDULQJVDQGFDQFDXVH premature wear. Tighten the nuts until you see the rubber washer just begin to compress. To test tightness, spin the roller - the roller should roll freely, but should not be able to spin freely IRUPRUHWKDQVHFRQGV 6.5HSODFHWKHVHDWFDUULDJHRQWKHPRQRUDLOWKHQUHSODFHWKHUHDUVWDQFKLRQRQWRWKHPRQRUDLO5HSODFH DQGWLJKWHQWKHPRQRUDLOVFUHZDQGQXW7LJKWHQWKHVRFNHWVHWVFUHZRQWKHUHDUVWDQFKLRQVOHHYHZLWK WKH´KH[NH\DOOHQZUHQFK SIDE VIEW OF SEAT CARRIAGE WITH PADDED BENCH (not drawn to scale) upper rear roller upper front roller MONORAIL front of machine lower rear roller lower front roller WLJKWHUÀWORRVHUÀW UBOLT ORRVHUÀWWLJKWHUÀW PADDED BENCH rubber washer 3” hex cap screw seat spacers rubber washer nut PADDED BENCH SEAT CARRIAGE upper seat roller MONORAIL cross section viewed from end of machine END VIEW OF SEAT CARRIAGE lower seat roller Vasa Ergometer User’s Manual PART 5 - Maintenance & Troubleshooting 07/01/11 DRIVE SHAFT, FLYWHEEL, AIR INLET & OUTLET MAINTENANCE As part of the Ergometer maintenance program, we suggest regular maintenace of a few parts inside the IURQWHQGDVVHPEO\7KLVZLOOUHTXLUHUHPRYDORIWKHIURQWFRYHU/RFDWHWKHIRXUVFUHZVLQWKHXSSHUDQG ORZHUFRUQHUVRQWKHIURQWFRYHURIWKHIURQWHQGDVVHPEO\)LJXUH$8VHWKH´DOOHQZUHQFKWR remove the four screws. /RFDWHWKH)O\ZKHHO)LJXUH%9DFXXPERWKWKHULJKWDQGOHIWVLGHRIWKHIDQWRUHPRYHDQ\GXVWWKDW PD\KDYHEXLOWXS3HUIRUPWKLVVWHSPRUHRUOHVVIUHTXHQWO\EDVHGRQ\RXUHQYLURQPHQW +80,'2876,'(RU322/6,'((19,5210(176/RFDWHWKH'ULYH6KDIW)LJXUH%,QVSHFWWKH left and right sides to see if it is getting dry or discolored. If so, apply lithium grease to protect the ¿QLVK/LWLXPJUHDVHLVLQFOXGHGLQWKH0DLQWHQDQFH.LWZKLFKLVVROGRQVHSDUDWHO\RQWKH$FFHVVRU\ 5HSODFHPHQW3DUWVSDJHDWWKHEDFNRIWKLVPDQXDO /RFDWHWKH$LU,QOHW$LU2XWOHW)LJXUH&9DFXXPWKHSHUIRUDWHGPHWDODUHDVWRUHPRYHDQ\GXVW buildup. 5HSODFHWKHSODVWLFFRYHU6OLGHLWLQWRSRVLWLRQWKHQUHSODFHWKHIRXUVFUHZVLQHDFKFRUQHU7LJKWHQZLWK ´DOOHQZUHQFK ERGOMETER FRONT COVER remove four screws with 5/32” allen wrench Figure B Figure C DRIVE SHAFT (LEFT SIDE) VACUUM AIR INLET Grease BOTH sides FLYWHEEL (LEFT SIDE) Vacuum Left & Right VLGHRIÁ\ZKHHO VASA ERGOMETER MONITOR (VM) MAINTENANCE VACUUM AIR OUTLET EDWWHU\ compartment BATTERY REPLACEMENT 7KHEDWWHULHVLQWKH9DVD(UJRPHWHU0RQLWRU90W\SLFDOO\ODVWDERXWZRUNLQJKRXUV,I ³/2&(//´DSSHDUVLQWKHWRS¿HOGRIWKH90PRQLWRUWKHEDWWHULHVQHHGWREHUHSODFHG7R FKDQJHWKHEDWWHULHVRSHQWKHEDWWHU\FRPSDUWPHQWRQWKHEDFNRIWKH90PRQLWRU)LJXUH $7KHPRQLWRUWDNHVWZR³$$´EDWWHULHV !! BATTERY !! BATTERY Figure A 6ASA )NC WWWVASATRAINERCOM 6!3! 127(6WDWLFGLVFKDUJHPD\FDXVHWKHPRQLWRUWRLQDGYHUWHQWO\WXUQRQ7KLVZLOOUHGXFHWKHOLIHRIWKH EDWWHULHVDVWKHPRQLWRUZLOOUHPDLQRQIRUPLQXWHVXQWLOWKH%DWWHU\6DYHIHDWXUHLVDFWLYDWHG BATTERY SAVE FEATURE 7KHUHLVDPLQXWHWLPHRXWIHDWXUHRQ\RXU90PRQLWRU,IWKHUHLVQR³DFWLYLW\´WKHPRQLWRUZLOOSRZHU GRZQDIWHUPLQXWHV³DFWLYLW\´LQFOXGHVLQSXWVIURPSXOOLQJRQWKHGULYHFRUGSXVKLQJEXWWRQVRUVHULDO communications with a computer). $Q\ZRUNRXWLQIRUPDWLRQZLOOEHFOHDUHGIURPWKHPHPRU\DVVRRQDV the monitor shuts off. IMPORTANT: 7KHPRQLWRULVDVHDOHGXQLW'2127WDNHDSDUW$Q\DWWHPSWWRGLVDVVHPEOHZLOO void warranty. 07/01/11 Vasa Ergometer User’s Manual PART 5 - Maintenance & Troubleshooting 77 TROUBLESHOOTING 7KLVVHFWLRQFRQWDLQVLQIRUPDWLRQIRUVROYLQJSRWHQWLDOSUREOHPVWKDWPD\DULVH6\PSWRPVDUHOLVWHGZLWK suggested remedies. If you still can not correct the problem after you consult the following pages, please contact our Technical 6HUYLFH'HSDUWPHQWDWLQIR#YDVDWUDLQHUFRPRU0RQGD\)ULGD\DPSP(67 3OHDVHKDYHDFRS\RI³*HWWLQJWRNQRZ\RXU9DVD(UJRPHWHU´SDJHLQIURQWRI\RXDQGWKH(UJ QHDUE\ZLWKWKHIURQWFRYHUUHPRYHGLIUHOHYDQWWR\RXUSUREOHP MONITOR SYMPTOM: The monitor is losing data or “zeros out” in the middle of a workout. 5HPHG\,IWKHPRQLWRUVHQVHVLQDFWLYLW\IRUPRUHWKDQVHFRQGVZKLOHLQWKHGHIDXOW%$6,&02'(LW ZLOOGLVSOD\\RXUZRUNRXWVXPPDU\:KHQWKHFRUGVDUHSXOOHGDIWHUWKHVXPPDU\DQHZZRUNRXWZLOO EHJLQFRXQWLQJXSIURP]HUR7RDYRLGWKLVXVHWKHSUHVHWZRUNRXWIXQFWLRQ SJ,I\RXVHWXSD SUHGHWHUPLQHGWLPHRUGLVWDQFHZRUNRXW\RXFDQVWRSIRUDQ\OHQJWKRIWLPHOHVVWKDQPLQXWHVZLWKRXWORVLQJ\RXUZRUNRXWGDWD.HHSLQPLQGWKDWWKHPRQLWRUZLOOFRQWLQXH FRXQWLQJWLPHEXWWKHGDWDZLOOQRWEH5(6(7ZLWKRQO\DIHZVHFRQGVRU few minutes of idol movement. It will automatically power down after 5 minutes of inactivity. SYMPTOM: The monitor is unsteady (moving or changing position) GXULQJDZRUNRXWPDNLQJLWGLI¿FXOWWRUHDG 5HPHG\0RYHWKHKRVHFODPSRYHUWKHSURQJVRIWKHPRXQWLQJVRFNHW WKHQWLJKWHQWKHKRVHFODPSZLWKDÀDWKHDGVFUHZGULYHUSJ SYMPTOM: The monitor turns on randomly by itself. 5HPHG\ The monitor must be connected to the connection cables to function properly. If the moniWRULVQRWLQXVHDQGKDVEHHQUHPRYHGIURPWKHIURQWHQGQRFDEOHVFRQQHFWHGLWLVUHFRPPHQGHGWR remove one or both of the AA batteries. This will prevent the batteries from losing power. SYMPTOM: The monitor is displaying erratic data (i.e. excessive high or low force, etc.). 5HPHG\%HFHUWDLQWKHFDEOHVDUHFRQQHFWHGSURSHUO\5LJKW 5HGSRUW/HIW %ODFNSRUWDQGIXOO\ LQVHUWHGLQWRWKHSRUWIRUDVROLGFRQQHFWLRQ1H[W5(6(7WKHPRQLWRUE\SRZHULQJRIISXVKWKH212)) EXWWRQ7XUQEDFNRQXVLQJWKH212))EXWWRQ7KHPRQLWRUKDVQRZEHHQ5(6(7WRFRPPXQLFDWHWR WKHLQWHUQDO/RDG&HOOVRU9HULI\WKDW\RXDUHLQWKHFRUUHFWYLHZLQJPRGH6:,0YV.$<$.7KH .D\DN0RGHZLOOGLVSOD\D³.´LQWKHXSSHUOHIWFRUQHUDQGGLVSOD\VGLVWDQFHV[JUHDWHUWKDQWKHVZLP PRGH5HIHUWRSDJHIRUIXOOGHWDLOV127(5HPRYLQJWKHEDWWHULHVZLOOUHVHWWR6:,0PRGH If neither remedy resolve your erratic readings, please contact Vasa for assistance. Vasa Ergometer User’s Manual PART 5 - Maintenance & Troubleshooting 07/01/11 ERGOMETER OPERATION SYMPTOM: I don’t seem to get enough resistance. It seems too easy. 5HPHG\$GMXVWWKHGDPSHUGRRUVHWWLQJWRDKLJKHUVHWWLQJ6HWWLQJVYDU\WRLVORZUHVLVWDQFHDQGLVDKLJKUHVLVWDQFH'XVWYDFXXPWKHLQOHWDQGRXWOHWDUHDV6HHWKHmaintenance section on pg. 74). SYMPTOM: The paddles (or handles) are hitting the idler pulley bracket when arms extend. 5HPHG\$GGRULQFUHDVHWKHUHVLVWDQFHOHYHORIWHWKHUFRUG7HWKHUFRUGVUHVWULFWWKHWUDYHORIWKH EHQFKFUHDWLQJDGUDJ$QFKRUWKHVHDWFDUULDJHEHQFKDVVHPEO\WRSUHYHQWPRYHPHQW7RNHHS WKHEHQFKVWDWLRQDU\LQVWDOOWKH520NQRENLWRSWLRQDODFFHVVRU\SJ SYMPTOM: The seat carriage sticks or will not glide smoothly on the monorail. 5HPHG\'XVWDQGUROOHUGHEULVZLOODFFXPXODWHRQWKHUROOLQJVXUIDFHRIWKHPRQRUDLO:HUHFRPPHQG URXWLQHFOHDQLQJRIWKHPRQRUDLOVXUIDFHDQGWKHUROOHUVXUIDFH6HHWKHVHDWFDUULDJHUROOHULQVWDOODWLRQ DQGURWDWLRQLQVWUXFWLRQVLQWKLVPDQXDOSJ127(1HZVHDWUROOHUVW\SLFDOO\QHHGWRZHDULQWRDQG conform to the monorail. As this happens, they will naturally emit some debris which will need to be UHPRYHG7\SLFDOEUHDNLQWDNHVEHWZHHQUHSHWLWLRQV SYMPTOM: The seat carriage is wobbly or loose. 5HPHG\ The top seat rollers may have worn down. Move the bottom two seat rollers so they are closer WRWKHPRQRUDLO6HHLQVWUXFWLRQVIRUVHDWUROOHULQVWDOODWLRQDQGGLDJUDPVORFDWHGLQWKHmaintenance section SJ SYMPTOM: The padded bench feels wobbly or rattles. 5HPHG\,WLVOLNHO\WKDWWKHEROWVKROGLQJWKHEHQFKRQWKHVHDWFDUULDJHDUHORRVHDQGQHHGWLJKWHQLQJ RUWKHVHDWUROOHUVQHHGDGMXVWPHQWVHHSUHYLRXVV\PSWRPUHPHG\7LJKWHQDOOIRXUEROWVZLWKWKH ´ZUHQFK0DNHVXUH\RXKDYHXVHGWKHORFNZDVKHUVDQGÀDWZDVKHUVEHWZHHQWKHEROWKHDGDQG WKHVHDWFDUULDJHEUDFNHWLQRUGHUWRVHFXUHWKHEROWV6HHDVVHPEO\LQVWUXFWLRQVSJ Symptom: The seat carriage bumps the rear stanchion in between each stroke. How can I eliminate this “bumpy ride”? 5HPHG\,QFUHDVHWKHWHPSRRI\RXUVWURNHLQFUHDVH\RXUIRUFHSHUVWURNHGHFUHDVHWKH OHYHOWKLFNQHVVRIWHWKHUFRUGDQFKRUWKHVHDWFDUULDJHEHQFKDVVHPEO\WRSUHYHQWPRYHPHQW 7RNHHSWKHEHQFKVWDWLRQDU\LQVWDOOWKH520NQRENLWRSWLRQDODFFHVVRU\SJRULI\RXZHLJK PRUHWKDQOEVFRQVLGHURSHQLQJWKHGDPSHUGRRUZLGHURUSXWWLQJD±LQFKWKLFNEORFNXQGHUWKH rear stanchion base bar to reduce the slope angle of the monorail. SYMPTOM: The drive cord does not rewind all the way or it does not rewind fast enough. 5HPHG\5HSODFHWKHUHZLQGVKRFNFRUG7KHUHFRLOVWUHQJWKRIWKHUHZLQGVKRFNFRUGZLOOGHFUHDVH RYHUWLPHDQGZLOOQHHGWREHUHSODFHG2UGHULQIRUPDWLRQFDQEHIRXQGRQSDJHRU,I\RXKDYH UHPRYHGWKHIURQWLQOHWFRYHUDQGGLVFRYHUHGWKDWWKHVKRFNFRUGLVWDQJOHGDURXQGRQHERWKGULYH VSRROVSOHDVHFRQWDFW9DVD 07/01/11 Vasa Ergometer User’s Manual PART 5 - Maintenance & Troubleshooting 79 STATEMENT OF GUARANTEE / WARRANTY 7KH9DVD(UJRPHWHULVJXDUDQWHHGDJDLQVWDOOGHIHFWVLQPDWHULDOVDQGZRUNPDQVKLSIRUQRQPRYLQJSDUWV IRUDVORQJDV\RXRZQ\RXUPDFKLQHZKHQXVHGDFFRUGLQJWRWKHLQVWUXFWLRQVLQWKLVPDQXDO:HZLOOUHpair or replace free of charge any non-moving part found to be defective. This guarantee is valid only when accompanied by dated proof of purchase. GUARANTEE LIMITATIONS: The Vasa, Inc. lifetime guarantee does not include the monitor batteries, monitor, tether cords, rewind VKRFNFRUGKDQGSDGGOHVKDQGOHVRUVHDWFDUULDJHUROOHUVZKLFKDUHFRQVLGHUHGPRYLQJSDUWVVHH limited warranty). Vasa, Inc. will not guarantee against rust, paint peeling, or tarnish if your machine is VWRUHGRUXVHGLQRUQHDUWKHIROORZLQJHQYLURQPHQWVRXWGRRUVQHDURFHDQDLURXWGRRUVH[SRVHGWRSUHFLSLWDWLRQKXPLGLW\DQGGLUHFWVXQOLJKWQH[WWRVZLPPLQJSRROVZLWKKLJKKXPLGLW\DQGRUFKHPLFDOULFK environments. This guarantee does not apply to damage caused to any part by accident, misuse, abuse, alteration, improper handling and/or improper assembly. In no event will Vasa, Inc. be liable for incidental or consequential damages resulting from a defective unit or improper assembly or use. LIMITED WARRANTY: 9DVD,QFZLOOZDUUDQW\IRUPRQWKVIURPWKHGDWHRISXUFKDVHÀ\ZKHHOPRQLWRUKDQGSDGGOHV KDQGOHVWHWKHUFRUGVDQGVHDWFDUULDJHUROOHUV9DVD,QFZLOOZDUUDQW\IRUPRQWKVIURPWKHGDWHRI SXUFKDVHWKHUHZLQGVKRFNFRUG7KHVHSDUWVDUHFRQVLGHUHGPRYLQJSDUWVZKLFKDUHGHVLJQHGWRZHDU ZHOOIRUPRUHWKDQLQGLFDWHGWLPHEXWDUHVXEMHFWWREUHDNDJHXQGHUDEQRUPDOXVH7KLVZDUUDQW\GRHV not apply in the case of damage to any part due to accident, misuse, abuse, alteration, improper handling and/or improper assembly. In no event will Vasa, Inc. be liable for incidental or consequential damages resulting from a defective unit or improper assembly or use. HOW TO OBTAIN GUARANTEE OR WARRANTY SERVICE STEP 1: Identify the serial number that is located on the top service of the fanwheel housing. It is visLEOHE\ORRNLQJWKURXJKWKHDLULQOHWSHUIRUDWHGPHWDOVFUHHQ STEP 2:&DOO9DVD&XVWRPHU6HUYLFHDWWKHQXPEHUVEHORZWRLQIRUPXVRIWKHSUREOHP\RXDUHH[SHULHQFLQJ,I\RXDUHLQVWUXFWHGWRUHWXUQWKHSDUWIRUUHSODFHPHQWRUUHSDLUSOHDVHIROORZ6WHSVWKUXEHORZ STEP 3:7RUHWXUQDSDUWIRUUHSODFHPHQWRUUHSDLUSOHDVHFRPSOHWHWKH:DUUDQW\&ODLPIRUPRQWKHQH[W SDJHSKRWRFRS\LW¿UVW,QFOXGH\RXUGDWHGSURRIRISXUFKDVHLIDYDLODEOHVHULDOQXPEHUUHWXUQDXWKRUL]DWLRQQXPEHU5$LVSURYLGHGE\FRQWDFWLQJ9DVD,QFLQ6WHSDERYHDQGDZULWWHQGHVFULSWLRQRI KRZWKHSDUWVIDLOHGVRWKDWZHPD\FRQWLQXHWRPDLQWDLQRXUKLJKHVWTXDOLW\FRQWURO STEP 4: 3URSHUO\SDFNDJHWKHGHIHFWLYHRUPDOIXQFWLRQLQJSDUWV,WLVWKHUHVSRQVLELOLW\RIWKHSXUFKDVHUWRHQVXUHWKDWWKHSURGXFWLVSURSHUO\SDFNDJHGDQGLQVXUHGIRUUHWXUQDVDQ\GDPDJHVXIIHUHGLV DWWKHSXUFKDVHU¶VULVNDQGLVQRWFRYHUHGE\WKLVJXDUDQWHH7KHSXUFKDVHULVUHVSRQVLEOHIRUDOOVKLSSLQJ FRVWV:HUHFRPPHQGVDYLQJWKHRULJLQDOSDFNDJLQJIURP\RXU9DVD(UJRPHWHU,I\RXGRQRWKDYHWKH RULJLQDOSDFNDJLQJ\RXPD\SXUFKDVHUHSODFHPHQWSDFNDJLQJIURP9DVD STEP 5:6KLSWKHGHIHFWLYHRUPDOIXQFWLRQLQJSDUWVDQGWKH:DUUDQW\&ODLP)RUPWRXVDWWKHDGGUHVV RQWKH:DUUDQW\&ODLP)RUP STEP 6:8SRQUHFHLSWRIWKHSDUWVZHZLOOLQVSHFWWKHGHIHFWRUGDPDJHFODLPHG9DVD,QFUHWDLQVWKH RSWLRQRIUHSODFLQJRUUHSDLULQJWKHSDUWV:HZLOOVHQGWKHUHSODFHPHQWSDUWRUWKHUHSDLUHGSDUWEDFNWR you in a timely manner. :HDW9DVDFRQVLVWHQWO\VWULYHWRSURYLGH\RXWKHFXVWRPHUZLWKWKHKLJKHVWTXDOLW\SURGXFWVDQGEHVW VHUYLFH,I\RXDUHHYHUGLVVDWLV¿HGZLWKDQ\RIRXUSURGXFWVRUVHUYLFHSOHDVHFRQWDFWXVLPPHGLDWHO\ :HYDOXH\RXUEXVLQHVV7KDQN\RX VASA CUSTOMER SERVICE Tel: 1.802.872.7101 Fax: 1.802.872.7104 or 1.501.421.6254 9am-5pm Eastern Standard Time, Monday - Friday (PDLOLQIR#YDVDWUDLQHUFRP:HEVLWHZZZYDVDWUDLQHUFRP Vasa Ergometer User’s Manual PART 5 - Maintenance & Troubleshooting 07/01/11 VASA WARRANTY CLAIM FORM If you have a defective or malfunctioning part, please contact Vasa by phone or email. Next, complete this form in its entirety and send it to us along with the part you wish to have repaired or replaced. ,QYRLFHBBBBBBBBBBBBB'DWHRI3XUFKDVHBBBBBBBBBBBBBBBBBBBB 6HULDO1XPEHUBBBBBBBBBBBBBBBBBBBBBBB /RFDWHGRQWKHWRSRIWKHIDQZKHHOKRXVLQJ,WLVYLVLEOHE\ORRNLQJWKURXJKWKHDLULQOHWSHUIRUDWHGPHWDOVFUHHQ air inlet metal screen 7RGD\¶V'DWHBBBBBBBBBBBBBBBBBB 5HWXUQ$XWKRUL]DWLRQ1XPEHUBBBBBBBBBBBBBBBBBBBBBBBBBBBBBBBBBBB &RQWDFW9DVD,QFWRUHFHLYHWKLVQXPEHUSULRUWRPDNLQJDUHWXUQ <RXU1DPHBBBBBBBBBBBBBBBBBBBBBBBBBBBBBBBBBBBBBBBBBBBBBBBBBB <RXU$GGUHVVBBBBBBBBBBBBBBBBBBBBBBBBBBBBBBBBBBBBBBBBBBBBBBBBBB BBBBBBBBBBBBBBBBBBBBBBBBBBBBBBBBBBBBBBBBBBBBBBBBBB &LW\BBBBBBBBBBBBBBBBB6WDWHBBBBBBBB=LSBBBBBBBBBBBB <RXUGD\WLPHWHOHSKRQHQXPEHUBBBBBBBBBBBBBBBBBBBBBBBB <RXU(PDLODGGUHVVBBBBBBBBBBBBBBBBBBBBBBBBBBBBBBBBBBBB 3OHDVHGHVFULEHWKHSUREOHP\RXDUHKDYLQJ 3DUW1DPH 3DUW 'HVFULSWLRQRIWKH3UREOHP BBBBBBBBBBBBBBBBBBBB BBBBBBBBB BBBBBBBBBBBBBBBBBBBBBBBBBBBB BBBBBBBBBBBBBBBBBBBB BBBBBBBBB BBBBBBBBBBBBBBBBBBBBBBBBBBBB BBBBBBBBBBBBBBBBBBBB BBBBBBBBB BBBBBBBBBBBBBBBBBBBBBBBBBBBB BBBBBBBBBBBBBBBBBBBB BBBBBBBBB BBBBBBBBBBBBBBBBBBBBBBBBBBBB BBBBBBBBBBBBBBBBBBBB BBBBBBBBB BBBBBBBBBBBBBBBBBBBBBBBBBBBB 3OHDVHFRQWDFW9DVDSULRUWRPDNLQJDUHWXUQ 9DVD,QF:DUUDQW\6HUYLFH $OOHQ0DUWLQ'ULYH (VVH[-XQFWLRQ97 7HO )D[RU (PDLOLQIR#YDVDWUDLQHUFRP :HEVLWHZZZYDVDWUDLQHUFRP 07/01/11 Vasa Ergometer User’s Manual PART 5 - Maintenance & Troubleshooting PRRTbb^aXTbaT_[PRT\T]c_PacbP]STgcaPb 5^ah^daEPbP4aV^\TcTa @3>:/13;3<B>/@BA @SeW\R2`WdS1]`R @S^ZOQS[S\b9Wb /113AA=@73A @SeW\R1OaaSbbS/aaS[PZg 2`WdSagabS[Q]`RaO\RQZW^aeWZZ\SSRb] PS`S^ZOQSR]dS`bW[SeWbV\]`[OZcaS9Wb 2`WdS1]`R2`WdS1]`R6]]Y W\QZcRSa(@SeW\R1OaaSbbS/aaS[PZg_bg) @SeW\RAV]QY1]`Ra^O`S_bg)2`WdS1]`Ra_bg )2`WdS1]`R 6]]Ya_bg )AOTSbg1ZO[^a_bg )b]]ZaO\RW\ab`cQbW]\a @SeW\R1OaaSbbS2`WdS1]`R@S^ZOQS[S\b9Wb('' 9OgOY9Wb =TTS`a`SOZWabWQYOgOY^ORRZW\Ue]`Y]cbaeWbV]cbb`OdSZW\U b]bVSeObS`1VO\USg]c`aSbc^T`][AeW[b]9OgOY ]`9OgOYb]AeW[W\c\RS`O[W\cbS9WbW\QZcRSa(YOgOY aVOTbT]]bP`OQSO\RO[]\]`OWZ[]\Wb]`[]c\bW\UagabS[ 9OgOY9Wb(# >O`b9/G/9ZPa >O`bD3@@97B#ZP 1O\]SaVOTbOZa]OdOWZOPZSWRSOZT]`2`OU]\0]Ob]`=Zg[^WQabgZS^ORRZW\U BSbVS`1]`Ra @cPPS`bcPW\UQ]`RaeWbVac^S`ab`]\U ^]ZgQO`P]\ObSQZW^abVOb^`]dWRSbS\aW]\ b]µbSbVS`¶bVSPS\QV BSbVS`1]`Ra(SOQV /\YZSAb`O^a /\YZSab`O^aOZZ]eg]cb]ObbOQVg]c`ZSUab]bVSR`WdS Q]`Ra]\bVSDOaO3`U][SbS`CaW\UbVSO\YZSab`O^ag]c QO\^S`T]`[SfS`QWaSaZWYSP`SOabab`]YSYWQYZSUSfbS\aW]\a VW^ORRcQbW]\OPRcQbW]\O\RVW^ÀSfW]\SfbS\aW]\ >O`b&;E/AZP /\YZSAb`O^a( # >O`bD3bSbVS`#ZPSOQV NEW >]eS`>ORRZSa BVS>]eS`>ORRZSaO`Sa^SQWOZVO\R^ORRZSa RSaWU\SRb]^]aWbW]\bVSVO\Re`WabO\R T]`SO`[µTcaSR¶b]USbVS`OaO\OZZW\]\S µPZORS¶BVWaOZZ]eabVSObVZSbSb]aSbOVWUVSZP]eQObQVeVWZS S\UOUW\UbVSZO`US`[]`S^]eS`TcZZObaO\R^SQb]`OZ[caQZSab] RSZWdS`[]`S^]eS`eObbaT]`[]`SST¿QWS\baeW[[W\U >]eS`>ORRZSa(!#^OW`>O`b>E@>>/2ZP >`]bSQbWdS1]dS` >`]bSQbg]c`DOaO3`U][SbS`OUOW\abeSObVS`O\RRW`beWbV bVWaeSObVS`CD`SaWabO\bQ]dS`/Za]^`]dWRSaO\SfQSZZS\b RSbS``S\bT]`c\eO\bSRcaS]TS_cW^[S\b3ZOabWQWhSRO\R Z]QYOPZSP]bb][7\QZcRSaab]`OUSPOU ESObVS`1]dS`(# >O`1=D3@!ZPa 7\QZcRSa^ORRZSae`WabbcPSO\RP`OQYSb`SORgb]ObbOQVb]R`WdSQ]`R B@/7<7<5D723=A NEW 0SbbS`BSQV\W_cS;]`S>]eS`+4OabS`AeW[[W\U BVWa<3EdWRS]TSObc`SaaeW[[S`Q]OQV9O`Zg\>W^Sa<SWZaS\O\R B`WObVZ]\1]OQVSaBW[1`]eZSgO\R/Z:g[O\T]`b`OW\W\UbSQV\W_cS bW^aT]`W[^`]dW\Ug]c`aeW[:SO`\V]eb]W[^`]dSg]c`bSQV\W_cSa] g]cQO\USb[]`S^]eS`W\g]c`ab`]YSBVSaSbW^aQO\PScaSRW\g]c` b`OW\W\UW\bVS^]]ZOaeSZZOa]\bVSDOaO3`U][SbS` 0SbbS`BSQV\W_cS2D2( ' >O`b2D20BZP 5]AeW[4`SSabgZS2D2eWbV9O`Zg\>W^Sa<SWZaS\ 9O`Zg\aVO`SaVS`aWfT`SSabgZST]Qca^]W\baT]`SdS`gZSdSZ]TaeW[[S`BVS aeW[[W\UT]]bOUS]T9O`Zg\Q][PW\SReWbVQZSO`abS^PgabS^W\ab`cQbW]\ eWZZVSZ^bOYSg]c`T`SSabgZSb]bVS\SfbZSdSZ 4`SSabgZS2D2(!' >O`b9><2D2ZP 8]W\1]OQVB`]g8OQ]Pa]\O\RT]c`Q][^SbWbWdSObVZSbSaT]`be]STTSQbWdS µYWQYPcbb¶W\R]]`aeW[e]`Y]cba]\bVSDOaO3`U][SbS`AE7;S`D/:A e]`Y]cbaeWZZW\Q`SOaSg]c`ab`]YS^]eS`PcWZRg]c`S\Rc`O\QSO\RW[^`]dS g]c``OQSa^ZWba>S`TSQbT]`b`WObVZSbSaRWabO\QSO\R]^S\eObS`aeW[[S`a AeW[S`dOZa2D2(!# >O`bAE7;3@D/:ZP 2SZcfS>ZOabWQ>ORRZSa 3`U]\][WQOZZgRSaWU\SRb]¿bbVSQ]\b]c` ]TbVSVO\RT]`aeW[[W\U]`ac`T^ORRZW\U :WUVbeSWUVbO\RRc`OPZS 2SZcfS>ORRZSa(!^OW`>O`b2:F>>/2ZP 7\QZcRSa^ORRZSa¿\US`bcPSe`WabbcPSO\RP`OQYSb`SORgb]ObbOQVb]R`WdSQ]`R 3fS`QWaS6O\RZSa 3aaS\bWOZT]`b]bOZP]Rgab`S\UbVb`OW\W\U BVSaS`cUUSRVO\RZSaO`S[ORS]TOb]cUV ^]ZgQO`P]\ObS\gZ]\eSPPW\UO\R[SbOZ2`W\U 3fS`QWaS6O\RZSa( #^OW`>O`b&;E62ZP ASOb@]ZZS`6O`ReO`S @=::3@(2SZ`W\`]ZZS`eWbVPSO`W\UaT]`g]c`aSObQO``WOUS @=::3@6/@2E/@3(7\a^SQbg]c``]ZZS`VO`ReO`S PST]`Sg]c]`RS``]ZZS`ab]aSSWTg]c\SSRb] `S^ZOQSbVSVO`ReO`S @=::3@(&SOQV>O`b #>A #ZP 6/@2E/@3A3B(!SOQV>O`b $/012 #ZP <]bS(BVS`SO`S"`]ZZS`a"VO`ReO`SaSba^S`[OQVW\SA]ZRW\RWdWRcOZZg >`WQSaacPXSQbb]QVO\USeWbV]cb\]bWQS Vasa Ergometer User’s Manual _cSabW]\a-QOZZcaOb&"&&D/A/]`dWaWbca]\ZW\SOb(eeedOaOb`OW\S`Q][ 07/01/11 ]`RS`T]`[(ePbPTaV^\TcTa_PacbPRRTbb^aXTb BcT_ )BT[TRch^daEPbP4aV^\TcTa<^ST[ QVSQY]\S MMMMDOaOAeW[3`U][SbS`MMM^c`QVOaSRPST]`S2SQS[PS` %MMM^c`QVOaSR8O\cO`g &]`ZObS` MMMMDOaOA^OQSAOdS`3`U][SbS`MMM &[]RSZeOZZ[]c\bSR^c`QVOaSR&Qc``S\b MMMMDOaO9OgOY3`U][SbS`MMM^c`QVOaSRPST]`S2SQS[PS` %MMM^c`QVOaSR8O\cO`g &]`ZObS` BcT_!)BWX__X]V0SSaTbb AS`WOZ<c[PS`(MMMMMMMMMMMMMMMMMMMMMMMMMMMMM Z]QObSR]\b]^]TTO\eVSSZV]caW\UaSS^OUS&T]` RSbOWZa]\eVS`Sb]¿\Rg]c`aS`WOZ\c[PS` BcT_")1X[[X]V0SSaTbbXUSXUUTaT]c <O[S <O[S /RR`Saa /RR`Saa 1Wbg 1Wbg AbObS HW^ AbObS BSZS^V]\S BSZS^V]\S 3[OWZ 3[OWZ HW^ BcT_#);XbccWTXcT\bh^dfXbWc^^aSTa 23A1@7>B7=<=47B3; >/@B A7H3 5`]c\R 2Og <Sfb2Og % % % % !# " "& %ROga ! " # $ & " ROga !# "# $ & ' # !# $ ' ROg B=B/:1=AB BcT_%)<TcW^S^U?Ph\T]c 1S`bW¿SR1VSQY]`;]\Sg=`RS` 1VSQY\]bS(]`RS`eWZZPSVSZR eSSYaT]`QVSQYb]QZSO` >c`QVOaS=`RS`\]bS(^ZSOaSW\QZcRS]T¿QWOZe`WbbS\^c`QVOaS]`RS`AQV]]ZU]dS`\[S\bO\RG;1/G;1/^c`QVOaS]`RS`aOQQS^bSR DWaO 7bS[eSWUVbaO`SW\^O`S\bVSaSaOTbS`WbS[^O`b\c[PS` >ZSOaSQ]\bOQbDOaOT]`OaVW^^W\U_c]bST]`]`RS`a]cbaWRSbVS Q]\bW\S\bOZCAabObSa]`T]`aVW^^W\UeSWUVbaSfQSSRW\U$^]c\Ra >`WQSaacPXSQbb]QVO\USeWbV]cb\]bWQS C<7B1=AB AcPB]bOZ AVW^^W\U6O\RZW\UaSSQVO`b]\ZSTb B]bOZ BcT_$)BWX__X]V ESWUVb ZP "ZPa #ZPa #ZPa $ ZPa !ZPa !"ZPa "#ZPa #$ZPa b`O\aWbbW[S ?C/<B7BG DB7;% ;OabS`1O`R 2WaQ]dS` ® /QQ]c\b(MMMMMMMMMMMMMMMMMMMMMMMMMM3f^W`ObW]\2ObS(MMMMMMM1DDMMMMMM <O[S]\1O`R(MMMMMMMMMMMMMMMMMMMMMMMAWU\Obc`S(MMMMMMMMMMMMMMMMMMMMMMMMMMMMMMMMM BcT_&)?[PRTh^da>aSTa A6=>=<:7<3(eeeD/A/B@/7<3@Q][ 1/::B=::4@33(&"&&D/A/ 7<B3@</B7=</:^ZSOaSQOZZ(& 4/F(& &% % &% %"]`#" $ #" DOaO7\Q /ZZS\;O`bW\2`WdS 3aaSf8c\QbW]\DB#"# W\T].dOaOb`OW\S`Q][ eeedOaOb`OW\S`Q][