1
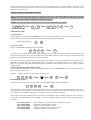
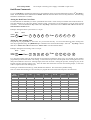
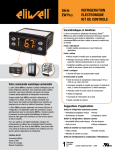
SCORPION
Z4120 Alarm Controller
As installed by Eagle Alarms
09 5357117
www.eaglealarms.co.nz
User Instructions
Using the Scorpion Z4120C alarm controllers
The Keypad
The Scorpion Z4120C and Z8020C communicate system status through the keypad beeper. During an arming cycle the
beeper will sound for the entire exit time. This is a ‘leave now’ warning. Scorpion will arm at the expiry of this period.
On entry, the beeper sounds for the programmed entry period. If a valid user code is entered to disarm the system, the
beeper emits two short tones. An incorrect entry is signalled by one long tone.
The ‘Status’ Lamp
The yellow status lamp is used to indicate several conditions.
Yellow lamp on:
Yellow lamp off:
Yellow lamp flashing:
the system is armed or arming
the system is disarmed
an alarm has occurred, a system fault exists or
the panic function has been activated
The ‘Mains’ Lamp
The ‘Mains’ lamp is on when mains power is applied. In the event of a mains failure the ‘Mains’ light flashes until
mains power is restored, and an arm/disarm cycle is completed. The ‘Mains’ lamp also flashes to indicate a low battery
condition. When the battery is restored to full charge and an arm/disarm cycle is completed, the ‘Mains’ lamp stops
flashing.
The ‘Armed’ Lamp
The ‘Armed’ lamp illuminates when the system is armed. The ‘Armed’ lamp also flashes to indicate when an alarm
condition has occurred.
User Codes
Scorpion Z4120C and Scorpion Z8020C are each capable of storing up to twenty-four user codes. Each user code may
be two to four digits in length and each may be programmed with one or all of six different functions. Each user code
may be programmed:
As a user code that can arm and/or disarm the system from a touch tone phone
As a user code that can select a partitioned area to arm (Z8020C only)
As a master user code that can program other user codes
As an arming code only (can not disarm the system)
As a user code that does not report to a central station
As a user code that can exclude zones at arming.
If no option is selected for a user code, that code will perform a basic arm and disarm function only.
User code 1 is factory set as a master user code 1234 and should be changed to your own selection. This user code can
also be used to program the remaining user codes. Your installer will need to assign the functions of each additional
user code when your system is installed. For example you may require user code 18 to be used by a domestic helper to
arm but not disarm the system. This restriction on code 18 will need to be pre-set by the installer. The code may be
entered at a later time using the master code. Use the user code attributes table in the rear of this user manual to record
the functions for each code.
Adding, Changing or Deleting a user Code
Enter a valid master user code, press keys 1+3 together then enter a new user code then enter # then the user
identifier (1 to 15). Repeat the procedure for adding other new user codes. To delete user codes, follow the same
procedure, but omit the ‘new user code’ step. Finish by entering a #.
Example. To change the master user code from 1234 to 1912 press the following sequence:
1 2 3 4 then 1 + 3 then 1
(Your current code)
(Together)
9
1
2
# then 1
(New code)
Arming the System
Using Quickarm
If your installer has programmed the quickarm option you can arm the system by entering 1 then #. For partitioned
systems (Z8020C only) entering 1 # will arm Area A and entering 2 # will arm Area B.
Quick arming Scorpion
1
#
Using a User Code
Enter a valid two, three or four digit user code then #.
1
2
3
4
then
#
If all zones are clear, the keypad sounds a repeating sequence of three short beeps for the duration of the exit delay and
the yellow status lamp turns on. The zone lamps for all zones that are arming are also turned on. At the end of the exit
delay the zone lamps extinguish and the system is now armed.
If a zone fault or potential alarm condition exists and the user attempts to arm the system, the lamp(s) for those zone(s)
flash and are accompanied by a repeating sequence of two long beeps. This indicates that one or more of the zones are
faulty or not secured. The panel should be disarmed, the problem located (possible open door or window) and the
system re-armed.
To Arm the System and Exclude a Zone(s)
Enter a valid user code then * (all zone LED’s light) followed by the zone number(s) to be excluded (those zone
LED’s turn off), then press #.
Example: to arm the system with zones 4 and 5 excluded press:
1
2
3
4
then 4
then
5 then #
Disarming the System
Follow the same sequence as for arming, enter a valid two, three or four digit user code then #.
1
2
3
4
then
#
The keypad will beep twice and the yellow status light will turn off. A flashing yellow status lamp indicates that one or
more zones have been alarmed. The zone lamps for any zones which have alarmed will flash until the next arming
cycle. Note the zone number(s) and notify your installer, or security monitoring company.
If the yellow status lamp is flashing and no zone lamps are flashing the alarm condition may have been caused by a
system fault, press 8 9 then # on your keypad. The following table indicates the type of alarm condition that has
occurred:
Zone 1 lamp flashes
Zone 2 lamp flashes
Zone 3 lamp flashes
Zone 4 lamp flashes
Zone 5 lamp flashes
Alarm caused by a nitewatch, two key, medical or fire panic
The battery has discharged or is faulty
Mains power to the alarm has failed
A dialler communications error has occurred
Phone line is faulty or is disconnected
2
Zone 6 lamp flashes
Siren output or auxiliary power supply overloaded or open circuit
Hold Down Commands
To use a ‘hold down’ command the function key (keypad digit) must be pressed and held down until a 2nd key-beep is
heard. Note that hold down commands will ONLY function when the alarm control is fully disarmed. The following
hold down commands are available:
Setting the Real Time Clock Time
It is advisable but not mandatory to set the system Real Time Clock. Check with your installer if the clock has been set.
The clock MUST be set if the Auto Arming feature is used. Clock time is in 24 hour format. To set the clock proceed
as follows: Press and hold down key 6 until a 2nd key-beep is heard then enter a master user code then # then the
time in 24 hour format then #.
Example: Setting the alarm system clock to 2:45 pm.
BEEP
HOLD
DOWN
6
BEEP
then 1
2
3
4
# then 1
4
4
5
#
Setting the Auto Arming Time
Scorpion may be programmed to ‘Auto Arm’ at a pre-set time each day. To access this feature an Auto Arming time
must be programmed using the [Hold Down] 7 command. Press and hold down key 7 until a 2nd key-beep is heard
then enter a master user code then # then the ‘time to arm’ in 24 hour format then #.
Example: Setting the auto arming time to 5:30 pm
BEEP
HOLD
DOWN
7
BEEP
then 1
2
3
4
# then 1
7
3
0
#
If a valid auto arming time has been entered, the keypad will sound three beeps every six seconds for the installer
programmed pre-alert time before auto arming. At the end of the pre-alert time the panel starts counting down the exit
delay and sounds the ‘leave now’ warning beeper, then arms all zones. During the pre-alert, entering any key at the
keypad will abort the auto arming cycle. Once the alarm has started the exit timer and warning beeper, a valid user
code is required to abort the arming cycle.
Entering an invalid auto arm time (eg. 2500) disables this function. This is the factory default setting.
Note: To enable Auto Arming it is also necessary to program the correct time into Scorpion’s real time clock.
User
User
Number
1
2
3
4
5
6
7
8
9
10
11
12
13
14
Initials
Master
Code
Arm
Only
Phone
Arm
Y
3
Arm area
A or B
Report to
Station
Can Exclude
Zones