1
Business Mobility (IP) DECT
DECT G266 and G566 Handsets
Basic User Guide
Date: February 2013
Great care has been taken to ensure that the information
contained in this handbook is accurate and complete. Should
any errors or omissions be discovered or should any user wish
to make a suggestion for improving this handbook, they are
invited to send the relevant details to:
NEC Nederland B.V.
P.O. BOX 32
1200 JD HILVERSUM
THE NETHERLANDS
© NEC Nederland B.V. 2013
All right are reserved. Reproduction in whole or in part is prohibited without the written consent of the
copyright owner. All brand names and product names in this document are trademarks or registered
trademarks of their respective companies.
2
Disclaimer
NEC reserves the right to revise or make changes or
improvements to the products described in the user manual or
to this user manual itself at any time without obligation to
notify any person of such revision or improvements.
The pictures, icons, screen shots and diagrams used in this user
manual have been derived from the G566 DECT Handset and
might be slightly different for the G255 DECT Handset.
3
Revision history
Revision history
February, 2013
Creation of this Basic User Manual.
4
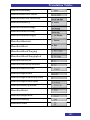
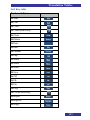
Contents
Contents
Disclaimer ......................................................................... 3
Revision history ................................................................ 4
Contents ............................................................................ 5
Introduction ..................................................................... 10
Notice on the use of the handsets ................................. 10
Getting started ................................................................ 11
Installing the battery pack ............................................. 11
Installing the charger ..................................................... 11
Charging the batteries ................................................... 12
Charging a spare battery .............................................................. 12
Charging guidelines...................................................................... 12
Charging and operating times ...................................................... 12
Charge display .............................................................. 13
Handset keys and display areas ................................... 14
Handset keys ................................................................................ 15
Display .......................................................................................... 17
Icon line ........................................................................................ 18
Time & Date area ......................................................................... 18
Dialogue area ............................................................................... 19
Idle mode............................................................................................ 19
Call mode ........................................................................................... 19
Dialogue mode ................................................................................... 20
Menu mode ........................................................................................ 21
Edit mode ........................................................................................... 21
Soft key line .................................................................................. 23
Used notation in this manual ......................................... 24
General functions ........................................................... 27
Switching the handset on .............................................. 27
Switching the handset off .............................................. 27
Key lock ........................................................................ 27
Locking or Unlocking .................................................................... 27
Call features .................................................................... 28
5
Contents
Make a call .................................................................... 28
Dialling a number ......................................................................... 28
Using Predial mode ...................................................................... 28
Using Central or Private Directory ................................................ 28
Using Speed dial .......................................................................... 29
Making an SOS call ...................................................................... 29
Answering a call ............................................................ 29
Answering a call in Normal mode................................................. 29
Answering a call using any key .................................................... 29
Auto-answering mode .................................................................. 29
Muting the ringer of an incoming call ........................................... 29
Rejecting an incoming call ........................................................... 29
Change settings during a call ........................................ 30
Adjusting the headset or loudspeaker volume ............................. 30
Using mute during a call ............................................................... 30
Deactivate the microphone (mute) ..................................................... 30
Activate the microphone (unmute) ...................................................... 30
Activate and deactivate the loudspeaker (toggle function) .......... 30
Transferring a call ......................................................... 30
Dialling second destination then transfer ..................................... 30
Using Private or Central Directory then transfer .......................... 31
Shuttle the call .............................................................................. 31
Calls list ........................................................................... 32
Actions on the calls lists ................................................ 33
Open Calls list .............................................................................. 33
Checking the details of a call ....................................................... 33
Dialling the number of the call list entry ....................................... 33
First edit then dial the number of the call list entry ....................... 34
Transferring a name/number to your contacts list ........................ 34
Add a number to an existing contact ............................................ 36
Transferring a number to the caller filter list ................................. 37
Deleting an entry .......................................................................... 37
Missed calls list entries will also be deleted from the list if: ......... 38
Deleting all entries ........................................................................ 38
Contacts .......................................................................... 39
Adding a new contact ................................................................... 39
Changing information of a contact ............................................... 40
Deleting a contact ......................................................................... 40
Deleting all contacts ..................................................................... 41
6
Contents
Speed dial feature ........................................................................ 41
Adding, replacing or deleting a speed dial contact ............................. 42
Adding contact to the caller filter list ............................................. 43
Messaging ....................................................................... 44
Normal, urgent and emergency messages ................... 44
Normal messages ........................................................................ 44
Urgent messages ......................................................................... 44
Emergency messages .................................................................. 44
Confirming receipts ...................................................................... 45
Message list full............................................................. 45
Message Menu Sections ............................................... 45
Open Message menu section ...................................................... 46
Actions on the messages .............................................. 46
Reading a message ..................................................................... 46
Writing and saving a new/draft message ..................................... 47
Writing and sending a new/draft message ................................... 47
Forwarding a message ................................................................. 50
Replying to an incoming message ............................................... 50
Deleting a message...................................................................... 51
Deleting all messages .................................................................. 51
Saving sender to the contacts list ................................................ 52
Add sender to existing contact ..................................................... 52
Message settings .......................................................... 52
Calendar .......................................................................... 54
Open the Calendar ....................................................................... 54
Changing the calendar format (week or month view) .................. 54
Open schedule for today .............................................................. 54
Open schedule for a given date ................................................... 54
Adding an appointment ................................................................ 55
Open appointment ........................................................................ 57
Editing an appointment ................................................................ 57
Copying an appointment .............................................................. 58
Deleting an appointment .............................................................. 58
Additional features (Accessories) ................................. 59
Calculator ...................................................................... 59
Stopwatch ..................................................................... 60
Alarms (alarm clock) ..................................................... 61
Open Alarms ................................................................................ 61
Assigning or change a daily alarm ............................................... 61
7
Contents
Turning off a daily alarm ............................................................... 61
Assigning or change a recurrent alarm ........................................ 62
Turning off a recurrent alarm ........................................................ 62
Setting snooze time ...................................................................... 63
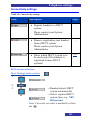
Telephone settings ......................................................... 64
Open Settings menu section ........................................................ 64
General settings ............................................................ 65
Setting Silent ................................................................................ 66
Setting the time and date ............................................................. 66
Setting the time .................................................................................. 66
Setting the date .................................................................................. 67
Setting the language .................................................................... 68
Configuring shortcuts ................................................................... 68
Configuring the LED signal .......................................................... 69
Security options ............................................................................ 70
Setting the Phone lock feature ........................................................... 70
Setting the Automatic keypad lock feature ......................................... 71
Changing the PIN code ...................................................................... 71
Changing the Proxy password............................................................ 72
Defining the handset name .......................................................... 73
Resetting settings ......................................................................... 73
View status information ................................................................ 74
Sounds (normal & silent) settings.................................. 75
Incoming call ................................................................................ 77
Setting the ring volume ....................................................................... 77
Setting the ring melodies .................................................................... 77
Setting the increasing ring feature ...................................................... 78
Setting the vibrator feature ................................................................. 78
Message notifications ................................................................... 79
Setting the notification volume............................................................ 79
Setting the notification melodies ......................................................... 80
Setting the increasing notification feature ........................................... 80
Setting the vibrator feature ................................................................. 81
Alerts ............................................................................................ 82
Setting the alert volume ...................................................................... 82
Setting the alert melody ...................................................................... 82
Setting the increasing alert feature ..................................................... 83
Setting the vibrator feature ................................................................. 83
Feedback ...................................................................................... 84
Setting the key sound feature ............................................................. 84
Setting confirmation sound ................................................................. 84
Setting the coverage warning feature ................................................. 85
Setting the charger warning feature ................................................... 85
8
Contents
Display settings ............................................................. 86
Selecting Wallpaper ..................................................................... 86
Selecting startup screen ............................................................... 87
Configuring power save ............................................................... 87
Calls settings ................................................................. 89
View statistics information ............................................................ 90
Answer mode configuration .......................................................... 90
Caller filter configuration .............................................................. 91
Adding an entry to the Caller filter list ................................................. 91
Changing a Caller filter entry .............................................................. 93
Deleting an entry from the Caller filter list ........................................... 94
Deleting all entries in the Caller filter list ............................................. 94
Activating Caller filter .......................................................................... 95
Configuring emergency or SOS calls ........................................... 96
Assigning emergency call number ...................................................... 96
Assigning an emergency message ..................................................... 98
Assigning the Silent charging feature ........................................... 98
Defining the missed call time ....................................................... 99
Voicemail ...................................................................... 99
Assigning the Voicemail number ................................................ 100
Connectivity settings ................................................... 101
DECT system selection .............................................................. 101
9
Introduction
Introduction
Also refer to the following document:
General DECT Handset Information Guide
Notice on the use of the handsets
Like all cordless telephones, the G266 and G566 DECT handsets
use radio signals, which do not guarantee a connection under all
circumstances. Do not rely exclusively on the DECT handsets
when making indispensable calls (such as medical emergencies).
SOS function
The SOS function of the G266 and G566 does not replace
companion supervision by a colleague or other people. In case of
critical, emergency or life-threatening situations make sure that
other persons are present or that appropriate measures are taken.
10
Getting started
Getting started
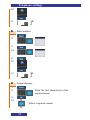
Installing the battery pack
1. Place the handset face down on a flat surface.
2. Pull the lock at the bottom of the battery compartment
cover upward and at the same time shift the cover
downwards.
3. Remove the battery compartment cover.
4. Push the battery pack into the casing.
5. Replace the battery cover.
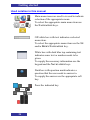
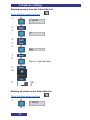
Installing the charger
1. Place the charger on a flat surface.
2. Connect the micro-B USB connector of the USB cable to
(the back of) the charger.
3. Connect the type A USB connector to the USB AC/DC
Adapter.
4. Connect the adapter to an electrical outlet.
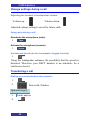
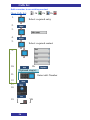
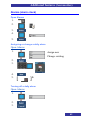
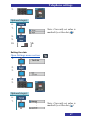
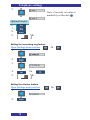
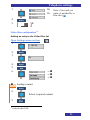
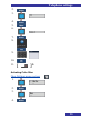
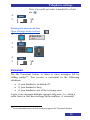
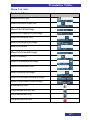
5. Place the handset on the charger as shown in Figure 1.
Figure 1: G566d, G566s and G266 in Desktop Charger
11
Getting started
Charging the batteries
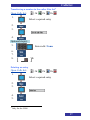
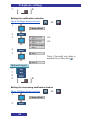
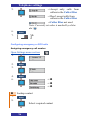
Place the handset in the charger as shown in Figure 1. For a few
seconds the display of the handset shows:
Figure 2: Battery charging display
Attention:
The handset, if switched off, automatically switches on
when placed in the charger.
Charging a spare battery
The Gx66 Desktop Charger can be used to charge a spare battery
pack for the G266/G566. To charge a spare battery pack:
1. Place the spare battery pack in the spare battery charging
slot compartment. (Upside down and text on the battery
pack to the front.)
2. Slid the spare battery pack under the metal rim to keep it
in place.
Charging guidelines
Please read the concerning section in the DECT Handsets –
General Information Guide carefully!
Charging and operating times
Discharged batteries require 7 hours (using the spare battery slot
might take longer) to completely recharge. Completely charged
batteries provide the handset with up to 20 hours of talk time and
160 hours of standby time.
12
Getting started
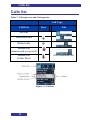
Charge display
The battery charge status appears on the top of the display screen:
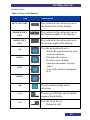
Table 1: Battery charge status icons
Icon
Charge status
Almost empty
Less than 10%
10% to 20%
,
..
,
20% to 90%
(the bigger the green bar, the higher the
charged percentage)
Fully charged (more than 90%)
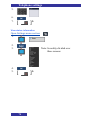
When the battery is nearly discharged a warning beep sounds and,
when not in a call, the display shows:
Figure 3: Battery low display
You cannot make calls while this message appears.
13
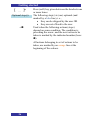
Getting started
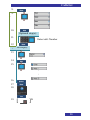
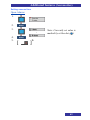
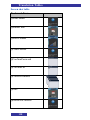
Handset keys and display areas
Figure 4: Elements of the G266
Figure 5: Elements of the G566
14
Getting started
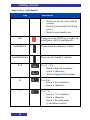
Handset keys
Table 2: Keys of the Handset
Key
Description
LEFT SOFT KEY
Key related to the action given on
the bottom left of the display.
MIDDLE SOFT
KEY
Key related to the action given on
the bottom middle of the display.
RIGHT SOFT
KEY
Key related to the action given on
the bottom right of the display.
UP
Use the navigation keys to:
Select the required menu icon
or menu element;
Navigate the cursor;
In some cases change
(increase/decrease) a given
value;
Access the shortcut assigned
to it.
DOWN
LEFT
RIGHT
OK
CALL
CLR
Used to acknowledge menu
selection.
Used to go off hook and to initiate
enquiry/hold/shuttle.
Use the Clear key to
Release a call;
15
Getting started
Table 2: Keys of the Handset
Key
Description
Return to the previous step in
a menu;
Switch your handset off (long
press)
Switch your handset on.
Long press the SOS key to make an
emergency call (if configured).
SOS
To increase the handset volume.
VOLUME UP
Decrease the handset volume.
VOLUME DOWN
1–9
:
:
Use 1 – 9 to
Insert a digit in a number;
Insert a character;
Select a Speed dial number
0
Use 0 to
Insert a 0 in a number;
Insert a character.
*
Use * to
Insert a * in a number;
Insert a character
Insert a decimal point
(Calculator feature).
16
Getting started
Table 2: Keys of the Handset
Key
Description
#
g
LINE KEY
Use # to
Insert a # in a number;
Switch between Normal and
Silent (sounds & alerts)
settings by long pressing
(more than 2 seconds) the key.
Toggle the character case
(capital, lower case or digit)
when in edit mode.
Only for the G566
Use one of the four Line keys to
Select a Speed dial number
Access the shortcut assigned
to it.
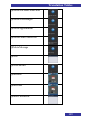
Display
Figure 6 shows the four areas of the display:
Icon line
Time & Date area
Dialogue area
Soft key line
Figure 6: Display screen
17
Getting started
Icon line
The icon line displays the status of the handset.
Table 3: Icon line icons
Icon
Description
Level of radio signal (always shown)
New text message recieved
Voice message waiting indication
Keypad locked
Alarm set
Missed calls
Ringer deactivated
Caller filter active
(only for G566 DECT Handset)
Battery charge status
Refer to Table 1 for Battery status icons.
Time & Date area
The Time & Date area is only shown in the Idle mode and gives
the current time and date. In any other mode this part of the
display is added to the Dialogue area (see next).
18
Getting started
Dialogue area
The Dialogue area displays information according to the
operational mode of the handset:
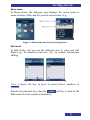
Idle mode
In Idle mode, the dialogue area displays information like DECT
system name, handset’s DNR, and so on.
Figure 7: Idle mode screen
Call mode
In Call mode, the dialogue area displays information related to the
call, like number and name of the calling/connected party and
some status icons (see Table 4 and Table 5).
Table 4: Call Set-up icons
Icon
Description
Incoming call
One to three green “circles” intermittendly shown
Outgoing call
One to three blue “circles” intermittendly shown
19
Getting started
Table 5: Call Conversation icons
Icon
Description
Call in conversation
Call set-up by this phone
Call in conversation
Call set-up to this phone
Loudspeaker on
Microphone muted while loudspeaker on
Microphone muted while loudspeaker off
Dialogue mode
In Dialogue mode, the dialogue area displays dialogues regarding
missed calls (see Figure 8), messaging, menu settings, warnings
and so on (see for some examples).
Figure 8: Examples Dialogue mode
20
Getting started
Menu mode
In Menu mode, the dialogue area displays the menu icons or
menu sections (tabs) and the specific menu items. E.g., :
Figure 9: Main menu and General setting menu
Edit mode
In Edit mode, you can use the dialogue area to enter and edit
digits (e.g., for numbers) and text, e.g., for contact information
editing:
Figure 10: Contacts name and number editing
Table 6 shows the key to press to insert letters, numbers or
symbols.
Besides the physical keys also the
Edit mode to insert (symbol) characters.
soft key is used in the
21
Getting started
Table 6: key functions in text mode
Key
Uppercase
Lowercase
1
1.!?,-”@+::
1.!?,-”@+::
2
ABC2ÆÀÁÂÄ
ÅÇ
abc2æàáâäåç
3
DEF3ÈÉÊË
def3èéêë
4
GHI4ÍÎÏ
ghi4íîï
5
JKL5
jkl5
6
MNO6ŒÓÔÖØ
mno6œóôöø
7
PQRS7Šß
pqrs7šß
8
TUV8ÙÚÛÜ
tuv8ùúûü
9
WXYZ9ŸŽ
wxyz9ÿž
0
(space) 0
(space) 0
*
*
*
#
Toggle character case: Abc → ABC → abc → 123
. , ` ? ! ″ - ( ) @ / : _ ; + & % * = < > £ (space) $ ¥ ⁰
[]{}\~^¡§¿#|ꞌʹ
22
Getting started
Soft key line
Soft keys appear below the handset dialogue area. The key
functions change automatically according to the operational state
of the handset.
23
Getting started
Used notation in this manual
Main menu icons are used to is used to indicate
selection of the appropriate menu.
To select the appropriate main menu item use
the NAVIGATION keys.
Off-white box with text indicates a selected
menu item.
To select the appropriate menu item use the UP
and/or DOWN NAVIGATION key.
White box with dark blue top containing text
indicates some text or number needs to be
given.
To supply the necessary information use the
keypad and the NAVIGATION keys.
Dark box with question mark indicates a
question that the user needs to answer to.
To supply the answer use the appropriate soft
key.
Press the indicated key.
…..
24
Getting started
The blue box with text indicates a soft key.
The three icons are special soft keys (available
in the idle state).
Select the appropriate soft key to execute the
indicated action:
Left soft key
Middle soft key
Right soft key
Use the keypad and/or the NAVIGATION keys
to enter or change a number, date, name or
text:
Use the keypad to insert one or more
digits (0 – 9, * and #) or characters
To delete a digit or character use soft
key
Use the Navigation keys to move the
cursor to the insertion point
Use the Up or Down Navigation key to
increase or decrease the value of the
selected field
Use (one of) the NAVIGATION keys
Use LEFT and/or RIGHT NAVIGATION key
Use UP and/or DOWN NAVIGATION key.
25
Getting started
[
…
]n
Optional step(s):
Press (soft) key given between the brackets one
or more times
The following step(s) is (are) optional (and
marked by a blue line), i.e.,
they can be skipped by the user OR
they are not offered to the user.
Used when the following actions (steps)
depend on some condition. The condition is
preceding the arrow, and the next action to be
taken is marked by the indicated number (here:
).
All actions belonging to set of actions to be
taken, are marked by an orange line at the
beginning of the actions.
26
General functions
General functions
Switching the handset on
1.
Switching the handset off
1.
˃ 3s
2.
Key lock
Attention: You can dial 911 and 112 when the key lock is active.
The key lock does not affect the SOS key.
Locking or Unlocking
1.
2.
Also automatic keypad lock can be set from the Settings menu.
27
Call features
Call features
Make a call
Dialling a number
1.
2.
Enter/edit: Number
Using Predial mode
1.
Enter/edit: Number
2.
Using Central or Private Directory
1
1.
Or
Optional step(s):
2.
Enter the first character(s) of the
required name
3.
4.
Select: required contact
Optional step(s):
5.
Select: appropriate number
6.
Or
1
Central Directory is only available if it is provided by your communication
system
28
Call features
Using Speed dial
1.
….
Long press
Or
Making an SOS call
See also Configuring emergency or SOS calls (page 96).
1.
Answering a call
Answering a call in Normal mode
1.
Or
1.
Loudspeaker off
Loudspeaker on
Answering a call using any key
See also Answer mode configuration (page 90).
1.
,
,
..
,
,
,
Loudspeaker off
Or
Or
1.
Loudspeaker on
Auto-answering mode
See also Answer mode configuration (page 90).
To answer an incoming call no manual action is required.
Muting the ringer of an incoming call
1.
Rejecting an incoming call
1.
29
Call features
Change settings during a call
Adjusting the headset or loudspeaker volume
Volume up:
Volume down:
Adjusted volume setting is saved for future calls.
Using mute during a call
Deactivate the microphone (mute)
1.
Activate the microphone (unmute)
1.
Activate and deactivate the loudspeaker (toggle function)
1.
Using the loudspeaker enhances the possibility that the speech is
distorted. Therefore your DECT handset is no substitute for a
conference device!
Transferring a call
Dialling second destination then transfer
1.
2.
Enter/edit: Number
Optional step(s):
3.
Await answer
4.
30
Call features
Using Private or Central Directory then transfer
1.
2.
Or
3.
Optional step(s):
4.
Enter the first character(s) of the
required name
5.
6.
Select: required contact
Optional step(s):
7.
8.
Select: appropriate number
Or
Optional step(s):
9.
10.
Await answer
Shuttle the call
To alternate between the two parties (before transfer):
1.
31
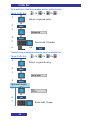
Calls list
Calls list
Table 7: Call type icons and Call type tabs
Call Type
Call List
Icon
All calls
-
Tab
Answered calls
Dialed calls
Missed call
(unanswered or rejected)
Missed call
(Caller filter)
(One combined list)
Figure 11: Call lists
32
Calls list
Actions on the calls lists
Open Calls list
1.
2.
=
=
=
=
Checking the details of a call
Open Calls list:
Or
Or
Or
1.
Select: required entry
2.
3.
[
]n
Dialling the number of the call list entry
Open Calls list:
Or
Or
Or
1.
Select: required entry
2.
Or
33
Calls list
First edit then dial the number of the call list entry
Open Calls list:
Or
Or
Or
1.
Select: required entry
2.
3.
4.
5.
Enter/edit: Number
6.
Or
Transferring a name/number to your contacts list
Open Calls list:
Or
Or
Or
1.
Select: required entry
2.
3.
4.
Optional step(s):
5.
6.
7.
Enter/edit: Name
34
Calls list
8.
9.
10.
Optional step(s):
11.
Enter/edit: Number
12.
Optional step(s):
13.
14.
15.
:
:
16.
17.
18.
19.
[
]n
35
Calls list
Add a number to an existing contact
Open Calls list:
Or
Or
Or
1.
Select: required entry
2.
3.
4.
5.
Select: required contact
9.
10.
Or
Optional step(s):
11.
Enter/edit: Number
12.
17.
18.
19.
]n
[
36
Calls list
Transferring a number to the caller filter list
Open Calls list:
Or
Or
2
Or
1.
Select: required entry
2.
3.
4.
Optional step(s):
5.
6.
7.
8.
Enter/edit: Name
[
]n
Deleting an entry
Open Calls list:
Or
Or
Or
1.
Select: required entry
2.
3.
4.
5.
2
Only for the G566
37
Calls list
6.
]n
[
Missed calls list entries will also be deleted from the list if:
You answer a call from the to the entry related number (entry
moved to the Answered calls list).
You dial the to the entry related number (entry moved to the
Dialed calls list).
Deleting all entries
Open Calls list:
Or
1.
2.
3.
4.
5.
[
38
]n
Or
Or
Contacts
Contacts
Adding a new contact
1.
2.
3.
4.
5.
6.
7.
8.
9.
10.
11.
12.
39
Contacts
Optional step(s):
13.
14.
15.
:
:
Note: Currently set value is
marked by a blue dot ( )
16.
17.
18.
19.
]n
[
Changing information of a contact
1.
2.
Select: required contact
3.
Continue as in Adding a new contact (page 39) from step 5.
Deleting a contact
1.
2.
Select: required contact
40
Contacts
3.
4.
5.
6.
7.
[
]n
Deleting all contacts
1.
2.
3.
4.
5.
6.
7.
8.
[
]n
Speed dial feature
See also Using Speed dial (page 29).
Attention: Only the first number in the “chain” Work, Mobile,
Home and Other assigned to the contact will be used
by the Speed dial key.
41
Contacts
Adding, replacing or deleting a speed dial contact
1.
2.
Select: required contact
3.
4.
5.
6.
3
add
replace
delete
3
7.
8.
add
7.
8.
replace
7.
8.
delete
[
[
[
]n
]n
]n
# = 2 .. 9, L1, L2, L3 or L4
42
Contacts
Adding contact to the caller filter list
4
1.
2.
Select: required contact
3.
4.
5.
6.
7.
4
[
]n
Only for the G566
43
Messaging
Messaging5
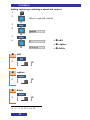
Normal, urgent and emergency messages
The system differentiates between Normal, Urgent and
Emergency messages.
Note: It is not possible to send an Emergency message from your
DECT handset.
Normal messages
The melody assigned to Notification normal plays when you
receive a normal message. If you receive a normal message
during a call, a short alert tone sounds.
Urgent messages
The handset shows urgent messages immediately on the display.
The melody assigned to Notification urgent plays when you
receive an urgent message. The ringer volume increases to the
maximum during the signalling process. If you receive an urgent
message during a call, a repeated short alert tone sounds.
Emergency messages
The handset shows emergency messages immediately on the
display.
The melody assigned to Notification emergency plays when you
receive an emergency message. The ringer volume increases to
the maximum during the signalling process. If you receive an
emergency message during a call, a repeated and in volume
increasing short alert tone sounds.
5
Only for the G566
44
Messaging
Confirming receipts
You must confirm the receipt of urgent and emergency messages.
If you do not confirm the message within 60 seconds, the initiator
receives a message that indicates the message was not delivered.
To confirm:
Positively:
Or
Negatively:
Or
Message list full
Attention:
If the display shows this warning no new
message can be received. Delete some
messages or change the Overwrite old setting
to On – see Message settings (page 52).
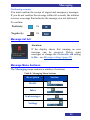
Message Menu Sections
The Messaging menu contains a number of sections:
Table 8: Messaging Menu Sections
Description
Section
Drafts
Inbox
Sent messages
Settings
45
Messaging
Open Message menu section
1.
2.
3.
4.
=
=
=
=
Actions on the messages
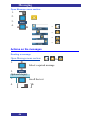
Reading a message
Open Message menu section:
,
1.
Select: required message
2.
Optional step(s):
3.
4.
Scroll the text
[
46
]n
Or
Messaging
Writing and saving a new/draft message
Open Message menu section:
1.
Or
1a.
Select: required message
1b.
2.
3.
4.
5.
[
]n
Writing and sending a new/draft message
Open Message menu section:
1.
Or
1a.
Select: required message
1b.
2.
3.
4.
5.
47
Messaging
6.
7.
8.
Contacts
Select: required contact
9.
Optional step(s):
10.
11.
7.
8.
]n
[
Enter number
9.
Optional step(s):
10.
11.
]n
[
48
Messaging
7.
Send to many
8.
Select: required contact
Optional step(s):
9.
Select: appropriate number
10.
Optional step(s):
11.
]n
12.
[
7.
8.
Central directory
Enter the first character(s) of the required
name
9.
Optional step(s):
10.
Select: required contact
11.
Optional step(s):
12.
13.
[
]n
49
Messaging
Forwarding a message
Open Message menu section:
Or
1.
Select: required message
2.
3.
4.
Optional step(s):
5.
6.
Continue as in Writing and sending a new/draft message
(page 47) from step 3.
Replying to an incoming message
Open Message menu section:
1.
Select: required message
2.
3.
4.
5.
6.
50
Messaging
Optional step(s):
7.
8.
[
]n
Deleting a message
Open Message menu section:
,
Or
1.
Select: required message
2.
4.
5.
6.
7.
[
]n
Deleting all messages
Open Message menu section:
,
Or
1.
2.
3.
4.
51
Messaging
5.
]n
[
Saving sender to the contacts list
Open Message menu section:
1.
Select: required message
2.
4.
5.
6.
Continue as in Transferring a name/number to your
contacts list (page 34) from step 5.
Add sender to existing contact
Open Message menu section:
1.
Select: required message
2.
3.
4.
5.
Continue as in Add a number to an existing contact (page
36) from step 5.
Message settings
The following messaging options can be configured to On or Off:
52
Messaging
Overwrite old to control what happens when the handset
receives a new message, but there is no room to store
more messages:
On: the oldest message stored on the phone is
overwritten.
Off: new message is not stored. An Urgent or
Emergency message is shown on the display; a
Normal message is rejected.
Sent messages to control whether sent messages are
stored in the handset (On) or not (Off).
Display to control whether Normal messages are
displayed immediately upon receipt (On) or not (Off).
Auto answer msg – Please contact your System
Administrator
Silent answer msg – Please contact your System
Administrator
Open Message menu section:
1.
Or
Or
2.
Or
3.
[
]n
53
Calendar
Calendar6
Open the Calendar
1.
2.
3.
Changing the calendar format (week or month view)
Open the Calendar
1.
2.
3.
4.
]n
[
Open schedule for today
Open the Calendar
1.
2.
3.
4.
Open schedule for a given date
Open the Calendar
1.
6
Only for the G566
54
Calendar
2.
3.
4.
5.
6.
Adding an appointment
Open the Calendar
1.
2.
3.
4.
5.
6.
7.
Go to step 12.
55
Calendar
7.
8.
9.
10.
11.
12.
13.
14.
15.
16.
17.
18.
]n
[
56
Calendar
17.
18.
19.
20.
21.
22.
]n
[
Open appointment
Note: Days with appointments will be marked with a red dot at
the bottom right of the date.
Open the day/date of the appointment using Open schedule for
today/Open schedule for a given date
1.
Select: required appointment
2.
Editing an appointment
Open appointment
1.
2.
Make the necessary changes like in Adding an
appointment (page 55) from step 2.
57
Calendar
Copying an appointment
Open appointment
1.
2.
3.
4.
Make the necessary changes like in Adding an
appointment (page 55) from step 2.
Deleting an appointment
Open appointment
1.
2.
3.
4.
5.
[
58
]n
Additional features (Accessories)
Additional features (Accessories)7
Calculator
When the Calculator is selected the following holds:
used to insert a decimal point
used to make a percentage of the given entry
change the use of the NAVIGATION keys between:
Matematical operators
Moving the cursor to the insertion point
1.
2.
3.
4.
5.
6.
Enter/edit: a value
7.
Enter/edit: mathematical operator (+, x, ÷ and -)
8.
Enter/edit: a value
9.
10.
7
calculate and show the result
[
]n
Only for the G566
59
Additional features (Accessories)
Stopwatch
1.
2.
3.
4.
5.
Use of the stopwatch soft keys:
Table 9: Stopwatch soft keys
Soft key
Description
Start a new measurement
Or
Continue a stopped measurement
Halt the measurement
Save the intermediate result and
continue the measurement
Reset the stopwatch (back to 0)
60
Additional features (Accessories)
Alarms (alarm clock)
Open Alarms
1.
2.
3.
4.
5.
Assigning or change a daily alarm
Open Alarms
1.
Assign new
Change existing
2.
3.
4.
5.
[
]n
Turning off a daily alarm
Open Alarms
1.
2.
3.
61
Additional features (Accessories)
4.
]n
[
Assigning or change a recurrent alarm
Open Alarms
1.
Assign new
Change existing
2.
3.
4.
For the required days of the week:
5.
:
:
6.
Or
7.
Turning off a recurrent alarm
Open Alarms
1.
2.
3.
4.
]n
[
62
Note: (Already) selected days are
marked with
Additional features (Accessories)
Setting snooze time
Open Alarms
1.
2.
3.
4.
5.
:
:
[
Note: Currently set value is
marked by a blue dot ( )
]n
63
Telephone settings
Telephone settings
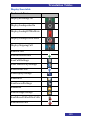
The Settings menu contains a number of sections:
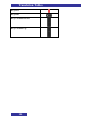
Table 10: Settings Menu Sections
Description
Section
General
Sounds - normal
Sounds - silent
Display
Calls
Connectivity
Open Settings menu section
1.
2.
3.
4.
=
=
=
=
=
=
64
Telephone settings
General settings
Table 11: General setting
Item
Description
Page
Switch to/from the silent “profile”
66
Set the current Time & date
66
Set the Language
68
Create Shortcuts to the handset
menus and features (by pressing a
navigation key)
68
Assign a certain condition to one
of the three LEDs
69
Set the security settings: Phone
lock, Automatic keylock, PIN
Code and Proxy password
70
Set the Handset name
73
Return settings to the factory
values. Not affected are:
Contacts, PIN Code, Proxy
password and the system
registrations
73
View handset information
74
65
Telephone settings
Setting Silent
If Silent is On the handset uses the sound definitions set with the
Sounds - silent settings, otherwise it uses the Sounds - normal
settings.
Open Settings menu section:
1.
2.
3.
Or
]n
[
Quickly toggle Silent setting:
1.
Long press
Setting the time and date
Note: If your communication system provides the date and time,
then setting the date and time has only a temporary effect and
will, in due time, revert to the by the system provided time and
date.
Setting the time
Open Settings menu section:
1.
2.
3.
4.
66
Telephone settings
5.
Optional step(s):
6.
7.
8.
9.
10.
Note: Currently set value is
marked by a blue dot ( )
[
]n
Setting the date
Open Settings menu section:
1.
2.
3.
4.
5.
Optional step(s):
6.
7.
:
:
Note: Currently set value is
marked by a blue dot ( )
67
Telephone settings
8.
9.
10.
[
]n
Setting the language
Open Settings menu section:
1.
2.
3.
4.
5.
:
:
[
Note: Currently set value is
marked by a blue dot ( )
]n
Configuring shortcuts
8
Shortcuts are used to get quick access to menu items.
Open Settings menu section:
1.
2.
3.
:
:
8
Only for the G566
68
Telephone settings
4.
5.
:
:
6.
7.
[
Note: Currently set value is
marked by a blue dot ( )
]n
Configuring the LED signal
The Red LED, Green LED and Yellow LED can be used to
indicate certain conditions to the user:
Missed call
Text message
Voice message
Text or voice msg
Low battery
Charging
Silent charging
Open Settings menu section:
1.
2.
3.
4.
69
Telephone settings
5.
:
:
6.
7.
[
Note: Currently set value is
marked by a blue dot ( )
]n
Security options
Setting the Phone lock feature
If the Phone lock is set then upon turning on your handset you’ll
be asked to enter the PIN Code.
Open Settings menu section:
1.
2.
3.
4.
5.
6.
7.
8.
9.
Note: Currently set value is
marked by a blue dot ( )
[
70
]n
Telephone settings
Setting the Automatic keypad lock feature
Open Settings menu section:
1.
2.
3.
4.
5.
:
:
6.
7.
[
Note: Currently set value is
marked by a blue dot ( )
]n
Changing the PIN code
Open Settings menu section:
1.
2.
3.
4.
5.
6.
71
Telephone settings
7.
8.
9.
10.
11.
[
]n
Changing the Proxy password
Change the Proxy password that is used at SIP authentication.
Open Settings menu section:
1.
2.
3.
4.
Optional step(s):
5.
6.
7.
8.
72
Telephone settings
9.
10.
11.
[
]n
Defining the handset name
Open Settings menu section:
1.
2.
3.
4.
5.
[
]n
Resetting settings
All user determined Settings are set to the default factory values!
Open Settings menu section:
1.
2.
3.
4.
73
Telephone settings
5.
6.
7.
[
]n
View status information
Open Settings menu section:
1.
2.
3.
4.
5.
Note: In reality divided over
three screens
[
74
]n
Telephone settings
Sounds (normal & silent) settings
Table 12: Sounds settings
Item
9
Description
Page
Sound settings related to an Incoming
call:
Ring volume
Ring external melody for calls
from an external source
Ring internal melody for calls
from an internal source
Ring unknown call melody for
calls from an unknown source
Increasing ring to determine
whether the Ring volume
increases gradually
Vibrator to define the trembler
feature for calls
77
Sound settings related to an incoming
message9:
Notification volume
Notification normal melody for
Normal messages
Notification urgent melody for
Urgent messages
Notification emergency melody
for Emergency messages
Increasing notification to
determine whether the
Notification volume increases
79
Only for the G566
75
Telephone settings
Table 12: Sounds settings
Item
Description
Page
gradually
Vibrator to define the trembler
feature for messages
10
Only for the G566
76
Sound settings related to Alerts (for
Calendar and Alarms)10:
Alert volume
Alert melody
Increasing alert to determine
whether the Alert volume
increases gradually
Vibrator to define the trembler
feature for Alerts
82
Sound settings related to:
Key sound for the sound that
occurs when you press a key
Confirmation sound for the
sound that indicates successful
setting
Coverage warning to define
whether or not a sound is given
when the handset moves out of the
coverage area
Charger warning to define
whether or not a sound is given
when the handset is put on the
charger
84
Telephone settings
Incoming call
Setting the ring volume
Open Settings menu section:
1.
Or
2.
3.
4.
5.
Or
6.
7.
[
]n
Setting the ring melodies
Open Settings menu section:
1.
2.
3.
Or
Or
Or
4.
77
Telephone settings
5.
:
:
Note: Currently set value is
marked by a blue dot ( )
Optional step(s):
6.
7.
8.
9.
[
]n
Setting the increasing ring feature
Open Settings menu section:
1.
Or
2.
3.
4.
5.
Or
[
]n
Setting the vibrator feature
Open Settings menu section:
1.
2.
78
Or
Telephone settings
3.
4.
5.
Note: Currently set value is
marked by a blue dot ( )
6.
7.
]n
[
Message notifications
11
Setting the notification volume
Open Settings menu section:
1.
Or
2.
3.
4.
5.
Or
6.
11
Only for the G566
79
Telephone settings
7.
[
]n
Setting the notification melodies
Open Settings menu section:
1.
2.
3.
Or
Or
Or
4.
5.
:
:
Note: Currently set value is
marked by a blue dot ( )
Optional step(s):
6.
7.
8.
9.
[
]n
Setting the increasing notification feature
Open Settings menu section:
1.
2.
80
Or
Telephone settings
3.
4.
5.
Or
[
]n
Setting the vibrator feature
Open Settings menu section:
1.
Or
2.
3.
4.
5.
Note: Currently set value is
marked by a blue dot ( )
6.
7.
[
]n
81
Telephone settings
Alerts
12
Setting the alert volume
Open Settings menu section:
1.
Or
2.
3.
4.
5.
Or
6.
7.
[
]n
Setting the alert melody
Open Settings menu section:
1.
2.
3.
4.
12
Only for the G566
82
Or
Telephone settings
5.
:
:
Note: Currently set value is
marked by a blue dot ( )
Optional step(s):
6.
7.
8.
9.
[
]n
Setting the increasing alert feature
Open Settings menu section:
1.
Or
2.
3.
4.
5.
Or
[
]n
Setting the vibrator feature
Open Settings menu section:
1.
Or
2.
83
Telephone settings
3.
4.
5.
Note: Currently set value is
marked by a blue dot ( )
6.
7.
[
]n
Feedback
Setting the key sound feature
Open Settings menu section:
1.
2.
3.
4.
5.
Or
Note: Currently set value is
marked by a blue dot ( )
[
]n
Setting confirmation sound
Open Settings menu section:
1.
84
Or
Telephone settings
2.
3.
4.
5.
Or
[
]n
Setting the coverage warning feature
Open Settings menu section:
1.
Or
2.
3.
4.
5.
Or
[
]n
Setting the charger warning feature
Open Settings menu section:
1.
Or
2.
3.
4.
Or
85
Telephone settings
5.
[
]n
Display settings
Table 13: Display settings
Item
Description
Page
Select the image that is displayed
on the screen of your handset in
the idle state
86
Select the startup screen image
which displays temporarily when
the handset starts
87
Configure the periods of time
after which the handset’s display
is dimmed and turned off
87
Selecting Wallpaper
For other Wallpaper than Default: Please contact your System
Administrator
Open Settings menu section:
1.
2.
3.
Note: Currently set value is
marked by a blue dot ( )
86
Telephone settings
Optional step(s):
4.
5.
6.
7.
[
]n
Selecting startup screen
For other Startup screen than Default or NEC: Please contact
your System Administrator
Open Settings menu section:
1.
2.
3.
Note: Currently set value is
marked by a blue dot ( )
Optional step(s):
4.
5.
6.
7.
[
]n
Configuring power save
The display of your DECT Handset has three intensity levels:
Display on;
Display dimmed;
Display off.
87
Telephone settings
Figure 12: Display intensity levels On, Dimmed and Off
The various levels are used to save energy and are applied based
on the Power save setting.
Open Settings menu section:
1.
2.
3.
4.
5.
To never turn off the display
set the second value to 0
[
88
]n
Telephone settings
Calls settings
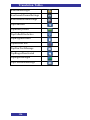
Table 14: Calls settings
Item
Description
Page
View information regarding
outgoing Call time and Message
count.
90
Determine how incoming calls
can be answered:
90
o Normal using
Or
o By pressing Any key
o Automatically (Auto answer)
Selectively block or accept
calls from specified callers.
91
Configure the Emergency call
feature to dial a number or
send a text message by long
pressing the SOS key.
96
Configure the Voicemail
number
100
Determine what action is taken
when the handset is called
while in the charger.
98
89
Telephone settings
Table 14: Calls settings
Item
Description
Page
Determine when a not
answered call is added to the
Missed calls list
View statistics information
Open Settings menu section:
1.
2.
3.
Or
Optional step(s):
4.
5.
6.
[
]n
Answer mode configuration
Open Settings menu section:
1.
2.
90
Telephone settings
3.
4.
5.
Or
Or
[
Note: Currently set
value is marked by a
blue dot ( )
]n
Caller filter configuration
13
Adding an entry to the Caller filter list
Open Settings menu section:
1.
2.
3.
4.
5.
6.
7.
8.
Lookup contact
Select: required contact
9.
13
Only for the G566
91
Telephone settings
10.
]n
11.
[
7.
8.
Enter number
9.
10.
11.
12.
]n
13.
[
7.
8.
Central directory
Enter the first character(s) of the
required name
9.
10.
Select: required contact
92
Telephone settings
11.
12.
13.
[
]n
Changing a Caller filter entry
Open Settings menu section:
1.
2.
3.
4.
5.
6.
7.
8.
Select: required entry
3.
Continue as in Adding an entry to the Caller filter list (page 91),
- Enter number, from step 8
93
Telephone settings
Deleting an entry from the Caller filter list
Open Settings menu section:
1.
2.
3.
4.
5.
6.
7.
8.
Select: required entry
9.
10.
11.
[
]n
Deleting all entries in the Caller filter list
Open Settings menu section:
1.
94
Telephone settings
2.
3.
4.
5.
6.
7.
8.
9.
10.
11.
[
]n
Activating Caller filter
Open Settings menu section:
1.
2.
3.
4.
95
Telephone settings
Accept only calls from
callers in the Caller filter
Don’t accept calls from
callers in the Caller filter
Caller filter not used
Note: Currently set value is marked by a blue
dot ( )
5.
6.
7.
[
]n
Configuring emergency or SOS calls
Assigning emergency call number
Open Settings menu section:
1.
2.
3.
4.
6.
7.
8.
Lookup contact
Select: required contact
96
Telephone settings
9.
10.
7.
8.
9.
10.
7.
8.
[
]n
Enter number
When no number is entered
then the Emergency call
feature is disabled
[
]n
Central directory
Enter the first character(s) of the required
name
9.
10.
Select: required contact
11.
12.
[
]n
97
Telephone settings
Assigning an emergency message
14
Open Settings menu section:
1.
2.
3.
4.
To make a voice call no
Emergency call message
should be defined.
5.
6.
7.
]n
[
Assigning the Silent charging feature
Open Settings menu section:
1.
2.
3.
14
15
Silent charging not used
Disconnect from the
system while in the
charger15
Turn off the ringer (and
vibrator) while in the
charger
Only for the G566
If configured: redirect call to alternative destination
98
Telephone settings
Note: Currently set value is marked by a blue
dot ( )
4.
5.
]n
[
Defining the missed call time
Open Settings menu section:
1.
2.
3.
4.
5.
]n
[
Voicemail
Use the Voicemail feature to listen to voice messages left by
calling parties16. You receive a voicemail in the following
situations:
if your handset is switched off
if your handset is busy
if your handset is out of the coverage area
A new voice message dialogue appears only once, i.e., when a
caller leaves a first new message in the mailbox. A voicemail
16
Your communications system needs to support the Voicemail feature
99
Telephone settings
symbol (
) appears in the icon line; it disappears after you
play the message.
Assigning the Voicemail number
Open Settings menu section:
1.
2.
3.
4.
5.
]n
[
100
Telephone settings
Connectivity settings
Table 15: Connectivity settings
Item
Description
Page
Register handset to a DECT
system
Please contact your System
Administrator
-
Remove registration your handset
from a DECT system
Please contact your System
Administrator
-
Select which DECT system is to
be used (only if the handset is
registered to more DECT
systems)
101
DECT system selection
Open Settings menu section:
1.
2.
3.
Handset selects DECT
system automatically
Select: required DECT
system (here e.g., NEC
Hilversum)
Note: Currently set value is marked by a blue
dot ( )
101
Telephone settings
4.
5.
]n
[
102
Translation Tables
The following tables are used for translations – they are not part
of the published user manual.
Keys table
Bookmark Name
Key0
Key1
Key9
KeyHash
KeyLineKey
KeyLoudspeaker
KeyMenu
KeyNavigation
KeyNavigationLeftRight
KeyNavigationUpDown
KeyOffHook
KeyOk
KeyOnHook
KeyPad
KeySoftKeyLeft
KeySoftKeyMiddle
KeySoftKeyRight
103
Translation Tables
KeySos
KeyStar
KeyVolumeDown
KeyVolumeUp
104
Translation Tables
Menu Items/Choices table
Bookmark Name
MainMenuAccessories
MainMenuCalendar
MainMenuCalls
MainMenuCentralDirectory
MainMenuContacts
MainMenuMessaging
MainMenuSettings
MenuItem10Minutes
MenuItem15Minutes
MenuItem15Seconds
MenuItem1Hour
MenuItem1Minute
MenuItem24Hour
MenuItem2Hours
MenuItem30Minutes
MenuItem4Hours
MenuItem5Minutes
MenuItem5MinutesNotBold
MenuItemAcceptList
105
Translation Tables
MenuItemAddContact
MenuItemAddToContact
MenuItemAlarmHhMm
MenuItemAlarmOff
MenuItemAlarms
MenuItemAlarmsShortcut
MenuItemAlertMelody
MenuItemAlerts
MenuItemAlertVolume
MenuItemAmPm
MenuItemAnswerMode
MenuItemAnyKey
MenuItemAtStart
MenuItemAutoAnswer
MenuItemAutomaticKeyLock
MenuItemAutoSelect
MenuItemBlockList
MenuItemCalculator
MenuItemCallerFilter
MenuItemCallTime
MenuItemCentralDirectory
MenuItemChangePinCode
106
Translation Tables
MenuItemChargerWarning
MenuItemClick
MenuItemConfirmationSound
MenuItemContacts
MenuItemCopy
MenuItemCoverageWarning
MenuItemDate
MenuItemDdMmYyyy
MenuItemDectSystem
MenuItemDelete
MenuItemDeleteAll
MenuItemDeleteAllContacts
MenuItemDeleteAllItems
MenuItemDeleteAllMessages
MenuItemDeleteContact
MenuItemDeleteItem
MenuItemDeleteMessage
MenuItemDeregister
MenuItemDisconnect
MenuItemDisplay
MenuItemDisplayDefault
MenuItemDisplayNEC
MenuItemDots
107
Translation Tables
MenuItemEdit
MenuItemEditBeforeCall
MenuItemEditContact
MenuItemEmergencyCall
MenuItemEnglish
MenuItemEnterNumber
MenuItemFeedback
MenuItemFilterOff
MenuItemForward
MenuItemGoToDate
MenuItemGoToToday
MenuItemGreenLed
MenuItemHandsetName
MenuItemHome
MenuItemIncomingCall
MenuItemIncreasingAlert
MenuItemIncreasingNotification
MenuItemIncreasingRing
MenuItemKeySound
MenuItemLanguage
MenuItemLedSignal
MenuItemLeftNavKey
108
Translation Tables
MenuItemLineKey4
MenuItemList
MenuItemLookUpContact
MenuItemMelody1
MenuItemMelody20
MenuItemMelodyDefault
MenuItemMessage
MenuItemMessageCount
MenuItemMessageNotification
MenuItemMissedCall
MenuItemMissedCallTime
MenuItemMobile
MenuItemMode
MenuItemName
MenuItemNameBlank
MenuItemNetworkSelect
MenuItemNone
MenuItemNormal
MenuItemNormalDot
MenuItemNotificationEmergency
MenuItemNotificationNormal
MenuItemNotificationUrgent
109
Translation Tables
MenuItemNotificationVolume
MenuItemNumber
MenuItemOffDot
MenuItemOn
MenuItemOther
MenuItemOtherTime
MenuItemOverwriteOld
MenuItemPhoneLock
MenuItemPowerSave
MenuItemProxyPassword
MenuItemRecurrentAlarm
MenuItemRecurrentAlarmHhMm
MenuItemRedLed
MenuItemRegister
MenuItemResetSettings
MenuItemRingExternal
MenuItemRingInternal
MenuItemRingtoneDefault
MenuItemRingUnknownCall
MenuItemRingVolume
MenuItemRussian2
110
Translation Tables
MenuItemSaturday
MenuItemSaveAsContact
MenuItemSaveInCallerFilter
MenuItemSecurity
MenuItemSendMessage
MenuItemSendToMany
MenuItemSentMessages
MenuItemShortcuts
MenuItemSilent
MenuItemSilentCharging
MenuItemSilentChargingLed
MenuItemSilentDot
MenuItemSilentDotNotBlue
MenuItemSnoozeTime
MenuItemSpeedDial
MenuItemSpeedDialEntryHash
MenuItemSpeedDialName
MenuItemStartUpScreen
MenuItemStatus
MenuItemStopwatch
MenuItemSunday
MenuItemTime
111
Translation Tables
MenuItemTimeDate
MenuItemTone
MenuItemUnits
MenuItemUrgent
MenuItemVibrateAndRing
MenuItemVibrateOnly
MenuItemVibrateThenRing
MenuItemVibrator
MenuItemViewMonths
MenuItemViewWeek
MenuItemVoiceMailNumber
MenuItemWallpaper
MenuItemWork
MenuItemYellowLed
MenuItemYyyyMmDd
MenuSaveInCallerFilter
112
Translation Tables
Soft Key table
Bookmark Name
SkAdd
SkCall
SkCalls
SkCentralDirectory
SkClear
SkDelete
SkDots
SkEdit
SkFormat
SkLap
SkMark
SkMore
SkMute
SkNew
SkOff
SkOk
SkOn
SkPlay
SkPrivateDirectory
SkReject
SkReplace
SkReply
113
Translation Tables
SkReset
SkSave
SkSelect
SkSend
SkSilent
SkStart
SkStop
SkSymbol
SkToggle
SkTurnOff
SkUnmark
SkUnmute
SkView
SkYes
114
Translation Tables
Display/Icon table
Bookmark Name
DisplayIncomingCall
DisplayLoudspeakerOn
DisplayLoudspOffMicMute
DisplayLoudspOnMicMute
DisplayOutgoingCall
IconAllCalls
-
IconAnsweredCalls
IconCallsSettings
IconConnectivitySettings
IconDialedCalls
IconDisplaySettings
IconDrafts
IconGeneralSettings
IconInbox
IconMessageSettings
IconMissedCallerFilterCalls
IconMissedCalls
115
Translation Tables
IconSentMessages
IconSoundsNormalSettings
IconSoundsSilentSettings
TopAlarmSet
TopBatteryStatus
TopCallerFilterActive
TopKeypadLocked
TopMissedCalls
TopNewTextMessage
TopRingerDeactivated
TopSignalStrength
TopVoiceMailMessage
116
Translation Tables
Menu Tab table
Bookmark Name
MenuTabAllCalls
MenuTabAnsweredCalls
MenuTabCallsSettings
MenuTabConnectivitySettings
MenuTabDialedCalls
MenuTabDisplaySettings
MenuTabDrafts
MenuTabGeneralSettings
MenuTabInbox
MenuTabMessageSettings
MenuTabMissedCalls
MenuTabSentMessages
MenuTabSoundsNormalSettings
MenuTabSoundsSilentSettings
TabIconAllCalls
TabIconAnsweredCalls
TabIconDialedCalls
TabIconMissedCalls
117
Translation Tables
Screen shot table
Bookmark Name
QAddContact
QAlarmTime
QAlertVolume
QClearCounter
QConfirmPassword
QConfirmPin
QContactNumbers
QDate
QDeleteAllContacts
118
Translation Tables
QDeleteAllFromCallerFilter
QDeleteAllMessages
QDeleteAppointment
QDeleteFromCallerFilter
QDeleteMessage
QDots
QDotsOnDark
QEndDate
QEndTime
QEnterCurrentPin
119
Translation Tables
QEnterName
QEnterNewPassword
QEnterNewPin
QEnterNumber
QEnterPassword
QEnterPin
QGoToDate
QHandsetName
QLocation
QMessage
QMissedCallTime
120
Translation Tables
QNotificationVolume
QPowerSave
QReminderDate
QReminderTime
QResetSettings
QRingVolume
QSaveAsDraft
QSaveInCallerFilter
QStartDate
121
Translation Tables
QStartTime
QStoreInCallerFilter
QSubject
QTime
QVoiceMailNumber
ScreenShotStorageFull
StatusInformation
122
Translation Tables
General text table
Bookmark Name
AppointmentNote
ApprNumber
AwaitAnswer
CalcShowResult
ContactSystemAdm
ContinueAsIn
EnterEdit
EnterEditPowerSave
EnterFirstCharacter
FromStep
LongPress
LoudspeakerOff
LoudspeakerOn
MakeNecessaryChanges
MathOperator
NotG266
OnBlueDot
OnContinue
OnLap
OnMarkDay
Note: Days with appointments will
be marked with a red dot at the
bottom right of the date.
appropriate number
Await answer
calculate and show the result
Please contact your System
Administrator
Continue as in
Enter/edit:
To never turn off the display set the
second value to 0
Enter the first character(s) of the
required name
from step
Long press
Loudspeaker off
Loudspeaker on
Make the necessary changes like in
mathematical operator (+, x, ÷ and -)
Only for the G566
Note: Currently set value is marked
by a blue dot ( )
Continue a stopped measurement
Save the intermediate result and
continue the measurement
Note: (Already) selected days are
marked with
123
Translation Tables
OnReset
OnStart
OnStop
OptionalStep
Or
RepeatDaySelect
ReqAppointment
ReqContact
ReqEntry
ReqMessage
ReqSystem
ScrollText
Select
UseKeypadDigChar
UseNavigation
UseToDeleteDigChar
UseUpDown
Value
VolumeDown
VolumeUp
124
Reset the stopwatch (back to 0)
Start a new measurement
Halt the measurement
Optional step(s):
Or
For the required days of the week:
required appointment
required contact
required entry
required message
required DECT system (here e.g.,
NEC Hilversum)
Scroll the text
Select:
Use the keypad to insert one or more
digits (0 – 9, * and #) or characters
Use the NAVIGATION keys to move
the cursor to the insertion point
To delete a digit or character use soft
key
Use the Up or Down NAVIGATION
key to increase or decrease the value
of the selected field
a value
Volume down:
Volume up:
Translation Tables
Text Strings taken from handset texts table
Bookmark Name
AlarmsStr
AlertMelodyStr
AlertsStr
AlertVolumeStr
AllStr
AnsweredStr
AnyKeyStr
AutoAnswerMsgStr
AutoAnswerStr
AutomaticKeylockStr
CalculatorStr
CalendarStr
CallerFilterStr
CallsStr
CallTimeStr
CentralDirectoryStr
ChangePinCodeStr
ChargerWarningStr
ChargingStr
ConfirmationSoundStr
ConnectivityStr
ContactsStr
CoverageWarningStr
DefaultStr
DialedStr
DisplayStr
DraftsStr
EmergencyCallStr
EmergencyStr
EnterNumberStr
GeneralStr
GreenLedStr
Alarms
Alert melody
Alerts
Alert volume
All
Answered
Any key
Auto answer msg
Auto answer
Automatic keylock
Calculator
Calendar
Caller filter
Calls
Call time
Central directory
Change PIN code
Charger warning
Charging
Confirmation sound
Connectivity
Contacts
Coverage warning
Default
Dialed
Display
Drafts
Emergency call
Emergency
Enter number
General
Green LED
125
Translation Tables
HandsetNameStr
HomeStr
InboxStr
IncomingCallStr
IncreasingAlertStr
IncreasingNotificationStr
IncreasingRingStr
KeySoundStr
LanguageStr
LedSignalStr
LookUpContactStr
LowBatteryStr
MessageCountStr
MessageNotificationStr
MessageStr
MessagingStr
MissedCallStr
MissedStr
MisssedCallsStr
MobileStr
NameStr
NecStr
NormalStr
NotificationEmergencyStr
NotificationNormalStr
NotificationUrgentStr
NotificationVolumeStr
NumberStr
OffStr
OnStr
OtherStr
OverwriteOldStr
PhoneLockStr
126
Handset name
Home
Inbox
Incoming call
Increasing alert
Increasing notification
Increasing ring
Key sound
Language
LED signal
Lookup contact
Low battery
Message count
Message notification
Message
Messaging
Missed call
Missed
Missed calls
Mobile
Name
NEC
Normal
Notification emergency
Notification normal
Notification urgent
Notification volume
Number
Off
On
Other
Overwrite old
Phone lock
Translation Tables
PinCodeStr
PowerSaveStr
ProxyPasswordStr
RedLedStr
RingExternalStr
RingInternalStr
RingUnknownCallStr
RingVolumeStr
SendToManyStr
SentMessagesStr
SettingsStr
ShortcutsStr
SilentAnswerMsgStr
SilentChargingStr
SilentStr
SoundsNormalStr
SoundsSilentStr
SpeedDialStr
StartupScreenStr
TextMessageStr
TextOrVoiceMsgStr
TimeDateStr
UrgentStr
VibratorStr
VoiceMailNumberStr
VoiceMessageStr
WallpaperStr
WorkStr
YellowLedStr
PIN Code
Power save
Proxy password
Red LED
Ring external
Ring internal
Ring unknown call
Ring volume
Send to many
Sent messages
Settings
Shortcuts
Silent answer msg
Silent charging
Silent
Sounds - normal
Sounds - silent
Speed dial
Startup screen
Text message
Text or voice msg
Time & date
Urgent
Vibrator
Voicemail number
Voice message
Wallpaper
Work
Yellow LED
127