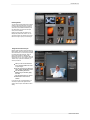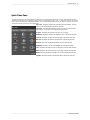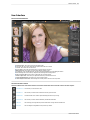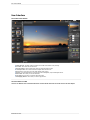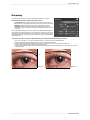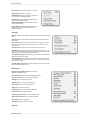
1
Perfect Photo Suite User Manual Copyright ©2015 on1, Inc. All Rights Reserved. Table of Contents Chapter 1: Welcome to Perfect Photo Suite Chapter 2: Introduction Using the Help System Contacting onOne Software Additional Help System Requirements Installation Licensing and Registration Opening Files Smart Photos Module Selector Using as Standalone Using with Adobe Photoshop Using with Adobe Lightroom Using with Apple Aperture Using with Other Applications Printing Managing Extras Preferences 1 5 6 7 8 9 10 11 12 14 15 16 17 18 20 22 23 24 27 Getting Started Browse Workspace Using Perfect Browse Photo Sources Managing Files and Folders Favorites Albums Recent Pane Working in Thumbnail View Persistent Thumbnail Cache Working in Detail View Navigating the Preview Using the Info Pane Metadata Ratings, Labels and Likes Filters Sent to Smart Photo History Menus Keyboard Shortcuts 30 31 32 33 34 35 37 38 39 40 42 44 45 47 48 49 50 51 52 53 56 Chapter 4: Perfect Layers 58 Chapter 3: Perfect Browse Getting Started Perfect Layers Workspace Perfect Layers Tool Well Navigating the Preview Navigator, Loupe, Histogram and Info Preview Window Modes Using the File Browser Using Perfect Layers Creating a New File and Adding Layers Adjusting Canvas Size Working with Layers The Layers Pane Transforming Layers Crop Tool Trimming Layers Using Color Fill Layers Perfect Eraser Retouch Brush Clone Stamp Red-Eye Tool Using the Masking Tools Mask Preview Modes Using the Masking Brush Quick Mask Tool Using the Masking Bug Using the Line Mask Tool Refining Masks Menus Keyboard Shortcuts 59 60 61 62 63 65 66 69 70 71 72 73 75 76 78 79 80 81 82 83 84 86 87 90 92 94 96 99 102 Chapter 5: Perfect Enhance 104 105 106 107 108 110 111 112 113 114 115 116 118 119 120 121 122 123 126 Getting Started Perfect Enhance Work Space Navigating the Preview Navigator, Loupe, Histogram and Info Using Perfect Enhance Quick Fixes Pane Color & Tone Adjustments Vignette Sharpening Noise Reduction Crop Tool Perfect Eraser Retouch Brush Red-Eye Tool Presets Module Settings Menus Keyboard Shortcuts Chapter 6: Perfect Portrait Getting Started User Interface Navigating the Preview Navigator, Loupe, Histogram and Info Preview Window Modes Browsing Presets Using Perfect Portrait Using The Face Select Tool Using The Face Edit Tool Skin Retouching Color Correction Eyes & Mouth Perfect Eraser Retouch Brush Adjusting the Skin Selection Viewing the Selection Masks Refining the Masking Selections Presets Setting the Defaults Menus Keyboard Shortcuts Chapter 7: Perfect Effects Getting Started User Interface Navigator, Loupe, Histogram and Info Navigating the Preview Preview Window Modes Using Perfect Effects Browsing Filters and Presets Using the Filter Stack Using Filters Using the Masking Tools Mask Preview Modes Using the Masking Brush Quick Mask Tool Using the Masking Bug Using the Line Mask Tool Refining Masks Presets Menus Keyboard Shortcuts Chapter 8: Perfect B&W Getting Started Perfect B&W Work Space Perfect B&W Tool Well 127 128 129 130 131 133 134 137 138 139 141 142 143 144 145 146 147 149 151 152 153 156 158 159 160 162 164 165 166 167 171 174 190 191 192 195 197 199 201 204 208 210 211 212 213 Navigating the Preview Navigator, Loupe, Histogram and Info Preview Window Modes Using Perfect B&W Browsing Presets Control Panes Adjustment Brushes Targeted Brightness Tool Mask Preview Modes Zones View Presets Menus Keyboard Shortcuts 214 215 217 218 219 222 225 228 229 230 231 232 235 Chapter 9: Perfect Resize 237 238 239 240 241 242 243 244 245 247 249 250 252 253 254 255 256 257 258 260 Getting Started How Big Can You Print Understanding Resolution When Should I Use Perfect Resize Supported Color Modes User Interface Navigating the Preview Navigator, Loupe, Histogram and Info Browsing Presets Using Perfect Resize Crop Tool Adjusting the Image Size Using Document Size Presets Settings Sharpening Film Grain Tiling Gallery Wrap Presets Menus Keyboard Shortcuts 264 Getting Started Batch Workspace How to Access Batch Using Perfect Batch Selecting Files Adding a Module Destination Pane Batch Presets 265 266 267 268 269 270 271 273 275 Chapter 11: Index 276 Chapter 10: Perfect Batch Welcome to Perfect Photo Suite 1 Welcome to Perfect Photo Suite Create extraordinary images, inspire your creativity, and solve the most common photo problems with Perfect Photo Suite 9—a complete photo editor designed to make your images look their best. Work the way you want and perform editing tasks that are too timeconsuming in Adobe® Photoshop®, or impossible to do alone in Lightroom®, Photoshop Elements, or Apple® Aperture®. You'll have all that you need to enhance, retouch and stylize images, replace backgrounds, and create high quality enlargements Perfect Photo Suite 2 Welcome to Perfect Photo Suite What's New Perfect Browse Lightning fast previews of all your files. You can start to view and work on your images right away. Ratings, Labels and Likes: You can now rate, label and “like” images. ratings and labels are stored in the metadata so they will transfer to other applications like Lightroom. Rotate: You can no rotate images in Browse. Metadata Pane: The new metadata pane allows you to view and edit EXIF and IPTC metadata. Filter Pane: The new filter pane allows you to filter (search inside) the contents of a folder. This is useful for finding just your five-star images for example. Batch Rename: Accessed from the contextual menu. You can batch rename files or folders. Sources Pane: The Sources and Folders panes have been merged together. This makes it easier to drag and drop across volumes. Favorites Pane: The favorites feature of the Folders pane has been split out into its own pane. Favorites are shortcuts to places where you keep your images. Send To: From Browse you can now send images to other applications. Photoshop, Lightroom and Aperture are automatically detected and added. You can also add as many of your own apps as you want. Save As: You can now save out copies directly from Browse in any supported file format. This works for one image at a time, if you want to do multiple images, use Batch instead. Smart Photos: Smart Photos are a special PSD format that allows you to save your settings and masks from each module that you use so you can go back and re-edit them later. Masking Changes: The best tools from Perfect Mask have been merged into the Suite in general. You can now access all the masking tools in Layers and Effects directly. These are big changes and you can now get better masks than before, in the place where you want to work with them, especially for selectively applying filters in Effects. Here is a rundown on the masking tools. Quick Mask Tool: This is the replacement for the Drop and Keep brushes from Perfect Mask. Select the tool and loosely brush over what you want to remove. It will automatically expand the selection to the borders it finds. Refine Brush: The Refine brush is used after the Quick Mask Tool or the Perfect Brush to clean up difficult areas like hair or trees. It now has a mode option which is set to paint-out by default. This provides better results than it used to because it does not bring back unwanted colors. Perfect Brush: The Perfect Brush is an option on the Masking Brush. It now works better on semi-transparent areas. It replaces the Magic Brush from Perfect Mask. Blur and Chisel Mask Tools: The Blur and Chisel Mask tools have both been migrated from Perfect Mask. They are used to refine the edge of the mask. You can now copy and paste masks from image to image and across modules. Keep in mind with Smart Photos your masks are stored on a per effect basis across time and can be re-edited later. Retina Display Support: For Mac users with Retina displays the preview area and all artwork are now drawn at 2x quality. This will be coming soon for Windows 8.1 users as well. Printing: You can now do basic printing from any module, including Resize and Browse. Access Print from the File menu. You can select the printer settings and paper size as well as control how the image will fit on the paper and the color management options. Auto Tone: There is a new auto tone algorithm that replaces the old auto levels. In the past we just set the the white and black points. Now it sets these as well as adjusts the brightness, contrast, shadows and highlights. Image processing performance has been increased. We use more OpenGL and OpenCL as well as more optimized use of multiple processor cores. Noise Reduction: There is a new noise reduction filter in Enhance and Effects. Lens Flare: There is a new lens flare filter in Effects. Crop Tool: The crop tool has been modernized. It now moves the image inside of the crop box instead of the other way around. It also has leveling tool. There are new crop aspect ratio presets as well as document size presets that allow you to crop and resize at the same time. This is in Layers, Enhance and Resize. Updated user interface What's Included Perfect Photo Suite Welcome to Perfect Photo Suite 3 Browse Layers Quickly get to your images wherever they're stored—whether they’re on your computer, network, or on a cloud-based storage service. Find the exact image you want by previewing them side-by-side and navigating through them with intuitive keyboard shortcuts. Combine and blend images without Adobe Photoshop. With layers, you have the power to swap faces, create balanced exposures, retouch portraits and landscapes, create layouts and composites, and more! Enhance Portrait Apply the basic adjustments that almost every image needs to go from good to great. You'll find tools to improve color, tone, and detail, and brushes for spot healing, cloning, and removing objects with content-aware fill technology. Focus on the art of portrait creation because the most time consuming retouching tasks are automated in the Portrait module. Improve skin texture and color, remove blemishes, and enhance eyes and mouths to create flawless portraits. B&W Effects Make your images extraordinary with the best effects available today. Customizable filters and hundreds of built-in presets inspire your creativity and give you ultimate control to create effects that make your images look their best. Develop stunning images that recreate the timeless look of black and white master photographers. Use a library of expertly-crafted presets for instant results or powerful, darkroom-inspired controls for you own custom look. Resize The Resize module gives you everything you need to prepare your images for print. Powered by Genuine Fractals technology, you'll maintain total clarity and sharpness of your image for your enlargements—even for snapshots taken with a mobile device. Perfect Photo Suite 4 Welcome to Perfect Photo Suite Suite Edition Comparison Basic Edition Premium Edition Includes Browse Module Yes Yes Includes Perfect Layers Yes Yes Includes Perfect Enhance Yes Yes Includes Perfect Portrait Yes Yes Includes Perfect Effects Yes Yes Includes Perfect B&W Yes Yes Includes Perfect Resize Yes Yes Includes Perfect Batch Yes Yes Use as a standalone application Yes Yes Integrates with Adobe® Lightroom® No Yes Integrates with Apple® Aperture® No Yes Integrates with Adobe® Photoshop Elements No Yes Batch Processing through export dialog in Lightroom No Yes Opens Raw files from most digital cameras Yes Yes Integrates with Adobe® Photoshop® No Yes Create or refine layer masks in Photoshop No Yes Resize CMYK, Grayscale and LAB colorspace images No Yes Use modules as re-editable Smart Filters in Photoshop No Yes Record Photoshop actions for repeated tasks or batch processing No Yes Live phone technical support First 90 Days Yes Email and online technical support Yes Yes Perfect Photo Suite Introduction 5 Introduction This introductory chapter includes general helpful information about how to use this help system, how to contact onOne Software, how to install and access the software, etc. It covers many of the foundation topics that you will need to understand to get started. Pages in this Section Using the Help System Contacting onOne Software Additional Help System Requirements Installation Licensing and Registration Opening Files Smart Photos Module Selector Using as Standalone Using with Adobe Photoshop Using with Adobe Lightroom Using with Apple Aperture Using with Other Applications Printing Managing Extras Preferences Perfect Photo Suite 6 Introduction Using the Help System This user guide is html based and readable in most web browsers. On the left side, you will see a table of contents that make it easy to find the section you are looking for. The table of contents is hyperlinked and will take you to the specified section by clicking on them. The main body of the page will show you the content you have requested. Use the scroll-bar at the right to scroll down for additional content. You may see hyperlinks in the body text. They will be blue and underlined. Clicking on one of these hyperlinks will take you to more relevant information. You use the same forward and back buttons in your browser to navigate this user guide as you would a regular web page. You can even bookmark pages so you can find them quickly later. If you don't see what you are looking for in the table of contents, try the search field at the upper right. You can type in what you are looking for and an index of pages will be created automatically that contain your search term. Printing the Manual You can print individual pages by pressing the Print button at the top of the page. A complete printable PDF version of this user guide is available in the user guide section of the onOne website. This version may be downloaded and viewed when you do not have an internet connection. The PDF version may also be installed on your tablet or eReader device for viewing off our computer. Perfect Photo Suite Introduction 7 Contacting onOne Software At onOne Software, we value our customers and offer a variety of ways to be contacted. • Visit our company website at: www.on1.com • For technical support please visit: www.on1.com/support on1, Inc. 15333 SW Sequoia Parkway Suite 150 Portland, OR 97224 © 20072015 onOne Software, Inc. All rights reserved. onOne Software is a registered trademark of onOne Software, Inc. The onOne Software logo are trademarks of onOne Software, Inc. Adobe, Photoshop, Photoshop Elements, Lightroom are either registered trademarks or trademarks of Adobe Systems, Incorporated in the United States and/or other countries. Mac OS X, the Mac logo, iPhoto and Aperture are trademarks of Apple, Inc., registered in the U.S. and other countries. Microsoft, Windows 7, Windows 8 are registered trademarks of Microsoft Corporation. All other trademarks are the property of their respective owners. The activation system used by onOne Software, Inc. is licensed under Patent No. 5,490,216. For a full list of license disclosures view the LICENSE.TXT file installed with the software. Perfect Photo Suite 8 Introduction Additional Help Technical Support Contact technical support at www.on1.com/support or by filing out a request form. Knowledge Base Search the Knowledge Base for common issues, tips & tricks, and compatibility questions. Frequently Asked Questions Check the list of Hot Topics on the onOne web site. This covers the most frequently asked questions. Video Tutorials Visit the onOne University for free online video tutorials and archived webinars. Many users find these to be the best and fastest way to get started and learn new techniques. Perfect Photo Suite Introduction 9 System Requirements Operating System Processor RAM Hard Drive Display Optional Application Integration Other Minimum Recommended Mac OS X 10.8, 10.9, 10.10 Windows Windows 7 or Windows 8 current maintenance releases, 64 bit only Intel Core 2 Duo, Xeon or better processor(s) 8 GB RAM Mac OSX 10.9, 10.10 Windows Windows 7 or Windows 8 current maintenance releases, 64 bit Quad-core Intel Core i5, Xeon or better processors(s) 8+ GB RAM 1 GB for installation 1 GB for installation Fast 7200 RPM or SSD drives 10% of boot volume should be free for scratch disk OpenGL 2.0 compatible video card with 256 OpenGL 4.0 compatible video card with MB dedicated video RAM, 1280x720 1GB dedicated video RAM, 1920x1080 resolution resolution Photoshop CS6, CC, CC 2014 Photoshop CC, CC 2014 Photoshop Elements 11, 12, 13 Photoshop Elements 12, 13 Photoshop Lightroom 4, 5, 6 Photoshop Lightroom 5, 6 Apple Aperture 3.6 Internet connection for activation, auto Wacom tablet for pressure sensitive update checking, content downloads and input tutorials. Hardware display calibration tool About Windows Video Cards If you are using Perfect Effects from a Windows based computer, it is important that you have the latest drivers for your video card installed to get the best performance. Check with your video card manufactures website for the latest drivers. Be sure your video card is OpenGL 2 compliant and has 256MB or more of dedicated VRAM. Many integrated video cards on low-end laptops may not meet these requirements. Perfect Photo Suite 10 Introduction Installation To install Perfect Effects, double click the installer icon and allow the installer to guide you. You may have downloaded the installer from the on1, Inc. website or it may be on a DVD if you elected for a physical shipment. You should close any supported host applications such as Photoshop, Lightroom or Aperture as well as any standalone versions of onOne products before installing or updating. Mac OS X The application is installed in the Perfect Effects folder in the Applications folder. All plug-in files for supported host applications (such as Photoshop, Lightroom, Aperture, and Photoshop Elements) found during the installation process will be installed automatically. You will see a summary of installed plug-ins at the end of installation. If a previous versions of Perfect Effects is found, it will be maintained or replaced based on your preference during installation. Support files are installed into /Library/Application Support/ and ~/Library/Application Support/ folder. Windows The application is installed in the Perfect Effects directory in the onOne Software directory in the Program Files directory. All plug-in files for supported host applications (such as Photoshop, Lightroom, Aperture, and Photoshop Elements) found during the installation process will be installed automatically. You will see a summary of installed plug-ins at the end of installation. If a previous versions of Perfect Effects is found, it will be maintained or replaced based on your preference during installation. Support files are installed into \ProgramData\onOne Software\. Uninstalling To uninstall Perfect Effects, follow these instructions. You should deactivate your product before uninstalling. This will allow you to transfer your license to another computer. Mac OSX 1. Go to the Applications/Perfect Effects/Documentation folder. 2. Double click on the Remove Perfect Effects application. Windows 1. Go to Control Panels. 2. Under Programs select Uninstall a program. 3. In the list that comes up select Perfect Effects and then click on the Uninstall button. Perfect Photo Suite Introduction 11 Licensing and Registration Perfect Effects will operate as a trial version for 30 days from when it is installed. If you have purchased Perfect Effects, you will want to license it so you can continue to use it past the trial period. When you install Perfect Effects it will prompt you to license it. Simply click on the license button and enter your license code. Your license code can be found in your order confirmation email if you purchased the download version directly from on1, Inc. If you purchased a physical copy of Perfect Effects, a sticker on the information card will have the license code on it. Your license code allows you to install Perfect Effects on two computers. When you enter your license code, Perfect Effects communicates with the on1, Inc. activation server and will activate your software. Your software must be licensed and activated to function past the trial period. If the computer you are activating does not have access to the internet, you can manually activate your software by following the manual activation instructions in the license dialog. If you wish to move your copy of Perfect Effects from one activated computer to new computer you will need to deactivate it first. Deactivation is a simple process. Simply open Perfect Effects and select Deactivate from the Help menu. This will deactivate Perfect Effects on the current machine, allowing you to install and activate it on another machine. If you lose your activation code, have your computer stolen and can not deactivate it, need to install on more than two computers or have other activation issues please contact on1, Inc. customer by visiting the support section of the on1, Inc. website. Product Improvement Program We believe that the best products are made by listening to our customers. We use many methods to gather your ideas and feedback including: emails, surveys, direct conversations, market analysis and the Product Improvement Program. The Product Improvement Program is built into our software and gathers information about how our software is used. It is the most accurate way for us learn what features are important to you and how our products fit into your workflow. Enrollment in the program is voluntary. When you participate, we collect basic information about how you use our programs and basic information about your computer. This information helps us learn what features are important to you and how we can make our software easier to use. No personal information is collected and you will not be contacted. You can choose to participate in the Product Improvement Program the first time you launch an on1, Inc. product. You can change your participation later, just click the Help menu, then Help Improve on1, Inc. Products. You can learn more about the Product Improvement Program here. Perfect Photo Suite 12 Introduction Opening Files Supported File Types Perfect Effects uses the Photoshop (PSD) file format as its default file type. The Photoshop file format is a commonly supported, publicly documented file format that is also the standard file for Adobe Photoshop. It is also supported by Photoshop Elements, Lightroom, Aperture and many other image editing applications. It supports multilayered images and layer masks making it the perfect format for durable, adjustable imaging. Perfect Effects also supports the opening and saving of the following file types, in RGB either 8 or 16-bits per pixel. Photoshop (PSD) Photoshop Large Document (PSB) Tagged Image File Format TIFF (TIF) Joint Photographic Experts Group JPEG (JPG) Portable Network Graphic (PNG) Camera Raw files from over 200 digital cameras Photoshop PSD files will maintain all the layers and layer masks you create in Perfect Effects and are recommended as your main file format. Photoshop files may also be saved as a Smart Photo , which is an onOne specific variant of the Photoshop format that allows you to re-edit your settings at a later date. If your saved file will be larger than 2 GB or 30,000 pixels on a side, your image will automatically be saved in the .PSB or Large Document format. This is a newer version of the PSD file format and still maintains all your layers and masks. You can use the Edit a Copy or Save As command to save flattened TIF and JPG files or PNG files with transparency. Camera raw files can only be opened, not saved directly. They must be saved as another file type. Opening Files You may open an existing file in several ways depending on which product you are using. Perfect Photo Suite Perfect Browse Perfect Layers Premium Editions of: Perfect B&W Perfect Effects Perfect Enhance Perfect Portrait Perfect Resize Perfect Effects Free Basic Editions of: Perfect B&W Perfect Effects Perfect Enhance Perfect Portrait Perfect Resize Open Command in the File Menu Open via Perfect Browse Drop on the Application Icon Plug-in from Adobe Photoshop Plug-in from Adobe Lightroom Plug-in from Apple Aperture Yes Yes Yes Yes Yes Yes Yes Yes Yes Yes Yes Yes Yes Yes Yes Yes Yes Yes Yes Yes Yes Yes Yes Yes Yes When opening an existing PSD file that has been editing in Photoshop it may contain unsupported layer types such as text layers, adjustment layers, etc. you will see a warning. You can still open a flattened version of the image if this happens. You can learn more here. Opening Options Perfect Photo Suite Introduction 13 When you open a file(s) you will be presented with the dialog to the right. It allows you to choose to work on the original file, a copy, or to stack the files together as layers. Edit a Copy: A copy of the original file is made using the Copy Options below and saved in the same folder as the original. Edit Original: The original file is edited directly. This overwrites the original file with your changes. This option is disabled for Raw or read-only files. Add as a Layer: The original file is added as a layer(s) into the current image in Perfect Layers. If no image is opened, a copy of the first image in your selection is created. If you select to open a copy, you can control the file type, color space, bit-depth and resolution. If you have multiple files selected, they will all be handled the same way. Checking the "Don't ask me again" box will bypass this dialogue box in the future and use the current options selected the next time you open an image. Perfect Photo Suite 14 Introduction Smart Photos Smart Photos are a special PSD format that allows you to save your settings and masks from each module that you use so you can go back and re-edit them later. Any settings you make, including masks and control points, are readjustable later. Creating a Smart Photo To create a Smart Photo, select the Smart Photo checkbox in the Edit What dialog when you open an image. If you access Perfect Effects as a plug-in from Lightroom or Aperture you have the choice each time you send a Photoshop file. You can also convert a layer in Perfect Layers to a Smart Layer, which converts the image to a Smart Photo, if you have Perfect Layers. Re-Editing a Smart Photo There are several ways to open and re-edit a Smart Photo depending on your product configuration: If you have the Perfect Photo Suite you can re-edit a Smart Photo by double-clicking on the module entry in the Smart Photo History pane in Perfect Browse or the Layers pane in Perfect Layers or just click on the module in the module selector. If you have a standalone application like Perfect Effects, Perfect B&W, Perfect Portrait or Perfect Enhance, simply open the image and your settings will be reloaded automatically. Similar to Smart Objects in Photoshop, Smart Photos have certain limitations. You cannot use any tool that will change the original pixels, such as crop or transform. This includes the retouching tools in Perfect Layers, however you can use them in Portrait and Enhance. You cannot change the image size or proportions either, so no crop or Resize. Perfect Photo Suite Introduction 15 Module Selector The Module Selector is a feature of the full Perfect Photo Suite only. The Perfect Photos Suite is a complete photo editor. It uses a modular approach, allowing each module to focus on one task. This makes accomplishing the task easier by removing unnecessary tools and giving access to just what you need to get the task done. When used as a standalone application, Perfect Browse is the default module upon first launch, it is used to navigate your drives and cloud services to find images to begin working. In the Preferences you may change the default startup module to Perfect Layers. If you prefer a layered workflow you can use the Layers module as the heart of your workflow, similar to using Adobe Photoshop. Depending on how you access the Perfect Photo Suite you may never notice Browse or Layers. The Module Selector If you access the Perfect Photo Suite as a standalone application you will start in Browse or Layers module. When you are ready to edit an image you will select the module you wish to use from the Module Selector in the upper right corner of the main window. You can easily switch between modules by clicking on another in the Module Selector. This allows you to perform multiple tasks during the same editing session. This is the module selector from the Perfect Photo Suite. It contains all of the available modules that onOne Software makes. If you have purchased a single product, you will only see that product module and Perfect Layers in your module selector. If you access the Perfect Photo Suite as a Photoshop Plug-in you see the Module Selector, but it will be disabled, you can only use one module at a time through Photoshop. The Module Selector will also be disabled if you use the following modules through Lightroom or Aperture: Perfect Portrait Perfect Effects Perfect B&W Perfect Enhance Perfect Resize When you access these modules, you use them on their own and then return back to Lightroom or Aperture directly. Your file will be saved and closed automatically. If you want to have access to all your modules during an editing session from Lightroom or Aperture, select the Perfect Photo Suite or Perfect Layers plug-in. This will start you in Perfect Layers and the Module Selector will be visible, allowing you to access all of the installed modules. Perfect Photo Suite 16 Introduction Using as Standalone Perfect Effects can be used as a standalone application without the need of Photoshop, Lightroom or other host application. To launch it follow these steps: Mac OS X 1. 2. 3. 4. Open your Hard Drive. Navigate to the Applications folder. Navigate to the Perfect Effects folder. Double click on the Perfect Effects application icon. You can add Perfect Effects to your dock for easy access by clicking and holding the icon in the dock, then select the Keep In Dock option. If you use Launchpad it can be found there as well. Windows 7 1. Go to your Start Menu. 2. Select the onOne Software group. 3. Select Perfect Effects. If you selected the "Add Icon to Desktop" option during installation you can also access Perfect Effects from there. Windows 8 1. Open the Start screen by pressing the Window key. 2. Select Perfect Effects. If you selected the "Add Icon to Desktop" option during installation you can also access Perfect Effects from there. Perfect Photo Suite Introduction 17 Using with Adobe® Photoshop® If you have the Premium Edition of Perfect Effects, you can access it as a plug-in through Adobe® Photoshop® or Photoshop® Elements®. This includes the onOne panel for Photoshop for fast access to plug-ins and their presets. As a Photoshop plug-in you can use modules in the Photoshop workflow. This includes using selections and masks as well as Smart Objects and Smart Filters. You can also record actions for automating and batch processing. If you do not have the Premium Edition of Perfect Effects and would like to use it inside of Photoshop, contact onOne Customer Service about upgrading to the Premium Edition. To use Perfect Effects inside of Adobe Photoshop follow these steps: 1. Open the image you want to work on. 2. Select the layer you want to work on. Generally Perfect Effects works on a copy of your selected layer, not the entire image. 3. From the File menu, select Automate, and then the module you would like to use. To use Perfect Effects inside of Adobe Photoshop Elements, follow these steps: 1. Open the image you want to work on. 2. Select the layer you want to work on. Generally Perfect Effects works on a copy of your selected layer, not the entire image. 3. From the File menu, select Automation Tools, and then the module you would like to use. Perfect Layers and Browse are not accessible from Adobe Photoshop or Photoshop Elements. onOne Panel Users of Adobe Photoshop can also access Perfect Effects as plug-ins using the onOne Extension Panel. This provides fast access to the Perfect Effects and its presets. To access the onOne panel, go the Window > Extensions menu in Photoshop and select onOne. The onOne panel behaves just like any other panel in Photoshop. It can be minimized or nested with other panels. To access a module, simple double-click on it. To use a preset, single click on the module name. A menu of available presets will be displayed. Simply double-click on one to apply it to your selected layer. If you wish to record actions using Perfect Effects be sure to access it from the File > Automate menu when recording. Perfect Photo Suite 18 Introduction Using with Adobe® Lightroom® If you have the Premium Edition of Perfect Effects you can access Perfect Effects as a plug-in inside of Lightroom. This provides an integrated, round-trip workflow. Perfect Effects is the perfect companion for Adobe Photoshop Lightroom. It integrates tightly with it and provides a seamless experience for enhancing your images. There are several ways to use Perfect Effects with Lightroom. Plug-In Extras Perfect Effects can be accessed from the File > Plug-in Extras menu. This is the preferred way to access it. It gives you access to all installed modules and has the most flexibility in how the files are handled. To edit an image in Perfect Effects follow these steps. 1. Select the image in Lightroom. 2. Go the File menu and select the Plug-In Extras flyout. 3. Select the module you would like to use. When you access Perfect Effects as a plug-in from Lightroom the module selector is only available for Perfect Layers or Perfect Mask. When you select one of these modules you can use as many modules as you desire during the same editing session. At the end of the editing session you must save and close the image from the Perfect Layers module. When you select a module other than Perfect Layers or Perfect Mask your image will be sent to it directly and when you press Apply, the image is saved and closed automatically and you are returned back to Lightroom. Selecting Multiple Images If you have multiple images selected, the behavior varies depending on which modules you select. Perfect Layers or Perfect Mask: Each file will be opened in its own tab. Then you may access any modules available in the Module Selector. All other plug-ins: Each image is opened in turn and you may adjust the settings on an image by image basis. Lightroom Plug-in Preferences When you use Perfect Effects through the Plug-In Extras menu there are important file handling options that are controlled in the Preferences dialog of the Perfect Layers module. These need to be configured in advance based on your desired workflow. File Type: The file type drop-down menu determines what type of file will be created. The default is PSD, which maintains layers. You can also select JPG or TIF if you prefer those formats and are not concerned about maintaining layers. The last option is same as source, which maintains the file type of the original file, except for Camera raw files which are saved as PSD. Color Space: The color space drop-down menu determines what RGB working color space is used; Adobe RGB 1998, sRGB or ProPhotoRGB. Bit Depth: The bit-depth drop-down menu determines the bit depth, either 8-bit or 16-bit per pixel. Resolution: The resolution drop-down menu determines the resolution of the file. Stack with Original: When enabled, the new image is stacked with the original image, making it easier to organize. Use Original for Single PSDs: When enabled, if you select a single PSD file, it will be edited directly, rather than having a copy made. External Editor Perfect Photo Suite Introduction 19 You can also access modules as external editors for all modules except Perfect Layers or Perfect Mask. You can access them from the Edit In... contextual menu. These behave similarly to the plug-ins in the Plug-In Extras menu but ignore the preferences set in Perfect Layers. Instead you have the option to control a subset of these options each time you access a module, in the same way you do when you access Photoshop or any other external editor. Batch Processing There are two ways to batch process multiple images in Lightroom with Perfect Effects. Perfect Batch Perfect Batch is the preferred way to batch process. You start with a selection of images in Lightroom or folder on disk, then batch-process them with multiple modules at the same time to solve complex workflows. For example a portait photographer can prepare images for a sales session by retouching every face, adding their stylized look and output small JPGs with their logo watermark, all in the same batch process. You can access Perfect Batch from the File > Plug-In Extras menu in Lightroom. You can learn more about using in the Perfect Batch section of this user guide. Key batch processing features include: Start with a selection of images from Lightroom or any folder you select. Batch process with a single module for simple jobs or create workflows where you string multiple modules together. Save workflows to use over and over. Pause on the first image to confirm your set-up, then automatically process the rest to match. Add a visual watermark, like your logo, to every image. Edit files in place or create new files with different size, name or file type. Lightroom Export You can also batch process with a single module through the Export menu in Lightroom. This is useful if you need to remove metadata or are more comfortable with Lightroom's Export. Batch processing through Export is driven by presets, so you need to create a preset that accomplishes the work you desire first. 1. Select the images you wish to batch process. 2. Go the Export under the File menu. 3. At the top under the Export to drop-down, select the module to use. 4. Complete the module specific options below. These will start with the preset, followed by options for selecting the export location, file naming, file size, etc. 5. Press the export button. You cannot save Lightroom export presets or use the Export with Previous option. Perfect Photo Suite 20 Introduction Using with Apple® Aperture® If you have the Premium Edition of Perfect Effects you can access Perfect Effects as a plug-in inside of Aperture. This provides an integrated, round-trip workflow. Perfect Effects integrates tightly with Apple Aperture and provides a seamless experience for enhancing your images. Perfect Effects can be accessed from the Photo > Edit with Plug-In menu. To edit an image in Perfect Effects follow these steps. 1. Select the image in Aperture. 2. Go the Photo menu and select the Edit with Plug-In flyout. 3. Select the module you would like to use. When you access Perfect Effects as a plug-in from Aperture the module selector is only available for Perfect Layers or Perfect Mask. When you select one of these modules you can use as many modules as you desire during the same editing session. At the end of the editing session you must save and close the image from the Perfect Layers module. When you select a module other than Perfect Layers or Perfect Mask your image will be sent to it directly and when you press Apply, the image is saved and closed automatically and you are returned back to Aperture. Selecting Multiple Images If you have multiple images selected, the behavior varies depending on which modules you select. Perfect Layers or Perfect Mask: Multiple images will be opened in separate tabs. All other plug-ins: Each image will open in a series so you can adjust the settings on each image. The file type, bit-depth and color space of the image is determined by the preferences in Aperture for external editors. Perfect Effects will maintain the file type, either PSD or TIF automatically to support compatibility with plug-ins from other manufactures. Keep in mind only PSD files store reeditable layers and mask. Batch Processing Perfect Photo Suite Introduction 21 Perfect Batch is the preferred way to batch process. You start with a selection of images in Aperture or folder on disk, then batch-process them with multiple modules at the same time to solve complex workflows. For example a portait photographer can prepare images for a sales session by retouching every face, adding their stylized look and output small JPGs with their logo watermark, all in the same batch process. You can access Perfect Batch from the Photo > Edit with Plugin menu in Lightroom. You can learn more about using in the Perfect Batch section of this user guide. Key batch processing features include: Start with a selection of images from Lightroom or any folder you select. Batch process with a single module for simple jobs or create workflows where you string multiple modules together. Save workflows to use over and over. Pause on the first image to confirm your set-up, then automatically process the rest to match. Add a visual watermark, like your logo, to every image. Edit files in place or create new files with different size, name or file type. Perfect Photo Suite 22 Introduction Using with Other Applications You can use Perfect Effects as an external editor with many other workflow applications such as Adobe Bridge or Apple iPhoto. First check the application user guide to see if it supports external editors. It should detail how to configure the host application to use an external editor. Generally this will include selecting Perfect Effects setting the file type to send to it. It is best to use PSD files if supported. Below are the instructions for configuring iPhoto. 1. Open the Preferences dialog, from the iPhoto menu. 2. Click on the Advanced tab. 3. From the Edit Photos: pop-up select the In Application... option (note if you have ever selected another external editor, it may be listed here instead.) 4. From the Choose dialog that appears, navigate the the Perfect Effects folder, inside the Applications folder and select [Product Name]. 5. In the RAW Photos: option, uncheck the Use RAW when using external editor option, and check the Save edits as 16-bit TIFF files option . Perfect Photo Suite Introduction 23 Printing You can print your photos to your printer using the Print function. 1. Select Print from the File menu. 2. Select your printer from the Printer pop-up. 3. Press the Print Setup button to adjust printer specific options such as paper size and type and printer specific color management options. 4. Adjust the number of copies, orientation and output resolution. 5. In the Print Area section set the area you would like to fill with image. The preview on the left shows the paper size and margins as well as the print area and how the image will fit or fill the print area. 6. Select the output Printer Profile and Rendering Intent to properly adjust the photos colors to your printer and paper combination. You may also select the Printer Managed Color option to let your printer driver manage the color instead. Tip: If you have already cropped and sized your image to your desired print area size, simply set the width and height to match in the Print Area section. Perfect Photo Suite 24 Introduction Managing Extras What are Extras? The Extras Manager let's you import and manage your own Extras content. Extras are: Backgrounds that can be imported and used in Perfect Layers. Borders than can be imported and used in Perfect Layers, Perfect Effects and Perfect B&W. Textures that can be imported and used in Perfect Layers and Perfect Effects. Presets for Perfect B&W, Perfect Effects, Perfect Enhance, Perfect Portrait and Perfect Resize. Extras can be content that you download from the onOne website or content that you create on your own. The Extras manager lets you create categories for each Extra type, import files as extras and delete user-added extras you no longer want. You can access the Extras Manager from the File menu in Browse and Perfect Layers or the Preset menu in modules that use presets. How to Import Extras Importing extras is simple. Start by opening the Extras Manager then follow these steps. 1. Select the type of extras you wish to import in the left column (Backgrounds, Borders, etc.) You can only import extras of one type at a time. 2. Click on the Import button in the footer of the left column. A Finder or Explorer Window will appear where you can select the files to import. If you want to import an entire folder, click into the folder then select the first file, then shift-click on the last file. Click import when you selection is complete 3. Select a category for your extras to live in. This is where you will be able to find it inside of the Perfect Effects. You can select from an existing category or create a new one. When your extras have been imported you will see them in the Extras Manager in the category you selected, in the type of extra they belong to. What Type of Images Can I Import as Extras? Backgrounds and Textures may be any image file that Perfect Effects can open including jpg, tif, raw or psd files. Border files must have a large central area that is transparent. This means that only files that support transparency like png can be imported as borders. If you have a .ONPreset file that you have downloaded from the onOne Software website, simply double-click on it to install it. There is no need to import it through the Extras Manager. Perfect Photo Suite Introduction 25 Browsing Extras You can browse and open Extras from the Browse module. In the Sources pane there are sources for onOne Extras (extras that are provided by onOne when you installed Perfect Effects) and User Extras where you can browse and open extras you have installed. Inside each source folder are folders for the Backgrounds, Borders and Textures. You can open these as layers into Perfect Layers to add them to an image or layout you are working on. Using Extras in Perfect Layers Browsing extras in Perfect Layers is similar to the Browse module. Click on the Extras tab of the left column mini-browser. You will see top-level folders for onOne Extras and User Extras. Inside of these will be sub-folders for Backgrounds, Borders and Textures. You can double-click on an extra to add it to your current image, just use the "Add as a Layer" option when asked how you want to open the file. Then you can use the transform tool to size and position the extra on your image. Use the Layers pane to change the order, opacity and blending mode. Use the Masking Brush and Masking Bug to selectively apply the extra. Use the Perfect Eraser to remove distractions from the extra if needed. If you save your file as a layered PSD file, you can always re-open the file again and have access to all of the layers and masks for further editing. Perfect Photo Suite 26 Introduction How to use in a Module You can access certain extras, like borders and textures, inside of modules like Perfect Effects and Perfect B&W. To use them follow these steps: 1. Open an image into Perfect Effects. 2. In the Filter Options pane, select the correct filter type, either Borders or Texturizer. 3. From the Category pop-up, select a category you have imported. User added extras categories appear at the bottom of the category list. 4. From the Texture pop-up select a texture from the category you selected. How to Delete Extras You can remove imported extras using the Extras Manager. Follow these steps: 1. 2. 3. 4. Open the Extras Manager. Click on the extras type that contains the content you wish to remove. This will display categories within that extras type. To delete an entire category, select in the left column and click on Delete button in the footer of the left column. To delete individual extras, select them in the right column and click on the Delete button in the footer of the right column. Deleting extras is permanent and can not be undone! Perfect Photo Suite Introduction 27 Preferences Note: This page refers to the Preferences dialog for the Perfect Photo Suite. If you have an individual product not all of the options detailed below may be available. The preferences dialog contains general application settings. The preferences are accessed from the Perfect Effects menu on Mac or the Edit menu on Windows. The preferences contain the following controls: General Settings 1. Working Color Space: When a new file is created or file is opened and has no color profile associated with it, this is the assumed color profile for the image. Images that come from plug-ins or have tagged or embedded profiles will use the associated profile instead. 2. Scrolling Controls: Lets you select how the mouse scroll wheel or scrolling gesture works. The options are: 1. None: Default 2. Preview Zoom: Adjusts the zoom of the preview window. Scrolling up increases the zoom, scrolling down decreases the zoom. It is important that the zooming is comfortable, not too fast or slow or jerky. 3. Preview Pan: Pans the image, like using the pan tool or navigator. It is important that the panning is comfortable, not too fast or slow or jerky. 4. Brush Size: Adjusts the size of the current tool if relevant, such as a brush tool. 3. Preview Background Color: You may select the color of the background behind the preview image. The default color is black. There should be options for black, white, light gray, dark gray and custom... The custom option a color picker where you can select your own background color 4. Start In: Determines which module will open at launch. Browse is the default. 5. Check of Updates on Launch: Enabled by default, the product will communicate with onOne server at launch and if an update is available it will prompt you to download, or skip. 6. Warn when leaving files in Layers: Enabled by default, if you have unsaved files open in Layers and want to close the program a warning dialog will appear with the options to Save & Close, Cancel, or OK which will close without saving. 7. Language: Select which language the app user interface is presented in. Usually this is determined automatically but the locale of the operating system but can be manually set. Plug-ins Perfect Photo Suite 28 Introduction 1. Smart Photos Save PSD Files As: When you send a PSD to Perfect Effects via a plug-in from Lightroom or Aperture you can choose between saving the file as a normal photo or a Smart Photo. 2. File Type: Specifies four options. PSD (Supports Layers, Defaults Setting. Same as Source (PSD for Raw). TIFF (No Layers). JPEG (No Layers). 3. Color Space: Specifies the color space to use when processing copies from Lightroom. This is similar to the working color space pop-up in the general preferences tab, however there are only the three options supported by Lightroom: sRGB, Adobe RGB 1998 and ProPhotoRGB. 4. Bit Depth: Sets the bit depth for the copies created by Lightroom, the options are 8 and 16-bit. 5. Resolution: Sets the resolution of copies created by Lightroom. 6. Stack with Original: Enabled by default, copies created by Lightroom are stacked with their original or source image. 7. Use Original for Single PSDs: Enabled by default. If your selection is a single PSD file, the original PSD is opened rather than creating a copy. Performance Settings 1. Memory Usage: Specifies the amount of system memory (RAM) that is used by the application. The default is 80%. 2. VRAM Usage: Specifies the amount of video memory (VRAM) that is used by the application. The default 80%. 3. Process 8-bit images as 16-bit: When enabled, 8-bit images are handled in a 16-bit space to reduce processing artifacts. This is recommended unless you have a computer with low memory. 4. Scratch Folder Location: Allows you to move or reset your memory cache. This is helpful if you have a small SSD drive as your system drive. This information is purged after each time you quit the application. 5. Browse Cache: Stores thumbnails previews on disk so that the next time you browse a folder it loads much faster. Here you can adjust the memory cache size or amount of information stored, empty, move, and or reset. Services Perfect Photo Suite Introduction 29 1. Services in Sources: Control which online storage services are displayed in the Sources pane in Perfect Browse. Perfect Photo Suite 30 Perfect Browse Perfect Browse Perfect Browse is a powerful and incredibly fast photo browser and manager. It gives you one place to find, view and manage your images no matter where they are located. Browse can view the images on your computer, memory cards, external hard drives, network shares and online storage services. Perfect Browse isn't a database so it doesn't have to catalog your images in order to view them. Just point it anywhere and you can view your photos. That also makes it lightning-fast. You can start to view and work with your images immediately after a shoot without having to wait for a long cataloging or importing process. Some of the features: Find your photos fast, anywhere they live: Local drives Network drives Online storages services Create a selection of images for Batch processing. Fast browsing without the need of a catalog. Copy, move, delete and rename files. Sort, flag, star or color code your images. Perfect Photo Suite Perfect Browse 31 Getting Started This getting started section will give you the basics of using the Browse Module. You might also try watching the getting started video tutorial. For detailed information on steps and controls mentioned in the getting started section, see the "Using the Browse Module" section instead. Pages in this Section Browse Workspace Perfect Photo Suite 32 Perfect Browse Browse Workspace The Browse Module allows easy access to your images on your computer, network or cloud based storage device while viewing a thumbnail grid or scrolling through a larger detail view. The main window sections of Browse Module: A. Favorites Pane: This pane contains your favorite folders to give quick and easy access to images. B. Sources Pane: This contains a list of common photo locations, including disks, favorites and cloud storage services. C. Filters Pane: This pane allows you to sort and search your images. D. Recent Pane: This keeps track of recently opened files and folders. E. Module Selector: This lists the available modules (Perfect Photo Suite only). F. This will display the number of files and folders you are viewing, you can use the arrow keys to move from item to item. G. This is your main preview window where you can view your images as thumbnails or a larger detail. H. Use this button to switch from thumbnail view to detail view. I. This slider will adjust the thumbnail size in your main preview window. J. This pop up will adjust your sort order. K. Info Pane: This section will give you detailed information about your image when available. L. Metadata Pane: This pane will show your metadata for your selected image. M. Smart Photo History Pane: This pane will show the history of your image within the suite. (Perfect Photo Suite only) N. Albums: Create collections or lists of photos and have them one click away at all times. Perfect Photo Suite Perfect Browse 33 Using Perfect Browse This section covers the complete use of the Browse Module. It includes how to navigate your folders, customize sources as well as information on preferences and menu options. Pages in this Section Photo Sources Managing Files and Folders Favorites Albums Recent Pane Working in Thumbnail View Persistent Thumbnail Cache Working in Detail View Using the Info Pane Metadata Ratings, Labels and Likes Filters Sent to Smart Photo History Menus Keyboard Shortcuts Perfect Photo Suite 34 Perfect Browse Photo Sources The Sources Pane is where you look for your photos. It contains a list of all disk drives, mounted server shares and cloud storage services on your computer. Attached Disks Browse automatically recognizes any disk (volume) inside or attached to your computer. This includes: Hard drives in your computer Hard drives attached to your computer with USB, Firewire, Thunderbolt, etc. Optical drives USB thumb drives Digital camera memory cards Digital cameras, music players and smartphones that support USB Mass Storage Network shares (mapped volumes on Windows) Disks appear in the Sources pane with a hard drive icon next to them. Keep in mind that some disks, like optical drives, are often read-only. You will be able to open a copy of a photo, but will be prompted to save the image to a new location. Cloud Storage Services Browse supports several common cloud storage services including Dropbox, Google Drive, Microsoft OneDrive and Apple iCloud Photo Stream. All of these services keep local copies of your images on your computer. Browse finds and monitors these locations automatically. If you edit an image stored in one of these locations they are automatically updated to the cloud. You can hide services you don't use in the Preferences. Browse automatically finds the default installation locations for these services. If you do not have one of these services installed, or you have it installed to a non-standard location you will be asked to install or locate the folder when you click on the source. iCloud Photo Stream is a read-only source. You can open an copy of an image from it and save it to a new location only. Navigating Sources Each Source that contains sub-folders will have a disclosure triangle next to it. You can click on this triangle or the Source name to open or "roll down" to show the first level of sub-folders inside the Source. Sub-folders that contain folders also have disclosure triangles. This method of viewing and navigating folders is common to both the Mac OS X and Windows operating systems. The contents of the Source or sub-folder there of you click on will be presented in the preview area. You can also navigate folders in the Preview area and the breadcrumbs bar above it. Perfect Photo Suite Perfect Browse 35 Managing Files and Folders You can use Perfect Browse to organize, delete and rename files and folders. This makes it a useful workflow tool for any photographer. Deleting a file or folder To delete a file or folder in the preview area, simply press the delete key or select delete from the right-click contextual menu. Then confirm that you wish to move the file to the trash. If you make a mistake you can use the undo command. If you have multiple files and or folders selected it will move them all to the trash. Some files or folders, like those on a network volume must be deleted immediately and cannot be undone. Renaming a file or folder You can rename a file or folder by selecting it, then choose Rename from the right-click contextual menu. If you select multiple files or folders you can batch rename them as well. You have the option to use any combination of the current filename, custom text and serial numbers. Creating a new folder You can create a new folder from the the right-click contextual menu in the preview area or selecting new subfolder in the Edit menu. This will create a new folder inside the selected folder. Copying and Moving files and folders You can copy and move files and folders in the ways you are accustomed to on your computer. You can select files and folders and use the copy command to copy them to the clipboard and then the paste command to paste them to new location, inside or outside of Browse. You can use this to copy a file or folder from one place to another or to attach an image to an email for example. You can also use the familiar drag and drop functions to copy or move files and folders. Dragging and dropping a file or folder will move it if it is on the same drive or copy it to another drive. You can drag and drop into and out of the Browse module. Perfect Photo Suite 36 Perfect Browse Save As You can create a copy of any image using the Save As command from the right-click contextual menu or the File menu. You can save your file in any supported format and select it's location. If you want to batch process multiple files use the Batch Command instead. Show in Finder / Show in Explorer You can reveal any file or folder in an operating system file window using this command from the right-click contextual menu. Perfect Photo Suite Perfect Browse 37 Favorites A Favorite is a short-cut to any file path where you store your images. Several Favorites are installed by default such as your Desktop, Pictures and the Extras folders. You can create your own Favorites by pressing the plus icon at the top of the Favorites pane. An open dialog will appear where you can navigate to the folder you wish to add as a Favorite. You can also remove a favorite by selecting it in the Favorites pane, then pressing the minus button. You can also add a favorite by simply dragging it into the "Drag Your Favorites Here" hotspot at the bottom of the pane. Perfect Photo Suite 38 Perfect Browse Albums A album is collection of photos you have designated. Use Albums to organize or keep track of photos on a project, event, or even a broader category like a portfolio. Creating an Album 1. Click the + icon to create a new Album. Give it a name and click OK. OR 2. You can also create an Album by first selecting photos and dragging them into the designated area at the bottom. Adding photos to an existing Album There are multiple ways to add photos including: -Dragging and dropping a photo on the Album -Right click > Add to Album -Copy and paste -Using the Menu at the top Album > Add Delete an Album 1. Click the Album to select it and then click the"-" button above. Perfect Photo Suite Perfect Browse 39 Recent Pane The Recent Pane keeps track of recently opened files or manually browsed folders. Files are listed in order of last opened. If you have not opened any files this pane will be empty. You can quickly access your most recent files in this pane by clicking on the one you want and it will appear in your main preview window. Keep in mind the Recent pane only shows files you have opened directly from Perfect Browse, not files you have sent to Perfect Browse from Lightroom, Aperture or Photoshop. You can clear the recent file list by pressing the trash can icon. Perfect Photo Suite 40 Perfect Browse Working in Thumbnail View The Thumbnail area is the largest part of the main window and it is responsible for displaying thumbnails of folders and images you have selected using the Source and Folder Panes. A. Adjust the size of the thumbnails using the slider located at the bottom or use "-/+" keys on your keyboard. B. Change the viewing mode between thumbnail and detail view. C. When Previewing images at full screen you can quickly go to the next image by using the navigational arrows. D. Use the breadcrumbs to quickly return to the root or click "back" to return one folder. E. Sort the thumbnails by filename or date using the pull down menu. The sort will always be descending, A-Z or oldest to newest. F. Add Star Ratings and color coding to your images for easy filtering. Perfect Photo Suite Perfect Browse 41 Selecting Multiple Images Select the first image and hold down on the 'shift' key and click on the last image of the group. If the images you wish to select are not in sequential order you can select each image individually by selecting the first image, now hold down 'Command' (Mac) or 'Control' (Windows) and select each image(s) while continuing to hold down on the Command/Control key. Perfect Photo Suite 42 Perfect Browse Home > Perfect Browse > Using Perfect Browse > Persistent Thumbnail Cache Persistent Thumbnail Cache Perfect Browse will cache thumbnails and/or preview images as well as extracted metadata. This will make it faster the second time a user browses a folder. It also stores user added or adjusted metadata such as ratings, labels, keywords, captions, rotation, etc. Through the Preferences pane you can adjust the size of the cache and change the storage location. See also Photo Sources Managing Files and Folders Favorites Albums Recent Pane Working in Thumbnail View Working in Detail View Using the Info Pane Metadata Ratings, Labels and Likes Filters Sent to Smart Photo History Menus Keyboard Shortcuts Perfect Photo Suite Perfect Browse 43 Perfect Photo Suite 44 Perfect Browse Working in Detail View In Detail View you can see a full-screen version of your photo. By default when you go to Detail View, your images will be displayed in fit mode, so you can see the entire image. However you can click on the image to zoom in to 100% or actual pixels. This is useful for judging small details and sharpness. Singleclicking on a image that is magnified will return back to fit mode. You can click and drag a magnified image to look around. Your zoom mode is maintained as you move from image to image so you can compare the same spot in several frames. There is also a Navigator pane where you can reposition the preview and change the magnification amount. In the footer of detail view you can view and adjust the Likes, Star Ratings and Color label for the current image. Fast Preview Mode Fast Preview mode allows you to view large previews from Raw files very quickly. It does this by extracting embedded previews from the Raw files rather than processing the full-sized image. The size of the embedded preview is controlled by the camera manufacture. In many cases the embedded preview is the same size as the full image. In some cases it is smaller. When this happens a small alert icon appears in the footer of detail view. If you need to zoom into 100%, press this icon to generate a fullsized preview. The embedded preview uses the in-camera processing. When you open the full-sized Raw file it may appear different as the Raw processing in Perfect Browse is different than the camera manufactures. If you prefer that that the previews always match, you can disable Fast Preview mode by press the button in the footer of detail view. Perfect Photo Suite Perfect Browse 45 Navigating the Preview Perfect Browse provides several ways to navigate and view your image in the Preview window. The Preview Window above is the main section where you preview and work on images. Hand Tool The Hand tool is used to position the image within the Preview window, whenever the preview zoom is larger than the viewable area. To pan (scroll) in the Preview window: Select the Hand Tool and drag the image until you locate the area you wish to view. With any other tool selected, hold down the spacebar while you drag the image in the window. Double-click the Hand tool in the Toolbar to set the image to a magnification that fits completely in the current window size. Zoom Tool The Zoom tool changes the magnification of the image in the Preview window. With the Zoom tool selected: Click in the Preview window to zoom in and center the image at the location clicked. Click and drag in the Preview window to draw a rectangular, the screen fills with the area within the rectangle when you release the mouse. Hold the Option key (Mac) or Alt key (Win) and click to zoom out. Double-click the Zoom tool in the Toolbar to set the image to 1:1 or 100% magnification, showing every pixel. This is best when examining small details. Perfect Photo Suite 46 Perfect Browse The Navigator Pane This gives you a birds-eye view of your image. The blue square region marks the image area that is visible in the preview pane. You can pan your image by clicking and dragging inside the blue region. At the bottom of the Navigator pane are several Zoom presets. Click on a Zoom preset to activate. FIT: Zooms to fit the current canvas size. This allows you to see your entire image. 100: Zooms to 100% or actual pixels. This is best for judging small details. 50: Zooms to 50% 25: Zooms to 25% Perfect Photo Suite Perfect Browse 47 Using the Info Pane The Info Pane displays common metadata for the currently selected file. You can view complete metadata in the Metadata Pane . This information may include: Camera Make and Model Focal Length of the Lens Capture Date and Time File Type GPS ISO Shutter Speed Aperture Exposure Compensation Filename Color Space Image Dimensions and Resolution Image Size and Bit Depth If any of the metadata fields are unavailable they will be left blank. GPS Metadata If your image has GPS metadata embedded in it, the GPS button will appear. Clicking on this button will open the default web browser to Google Maps and navigate to the location where the image was taken. Perfect Photo Suite 48 Perfect Browse Metadata The Metadata Pane allows you to view and add important metadata about our photo. This can include your copyright and contact information as well as keywords and descriptions. You can also view your camera settings (EXIF) and view and edit IPTC metadata used by journalists and stock photographers. You can change the metadata in multiple images at the same time by selecting them all, then changing a metadata field. Embedding Metadata Metadata you add in Perfect Browse is stored is industry standard XMP sidecar files for all formats. This facilities the transfer or metadata to any application that supports XMP. When you edit and image, create a copy of an image for editing or use the Send to command the metadata is embedded into the file automatically (with the exception of camera RAW files). You can manually embed your metadata into images using the embed metadata command from the Photos menu. This will open each image you have selected, update the metadata and re-save it. This is supported for TIF, PSD, PSB and JPG files. Camera Raw and PNG files do not support direct embedding of metadata. Perfect Photo Suite Perfect Browse 49 Ratings, Labels and Likes When you return from a shoot you have hundreds, if not thousands of images to download, sort out and cull. This process is where many photographers spend much of their time. Perfect Browse provides the tools to make this process efficient. Using an industry-standard rating and label system, it is fast to sort and cull your favorites from the ordinary and the throw-away shots. Perfect Browse offers three ways, aside from keywords and sub-folders, to mark and group similar images. All of these methods may be set several ways including; From the Photo menu, the right-click contextual menu, clicking the badges on the image thumbnail or in the footer of Image view. There are also keyboard shortcuts associated with each classification option. 1. Star Ratings: Set from Zero to Five stars. Photographers often use five stars for their favorite images and one star for images they don't want to keep. You can adjust the rating using the 1-5 keys on the keyboard. You can also clear the stars with the ` key. 2. Color Labels: There are five color labels as well. Color labels are a great way to mark sub-sets of images for special handling. You can set the color ratings with the 6-0 keys. 3. Likes: The most common need for photographers is to mark their favorite images and the ones they want to delete. This is best accomplished with the Like classification. There are three clear options, Like, Dislike and not set. You can set your Liked images with the P keyboard shortcut, your Dislikes with the X key and clear the settings with the U key. Both star ratings and color labels are industry standards. When you use these tools, the settings are stored in the metadata and will be available in other photo editors and managers, like Lightroom. Likes are proprietary and will only appear in Perfect Browse. Perfect Photo Suite 50 Perfect Browse Filters The Filters pane allows you to find just the photos you are interested in your current folder. It will search for an photos that match the criteria you set. Photos must match ALL of the set criteria to be found. To use the Filter pane follow these steps: 1. Make sure you have the folder of images you are interested in viewing selected in the Sources pane. 2. Turn the Filter pane on. 3. Set your filter criteria. Tip: The Filter pane works by filtering or searching within the current folder only. It will not show results from other folders. It does not search all of your photos. You can filter your photos using the following options: Liked, disliked or not set. Star ratings from zero to five. You can also control if you want it to show only the exact number of stars or greater than or equal to, or less than or equal to the set number of stars. Color Labels Date Range. There are several preset relative date ranges or you can set your own defined date range. Text search. You can type into the search field to find images that contain the text in the filename, keywords or description. Saved Filters You can save your filter criteria so you can use them again in the future. Perfect Browse comes with several common saved filters that you can access from the Saved Filters: pop-up. To save your own filter criteria just press the plus button next to the Saved Filters: pop-up. You may also delete the current saved filter by pressing the minus button. Perfect Photo Suite Perfect Browse 51 Sent to Perfect Browse lets you send images you are viewing to other applications for editing. This is done via the Send to option, which is available from the right-click contextual menu or the Edit menu. Perfect Browse automatically detects the following common photo managers or editors and lists the latest installed version: Adobe Photoshop Adobe Photoshop Elements Adobe Photoshop Lightroom Apple Aperture You can also set-up any application you want to send your photos to. Simply select the Send to Other Application option. Then select the application you want to send your photos to. The application will be remembered and listed with your other Send to options. For example, if you use and email client you can add it to easily email photos. Perfect Photo Suite 52 Perfect Browse Smart Photo History The Smart Photo History Pane is only available in the Perfect Photo Suite. The Smart Photo History pane displays all of the Smart Layers inside of a Smart Photo. For each Smart Layer it lists what modules have been applied to it. Re-Edit a Smart Photo 1. Select the Smart Photo in Perfect Browse. 2. In the Smart Photo History Pane, double-click on the module you want to re-edit. 3. The photo will open in the selected module with the settings and masks as they where when you saved the image. 4. Adjust your settings or masks and press the Save and Close button. 5. Your image will be returned to Perfect Browse and you will see your changes applied. Manage Smart Layers If you want to turn off, or delete a Smart Layer, open the image in Perfect Layers and use the Layers pane. Here you can edit, hide or delete modules from each Smart Layer in a Smart Photo. Perfect Photo Suite Perfect Browse 53 Menus Perfect Browse (Mac OS X Only) About Perfect Browse: Opens the about box, displays your version number and activation code. (Help menu on Windows) Preferences: Opens the preferences dialog. (Edit menu on Windows) Quit Perfect Browse: Quits Perfect Browse. File Menu Browse Folder: Opens the browse dialog where you can select which folder you would like to browse Add Favorite: Opens the add favorite dialog that you can add a favorite folder permanently to the Sources pane Manage Extras: Opens the Extras Manager where you can import and manage extras like Borders, Backgrounds, Textures and Presets. Edit in...: Will launch the module with the file you have currently selected Batch: Opens the Batch mode window Edit Menu Undo: Undoes the last file operation. This is only available the last thing you did. Redo: Redoes the undo operation. This is only available if the last thing you did was an undo. Select All: Selects all the images in the current folder Select None: Deselects all the images in the current folder Deselect: Deselects the current item Copy: Copies the currently selected items Paste: Pastes (copies) the items in the clipboard to the current location Rename: Renames the selected file or folder Delete: Moves the selected files and or folders to the trash Add Subfolder: Adds a new empty subfolder inside the current folder Perfect Photo Suite 54 Perfect Browse View Menu Bigger Thumbnails: Increases the size of the thumbnails Smaller Thumbnails: Decreases the size of thumbnails Sort: Sort by filename or date View Mode: Select from thumbnail or Detail view. Preview Background Color: Change the preview background color the thumbnails Album Menu Create Album: Creates a new Album Rename Album: Renames selected Album. Delete Album: Deletes selected Album. Add to Album: Provides list of Albums to add selected photos to. Remove from album: Removes selected photo(s) from Album Window Menu Info: Opens and closes the Info pane. Sources: Opens and closes the Sources pane. Folders: Opens and closes the Folders pane. Recent: Opens and closes the Recent pane. Show Browse Panel: Hides or reveals the entire Browse Panel (left column of control panes). Hide Panels: Hides or reveals both the left and the right Panels. Full Screen Mode: Enters or exits full-screen mode Perfect Photo Suite Perfect Browse 55 Help Menu Search: Searches the menus (Mac OSX only). Browse Online Help: Opens this html Help in your default web browser. Video Tutorials: Opens the online Video Tutorial in your default web browser. Getting Started: Opens the online Getting Started overlay. Show Keyboard Shortcuts: Opens the keyboard shortcut inspector. Perfect Inspiration: Takes you to the Perfect Inspiration web site. Check for Updates: Checks with the onOne update server to see if you are running the current version. If there is a newer version you will be notified and be walked through the update process. Deactivate: Opens the activation dialog. These are used to deactivate your software for moving it to another computer or for a return. Registration: Opens the default web browser and navigates to the registration page of the onOne website. Provide Feedback: Opens the default web browser and navigates to the feedback page of the onOne website. Help Improve onOne Products: Opens the Improve onOne Products dialog. Perfect Photo Suite 56 Perfect Browse Keyboard Shortcuts Browse Folder Mac OSX Windows cmd b ctl b Save As cmd shift S ctl shift S Print cmd P ctl P Exit cmd q ctl q Undo cmd Z ctl Z Redo cmd shift Z ctl shift Z Select All cmd a ctl a Select None cmd d ctl d Deselect / / Copy cmd C ctl C Paste cmd V ctl V Delete File Delete Delete Preferences cmd , ctl , Bigger Thumbnails + + Smaller Thumbnails - - Enable Filters cmd L ctl L Reset Filters cmd shift L ctl shift L Return to Thumbnail View esc or g Switch to Detail View E E Color Label 6 (Red) 7 (Yellow) 8 (Green) 9 (Blue) 0 (Purple) 6 (Red) 7 (Yellow) 8 (Green) 9 (Blue) 0 (Purple) Rating `(Clear Rating) 1(Rate as 1 Star) 2(Rate as 2 Stars) 3(Rate as 3 Stars) 4(Rate as 4 Stars) 5(Rate as 5 Stars) `(Clear Rating) 1(Rate as 1 Star) 2(Rate as 2 Stars) 3(Rate as 3 Stars) 4(Rate as 4 Stars) 5(Rate as 5 Stars) Like P(Like) X(Dislike) U(Clear) P(Like) X(Dislike) U(Clear) esc or g Rotate 90 Degrees CW Cmd ] ctl ] Rotage 90 Degrees CCW Cmd [ ctl [ Sources Navigation Up Arrow (up) Down Arrow (down) Right Arrow (open folder or Down) Left Arrow (close folder or up) Up Arrow (up) Down Arrow (down) Right Arrow (open folder or Down) Left Arrow (close folder or up) Up Arrow (up) Up Arrow (up) Down Arrow (down) Down Arrow (down) Left Arrow (left) Left Arrow (left) Right Arrow (right) Right Arrow (right) Thumbnail View Navigation Enter (image view or Enter (image view or browse folder) browse folder) Cmd Up Arrow (browse Ctl Up Arrow (browse up one level) up one level) Favorites cmd 1 ctl 1 Sources cmd 2 ctl 2 Filters cmd 3 ctl 3 Recent cmd 4 ctl 4 Info cmd 5 ctl 5 Metadata cmd 6 ctl 6 Smart Photo History cmd 7 ctl 7 Show/Hide Browse Panel cmd Left Arrow ctl Left Arrow Show/Hide Photo Panel cmd Right Arrow ctl Right Arrow Hide Panels tab tab Perfect Photo Suite Perfect Browse 57 Full Screen Mode cmd ctl f F11 Keyboard Shortcuts cmd shift k ctl shift k Perfect Photo Suite 58 Perfect Layers Perfect Layers Perfect Layers provides the benefits of a layered workflow without the need for Adobe Photoshop. It can also act as the hub of your workflow in Perfect Photo Suite if you are familiar with the Photoshop and Plug-in workflow. It can be used for: The opening and saving of files. Merging multiple files into a single layered file. Combining the best parts of several images together using layers and masks. Selecting the layer you would like to work on in other modules. If you access the suite via Adobe Photoshop you won't see Perfect Layers. On its own, Perfect Layers is incredibly useful, especially if you don't own Adobe Photoshop. It is the fast and easy way to a layered workflow. Use it to change skies, composite multiple images together or retouch portraits. Some of the features: Combine multiple images into a layered Photoshop-compatible file. Adjust layer size, position, blending mode and opacity. Use the built-in layer masks and masking tools to blend multiple layers together. Use the Retouch Brush to remove blemishes and dust spots. With Perfect Layers, multiple images can be merged as separate layer of a single new file. Then you can easily reorder and position each layer; As well as change blending modes and opacity. In addition, you can selectively blend, or mask layers together using the Masking Brush and Masking Bug. Perfect Layers saves its work as native layered Photoshop files so users can open them directly with Photoshop for additional editing. Perfect Photo Suite Perfect Layers 59 Getting Started This getting started section will give you the basics of using Perfect Layers. If you have never used Perfect Layers before, this is a good place to start. You might also try watching the getting started video link. For detailed information on steps and controls mentioned in the getting started section, see the "Using Perfect Layers" section instead. Pages in this Section Perfect Layers Workspace Perfect Layers Tool Well Navigating the Preview Navigator, Loupe, Histogram and Info Preview Window Modes Using the File Browser Perfect Photo Suite 60 Perfect Layers Perfect Layers Workspace Perfect Layers provides you with an easy-to-use work space for editing your photos. Below is an overview of the main sections. The Main Window: The main window sections of Perfect Layers: A. Browser Section: This is located on the left side of the window. It is where you browse and select your images. B. Tool Well: This is where the tools are located. C. Preview Window: This is the main section where you preview and work on images. D. Tool Options Bar: This strip above the preview window contains the options for the selected tool. E. Navigator, Loupe Histogram and Info Pane: This pane will access navigational, loupe, histogram features as well as file information. F. Layers Pane: This is where you control the layer order and apply blending modes. G. Module Selector: This is where you select other modules to work in. H. Close & Save Buttons: This is one way to save or close the current image. Perfect Photo Suite Perfect Layers 61 Perfect Layers Tool Well There are fifteen different tools in the tool well. More details about each tool are covered in the following chapters, click on a tool title to learn how to use it. Transform Tool This moves and changes the size and rotation of your layer. Crop Tool This crops your image. Trim Tool This trims a single layer. Perfect Eraser This uses content aware technology to remove unwanted objects. Retouch Brush This retouches small imperfections. Clone Stamp This tool paints over an area from a sample of another area. Red Eye Tool This tool reduces red eye. Masking Brush This masks areas using brush strokes to expose underlying layers. Quick Mask Tool This tool masks out large similar areas quickly. Masking Bug This masks areas using gradients to expose underlying layers. Line Mask Tool This tool is for creating linear masks. Refine Brush This tool refines the mask intersections to cleanly mask difficult areas like hair. Chisel Mask Tool This tool moves the edge of the mask slightly to remove fringes. Blur Mask Tool This tool softens the mask slightly to blend more naturally. Pan Tool This tool repositions your image within the preview window. Zoom Tool This tool changes the magnification in the preview window. Perfect Photo Suite 62 Perfect Layers Navigating the Preview Perfect Photo Suite provides several ways to navigate and view your image in the Preview window. The Preview Window above is the main section where you preview and work on images. Hand Tool The Hand tool is used to position the image within the Preview window, whenever the preview zoom is larger than the viewable area. To pan (scroll) in the Preview window: Select the Hand Tool and drag the image until you locate the area you wish to view. With any other tool selected, hold down the spacebar while you drag the image in the window. Double-click the Hand tool in the Toolbar to set the image to a magnification that fits completely in the current window size. Zoom Tool The Zoom tool changes the magnification of the image in the Preview window. With the Zoom tool selected: Click in the Preview window to zoom in and center the image at the location clicked. Click and drag in the Preview window to draw a rectangular, the screen fills with the area within the rectangle when you release the mouse. Hold the Option key (Mac) or Alt key (Win) and click to zoom out. Double-click the Zoom tool in the Toolbar to set the image to 1:1 or 100% magnification, showing every pixel. This is best when examining small details. Perfect Photo Suite Perfect Layers 63 Navigator, Loupe, Histogram and Info At the top of the control panel on the right of the main window is the Navigator | Loupe | Histogram | Info panes. It contains four useful tools for inspecting and viewing details of your image. The Navigator Pane This gives you a birds-eye view of your image. The blue square region marks the image area that is visible in the preview pane. You can pan your image by clicking and dragging inside the blue region. At the bottom of the Navigator pane are several Zoom presets. Click on a Zoom preset to activate. FIT: Zooms to fit the current canvas size. This allows you to see your entire image. 100: Zooms to 100% or actual pixels. This is best for judging small details. 50: Zooms to 50% 25: Zooms to 25% The Loupe Pane This gives you a magnified view of the section of the preview under the cursor. This allows you to view the quality of your results while maintaining a complete view of your image. At the bottom of the Loupe Pane is a sliding for adjusting the zoom level. The Histogram Pane This gives you a color chart of the shadow, mid-tone and highlight areas based on the image RGB values. This is useful to show areas within the image that may be clipping. Clipping is when your image contains pure blacks or white and can signify loss of highlight or shadow detail. The left side of the histogram represents the shadows, while the right represents the highlights. At the top of each end is a triangle. If the triangle is lit, there is clipping on that side of the histogram. If you click on the arrows, you will activate the clipping overlay on your image. The areas of your image with a blue overlay are pure black, while the areas with the red overlay are pure white. You can turn the clipping view off again by clicking on one of the triangles. You can also temporarily enable clipping view by holding down the J key at any time. The clipping view is useful when you are making adjusts to the brightness and contrast of your image. The Histogram pane also displays the RGB values under the cursor at the bottom of the pane. Perfect Photo Suite 64 Perfect Layers The Info Pane The info pane will display important metadata about your file including: Camera type File type Focal length and lens information Date and time captured Exposure information ISO Shutter Speed Aperture Exposure Value Filename Color Space Dimensions File Size and Bit Depth If your camera allows for GPS the GPS button will be viewable and you can click on it to get the GPS cordinates for where the image was taken. This feature only works if you have GPS enabled on your camera or mobile device. Otherwise you will not see the GPS button. The Info panel is not visible when you access a Module as a Photoshop plug-in. Perfect Photo Suite Perfect Layers 65 Preview Window Modes The preview window has several modes including; single image, side-by-side (horizontal or vertical) and split-screen (horizontal or vertical) versions of an image. This allows you to compare layers side-by-side or to view a layer mask and the layer side-by-side. At the bottom left of the Preview Window is a button that toggles and shows the current Preview Mode. You can also change the mode from the View menu. Single Mode Screen. Left-Right Screen. Top-Bottom Screen. Top-Bottom Split Screen. Left-Right Split Screen. Tip: You can use the keyboard shortcuts below to quickly switch view modes. Items in parenthesis are for Windows. Command (Control) L: Command-Option (Control-Alt) L: Command (Control) T: Command-Option (Control-Alt) T: Command (Control) Y: Change the preview mode to Left/Right. Change the preview mode to Left/Right Split screen. Change the preview mode to Top/Bottom. Change the preview mode to Top/Bottom Split screen. Change the view mode to single image. Perfect Photo Suite 66 Perfect Layers Using the File Browser Built into Perfect Layers is a file browser, located in the left panel. You can use it to browse your images as well as content you download from the onOne website. Below is a description of the controls in the file browser. A. Browser Tabs: This switches between the File tab and the Extras tab. The Extras tab displays the included backgrounds, borders and textures. B. Folder Tree: This drop-down menu displays the folder paths above the folder you are browsing. You can use this to quickly navigate up the folder tree. The currently selected root folder is displayed here as well. C. Search Field: Use the search field to locate files in the current sub-folder. D. Image Thumbnails: Images are displayed as thumbnails and will have the filename and extension listed below it. E. Resize Handle: On the right edge is a resize handle that you can drag to change the size of the browser or close it. F. File Info: This window will show captured and modified dates, color space, exposure settings and size on disk if applicable. G. Browser Modes: These icons control the browser views. One column, two column, three column or list view. H. Quick View Browser Button: Press this button to open the current folder in the Quick View Browser. Browsing a Folder You can select which folder to browse by selecting a folder in the drop down menu under Files. The last folder you browsed will be remembered and displayed automatically. Navigating the Browser To open a sub-folder, click on it. To close it, click on it again. Only one top-level folder can be open at a time. Double-clicking on a folder sets it to the root folder and its name will appear in the folder tree drop-down. The selected item, either a folder or file, will have a light silver box around it. You can use the up and down arrow keys to change your selection in the browser. You can open or close folders using the command (control on Windows) up and down arrows. You can select multiple files by holding down the shift key. Perfect Photo Suite Perfect Layers 67 You cannot move or delete files from the File Browser. Opening Files from the Browser You can open an image in the browser by double-clicking it. If you already have an image open you will be prompted to either merge the selected file as anew layer or to open it as a new file. If you have multiple images selected, you can open them as layers using the Open Selected from Browser command in the File menu. Searching for Files To search for files in the currently selected folder, type in the name of the file in the search field. The search results appear in a new sub-folder called search results, which will be selected automatically. You can clear the search field by pressing the x at the right end of the search field. Browser Pop-Up To view a larger preview on an image, enable the Show Browser Pop-up in the View menu. When you mouse over a thumbnail, a larger preview will be displayed in a pop-up window. Resizing and Closing the Browser The browser can be resized by dragging the resize handle on the right margin of the browser. The browser can be closed or reopened by clicking on the resize handle or using the cmd (control on Windows) left and right arrow keys. Browser Modes The browser offers four viewing modes. Three that display thumbnails in columns and one list view. The browser modes are selected using the browser mode icons at the bottom of the browser. single column view two column view list view Extras Tab The Extras tab displays add-on content including backgrounds, borders and textures. When you download content packs from the onOne website they are automatically installed in the Extras tab. Quick View Browser Perfect Photo Suite 68 Perfect Layers The Quick View Browser adds an elegant full-screen view of your images, filters and presets. Whether you are looking for the right image or the right look, the Quick View Browser will make fast work of the problem. Just press the Quick View Browser button (or the option (alt) right arrow keyboard shortcut and you will see the full array of options to choose from. You can visually navigate categories, then dive into them to find just the right look. Browse folders and images quickly to find the right one to work on. View all your filter or preset categories at one time, then dive into them to find the perfect look with an effortless, tablet feel. Variable thumbnail sizes gives you a few large previews or many small ones depending on your screen size and content. Back button and breadcrumbs make it easy to navigate a complex folder structure. Use your keyboard arrow keys to navigate. Press the return key to select an item or open a folder. Use the command or control left arrow to go up a folder level. Perfect Photo Suite Perfect Layers 69 Using Perfect Layers This section covers the complete use of Perfect Layers. It includes how to use each tool and control as well as information on preferences and menu options. Pages in this Section Creating a New File and Adding Layers Adjusting Canvas Size Working with Layers Menus Keyboard Shortcuts Perfect Photo Suite 70 Perfect Layers Creating a New File and Adding Layers You can create a new file in several ways. 1. Create a new, empty file from the File > New menu. The New Image dialog is presented, see the image to the right. From the New Image dialog, you have the following options. Name: Presets the name of the image. Preset: Lists a range of preset image dimensions for common print sizes. Width: Sets the width. There is a drop-down menu that includes inches, cm and pixels. Height: The same as the width, just for setting the height. Swap Dimensions button: Pressing this button will swap the current width and height. Resolution: Sets the resolution of the image. Color Space: Sets the color space (icc profile) of the image. The default is set based on the user preferences. Only RGB color space profiles are available. Bit Depth: Sets the bit depth of the image, either 8-bit or 16-bit. 1. Merge one or more images together using the Add Layer from File command. 2. Merge one or more images together using the Lightroom or Aperture plug-ins or external editor option. 3. Dragging one or more images onto the Perfect Layers icon. Adding Layers from Files You may add images (flat or layered) as layers into an open file by: 1. Using the Add Layer from File command from the File menu. 2. Opening a file from the Browser or the Browse module and choosing the Add as a layer option. Working with Tabs Each photo you open in Perfect Layers is contained in its own tab. The tabs for each photo appears at the top of the interface. Close a tab by clicking on the "X" icon. How do I combine two tabs in to one? In Tab 1 choose Layer > Copy Layer. Click to switch to Tab 2 and choose Layer > Paste Layer. Close a by clicking "X". Perfect Photo Suite Perfect Layers 71 Adjusting Canvas Size The canvas size, or image size is the aperture through which you view the layers. An image may have layers that are larger than the canvas size and are partially hidden by the canvas size aperture. 1. When creating a new empty file from the File > New dialog, an arbitrary size is set by you. When creating a new image, you have the option to set the resolution. 2. When creating a new PSD file by merging other files together using the Add Layer from File command, the source image that has the largest pixel dimensions will become the bottom most layer and will set the canvas size. The canvas size is adjustable by the user. 3. When opening an existing PSD file, the canvas size is already set. The canvas size is adjustable by the user by accessing the Canvas Size dialog from the Edit menu. Layer image data outside the canvas area is maintained. Adjusting the Canvas Size 1. In the top section, Current Size, it displays the current canvas size and is non-editable. 2. Below the Current Size is the New Size section. It displays the current width and height and is editable. There is a drop-down menu with options for pixels, inches and cm. There are width and height fields where you can adjust the canvas size. The canvas size dialog does not interpolate (resize all the layers at the same time). This is the same as the image size dialog box in Photoshop when the resize image option is disabled. There is a lock proportions toggle that locks the width and height proportions together. Adjusting the width will change the height proportionally. This option is on by default. At the top of the new size section is a pop-up called Set To. The values in the pop-up are; Current Layer, All Layers and Custom. When a user selects the current layer option, the width, and height are set to the size of the currently selected layer(s). If the user selects all layers, the width and height are set to the union of all the layers, making all the pixels on all layers visible in the canvas. If the user selects one of the layer size options and then manually overrides them, the pop-up changes to custom. Perfect Photo Suite 72 Perfect Layers Working with Layers The concept of a layers and a layered workflow is the key benefit of Perfect Layers. Having the ability to create composites of multiple layers is the most powerful tool in a photographer's arsenal and is the heart of many photographers workflows. This feature is lacking in Lightroom and Aperture and requires photographers to purchase Photoshop which is expensive and cumbersome to learn. Articles in this Section The Layers Pane Transforming Layers Crop Tool Trimming Layers Using Color Fill Layers Perfect Eraser Retouch Brush Clone Stamp Red-Eye Tool Using the Masking Tools Perfect Photo Suite Perfect Layers 73 The Layers Pane Layers are listed in the Layers Pane, located in the right column. It lists the layers and contains the controls to adjust them. Layer Visibility You may change the visibility of a layer (hide it) by pressing the eye icon to the left of the layer thumbnail. This will hide a layer without deleting it. You can hide all layers except the current layer by holding the option (Mac OS X) or alt (Windows) key when clicking on the eye icon. This is especially useful for viewing the bottom most layer, which in some cases is the original image. This acts like a before and after preview. Changing Layer Order You may change the order of layers by dragging and dropping layers into the order you prefer. You may select multiple layers at the same time by holding down the command (Mac OS X) or control (Windows) key while clicking. Renaming Layers You can rename a layer by double-clicking on it. The name turns into an editable field. Type in your preferred name and press enter. When merging files together the layer name is the name of the source image. This is a useful verification of the source image. Perfect Photo Suite 74 Perfect Layers Deleting a Layer You may delete a layer by selecting the layer, then pressing the Delete button . You may also use the Delete key on your keyboard. Duplicating a Layer You may duplicate or copy the current layer by pressing the Copy button keyboard shortcut. . You may also use the command (Mac OS X) or control (Windows) + J Merging Layers You may merge layers by selecting them and then pressing the Merge button keyboard shortcut. . You may also use the command (Mac OS X) or control (Windows) + E Creating Color Fill Layers Color Fill Layers are new layers filled with a solid color. They are useful for altering the color and tone of the image. To create a Color Fill Layer, press the Fill button . You can learn more about using Color Fill Layers here. Convert to a Smart Layer You can convert any layer into a Smart Layer, if the image is a Smart Photo. This allows you to re-edit any settings you add to a layer in modules like Perfect Effects. Changing Blending Modes Blending modes determine how the selected layer blend with the layer(s) below it. The default blending mode is normal. This maintains the full opacity of the upper layer. Perfect Layers also supports many other blending modes which can be used to alter the brightness, contrast and color of the image by combining either a copy of the underlying layer or a Color Fill Layer. Changing Opacity The opacity slider controls how opaque, or how strong the selected layer is. The default is 100%. At lower settings, the layer will blend with the layer(s) under it. Altering the blending mode and opacity of a layer can create a wide range of color and tone effects. Layer Masks If you use any of the masking tools, a layer mask will be created automatically. A layer mask appears as grayscale thumbnail next to the layer icon. There is no need to select the layer mask to work on it, invert it, or reset it. Think of it as always selected with the layer. You can also copy and paste Layer Masks from the Layers menu or by dragging and dropping them from layer to layer. Perfect Photo Suite Perfect Layers 75 Transforming Layers Transform Tool: The Transform Tool is located at the top of the tool well. It is used to manipulate the image and layers. A layer may be repositioned, sized or rotated using the Transform Tool. When the Transform Tool is selected, transform handles will appear on the edges of the selected layer. You use these transform handles to manipulate the image. You can only transform one layer at a time. Repositioning a Layer To reposition a layer, simply click and drag inside the transform box. You can also use the keyboard arrow keys to nudge a layer one pixel in any direction. Resizing a Layer To resize a layer, click and drag on any of the transform handles. Clicking on a corner handle allows you to adjust two sides simultaneously. Clicking on a side handle allows you to adjust that side. If you hold the shift key down while adjusting the size, the proportions of the layer are maintained. If you hold down the option (Mac OS X) or alt (Windows) key while resizing your image will resize from the center instead of from the edge. You can hold down both the shift and option or alt simultaneously to resize, proportionally from the center. You can also type in the size you desire in the Tool Options Bar (see below) in the width and height fields. You can also size a layer to fill the canvas automatically by pressing the Fill but in the Inspector. The Tool Options Bar Rotating a Layer To rotate a layer, move the Transform Tool near but just outside a corner transform handle. Notice that the tool cursor changes to a rotate cursor. Now click and drag to rotate the layer. You can also use the opt (alt) left and right arrow keys to rotate a layer when the transform tool is selected. To rotate the layer quickly in 90 degree increments, you can use the rotate left and rotate right buttons in the Tool Options Bar. Flipping a Layer You can flip a layer either horizontally or vertically by pressing the flip buttons in the Tool Options Bar. When you have completed your transforms you need to commit the changes. You can do this by pressing the Apply button that appears in the Tool Options Bar or by pressing the enter key. You can cancel a transform by pressing the Cancel button in the Tool Options Bar or by pressing the escape key. Perfect Photo Suite 76 Perfect Layers Crop Tool Crop Tool: This is used to crop and resize the entire image. The crop tool removes any pixels outside a crop box and changes the canvas size at the same time. To crop the image, select the Crop Tool from the tool well. Then adjust the corner handles of the crop tool overlay. The area outside the crop box appears darkened for guidance. You can resize and move the image inside the crop box. When you are satisfied with your settings, press the Apply button in the Tool Options Bar or press enter. Moving the Image: To move the image inside the crop box, simply click and drag inside the box. You can also nudge the image using the arrow keys on your keyboard. Resizing a Crop Box: To resize the Crop Box, click and drag on any of the resize handles. Clicking on a corner handle allows you to adjust two sides at the same time. Clicking on a side handle allows you to adjust that side. If you hold the shift key down while adjusting the size, the proportions of the box are maintained. To rotate the crop box, move outside a corner until the tool changes to rotate. You can also set the aspect ratio or size of the crop box in the tool options bar. The Crop tool is not available when using a Smart Photo. Crop Tool Options Preset pop-up: Pop-up controls the crop tool mode as well as aspect ratio and document size presets. Width: Sets the width of the crop box. Swap Dimensions: Swaps the width and height. Handy for rotating the crop box. Height: Sets the height of the crop box. Units: Determines the unit of measure: Pixels, inches, centimeters, etc. Leveling Tool: Click and drag this tool across an element in your image that should be level. Angle: See and adjust the angle of rotation. Rotate: Rotates the image 90 degrees. Cancel: Resets the crop tool. Apply: Applies the crop and resizes your photo. Crop Tool Modes Perfect Photo Suite Perfect Layers 77 The Crop Tool works in three modes: Freeform: In this mode you can adjust the crop box any way you like. The image will not be resized. Any area outside the crop box will be trimmed off. Use this mode if you just want to change the shape or recompose your image for general use. Aspect Ratio: You can lock the crop box to an aspect ratio. This makes sure the crop box shape doesn't change, just the size. Use this option to trim existing pixels while maintaining a ratio without resizing the image. Document Size Presets: Document Size Presets allow you to crop and resize your image at the same time. If you know your intent is to print the image at a certain size you can crop and resize the image at the same time. Many common sizes are included plus you can create your own. Leveling the Image The Crop Tool has a special Leveling Tool for automatically adjusting your image to be level. 1. Select the Crop Tool. 2. Select the Leveling Tool from the Crop Tool Options Bar. Your cursor will change to the Leveling Tool. 3. Click and drag a line across your image that should be level, either horizontally or vertically. When you release the mouse the image will be adjusted automatically to the correct angle. Perfect Photo Suite 78 Perfect Layers Trimming Layers Trim Tool: The trim tool is used to trim or crop a layer. It removes any pixels outside of a crop-style box for the current layer. Using the Trim Tool To trim a layer, select the Trim Tool from the tool well. It looks like a pair of scissors. Then drag a box over the area you wish to keep on the selected layer. The area outside the trim box appears darkened for guidance. You can resize and move the trim box. When you are satisfied with your settings, press the Apply button in the Tool Options Bar. Moving the Trim Box To move the Trim Box simply click and drag inside the box. You can also nudge the box using the arrow keys on your keyboard. Resizing a Trim Box To resize the Trim Box, click and drag on any of the resize handles. Clicking on a corner handle allows you to adjust two sides simultaneously. Clicking on a side handle allows you to adjust that side. If you hold the shift key down while adjusting the size, the proportions of the box are maintained. You cannot rotate a Trim Box. You can manually enter the size of the trim box in pixels using the width and height fields in the Tool Options Bar (see below). When you have completed your adjustments, you need to commit the changes. You can do this by pressing the Apply button that appears in the Tool Options Bar or by pressing the enter key. You can cancel a transform by pressing the Cancel button in the Tool Options Bar or by pressing the escape key. The Trim Tool Options Bar Perfect Photo Suite Perfect Layers 79 Using Color Fill Layers Color Fill Layers provide fast, re-editable ways to alter the brightness, contrast and color of your image. Color Fill Layers leverage the power of layers, blending modes, and opacity. Color Fill Layers are simply layers filled with a solid color. However by changing the color, blending mode, and opacity along with Perfect Layer's masking tools you can do the following: Before After Create a burn or dodge layer to selectively lighten or darken the image. Convert the image to black and white. Tint the image any color. Add a vignette. Simulate photographic filters like warming and cooling. Create darkroom looks like sepia toner. Creating Color Fill Layer To create a Color Fill Layer, press the Fill button in the Layers Pane or use the New Color Fill Layer command from the Layers menu. The Color Fill Layer dialog will appear. With this dialog you can select a preset or manually adjust the color, blending mode, and opacity of the Color Fill Layer. 1. Preset: This pop-up list contains presets for many common filter effects. Select a preset from the menu to preview it on your image. 2. Fill Color: This is a color well that displays the current color. You may press the color well to open a color picker dialog. Selecting new colors in the color well will be previewed in realtime on the image. 3. Blending Mode: This option sets the blending mode for the layer. You can always change this later from the Layers pane. 4. Opacity: This slider sets the opacity for the layer. You can think of this as a strength slider for the effect. You can always change this later from the Layers pane. Editing a Color Fill Layer You can edit an existing Color Fill Layer by using the Edit Color Fill Layer option from the Layers menu. It will reopen the Color Fill Layer dialog where you can adjust the settings. Color Fill Layers work similar to a regular layer. You can move, resize, rotate, trim, delete and duplicate them. Masking a Color Fill Layer You can mask, or selectively apply a Color Fill Layer using any of the masking tools in Perfect Layers, similar to any other layer. To learn how to mask a layer, see the Masking Layers section. Perfect Photo Suite 80 Perfect Layers Perfect Eraser The Perfect Eraser can be used to remove distracting elements and blemishes from your image. How it Works The Perfect Eraser employs a content aware algorithm that replaces the pixels with a natural and plausible result within the boundaries that are painted. Using the Perfect Eraser Activate the tool by selecting it in the Tool-Well. Simply paint over the area you wish to remove. Make sure you cover the entire area. A red overlay appears where you paint. You can adjust the size of the brush using the Tool Options bar. If the first attempt does not give you a perfect result, simply paint over it again and it will improve with each pass. You can also fine tune the area after using the Retouch Brush. Perfect Photo Suite Perfect Layers 81 Retouch Brush Retouch Brush: Use the Retouch Brush to remove small imperfections like dust or blemishes. Just dab the retouch brush on spots like acne, dust spots, power lines, etc. It looks at the neighboring areas and fills in the brush with similar color and texture. It is best to use the smallest brush size possible and to work by dabbing rather than making large brush strokes. If you dab with the Retouch Brush and don't like the results, use the undo command and try using a smaller brush or vary your brush stroke and try again. The Retouch Brush is perfect for retouching skin. You can control the Retouch Brush using the Tool Options Bar: Brush Size: This adjusts the overall size of the brush. Brush Feather: This adjusts the hardness of the brush. It works best to use a feather larger than 50 to blend and look natural. Brush Opacity: This adjusts how strong the retouching is. Use 100% to completely remove an imperfection. Use a lower opacity to soften them. W: If you have a Wacom pressure sensitive tablet, you can adjust the size of the brush according to the pressure. Click on the "W" in the box to activate the Wacom sensitivity controls. Perfect Photo Suite 82 Perfect Layers Clone Stamp Clone Stamp: Use this tool for replacing an area of the image with a sample area from a different part of the image. This will allow you to select an area to clone. Hold down the option (Mac) or alt key (Win) and click the area you want to clone from. Then click and drag on the area you want to clone over and it will clone from the point you selected. You can adjust the size of brush, feather and opacity just as you would with the regular brush. This just gives you more control over the area you want to retouch. Tool Options Bar Perfect Photo Suite Perfect Layers 83 Red-Eye Tool Red-Eye Tool: To instantly reduce red-eye. The Red-Eye Tool is the perfect tool for eliminating or reducing red eye in your images. It's a simple one-click stamp that will immediately take care of red eye. You start by selecting the red eye brush in your Tool-Well. Next adjust your brush size to be as close to the same size as the red eye you are wanting to remove. Then place the brush right over the eye and click once to remove. The Protect Skin toggle reduces the tools affect on skin colored areas. It is on by default. If the red-eye reduction is not strong enough, try toggling this off. Perfect Photo Suite 84 Perfect Layers Using the Masking Tools Masking is a technique or technology used to solve many problems. Rarely is creating a mask the end goal of masking. You use masking to combine images and exposures, swap heads, replace skies and add effects to portions of an image. Perfect Photo Suite users can choose from a fleet of mask creation and refinement tools. This opens a whole new world of control and creative options. Using the masking tools is just like using a layer mask in Photoshop to hide or reveal a layer or filter in specific, user-defined areas of the image. The Masking tools even support pressure-sensitive Wacom tablets for the ultimate in control. You can think of masking as painting with black paint on white paper. A white mask reveals all the layer (or filter) that the mask is attached to. An all white mask is considered blank or empty and shows all the selected layer. As you use the masking tools, you are adding black paint (Paint-Out mode). Where you paint with black you are hiding the current layer, allowing the layers under it to show through. Think of it like cutting a hole in the mask. If you make a mistake, you can switch your paint color to white (Paint-In mode) and paint the layer back in like an eraser. When you paint you have more than just white or black, but any shade of gray in between depending on the opacity of the tool. Shades of gray partially hide the layer, blending the layers together. Each layer in Perfect Layers or filter layer in Perfect Effects has a mask automatically added to it. This allows you blend each layer differently. There are several global masking options that can be accessed from either the masking Tool Option Bar or the Masking Menu. They affect the entire mask on the selected filter layer. Reset Mask Reseting a mask returns it to all white. The entire layer is visible. Invert Mask Invert swaps the white for black and black for white. What was hidden is now revealed and vice-versa. Inverting a mask can be very useful. It allows you to paint a layer in, rather than out, which is handy if you only want to work with a small area. Copy and Paste Mask You to copy the mask from one layer to another. This is handy if you have painted a complex mask on one layer for an adjustment and you wish to use the same mask on another layer for a different adjustment. To copy or paste a mask, use the Copy Mask and Paste Mask commands from the Masking menu. You can even copy and paste masks between Perfect Layers and Perfect Effects. Luminosity Mask A luminosity Mask is based on specific tones derived from the image. Great for blending layers selectively based on the brightness of the image. Perfect Photo Suite Perfect Layers 85 Paint-In Effects Some of the filters in Perfect Effects are designed to be painted-in. When you add them to your image, you will not see the image change, but the Masking Brush will be selected automatically. Simply paint where you would like the filter to be applied. You can identify Paint-In filters by the paint-brush icon in the upper left corner of the thumbnail. Most of the Paint-In filters are located in the Basic Brushes category. Perfect Photo Suite 86 Perfect Layers Mask Preview Modes Mask preview modes allow you to view your mask in several ways. The drop-down menu for Mask View Mode is located at the bottom of the Preview Window. A close-up of the Mask View Modes Before: Shows the original image with no effects applied. After: Shows the image with the current effect stack applied. Previous Effect: Shows the previous effect results so you can compare just your current effect. Mask-Red: Shows the mask of the current effect layer in a red overlay. Mask-White: Shows the mask of the current effect layer in white. Mask-Dark: Shows the mask of the current effect layer in as a dark overlay. Mask-Grayscale: Shows the mask of the current effect layer in black and white. Mask View allows you to view the mask for each effect layer that you have created with the Masking Brush and Masking Bug. You can view the mask in several modes, which are accessible from the Masking menu or from the Mask View drop-down in the bottom left of each preview pane. Below are examples of the different mask view modes. You can toggle the mask view on and off with the control (Mac OSX) or control (Windows) + M keyboard shortcut. Mask-Red The masked area appears as 50% red. This is similar to the Quick Mask view in Photoshop. Mask-Dark The masked area appears as 90% black. Perfect Photo Suite Mask-White The masked area appears as solid white. Mask-Grayscale The masked area appears as black. The unmasked areas appear as white. This is the same as viewing a layer mask in Photoshop. Perfect Layers 87 Using the Masking Brush The Masking Brush: The Masking Brush functions like a brush tool for masking layers. The Masking Brush is one of two tools in Perfect Effects for masking filters. When you select the Masking Brush, your tool icon changes to a circle that represents the size of the brush. It may also appear as two concentric circles (see below), indicating the inner hard edge and outer soft edge of the brush if the feather control is set above zero. There is also either a plus or minus in the center of the brush. Minus means the brush mode is set to paint-out, plus means it is set to paint-in. How to use the Masking Brush To use the Masking Brush, select it in the tool well. Make sure you are on the effect you wish to hide. Then check your brush mode and confirm it is set to Paint-Out. You are ready to mask now, simply paint on the image in the areas you wish to hide. As you brush, you will see the underlying effect(s) appear. If you make a mistake while brushing you have several options to correct them: First you can use the Undo command from the edit menu. This will undo the last brush stroke you created. You can toggle the paint mode to Paint-In and brush over your mistake. How to control the Masking Brush The Masking Brush Tool Options Bar Paint Mode The paint mode controls is you are Painting-Out (hiding the effect) or Painting-In (restoring the effect). You can tell your current mode by looking at the plus or minus icon in the center of the brush. If the icon is minus, you are painting out. If the icon is a plus, you are painting-in. You can change the mode in the Tool Options Bar, or by pressing the X key, or by holding down the option (alt) key temporarily. Invert Mask Invert swaps the hidden areas for the visible areas. What was hidden is no revealed and vice-versa. Inverting a mask can be very useful. It allows you to paint a layer in, rather than out, which is handy if you only want to work with a small area. You can invert the mask by pressing the Invert button in the Tool Options Bar. Reset Mask Reseting a mask reveals the entire layer it is associated with. You can reset the mask by pressing the Reset button in the Tool Options Bar. Erase Brush Strokes This is a special mode used when retouching the mask created by a Masking Bug. It allows you to erase your brush strokes made with the Masking Brush while maintaining the mask from the Masking Bug. Brush Size You can control the size of the brush using the Size pop-up in the Tool Options Bar. You use a small brush at high magnification for precise work, and a large brush at fit to screen for general work. To the right, you can see examples of brush strokes at varying sizes. You can control the size of the brush several ways: Use the Size pop-up in the Tool Options Bar. Use the left and right bracket keys ( [ ] ). Use the mouse scroll wheel (preferences must be set to this). Use your Wacom pressure sensitive tablet. Perfect Photo Suite 88 Perfect Layers Feather You control the amount of feathering or hardness of the brush by using the Feather pop-up in the Tool Options Bar. The feather has a range from 1 to 100 percent. You use a small feather at high magnification for precise, hard-edged work and a large, soft-edged brush at fit to screen for general work. You can visually see your feather by watching the outer concentric circle of the brush tool. To the right you can see examples of different feather options. You can control the size of the brush several ways: Use the Feather pop-up in the Tool Options Bar. Use the shift + left and right bracket keys ( [ ] ). Opacity You can control the opacity, or strength of the brush with the Opacity pop-up in the Tool Options Bar. Think of the opacity as the shade of gray you are painting with. The opacity has a range from 1 to 100 percent. You use a high opacity to paint quickly and hide large areas. You use a lower opacity for blending areas together or for subtle work. To the right you can see examples of different opacity options. You can control the size of the brush several ways: Use the Opacity pop-up in the Tool Options Bar. Use the option (Mac OSX) or alt (Windows) + 0-9 keys. Use your Wacom pressure sensitive tablet. Wacom® Controls Perfect Layers supports pressure sensitive Wacom tablets. When you use the Masking Brush you can enable pressure sensitive controls for the brush size, brush opacity, or both simultaneously. Click on the W button next to each control in the Tool Options Bar to activate the pressure sensitive controls. The harder you press; the greater the size or opacity will get. You can set the maximum value you want to use the Brush Size and Opacity sliders. To the right you can see examples of how pressure sensitivity can be used to control the Masking Brush. Perfect Photo Suite Perfect Layers 89 Perfect Brush The Perfect Brush option enables a unique, color-based, self masking technology. When enabled, as you paint with the Masking Brush it collects the colors under the center of the brush and only masks those colors. This protects the mask from being applied across edges. A great of example of using the Perfect Brush option would be to mask a sky along a horizon of mountains. Tip: You can turn the Perfect Brush on and off using the command or control -r keyboard shortcut. You can also temporarily lock the color to remove by holding down the control key(win) or the command key(mac). This is useful when brushing through areas with a lot of openings like tree branches. Perfect Photo Suite 90 Perfect Layers Quick Mask Tool Quick Mask Tool: Used to mask large similar areas quickly. The Quick Mask Tool is often the best place to start your masks. It automatically masks large similar areas without the need to brush over everything. You just need to brush loosely over what you want to mask to give it a hint. It then figures out the rest on its own. To use the Quick Mask Tool follow these steps: 1. Select the Quick Mask Tool from the Tool-well. 2. Make sure the tool mode is set to Paint Out. 3. Loosely brush over the area you want to mask. This could be a background you want to remove or a sky or an area you want to remove an effect from. When you release the mouse button the area is automatically expanded and masked. In simple cases your work may be done. 4. Continue to brush over the area you want to mask in areas that where not automatically removed. You can also try the Grow button. Stop brushing when you get to difficult areas like hair. 5. Use the Refine Brush over difficult areas like hair to refine your mask. Below are descriptions of the controls in the Quick Mask Tool Options Bar. Mode: Controls whether you want to paint out (mask) or paint in (restore). Generally you will use the paint out mode. Size: Sets the size of the tool. Wacom Toggle: If you have a Wacom pressure sensitive tablet you can control certain parameters with pressure. Controls with a W icon next to them support this when they are turned on. Box Tool: The box tool allows you to drag a box over your subject, then press return to remove anything outside the box. Grow: Intelligently expands the mask to include more similar regions. Invert: Inverts or flips the mask so that what was hidden is now revealed and vice versa. Reset: Resets the mask to all white. Box Mode Perfect Photo Suite Perfect Layers 91 The Quick Mask Tool is generally used as brush but it has a second option called Box Mode. Box mode is perfect for when your subject is isolated and not touching the edges of your image. To enable Box Mode, select the Box tool in the tool options bar. Then drag a box over your subject. You can adjust the size and position of the box using the corner handles. Then hit the return key to automatically remove anything outside of the box and anything similar from inside the box. Perfect Photo Suite 92 Perfect Layers Using the Masking Bug Masking Bug: This is used for blending layers by creating Radial, gradient, and reflected gradient mask shape quickly. The Masking Bug is perfect for tasks like darkening skies, creating vignettes and graduated filters. Learning to use the Masking Bug is fast and easy. All the adjustments made with the Masking Bug are live and readjustable until you press apply. Masking Bug Tool Options The Tool Options Bar for the Masking Bug includes the options shown above and detailed here: Preset: The preset pop-up includes several common ways to use the Masking Bug. These presets change the current Masking Bug to match the preset Shape: The shape pop-up controls the shape of the Masking Bug. The shapes are center, edges, gradient and reflected gradient. Opacity: Sets the maximum opacity or density of the mask. Add: Adds a new Masking Bug using the current settings. Delete: Deletes the current Masking Bug Reset: Resets the mask on the layer completely. This removes all Masking Bugs and clears and brushing that has been done. Adjusting the Masking Bug Start by adding a Masking Bug to a layer by clicking on it or pressing the Add button. Then set the Mask View mode to Mask - Grayscale. This will let you see the Masking Bug in simple black and white. Move: Click the large circle and drag. Size: Adjust the size of the masking bug by using the solid line Feather: Use the dashed line to adjust the feather or hardness of the mask. Rotate: The handle of the center circle will rotate the mask. Perfect Photo Suite Reflected Gradient Gradient Center Edges Perfect Layers 93 Working with Multiple Masking Bugs You can use up to six Masking Bugs per layer. Each Masking Bug is re-editable until you hit Apply and save your image. To add another Masking Bug, to create a complex mask shape, press the Add button or click outside of the current Masking Bug while the Masking Bug tool is selected. Only one Masking Bug may be adjusted at a time. This is the active Masking Bug. You will see the overlay controls for the active Masking Bug while your mouse is over the preview area. Inactive Masking Bugs are marked with a small circle. You can select an inactive Masking Bug by clicking on this small circle marker. Masking Bugs are subtractive. Each Masking Bug hides more and more of the current layer. When Masking Bugs overlay each other they may hide more of the layer too. You can always use the Masking Brush to over-ride and paint areas back in hidden by the Masking Bugs. Perfect Photo Suite 94 Perfect Layers Using the Line Mask Tool Line Mask Tool: This tool is used to mask strait lines. The line mask tool works great for creating linear masks that are strait sided and can include angles but not for curves. Line Mask Tool Options Using the Line Mask T Begin by selecting the too Mode: Add/Remove Feather: Adjusts the feather of mask i.e. the hardness of the line transition from black to white. Perfect Photo Suite Perfect Layers 95 Perfect Photo Suite 96 Perfect Layers Refining Masks There are several tools in Perfect Photo Suite that may be used to refine or clean-up a mask. Refine Brush: This tool cleans up intricate areas and the borders between the Keep and Drop Brush. The Refine Brush is used to clean up the borders between the subject and background as well as intricate areas like hair, lace, mesh and tree branches. Once you have removed the majority of the background with the Quick Mask Tool or Perfect Brush, paint the intersection of the subject and background to refine the border. This will remove islands of background color and make the edge more defined. Refine Brush Tool Options Mode: Controls the refinement mode, either paint out, which always refines to remove, paint in, which always refines to restore or Auto which does both at the same time. Paint out is recommended in most cases. Size: This slider adjusts the size of the brush. Select a brush size that is just larger than the intersection of the subject and background. Avoid using oversized brushes it will take longer to process and may yield lower quality results. Wacom Toggle: If you have a Wacom pressure sensitive tablet you can control certain parameters with pressure. Controls with a W icon next to them support this when they are turned on. Color Decontamination: When enabled, colors from the drop regions are filtered out of the keep regions. This changes the colors of the pixels in the image. This is useful when the background you are trying to remove have a strong color such as green or blue screens. The Chisel Mask Tool:The Chisel tool is used for removing fringes or halos along hard edges. Perfect Photo Suite Perfect Layers 97 Fringes are common when the background to be removed is brighter than the foreground. The chisel works like a chisel or plane in a wood shop. It removes just a sliver along the edges. The chisel tool only works on the edges so you don't have to be careful with it. Chisel Mask Tool Options Mode: Select remove or restore. Size: Adjusts the size of the chisel tool. Feel free to use a large chisel to make brushing fast. The size of the chisel does not affect how much is chiseled off. Amount: Controls the amount, or depth of the chisel. Use the lowest amount needed to maintain as much detail as possible. Tip: You can double-click on the chisel tool icon in the tool well to apply the chisel to the entire image. The Blur Mask Tool: Softens edges where you paint. Softening the edges on blurred or semi-transparent subjects like hair can make them blend with a new background in a more realistic manner. The blur tool only works on the edges so you don't have to be careful with it Blur Mask Tool Options Perfect Photo Suite 98 Perfect Layers Mode: In/Out/Normal lets you adjust exactly what part of the mask edge to blur. Size: Adjusts the size of the blur tool. Feel free to use a large size to make brushing fast. The size of the brush does not affect the blur amount. Amount: Controls the amount of blur. Use the lowest amount needed to maintain as much detail as possible. Tip: You can double-click on the blur tool icon in the tool well to apply the blur to the entire image. Mode: Select remove or restore. Size: Adjusts the size of the chisel tool. Feel free to use a large chisel to make brushing fast. The size of the chisel does not affect how much is chiseled off. Amount: Controls the amount, or depth of the chisel. Use the lowest amount needed to maintain as much detail as possible. Chisel Hardness: Adjusts how sharp the edge created by the chisel is. The higher the amount, the softer the edge. Perfect Photo Suite Perfect Layers 99 Menus Perfect Photo Suite (Mac OS X Only) About Perfect Photo Suite: Opens the about box, displays your version number and activation code. (Help menu on Windows) Preferences: Opens the preferences dialog. (Edit menu on Windows) Quit: Quits. File Menu New: Opens the create new file dialog for creating a new file. Open: Opens the open dialog for locating and opening an existing file. Add Layer(s) from File: Opens the open dialog for location files to merge into the current open file. Open Selected from Browser: Opens the images selected in the browser. Browse Folder: Fly-out sub-menu of sources to Browse. You can also opens the browse dialog where you can select which folder you would like to browse in a new browser tab. Browse Extras: Switches the browser to the Extras tab where you can view and open website content. Manage Extras: Opens the Extras Manager where you can import and manage extras like Borders, Backgrounds, Textures and Presets. Open Recent: Displays a list of recently opened files. Close: Closes the current file. You will have the opportunity to save or not. Close All: Closes all open files. You will have the opportunity to save or not. Save: Saves the current file. Save As: Opens the Save As dialog where you can select the filename and location to save to. Revert to Saved: Reopens the file without your changes. Batch: Opens Perfect Batch window. Print: Allows you to print your image. Edit Menu Undo: Undoes the last action. Redo: Redoes the last undone action Copy: Disabled. Paste: Disabled. Rename: Renames the selected file or folder in the browser tab. Delete: Moves the selected file or folder in the browser tab to the trash. Add Subfolder: Adds a new empty folder inside the selected folder in the browser tab. Adjust Canvas Size: Opens the canvas size dialog where you can adjust the canvas size. Perfect Photo Suite 100 Perfect Layers Layer Menu Duplicate: Duplicates or copies the current layer. Delete: Deletes the current layer. Copy Layer: Copies the current layer into memory so you can paste it later. Paste Layer: Pastes the layer in memory into a new layer in the current image. Merge Layers: Merges the selected layers into a single layer. Merge All: Merges all layers into a single layer. New Stamped Layer: Creates a new layer above the current layer that contains a merged version of all the layers under it. Hide Other Layers: Toggles the visibility off of all layers except the current one. Makes it easy to see just the current layer. New Color Fill Layer: Adds a new color fill layer. Edit Color Fill Layer: Opens the color fill layer dialog where you can set the properties of the selected color fill layer. Convert to Smart Layer: Allows you to change your layer to a smart layer. Masking Menu Invert Mask: Inverts the mask. Visible areas become hidden and hidden areas become visible. Reset Mask: Resets the mask to plain white. Copy Mask: Copies the mask from the current layer. Paste Mask: Pastes the mask in the clipboard to the mask on the current layer. Create Luminosity Mask: Creates layer mask based off of the photos tonal values. Masking Bug Tool Opacity: Sets the opacity of the Masking Bug tool cursor. View Menu Zoom In: Adjusts the preview zoom in one increment, makes the preview image larger. Zoom Out: Adjusts the preview zoom out one increment, makes the preview image smaller. Fit to Screen: Sets the zoom to fit the entire image on screen. Actual Pixels: Sets the zoom to 100% or actual pixels. Show Browser Pop-up: Enables the browser pop-up window. Browser Mode: Allows the user to select how the Browser Library displays the categories. Show Clipping: Shows the clipping overlay view, which overrides the current mask view. Preview Mode: Allows the user to switch preview modes. Preview Background Color: Toggles the background color options. Show Mask: Allows the viewer to see the mask. Mask View Mode: Allows the user to select the various mask modes. Window Menu Navigator/Loupe/Histogram: Opens and closes the Navigator pane. Layers: Opens and closes the Layers pane. Open Quick View Browser: Opens the Quick View Browser window, displaying the contents of the current folder. Show Browser Panel: Hides or shows the Control Panel. Show Control Panel: Hides or shows the Control Panel. Hide Panels: Hides or shows all Panels. Full Screen: Toggles to and from full screen mode. Document Name: Shows the name, zoom level and bit depth of the open image. Perfect Photo Suite Perfect Layers 101 Help Menu Search: Searches the menus (Mac OSX only). Perfect Layers Online Help: Opens this html Help in your default web browser. Video Tutorials: Opens the online Video Tutorial in your default web browser. Getting Started: Opens the online Getting Started overlay. Show Keyboard Shortcuts: Opens the keyboard shortcut inspector. Perfect Inspiration: Takes you to the Perfect Inspiration web site. Check for Updates: Checks with the onOne update server to see if you are running the current version. If there is a newer version you will be notified and be walked through the update process. Deactivate: Opens the activation dialog. These are used to deactivate your software for moving it to another computer or for a return. Registration: Opens the default web browser and navigates to the registration page of the onOne website. Provide Feedback: Opens the default web browser and navigates to the feedback page of the onOne website. Help Improve onOne Products: Opens the Improve onOne Products dialog. Perfect Photo Suite 102 Perfect Layers Keyboard Shortcuts Action Mac Win New File cmd n ctl n Open cmd o ctl o Add Layer(s) from File cmd shift o ctl shift o Open Selected from Browser cmd opt o ctl alt o Close cmd w ctl w Save cmd s ctl s Save As cmd shift s ctl shift s Print cmd p ctl p Exit cmd q ctl q Undo cmd z ctl z Redo cmd shift z ctl shift z Copy cmd c ctl c ctl v Paste cmd v Delete File delete delete Duplicate Layer cmd j ctl j ctl e Merge Layers cmd e Merge Visible cmd shift e ctl shift e New Layer from Composite cmd shift j ctl shift j Next Blend Mode Shift + Shift + Previous Blend Mode Shift - Layer Opacity 1 (10%) 2 (20%) 0 (100%) etc Shift 1 (10%) 2 (20%) 0 (100%) etc Paint in/ Paint Out x x Invert Mask cmd i ctl i Toggle Perfect Brush cmd r ctl r Brush Size larger ] smaller [ larger ] smaller [ Brush Feather softer shift ] harder shift [ softer shift ] harder shift [ Brush Opacity opt 1 (10%) opt 2 (20%) opt 0 (100%) etc opt 1 (10%) opt 2 (20%) opt 0 (100%) etc Show/Hide Mask o o Zoom In cmd + ctl + Zoom Out cmd - ctl - Fit to Screen cmd 0 ctl 0 Actual Pixels cmd opt 0 ctl alt 0 Next Browser View Mode cmd b ctl b Navigate Browser Selection Arrow Keys Arrow Keys Open Selected Sub-dir Right Arrow Right Arrow Close Selected Sub-dir Left Arrow Left Arrow Preview Modes -Single -Left/Right -Left/Right Shift -Top/Bottom -Top/Bottom Shift cmd y cmd l cmd opt l cmd t cmd opt t ctl y ctl l ctl opt l ctl t ctl alt t Navigator cmd 1 ctl 1 Layers cmd 2 ctl 2 Open Quick View Browser cmd up arrow ctl up arrow Keyboard Shortcuts cmd shift k ctl shift k Transform Tool v v Perfect Photo Suite Perfect Layers 103 Red Eye Tool e e Crop Tool c c Trim Tool t t Masking Brush b b Masking Bug m m Quick Mask Tool w w Refine Brush f f Chisel Tool k k Blur Tool l l Perfect Eraser q q Retouch Brush r r Pan Tool h h Zoom Tool z z Rotate Crop Clockwise opt right arrow alt right arrow Rotate Crop Counter Clockwise opt right arrow alt right arrow Perfect Photo Suite 104 Perfect Enhance Perfect Enhance Automatic fixes and or fine tune your brightness, contrast, white balance, vibrance, detail, vignette and basic tools. Some of the features: Tools for cropping, retouching small blemishes and red eye correction. Perfect Eraser using content-aware fill technology, removes objects and automatically reconstructs the area. Enhance colors, vibrancy, dictate contrast, precision temperature control for white balancing. Automated options for one click correction. Sharpening for increasing clarity and detail. Noise Reduction Complete vignette control with a customizable center. Preset commands for streamlining the editing process. What This Means For You Whether you are a hobbyist photographer or a working professional, the foundation of editing begins in Enhance. This module is designed for improving the overall quality of the image the genesis of every workflow. Perfect Photo Suite Perfect Enhance 105 Getting Started This getting started section will give you the basics of using Perfect Enhance. If you have never used Perfect Enhance before, this is a good place to start. You might also try watching the getting started video tutorial. For detailed information on steps and controls mentioned in the getting started section, see the "Using Perfect Enhance" section. Perfect Photo Suite 106 Perfect Enhance Perfect Enhance Work Space The Perfect Enhance Main Screen Overview Perfect Enhance provides you with an easy-to-use work space for editing your photos. Below is an overview of the main sections. The main window sections of Perfect Enhance: A. Presets: Displays a list of categories and presets. B. Tool Well: This is where the tools are located. C. Module Selector: This is where you choose which module to use. D. Tool Bar: This is where information on your selected tool will live. E. Module Selector: This is where you choose which module to use. F. The Navigator, Loupe, Histogram and Info Panes. G. Quick Fixes Pane: This pane gives you fast, intuitive buttons for the most common adjustments. H. Color & Tone Adjustments Pane: This pane will give you more advanced settings to adjust both the color and tone of your image. I. Vignette/Sharpening/Noise Reduction Panes: These panes will help make adjustments to your image. J. The Cancel/Apply or Cancel/Save&Close Buttons: This is where you cancel or apply an action. Crop Tool Trim the and resize the image to your desired size Perfect Eraser Use this tool to remove distractions like signs and powerlines. Retouch Brush Use this tool to remove blemishes like dust spots and acne. Red Eye Tool Use this tool to remove red-eyes. Hand Tool Adjusts the photo position in the preview area. Zoom Tool Adjusts the magnification of the image in the preview area. Perfect Photo Suite Perfect Enhance 107 Navigating the Preview Perfect Enhance provides several ways to navigate and view your image in the Preview window. The Preview Window above is the main section where you preview and work on images. Hand Tool The Hand tool is used to position the image within the Preview window, whenever the preview zoom is larger than the viewable area. To pan (scroll) in the Preview window: Select the Hand Tool and drag the image until you locate the area you wish to view. With any other tool selected, hold down the spacebar while you drag the image in the window. Double-click the Hand tool in the Toolbar to set the image to a magnification that fits completely in the current window size. Zoom Tool The Zoom tool changes the magnification of the image in the Preview window. With the Zoom tool selected: Click in the Preview window to zoom in and center the image at the location clicked. Click and drag in the Preview window to draw a rectangular, the screen fills with the area within the rectangle when you release the mouse. Hold the Option key (Mac) or Alt key (Win) and click to zoom out. Double-click the Zoom tool in the Toolbar to set the image to 1:1 or 100% magnification, showing every pixel. This is best when examining small details. Perfect Photo Suite 108 Perfect Enhance Navigator, Loupe, Histogram and Info At the top of the control panel on the right of the main window is the Navigator | Loupe | Histogram | Info panes. It contains four useful tools for inspecting and viewing details of your image. The Navigator Pane This gives you a birds-eye view of your image. The white rectangular region marks the image area that is visible in the preview pane. You can pan your image by clicking and dragging inside the blue region. At the bottom of the Navigator pane are several Zoom presets. Click on a Zoom preset to activate. FIT: Zooms to fit the current canvas size. This allows you to see your entire image. 100: Zooms to 100% or actual pixels. This is best for judging small details. 50: Zooms to 50% 25: Zooms to 25% The Loupe Pane This gives you a magnified view of the section of the preview under the cursor. This allows you to view the quality of your results while maintaining a complete view of your image. At the bottom of the Loupe Pane there is a slider for adjusting the zoom level. Perfect Photo Suite Perfect Enhance 109 The Histogram Pane This gives you a color chart of the shadow, mid-tone and highlight areas based on the image RGB values. This is useful to show areas within the image that may be clipping. Clipping is when your image contains pure blacks or white and can signify loss of highlight or shadow detail. The left side of the histogram represents the shadows, while the right represents the highlights. At the top of each end is a triangle. If the triangle is lit, there is clipping on that side of the histogram. If you click on the arrows, you will activate the clipping overlay on your image. The areas of your image with a blue overlay are pure black, while the areas with the red overlay are pure white. You can turn the clipping view off again by clicking on one of the triangles. You can also temporarily enable clipping view by holding down the J key at any time. The clipping view is useful when you are making adjusts to the brightness and contrast of your image. The Histogram pane also displays the RGB values under the cursor at the bottom of the pane. Clipping View The Info Pane The info pane will display important metadata about your file including: Camera type File type Focal length Date and time captured Exposure information ISO Shutter Speed Aperture Exposure Value Filename Color Space Dimensions and resolution File Size and Bit-Depth If your camera allows for GPS the GPS button will be viewable and you can click on it to get the GPS cordinates for where the image was taken. This feature only works if you have GPS enabled on your camera or mobile device. Otherwise you will not see the GPS button. The Info panel is not visible when you access Perfect Enhance as a Photoshop plug-in. Perfect Photo Suite 110 Perfect Enhance Using Perfect Enhance Pages in this Section Quick Fixes Pane Color & Tone Adjustments Vignette Sharpening Noise Reduction Crop Tool Perfect Eraser Retouch Brush Red-Eye Tool Presets Module Settings Menus Keyboard Shortcuts Perfect Photo Suite Perfect Enhance 111 Quick Fixes Pane The Quick Fixes pane is home for common adjustment controls in the form of simple buttons to quickly tune your image. The basic adjustments can be controlled through these buttons as an alternative to using the sliders. The buttons have two sides, "-" and "+". By clicking on these you can either turn down(-) or up(+) the intensity of the corresponding adjustment. For even quicker automated adjustments use the "Auto Tone" and "Auto Color" buttons. Click "Reset All" to start over and revert to the original image. Auto Tone: This button sets the white and black point automatically. The Auto button in Tone adjustments Pane will also do the same. Auto Color: This button will attempt to remove the color cast and correct the white balance. The Auto button in Color adjustments will do the same. Fix Focus: This button will help correct the focus on your image. Brightness: This button will adjust the Brightness slider 10 points with each click. Contrast: This button will adjust the Contrast slider 10 points with each click. Vibrance: This button will adjust the Vibrance slider 10 points with each click. Shadows: This button will adjust the Shadows 10 points with each click. Highlights: This button will adjust the Highlights 10 points with each click. Color: This button will adjust the Color or Temperature 10 points with each click. Noise: This button will remove the Noise in your image 10 points with each click. Detail: This button will adjust the Detail in your image 10 points with each click. Vignette: This button will adjust the Vignette slider 10 points with each click. Perfect Photo Suite 112 Perfect Enhance Color & Tone Adjustments The Color & Tone Adjustments Pane provides the tools needed to correct and enhance the brightness, contrast, detail and color in your images. Tone The Tone sliders control the global tonality, or brightness and contrast of the image. You can adjust each of the following: Brightness: Adjusting the slider to the right will lighten your image. Adjusting to the left will darken your image. Contrast: This will increase or decrease the contrast in your image. Shadows: This slider lightens the shadows, revealing details. Highlights: This slider darkens the highlights, recovering detail. Levels The Levels sections sets the white and black points which are key to gaining good contrast. Every image should have at least some pure white and black. It is handy to watch the histogram and/or use the clipping overlay when adjusting the levels. Auto Button: The auto button sets the white and black points automatically. Whites: This slider will clip the whites adding more contrast to the whites. Blacks: This slider will clip the blacks adding more contrast to the blacks. Detail: Increases the detail or structure in your image. Color The Color sliders control Temperature, Tint and Vibrance. They are used to remove a color cast and enhance the color of the image. Auto Button: The auto button attempts to detect and remove a color cast. It makes adjustments to the Temperature and Tint sliders. Temperature: This slider will shift the color either cooler or warmer (Blue/Orange). Tint: This slider will shift the color either green or magenta. Vibrance: This slider controls the vibrance of the colors. Reduce Vibrance on Skin: When turned on, adjustments made with Vibrance slider are reduced on skin colored areas. This allows you to increase the vibrance of clothing and the background without adversely affecting the skin color. Gray Dropper The Gray Dropper is used to remove a color cast or "neutralize" the image. Click the icon to activate, the cursor will change to the Gray Dropper. Click an area in the image that should be gray with no color and the sliders will automatically adjust according to the sample you have selected. Reset: will revert to the original image and set all the sliders back to the zero value. Perfect Photo Suite Perfect Enhance 113 Vignette The Vignette pane creates flexible vignettes which focus the viewers eye toward the center of the image by darkening distracting edges. Use the Preset Buttons to quickly apply a vignette and customize the look with the advanced controls. Use the global on/off button to toggle the vignette effect on or off. Preset Buttons: None: Reverts to the default, no vignette. Subtle: Adds a soft oblong vignette. Strong: Adds a stronger oblong vignette. Edges: Adds a rectangular vignette. The hidden Advanced controls can be expanded by clicking the triangle. The Preset drop down menu contains additional vignette presets. The sliders may be used for fine tuning the look of the vignette. Brightness: Controls how light or dark the vignette is. Size: Controls the size of the vignette. Feather: Controls the hardness of the edge of the vignette. Roundness: Controls the shape of the vignette from square to round. Style: This drop down menu will allow you to select either a normal, subtle or soft vignette. The Center Tool allows you to select the center point of the vignette. Click on the tool icon to activate and then click on the area in the image you wish to make the center. The Reset button will return the setting to the default with no vignette. Perfect Photo Suite 114 Perfect Enhance Sharpening The Sharpening pane contains the controls for increasing the sharpness of the image. Use the Preset Buttons to quickly apply sharpening and customize the look with the advanced controls. Use the global on/off button to toggle the sharpening effect on or off. Preset Buttons None: Default setting that applies no sharpening. Fix Focus: Applies high-pass sharpening, perfect for making an out-of-focus image appear in-focus. Screen: Perfect for images that will be viewed on computer screens. Print: Perfect for images that will be printed. The hidden Advanced controls can be expanded by clicking the triangle. The Sharpen For drop down menu includes additional presets based on the output type including paper and subject matter types. The Type drop down menu includes the three sharpening methods; progressive, high-pass and unsharp mask. The Sliders may be used for fine tuning the sharpening effect. Amount: Controls the overall amount of sharpening. Protect Dark: Reduces the sharpening on shadow tones. Protect Lights: Reduces the sharpening on highlight tones. Protect Skin: Reduces the sharpening on skin colored areas. The Reset button will return to default settings that applies no sharpening. Perfect Photo Suite Perfect Enhance 115 Noise Reduction The Noise Reduction pane contains the controls for decreasing the noise or grain in your image. Use the Preset Buttons to quickly reduce noise or customize the look with the advanced controls. Use the global on/off button to toggle the noise effect on or off. The noise reduction filter is used to reduce both luminance and color noise while maintaining image detail. Preset Icons: Presets for a quick adjustment. Luminance: Adjusts the overall strength of the noise reduction applied to the luminance or detail of the image. Hold down the alt key to see just the luminance while adjusting this slider. Color: Controls the amount of noise reduction applied just to the color or chroma of the image. Detail: Controls how much edge detail is protected. Hold down the a alt key see the the edge mask while adjusting this slider. Automatically Zoom to 1:1: It is important that you view your image at 100% or 1:1 when adjusting noise reduction controls. This automatically zooms in for you. Apply to: Allows you to limit the noise reduction to just a portion of the image based on color or brightness. Dropper: Sets a custom color range to apply the noise reduction to. Range: Adjusts the range or fuzziness of the color range to apply the noise reduction to. Reset will return the settings to the default. Perfect Photo Suite 116 Perfect Enhance Crop Tool Crop Tool: This is used to crop and resize the entire image. The crop tool removes any pixels outside a crop box and changes the canvas size at the same time. To crop the image, select the Crop Tool from the tool well. Then adjust the corner handles of the crop tool overlay. The area outside the crop box appears darkened for guidance. You can resize and move the image inside the crop box. When you are satisfied with your settings, press the Apply button in the Tool Options Bar or press enter. Moving the Image: To move the image inside the crop box, simply click and drag inside the box. You can also nudge the image using the arrow keys on your keyboard. Resizing a Crop Box: To resize the Crop Box, click and drag on any of the resize handles. Clicking on a corner handle allows you to adjust two sides at the same time. Clicking on a side handle allows you to adjust that side. If you hold the shift key down while adjusting the size, the proportions of the box are maintained. To rotate the crop box, move outside a corner until the tool changes to rotate. You can also set the aspect ratio or size of the crop box in the tool options bar. The Crop tool is not available when using a Smart Photo. Crop Tool Options Preset pop-up: Pop-up controls the crop tool mode as well as aspect ration and document size presets. Width: Sets the width of the crop box. Swap Dimensions: Swaps the width and height. Handy for rotating the crop box. Height: Sets the height of the crop box. Units: Determines the unit of measure: Pixels, inches, centimeters, etc. Leveling Tool: Click and drag this tool across an element in your image that should be level. Angle: See and adjust the angle of rotation. Rotate: Rotates the image 90 degrees. Cancel: Resets the crop tool. Apply: Applies the crop and resizes your photo. Crop Tool Modes Perfect Photo Suite Perfect Enhance 117 The Crop Tool works in three modes: Freeform: In this mode you can adjust the crop box any way you like. The image will not be resized. Any area outside the crop box will be trimmed off. Use this mode if you just want to change the shape or recompose your image for general use. Aspect Ratio: You can lock the crop box to an aspect ratio. This makes sure the crop box shape doesn't change, just the size. Use this option to trim existing pixels while maintaining a ratio without resizing the image. Document Size Presets: Document Size Presets allow you to crop and resize your image at the same time. If you know your intent is to print the image at a certain size you can crop and resize the image at the same time. Many common sizes are included plus you can create your own. Leveling the Image The Crop Tool has a special Leveling Tool for automatically rotating your image to be level. 1. Select the Crop Tool. 2. Select the Leveling Tool from the Crop Tool Options Bar. Your cursor will change to the Leveling Tool. 3. Click and drag a line across your image that should be level, either horizontally or vertically. When you release the mouse the image will be rotated automatically to the correct angle. Perfect Photo Suite 118 Perfect Enhance Perfect Eraser The Perfect Eraser can be used to remove distracting elements and blemishes from your image. How it Works The Perfect Eraser employs a content aware algorithm that replaces the pixels with a natural and plausible result within the boundaries that are painted. Using the Perfect Eraser Activate the tool by selecting it in the Tool-Well. Simply paint over the area you wish to remove. Make sure you cover the entire area. A red overlay appears where you paint. You can adjust the size of the brush using the Tool Options bar. If the first attempt does not give you a perfect result, simply paint over it again and it will improve with each pass. You can also fine tune the area after using the Retouch Brush. Perfect Photo Suite Perfect Enhance 119 Retouch Brush Retouch Brush: Use the Retouch Brush to remove small imperfections like dust or blemishes. Just dab the retouch brush on spots like acne, dust spots, power lines, etc. It looks at the neighboring areas and fills in the brush with similar color and texture. It is best to use the smallest brush size possible and to work by dabbing rather than making large brush strokes. If you dab with the Retouch Brush and don't like the results, use the undo command and try using a smaller brush or vary your brush stroke and try again. The Retouch Brush is perfect for retouching skin. You can control the Retouch Brush using the Tool Options Bar Brush Size: This adjusts the overall size of the brush. Brush Feather: This adjusts the hardness of the brush. It works best to use a feather larger than 50 to blend and look natural. Brush Opacity: This adjusts how strong the retouching is. Use 100% to completely remove an imperfection. Use a lower opacity to soften them. W: If you have a Wacom pressure sensitive tablet, you can adjust the size of the brush according to the pressure. Click on the "W" in the box to activate the Wacom sensitivity controls. Perfect Photo Suite 120 Perfect Enhance Red-Eye Tool Red-Eye Tool: To instantly reduce red-eye. The Red-Eye Tool is the perfect tool for eliminating or reducing red eye in your images. It's a simple one-click stamp that will immediately take care of red eye. You start by selecting the red eye brush in your Tool-Well. Next adjust your brush size to be as close to the same size as the red eye you are wanting to remove. Then place brush right over the eye and click once to remove. The Protect Skin toggle reduces the tools affect on skin colored areas. It is on by default. If the red-eye reduction is not strong enough, try toggling this off. Perfect Photo Suite Perfect Enhance 121 Presets Presets store all of the adjustments you make in Perfect Enhance. Presets are a fast and easy way to get consistent results. You can save your own presets for batch processing or for simply reproducing your look when retouching. Presets do not store masks created by tools other than the Masking Bug. Using a Preset Using a preset is simple, just click on it in the Preset Browser. Saving a Preset Saving a preset is simple. Once you have your settings that you wish to save, go to the Preset menu and select Save Preset. The New Preset dialog will appear (shown to the right). There are several fields to complete including the preset name, the category, creator and description. In the category pull-down you can select which existing category the preset should saved into. You can also create a new category this way by selecting new category from the bottom of the list. You can edit a preset's name, creator or description by selecting it and then selecting Edit Preset Info from the Preset menu. If you want to edit the settings in a preset, load it into, make your adjustments and then re-save the preset with the same name and location. Deleting a Preset You can remove a preset if you no longer want to have access to it. To remove a preset, follow these steps: 1. Select the preset you wish to remove in the preset browser. 2. Select Delete Preset from the Preset menu. Importing & Sharing Presets You can import presets you have downloaded from the onOne website using these steps. 1. Download the preset pack from the onOne website. It should have a .ONPreset extension. 2. Double-click on the preset pack, it will install the presets into a category named the same as the preset pack. That's it, next time you use Perfect Enhance the new presets will be located in the My Presets tab, in a category named after the preset pack. You can delete the files you downloaded, they have been copied into Perfect Effects. You can share presets like you would share any other file, such as email or posting them to a website. First you need to find the preset files. The easiest way it to open Perfect Enhance then from the Preset menu select Show Presets Folder. A window will open and will display the presets folder. In the presets folder are sub-folders for your preset categories. Inside each sub-folder are the individual preset files. You can copy these presets to another computer, attach them to an email or post them on a website. Perfect Photo Suite 122 Perfect Enhance Module Settings The Perfect Enhance settings dialog contains options for customizing your experience at launch. Default Settings The default settings section allows you to control what adjustments are applied each time you open an image in Enhance. No Changes: The default option leaves the image is, no automatic adjustments are made upon opening Perfect Enhance. Automatic Enhancement: Automatically adjusts the brightness, contrast, and color. My Settings: Uses settings from the preset selected in the drop down. You may choose a factory preset or customize your own look and save the preset and use it as a default adjustments that take place at launch. See the Presets page for more information. Apply Results Apply to the Current Image Layer. Apply to a Copy of the Current Layer will make a new layer on the image with Enhance adjustments. Perfect Photo Suite Perfect Enhance 123 Menus Perfect Enhance About Perfect Enhance: Opens the about box. This dialog contains your serial number, version number and information on contacting onOne Software for support. Preferences: Opens the preferences dialog. Quit Perfect Enhance: Quits the application. File Save & Close: Applies the current settings to your image and returns to the host application. Cancel: Cancels Perfect B&W and returns back to the host application with no changes. Edit Undo: Reverses the last user action. Redo: Reapplies the last user action if it has been undone. Cut: Unused. Copy: Unused. Paste: Unused. Reset All: Resets all controls back to their default settings. Module Settings: Adjust any automatic changes to your images when Enhance is launched. Preferences (Windows Only): Opens the Perfect Enhance preferences dialog. Preset Save Preset: Saves the current settings as a new preset. Import Preset: Opens the import preset dialog to help you import presets you have downloaded. Show Presets Folder: Opens a Finder or Explorer window showing the presets folder. Delete Preset: Deletes the current preset. Edit Preset Info: Opens the preset dialog so you can edit the name, author or description information. Manage Extras: Opens the Extras Manager where you can import and manage extras like Borders, Backgrounds, Textures and Presets. Perfect Photo Suite 124 Perfect Enhance View Zoom In: Zooms the preview window in one increment. This will make the preview image larger. Zoom Out: Zooms the preview window out one increment. This will make the preview images smaller. Fit to Screen: This sets the preview image so that the entire image is on screen at once. Think of this as an overview of the entire image. This is the setting you will use most of the time. Actual Pixels: This sets the preview image so that it zooms to actual pixels or 1:1 also called 100%. This setting allows you to see every pixel in the image. This is useful when making precision adjustments. Show Browser Pop-up: Enables the browser pop-up window. Browser Mode: Allows the user to select how the Browser Library displays the categories. Show Clipping: Shows the clipping overlay view, which over-rides the current mask view. Show Preview: Toggle to enable or disable the preview. Preview Background Color: Toggles the background color options. Window Navigator: Hides or shows the Navigator, Loupe, Histogram and Info pane. Quick Fixes: Hides or shows the Quick Fixes pane. Color & Tone Adjustments: Hides or shows the Color & Tone Adjustments pane. Vignette: Hides or shows the Vignette pane. Sharpening: Hides or shows the Sharpening pane. Solo Mode: Enables solo mode. When Solo Mode is enabled, only one control pane may be open at a time. Show Browser Panel: Hides or shows the Browser Panel. Show Control Panel: Hides or shows the Control Panel. Hide Panels: Hides or shows all Panels. Full Screen: Toggles to and from full screen mode. Document Name: Shows the name, zoom level and bit depth of the open image. Perfect Photo Suite Perfect Enhance 125 Help Search: Searches the menu options (Mac OSX only). Perfect Enhance Online Help: Opens this html Help in your default web browser. Video Tutorials: Opens the online Video Tutorial in your default web browser. Getting Started: Opens the online Getting Started overlay. Show Keyboard Shortcuts: Opens the keyboard shortcut inspector. Perfect Inspiration: Takes you to the Perfect Inspiration web site. Check for Updates: Checks with the onOne update server to see if you are running the current version. If there is a newer version you will be notified and be walked through the update process. Provide Feedback: Opens the default web browser and navigates to the feedback page of the onOne website. About Perfect Enhance (Windows Only): Opens the about box with the version number and license code displayed. Help Improve onOne Products: Opens the Improve onOne Products dialog. Perfect Photo Suite 126 Perfect Enhance Keyboard Shortcuts Action Mac Win Print cmd p ctl p Undo cmd z ctl z Redo cmd shift z ctl shift z Cut cmd x ctl x Copy cmd c ctl c Paste cmd v ctl v Save Preset cmd shift s ctl shift s Zoom-In cmd + ctl + Zoom-Out cmd - ctl - Fit to Screen cmd 0 ctl 0 Actual Pixels cmd opt 0 ctl opt 0 Next Browser View Mode cmd B ctl B Navigate Browser Selection Arrow Keys Arrow Keys Open Selected Category Right Arrow Right Arrow Close Selected Category Left Arrow Left Arrow Show Clipping opt J opt J Show Preview cmd p ctl p Navigator/Loupe/Histogram cmd 1 ctl 1 Quick Fixes cmd 2 ctl 2 Color & Tone Adjustments cmd 3 ctl 3 Vignette cmd 4 ctl 4 Sharpening cmd 5 ctl 5 Noise Reduction cmd 6 ctl 6 Show Browser Panel cmd left arrow ctl left arrow Show Control Panel cmd right arrow ctl right arrow Hide Panels tab tab Full Screen Mode cmd ctl f F11 Keyboard Shortcuts cmd shift k ctl shift k Pan Tool h h Perfect Eraser q q Crop Tool c c Red Eye Tool e e Retouch Brush r r Zoom Tool z z Brush Size larger ] smaller [ larger ] smaller [ Brush Feather softer shift ] harder shift [ softer shift ] harder shift [ Brush Opacity opt 1 (10%) opt 2 (20%) opt 0 (100%) etc opt 1 (10%) opt 2 (20%) opt 0 (100%) etc Toggle Tool Mode x x Temporarily Select Hand tool Hold Spacebar Hold Spacebar Temporarily Toggle Tool Mode Hold opt hold alt Temporarily Toggle Clipping View j j Rotate Crop Clockwise opt right arrow alt right arrow Rotate Crop Counter Clockwise opt left arrow alt left arrow Perfect Photo Suite Perfect Portrait 127 Perfect Portrait Focus on the art of portrait creation because the most time consuming retouching tasks have now been automated. With Perfect Portrait, you can improve skin texture and color, remove blemishes, and enhance eyes, lips and teeth. You'll find that it's never been so easy to create stunning portraits your family and clients will love. Give each face in your image the specific attention it needs. Perfect Portrait automatically recognizes each person in your photo and allows you to retouch each separately. More than just finding each face, Perfect Portrait also quickly finds the eyes and mouth in a portrait automatically. You no longer have to waste time painting in the features or use complicated manual "wizards" because the features are identified right away. So, you can quickly get to the task of enhancing those critical features. Perfect Photo Suite 128 Perfect Portrait Getting Started This getting started section will give you the basics of using Perfect Portrait. If you have never used Perfect Portrait before, this is a good place to start. You might also try watching the getting started video tutorial. For detailed information on steps and controls mentioned in the getting started section, see the "Using Perfect Portrait" section instead. Perfect Photo Suite Perfect Portrait 129 User Interface Perfect Portrait Main Window: A. Preset Browser: This is where you browse and apply presets B. Tools Option Bar: This is where information and options about each tool is selected. C. Tool Well: This is where the tools are located. D. Preview Window: This is the main section where you preview and work on images. E. Module Selector: This is where you choose which software module to open. F. The Navigator, Loupe and Histogram Pane: This pane will access Navigational, Loupe and Histogram features. G. Skin Retouching Pane: This is where you adjust the skin smoothing and retouching controls. H. Color Correction Pane: This is where you adjust the color correction controls. I. Mouth & Eyes Pane: This is where you adjust the mouth and eye enhancement controls. J. Cancel & Apply Buttons: This is where you cancel or apply an action. K. Mouth & Eye Control Points: Click and drag these control points to refine the mouth & eye areas. The Perfect Portrait Tool Well There are 5 different tools in the Perfect Portrait tool well. More details about each tool will be covered in the next chapters. Face Select Tool This tool lets you select the face to edit. Face Edit Tool This tool lets you edit the areas of the face like the skin, eyes and mouth. Perfect Eraser The Perfect Eraser can be used to replace distracting elements from your image. Retouch Brush This tool lets you retouch areas like blemishes, wrinkles and discoloration. Hand Tool This tool drags your image within the preview window when it's larger than the viewable area. Zoom Tool This tool changes the magnification in the preview up to 1600%. Perfect Photo Suite 130 Perfect Portrait Navigating the Preview Perfect Portrait provides several ways to navigate and view your image in the Preview window. The Preview Window above is the main section where you preview and work on images. Hand Tool The Hand tool is used to position the image within the Preview window, whenever the preview zoom is larger than the viewable area. To pan (scroll) in the Preview window: Select the Hand Tool and drag the image until you locate the area you wish to view. With any other tool selected, hold down the spacebar while you drag the image in the window. Double-click the Hand tool in the Toolbar to set the image to a magnification that fits completely in the current window size. Zoom Tool The Zoom tool changes the magnification of the image in the Preview window. With the Zoom tool selected: Click in the Preview window to zoom in and center the image at the location clicked. Click and drag in the Preview window to draw a rectangular, the screen fills with the area within the rectangle when you release the mouse. Hold the Option key (Mac) or Alt key (Win) and click to zoom out. Double-click the Zoom tool in the Toolbar to set the image to 1:1 or 100% magnification, showing every pixel. This is best when examining small details. Perfect Photo Suite Perfect Portrait 131 Navigator, Loupe, Histogram and Info At the top of the control panel on the right of the main window is the Navigator | Loupe | Histogram | Info panes. It contains four useful tools for inspecting and viewing details of your image. The Navigator Pane This gives you a birds-eye view of your image. The blue square region marks the image area that is visible in the preview pane. You can pan your image by clicking and dragging inside the blue region. At the bottom of the Navigator pane are several Zoom presets. Click on a Zoom preset to activate. FIT: Zooms to fit the current canvas size. This allows you to see your entire image. 100: Zooms to 100% or actual pixels. This is best for judging small details. 50: Zooms to 50% 25: Zooms to 25% The Loupe Pane This gives you a magnified view of the section of the preview under the cursor. This allows you to view the quality of your results while maintaining a complete view of your image. At the bottom of the Loupe Pane is a sliding for adjusting the zoom level. The Histogram Pane This gives you a color chart of the shadow, mid-tone and highlight areas based on the image RGB values. This is useful to show areas within the image that may be clipping. Clipping is when your image contains pure blacks or white and can signify loss of highlight or shadow detail. The left side of the histogram represents the shadows, while the right represents the highlights. At the top of each end is a triangle. If the triangle is lit, there is clipping on that side of the histogram. If you click on the arrows, you will activate the clipping overlay on your image. The areas of your image with a blue overlay are pure black, while the areas with the red overlay are pure white. You can turn the clipping view off again by clicking on one of the triangles. You can also temporarily enable clipping view by holding down the J key at any time. The clipping view is useful when you are making adjusts to the brightness and contrast of your image. The Histogram pane also displays the RGB values under the cursor at the bottom of the pane. Perfect Photo Suite 132 Perfect Portrait The Info Pane The info pane will display important metadata about your file including: Camera type File type Focal length and lens information Date and time captured Exposure information ISO Shutter Speed Aperture Exposure Value Filename Color Space Dimensions File Size and Bit Depth If your camera allows for GPS the GPS button will be viewable and you can click on it to get the GPS cordinates for where the image was taken. This feature only works if you have GPS enabled on your camera or mobile device. Otherwise you will not see the GPS button. The Info panel is not visible when you access B&W Module as a Photoshop plug-in. Perfect Photo Suite Perfect Portrait 133 Preview Window Modes The preview window has several modes including; single image, side-by-side (horizontal or vertical) and split-screen (horizontal or vertical) versions of an image. This allows you to compare layers side-by-side or to view a layer mask and the layer side-by-side. At the bottom left of the Preview Window is a button that toggles and shows the current Preview Mode. You can also change the mode from the View menu. Single Mode Screen. Left-Right Screen. Top-Bottom Screen. Top-Bottom Split Screen. Left-Right Split Screen. Tip: You can use the keyboard shortcuts below to quickly switch view modes. Items in parenthesis are for Windows. Command (Control) L: Command-Option (Control-Alt) L: Command (Control) T: Command-Option (Control-Alt) T: Command (Control) Y: Change the preview mode to Left/Right. Change the preview mode to Left/Right Split screen. Change the preview mode to Top/Bottom. Change the preview mode to Top/Bottom Split screen. Change the view mode to single image. Perfect Photo Suite 134 Perfect Portrait Browsing Presets Built into Perfect Portrait is a preset browser, located in the left panel. You can use it to browse the factory supplied presets, presets you have created or downloaded from the onOne website or for marking and finding your favorites. Below is a description of the controls in the file browser. A. Browser Tabs: This switches between the Effects tab, Favorites tab and My Presets tab. B. Search Field: Use the search field to locate effects and presets. Simply start to type and your results will appear in a new sub-folder called search results while you type. C. Categories: Categories work just like folders. Select one to open it and view its contents D. Effect: An effect is displayed as a thumbnail of the image with the effect applied and will have the effect name listed below it. E. Resize Handle: On the right edge is a resize handle that you can drag to change the size of the browser or close it. F. Favorite Flag: Click on the flag to mark an effect or preset as a favorite. It will appear in the Favorites tab automatically. G. Browser Modes: These icons control the browser mode. Either thumbnail columns or list view. H. Quick View Browser: Pressing this button opens the Quick View Browser where you can see larger versions of each preset. Browser Tabs The Browser is divided into three tabs; Library, Favorites and My Presets. Library: The Library tab contains the factory presets provided by onOne Software. They are a good place to start. Favorites: When you click on the favorite flag on a preset, in any tab, it is added to the Favorites tab automatically. This makes it fast to find the presets you use most frequently. My Presets: When save your own presets, or install presets from the onOne website, they will be located here. Navigating the Browser To open a category, click on it. To close it, click on it again. Only one top-level folder can be open at a time. The selected item, either a category or preset, will have a light silver box around it. You can use the up and down arrow keys to change your selection in the browser. You can open or close categories using the command (control on Windows) up and down arrows. Perfect Photo Suite Perfect Portrait 135 You cannot move or delete presets from the browser. Selecting a Preset to Use To activate a preset on your image, simply click on the preset. Searching for Presets To search for presets in the current browser tab, type in the name of the file in the search field. The search results appear in a new sub-folder called search results, which will be selected automatically. You can clear the search field by pressing the x at the right end of the search field. Browser Pop-Up To view a larger preview on a preset, enable the Show Browser Pop-up in the View menu. When you mouse over a thumbnail, a larger preview will be displayed in a pop-up window. Resizing and Closing the Browser The browser can be resized by dragging the resize handle on the right margin of the browser. The browser can be closed or reopened by clicking on the resize handle or using the cmd (control on Windows) left and right arrow keys. Browser Modes The browser offers four viewing modes. Three that display thumbnails in columns and one list view. The browser modes are selected using the browser mode icons at the bottom of the browser. single column view two column view list view Quick View Browser Perfect Photo Suite 136 Perfect Portrait The Quick View Browser adds an elegant full-screen view of your images, effects and presets. Whether you are looking for the right image or the right look, the Quick View Browser will make fast work of the problem. Just press the Quick View Browser button (or the option (alt) right arrow keyboard shortcut and you will see the full array of options to choose from. You can visually navigate categories, then dive into them to find just the right look. Browse folders and images quickly to find the right one to work on. View all your effect or preset categories at one time, then dive into them to find the perfect look with an effortless, tablet feel. Variable thumbnail sizes gives you a few large previews or many small ones depending on your screen size and content. Back button and breadcrumbs make it easy to navigate a complex folder structure. Use your keyboard arrow keys to navigate. Press the return key to select an item or open a folder. Use the command or control left arrow to go up a folder level. Perfect Photo Suite Perfect Portrait 137 Using Perfect Portrait The heart of Perfect Portrait is the automatic finding of faces and creation of accurate and feathered skin selections. Perfect Portrait is designed to simplify retouching and empower portrait photographers of all levels to create stunning portraits. It contains what we feel are the most important tools for color correcting, retouching, smoothing, and enhancing portrait images. Below are the steps to start selecting and editing faces. Step 1 When you launch Perfect Portrait, it scans for faces in the image. The selected faces are marked with a white rectangle box. Select a face to edit and a green highlight box will surround it. Each face box will have an "X" icon in the upper left corner. This icon can be pressed to delete that face selection. If Perfect Portrait does not find a face automatically you can manually select one by using the Face Select Tool and clicking on the face to add. See "Adding Faces" in the Face Select Tool section for details. Step 2 When you select a face by clicking on it, the preview will zoom in to the face and the eye & mouth control points will be visible. You can adjust the selection by moving the control points. If you need to adjust the overall location of an eye, click on the cyan dot in the center of the eye. Use the control points to fine tune the selection around the eyes and mouth. You may press the Hide Controls button located in the Tool Options Bar which will hide the control points. Step 3 Now, you can refine the skin selection as well as adjust the color, eyes and mouth using the controls in the panes located to the right. These include: Skin Retouching Color Correction Eye & Mouth Enhancing Step 4 A user may also select the Retouch Brush to manually reduce stubborn spots anywhere in the image. Perfect Photo Suite 138 Perfect Portrait Using The Face Select Tool Face Select Tool: Click with the Face Select Tool to select or add a new face selection. The Face Select Tool is used to select which face to edit. When the Face Tool is selected, boxes appear on each face in the image. The current face box is marked in green, other face brackets are marked in white. You click on the face you wish to work on, the tool automatically switches to the Face Edit Tool. The eye & mouth control points become visible. Adding Faces Occasionally Perfect Portrait may not find the face you wish to retouch in a scene. This can occur if: The face is small compared to the rest of the image. The subjects eyes are closed or has glasses on. The subject is in a profile pose. The subject is upside-down. The lighting contrast is heavy. If Perfect Portrait does not find a face automatically you can manually select it by clicking the Face Select Tool on the face you would like to add. A Square box appears on screen. Move it over the face you wish to add. Adjust the size of the box with the side handles. The box should go from the hairline to the chin and be centered on the face. When you have the box adjusted, press the Apply button and Perfect Portrait will add the new face. Deleting Faces If Perfect Portrait detects a face you do not wish to retouch, simply click on the X in the upper left corner of the face box. Perfect Photo Suite Perfect Portrait 139 Using The Face Edit Tool Face Edit Tool: Refines the Skin Selection and Moves the Control Points. The Face Edit Tool is a dual-mode tool. It is used to refine the mask for the skin selection as well as adjust the eye & mouth control points. When the Face Edit Tool is not over a control point it is similar to the Masking Brush in other onOne Software tools. It is used to refine the skin selection. It has two states, "Add to Skin" and "Not Skin" which equate to paint-in and paint-out in mask mode. The tool is represented as concentric circles that are white. When this tool is over an eye & mouth control point it switches to a normal cursor. A user clicks and drags a control point to adjust its location. There are five control points for each eye and six for the mouth. They are used to define these areas for enhancement: The iris of each eye The sclera, or white area of each eye The lips The area inside lips, generally the teeth The number of control points is kept minimal to make Perfect Portrait easier to use. The lines don't need to match the contours of the eyes & mouth perfectly. The selections are feathered on the edges and are limited to the expected color and tonal ranges of the area to be adjusted. The Face Edit Tool Options Bar Perfect Photo Suite 140 Perfect Portrait Mode: This mode selects either Not Skin, or Add to Skin. Use the Add to Skin mode to brush more mask areas on the skin or Not Skin to subtract mask areas around the skin. Size: This controls the brush size, also contains a toggle "W" to turn off or on the Wacom pressure sensitivity. Feather: This controls the brush feather, or hardness. Opacity: This controls the opacity, also contains a toggle "W" to turn off or on the Wacom pressure sensitivity. Perfect Brush: This enables the Perfect Brush function, a self masking mode based on color that protects edges. Tip: You can turn the Perfect Brush on and off using the command or control -r keyboard shortcut. You can also temporarily lock the color the remove by holding down the control key. This is useful when brushing through areas with lots of openings like hair. Previous/Next Face: These right-left arrow buttons select which face is selected next. Hide Controls: This button toggles the showing of the control points. Normally, the control points are visible. This is good when you are fine-tuning control point position. However, it obscures the image and makes it difficult to know how to adjust the Skin Retouching, Color Correction and Eye & Mouth options. When you press this button, it hides the control points. This allows the you to see the results of the current settings and to better adjust the controls. Reset Face: This button resets the mask, control points and right group settings to their defaults for the face. Perfect Photo Suite Perfect Portrait 141 Skin Retouching Reduce Blemishes, Smooth the Skin and Even the Skin Hue. The Skin Retouching Pane contains the controls for adjusting the automatic blemish reduction, skin smoothing, shine and shadow reduction as well as texture addition. Face Size: The Face Size drop-down menu is used to adjust the overall size of the face skin mask. To adjust it, click and hold on the drop-down. The current automatic face skin mask is shown. If important skin areas at the edges of the face are not included select a larger size. It may take a second or two to render the updated mask. Keep the drop-down held down so you can see the results of your selection. Keep in mind you can always refine the skin mask using the Face Edit Tool as well Blemishes: Adjust the Blemishes slider first. It attacks the medium sized blemishes such as large pores, acne, freckles, fine lines, etc. It reduces the appearance of blemishes while maintaining the fine pore structure of the skin for a natural appearance. Typical settings for females and children are 60-80, 30-50 for males. Smoothing: Smoothing is the second slider to adjust. It acts on the smallest details to add a smooth finish to the skin, similar to powder in the cosmetics world. Use the smallest amount you can to preserve a natural look. Typical settings for females are 20-40, males and children 10-20. Shine: The shine slider is used to reduce the brightness of highlights on the skin. It is great for reducing shine from oils in the skin. Shadows: The shadow slider is used to brighten shadows in the skin. This is useful for dark eye bags and deep wrinkles. Texture: The texture slider introduces a synthetic skin texture to the skin areas. Generally it is not needed. It is useful on overexposed images where no texture remains. Evenness: Evenness adjusts how consistent the skin color is across the entire face. It is great for correction highlights that may be too yellow, shadows that may be too green or reducing redness in noses and ears. It is also useful for making family portraits more consistent from person to person. Face Only: The face only toggle limits the skin retouching to just the skin of the face. This is on by default and is recommended for most uses. This will prevent other flesh colored areas in your scene from being retouched. This includes things like hair or other people. There are two occasions when you would want to disable the face only toggle: If you are working on a single subject with little or no clothing and you wish to apply the skin retouching to all the subjects skin. Your're working on a large group portrait where it is impractical to adjust each face separately. You can instead disable the face only option and apply the same retouching to everyone in the scene. Perfect Photo Suite 142 Perfect Portrait Color Correction The Color Correction pane is used to color correct the image based on skin color. When a face is selected, Perfect Portrait automatically color corrects the entire image based on the skin color of your subject. When Perfect Portrait finds the first face in the scene, it analysis the average skin color of that face and compares it to libraries of hundreds of thousands of color correct skin color samples. If the first face is deleted, the next face takes over and the color correction base value is reset. Color correction only needs to be performed on one person in a scene. If you have multiple people, they all have the same color cast issues. Using the Color Correction controls on one person will correct the others as well. The Color Correction pane contains the following controls: Amount: Adjusts the overall strength of the correction. Warmth: Warmth is set automatically based on the image but can be adjusted up or down based on personal preference. Underexposed images may have too much warmth, where open sky, or overexposed images may not be warm enough. Color Shift: Color correction does its best too automatically correct color but may need help based on personal preferences. Use the Color Shift slider to adjust the color or hue to control how red the skin is. Ethnicity: The ethnicity pop-up determines which color library to use for the color correction. Every ethnicity has a different hue characteristic no matter how bright or saturated the skin is. For the best results, use the ethnicity library for the face that is selected. If you are not sure, use the Average option which is an average of all ethnicities. Perfect Photo Suite Perfect Portrait 143 Eyes & Mouth The Mouth and Eyes pane contains the controls for enhancing the eyes and mouth. The eyes and mouth are the key features of the face. Beyond skin retouching, they are the most important and common areas to retouch or enhance. Brightening the eyes and teeth are very common but can be difficult to do in Photoshop in a realistic way. Perfect Portrait automatically detects the mouth and eye regions to provide enhancement. You can adjust the automatic selections using the Face Edit Tool. The eye and mouth selections are broken down into four regions: Whites of the eyes (sclera) Iris of the eyes Lips Teeth (area inside the lips) The number of control points is kept minimal to make Perfect Portrait easier to use. The lines don't need to match the contours of the eyes & mouth perfectly. The selections are feathered on the edges and are limited to the expected color and tonal ranges of the area to be adjusted. Below is a list of the controls and when to use them. EyesWhitening: The Eye Whitening slider is used to lighten and whiten the sclera or the whites of the eyes. Detail: The Eye Clarity slider increases the clarity or sharpness of the eye area. Reduce Red Eye: When this is checked it will automatically reduce red eye. MouthWhitening: The Mouth Whitening slider whitens and lightens the teeth. If the subject's teeth are not showing, don't use this control. Vibrance: The Mouth Vibrance slider increase the vibrancy or color saturation of the red hues in the mouth region. It is useful for enhancing lip color, typically for women with lipstick. Perfect Photo Suite 144 Perfect Portrait Perfect Eraser The Perfect Eraser can be used to remove distracting elements and blemishes from your image. How it Works The Perfect Eraser employs a content aware algorithm that replaces the pixels with a natural and plausible result within the boundaries that are painted. Using the Perfect Eraser Activate the tool by selecting it in the Tool-Well. Simply paint over the area you wish to remove. Make sure you cover the entire area. A red overlay appears where you paint. You can adjust the size of the brush using the Tool Options bar. If the first attempt does not give you a perfect result, simply paint over it again and it will improve with each pass. You can also fine tune the area after using the Retouch Brush. Perfect Photo Suite Perfect Portrait 145 Retouch Brush Retouch Brush: Use the Retouch Brush to remove small imperfections like dust or blemishes. Just dab the retouch brush on spots like acne, dust spots, power lines, etc. It looks at the neighboring areas and fills in the brush with similar color and texture. It is best to use the smallest brush size possible and to work by dabbing rather than making large brush strokes. If you dab with the Retouch Brush and don't like the results, use the undo command and try using a smaller brush or vary your brush stroke and try again. The Retouch Brush is perfect for retouching skin. You can control the Retouch Brush using the Tool Options Bar Brush Size: This adjusts the overall size of the brush. Brush Feather: This adjusts the hardness of the brush. It works best to use a feather larger than 50 to blend and look natural. Brush Opacity: This adjusts how strong the retouching is. Use 100% to completely remove an imperfection. Use a lower opacity to soften them. W: If you have a Wacom pressure sensitive tablet, you can adjust the size of the brush according to the pressure. Click on the "W" in the box to activate the Wacom sensitivity controls. Perfect Photo Suite 146 Perfect Portrait Adjusting the Skin Selection When Perfect Portrait finds a face it automatically generates a selection, or mask, for the skin of the face. Generally the automatic mask is very good but occasionally you may need to adjust it to add areas of skin that where not included or to remove areas such as hair that are included by mistake. This skin selection can viewed and adjusted with the Face Edit Tool. Adjusting the Face Size for can be viewed and adjusted in the Skin Retouching Pane under the Face Size selection. You can adjust the mask by using the Face Edit Tool. This tool work the same as the Masking Brush in other onOne products. Editing the Skin Mask You can also edit the skin mask directly using the Face Edit Tool. Visit the Refining the Masking Selections page for details. Perfect Photo Suite Perfect Portrait 147 Viewing the Selection Masks Perfect Portrait allows you to view and edit the skin mask. You can view the mask in the Masking menu on the bottom left corner of each preview pane. You can also view the mask and adjust the size in the Skin Retouching Pane under the Face Size selection. Below are examples of the different mask view modes. You can toggle mask view on and off with the command (Mac OSX) or control (Windows) plus m keyboard shortcut. Red The masked area appears as 50% red. This is similar to the Quick Mask view in Photoshop. White The masked area appears as solid white. Perfect Photo Suite 148 Perfect Portrait Dark The masked area appears as 90% black. Grayscale The masked area black, while the unmasked area is white. Perfect Photo Suite Perfect Portrait 149 Refining the Masking Selections In many cases adjusting the Skin selection mask is not needed. The automatic selections created by Perfect Portrait work well on many images. To see if you need to refine the selection masks, follow the steps below. First, select the Face Edit tool. This dual-mode tool functions as a masking brush with concentric circles when not over a control point. You control the brush Size and Feather settings in the Tool Options Bar. Enable either the Mask-Red or Mask-Dark setting in the Mask View drop-down located bottom-left of the Preview Window. This will allow you to view the mask that Perfect Portrait uses to define the skin areas to edit. These view modes make it easy to see the mask and the image simultaneously. The preview sample at the right was selected to Mask-Dark. Now use the Face Edit tool to paint-in areas of the skin that might have not been included in the automatic selection. You can also set the mode to "Not Skin" to undo areas of the mask you painted in. Perfect Photo Suite 150 Perfect Portrait Focus on the hair around the face. Don't worry too much about the areas around the eyes and mouth, these areas are adjusted in the Eye and Mouth window pane. Make sure that the eyebrows are not selected unless you want to soften them. Perfect Brush The Perfect Brush option enableds a unique, color-based, self masking technology. When enabled, as you paint with the Masking Brush it collects the colors under the center of the brush and only masks those colors. This protects the mask from being applied across edges. Tip: You can turn the Perfect Brush on and off using the command or control -r keyboard shortcut. You can also temporarily lock the color to remove by holding down the control key(win) or the command key(mac). This is useful when brushing through an area with a lot of openings. Perfect Photo Suite Perfect Portrait 151 Presets Presets store all of the adjustments you make in Perfect Portrait. Presets are a fast and easy way to get consistent results. You can save your own presets for batch processing or for simply reproducing your look when retouching. Presets do not store masks created by tools other than the Masking Bug. Using a Preset Using a preset is simple, just click on it in the Preset Browser. Saving a Preset Saving a preset is simple. Once you have your settings that you wish to save, go to the Preset menu and select Save Preset. The New Preset dialog will appear (shown to the right). There are several fields to complete including the preset name, the category, creator and description. In the category pull-down you can select which existing category the preset should saved into. You can also create a new category this way by selecting new category from the bottom of the list. You can edit a preset's name, creator or description by selecting it and then selecting Edit Preset Info from the Preset menu. If you want to edit the settings in a preset, load it into, make your adjustments and then re-save the preset with the same name and location. Deleting a Preset You can remove a preset if you no longer want to have access to it. To remove a preset, follow these steps: 1. Select the preset you wish to remove in the preset browser. 2. Select Delete Preset from the Preset menu. Importing & Sharing Presets You can import presets you have downloaded from the onOne website using these steps. 1. Download the preset pack from the onOne website. It should have a .ONPreset extension. 2. Double-click on the preset pack, it will install the presets into a category named the same as the preset pack. That's it, next time you use Perfect Portrait the new presets will be located in the My Presets tab, in a category named after the preset pack. You can delete the files you downloaded, they have been copied into Perfect Effects. You can share presets like you would share any other file, such as email or posting them to a website. First you need to find the preset files. The easiest way it to open Perfect Portrait then from the Preset menu select Show Presets Folder. A window will open and will display the presets folder. In the presets folder are sub-folders for your preset categories. Inside each sub-folder are the individual preset files. You can copy these presets to another computer, attach them to an email or post them on a website. Perfect Photo Suite 152 Perfect Portrait Setting the Defaults The Module Settings are located in the Edit menu allow you to control the default settings that Perfect Portrait uses. Below are the options: Skin Only: Adds a modest amount of skin retouching only. Natural: Adds a modest amount of skin retouching and facial feature enhancement. No color correction is added. This is the default setting. Strong: Adds a heavy retouch with color correction and feature enhancement. This is the default from Perfect Portrait version 1. My Settings: A set of drop-down menus where the user may select a category and preset saved in the My Presets tab. This way you can set your own defaults exactly they way you want. Perfect Photo Suite Perfect Portrait 153 Menus Perfect Portrait About: Opens the about box. This dialog contains your serial number, version number and information on contacting onOne Software for support. Preferences: Opens the preferences dialog. Quit: Quits the application. File Apply: Applies the current settings and returns to the host application. Cancel: Cancels and returns back to the host application with no changes. Edit Undo: Reverses the last user action. Redo: Reapplies the last user action if it has been undone. Undo Stroke: If the last action was a brush stroke, this reverses the entire brush stroke. Redo Stroke: If your last action was an undo of a Brush Stroke, this reapplies the entire stroke. Cut: Unused Copy: Unused. Paste: Unused Reset All: Resets all the floating palette controls back to their default settings. Face Add Face: Opens the Add Face routine. Delete Face: Deletes the selected face. Reset Face: Resets the selected face controls and masks to default. Next Face: Cycles to the next face. This is disabled if only one face. Previous Face: Cycles to the previous face. This is disabled if only one face. Show All Faces: Displays all selected faces. Sets the preview zoom to fit and changes tools to the Face Select Tool. Copy Settings: Copies the settings from the current face to the clipboard. Paste Settings: Pastes the settings from the clipboard onto the current image. Perfect Photo Suite 154 Perfect Portrait Preset Save Preset: Saves the current Effect Stack as a new preset. Delete Preset: Deletes the current preset. Edit Preset: Opens the preset dialog so you can edit the name, author or description information. Import Preset: Opens the import preset dialog to help you import presets you have downloaded. Show Presets Folder: Opens a Finder or Explorer window showing the presets folder. Manage Extras: Opens the Extras Manager where you can import and manage extras like Borders, Backgrounds, Textures and Presets. View Zoom In: Zooms the preview window in one increment. This will make the preview image larger. Zoom Out: Zooms the preview window out one increment. This will make the preview image smaller. Fit to Screen: Fits the zoom to the screen so the entire image is viewable. Fill with Face: Sets the zoom so the current face fills the entire screen. Actual Pixels: This sets the preview image so that it zooms to actual pixels or 1:1 also called 100%. This setting allows you to see every pixel in the image. This is useful when making precision adjustments. Show Browser Pop-up: Enables the browser pop-up window. Browser Mode: Allows the user to select how the Browser Library displays the categories. Show Clipping: Shows the clipping overlay view, which over-rides the current mask view. Show Preview: Toggle to enable or disable the preview. Preview Mode: Allows the user to switch preview modes. Preview Background Color: Toggles the background color options. Show Mask: Shows or hides the mask view. Mask View Mode: Select which mask view mode to view. Show Tool Guidance: Shows the tool guidance inspectors. Window Navigator/Loupe/Histogram: Hides or shows the Navigator, Loupe/ Histogram pane. Skin Retouching: Opens/closes the Skin Retouching pane. Color Correction: Opens/closes the Color Correction pane. Eyes & Mouth: Opens/closes the Color Correction pane. Show Browser Panel: Hides or shows the Browser Panel. Show Control Panel: Hides or shows the Control Panel. Hide Panels: Hides or shows all Panels. Full Screen: Toggles to and from full screen mode. Document Name: Shows the name, zoom level and bit depth of the open image. Perfect Photo Suite Perfect Portrait 155 Help Search: Mac OSX only. Searches the menus options. Perfect Portrait Online Help: Opens this html Help in your default web browser. Video Tutorials: Opens the online Video Tutorial in your default web browser. Getting Started: Opens the online Getting Started overlay. Show Keyboard Shortcuts: Opens the keyboard shortcut inspector. Perfect Inspiration: Takes you to the Perfect Inspiration web site. Check for Updates: Checks with the onOne update server to see if you are running the current version. If there is a newer version you will be notified and be walked through the update process. Deactivate: Opens the activation dialog. These are used to deactivate your software for moving it to another computer or for a return. Registration: Opens the default web browser and navigates to the registration page of the onOne website. Provide Feedback: Opens the default web browser and navigates to the feedback page of the onOne website. Help Improve onOne Products: Opens the Improve onOne Products dialog. Perfect Photo Suite 156 Perfect Portrait Keyboard Shortcuts Perfect Portrait has many keyboard short-cuts to make it faster to access common buttons and menu items. It also uses many of the keyboard shortcuts that Photoshop uses, making it intuitive to learn. Here is a list of the most commonly used keyboard shortcuts: Action Mac Win Apply Return Return Cancel Esc Esc Print cmd p ctl p Undo cmd z ctl z Redo cmd shift z ctl shift z Cut cmd x ctl x ctl c Copy cmd c Paste cmd v ctl v Next Face cmd shift n ctl shift n Previous Face cmd shift opt n ctl shift alt n Show All Faces cmd opt n ctl alt n ctl shift c Copy Settings cmd shift c Paste Settings cmd shift v ctl shift v Save Preset cmd shift s ctl shift s Zoom In cmd + ctl + Zoom Out cmd - ctl - Fit to Screen cmd 0 ctl 0 Actual Pixels cmd opt 0 ctl alt 0 Next Browser View Mode cmd b ctl b Navigate Browser Selection Arrow Keys Arrow Keys Open Selected Category Right Arrow Right Arrow Close Selected Category Left Arrow Left Arrow Show Clipping opt j alt j Preview On/Off \ \ cmd Y cmd L cmd opt L cmd T cmd opt T ctl Y ctl L ctl alt L ctl T ctl alt T Show Mask o o Navigator/Loupe/Histogram cmd 1 ctl 1 Skin Retouching cmd 2 ctl 2 Color Correction cmd 3 ctl 3 Eyes & Mouth cmd 4 ctl 4 Open Quick View Browser cmd up arrow ctl up arrow Show Browser Panel cmd left arrow ctl left arrow Show Control Panel cmd right arrow ctl right arrow Preview Modes -Single -Left/Right -Left/Right Split -Top/Bottom -Top/Bottom Split Hide Panels tab tab Full Screen cmd ctl f ctl alt f Keyboard Shortcuts cmd shift k ctl shift k Select Pan Tool h h Select Zoom Tool z z Select Face Select Tool s s Select Retouch Brush r r Select Face Edit Tool e e Toggle Perfect Brush cmd r ctl r Brush Size larger ] smaller [ larger ] smaller [ Perfect Photo Suite Perfect Portrait 157 Brush Feather softer shift ] harder shift [ softer shift ] harder shift [ Brush Opacity opt 1 (10%) opt 2 (20%) opt 0 (100%) etc opt ] more opaque opt [ less opaque opt 1 (10%) opt 2 (20%) opt 0 (100%) etc alt ] more opaque alt [ less opaque Toggle Tool Mode x x Toggle Mask View ctl opt m ctl alt m Temporarily hide controls and use pan tool space space Perfect Photo Suite 158 Perfect Effects Perfect Effects Perfect Effects gives photographers a fast and powerful way to create images with impact. It includes an updated library of professional quality photographic filters that can be previewed live on your image before being applied. Live previews are shown in full screen so you can see your image at its best. You'll enjoy the ability to stack multiple filters together to create your own unique look. Perfect Effects takes the idea of stacking filters further with updated blending options that provide better control over how effects are combined. These advanced tools include blending modes options and the ability to limit filters to specific color or tonal ranges of an image. Perfect Photo Suite Perfect Effects 159 Getting Started This getting started section will give you the basics of using Perfect Effects. If you have never used Perfect Effects before this is a good place to start. You can also watch the getting started video tutorial. For detailed information on steps and controls mentioned in the getting started section see the Using Perfect Effects section instead. When to use Perfect Effects The broad range of effects in Perfect Effects makes it useful at many steps in the digital workflow. For example, the filters in the Brightness, Contrast and Color Correction categories may be used early in the workflow for correcting the color and tone of an image. While filters in many categories are designed for a more artistic effect, it may be used in the middle of the process as well. Finally, Perfect Effects has several filters designed for sharpening in the Sharpening category that should be applied as the last step before printing. Perfect Photo Suite 160 Perfect Effects User Interface Perfect Effects Main Window: A. Effects Browser: This library of filters is located on the left side of the window for easy browsing. B. Tool Well: This is where the tools are located. C. Preview Window: This is the main section where you preview and work on images. D. Tools Option Bar: This is where information and options about each tool is set. E. Module Selector: This is where you choose which software module to open. F. Navigator, Loupe and Histogram Pane: This pane will access the Navigational, Loupe and Histogram features. G. Filter Stack: This is where you view and stack filters. H. Filter Options: This is where you access the filter options pane. I. Cancel/Apply Buttons: This is where you cancel or apply an action. The Perfect Effects Tool Well There are four different tools in the Perfect Effects tool well. More details about each tool will be covered in the next chapters. Perfect Photo Suite Perfect Effects 161 Masking Brush This masks out filters using brush strokes to expose underlying filter layers. Quick Mask Tool This tool masks out large similar areas quickly. Masking Bug This tool lets you mask out the layer to expose the original Line Mask Tool This tool is good for linear strait masking. Refine Brush This tool refines the mask intersections to cleanly mask difficult areas like hair. Chisel Mask Tool This tool moves the edge of the mask slightly to remove fringes. Blur Mask Tool This tool softens the mask slightly to blend more naturally. Hand Tool This tool drags your image within the preview window when it's larger than the viewable area. Zoom Tool This tool changes the magnification in the preview window. underlying image. Perfect Photo Suite 162 Perfect Effects Navigator, Loupe, Histogram and Info At the top of the control panel on the right of the main window is the Navigator | Loupe | Histogram | Info panes. It contains four useful tools for inspecting and viewing details of your image. The Navigator Pane This gives you a birds-eye view of your image. The blue square region marks the image area that is visible in the preview pane. You can pan your image by clicking and dragging inside the blue region. At the bottom of the Navigator pane are several Zoom presets. Click on a Zoom preset to activate. FIT: Zooms to fit the current canvas size. This allows you to see your entire image. 100: Zooms to 100% or actual pixels. This is best for judging small details. 50: Zooms to 50% 25: Zooms to 25% The Loupe Pane This gives you a magnified view of the section of the preview under the cursor. This allows you to view the quality of your results while maintaining a complete view of your image. At the bottom of the Loupe Pane is a sliding for adjusting the zoom level. Perfect Photo Suite Perfect Effects 163 The Histogram Pane This gives you a color chart of the shadow, mid-tone and highlight areas based on the image RGB values. This is useful to show areas within the image that may be clipping. Clipping is when your image contains pure blacks or white and can signify loss of highlight or shadow detail. The left side of the histogram represents the shadows, while the right represents the highlights. At the top of each end is a triangle. If the triangle is lit, there is clipping on that side of the histogram. If you click on the arrows, you will activate the clipping overlay on your image. The areas of your image with a blue overlay are pure black, while the areas with the red overlay are pure white. You can turn the clipping view off again by clicking on one of the triangles. You can also temporarily enable clipping view by holding down the J key at any time. The clipping view is useful when you are making adjusts to the brightness and contrast of your image. The Histogram pane also displays the RGB values under the cursor at the bottom of the pane. Clipping View The Info Pane The info pane will display important metadata about your file including: Camera type File type Focal length and lens information Date and time captured Exposure information ISO Shutter Speed Aperture Exposure Value Filename Color Space Dimensions File Size and Bit Depth If your camera allows for GPS the GPS button will be viewable and you can click on it to get the GPS cordinates for where the image was taken. This feature only works if you have GPS enabled on your camera or mobile device. Otherwise you will not see the GPS button. The Info panel is not visible when you access Perfect Effects as a Photoshop plug-in. Perfect Photo Suite 164 Perfect Effects Navigating the Preview Perfect Effects provides several ways to navigate and view your image in the Preview window. The Preview Window above is the main section where you preview and work on images. Hand Tool The Hand tool is used to position the image within the Preview window, whenever the preview zoom is larger than the viewable area. To pan (scroll) in the Preview window: Select the Hand Tool and drag the image until you locate the area you wish to view. With any other tool selected, hold down the spacebar while you drag the image in the window. Double-click the Hand tool in the Toolbar to set the image to a magnification that fits completely in the current window size. Zoom Tool The Zoom tool changes the magnification of the image in the Preview window. With the Zoom tool selected: Click in the Preview window to zoom in and center the image at the location clicked. Click and drag in the Preview window to draw a rectangular, the screen fills with the area within the rectangle when you release the mouse. Hold the Option key (Mac) or Alt key (Win) and click to zoom out. Double-click the Zoom tool in the Toolbar to set the image to 1:1 or 100% magnification, showing every pixel. This is best when examining small details. Perfect Photo Suite Perfect Effects 165 Preview Window Modes The preview window has several modes including; single image, side-by-side (horizontal or vertical) and split-screen (horizontal or vertical) versions of an image. This allows you to compare layers side-by-side or to view a layer mask and the layer side-by-side. At the bottom left of the Preview Window is a button that toggles and shows the current Preview Mode. You can also change the mode from the View menu. Single Mode Screen. Left-Right Screen. Top-Bottom Screen. Top-Bottom Split Screen. Left-Right Split Screen. Tip: You can use the keyboard shortcuts below to quickly switch view modes. Items in parenthesis are for Windows. Command (Control) L: Command-Option (Control-Alt) L: Command (Control) T: Command-Option (Control-Alt) T: Command (Control) Y: Change the preview mode to Left/Right. Change the preview mode to Left/Right Split screen. Change the preview mode to Top/Bottom. Change the preview mode to Top/Bottom Split screen. Change the view mode to single image. Perfect Photo Suite 166 Perfect Effects Using Perfect Effects Perfect Effects is designed to work in steps by adding and adjusting multiple effects on top of each other. If you are a photographer, think of this like adding filters over your cameras lens. First, you would add a polarizer to increase the contrast. Next you would add a graduated neutral density filter to darken the sky and perhaps add a vignette lens hood to darken the edges. This same concept is what drives Perfect Effects, except you have many more filters and more flexibility and control. Perfect Effects provides several ways to work depending on your skill level. It works for beginners through advanced users. Below are example workflows for different levels. Beginner A new user can simply click on an filter and apply it. This is the easiest way to get started. 1. Start by opening an image into Perfect Effects. 2. On the left side you will see the Browser with a list of categories. Click on a category to open up a series of filters. You will now see your image with different filter applied. 3. Simply click on the filter you like and press the Apply button. Intermediate An intermediate user may try stacking filters and adjusting their strength. 1. 2. 3. 4. 5. Start by opening an image into Perfect Effects. Add a filter from the Browser, adjust its strength with the sliders in the Filter Options pane. Add another filter layer by pressing the Add button in the Filter Stack pane, then select a new filter from the library. Continue to add filters and adjust their settings. When you have created a filter stack you like, press the Apply button. Advanced An advanced user may stack multiple filters, adjust the strength, blending options, filter options and use the masking tools to selectively apply filters. 1. 2. 3. 4. 5. 6. 7. Start by opening an image into Perfect Effects. Add a filter from the Browser. Adjust the filter options in the Filter Options pane. This pane contains controls relevant to the selected filter. Use the blending options to control the blending mode. You can also control which color or tonal ranges are affected. Continue adding effect filters, adjusting the filter options and blending options to achieve the desired look. Use the masking tools to selectively apply each filter layer by painting them in or out or applying a filter as a gradient or vignette. When you have created a filter stack you like, press the Apply button. You can also save a stack as a preset so it can be used again later. Perfect Photo Suite Perfect Effects 167 Browsing Filters and Presets Built into Perfect Effects is a browser, located in the left panel. You can use it to browse the factory supplied filters, presets you have created or downloaded from the onOne website or for marking and finding your favorites. Below is a description of the controls in the browser. A. Browser Tabs: This switches between filters, presets and favorites. B. Search Field: Use the search field to locate files in the current sub-folder. Simply start to type and your results will appear in a new sub-folder called search results while you type. C. Filter Categories: This will list the different filter categories for you to choose from. D. Image File: A thumbnail of the image is displayed and will have the filter applied to it. E. Resize Handle: On the right edge is a resize handle that you can drag to change the size of the browser or close it. F. Browser Modes: These icons control the browser views. One column, two column, three column or list view. G. Quick View Browser Button: Press this button to open the current folder in the Quick View Browser. Browser Tabs The Browser is divided into three tabs; Filters, Presets and Favorites. Filters: The Filters tab contains the factory Filters provided by onOne Software. Presets: When save your own presets, or install presets from the onOne website, they will be located here. Favorites: When you click on the favorite flag on a filter or preset, in any tab, it is added to the Favorites tab automatically. This makes it fast to find the filters and presets you use most frequently. Navigating the Browser To open a category, click on it. To close it, click on it again. Only one top-level folder can be open at a time. The selected item, either a category, filter or preset, will have a light silver box around it. You can use the up and down arrow keys to change your selection in the browser. You can open or close categories using the command (control on Windows) up and down arrows. Perfect Photo Suite 168 Perfect Effects You cannot move or delete presets from the browser. Selecting a Filter or Preset to Use To activate a filter or preset on your image, simply click on it. Searching To search for filters or presets in the current browser tab, type in the name of the file in the search field. The search results appear in a new sub-folder called search results, which will be selected automatically. You can clear the search field by pressing the x at the right end of the search field. Browser Pop-Up To view a larger preview on a filter or preset, enable the Show Browser Pop-up in the View menu. When you mouse over a thumbnail, a larger preview will be displayed in a pop-up window. Resizing and Closing the Browser The browser can be resized by dragging the resize handle on the right margin of the browser. The browser can be closed or reopened by clicking on the resize handle or using the cmd (control on Windows) left and right arrow keys. Browser Modes The browser offers four viewing modes. Three that display thumbnails in columns and one list view. The browser modes are selected using the browser mode icons at the bottom of the browser. single column view Quick View Browser Perfect Photo Suite two column view list view Perfect Effects 169 The Quick View Browser adds an elegant full-screen view of your images, filters and presets. Whether you are looking for the right image or the right look, the Quick View Browser will make fast work of the problem. Just press the Quick View Browser button (or the option (alt) right arrow keyboard shortcut) and you will see the full array of options to choose from. You can visually navigate categories, then dive into them to find just the right look. Browse folders and images quickly to find the right one to work on. View all your filters or preset categories at one time, then dive into them to find the perfect look with an effortless, tablet feel. Variable thumbnail sizes gives you a few large previews or many small ones depending on your screen size and content. Back button and breadcrumbs make it easy to navigate a complex folder structure. Use your keyboard arrow keys to navigate Press the return key to select an item or open a folder. Use the command or control left arrow to go up a folder level. Perfect Photo Suite 170 Perfect Effects Perfect Photo Suite Perfect Effects 171 Using the Filter Stack The Filter Stack is a list of all Filters and presets added to an image. When you add a Filter to your image, it will appear on the current Filter Layer in the Filters Stack pane. The Stack works similar to the Layers or History palettes in Photoshop. At the bottom of the Filters Stack is your original image. Each Filter you select in the Library will replace the Filter on the currently selected Filter Layer. You can create as many Filter Layers as needed. You move forward and backward in time by selecting different Filter Layers in the Stack. For example, if you had a Filter Stack with the original and three Filter Layers applied, you could go back to the first Filter by selecting it in the Filters Stack. The second and third Filter Layers will appear disabled and your preview will show only the results of the original with the first Filter Layer applied. You can then click on the third Filter Layer, the most recently applied, and the second and third Filters will appear active again and the preview will show the results of all three Filters. The results of each Filter Layer in Perfect Effects are cumulative, so the results of the first Filter are passed to the second Filter and so forth. It is best to work with Perfect Effects in a step-by-step process, knowing that the results from each step are the starting point for the next Filter. This means that when selecting the Filters to apply, think about the workflow order you use. It is best to make color and tonal adjustments first, followed by special Filters and finish with final touches such as vignettes and sharpening. Thinking of the proper steps to add Filters in Perfect Effects will give you better and faster results. Perfect Photo Suite 172 Perfect Effects Changing the Current Filter When you start in Perfect Effects, there will be an empty Filter Layer on top of your original. Your original is at the bottom of the Filter Stack. To add an Filter to the empty Filter Layer, select it first, then click on an Filter thumbnail in the Filters Browser. You can change the Filter in a Filter Layer by clicking a different Filter thumbnail in the Filter Library. Adding Filters To add another Filter Layer so you can stack multiple Filters, click the Add button at the bottom of the Filters Stack. This creates a new empty Filter Layer. Then select another Filter from the Filter Browser. You can also double-click on a Filter in the Filter Browser to place it in the current Filter Layer and add a new empty Filter Layer above it. Hiding Filters A Filter may be temporarily hidden or revealed by pressing the Eye icon next to the Filter in the Stack. When you hide a Filter, you are not removing it from the Stack. You can reveal it again anytime. Keep in mind that hiding a Filter in the middle of the Stack may take a moment to re-render and update your preview. Changing Filter Order Filters may be reordered in the Stack by clicking and dragging them into the desired position. Reordering Filters can have a huge difference on the results of the image. Reordering Filters will cause the Stack to re-render which may take a few moments. Deleting an Filter You remove a Filter by selecting it and pressing the Delete button at the bottom of the Filters Stack or by pressing the delete key on your keyboard. Tip: You can clear all the Filters from the Frame Stack at once by option (alt on Windows) clicking on the delete button. Adjusting the Opacity The Layer Opacity slider controls how the selected Filter blends with the previous Filter or the original image. You adjust the opacity for any Filter by selecting it and then adjusting the layer opacity slider. Adjusting the opacity slider effectively adjusts the strength of a Filter. For example, if you add a black and white conversion Filter, sliding the layer opacity down will reveal some of the color from the previous state. Usually, the opacity slider will be set to 100% when you add a Filter, however with some Filters like vignettes and soft focus Filters, it may be automatically set at 50%. Adjusting the layer opacity slider to greater than 50% will make the Filter stronger, while adjusting it to less than 50% will make the Filter weaker. Blending Options Clicking on the Blending Options arrow will drop down the Blending Options. This window offers advanced blending options between Filters. The blending options controls are: Perfect Photo Suite Perfect Effects 173 Blending: A pop-up list of blending modes. The list includes normal, lighten, darken, screen, multiply, softlight, hardlight, overlay and color. Apply Filter To: A pop-up list of color or tonal ranges will appear, only one may be selected. The options are; all, highlights, midtones, shadows, reds, greens, blues, magentas, cyans, yellows, flesh colors, vivid colors and neutrals. This applied Filter creates a selection based on the lightness, hue, or saturation range specified. There is a Fuzziness slider associated with this control that adjusts the hardness or precision of the selection. The range is zero to 100. Custom: Select the Dropper tool and click on the image to sample a custom color range. Protect: The protect sliders are used to remove a Filter from a specific color or tonal range. The sliders are; highlights, shadows and skin. The selection created should be feathered and appear natural. The default for these sliders is zero; the range is zero to 64. The range for Flesh Colors is zero to 100. Reset: This resets all settings to the original default settings. Perfect Photo Suite 174 Perfect Effects Using Filters Perfect Effects has its own image-processing engine. This allows you to control the settings for many filters down to the smallest detail. There are 25 Filters that do all the work in Perfect Effects. Stacking and blending these filters will create different effects. These filters are accessed in the Filter Options pane or the Browser The Filters are: Adjustable Gradient Adjustment Brush Antique Black and White Bleach Bypass Blur Borders Color Enhancer Cross Process Dynamic Contrast Glow Grunge HDR Look Lens Blur Lens Flare Nose Reduction Photo Filter Portrait Enhancer Sharpening Split Tone Sunshine Texturizer Tone Enhancer Vignette Vintage Adjustable Gradient Adjustable Gradient makes it fast to add common adjustments to a portion of the image. Adding the Adjustable Gradient will automatically activate the Masking Bug. This is used when you want to apply a custom filter to a particular area of an image. Preset Icons: Shortcuts to the most popular presets. Presets: Pop-up that lists all built-in presets for the filter. Brightness: Adjusts the overall brightness of the image. Contrast: Adjusts the overall contrast of the image. Compression: Compresses the tonal scale to reveal highlights and detail. Detail: Enhances the details by increasing the micro contrast. Warmth: Makes the image warmer or cooler. Vibrance: Controls the vibrance or how saturated the colors appear. Glow: Adjusts the image glow. Type: Sets the style or blending for the glow. Reset will return the settings to the default. Perfect Photo Suite Perfect Effects 175 Adjustment Brush The Adjustment Brush filter lets you paint-in common adjustments just where you need them. Preset Icons: Shortcuts to the most popular presets. Presets: Pop-up that lists all built-in presets for the filter. Brightness: Adjusts the overall brightness of the image. Contrast: Adjusts the overall contrast of the image. Compression: Compresses the tonal scale to reveal highlights and detail. Detail: Enhances the details by increasing the micro contrast. Warmth: Makes the image warmer or cooler. Vibrance: Controls the vibrance or how saturated the colors appear. Glow: Adjusts the image glow. Type: Sets the style or blending for the glow. Reset will return the settings to the default. When you add an Adjustment Brush, nothing appears on your image until you paint it where you want it. Antique To give your image an aged look, older than the vintage filter, monochromatic or hand colored. Preset Icons: Shortcuts to the most popular presets. Presets: Pop-up that lists all built-in presets for the filter. Brightness: Adjusts the overall brightness of the image. Haze: Adds haze or white fill to the image. Saturation: Adjusts the color saturation. Color: Drop down menu displays a list of color options similar to the duotone filter. Film Grain: Amount controls the strength and size dictates how large the grain appears. Reset will return the settings to the default. Perfect Photo Suite 176 Perfect Effects Black and White The black and white effect is used to turn a color image into a monochromatic image. Preset: A preset menu drop down full of popular looks. Filter: Simulates placing a colored filter over your lens when photographing with black and white film. It works like a channel mixer, choosing the percentage of each channel to use. Brightness: Adjusts the overall brightness of the image. Contrast: Adjusts the overall contrast of the image. Auto: Selects the Black and White points automatically. Highlights: This slider darkens the highlights recovering detail. Shadows: This slider lightens the shadows revealing detail. Whites: This slider adds more contrast to the whites. Blacks: Adds more contrast to the blacks. Detail: Enhances the fine details. Toner: A drop-down list of darkroom toners which add a subtle color tint to the image. Highlights: Click on the color square to select the highlight toner color. The Amount slider controls the strength of the toner color on the highlights. Shadows: Click on the color square to select the shadow toner color. The Amount slider controls the strength of the toner color on the shadows. Swap Colors: Pressing this button swaps the highlight and shadow colors. Preserve Whites and Blacks: When on, this checkbox keeps the pure whites and blacks neutral instead of taking on the color of the toner. Film Grain: A drop-down list of Film Grains from popular black and white films. Amount slider is for controlling the strength. Size slider adjusts the scale of the grain. Reset will return the settings to the default. Bleach Bypass An old color processing technique when the bleaching step was skipped. It reduces the saturation and increases the contrast. Preset Icons: Shortcuts to the most popular presets. Presets: Pop-up that lists all built-in presets for the filter. Amount: Controls the strength or amount of the bleach bypass appearance. Brightness: Adjusts the overall brightness of the image. Contrast: Increases or decreases the global contrast. Detail: Enhances the details by increasing the micro contrast. Saturation: Adjusts the underlying saturation. Tint: Choose a new color by clicking in the color icon. Amount: Adjusts the strength of the tint. Reset will return the settings to the default. Perfect Photo Suite Perfect Effects 177 Blur The blur filter contains four options for blurring the image. These options are Normal, Radial, Motion and Surface. Each Type of blur has it own individual sliders. Use the Preset drop down menu or click on the Type Icon to select the blur. Normal: A gaussian blur applied to the entire image. Amount slider controls the strength of the blur. Halo slider controls the fuzziness of the radius. Radial: A zoom from center style. Amount controls the strength of the blur. Quality controls how noisy or the graininess of the blur. Smoothing softens the lines created by the motion. The Radial option also includes a center spot selector. Activate the spot selector by clicking on the icon and then click on the part of the image you want to make the center of the radial blur. Motion: A motion look to make the object or camera appear to be moving. Amount controls the strength of the blur. Distance controls the blur relative to area between the subject and camera. Angle sets the angle of the blur. Smoothing softens the lines created by the motion. *The Shake preset is a motion type. Surface: Simply maintains the edges but adds blur to the details. Amount slider controls the strength of the blur. Halo slider controls the fuzziness of the radius. Threshold sets how similar colors are grouped. Reset will return the settings to the default. Perfect Photo Suite 178 Perfect Effects Borders Adds authentic looking borders. Preset: Drop down menu of popular borders. Category: Sets the category. Border: Selects which border to add. Mode: Sets the blending mode for the border. Opacity: Sets the strength or opacity. Hue: Sets the hue of the border. Saturation: Sets the saturation of the border. Brightness: Sets the brightness of the border. Colorize: When checked will allow users to adjust the Border color by using the Hue, Saturation, and Brightness sliders. Invert: Inverts the colorize options. Thickness: Sets the thickness of the border. Fit Image: Adjusts the size of the image under the border. Button icons (right to left): Rotate clockwise 90 degrees, rotate counterclockwise 90 degrees, flip vertically, flip horizontally. Reset will return the settings to the default. Color Enhancer The color enhancer can be used to control the saturation or vibrancy of colors in the image. This can be done on a global basis (All) or per a range of colors. Presets: Pop-up that lists all built-in presets for the filter. Auto: Detects and removes a color cast. Temperature: Adjusts the warmth of the image. Tint: Shifts the hue between green and magenta. Vibrance: Adjusts the vibrance of muted colors. Gray dropper: Manually select a gray area to set the temperature and tint sliders automatically. Limit Vibrance on Skin box: When checked will protect flesh tones. Color Range: Selects which color range to adjust. Hue: Changes the hue for the selected color range. Saturation: Adjusts the saturation of the selected color range. Brightness: Adjusts the brightness of the selected color range. Purity - Highlights: Reduces the saturation in the highlights. Purity - Shadows: Reduces the saturation in the shadows. Reset will return the settings to the default. Perfect Photo Suite Perfect Effects 179 Cross Process This filter simulates processing film deliberately with the incorrect chemistry. This process will create unnatural colors and high contrast. Preset Icons: Quick automation of popular cross processes. Presets: A drop-down menu with a selection of cross process presets. Styles: A drop down list of all color styles. Amount: Controls the overall strength of the filter. Brightness: Adjusts the overall brightness. Contrast: Adjusts the overall contrast. Saturation: Adjusts the underlining saturation. Reset will return the settings to the default. Dynamic Contrast Dynamic contrast adds clarity or tonal contrast to your image making the image pop. Preset Icons: Presets for quick adjustments. Preset: A drop-down menu with a fill list of dynamic contrast presets. Detail Small: Adjusts contrast in small areas. Detail Medium: Adjusts contrast in medium areas. Detail Large: Adjusts the contrast in large areas. Auto: Sets the black and white points automatically. Highlights: Recovers detail in the highlights. Shadows: Recovers detail in the shadows. Whites: Increases the white contrast. Blacks: Increases the black contrast. Vibrance: Adjusts the vibrance of muted colors. Reset will return the settings to the default. Glow This filter adds a soft focus glow to the image. Preset Icons: Presets for quick adjustments. Preset: A drop-down menu with a list of glow presets. Amount: Controls the overall strength of the glow. Halo: Sets the fuzziness or radius of the glow. Style: A drop-down menu to set the style or blending. Warmth: Controls the temperature of the glow. Saturation: Adjusts the saturation of the image. Reset will return the settings to the default. Perfect Photo Suite 180 Perfect Effects Grunge This filter is used to add a dirty or grungy look to your image. Its great for urban exploration or even senior portraits. Preset Icons: Presets for quick adjustments. Preset: A drop-down menu with a list of grunge presets. Amount: Adjusts the overall strength of the grunge. Brightness: Adjusts the overall brightness of the image. Saturation: Adjusts the underlying saturation. Detail: Adjusts the amount of detail. Glow Amount: Adds a glow to the grunge. Glow Style: A drop-down of glow styles or blending. Film Grain Amount: Adds film grain to the image. Film Grain Size: Controls the grain size. Reset will return the settings to the default. HDR Look This filter recreates the HDR style of tone mapping. Preset Icons: Presets for a quick adjustment. Preset: A drop-down menu with a list of HDR presets. Compression: Compresses the tone to reveal highlight and shadow detail. Detail: Increases the local contrast. Clarity: Increases the global contrast. Highlights: Recovers detail in the highlights. Shadows: Recovers detail in the shadows. Vibrance: Adjusts the vibrance of muted colors. Glow: Adds a bright glow. Grunge: Adds a dark gritty look. Reset will return the settings to the default. Perfect Photo Suite Perfect Effects 181 Lens Blur This filter is the replacement for FocalPoint. It creates a blur, based on a camera lens such as a tilt-shift or a shallow depth of field look. Preset Icons: Presets for a quick adjustment. Amount: Adjusts the overall strength of the blur. Optic Quality: Controls the aperture shape in the inner and outer feather. Motion: Adds motion to the blur. Motion Type: A drop-down for selecting a motion type. Angle: Sets the direction of the motion blur. Sides: Sets the number of blades in the lens aperture changing the shape of the bokeh. Curvature: Sets the curvature of the aperture blades. Blooming: Adjusts the highlight bokeh. Brightness: Controls the overall brightness of the blur. Contrast: Controls the contrast of the blurred areas. Film Grain: Adds simulated film grain to the blurred areas. Reset will return the settings to the default. Lens Flare The Lens Flare filter is used to create or enhance images shot into the sun. It reduces contrast, shifts color and renders a realistic lens flare. Preset Icons: Presets for a quick adjustment. Style: Sets the style, either lens flare or sun spot. Amount: Adjusts the overall strength of the effect. Size: Controls the size of the effect. Light Source Tool: Click and drag with this tool to set the location of the light source. This can be off the image. Camera Position Tool: Click and drag with this tool to set the location of the camera. This changes the shape of the lens flare. This can be off the image. Show Rings: Shows or hides round aperture shaped artifacts in the lens flare. Color Style: Select a vintage color look. Amount: Control the amount of the vintage color look. Vibrance: Add vibrance to the underlying image. Shadow Fade: Decreases the shadow density by brightening the shadows. Adds a matte or faded look Blooming: Adjusts the highlight bokeh. Random will set all the properties randomly. Reset will return the settings to the default. Perfect Photo Suite 182 Perfect Effects Noise Reduction The noise reduction filter is used to reduce both luminance and color noise while maintaining image detail. Preset Icons: Presets for a quick adjustment. Luminance: Adjusts the overall strength of the noise reduction applied to the luminance or detail of the image. Hold down the alt key to see just the luminance while adjusting this slider. Color: Controls the amount of noise reduction applied just to the color or chroma of the image. Detail: Controls how much edge detail is protected. Hold down the alt key to see the edge mask while adjusting this slider. Automatically Zoom to 1:1: It is important that you view your image at 100% or 1:1 when adjusting noise reduction controls. This automatically zooms in for you. Apply to: Allows you to limit the noise reduction to just a portion of the image based on color or brightness. Dropper: Sets a custom color range to apply the noise reduction to. Range: Adjusts the range or fuzziness of the color range to apply the noise reduction to. Reset will return the settings to the default. Perfect Photo Suite Perfect Effects 183 Photo Filter This filter recreates solid color filters like warming and cooling. It also creates gradient filters like neutral density and bicolor filters. Bicolor filters are different colors on each side of a divide. Each filter offers different options. Below are examples of these types of filters. Graduated Here are the filter options: Filter: A drop-down menu with filter presets. Filter Icons: Sets the filter type; Solid, graduated, bi-color or center. Colors: Color wells for setting the filter color. Strength: Sets the strength or opacity of the filter. Saturation: Adjusts the saturation of the underlying image. Position: These are controls for adjusting the position, rotation and transition (hardness). Mode: Sets the blending mode. Graduated and Bi-Color Presets: Selects the filter position on the image. Distance: Adjusts the edge of the filter position. Rotation: Adjusts the filter rotation or angle. Transition: Adjusts the hardness of the feather. Center Transition: Adjusts the hardness of the feather. Size: Adjusts the size of the center spot. In/Out: Inverts the filter. Reset will return the settings to the default. Bi-Color Perfect Photo Suite 184 Perfect Effects Center Perfect Photo Suite Perfect Effects 185 Portrait Enhancer The Portrait Enhancer is used to reduce blemishes, smooth skin and reduce shine on skin. Preset: Presets for quick adjustments. Blemishes: Adjusts the strength of acne, pores and fine lines. Smoothing: Adjusts the strength of smoothing similar to makeup foundation. Shine: Adjusts the strength of the skin shine. Skin Color: Use the Color Dropper icon to select the skin color. Click the icon to activate it and single click again on the color of the skin in the image. Color Well: This will display the color you have chosen, if you click on the box it will bring up a color picker. Range: Adjusts the precision of the color selected. Reset will return the settings to the default. Perfect Photo Suite 186 Perfect Effects Sharpening The sharpening filter adds a touch of sharpness to compensate for a moving subject, out of focus camera or for an illustrative effect. Preset Icons: Presets for quick adjustments. Preset: A drop-down menu of Presets. Type: A drop-down menu of the sharpening types. High-Pass, Progressive and Unsharp Mask. Each sharpening method has its own set of sliders. Amount: Controls the overall strength of the sharpening. Radius: Sets the radius of the sharpening. Detail: Controls the small details. Protection: Protects tonal areas such as skies. High-Pass Reset will return the settings to the default. Progressive Unsharp Mask Perfect Photo Suite Perfect Effects 187 Split Tone This filter was formally known as Duotone. It is a gradient map that tints the dark and light portions of the image in different hues. This is used to age an image and give it an antique or vintage look. Preset Icons: Preset for quick adjustments. Preset: A drop-down menu of all Split Tone presets. Highlights Color: Use the Color Well icon to launch the color picker. Highlights Amount: Controls the strength of the color selected on the highlights. Shadows Color: Use the Color Well icon to launch the color picker. Shadows Amount: Controls the strength of the color selected on the shadows. Swap Colors: Swaps the Highlight and Shadow colors. Balance: Adjusts the balance between the shadow and highlight colors. Mode: Sets the blending mode for the split tone. Reset will return the settings to the default. Sunshine This Filter increases the appearance of sunshine. It makes a flat cloudy day more vivid. Preset Icons: Presets for quick adjustments. Preset: A drop-down menu of all the Sunshine presets. Amount: Controls the overall strength of the Sunshine. Warmth: Adjusts the temperature. Saturation: Adjusts the the vibrance or saturation. Glow: Adds a bright glow to the image. Reset will return all the settings to the default. Texturizer This filter places a texture over the image to add a stylized look. When loading a texture file, it will be rotated automatically to match the orientation of the destination image layer. The user can override the rotation with the rotate and flip tools. Preset: A drop-down menu of all the Texture presets. Category: Sets the category. Texture: Selects the specific texture type. Mode: Sets the blending mode for the texture. Opacity: Sets the strength or opacity. Hue: Adjusts the Hue of the texture. Saturation: Controls the saturation of the texture. Brightness: Adjusts the brightness of the texture. Scale: Changes the size of the texture. Rotate & Flip Icons: Rotates or flips the texture. Reset wil return all the setting to the default. Perfect Photo Suite 188 Perfect Effects Tone Enhancer The tone enhancer controls the brightness and contrast, or tone of the image. Preset: A drop-down menu of all the Tone Enhancer Presets. Brightness: Adjusts the global brightness. Contrast: Adjusts the global contrast. Shadows: Lightens the shadows to recover detail. Highlights: Darkens the highlights to recover overexposed areas. Compression: Compresses the tonal scale. Auto: When enabled, this sets the black and white clipping points automatically, improving the contrast range. Whites: Sets the white clipping amount. Blacks: Sets the black clipping amount. Detail: Increases the local contrast in the image. Clarity: Enhances large edges to add clarity. Curves: The curves dialog is a powerful, advanced tool for adjusting contrast and color. Reset will return all the settings to the default. Vignette The vignette control allows the user to darken or lighten the edges of the image. Preset Icons: Presets for quick adjustments. Presets: A drop-down menu of all the Vignette presets. Brightness: Controls how light or dark the vignette is. Size: Controls the size of the midpoint of the gradient. Feather: Controls the hardness of the edge of the vignette. Roundness: Controls the shape of the vignette square to round. Style: This drop down menu will allow you to select either a normal, subtle or soft vignette. Center Tool: This tool allows you to select the center point of the vignette. Click on the tool icon to activate and then click on the area in the image you wish to make the center. Reset will return all the setting to the default. Perfect Photo Suite Perfect Effects 189 Vintage The vintage filter is for adding an aged, vintage look reminiscent of films and papers for the late 20th Century. Preset Icons: Presets for quick adjustments. Preset: A drop-down menu of all the Vintage presets. Style: A drop-down menu of various color styles. Amount: Controls the overall strength. Saturation: Adjusts the saturation of the original image. Film Grain Amount: Adds film grain to the image. Film Grain Size: Controls the grain size. Reset will return all the settings to the default. Perfect Photo Suite 190 Perfect Effects Using the Masking Tools Masking is a technique or technology used to solve many problems. Rarely is creating a mask the end goal of masking. You use masking to combine images and exposures, swap heads, replace skies and add effects to portions of an image. Perfect Effects users can choose from a fleet of mask creation and refinement tools. This opens a whole new world of control and creative options. Using the masking tools is just like using a layer mask in Photoshop to hide or reveal a layer or filter in specific, user-defined areas of the image. The Masking tools even support pressure-sensitive Wacom tablets for the ultimate in control. You can think of masking as painting with black paint on white paper. A white mask reveals all the layer (or filter) that the mask is attached to. An all white mask is considered blank or empty and shows all the selected layer. As you use the masking tools, you are adding black paint (Paint-Out mode). Where you paint with black you are hiding the current layer, allowing the layers under it to show through. Think of it like cutting a hole in the mask. If you make a mistake, you can switch your paint color to white (Paint-In mode) and paint the layer back in like an eraser. When you paint you have more than just white or black, but any shade of gray in between depending on the opacity of the tool. Shades of gray partially hide the layer, blending the layers together. Each layer in Perfect Layers or filter layer in Perfect Effects has a mask automatically added to it. This allows you blend each layer differently. There are several global masking options that can be accessed from either the masking Tool Option Bar or the Masking Menu. They affect the entire mask on the selected filter layer. Reset Mask Reseting a mask returns it to all white. The entire layer is visible. Invert Mask Invert swaps the white for black and black for white. What was hidden is now revealed and vice-versa. Inverting a mask can be very useful. It allows you to paint a layer in, rather than out, which is handy if you only want to work with a small area. Copy and Paste Mask You to copy the mask from one layer to another. This is handy if you have painted a complex mask on one layer for an adjustment and you wish to use the same mask on another layer for a different adjustment. To copy or paste a mask, use the Copy Mask and Paste Mask commands from the Masking menu. You can even copy and paste masks between Perfect Layers and Perfect Effects. Paint-In Effects Some of the filters in Perfect Effects are designed to be painted-in. When you add them to your image, you will not see the image change, but the Masking Brush will be selected automatically. Simply paint where you would like the filter to be applied. You can identify Paint-In filters by the paint-brush icon in the upper left corner of the thumbnail. Most of the Paint-In filters are located in the Basic Brushes category. Perfect Photo Suite Perfect Effects 191 Mask Preview Modes Mask preview modes allow you to view your mask in several ways. The drop-down menu for Mask View Mode is located at the bottom of the Preview Window. A close-up of the Mask View Modes Before: Shows the original image with no effects applied. After: Shows the image with the current effect stack applied. Previous Effect: Shows the previous effect results so you can compare just your current effect. Mask-Red: Shows the mask of the current effect layer in a red overlay. Mask-White: Shows the mask of the current effect layer in white. Mask-Dark: Shows the mask of the current effect layer in as a dark overlay. Mask-Grayscale: Shows the mask of the current effect layer in black and white. Mask View allows you to view the mask for each effect layer that you have created with the Masking Brush and Masking Bug. You can view the mask in several modes, which are accessible from the Masking menu or from the Mask View drop-down in the bottom left of each preview pane. Below are examples of the different mask view modes. You can toggle the mask view on and off with the control (Mac OSX) or control (Windows) + M keyboard shortcut. Mask-Red The masked area appears as 50% red. This is similar to the Quick Mask view in Photoshop. Mask-Dark The masked area appears as 90% black. Mask-White The masked area appears as solid white. Mask-Grayscale The masked area appears as black. The unmasked areas appear as white. This is the same as viewing a layer mask in Photoshop. Perfect Photo Suite 192 Perfect Effects Using the Masking Brush The Masking Brush: The Masking Brush functions like a brush tool for masking layers. The Masking Brush is one of two tools in Perfect Effects for masking filters. When you select the Masking Brush, your tool icon changes to a circle that represents the size of the brush. It may also appear as two concentric circles (see below), indicating the inner hard edge and outer soft edge of the brush if the feather control is set above zero. There is also either a plus or minus in the center of the brush. Minus means the brush mode is set to paint-out, plus means it is set to paint-in. How to use the Masking Brush To use the Masking Brush, select it in the tool well. Make sure you are on the effect you wish to hide. Then check your brush mode and confirm it is set to Paint-Out. You are ready to mask now, simply paint on the image in the areas you wish to hide. As you brush, you will see the underlying effect(s) appear. If you make a mistake while brushing you have several options to correct them: First you can use the Undo command from the edit menu. This will undo the last brush stroke you created. You can toggle the paint mode to Paint-In and brush over your mistake. How to control the Masking Brush The Masking Brush Tool Options Bar Paint Mode The paint mode controls is you are Painting-Out (hiding the effect) or Painting-In (restoring the effect). You can tell your current mode by looking at the plus or minus icon in the center of the brush. If the icon is minus, you are painting out. If the icon is a plus, you are painting-in. You can change the mode in the Tool Options Bar, or by pressing the X key, or by holding down the option (alt) key temporarily. Invert Mask Invert swaps the hidden areas for the visible areas. What was hidden is no revealed and vice-versa. Inverting a mask can be very useful. It allows you to paint a layer in, rather than out, which is handy if you only want to work with a small area. You can invert the mask by pressing the Invert button in the Tool Options Bar. Reset Mask Reseting a mask reveals the entire layer it is associated with. You can reset the mask by pressing the Reset button in the Tool Options Bar. Erase Brush Strokes This is a special mode used when retouching the mask created by a Masking Bug. It allows you to erase your brush strokes made with the Masking Brush while maintaining the mask from the Masking Bug. Brush Size You can control the size of the brush using the Size pop-up in the Tool Options Bar. You use a small brush at high magnification for precise work, and a large brush at fit to screen for general work. To the right, you can see examples of brush strokes at varying sizes. You can control the size of the brush several ways: Use the Size pop-up in the Tool Options Bar. Use the left and right bracket keys ( [ ] ). Use the mouse scroll wheel (preferences must be set to this). Use your Wacom pressure sensitive tablet. Perfect Photo Suite Perfect Effects 193 Feather You control the amount of feathering or hardness of the brush by using the Feather pop-up in the Tool Options Bar. The feather has a range from 1 to 100 percent. You use a small feather at high magnification for precise, hard-edged work and a large, soft-edged brush at fit to screen for general work. You can visually see your feather by watching the outer concentric circle of the brush tool. To the right you can see examples of different feather options. You can control the size of the brush several ways: Use the Feather pop-up in the Tool Options Bar. Use the shift + left and right bracket keys ( [ ] ). Opacity You can control the opacity, or strength of the brush with the Opacity pop-up in the Tool Options Bar. Think of the opacity as the shade of gray you are painting with. The opacity has a range from 1 to 100 percent. You use a high opacity to paint quickly and hide large areas. You use a lower opacity for blending areas together or for subtle work. To the right you can see examples of different opacity options. You can control the size of the brush several ways: Use the Opacity pop-up in the Tool Options Bar. Use the option (Mac OSX) or alt (Windows) + 0-9 keys. Use your Wacom pressure sensitive tablet. Wacom® Controls Perfect Layers supports pressure sensitive Wacom tablets. When you use the Masking Brush you can enable pressure sensitive controls for the brush size, brush opacity, or both simultaneously. Click on the W button next to each control in the Tool Options Bar to activate the pressure sensitive controls. The harder you press; the greater the size or opacity will get. You can set the maximum value you want to use the Brush Size and Opacity sliders. To the right you can see examples of how pressure sensitivity can be used to control the Masking Brush. Perfect Photo Suite 194 Perfect Effects Perfect Brush The Perfect Brush option enables a unique, color-based, self masking technology. When enabled, as you paint with the Masking Brush it collects the colors under the center of the brush and only masks those colors. This protects the mask from being applied across edges. A great of example of using the Perfect Brush option would be to mask a sky along a horizon of mountains. Tip: You can turn the Perfect Brush on and off using the command or control -r keyboard shortcut. You can also temporarily lock the color to remove by holding down the control key(win) or the command key(mac). This is useful when brushing through areas with a lot of openings like tree branches. Perfect Photo Suite Perfect Effects 195 Quick Mask Tool Quick Mask Tool: Used to mask large similar areas quickly. The Quick Mask Tool is often the best place to start your masks. It automatically masks large similar areas without the need to brush over everything. You just need to brush loosely over what you want to mask to give it a hint. It then figures out the rest on its own. To use the Quick Mask Tool follow these steps: 1. Select the Quick Mask Tool from the Tool-well. 2. Make sure the tool mode is set to Paint Out. 3. Loosely brush over the area you want to mask. This could be a background you want to remove or a sky or an area you want to remove an effect from. When you release the mouse button the area is automatically expanded and masked. In simple cases your work may be done. 4. Continue to brush over the area you want to mask in areas that where not automatically removed. You can also try the Grow button. Stop brushing when you get to difficult areas like hair. 5. Use the Refine Brush over difficult areas like hair to refine your mask. Below are descriptions of the controls in the Quick Mask Tool Options Bar. Mode: Controls whether you want to paint out (mask) or paint in (restore). Generally you will use the paint out mode. Size: Sets the size of the tool. Wacom Toggle: If you have a Wacom pressure sensitive tablet you can control certain parameters with pressure. Controls with a W icon next to them support this when they are turned on. Box Tool: The box tool allows you to drag a box over your subject, then press return to remove anything outside the box. Grow: Intelligently expands the mask to include more similar regions. Invert: Inverts or flips the mask so that what was hidden is now revealed and vice versa. Reset: Resets the mask to all white. Box Mode Perfect Photo Suite 196 Perfect Effects The Quick Mask Tool is generally used as brush but it has a second option called Box Mode. Box mode is perfect for when your subject is isolated and not touching the edges of your image. To enable Box Mode, select the Box tool in the tool options bar. Then drag a box over your subject. You can adjust the size and position of the box using the corner handles. Then hit the return key to automatically remove anything outside of the box and anything similar from inside the box. Perfect Photo Suite Perfect Effects 197 Using the Masking Bug Masking Bug: This is used for blending layers by creating Radial, gradient, and reflected gradient mask shape quickly. The Masking Bug is perfect for tasks like darkening skies, creating vignettes and graduated filters. Learning to use the Masking Bug is fast and easy. All the adjustments made with the Masking Bug are live and readjustable until you press apply. Masking Bug Tool Options The Tool Options Bar for the Masking Bug includes the options shown above and detailed here: Preset: The preset pop-up includes several common ways to use the Masking Bug. These presets change the current Masking Bug to match the preset Shape: The shape pop-up controls the shape of the Masking Bug. The shapes are center, edges, gradient and reflected gradient. Opacity: Sets the maximum opacity or density of the mask. Add: Adds a new Masking Bug using the current settings. Delete: Deletes the current Masking Bug Reset: Resets the mask on the layer completely. This removes all Masking Bugs and clears and brushing that has been done. Adjusting the Masking Bug Start by adding a Masking Bug to a layer by clicking on it or pressing the Add button. Then set the Mask View mode to Mask - Grayscale. This will let you see the Masking Bug in simple black and white. Move: Click the large circle and drag. Size: Adjust the size of the masking bug by using the solid line Feather: Use the dashed line to adjust the feather or hardness of the mask. Rotate: The handle of the center circle will rotate the mask. Reflected Gradient Gradient Center Edges Perfect Photo Suite 198 Perfect Effects Working with Multiple Masking Bugs You can use up to six Masking Bugs per layer. Each Masking Bug is re-editable until you hit Apply and save your image. To add another Masking Bug, to create a complex mask shape, press the Add button or click outside of the current Masking Bug while the Masking Bug tool is selected. Only one Masking Bug may be adjusted at a time. This is the active Masking Bug. You will see the overlay controls for the active Masking Bug while your mouse is over the preview area. Inactive Masking Bugs are marked with a small circle. You can select an inactive Masking Bug by clicking on this small circle marker. Masking Bugs are subtractive. Each Masking Bug hides more and more of the current layer. When Masking Bugs overlay each other they may hide more of the layer too. You can always use the Masking Brush to over-ride and paint areas back in hidden by the Masking Bugs. Perfect Photo Suite Perfect Effects 199 Using the Line Mask Tool Line Mask Tool: This tool is used to mask strait lines. The line mask tool works great for creating linear masks that are strait sided and can include angles but not for curves. Using the Line Mask T Line Mask Tool Options Begin by selecting the too Mode: Add/Remove Feather: Adjusts the feather of mask i.e. the hardness of the line transition from black to white. Perfect Photo Suite 200 Perfect Effects Perfect Photo Suite Perfect Effects 201 Refining Masks There are several tools in Perfect Effects that may be used to refine or clean-up a mask. Refine Brush: This tool cleans up intricate areas and the borders between the Keep and Drop Brush. The Refine Brush is used to clean up the borders between the subject and background as well as intricate areas like hair, lace, mesh and tree branches. Once you have removed the majority of the background with the Quick Mask Tool or Perfect Brush, paint the intersection of the subject and background to refine the border. This will remove islands of background color and make the edge more defined. Refine Brush Tool Options Mode: Controls the refinement mode, either paint out, which always refines to remove, paint in, which always refines to restore or Auto which does both at the same time. Paint out is recommended in most cases. Size: This slider adjusts the size of the brush. Select a brush size that is just larger than the intersection of the subject and background. Avoid using oversized brushes it will take longer to process and may yield lower quality results. Wacom Toggle: If you have a Wacom pressure sensitive tablet you can control certain parameters with pressure. Controls with a W icon next to them support this when they are turned on. Color Decontamination: When enabled, colors from the drop regions are filtered out of the keep regions. This changes the colors of the pixels in the image. This is useful when the background you are trying to remove have a strong color such as green or blue screens. The Chisel Mask Tool:The Chisel tool is used for removing fringes or halos along hard edges. Perfect Photo Suite 202 Perfect Effects Fringes are common when the background to be removed is brighter than the foreground. The chisel works like a chisel or plane in a wood shop. It removes just a sliver along the edges. The chisel tool only works on the edges so you don't have to be careful with it. Chisel Mask Tool Options Mode: Select remove or restore. Size: Adjusts the size of the chisel tool. Feel free to use a large chisel to make brushing fast. The size of the chisel does not affect how much is chiseled off. Amount: Controls the amount, or depth of the chisel. Use the lowest amount needed to maintain as much detail as possible. The Blur Mask Tool:Softens edges where you paint. Softening the edges on blurred or semi-transparent subjects like hair can make them blend with a new background in a more realistic manner. The blur tool only works on the edges so you don't have to be careful with it Blur Mask Tool Options Size: Adjusts the size of the blur tool. Feel free to use a large size to make brushing fast. The size of the brush does not affect the blur amount. Amount: Controls the amount of blur. Use the lowest amount needed to maintain as much detail as possible. Perfect Photo Suite Perfect Effects 203 Mode: Select remove or restore. Size: Adjusts the size of the chisel tool. Feel free to use a large chisel to make brushing fast. The size of the chisel does not affect how much is chiseled off. Amount: Controls the amount, or depth of the chisel. Use the lowest amount needed to maintain as much detail as possible. Chisel Hardness: Adjusts how sharp the edge created by the chisel is. The higher the amount, the softer the edge. Perfect Photo Suite 204 Perfect Effects Presets Presets store all of the adjustments you make in Perfect Effects. Presets are a fast and easy way to get consistent results. You can save your own presets for batch processing or for simply reproducing your look when retouching. Presets do not store masks created by tools other than the Masking Bug. Using a Preset Using a preset is simple, just click on it in the Preset Browser. Saving a Preset Saving a preset is simple. Once you have your settings that you wish to save, go to the Preset menu and select Save Preset. The New Preset dialog will appear (shown to the right). There are several fields to complete including the preset name, the category, creator and description. In the category pull-down you can select which existing category the preset should saved into. You can also create a new category this way by selecting new category from the bottom of the list. You can edit a preset's name, creator or description by selecting it and then selecting Edit Preset Info from the Preset menu. If you want to edit the settings in a preset, load it into, make your adjustments and then re-save the preset with the same name and location. Deleting a Preset You can remove a preset if you no longer want to have access to it. To remove a preset, follow these steps: 1. Select the preset you wish to remove in the preset browser. 2. Select Delete Preset from the Preset menu. Importing & Sharing Presets You can import presets you have downloaded from the onOne website using these steps. 1. Download the preset pack from the onOne website. It should have a .ONPreset extension. 2. Double-click on the preset pack, it will install the presets into a category named the same as the preset pack. That's it, next time you use Perfect Effects the new presets will be located in the My Presets tab, in a category named after the preset pack. You can delete the files you downloaded, they have been copied into Perfect Effects. You can share presets like you would share any other file, such as email or posting them to a website. First you need to find the preset files. The easiest way it to open Perfect Effects then from the Preset menu select Show Presets Folder. A window will open and will display the presets folder. In the presets folder are sub-folders for your preset categories. Inside each sub-folder are the individual preset files. You can copy these presets to another computer, attach them to an email or post them on a website. Perfect Photo Suite Perfect Effects 205 Menus Perfect Effects About Perfect Effects: Opens the about box. This dialog contains your serial number, version number and information on contacting onOne Software for support. Preferences: Opens the preferences dialog. Quit: Quits the application. File Save & Close: Applies the current effect Stack and options to your image and returns to the host application. Cancel: Cancels Perfect Effects and returns back to the host application with no changes. Print: This will allow you to print your image. Edit Undo: Reverses the last user action. Redo: Reapplies the last user action if it has been undone. Cut: Cuts the current text into the clipboard. Copy: Copies the current text into the clipboard. Paste: Pastes the content of the clipboard. Reset All: Resets all the floating palette controls back to their default settings. Preferences (Windows Only): Opens the Perfect Effects preferences dialog. Mask Invert Mask: Inverts the mask, what was hidden is revealed and vice versa. Reset Mask: Resets the mask to plain white. Copy Mask: Copies the mask. Paste Mask: Pastes the mask. Masking Bug Tool Opacity: Sets the opacity of the Masking Bug tool overlay. This has no effect on the image, just how obvious the Masking Bug tool is on screen. Perfect Photo Suite 206 Perfect Effects Preset Save Preset: Saves the current Effect Stack as a new preset. Import Preset: Opens the import preset dialog to help you import presets you have downloaded. Show Presets Folder: Opens a Finder or Explorer window showing the presets folder. Delete Preset: Deletes the current preset. Edit Preset Info: Opens the preset dialog so you can edit the name, author or description information. Manage Extras: Opens the Extras Manager where you can import and manage extras like Borders, Backgrounds, Textures and Presets. View Zoom In: Zooms the preview window in one increment. This will make the preview image larger. Zoom Out: Zooms the preview window out one increment. This will make the preview image smaller. Fit to Screen: This sets the preview image so that the entire image is on screen at once. Think of this as an overview of the entire image. This is the setting you will use most of the time. Actual Pixels: This sets the preview image so that it zooms to actual pixels or 1:1 also called 100%. This setting allows you to see every pixel in the image. This is useful when making precision adjustments. Show Browser Pop-up: Enables the browser pop-up window. Select Filter Automatically: This will apply the first filter in each category automatically. Browser Mode: Allows the user to select how the Browser Library displays the categories. Show Clipping: Shows the clipping overlay view, which overrides the current mask view. Show Preview: Toggle to enable or disable the preview. Preview Mode: Allows the user to switch preview modes. Preview Background Color: Toggles the background color options. Show Mask: Allows the viewer to see the mask. Mask View Mode: Allows the user to select the various mask modes. Perfect Photo Suite Perfect Effects 207 Window Navigator/Loupe/Histogram: Hides or shows the Navigator, Loupe/ Histogram pane. Filter Stack: Hides or shows the Filters Stack pane. Filter Options: Hides or shows the Filter Options pane. Filter Options is only available in Advanced mode. Open Quick View Browser: This toggles open your quick view browser. Show Browser Panel: Hides or shows the Browser Panel. Show Control Panel: Hides or shows the Control Panel. Hide Panels: Hides or shows all Panels. Full Screen: Toggles to and from full screen mode. Document Name: Shows the name, zoom level and bit depth of the open image. Help Search: Mac OSX only. Searches the menus options. Perfect Effects Online Help: Opens this html Help in your default web browser. Video Tutorials: Opens the online Video Tutorial in your default web browser. Getting Started: Opens the getting started overlay. Show Keyboard Shortcuts: Opens the keyboard shortcut inspector. Perfect Inspiration: Takes you to the Perfect Inspiration web site. Check for Updates: Checks with the onOne update server to see if you are running the current version. If there is a newer version you will be notified and be walked through the update process. Deactivate: Opens the activation dialog. These are used to deactivate your software for moving it to another computer or for a return. Registration: Opens the default web browser and navigates to the registration page of the onOne website. Provide Feedback: Opens the default web browser and navigates to the feedback page of the onOne website. About Perfect Effects (Windows Only): Opens the about box with the version number and license code displayed. Help Improve onOne Products: Opens the Improve onOne Products dialog. Perfect Photo Suite 208 Perfect Effects Keyboard Shortcuts Perfect Effects has many keyboard short-cuts to make it faster to access common buttons and menu items. It also uses many of the keyboard shortcuts that Photoshop uses, making it intuitive to learn. Here is a list of the most commonly used keyboard shortcuts: Action Mac Win Print cmd p ctl p Undo cmd z ctl z Redo cmd shift z ctl shift z Cut cmd x ctl x ctl c Copy cmd c Paste cmd v ctl v Invert Mask cmd i ctl i Save Preset cmd shift s ctl shift s Next Browser View Mode cmd b ctl b Navigate Browser Selection Arrow Keys Arrow Keys Open Selected Category Right Arrow Right Arrow Close Selected Category Left Arrow Left Arrow Show Clipping opt j alt j Preview Modes - Single Image - Left/Right - Left/Right Split - Top/Bottom - Top/Bottom Split cmd Y cmd L cmd opt L cmd T cmd opt T ctl Y ctl L ctl opt L ctl T ctl opt T Show Mask o o Navigator/Loupe/Histogram cmd 1 ctl 1 Filter Stack cmd 2 ctl 2 Filter Options cmd 3 ctl 3 Show Browser Panel cmd left arrow ctl left arrow Show Control Panel cmd right arrow ctl right arrow Hide Panels tab tab Fullscreen Mode cmd ctl f F11 Keyboard Shortcuts cmd shift k ctl shift k Select Masking Brush b b Select Masking Bug m m Select Hand Tool h h Select Zoom Tool z z Zoom-In cmd + ctl + Zoom-Out cmd - ctl - Actual Pixels cmd opt 0 ctl alt 0 Fit to Screen cmd 0 ctl 0 Brush Size larger ] smaller [ larger ] smaller [ Brush Feather softer shift ] harder shift [ softer shift ] harder shift [ Brush Opacity opt 1 (10%) opt 2 (20%) opt 0 (100%) etc or opt ] opt [ opt 1 (10%) opt 2 (20%) opt 0 (100%) etc or alt ] alt [ ctl r Toggle Perfect Brush cmd r Toggle Tool Mode x x Temp Select Hand Tool Hold Space Hold Space Temp Toggle Tool Mode hold opt hold ctl Temp Toggle Clipping View j j Show Preview \ \ Perfect Photo Suite Perfect Effects 209 Show Quick View Browser cmd up arrow ctl up arrow Perfect Photo Suite 210 Perfect B&W Perfect B&W The easiest way to develop stunning black & white images The pinnacle for many photographers is the perfectly mastered black and white print. With Perfect B&W, you can easily develop your own stunning black and white images. Its powerful and intuitive tools give you instant results with complete creative control. Use Perfect B&W to add dramatic and elegant looks to your photos and create the many moods black and white photography can evoke—resulting in beautiful and provocative imagery. Some of the features: Reproduce vintage styles using film grain and darkroom techniques quickly with a library of well crafted presets. Save time and stay focused on your image editing when your library of favorite effects are always nearby. Precisely dodge and burn, add detail, and apply selective color with a set of powerful brushes designed for black & white processing. Paint inside the lines with precision using the new edge-detecting Perfect Brush. Use Blending Modes to blend your black & white image with your original to achieve a unique hand-painted or grungy effect. Imply mood and depth with striking detail using the Toner Presets in Perfect B&W. Use built-in color filter presets to enhance contrast in your image. Adjust the relative brightness of the details you care about, whether it's the sky, foliage, or people. Optimize the balance of tone and contrast in your image with the Tone Curve. Adjust shadows, mid-tones, and highlights to create the exact look you want. Accentuate your images with vignettes, authentic film & darkroom edge effects, and borders. What This Means For You Whether you are a hobbyist photographer or a working professional, you can achieve classic black and white looks instantly with a library of expertly crafted effects or customize your own unique look using powerful, darkroom-inspired controls that replicate time-honored processing techniques. Enhance tone and contrast by boosting shadow and highlight details or bring back a touch of selective color. Control the exact appearance of your image using a set of essential adjustment brushes and achieve precise edge detected masking with the all-new Perfect Brush. With Perfect B&W, you'll infuse the artistry of black and white photography and create your own masterpiece. Perfect Photo Suite Perfect B&W 211 Getting Started This getting started section will give you the basics of using Perfect B&W. If you have never used Perfect B&W before, this is a good place to start. You might also try watching the getting started video tutorial. For detailed information on steps and controls mentioned in the getting started section, see the "Using Perfect B&W" section instead. Perfect Photo Suite 212 Perfect B&W Perfect B&W Work Space The Perfect B&W Main Screen Overview Perfect B&W provides you with an easy-to-use work space for editing your photos. Below is an overview of the main sections. The main window sections of Perfect B&W: A. Browser Section: This is located on the left side of the window. It is where you browse different effects. B. Tool Well: This is where the tools are located. C. Preview Window: This is the main section where you preview and work on images. D. Tools Option Bar: This is where information and options about each tool is set. E. Module Selector: This is where you choose which software module to open. F. The Navigator, Loupe and Histogram Pane: This pane will access navigational, loupe and histogram features. G. The Control Panes: These are located on the right side. It's where you access the ten different control panes. H. The Cancel/Apply Buttons: This is where you cancel or apply an action. Perfect Photo Suite Perfect B&W 213 Perfect B&W Tool Well There are seven different tools in the Perfect B&W tool well. More details about each tool are covered in the following chapters. Brightness Brush This is used to locally lighten or darken areas of the image (burn or dodge). Contrast Brush This is used to locally increase or decrease the amount of contrast in the image. Detail Brush This is used to locally increase or decrease the amount of detail in the image. Targeted Brightness This varies the brightness of a color range by adjusting the Color Response panel settings. Selective Color Brush This is used to locally paint back the color from the original image. Hand Tool This tool drags your image within the preview window when it's larger than the viewable area. Zoom Tool This tool changes the magnification in the preview window. Perfect Photo Suite 214 Perfect B&W Navigating the Preview Perfect BW provides several ways to navigate and view your image in the Preview window. The Preview Window above is the main section where you preview and work on images. Hand Tool The Hand tool is used to position the image within the Preview window, whenever the preview zoom is larger than the viewable area. To pan (scroll) in the Preview window: Select the Hand Tool and drag the image until you locate the area you wish to view. With any other tool selected, hold down the spacebar while you drag the image in the window. Double-click the Hand tool in the Toolbar to set the image to a magnification that fits completely in the current window size. Zoom Tool The Zoom tool changes the magnification of the image in the Preview window. With the Zoom tool selected: Click in the Preview window to zoom in and center the image at the location clicked. Click and drag in the Preview window to draw a rectangular, the screen fills with the area within the rectangle when you release the mouse. Hold the Option key (Mac) or Alt key (Win) and click to zoom out. Double-click the Zoom tool in the Toolbar to set the image to 1:1 or 100% magnification, showing every pixel. This is best when examining small details. Perfect Photo Suite Perfect B&W 215 Navigator, Loupe, Histogram and Info At the top of the control panel on the right of the main window is the Navigator | Loupe | Histogram | Info panes. It contains four useful tools for inspecting and viewing details of your image. The Navigator Pane This gives you a birds-eye view of your image. The blue square region marks the image area that is visible in the preview pane. You can pan your image by clicking and dragging inside the blue region. At the bottom of the Navigator pane are several Zoom presets. Click on a Zoom preset to activate. FIT: Zooms to fit the current canvas size. This allows you to see your entire image. 100: Zooms to 100% or actual pixels. This is best for judging small details. 50: Zooms to 50% 25: Zooms to 25% The Loupe Pane This gives you a magnified view of the section of the preview under the cursor. This allows you to view the quality of your results while maintaining a complete view of your image. At the bottom of the Loupe Pane is a sliding for adjusting the zoom level. The Histogram Pane This gives you a color chart of the shadow, mid-tone and highlight areas based on the image RGB values. This is useful to show areas within the image that may be clipping. Clipping is when your image contains pure blacks or white and can signify loss of highlight or shadow detail. The left side of the histogram represents the shadows, while the right represents the highlights. At the top of each end is a triangle. If the triangle is lit, there is clipping on that side of the histogram. If you click on the arrows, you will activate the clipping overlay on your image. The areas of your image with a blue overlay are pure black, while the areas with the red overlay are pure white. You can turn the clipping view off again by clicking on one of the triangles. You can also temporarily enable clipping view by holding down the J key at any time. The clipping view is useful when you are making adjusts to the brightness and contrast of your image. The Histogram pane also displays the RGB values under the cursor at the bottom of the pane. Perfect Photo Suite 216 Perfect B&W The Info Pane The info pane will display important metadata about your file including: Camera type File type Focal length and lens information Date and time captured Exposure information ISO Shutter Speed Aperture Exposure Value Filename Color Space Dimensions File Size and Bit Depth If your camera allows for GPS the GPS button will be viewable and you can click on it to get the GPS cordinates for where the image was taken. This feature only works if you have GPS enabled on your camera or mobile device. Otherwise you will not see the GPS button. The Info panel is not visible when you access B&W Module as a Photoshop plug-in. Perfect Photo Suite Perfect B&W 217 Preview Window Modes The preview window has several modes including; single image, side-by-side (horizontal or vertical) and split-screen (horizontal or vertical) versions of an image. This allows you to compare layers side-by-side or to view a layer mask and the layer side-by-side. At the bottom left of the Preview Window is a button that toggles and shows the current Preview Mode. You can also change the mode from the View menu. Single Mode Screen. Left-Right Screen. Top-Bottom Screen. Top-Bottom Split Screen. Left-Right Split Screen. Tip: You can use the keyboard shortcuts below to quickly switch view modes. Items in parenthesis are for Windows. Command (Control) L: Command-Option (Control-Alt) L: Command (Control) T: Command-Option (Control-Alt) T: Command (Control) Y: Change the preview mode to Left/Right. Change the preview mode to Left/Right Split screen. Change the preview mode to Top/Bottom. Change the preview mode to Top/Bottom Split screen. Change the view mode to single image. Perfect Photo Suite 218 Perfect B&W Using Perfect B&W Pages in this Section Browsing Presets Control Panes Adjustment Brushes Targeted Brightness Tool Mask Preview Modes Zones View Presets Menus Keyboard Shortcuts Perfect Photo Suite Perfect B&W 219 Browsing Presets Built into Perfect BW is a browser, located in the left panel. You can use it to browse the factory supplied presets, presets you have created or downloaded from the onOne Marketplace or for marking and finding your favorites. Below is a description of the controls in the browser. A. Browser Tabs: This switches between the presets tab, Favorites tab and My Presets tab. B. Search Field: Use the search field to locate presets and presets. Simply start to type and your results will appear in a new sub-folder called search results while you type. C. Categories: Categories work just like folders. Select one to open it and view its contents D. preset: An preset is displayed as a thumbnail of the image with the preset applied and will have the preset name listed below it. E. Resize Handle: On the right edge is a resize handle that you can drag to change the size of the browser or close it. F. Favorite Flag: Click on the flag to mark an preset or preset as a favorite. It will appear in the Favorites tab automatically. G. Browser Modes: These icons control the browser mode. Either thumbnail columns or list view. H. Quick View Browser: Pressing this button opens the Quick View Browser where you can see larger versions of each preset. Browser Tabs The Browser is divided into three tabs; presets, Favorites and My Presets. Presets: The presets tab contains the factory presets provided by onOne Software. Favorites: When you click on the favorite flag on an preset or preset, in any tab, it is added to the Favorites tab automatically. This makes it fast to find the presets and presets you use most frequently. My Presets: When save your own presets, or install presets from the onOne Marketplace, they will be located here. Navigating the Browser To open a category, click on it. To close it, click on it again. Perfect Photo Suite 220 Perfect B&W Only one top-level folder can be open at a time. The selected item, either a category, preset or preset, will have a light silver box around it. You can use the up and down arrow keys to change your selection in the browser. You can open or close categories using the command (control on Windows) up and down arrows. You cannot move or delete presets from the browser. Selecting an preset or Preset to Use To activate an preset or preset on your image, simply click on it. Searching To search for presets or presets in the current browser tab, type in the name of the file in the search field. The search results appear in a new sub-folder called search results, which will be selected automatically. You can clear the search field by pressing the x at the right end of the search field. Browser Pop-Up To view a larger preview on an preset or preset, enable the Show Browser Pop-up in the View menu. When you mouse over a thumbnail, a larger preview will be displayed in a pop-up window. Resizing and Closing the Browser The browser can be resized by dragging the resize handle on the right margin of the browser. The browser can be closed or reopened by clicking on the resize handle or using the command (control on Windows) left and right arrow keys. Browser Modes The browser offers four viewing modes. Three that display thumbnails in columns and one list view. The browser modes are selected using the browser mode icons at the bottom of the browser. single column view Quick View Browser Perfect Photo Suite two column view list view Perfect B&W 221 The Quick View Browser adds an elegant full-screen view of your images, presets and presets. Whether you are looking for the right image or the right look, the Quick View Browser will make fast work of the problem. Just press the Quick View Browser button (or the option (alt) right arrow keyboard shortcut) and you will see the full array of options to choose from. You can visually navigate categories, then dive into them to find just the right look. Browse folders and images quickly to find the right one to work on. View all your preset or preset categories at one time, then dive into them to find the perfect look with an effortless, tablet feel. Variable thumbnail sizes gives you a few large previews or many small ones depending on your screen size and content. Back button and breadcrumbs make it easy to navigate a complex folder structure. Use your keyboard arrow keys to navigate. Press the return key to select an item or open a folder. Use the command or control left arrow to go up a folder level. Perfect Photo Suite 222 Perfect B&W Control Panes Perfect B&W has a series of ten control panes to convert and enhance your B&W images. The Control Panes are: Tone Color Response Tone Curve Glow Film Grain Toner Vignette Border Sharpening Blending Tone The Tone pane controls the global tonality, or brightness and contrast of the image. You can adjust each of the following: Brightness: Adjusting the slider to the right will lighten your image. Adjusting to the left will darken your image. Contrast: This will increase or decrease the contrast in your image. Blacks: This slider will clip the blacks adding more contrast to the blacks. Whites: This slider will clip the whites adding more contrast to the whites. Auto Levels: This will set the black and white points automatically. Shadows: This slider lightens the shadows, revealing details. Highlights: This slider darkens the highlights, recovering detail. Detail: Increases the detail or structure in your image. Color Response The Color Response pane controls the black and white conversion. Get the effect of photographic filters after the shot. Use built-in color filter presets to enhance contrast in your image and adjust the relative brightness of the details, whether it's the sky, foliage, or people. The top section contains presets based on different color filter options. These simulate using different colored filters over the lens when photographing with film. Color Sliders: The color sliders increase or decrease the brightness of each color range. Auto Mix: When enabled, the color sliders are set automatically. Perfect Photo Suite Perfect B&W 223 Tone Curve The Tone Curve pane controls the global tonality of the image. You can adjust your shadows, mid-tones and highlights to create the exact look you want. Glow The Glow pane controls diffusion over the camera or enlarging lens. Style: Sets the blending mode of the glow layer. Amount: Adjusts the blur strength or opacity. Halo: Adjust the halo, or blur radius. Film Grain The Film Grain pane loads an overlay of scanned film grain to add the appearance of film grain. Choose from a selection of carefully crafted film types that integrate realistic grain onto your images. Film Type: A drop-down list of Film Grains from popular black and white films. Amount: Adjusts the strength, or amount of film grain. Size: Adjusts the size of the grain, simulating different sizes of film. Toner The Toner pane simulates different chemical toners or paper types used in the darkroom. It is divided into two sections. One for toning the paper (the highlights) and one for toning the silver (the shadows). Select from a collection of toners such as copper, cyanotype, selenium, sepia or build your own. Preset: A drop-down menu with a selection of toner presets. Paper (Highlights): Sets the highlight color. Amount: Sets the strength, or opacity of the effect Silver (Shadows): Sets the shadow color. Balance Sets the transition between the highlight and shadow color. Perfect Photo Suite 224 Perfect B&W Vignette The Vignette pane creates flexible vignettes and authentic film & darkroom edge effects. Brightness: Adjusts the brightness of the vignette, either dark or light. Size: Adjusts the size of the vignette. Feather: Sets the feather or hardness. Roundness: Changes the shape from round to square. Style: Sets the blending mode. Border The Border pane creates flexible print edges. There are several categories and options to adjust your border. Category: Sets the category of border. Border: Select which border to add. Blending: Sets the blending mode for the border. Opacity: Sets the strength or opacity. Size: Changes the size of the border. Rotate & Flip: Rotates or flips the border. Sharpening The sharpening pane controls the overall sharpness of an image.There are three types of sharpening; Progressive, High Pass and Unsharp Mask. Each of the types have sliders to adjust the following: Type: Sets the type of sharpening; Progressive, High Pass or Unsharp Mask Halo: Sets the halo or radius. Amount: Sets the amount of sharpening. Protect: There are three sliders for adjusting the amount of protection for the Darks, Lights and Skin colors. Ethnicity: A drop-down menu to select the ethnicity of the skin to protect. Blending The Blending Pane allows you to blend the black and white version back to the original color image. With this you can create subtle antique, hand-colored or grunge looks. Blending: Sets the blending mode. Opacity: Sets the amount of the added effect to your image. Perfect Photo Suite Perfect B&W 225 Adjustment Brushes Perfect B&W features several adjustment brushes for local control. These brush tools (Brightness, Contrast, Detail and Selective Color) mimic many darkroom techniques like burning, dodging, bleaching, and reducing. There are also options that were almost impossible in the darkroom such as local contrast and sharpening. Brightness Brush The Brightness Brush is the most commonly used tool. It allows you to lighten or darken areas of the image where you paint. Think of this as burning or dodging in the darkroom. When you use the Brightness Brush with the Perfect Brush option enabled you have a smart, auto-masking burn and dodge tool that makes it fast and easy to adjust the brightness locally in a realistic way Contrast Brush The Contrast Brush works the same as the Brightness Brush but allows you to increase or decrease contrast locally. You can use this tool to enhance your center of interest or to reduce distractions. Detail Brush The Detail Brush gives you the power to control the detail or structure of the image locally. You can use it add crispy details to your center of interest or to reduce noise in the sky. Selective Color Brush The Selective Color Brush allows you to hand-paint color back into your image, just like painting with oils on a print. The best part is you don't have to pick the color to paint with. Reveal subtle bits of color or paint black and white just where you want it. Adjusting the Brushes When you select the adjustment brushes, your tool changes to a circle representing the size of the brush. It will appear as two concentric circles indicating the inner hard edge and outer soft edge of the brush if the feather control is set above zero. There is also either a plus or minus in the center of the brush. Minus means the brush mode is set to paint-out, plus means it is set to paint-in. To use the one of the adjustment brushes, select it in the tool well. Then check the brush mode and confirm it is set to the desired mode. Then adjust the size and feather. Next, brush over the image in the areas you wish to adjust. If you make a mistake it is easy to fix using one of these methods. First you can use the Undo command from the edit menu. This will undo the last brush stroke you created. You can toggle the paint mode to Paint-In and brush over your mistake. You can always reset all the brush strokes for the tool by pressing the Reset button in the Tool Options Bar. Brightness Brush Tool Options Bar The brush mode, size and feather and amount are controlled in the Tool Options Bar, which changes for each tool. Mode The mode toggles the control to Lighten or Darken an image when you brush over the image. You can tell your current mode by looking at the plus or minus icon in the center of the brush. If the icon is minus, you are painting out. If the icon is a plus, you are painting-in. You can change the mode in the Tool Options Bar, or by pressing the X key, or by holding down the option (alt) key temporarily. Perfect Photo Suite 226 Perfect B&W Size You can control the size of the brush using the Brush Size Slider. The brush has a range from 1 to 500 pixels. You use a small brush at high magnification for precise work, and a large brush at "fit to screen" for general work. To the right, you can see examples of brush strokes at varying sizes. You can control the size of the brush several ways: Use the Brush Size Slider. Use the left and right bracket keys ( [ ] ). Use the mouse scroll wheel (preferences must be set to this). Use your Wacom pressure sensitive tablet. Feather You control the amount of feathering or hardness of the brush by using the Feather Slider. The feather has a range from 1 to 100 percent. You use a small feather at high magnification for precise, hard-edged work and a large, soft-edged brush at "fit to screen" for general work. You can visually see your feather by watching the outer concentric circle of the brush tool. To the right you can see examples of different feather options. You can control the size of the brush several ways: Use the Feather Slider. Use the shift + left and right bracket keys ( [ ] ). Amount You can control the opacity, or strength of the brush with the Amount Slider. Think of the amount as the shade of gray you are painting with. The opacity has a range from 1 to 100 percent. You use a high opacity to paint quickly and hide large areas. You use a lower opacity for blending areas together or for subtle work. To the right you can see examples of different opacity options. You can control the size of the brush several ways: Use the Opacity Slider. Use the option (Mac OSX) or alt (Windows) + 0-9 keys. Use your Wacom pressure sensitive tablet. Perfect Photo Suite Perfect B&W 227 Wacom® Controls Perfect Layers supports pressure sensitive Wacom tablets. When you use the Masking Brush you, can enable special pressure sensitive controls for the brush size, brush opacity, or both simultaneously. Click on the "W" to activate the pressure sensitive controls. The harder you press; the greater the size or opacity will get. You can set the maximum value you want to use the Brush Size and Opacity sliders. To the right you can see examples of how pressure sensitivity can be used to control the Masking Brush. Perfect Brush The Perfect Brush option enables a unique, color-based, self masking technology. When enabled, as you paint with the Masking Brush it collects the colors under the center of the brush and only masks those colors. This protects the mask from being applied across edges. A great of example of using the Perfect Brush option would be to mask a sky along a horizon of mountains. Tip: You can turn the Perfect Brush on and off using the command or control -r keyboard shortcut. You can also temporarily lock the color to remove by holding down the control key(win) or command key(mac). This is useful when brushing through areas with lots of openings like tree branches. Perfect Photo Suite 228 Perfect B&W Targeted Brightness Tool Targeted Brightness Tool The Targeted Brightness tool allows you to quickly control the brightness of local areas in the image based on their color. An example of this tool in use would be to darken the sky. By clicking on the sky, the blue or aqua color range would be selected. Then you can decrease the brightness to darken the sky. Using the Targeted Brightness Tool is simply, follow these steps: 1. Select the Targeted Brightness Tool from the tool-well. 2. Click and hold on the area you would like to make lighter or darker. 3. Drag your mouse to the left to make the area darker, or to the right to make it lighter. Keep in mind the Targeted Brightness Tool works by adjusting the brightness of an entire color range in the Color Response pane. Darkening the sky will also darken anything else in the scene that is a similar color such as water. Perfect Photo Suite Perfect B&W 229 Mask Preview Modes Mask preview modes allow you to view your image mask in several ways. The drop-down menu for Mask View Mode is located at the bottom of the Preview Window. A close-up of the Mask View Modes Before: Shows the original image with no effects applied. After: Shows the image with the current effect stack applied. Previous Effect: Shows the previous effect results so you can compare just your current effect. Mask-Red: Shows the mask of the current effect layer in a red overlay. Mask-White: Shows the mask of the current effect layer in white. Mask-Dark: Shows the mask of the current effect layer in as a dark overlay. Mask-Grayscale: Shows the mask of the current effect layer in black and white. Mask View allows you to view the mask for each effect layer that you have created with the Masking Brush and Masking Bug. You can view the mask in several modes, which are accessible from the Masking menu or from the Mask View drop-down in the bottom left of each preview pane. Below are examples of the different mask view modes. You can toggle the mask view on and off with the control (Mac OSX) or control (Windows) + M keyboard shortcut. Mask-Red The masked area appears as 50% red. This is similar to the Quick Mask view in Photoshop. Mask-Dark The masked area appears as 90% black. Mask-White The masked area appears as solid white. Mask-Grayscale The masked area appears as black. The unmasked areas appear as white. This is the same as viewing a layer mask in Photoshop. Perfect Photo Suite 230 Perfect B&W Zones View This view simulates the 11 zones of the Zone System. It updates in realtime as the user makes changes. The Zones view is accessed from the the Mask View mode drop-down menu. A close-up of the Mask View Mode drop-down menu and options. After: this shows the image results for the current layer (default option). Before: this shows the image in its original state. Zones: this shows the image broken down into a simulated zone system. Perfect Photo Suite Perfect B&W 231 Presets Presets store all of the settings you can adjust in the the control panels on the right. Presets are a fast and easy way to get consistent results. You can save your own presets for batch processing or for simply reproducing your look when retouching. Using a Preset Using a preset is simple, just click on it in the Preset Browser. Saving a Preset Saving a preset is simple. Once you have your settings that you wish to save, go to the Preset menu and select Save Preset. The New Preset dialog will appear (shown to the right). There are several fields to complete including the preset name, the category, creator and description. In the category pull-down you can select which existing category the preset should saved into. You can also create a new category this way by selecting new category from the bottom of the list. You can edit a preset's name, creator or description by selecting it and then selecting Edit Preset Info from the Preset menu. If you want to edit the settings in a preset, load it into, make your adjustments and then re-save the preset with the same name and location. Deleting a Preset You can remove a preset from Perfect B&W if you no longer want to have access to it. To remove a preset, follow these steps: 1. Open Perfect B&W 2. Select the preset you wish to remove in the preset browser. 3. Select Delete Preset from the Preset menu. Importing & Sharing Presets You can import presets you have downloaded from the onOne website using these steps. 1. Download the preset pack from the onOne website. It should have a .ONPreset extension. 2. Double-click on the preset pack, it will install the presets into a category named the same as the preset pack. That's it, next time you use Perfect B&W the new presets will be located in the My Presets tab, in a category named after the preset pack. You can delete the files you downloaded as they have been copied into Perfect B&W. You can share presets like you would share any other file, such as email or posting them to a website. First you need to find the preset files. The easiest way it to open Perfect B&W, then from the Preset menu select Show Presets Folder. A Finder (Mac) or Explorer (Win) window will open and will display the presets folder. In the presets folder are sub-folders for your preset categories. Inside each sub-folder are the individual preset files, with a .ONB&W extension. You can copy these presets to another computer, attach them to an email or post them on a website. Perfect Photo Suite 232 Perfect B&W Menus Perfect BW About: Opens the about box. This dialog contains your serial number, version number and information on contacting onOne Software for support. Preferences: Opens the preferences dialog. Quit: Quits the application. File Apply: Applies the current settings to your image and returns to the host application. Cancel: Cancels Perfect B&W and returns back to the host application with no changes. Edit Undo: Reverses the last user action. Redo: Reapplies the last user action if it has been undone. Undo Stroke: If you have segmented undo enabled, if the last action was a brush stroke this reverses the entire brush stroke. Redo Stroke: If you have segmented undo enabled, if your last action was an undo of a Brush Stroke this reapplies the entire stroke. Cut: Unused. Copy: Unused. Paste: Unused. Reset All: Resets all controls back to their default settings. Preferences (Windows Only): Opens the Perfect B&W preferences dialog. Preset Save Preset: Saves the current settings as a new preset. Import Preset: Opens the import preset dialog to help you import presets you have downloaded. Show Presets Folder: Opens a Finder or Explorer window showing the presets folder. Delete Preset: Deletes the current preset. Edit Preset Info: Opens the preset dialog so you can edit the name, author or description information. Manage Extras: Opens the Extras Manager where you can import and manage extras like Borders, Backgrounds, Textures and Presets. Perfect Photo Suite Perfect B&W 233 View Zoom In: Zooms the preview window in one increment. This will make the preview image larger. Zoom Out: Zooms the preview window out one increment. This will make the preview images smaller. Fit to Screen: This sets the preview image so that the entire image is on screen at once. Think of this as an overview of the entire image. This is the setting you will use most of the time. Fill: If the target layer is smaller than the canvas size, it sets the zoom to fill the preview with the target layer. Actual Pixels: This sets the preview image so that it zooms to actual pixels or 1:1 also called 100%. This setting allows you to see every pixel in the image. This is useful when making precision adjustments. Show Browser Pop-up: Enables the browser pop-up window. Browser Mode: Allows the user to select how the Browser Library displays the categories. Show Clipping: Shows the clipping overlay view, which over-rides the current mask view. Show Preview: Toggle to enable or disable the preview. Preview Mode: Allows the user to switch preview modes. Preview Background Color: Toggles the background color options. Show Mask: Allows the viewer to see the mask. Mask View Mode: Allows the user to select the various mask modes. Window Navigator/Loupe/Histogram: Hides or shows the Navigator, Loupe/ Histogram pane. Tone: Hides or shows the Tone pane. Color Response: Hides or shows the Color Response pane. Tone Curve: Hides or shows the Tone Curve pane. Glow: Hides or shows the Glow pane. Grain: Hides or shows the Grain pane. Toner: Hides or shows the Toner pane. Vignette: Hides or shows the Vignette pane. Border: Hides or shows the Border pane. Sharpening: Hides or shows the Sharpening pane. Blending: Hides or shows the Blending pane. Solo Mode: Enables solo mode. When Solo Mode is enabled, only one control pane may be open at a time. Show Browser Panel: Hides or shows the Browser Panel. Show Control Panel: Hides or shows the Control Panel. Hide Panels: Hides or shows all Panels. Full Screen: Toggles to and from full screen mode. Document Name: Shows the name, zoom level and bit depth of the open image. Perfect Photo Suite 234 Perfect B&W Help Search: Searches the menu options (Mac OSX only). Perfect B&W Online Help: Opens this html Help in your default web browser. Video Tutorials: Opens the online Video Tutorial in your default web browser. Getting Started: Opens the online Getting Started overlay. Show Keyboard Shortcuts: Opens the keyboard shortcut inspector. Perfect Inspiration: Takes you to the Perfect Inspiration web site. Check for Updates: Checks with the onOne update server to see if you are running the current version. If there is a newer version you will be notified and be walked through the update process. Deactivate: Opens the activation dialog. These are used to deactivate your software for moving to another computer or for a return. Registration: Opens the default web browser and navigates to the registration page of the onOne website. Provide Feedback: Opens the default web browser and navigates to the feedback page of the onOne website. About Perfect B&W (Windows Only): Opens the about box with the version number and license code displayed. Help Improve onOne Products: Opens the Improve onOne Products dialog. Perfect Photo Suite Perfect B&W 235 Keyboard Shortcuts Action Mac Win Print cmd p ctl p Undo cmd z ctl z Redo cmd shift z ctl shift z Cut cmd x ctl x ctl c Copy cmd c Paste cmd v ctl v Save Preset cmd shift s ctl shift s Zoom In cmd + ctl + Zoom Out cmd - ctl - Fit to Screen cmd 0 ctl 0 Actual Pixels cmd opt 0 ctl alt 0 Next Browser View Mode cmd b ctl b Navigate Browser Selection Arrow Keys Arrow Keys Open Selected Category Right Arrow Right Arrow Close Selected Category Left Arrow Left Arrow Show Clipping opt j alt j Show Preview \ \ Preview Modes Toggle Perfect Brush cmd r ctl r Show Mask o o Navigator/Loupe/Histogram cmd 1 ctl 1 Tone Pane cmd 2 ctl 2 Color Response Pane cmd 3 ctl 3 Tone Curve Pane cmd 4 ctl 4 Glow Pane cmd 5 ctl 5 Grain Pane cmd 6 ctl 6 Toner Pane cmd 7 ctl 7 Vignette Pane cmd 8 ctl 8 Border Pane cmd 9 ctl 9 Open Quick View Browser cmd up arrow ctl up arrow Show Browser Panel cmd left arrow ctl left arrow Show Control Panel cmd right arrow ctl right arrow Hide Panels tab Full Screen Mode cmd ctl f tab f11 Keyboard Shortcuts cmd skift k ctl shift k Brightness Tool o o Contrast Tool t t Detail Tool d d Targeted Brightness Tool i i Select Masking Brush m m h Select Hand Tool h Select Zoom Tool z z Brush Size larger ] smaller [ larger ] smaller [ Brush Feather softer shift ] harder shift [ softer shift ] harder shift [ Brush Opacity opt 1 (10%) opt 2 (20%) opt 0 (100%) etc opt 1 (10%) opt 2 (20%) opt 0 (100%) etc Toggle Tool Mode x x Temporarily Select Hand Tool hold space hold space Perfect Photo Suite 236 Perfect B&W Temporarily toggle tool mode Perfect Photo Suite hold opt hold alt Perfect Resize 237 Perfect Resize Welcome to onOne Software™ Perfect Resize Perfect Resize, the next generation of Genuine Fractals, is the industry standard for image resizing. It is renowned across the photographic and printing industries for its ability to increase image size over 1000% without the loss of sharpness or detail that you would normally expect. Its patented, fractal based interpolation algorithms work like nothing else and the results speak for themselves. Perfect Resize 8 allows you to crop and resize your image in a single step with no guess work. Its new Tiling and Gallery Wrap features make it easy to get your enlargements printed just the way you want. Fire up the batch processing engine to resize an entire folder of images quickly. You can even access the power of Perfect Resize inside of Adobe Photoshop, Lightroom or Apple Aperture. Perfect Photo Suite 238 Perfect Resize Getting Started This getting started section will give you the basics of using Perfect Resize 8. If you have never used Perfect Resize 8 before, this is a good place to start. You might also try watching the getting started video tutorial. For detailed information on steps and controls mentioned in the getting started section, see the "Using Perfect Resize" section instead. Perfect Photo Suite Perfect Resize 239 How Big Can You Print People often ask how large a print can be made with Perfect Resize. If your original image is sharp, has good details and little noise, you could go as large as 1000% of the original size. 1000% is ten times the size of the original file. For example, an original file that is 8"x10" could be resized to 80"x100". Viewing distance plays a big part of this. Standard viewing distances are two-times the diagonal of a print. For example, for an 8"x10" it would be about two feet away. An 80"x100" would be about 21 feet. That seems like a lot but that image is almost 7'x9'. Keep in mind that many photographers scrutinize their images closer than standard viewing distances. Images are perceived in color, tonality and sharpness. Other interpolation techniques maintain color and tonality but sacrifice sharpness by "inflating" the image uniformly. The image still looks familiar but will not be crisp. Depending on the amount of interpolation, this can be severe and noticeable even at standard viewing distances. Perfect Resize maintains the color, tonality, and sharpness of an image at all sizes. It will always look the same when viewed at the proper distances. It is unrealistic to assume that the fidelity when viewed at 100% will be the same for an 8x10 and an 80x100 created by Perfect Resize. Perfect Resize will maintain the edges which perceptually make the image sharp, but it cannot create detail where there was none in the past. When the shutter is pressed, a finite amount of detail is captured. A good way to think about this is to look at an insect on a leaf. If you look at it with a magnifying glass, you will see more detail than you did than when looking at it with the naked eye. Now if you take a digital photograph of that same insect and look at it in the computer and zoom in past 100% you do not see any more detail. The information you see is limited by what the camera captured. Perfect Resize works the same way, it can not create new detail but instead takes the finite amount of detail available and increase it in size. Perfect Resize isn't magic. We have all watched CSI where they take a security photo and enlarge the reflection in the victim’s eye to see the killer, with results that look amazing. This is pure science fiction. You cannot create detail where there was none before. But if your original file has good detail and little noise, you will be able to make very good looking enlargements from your files. This is what Perfect Resize does better than any other software. Perfect Photo Suite 240 Perfect Resize Understanding Resolution How Much Resolution Do I Need? To answer this, you need to know two things: The size of the print you need to make. The resolution that your printer needs for best results. The size of the print is as large you would like. This may be limited by the size of your printer. Resolution is the density of the pixels for a given distance, usually measured in pixels or dots per inch. Most modern inkjet printers print anywhere from 1200 to 4800 dots per inch (what the printer manufacturers really mean is 1200-4800 droplets of ink per inch). Inkjet printers use many tiny round droplets of 4-12 ink colors to reproduce one square pixel in your image that could be one of any millions of colors. A common mistake is to set the resolution of the file to the resolution of the printer. In all but a few special printers this will lead to huge files that will not print well, if at all. The secret is that the human eye cannot see more than 250-300 pixels per inch. So the ideal resolution for your files should be close to this. Once you know the print size and resolution, it is easy to use Perfect Resize 7.5 to resize your file to the desired output. Simply input the resolution and then either the print width or height. You'll see that the corresponding dimension is automatically filled in by Perfect Resize 7.5 based on the proportions of your image. Keep the proportions in mind because the proportions of film, digital camera sensors and paper can all be different. For example, most digital camera sensors are proportioned so that the height is two-thirds the width or 1:1.5; While the most common paper size, in the US, is the letter which is 8.5x11 inches or about 1:1.25. These kind of proportion mis-matches are common and require that the original image be cropped to fit the proportions of the paper size. If your image cannot be cropped without ruining the composition then you will need to adjust your print size to a longer dimension. Resizing an image larger than the original size requires new pixels to be created. This process is called interpolation or resampling. There are many mathematical ways, called algorithms, to do this. The most common method used by many pixel editing applications is called bicubic interpolation. Bicubic along with its newer variants bicubic smoother and bicubic sharper work by averaging a small group of neighboring pixels to determine the color value of the new pixels to be added. While this technique is fast, it does not distinguish edges so there is a uniform loss of sharpness and detail across the image. Perfect Resize patented scaling algorithm is fundamentally different from bicubic or other interpolation methods. While other methods sample nearby pixels and decide new pixel values one by one, Perfect Resize uses a sampling technique called Fractal Scaling. Fractal Scaling samples nearby "blocks," square groups of pixels, and varying sizes, compares them to smaller versions of the original image and mosaics these patches together to create a larger version of the original. By doing this repeatedly, often the characteristics of the image like edges, smooth areas, and textures are reinforced for each larger version. Noise is de-emphasized and sharp details are maintained. All this number crunching may take a bit longer than the single pass interpolation methods like bicubic, but good things come to those who wait and the reward is far superior results. Perfect Photo Suite Perfect Resize 241 When Should I Use Perfect Resize Perfect Resize should be used as one of the last steps in your workflow before printing. The power of Perfect Resize is in the concept of resolution on demand. You can work with a modest size file, which makes your editing faster and takes less hard drive space and memory. Then when you are ready to output your file, you resize it with Perfect Resize to the desired size and sharpen it for output. This means you don’t have to keep multiple versions of a file at different print sizes; you just create what you need on-the-fly. Perfect Resize also supports layered Photoshop files so you can maintain all your layers in the entire process. Perfect Photo Suite 242 Perfect Resize Supported Color Modes When used as a standalone application or through Lightroom and Aperture, Perfect Resize supports 8 or 16-bit RGB images. These are the most common among Photographers. If you use Perfect Resize through Photoshop, you have access to a larger range of color modes, depending on the version of Perfect Resize you have. Consult the chart below for details. Perfect Resize Basic Edition Perfect Resize Premium Edition Perfect Resize Premium Edition via Standalone via Photoshop Perfect Resize Premium via Lightroom or Aperture RGB 8-bit RGB 16-bit Grayscale 8-bit Grayscale 16-bit Lab 8-bit Lab 16-bit CMYK 8-bit CMYK 16-bit Photoshop Layers Layer Masks Text Layers Adjustment Layers Alpha Channels Paths Smart Objects Perfect Photo Suite Yes Yes No No No No No No Yes Yes No No No No No Yes Yes Yes Yes Yes Yes Yes Yes Yes Yes Yes Yes Yes Yes No Perfect Resize 243 User Interface The Perfect Resize Main Window Perfect Resize provides you with an easy-to-use work area for editing your photos. Below is an overview of the main sections. The main sections of Perfect Resize: A. Preset Browser: This panel is located on the left side of the window and is where you view a Library of presets. B. Tool Well: This is where the tools are located. C. Tool Options Bar: This strip above the preview window contains the options for the selected tool. D. Preview Window: This is the main section where you preview and work on images. E. Module Selector: This is where you select other modules to work in. F. Control Panel: This is where you access the Control Panes. The Perfect Resize Tool Well There are three different tools in the Perfect Resize tool well. More details about each tool will be covered in the next chapters. Crop Tool This tool lets you crop the image. Hand Tool This tool drags your image within the preview window when it's larger than the viewable area. Zoom Tool This tool changes the magnification in the preview window. Perfect Photo Suite 244 Perfect Resize Navigating the Preview Perfect Resize provides several ways to navigate and view your image in the Preview window. The Preview Window above is the main section where you preview and work on images. Hand Tool The Hand tool is used to position the image within the Preview window, whenever the preview zoom is larger than the viewable area. To pan (scroll) in the Preview window: Select the Hand Tool and drag the image until you locate the area you wish to view. With any other tool selected, hold down the spacebar while you drag the image in the window. Double-click the Hand tool in the Toolbar to set the image to a magnification that fits completely in the current window size. Zoom Tool The Zoom tool changes the magnification of the image in the Preview window. With the Zoom tool selected: Click in the Preview window to zoom in and center the image at the location clicked. Click and drag in the Preview window to draw a rectangular, the screen fills with the area within the rectangle when you release the mouse. Hold the Option key (Mac) or Alt key (Win) and click to zoom out. Double-click the Zoom tool in the Toolbar to set the image to 1:1 or 100% magnification, showing every pixel. This is best when examining small details. Perfect Photo Suite Perfect Resize 245 Navigator, Loupe, Histogram and Info At the top of the control panel on the right of the main window is the Navigator | Loupe | Histogram | Info panes. It contains four useful tools for inspecting and viewing details of your image. The Navigator Pane This gives you a birds-eye view of your image. The blue square region marks the image area that is visible in the preview pane. You can pan your image by clicking and dragging inside the blue region. At the bottom of the Navigator pane are several Zoom presets. Click on a Zoom preset to activate. FIT: Zooms to fit the current canvas size. This allows you to see your entire image. 100: Zooms to 100% or actual pixels. This is best for judging small details. 50: Zooms to 50% 25: Zooms to 25% The Loupe Pane This gives you a magnified view of the section of the preview under the cursor. This allows you to view the quality of your results while maintaining a complete view of your image. At the bottom of the Loupe Pane is a sliding for adjusting the zoom level. The Histogram Pane This gives you a color chart of the shadow, mid-tone and highlight areas based on the image RGB values. This is useful to show areas within the image that may be clipping. Clipping is when your image contains pure blacks or white and can signify loss of highlight or shadow detail. The left side of the histogram represents the shadows, while the right represents the highlights. At the top of each end is a triangle. If the triangle is lit, there is clipping on that side of the histogram. If you click on the arrows, you will activate the clipping overlay on your image. The areas of your image with a blue overlay are pure black, while the areas with the red overlay are pure white. You can turn the clipping view off again by clicking on one of the triangles. You can also temporarily enable clipping view by holding down the J key at any time. The clipping view is useful when you are making adjusts to the brightness and contrast of your image. The Histogram pane also displays the RGB values under the cursor at the bottom of the pane. Perfect Photo Suite 246 Perfect Resize The Info Pane The info pane will display important metadata about your file including: Camera type File type Focal length and lens information Date and time captured Exposure information ISO Shutter Speed Aperture Exposure Value Filename Color Space Dimensions File Size and Bit Depth If your camera allows for GPS the GPS button will be viewable and you can click on it to get the GPS cordinates for where the image was taken. This feature only works if you have GPS enabled on your camera or mobile device. Otherwise you will not see the GPS button. The Info panel is not visible when you access B&W Module as a Photoshop plug-in. Perfect Photo Suite Perfect Resize 247 Browsing Presets Built into Perfect Resize is a preset browser, located in the left panel. You can use it to browse the factory supplied presets, presets you have created or downloaded from the onOne website or for marking and finding your favorites. Below is a description of the controls in the file browser. A. Browser Tabs: This switches between the Library tab, Favorites tab and My Presets tab. B. Search Field: Use the search field to locate presets in the current tab. Simply start to type and your results will appear in a new sub-category called search results while you type. C. Closed Category: A closed category has a dark gray tab and the arrow faces to the right. D. Open Category: An open category has a light gray tab and the arrow faces down. E. Preset: A preset is displayed by its name. F. Favorite Flag: Click on the this flag to mark a preset as a favorite. It will appear in the Favorites tab automatically. G. Resize Handle: On the right edge is a resize handle that you can drag to change the size of the browser or close it. Browser Tabs The Browser is divided into three tabs; Library, Favorites and My Presets. Library: The Library tab contains the factory presets provided by onOne Software. They are a good place to start. Favorites: When you click on the favorite flag on a preset, in any tab, it is added to the Favorites tab automatically. This makes it fast to find the presets you use most frequently. My Presets: When save your own presets, or install presets from the onOne website, they will be located here. Navigating the Browser To open a category, click on it. To close it, click on it again. Only one top-level folder can be open at a time. The selected item, either a category or preset, will have a light silver box around it. You can use the up and down arrow keys to change your selection in the browser. You can open or close categories using the command (control on Windows) up and down arrows. Perfect Photo Suite 248 Perfect Resize Selecting a Preset to Use To activate a preset on your image, simply click on the preset. Searching for Presets To search for presets in the current browser tab, type in the name of the file in the search field. The search results appear in a new sub-folder called search results, which will be selected automatically. You can clear the search field by pressing the x at the right end of the search field. Browser Pop-Up To view a larger preview on a preset, enable the Show Browser Pop-up in the View menu. When you mouse over a thumbnail, a larger preview will be displayed in a pop-up window. Resizing and Closing the Browser The browser can be resized by dragging the resize handle on the right margin of the browser. The browser can be closed or reopened by clicking on the resize handle or using the cmd (control on Windows) left and right arrow keys. Perfect Photo Suite Perfect Resize 249 Using Perfect Resize Pages in this Section Crop Tool Adjusting the Image Size Using Document Size Presets Settings Sharpening Film Grain Tiling Gallery Wrap Presets Menus Keyboard Shortcuts Perfect Photo Suite 250 Perfect Resize Crop Tool Crop Tool: This is used to crop and resize the entire image. The crop tool removes any pixels outside a crop box and changes the canvas size at the same time. To crop the image, select the Crop Tool from the tool well. Then adjust the corner handles of the crop tool overlay. The area outside the crop box appears darkened for guidance. You can resize and move the image inside the crop box. When you are satisfied with your settings, press the Apply button in the Tool Options Bar or press enter. Moving the Image: To move the image inside the crop box, simply click and drag inside the box. You can also nudge the image using the arrow keys on your keyboard. Resizing a Crop Box: To resize the Crop Box, click and drag on any of the resize handles. Clicking on a corner handle allows you to adjust two sides at the same time. Clicking on a side handle allows you to adjust that side. If you hold the shift key down while adjusting the size, the proportions of the box are maintained. To rotate the crop box, move outside a corner until the tool changes to rotate. You can also set the aspect ratio or size of the crop box in the tool options bar. The Crop tool is not available when using a Smart Photo. Crop Tool Options Preset pop-up: Pop-up controls the crop tool mode as well as aspect ration and document size presets. Width: Sets the width of the crop box. Swap Dimensions: Swaps the width and height. Handy for rotating the crop box. Height: Sets the height of the crop box. Units: Determines the unit of measure: Pixels, inches, centimeters, etc. Leveling Tool: Click and drag this tool across an element in your image that should be level. Angle: See and adjust the angle of rotation. Rotate: Rotates the image 90 degrees. Cancel: Resets the crop tool. Apply: Applies the crop and resizes your photo. Crop Tool Modes Perfect Photo Suite Perfect Resize 251 The Crop Tool works in three modes: Freeform: In this mode you can adjust the crop box any way you like. The image will not be resized. Any area outside the crop box will be trimmed off. Use this mode if you just want to change the shape or recompose your image for general use. Aspect Ratio: You can lock the crop box to an aspect ratio. This makes sure the crop box shape doesn't change, just the size. Use this option to trim existing pixels while maintaining a ratio without resizing the image. Document Size Presets: Document Size Presets allow you to crop and resize your image at the same time. If you know your intent is to print the image at a certain size you can crop and resize the image at the same time. Many common sizes are included plus you can create your own. Leveling the Image The Crop Tool has a special Leveling Tool for automatically rotating your image to be level. 1. Select the Crop Tool. 2. Select the Leveling Tool from the Crop Tool Options Bar. Your cursor will change to the Leveling Tool. 3. Click and drag a line across your image that should be level, either horizontally or vertically. When you release the mouse the image will be rotated automatically to the correct angle. Perfect Photo Suite 252 Perfect Resize Adjusting the Image Size In Perfect Resize, you can adjust your image size using either the Document Size pane or the Crop Tool Options Bar. The information in these areas are interrelated and locked together. Adjusting the values in either pane will lead to changes in the other pane. In the Document Size pane it displays the current desired Document Size or the original image size if you have not adjusted anything. You can simply type into the Width or Height fields to change the Document Size. Keep in mind that the Width and Height fields are locked together to maintain the photo proportions. Changing the width will change the height proportionally. Perfect Resize does not support nonproportional scaling. If you would like to change the proportions of the image it requires cropping, so use the crop tool. The Document Size Presets make it easy to crop and resize your photo at the same time. Simply select one to set the width and height automatically. This also selects the Crop Tool so you can adjust the document size to fit your photo. You also control your resolution, known as pixels per inch or dots per inch. This is important to adjust based on your output device. The Pixel Dimensions pane displays the current image size in pixels as well as the file size, bit-depth and scaling factor. Perfect Photo Suite Perfect Resize 253 Using Document Size Presets Document size presets allows you to crop and resize your image simultaneously. Often, when you are using Perfect Resize it is to create a file for print output at a known common size. In these cases, using a Document Size Preset can be the fastest way to set your Document Size and crop your image to the needed proportions. Follow these instructions to use a Document Size Preset: 1. Select your desired size from the Document Size preset pull-down in the Document Size pane, or Crop Tool Options Bar. You will see that the Document Size fields will be completed automatically for you and that a crop box is drawn on your image matching the proportions of the Document Size Preset that you selected. 2. If needed, select the rotate crop box to rotate your crop box to the proper orientation. It will automatically rotate to match the orientation of your image, but if you want to crop differently you may need to rotate it. 3. Now, you can use the crop tool to reposition and change the size of the crop box so that it contains just the image area that you want. Note that the crop box proportions and Document Size are locked so that you will always have the finished document size that you requested. 4. Adjust your resolution to what is needed for your output device. If you are unsure what to select, use the resolution drop-down menu for common settings. Perfect Resize comes with many commonly used print, paper and video Document Size Presets but also allow users to create their own. To create your own Document Size Preset follow these instructions: 1. Select your image and launch Perfect Resize. 2. From the Document Size Preset pull-down, select custom > Manage Custom Sizes. 3. Click on the Add button. 4. Double-click on the highlighted untitled name and name your preset. 5. Double-click on the width and height and fill in the proper values. 6. Click on the units and select the proper unit. 7. Click on the Okay button. Tip: If you select the incorrect Document Size Preset you can change it by selecting a different one. If you do not wish to use a Document Size Preset after you have selected one you can press the Reset button in the Document Size pane or the Cancel button in the Crop Tool Options Bar. Tip: The lock crop option locks the proportions and document size settings for the given crop. This is enabled by default when you use a Document Size Preset. Perfect Photo Suite 254 Perfect Resize Settings The settings dialog contains the controls for selecting the resizing method, or algorithm, and its settings. Every image is different and selecting the correct settings here can improve the quality of the results. To help you get started, try one of the presets in the Image Type drop-down menu. Image Type: This pop-up contains presets that adjust the settings for Amount and Threshold automatically. Method: The method drop-down selects the the method, or algorithm, used to resize the image. The options are: Genuine Fractals: This is the classic, patented, fractal-based algorithm that has made Perfect Resize the standard for over a decade. Perfect Resize Portrait: This is a new variation on the Genuine Fractals algorithm designed for portrait images. It is slightly softer and does a better job representing skin and hair textures. Texture Controls When you select the Genuine Fractals method there are several other controls that tune the resizing algorithm based on the image. These deal with the texture of the image. If you were to analyze an image from a detail perspective you could break it into three categories: Edges, Continuous Tone and Textures. Edges are obvious; these are the sharp details that define the edges of the subject in your image. It’s paramount that these are maintained in order for your enlargement to maintain quality. The continuous tone areas are things like skin or skies that are mostly solid or graduated color. These resize easily as there is little detail in these areas. The last area, what we call texture is areas that fall between these two. They are areas that still contain detail but are not sharp edges. These are things like the surface of rocks, tree bark, fabric, animal fur, etc. The amount of detail in these texture areas can have a large impact on the perceived sharpness and quality of an image. In Perfect Resize you can control the key algorithm variables that effect these areas. In Perfect Resize there are even presets for different image types and subject matters that help you get the best results in reproducing these textured areas. Texture: This controls the amount of detail in flat, non-edge areas of an image. If your image contains lots of small detail that does not have defined edges (many organic patterns like leaves, rock, bark; or man-made patterns like fabric) it may be good to increase the amount to a setting of 4 or 5. Settings beyond 5 will often introduce a bumpy noise pattern which is undesirable unless your original image was from scanned film. Settings lower than the default 3 are useful for images with large areas of continuous tone that have no appreciable detail (sand, snow, sky) but have hard edged foreground subjects such as landscape images, architecture or portraiture. Threshold: This controls the amount of hard edge detail that is enhanced. The default setting is 25. Decreasing the threshold will focus the algorithms only on edge information. This may be useful for portraiture or for reducing noise in your image. Settings higher than 25 will increase the amount of small detail in flatter areas of the image. Settings as high as 100 are useful for highly detailed images such as hair or feathers. Higher threshold settings will also make Perfect Resize process faster. A good way to start adjusting these controls is by setting the threshold to 100 and then move the amount up until the image is too noisy (bumpy) and then reduce the threshold to smooth out the noise in continuous tone areas. For detailed images with no little or no continuous tone, you might try the amount at 4 and the threshold at 100. For portrait images or images with significant JPG artifacts you should try an amount of 2-3 and threshold of 25 or lower. Smoothness: The smoothness slider is used to reduce artifacts along hard curved edges. Use the lowest setting needed. Tip: Always make sure your zoom is set to 100% or 1:1 when adjusting the controls in the Texture Control Pane. Perfect Photo Suite Perfect Resize 255 Sharpening The sharpening pane contains the controls to add additional sharpness to your image. Perfect Resize features three different sharpening methods: Unsharp Mask: Good for general sharpening. Similar to Photoshop's unsharp mask function except it is only applied to the luminance of the image to prevent color artifacts. Highpass: Highpass sharpening is helpful when the original image is not sharp. Progressive: Similar to the unsharp mask except it sharpens different amounts depending on the size of the details in the image. Small details are enhanced more than large ones. Using the Sharpening controls can save you the workflow step of adding additional Sharpening before printing and can help compensate for loss of sharpness due to dot gain from your printer. Sharpening should only be applied at the end of your workflow just before printing. If you plan to do additional retouching or compositing work after resizing your image, you should disable the Sharpening controls. To sharpen your image for output, use these steps after you have adjusted the Document Size pane controls. 1. 2. 3. 4. 5. Zoom in on your image to 1:1. You can do this easily by using the 1:1 Zoom preset located in the Navigator pane. Enable the Sharpening controls by toggling the on/off control in the Sharpening pane title bar. Select the sharpening method that will provide the best results for your image. You may need to experiment to determine this. Adjust the amount slider to determine the amount of sharpening desired. Use the Highlight and Shadow sliders to limit the sharpening from being applied to the darkest and lightest areas of the image which can prevent sharpening of noise. Sharpening Off Sharpening On Perfect Photo Suite 256 Perfect Resize Film Grain The Film Grain setting controls the amount of simulated Film Grain (noise) to your image. Adding a modest amount of Film Grain can make your image appear sharper visually and can help hide imperfections like JPG artifacts. This is especially useful for monochrome images. Film Grain should only be added just before printing. If you need to do other retouching or compositing work in Photoshop after resizing your image, you should disable the Film Grain controls. To add Film Grain to your image follow these steps: 1. 2. 3. 4. Zoom in on your image to 1:1. You can do this easily by using the 1:1 Zoom preset located in the Navigator pane. Enable the Film Grain controls by toggling the on/off control in the Film Grain pane title bar. Adjust the slider up or down until the desired amount of Film Grain is added. You can preview just the effect of the Film Grain by toggling the Film Grain on/off control. Film Grain Off Perfect Photo Suite Film Grain On Perfect Resize 257 Tiling The tiling feature in Perfect Resize will divide an enlargement into smaller pieces that can be printed on a smaller printer. Lets say you want to create a mural that is 8 feet tall by 12 feet long but your printer can only print 24 inch wide strips. With the tiling feature you could automatically create four separate files that are 24" wide and 8 feet tall so you can create your mural in sections. With the tiling feature all you do is specify the size of paper you have to print on and if you would like the pages to overlap. Then Perfect Resize 7.5 will resize your image and section it down into the individual tiles. To use the Tiling feature, follow these instructions: 1. Turn tiling on by toggling the on/off switch in the pane header. 2. Set the Width and Height fields to the size and orientation of paper that you wish to print on, or you can select the number of rows and columns instead. 3. Set the Overlap size. The overlap makes each tile overlap so you can tape multiple panels together and corrects for printer margins if you are not printing borderless. 4. Set the file type for the newly created files for each tile. 5. Set the destination folder for the new files. Each file will be named with the original filename and the tile indicated in the filename. The preview will show cyan guide lines for each tile that will be created. The bottom of the Tiling pane will tell you how many tiles will be created. Perfect Photo Suite 258 Perfect Resize Gallery Wrap The Gallery Wrap feature is designed to help you print on canvas. When making enlargements for canvas it is common to wrap a portion of the image around wooden stretcher bars. These can be several inches thick and are used for mounting the canvas. These are commonly called gallery wraps. However, if the photographer had important detail near the edges of the image they may be lost in the wrapping process. The Gallery Wrap feature in Perfect Resize Professional Edition automatically creates extended margins by reflecting or stretching the areas near the edge of the image allowing the photographer to create a gallery wrap without having to sacrifice any of the original image. The Gallery Wrap feature allows you to select the thickness of the canvas mounting bars and offers a variety of techniques for creating additional margins. To use the Gallery Wrap feature follow these instructions: 1. Turn on the Gallery Wrap feature by toggling the on/off switch in the pane header. 2. Set the Thickness control to the amount of margins you would like to add. A good rule of thumb is the thickness of the stretcher bars, plus half an inch. 3. Select the Type you would like to use. 4. If you wish to add a color overlay to the gallery wrap wings set the color and opacity. The Gallery Wrap feature has several methods for adding margins: Type: Reflect: Copies an area equal to the thickness setting around your image, then flips each side and adds it as the margins. This is a good general purpose technique. Reflect Soft: Does the same as the Reflect method but softens the added margins. Stretch: The Stretch method takes a small area around the edge of the image and stretches it to add the margins. Stretch Soft: Does the same as stretch, but softens the added margins. Thickness: This how thick your canvas stretcher bars are. Generally two inches works well for most gallery wraps. Overlay Color: You can also add a color overlay over the wrap area. This can be used to darken the wrap or fill it with a solid color. Opacity: This sets the opacity of the overlay color. At the default of zero, there is no color overlay added. Add to New Layer: This places the wrap wings on their own layer, rather then merging them with the image. Perfect Photo Suite Perfect Resize 259 Without the Gallery Wrap feature, important parts of the image get lost when wrapped. With Gallery Wrap enabled, you can maintain the original image area but still have the extended margins needed to wrap canvas on thick stretcher bars. Note: It is not recommended that you use the borderless printing option on a printer or use borderless lab prints when the overlap is set to zero. Both borderless methods increase the image size 1-3 percent to allow for overprinting and/or trimming. The resulting prints may not align properly. Perfect Photo Suite 260 Perfect Resize Presets Presets store all of the adjustments you make in Perfect Resize. Presets are a fast and easy way to get consistent results. You can save your own presets for batch processing or for simply reproducing your look when retouching. Presets do not store masks created by tools other than the Masking Bug. Using a Preset Using a preset is simple, just click on it in the Preset Browser. Saving a Preset Saving a preset is simple. Once you have your settings that you wish to save, go to the Preset menu and select Save Preset. The New Preset dialog will appear (shown to the right). There are several fields to complete including the preset name, the category, creator and description. In the category pull-down you can select which existing category the preset should saved into. You can also create a new category this way by selecting new category from the bottom of the list. You can edit a preset's name, creator or description by selecting it and then selecting Edit Preset Info from the Preset menu. If you want to edit the settings in a preset, load it into, make your adjustments and then re-save the preset with the same name and location. Deleting a Preset You can remove a preset if you no longer want to have access to it. To remove a preset, follow these steps: 1. Select the preset you wish to remove in the preset browser. 2. Select Delete Preset from the Preset menu. Importing & Sharing Presets You can import presets you have downloaded from the onOne website using these steps. 1. Download the preset pack from the onOne website. It should have a .ONPreset extension. 2. Double-click on the preset pack, it will install the presets into a category named the same as the preset pack. That's it, next time you use Perfect Resize the new presets will be located in the My Presets tab, in a category named after the preset pack. You can delete the files you downloaded, they have been copied into Perfect Effects. You can share presets like you would share any other file, such as email or posting them to a website. First you need to find the preset files. The easiest way it to open Perfect Resize then from the Preset menu select Show Presets Folder. A window will open and will display the presets folder. In the presets folder are sub-folders for your preset categories. Inside each sub-folder are the individual preset files. You can copy these presets to another computer, attach them to an email or post them on a website. Perfect Photo Suite Perfect Resize 261 Menus Application Menu About Perfect Resize: Opens the about dialog box. It contains your serial number, version number and information on contacting onOne Software for support. Preferences: Opens the Perfect Resize preferences dialog. Services: Opens the OS level Services flyout (Mac only). Hide Perfect Resize: Hides the window. Quit Perfect Resize: Quits Perfect Resize. File Menu Cancel: Cancels Perfect Resize and returns back to the host application with no changes. Apply: Applies the current document size settings and options to your image and returns to the host application. Edit Menu Undo: Reverses adding a preset Redo: Unused Copy: Unused Cut: Unused Paste: Unused Reset All: Resets all the controls back to their default settings. Preset Menu Perfect Photo Suite 262 Perfect Resize Save Preset: Saves the current settings as a new preset. Delete Preset: Deletes the current preset. Edit Preset Info: Opens the preset dialog so you can edit the name, author or description information. Import Preset: Opens the import preset dialog to help you import presets you have downloaded. Show Presets Folder: Opens a Finder or Explorer window showing the presets folder. Manage Extras: Opens the Extras Manager where you can import and manage extras like Borders, Backgrounds, Textures and Presets. View Menu Zoom In: Zooms the preview window in one increment. This will make the preview image larger. Zoom Out: Zooms the preview window out one increment. This will make the preview image smaller. Fit to Screen: This sets the preview image so that the entire image is on screen at once. Think of this as an overview of the entire image. This is the setting you will use most of the time. Fill with Layer: Sets the zoom so the current layer fills the entire screen. Actual Pixels: This sets the preview image so that it zooms to actual pixels or 1:1 also called 100%. This setting allows you to see every pixel in the image. This is useful when making adjustments to the Settings, Sharpening or Film Grain. Show Browser Pop-up: Enables the browser pop-up window. A checkmark should appear next to this when it is enabled. Show Clipping: Shows the clipping overlay view, which overrides the current mask view. No checkmark is displayed for this mode. The user can temporarily show this mode by holding down J as well. Preview Background Color: Flyout with background color options, the selected item should have a checkmark next to it. Window Menu Navigator/Loupe/Histogram: Opens or closes the Navigator/Loupe/Histogram pane. Pixel Dimensions: Opens or closes the Pixel Dimensions pane. Document Size: Opens or closes the Document Size pane. Settings: Opens or closes the Settings pane. Sharpening: Opens or closes the Sharpening pane. Film Grain: Opens or closes the Film Grain pane. Tiling: Opens or closes the Tiling pane. Gallery Wrap: Opens or closes the Gallery Wrap pane. Solo Mode: Enables or disables Solo Mode. Show Browser Panel: Opens or closes the Browser Panel. Show Control Panel: Opens or closes the Control Panel. Hide Panel: Opens or closes all Panels. Full Screen: Opens the window to full screen. Help Menu Perfect Photo Suite Perfect Resize 263 Search: Searches the Menus (Mac only) Perfect Resize Online Help: Opens this html help in your default web browser. Video Tutorials: Opens a web browser to the tutorial section of the onOne website. Getting Started: Opens the Getting Started section in your default web browser. Keyboard Shortcuts: Opens a dark style dialog that displays the keyboard shortcuts for that platform. Perfect Inspiration: Opens the onOne Perfect Inspiration Gallery in your default web browser. Check For Updates: Checks for updates with the onOne auto update server. Deactivate: Opens the activation dialog. This is used to deactivate your software so you can move it to another computer or make a return. Register: Opens the default web browser and navigates to the registration page. Provide Feedback: Opens the default web browser and navigates to the feedback page. Help Improve onOne Products: Opens the Improve onOne Products dialog. Perfect Photo Suite 264 Perfect Resize Keyboard Shortcuts Action Mac Win Print cmd p ctl p Undo cmd z ctl z Redo cmd shift z ctl shift z Cut cmd x ctl x Copy cmd c ctl c Paste cmd v ctl v Save Preset cmd shift s ctl shift s Navigate Browser Selection Arrow Keys Arrow Keys Open Selected Category Right Arrow Right Arrow Close Selected Category Left Arrow Left Arrow Zoom In cmd + ctl + Zoom Out cmd - ctl- Fit to Screen cmd 0 cmd 0 Actual Pixels cmd opt 0 ctl alt 0 Show Clipping opt j alt j Navigator/Loupe/Histogram cmd 1 ctl 1 Pixel Dimensions cmd 2 ctl 2 Document Size cmd 3 ctl 3 Settings cmd 4 ctl 4 Sharpening cmd 5 ctl 5 Film Grain cmd 6 ctl 6 Tiling cmd 7 ctl 7 Gallery Wrap cmd 8 ctl 8 Show Browser Panel cmd left arrow ctl left arrow Show Control Panel cmd right arrow ctl right arrow Full Screen Mode cmd ctl f F11 Keyboard Shortcuts cmd shift k ctl shift k h Hand Tool h Zoom Tool z z Crop Tool c c Temporarily Select Hand tool Hold Space Hold Space Rotate Crop Clockwise opt right arrow alt right arrow Rotate Crop Counter Clockwise opt left arrow Perfect Photo Suite alt left arrow Perfect Batch 265 Perfect Batch Perfect Batch is an engine for automating processes or applying presets that are available in each module. It is ideal for applying universal adjustments across a large number of images. It can be launched from the Browse module or through Perfect Layers. There are a number of reasons to use a Batch process. Some features of onOne Batch include: Convert Files: Select a source folder and create a new child folder and convert a large number of files to a new desired format. Resize Files: Prepare files for printing, web or simply changing the dimension and/or resolution. Apply Module Presets: Use the factory presets or apply your own custom preset created from Perfect; Enhance, Portrait, Effects, B&W and Resize. Perfect Photo Suite 266 Perfect Batch Getting Started This getting started section will give you the basics of using Perfect Batch. If you have never used Perfect Batch before, this is a good place to start. You might also try watching the getting started video tutorial. For detailed information on steps and controls mentioned in the getting started section, see the "Using Perfect Batch" section instead. Pages in this Section Batch Workspace How to Access Batch Perfect Photo Suite Perfect Batch 267 Batch Workspace To launch the Batch dialog box you must first be inside of either Perfect Layers or the Browse module. Go to File > Batch to bring up the workspace dialog box. Within this dialog box you will be able to select a source, the preset(s) that will be applied, the destination and even place a watermark on the image. The Batch Dialog: Perfect Photo Suite 268 Perfect Batch How to Access Batch Launch the stand alone application of Perfect Photo Suite 8. The Batch module can be accessed inside of either Browse or Perfect Layers. Go to File > Batch and this will launch the batch dialogue. You can also select a group of images in the Browse module and select Perfect Batch from the right-click contextual menu. You can also access Perfect Batch inside of Adobe Photoshop, Adobe Lightroom or Apple Aperture. Perfect Photo Suite Perfect Batch 269 Using Perfect Batch This section covers the complete use of Perfect Batch. It includes how to select files, adding a module preset and saving to a destination. Pages in this Section Selecting Files Adding a Module Destination Pane Batch Presets Perfect Photo Suite 270 Perfect Batch Selecting Files The first step to beginning a Batch process is to select the Folder or Files. The Source defines those Files or Folders. There are two ways to choose the Source. Selected Items: Inside of Browse you can simply select the the Folder or Files before going to File > Batch. The Source drop down menu will read "Selected Items." Folder: This option will require you to click the Choose button. The Choose button presents you with a Finder or Windows Explorer dialogue where you will navigate to and select a Folder. After you have a folder selected the description will appear next to Folder. Include SubFolders: If this box is checked the Batch will also process any that reside within subfolders of the parent Folder you have selected. Perfect Photo Suite Perfect Batch 271 Adding a Module After you select a source you choose the module(s) you wish to use for the Batch process. Each Module has its own pane that contains a choice of Type, Category and Preset. If you are not familiar with Presets we recommend you review the Preset pages for each module to better understand how this works. Type: Choose between either a Factory Preset or a Personal Preset you have created or installed. Category: Select the category in which the Preset lives. Preset: Pick the preset you want to apply during the Batch. Pause on the first image: When checked the first image is processed and the batch will pause so you can evaluate. The Perfect Resize module includes additional options for output. You can apply a preset, either factory supplied or a user saved preset, or you can enter the size you desire. If you manually enter a size you can select to fit in a specified size (width & height) or to scale the long or short side of the images to a specified dimension. This can be good for resizing images for web or for proofs. Perfect Photo Suite 272 Perfect Batch The Watermark module allows you to add an overlay to the image, typically used for your logo, signature or copyright. File: Click the Choose button to select the file you wish to use as your watermark. Size: This slider controls the size of the watermark file. Inset: This will determine the percentage in which the file is inset from the edge. Opacity: This sets the opacity of the watermark. Location: This grid sets the location of the watermark. Click on the square of the location you desire. Perfect Photo Suite Perfect Batch 273 Destination Pane Perfect Photo Suite 274 Perfect Batch The destination pane is the last step in the Batch workflow. This determines where the processed files are saved, how they are named, the file type and additional options. Save To: This drop down menu includes three options; Round Trip, Current Location or Folder. Roundtrip saves the file over the original and uses the same file format, bit-depth, color space and name. Naturally all the additional options will be grayed when this option is selected. Current Location will write the file to the same location as the original file. The Folder option will allow you to choose a new location the files will be saved to. Click the Choose button to select the new location. Folder: The Folder will list the path the file is going to be saved. This line will only be seen when the Folder option is selected under Save To. Put in Subfolder: When checked this will create a subfolder in the destination and you may name the subfolder in the field on the right. Match Source Folders: When checked this option will match the hierarchy of the source folder. Existing Files: This drop down determines what will happen if there is a file name conflict. Overwrite without warning or Prevent overwrite. If Prevent overwrite is chosen the word 'copy' will be added to the file(s). File Type: This drop down determines the file format or extension. The choices include; Same as Source, Photoshop, Photoshop Large Document, JPEG, TIFF and PNG. The quality slider is only available for JPEG. Color Space: This drop down will include all the available color profiles installed on your system. Naming Element: This option may be used to determine the file name. The options include; Current Name, Text and Number. The field to the right allows you to enter a custom name. The plus and minus icons will allow you to add or remove naming elements. Current Name will use the source name without the file extension. Text is used for assigning a custom text string. Number creates an automatically incremented number, starting with the number input in the field. Perfect Photo Suite Perfect Batch 275 Batch Presets Presets for the Batch settings can be saved and used again. Presets will remember all of the settings and details selected on the right, in the Batch dialogue. Saving Presets: To save a preset click the "+" icon at the lower left. This opens a preset dialogue where you define the name, category, creator and description. Using Presets: To use a preset simply double click on the name. This will load the preset settings in the batch dialogue. Deleting Presets: To delete a preset select the item and click the "-" icon at the bottom left. Perfect Photo Suite Index Browser Menu 53 Browser Section 129 Brushes 22519590 , , Bucket Tool 20196 , A About Perfect Layers 58 About Perfect Photo Suite About Resize 237 Activation 11 Adding a Module 271 adding effects 171 Adding Faces 138 Adding Layers from Files 70 Additional Help 8 Address 7 Adjusting Canvas Size 71 Adjusting the Image Size 252 Adjusting the Selection Masks 146 Adjustment Layers 242 Album Menu 53 Albums 38 Alpha Channels 242 Amount 142 Aperture 20 application menu applying a preset 171 Auto Color 111 Auto Levels 111 B Batch 266 Batch 20 ,18 Batch destination 273 Batch dialogue 267 Batch Presets 275 Batch processing 266265 , Batch Workspace 267 Black and White 174 Blemishes 141 blending 171 Blending 222 Blending Mode 73 Blur 174 Blur Tool 20196 , Border 222 Borders 174 Bridge 22 Brightness Brush 213 Brightness tool 228 Browse 32 ,30 Browser 32 ,40 ,212219167 , , ,10660 , ,66 ,134247 , C Canvas Size 71 Changing Blending Modes 73 Changing Layer Order 73 changing order of effect 171 Chisel Tool 20196 , Clean Up Tools 20196 , Clone Brush 82 Clone Stamp 82 CMYK 16-bit 242 CMYK 8-bit 242 Color 112 Color & Tone Adjustments 112 Color Correction 142 Color Correction Pane 129 Color Enhancer 174 Color Fill Layer 79 Color Response 222 Color Shift 142 Contacting 7 Contacting onOne Software 7 contrast 225 Contrast Brush 213 Control Panes 222 copy mask 19084 , Creating a New File 70 creating presets 253 Crop Tool 21210660 , , ,61 D Deactive 11 Deleting a Layer 73 ,73 deleting a preset 231204121151260 , , , , deleting an effect 171 Deleting Faces 138 Destination Detail Brush 213 Directory 21916766 , , ,134247 , Display 9 document size 253 document size presets 253 DPI 240 Drop Brush 19590 , Duotone 174 E Edit 232123 , Edit Menu 53 Edit Menu 53 ,99 , Edit with Plug-in 20 Editing a Color Fill Layer 79 Effect Options 174 Effects 171 Effects Stack 171 Enhance 105 eReader 6 Ethnicity 142 EXIF Data 47 expanding a preset 171 Export 20 ,18 External Editor 20 ,18 ,22 Eyes 143 F Face Edit Tool 139 Face Select Tool 138 FAQ 8 Feather 139 feathering 225 File 232123 , File Browser 21916766 , , ,134247 , File Formats 12 File Menu 53 ,53 ,21916799 , , ,66 ,134, ,247 Film Grain , Filters 174 Flipping a Layer 75 Folder 21916766 , , ,134247 , Folders 37 Folders 32 Frequently Asked Questions 8 G Gallery Wrap 258 Geting Started 26621110559 , , , Getting Started 31 ,159128238 , , Glow 222174 , GPS 47 Grayscale 16-bit 242 Grayscale 8-bit 242 H Hand Tool 21221310610760 , , , , help Help 2321238 , , ,6 Help Menu 53 ,99 Hide Controls 139 hiding effects 171 highpass 255 Histogram 21221516210610860 , , , , , ,63 ,131245 , Histogram Pane 129 How Big Can You Print 239 How to Access Batch 268 M I image type 254 importing a preset 231204121151260 , , , , Info 47 Installation 10 Interface 40 ,243 Introduction 5 invert mask 19084 , iPhoto 22 K Keep Brush 19590 , Keyboard Shortcuts 56 ,235208126102156264 , , , , , Knowledge Base 8 L Lab 16-bit 242 Lab 8-bit 242 largest print 239 Layer Masks 242 Layer Masks 73 Layer Menu 99 Layer Visibility 73 Layers 72 Layers Pane 21210660 , , Left-Right Screen 21716565 , , ,133 Left-Right Split Screen 21716565 , , ,133 Legal 7 Licensing 11 Lightroom 18 Loupe 21221516210610860 , , , , , ,63 ,129131245 , , Mac OSX 9 Mask 146 Mask Modes 22919186 , , Masking a Color Fill Layer 79 Masking Brush 21219010684 , , , ,60 ,61 Masking Bug 21219010684 , , , ,60 ,61 Masking Menu 99 Masking Selections 149 Masking tools 19084 , Masks 21210660 , , Menus 53 ,232, ,12399 , ,153, Merging Layers 73 MetaData 47 method 254 Mode 139 Module Selector 15 Module Settings 122 Modules 129 Mouth 143 Mouth and Eyes 143 Mouth and Eyes Pane 129 Moving a Layer 75 Moving the Trim Box 78 N Navigating the Preview Window 21210660 , , Navigator 129 Navigator 212215162 , , ,10610860 , , ,63 ,131245 , O onOne Panel 17 onOne Software 7 onOne University 8 Opacity 139 OpenGL 9 Opening 12 Print capabilities Printing 6 ,240 printing resolution 240 progressive 255 PSB 12 PSD 12 Q Quick Fixes 111 P paint in effects 19084 , Pan Tool 21361 , paste mask 19084 , Paths 242 PDF 6 Perfect Batch 265 Perfect Brush 139 Perfect Enhance 105 Perfect Layers 15 Perfect Photo Suite 232123 , Perfect Portrait Menus 153 Phone 7 Photo Filter 174 Photoshop 17 Photoshop Elements 17 Photoshop Layers 242 Plug-In Extras 18 PNG 12 Preset 232123 , preset menu presets 231204121151253260 , , , , , preview 107 Preview Window 21210660 , , ,129 Preview Window Modes 23022921719116586 , , , , , ,65 ,133 R RAW 12 Recent 39 Recent 32 Refine Brush 19590 , Refining the Masking Selections 149 Registration 11 Renaming Layers 73 Reset Face 139 reset mask 19084 , resizing 239 Resizing a Layer 75 Resizing a Trim Box 78 Resolution 240 Retouch Brush 21210660 , , ,61 RGB 16-bit 242 RGB 8-bit 242 Rotating a Layer 75 S Save As 12 Saving 12 saving a preset 231204121151260 , , , , Searching 219 sections 243 Selecting Files 270 Selection Masks 146 selective color 225 Selective Color Brush 213 Setting Defaults 152 Settings 254 Shadows 141 sharing a preset 204121151260 , , , sharing presets 231 Sharpen 174 Sharpening 222114255 , , Shine 141 Single Mode Screen 21716565 , , ,133 Size 139 sizing 253 skin color 142 Skin Retouching 141 Skin Retouching Pane 129 Smart Objects 242 Smoothing 141 smoothness 254 Source 270 Sources 34 ,32 Standalone 16 Support 7 Support File Types 12 Supported File Types 242 System Requirements 9 T Tablet 6 Targeted Brightness 213 Text Layers 242 Texture 141254 , Texturing 174 The Layers Pane 73 The Trim Inspector 78 threshold 254 Thumbnail 40 TIF 12 Tiling 257 Tone 222112 , Tone Curve 222 Tone Enhancer 174 Toner 222 Tool Well 21221316010660 , , , , ,61 ,129243 , Tools Option Bar 129 Top-Bottom Screen 21716565 , , ,133 Top-Bottom Split Screen 21716565 , , ,133 Transform Tool 21210660 , , ,61 Transforming Layers 75 Trim Tool 21210660 , , ,61 ,78 Trimming Layers 78 U Uninstalling 10 unsharp mask 255 User Guide 26530 , ,21010458 , , ,1 User Interface 160 User Interface 32 ,21215910660 , , , ,129 Using a preset 204121151260 , , , Using Browse 33 using brushes 225 Using Color Fill Layers 79 Using Modules 15 Using Perfect Batch 269 Using Perfect Black and White 218110 , Using Perfect Effects 166 Using Perfect Layers 69 Using Perfect Portrait 137 Using Perfect Resize 249 Using the Help System 6 Using the Trim Tool 78 Using with Photoshop 17 V Video Tutorials 8 View 232123 , View Menu 53 ,99 , Viewing the Selection Masks 147 Vignette 222174113 , , W Warmth 142 Watermark Webinar 8 welcome 158237 , Welcome to Perfect B&W 210104 , Welcome to Perfect Effects 158 Welcome to Perfect Portrait 127 When use Perfect Resize 241 Whitening 143 Window 232123 , Window Menu 53 ,99 , Windows 9 Work Area 243 Working with Layers 73 Z Zone Modes 230 Zones 230 Zoom Tool 21221310610760 , , , , ,61