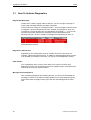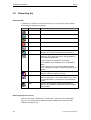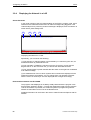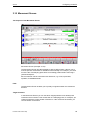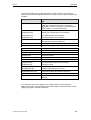
1
WinCC
WinCC/ProAgent
User Manual
Preface, Contents
Introduction to Process
Diagnostics
1
Effects on WinCC
2
Display in Runtime Mode
3
Configuring in WinCC
4
Appendix
5
Index
Edition 04/03
Safety Guidelines
This manual contains notices which you should observe to ensure your own personal safety, as well as
to protect the product and connected equipment. These notices are marked as follows according to the
level of danger:
Danger
indicates an imminently hazardous situation which, if not avoided, will result in death or serious injury.
Warning
indicates a potentially hazardous situation which, if not avoided, could result in death or serious injury.
Caution
used with the safety alert symbol indicates a potentially hazardous situation which, if not avoided, may
result in minor or moderate injury.
Caution
used without safety alert symbol indicates a potentially hazardous situation which, if not avoided, may
result in property damage.
Attention
indicates that unwanted events or status can occur if the relevant information is not observed.
Note
draws your attention to particularly important information on the product, handling the product, or to a
particular part of the documentation.
Qualified Personnel
Only qualified personnel should be allowed to install and work with this software. Qualified personnel
within the meaning of the safety notices of this documentation are persons capable of giving due
consideration to safety engineering standards when using this software on systems.
Correct Usage
Note the following:
Warning
The equipment may be used only for the applications stipulated in the catalog and in the technical
description and only in conjunction with other equipment and components recommended or approved
by Siemens.
Startup must not take place until it is established that the machine, which is to accommodate this
component, is in conformity with the guideline 98/37 ECC.
Faultless and safe operation of the product presupposes proper transportation, proper storage, erection
and installation as well as careful operation and maintenance.
Trademarks
The registered trademarks of the Siemens AG can be found in the preface. The remaining trademarks
in this publication may be trademarks, whose use by third parties for their own purposes could violate
the rights of the owner.
Impressum
Editor and Publisher: A&D PT1 D1
Copyright Siemens AG 2003 All rights reserved
Exclusion of liability
The transmission and reproduction of this documentation and the exploitation and
communication of its contents are not allowed, unless expressly granted. Violators are
liable for damages. All rights reserved, especially in the case of the granting of a
patent or registration by GM.
We have checked the content of this publication for compliance with the described
hard and software. However, discrepancies cannot be excluded, with the result that
we assume no guarantee for total compliance. The information in this publication is
checked regularly, and any necessary corrections are included in the following
editions. We would be grateful for any suggestions for improvement.
Siemens AG
Bereich Automation & Drives
Geschäftsgebiet SIMATIC HMI
Postfach 4848, D-90327 Nuernberg
Siemens Aktiengesellschaft
ã Siemens AG 2003
Technical data subject to change.
Edition 04/03
Preface
Preface
Purpose
This document provides you with important information concerning
WinCC/ProAgent.
• It gives you an introduction into process diagnostics.
• You learn how a diagnosis is displayed on the operating unit.
• You learn which requirements have to be satisfied for configuration.
• You learn how to configure process diagnostics and the diagnostic screens.
• You are provided with a comprehensive reference.
WinCC\ProAgent
User Manual
Printout of the Online Help
i
Preface
Edition 04/03
Notation
There are a number of character formats used in this manual to assist reader
orientation:
"Output”
"File” → "Edit”
Text and input and output on the screen of the operating unit
are shown on inverted commas.
Menu options, dialog box names, tabs and buttons of the
operating system and the application are shown in inverted
commas.
The whole path is always specified for menu options.
History
The different issues of this User's Guide describe the following software
versions:
Issue 02/98
WinCC version 4.01
ProAgent version 4.0
Issue 11/98
WinCC version 4.01
ProAgent version 4.0
Issue 06/99
WinCC version 4.02
ProAgent version 4.5
Issue 04/00
WinCC version 5.0
ProAgent version 5.0
Issue 03/01
WinCC version 5.0 SP2
ProAgent version 5.5
Issue 02/02
WinCC version 5.1
ProAgent version 5.6
Issue 04/03
WinCC version 6.0
ProAgent version 6.0
Trademarks
The following names are registered trademarks of Siemens AG:
•
•
•
•
•
•
•
•
®
WinCC
®
SIMATIC
®
SIMATIC HMI
®
SIMATIC NET
®
SINEC
®
STEP
®
HMI
®
ProAgent
The remaining trademarks in this publication may be trademarks, whose use by
third parties for their own purposes could violate the rights of the owner.
ii
WinCC\ProAgent
User Manual
Printout of the Online Help
Edition 04/03
Preface
Customer and technical support
Available worldwide around the clock:
Nürnberg
Johnson City
Peking
SIMATIC Hotline
Worldwide (Nuremberg)
Worldwide (Nuremberg)
Technical support
Technical support
(FreeContact)
(chargeable, available only with
SIMATIC Card)
Local time: Mon. through–Fri. 07.00
a.m. to 5.00 PM
Local time: Mon. through–Fri. 0:00 to
24:00
Phone:
+49 (180) 5050-222
Phone:
+49 (911) 895-7777
Fax:
+49 (180) 5050-223
Fax:
+49 (911) 895-7001
E-mail:
techsupport@
ad.siemens.de
GMT:
+01.00
GMT:
+1.00
Europe and Africa (Nuremberg)
America (Johnson City)
Asien/Australien (Peking)
Authorization
Technical support and
authorization
Technical Support and
Authorization
Local time: Mon. through–Fri. 7:00 to
17:00
Local time: Mon. through–Fri. 8:00 to
19:00
Local time: Mo.–Fr. 8:30 bis 17:30
Phone:
+49 (911) 895-7200
Phone:
+1 423 461-2522
Phone:
+86 10 64 75 75 75
Fax:
+49 (911) 895-7201
Fax:
+1 423 461-2289
Fax:
+86 10 64 74 74 74
E-mail:
authorization@
nbgm.siemens.de
E-mail:
simatic.hotline@
sea.siemens.com
E-mail:
adsupport.asia@
siemens.com
GMT:
+1.00
GMT:
-5.00
GMT:
+8:00
The languages spoken on the SIMATIC Hotlines are generally German and
English – on the Authorization Hotline French, Italian and Spanish are spoken
too.
Other sources of assistance
Should you have any technical queries, please get in touch with your local
Siemens contact at the Siemens agencies and offices.
WinCC\ProAgent
User Manual
Printout of the Online Help
iii
Preface
Edition 04/03
SIMATIC Customer Support Online Services
The SIMATIC Customer Support team offers you substantial additional
information about SIMATIC products via its online services:
• General current information can be obtained
–
In the Internet under
http://www.siemens.com/simatic
• Current Product Information leaflets, FAQs (Frequently Asked Questions),
Downloads, Tips and Tricks can be obtained
–
In the Internet under
http://www.siemens.com/automation/service&support
Training Center
Siemens offers a number of training courses to familiarize you with the
SIMATIC S7 automation system. Please contact your regional training center or
our central training center in D 90327 Nuremberg, Germany for details.
Telephone:
+49 (911) 895-3200
Internet:
http://www.sitrain.com
E-Mail:
[email protected]
Other Sources of Assistance
In case of technical queries, please contact the Siemens representatives in the
subsidiaries and branches responsible for your area.
The addresses can be found:
•
In the Siemens Catalog ST 80
•
In the Internet under
http://www.siemens.com/automation/partner
In the Interactive Catalog CA01
http://www.siemens.com/automation/ca01
iv
WinCC\ProAgent
User Manual
Printout of the Online Help
04.03
Contents
Contents
1
Introduction to Process Diagnostics ................................................. 3
1.1
1.2
1.3
2
Effects on WinCC............................................................................... 11
2.1
2.2
2.3
3
How a Process Diagnosis is Carried Out .................................................. 5
How a Process Diagnosis is Configured ................................................... 7
Before You Start ...................................................................................... 10
After Installation....................................................................................... 12
After Generation ...................................................................................... 13
ALARM_S Messaging ............................................................................. 15
Display in Runtime Mode .................................................................. 17
3.1
3.1.1
3.2
3.3
3.4
3.5
3.6
3.6.1
3.7
3.7.1
3.7.2
3.7.3
3.8
3.8.1
3.8.2
3.8.3
3.8.4
3.8.5
3.9
3.9.1
3.9.2
3.9.3
3.9.4
3.9.5
3.9.6
3.9.7
3.9.8
3.9.9
3.9.10
3.9.10.1
3.9.10.2
3.9.10.3
3.9.10.4
3.10
3.10.1
3.10.2
3.10.3
3.10.4
3.10.5
3.11
Printout of the Online Help
How To Activate Diagnostics................................................................... 18
What Are the Individual Diagnostic Screens Used For? ......................... 19
Operating Principles ................................................................................ 26
Structure of the Diagnostic Screens........................................................ 28
Global Screen Header ............................................................................. 29
Global Key Set......................................................................................... 30
ProAgent's User Screen .......................................................................... 33
What You See on ProAgent's User Screen............................................. 34
Message Screen...................................................................................... 35
What You See in the Message Screen ................................................... 37
Keys in the Message Screen................................................................... 39
How to Work with the Message Screen .................................................. 40
Overview Screen ..................................................................................... 45
What You See on the Overview Screen.................................................. 46
Keys in the Overview Screen .................................................................. 50
How to Work with the Overview Screen .................................................. 51
Changing the Display Mode .................................................................... 55
Hierarchical Units on the Overview Screen............................................. 56
Detail Screen ........................................................................................... 58
What You See on the Detail Screen........................................................ 61
Displaying the Network as a Symbol List ................................................ 64
Displaying the Network in an STL ........................................................... 65
Displaying the Network in a LAD............................................................. 66
Keys in the Detail Screen ........................................................................ 67
How to Work with the Detail Screen........................................................ 69
Switching Between Partial and Full View ................................................ 73
Switching Between Initial Values and Current Status ............................. 74
Switching Action or Transition ................................................................. 75
Enhanced Possibilities with S7-PDIAG ................................................... 77
Auxiliary Networks ................................................................................... 78
Jump Commands .................................................................................... 79
Multiple Assignments............................................................................... 80
Exclusion Operands ................................................................................ 81
Movement Screen ................................................................................... 83
What You See in the Movement Screen ................................................. 85
Keys in the Movement Screen ................................................................ 88
How to Work with the Movement Screen ................................................ 89
Hierarchical Units on the Movement Screen ........................................... 93
Master List of All Movements .................................................................. 94
Step Sequence Screen............................................................................ 95
v
Contents
04.03
3.11.1
3.11.1.1
3.11.1.2
3.11.1.3
3.11.2
3.11.2.1
3.11.2.2
3.11.2.3
4
Configuring in WinCC ..................................................................... 117
4.1
4.2
4.3
4.4
4.5
4.5.1
4.5.2
4.5.3
4.5.4
4.5.5
4.5.6
4.5.7
4.5.8
4.5.9
4.5.10
4.6
4.6.1
4.6.2
4.6.3
4.6.4
4.6.5
4.6.6
4.6.7
4.6.8
4.7
4.7.1
4.7.2
5
Basic Requirements of the PLC Program ............................................. 118
Shared Database with STEP 7.............................................................. 120
When You Configure with ProAgent...................................................... 123
How You Configure with ProAgent........................................................ 125
Configuration Steps in Detail ................................................................. 128
Settings for Generation.......................................................................... 130
Automatically Transfer Newly Generated Data to Runtime................... 133
Defining the System Hardware.............................................................. 134
Selecting a CPU/Program for Generation ............................................. 135
Selecting the Units for Diagnosis .......................................................... 136
Selecting Display Classes ..................................................................... 140
Defining Message Generation............................................................... 143
Defining the Alarm Diagnostic Screen................................................... 144
Defining the Diagnostic Screen for Manual Starting of Diagnosis ........ 146
Setting Key Labeling.............................................................................. 148
Defining the Device ID........................................................................... 150
Defining Input Privileges........................................................................ 151
Defining Report Files ............................................................................. 152
Carrying Out Generation ....................................................................... 154
Minor Changes during Commissioning ................................................. 156
Checking the Runtime Modules ............................................................ 158
Configuring Installation Screens for Starting ProAgent......................... 159
Multi-Lingual Projects ............................................................................ 161
Other Hardware Platforms..................................................................... 163
Changing the Diagnostic Screens ......................................................... 167
Internal Structure of the Diagnostic Screens......................................... 168
Practical Ideas ....................................................................................... 170
Appendix .......................................................................................... 177
5.1
5.1.1
5.1.2
5.1.3
5.1.4
5.1.5
5.1.6
5.1.7
5.1.8
5.1.9
5.2
5.2.1
5.2.2
5.2.3
5.3
5.4
vi
The Simple Step Sequence Screen ........................................................ 96
What You See on the Step Sequence Screen ........................................ 97
Keys on the Step Sequence Screen ....................................................... 99
How to Work with the Simple Step Sequence Screen .......................... 100
The Expanded Step Sequence Screen ................................................. 104
What You See on the Expanded Step Sequence Screen..................... 106
How to Work with the Expanded Step Sequence Screen ..................... 110
Synchronizing a step sequence ............................................................ 115
ProAgent Functions (Overview) ............................................................ 178
Function for Opening the Defined Start Screen .................................... 180
Functions for Directly Opening Specific Diagnostic Screens ................ 181
Directly Open Diagnostic Screens for a Specific Unit ........................... 182
Directly Open Diagnostic Screens for a Specific Message ................... 186
Activating the New Configuration in Runtime........................................ 189
Display the Name of a Current Step on a System Screen .................... 190
Changing the Runtime Language.......................................................... 195
Statistical Evaluation of Cause of Error................................................. 196
Exiting Diagnostics ................................................................................ 200
The ProAgent Editor .............................................................................. 201
Generation Run Tab .............................................................................. 202
Options Tab ........................................................................................... 204
Report Tab............................................................................................. 206
Online Generation ................................................................................. 207
Criteria Analysis..................................................................................... 210
Printout of the Online Help
04.03
Introduction to Process Diagnostics
WinCC/Proagent
Contents
The "ProAgent" options package enables you to configure powerful process
diagnostics functions. These diagnostics functions help you detect and rectify
potential faults very quickly. In that way, you will be able to increase the availability
of your installation, reduce downtimes and bring down costs.
This documentation provides you with the information you need to do the following:
•
configure an installation-specific process diagnosis
•
detect a process error, find the cause of the error and rectify the error
What You Are Expected to Know Already
This documentation assumes that you already have general experience of
configuring with WinCC. The topics dealt with here are therefore restricted to
describing the functions and procedures offered by ProAgent but not contained in
the standard functional scope of WinCC.
It also assumes you have a basic knowledge of STEP 7 and associated options
packages.
Note
If you want to configure a process diagnosis yourself, all the chapters will be
important to you. If you want to work with a process diagnosis that has already
been configured, you only need to read the chapters entitled "Introduction" and
"Display in Runtime Mode".
Where to Find What
The chapters of this documentation are arranged by topic as follows:
•
The chapter entitled "Introduction to Process Diagnostics" helps you get to
know the advantages of process diagnostics and shows you how simple it is to
find and rectify the cause of a fault. An overview shows you what steps are
required for configuration and where the interfaces are between STEP 7,
WinCC and ProAgent.
•
The chapter entitled "Effects on WinCC" shows you which components are
added to WinCC when you use ProAgent. Installing the ProAgent option
package adds some script functions that are required for process diagnosis to
the Global Script Editor.
•
The chapter entitled "Display in Runtime Mode" describes in detail how the
different diagnostic screens appear in WinCC Runtime mode, what they show
and which functions you can trigger as a user. It also explains what the
sequence of process diagnosis and fault rectification looks like in practice. You
need to know this before you begin creating your own configuration.
Printout of the Online Help
1
Introduction to Process Diagnostics
04.03
•
The chapter entitled "Configuring in WinCC" then informs you how you can
integrate a process diagnosis into a new configuration or how you can 'retrofit'
an existing configuration with process diagnosis. In addition, this chapter also
provides a number of tips on how you can adapt the diagnostic screens to the
design of your system screens.
•
In the "Reference", finally, you will find detailed information on the "functions"
that have been added to the basic WinCC package for process diagnostics and
on the dialog boxes of the "ProAgent Editor". You also receive information on
the "Online Compilation" and "Criteria Analysis" topics.
Printing
Everything contained in the online help can also be found in an electronic
manual that you can open using the button alongside. The electronic
manual also allows you to print whole sections of the online help.
An installable version of Acrobat Readers can be found in the directory
"..\ Smarttools\Acroread" on the WinCC CD-ROM.
2
Printout of the Online Help
04.03
1
Effects on WinCC
Introduction to Process Diagnostics
What Process Diagnosis Can Achieve
SIMATIC S7 PLCs enable you to configure powerful process diagnostics functions.
These diagnostics functions help you detect and rectify potential faults very quickly.
In that way, you will be able to increase the availability of your installation, reduce
downtimes and bring down costs.
Alarm message in runtime mode
Automatic analysis
Display of cause of fault
on OS
Process diagnosis
Option package
ProAgent
System availability
Triggering of mouvements
to rectify faults
with the OS
Down times
Costs
Sequence and Benefits of Process Diagnosis
Avoiding Problems
Many problems can be avoided from the outset
The flexibility of the process diagnostics system enables potential problems in the
process sequence to be identified before they actually occur. For example, wear on
a tool is indicated by an increase in forces. The process diagnostics system can
monitor these forces and initiate replacement of the tool at the appropriate time.
Identifying Problems
Problems can still be identified without process diagnostics
WinCC enables you to visualize installations and control them by means of an
easy-to-use interface. A powerful message system draws your attention to faults in
the process.
An error message appears on the OS as an indication.
Rectifying Problems
Situation-relevant information assists you in locating the fault
If problems arise in the process sequence, you can use the OS to trace quite
simply which units have caused the fault. To this end, you can examine the results
of logical operation directly on the OS either in the statement list or in the ladder
diagram and thus find the fault quickly.
Printout of the Online Help
3
Effects on WinCC
04.03
You can quickly remedy the problem
To rectify the fault, you can trigger targeted movements on the OS.
If several parts of the installation have been damaged, you can see this on the OS
and can take the necessary steps to have the individual parts repaired at the same
time.
And that means that your installation will be ready for operation again as quickly as
possible.
Message display
Do not shift
x-axis
Process diagnosis
I1.0
I1.1 O1.0
Fault rectification in prompted manual mode
Message, Diagnosis, Assistance with Fault Rectification
4
Printout of the Online Help
04.03
1.1
Effects on WinCC
How a Process Diagnosis is Carried Out
Diagnostic Screens
When you configure process diagnostics, a number of additional diagnostic
screens are integrated into the configuration. The contents of the screens can be
adapted dynamically to the technological units of the installation.
You can select your start screen for the process diagnostics system yourself. In
addition, you can set which ProAgent screen is opened with an ALARM_S
message in WinCC Runtime mode.
Performing a process diagnosis is extremely easy. You can switch between the
various diagnostic screens simply by pressing a key:
•
ProAgent's user screen is an example of the configuration of a screen that
contains the global key set for calling up the ProAgent screens.
•
In the Global Message Window, all diagnosis-capable messages are marked.
This marking means you can see that you can trace the causes of faults in the
process control system. In addition, a series of additional functions for
selecting and processing the individual alarm messages is displayed.
•
The Overview Screen displays all the units and their subunits. This enables
you to see at a glance which operating mode the individual units are in.
•
The Movement Screen provides quick assistance with rectifying faults. You can
see at a glance which movements are blocked and those which can still be
executed. Movements by individual units can be triggered by keys.
•
The Step Sequence Screen shows you the individual steps in a sequence of
steps. You can search for individual steps and then trigger them.
•
The Detail Screen shows the result of the error analysis which is performed
automatically by the OS. For this purpose the display presents a clear signal
list, a more detailed statement list (STL) or a ladder diagram (LAD) with the
appropriate section from the STEP 7 program code. The status bits of the
operands and all the results of logical operations can be displayed at the same
time. Signals that caused an error are highlighted. The cause of an error can
therefore quickly be traced.
Printout of the Online Help
5
Effects on WinCC
04.03
The Different Diagnostic Screens
Standardization
The entire user interface has been standardized, so that all installations and
sections of installations are controlled along uniform lines.
A detailed description of the individual diagnostic screens can be found in the
chapter entitled "Display in Runtime Mode".
6
Printout of the Online Help
04.03
1.2
Effects on WinCC
How a Process Diagnosis is Configured
System Concept
ProAgent is a universal system solution and designed for optimum interaction
between STEP 7, optional STEP 7 packages and the WinCC visualization system.
WinCC offers you a standardized and ergonomic user interface for configuring
process diagnostics. It makes no difference whether you integrate process
diagnostics into a new project to be created or into an existing project.
Subtasks
Just as when configuring an installation, there are two main subtasks involved in
implementing a process diagnosis:
Programming the PLC
Configuring the OS
Just like WinCC, you use ProAgent for the second step only, that of configuring the
OS.
S7-PDIAG
S7-GRAPH
PLC
Shared
database
ProAgent
Operator Station
Steps Involved in Configuring the Process Diagnosis
Printout of the Online Help
7
Effects on WinCC
04.03
Programming the PLC
Preparations for process diagnostics differ depending on which language you use
for programming a PLC:
•
If you are using S7-GRAPH and its compiler is set to ALARM_S, your
programs will automatically become diagnosis-capable. You will find further
information on this subject in the "S7-GRAPH Manual".
•
If you are programming in LAD/CSF/STL, you need the S7-PDIAG option
package. S7-PDIAG creates additional modules for monitoring your process for
the purposes of fault detection. This is done for the most part automatically.
Thanks to the global approach of S7 process diagnostics, you can work within an
installation using different programming languages to suit your particular needs.
You can also detect and locate process faults in "mixed" sequential and logic
control systems.
Programming the PLC and defining the settings in S7-PDIAG are the first steps in
creating the process diagnosis. They are followed by configuration of the OS using
WinCC and ProAgent.
Common Database as Interface
When translating the PLC program, the STEP 7 option packages store all the data
required for the process diagnosis in a shared database.
WinCC will then access this database during the next step, so that it can configure
the OS.
Configuring the OS
Once the STEP 7 program has been created, the process diagnostics function for
the OS can be configured. This is the point at which the optional WinCC package,
ProAgent, is first put to use.
It goes without saying that you do not need to repeat any of the entries already
made in STEP 7. All relevant information was stored in the shared database now
accessed by ProAgent.
The diagnostic screens are supplied ready-configured. If in a particular case you
would like to customize the design of one of the screens to suit your own special
requirements, you can take advantage of the extensive possibilities offered by the
Graphics Designer.
More information about possible design alterations can be found in the chapter
entitled "Changing the Diagnostic Screens".
Configuration in WinCC is simple and quick. All you still have to do is:
8
Printout of the Online Help
04.03
Effects on WinCC
Defining
target hardwarwe
Defining options
Selecting
units
Carrying out
generation
Configuring the OS for Process Diagnostics
In the first step you set the system hardware for which you want to configure
process diagnostics.
In the second step you select the options for your process diagnostics.
In the third step, you select the units of your S7 PLC for which you would like to set
up process diagnostics. This selection is quite simple: ProAgent prepares a list in
which you need only click the units concerned.
The final step you perform is to generate the new database for diagnostics, a task
which requires you simply to press a button.
You will find detailed instructions on configuration with ProAgent in the section
"How You Configure with ProAgent".
Printout of the Online Help
9
Effects on WinCC
1.3
04.03
Before You Start
ProAgent for Configuring the OS
ProAgent is only part of the world of S7 and therefore also just "one" part of
creating a process diagnosis. Like WinCC, ProAgent is only used for configuring
the OS and not the PLC.
Requirements
In order to be able to configure a process diagnosis, certain basic requirements
must be met. They can be summarized as follows:
You have to install the following software or have already installed it:
•
STEP 7
•
WinCC with Object Manager
•
PLC/OS Engineering
•
ProAgent
In addition, the following requirements must be met:
10
•
The PLC must have been programmed already - either with LAD/CSF/STL and
S7-PDIAG or S7-GRAPH.
•
If the PLC has been programmed in STEP 7 (LAD/FUP/STL), additional error
detection blocks must have been created using the S7-PDIAG option package.
Error detection must have been activated.
Printout of the Online Help
04.03
2
Display in Runtime Mode
Effects on WinCC
Introduction
Installing the ProAgent option package adds some script functions that are
required for process diagnosis to the Global Script Editor.
This section shows you which new components have been added.
Printout of the Online Help
11
Display in Runtime Mode
2.1
04.03
After Installation
Diagnostic Screens
While ProAgent is being installed, a folder called "ProAgent" is created at the
WinCC system folder. It contains diagnostic screens that are fully ready for use for
the different OS.
Note
The names of the screens required for process diagnostics all begin with the prefix
"@Diag". This means that these diagnostic screens are always listed together.
Since ProAgent is used around the world, all the names used are English.
The ProAgent Editor
ProAgent is added to the standard editors, with its own icon in the Project
Navigation Window of the Control Center:
The ProAgent Editor
When ProAgent is installed, if you choose "Editors" from the menu, you will now
find an additional option called "ProAgent".
By opening the shortcut menu with the right mouse button or by choosing "Editors"
→ "ProAgent" → "Open", you can call the configuration dialog box for process
diagnostics.
12
Printout of the Online Help
04.03
2.2
Display in Runtime Mode
After Generation
Introduction
By generating ProAgent, stored pieces of message text and all data required for
diagnostics are imported from the database shared with STEP 7 and saved
together with the configuration in WinCC.
The effects of generating ProAgent with respect to WinCC are described below.
Tag Management
In Tag Management, the entry "SIMATIC S7 PROTOCOL SUITE" is stored with
further subitems under the item "Internal Tags". This provides you with the
connections, channels and tags necessary for selecting the units that can be
diagnosed:
SIMATIC S7 PROTOCOL SUITE
The Graphics Designer Editor
The ready-made diagnostic screens are copied from the respective template to the
"GraCS" folder in your current WinCC project. These screens with the prefix
"@Diag" are therefore also listed in the table window of the Graphics Designer.
The Alarm Logging Editor
In alarm logging, all the ALARM_S messages relevant to process diagnostics and
any process control system messages are added.
This means the ProAgent Message Screens have been enhanced by the following
additional functions:
•
All ALARM_S messages for which you can perform a criteria analysis are
identified in the "Diag" message block by an asterisk, "*".
•
All other ALARM_S messages are identified in the "Diag" message block by a
letter "A".
Printout of the Online Help
13
Display in Runtime Mode
•
04.03
The format strings entered in the "Message Text" message block provide
information about the blocked operands. The format strings are described in
the "Criteria Analysis" topic.
Diagnosable Alarm Message
Further, new message classes are created at "Message Class", with which you can
precisely select from the Message Screen the messages that you want to display
in the WinCC Runtime mode of process diagnostics.
The Global Script Editor
In the Global Script editor, a folder called "ProAgent" is created at the entry called
"Standard Functions" and contains the functions required for diagnostics.
A description of all ProAgent functions can be found under the topic "Functions".
14
Printout of the Online Help
04.03
2.3
Display in Runtime Mode
ALARM_S Messaging
Why ALARM_S?
STEP 7 option packages S7-PDIAG and S7-GRAPH send ALARM_S messages.
ALARM_S-messages are essential for process diagnostics with ProAgent.
When an error occurs, the CPU sends the time in addition to the state of the
message (active, cleared or acknowledged).
This makes an exact diagnosis of the cause of the error possible.
You can use ALARM_S alongside the message bit procedure used to date. You
can also continue to use existing projects.
What is ALARM_S?
ALARM_S is a message number procedure. The message numbers are assigned
by the system when you configure in STEP 7. Message text is uniquely assigned
by the numbers.
Changes due to ALARM_S
Due to the use of the ALARM_S message number procedure, there are certain
minor changes relating to configuration and in the Message Screen on the OS.
Messages are no longer configured in WinCC, but while programming the PLC in
STEP 7 instead.
Printout of the Online Help
15
Display in Runtime Mode
16
04.03
Printout of the Online Help
04.03
3
Configuring in WinCC
Display in Runtime Mode
Introduction
When you configure process diagnostics, a number of additional diagnostic
screens are integrated into the configuration. The contents of the screens can be
adapted dynamically to the technological units of the installation.
Standardization
The entire user interface has been standardized, so that all installations and
sections of installations are controlled along uniform lines.
Diagnostic Screens
The following individual diagnostic screens are integrated:
•
The ProAgent User Screen as an example of the configuration of the global
key set for calling the ProAgent screens
•
The Message Screen, in which the diagnosable messages can be selected
and processed
•
The Overview Screen, in which the operator can see at a glance which
operating mode the individual units are in.
•
The Movement Screen for quick rectification of an error.
•
The Step Sequence Screen, in which you can run individual steps manually,
reinitialize sequences of steps and adjust these to match the program
•
The Detail Screen, which shows the result of the error analysis which is
performed automatically by ProAgent.
Printout of the Online Help
17
Configuring in WinCC
3.1
04.03
How To Activate Diagnostics
Diagnosable Messages
Thanks to the "Alarm Logging" editor of WinCC, you are no longer a stranger to
working with message windows and alarm messages.
There is still such a thing as a message window – even if ProAgent has been used
to configure a process diagnostics function. ALARM_S messages for which you
can perform a criteria analysis are now identified by an asterisk, "*". You can call
up further information about these messages from the Detail Screen and
Movement Screen. All other ALARM_S messages are identified by a letter "A".
Alarm Message Structure
Diagnostics Start Screen
Depending on the configuration, there is normally at least one key which, for
example, calls the Movement Screen, in addition to starting diagnostics by means
of an ALARM_S message. From there, you can go to other diagnostic screens.
Other Routes
Your configuration may, however, also allow you to select one of the other
diagnostic screens (e.g. the Message Screen, the Detail Screen or the Movement
Screen) direct from your system screens.
Message Acknowledgement
After completing diagnosis and rectifying the fault, you have to acknowledge the
message as normal. If the alarm message belongs to an acknowledgment group,
all the other alarm messages of this group are also acknowledged at the same
time.
18
Printout of the Online Help
04.03
3.1.1
Configuring in WinCC
What Are the Individual Diagnostic Screens Used For?
Diagnostic Screens
When you configure process diagnostics, a number of diagnostic screens are
integrated into your project. Process diagnostics runs in WinCC Runtime mode
with the help of these screens.
The diagnostic screens are for the most part standardized and differ only minimally
between the various OSs. The following figures show examples of diagnostic
screens on a PC.
ProAgent's User Screen
global key set
message line
ProAgent's User Screen (example on PC)
ProAgent's User Screen shows you how the global key set is configured for calling
up the ProAgent screens. You can insert keys that have been configured
appropriately into the system screens for your project, enabling you to switch
directly to the individual diagnostic screens.
You will find a detailed description of ProAgent's user screen in the section entitled
"ProAgent's User Screen".
Note
Printout of the Online Help
19
Configuring in WinCC
04.03
To return from the diagnostic screens to your default configuration, you have to
adjust the assignment of the "Back" key.
Message Screen
diagnosable alarm message
picture-specific key set
global picture header
global key set
Message Screen (example on PC)
The Message Screen displays all pending process messages. The screen-specific
keys allow you to call a dialog box for selecting messages and to acknowledge
ALARM_S messages, among other things. You can also view archived messages
and carry out a criteria analysis, provided that the appropriate information has also
been archived and the data stored is consistent with the ProAgent diagnostics
database.
A detailed description of the Message Screen can be found in the section entitled
"Message Screen".
20
Printout of the Online Help
04.03
Configuring in WinCC
Overview Screen
global picture header
blocked unit
picture-specific
key set
message line
global key set
Overview Screen (example on PC)
The Overview Screen shows an overview of all the units in the system.
This enables you to see at a glance which operating mode a particular unit is in.
Blocked units are identified as such. When a fault is rectified, this marking is
removed.
A detailed description of the Overview Screen can be found in the section entitled
"Overview Screen".
Printout of the Online Help
21
Configuring in WinCC
04.03
Detail Screen
these signals caused result of logical
operation
a process error
global
key set
message line
global picture
header
picture-specific
key set
Detail Screen (example on PC)
The process diagnosis analyzes which signals in the PLC program have led to an
error message. The detail screen shows the result of this criteria analysis. This
means you recognize not only that a fault has occurred, but also the cause of this
fault.
The Detail Screen shows the relevant section of the STEP 7 program code in STL
or LAD format. Parallel to this, the status bits of the operands, all results of logical
operations, symbols and comments are displayed. Signals that have caused a fault
are highlighted.
A detailed description of the Detail Screen can be found in the section entitled
"Detail Screen".
22
Printout of the Online Help
04.03
Configuring in WinCC
Movement Screen
movement possible
picture-specific key set
movement blocked
message line
global picture header
global key set
Movement Screen (example on PC)
The Movement Screen provides assistance with rectifying faults. It enables you to
trigger targeted movements of individual units very simply.
The symbols displayed help you to see at a glance whether a movement is
blocked.
A detailed description of the Movement Screen will be found in the section entitled
"Movement Screen".
Printout of the Online Help
23
Configuring in WinCC
04.03
Step Sequence Screen
disturbed step
picture-specific
key set
active step
global picture
header
message line
global key set
Step Sequence Screen (example on PC)
The Step Sequence Screen helps you to rectify faults in an S7 Graph sequence of
steps.
The Step Sequence Screen displays a list of all the steps in the step sequence.
Steps with faults and active steps are indicated by specific colors. From here you
can initialize the sequence of steps or activate individual steps, for example.
24
Printout of the Online Help
04.03
Configuring in WinCC
list of operands
disturbed step
picture-specific message line
key set
global picture
header
global key set
Expanded Step Sequence Screen (example on PC)
If the S7-GRAPH-OCX belonging to STEP7 is installed on your OS with Control
GraphVisu, you receive an expanded step sequence screen. Apart from the
sequence list, it contains a list of malfunctioning operands and a graphic
presentation of the step sequence, as you know from S7-GRAPH. With the
Expanded Step Sequence Screen you can synchronize a step sequence with a
process again after a malfunction.
A detailed description of the Step Sequence Screen is given in the section entitled
"Step Sequence Screen".
Printout of the Online Help
25
Configuring in WinCC
3.2
04.03
Operating Principles
Standardization
Operation of the individual diagnostic screens is standardized and is based on the
design options familiar to you from WinCC.
Standardized graphics are used in all diagnostic screens.
Once you have got to know the basic structure of the diagnostic screens and the
various symbols used, you will quickly find your way round all screens.
Linking Diagnostic Screens
The ProAgent User Screen can be used as the start screen for diagnostics. For
precise error localization and elimination, you can then change directly to the
Overview Screen, Message Screen, Detail Screen, Movement Screen or Step
Sequence Screen.
The information displayed following a change of screens will always depend on
which message or unit is highlighted. When an initial message is issued, the
corresponding unit is selected.
You can return from the diagnostic screens at any time to the system screen from
which you activated diagnostics.
User screen
Message
screen
Movement
screen
Overview
screen
Detail screen
S7-KFA-Editor/
S7-PDIAG/
S7-GRAPH
Sequence
handling screen
S7-Manager
Linking Diagnostic Screens
Controlling via Keyboard and Mouse
Depending on the type of your OS, you can continue to work in the way to which
you are accustomed. Basically, you can run all diagnostic screens at the click of a
mouse or by using function and arrow keys.
Note
26
Printout of the Online Help
04.03
Configuring in WinCC
For reasons of clarity, all keys are reproduced in this documentation with the
symbols or text name which can be seen on the diagnostic screens. The key
numbers and associated letters ("F" or "K") are not used, since they vary
depending on the type of OS configured.
Symbols
The cursor functions possible are depicted by the following symbols:
Symbol
Key
Function
Cursor Up, Cursor Down
Indicates that the display can be scrolled
vertically by one element.
Indicates that the display can be scrolled
vertically by one page.
Cursor Left,
Cursor Right
Indicates that the display can be scrolled
horizontally by one element.
Indicates that the display can be scrolled
horizontally by one page.
Other symbols are used to denote errors and errored results of logic operations:
Symbol Name
Warning triangle
Function
Identifies a faulty unit or blocked movement.
That unit whose fault occurred first is marked by
a flashing border around this symbol.
Printout of the Online Help
Lightning flash
Identifies a faulty signal.
Connection disturbed
Indicates an errored connection or an
addressing error.
Inconsistency alert
Indicates a unit for which the network data has
changed in the STEP 7 configuration. During a
criteria analysis the network data is read by
ProAgent from the PLC.
Consistency error
The data in ProAgent is not consistent with that
in the STEP 7 database. The project needs to
be re-generated.
Archive
Indicates a criteria analysis displayed from the
data stored in the comment for a message.
27
Configuring in WinCC
3.3
04.03
Structure of the Diagnostic Screens
Standardized Structure
All the diagnostic screens – except the User Screen – are structured in three parts:
a part specific to each diagnostic screen is sandwiched between a "global screen
header" and a "global key set". Above the keys is a message line for displaying the
earliest message.
Global picture header
Application area
Global key set
Sections of the Diagnostic Screens
Clear partitioning of diagnostic screens into one screen-specific and two global
sections make sure you can quickly find your bearings when running the different
screens.
28
Printout of the Online Help
04.03
3.4
Configuring in WinCC
Global Screen Header
Structure
user
display of date
clock
Global Screen Header
The date and time are always displayed in all diagnostic screens.
In addition, displayed to the right of the "User" symbol is the name under which you
or your group logged on in WinCC.
ProAgent is integrated in the central access protection function of WinCC. This
enables you, for example, to protect particular operating objects against being
used by unauthorized persons. You should use this in the Overview Screen for the
"Operating Mode" and "S7 Manager" keys. Further information can be found in the
manual or in the Online Help for the WinCC editor "User Administrator".
Printout of the Online Help
29
Configuring in WinCC
3.5
04.03
Global Key Set
Global Key Set
In addition to a number of screen-specific keys, you can also use various global
screen keys in all diagnostic screens.
Symbol Name
Function
"Overview"
You use this key to open the Overview Screen.
"Detail View"
You use this key to open the Detail Screen.
"Movements"
You use this key to open the Movement Screen.
"Messages"
You use this key to open the Message Screen.
"Sequence"
You use this key to open the Step Sequence Screen.
"S7 Manager"
With this key you can change directly to SIMATIC
Manager to work with other SIMATIC applications.
"Network entry"
With this key you can directly display the selected
message, unit or step sequence in the application in
which it was programmed:
a step sequence is displayed in S7-GRAPH.
an S7-PDIAG unit is displayed in the LAD/FBD/STL
editor.
in the case of process control and "Report system
error" messages, the Step 7 hardware diagnostics are
opened.
"Language"
With this key you can select - with multi-lingual
projects - German, English or French.
"Information"
You can use this key to open the window entitled
"Screen Information". This window allows you to enter
or read information or comments for each diagnostic
screen.
"Back"
You can use this key to exit diagnosis mode and
return to the installation screen from which ProAgent
was activated.
Switching Diagnostic Screen
With the "Overview", "Detail View", "Movements", "Sequence" and "Messages"
keys you can change directly between these five diagnostic screens for every
selected message or unit.
30
Printout of the Online Help
04.03
Configuring in WinCC
The key of the diagnostic screen currently displayed is deactivated.
Calling SIMATIC Manager
If you require SIMATIC Manager - for example, to work with other SIMATIC
applications - press the "S7 Manager" key. If SIMATIC Manager is already open,
its window is placed on top. If it is not open, SIMATIC Manager will be opened with
the last project to be called.
Network Entry
You can use this key to directly open one of the STEP 7 applications and look how
the unit is programmed. If you have the appropriate input privilege, you can also
make changes there.
Which tool is called depends on the type of unit that you currently have selected:
•
if a sequence is selected, this will be displayed in S7-GRAPH
•
if an S7-PDIAG unit is selected, this will be displayed in the LAD/FBD/STL
editor.
Note
In the currently available versions of S7-GRAPH (v. 5.0) and STEP 7 Hardware
Diagnostics (v. 5.1), Open in Read Only mode is not possible. Instead these tools
are always opened in Edit mode.
You should therefore always give keys that allow entry into these tools the
appropriate input privilege!
Changing Languages
Using the "Language" key, you can reset the language of the diagnostic screen
concerned to German, English or French at Runtime. The screen will then be
rebuilt in the corresponding language.
Calling Screen Information
Use the "Information" key to call the information window.
Printout of the Online Help
31
Configuring in WinCC
04.03
Information Window
In this window you can enter an explanatory text or comment for each diagnostic
screen and save it using the "Save Text" button. In this way, you can give users
special information, instructions and tips. With multi-lingual projects, information is
displayed only in the languages in which it was entered.
Exiting Diagnostics
You can exit diagnostic mode whenever you like by pressing "Back".
32
Printout of the Online Help
04.03
3.6
Configuring in WinCC
ProAgent's User Screen
The Purpose of ProAgent's User Screen
ProAgent's User Screen (example on PC)
The ProAgent User Screen is designed as an example configuration for starting
process diagnostics from the system screens. You can copy the keys and thus
integrate opening of the ProAgent screens into your system screens.
From there, you can move to the Message Screen and the Overview Screen where
you can obtain an overview of pending error messages.
Note
If you want to use this screen together with your default configuration, you have to
adjust the "Back"
Printout of the Online Help
key.
33
Configuring in WinCC
3.6.1
04.03
What You See on ProAgent's User Screen
Screen Elements
The structure of ProAgent's user screen is similar to that of other diagnostic
screens.
ProAgent's User Screen (example on PC)
(1) Here you can see the precise product designation of ProAgent and the
copyright notices. You can modify this center area of the user screen in a very
simple manner to reflect your corporate design and, for example, to insert your
company logo at this point (refer to "Changing the Diagnostic Screens").
(2) The keys in this section enable you, among other things, to switch to the other
diagnostic screens (see "Global Key Set").
(3) The earliest message is displayed on the message line. You can scroll to other
messages.
34
Printout of the Online Help
04.03
3.7
Configuring in WinCC
Message Screen
The Purpose of the Message Screen
The Message Screen displays all pending process messages. The messages are
displayed in chronological order: the oldest message is on the top line, the latest
on the bottom line. In the long-term archive, the first defective operand of the basic
network is displayed in addition to the message text. To do this, the "Store result of
criteria analysis in the message comment" check box must be checked on the
"Options" tab in your ProAgent editor.
The Message Screen frequently serves as the entry point to diagnostics. It enables
you to observe whether and which faults occur. You can then branch selectively to
further diagnostic screens.
Message Screen (example on PC)
This screen allows you to recognize at a glance which messages are diagnosable.
You can then carry out a process diagnosis for those messages.
Functions
You can select a specific message and then open other diagnostic screens along
context-sensitive lines:
•
The Detail Screen: this screen shows the program code that caused the
selected alarm message.
•
The Movement Screen: this shows all movements of the blocked unit. And, of
course, you can also execute those movements directly from that point as well.
Printout of the Online Help
35
Configuring in WinCC
04.03
•
The Step Sequence Screen: this screen shows you the sequence of steps on
which the blocked unit is based. You can enable or disable single steps of the
whole step sequence.
•
If you want to see an overview of the various units of your system, you can
open the "Overview Screen".
In addition, in the Message Screen you can open a dialog box for filtering
messages, acknowledge ALARM_S messages and view archived messages.
36
Printout of the Online Help
04.03
3.7.1
Configuring in WinCC
What You See in the Message Screen
Screen Elements
Like all the diagnostic screens, the Message Screen has a standardized layout.
There are only slight variations between the display on the various OSs.
The following illustration shows an example of the Message Screen on a PC.
Message Screen (example on PC)
The Message Screen contains the following entries:
(1) The "Diag" column shows you whether an ALARM_S message has been
issued and whether you can carry out an analysis of the criteria for this message:
"A": identifies a diagnosable message, i.e. an ALARM_S message.
"*": identifies a diagnosable message for which you also carry out an analysis of
the criteria. You can call up the Detail Screen or the Movement Screen for such
messages.
This column remains blank if messages issued are not diagnosable.
(2) The "Status" column displays the message status:
"C": message arrived
"G": message departed
"CG": message arrived and departed
Printout of the Online Help
37
Configuring in WinCC
04.03
(3) When the message list is selected, you can see in the "Acknowledged" column
whether the message has been acknowledged.
(4) The "Date" column displays the date of the event.
(5) The "Time" column displays the time of the event.
(6) The "Message text" column displays the user texts that have been configured in
the configuration system of Alarm Logging or with the optional STEP 7 packages.
Regardless of the settings in the WinCC-Editor Alarm Logging, additional columns
can be displayed. These can contain the results of a criteria analysis, for example.
Colors
If you accept the presettings, the colors of the individual messages have the
following meanings:
•
White on a red background: ALARM_S messages
•
White on a blue background: the message currently selected
•
Yellow against a black background: process control system messages (further
information is contained in the manuals and Online Help tools for STEP 7).
You can, however, change these color settings. (Refer to "Changing the Diagnostic
Screens".)
38
Printout of the Online Help
04.03
3.7.2
Configuring in WinCC
Keys in the Message Screen
Symbol
...
Printout of the Online Help
Name
Function
"Up/Down"
Use the vertical arrow keys or the mouse to
move the selection bar for selecting messages.
"Message list"
You use this key to call the current message
sequence.
"Short-term Archive"
You can use this key to check messages
stored in the continuous archive (or short-term
archive) in WinCC Runtime mode.
"Long-term Archive"
You can use this key to check messages
archived in the sequence archive (or long-term
archive) in WinCC Runtime mode.
"Selection"
You can use this key to open the selection
dialog box for defining the selection criteria. All
messages that do not satisfy these criteria are
then no longer displayed.
"Info text"
You can use this key to open a dialog box for
displaying longer information texts. All text has
to be configured in S7.
"Comment"
You can use this key to open a text editor for
editing short comments.
"Single ack"
You can use this key to acknowledge a single
message.
"Group ack"
You can use this key to acknowledge all
pending currently visible messages that require
acknowledgement, as long as they do not have
to be acknowledged singly (single
acknowledgement only).
The keys of the global key set (see "Global
Key Set").
39
Configuring in WinCC
3.7.3
04.03
How to Work with the Message Screen
Aims
You have opened the Message Screen in order to obtain an overview of the
pending alarm messages. You wish to carry out a process diagnosis for specific
messages.
Message Screen (example on PC)
Filtering Out Messages
First of all, you gain an overview of all the diagnosable messages. Use the
"Selection" key to call the "Set Selection" dialog box and thus harmonize the
Message Screen with your specific requirements in WinCC Runtime mode.
Further information about the various filter criteria can be found in the manual or
Online Help texts for "Alarm Logging".
Selecting a Message
Before performing process diagnostics for a specific alarm message, select the
message concerned. To do this, click the message concerned with the mouse or
move the selection bar with the arrow keys to the corresponding point.
Switching to the Overview Screen
40
Printout of the Online Help
04.03
Configuring in WinCC
To obtain an overview of which units of your system are affected by the faults, use
the "Overview" key to switch to the Overview Screen. The unit relating to the
message is selected on the screen. From here, you can switch to the Movement
Screen in order to manually trigger individual "movements" for a specific unit or
return to the Message Screen.
Switching to the Detail Screen
Once you have selected the required message, you can press the "Detail View"
key to switch to the Detail Screen. This shows you the section of the STEP 7
program code responsible for triggering the alarm message.
Note
You can also call the Detail Screen and perform an analysis of the criteria for
messages from an archive.
Switching to the Movement Screen
Once you have selected a message, you can use the "Movements" key to switch
directly to the Movement Screen (i.e. without having to go via the Overview
Screen). The Movement Screen shows all movements for the units where there are
faults and allows you to execute those movements directly as well.
Switching to the Step Sequence Screen
If you have selected a message based on an S7 GRAPH step sequence, then you
can use the "Sequence" key to switch directly to the Step Sequence Screen. On it,
you can specifically enable or disable single steps of the whole step sequence.
Displaying Archived Messages
In WinCC Runtime mode, you can check all archived messages at any time. For
this, all the archiving options with which you will be familiar from alarm logging are
available to you.
Note
Should you wish to use the archive functions, you must configure them first in
alarm logging using the "Archive Configuration" dialog box.
Printout of the Online Help
41
Configuring in WinCC
04.03
Selecting the messages in the short-term archive.
The "Long-term archive" key displays messages stored in the long-term archive,
provided that the corresponding information was also stored and the data stored is
consistent with the ProAgent diagnostics database. Further information on the
long-term archive can be found in the WinCC manual or Online Help texts for
"Alarm Logging".
You can also call the Detail Screen and perform an analysis of the criteria for
messages that have already been archived.
Message Comments
If you want to enter a brief explanation on a message for other users (for example
"This message arose today because ..."), press the "Comment" key.
Message comment input presupposes an activated long-term archive.
Message Comment Dialog Box
The "Number" field contains the number of the single message in question (as it is
stored in the table window of Alarm Logging).
You can see when the message occurred from the "Date" and "Time" boxes. The
"User" and "Computer" boxes indicate who entered the comment.
Note
42
Printout of the Online Help
04.03
Configuring in WinCC
When configured to do so, the "Comment" box also displays the operands
triggering the message and the diagnostics entry operand. If this is the case, you
should not make any changes here!
Info Text
In STEP 7, Help information for the project runtime can be stored for every
message. If you wish to view this information at runtime, press the "Info text" key to
open the "Info Text For A Message" dialog box.
Info Text Dialog Box
The "Number" field contains the number of the single message in question (as it is
stored in the table window of Alarm Logging).
Further information can be found in the manual or Online Help texts for "Alarm
Logging".
Acknowledging Messages
After completing diagnostics and rectifying the fault, the final step you have to take
is to acknowledge the messages:
Acknowledge a single message with the "Single ack" key.
With the "Group ack" key, you acknowledge not only the selected message but all
pending currently visible messages requiring acknowledgement, provided they do
not require single acknowledgement.
Printout of the Online Help
43
Configuring in WinCC
04.03
You can check and/or alter the precise acknowledgement criteria in Alarm Logging
in the "Configure Message Classes" dialog box on the "Acknowledgement" tab.
Further information can be found in the manual or Online Help texts for "Alarm
Logging".
Exiting the Message Screen
You can switch directly from the Message Screen to the other diagnostic screens
or also exit diagnostics:
switches to the Overview Screen
switches to the Detail Screen
switches to the Movement Screen
switches to the Step Sequence Screen
exits diagnostics
44
Printout of the Online Help
04.03
3.8
Configuring in WinCC
Overview Screen
The Purpose of the Overview Screen
The Overview Screen shows all the units in your system.
Overview Screen (example on PC)
It gives you the following information about each unit:
•
whether it has a fault
•
in which operating mode it is (Manual, Automatic etc.)
•
in the case of S7 Graph sequences, which step of the sequence is currently
active.
If there are faults on more than one unit, you can see on which one the fault first
occurred. In this way, you immediately see where the actual cause is located and
which faults are secondary in nature.
Functions
You can select a unit from the list and set its operating mode. For example, you
can switch from Automatic to Manual mode in order to be able to rectify a fault
manually.
Once you have selected a unit, you can analyze it in more detail on the Detail
Screen and then switch to the Movement Screen to execute individual movements
manually in order to rectify the fault. If a S7-GRAPH step sequence is based on the
unit, you can enable or disable single steps or the whole chain on the Step
Sequence Screen.
Printout of the Online Help
45
Configuring in WinCC
3.8.1
04.03
What You See on the Overview Screen
Standardized Layout
Like all the diagnostic screens, the Overview Screen has a standardized layout.
There are only slight variations between the display on the various OSs.
The following illustration shows an example of the Overview Screen on a PC.
2
1
8
3
5
9
4
6
10
7
11
12
13
14
Overview Screen (example on PC)
Display Mode
(1) Information is provided on the display mode in the top left box:
The "Warning Triangle" symbol is displayed here if only the blocked units are
displayed. If this symbol is not shown then all the units are displayed (see
"Changing the Display Mode").
46
Printout of the Online Help
04.03
Configuring in WinCC
Arrow symbols appear in this field if there are more units than can be displayed in
the list at one time. You can then scroll up or down through the list of units by
clicking the buttons to the right of the table or using the cursor keys of your OS.
Information on the Selected Unit
In the top segment of the display, you are provided with detailed information on the
hierarchy of the units (refer to "Hierarchical Units on the Overview Screen") and on
the unit highlighted by the selection bar.
(2) The name of the next higher unit in the hierarchy appears in the "Unit Level"
box.
(3) The "Unit No." field tells you the block type (FC or DB) and the block number of
the selected unit.
(4) The complete name of the unit appears in the "Unit" box. This name depends
on the programming of the PLC:
•
If the unit was programmed in S7-PDIAG, this is the symbol of the block or an
absolute name.
•
If the unit was programmed in S7 GRAPH, this is a sequence name.
(5) The current mode of the unit is displayed in the "Operating Mode" box. If the
STEP 7 program does not define an operating mode, the field remains blank. You
can change modes with the "Operating Mode" key.
Boxes (6) and (7) appear only if the selected unit was programmed in S7 GRAPH.
(6) In the "Step" box you can see the step name of the first active step.
(7) The numbers of the active steps appear in these boxes. The numbers of the
errored actions are always displayed first from left to right. They are identified by a
highlight. If there are more active steps than can be displayed, the following symbol
appears:
Overview of Units
The center section of the display shows a table of all diagnosable units in your
system. The order in which they are displayed depends on the attributes which you
assigned to the units in S7-PDIAG in the "Properties - Units" dialog box. The
Overview Screen in ProAgent is built in accordance with the attributes "Belongs to
Screen“ and "Position on Screen“. Units for which these attributes are not set are
attached to the bottom of the list.
(8) Displayed in the left of the table is the current status of a unit:
The "Warning Triangle" symbol indicates that a unit is blocked. A red border
flashes round the "Warning Triangle" symbol in front of the unit that became
blocked first. This indicates to you that this fault is not a secondary fault.
Printout of the Online Help
47
Configuring in WinCC
04.03
The "Connection Errored" symbol indicates that connection to the PLC is errored or
an addressing error has occurred.
The "Inconsistency alert" symbol indicates that the data for this network has
changed in the STEP 7 configuration. In a criteria analysis the network data is read
by ProAgent direct from the PLC.
The "Consistency error" symbol indicates that the data for this network is not
consistent with the STEP 7 database. Re-generate your project before continuing.
(9) The "Unit Name" column displays the name of a unit stored in the PLC
program. This is:
•
the symbol of a module or an absolute designator if the unit was programmed
in S7-PDIAG
•
a sequence name if the unit was programmed in S7-GRAPH
(10) The contents of the "Step Name" and "Action" columns depend on the
programming of the unit:
•
nothing is displayed if the unit was programmed in S7-PDIAG
•
the step name and the number of the active step are displayed when S7GRAPH is used.
(11) In the "Mode" column you can see which operating mode is currently set for
that unit. If the STEP 7 program does not define an operating mode, the field
remains blank.
You can change modes with the "Operating Mode" key.
(12) To the right of the "Mode" column you can see whether there is a higher-level
or lower-level unit available for the unit concerned:
This symbol indicates a "lower-level unit". You can switch to that unit either by leftclicking the symbol or with the "Layer Down" key.
This symbol indicates a "higher-level unit". You can switch to that unit either by
right-clicking the symbol or with the "Layer Up" key.
This symbol indicates that there is a "lower-level unit" and a "higher-level unit". You
can switch unit level either by right-click or left clicking, or using the "Layer Up" and
"Layer Down" keys.
(13) On the far right you can see whether there is a movement for the unit
concerned:
48
Printout of the Online Help
04.03
Configuring in WinCC
If there is a movement for the unit or a lower-level unit, the "Movement" symbol is
displayed. You can then switch to the Movement Screen by left-clicking the symbol
or using the "Movements" key.
The "Movements" symbol to the right of a sequence indicates that this sequence
has been assigned a movement unit in S7 GRAPH (see "Basic Requirements of
the PLC Program"). The assigned movement unit will be handled in the Overview
Screen as part of the sequence and will not be shown as a separate unit.
(14) Here you can scroll up and down in the list of units by clicking the mouse if
more units are present than can all be displayed in the list at the same time.
Printout of the Online Help
49
Configuring in WinCC
3.8.2
04.03
Keys in the Overview Screen
Symbol
Name
Function
"Up / Down"
You use the Up and Down cursor keys to move
the highlight between units.
"Page Up"
With these keys you can move the selection bar
one whole page up or down.
"Page Down"
If there are more units than can be displayed on
the screen at the same time, the display is
scrolled as soon as you move the highlight past
the top or bottom end of the message list.
"Layer Down"
Use this key to switch to a lower-level
"hierarchical unit".
The "Subordinate Unit" symbol to the right of the
unit indicates that there is a lower-level unit. In
this case the "Layer Down" key is enabled. If
there isn't a subordinate unit, the key is
deactivated.
"Layer Up"
Use this key to switch to a higher-level
"hierarchical unit".
You can see whether a higher-level unit is
present by this key being enabled. If there isn't a
higher-order unit, the key is deactivated.
...
"Operating Mode"
Use this key to change the "operating mode" of
the selected unit. The operating modes that are
possible depend on how the unit has been
programmed. If no mode is defined, the key is
disabled.
"All / Errored"
Use this key to toggle the "Display Mode"
between display of all units and display of units
with faults only.
The keys of the global key set (see "Global Key
Set").
Note
ProAgent is integrated in the central access protection function of WinCC. This
enables you, for example, to protect particular operating objects against being
used by unauthorized persons. You should use this in particular for the
"Sequence", "Network Entry", "Operating Mode" and "S7 Manager" keys. Further
information can be found in the manual or in the Online Help for the WinCC editor
"User Administrator".
50
Printout of the Online Help
04.03
3.8.3
Configuring in WinCC
How to Work with the Overview Screen
Aims
You have opened the Overview Screen to see on which units of your system there
are faults. You would like to see which unit caused the error and what triggered the
error. Finally, you would like specifically to move individual system components to
clear the error.
Overview Screen (example on PC)
On Which Units Are There Faults?
First of all, you would like to gain an overview of the units blocked. You use the
cursor keys to move the highlight through the list. All blocked units are marked by
the "Warning Triangle" symbol.
To see only those units with faults, use the "All / Errored" key to switch display
mode. Those units that are not blocked are then no longer displayed, and you can
move directly between the blocked units with the highlight.
This setting is retained until you restart WinCC Runtime mode or change the
display mode back to the display of all units by pressing the key.
On Which Unit Did a Fault Occur First?
A red border round the "Warning Triangle" flashes next to the unit in which an error
occurred first.
Printout of the Online Help
51
Configuring in WinCC
04.03
Information on the Unit
You move the highlight onto the unit with the flashing border. That unit is now
selected. In the top segment of the display, you can see more extensive
information on that unit: the next higher hierarchical layer of the selected unit, the
block type, unit-assigned text, the current operating mode and the step numbers of
the active actions.
Criteria Analysis
If the cause of the fault is not clear, you can investigate the fault more closely to
see which logical operation results in the program code have led to the error
message. To do so, use the "Detail View" key to open the Detail Screen.
Changing the Operating Mode
If you know what has caused the fault, you will naturally want to rectify it as quickly
as possible so that the system can be started up again. To that end, you can
execute specific movements on particular units in Manual mode, for example.
Note
It depends on your PLC program whether or not it is necessary to switch to manual
mode or to another mode before triggering manual movements.
To change the operating mode, move the highlight to a unit on which you wish to
carry out a movement.
If there are other lower-level hierarchical units related to that unit, the "Subordinate
Unit" symbol will be displayed on the right (see "Hierarchical Units on the Overview
Screen"). You can change to a lower layer in the hierarchy with the "Layer Down"
key and make a more accurate selection.
Finally, press the "Operating Mode" key to open the dialog box for selecting the
modes.
Here you can select the mode concerned with the mouse or the arrow keys and
press the "OK" button or confirm with "Enter".
52
Printout of the Online Help
04.03
Configuring in WinCC
The dialog box "Operating mode"
Opening the Movement Screen
Once you have selected the unit or subunit that you wish to move and have set the
correct operating mode, use the "Movements" key to switch to the Movement
Screen.
Opening the Step Sequence Screen
If you have selected a unit that was programmed in S7-GRAPH, you can use the
"step sequence" to switch directly to the Step Sequence Screen. On it, you can
enable or disable single steps of the whole step sequence.
If the "Movements" symbol is displayed on the right of a sequence, then the
sequence was assigned a movement unit in S7-GRAPH (see "Basic Requirements
of the PLC Program"). The assigned movement unit will be handled in the
Overview Screen as part of the sequence and will not be shown as a separate unit.
You can then switch to the Movement Screen either by left-clicking the symbol or
with the "Movements" key.
Network Entry
You can use this key to directly open one of the STEP 7 applications and look how
the unit is programmed. If you have the appropriate input privilege, you can also
make changes there.
Which tool is called depends on the type of unit that you currently have selected:
Printout of the Online Help
53
Configuring in WinCC
04.03
•
if a sequence is selected, this will be displayed in S7-GRAPH
•
if an S7-PDIAG unit is selected, this will be displayed in the LAD/FBD/STL
editor.
Note
In the currently available versions of S7-GRAPH (v. 5.0) and STEP 7 Hardware
Diagnostics (v. 5.1), Open in Read Only mode is not possible. Instead these tools
are always opened in Edit mode.
You should therefore always give keys that allow entry into these tools the
appropriate input privilege!
Exiting the Overview Screen
You can switch directly from the Overview Screen to the other diagnostic screens
or also exit diagnostics:
switches to the Detail Screen
switches to the Movement Screen
switches to the Step Sequence Screen
switches to the Message Screen
exits diagnostics
54
Printout of the Online Help
04.03
3.8.4
Configuring in WinCC
Changing the Display Mode
Two Display Modes
You can determine whether all the units are to be shown in the Overview Screen or
only those with faults.
To change back to the other display mode, press the "All / Errored" key.
When to Use Which Mode
Restricting the units displayed to those blocked is especially useful if your
installation consists of a very large number of units. If, however, you wish to select
a unit without a fault (e.g. to execute a movement), you must switch back to the
display mode showing all units.
How to Tell Which Mode is Active
You can tell which display mode is active thanks to a graphic symbol at the top left
of the display field:
•
The "Warning Triangle" symbol is displayed if only the blocked units are
displayed.
•
The symbol is not displayed if you are able to see and select all the units
irrespective of whether they are blocked or not.
Printout of the Online Help
55
Configuring in WinCC
3.8.5
04.03
Hierarchical Units on the Overview Screen
Hierarchical Units
When programming a PLC it is possible depending on the programming language
used to define a hierarchy of the units. Thus in the case of S7-PDIAG a unit can
be equated with a module which as a rule also represents a process unit. By virtue
of the multi-instance concept of STEP 7 a unit can also contain other units.
As soon as at least one subunit has a fault, the immediately higher-order unit is
also marked as having a fault. The marker is thus passed on from one level to the
next right up to the highest hierarchical level.
Note
When the PLC is programmed in S7-GRAPH, there are no hierarchical units.
Identifying Hierarchical Units
In this way you can tell whether there are any more hierarchical layers associated
with a unit.
If there are only lower-level units for a specific unit, this symbol appears to the right
of the unit concerned. In this case the "Layer Down" key is highlighted in color,
whereas the "Layer Up" key is grayed.
If there are only higher-level units for a specific unit, this symbol appears to the
right of the unit concerned. In this case the "Layer Up" key is highlighted in color,
whereas the "Layer Down" key is grayed.
This symbol indicates that there are a lower-level unit and a higher-level unit for a
given unit. In this case the "Layer Up" and the "Layer Down" keys are highlighted in
color.
Changing Hierarchical Level
Procedure
56
1
Move the highlight to the unit whose subordinate or higher-order units you wish
to display.
2
Press the "Layer Down" key if you would like to see the lower-level units, or
press the "Layer Up" key to see the higher-level unit.
Printout of the Online Help
04.03
Configuring in WinCC
When you move down a hierarchical level, only the subunits of the selected unit
are shown.
When you move up a hierarchical level, all units on that level are once again
displayed.
Printout of the Online Help
57
Configuring in WinCC
3.9
04.03
Detail Screen
Criteria Analysis
Retracing a fault to the relevant points in the program code is referred to as
analysis of criteria. The Detail Screen shows the result of the criteria analysis in the
form of a symbol table, an STL or an LAD.
Symbol List, STL or LAD
Depending on the configuration, the diagnosis result is first shown either in a clear
symbol list, in a detailed statement list (STL) or as a ladder diagram (LAD). You
can switch between the display modes easily using keys.
Detail Screen in Symbol List Display Mode (example on PC)
58
Printout of the Online Help
04.03
Configuring in WinCC
Detail Screen in STL Display Mode (example on PC)
Detail Screen in LAD Display Mode (example on PC)
When you call the Detail Screen for the first time, the criteria are shown initially as
a symbol list. Each time you open the display after this time, the type of display
used is the one you used the last time. You can switch easily between the types of
display by pressing the "Symbol list/STL/LAD" key (see "Keys in the Detail
Screen").
Note
Printout of the Online Help
59
Configuring in WinCC
04.03
In principle, the variants of the Detail Screen are equivalent. They differ only with
respect to the way they look and are used.
The LAD variant, however, is not able to display all commands. The following are
permissible:
U op, UN op, U(, O op, ON op, O(, O, ), NOT, = op, S op, R op, X, X(, XN, XN(,
Label
("op" = operand; "Label" only at the beginning of the network, "U" corresponds to
"A" in IEC notation)
Should an instruction be shown that cannot be displayed in LAD, a message is
issued. You can then use the "Symbol list/STL/LAD" key to switch to symbol list
display mode and from there to STL display mode.
Program Excerpt
The display of the STEP 7 program code lists the points in the PLC program which
triggered a process fault. This should not be confused with a programming error.
When the process fault occurs, a quite specific status comes into being for which
the program is monitored. This status is characteristic of a fault in the installation
and therefore leads to an alarm message being displayed.
Since the process diagnosis system can monitor a whole range of conditions and
mutual interdependencies can also be defined, it is of course of interest to see
which signals have led to the issue of an alarm message.
From this information you can derive what is causing the alarm and how it may be
rectified in the shortest possible time.
Additional Information
Symbols and comments are displayed in addition to the program code. At the
same time, you are shown the status of the operands and all results of logical
operations.
All signals whose status has contributed to the error message are marked. This
enables you to immediately recognize what conditions have led to the alarm
message being triggered.
60
Printout of the Online Help
04.03
3.9.1
Configuring in WinCC
What You See on the Detail Screen
Faults Displayed
Which faults are displayed when you open the Detail Screen depends on from
where you have opened it:
•
If you have opened the Detail Screen from the Message Screen you will have
first selected a unit. The Detail Screen now shows you the fault that has
triggered this message.
•
If you have called up the Detail Screen from the Overview Screen you will have
first had to select a unit. The Detail Screen then shows the fault in the first
action of that unit with a fault.
General Layout
Like all the diagnostic screens, the Detail Screen has a standardized layout.
Changing between Symbol List, STL and LAD display mode changes only the
center section of the Detail Screen. The information about the unit (in the top
section) and the assignment of the keys remain unchanged.
The following illustration depicts an example of the STL variant of a Detail Screen
on a PC.
1
9
5
2
3
6
13
10
4
14
7
11
8
12
15
Detail Screen (example of STL variant on PC)
Printout of the Online Help
61
Configuring in WinCC
04.03
Information About the Unit
The top section of the Detail Screen contains detailed information about the unit in
which the process fault has occurred.
(1) At the top left, you obtain information on the display mode:
The "lightning flash" symbol appears here if partial view is active - this lists only
those instructions and/or switches that have not been performed (see "Switching
Between Partial and Full View").
The "spectacles" symbol appears here if the current status bits are displayed rather
than the status bits at the time of occurrence of the fault (initial values) (see
"Switching Between Initial Values and Current Status").
Arrow symbols appear in this field if there are more statements or switches than
can be displayed at one time. You can then scroll through these
statements/switches using either the keyboard or the mouse.
The "inconsistency alert" symbol is displayed here if the data of this network has
changed in the STEP 7 configuration. In a criteria analysis the network data is read
by ProAgent direct from the PLC.
The "Archive" symbol is displayed here if, instead of displaying the current status of
your system, a criteria analysis is performed for a message from the archive.
(2) The name of the next higher unit in the hierarchy appears in the "Unit Level"
box.
(3) The "Unit No." field tells you the block type (FC or DB) and the block number of
the selected unit.
(4) The "Unit" box displays the name of the unit you selected.
The displays and contents of the following fields depend on the programming of the
unit:
Programming in S7 GRAPH
If the unit was programmed in S7 GRAPH, you are provided with two lines of
information on the blocked step or blocked transition.
(5) The "lightning flash" symbol appears here if the currently displayed step is
blocked.
Boxes (6) and (7) appear only if the selected unit was programmed in S7 GRAPH.
62
Printout of the Online Help
04.03
Configuring in WinCC
(6) In the "Step" box you can see the step name of the first active step.
(7) The number of this step is displayed in the "No." box.
(8) The "Parallel Steps" box lists the numbers of the currently active steps. The
step selected is marked here. If more parallel steps are possible than can be
displayed at one time, this symbol also appears in this field:
.
With transitions, the "Subsequent Steps for Selected Transitions" are displayed
here.
(9) The "lightning flash" symbol appears here if the currently displayed transition is
blocked.
(10) You can see the transition name in the "Transition" box.
(11) The "No." box displays the number of this transition.
(12) The "Subsequent Transitions of Selected Step" box lists the user numbers of
the subsequent transitions currently possible for the step selected. The transition
selected is marked here. If more subsequent transitions are possible than can be
displayed then this field will also contain the symbol:
.
With transitions, "parallel transitions" are displayed here.
Programming in S7-PDIAG:
If the unit was programmed in S7-PDIAG, you obtain only one more line of
information.
(13) The "Expression" box displays the absolute designator of the expression
selected.
(14) The "No." box displays the network number of the expression you selected.
(15) The "Expressions of selected unit" box lists the expressions possible for the
unit selected. The expression selected is marked here. If more elements are
possible than can be displayed then this field will also contain the symbol:
.
Representation of the Network
The center section of the display shows an excerpt from the STEP 7 program code
of the disturbed network. You can choose between display as a "symbol list", in
"STL" or in "LAD".
If the Detail Screen displays the criteria analysis for a message that has already
been archived, then the network is shown with a yellow background.
Printout of the Online Help
63
Configuring in WinCC
3.9.2
04.03
Displaying the Network as a Symbol List
Screen Elements
In the symbol list view of the STEP 7 program code the middle part of the Detail
Screen shows only the signals which resulted in an alarm message being
triggered. This gives you a quick overview of the faults that have occurred. If the
criteria analysis for a previously archived message is displayed, then the network is
shown with a yellow background.
1
2
3
4
Displaying the Network as a Symbol List
The following elements are displayed:
(1) The "lightning flash" symbol appears here because the signal shown next to it
has contributed to an alarm message.
(2) "Signal": The different operands are displayed here. If "SIMATIC" has been set
in the S7 project, you will see the English names. If "IEC" has been set, you will
see the international names.
(3) "Symbols": This field lists the symbol of the signal in accordance with the
symbol table in STEP 7.
(4) "Comment": Displays a comment on the signal in question as stored in the
STEP 7 symbol list.
64
Printout of the Online Help
04.03
3.9.3
Configuring in WinCC
Displaying the Network in an STL
Screen Elements
In the center section of the STL representation of the STEP 7 program code, those
statements are marked that have led to an alarm message being triggered. If the
criteria analysis for a previously archived message is displayed, then the network is
shown with a yellow background.
1
2
3
4
5
6
7
Displaying the Network in an STL
The following elements are displayed:
(1) The "lightning flash" symbol appears here if the adjacent signal has contributed
to an alarm message.
(2) Operator: If "SIMATIC" has been set in the S7 project, you will see the English
names. If "IEC" has been set, you will see the international names.
(3) "Signal": The different operands are displayed here.
(4) "RLO": The associated result of logic operation appears here.
(5) "Status": The status of the operands appears here. The information displayed
relates either to the values at the time of occurrence of the fault (initial values) or
the current status (see "Switching Between Initial Values and Current Status").
(6) "Symbols": This field lists the symbol of the signal in accordance with the
symbol table in STEP 7.
(7) "Comment": A comment on the signal concerned as shown in the STEP 7
symbol list appears here.
Enhanced Possibilities with S7-PDIAG
The program code displayed is not always totally identical with the program code
that has been entered in STEP 7. To keep the displayed excerpt from the program
code as informative as possible, the enhanced options of programming with S7PDIAG are also taken into account in the Detail Screen.
Detailed information can be found in the section called "Enhanced Options with S7PDIAG".
Printout of the Online Help
65
Configuring in WinCC
3.9.4
04.03
Displaying the Network in a LAD
Screen Elements
In the center section of the LAD representation of the STEP 7 program code, those
statements are marked that have led to an alarm message being triggered. If the
criteria analysis for a previously archived message is displayed, then the network is
shown with a yellow background.
1
2
3
4
Displaying the Network in a LAD
Specifically, you are shown the following:
(1) The switches. A switched switch is represented by a continuous green line, an
unswitched switch by a dashed blue line.
(2) The operands. If "SIMATIC" has been set in the S7 project, you will see the
English names. If "IEC" has been set, you will see the international names.
(3) The "lightning flash" symbol indicates that the switch to the right has contributed
to an alarm message.
(4) An additional line of text in which symbols and comments are displayed for the
operand marked by the highlight. You can change from one operand to another
with the mouse or arrow keys. The text displayed then changes accordingly.
Enhanced Possibilities with S7-PDIAG
The program code displayed is not always totally identical with the program code
that has been entered in STEP 7. To keep the displayed excerpt from the program
code as informative as possible, the enhanced options of programming with S7PDIAG are also taken into account in the Detail Screen.
Detailed information can be found in the section called "Enhanced Options with S7PDIAG".
66
Printout of the Online Help
04.03
3.9.5
Configuring in WinCC
Keys in the Detail Screen
Symbol
Name
Function
"Up/Down"
The directions in which you can scroll
depend on the type of the display. On the
left of the information about the unit,
small arrows indicate the directions in
which the selection bar can move:
"Left/Right"
In the STL and signal list
representations, you can scroll up and
down if there are more lines than can be
displayed at any one time on the display.
In the LAD representation, you can move
the highlight through the network
displayed in all directions.
If you move the highlight beyond the
visible display the screen is scrolled
accordingly and reconstructed.
"Step"
The function of this key depends on the
programming of the unit:
S7-GRAPH:
scroll by means of parallel steps or
subsequent steps of the selected
transition
S7-PDIAG:
no function
"Transition"
The function of this key depends on the
programming of the unit:
S7-GRAPH:
scroll by means of subsequent transitions
or parallel transitions of the selected step
S7-PDIAG:
no function
"Sequence down"
The function of this key depends on the
programming of the unit:
S7-GRAPH:
switch the level in the step sequence
downward (from step to subsequent
transition and from transition to
subsequent step)
S7-PDIAG:
no function
"Sequence up"
The function of this key depends on the
programming of the unit:
S7-GRAPH:
Printout of the Online Help
67
Configuring in WinCC
Symbol
04.03
Name
Function
switch the level in the step sequence
upward (from step to previous transition
and from transition to previous step)
S7-PDIAG:
no function
"Next error"
The function of this key depends on the
programming of the unit:
S7-GRAPH:
switch to the next failed step
For units which were programmed in S7GRAPH and use movement blocks
created in S7-PDIAG: the change is to all
blocked steps and transitions, followed
by the movement blocks.
"Further expression"
You use this key to change within an
error.
S7 GRAPH:
the switch is to the next transition (see
"Switching Action or Transition").
S7-PDIAG:
in the case of Multiple Assignments to a
monitored operand the change is to the
next network containing an assignment
to that operand.
"All / Errored"
This key is used to toggle between full
and partial view of the criteria (see
"Switching Between Partial and Full
View").
In the partial view, only those criteria that
have led to a fault are displayed.
This key is not active in symbol list
display mode.
...
68
"Symbol list/STL/LAD"
You can use this key to switch between
symbol list, STL and LAD display modes.
"Init. v. / status"
This key is used to determine what status
and therefore which logical operation
results are shown, i.e. the values at the
time of occurrence of the fault (initial
values) or the current values (see
"Switching Between Initial Values and
Current Status").
The keys of the global key set (see
"Global Key Set").
Printout of the Online Help
04.03
3.9.6
Configuring in WinCC
How to Work with the Detail Screen
Aims
You have opened the Detail Screen in order to see which statements of the STEP
7 program have led to a specific alarm message. This enables you to recognize
which operand triggered the error message and correspondingly where the fault is
that needs to be rectified.
The center section of the display shows an excerpt from the STEP 7 program code
of the disturbed networks. Those statements that have led to an alarm message
are marked. If the criteria analysis for a previously archived message is displayed,
then the network is shown with a yellow background and the "Archive" symbol is
displayed.
Detail Screen in STL Mode (example on PC)
Which Unit?
The top two lines of the display show the higher unit level and the unit with which
the excerpt from the program code is associated. The associated text in STEP 7 is
displayed here.
Which Expression? Which Step?
The following lines depend on the programming language in which the abovestated unit has been programmed:
Printout of the Online Help
69
Configuring in WinCC
04.03
•
If the unit has been programmed in S7-PDIAG, the respective expression is
displayed. Next to it on the right, the other possible expressions of the selected
unit are displayed for multiple assignments.
•
If the unit was programmed in S7 GRAPH, the number of the active step and
the assigned text are displayed. The following line then provides information
about the transitions.
Which Transition?
If the unit whose program code is being displayed has been programmed in S7
GRAPH, the third line shows you which transitions belong to the step displayed.
The transition to which the displayed program code belongs is marked.
Symbol List, STL or LAD
If you prefer STL or LAD display modes you can switch from symbol list display
mode to STL display mode at any time using the Symbol list/STL/LAD key. If you
activate this key again you will switch to LAD display mode. Pressing the key again
will take you back to symbol list display mode.
Deducing Information from Symbol List Display Mode
The symbol list shows only signals with a fault, together with the associated icons
and comments.
This gives you an overview of the essential information on the faults that exist so
that you can analyze the cause of the fault quickly.
Deducing Information from the STL Representation
The statement list shows the individual operators and operands, status bits, logical
operation results, symbols and remarks. All statements that have led to an alarm
message being triggered are marked with a "lightning flash" symbol.
This enables you to immediately recognize what operands have led to the alarm
being triggered. If you examine the instructions concerned, you will quickly be able
to locate the cause of the fault. The logical operation results will help you in that
regard.
Deducing Information from the LAD Representation
The ladder diagram shows the individual switches and operands. You can
recognize the status bits from the line style in the view of the switches:
•
switched switches are shown by continuous green lines
•
unswitched switches are shown by dashed blue lines
The output field beneath the ladder diagram displays the symbols and comments
for the operand marked.
70
Printout of the Online Help
04.03
Configuring in WinCC
With this information, you can ascertain as easily as in STL mode which operands
triggered the alarm.
Other Actions, Transitions and Networks
You can view the criteria analysis of alternative actions, transitions or networks
simply by pressing a key (refer to "Switching Action or Transition").
Modifying the View Options
Furthermore, you have the option of adapting the type of display to your own
particular requirements:
If you want to be able to view all signals, i.e. including those that have not led to a
fault, press the "All / Errored" key (see "Switching Between Partial and Full View").
If you wish, you can view the current status bits instead of the displayed initial
values (of the status bits at the time of the error occurring). To do this, press the
"Init. v. / status" key (see "Switching Between Initial Values and Current Status").
Network Entry
You can use this key to directly open one of the STEP 7 applications and look how
the unit is programmed. If you have the appropriate input privilege, you can also
make changes there.
Which tool is called depends on the type of unit that you currently have selected:
•
if a sequence is selected, this will be displayed in S7-GRAPH
•
if an S7-PDIAG unit is selected, this will be displayed in the LAD/FBD/STL
editor.
Note
In the currently available versions of S7-GRAPH (v. 5.0) and STEP 7 Hardware
Diagnostics (v. 5.1), Open in Read Only mode is not possible. Instead these tools
are always opened in Edit mode.
You should therefore always give keys that allow entry into these tools the
appropriate input privilege!
Exiting the Detail Screen
You can switch directly from the Detail Screen to the other diagnostic screens or
also exit diagnostics:
Printout of the Online Help
71
Configuring in WinCC
04.03
switches to the Overview Screen
switches to the Movement Screen
switches to the Step Sequence Screen
switches to the Message Screen
exits diagnostics
72
Printout of the Online Help
04.03
3.9.7
Configuring in WinCC
Switching Between Partial and Full View
Two Display Modes
On the Detail Screen in STL or LAD display mode you can choose whether you
•
want to see all the statements of a network being displayed (= full display)
•
or whether you only want to see statements that have caused the monitored
signal to be put in the wrong status (= partial view)
Procedure
To toggle between the two states, press the "All/errored" key. With partial view, the
"lightning flash" symbol is displayed top left next to the "Unit Level" box.
Partial view is particularly useful if you want to be able to quickly locate the critical
statements that have resulted in the issue of an alarm message.
On the Detail Screen in symbol list display mode the "All / errored" key is not
active, since here only faulty units are shown irrespective.
Printout of the Online Help
73
Configuring in WinCC
3.9.8
04.03
Switching Between Initial Values and Current Status
Values Displayed
By default, those status bits displayed are those which were valid at the moment at
which the fault monitoring system first detected the process fault. For that reason
those values are also referred to as "initial values". They are always retained until
the next fault occurs.
These values are also the basis on which the logical operation results (RLOs) are
founded.
With sequences of steps, the status is updated only when the corresponding step
is active.
You can inquire the current status in addition to the initial values. On the basis of
the current status, you can e.g. trace online how corrective measures affect the
status of the installation.
If you have set the display mode to symbol list mode or partial view (see "Switching
Between Partial and Full View") you can see right away if the fault has been put
right. In that case, no more signals are displayed on the screen.
Procedure
To toggle between initial values and current status, press the "Init. v./status" key.
When the current status is displayed, the "spectacles" symbol appears top left next
to the "Unit Level" box.
74
Printout of the Online Help
04.03
3.9.9
Configuring in WinCC
Switching Action or Transition
Introduction
On the Detail Screen you can easily switch to other actions (steps) and transitions.
Which keys you can use to do so depends on how the unit has been programmed.
Programming in S7-PDIAG
A unit can exhibit more than one error at a time. By pressing a key, you are then
able to move on to the next blocked action of this unit.
To switch the action, press the "Next Error" key.
The display of the elements in the top part of the screen will be modified
correspondingly (see "What You Can See on the Detail Screen").
Programming in S7-GRAPH
Only one network can be displayed at any one time in the Detail Screen. However,
the cause of the fault may be located in more than one network. These networks
can constitute the locking condition for the step, or individual transitions.
Whether the first blocked transition or the locking condition is displayed depends
on whether S7-GRAPH reports a monitoring or a locking fault.
To change to parallel steps or subsequent steps of the selected transition, press
the "Step" key.
To change to subsequent transitions or parallel transitions of the selected step,
press the "Transition" key.
To switch to the next lower level in the sequence of steps, press the "Sequence
Down" key.
To switch to the next higher level in the sequence of steps, press the "Sequence
Up" key.
Printout of the Online Help
75
Configuring in WinCC
04.03
To change directly to blocked steps, press the "Next Error" key. With units which
were programmed in S7-GRAPH and use movement blocks created in S7-PDIAG,
the initial change is to all blocked steps and transitions, followed by the movement
blocks.
Multiple Assignment of Monitored Operands
Note
When programming in STEP 7, avoid multiple assignments.
With "Multiple Assignments" to a monitored operand, the cause of the error may
reside on different networks.
You can then switch with the "Further expression" key between the participating
networks.
You can tell which network is currently being displayed from the information in the
top part of the Detail Screen. The block number displayed on the first line remains
unchanged, however.
76
Printout of the Online Help
04.03
Configuring in WinCC
3.9.10 Enhanced Possibilities with S7-PDIAG
Program Code Displayed
The program code displayed is not always totally identical with the program code
that has been entered in STEP 7. To keep the displayed excerpt from the program
code as informative as possible, the enhanced options of programming with S7PDIAG are also taken into account in the Detail Screen. This affects auxiliary
networks, jump commands, multiple assignments and exclusion operands.
Printout of the Online Help
77
Configuring in WinCC
04.03
3.9.10.1 Auxiliary Networks
Expanded Display
The program code displayed is not always totally identical with the program code
that has been entered in STEP 7. To specify an excerpt that is as informative as
possible, the "auxiliary networks" created in S7-PDIAG are displayed by ProAgent.
This means, for example, that the entire assignment can be repeated in place of a
flag. This makes it easier for you trace a signal out to the periphery.
Reference networks are shown in symbol list, STL and LAD display modes of the
Detail Screen.
Programming in STL
Display in ProAgent
A
I1.0
A
I1.1
A
I1.2
=
M1.0
A
I1.0
A
I1.2
A
I1.1
A
M1.0
=
O1.0
=
O1.0
Programming in LAD
I1.0
I1.1
Display in ProAgent
M1.0
I1.2
I1.2
M1.0
I1.0
I1.1
O1.0
O1.0
Auxiliary Network in STL and LAD
78
Printout of the Online Help
04.03
Configuring in WinCC
3.9.10.2 Jump Commands
Expanded Display
The ProAgent's criteria analysis is able to resolve complex PLC programs with
labels and display them on the operator panel.
Display is designed such that all code sections that can be evaluated are visible.
Programming in STL
Display in ProAgent
Network 1
Label:
A M 5.0
A M 6.0
= M 2.0
Network 2
A
M 1.0
A
M 2.0
=
M 3.0
A
M 1.0
A(
La:
A
M 5.0
A
M 6.0
)
=
M 3.0
Resolution of Jump Commands
Labels External to the Start of a Network
In the LAD view of the Detail Screen, a display is possible only if the label is
located at the start of the network. In the STL view, display is possible at all times;
however, the display device sets the first check with labels. The following
statement is then treated as a start of a network as a matter of principle.
Attention
This behavior may differ from actual execution on the PLC. There may therefore be
differences between the results of logic operations shown on the operator panel
and those actually present on the PLC.
Printout of the Online Help
79
Configuring in WinCC
04.03
3.9.10.3 Multiple Assignments
Note
When programming in STEP 7, avoid multiple assignments.
Expanded Display
If your PLC program performs multiple assignments to a monitored operand - for
example, with SET/RESET or even with a direct assignment - you can switch
between all the networks affected in the Detail Screen at the press of a key.
Programming in STL
Switching over a key
Network 1
A
M 1.0
AN
M 2.0
S
M 7.0
Network 2
AN
M 1.0
A
M 2.0
R
M 7.0
Multiple Assignment of Monitored Operand M 7.0
You can tell which network is currently being displayed from the information in the
top part of the Detail Screen.
80
Printout of the Online Help
04.03
Configuring in WinCC
3.9.10.4 Exclusion Operands
What Are Exclusion Operands?
The criteria analysis treats all operands as equals. This may result in subnetworks
being identified as failed which strictly speaking are contributory to the cause of the
error from a logical point of view; but with additional knowledge they can be
excluded as being contributors to the cause of the error.
An example of this is different system operating modes which, according to their
definition, can never occur on a unit simultaneously, or individual operands for
different product variants which likewise cannot be produced simultaneously.
For this reason S7-PDIAG features the option of defining a list of what are known
as "exclusion operands". ProAgent then marks only those signals on the network
as failed in which the exclusion operand is registered with a value not equal to "0“.
The exclusion operands defined here are also effective for S7 GRAPH networks.
Example:
The following example shows operand monitoring of A 1.0 to state "0“ with modes
"Auto“ and "Manual“:
Without
Exclusion operands
RLO
Status
A
#Auto
1
1
A
E 0.0
0
0
0
1
O
A
A
#Manual
E 0.1
0
0
0
0
=
A 1.0
0
0
Exclusion operands
A
#Auto
RLO
1
A
E 0.0
0
0
1
A
#Manual
0
0
A
=
E 0.1
A 1.0
0
0
0
0
O
Status
1
0
Example of Exclusion Operands
Printout of the Online Help
81
Configuring in WinCC
04.03
Strictly from a logical point of view, identification of failed lines in the top section of
the program is correct. The subnetwork, which is operating in "Manual“ mode, is
not a contributory factor to the error according to its definition, however, since the
system is already in "Auto“ mode and cannot be in another mode at the same time.
Taking this additional knowledge into account, a considerably clearer error
identification is shown in the lower section of the program.
Display by ProAgent
Due to the definition of the exclusion operands in S7-PDIAG, fewer lines are
identified as contributing to the error in the Detail Screen.
You can use the "All / errored" key to toggle between partial and full view as usual
(see "Switching Between Partial and Full View"):
With full view, all the lines can still be seen, but fewer lines are identified by the
"lightning flash" symbol as being contributory factors.
With partial view, correspondingly fewer lines are displayed.
In either case, visibility is distinctly improved and analysis is facilitated.
82
Printout of the Online Help
04.03
Configuring in WinCC
3.10 Movement Screen
The Purpose of the Movement Screen
Movement Screen (example on PC)
The Movement Screen provides assistance with rectifying faults. It allows you to
execute specific movements for individual units manually. For example, you could
move the die of a stamping press back to its starting position before removing a
jammed workpiece.
Each movement can be executed in two directions, e.g. in/out, open/close,
up/down, forward/backwards.
Fault
The Movement Screen enables you to quickly recognize whether a movement is
blocked.
Target Positions
In the Movement Screen you can see which target positions have already been
reached in the movement. This means that on a stamping press, for example, you
could see what the current position of the die is. If the movement is blocked, you
can see where it is blocked.
Printout of the Online Help
83
Configuring in WinCC
04.03
Direct Keys
In the ProAgent Movement Screen, movements are triggered by the "Set Bit"
functions. Alternatively, you can also use the direct key functions of an FI45 to
operate your system. Using the direct keys, you can directly set bits in the I/O area
of the SIMATIC S7 from the FI45.
Using direct keys, you can implement high-speed key operation without the delays
associated with communication. They are a requirement for typing mode, for
instance.
Please refer to the "S7-PDIAG Description" and the "FI45 Technical Description"
for further advice on configuration of the direct key functions.
Requirements
A PLC has to be properly programmed in order to be able to trigger movements in
WinCC Runtime mode. The UDT "Movement" must be used. You will find further
information on programming movements in the Manual and in Online Help for S7PDIAG.
If the same movement is being used by more than on operating unit, you must use
the expanded "Movement" UDT (UDT2), so that the movement can clearly be
assigned to the operating unit by means of the device ID in UDT2.
Note
With programming with S7-GRAPH, movements cannot be defined. But in S7GRAPH you can assign movements from S7-PDIAG to a unit.
84
Printout of the Online Help
04.03
Configuring in WinCC
3.10.1 What You See in the Movement Screen
General Layout
The Movement Screen shows a list of all the movements configured for a unit and
their subordinate hierarchy levels.
Like all the diagnostic screens, the Movement Screen has a standard layout. There
are only slight variations between the display on the various OSs.
The following illustration shows an example of the Movement Screen on a PC.
5
2
3
4
1
6
7
9
8
Movement Screen (example on PC)
Information About the Unit
The "Unit" box shows a precise designation of the unit for which the possible
movements are displayed further below.
Which unit is selected depends on the screen from which the Movement Screen
was opened:
•
If you activated the Movement Screen from the Message Screen, the selected
unit is determined by the alarm message that was highlighted by the cursor
when the Message Screen was quit. The unit or subunit to which this alarm
message is assigned will be the unit selected in the Movement Screen.
Printout of the Online Help
85
Configuring in WinCC
•
04.03
If you activated the Movement Screen from the Overview Screen, the selected
unit is the unit that was highlighted by the cursor when the Overview Screen
was quit.
Specifically, the information about the selected unit is made up of the following
details:
(1) The complete name of the unit appears in the "Unit" box.
(2) In this box you can see the block type, "DB", and the block number of the
selected unit.
List of Movements
Movements are displayed beneath the information on the selected unit.
The individual movements are arranged below one another.
The order in which they are displayed depends on the attributes which you
assigned to the units in S7-PDIAG in the "Properties - Units" dialog box. The
Movement Screen in ProAgent is built in accordance with the attributes "Belongs to
Screen“ and "Position in Screen“. If no default values are specified or if individual
positions are assigned twice (including cross-CPU), the order is random.
Each movement can be executed in two directions, e.g. in/out, open/close,
up/down, forward/backwards. One direction of movement is symbolized by the left
side of the screen and the other by the right side.
Each movement is assigned two keys which are located immediately to the left and
right of the display of the respective movement. These keys are used to trigger the
movements.
Every movement line consists of the following elements:
(3) This shows you what movements are involved. The text is assigned to the
movement when the unit is programmed (tag name of movement).
(4) If the movement is errored or assigned to another operating unit, a "warning
triangle" appear at this point as an error ID.
When the connection to the PLC is faulty or an addressing error has occurred, the
"connection faulty" symbol appears.
(5) This shows you which direction of movement is symbolized by which side of the
screen. This movement is executed when you press the adjacent key or the
corresponding traversing key.
(6) Here the output from which the movement is controlled is displayed. With the
"Symbol / Addr." key, you can switch between the symbolic and the absolute
display of the output if suitable attributes have been stored during programming in
S7-PDIAG at "Contr. address dir. 1" and "Contr. address dir. 2".
(7) Here you are shown a representation of various target positions. The exact
representation of the target positions depends on the programming in S7-PDIAG.
For example, an explanatory text may be displayed for each target position and
reaching the target position may be signaled by a change in background color. For
more information, please consult your S7-PDIAG documentation.
(8) If you use a PC as the OS, the triangle in the margin takes the form of a button.
You can click it with the mouse or press the function key indicated. With an FI45, it
points to the associated soft key (for example, "S3" or "S4").
86
Printout of the Online Help
04.03
Configuring in WinCC
The triangle also indicates to you whether or not a movement can be executed:
•
if the movement can be executed, the triangle is displayed in blue
•
if the movement cannot be executed because it is either errored or because an
interlock is locked (for example, when the final target position has already been
reached or the movement is assigned to another operating unit), the triangle
merely appears as an outline.
(9) While a movement is being executed, the square next to the button flashes.
Printout of the Online Help
87
Configuring in WinCC
04.03
3.10.2 Keys in the Movement Screen
Symbol
Name
Function
"Side command buttons" (PC)
You use these keys to trigger the
individual movements. A movement
can only be executed if the triangle
symbol has a blue background. If the
symbol is displayed simply as an
outline, the movement cannot be
executed.
"Soft keys" (FI45)
A movement is driven for the whole
time you keep the key pressed. If
execution of the movement is
successful, the square next to the
triangle symbol is likewise highlighted
blue.
...
88
"Up/Down"
If more movements are present for a
unit and the lower-level units than
can be displayed on the OS, scroll
UP or DOWN with the arrow keys or
the mouse. If this is possible, one of
the cursor symbols appears in the
top left corner.
"Subunits"
This key is used to specify whether
only the movements of the selected
(superior) unit are displayed or all
movements of subordinate units as
well (see "Hierarchical Units on the
Movement Screen"). The (top-level)
unit is the unit in this instance which
was selected in the screen from
which the Movement Screen was
called.
"Symbol / Addr."
Use this key to switch the display of
the outputs between symbolic and
absolute representation that are
driven by the movements. The
corresponding attributes have to be
stored in S7-PDIAG during
programming.
"All Movements"
Use this key to call an overview of all
movements. You can quickly select
the movement you require (refer to
the "Master List of All Movements").
The keys of the global key set (see
"Global Key Set").
Printout of the Online Help
04.03
Configuring in WinCC
3.10.3 How to Work with the Movement Screen
Aims
You want to remove a block and to do so, to initiate some movements on the
blocked unit manually. You also want to see which movements are blocked.
Movement Screen (example on PC)
Which Unit?
In the "Unit" box, check that you are in the right unit as only the movements
associated with this unit are displayed.
Which Movements?
On the rest of the screen, all the available movements are listed one under the
other on separate lines. Scroll with the mouse or arrow keys through the list in case
more movements are possible than can be displayed simultaneously on the
screen. Small arrows in the top left corner indicate other movements.
Printout of the Online Help
89
Configuring in WinCC
04.03
If a unit also has hierarchically subordinate units, you can use the "Subunits" key to
view the movements of those subunits as well (see "Hierarchical Units on the
Movement Screen").
If you want to trigger a movement which is not currently being displayed, you can
call a list of all movements using the "All Mov." key. You can quickly select the
movement you want from this list and call the corresponding Movement Screen
(refer to "Master List of All Movements").
Which Faults?
You recognize that a movement is blocked by the fact that the "warning triangle"
symbol appears in the center of the line under the name of the movement.
Whether a movement can be executed in a particular direction is indicated by the
triangle symbols at either end of each line:
A warning triangle highlighted blue indicates that this movement is possible in the
specified direction.
If the triangle symbol is displayed simply as an outline, the movement in the
specified direction cannot be executed.
Note
If a movement cannot be triggered, this does not mean that it is blocked. Finally,
specific interlocks can be stored in the PLC program, the movement can be
assigned to another operating unit or it has already reached the extreme target
position.
Executing a Movement
You can trigger a movement by pressing the key on the immediate left or right of
the triangle symbol on the display, or by pressing the corresponding soft key.
Tracking a Movement
90
Printout of the Online Help
04.03
Configuring in WinCC
While the movement is being executed, the square next to the triangle symbol
highlighted blue flashes.
With suitable programming in S7-PDIAG, you detect from the appearance of the
associated target position symbol whether a specific target position has been
reached:
•
white square: target position not yet reached
•
green square: target position reached or passed
Network Entry
You can use this key to directly open one of the STEP 7 applications and look how
the unit is programmed. If you have the appropriate input privilege, you can also
make changes there.
Which tool is called depends on the type of unit that you currently have selected:
•
if a sequence is selected, this will be displayed in S7-GRAPH
•
if an S7-PDIAG unit is selected, this will be displayed in the LAD/FBD/STL
editor.
Note
In the currently available versions of S7-GRAPH (v. 5.0) and STEP 7 Hardware
Diagnostics (v. 5.1), Open in Read Only mode is not possible. Instead these tools
are always opened in Edit mode.
You should therefore always give keys that allow entry into these tools the
appropriate input privilege!
Exiting the Movement Screen
You can switch directly from the Movement Screen to the other diagnostic screens
or also exit diagnostics:
switches to the Overview Screen
switches to the Detail Screen
switches to the Message Screen
Printout of the Online Help
91
Configuring in WinCC
04.03
exits diagnostics
92
Printout of the Online Help
04.03
Configuring in WinCC
3.10.4 Hierarchical Units on the Movement Screen
Hierarchy of the Units in the PLC
When programming a PLC it is possible depending on the programming language
used to define a hierarchy of individual units. Thus in the case of S7-PDIAG a unit
can be equated with a module which as a rule also represents a process unit. By
virtue of the multi-instance concept of STEP a unit can also contain other units.
Display
The Movement Screen always shows all movements for a specific unit of your
system. Which units these are depends on where the Movement Screen was
activated from (see "What You See on the Movement Screen").
If you wish to trigger movements of lower-level units, you have to switch the
display.
Procedure
To view the movements of lower-level units as well, press the "Subunits" key.
All movements of lower-level units are displayed after the display has been
switched.
To hide the movements of lower-level units, press the key again.
Printout of the Online Help
93
Configuring in WinCC
04.03
3.10.5 Master List of All Movements
What is the Master List User For?
Generally, not all movements are visible in the Movement Screen. If you want to
trigger a movement which is not currently being displayed, you can call a list of all
movements. You can select the movement you want from this list and change to
the corresponding Movement Screen. You can then trigger the movement.
Quickly Selecting a Movement
To change to a movement not displayed in the Movement Screen, perform the
following steps:
Procedure
1
While you are in the Movement Screen, call the list of movements using
the "All Mov." key.
A list of all movements appears. For every movement there is a "unit name", a
"movement name" and the "address outputs".
2
To find the movement you are looking for,
scroll through the list or
enter one or more characters as a filter. The movement list will then display
only those movements with a unit name, movement name or address outputs
containing the text entered.
3
Select the movement you want with the arrow keys or the mouse.
4
Press "OK" to change to the Movement Screen associated with the movement
you selected, or
press "Cancel" to return to the previous Movement Screen.
94
Printout of the Online Help
04.03
Configuring in WinCC
3.11 Step Sequence Screen
What is the Step Sequence Screen Used for?
The Step Sequence Screen helps you to rectify faults in an S7 Graph sequence of
steps. There are two versions of the Step Sequence Screen. You receive either the
Simple Step Sequence Screen or the Expanded Step Sequence Screen,
depending on the installation of your OS and on the configuration.
Note
You get the Expanded Step Sequence Screen when the S7-GRAPH-OCX with the
Control GraphVisu is installed on your OS. The S7-GRAPH-OCX is a component
of S7-GRAPH in version 5.1 or higher.
Printout of the Online Help
95
Configuring in WinCC
04.03
3.11.1 The Simple Step Sequence Screen
What is the Simple Step Sequence Screen Used for?
The Step Sequence Screen helps you to rectify faults in an S7 Graph sequence of
steps.
Simple Step Sequence Screen (example on PC)
The Step Sequence Screen displays information on the unit that was selected on
the diagnostic screen from which you opened the Step Sequence Screen (name,
current step with number and name).
Functions
In the Step Sequence Screen you can
•
select specific individual steps manually in order to activate or deactivate them,
•
re-initialize the sequence of steps or clear it.
Warning
When using the Step Sequence Screen, you must ensure that the sequence
remains in a consistent state.
96
Printout of the Online Help
04.03
Configuring in WinCC
3.11.1.1 What You See on the Step Sequence Screen
Standardized Layout
Like all the diagnostic screens, the step screen has a standardized layout. There
are only slight variations between the display on the various OSs.
The following illustration shows an example of the Step Sequence Screen on a PC.
1
2
4
3
5
6
Step Sequence Screen (example on PC)
Information on the Selected Unit
In the upper area of the display you obtain detailed information on the unit selected
in the diagnostic screen from which the Step Sequence Screen was opened.
(1) The name of the next higher unit in the hierarchy appears in the "Unit Level"
box.
(2) The "Unit No." field tells you the block type (FC or DB) and the block number of
the selected unit.
(3) The sequence name appears in the "Unit" box.
(4) The current mode of the unit is displayed in the "Operating Mode" box.
Representation of the Sequence of Steps
The central area of the Step Sequence Screen displays the individual steps in the
sequence selected.
Printout of the Online Help
97
Configuring in WinCC
04.03
(5) Here you can see a list of all the steps in the sequence selected. The step
name and step number are displayed for all the steps. You can tell the status of a
step from its color:
•
green = active
•
red = disturbed
(6) Here you can enter characters as a filter. Then only the steps with a name or
number containing the text entered will be displayed.
98
Printout of the Online Help
04.03
Configuring in WinCC
3.11.1.2 Keys on the Step Sequence Screen
Symbol
...
Printout of the Online Help
Name
Function
Automatic mode
With this key you reset the operating
mode to "Automatic".
Manual mode
With this key you reset the operating
mode to "Manual mode".
Inching mode
With this key you reset the operating
mode to "Inching mode".
Deactivate Sequence
You use this key to deactivate all the
steps in the step sequence. No further
steps will be executed.
Initialize Sequence
You use this key to start the step
sequence with the defined initial steps.
Disable Step
With this key you deactivate the
selected step. To do this, you must be
in "Manual mode".
Enable Step
With this key you activate the selected
step. To do this, you must be in
"Manual mode".
Increment Step
In Inching mode you use this key to
activate the next step.
Acknowledge Sequence
You use this key to acknowledge a
monitoring fault that has arisen during
operation (supervision condition met).
The keys of the global key set (see
"Global Key Set").
99
Configuring in WinCC
04.03
3.11.1.3 How to Work with the Simple Step Sequence Screen
Aims
You want to eliminate a fault by activating steps in the sequence on which the unit
with the fault is based.
Simple Step Sequence Screen (example on PC)
Warning
When using the Step Sequence Screen, you must ensure that the sequence
remains in a consistent state.
Process
On the Simple Step Sequence Screen, you can first see which steps are available.
For troubleshooting, you must first switch to Manual of Inching mode and can then
enable and disable individual steps.
Which Unit?
In the "Unit" box, check that you are in the right sequence as only the steps
associated with this sequence are displayed.
100
Printout of the Online Help
04.03
Configuring in WinCC
Displaying the available steps
A list of all the available steps is displayed in the center part of the screen. You will
see the step number and step name for each step.
Procedure
1
To find the step you are looking for:
Scroll through the list with the mouse of the arrow keys,
or
enter one or more characters as a filter. The step list will then show only those
steps with a name or number containing the text entered.
2
Select the step you want with the arrow keys or the mouse.
Selecting the Operating mode
To trigger individual steps you can select the following in different operating
modes:
If you press the "Automatic Mode" key, the step is automatically advanced as soon
as the transition is satisfied.
If you press the "Manual" key, you can make the step move on even if the
transition is not satisfied.
If you press the "Inching mode" key, you advance the step sequence mode to the
next step in Inching mode. provided that the transition is satisfied.
You can now monitor how the status of the sequence of steps changes.
Operating single steps in Manual mode
If the sequence of steps is in "Manual" mode, you can activate individual steps
irrespective of whether the transition is satisfied.
Use this key to activate the individual step selected.
Use this key to deactivate the individual step selected.
Printout of the Online Help
101
Configuring in WinCC
04.03
Step Sequence mode
On the Step Sequence Screen you can also activate or deactivate the entire
sequence of steps.
If you press the "Initialize" key, you will restart the entire sequence of steps with the
initial steps defined.
If you press the "Disable" key, you will deactivate all the steps in the sequence. No
further steps will be executed.
Network Entry
You can use this key to directly open one of the STEP 7 applications and look how
the unit is programmed. If you have the appropriate input privilege, you can also
make changes there.
Which tool is called depends on the type of unit that you currently have selected:
•
if a sequence is selected, this will be displayed in S7-GRAPH
•
if an S7-PDIAG unit is selected, this will be displayed in the LAD/FBD/STL
editor.
Note
In the currently available versions of S7-GRAPH (v. 5.0) and STEP 7 Hardware
Diagnostics (v. 5.1), Open in Read Only mode is not possible. Instead these tools
are always opened in Edit mode.
You should therefore always give keys that allow entry into these tools the
appropriate input privilege!
Exiting the Step Sequence Screen
You can switch directly from the Step Sequence Screen to the other diagnostic
screens or also exit diagnostics:
switches to the Overview Screen
switches to the Detail Screen
102
Printout of the Online Help
04.03
Configuring in WinCC
switches to the Movement Screen
switches to the Message Screen
exits diagnostics
Printout of the Online Help
103
Configuring in WinCC
04.03
3.11.2 The Expanded Step Sequence Screen
Note
You get the Expanded Step Sequence Screen when the S7-GRAPH-OCX with the
Control GraphVisu is installed on your OS. The S7-GRAPH-OCX is a component
of S7-GRAPH in version 5.1 or higher.
What is the Expanded Step Sequence Screen Used for?
The Step Sequence Screen helps you to rectify faults in an S7 Graph sequence of
steps.
Expanded Step Sequence Screen (example on PC)
Apart from the sequence list, the Expanded Step Sequence Screen contains a list
of malfunctioning operands and a graphic presentation of the step sequence, as
you know from S7-GRAPH.
Functions
In the Expanded Step Sequence Screen you can
104
•
select specific individual steps manually in order to activate or deactivate them,
•
re-initialize the sequence of steps or clear it
•
synchronize a step sequence again with the process after an error.
Printout of the Online Help
04.03
Configuring in WinCC
Warning
When using the Step Sequence Screen, you must ensure that the sequence
remains in a consistent state.
Printout of the Online Help
105
Configuring in WinCC
04.03
3.11.2.1 What You See on the Expanded Step Sequence Screen
Standardized Layout
Like all the diagnostic screens, the step screen has a standardized layout. The
Expanded Step Sequence Screen contains information about the unit, a step list,
an operand list and the graphic display of the step sequence.
The following illustration shows an example of the Expanded Step Sequence
Screen on a PC.
1
5
6
7
8
2
9
4
3
10
11
Step Sequence Screen (example on PC)
Information on the Selected Unit
In the upper area of the display you obtain detailed information on the unit selected
in the diagnostic screen from which the Step Sequence Screen was opened.
(1) The name of the next higher unit in the hierarchy appears in the "Unit Level"
box.
(2) The "Unit No." field tells you the block type (FC or DB) and the block number of
the selected unit.
(3) The sequence name appears in the "Unit" box.
(4) The current mode of the unit is displayed in the "Operating Mode" box.
106
Printout of the Online Help
04.03
Configuring in WinCC
Step list
The top left area of the Expanded Step Sequence Screen displays the individual
steps in the sequence selected.
(5) Here you can see a list of all the steps in the sequence selected. The step
name and step number are displayed for all the steps. You can tell the status of a
step from its color:
•
green = active
•
red = disturbed
The system automatically displays the section of the step list that corresponds to
the graphic display of the step sequence in the right section of the screen.
List of errored operands
The bottom left part of the Expanded Step Sequence Screen conatins a list of the
missing and/or errored operands. The display depnds on the object that is selected
on the right of the graphic display of the step sequence or (in Automatic mode) is in
focus.
•
If a step is in focus and there is an interlock or supervision error, the operand
list displays the errored operands for the step you selected.
•
If a step is in focus and there is no interlock or supervision error, the missing
operands for the subsequent transitions of the selected step are displayed in
the operand list.
•
If the focus is on a transition, the missing operands for this transition are shown
in the operand list.
•
If the focus is on a branching point, the operation list remains blank.
Specifically, you will see the following elements in the operand list:
(6) The "Type" column shows you which error has occurred:
•
•
= Interlock error
= Supervision error or missing operand in a transition
(7) "Operand" column: The different operands are displayed here.
(8) "Status" column: The status of the operand can assume the following values.
•
0 = signal missing
•
1 = signal must not be present
(9) "Symbols" column: This field lists the symbol of the signal in accordance with
the symbol table in STEP 7.
(10) "Comment" column: A comment on the signal concerned as shown in the
STEP 7 symbol list appears here.
Graphic display of the step sequence
Printout of the Online Help
107
Configuring in WinCC
04.03
(11) The right half of the screen shows a graphic display of the step sequence,
which will be familiar to you from S7-GRAPH. This area is also responsible for
what is shown in the step sequnce list and the operand list.
You can recognize the status of a step and the step sequence object currently in
focus from the colors:
•
Blue rectangle in background: object is in focus
•
Green = step is active
•
Red = step is errored
In Manual mode you can scroll through the step sequence display with the arrow
keys. In Automatic mode the graphic display is automatically tracked so that there
is always at least one active step visible in the displayed section.
You can use the "+" and "-" keys to zoom in and out of the graphic display.
108
Printout of the Online Help
04.03
Configuring in WinCC
Keys on the Expanded Step Sequence Screen
Symbol
Name
Function
Switch operating modes
You use this key to open the
"Mode Change" dialog box. Here
you can set Automatic, Manual or
Inching mode.
Display synchronization point
In Manual mode only:
Use this key to view the point of
the step sequence at which you
can synchrinize the step
sequence with the process.
Reject synchronization proposal
Use this key to reject the
proposed synchronization point.
Accept synchronization proposal
Use this key to accept the
proposed synchronization point.
The proposed step is activated.
You can then switch the step
sequence back to Automatic
mode.
Deactivate Sequence
You use this key to deactivate all
the steps in the step sequence.
No further steps will be executed.
Initialize Sequence
You use this key to start the step
sequence with the initial steps
defined.
Disable Step
In "Manual" mode only:
Use this key to deactivate the
selected step.
Enable Step
In "Manual" mode only:
Use this key to activate the
selected step.
...
Printout of the Online Help
Increment Step
In "Inching" mode only:
Use this key to activate the next
step.
Acknowledge error
You use this key to acknowledge
a monitoring fault that has arisen
during operation (supervision
condition met).
The keys of the global key set
(see "Global Key Set").
109
Configuring in WinCC
04.03
3.11.2.2 How to Work with the Expanded Step Sequence Screen
Aims
You want to eliminate a process fault by activating steps in the sequence on which
the unit with the fault is based.
Expanded Step Sequence Screen (example on PC)
Warning
When using the Step Sequence Screen, you must ensure that the sequence
remains in a consistent state.
Process
When there is an error in a S7-Graph step sequence, you must first analyze the
error involved.
To eliminate the fault, you must change the operating mode from Manual to Inching
mode. Once the error has been cleared, you can synchronize the step sequence
with the process again and go back to Automatic mode.
Which Unit?
In the "Unit" box, check that you are in the right sequence as only the steps
associated with this sequence are displayed.
110
Printout of the Online Help
04.03
Configuring in WinCC
Deriving information about the error from the step sequence display
In the graphic display of the step sequence (right half of the screen), you can
recognize the status of a step and the step sequence object currently in focus by
the colored highligting:
•
Blue rectangle in background: object is in focus
•
Green = step is active
•
Red = step is errored
In Automatic mode the graphic display is automatically tracked so that there is
always at least one active step visible in the displayed section. In Manual mode
you can scroll through the step sequence display with the arrow keys. You can use
the "+" and "-" keys to zoom in and out of the graphic display.
You can obtain a short overview of the steps avaialble to you in the step sequence
list (top left). Here, again, active steps are green, and errored steps are red.
The operand list (bottom left) provides details of the type and cause of the error.
Here you will find the following information:
•
Type of error:
= interlock error,
missing from a transition
•
Missing or errored operands
•
Status of the operand (0 = signal missing, 1 = signal must not be present)
•
Symbols and comment on the signal
= supervision error or operand
Selecting the Operating Mode
To eliminate errors, switch the operating mode to "Manual".
Press the "Change Modes" key to open the dialog box for selecting the modes.
Printout of the Online Help
111
Configuring in WinCC
04.03
The dialog box "Operating mode"
The following operating modes are available:
•
Automatic mode: The step is advanced automatically as soon as the transition
has been satisfied.
•
Manual mode: You can use the "Activate Step" key to advance the step
manually, even if the transition has not been satisfied.
•
Inching mode: When the transition has been satisfied, you can use the
"Activate Step" key to switch the the step sequence to the next step.
In the "Operating Mode" dialog box you can select the operating mode you require
using the mouse or the arrow keys and confirm it by clicking the "Apply" button or
by pressing "Enter".
Executing Individual Steps
If the sequence of steps is in "Manual" mode, you can activate individual steps
irrespective of whether the transition is satisfied.
If the sequence of steps is in "Inching" mode, you can activate individual steps only
when the transition is satisfied.
Use this key to deactivate the individual step selected.
112
Printout of the Online Help
04.03
Configuring in WinCC
Use this key to deactivate the individual step selected.
Synchronization
After troubleshooting, you have to synchronize the step sequence with the process
again before you can revert to "Automatic" mode. (Refer to "Synchronizing a step
sequence").
If you press the "Display Synchronization Point" key, a step is identified as a
potential synchronization point by means of a yellow frame. You can reject or
accept this proposal. If no synchronization point can be proposed, you receive an
appropriate error message. In this case you must first troubleshoot further errors.
Use this key to reject the proposed synchronization point. Synchronization is
discontinued and the status of the step sequence remains unchanged.
Use this key to accept the proposed synchronization point. The proposed step is
activated. You can then go to Automatic mode and let the step sequence run
again.
Step Sequence mode
On the Step Sequence Screen you can also activate or deactivate the entire
sequence of steps.
If you press the "Initialize" key, you will restart the entire sequence of steps with the
initial steps defined.
If you press the "Disable" key, you will deactivate all the steps in the sequence. No
further steps will be executed.
Network Entry
You can use this key to directly open one of the STEP 7 applications and look how
the unit is programmed. If you have the appropriate input privilege, you can also
make changes there.
Which tool is called depends on the type of unit that you currently have selected:
•
if a sequence is selected, this will be displayed in S7-GRAPH
Printout of the Online Help
113
Configuring in WinCC
•
04.03
if an S7-PDIAG unit is selected, this will be displayed in the LAD/FBD/STL
editor.
Note
In the currently available versions of S7-GRAPH (v. 5.0) and STEP 7 Hardware
Diagnostics (v. 5.1), Open in Read Only mode is not possible. Instead these tools
are always opened in Edit mode.
You should therefore always give keys that allow entry into these tools the
appropriate input privilege!
Exiting the Step Sequence Screen
You can switch directly from the Step Sequence Screen to the other diagnostic
screens or also exit diagnostics:
switches to the Overview Screen
switches to the Detail Screen
switches to the Movement Screen
switches to the Message Screen
exits diagnostics
114
Printout of the Online Help
04.03
Configuring in WinCC
3.11.2.3 Synchronizing a step sequence
Synchronization on the Expanded Step Sequence Screen
To troubleshoot errors in a step sequence, you must place the step sequence in
"Manual" mode manually in another state (for example, activate a step without the
prior transition being satisfied). The step sequence is then no longer synchronous
with the rest of the process.
After the error has been eliminated, the step sequence must first be synchronized
with the rest of the process again before the process can continue to run in
"Automatic" mode.
In this connection you are supported by the Expanded Step Sequence Screen of
ProAgent in that it proposes a step as the synchronization point.
Requirements
The "Display Synchronization Point" key is active only when "Manual" mode is set.
Synchronizing
Procedure
1
Press the "Display Synchronization Point" key
ProAgent now checks whether the following conditions are satisfied:
- The CPU has been set to RUN-P mode.
- An error does not occur when status information is requested.
- The system proposes just one step for enabling.
If all these conditions are satisfied, the step proposed as the synchronization
point is highlighted in yellow in the graphic display of the step sequence. The
"Reject Synchronization Proposal" and "Accept Synchronization Proposal"
keys become active.
If these conditions are not satisfied, an appropriate error message is issued
and synchronization is terminated.
2
To reject the proposed synchronization point, press the "Reject
Synchronization Proposal" key. Synchronization is discontinued without
changes.
To accept the proposed synchronization point, press the "Accept
Synchronization Proposal" key.
The step sequence is synchronized with the rest of the process. You can then
go to Automatic mode and let the process continue.
Printout of the Online Help
115
Configuring in WinCC
116
04.03
Printout of the Online Help
04.03
4
Appendix
Configuring in WinCC
Use of WinCC/ProAgent
Once the STEP 7 program for the PLC has been created, the process diagnosis
can be configured for the OS. This is the point at which the optional WinCC
package, ProAgent, is first put to use.
It goes without saying that you do not need to repeat any of the entries already
made in STEP 7. All relevant information was stored in the shared database now
accessed by ProAgent.
All you have to do is make the settings you want in WinCC and in the ProAgent
editor before initiating generation of your project.
The diagnostic screens are supplied ready-configured. If in a particular case you
would like to customize the design of one of the screens to suit your own special
requirements, you can take advantage of the extensive possibilities offered by the
"Graphics Designer".
Printout of the Online Help
117
Appendix
4.1
04.03
Basic Requirements of the PLC Program
Basis for Starting Work
When configuring process diagnosis, both the PLC and the OS have to be
configured. ProAgent serves purely to configure the OS.
Note
ProAgent requires a diagnosable PLC program to enable it to start work.
Programming Language
The PLC is programmed either in STEP 7 (STL or LAD) or in S7-GRAPH.
•
If you are using STEP 7 (STL/FBD/LAD), you require the optional S7-PDIAG
package. S7-PDIAG allows you to extend the PLC program so that individual
signals such as for the status of inputs, outputs, markers etc. are monitored.
•
When S7-GRAPH is used, the PLC programs can automatically be diagnosed
if suitable settings are performed. The currently active steps are always
monitored. Monitoring functions are available across the whole sequence and
are integrated in the sequence module.
You will likewise need the S7-PDIAG options package only if you want to trigger
movements for S7-GRAPH units.
The procedure for programming the PLC and the particular aspects to be
considered when doing so are explained in the documentation for S7-PDIAG
and/or S7-GRAPH.
What You Must Remember
•
The PLC program must have been compiled.
•
The PLC program must operate without errors.
•
If you are working with several languages, those languages you select in
WinCC must actually be configured in the PLC program.
•
If not, text originating from the STEP 7 project (for example, unit names,
movement names etc.) are reproduced in the STEP 7 default language and
ProAgent text will be in English.
What You Must Remember When Using S7PDIAG
If you are working with S7-PDIAG, bear the following points in mind:
118
•
The function block for fault detection in OB1 must be called.
•
The program must not contain a loop, since the function block for fault
detection is only called once per cycle.
Printout of the Online Help
04.03
Appendix
•
Error detection must be activated in S7-PDIAG for the different monitoring
routines.
•
Initial value detection has to be activated for the different monitoring routines if
you wish to perform a criteria analysis on the Detail Screen.
•
The UDT "Movement" must be used if you want to use the "Movement
Screen". The UDT "Movement" sets up a standardized interface to the
Movement Screen.
What You Must Remember When Using S7GRAPH
If you are working with S7-GRAPH, bear the following points in mind:
•
Under "Options" → "Block Settings" → "Process Diagnostics" you can assign
an FB/DB pair to a sequence.
•
In ProAgent, this unit of movement (the FB/DB pair) will be handled in the
Overview Screen as part of a sequence and will not be shown as a separate
unit.
Instead, the "Movements" symbol will appear next to the assigned unit.
•
The error handling and the criteria analysis for ALARM_S messages of the
movement unit continue to be active. You can move back and forth to the
movement unit at the sequence.
Note
ProAgent can only correctly evaluate the assignment when you follow these rules:
A movement block can only be assigned to one sequence.
A sequence can in turn only be assigned one FB/DB pair.
You can configure more than one movement in a block. You are also allowed to
cascade calls to movement blocks.
S7-GRAPH does not check the plausibility of the assignment of blocks to a
sequence.
Printout of the Online Help
119
Appendix
4.2
04.03
Shared Database with STEP 7
Accessing the Database
STEP 7 and its optional packages store all the data required for process diagnosis
in a shared database.
S7-PDIAG
S7-GRAPH
write
shared
database
read
ProAgent
Shared Database
ProAgent and WinCC take the information they need about the installed PLCs from
this database:
120
•
Which units are diagnosable?
•
Which signals are monitored for which statuses?
Printout of the Online Help
04.03
Appendix
•
Which display classes have been defined?
•
Which message texts have been defined?
Updating the Database
Always translate the monitoring blocks before starting to configure in ProAgent
following modifications to the PLC program.
Content Requirements
At each point, WinCC and ProAgent place specific "minimum requirements" on the
data available in the database.
It is always preferable, of course, if the PLC program is already complete and fully
tested. In practice, however, this will not always be the case and you may possibly
want to work on the PLC program and configuration of the OS in parallel.
A description of the individual stages in the process is provided in the chapter "How
You Configure with ProAgent".
Data Consistency
Whereas PLCs and OS exchange data in Runtime mode, they do not exchange
their programs. As the programmer, you are responsible for ensuring that the latest
version of the relevant program is used on each device.
If, then, it becomes necessary to make diagnosis-related changes to the PLC
program at a later point, you must also regenerate the configuration of the OS, so
that no inconsistencies arise.
If S7-GRAPH sequences are modified, changes relevant to diagnostics are
automatically entered in the S7 diagnostics database when modifications are
saved.
With modifications on a network, regeneration has to be performed with S7-PDIAG
in order to update the S7 diagnostics database.
Note
If the S7 diagnostics database is updated, regeneration has to be performed with
ProAgent so that the data are consistent.
During commissioning, in the event of minor changes in S7-PDIAG you can apply
the data relevant to diagnosis direct to the CPU. You then do not have to recompile
your ProAgent project for the time being. More information on this topic can be
found in the section entitled "Minor Changes during Commissioning".
When generating the OS configuration, the stored messages and diagnosis data
are imported from the database shared with STEP 7.
Printout of the Online Help
121
Appendix
04.03
S7–GRAPH
changes
STEP 7
changes
Generate
S7–PDIAG
STEP 7 diagnostics database
Changes ?
Yes
Regenerate with
ProAgent
No
Messages and
Diagnostic data are
imported
from Database
Datenbase for
ProAgent
consistent
Data Consistency
122
Printout of the Online Help
04.03
4.3
Appendix
When You Configure with ProAgent
Project Status
When you configure and thus generate ProAgent depends on whether you want to
begin a new project, "retrofit" an existing project or update an existing project.
Procedure for a New Project
WinCC and ProAgent require a diagnosable PLC program to enable them to start
work. You must, therefore, first create a new project in STEP 7.
To create a new diagnosable project:
Procedure
1
Create your project in the SIMATIC Manager of STEP 7.
2
Program your PLC. To do this and depending on your requirements, use either
STEP 7 (STL or LAD) together with the S7-PDIAG or S7-GRAPH options
package.
3
Create an OS in SIMATIC Manager.
4
Select in STEP 7 the OS for which you want to configure process diagnostics.
5
Start ProAgent and generate process diagnostics for the relevant data (refer to
"How You Configure with ProAgent").
6
Use the Graphics Designer of WinCC to create your installation screens.
When you start ProAgent manually, you have to insert at least one button to call
the diagnostic screens manually (refer to "Configuring Installation Screens for
Starting ProAgent").
Note
For you to be able manually to call the diagnostic screens from your system
screens, you require special "ProAgent functions". You should therefore generate
with ProAgent prior to other configurations in WinCC.
"Retrofitting" an Existing Project
To integrate ProAgent in an existing project:
Procedure
1
Create in SIMATIC Manager an OS of the same name as your existing project.
2
Close SIMATIC Manager.
The STEP 7 project folder contains a folder of the same name as your project.
It stores the WinCC project data just generated.
Printout of the Online Help
123
Appendix
04.03
Procedure
3
Delete the WinCC project data just generated.
4
Copy the data of the WinCC project which you want to upgrade to the project
folder that has just been created.
5
Open in SIMATIC Manager the OS you have just created and regenerate the
diagnostic data in WinCC.
Attention
The settings in alarm logging are overwritten during generation with ProAgent. This
affects the color settings, acknowledgement theory and names. To avoid this,
deactivate the "Master reset of created message configuration" check box on the
tab labeled "Generation Run".
Updating an Existing Project
When changes are made to the S7 diagnostics database, you can update the
diagnostic data in WinCC by regenerating with ProAgent.
If you update the diagnostic screens in the process, you can also undo all changes
that you have made to the design of the diagnostic screens.
Upgrading Existing Projects from a previous ProAgent Version to to 6.0
To upgrade an existing project from a previous ProAgent Version to Verson 6.0. all
you have to do is regenerate version 6.0.
Procedure
1
In the ProAgent editor, select the "Generation Run" tab.
2
Select the "Master reset of created messages" check box.
All the messages created by the mapper are first deleted and replaced with the
current messages from the S7 database.
3
Click the "ProAgent Images and Overwrite C Scripts" button. The components
are then overwritten immediately.
4
Compile your project using ProAgent version 6.0.
Note
All changes you have made to messages, ProAgent screens and the file
"ProAgentInit.Pas" will be overwritten on generation. You should therefore back up
your project before starting a generation run.
124
Printout of the Online Help
04.03
4.4
Appendix
How You Configure with ProAgent
Overview
The diagram below shows the chronological sequence of all steps to be completed
when configuring a process diagnosis.
Configuration Steps for a Process Diagnosis
Requirements of the PLC Program
As a system solution, WinCC and ProAgent are tailored to STEP 7 software.
A breakdown of the minimum requirements to be satisfied by the PLC program is
given in the section "Requirements of the PLC Program".
So that input does not have to be repeated, the system uses a shared database as
an interface. This explains why the PLC program must already be installed and
compiled before you can start working in WinCC.
A list of which steps should have been completed in STEP 7 at what point is given
in the section "Shared Database with STEP 7".
Opening the "ProAgent Configuration" Dialog Box
All settings required for ProAgent generation are made in the dialog box entitled
"ProAgent Configuration".
Printout of the Online Help
125
Appendix
04.03
Procedure
1
Right-click the "ProAgent" editor in the project navigation window of WinCC.
2
Select the "Open" command in the shortcut menu.
The ProAgent editor opens with the "ProAgent Configuration" dialog box.
"ProAgent Configuration" dialog box
With the aid of the three tabs, you can:
126
•
set the system hardware and select the PLCs, units and network connections
you want to diagnose
•
configure the generation, runtime and report functions of ProAgent
•
define the scope of generation by selecting the CPUs or the programs you
want to generate
Printout of the Online Help
04.03
Appendix
•
start and trace the generation run
The tabs are described in detail under the "ProAgent Editor" topic in the appendix.
Configuration Steps
A detailed description of the work steps involved in configuring with ProAgent can
be found in the chapter entitled "Configuration Steps in Detail".
Printout of the Online Help
127
Appendix
4.5
04.03
Configuration Steps in Detail
Work Steps Involved in Configuration
Configuration using ProAgent necessitates a maximum 16 work steps.
Note
You can perform steps 1 to 13 in any order. Some of these steps are optional. The
concluding steps 14 to 16 must be carried out in the given order and are absolutely
necessary.
Procedure
1
Defining the System Hardware
Define the type of the configured OS.
2
Settings for Generation
You define how much data from the STEP 7 database is transferred to the
WinCC database. You also define what happens to existing WinCC data.
3
Automatically Transfer Newly Generated Data to Runtime
Use this option to define whether the configuration created during generation
is automatically transferred to WinCC Runtime.
4
Selecting the Units for Diagnosis
Select the units on your system for which you would like to perform process
diagnosis.
5
Selecting the CPU/Program (Optional)
You can limit the generation run to individual CPUs or programs. If one CPU
or one program has to be generated, the check box in front of the entry
concerned turns gray and cannot be deselected.
6
Selecting Message Types
You can define the types of messages to be included in the alarm
management.
7
Selecting Display Classes (optional)
Use this option to define whether you want to display ALARM_S messages in
addition to the messages selected for the messages and you have assigned
certain display classes to the former in STEP 7.
8
Defining the Alarm Diagnostic Screen
You decide which diagnostic screen will be opened by an ALARM_S error
message in WinCC Runtime mode.
9
Defining the Diagnostic Screen for Manual Starting of Diagnosis
You define which diagnostic screen the user is allowed to open manually from
the system screens.
10
128
Setting Key Labeling
Printout of the Online Help
04.03
Appendix
Procedure
You define whether the keys in the diagnostic screens should be displayed
with symbols or text.
11
Defining Access Protection (Optional)
You specify which input privilege must exist for STEP 7 network entry.
12
Entering the Device ID (Optional)
You can assign a unique number to the display device using the device ID.
The device ID is required for assigning movements when the same
movements are displayed on several operating units.
13
Defining Report Files (Optional)
You can set whether relevant messages are logged in files during the
generation run and in WinCC Runtime mode.
14
Carrying Out Generation
When you have checked all your settings, start generation by clicking
"Generation".
15
Checking the Runtime Modules
You check the settings relating to WinCC Runtime mode in your project.
16
Configuring Installation Screens for Starting ProAgent
Finally, configure buttons for calling process diagnostics manually on your
system screens.
Printout of the Online Help
129
Appendix
4.5.1
04.03
Settings for Generation
Accessing the Shared Database
During generation, ProAgent accesses the database shared with STEP 7 and
imports from it all the pieces of message text stored in STEP 7 and all the
necessary diagnostic data.
Text and data are stored together with the configuration in WinCC.
The following data and pieces of message text are added to WinCC in this
instance:
•
the ready-to-use diagnostic screens copied to the folder of the current WinCC
project
•
the PLCs, units and network connections selected for the diagnosis
•
the ALARM_S messages created in Alarm Logging for the current WinCC
project
Furthermore, the ProAgent initialization function, "ProAgentInit.Pas", is overwritten.
Note
Make sure that the database is fully up to date before generation. If you have made
any alterations in STEP 7, recompile the modules concerned. This updates the file
storage in STEP 7 at the same time (see "Shared Database with STEP 7").
If S7-GRAPH sequences were modified, changes relevant to diagnostics are
automatically entered in the S7 diagnostics database when modifications are
saved.
With modifications on a network, regeneration has to be performed with S7-PDIAG
in order to update the S7 diagnostics database.
During commissioning you can directly transfer the diagnostic-relevant data to the
CPU with changes in S7-PDIAG. You then do not have to recompile your ProAgent
project for the time being. More information on this topic can be found in the
section entitled "Minor Changes during Commissioning".
Updating an Existing Project
If you regenerate at a later point of time for example, because the STEP 7
program has changed or because you have included additional units in process
diagnostics you can set the procedure for handling existing messages, message
configurations, diagnostic screens and C scripts.
With existing ProAgent screens, only the missing parts are added during
regeneration, while all the existing parts are not updated. In this way, for example,
130
Printout of the Online Help
04.03
Appendix
you can retain changes you made to the diagnostic screens subsequent to
generation, despite regeneration.
If you want to ensure that your project will be completely updated and any changes
that may have been made are really undone, you must overwrite the ProAgent
screens and C scripts perform a master reset of the messages prior to generation,
so that they can be recreated during generation.
When you overwrite existing components during generation, you can undo all
diagnostics-specific changes to your project and all changes to the ProAgent
screens. You should therefore back up the screens in your project before starting a
new generation run. If necessary, you can then recover your original data using
this backup copy.
Update Which Components?
Updating Existing Components
Prior to a new generation run, you can select the following options:
•
"Master reset of created messages" check box: All the messages created by
the mapper are first deleted and replaced with the current messages from the
S7 database. If this check box is active, it is not possible to generate as long
as the WinCC project is in Runtime. In this case you receive a corresponding
warning.
•
"Master reset of created message configuration" check box: This check box
should be selected only if you delete the message configuration in alarm
logging and want to recreate it during generation. This affects the color
settings, acknowledgement theory and names in alarm logging.
•
"Overwrite ProAgent screens and C scripts" button In the following cases you
should operate this button before generation: - the project has been updated to
a new version - changes to the ProAgent screens should be undone. All
ProAgent diagnostic screens and all C scripts are then overwritten
immediately. Any changes you may have made are then lost.
Note
If you have changed the system hardware (ProAgent editor, "Generation Run" tab)
or the key labeling (ProAgent editor, "Options" tab) since the last generation, all
ProAgent diagnostic screens and all C scripts will be overwritten automatically
during generation.
Printout of the Online Help
131
Appendix
04.03
Updating Existing Components
Procedure
1
In the ProAgent editor, select the "Generation Run" tab.
2
If you want to update created "messages" or the "message configuration",
select the corresponding check box.
The components concerned will be re-created in the next generation run.
If you do not want to update the component, deselect the check box.
3
132
If you want to update the ProAgent screens and the C scripts, click the
"Overwrite" button. The components are then overwritten immediately.
Printout of the Online Help
04.03
4.5.2
Appendix
Automatically Transfer Newly Generated Data to Runtime
Online Generation
From ProAgent Version 6.0, you can generate online while WinCC Runtime is
running.
Automatically Activating the Data Generated
Automatically Activating the Data Generated
On the "Generation Run" tab you can set that, after generation, the newly
generated data will be automatically activated. This is however only possible if no
diagnostic screen is open in Runtime.
If a diagnostic screen is open in Runtime, you are informed that a new ProAgent
configuration is available. This is activated as soon as all diagnostic screens are
closed. When you reopen a diagnostic screen, the newly generated data are
automatically loaded.
Note
If the "Automatically transfer newly generated data to Runtime" check box is not
selected, you are then responsible for ensuring that the newly generated ProAgent
configuration is activated. This can be done by restarting WinCC Runtime or by
calling the "ProAgentActivateLastGenData" function.
Procedure
1
In the "ProAgent Configuration" dialog box, select the "Generation Run" tab.
2
Activate or deactivate the "Automatically transfer newly generated data to
Runtime" check box under "Runtime".
Printout of the Online Help
133
Appendix
4.5.3
04.03
Defining the System Hardware
System Hardware
First of all, you define the OS on which your diagnosis is to be carried out. You can
choose between operator stations "FI 45", "Standard PC" and "Panel PC",
depending on the application.
Selecting the System Hardware
Defining the System Hardware
Note
If you change the system hardware before subsequent generation, the ProAgent
diagnostic screens and C scripts will be overwritten automatically during
generation. If this is the case, all other changes to the diagnostic screens are also
undone. In this case you receive a warning before generation.
If, however, you reset the original hardware before generation, the ProAgent
diagnostic screens and the C scripts will not be overwritten.
Procedure
134
1
In the "ProAgent Configuration" dialog box, select the "Generation Run" tab.
2
At "System Hardware", click the appropriate check box for "PC", "Panel PC" or
F I45.
Printout of the Online Help
04.03
4.5.4
Appendix
Selecting a CPU/Program for Generation
Limiting the extent of the of the Generation run
Generation can take some time with large projects. But it is not necessary to
generate for all involved CPUs/programs in every generation run. In the ProAgent
configuration you can select the CPUs/programs for which you want to generate.
Note
If you have performed changes within a CPU or program (such as removing or
adding units), that CPU or that program must be generated. The CPU or program
is then identified by a gray check box, which is selected and cannot be deselected.
Generating specifically a CPU/Program
Procedure
1
In the "ProAgent Configuration" dialog box, select the "Generation Run" tab.
2
In the "Selected Units" field, you can tell from the check box in front of the
entry which CPUs/programs will be included in the next generation run. There
are the following identifiers:
Box black and selected: CPU/program will be generated
Box black and deselected: CPU/program will not be generated
Box gray and selected: CPU/program must be generated, the check mark
cannot be removed.
If you want to change the selection, click the black check box belonging to the
CPU/program. You can select or deselect the check box.
Printout of the Online Help
135
Appendix
4.5.5
04.03
Selecting the Units for Diagnosis
Clarity Through Careful Selection
In WinCC, you can deliberately define which PLCs and units you want to monitor
with a certain OS. If your installation is equipped with a number of OSs, it is of
course desirable to carry out diagnosis on each OS only for those units that are
actually operated by this OS.
The units monitored with an OS can be located in different STEP 7 projects if these
are summarized in a STEP 7 multiproject.
"Select Units" Dialog Box
You set the units you want to include in process diagnostics in the "Select Units"
dialog box.
Selecting the Units
Only those units that are also diagnosable - i.e. that have been programmed using
S7-PDIAG or S7-GRAPH - are displayed for selection.
HiGraph units are not supported in ProAgent.
The displayed tree structure shows the units associated with the CPUs.
If you are using S7PDIAG 5.0 or higher, you can form groups of units. When
selecting units in ProAgent, they are displayed in groups and can be selected for
diagnostics. Units that are assigned to a group are displayed in the unit selection in
this group.
136
Printout of the Online Help
04.03
Appendix
If you have summarized several STEP 7 projects into one STEP 7 multiproject, the
diagnosable units of all the projects in the multiproject are displayed in the "Select
ProAgent Unit" dialog box.
Example of Unit Selection in a STEP 7 Multiproject
The units are located in this example in the three "MultiCC", "MultiPart" and
"MultiPLC" STEP 7 projects which have been summarized into one STEP 7
multiproject.
Note
WinCC obtains the information it requires from the database it shares with STEP 7.
If you cannot find a particular diagnosable unit you are looking for on the list,
recompile the PLC program and check the CPU power connection (see "Shared
Database with STEP 7").
Adding Units
Note
Select only those units for diagnostics for which you will indeed require process
diagnostics later.
Please also make sure that if a CPU is listed twice, you do not select it twice (e.g.
under MPI and Industrial Ethernet). Each CPU may be selected only once, i.e. for
one connection only.
Printout of the Online Help
137
Appendix
04.03
Procedure
1
In the ProAgent editor, select the "Generation Run" tab.
2
Click the "Units" button.
3
Select the corresponding entry in the "Units that can be diagnosed" column.
You open and close the separate hierarchical levels by clicking the "+" or ""
symbol respectively.
4
Click the ">>" button.
The unit, CPU or network component then appears in the list of "Selected
Units".
Note:
HiGraph units cannot be selected since they are not supported in ProAgent. If
the HiGraph unit is provided with the corresponding generator ID (HiGraph 5.0
or higher), the symbol
5
indicates that this unit cannot be selected.
Confirm by clicking "OK".
This means that the unit, CPU or network component can be diagnosed in
WinCC Runtime mode and is indicated on the "Generation Run" tab in the
units window.
Removing Units
Procedure
1
Select the corresponding entry in the "Selected Units" column.
2
Click the "<<" button.
The unit, CPU or network component then disappears from the list of "Selected
Units".
Note:
In earlier ProAgent versions it was indeed not possible to select HiGraph units
but they were taken into account in process diagnostics. If a HiGraph unit in an
existing project is listed in the list of "Selected Units", the unit is identified in
ProAgent 5.6 or higher with the symbol "Unit cannot be selected"
.
Remove these HiGraph units by means of the "<<" button from the list of
"Selected Units".
3
Confirm by clicking "OK".
This means that in WinCC Runtime mode, process diagnostics is no longer
possible for all deselected units.
Note
138
Printout of the Online Help
04.03
Appendix
If you only want to forward messages relating to the selected units from the CPU to
WinCC/ProAgent, then you must activate the option "Generate messages per unit"
on the "Options" tab in the ProAgent editor.
In addition, you can display alarm messages of particular display classes on the
OS.
Printout of the Online Help
139
Appendix
4.5.6
04.03
Selecting Display Classes
Note
Display classes have only to be selected if you want to display ALARM_S
messages in addition to the messages selected for the messages and you have
assigned certain display classes to the former in STEP 7. Otherwise you can skip
this section.
What Are Display Classes?
Display classes are defined in STEP 7. When you are configuring with ProAgent,
you can restrict displayed messages to certain display classes.
The CPU of a PLC always issues ALARM_S messages to all stations that are
logged in. You may, however, not want to display all messages on a specific OS –
because this would overtax the users, for example. In this case, certain messages
could be set to be displayed on a server only.
In order to be able to carry out such a selective selection, STEP 7 allows you to
assign a "display class" to each message. In all, there are 16 display classes
(display classes 0 to 15).
Example:
You assign the display class 1 to messages that are to appear on a specific OS
(e.g. on a specific client); messages that are to appear on a different OS (e.g. on
the server) are assigned display class 2.
This means that only those messages are evaluated on the respective OS, that
belong to the display classes concerned. Any other ALARM_S messages are
immediately discarded.
140
Printout of the Online Help
04.03
Appendix
Assigned
display class
Selected
display classes
1
1
Message A
1
Message B
0
Message C
0
1
2
2
Message D
Display classes define which messages are displayed
Specifying Display Classes
The display class to which an ALARM_S message belongs is determined while you
configure the message in STEP 7. Refer to the STEP 7 documentation on
message configuration for a detailed description of the method.
If you do not specify a display class in STEP 7, the message concerned is
automatically assigned to display class 0.
Selecting Display Classes
You must define for ProAgent which display classes are to be displayed on the
configured OS.
Procedure
1
In the ProAgent editor, select the "Options" tab.
2
Selection of the Display Classes
If you want to restrict the messages displayed on the configured OS to
messages of quite specific display classes, select the check boxes for all the
display classes that should be displayed.
In WinCC Runtime mode, all messages of these message classes are
displayed on the configured OS.
Example:
Printout of the Online Help
141
Appendix
04.03
Procedure
With the setting illustrated, the messages of display classes 1, 3, 5, 7, 9, 11, 13
and 15 appear.
If you deactivate all the display classes, only messages originating from units
that you have selected for the OS configured will be displayed.
3
If you want to select messages only by means of the display classes, deselect
the "Generate Messages per Unit" check box.
Only then will all the messages in the display classes selected be included in
alarm management, irrespective of the unit to which they belong.
142
Printout of the Online Help
04.03
4.5.7
Appendix
Defining Message Generation
Introduction
In the ProAgent editor you can select the messages to be included in alarm
management. Including fewer messages in the system can shorten the generation
time.
Selecting Messages
Defining Message Generation
The following options are available:
•
"Generate Messages per Unit": if this box is activated, only the messages
originating from units being monitored by the OS in question will be included in
alarm management.
•
"Generate Report System Errors Messages": if you activate this box,
messages generated by the STEP 7 function "Report system errors" on the
basis of a system error in a STEP 7 component will be included in alarm
management. They will be displayed in runtime on the OS. If you have the
necessary rights you can call the S7 hardware diagnostics for this message
direct from ProAgent. Detailed information can be found under "Report system
errors" in the STEP 7 documentation.
•
"Generate PLC Process Control System Messages": process control system
messages are messages generated by the process control, e.g. when starting
up the system. If you activate this box, you can introduce predefined process
control system messages into the system. These messages will be included in
alarm management. They will be displayed in runtime on the OS. If you have
the necessary rights you can call the S7 hardware diagnostics for this message
direct from ProAgent.
Defining Message Generation
Procedure
1
In the ProAgent editor, select the "Options" tab.
2
Under "Messages", activate the check box next to the option that you want to
activate.
The messages in question will be generated in alarm management during the
next generation run.
Printout of the Online Help
143
Appendix
4.5.8
04.03
Defining the Alarm Diagnostic Screen
Diagnostic Screens
You decide for yourself which diagnostic screen will be automatically opened for
process diagnostics with ProAgent for an ALARM_S error message in WinCC
Runtime mode.
You can choose between the following screens:
•
Overview Screen
•
Detail Screen
•
Movement Screen
•
Step Sequence Screen
•
Message Screen
If you want to specify the moment at which a process diagnosis is to be carried out
yourself, you can waive the option of automatic opening of a diagnostic screen. To
do this, select the "(none)" option in the selection menu.
Your system screen is thus not replaced with a ProAgent diagnostic screen even
when an ALARM_S message is issued.
Default Settings
When you apply the default setting, the Global Message Window is opened when
an ALARM_S message is issued.
Defining the Alarm Diagnostic Screen
144
Printout of the Online Help
04.03
Appendix
Changing the "Alarm Diagnostic Screen"
Procedure
1
In the ProAgent editor, select the "Options" tab.
2
Click the arrow in "Alarm Diagnostic Screen" to open the selection menu.
3
Select the diagnostic screen you want.
This diagnostic screen will now be opened by an ALARM_S message.
Printout of the Online Help
145
Appendix
4.5.9
04.03
Defining the Diagnostic Screen for Manual Starting of Diagnosis
Diagnostic Screens
You can also start process diagnosis yourself from your system screens at any
time without an error message being issued. You do this by first defining a specific
diagnostic screen as the Start Screen.
You can make one of the following screens the Start Screen of your configuration:
•
Overview Screen
•
Detail Screen
•
Movement Screen
•
Step Sequence Screen
•
Message Screen
Defining the Start Screen for Manual Starting of Diagnosis
Procedure
1
In the ProAgent editor, select the "Options" tab.
2
Click the arrow in "Start Screen" to open the selection menu.
3
Select the diagnostic screen you want.
Start Screen for Manual Starting of Diagnosis
This diagnostic screen is now the start screen for your configuration.
Selecting the Start Screen
The diagnostic screen you select as the start screen will depend on your
application.
Normally, you start process diagnostics by calling the Message Screen or the
Overview Screen from a system screen in your configuration. You can then select
a unit or a message for which you would like to perform a criteria analysis.
If it is of advantage for your application – e.g. if a certain fault occurs very
frequently and you already know that the message issued is diagnosable – you can
146
Printout of the Online Help
04.03
Appendix
also set the Detail Screen or Movement Screen directly in order to speed up
rectification of the fault.
You can switch between the diagnostic screens in any order simply by pressing a
key and return directly to the system screen from which you started by pressing
"Back".
Plant
Diagnosis
Direct Access to Individual Diagnostic Screens
Default Settings
If you accept the default settings, the Overview Screen will be opened when you
start diagnosis manually.
Opening the Start Screen
Once you have concluded configuration of ProAgent, you still have to create a
button in your installation screens for starting process diagnosis manually (see
"Configuring Installation Screens for Starting ProAgent").
Using a User-Defined Start Screen
For starting diagnostics, you can alternatively embed your own start screen from
which you can go to the other diagnostic screens.
For this purpose, you can first customize the supplied user screen, UserBild.pdl, in
Graphics Designer. You can also embed your company logo, for example.
You must embed the user-defined start screen in WinCC at "Computer"
"Properties" (refer to "Checking the Runtime Modules").
In this case you do not require a button for calling process diagnostics manually on
your system screens.
Printout of the Online Help
147
Appendix
04.03
4.5.10 Setting Key Labeling
Introduction
When a project is generated you can set whether the keys in the lower segment of
the diagnostic screens should be labeled with graphic symbols or text.
For this, pieces of text in German, English and French are stored on the diagnostic
screens, in addition to the corresponding symbols.
Note
If you change the key labeling before subsequent generation, the ProAgent
diagnostic screens will be overwritten automatically during generation. If this is the
case, other changes to the diagnostic screens are also undone. Your attention is
drawn to this change, however.
If, however, you reset the original labeling before generation, the ProAgent
diagnostic screens and the C scripts will not be overwritten.
Setting Key Labeling
Setting Key Labeling
148
•
If you wish the keys to exhibit symbols, click the "Symbols" check box.
•
The set of keys then appears in symbolic form at runtime. Pressing the
"Language" key has no effect on the set of keys.
•
If you want to have the buttons labeled with pieces of text, click the "Text"
check box.
•
The set of keys is labeled at runtime with pieces of text in the user interface
language you have just set. When you press the "Language" key, the display
of the set of keys is adjusted accordingly.
•
Only those languages are embedded for which pieces of text have been stored
on the diagnostic screens and are available in the S7 project.
Printout of the Online Help
04.03
Appendix
Changing Key Labeling
If you change the key labeling before subsequent generation, your diagnostic
screens will also be overwritten.
Procedure
1
In the ProAgent editor, activate the option you require in the "Key Label" box
on the "Options" tab.
Printout of the Online Help
149
Appendix
4.6
04.03
Defining the Device ID
You can assign a unique number to the display unit with the device ID. The device
ID is required for assigning movements when several operating units can display
and run the same movements.
Note
To use the device ID, the "Movement" UDT (UDT2), to which the device ID has
been added and which is part of the package in S7-PDIAG 5.0 HF3 or higher, must
be used. This is important if several operating units can display and run the same
movements.
The expanded "Movement" UDT (UDT2) is described in the "S7-PDIAG Manual"
version 5.0 HF3 and higher.
Defining the Device ID
Procedure
Procedure
1
In the ProAgent editor, select the "Options" tab.
The "Device ID" box shows you the currently valid identifier for the operating
unit. The default value of the device ID is "0".
2
Enter the device ID you want.
Values between 1 and 255 are allowed.
150
Printout of the Online Help
04.03
4.6.1
Appendix
Defining Input Privileges
In the diagnostic screens you can open the STEP 7 programming tool in which the
unit you have just selected was programmed direct.
On generation you can specify in the ProAgent editor, on the "Options" tab, the
input privilege that the user must have in order to open the LAD/FBD/STL editor in
Edit mode and not merely in Read-Only mode.
Note
In the currently available versions of S7-GRAPH (v. 5.0) and STEP 7 Hardware
Diagnostics (v. 5.1), Open in Read Only mode is not possible. Instead these tools
are always opened in Edit mode.
You should therefore always give keys that allow entry into these tools the
appropriate input privilege!
Defining the Input Privilege Level
Procedure
Procedure
1
In the ProAgent editor, select the "Options" tab.
The level currently set is shown in the "Input privilege level for STEP 7 network
entry" box.
2
To change the input privilege level, click "Select".
A dialog box opens showing the privilege levels allocated in the WinCC User
Administrator.
3
Select an input privilege level.
Printout of the Online Help
151
Appendix
4.6.2
04.03
Defining Report Files
What Report Files Are There?
In ProAgent there are three files which support you if problems arise during
configuration and in WinCC Runtime mode:
•
the configuration report file of the editor
•
the generation diagnostic file
•
the Runtime mode diagnostic file
You can view the contents of the various files using the corresponding "Open"
button in a text editor.
Configuration Report File of the Editor
The "PaGen.log" report file is created for every project, during initial generation, in
the WinCC project directory. This file stores the following configuration information
of the editor:
•
the ProAgent editor settings during generation
•
the date and status of generation
•
the units selected
Generation Report File
Diagnostic Files
Two diagnostic files support you during troubleshooting:
Diagnostic Files
152
Printout of the Online Help
04.03
Appendix
Generation Diagnostic File
In every generation run, ProAgent creates a diagnostic file called "PaCS.log" in the
WinCC project directory. If a file of the same name exists already, it is overwritten.
The information contained in this file on the generation run will depend on whether
you select the corresponding check box, "Log Error Details":
•
Not selected: OK messages for successfully performed generation steps
•
Selected: messages on errors, error locations and causes of error for the
generation steps that were not completed successfully
Runtime Mode Diagnostic File
You also have the option of creating a diagnostic file for errors occurring in WinCC
Runtime mode. The file is called "PaRT.log" and is similarly located in the WinCC
project directory.
Creating the Runtime Mode Diagnostic File
Procedure
1
In the ProAgent editor, select the "Report" tab.
2
At "Runtime Diagnostic File", select the check box in front of "Log Errors".
The diagnostic file is created during the next generation run in the WinCC
project directory, or any existing diagnostic file is overwritten.
Note
You should create this file only if you really need the information you derive from it
- in other words, in the event of an error. If you do not, you will use system
resources on the OS unnecessarily.
Printout of the Online Help
153
Appendix
4.6.3
04.03
Carrying Out Generation
Generating a Complete Configuration
Procedure
1
Make sure that the various options on all three tabs in the ProAgent editor are
set correctly.
2
On the "Generation Run" tab, click the "Units" button and check in the "Select
Units" dialog box whether the right units have been selected for generation.
If the details are not correct, simply repeat unit selection before closing the
dialog box.
4
Check on the "Generation Run" tab, in the "Selected Units" box, whether the
correct CPUs/programs have been selected for generation.
You can tell from the check mark in front of an entry which CPUs/programs will
be regenerated:
Box black and selected: CPU/program will be generated
Box black and deselected: CPU/program will not be generated
Box gray and selected: CPU/program must be generated, the check box
cannot be deselected.
To modify the selection, you can place or clear the check mark in the black
check box belonging to the CPU/program by clicking the check box.
3
Click the "Generation" button.
The project will be regenerated.
The generation run is executed in the background of the application. Depending on
the computing capacity, i.e. speed, of your computer, this process can take a
number of minutes. The status bar beneath the display box of the units keeps you
informed of the current status of generation. If errors arise during generation, the
error messages are likewise displayed in this field.
Afterward, the configuration is fully diagnosable. You have generated a complete
database and running environment for process diagnosis.
Online Generation During WinCC Runtime
From ProAgent Version 6.0 it is possible to generate online, i.e. to generate while
WinCC is in Runtime.
When generating online, not the entire configuration of the OS is generated. Only
the changes since the last generation are generated.
154
Printout of the Online Help
04.03
Appendix
The following restrictions apply when generating online:
•
It is not possible to delete the messages created.
•
The newly generated data are only activated automatically if the corresponding
check box on the "Generation Run" tab is activated and if no diagnostic screen
is open in Runtime.
Further information can be found under the "Online Generation" topic.
Printout of the Online Help
155
Appendix
4.6.4
04.03
Minor Changes during Commissioning
Copy Network Data Relevant to Diagnosis to PLC
In S7- PDIAG version 5.0 or higher network data relevant to diagnosis can be
stored direct in the PLC. If you enable this mode in S7PDIAG, you can directly see
how minor changes to your S7PDIAG project affect the WinCC/ProAgent project.
The ProAgent configuration does not have to be recompiled for this. This can save
you a lot of time, particularly during the commissioning phase.
Note
Prior to final commissioning of the modified S7-PDIAG project you should carry out
a final compilation of the ProAgent configuration to ensure correct functioning of
the OS.
When Should You Select "Copy Network Data Relevant to Diagnosis to PLC"?
Testing the following changes in the S7-PDIAG configuration does not require
recompilation in ProAgent:
•
adding or removing operands in monitored networks
•
changing the network logic or the operators in monitored networks
•
changing the monitoring time
In these cases it is sufficient to recompile your S7-PDIAG configuration and reload
the CPU. The OS then reads the modified operands, operators or monitoring times
direct from the CPU. Synchronization with the STEP 7 database is not required for
this data.
Limitations
If "Copy Network Data Relevant to Diagnosis to PLC" is selected, the following
data can then only be read from the common STEP 7 database and is therefore
not displayed or not up to date:
•
symbols and remarks for newly added operands
•
modified symbols and remarks for existing operands
•
modified message texts
On the Overview Screen and Detail Screen the units for which data was read
directly from the CPU are marked with the "inconsistency alert" symbol.
If new monitors have been added in your S7-PDIAG configuration, again you must
compile in ProAgent as usual.
Further information on "Copy Network Data Relevant to Diagnosis to PLC" can be
found in the documentation on S7-PDIAG.
156
Printout of the Online Help
04.03
Appendix
Selecting the Option "Copy Network Data Relevant to Diagnosis to PLC"
Procedure
1
In S7-PDIAG, call the menu command "Tools" → "Settings" → "Compile".
The "Settings" dialog box opens.
2
Select the "Copy Network Data Relevant to Diagnosis to PLC" check box.
3
Deselect the "Overwrite Instances" check box.
Note
After startup you should carry out generation with ProAgent.
Printout of the Online Help
157
Appendix
4.6.5
04.03
Checking the Runtime Modules
Runtime Mode
Once you have completed generation, you must perform the settings for WinCC
Runtime mode before starting Diagnostic mode:
•
You check that all necessary Runtime modules are activated.
•
You select the language for display in WinCC Runtime mode.
Checking the Runtime Modules
Procedure
1
Click "Computer" in the Project Navigation Window of WinCC with the right
mouse button and select the "Properties" command in the shortcut menu.
2
Click the "Properties" button.
3
Make sure that the following modules are activated on the "Startup" tab. If not,
select them by clicking their check boxes.
"Text Library Runtime"
"Global Script Runtime"
"Alarm Logging Runtime"
"Graphics Runtime"
158
4
On the "Parameters" tab, select the language for OS screen display in WinCC
Runtime mode.
5
If you wish to embed a user-defined start screen for WinCC, select it in the
"Start Screen" box.
6
Click "OK" to confirm your input.
Printout of the Online Help
04.03
4.6.6
Appendix
Configuring Installation Screens for Starting ProAgent
Introduction
Once you have completed ProAgent generation and checked the runtime modules,
the last step you have to perform is to configure the buttons in the installation
screens for starting ProAgent manually.
Opening the Defined Start Screen
First you must configure a button for opening the start screen defined in the
ProAgent editor.
Procedure
1
Open your installation screen in the Graphics Designer.
2
Insert a button in the normal way by means of the "Object Palette".
3
Label the button by writing the word "ProAgent", "Diagnosis" or something
similar in it.
4
Click this button with the right mouse button and select the "Properties"
command in the shortcut menu.
5
Click the "Mouse" option on the "Event" tab.
6
Double-click "Execution on Mouse Click".
The "Edit Action" dialog box is opened.
7
Under the "Standard Functions / ProAgent" entry, right-click on
"ProAgentEnterDiag" and select "OK".
This function is then applied.
You can see the excerpt from the program here.
#include "apdefap.h"
void OnClick(char* lpszScreenName, char* lpszObjectName, char*
lpszPropertyName)
{
ProAgentEnterDiagMove();
//Return type :DWORD
}
8
In order to be able to start process diagnosis manually via the keyboard too,
follow the same procedure as described above for the "Keyboard" option.
9
On the "Properties" tab, in the "Miscellaneous" group, at "Hot Key", enter the
hot key you want.
Printout of the Online Help
159
Appendix
04.03
Opening Specific Diagnostic Screens
If you want, you can configure other buttons in your installation screen here instead
of or as well as the "ProAgent" button, which you can then use to open the
individual diagnostic screens direct (Overview Screen, Detail Screen, Message
Screen, Movement Screen, Step Sequence Screen).
Procedure
1
Insert a button.
2
Label this button, e.g. by writing "Movement Screen" in it.
3
Click this button with the right mouse button and select the "Properties"
command in the shortcut menu.
4
Click the "Mouse" option on the "Event" tab.
5
Double-click "Execution on Mouse Click".
The "Edit Action" dialog box is opened.
6
Under the "Standard Functions / ProAgent" entry, right-click on
ProAgentEnterDiagMove" if you want to open the Movement Screen.
"ProAgentEnterDiagSeq" if you want to open the Step Sequence Screen.
"ProAgentEnterDiagSeqVisu" if you want to open the Step Sequence Screen.
"ProAgentEnterDiagOverview" if you want to open the Overview Screen.
"ProAgentEnterDiagMessage" if you want to open the Message Screen.
"ProAgentEnterDiagDetail" if you want to open the Detail Screen.
Note on the Step Sequence Screen:
If you are using the ProAgentEnterDiagSeqVisu function or the
ProAgentEnterDiagSeq function, the expanded Step Sequence Screen will be
displayed if the S7-GRAPH-OCX is installed and the expanded Step Sequence
Screen @DiagSeqVisu.pdl is found in the GraCS directory of the WinCC
project. If one of these conditions is not satisfied, the simple Step Sequence
Screen will be displayed.
7
Select the "OK" command. This function is then applied.
Example
If you want to open the Movement Screen, for example, the complete
command line will read as follows:
ProAgentEnterDiagMove();
8
If you also want to start this diagnostic screen manually via the keyboard,
proceed in the same way as for the "Keyboard" entry.
9
On the "Properties" tab in the "Miscellaneous" group, at "Hot Key", enter the
hot key you want.
You have then completed configuration of process diagnostics with ProAgent.
160
Printout of the Online Help
04.03
4.6.7
Appendix
Multi-Lingual Projects
Introduction
All diagnostic screens in ProAgent are multi-lingual with text in English, French and
English (USA). You can switch the user interface language at runtime as you
please.
In addition to the three standard languages, you can also store text in other
languages in your projects.
Requirements
Since ProAgent accesses the database shared with STEP 7, all the languages
used on the diagnostic screens must also be created in STEP 7. If not, text
originating from the STEP 7 project (for example, unit names, movement names
etc.) are reproduced in the STEP 7 default language.
Adapting the "Language Switch" Dialog Box
For you to be able to access other languages at runtime, there must be an option
in the "Language Switch" dialog box for selecting the new languages. For this, you
have to adapt the "@DiagLanguage.pdl" diagnostic screen.
Example: Language Switch to Swedish
In your project, you want to be able to support Swedish instead of French, a
standard language.
To be able to embed a new language, you must first know the WinCC language for
the language concerned.
Procedure
1
Determine the language ID you require from the index in WinCC online Help
under "language identifiers".
Here there is the following entry for Swedish: "LANG_SWEDISH 0x041D"
2
Open in "Graphics Designer" the diagnostic screen "@DiagLanguage.pdl".
3
Right-click the button displaying the French flag and choose the command
"Properties" from the shortcut menu.
4
Click the "Mouse" option on the "Event" tab.
5
Double-click "Execution on Mouse Click".
The "Edit Action" dialog box is opened.
6
In the line
SetLanguage(0x40)
replace the languageID "0x40C" (French) with "0x41D" (Swedish).
7
So that you can also operate language selection with "Enter", proceed in the
same manner as for the "Keyboard" entry.
Printout of the Online Help
161
Appendix
04.03
Procedure
8
On the "Properties" tab in the "Miscellaneous" group, at "Hot Key", enter the
hot key you want.
9
Embed a new bitmap - for example, the Swedish flag - at "Miscellaneous" →
"Status On" and "Screen Status Off".
10
Click "OK" to close the dialog box.
At runtime, the user interface language can now be changed to Swedish in
the "Language Switch" dialog box.
Adapting Text
The WinCC CD-ROM contains a folder called "SmartTools" in which you will find
the tool "CC_GraficsTextImportExport/EasyLang.exe". This tool can be used to
export all text and fonts from the WinCC screens, and to translate and re-import
them.
When you do so, adapt for other languages the fonts as well for those boxes that
do not contain text, since text is only entered in these boxes at runtime.
You will find further information in the appropriate online Help.
Note
To configure a new language for the master list of movements, you must edit - in
the "@DiagMove" screen - the button called "@ButtonColHeaderDescription",
which is not visible at runtime. The button is merely used to store text for column
titles on the master list of movements.
Texts for the different column titles are separated by a #. If you wish to embed a
new user interface language in your project, you have to translate this text
accordingly. In addition, you might have to adjust the font and its size on the
shortcut menu at "Properties".
162
Printout of the Online Help
04.03
4.6.8
Appendix
Other Hardware Platforms
Keyboard Assignment Can Be Adapted
In WinCC/ProAgent V 4.5 or higher ServicePack 1 it is possible to adapt the
keyboard assignment in the Movement Screen to other hardware platforms. In
addition, the number of lines displayed in the Overview Screen and in the
Movement Screen can be reduced.
Note
You should be used to dealing with *.ini files in Windows before adjusting these
settings. If you want to change the key codes in the Movement Screen, you will
also need Windows programming skills.
Configuration File GraCS.ini
You must make all the settings in the file "GraCS.ini", which is found in the
"<ComputerName>\GraCS" subdirectory of your WinCC project.
All the keywords are to be specified within the "[ProAgent]" section. If this section
does not yet exist, you will have to create it.
Keywords
The following keywords are supported:
Keyword
Meaning
NumberOfUnits
Number of unit lines in the Overview Screen
NumberOfMoves
Number of movement lines in the Movement Screen
MoveKey1
Key code for "Page Up/Down" and "Start movement"
...
MoveKey12
MoveKey<n> entries
The MoveKey<n> entries have the following format:
MoveKey<n>=<VirtualKeyCode>, <Qualifier>, <QualifierMask>
Parameters
Parameters
Value
Meaning
<n>
1
Key for Page Up
Printout of the Online Help
163
Appendix
04.03
2
Key for Page Down
3
Move line 1, move direction 1
(left)
4
...
11
12
Move line 1, move direction 2
(right)
...
Move line 5, move direction 1
(left)
Move line 5, move direction 2
(right)
<VirtualKeyCode The virtual Windows key code for the key. You can find the
>
definition in, for example, the header file WinUser.h or determine
them in WinCC by outputting the key code (nChar) with the
OnKeyDown keyboard event. The key code is best specified in
hexadecimal format (e.g. 0x70 corresponds to F1), but you can
also specify the values in the decimal system or in the octal
system.
<Qualifier>
This specifies whether Shift and/or Controll have to be pressed
in addition to the key specified at <VirtualKeyCode>:
0x00
0x01
Neither Shift nor Control must
be pressed (default)
0x02
Only Shift must be pressed
0x03
Only Control must be pressed
Shift+Control must both be
pressed
<QualifierMask> Specify here which qualifier is to be ignored in a key
comparison. Under normal circumstances, you should never
specify this value.
0x00
All qualifiers are ignored
0x01
Only Shift is scanned, Control is
ignored
0x02
0x03
Only Control is scanned, Shift is
ignored
Shift+Control are both scanned
(default)
Examples for the file "GraCS.ini"
1024x768 Resolution for PC Platform
[ProAgent]
; Settings for the Overview Screen
NumberOfUnits=14
; maximum number of units that the Overview Screen can display
164
Printout of the Online Help
04.03
Appendix
; at once (value must be less than or equal to 14)
; Settings for the Movement Screen
NumberOfMoves=5
; maximum number of movements that the Movement Screen can display
; at once (value must be less than or equal to 5)
MoveKey1= 0x21
; Key that scrolls up a page: Page Up
MoveKey2= 0x22
; Key that scrolls down a page: Page Down
MoveKey3= 0x70, 0x02
; 1st movement line, left: key for movement direction 1: Ctrl-F1
MoveKey4= 0x76, 0x02
; 1st movement line, right: key for movement direction 2: Ctrl-F7
MoveKey5= 0x71, 0x02
; 2nd movement line, left: key for movement direction 1: Ctrl-F2
MoveKey6= 0x77, 0x02
; 2nd movement line, right: key for movement direction 2: Ctrl-F8
MoveKey7= 0x72, 0x02
; 3rd movement line, left: key for movement direction 1: Ctrl-F3
MoveKey8= 0x78, 0x02
; 3rd movement line, right: key for movement direction 2: Ctrl-F9
MoveKey9= 0x73, 0x02
; 4th movement line, left: key for movement direction 1: Ctrl-F4
MoveKey10= 0x79, 0x02
; 4th movement line, right: key for movement direction 2: Ctrl-F10
MoveKey11= 0x74, 0x02
; 5th movement line, left: key for movement direction 1: Ctrl-F5
MoveKey12= 0x7A, 0x02
; 5th movement line, right: key for movement direction 2: Ctrl-F11
1024x768 Resolution for FI45
[ProAgent]
; Settings for the Overview Screen
Printout of the Online Help
165
Appendix
04.03
NumberOfUnits=14
; maximum number of units that the Overview Screen can display
; at once (value must be less than or equal to 14)
; Settings for the Movement Screen
NumberOfMoves=5
; maximum number of movements that the Movement Screen can display
; at once (value must be less than or equal to 5)
MoveKey1= 0x21
; Key that scrolls up a page: Page Up
MoveKey2= 0x22
; Key that scrolls down a page: Page Down
MoveKey3= 0x7B, 0x00
; 1st movement line, left: key for movement direction 1: F12
MoveKey4= 0x7B, 0x02
; 1st movement line, right: key for movement direction 2: Ctrl-F12
MoveKey5= 0x70, 0x03
; 2nd movement line, left: key for movement direction 1: Ctrl+Shift-F1
MoveKey6= 0x76, 0x03
; 2nd movement line, right: key for movement direction 2: Ctrl+Shift-F7
MoveKey7= 0x71, 0x03
; 3rd movement line, left: key for movement direction 1: Ctrl+Shift-F2
MoveKey8= 0x77, 0x03
; 3rd movement line, right: key for movement direction 2: Ctrl+Shift-F8
MoveKey9= 0x72, 0x03
; 4th movement line, left: key for movement direction 1: Ctrl+Shift-F3
MoveKey10= 0x78, 0x03
; 4th movement line, right: key for movement direction 2: Ctrl+Shift-F9
MoveKey11= 0x73, 0x03
; 5th movement line, left: key for movement direction 1: Ctrl+Shift-F4
MoveKey12= 0x79, 0x03
; 5th movement line, right: key for movement direction 2: Ctrl+Shift-F10
166
Printout of the Online Help
04.03
4.7
Appendix
Changing the Diagnostic Screens
Ready-made Diagnostic Screens
Besides the installation screens you have created yourself in the Graphics
Designer, the diagnostic screens are the only interface between the installation and
the user. For this reason, great care must be taken when making changes. You
must provide your users with a user-friendly interface which enables them to
recognize process faults at a glance and rectify them quickly.
When ProAgent is generated, ready-to-use diagnostic screens for various OSs are
integrated into your WinCC project.
With the aid of these diagnostic screens, you can solve all diagnosis tasks with
ease without having to bother about the details of configuration. You should take
advantage of this and only make changes to the diagnostics screens yourself in
exceptional cases.
Sensible Adaptations
The diagnostic screens all have a standardized design. This design is the best
possible compromise between different requirement profiles.
With a relatively small amount of effort, you can adapt ProAgent to the layout and
design of your own particular installation screens. Process diagnosis can in this
way be integrated perfectly into your installation visualization also with regard to
how it looks.
You make all design changes using the Graphics Designer as accustomed.
Warning
You should only adapt the design of the diagnostic screens to the rest of your
installation configuration. Never make changes to the functionality. To be able to
do this, you must have a sound grasp of Global Script. Even small changes can
greatly impair the operability of diagnosis.
After an Adaptation
Note
If you later perform a new generation run for example, to integrate additional units
into diagnostics and you have changed the settings for the system hardware of the
key labeling in the "ProAgent Configuration" dialog box, your modified diagnostic
screens will be replaced by the original ProAgent diagnostic screens without your
being asked.
You should therefore back up the screens in your project before starting a new
generation run. If necessary, you can then recover your original data using this
backup copy.
Printout of the Online Help
167
Appendix
4.7.1
04.03
Internal Structure of the Diagnostic Screens
Screen Sections
All diagnostic screens consist of various screen and application sections that are
tiled vertically and horizontally. The basic structure of the screens is characterized
by a definite, clear division into one screen-specific and two cross-screen (i.e.
common to all screens) sections: each diagnostic screen has a screen-specific
application area embedded between a global screen header and a global key set.
The figure below shows this basic structure of the screens:
Sections of the Diagnostic Screens
Diagnostic screens can be divided into three sections:
•
The global screen header consists of several objects for displaying the date,
time etc.
•
Depending on the particular diagnostic screen, the application area contains
different screens, dialog boxes and screen-specific key sets.
•
The global key set consists of 10 buttons positioned next to one another. There
is a message line over the keys
File Names of the Diagnostic Screens
All the names of the diagnostic screens begin with the prefix "@Diag". Since
ProAgent is used around the world, all screens are given English names.
168
Printout of the Online Help
04.03
Appendix
The following table shows all the diagnostic screens, screen components and
dialog boxes that were integrated into WinCC's "GraCS" folder when ProAgent was
installed:
Name
Diagnostic screen, screen component or dialog
box
@Diag_Start.pdl
Background screen with global screen header,
global key set and various dialog boxes for the
applications: "Switch Language" / "Exit Diagnostics" /
"Open STEP 7" / "Screen Information"
@DiagDetail.pdl
Detail Screen (without network)
@DiagOpList.pdl
Symbol List representation of the network
@DiagCRAY.pdl
STL representation of the network
@DiagCKOP.pdl
LAD representation of the network
@DiagCRAYError.pdl
"Inconsistent Database or Communication Error
during Criteria Analysis" dialog box
@DiagInfo.pdl
"Screen Information" dialog box
@DiagLanguage.pdl
"Switch Language" dialog box
@DiagMessage.pdl
Message Screen
@DiagMessageBox.pdl
Dialog box for output of information in note form
@DiagMode.pdl
"Operating mode" dialog box
DiagMove.pdl
Movement Screen
@DiagNewGenData.pdl
"New Configuration" dialog box
@DiagNoSubunitFailed.pdl
"No More Errored Expressions Present" dialog box
@DiagOverv.pdl
Overview Screen (without unit overview)
@DiagUnits.pdl
Overview of units
@DiagSeq.pdl
Simple Step Sequence Screen
@DiagSeqVisu.pdl
Expanded Step Sequence Screen
@DiagSimaticError.pdl
"SIMATIC Manager Not Started" dialog box
@DiagWait.pdl
"Please wait, searching in database" dialog box
UserBild.pdl
This screen serves as a template for your application
screens.
If, for example, you want to display your company logo in all of ProAgent's
diagnostic screens, you will need to change the header of ProAgent's basic screen
"@Diag_Start.pdl" in Graphics Designer.
Printout of the Online Help
169
Appendix
4.7.2
04.03
Practical Ideas
In principle, there is virtually no limit to the customization options due to the
numerous functions provided by Graphics Designer. The following sections
therefore offer just a few ideas for frequent applications.
Further information about the exact procedure can be found in the WinCC manual
or in the Online Help of the "Graphics Designer".
ProAgent's User Screen
On the ProAgent user screen you can replace the Siemens logo, for example, with
your own company logo and embed additional symbols in your system.
To do this, open the screen called "UserScreen" in Graphics Designer and perform
your modifications.
Global Screen Header
In the global screen header, for example, you can add a company symbol or
modify the way in which the date and time are displayed.
To do this, open the "@Diag_Start" screen in the Graphics Designer, select the
object in question and carry out your modifications.
Font Size and Character Set
You can change the font size and character set of the diagnostic screens. If you do
so, you must observe the basic rules relating to text design and layout. The size of
the text should, therefore, be matched to the importance of the information
contained in the text, but also to the distance the user will probably be away from
the screen. The font should be the same as that used in the rest of your installation
screens.
If you use a large font size, make sure that longer texts still have sufficient room.
To make changes to the font size or character set, open the screen in question in
the Graphics Designer, click the object with the right mouse button, select the
"Configuration" command from the context menu and edit the font and font size
there.
Key Symbols
You can modify the symbols on the global and screen-specific keys by editing the
bitmap linked to the key in a graphics program. To learn the name of the bitmap,
right-click the key in Graphics Designer and choose "Properties" from the shortcut
menu. Make sure the key remains linked to the bitmap of that name.
Note
If possible, do not make any changes to the key assignments, since the keys are
not just linked with a simple screen exchange. Other actions can be linked to every
key.
170
Printout of the Online Help
04.03
Appendix
Key Text
You can modify the text on the global and screen-specific keys by right-clicking the
key in Graphics Designer. Choose "Properties" from the shortcut menu and
customize the key label.
Screen Symbols
You can modify all the symbols on the diagnostic screens by editing the bitmap
concerned in a graphics program. To learn the name of the bitmap, right-click the
screen symbol in Graphics Designer and choose "Properties" from the shortcut
menu.
If, in doing so, you modify symbols that are also used for specific keys (for
example, "lightning flash", "warning triangle", etc.), you should adapt those key
symbols accordingly.
Additional Toolbar in the Global Message Window
Additional Toolbar in the Global Message Window
Further information about changes to the Message Screens can be found in the
manual or in the Online Help for "Alarm Logging".
In the Global Message Window, you can also make additional functions (e.g. horn
acknowledgement, switching to the start of the list, switching to the end of the list)
available in an additional toolbar.
Procedure
1
Open the "Alarm Logging" editor to edit the global message window.
2
Right-click "@DiagWindow" in the data window and choose the "Configuration"
command.
3
In the "Configure Message Window" dialog box, select the "Toolbar" tab.
4
Click the "Display Toolbar" check box and select the alignment of the toolbar.
5
Under "Key Functions", click the relevant check boxes to select which symbols
are to be incorporated into the toolbar.
6
Confirm your inputs by clicking "OK".
Changing the Order of Message Blocks
You can change the order of the message blocks in the message lines of the
Message Screen and "Global Message Window".
Procedure
Printout of the Online Help
171
Appendix
04.03
Procedure
1
Open the "Alarm Logging" editor.
2
Click "Message Window Templates" in the navigation window.
3
Right-click "@DiagLineWindow" in the data window and choose the
"Properties" command.
4
On the "Message Line", you can now configure a new message line format
using the "New" button or select an existing format.
5
You can now select the message blocks you want on the "Message Line
Format" tab of the "Message Line" dialog box and sort them with the "Down"
and "Up" buttons.
Changing the Colors of the Message Lines
You can also change the display colors of the messages for the statuses "arrived"
and "departed".
When changing message colors, it is especially important to use sharply
contrasting colors for color coding of the different states.
Procedure
1
Open the "Alarm Logging" editor.
2
Click "Message Classes" in the navigation window.
3
Right-click the message class concerned in the data window and choose the
"Properties" command.
4
Select the message type from the "Configure Message Classes" dialog box
and, by pressing the "Properties", open the "Type" dialog box.
5
Use the "Text Color" and "Background Color" buttons to select the colors you
want.
Changing the Display of Target Positions in the Movement Screen
In the Movement Screen the target positions are displayed according to the setting
that you made in S7-PDIAG. You can also change this setting for each target
position.
Note
To change the target positions in S7-PDIAG, you require S7-PDIAG Hotfix x. You
can download it from the Internet or order it by Hotline.
Procedure
1
Right-click in the S7-PDIAG editor to bring up the shortcut menu for the
movement and select the menu item "Movement Screen".
The "Movement Screen" dialog box opens.
2
172
Click the target position for which you want to change the display.
Printout of the Online Help
04.03
Appendix
Procedure
3
Select a form of representation from the "Application on HMI" list. The following
settings are available:
"(0) Not used":
The target position is not displayed
"(1) Free text":
The test you entered in the "Text/format text" box is displayed. The color of the
target position changes as a function of the value of the associated target
position bit in the UDT.
"(2) Autom. preassigned as text":
the operand is automatically displayed as text. The color of the target position
changes as a function of the value of the associated target position bit in the
UDT.
"(3) Autom. preassigned as Oper.":
The operand is automatically displayed as a symbol and absolutely. The color
of the target position changes as a function of the value of the associated
target position bit in the UDT.
"(4) Editable operand (bit)":
the operand that you selected in the "Operand" box is automatically displayed
as a symbol and as an absolute value. The color of the target position changes
depending on the value of the operand.
"(5) Editable operand (free)":
the text that you entered in the "Text/format text" box is displayed. Instead of
the format string contained in the text, the value of the operand selected in the
"Operand" box is displayed. The color of the target position changes
depending on the value of the operand.
4
If you have selected the entry (1) or the entry (5) at "Application on the HMI",
specify the text which you want the target position to have in the "Text/format
text" box. If you selected entry (5), the text must contain a format string.
If you selected entry (3), (4) or (5) under "Application on HMI", then in the
"Operand" field you select which operand is to be displayed.
5
Repeat steps 2 to 4 for all the target positions displayed in the Movement
Screen.
6
Confirm your inputs by clicking "OK".
In the Movement Screen the target positions for this movement are shown in
accordance with your settings.
Open the Simple, not the Expanded Step Screen
In WinCC/ProAgent 5.6 and higher, the Expanded Step Sequence Screen
"@DiagSeqVisu.pdl" will always be displayed, to the extent allowed by the
installation, when the "Step Sequence Screen" is operated. If you want to have the
Simple Step Sequence Screen "@DiagSeq.pdl" displayed instead, you must
delete, move or rename the Step Sequence Screen "@DiagSeqVisu.pdl" in the
"GraCS" directory of the WinCC project.
Printout of the Online Help
173
Appendix
04.03
If you have decided to display the Simple Step Sequence Screen for a project, the
following point will be of interest: if you select the "Overwrite Screens" function in
the ProAgent editor, all screens will be copied from the "WinCC/ProAgent"
directory of the selected system hardware to the "GraCS" project directory. In other
words, if there is a file called "@DiagSeqVisu.pdl" in the "WinCC/ProAgent"
directory, this file will again be in "GraCS" directory of the WinCC project
concerned after selecting "Overwrite Screens" in the ProAgent editor. After this
function has been triggered, therefore, the Expanded Step Sequence Screen will
again be displayed in this WinCC project. If you want the Simple Step Sequence
Screen to be displayed following selection of the "Overwrite Screens" function in
the ProAgent editor, the file in the appropriate directory for the system hardware in
the "WinCC/ProAgent" directory must be deleted, renamed or moved. However,
this will then affect the creation of a new WinCC project and also selection of the
"Overwrite Screens" function in the ProAgent editor within any other WinCC
project. The Simple Step Sequence Screen will then be displayed in all these
projects with this system hardware.
Inhibiting mode switching on the Expanded Step Sequence Screen
The "Mode" key can be operated at all times on the Expanded Step Sequence
Screen. If you do not want the operator to be able to operate this key whenever he
wants to, you can lock the key as follows:
Procedure
1
Open the Expanded Step Sequencer Screen "@DiagSeqVisu.pdl" in the
"Graphics Designer" editor.
2
Open the shortcut menu for the "Mode" button ("ButtonF1" object) by rightclicking and choose "Properties" from the menu.
The "Properties" dialog box opens.
3
On the "Properties" tab at "Button/Miscellaneous", delete the dynamic option at
"Operator control enable" and at "Screen state off".
Setting the display of the operand list in the Expanded Step Sequence Screen
The Expanded Step Sequence Screen displays the blocked and missing operands
in the operand list. The precise operand display is controlled by flags in the
corresponding C script. To change the default values, you can open the Expanded
Step Sequence Screen "@DiagSeqVisu.pdl" in the "Graphics Designer" editor and
then modify the flags.
The flags then have the following meanings:
174
Printout of the Online Help
04.03
Appendix
Flag
Flag = TRUE
Default Settings
ShowTransitionFaultsOnInterlockError
If there is an
interlock error, the
blocked operands
of the subsequent
transition are also
displayed.
FALSE
ShowMissingOperandsOnNoError
TRUE
If there is neither
an interlock error
nor a supervision
error with regard to
the focussed step,
the missing
operands for the
subsequent
transitions are
displayed.
Perform the following steps to modify the flags
Procedure
1
Open the Expanded Step Sequencer Screen "@DiagSeqVisu.pdl" in the
"Graphics Designer" editor.
2
Open the shortcut menu for the "Circle2" object by right-clicking and choose
"Properties" from the menu.
The "Properties" dialog box opens.
3
On the "Properties" tab, at "Circle/Miscellaneous" and the attribute "Display",
double-click on the button in the "Dynamic" column.
The "Edit Action" dialog box opens.
4
The two flags are defined with the following default values at approximately
Row 150:
BOOL bShowTransitionFaultsOnInterlockError = FALSE
BOOL bShowMissingOperandsOnNoError = TRUE
Set the flags in the way you wish.
5
Trigger "Create action" and close the dialog box by clicking OK.
The changes are initially noticed locally.
6
Save the screen in Graphics Designer.
Printout of the Online Help
175
04.03
5
Appendix
Appendix
In the "Reference", finally, you will find detailed information on the ProAgent
functions that have been added to the basic WinCC package for process
diagnostics and on the dialog boxes of the "ProAgent Editor". You also receive
information on the "Online Generation" and "Criteria Analysis" topics.
Printout of the Online Help
177
Appendix
5.1
04.03
ProAgent Functions (Overview)
Additional Functions
The WinCC editor "Global Script" offers a large number of different functions. You
will find a description of these functions in the "WinCC Manual" and in the WinCC
Online Help for "Global Script".
ProAgent adds to these functions other standard functions that are required solely
for process diagnostics. These functions only become available in WinCC once
ProAgent has been installed and generated.
Note
Use of the more complex ProAgent functions in particular necessitates in-depth
knowledge of programming in C.
ProAgent Function Options
The ProAgent standard functions allow the following configurations:
•
Open the Defined Start Screen Use this function to open the start screen set
for generation
•
Directly Open Specific Diagnostic Screens With this function you open the
specific diagnostic screens
•
Directly Open Diagnostic Screens for a Specific Unit On the basis of one unit,
open one of the associated diagnostic screens with this function.
•
Directly Open Diagnostic Screens for a Specific Message On the basis of one
message, open one of the associated diagnostic screens with this function.
•
Display the Name of a Current Step on a System Screen With this function you
can output the name of the current step to the screen.
•
Activating the New Configuration in Runtime With this function you can activate
the newly generated configuration in WinCC Runtime.
•
Changing the Runtime Language With this function you change the interface
language of the diagnostic screens.
•
Exiting Diagnostics With this function you exit diagnostics.
Internal Functions
Further internal functions are embedded that you should not call yourself, even
though they are used by the diagnostic screens supplied with the software.
Private Functions
178
Printout of the Online Help
04.03
Appendix
In addition to using ProAgent's standard functions, you can write your own
functions with the "Global Script" editor. You will find an example of this in
"Statistical Evaluation of Cause of Error".
Printout of the Online Help
179
Appendix
5.1.1
04.03
Function for Opening the Defined Start Screen
Objective
When configuring with ProAgent, you set the "Start Screen" on the "Options" tab.
This diagnostic screen is opened when you start process diagnostics. For this, you
have to configure a button with the "ProAgentEnterDiag" function on your system
screen.
Function
Description
ProAgentEnterDiag
With this function you can open the defined start screen from
any system screen when you start diagnostics manually.
Note
If you have generated and on the "Generation Run" tab the "Automatically transfer
newly generated data to Runtime" check box was active, the new configuration is
automatically loaded when the ProAgentEnterDiag function is executed.
Configuration Stage
You will find a description of the necessary configuration steps in the section called
"Configuring Installation Screens for Starting ProAgent".
180
Printout of the Online Help
04.03
5.1.2
Appendix
Functions for Directly Opening Specific Diagnostic Screens
Objective
With the following functions, you can configure buttons on the system screens for
directly opening different diagnostic screens.
Function
Description
ProAgentEnterDiagDetail
With this function you can open the Detail Screen
from any system screen when you start diagnostics
manually.
ProAgentEnterDiagMessage
With this function you open the Message Screen
from any system screen when you start diagnostics
manually.
ProAgentEnterDiagMove
With this function you can open the Movement
Screen from any system screen when you start
diagnostics manually.
ProAgentEnterDiagSeq
With this function you can open the Expanded Step
Sequence Screen from any system screen when
you start diagnostics manually. If the S7-GRAPHOCX is not installed or the Expanded Step
Sequence Screen "@DiagSeqVisu.pdl" is not
found, the Simple Step Sequence Screen
"@DiagSeq.pdl" is opened automatically.
ProAgentEnterDiagSeqVisu
With this function you can open the Step Sequence
Screen from any system screen when you start
diagnostics manually. If the S7-GRAPH-OCX is not
installed or the Expanded Step Sequence Screen
"@DiagSeqVisu.pdl" is not found, the Simple Step
Sequence Screen "@DiagSeq.pdl" is opened.
ProAgentEnterDiagOverview
With this function you can open the Overview
Screen from any system screen when you start
diagnostics manually.
In all cases when a screen is opened those units are displayed on the diagnostic
screen which were displayed the last time the corresponding screen was opened.
If you want to open a diagnostic screen for a specific unit or for a specific message,
you must use other ProAgent standard functions (refer to "Directly Open Diagnostic
Screens for a Specific Unit" and "Directly Open Diagnostic Screens for a Specific
Message").
Configuration Stage
You will find a description of the necessary configuration steps in the section called
"Configuring Installation Screens for Starting ProAgent".
Printout of the Online Help
181
Appendix
5.1.3
04.03
Directly Open Diagnostic Screens for a Specific Unit
Objective
ProAgent makes available standard functions with which you open the Overview
Screen, the Detail Screen or the Movement Screen for specific units from your
system screens. These functions allow quicker operation at runtime, since there is
no need for previous selection of a unit on the Overview Screen.
Function
Description
ProAgentUserEnterDiagOverview
This function opens the Overview Screen for
the specified unit.
ProAgentUserEnterDiagDetail
This function opens the Detail Screen for the
specified unit.
ProAgentUserEnterDiagMove
This function opens the Movement Screen for
the specified unit.
ProAgentUserEnterDiagSeq
This function opens the Step Sequence
Screen for the specified unit.
ProAgentUserEnterDiagSeqVisu
This function opens the extended Step
Sequence Screen for the specified unit.
Call
ProAgentUserEnterDiagOverview
DWORD ProAgentUserEnterDiagOverview
(const char *lpszS7Stationname,
const char *lpszS7CPUname,
long BlockNumber,
char *lpszBlockType)
ProAgentUserEnterDiagDetail
DWORD ProAgentUserEnterDiagDetail
(const char *lpszS7Stationname,
const char *lpszS7CPUname,
long BlockNumber,
char *lpszBlockType)
ProAgentUserEnterDiagMove
DWORD ProAgentUserEnterDiagMove
(const char *lpszS7Stationname,
const char *lpszS7CPUname,
182
Printout of the Online Help
04.03
Appendix
long BlockNumber)
ProAgentUserEnterDiagSeq
DWORD ProAgentUserEnterDiagSeq
(const char *lpszS7Stationname,
const char *lpszS7CPUname,
long BlockNumber
char *lpszBlockType)
ProAgentUserEnterDiagSeqVisu
DWORD ProAgentUserEnterDiagSeqVisu
(const char *lpszS7Stationname,
const char *lpszS7CPUname,
long BlockNumber
char *lpszBlockType)
Parameters
Parameters
Meaning
lpszS7Stationname
Name of the station of the mapped Step7 project
(upper/lower case is ignored)
lpszS7CPUname
Name of the CPU within the station of the mapped Step7
project (upper/lower case is ignored)
BlockNumber
Number of the block (DB) of the unit for which the screen is
to be opened
lpszBlockType
Type of block; the strings "FC" and "DB" are permitted here.
This parameter is not required with the
"ProAgentUserEnterDiagMove" function, since type "DB" is
always assumed.
Return Values
0 = desired screen was opened
> 0 = error as per table; more than one bit can be set
Error Values for ProAgentUserEnterDiagOverview and for
ProAgentUserEnterDiagDetail
Printout of the Online Help
183
Appendix
04.03
The following error dialog boxes have been defined in the header file c7rt_api.h:
Error Value
Meaning
C7_APIERROR_NOTINITIALIZED
ProAgent Dll not initialized
C7_APIERROR_STATIONNOTFOUND
Station not found in project
C7_APIERROR_CPUNOTFOUND
CPU not found on station
C7_APIERROR_PARAMETERLIST
Wrong specification in API parameter
list
C7_APIERROR_NOUNIT
No unit with this
(DB/FC) block number
C7_APIERROR_NOBLOCKTYPE
Block type illegal
Error Values for ProAgentUserEnterDiagMove
The following error dialog boxes have been defined in the header file c7rt_api.h:
Error Value
Meaning
C7_APIERROR_NOTINITIALIZED
ProAgent Dll not initialized
C7_APIERROR_STATIONNOTFOUND
Station not found in project
C7_APIERROR_CPUNOTFOUND
CPU not found on station
C7_APIERROR_PARAMETERLIST
Wrong specification in API parameter
list
C7_APIERROR_NOMOVE
This unit/subunit has no movement
C7_APIERROR_NOUNIT
No unit with this (DB) block number
C7_APIERROR_NOBLOCKTYPE
Block type illegal
Error Values for ProAgentUserEnterDiagSeq and for
ProAgentUserEnterDiagSeqVisu
The following error dialog boxes have been defined in the header file c7rt_api.h:
184
Error Value
Meaning
C7_APIERROR_NOTINITIALIZED
ProAgent Dll not initialized
C7_APIERROR_STATIONNOTFOUND
Station not found in project
C7_APIERROR_CPUNOTFOUND
CPU not found on station
C7_APIERROR_NOUNIT
No unit with this (DB) block number
C7_APIERROR_NOS7GRAPH
This unit is not based on an S7 GRAPH
step sequence.
Printout of the Online Help
04.03
Appendix
Configuration Stage
Configuring is similar to the configuration steps describes in the section entitled
"Configuring Installation Screens for Starting ProAgent".
Example Program
You want to open the Movement Screen directly for the following unit:
ProAgent_Station
Station name
CPU414-1
CPU name
10
DB number of unit
Configure the following call to the button you require:
#include "apdefap.h"
void OnClick(char* lpszScreenName, char* lpszObjectName, char*
lpszPropertyName)
{
ProAgentUserEnterDiagMove("ProAgent_Station","CPU4141",10);
//Return type :DWORD
}
Printout of the Online Help
185
Appendix
5.1.4
04.03
Directly Open Diagnostic Screens for a Specific Message
Objective
Using the ProAgent "ProAgentUserMessageEnterDiagPictureEx" standard
function, you can open the Overview Screen, Detail Screen or the Movement
Screen for specific messages from a system screen.
To do this, you have to configure a message window on the system screen
concerned. If you select a message from it at Runtime, you can open the
associated Overview Screen, Detail Screen or Movement Screen by means of a
button - depending on your configuration.
Note
The "ProAgentUserMessageEnterDiagPicture" function is still supported. It should
however be no longer used in ProAgent V6.0 due to newly introducted data
structures. Instead use the "ProAgentUserMessageEnterDiagPictureEx" function!
Function
Description
ProAgentUserMessageEnterDiagPictureEx
This function opens the Overview
Screen, the Detail Screen or the
Movement Screen for the message
you selected.
Call
ProAgentUserMessageEnterDiagPictureEx
DWORD ProAgentUserMessageEnterDiagPictureEx
(MSG_RTDATA_STRUCT_EX6 &rtData,
WORD ProAgentScreenID)
186
Printout of the Online Help
04.03
Appendix
Parameters
Parameters
Meaning
&rtData
Structure containing information on the unit you selected.
Determined earlier with the
"MSRTGetSelectedMessageEx6" function.
ProAgentScreenID
The ProAgent screen you want to open. The following values
are available:
"C7_OVERV_PICT_ID" (overview screen)
"C7_DETAIL_PICT_ID" (detail screen)
"C7_MOVE_PICT_ID" (movement screen)
"C7_SEQ_PICT_ID" (step sequence screen)
Return Values
0: the specified diagnostic screen was opened
0x8.......: error; the specified diagnostic screen could not be opened
Configuration Stage
Configuring is similar to the configuration steps describes in the section entitled
"Configuring Installation Screens for Starting ProAgent".
Example Program
You have configured a system screen containing the ProAgent message window
template. At Runtime, you can select a message and click a specific button to open
the Overview Screen for that message.
Configure the following call to the button:
#include "apdefap.h"
void OnClick(char* lpszScreenName, char* lpszObjectName, char*
lpszPropertyName)
{
// Name of the message window template (refer to the Alarm Logging editor)
// that is visible in the current window
// and in which the message was selected.
// for example, ProAgent message window template
char* messageWindowTemplateName = "@DiagWindow";
// Select the ProAgent screen which you want to open
Printout of the Online Help
187
Appendix
04.03
WORD ProAgentPictureID = C7_OVERV_PICT_ID; // e.g. Overview Screen
BOOL result = FALSE; // Function value return
CMN_ERROR error; // WinCC error structure
MSG_RTDATA_STRUCT_EX6 rtData; // Information on the selected
message
// Fetch information on selected message
result = MSRTGetSelectedMessageEx6(messageWindowTemplateName ,
&rtData, &error);
if(result)
{
DWORD dwRet = 0; // Function return value
// Open screen
dwRet = ProAgentUserMessageEnterDiagPictureEx(&rtData,
ProAgentPictureID);
if(dwRet!=0)
{
// Error treatment for
ProAgentUserMessageEnterDiagPictureEx
}
}
else
}
//Error treatment for MSRTGetSelectedMessageEx6
{
}
188
Printout of the Online Help
04.03
5.1.5
Appendix
Activating the New Configuration in Runtime
Objective
Using the ProAgent standard function "ProAgentActivateLastGenData", you can
activate the newly generated configuration in WinCC.
This function is automatically run if all of the following conditions are met:
•
Generation was successful.
•
In WinCC Runtime there is no ProAgent standard diagnostic screen open.
•
On the "Generation Run" tab the "Automatically transfer newly generated data
to Runtime" check box is activated in the ProAgent editor.
If the check box is not active, you must ensure that the newly generated ProAgent
configuration is activated. This can be done by calling the
"ProAgentActivateLastGenData" function or restarting WinCC Runtime.
Note
Calling this function can lead to undefined results if you run this from one of the
ProAgent standard diagnostics screens: overview screen, detail screen, message
screen, movement screen or step sequence screen.
Requirements
There is a newly generated configuration available which has not yet been
activated.
Call
DWORD ProAgentActivateLastGenData()
Return Values
0: newly generated configuration was activated
> 0: error, new configuration was not activated
Error values for ProAgentActivateLastGenData
The following error bits have been defined in the header file c7rt_api.h:
Error Value
Meaning
C7_APIERROR_PA_ACTIVE
a ProAgent standard diagosnostic screen is
loaded
C7_APIERROR_PA_REINIT
the activation failed
Printout of the Online Help
189
Appendix
5.1.6
04.03
Display the Name of a Current Step on a System Screen
Objective
With the "ProAgentUserGetS7GraphStepInfo" ProAgent standard function, you can
display the name of the current step of a S7-Graph sequence on one of your
system screens.
Requirements
The display step number of the current step must be known. You can apply it
directly from the output parameters of the S7-GRAPH FB.
Procedure for determining the step number:
Procedure
1
Compare output parameter S_NO (display step number) of the FB with output
parameter S_ACTIVE (displayed step is active).
The result of the logical operation is the display step number of the current
step.
2
Apply the logical operation result to WinCC.
Note
You will find more information in Online Help on S7-Graph under the topic "Calling
the S7 Graph FB".
Call
DWORD ProAgentUserGetS7GraphStepInfo
(const char *lpszS7Stationname,
const char *lpszS7CPUname,
void *pStepInfo)
Parameters
190
Parameters
Meaning
lpszS7Stationname
Name of the station of the mapped Step7 project
(upper/lower case is ignored)
lpszS7CPUname
Name of the CPU within the station of the mapped Step7
project (upper/lower case is ignored)
*pStepInfo
Pointer to a structure for the step information defined in the
ProAgent header file, c7rt_api.h. Since this structure is
Printout of the Online Help
04.03
Appendix
Parameters
Meaning
not known until a project is generated for the first time with
ProAgent editor, the structure has to be transferred in this
instance by means of a pointer to void.
Step Information Structure
typedef struct STRUCT_C7_S7GRAPHSTEP
{
BOOL Valid; //in: ParentObjID and ProgramIndex
valid for this sequence
long BlockNumber; //in: block number of unit (DB)
long ProgrammIndex; //in/out: internal ProgramIndex
long ParentObjID; //in/out: ID of sequence unit
long StepNumber; //in/out: step number display in
S7Graph/ProAgent
char StepName[C7_MAX_AT_NAME+2] //out: step name
}C7_S7GRAPHSTEP
For the initial call, "Valid" must be at "FALSE". BlockNumber and StepNumber
have to be written with the data required. Following a successful call, StepName
and the other parameters are filled in by the function.
Note
With more queries of the same sequence, access time is improved if the contents
of the structure is backed up in the user C action and only the StepNumber is still
specified.
Return Values
0 = step name has been determined
> 0 = error as per table; more than one bit can be set
Error values for ProAgentUserGetS7GraphStepInfo
The following error bits have been defined in the header file, c7rt_api.h:
Error Value
Meaning
C7_APIERROR_NOTINITIALIZED
ProAgent Dll not initialized
C7_APIERROR_STATIONNOTFOUND
Station not found in project
C7_APIERROR_CPUNOTFOUND
CPU not found on station
C7_APIERROR_PARAMETERLIST
Wrong specification in API parameter
list
C7_APIERROR_NOUNIT
No unit on station/CPU with this (DB)
block number
Printout of the Online Help
191
Appendix
04.03
Error Value
Meaning
C7_APIERROR_NOS7GRAPH
The unit is not a S7-Graph unit
C7_APIERROR_NOSTEP
Step number invalid
Configuration Stage
Configuring is similar to the configuration steps describes in the section entitled
"Configuring Installation Screens for Starting ProAgent".
Example Program
In one of your user screens you want to output the name of the current step in an
IO field. The following data is known:
ProAgent_Station
Station name
CPU414-1
CPU name
101
DB number of the S7-GRAPH unit
5
Display step number in S7-GRAPH/ProAgent
Configure the following call to the I/O field:
#include "apdefap.h"
void OnClick(char* lpszScreenName, char* lpszObjectName, char*
lpszPropertyName)
{
DWORD result;
// Structure of step information (static is important here)
static C7_S7GRAPHSTEP stepInfo = {FALSE};
// Name of station of mapped Step7 project
const char *lpszS7StationName = "ProAgent_Station";
// Name of CPU within station
const char *lpszS7CpuName = "CPU414-1";
// Block Number of unit (DB number)
stepInfo.BlockNumber = 101;
// Display step number in S7Graph/ProAgent
stepInfo.StepNumber = 5;
192
Printout of the Online Help
04.03
Appendix
// Transfer Output Parameters:
printf("Station name: \"%s\"\r\n", lpszS7StationName);
printf("CPU name: \"%s\"\r\n", lpszS7CpuName);
printf("DB number: %ld\r\n", stepInfo.BlockNumber);
printf("step number: %ld\r\n", stepInfo.StepNumber);
// Fetch step name
result = ProAgentUserGetS7GraphStepInfo(lpszS7StationName,
lpszS7CpuName, &stepInfo);
if(result == 0)
{
// Return value == 0: everything ok
// Read out step name:
printf("step name: \"%s\"\r\n", stepInfo.StepName);
}
else
{
//Return value != 0:
//Error as per table; more than one bit may be set
//Error handling
printf("ProAgentUserGetS7GraphStepInfo supplied error code
0x%lx\r\n", result);
if((result & C7_APIERROR_NOTINITIALIZED) ==
C7_APIERROR_NOTINITIALIZED)
printf("ProAgent Runtime System not initialized as yet!\r\n");
if((result & C7_APIERROR_STATIONOTFOUND) ==
C7_APIERROR_STATIONOTFOUND)
printf("station not found!\r\n");
if((result & C7_APIERROR_CPUNOTFOUND) ==
C7_APIERROR_CPUNOTFOUND)
printf("CPU not found!\r\n");
Printout of the Online Help
193
Appendix
04.03
if((result & C7_APIERROR_PARAMETERLIST) ==
C7_APIERROR_PARAMETERLIST)
printf("Illegal parameters!\r\n");
if((result & C7_APIERROR_NOUNIT) == C7_APIERROR_NOUNIT)
printf("specified unit not found!\r\n");
if((result & C7_APIERROR_NOS7GRAPH) ==
C7_APIERROR_NOS7GRAPH)
printf("specified unit is not a S7-Graph unit!\r\n");
if((result & C7_APIERROR_NOSTEP) == C7_APIERROR_NOSTEP)
printf("specified step number not found!\r\n");
}
printf("\r\n");
}
194
Printout of the Online Help
04.03
5.1.7
Appendix
Changing the Runtime Language
Objective
With the "ProAgentSetLanguage" ProAgent standard function you can change the
user interface language of the diagnostic screens at runtime.
Attention
This function may only be called from the ProAgent "Select Language" dialog box.
To switch languages at other points of the project, you must use the WinCC
"SetLanguage" function
Requirements
Pieces of text must be stored in the STEP 7 project and on the ProAgent
diagnostic screens in the language concerned. If not, text originating from the
STEP 7 project (for example, unit names, movement names, etc.) are reproduced
in the STEP 7 default language and ProAgent text will be in English.
Call
BOOL ProAgentSetLanguage (DWORD dwLocaleID)
Parameters
Parameters
Meaning
dwLocaleID
SprachID; the values for the different languages can be found in the
index of WinCC Online Help under "language identifiers".
If "dwLocaleID == 0": close dialog box without changing language.
Return Values
TRUE: text was switched
FALSE: error in language switch
Printout of the Online Help
195
Appendix
5.1.8
04.03
Statistical Evaluation of Cause of Error
Objective
If an ALARM_S message that can be subjected to a criteria analysis appears, the
results of the criteria analysis are saved in the message (associated process value
blocks 7,8,9,10). This information includes the operand triggering the message and
the diagnostics entry operand (refer to "Criteria Analysis").
If you want to use this information - for example, to make the results of the criteria
analysis available to a higher-level control system and to evaluate them on that
system from a statistical point of view - you must write a suitable function for
evaluating this information. You will find further information about writing private
functions in the Online Help for the "Global Script" editor.
Using a callback function, this function is called every time an ALARM_S message
that can be subjected to a criteria analysis becomes active, is acknowledged and
becomes inactive at Runtime.
Function for Evaluating Criteria Analysis Results
This function reads out the first blocked operand of an ALARM_S message that
can be subjected to a criteria analysis, including its symbol and comment.
You will find more information on the structures used
"MSG_RTDATA_TEXTVAL256_STRUCT" and "MSG_COMMENT_STRUCT" in
the WinCC-ODK description.
Procedure
1
Open the "Global Script" editor in WinCC.
2
In the "Function Drop-Down Box" right-click the "Project Functions" entry.
3
Select the "New" → "Function" entry from the shortcut menu.
The editing window opens.
4
Configure the following function with any name. In our example we will call it
"MyKritCallback":
Example Program
#include "apdefap.h"
// In ProAgent 5.5 or higher: remove the comment character in front of the next
line
//#define PROAGENT_V55
BOOL MyKritCallback(long progIndex, DWORD dwNotify,
MSG_RTDATA_TEXTVAL256_STRUCT* pRtData,
MSG_COMMENT_STRUCT*
MsgComment, LPVOID lpvUser)
{
BOOL result;
long signalLen;
196
Printout of the Online Help
04.03
Appendix
Procedure
char signal[C7_MAX_SIGNAL + 1] = "";
char symbol[C7_MAX_SYMBOL + 1] = "";
char zuliComment[C7OM_MAX_COMM_STR + 1] = "";
char operandListKey[] = "@OP:";
if (pRtData == NULL)
{
printf("MyKritCallback: return FALSE (pRtData = NULL)\r\n");
return FALSE;
}
if (MsgComment == NULL)
{
printf("MyKritCallback: return FALSE (MsgComment = NULL)\r\n");
return FALSE;
}
if (MsgComment->szText == NULL)
{
printf("MyKritCallback: return FALSE (MsgComment->szText = NULL)\r\n");
return FALSE;
}
// Only investigate messages having the "arrived" status
if((pRtData->dwMsgState & 0xffff) != MSG_STATE_COME)
{
return TRUE;
}
else
{
// MsgComment->szText: z.B."SYMB_E 1.0 E1.0
@OP:E1.0|E1.1|@DEO:M1.0@FV:07@ERR:00050005"
char* pos = NULL; // Located at the beginning of "@OP:"
char* posSignalStart = NULL; // Start of the current AbsoluteOperand
char* posSignalEnd = NULL; // End of the current AbsoluteOperand + 1
(pointer at '|')
posSignalStart = MsgComment->szText;
#ifdef PROAGENT_V55
// In ProAgent 5.5 and higher: Look for "@OP:" and skip
pos = strstr(MsgComment->szText, operandListKey);
if (pos == NULL)
{
printf("MyKritCallback: Identification '%s' not found in MsgComment-
Printout of the Online Help
197
Appendix
04.03
Procedure
>szText!\r\n", operandListKey);
}
else
posSignalStart = pos + strlen(operandListKey);
#endif
// Extract all operands from string
// If only the first operand is required, just replace "while(" with
// an "if("
while(pos // Keyword "@OP:" found
&& (*posSignalStart != '@') // End of operand not reached as yet
&& (posSignalEnd = strchr(posSignalStart, '|')) // '|' found as termination
)
{
// Extract current absolute operand in 'signal'
signalLen = min(posSignalEnd - posSignalStart, sizeof(signal) - 1);
if (signalLen > 0 && signalLen <= C7_MAX_SIGNAL)
{
strncpy(signal, posSignalStart, signalLen);
signal[signalLen] = 0;
symbol[0] = 0;
zuliComment[0] = 0;
// Fetch symbol and comment
result = C7_GetZuliTextEx(C7_GET_TAB_PARA, progIndex,
signal, symbol, zuliComment, NULL);
if(!result)
{
// No symbol or comment found, but it does not matter, for
// the symbol and the comment are automatically assigned
// the absolute operand
}
// Always output signal, even if no symbol
// or comment has been found
printf("MyKritCallback: Signal: \"%s\", Symbol: \"%s\", Comment: \"%s\"\r\n",
signal, symbol, zuliComment
);
}
else
{
printf("MyKritCallback: to short or to long operand in operand list
(posSignalStart=%s)\r\n", posSignalStart);
198
Printout of the Online Help
04.03
Appendix
Procedure
}
// Prepare for next operand
posSignalStart = posSignalEnd + 1;
}
}
return TRUE;
}
Activate Callback Function
Procedure for activating the "MyKritCallback" function as the callback function
upon every change of status of a diagnosable message:
Procedure
1
In the "Global Script" editor, open the function "ProAgentInit.pas" in the
"Actions\GlobalActions" function group.
This function contains the line:
C7DIAG_MSG_PROC pCallBack = NULL;
2
Change the line to:
C7DIAG_MSG_PROC pCallBack = MyKritCallback;
or insert your own function name.
The "MyKritCallback" function is now executed when a diagnosable message
becomes active or its status changes.
Note
When you regenerate you project and operate the button "Overwrite ProAgent
Screens and C Script" in the ProAgent editor on the "Generation Run" tab or have
modified the settings for the system hardware or the key labeling prior to
generation, the ProAgent initialization function "ProAgentInit.pas" will likewise be
overwritten. Your changes are then undone.
Printout of the Online Help
199
Appendix
5.1.9
04.03
Exiting Diagnostics
Introduction
In addition to the functions for calling diagnostics, a further function is provided for
exiting diagnostics.
Function
Description
ProAgentLeaveDiag
This function enables you to configure an additional button
to be used for quitting diagnosis.
Note
Please ensure that you do not quit diagnosis while in a critical situation.
You must make sure that all necessary interlocks have been implemented
beforehand and that no more movements are carried out.
If generation was carried out while a diagnostic screen was open in WinCC
Runtime and on the "Generation Run" tab, the "Automatically transfer newly
generated data to Runtime" option was active, the new configuration is
automatically activated when the ProAgentLeaveDiag function is executed.
Configuration Stage
Configuring is similar to the configuration steps describes in the section entitled
"Configuring Installation Screens for Starting ProAgent".
200
Printout of the Online Help
04.03
5.2
Appendix
The ProAgent Editor
Call
There are various ways of opening the ProAgent editor:
Project Navigation Window of the Control Center
When ProAgent is installed a ProAgent icon is added to the standard editors in the
Project Navigation Window of the Control Center:
ProAgent
The ProAgent Editor
Here you can right-click to open the ProAgent editor using the shortcut menu.
Menu
On the menu you can open ProAgent by clicking "Editors" → "ProAgent" →
"Open".
Structure
The ProAgent editor consists of three tabs: "Generation Run", "Options" and
"Report".
Printout of the Online Help
201
Appendix
5.2.1
04.03
Generation Run Tab
On this tab you can select the system hardware and the units on your system for
which you want to configure process diagnostics.
You can control behavior during generation by means of various settings for
overwriting different components.
System Hardware
The standard PC, panel PC and FI 45 are supported as system hardware. The
diagnostic screen has a resolution of 1024x768 pixel.
Overwriting Certain Components
ProAgent allows you to adapt all diagnosis components to your own specific
requirements. When regenerating your project, you can use these check boxes to
select whether you want to retain your changes or undo them by overwriting.
You can overwrite the following components:
•
"Messages": If you select this check box, all messages created in Alarm
Logging for the current WinCC project are regenerated. If this check box is
active, it is not possible to generate as long as the WinCC project is in
Runtime. In this case you receive a warning before generation.
•
"Message Configuration": This check box should be selected only if you delete
the message configuration in Alarm Logging and want to recreate it during
generation. This affects the color settings, acknowledgement theory and
names in alarm logging.
•
"ProAgent Screens and C Scripts": When you operate this button, all
diagnostic screens are overwritten immediately. All changes you have made
are then lost. Furthermore, the ProAgent initialization function,
"ProAgentInit.Pas", is overwritten. In the following cases you should operate
this button before generation: - the project has been updated to a new version changes to the ProAgent screens should be undone.
Runtime
You can then start the generation in the ProAgent editor while WinCC Runtime is
running.
If the "Automatically transfer newly generated data to Runtime" check box is active,
when the generation is finished the newly generated data are automatically loaded.
This is however only possible if all diagnostic screens are closed in Runtime.
If a diagnostic screen is open in Runtime, you are informed that a new ProAgent
configuration is available. This is activated as soon as all diagnostic screens are
closed. When you reopen a diagnostic screen, the newly generated data are
automatically loaded.
Selected Units
202
Printout of the Online Help
04.03
Appendix
This window displays the selected units in a tree structure. Using the check boxes,
you can define which CPUs/programs are regenerated when you press the
"Generate" button.
Note
Overwriting of the ProAgent screens may lead to all the data in your project being
changed. You should therefore always back up your project screens before starting
a new generation operation.
Information About the Generation
This output field displays information about the current status of the generation
during the generation run. If errors arise during generation, the error messages are
likewise displayed in this field.
Units
Use the "Units" button to open the "Select Units" dialog box. Here you define for
which of the diagnosable units you want to carry out the process diagnosis.
Generation
Once you have fully configured your diagnosis project on the three tabs
"Generation Run", "Options" and "Report", start the generation run by clicking the
"Generation" button.
The generation run is executed in the background of the application. Depending on
the computing capacity, i.e. speed, of your computer, this process can take a
number of minutes. The "Information about the Generation" output field informs
you continuously about the instantaneous status of generation.
Printout of the Online Help
203
Appendix
5.2.2
04.03
Options Tab
This tab enables you to select further generation options before starting the
generation run.
Messages and Display Classes
In the ProAgent editor you can select the messages to be included in alarm
management. Including fewer messages in the system can shorten the generation
time.
You can include the following types of messages:
•
"Generate Messages per Unit": only the messages originating from units
monitored with the OS in question are included in alarm management.
•
"Generate Report System Errors Messages": messages generated by the
STEP 7 function "Report system errors" due to a system error in a STEP 7
component are included in alarm management.
•
"Generate PLC Process Control System Messages": predefined process
control system messages are included in alarm management.
•
"Select Display Classes": Messages of certain display classes are created.
A message is then generated if either the appropriate unit was selected ("Generate
Messages per Unit") or the display class is selected.
By selecting certain display types (display classes), you have the option of
expanding the messages displayed to include those of certain classes. You can
then output these messages on another display device, for example, enabling you
to distribute them purposefully between different OSs.
Alarm Diagnostic Screen
At "Alarm Diagnostic Screen" you select which diagnostic screen will be opened
when an ALARM_S error message is issued in WinCC Runtime mode. You can
choose between the following screens:
•
"Message Screen"
•
Overview Screen
•
"Detail Screen"
•
"Movement Screen"
•
"Step Sequence Screen"
Selecting the option "(None)" results in no diagnostic screen being opened when
an ALARM_S message is issued.
Start Screen
The "Start Screen" field allows you to define which one of the diagnostic screens is
opened when you activate diagnosis from one of your installation screens.
204
Printout of the Online Help
04.03
Appendix
Key Label
At "Key Label", you can set whether the keys in the lower segment of the
diagnostic screens should be labeled with symbols or text.
For this, pieces of text in German, English and French are stored on the diagnostic
screens, in addition to the corresponding graphics.
If you selected "Text", the set of keys is labeled at Runtime with text in the user
interface language you have just set. When you press the "Language" key, the
display of the set of keys is adjusted accordingly.
The ProAgent standard languages are supported, while you have to configure
other languages (refer to "Multi-Lingual Projects").
Input Privilege for STEP 7 Network Entry
In the diagnostic screens you can open the STEP 7 programming tool in which the
unit you have just selected was programmed direct.
Here you can define the input privilege that the user must have in order to open the
LAD/FBD/STL editors in Edit mode and not just in Read-Only mode.
Note
In the currently available versions of S7-GRAPH (v. 5.0) and STEP 7 Hardware
Diagnostics (v. 5.1), Open in Read Only mode is not possible. Instead these tools
are always opened in Edit mode.
You should therefore always give keys that allow entry into these tools the
appropriate input privilege!
Device ID
You assign a unique number to the display unit with the device ID. The device ID is
required for assigning movements when several operating units can display and
run the same movements. The default value of the device ID is "0". You can enter
values between 1 and 255.
Printout of the Online Help
205
Appendix
5.2.3
04.03
Report Tab
On this tab you can create a report file for generation and diagnostic files for
generation and the WinCC Runtime mode of your project.
Using the Report and Diagnostic Files
These files allow you to log, save and print status information and error messages.
By means of the "Open" button, you can check, edit and print the contents of the
file concerned in the Windows text editor.
Configuration Report File of the Editor
The "PaGen.log" report file is created for every project, during initial generation, in
the WinCC project path. This file stores the following generation information:
•
the ProAgent editor settings during generation
•
the date and status of generation
•
the units selected
Note
With regeneration, the new data are appended to the existing data.
Generation Diagnostic File
In every generation run, ProAgent creates a diagnostic file called "PaCS.log" in the
WinCC diagnostics directory. If a file of the same name exists already, it is
overwritten.
The information contained in this file on the generation run will depend on whether
you select the corresponding check box, "Log Error Details":
•
Not selected: OK messages for successfully performed generation steps
•
Selected: messages on errors, error locations and causes of error for the
generation steps that were not completed successfully
Runtime Mode Diagnostic File
You also have the option of creating a separate diagnostic file for errors occurring
in WinCC Runtime mode. The file is called "PaRT.log" and is similarly located in
the WinCC diagnostics directory.
If, at "Runtime - Diagnostic File", you select the check box for "Log Errors", the
diagnostic file is created during the next generation run in the WinCC project
directory, and all errors that occur are written to an existing diagnostic file.
206
Printout of the Online Help
04.03
5.3
Appendix
Online Generation
Generation During WinCC Runtime
From ProAgent Version 6.0 it is possible to generate online, i.e. to generate while
WinCC Runtime is running.
When generating online, not the entire configuration of the OS is generated. Only
the changes since the last generation are generated.
The following restrictions apply when generating online:
•
It is not possible to reset the messages created.
•
The newly generated data are only activated automatically if the corresponding
check box on the "Generation Run" tab is activated and if no diagnostic screen
is open in Runtime.
No Master Reset for Messages Created
When WinCC Runtime is active, the messages created in Alarm Logging for the
current WinCC project cannot be regenerated. Therefore when generating online
on the "Generation Run" tab, the "Master reset of created messages" should not
be active.
If you begin online generation even though the check box is activated, the
generation is cancelled with a corresponding warning.
If you start the ProAgent editor while WinCC Runtime is active, the "Master reset of
created messages" check box cannot be activated, because during Runtime it is
not possible to generate with this function. After ending Runtime the check box can
be reactivated.
Activating the Newly Generated Data
If on the "Generation Run" tab, the "Automatically transfer newly generated data to
Runtime" check box is selected in the ProAgent editor, the newly generated data
are automatically activated. This is however only possible if no diagnostic screen is
open in Runtime.
If a diagnostic screen is open in Runtime, you are informed that a new ProAgent
configuration is available. This is activated as soon as all diagnostic screens are
closed. When you reopen a diagnostic screen, the newly generated data are
automatically loaded.
If the "Automatically transfer newly generated data to Runtime" check box is not
selected, you are then responsible for ensuring that the newly generated ProAgent
configuration is activated. This can be done by restarting WinCC Runtime or with
the aid of a button on which the "ProAgentActivateLastGenData" function is
configured.
Sample Program to Activate Newly Generated Data
Printout of the Online Help
207
Appendix
04.03
Configure the following script on a button to call the
"ProAgentActivateLastGenData" function:
#include "apdefap.h"
void OnClick(char* lpszPictureName, char* lpszObjectName,
char* lpszPropertyName)
{
DWORD dwRet = 0;
dwRet = ProAgentActivateLastGenData();
if dwRet != 0)
{
switch (dwRet)
{
case C7_APIERROR_PA_ACTIVE:
// Error treatment: a ProAgent standard diagosnostic screen is
loaded
...
break;
case C7_APIERROR_PA_REINIT:
// Error treatment: the activation failed
...
break;
}
}
else
{
// Call successful
...
}
}
Starting the online generation or the ProAgent editor from WinCC Runtime
You can start the online generation from a user screen of WinCC Runtime.
So that before generating online, you can change the settings in the ProAgent
editor, configure a script to start the ProAgent editor on a button. After changing
the settings, you can start the online generation directly from the ProAgent editor.
Sample Program to Start the ProAgent Editor
208
Printout of the Online Help
04.03
Appendix
Configure the following call to the button:
#include "apdefap.h"
void OnClick(char* lpszScreenName, char* lpszObjectName, char*
lpszPropertyName)
{
char szProjName[128];
char szCmdBuf[128];
CMN_ERROR Err;
BOOL bRet;
// Determine file name of the current project
bRet = DMGetRuntimeProject(szProjName,sizeof(szProjName),&Err);
if (TRUE == bRet)
{
sprintf(szCmdBuf, "C7CS -f=\"%s\"", szProjName);
ProgramExecute(szCmdBuf); //Return-Type: unsigned long int
}
}
Printout of the Online Help
209
Appendix
5.4
04.03
Criteria Analysis
Definition
Retracing a process error to the relevant points in the program code is referred to
as analysis of criteria.
Criteria Analysis Using ProAgent
You can use the criteria ananysis to determine the cause of a process error. At
Runtime if an ALARM_S message appears, a criteria analysis is carried out.
The message screen displays the blocked operands when the corresponding
messages are configured.
The detail screen displays the section from the STEP7 program code which is
responsible for triggering the alarm message.
Criteria Analysis Process
The following happens with a criteria analysis:
S7-PDIAG monitors the individual operands in the S7 control and triggers a
message when a certain trigger is released, if an operand no longer has the
required state for example.
Example: Required state of the operand A1.3 = 0. If the state of the operand
changes during the process to A1.3 = 1, the "Level of Operand A1.3 is 1" message
is triggered.
ProAgent receives the message and examines why the operand no longer has the
required state. To do this, the network programmed in STEP7 is examined and a
list of all operands is created that have contributed to the process error occurring.
Usually these are inputs in the process or bit memory which return process states.
The operands found are known as "blocked operands".
The first blocked operand (or all blocked operands) of the monitored network can
be displayed in each message line of a WinCC message window. This makes it
possible to isolate the cause of the error in the message window without having to
open the ProAgent detail screen for the criteria analysis. Often this is sufficient to
clear the fault. This enables quick fault clearance.
Format Strings
To display blocked operands in the message text, add so-called format strings to
the message text when configuring messages. Format strings contain information
about the blocked operand(s) and are replaced by corresponding text when
displayed in Runtime.
210
Printout of the Online Help
04.03
Appendix
The following format strings are available:
Format String
Contents
@ErrOpAll@
Symbols for all blocked operands (separated by "|")
@ErrOpSym1@
Symbol for the first blocked operand
@ErrOpCom1@
Comment for the first blocked operand
@ErrOpAbs1@
Address of the first blocked operand, E 1.0 for example
You can place these format strings anywhere in the message text. The replaced
text is also replaced in AlarmOCX, the Report System and wherever else the other
@...@ format strings are interpreted (@7%s@ bis @10%s@).
Displaying Format Strings
When you carry out generation with ProAgent for the first time in a new WinCC
project, or if the option "Master Reset of Created Message Configuration" is active,
then the AlarmLoggingWizard is started automatically .
The Wizard generates a particular structure of message blocks that is a
requirement for generating messages using the PLC-OS Engineering Tool. In so
doing, the message block "message text" is generated under "User text blocks".
At Runtime the format strings are replaced and displayed in the message screen.
Printout of the Online Help
211
Appendix
212
04.03
Printout of the Online Help
04.03
Index
Index
A
D
Access Protection
29
Action
Changing in the Detail Screen
75
Activating
185
Data
131, 203
Activating Data
131
Activating Process Diagnostics
18
Alarm Management
140
Appendix
173
Auxiliary Networks
61, 78
Data from PLC
153
Database
7
Shared with STEP 7
7, 118, 153
Update
118, 131
Date Display
29
Defining Access Protection
148
Defining Input Privileges
148
Detail Screen
5, 19
Displaying the Network in a LAD
66
Initial Values/Current Status
74
Keys
67
Practical Approach
69
Representation of the Network in STL 65
Structure
61
Switching Action
75
Switching the View
73
Switching Transition
75
Symbol List Display
64
Use
58
Device ID
147
Diag (Prefix)
12, 165
DiagDataInASModus
153
Diagnostic Screens
5, 19
Changing
30
Changing the Structure
164, 165, 167
Dialog Box
200
For Manual Starting of Diagnosis
143
In the Case of an Alarm
141
Names
165
Structure
28, 29
Tasks
19
Diagnostics
3
Configuring
121
Exiting
30
Starting
141, 143
Diagnostics Entry Operand
192
Direct Keys
89
Display
61
at Runtime
17
Switching in the Detail Screen
73
Switching in the Overview Screen
55
Display Initial Values
74
DP Keys
89
B
Benefits of Process Diagnosis
Blocked Operand
3
206
C
Callback Function
192
Calling Screen Information
30
Cause of Error
192
Commissioning
153
Compiling
158
Configuration Stage
121, 138
Calling Installation Screens from
ProAgent
156
Carrying Out Generation
151
Checking the Runtime Modules
155
Configuration Dialog
123
Defining Report Files
149
Defining the Alarm Diagnostic Screen
141
Defining the Generation
128
Defining the Start Screen
143
For a New Project
121
For an Existing Project
121
in WinCC
115
Message Generation
140
Process Diagnostics
7
Selecting Display Classes
138
Selecting Units
134
Step Overview
123, 126
System Hardware and Resolution
132
Control GraphVisu
95
Creating Control System Messages
140
Criteria Analysis
206
Printout of the Online Help
E
Exclusion Operands
81
Index-1
Index
04.03
Expanded Message Information
37
F
Foreign Language
158
Format String
206
Functions173, 174, 176, 177, 178, 182,
186, 191, 192, 196
G
Generation
Carrying out
Defining
Dialog Box
Online
Global Key Set
GraphVisu
128, 131, 151
151
128
198
131, 203
30
95
H
Hardware Platforms
Hierarchical Units
On the Movement Screen
On the Overview Screen
160
56, 93
93
56
M
Message Acknowledgement
18
Message Comment
37
Message Screen
5, 19
Keys
39
Practical Approach
40
Structure
37
Use
35
Messages
192
Creating
140
Diagnosable Messages
18
Messaging
15
Movement
94
Occupy
147
Movement Screen
5, 19, 94, 160
Executing Movements
89
Hierarchical Units
93
Keys
88
List of All Movements
94
Practical Approach
89
Structure
85
Use
83
Multi-Lingual Projects
158
Multiple Assignments
80
N
Names of the Diagnostic Screens
165
J
Jump Commands
79
K
Key Assignment
Keys
Detail Screen
Expanded Step Sequence Screen
Global Key Set
Message Screen
Movement Screen
Overview Screen
Simple Step Sequence Screen
160
28
67
107
30
39
88
50
99
Index-2
Online Generation
Operating Principles
OS
Other Hardware Platforms
Overview Screen
Hierarchical Units
Keys
Practical Approach
Structure
Switching the Display
Use
131, 203
26
7
160
5, 19, 160
56
50
51
46
55
45
P
L
LAD
Language
O
58
158
PLC Program
10
ProAgent Basic Screen
5, 19
ProAgent Menu Item
12
ProAgentActivatLastGenData (Function)185
ProAgentEnterDiag (Function)
176
ProAgentEnterDiagDetail (Function) 177
ProAgentEnterDiagMessage (Function)177
Printout of the Online Help
04.03
Index
ProAgentEnterDiagMove (Function)
177
ProAgentEnterDiagOverview (Function)
177
ProAgentEnterDiagStart (Function)
177
ProAgentLeaveDiag (Function)
196
ProAgent's User Screen
34
Structure
34
Use
33
ProAgentSetLanguage (Function)
191
ProAgentUserEnterDiagDetail (Function)
178
ProAgentUserEnterDiagMove (Function)
178
ProAgentUserEnterDiagOverview
(Function)
178
ProAgentUserGetS7GraphStepInfo
(Function)
186
ProAgentUserMessageEnterDiagPicture
(Function)
182
ProAgentUserMessageEnterDiagPictureEx
(Function)
182
Procedure for Process Diagnosis
5
Process Diagnostics
3
Activating
18
Carrying out
5
Configuring
7
Q
Quickly Selecting a Movement
94
R
Reference
Report File
Dialog Box
For Generation
In Runtime Mode
Reporting a System Error
Requirements
Before You Start
Of the PLC Program
Requirements of the PLC Program
T
173
149
202
149
149
140
116
10
116
116
S
S7-GRAPH
7, 10
Requirements
116
S7-GRAPH-OCX
95
S7-PDIAG
7, 10
Minor Changes during Commissioning
153
Requirements
116
Printout of the Online Help
Scope of Functions for Process Diagnostics... 3
Screen Header
29
Selecting Display Classes
138
Setting Key Labeling
145
Shared Database
7
Accessing
128
With STEP 7
118
Starting Process Diagnostics
18
STEP 7
10
Requirements
116
Shared Database With
118
Step Sequence
95
Step Sequence Screen
5, 19, 95
Expanded
104
Simple
96
Step Sequence Screen (Expanded)103,
104, 107, 108
Keys
107
Practical Approach
108
Structure
104
Synchronization
113
Step Sequence Screen (Simple)
96
Keys
99
Practical Approach
100
Structure
97
STL
58
Switching Operating Modes
51
Symbols in the Diagnostics Screens
26
Synchronization
113
System Hardware
132
Dialog Box
200
Tag Management
The ProAgent Editor
Transition
Changing in the Detail Screen
Traversing Keys
Dialog Box
Troubleshooting
13
197
75
75
89
200
3
U
Units
Display Blocked Units
55
Hierarchical Units on the Movement
Screen
93
Hierarchical Units on the Overview Screen56
Selecting for Diagnosis
134
Show All
55
User
29
User Administrator
148
Index-3
Index
04.03
W
WinCC
Runtime
Index-4
11
185
Printout of the Online Help