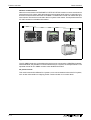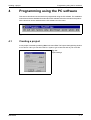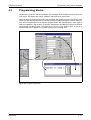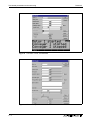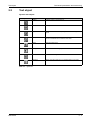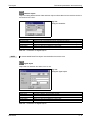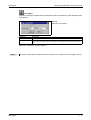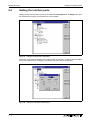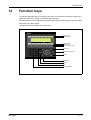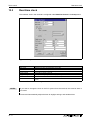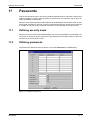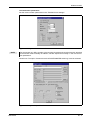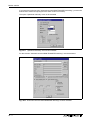
1
MITSUBISHI ELECTRIC
MAC Operator Terminal
Human-Machine-Interface
User's Manual
MAC E300
Art.No.: 65592
2001 05 02
Version C
MITSUBISHI ELECTRIC INDUSTRIAL AUTOMATION
User’s Manual
Operator Terminal MAC E300
Article no.: 65592 C
A
B
Version
03/1998
10/1998
pdp
pdp
Changes / Additions / Corrections
C
05/2001
pdp
—
General:
Chp. 10
Par. 4.7
Par. 10.4
Tab. 4-1
Tab. 4-6
Tab. 17-1
Tab. 17-1
Par. 4.7
Par. 18.4.1
Tab. 4-6
Tab. 12-2
Tab. 12-2
Tab. 12-2
Par. 15.3.4
General:
Following list shows the changes from version 1.00 to 1.10.
More efficient recipe storing
Definition of current recipe register in System Signals in Setup
Support for HMI-Tools
New PLC-drivers
Indexed message libraries
Current password level
RUN Æ PROG password
More character sets
Block connected to alarms
Disable alarm group printing
IO events
Increase or decrease analog IO with a defined value
Set analog IO to a defined value
Memory expansion
Update to programming software MAC Programmer+, version 5.x
About this manual
The texts, illustrations, diagrams and examples in this manual are only intended
as aids to help explain the functioning, operation, use and programming of the
operator terminal MAC E300 in combination with the system program version
4.0x and a MELSEC programmable logic controller.
Optionally, the operator terminal can be operated via an interface card within a
PROFIBUS/DP network.
If you have any questions regarding the installation and operation of the
equipment described in this manual, please do not hesitate to contact
your sales office or one of your Mitsubishi distribution
partners (see cover page).
You can also obtain information updates and answers to frequently
asked questions from our Internet website and our MEL-FAX fax on
demand server
(MEL-FAX: +49 (0) 21 02 / 4 86-4 85 or +49 (0) 21 02 / 4 86-7 90).
MITSUBISHI ELECTRIC EUROPE B.V. reserves the right to change the
specifications of its products and/or the contents of this manual at any time and
without prior notice.
© 05/2001
Safety Information
For qualified staff only
This manual is only intended for use by properly trained and qualified electrical technicians who
are fully acquainted with automation technology safety standards. All work with the hardware described, including system design, installation, setup, maintenance, service and testing, may
only be performed by trained electrical technicians with approved qualifications who are fully acquainted with the applicable automation technology safety standards and regulations. Any operations or modifications of the hardware and/or software of our products not specifically described in this manual may only be performed by authorised Mitsubishi staff.
Proper use of the products
The MC modules are only intended for the specific applications explicitly described in this manual. Please take care to observe all the installation and operating parameters specified in the
manual. The design, manufacturing, testing and documentation of these products have all been
carried out in strict accordance with the relevant safety standards. Under normal circumstances
the products described here do not constitute a potential source of injury to persons or property
provided that you precisely observe the instructions and safety information provided for proper
system design, installation and operation. However, unqualified modification of the hardware or
software or failure to observe the warnings on the product and in this manual can result in serious personal injury and/or damage to property. Never use any peripheral or expansion equipment with the MC modules other than that specifically approved and recommended by
Mitsubishi Electric.
Any other use or application of the products is deemed to be improper.
Relevant safety regulations
All safety and accident prevention regulations relevant to your specific application must be observed in the system design, installation, setup, maintenance, servicing and testing of these
products.
The regulations listed below are particularly important. This list does not claim to be complete;
however, you are responsible for knowing and applying the regulations applicable to you.
● VDE Standards
– VDE 0100 (regulations for electrical installations with rated voltages up to 1000 V)
– VDE 0105 (operation of electrical installations)
– VDE 0113 (electrical systems with electronic equipment)
– VDE 0160 (configuration of electrical systems and electrical equipment)
– VDE 0550/0551 (regulations for transformers)
– VDE 0700 (safety of electrical appliances for household use and similar applications)
– VDE 0860 (safety regulations for mains-powered electronic appliances and their accessories for household use and similar applications)
● Fire safety regulations
● Accident prevention regulations
– VBG No. 4 (electrical systems and equipment)
User’s Manual MC Modules
V
Safety warnings in this manual
In this manual special warnings that are important for the proper and safe use of the products
are clearly identified as follows:
4
DANGER:
Personnel health and injury warnings. Failure to observe the precautions described
here can result in serious health and injury hazards.
)
CAUTION:
Equipment and property damage warnings. Failure to observe the precautions described here can result in serious damage to the equipment or other property.
VI
General safety information and precautions
The following safety precautions are intended as a general guideline for using the MC system
together with other equipment. These precautions must always be observed in the design, installation and operation of all control systems.
4
DANGER:
● Observe all safety and accident prevention regulations applicable to your specific
application. Installation, wiring and opening of the assemblies, components and devices may only be performed with all power supplies disconnected.
● Assemblies, components and devices must always be installed in a shockproof
housing fitted with a proper cover and protective equipment.
● Devices with a permanent connection to the mains power supply must be integrated
in the building installations with an all-pole disconnection switch and a suitable
fuse.
● Check power cables and lines connected to the equipment regularly for breaks and
insulation damage. If cable damage is found, immediately disconnect the equipment
and the cables from the power supply and replace the defective cabling.
● Before using the equipment for the first time check that the power supply rating
matches that of the local mains power.
● You are responsible for taking the necessary precautions to ensure that programs
interrupted by brownouts and power failures can be restarted properly and safely.
In particular, you must ensure that dangerous conditions cannot occur under any
circumstances, even for brief periods. If necessary you must make provision for
forcing an EMERGENCY OFF condition to prevent such conditions.
● EMERGENCY OFF facilities pursuant to EN 60204/IEC 204 VDE 0113 must remain
fully operative at all times and in all control system operating modes. The EMERGENCY OFF facility reset function must be designed so that it cannot cause an uncontrolled or undefined restart.
● You must also implement hardware and software safety precautions to prevent the
possibility of undefined control system states caused by signal line cable or core
breaks.
User’s Manual MC Modules
VII
Typographic Conventions
.
Important information
Notes containing important information are clearly identified as follows:
NOTE
Note text
Numbering in figures and illustrations
Reference numbers in figures and illustrations are shown with white numbers in a black circle
and the corresponding explanations shown beneath the illustrations are identified with the same
numbers, like this:
����
Procedures
In some cases the setup, operation, maintenance and other instructions are explained with numbered procedures. The individual steps of these procedures are numbered in ascending order
with black numbers in a white circle, and they must be performed in the exact order shown:
햲 Text
햳 Text
햴 Text
Footnotes in tables
Footnote characters in tables are printed in superscript and the corresponding footnotes shown
beneath the table are identified by the same characters, also in superscript.
If a table contains more than one footnote, they are all listed below the table and numbered in
ascending order with black numbers in a white circle, like this:
�
Text
Text
�
Text
�
VIII
Contents
Contents
1
Introduction
1.1
Programming . . . . . . . . . . . . . . . . . . . . . . . . . . . . . . . . . . . . . . . . . . . . . . . . . .1 - 3
1.2
Connecting the terminal to the PLC system . . . . . . . . . . . . . . . . . . . . . . . . . . .1 - 4
1.3
Operation modes . . . . . . . . . . . . . . . . . . . . . . . . . . . . . . . . . . . . . . . . . . . . . . .1 - 5
1.4
Status display and control . . . . . . . . . . . . . . . . . . . . . . . . . . . . . . . . . . . . . . . .1 - 6
1.5
Location of the terminal . . . . . . . . . . . . . . . . . . . . . . . . . . . . . . . . . . . . . . . . . .1 - 7
1.6
Compact solutions . . . . . . . . . . . . . . . . . . . . . . . . . . . . . . . . . . . . . . . . . . . . . .1 - 8
2
Function overview
2.1
Basic functions . . . . . . . . . . . . . . . . . . . . . . . . . . . . . . . . . . . . . . . . . . . . . . . . .2 - 2
2.1.1
Graphic block . . . . . . . . . . . . . . . . . . . . . . . . . . . . . . . . . . . . . . . . . . .2 - 2
2.1.2
Textblock . . . . . . . . . . . . . . . . . . . . . . . . . . . . . . . . . . . . . . . . . . . . . . .2 - 2
2.1.3
Alarm handling . . . . . . . . . . . . . . . . . . . . . . . . . . . . . . . . . . . . . . . . . .2 - 3
2.1.4
Password . . . . . . . . . . . . . . . . . . . . . . . . . . . . . . . . . . . . . . . . . . . . . .2 - 3
2.1.5
LED . . . . . . . . . . . . . . . . . . . . . . . . . . . . . . . . . . . . . . . . . . . . . . . . . . .2 - 3
2.1.6
Function keys . . . . . . . . . . . . . . . . . . . . . . . . . . . . . . . . . . . . . . . . . . .2 - 4
2.1.7
Realtime trend . . . . . . . . . . . . . . . . . . . . . . . . . . . . . . . . . . . . . . . . . . .2 - 4
2.1.8
Recipe handling . . . . . . . . . . . . . . . . . . . . . . . . . . . . . . . . . . . . . . . . .2 - 4
2.1.9
Report printout . . . . . . . . . . . . . . . . . . . . . . . . . . . . . . . . . . . . . . . . . .2 - 5
2.1.10 Communication . . . . . . . . . . . . . . . . . . . . . . . . . . . . . . . . . . . . . . . . . .2 - 5
2.1.11 Time control . . . . . . . . . . . . . . . . . . . . . . . . . . . . . . . . . . . . . . . . . . . .2 - 7
3
General
3.1
Method for programming a project . . . . . . . . . . . . . . . . . . . . . . . . . . . . . . . . . .3 - 1
3.2
General advice . . . . . . . . . . . . . . . . . . . . . . . . . . . . . . . . . . . . . . . . . . . . . . . . .3 - 2
3.2.1
Communication . . . . . . . . . . . . . . . . . . . . . . . . . . . . . . . . . . . . . . . . . .3 - 2
3.3
Menu structure . . . . . . . . . . . . . . . . . . . . . . . . . . . . . . . . . . . . . . . . . . . . . . . . .3 - 3
3.4
Function keys . . . . . . . . . . . . . . . . . . . . . . . . . . . . . . . . . . . . . . . . . . . . . . . . . .3 - 4
3.5
Blocks . . . . . . . . . . . . . . . . . . . . . . . . . . . . . . . . . . . . . . . . . . . . . . . . . . . . . . . .3 - 5
MAC E300
IX
Contents
3.6
X
Signal format . . . . . . . . . . . . . . . . . . . . . . . . . . . . . . . . . . . . . . . . . . . . . . . . . .3 - 6
3.6.1
Digital signals (ON/OFF) . . . . . . . . . . . . . . . . . . . . . . . . . . . . . . . . . . .3 - 6
3.6.2
Analog signals (Values) . . . . . . . . . . . . . . . . . . . . . . . . . . . . . . . . . . .3 - 6
3.6.3
Format of register types . . . . . . . . . . . . . . . . . . . . . . . . . . . . . . . . . . .3 - 7
3.6.4
Index addressing . . . . . . . . . . . . . . . . . . . . . . . . . . . . . . . . . . . . . . . . .3 - 8
3.6.5
General functions and parameters . . . . . . . . . . . . . . . . . . . . . . . . . . .3 - 9
4
Programming using the PC software
4.1
Creating a project . . . . . . . . . . . . . . . . . . . . . . . . . . . . . . . . . . . . . . . . . . . . . . .4 - 1
4.2
Creating a block . . . . . . . . . . . . . . . . . . . . . . . . . . . . . . . . . . . . . . . . . . . . . . . .4 - 4
4.2.1
Define block . . . . . . . . . . . . . . . . . . . . . . . . . . . . . . . . . . . . . . . . . . . .4 - 5
4.2.2
Define the block header . . . . . . . . . . . . . . . . . . . . . . . . . . . . . . . . . . .4 - 6
4.2.3
Settings for the Block Manager . . . . . . . . . . . . . . . . . . . . . . . . . . . . . .4 - 9
4.3
Programming blocks. . . . . . . . . . . . . . . . . . . . . . . . . . . . . . . . . . . . . . . . . . . .4 - 11
4.4
The File Menu. . . . . . . . . . . . . . . . . . . . . . . . . . . . . . . . . . . . . . . . . . . . . . . . .4 - 12
4.5
The Edit Menu . . . . . . . . . . . . . . . . . . . . . . . . . . . . . . . . . . . . . . . . . . . . . . . .4 - 12
4.6
The View Menu. . . . . . . . . . . . . . . . . . . . . . . . . . . . . . . . . . . . . . . . . . . . . . . .4 - 13
4.7
The Functions Menu. . . . . . . . . . . . . . . . . . . . . . . . . . . . . . . . . . . . . . . . . . . .4 - 15
4.8
The Setup Menu . . . . . . . . . . . . . . . . . . . . . . . . . . . . . . . . . . . . . . . . . . . . . . .4 - 16
4.9
The Block Manager Menu . . . . . . . . . . . . . . . . . . . . . . . . . . . . . . . . . . . . . . .4 - 24
4.10
The Transfer Menu . . . . . . . . . . . . . . . . . . . . . . . . . . . . . . . . . . . . . . . . . . . . .4 - 24
4.11
The Windows Menu . . . . . . . . . . . . . . . . . . . . . . . . . . . . . . . . . . . . . . . . . . . .4 - 25
4.12
The Help Menu . . . . . . . . . . . . . . . . . . . . . . . . . . . . . . . . . . . . . . . . . . . . . . . .4 - 25
5
Text-based presentation and maneuvring
5.1
Textblock . . . . . . . . . . . . . . . . . . . . . . . . . . . . . . . . . . . . . . . . . . . . . . . . . . . . .5 - 1
5.2
Text object . . . . . . . . . . . . . . . . . . . . . . . . . . . . . . . . . . . . . . . . . . . . . . . . . . . .5 - 3
6
Graphic presentation and maneuvring
6.1
Creating a hierarchy of menus . . . . . . . . . . . . . . . . . . . . . . . . . . . . . . . . . . . . .6 - 1
6.2
Graphic objects. . . . . . . . . . . . . . . . . . . . . . . . . . . . . . . . . . . . . . . . . . . . . . . . .6 - 4
Contents
7
Alarm handling
7.1
Alarm grouping . . . . . . . . . . . . . . . . . . . . . . . . . . . . . . . . . . . . . . . . . . . . . . . . .7 - 2
7.1.1
Defining alarm groups . . . . . . . . . . . . . . . . . . . . . . . . . . . . . . . . . . . . .7 - 2
7.2
Alarm messages. . . . . . . . . . . . . . . . . . . . . . . . . . . . . . . . . . . . . . . . . . . . . . . .7 - 3
7.3
Configuring the alarm list . . . . . . . . . . . . . . . . . . . . . . . . . . . . . . . . . . . . . . . . .7 - 4
8
Trends
8.1
Defining trend objects. . . . . . . . . . . . . . . . . . . . . . . . . . . . . . . . . . . . . . . . . . . .8 - 2
9
Report print-outs
9.1
Create report print-outs . . . . . . . . . . . . . . . . . . . . . . . . . . . . . . . . . . . . . . . . . .9 - 1
9.2
Defining the print-out . . . . . . . . . . . . . . . . . . . . . . . . . . . . . . . . . . . . . . . . . . . .9 - 2
9.3
Printer settings . . . . . . . . . . . . . . . . . . . . . . . . . . . . . . . . . . . . . . . . . . . . . . . . .9 - 3
9.4
Setting the interface ports. . . . . . . . . . . . . . . . . . . . . . . . . . . . . . . . . . . . . . . . .9 - 4
10
Recipes
10.1
Creating a recipe . . . . . . . . . . . . . . . . . . . . . . . . . . . . . . . . . . . . . . . . . . . . . .10 - 3
10.2
Transferring a recipe to the PLC system . . . . . . . . . . . . . . . . . . . . . . . . . . . .10 - 4
10.3
Erasing a recipe . . . . . . . . . . . . . . . . . . . . . . . . . . . . . . . . . . . . . . . . . . . . . . .10 - 4
10.4
The file transfer program from the HMI Tools. . . . . . . . . . . . . . . . . . . . . . . . .10 - 5
10.4.1 Introduction . . . . . . . . . . . . . . . . . . . . . . . . . . . . . . . . . . . . . . . . . . . .10 - 5
10.4.2 File management . . . . . . . . . . . . . . . . . . . . . . . . . . . . . . . . . . . . . . .10 - 6
10.4.3 Functions. . . . . . . . . . . . . . . . . . . . . . . . . . . . . . . . . . . . . . . . . . . . . .10 - 6
10.4.4 Communication settings . . . . . . . . . . . . . . . . . . . . . . . . . . . . . . . . . .10 - 7
10.5
Loading and saving recipes via the
PLC program . . . . . . . . . . . . . . . . . . . . . . . . . . . . . . . . . . . . . . . . . . . . . . . . .10 - 8
11
LEDs
11.1
Run-time mode . . . . . . . . . . . . . . . . . . . . . . . . . . . . . . . . . . . . . . . . . . . . . . . .11 - 1
MAC E300
XI
Contents
12
Function keys
12.1
Definition of function keys. . . . . . . . . . . . . . . . . . . . . . . . . . . . . . . . . . . . . . . .12 - 2
12.2
Jump to block with the function keys . . . . . . . . . . . . . . . . . . . . . . . . . . . . . . .12 - 4
12.3
Keyfield. . . . . . . . . . . . . . . . . . . . . . . . . . . . . . . . . . . . . . . . . . . . . . . . . . . . . .12 - 4
13
Time control
13.1
Defining the time channels . . . . . . . . . . . . . . . . . . . . . . . . . . . . . . . . . . . . . . .13 - 1
13.2
Run-time mode . . . . . . . . . . . . . . . . . . . . . . . . . . . . . . . . . . . . . . . . . . . . . . . .13 - 1
13.3
Real-time clock . . . . . . . . . . . . . . . . . . . . . . . . . . . . . . . . . . . . . . . . . . . . . . . .13 - 2
14
Message library
15
Communication
15.1
The terminal in the transparent mode. . . . . . . . . . . . . . . . . . . . . . . . . . . . . . .15 - 1
15.1.1 Connecting a personal computer or other computer system. . . . . . .15 - 1
15.1.2 Settings in the terminal and
MELSEC MEDOC/MELSEC MEDOC plus . . . . . . . . . . . . . . . . . . . .15 - 2
15.1.3 Connecting two terminals . . . . . . . . . . . . . . . . . . . . . . . . . . . . . . . . .15 - 2
15.1.4 Settings for two terminals . . . . . . . . . . . . . . . . . . . . . . . . . . . . . . . . .15 - 3
15.1.5 E300 as communication interface
(No protocol mode) . . . . . . . . . . . . . . . . . . . . . . . . . . . . . . . . . . . . . .15 - 4
15.1.6 Example of using the no protocol mode . . . . . . . . . . . . . . . . . . . . . .15 - 6
15.2
Expansions card . . . . . . . . . . . . . . . . . . . . . . . . . . . . . . . . . . . . . . . . . . . . . .15 - 11
15.2.1 IFC PBDP . . . . . . . . . . . . . . . . . . . . . . . . . . . . . . . . . . . . . . . . . . . .15 - 11
15.2.2 IFC MC . . . . . . . . . . . . . . . . . . . . . . . . . . . . . . . . . . . . . . . . . . . . . .15 - 11
15.2.3 IFC 128E . . . . . . . . . . . . . . . . . . . . . . . . . . . . . . . . . . . . . . . . . . . . .15 - 11
15.2.4 IFC ETTP und IFC ETCX . . . . . . . . . . . . . . . . . . . . . . . . . . . . . . . .15 - 11
15.2.5 IFC PI . . . . . . . . . . . . . . . . . . . . . . . . . . . . . . . . . . . . . . . . . . . . . . .15 - 11
XII
16
Project transfer
16.1
Terminal settings . . . . . . . . . . . . . . . . . . . . . . . . . . . . . . . . . . . . . . . . . . . . . .16 - 1
16.2
Transfer settings. . . . . . . . . . . . . . . . . . . . . . . . . . . . . . . . . . . . . . . . . . . . . . .16 - 2
Contents
17
Passwords
17.1
Defining security levels. . . . . . . . . . . . . . . . . . . . . . . . . . . . . . . . . . . . . . . . . .17 - 1
17.2
Defining passwords . . . . . . . . . . . . . . . . . . . . . . . . . . . . . . . . . . . . . . . . . . . .17 - 1
17.3
Logging in . . . . . . . . . . . . . . . . . . . . . . . . . . . . . . . . . . . . . . . . . . . . . . . . . . . .17 - 2
17.4
Altering passwords in run-time mode . . . . . . . . . . . . . . . . . . . . . . . . . . . . . . .17 - 2
18
Run-time mode
18.1
Selecting maneuverable objects. . . . . . . . . . . . . . . . . . . . . . . . . . . . . . . . . . .18 - 1
18.2
Maneuvering Graphicblocks . . . . . . . . . . . . . . . . . . . . . . . . . . . . . . . . . . . . . .18 - 2
18.2.1 Digital objects . . . . . . . . . . . . . . . . . . . . . . . . . . . . . . . . . . . . . . . . . .18 - 2
18.2.2 Analog objects. . . . . . . . . . . . . . . . . . . . . . . . . . . . . . . . . . . . . . . . . .18 - 2
18.2.3 Other objects . . . . . . . . . . . . . . . . . . . . . . . . . . . . . . . . . . . . . . . . . . .18 - 2
18.3
Maneuvering Textblocks. . . . . . . . . . . . . . . . . . . . . . . . . . . . . . . . . . . . . . . . .18 - 3
18.3.1 Digital objects . . . . . . . . . . . . . . . . . . . . . . . . . . . . . . . . . . . . . . . . . .18 - 3
18.3.2 Analog objects. . . . . . . . . . . . . . . . . . . . . . . . . . . . . . . . . . . . . . . . . .18 - 3
18.4
Alarms . . . . . . . . . . . . . . . . . . . . . . . . . . . . . . . . . . . . . . . . . . . . . . . . . . . . . .18 - 4
18.4.1 Block linked to alarms . . . . . . . . . . . . . . . . . . . . . . . . . . . . . . . . . . . .18 - 4
18.5
Graphic alarm page in run-time mode . . . . . . . . . . . . . . . . . . . . . . . . . . . . . .18 - 5
18.6
Time channels . . . . . . . . . . . . . . . . . . . . . . . . . . . . . . . . . . . . . . . . . . . . . . . .18 - 6
18.7
Passwords . . . . . . . . . . . . . . . . . . . . . . . . . . . . . . . . . . . . . . . . . . . . . . . . . . .18 - 6
18.8
Function keys . . . . . . . . . . . . . . . . . . . . . . . . . . . . . . . . . . . . . . . . . . . . . . . . .18 - 6
18.9
LEDs. . . . . . . . . . . . . . . . . . . . . . . . . . . . . . . . . . . . . . . . . . . . . . . . . . . . . . . .18 - 6
19
Using the keyboard
19.1
Modes. . . . . . . . . . . . . . . . . . . . . . . . . . . . . . . . . . . . . . . . . . . . . . . . . . . . . . .19 - 1
19.2
Keyboard . . . . . . . . . . . . . . . . . . . . . . . . . . . . . . . . . . . . . . . . . . . . . . . . . . . .19 - 2
19.2.1 Keyfield . . . . . . . . . . . . . . . . . . . . . . . . . . . . . . . . . . . . . . . . . . . . . . .19 - 2
19.2.2 Key sequences . . . . . . . . . . . . . . . . . . . . . . . . . . . . . . . . . . . . . . . . .19 - 3
19.3
Help line . . . . . . . . . . . . . . . . . . . . . . . . . . . . . . . . . . . . . . . . . . . . . . . . . . . . .19 - 3
19.4
Menu system . . . . . . . . . . . . . . . . . . . . . . . . . . . . . . . . . . . . . . . . . . . . . . . . .19 - 3
MAC E300
XIII
Contents
19.5
Editing graphic objects . . . . . . . . . . . . . . . . . . . . . . . . . . . . . . . . . . . . . . . . . .19 - 4
19.6
Set the real time clock . . . . . . . . . . . . . . . . . . . . . . . . . . . . . . . . . . . . . . . . . .19 - 4
20
Modem transfer
21
Connection to an Allen Bradley PLC system
21.1
Settings in the terminal . . . . . . . . . . . . . . . . . . . . . . . . . . . . . . . . . . . . . . . . . .21 - 1
21.2
Communication protocol. . . . . . . . . . . . . . . . . . . . . . . . . . . . . . . . . . . . . . . . .21 - 2
21.3
Addressing . . . . . . . . . . . . . . . . . . . . . . . . . . . . . . . . . . . . . . . . . . . . . . . . . . .21 - 2
21.3.1 Addressing example . . . . . . . . . . . . . . . . . . . . . . . . . . . . . . . . . . . . .21 - 2
21.3.2 Syntax for addressing . . . . . . . . . . . . . . . . . . . . . . . . . . . . . . . . . . . .21 - 3
21.4
Connection to PLC . . . . . . . . . . . . . . . . . . . . . . . . . . . . . . . . . . . . . . . . . . . . .21 - 5
21.4.1 MicroLogix . . . . . . . . . . . . . . . . . . . . . . . . . . . . . . . . . . . . . . . . . . . . .21 - 5
21.4.2 RS232-C/DH485 interface, 1747-KE (SLC series) . . . . . . . . . . . . . .21 - 5
A
Appendix
A.1
System configuration . . . . . . . . . . . . . . . . . . . . . . . . . . . . . . . . . . . . . . . . . . . A - 1
A.2
XIV
A.1.1
Erasing the memory . . . . . . . . . . . . . . . . . . . . . . . . . . . . . . . . . . . . . A - 1
A.1.2
Downloading the system program. . . . . . . . . . . . . . . . . . . . . . . . . . . A - 2
A.1.3
Information page . . . . . . . . . . . . . . . . . . . . . . . . . . . . . . . . . . . . . . . . A - 4
A.1.4
Contrast settings . . . . . . . . . . . . . . . . . . . . . . . . . . . . . . . . . . . . . . . . A - 5
A.1.5
Project memory . . . . . . . . . . . . . . . . . . . . . . . . . . . . . . . . . . . . . . . . . A - 5
Glossary . . . . . . . . . . . . . . . . . . . . . . . . . . . . . . . . . . . . . . . . . . . . . . . . . . . . . A - 6
Introduction
1
Introduction
The pace of production in today's industrial work environment increases steadily. At the same
time, the operator's job responsibilities increase and become more comprehensive. Quickly and
simply, the operator must get machine status information and, equally simply, must be able to
control the machine's operation. The PLC system's functions increase and become more advanced, making it possible to effectively and efficiently control complicated processes. With the
MAC operator terminal from G & L Beijer Electronics AB, human-machine communication is
made simple and safe – even for the most advanced processes.
The operator panels were developed to meet the requirements of human-machine communication for supervision and control in a variety of usage areas in the manufacturing- and process
industries, etc. The terminal simplifies the operator's work because it is easily adapted to the
operator's work environment. This means that the operator can continue to use the terms and
protocols he or she is familiar with.
In the terminal, projects can be built up as menu hierarchies, or as sequences. A menu hierarchy
comprises a main screen (with, for example, an overview) and a number of subsequent screens
with more detailed information for a particular section. The operator can select which screen is
displayed.
In the MAC operator terminal, a screen is called a block.
Main menu
Recipe
Motor status
Temperature
Film quality
Fig. 1-1: Menu hierarchy
MAC E300
1-1
Introduction
A sequence starts with a main menu, from which the operator chooses a sequence where the
blocks are displayed in a pre-set arrangement. Normally, the blocks are controlled by the PLC
program.
Main menu
Prewash
Settings
Main wash
Rinse
Spin drying
End of
program
Fig. 1-2: Sequence
The terminal's functions enable either graphical or alphanumeric presentation and control. Additionally, there are functions for alarm handling, report printout, real time trend, recipe handling,
time control, and more.
The terminal's functions are not only simple to manage, they also provide clear cost advantages
compared to conventional systems with buttons, indicator lamps, time relays, preset counters,
and seven-day clocks. The terminal also offers functions which facilitate a more comprehensive
use of the PLC system.
1-2
Programming
1.1
Introduction
Programming
The E300 is programmed through a PC using the MAC Programmer+/SW-MTA-WIN software.
Hereafter this product is referred to as the PC software. It is also possible to program the terminal
through the built-in keyboard.
Fig. 1-3: Programming with a PC
For the most part the terminal is object oriented, that is its work is based on an object, and the
functions this is to have are determined afterwards. All types of signals are defined on this principle.
The programmed project is stored in the terminal.
MAC E300
1-3
Introduction
1.2
Connecting the terminal to the PLC system
Connecting the terminal to the PLC system
A terminal couple to the PLC system offers many benefits:
● The user doesn't need to make changes or additions to existing PLC programs
● The terminal doesn't block any of the PLC system's inputs or outputs
● It improves the clarity and accessibility of such PLC system functions as time control and
alarm handling
Fig. 1-4: Connecting the terminal to a PLC system
1-4
Operation modes
1.3
Introduction
Operation modes
E300 has three operating modes:
● Configuration mode (setup)
● Programming mode
● Run mode
Configuration mode
Here the basic settings are made such as choice of PLC system, menu language and printer settings.
Programming mode (PROG)
Here the terminal can be programmed and changes can be easily made at system set-up.
Run mode (RUN)
When the terminal is running with PLC.
Switch between PROG and RUN
Switch between programming mode (PROG) and run mode (RUN), by simultaneously pressing
the [←] and [MAIN] keys. If you want to disable the possibility to switch between PROG and RUN
from the terminal, enter the RPD command in the command line below the sytem signal. In this
case the PROG and RUN modes can only be toggled via the MAC Programmer+ software. For
more information refer to chapter 4, Programming using the PC software.
MAC E300
1-5
Introduction
1.4
Status display and control
Status display and control
The operator is very familiar with indicator lamps, as well as analog and digital displays for showing status as they appear today in the vast majority of applications. The same applies to push
buttons, rotary and thumbwheel switches for controlling a system. Replacing them with a terminal provides the operator with all status display and control systems in one unit.
The operator can see and control all the information in the PLC system using the nomenclature
of the machine. By doing so the operation of the complete system is not only enhanced but also
simplified.
Fig. 1-5: Analog and digital display
This is possible with a terminal thanks to the fact that the interchange of all information takes
place through so-called blocks in the terminal.
A block can be defined as a Textblock with only text information, or a Graphic block with full
graphics.
The terminals have function keys for direct control. When an operator presses/energizes a function key during run, the digital signal in the PLC system linked to the function key will be switched
on.
If several blocks are used, the operator can use jump objects to move between different blocks.
In this way, a menu tree is created, allowing a structured application.
1-6
Location of the terminal
1.5
Introduction
Location of the terminal
The terminal can be installed and operated directly on the production site, provided the ambient
conditions concerning cleanliness and safety allow for it.
In some cases, such as monitoring/running or maintenance, the operator´s workplace can be
several kilometres from the process. Communication is via modem.
A unit working in parallel can also be connected. This could be another terminal. It could also be
a PC with the programming tool MELSEC MEDOC. It is then possible to program the PLC system via the terminal at the same time as the terminal communicates with the PLC system.
Fig. 1-6: Location of the terminal
MAC E300
1-7
Introduction
1.6
Compact solutions
Compact solutions
External units such as barcode readers, weighing machines, telephone modems and so on can
be connected to the PLC system via the terminal. All the connection requires is that the unit can
be connected to an RS-232 interface and that the communications is by ASCII-protocol. Data
entering the terminal is written directly to the PLC register.
For information about installation and technical data, see the Installation manual delivered with
the terminal.
Fig. 1-7: Connection of external units
1-8
Function overview
2
Function overview
12
9
3
6
Fig. 2-1: Function overview
MAC E300
2-1
Function overview
2.1
Basic functions
2.1.1
Graphic block
Basic functions
Graphic blocks are used to create graphic operator dialogs. There are static and dynamic graphics.
Static graphic objects
Static graphic objects form the background graphics such as lines, circles, symbols and texts in
various sizes, e.g. headings and help texts. Static information is not changed by the PLC system
or the operator.
Dynamic graphic objects
Dynamic graphics are graphics which are linked to signals in the PLC system. Examples of dynamic graphics are bar graphs, trend curves, analog and digital clocks, VU meters etc. Dynamic
information such as numeric values and turning on/off are changed by the PLC system or the operator.
2.1.2
Textblock
Textblock is used to build up dialogs and reports. A textblock can consist of an arbitrary number
of text lines. The terminal can display 8 rows of 40 characters or 4 rows of 20 characters at the
same time.
Static text
Static text is textblock text which is not changed by the PLC system or the operator when executing the program.
Dynamic object
Dynamic objects are objects which are linked to the signals in the PLC system. There are seven
types of dynamic object: digital, analog, jump, date/time, bar graph, multi-choice and text object.
Information to the object is changed continuously by the operator or PLC system.
2-2
Basic functions
2.1.3
Function overview
Alarm handling
In certain cases events can occur in the process which require immediate attention. To meet this
requirement there is the possibility in the terminals of linking the signals to an alarm message.
Maintaining alarm management is important in order to minimize downtime costs. During
operation, the alarm is registered in an alarm list, with time stamp. With the help of the list the
operator can trace the cause and sequence which activated the alarm, and can also acknowledge each alarm. The alarm list can be displayed or printed out. Alarms can be grouped, and can
contain dynamic data.
Alarm list
18.2.97 20:11:40 Conveyor 2 empty
18.2.97 20:35:09 Queue full
19.2.97 03:29:12 Low pressure
Fig. 2-2: Alarm message
2.1.4
Password
Security levels can be assigned to blocks, function keys, and maneuvrable objects, to restrict access to, for example, certain parts of an installation, via a password, the user can log in to the
approved level.
2.1.5
LED
Light diodes are used to indicate different events in the process, such as on/off. The terminal has
16 LEDs which can assume three shades: off, red and green. The light diodes are controlled by
the data register in the PLC system.
MAC E300
2-3
Function overview
2.1.6
Basic functions
Function keys
Function keys are used to activate different events in the process; e.g. to start a fan. The digital
signal linked to a function key is activated according to the function linked to the key when it was
defined. Function keys can be defined for global use – in the whole project – or local, in a particular block. Function keys can also be used for internal functions, for example, to activate
change of blocks.
F1
F2
F3
F4
F5
F6
F7
F8
Fig. 2-3: Function keys
2.1.7
Realtime trend
This function permits analog values from the PLC system to be presented in the terminal during
operation as a curve diagram. It is possible to present several independent trend curves in the
same or different blocks.
2.1.8
Recipe handling
Recipe handling permits fast change of product in the production line. For example, a production
line produces several similar products, such as ice cream with different flavours. The same
project blocks can be utilized, with changes made to select parameter.
The function rationalizes time-critical production by making it possible to quickly get new parameter settings from the PLC system.
A portion of the project memory can be set aside for recipe storage. This function means that all
dynamic data in a block (such as signals, and their values during operation) are saved in a file.
With the function, parameter settings can be re-used. The operator creates a recipe library with
files containing the different parameter settings.
2-4
Basic functions
2.1.9
Function overview
Report printout
Text blocks can be used to follow up and facilitate a more effective production, by creating regular
reports of, for example number of manufactured units, or production stops. Reports can be
printed out, or their information can be forwarded to a supervisory computer, for summarization
or further processing.
Report
970412 Number of stops 2
Fig. 2-4: Report printout
2.1.10
Communication
The terminal can be used in several communication configurations: field buses, transparent
mode, no protocol mode, network with IFC 50E and in PROFIBUS network.
Transparent mode
Transparent mode is used to connect parallel units to the PLC system. In this way, several terminals can work with the same PLC system, or a PC with MELSEC MEDOC or a supervisory
PC operating system via the terminal.
MAC E300
2-5
Function overview
Basic functions
Network communication
Network communication via ETHERNET IFC ETTP/IFC ETCX is used to connect more than two
terminals to an PLC system, while still retaining good operating performance. An example is production lines with a terminal at each work station. A network can include one master and up to
seven slaves. The terminal connected to the PLC system is the master. The separate manual for
IFC 50E contains more detailed information.
Fig. 2-5: Network communication
The IFC PBDP expansion card enables the terminal to be connected to a PROFIBUS network.
With PROFIBUS, it is possible to communicate with any PLC system; for example Siemens. The
separate manual for IFC PBDP contains more detailed information.
No protocol mode
This mode is used to link different PLC systems, or to connect external units to the PLC system,
such as bar code readers or weighing scales. Communication is via control block.
2-6
Basic functions
2.1.11
Function overview
Time control
Many applications also require time control. Via the terminal it is possible to control when a machine is on or off, instead of connecting to extra time relays or seven-day clocks.
A real-time clock is built into the terminal. Digital signals are set and reset relative to this clock
without requiring programming in the PLC. Control can then be carried out with respect to the
time of day, and day of the week.
Four different time intervals can be entered for each object. A time interval is a day of the week
or a part of a day as well as the start and stop times. It is possible to allow the operator to change
the time interval dynamically.
Signal:M107
1: MO-FR
2: MO
3: SA
4: SA-SU
0600-1800
2200-2230
1000-1345
1500-1800
Fig. 2-6: Time control
MAC E300
2-7
Function overview
2-8
Basic functions
Method for programming a project
3
General
General
This section describes how the terminal is designed as well as the basics for using it. Furthermore there is an explanation of the general rules and object parameters as well as common
functions which apply to the terminal.
NOTE
3.1
In the manual we use a PLC-system from Mitsubishi Electric.
Method for programming a project
Building up the application in the terminal graphically provides the operator with concise information on the operation of the system. It is important to organize your application well. Think
about which functions are required. Begin at the introductory level and then work down through
the levels of detail. When an object is programmed base this on the functions in your application.
Each function then becomes one or more blocks depending on how complex the function is. A
project can contain both Graphic- and Textblocks and each block can contain static and dynamic
objects. To achieve a structured application the block should be created in a hierarchy which
makes working natural for the operator.
In the run mode it is possible to test all or parts of the application before running.
Block 0
Block n
Block n
Fig. 3-1: Structured application
MAC E300
3-1
General
General advice
3.2
General advice
3.2.1
Communication
The following should be noted so that communication is quick and efficient.
Group PLC signals consecutively
The terminal is continually reading signals from the PLC according to the following:
1. Display signals
2. Block print-out signals
3. LED register
4. Trend register
5. Bargraph register with min/max indicators
6. PLC clock register
7. Alarm
The signals in the screens are only read when the screen is on, that is the number of blocks does
not affect the communication time.
The signals from the PLC system are read most rapidly if the signals are consecutive. If for example, 100 alarm is defined, it is quickest to read these if they are linked to, for example, M0M99. If the signals are spread out (e.g. X0, Y30, T45 etc.) the updating is slower.
The following signals do not affect communication:
● Signals linked to function keys
● Time channels
● Objects in the alarm messages
Efficient block changes
Block changes are carried out most rapidly and efficiently through the block jump function on the
function keys or through a jump object.
”Display signals” in the block header should only be used when the PLC system is to force the
presentation of another screen.
The ”New Display” register can also be used if the PLC system is to change the screen. This
does not affect communication as much as a larger number of ”Display signals”.
Use the terminal´s clock
An extra load is put on communication if the PLC system´s clock is used since the clock register
must be read up to the terminal. Downloading of the terminal´s clock to the PLC system also creates an extra load. The interval between downloadings should therefore be as long as possible.
3-2
Menu structure
3.3
General
Menu structure
The terminal is divided into three modes: configuration, programming and run mode. Normally
configuration and programming are carried out with the PC software. Each mode consist of different number of menu levels depending on the function. Each level consists of a menu where
you make a choice or state a parameter to go on to the next level (menu).
The application is built up of blocks, Textblocks and/or Graphic blocks. Values from the PLC system are shown and altered in the blocks. Each block has a block number between 0 and 989 allocated by the program. Blocks 990-999 are reserved for special purposes, so-called system
blocks. The terminal is object-oriented which means that a block can contain all the signals
linked to an object for controlling and monitoring; a pump for example.
Configuration mode
Programming mode
Run-time mode
Transfer
Block list
Block 0
Edit
System signals
Index register
Language
PLC selection
Level 1
Block
Alarm
Function keys
LED
Time channels
Level 2
Block n
Graphic block
Level 3
Fig. 3-2: Menu structure
MAC E300
3-3
General
3.4
Function keys
Function keys
The figure below shows the layout of the function keys.
LED L1–L8
Labeling field
F3
F2
F1
7
8
9
4
5
6
1
2
3
-
0
.
F4
F5
List
F6
Labeling field
LED L9–L16
Function keys F1–F8
F8
F7
Alarm Ack
Ack
Main
Prev
←
↵
Main Menu (Block 0)
Enter
Backspace
Preview
List
Numeric keyfield
Fig. 3-3: Function keys
3-4
Blocks
3.5
General
Blocks
A block header is defined for each block. The block number, type of block, status word etc. are
contained in the block header. The alarm, time channels and contrast settings functions can also
be called up as blocks. These are called system blocks.
NOTE
The block type cannot be altered for a defined block.
Fig. 3-4: Block header
MAC E300
3-5
General
3.6
Signal format
Signal format
The PLC system’s signal types are allocated according to the table below. See the PLC system
manual for the used for the complete address area.
3.6.1
Digital signals (ON/OFF)
The terminal can handle digital signals of the following types: For addressing Allen Bradley we
refer to chapter 21, Connection to an Allen Bradley PLC system.
Signal
Function
A series
FX series
X
Input
쎲
쎲
Y
Output
쎲
쎲
M
Memory cell
쎲
쎲
B
Link memory cell (MELSEC NET)
쎲
F
Error memory cell
쎲
S
Sequence memory cell
T
Timer
쎲
쎲
C
Counter
쎲
쎲
쎲
Tab. 3-1: Digital signals
3.6.2
Analog signals (Values)
The terminal can handle analog signals of the following types: For addressing Allen Bradley we
refer to chapter 21, Connection to an Allen Bradley PLC system.
Signal
Function
A series
FX series
쎲
D
Data register
쎲
W
Link register (MELSEC NET)
쎲
R
File register
쎲
T
Timer
쎲
쎲
C
Counter
쎲
쎲
Tab. 3-2: Analog signals
NOTE
3-6
32-bit counters (C200–C255) are not available in FX series.
Signal format
3.6.3
General
Format of register types
Refer to the PLC manual for the valid signal formats.
Format
Value range
16-bit signed
16-bit unsigned
−32768 – +32767
0 – +65535
32-bit signed
−214783648 – +214783647
32-bit unsigned
32-bit float
with exponent
0 – +4294967295
32-bit float
without exponent
BCD float, 32-bit
The positions and decimals state the valid range.
Example: 8 positions and 3 decimals => ±999,999
0 – 9999,9999. MELSEC AnA PLC systems only.
BCD 16-bit
0 – 9999
±3,4E38. Values greater than 1.000.000 are represented with exponent.
BCD 32-bit
0 – 99999999
HEX 16-bit
HEX 16-bit
0 – FFFF
0 – FFFFFFFF
Tab. 3-3: Format of register types
MAC E300
3-7
General
3.6.4
Signal format
Index addressing
Index addressing makes it possible to use the same block; for example, for the control of several
motors. In the example below the torques are linked to the D100I1 register. The torque is shown
for one of the three motors depending on the value in the index register, in this case the value
in D0. The value in D0 decides for which motor the torque is shown. The content of the index register is added to the address and the result forms the address which is shown. Generally it can
be said that:
ShownValue=content(DataRegisterAddress+content[Indexdataregister])
MOTOR 1
MOTOR 2
Torque in D101
Torque in D102
MOTOR 3
Torque in D103
In the example D0
contains the values 1, 2
and 3 depending on
motor´s which torque
shall be shown.
D100I1
Fig. 3-5: Index addressing
3-8
Signal format
3.6.5
General
General functions and parameters
Scaling
The Offset and Gain parameters are used to change the scale of the register value to a shown
value according to the following equation:
DisplayValue=Offset+Gain*RegisterValue
When the object is altered from the terminal in the run mode, the scale is changed for the shown
value according to the following equation:
RegisterValue=(DisplayValue−Offset)/Gain
Scaling does not affect the defined max and min values nor the number of decimal places.
Offset and Gain calculation
The function OGC is an aid for calculating the Offset and Gain parameters. Enter the max and
min values for the PLC register and the max and min values for the presented value. The function
will then calculate the correct value of the parameters Offset and Gain.
Reserved characters
The following ASCII characters are reserved for internal functions in the terminal and may not
be used.
Hex
Dec
Character
ASCII control code
01
01
SOH
02
02
STX
03
03
ETX
04
04
EOT
05
05
ENQ
06
06
ACK
07
07
BEL
15
21
§
23
35
#
(textblock only)
Tab. 3-4: Reserved characters
Positions
The number of character positions which the object will take up on the display are given by the
Position parameter.
Adjustment
Whether the text is left aligned or centered is set with the Adjust parameter.
Frame
Whether a frame can be drawn around the object is set with the Frame parameter.
Maneuver
Whether the object can be altered from the terminal in the run mode is set with the Maneuverable parameter.
Min
The Minimum value parameter states the minimum value the object can have or the minimum
limit for maneuvering.
MAC E300
3-9
General
Signal format
Max
The Maximum value parameter states the maximum value the object can have or the maximum
limit for maneuvering.
Scale division
The Scale division parameter states with which interval the scale numbers shall be drawn.
Scale ticks
The Scale ticks parameter states the interval between the scale ticks displayed.
Decimals
The Decimals parameter states the number of decimal places with which the value is entered.
Security level
The Security Level parameter states the security level for the object. See the Password section.
3 - 10
Creating a project
4
Programming using the PC software
Programming using the PC software
This section describes how the terminal is programmed using the PC software. For installation
instructions and more detailed information about PC software refer to the manual for the product.
All the functions can be reached with the PC software from the menu:
Fig. 4-1: Menu
4.1
Creating a project
A new project is created by selecting New in the menu File. The Project Settings dialog window
is now shown. Here you can select the PLC system, type of terminal and any I/O name file.
Fig. 4-2:
Project settings
MAC E300
4-1
Programming using the PC software
Creating a project
Terminal:
Select the type of terminal here. Click on the "Change" button to open the terminal selection
dialog.
Fig. 4-3:
Terminal selection dialog
PLC system:
Select here the PLC system to which the terminal is to be connected. Click on the "Change" button to open the controller system selection dialog.
The terminal can be connected to almost any available PLC system. The following figure only
shows a small selection of configuration choices.
Fig. 4-4: Example 1 for a selected PLC system (MELSEC Q series via CC-LINK)
4-2
Creating a project
Programming using the PC software
Fig. 4-5: Example 2 for a selected PLC system (SIMATIC S5 series in german)
MAC E300
4-3
Programming using the PC software
4.2
Creating a block
Creating a block
The block manager is shown when you have created a project. Which blocks are included in an
application is shown here.
Fig. 4-6: Block manager
In the block manager there is a toolbox with the following functions.
Symbol
Funktion
Mark block and create block.
Add a new block.
Define block header for selected block.
Make a block jump to the block to be created with the cursor.
Make function key block jump to the block to be created with the cursor.
Delete selected block.
Edit selected block.
Block manager settings.
Zoom in.
Zoom out.
Tab. 4-5: Toolbox
4-4
Creating a block
4.2.1
Programming using the PC software
Define block
When you want to add a block the following dialog is shown.
Fig. 4-7: Create new block
Block name:
A name for the block can be written here. The block name is shown in the block manager and in
the block list.
Block no.:
The number of the block. The defined values are entered automatically if a block with assigned
number already exists. The block number 0 is shown automatically on starting up and must
always be used in a project.
Block type:
Select block type, graphic or text.
Screen size:
Textblock only. Select the character size in the textblock. It is not possible to alter the type of a
defined block.
Template:
Here you can copy a template to the block or save the block as a template.
MAC E300
4-5
Programming using the PC software
4.2.2
Creating a block
Define the block header
Basic parameters valid for each single block are defined in the block header. The following parameters can be defined in the block header:
Fig. 4-8: Block header
Block no.:
The number of the block. The defined values are entered automatically if a block with assigned
number already exists. The block number 0 is shown automatically on starting up and must
always be used in a project.
Block name:
A name for the block can be written here. Block name is optional.
Display signal:
A digital signal which when activated results in the block being shown on the display. If display
signal are used they should be ordered consecutively, for the different blocks to get the best performance. This field is not filled in if another method for changing block is used.
Print signal:
Only applies to textblocks. A digital signal which when activated results in the block being printed
out on a connected printer. The display signal and printer signal can be the same. The printer
signals should be used consecutively to print out as quickly as possible.
4-6
Creating a block
Programming using the PC software
Completion signal:
A digital signal which is activated when the print out is completed.
Normally the signal is set. If the function Reset in Block Header is marked then the signal is set
to zero when the print out is completed.
Send mail signal:
When this digital signal is activated, it sends a message via e-mail (for textblocks only).
Mail completion signal:
A digital signal which is activated by the terminal when the message is sent. By default the signal
will be set. If you activate the Reset checkbox, the signal will be reset.
Mail to addess:
Enter the email address to the receiver. Select up to eight receivers from the list shown when you
click on the "..." button. The list of email addresses is defined in the dialog Setup/Network
Services/SMTP Client Service.
Attach file:
Enter the name of a trend or recipe file to be attached to the message. If there is a trend file and
a recipe file with the same name, the trend file is sent.
Security level:
A security level (0–8) for the block is stated here. The operator must enter a password equivalent
to a given or higher security level if a security level > 0 is stated.
Block type:
The block type (graphic block or text block) is specified here. Once the block type has been specified, it cannot be changed again.
Screen size:
Valid for text blocks only. The character size of a text block is specified here.
Fkeys:
The local function keys (F1-F8) for the block are defined here. Enter a signal that will be activated
when the function key is pressed. See the section on Function Keys.
Keyfield:
Here you define leadtexts for the function keys F2-F7. Enter a freely defined text of maximum 6
characters. One or two lines at the bottom of the block will be occupied. For more information,
see the chapter Function keys.
Template:
Here you can copy a template to the block or save the block as a template.
MAC E300
4-7
Programming using the PC software
Creating a block
Status:
Click on the "Status" button to open the "Block Options" dialog.
Fig. 4-9:
Block Options dialog
States the display’s appearance in the run mode. The status word has no function in the system
blocks. The parameters in the status word have the following functions.
Cursor off: (Textblocks only) States if the cursor will be visible in the block in the run mode.
Put cursor at first man. object: (Textblocks only) States if the cursor will be on the first
maneuvrable object instead of in the top left-hand corner.
Disable main menu key: States if the [MAIN] key is to be blocked in the run mode when
the block is shown on the display.
Disable alarm list key: States if the [LIST] key is to be blocked in the run mode when the
block is shown on the display.
MORE indication: (Textblocks only) States if the + sign is to be shown in the bottom righthand corner and the top right-hand corner when there is more of the block above and below
respectively than that shown on the display.
Auto data entry: States if the cursor will automatically move to the next maneuvrable object
after an entry. The cursor can only be placed on maneuvrable objects in this state.
Remove unused signals: States if unused obejcts are to be removed to improve a
comprehensible programming.
Disable Prev Key: States if the [PREV] key is to be blocked in the run mode when the block
is shown on the display.
4-8
Creating a block
4.2.3
Programming using the PC software
Settings for the Block Manager
Here you make the settings for the presentation in the Block Manager. Select a block and select
"Settings..." from the context menu (right-click).
Block tab:
Select how data should be presented in the block.
Abb. 4-10: Menü Block-Manager-Einstellungen – Registrierkarte Block
Blockname: Check the respective checkbox to show the block name on a block. Click on
the "Font" button to select a font for the block name representation. A font sample is shown.
Block number & display signal): Check the respective checkbox to show the block number
and the display signal. Click on the "Font" button to select a font for the block number and
display signal representation. A font sample is shown.
3D effects: Check the checkbox to represent the blocks with a 3D effect similar to the
Windows buttons. If the checkbox is not checked, colours can be assigned to the diefferent
block types.
MAC E300
4-9
Programming using the PC software
Creating a block
Reference tab:
Select the appearance of the Block Manager.
Abb. 4-11: Menü Block-Manager-Einstellungen – Registrierkarte Reference
Style: Select the representation style for the blocks as indicated.
Show references from blocks to: Select the block references to be shown.
Edit tab:
Select special functions for the presentation in the Block Manager.
Abb. 4-12: Menü Block-Manager-Einstellungen – Registrierkarte Edit
4 - 10
Programming blocks
4.3
Programming using the PC software
Programming blocks
Double click on a block in the block manager. The working area for the block and the tool box are
now shown. The objects that can be created in the block are in the tool box.
Select an object by clicking on the object in the tool box, and place the cursor in the working area
where you want the object to end up. The dialog window for selected objects is shown when you
click. General parameters for the objects are described in the General section. Each type of
object is explained in the sections on Graphic Presentation and Maneuvring and Text-based
Presentation and Maneuvring . The object is now shown on the working area. If you have
selected static text or graphics, it is written directly on the working area.
Fig. 4-13: Programming blocks
MAC E300
4 - 11
Programming using the PC software
4.4
The File Menu
The File Menu
There are functions for creating, opening, saving and closing projects in the File menu. Printer
settings, previewing print out, creating documentation headers and activating print out are also
selected from here. Furthermore there are functions for testing a project and altering project settings.
Fig. 4-14:
File menu
4.5
The Edit Menu
Functions for cutting, copying and pasting are found in the Edit menu.
Fig. 4-15:
Edit menu
4 - 12
The View Menu
4.6
Programming using the PC software
The View Menu
Function editor for block editing, symbol handling, function keys, LED, alarm and time channels
are to be found in the View menu.
Fig. 4-16:
View menu
Block List
Blocks included in the application are shown in the block list. In the block list you create new
blocks by pressing the button New. Basic parameters for the block are defined in the block head.
Fig. 4-17: Block list
Block Manager
Blocks included in the application are shown in the Block Manager graphically. In the Block
Manager you create new blocks, define the block header, define block jump with the functions
in the toolbox.
Symbol Manager
Activates the symbol manager. In the symbol manager you create a library of symbols in BMP
format. The symbols in the symbol manager are then available in the symbol list when you create
static and dynamic symbol objects.
MAC E300
4 - 13
Programming using the PC software
The View Menu
I/O crossreference
The function crossreference is used to document I/Os in a clear way. Select the function "I/O
crossreference" from the "View" menu.
Fig. 4-18: I/O crossreference
In the dialog displayed you state the "Start I/O" and the "End I/O". If you leave the start I/O field
empty, all I/Os up to the value in the end I/O field will be included. If you leave the end I/O field
empty, all I/Os from the value in the start I/O field will be included. If you leave both the fields empty, all I/Os in the list will be included.
Presentation
The result of the function will be presented in a list with two levels. The first level shows the used
I/Os and how many objects refer to the respective I/Os.
You reach the second level when you double-click on the "+" character to the left of the I/O. Now
the objects containing the I/O you clicked on are displayed. The "+" character will become a "-"
character. The "Print View" button opens the print dialog and you can select to print the crossreference list as it looks on the display to a connected printer.
Name list
The "Name list..." function creates a list of all added and used signals. Signals without a name
can be added via the "Undefined" button. The names of the signals can be edited in the name
list. The "Rebind" function refreshes the name list immediately. The name list can be exported
as text file and stored in the MAC Programmer+..
Fig. 4-19: Name list
4 - 14
The Functions Menu
4.7
Programming using the PC software
The Functions Menu
The functions menu includes editing functions for function keys, LEDs, alarms, time channels,
passwords, and message libraries
Fig. 4-20:
Functions menu
Function keys
Under Function keys you define global and local function keys. See the chapter Function keys.
LED
Under LED you define the function for the LEDs. See the chapter LEDs.
Alarm Groups
Under Alarm Group you can group alarms; for example, by danger level - so that they can be
more reality identified and dealt with. See the chapter Alarm handling.
Alarms
Under Alarms you define alarm messages and the signal to be connected which will activate the
alarm. See the chapter Alarm handling.
Time Channels
Under Time Channels you define the time channels used to control events in the process at
specified times. See the chapter Time control.
Password
Under Password the password is defined for the different access levels of the applications . See
the chapter Password.
Message Library
Under Message Library you define message libraries. See the chapter Message library.
MAC E300
4 - 15
Programming using the PC software
4.8
The Setup Menu
The Setup Menu
Functions for configuration of the terminal are to be found in the Setup menu.
Fig. 4-21:
Setup menu
System signals
Setting of the handshaking signals between the E300 and the PLC system.
● Current display reg.:
Data register in the PLC system which contains the number of the block shown on the display
in the run mode. The data register is updated automatically by the terminal on changing
block. This register does not affect the choice of Textblock.
● New display reg.:
A PLC data register that determines which block will be shown on the display. D100 can be
stated for example. The value 34 is entered into D100 from the PLC program or the terminal
if block 34 is to be shown on the display.
● Buzzer signal:
A register whose value decides the sound of the buzzer. See the table below. If the value is
0 then the buzzer is silent. The unit in the table is Hz.
C
D
E
F
G
Contra
33
37
41
44
49
55
62
Large
65
73
82
87
98
110
123
Small
131
147
165
175
196
220
247
One
262
294
330
349
392
440
494
Two
523
587
659
698
784
880
988
Three
1046
1174
1318
1397
1568
1760
1975
Four
2093
2348
2636
2794
3136
3520
3950
Five
4186
Tab. 4-6: Buzzer signal
● Backlight signal:
Digital signal which determines if the display is to be switched on or off.
4 - 16
A
B
The Setup Menu
Programming using the PC software
● No prot. ctrl. reg.:
The first control register used in the No protocol mode. The No protocol mode is described
in the Communication section.
● Cursor ctrl. block:
Start register to a control block in the terminal which writes the current cursor position to the
data register in the PLC system.
Register
Dn0
Description
Current cursor position X (in pixels), 0–239.
Dn1
Current cursor position Y (in pixels), 0–63.
Dn2
Status register:
0. Normal
1. User trying to move down but there is no object there.
2. User trying to move up but there is no object there.
3. User trying to move left but there is no object there.
4. User trying to move right but there is no object there.
Tab. 4-7: Cursor control block
● Recipe ctrl.block:
Control block for loading/saving/deleting of recipe files via the PLC system.
Register
Content
Description
Dn0
Command
Command register set by the PLC
Available commands:
0. No command.
1. Save recipe to the terminal.
2. Read recipe from the terminal.
3. Delete recipe from the terminal.
Dn1
Result code
Handshake register set by the terminal
0. Ready for new command.
1. OK
2. Recipe file write error.
3. Recipe file not found.
Dn2
File name char. 1–2
Dn3
Dn4
File name char. 3–4
File name char. 5–6
Dn5
File name char. 7–8
Dn6
Dn7
Start data register
Number of registers
Recipe file name in the terminal.
First data register to be read/written to/from recipe file.
Number of registers to read/write to/from recipe file.
Tab. 4-8: Recipe control block
NOTE
Maximum 1000 registers per recipe.
● Current recipe reg.:
Enter the first of four registers where the terminal put the name of the latest loaded recipe
from the PLC system. The name can then be presented in an ASCII object. The function
will always occupy four registers (eight characters) regardless of the length of the recipe
name.
● Library index reg.:
Used for indexing message libraries. In the message object you state the number of the
library from which the texts are loaded. If an index register is defined, the contents of the
index register are added to the stated number in the object. This makes it possible to control
from which library the texts are loaded from.
MAC E300
4 - 17
Programming using the PC software
The Setup Menu
Commands
One or more of the following commands can be stated on the command line. The commands are
separated by a space.
Command
Description
BR
BatchRead - communication with xxxC24, FX and A series.
BSD
Disable Baud switching when communicating via transparent mode with FX2N and Q. BSD must
be set in the terminal not connected to the PLC system.
DGP
Delete the alarm group from the alarm print out.
MLn
This command is used for indexing message libraries. State ML and a register, e.g. MLD10. The
terminal will show the texts in the library addressed by the constant for the library plus the content
in the register stated with the command ML.
NPn
Digital signal for switching between No protocol and Transparent/printer modes, e.g. NPM 100.
Used for switching between No protocol and Transparent/printer modes in run-time mode e.g. to
ring up a computer and send a message.
NTx
Timeout in ms for messages in the No protocol mode.
PRDn
Digital signal for stopping the print out, e.g. PRDM100.
RPD
RUN/PROG disable. Turns off the possibility to switch between RUN/PROG with the keys
[BACKSPACE] and [MAIN]. If RPD is used you switch mode via the PC software.
Rx
Maximum number of retransmissions. x = number of attempts.
SW
Converts text with 8 bits IBM PC extended ASCII to Swedish ASCII (7 bits) characters on printing.
Tx
Timeout for x milliseconds.
Tab. 4-9: Commands
Index register
Index addressing of dynamic objects. For more information see the General section.
Country settings
● Language:
Choice of system message language; British English, German, Swedish or American
English. The default setting is English menu texts.
● Character set:
The choice of character set. Four key codes (C1–C4) have been reserved for national
characters. Choose between Swedish, German, French, Spanish, Slavic, Norwegian/Danish and Russian.
4 - 18
The Setup Menu
Programming using the PC software
Date/Time format
Setting of date and time format.
● Date format:
The default format is YY-MM-DD where Y=year, M=month and D=day.
● Time format:
The default format is HH:MM:SS where H=hour, M=minute and S=second.
● PLC register:
Enter start address for storing date/time. Is only used if clock →PLC is YES.
The default setting is D9025 for the PLC system in A series.
Data register
8 higher bits
8 lower bits
D9025
year
month
D9026
day
hour
D9027
minute
second
D9028
reset
day of the week
Tab. 4-10: Register settings
The default setting is D8013 for the PLC system in FX and FX0N series.
Data register
Presentation
D8013
second
D8014
minute
D8015
D8016
hour
day
D8017
month
D8018
D8019
year
day of the week
Tab. 4-11: Register settings
● Clock used:
Select in the list of choices. Terminal means that the terminal’s built-in clock is used and
PLC means that the clock in the PLC system is used.
● Clock→PLC:
Mark if the clock in the terminal is to be transferred to the register in the PLC system..
NOTE
If the realtime clock in the PLC system is activated and the terminal clock is transferred to
the same register, the clock in the PLC system is superior.
● Update interval:
Updating interval in seconds. Only used when Clock→PLC is active.
● Daylight saving:
The beginning and end of daylight saving time is defined here. State the day of the week,
week in the month, month and hour. The default setting in the PC software is selectable
between Europe, the US and User defined.
MAC E300
4 - 19
The Setup Menu
Programming using the PC software
Online Settings
Here you can activate the time channels.
Fig. 4-22:
Online Settings
Terminal Options
Here you specify the basic settings of the MAC terminal.
Fig. 4-23:
Terminal Options
● Screen save time:
The time in minutes after the last operation on the display when it will switch off. The default
setting is 10 minutes. This function is used to optimize the working life of the display. Also
see the section "Backlight action" in the chapter "Alarm handling".
● Key delay time:
The time interval between pressing the same key before the cursor moves to the next
position. Used for input of ASCII characters (A-Z etc.). See the section "Alpha/numerical
keys" in the chapter "Terminal functions".
● Key beep:
States whether the terminal will beep when a key is pressed.
● Key repeat:
States whether the numerical keys, error keys, and built-in function keys are to be repeated
as long as the key is pressed. Function keys and input of ASCII characters (A-Z etc.) can
not be repeated.
MAC E300
4 - 20
The Setup Menu
Programming using the PC software
Alarm settings
General setting of the alarm list. For more information see the section on Alarm handling.
Fig. 4-24: Alarm Settings
● Active signal:
Enter the digital signal which the terminal will set when an active alarm exists.
● Unack. signal:
Enter the digital signal which the terminal will set when an unacknowledged alarm exists.
● List erase signal:
A digital signal which erases the whole alarm list when set.
● Reset:
Check to reset the list erase signal when the list is erased.
● List size:
The size of the list in total kBytes. Default setting is 1. Maximum 10 kBytes.
● Alarm symbol:
Choose when the alarm symbol is to be shown on the display. In textblock and in graphic
block ALARM is shown in the upper right corner is shown.
Choice
Alarm symbol is shown when
active
unacknowledge
No
쎲
Unacknowledged
Active
쎲
All
쎲
쎲
Tab. 4-12: Alarm symbols
● Backlight
Function not supported for MAC E300
● Alarm cursor
Function not supported for MAC E300
MAC E300
4 - 21
The Setup Menu
Programming using the PC software
Peripherals
All communications configurations are made under "Peripherals". When you select "Peripherals" the following is displayed. The display shows the units defined for the system. You can
drag and drop the units.
Fig. 4-25: Peripheral configuration
Buttons
● Edit...
You can mark a unit or a port on the display and press "Edit..." or click the right mouse button.
Then the dialog for the selected unit /port is displayed.
● Ports...
When you select "Ports..." or click the right mouse button a dialog is displayed where you
can see current configurations.
● Expand all.../Collapse all...
You can expand or collapse all nodes of the whole tree of units.
● Exit
Click on "Exit" to leave the dialog.
Grafical symbols
● RS-232C
When you select the RS-232C port and press Edit... or click the right mouse button adialog
is displayed where you select baudrate, parity, number of data bits, and stop bits for the port.
● HMI Tools
The "HMI tools" is a program package that helps you transfer files and system programs
between personal computer and operator terminal easily. In the example here the data is
transferred via the RS-232C port.
● Transparent mode
The PLC system can be programmed by a personal computer for example while the PLC
system is connected to the operator terminal. The operator terminal is set to the programming or RUN mode. In the example here the data is transferred via the RS-232C port.
MAC E300
4 - 22
The Setup Menu
Programming using the PC software
● RS-422
When you select the RS-422 port and press "Edit..." or click the right mouse button a dialog
is displayed where you select baudrate, parity, number of data bits, and stop bits for the port.
● Controller
Here the connected controller system can be setup. Select the controller symbol and press
"Edit..." or click the right mouse button. A dialog box appears containing the settings for the
connected controller. By default a demo driver that simulates a controller system is setup.
This way, the created projects can even be tested without having a real controller system
connected.
For details on the controller selection refer to section 4.1.
● Expansion slots
An expansion card can be fit to the expansion slot to increase the performance of your
operator terminal. For further information refer to section 15.3, "Expansion cards".
When you select an "Expansion slot" and press "Edit..." or click the right mouse button you
can define which expansion card you want to use and then make the settings for the
expansion card respectively.
● Unused functions
Functions currently not being in use are collected under "Unused functions":
Printer port, no protocol mode, network connections via TCP/IP, and modem communications.
To enable a function move it via drag-and-drop to the desired position.
To configure a function select it and press "Edit..." or click the right mouse button. A dialog
box appears containing the settings.
MAC E300
4 - 23
The Block Manager Menu
4.9
Programming using the PC software
The Block Manager Menu
The Block manager menu has functions for programming blocks. See section 4.3, Programming blocks.
Fig. 4-26:
Block manager
4.10
The Transfer Menu
The Transfer menu has functions for the transfer of projects as well as communication settings
for transferring between a PC and the terminal. See the chapter Transferring project.
Fig. 4-27:
Transfer
NOTE
MAC E300
The communication settings must be the same in the PC software as in the terminal.
4 - 24
The Windows Menu
4.11
Programming using the PC software
The Windows Menu
The Windows menu contains standard Windows functions.
Fig. 4-28:
Window
4.12
The Help Menu
The Help menu contains help texts.
Fig. 4-29:
Help
MAC E300
4 - 25
The Help Menu
MAC E300
Programming using the PC software
4 - 26
Textblock
5
Text-based presentation and maneuvring
Text-based presentation and
maneuvring
Text-based presentation and maneuvring is used to create operator dialogs. Text objects in tabular form are shown in this section. Every object is then described separately. General parameters for the objects are given in the General section.
5.1
Textblock
Textblock can be defined with three different font sizes, 4 rows of 20 characters, 8 rows of 40
characters or report. The font size is selected in the blockhead when the block is defined. It is not
possible to change font size in a defined block. The alternative Report is used when a textblock
is used as a report printout. The following diagrams shows the different font sizes.
Fig. 5-1: Font size: 8 rows, 40 characters
MAC E300
5-1
Text-based presentation and maneuvring
Fig. 5-2: Font size: 4 rows, 20 characters
Fig. 5-3: Font size: Report
5-2
Textblock
Text object
5.2
Text-based presentation and maneuvring
Text object
Dynamic text objects
Symbol
Object
Description
Analog
Presents values in numerical form.
Date/time
Setting of date and time.
Digital
Switch between two texts depending on the state of a digital
signal.
Multiple-choice
Links a analog signal which can assume eight different states. A
text of 30 characters can be linked to each state.
Jump
Jump to another block.
Bar graph
Presents values as a bar graph.
Text
Handles ASCII strings.
Message
Object controlling which text in a message library to be shown.
Tab. 5-1: Symbols
MAC E300
5-3
Text-based presentation and maneuvring
Text object
Analog object
Object which presents values in numerical form as whole or decimal numbers.
Fig. 5-4: Dialog box analog object
Parameter
Description
Analog signal
The signal´s address.
Positions
Decimals
The number of positions used by the object. Characters such as minus sign or decimal
points must also be counted.
The number of decimal places which represent the object.
Maneuverable
States if the object can be altered in run-time.
Minimum value
Maximum value
The minimum value you can enter for an object.
The maximum value you can enter for an object.
Offset and Gain
Used to change scale of the register value. Se the chapter General.
OGC
Offset and Gain Calculation. Calculates offset and gain depending on the value range of
controller and operator terminal.
Security level
Select security level for the object.
Tab. 5-2: Parameters for analog objects
NOTE
5-4
Minimum value and maximum value is only valid when maneuvring the object.
Text object
Text-based presentation and maneuvring
Date/time object
Object for setting date and time. Date and time objects collect data from the real-time clocks in
the terminal or the PLC.
Fig. 5-5:
Dialog box date/time
Parameter
Description
Day of the week
States if the day of the week will be shown. Requires two positions.
Date
Time
States if the date will be shown. Use the form given in Date/time format in configuration.
States if the time will be shown. Use the form given in Date/time format in configuration.
Maneuverable
Select if the object can be altered in run-time mode.
Security level
Select security level for the object.
Tab. 5-3: Parameters for digital objects
NOTE
A maneuverable Date/Time object must be defined to set the clock.
Digital object
Object that can assume two states, zero or one.
Fig. 5-6:
Dialogbox digital object
Parameter
Description
Digital signal
The signal´s address. See the chapter General.
Text 0
Text 1
The text shown when the signal is zero.
The text shown when the signal is one.
Maneuverable
Select if the object can be altered in run-time mode.
Security level
Select security level for the object.
Tab. 5-4: Parameters for digital objects
MAC E300
5-5
Text-based presentation and maneuvring
Text object
Multiple choice object
The object is linked to a analog signal which can assume eight different states. A text of up to 30
characters can be linked to each state.
Fig. 5-7:
Dialog box multiple choice object
Parameter
Description
Analog signal
The register controlling which text to be shown.
Text 0–Text 7
Man 0–Man 7
The texts that will be shown for each state of the object.
States whether it is possible to maneuvre to this status in run mode.
Security level
Select security level for the object.
Tab. 5-5: Parameters for multiple choice objects
5-6
Text object
Text-based presentation and maneuvring
Jump object
Objects for jumping to another block. Hierarchical menus can be built up in the application with
jump objects.
Fig. 5-8:
Dialog box jump object
Parameter
Description
Current block
Jump to block
States the number of the block left.
States the number of the block being jumped to. Jumping back to the previous block is possible by linking the RET function to a function key (nine levels back). See Function Key section.
Tab. 5-6: Parameters for jump objects
NOTE
MAC E300
If a jump is generated to a block that does not exist in run mode an error message is shown.
5-7
Text-based presentation and maneuvring
Text object
Bar graph object
Presents values in the form of a bar graph. The bar will be horizontal so that the maximum
number of positions are marked when the value has reached its maximum level.
Fig. 5-9: Dialog box bar graph
Parameter
Description
Analog signal
Positions
The signal´s address. See the chapter General.
The number of positions which the bar uses.
Direction
States whether the bar will be presented to the right or left.
Minimum value
Maximum value
Offset and Gain
The minimum value for the object.
The maximum value for the object.
OGC
Offset and Gain Calculation. Calculates offset and gain depending on the value range of
controller and operator terminal.
Used to change scale of the register value. See the chapter General.
Tab. 5-7: Parameters for bar graph objects
5-8
Text object
Text-based presentation and maneuvring
Text object
Object for handling ASCII strings. It is possible to present the text stored in the PLC’s data register. Texts should be in ASCII format. The texts can be altered in run-time mode from the terminal by opening and closing the entry field with [ENTER].
The text is converted from 8-bit IBM extended ASCII to Swedish 7-bits
ASCII if SW is stated on the command line in System Signals.
Fig. 5-10:
Dialog box text object
Parameter
Description
Analog signal
The register where text for the first position is stored.
Positions
Maneuverable
Each register contains two characters (occupying two positions). The basic setting is 8 positions which is equivalent to four registers.
Select if the object can be forcibly set in the run-time mode.
Security level
Select security level for the object.
Tab. 5-8: Parameters for text objects
MAC E300
5-9
Text-based presentation and maneuvring
Text object
Message
Message object presenting texts from message libraries.
Fig. 5-11:
Dialog box message library
Parameter
Description
Analog signal
Analog signal controlling which text from choosen message library to be shown.
Library
Positions
Select message library. Defined under Message Library in the View menu.
Number of positions to be displayed.
Security level
Select security level for the object.
Maneuverable range
Specify the range the object can be maneuvered within in operating mode.
Tab. 5-9: Parameters for messages
For more detailed information, see the chapter Message library.
5 - 10
Creating a hierarchy of menus
6
Graphic presentation and maneuvring
Graphic presentation and maneuvring
In this section there is an example of how to create an application, a hierarchy of menus. The
graphic object is first presented in tabular form and each object is then described. General parameters for the objects are described in the General section.
6.1
Creating a hierarchy of menus
This section is an example that shows how a hierarchy of menus is built up. The application is
the manufacture of film. The example shows how you can structure an application and divide it
into different blocks and through the jump function to create a hierarchy of menus. This is an
operator-friendly way of building up an application. The operator chooses which block is to be
shown depending on the state of the process. Jumps between the different blocks are controlled
by the function keys, through jump objects in the block, or from the PLC system it self.
In an application built up in the form of a hierarchy of menus there is a main menu where, for example, an overview of the process is shown and from where navigation to other ”blocks” which
show various details of the process.
Block 0
Main menu
Block 10
Recipe
Block 20
Motor status
Block 30
Temperature
Block 40
Film qualitiy
Fig. 6-1: Application in form of a hierarchy
MAC E300
6-1
Graphic presentation and maneuvring
Creating a hierarchy of menus
Main menu
Block 0 is the main menu, a Graphic block which contains an overview our application. There is
a start/stop button as well as jump functions through the hierarchy and to the recipes, motor status, temperature and film quality. The block is constructed of static graphics and jump objects.
Fig. 6-2: Main menu
The Process Method block
Process methods can be created, recalled or erased in this block. The block is constructed of numeric objects which can be set to required values. The objects are linked to signals in the plant
which affect the various materials used in the production of film. All dynamic data in the block is
saved in a recipe file with the Save recipe function. The operator can recall existing recipes by
pressing the Load Recipe function. Functions for recipes are linked to the function keys F5-F7
in this example.
Fig. 6-3: Process Method block
6-2
Creating a hierarchy of menus
Graphic presentation and maneuvring
The Motor Status block
There are two VU meter objects. The VU meters are linked to the signals for speed and current.
Fig. 6-4: Motor Status block
The Temperature block
There are two bar objects in the Temperature block which present the extruder temperatures in
the zones 1-2. The object is linked to the respective functions in our application.
Fig. 6-5: Temperature block
The Film Quality block
The quality of the film manufactured is presented in the Film Quality block. Furthermore there is
a jump object for jumping to the main menu.
Fig. 6-6:
Film Quality block
MAC E300
6-3
Graphic presentation and maneuvring
6.2
Graphic objects
Graphic objects
Static graphic objects
Static graphic objects are used to draw graphics which are not affected by the process.
Symbol
Object
Arc
Ellipse, filled
Line
Rectangle, filled
Symbol
Text
Polygon line
Tab. 6-1: Overview of static graphic objects
NOTE
Static object will always be drawn behind dynamic objects during presentation.
Digital graphic objects
Digital graphic objects are linked to digital signals in the PLC system.
Symbol
Object
Description
Digital symbol
Switch between two symbols depending on the state of a digital signal.
Digital text
Switch between two texts depending on the state of a digital signal.
Filled object
Used to fill in a framed area depending on the state of a digital signal.
Tab. 6-2: Overview of digital graphic objects
6-4
Graphic objects
Graphic presentation and maneuvring
Analog graphic objects
Analog graphic objects are linked to the registers in the PLC system.
Symbol
Object
Description
ASCII
Handle ASCII strings in Graphic blocks.
Diagram
Used to draw X/Y diagrams based on the content of the PLC registers.
Multichoice
Linked to a register which can assume up to eight different states. Text of up
to 30 characters can be linked to each state.
Multisymbol
Shows one of up to eight symbols depending on the value in the data register.
Numeric
Entering and presentation of values as numbers
Slide
Makes possible the increasing and decreasing the value of an analog signal.
S meter
Creates a graphic speedometer on the display.
Bar
Presents values in as a bar chart.
Trend
Presents values collected from the registers as a curve.
VU meter
Creates a graphic VU meter on the display.
Message
Used to control which text in a Message library to be shown.
Analog fill
Function not supported by E300
Tab. 6-3: Overview of analog graphic objects
MAC E300
6-5
Graphic presentation and maneuvring
Graphic objects
Other objects
Symbol
Object
Description
Jump
Jump to another block.
Alarm banner
Used to show a line in the alarm list.
Digital clock
Object to show a digital clock.
Analog clock
Object to show an analog clock.
TCP/IP command
prompt
Object to send TCP/IP commands to other units. Only valid if the terminal is
used in a TCP/IP network.
Zoom in
Zoom the display in (larger).
Zoom out
Zoom the display out (smaller).
Grid
A grid is displayed helping to position the objects exactly.
Polygon
Draw a polygon line (no effect on process).
Tab. 6-4: Overview of other objects
NOTE
6-6
Parameters which apply generally for object are described in the General section.
Graphic objects
Graphic presentation and maneuvring
Digital symbol
Object which is used to switch between two chosen symbols depending on the state of a digital
signal.
Fig. 6-7: Dialog box digital symbol
Parameter
Description
Digital signal
The address of the signal.
Symbol OFF
Select the symbol which is to be shown when the signal is 0.
Symbol ON
Select the symbol which is to be shown when the signal is 1.
Maneuverable
Security Level
When selected the object can be forced from the terminal in run mode.
Select security level for the object. 0 means no security level.
Tab. 6-5: Parameters for digital symbols
MAC E300
6-7
Graphic presentation and maneuvring
Graphic objects
Digital text
Text object which is used to switch between two entered texts depending on the state of a digital
signal. The maximum text length is 30 characters.
Fig. 6-8: Dialog box digital text
Parameter
Description
Digital signal
Text 0
The address of the digital signal.
The text which is to be shown when the signal is 0.
Text 1
The text which is to be shown when the signal is 1.
Font size
Security Level
Select font size.
Select security level. 0 means no security level.
Maneuverable
When selected the object can be forced from the terminal in run mode.
Adjustment
Frame
Select whether the text is to be left aligned or centred.
Select if a frame shall be drawn around the object.
Tab. 6-6: Parameters for digital texts
6-8
Graphic objects
Graphic presentation and maneuvring
Digital fill
Objects used for filling framed areas.
Fig. 6-9: Dialog box digital fill
Parameter
Description
Digital signal
The address of the analog signal.
Maneuverable
When selected the object can be forced from the terminal in run mode.
Security Level
Select security level for the object.
Pattern
Select if the filling shall be solid or dashed.
Tab. 6-7: Parameters for digital fills
NOTE
Filling areas that are too irregular can cause system failure in run mode. Filling can, in certain cases, make the screen slow.
Placing an object
The program calculates what is to be filled in the specified area. It´s therefore important that the
object is correctly placed. The filled area is limited only by static objects and static parts of dynamic objects.
Object’s
placement
x
TEXT
Good! To give the display
better response, frame the text
so it does not need to be filled.
Object’s
placement
x
TEXT
Bad! The display will be slow,
because the program must
make many calculations to fill in
the irregular areas between
letters.
Fig. 6-10: Placing an object
MAC E300
6-9
Graphic presentation and maneuvring
Graphic objects
ASCII
Object for handling ASCII strings in Graphic blocks. ASCII objects provide the opportunity to
present texts stored in the CPU’s data register. The texts should be in IBM extended ASCII
format.
Fig. 6-11: Dialog box ASCII object
Parameter
Description
Analog signal
Positions
State the register where the text for the first position is to be stored.
State the number of positions the text will occupy on the display.
Font size
Select font size.
Security Level
Maneuverable
Select security level for the object.
When selected the object can be forced from the terminal in run mode.
Adjustment
Select whether the object is to be left aligned or centred.
Frame
Select if a frame shall be drawn around the object.
Tab. 6-8: Parameters for ASCII objects
6 - 10
Graphic objects
Graphic presentation and maneuvring
Diagram
Objects used to draw X/Y diagrams or bar graphs based on the content of the PLC register. This
is a real-time function. The object is normally used for non-time-based presentations. Timebased display with a sample time of <1 second can be shown if the PLC creates data collection.
As an example we shall say the value in D100 is the first X-coordinate and the value in D200 the
first Y-coordinate. The number of register pairs will be 4. The table and the figure below illustrate
our example.
X-coordinate
Register
X0
D100
X1
D101
X2
D102
X3
D103
Value
Y-coordinate
Register
Value
0
Y0
D200
11
41
Y1
D201
40
51
Y2
D202
85
92
Y3
D203
62
Tab. 6-9: Coordinates
X2,Y2
X3,Y3
X1,Y1
X0,Y0
Fig. 6-12: Diagram and dialog box
Parameter
Description
Register pair count
The number of register pair to be drawn as dots or bars.
Y Analog signal
Y Scale division
The register which contains the first Y-coordinate.
The interval between the scale number on the Y-axis.
Y Scale ticks
The interval between the scale ticks displayed on the Y-axis.
Y Minimum value
The minimum value of the Y-coordinate.
Y Maximum value
X Analog signal
The maximum value of the Y-coordinate.
The register which contains the first X-coordinate.
X Scale division
The interval between the scale number on the X-axis.
X Scale ticks
X Minimum value
The interval between the scale ticks displayed on the X-axis.
The minimum value of the X-coordinate.
X Maximum value
The maximum value of the X-coordinate.
Value form
Select whether the diagram shall be a bar graph or linear graph. A bar is drawn for
each register pair in the bar graph. The X/Y coordinates are marked in as dots
between which a line is drawn in a linear graph.
Frame
Select if a frame shall be drawn around the object.
Tab. 6-10: Parameter settings for diagrams
MAC E300
6 - 11
Graphic presentation and maneuvring
Graphic objects
Multiple choice
Objects that can have several states. The object is linked to a register which can assume a maximum of eight states. Each state can be allocated a text, maximum 40 characters long.
Fig. 6-13: Dialog box multiple choice object
Parameter
Description
Analog signal
The register that decides which text that is to be displayed.
Text 0-7
Man 0-7
The texts which are to be shown for each state of the object.
When selected the object can be maneuvred to this state in run-time mode. See the section
Run-time mode for maneuvring.
Adjustment
Select whether the text shall be left aligned or centred.
Frame
Font size
Select if a frame shall be drawn around the object.
Select font size in the object.
Security Level
Select security level for the object.
Tab. 6-11: Parameter settings for multiple choice objects
6 - 12
Graphic objects
Graphic presentation and maneuvring
Multisymbol
Objects that can show one of a maximum of eight different symbols depending on the value in
a data register. The PLC register can also control the symbol’s location on the display.
Fig. 6-14: Dialog box multisymbol
Parameter
Description
Analog signal
The register that decides which symbol to be displayed.
Move X
The value which contains the X-coordinate for the object.
Permissible values are 0-239.
The value which contains the Y-coordinate for the object.
Permissible values are 0-63.
Move Y
Symbol 0-7
Select the symbol to be displayed. If the value of the register is 0, then symbol 0, is displayed etc.
Tab. 6-12: Parameter settings for multisymbols
NOTE
MAC E300
Move X and Y only need to be stated if the object is to be moved around on the display with
the help of the PLC.
6 - 13
Graphic presentation and maneuvring
Graphic objects
Numeric
Objects for entry and presentation of values in numerical form. It is used for example to create
entry fields.
Fig. 6-15: Dialog box numeric
Parameter
Description
Analog signal
The address of the signal. See the chapter General.
Positions
The number of positions the value will be shown with.
Decimals
Zero fill
The number of decimals the value shall be shown with.
Select if zeros are to be printed out in empty positions.
Adjustment
Select if the value shall be left aligned or centred.
Maneuverable
Minimum value
Select if the object can be altered from the terminal in the run mode.
The minimum limit for maneuvring.
Maximum value
The maximum limit for maneuvring.
Offset and Gain
OGC
Used to scale register value. See the chapter General.
Offset and Gain Calculation. Calculates offset and gain depending on the value range of
controller and operator terminal.
Frame
Select if a frame shall be drawn around the object.
Font Size
Security level
Select font size in the object.
Select security level for the object.
Tab. 6-13: Parameter settings for numeric objects
NOTE
6 - 14
Minimum value and maximum value are only active when maneuvring the object.
Graphic objects
Graphic presentation and maneuvring
Slide
Objects which make it possible to increase or decrease the value of an analog signal.
Fig. 6-16: Dialog box slide
Parameter
Description
Analog signal
The signal address. See the chapter General.
Minimum value
The minimum value the object can have.
Maximum value
Direction
The maximum value the object can have.
Select whether the object shall be presented vertically or to the right.
Security level
Select security level for the object.
Maneuverable
Scale division
Select whether the object can be altered from the terminal in the run mode.
State the interval between the scale numbers to be drawn.
Scale ticks
State the interval between the scale ticks displayed.
Offset and Gain
OGC
Used to scale register value. See the chapter General.
Offset and Gain Calculation. Calculates offset and gain depending on the value range of
controller and operator terminal.
Frame
Select if a frame shall be drawn around the object.
Direction
Font Size
Select vertical or horizontal slide.
Select font size in the object.
Tab. 6-14: Parameter settings for slides
MAC E300
6 - 15
Graphic presentation and maneuvring
Graphic objects
S-meter
Objects for creating a graphic speedometer on the display.
Fig. 6-17: Dialog box S-meter
Parameter
Description
Analog signal
The address of the signal. See the chapter General.
Minimum value
The minimum value the object can display.
Maximum value
Scale division
The maximum value the object can display.
State the interval between the scale numbers to be drawn.
Scale ticks
State the interval between the scale ticks displayed.
Angle
Offset and Gain
State the angle, working area, for the object. 10-360 degrees.
Used to scale register value. See the chapter General.
OGC
Offset and Gain Calculation. Calculates offset and gain depending on the value range of
controller and operator terminal.
Select if a frame shall be drawn around the object.
Frame
Tab. 6-15: Parameter settings for S-meters
6 - 16
Graphic objects
Graphic presentation and maneuvring
Bar
Objects which present whole or decimal numbers in the form of a bar graph.
Fig. 6-18: Dialog box bar
Parameter
Description
Analog signal
The address of the signal. See the chapter General.
Minimum value
Maximum value
The minimum value the signal can have.
The maximum value the signal can have.
Direction
Select whether the bar is to be shown to the right, left, up or down.
Scale
Box
Select whether the scale is to be shown.
Select whether a box is to be drawn around the bar.
Indicators
Select whether the highest and/or the lowest value for the signal shall be shown on the
axis. Indicators are set to zero when the terminal is switched on. Zeroing can also be
carried out in the run-time mode, see the Run-time mode section. The indicators only
function for 16-bit numbers.
Scale division
State the interval between the scale numbers to be drawn.
Scale ticks
State the interval between the scale ticks displayed.
Offset and Gain
OGC
Used to scale register value. See the chapter General.
Offset and Gain Calculation. Calculates offset and gain depending on the value range of
controller and operator terminal.
Frame
Pattern
Select if a frame shall be drawn around the object.
Select solid or dashed fill pattern for the object.
Tab. 6-16: Parameter settings for bars
MAC E300
6 - 17
Graphic presentation and maneuvring
Graphic objects
Trend
Objects which graphically present collected values from analog signals.
Fig. 6-19: Dialog box trend
Parameter
Description
Curve
Analog signal
Select the curve you want to edit. The MAC E300 stores up to 2 curves.
The analog signals the object shall sample and present the values for. Only 16-bit
numbers can be used.
Offset and Gain
OGC
Used to scale register value. See the chapter General.
Offset and Gain Calculation. Calculates offset and gain depending on the value
range of controller and operator terminal.
Y Minimum value
The minimum value on the Y-axis.
Y Maximum value
Y Scale
The maximum value on the Y-axis.
States which side of the Y-axis shall be shown, to the left, right, both or neither.
Y Scale division
The interval between the scale number on the Y-axis.
Y Scale ticks
X Sample interval
The interval between the scale ticks displayed.
States the time interval between the collection of data. Minimum value is 1 second.
X Time range
States the time interval to be shown in the trend diagram.
X Time scale division
X Time scale ticks
The interval between the scale number on the X-axis.
The interval between the scale ticks displayed.
Frame
Select if a frame shall be drawn around the object.
Tab. 6-17: Parameter settings for trends
6 - 18
Graphic objects
Graphic presentation and maneuvring
VU-meter
Object for creating a graphic VU meter on the display.
Fig. 6-20: Dialog box VU-meter
Parameter
Description
Analog signal
The address of the signal. See the chapter General.
Minimum value
Maximum value
The minimum value the signal can have.
The maximum value the signal can have.
Scale division
State the interval between the scale numbers to be drawn.
Scale ticks
Offset and Gain
State the interval between the scale ticks displayed.
Used to scale register value. See the chapter General.
Frame
Select if a frame shall be drawn around the object.
Tab. 6-18: Parameter setting for VU-meters
MAC E300
6 - 19
Graphic presentation and maneuvring
Graphic objects
Jump
Object for jumping to another block. Makes it possible to build up a
hierarchy of menus in the application. Jumping back to the previous block is done by pressing
the [PREV] key (up to nine levels back). See chapter Function Keys.
Fig. 6-21: Dialog box jump
Parameter
Description
Jump to block
Positions
States the number of the block to which the jump is to be made.
The number of positions the text will take up on the display.
Text
Enter any text that will be displayed.
Adjustment
Frame
Select whether the text shall be left aligned or centred.
Select if a frame shall be drawn around the object.
Font size
Select font size.
Tab. 6-19: Parameter settings for jumps
NOTE
6 - 20
If a jump is generated to a block that does not exist in run mode an error message is shown.
Graphic objects
Graphic presentation and maneuvring
Message
Message object presenting texts from message libraries.
Fig. 6-22: Dialog box message
Parameter
Beskrivning
Analog signal
Analog signal controlling which text from choosen message library to be
shown.
Library
Font size
Select message library. Defined under Message Library in the View menu.
Select font size of the text.
Positions
Number of positions to be displayed.
Security level
Select security level for the object.
Maneuverable
range
Specify the range the object can be maneuvered within in operating mode.
Adjustment
Select if the text shall be left aligned or centered.
Frame
Select if the text shall be displayed with a frame.
Tab. 6-20: Parameter settings for messages
For more detailed information, see the chapter Message library.
MAC E300
6 - 21
Graphic presentation and maneuvring
Graphic objects
Alarm banner
Object used to show a line in the alarm list.
Fig. 6-23: Dialog box alarm banner
Parameter
Description
List line number
States the number of the line in the alarm list from which information is to be collected
(1=first line, 2=second line etc.).
Positions
Font size
The number of positions to be displayed.
Select font size for the text in the object.
Show day of the
week
Select whether the day of the week will be shown in the alarm line.
Show date
Show time
Select whether the date will be shown in the alarm line.
Select whether the time will be shown in the alarm line.
Show symbol
Select whether the alarm symbols will be shown in the alarm line. See the chapter Alarm
handling.
Select whether it will be possible to acknowledge the alarm.
States which alarm group will be shown on the alarm line. The object will be shown in the
color specified for the alarm group.
Select security level for the object.
Select if a frame shall be drawn around the object.
Ack possible
Alarm group
Security level
Frame
Tab. 6-21: Parameter settings for alarm banners
6 - 22
Graphic objects
Graphic presentation and maneuvring
Digital Clock
Time object for presenting a digital clock.
Fig. 6-24: Dialog box digital clock
Parameter
Description
Day of the week
Date
Select whether the day of the week will be shown.
Select whether the date will be shown.
Time
Select whether the time will be shown.
Time format
Maneuverable
Time can be shown either as AM/PM or a 24-hour clock.
Select whether the clock can be reset in run mode.
Frame
Select if a frame shall be drawn around the object.
Font size
Security level
Select font size for the text in the object.
Select security level for the object.
Tab. 6-22: Parameter settings for digital clock
MAC E300
6 - 23
Graphic presentation and maneuvring
Analog clock
Time object for presenting an analog clock.
Fig. 6-25: Dialog box analog clock
Parameter
Description
Seconds
Select whether the clock will be shown with a second hand.
Frame
Select whether the clock shall be shown with a frame.
Tab. 6-23: Parameter settings for analog clock
6 - 24
Graphic objects
Graphic objects
Graphic presentation and maneuvring
TCP/IP command prompt
A window in which TCP/IP commands can be entered and sent between terminals in a TCP/IP
network. In run-time previous commands can be called up with keys [Up] and [Down].
In the following example after pressing the function key [F1] the command line
"PING 192.168.1.10"
is written to the DOS command prompt. After pressing [Enter] the command will be sent.
Abb. 6-26: Parameter settings for TCP/IP command prompt
Parameter
Description
No. of columns
No. of rows
The width of the window.
The height of the window.
Font size
Select font size in the object.
Enable accelerator
keys
Select whether the function keys [F1]-[F4] should write predefined commands in the window.
Accelerator keys
Enter any command that will be written at the command prompt by pressing the respective
function key.
Frame
BG
Select the type of frame the window will be shown with.
Function not supported by E300
Text
Function not supported by E300
Tab. 6-24: Parameter settings
TCP/IP commands
Command
Description
IPCONFIG
PING
View network parameters
Check whether the host can be accessed
ROUTE
View, add, and delete routes
ARP
View, add, and delete IP hardware addresses
Tab. 6-25: TCP/IP commands
For more details refer to chapter 15, "Communication".
MAC E300
6 - 25
Graphic objects
MAC E300
Graphic presentation and maneuvring
6 - 26
Alarm handling
7
Alarm handling
This section describes alarm management. This function is divided into alarm groups, alarm
messages and an alarm list. The alarms can be divided into groups, for example to create an order of priorities. The alarm messages are definitions of the signals that will activate an alarm as
well as the alarm message for each signal. The alarm list contains alarms caused in the run mode.
Alarm list
18.2.97 20:11:40 Conveyor 2 empty
18.2.97 20:35:09 Queue full
19.2.97 03:29:12 Low pressure
Fig. 7-1: Alarm list
MAC E300
7-1
Alarm handling
7.1
Alarm grouping
Alarm grouping
Alarms in E300 can be divided into four groups. Alarms can be sorted into groups in the alarm
block. It is not necessary to define the alarm groups.
7.1.1
Defining alarm groups
Alarm groups are defined under Alarm group in the View menu. The attribute for alarms in this
group are decided in the following dialog box.
Fig. 7-2: Dialog box Alarm Group
Parameter
Description
Group name
Any name for the alarm group.
Summary notify
Active - Digital signal which is set when there is an active alarm in the group.
Unack - Digital signal which is set when there is an unacknowledged alarm in the group.
Digital signal which acknowledges all the alarms in the group simultaneously.
Remote
acknowledge
Tab. 7-1: Functions in the dialog box Alarm Group
7-2
Alarm messages
7.2
Alarm handling
Alarm messages
Alarm messages are defined under Alarms in the Functions menu. The alarm message is entered here with a maximum of 38 characters. The message can contain dynamic data (just like
a textblock) which can be digital or analog. You can define 100 to 300 alarms depending on the
application.
Fig. 7-3: Dialog box Alarms
Parameter
Description
Alarm text
An alarm text. Maximum 38 characters.
Signal
The digital signal which when activated generates the alarm is stated here.
Alarm when signal is
Select On, if a set signal should cause an alarm. Select Off, if a reset signal should
cause an alarm.
Acknowledge notify
Digital signal affected when the alarm is acknowledged. Normally the signal is set.
Reset
The above signal is reset when the alarm is acknowledged if Reset is marked.
Remote acknowledge
Alarm group
Digital signal which acknowledges the alarm when when activated.
States the alarm group for the definition.
Info block
State a block number of a text or graphic block. This makes it possible to give the
operator a “help page” containing information about the alarm and possible
actions. 0 means that no block are linked to the alarm. See the chapter Run-time
mode.
Ack. required
States if the alarm should be acknowledged or not. A cross in the square means
that the alarm must be acknowledged and no cross means that the alarm functions
as an indicator alarm, that is as a form of information.
History
States when the alarm shall be taken out of the alarm list. A cross means that the
alarm remains in the list until the alarm list is full. No cross means that the the
alarm is taken out of the list when it is acknowledged and is no longer active. If the
Acknowledge parameter is not marked then the alarm is taken out of the list as
soon as it is not active.
To printer
Whether the alarm message should be printed out directly if the alarm status
changes is stated here.
Tab. 7-2: Parameters for the alarms
MAC E300
7-3
Alarm handling
7.3
Configuring the alarm list
Configuring the alarm list
General settings for the alarm list are made in Alarm settings in the Setup menu. Alarms take
different amounts of space in the alarm list depending on the length of the alarm text and the
number of objects in the alarm text.
Fig. 7-4: Dialog box Alarm Settings
Parameter
Description
Active signal
Unack signal
States the digital signal which the terminal sets when there is an active alarm.
States the digital signal which the terminal sets when there is an unacknowledged
alarm.
List erase signal
States the digital signal which when set erases the whole alarm list.
Reset
List size
Means that the signal stated on List erase is reset when the alarm list is erased.
States the list size in number of kBytes.
Alarm symbol
States when the alarm symbol should be shown, see table below. ALARM is shown in
both Textblock and Graphicblock in the top right-hand corner of the display.
Tab. 7-3: Functions in the dialog box Alarm Settings
Option
Alarm symbol shows when
active
unacknowledge
NO
UNACK
앬
ACTIVE
앬
ALL
앬
Tab. 7-4: Options of the function Alarm Symbol
7-4
앬
Trends
8
Trends
This section describes trends. This function means that analog values from the PLC system are
presented in a trend object while running. The presentation is in the form of a curve.
It is possible to define several independent trend curves in the same or different blocks. The total
number of 10 trends can be used in a application.
Fig. 8-1: Trend diagram
MAC E300
8-1
Trends
8.1
Defining trend objects
Defining trend objects
Trend objects are defined as other dynamic objects in a block. The object can be linked to one
or two analog signals. The following parameters are defined for a trend object:
Fig. 8-2: Dialog box trend object
Parameter
Description
Curve
Select the curve you want to edit. The MAC E300 stores up to 2 curves.
Analog signal
The analog signals the object shall sample and present the values for. Only 16-bit
numbers can be used.
Offset and Gain
Used to scale register value. See the chapter General.
OGC
Offset and Gain Calculation. Calculates offset and gain depending on the value
range of controller and operator terminal.
The minimum value on the Y-axis.
Y Minimum value
Y Maximum value
The maximum value on the Y-axis.
Y Scale
Y Scale division
States which side of the Y-axis shall be shown, to the left, right, both or neither.
The interval between the scale number on the Y-axis.
Y Scale ticks
The interval between the scale ticks displayed.
X Sample interval
X Time range
States the time interval between the collection of data. Minimum value is 1 second.
States the time interval to be shown in the trend diagram.
X Time scale division
The interval between the scale number on the X-axis.
X Time scale ticks
The interval between the scale ticks displayed.
Frame
Select if a frame shall be drawn around the object.
Tab. 6-5: Parameter settings for trends
8-2
Create report print-outs
9
Report print-outs
Report print-outs
This section describes how to make a report print-out from the terminal. For production followup it is simple to creat different types of reports such as daily reports and event reports. The illustration below shows the principle for generating a daily report.
Fig. 9-1: Create report printouts
9.1
Create report print-outs
The reports are created as Textblocks with static and dynamic text. The report has a maximum
width of 150 characters. In the textblock you enter a free text, e.g. table head and other static text
which always will be printed. To get dynamic values from the process in the report you define dynamic objects, presenting the value for the signal the object is linked to. See the chapter Textbased presentation and maneuvring. Via time channels it is possible to decide when the report
is to be printed.
MAC E300
9-1
Report print-outs
9.2
Defining the print-out
Defining the print-out
The Printer signal parameter in the block header gives the signal which when set activates the
print-out. A Completion signal is also given here which is set when the print-out is complete.
This signal is instead set to zero if Reset is marked.
Fig. 9-2: Dialog box block header
NOTE
9-2
Graphic blocks can not be used for report print-outs.
Printer settings
9.3
Report print-outs
Printer settings
The settings for the printer must be made under Printer settings (Setup menu -> "Peripherals",
-> select "Printer" then "Edit"). For more detailed information concerning the printer refer to the
manual for the printer used.
Fig. 9-3:
Dialog box printer settings
Parameter
Description
Page length
The number of lines to be printed out before form feed. Form feed never takes
place if the page length is set to 0.
New line character
Handshake
End of line character; CR/LF, CR, LF or none.
States whether handshaking between the printer and terminal will take place with
XON/XOFF or CTS/RTS.
Tab. 9-1: Parameter settings for printers
MAC E300
9-3
Report print-outs
9.4
Setting the interface ports
Setting the interface ports
Settings for the communication port must be made under Peripherals in the Setup menu. See
the manual for the printer concerned for the correct setting.
Fig. 9-4: Dialog box peripheral configuration
Right-click on the selected interface port symbol or click on the "Edit..." button to open the dialog
box for the interface port. Configure your interface port and confirm with [Enter].
Fig. 9-5: Dialog box RS-232C interface port
9-4
Setting the interface ports
Report print-outs
Click on the "Ports..." button to open the "Ports selections" dialog box. Here you can see quickly
and easily which peripheral devices are connected to which interface port of the MAC E300 operator terminal. Here you can also edit the port selections.
Abb. 9-6:
Dialog box port selections
MAC E300
9-5
Report print-outs
9-6
Setting the interface ports
Recipes
10
Recipes
This chapter describes the function recipe handling. The recipes function means that all dynamic data in a block, that is signals and their values, can be saved to the file in the run mode.
The operator can then down-load the file to the PLC system. The PLC system then starts to work
with the loaded values. By using the recipe handling function a large amount of parameter settings can easily be reused. The user creates a recipe library containing files with different parameter settings. This function makes time-critical production more efficient. For example when
you often shift between similar products e.g. when producing a unit in different colors. The recipe
files can be created from the terminal or from the PLC system.
Recipe files are stored in the terminal. To use recipes, the functions for storing, loading and erasing recipes must be linked to function keys, see the chapter Function keys.
The diagram below shows the principle for managing recipes.
The personal computer is used to
program the terminal. The personal computer is used for example
as back-up for production recipes
or to create new recipes through
The recipe block can access
values from the PLC system which
via the terminal are stored as a
recipe.
the program Transfer.
Create new recipe files with the RECWR
function.
Recipe file
M100
M102
D0
D1
D102
D103
1
0
25
100
12
1123
FX2N
CPU
Load the recipe in the
PLC system with the
RECRD function.
The RECRD function can be defined in
any block, for example a block that is
used to start running.
Fig. 10-1: Recipe handling
MAC E300
10 - 1
Recipes
Calculate the recipe size
Use the following equation to calculate how much the recipe will occupy the project memory.
S = 80 + Σ (2 ∗ IOGi + 18)
S = number of bytes. If S calculated will be less than 360, S will be set to 360.
n = the number of IO-series
IOGi = the number of used data registers, relays, etc.
Example 왓
Our recipe has the following series D0–D109, D200–D499 and M0–M99.
The calculation will be:
Calculate the sums of the different series:
1074 = (2 * 110 + 18) + (2 * 300 + 18) + (2 * 100 + 18)
Then calculate the sum:
S = 80 + 1074
S = 1154 bytes
왕
10 - 2
Creating a recipe
10.1
Recipes
Creating a recipe
Which block or blocks are to be used to save the recipe is decided when the application is programmed. All those signals that are to be included in the recipe are defined in the recipe block.
All dynamic values in the block are stored in the recipe file. All digital and all analog objects except trend objects can be used as recipe parameters.
A jump is made in run-time mode to the block which contains the recipe parameters. Enter the
required values in the dynamic object and press the function key which is linked to RECWR. The
name of the file is given in the entry field shown. The recipe file is stored in the terminal.
Fig. 10-2: Storing a recipe
MAC E300
10 - 3
Recipes
10.2
Transferring a recipe to the PLC system
Transferring a recipe to the PLC system
The recipe is transferred to the PLC system in run-time mode with the "Load recipe" function.
This means that the signals and their values stored in the file are transferred to the PLC system.
When the function key for "Load recipe" is pressed a list of available recipe files to choose from
is shown. Select one and press [ENTER]. The PLC system will then run with the downloaded
values.
Fig. 10-3: Transferring a recipe
10.3
Erasing a recipe
Any named recipe can be erased in run-time mode from the terminal memory with the "Delete
recipe" function. Press the function key connected to "Delete recipe". Available recipe files to
choose from are now shown. Select the file to be erased and press [ENTER]. Confirm the erasure by pressing [ENTER] or abort by pressing [PREV].
10 - 4
The file transfer program from the HMI Tools
Recipes
10.4
The file transfer program from the HMI Tools
10.4.1
Introduction
HMI Tools is a program package for transferring data files and system programs between the
personal computer and the terminal. The package contains the following functions:
● Transferring recipe data and alarm lists between the personal computer and the terminal.
● Modem settings for the connection between a personal computer and a terminal.
● Loading the system program to flash memory based terminals (MAC E series).
● Transferring the terminal project between a remote personal computer and a terminal.
The file transfer program transfers recipes and trend files between a personal computer and an
operator terminal.
NOTE
The terminal must be running and connected to the personal computer before you start the
file transfer!
Double-click on the program icon to start the file tranfer programm
Fig. 10-4:
Program icon file transfer
When the moduls is activated the following dialog is displayed.
Fig. 10-5: Main window of File Transfer Program (HMI-Tools)
In the "File" menu you will find the function "Save settings".
MAC E300
10 - 5
Recipes
10.4.2
The file transfer program from the HMI Tools
File management
Files in the terminal
The files in the terminal, recipes and alarm groups, are displayed under "Terminal Files". You can
select to transfer all files in all folders, all files in one folder or a separate file. With the "Delete"
function you can delete files in the terminal.
Select folders/files
Select all folders by marking the uppermost folder, the folder named as the terminal. If you mark
the folder Recipe, Trend or Alarm you select the files in the marked folder. You can also select
separate files.
Click on the "+" character to open a folder and show underlaying folders and files.
Click on the "-" character to close a folder.
Files in the personal computer
The files in the personal computer are displayed under "Files". When you transfer e.g. recipe
files you should place the files in a separate library called "Recipe".
NOTE
10.4.3
Only recipe files can be transferred from the personal computer to the terminal.
Functions
Edit Recipe
The function "Edit Recipe" is used to edit the recipe file. You can change the values and write a
comment text to the different lines in the recipe. The comments are saved in separate files as a
recipe template and can not be transferred to the terminal.
Delete Files
The function "Delete Files" is used to delete selected files in the PC Files window.
Refresh
The function "Refresh" is used to update the windows "Terminal Files" and "PC Files".
10 - 6
The file transfer program from the HMI Tools
10.4.4
Recipes
Communication settings
Under "Options" you will find the function "Comm. settings". Select "New" to define the communication settings. Here you make the settings for port, baudrate, data bits, stop bits, parity,
and phone number, if you want to communicate via a modem. The communication settings must
be the same in the RS-232C interface port of the terminal under "Setup/Peripherals".
Fig. 10-6:
Dialog box phone number
(and communication settings)
Parameter
Description
Name
Phone Number
Enter a user defined name.
Enter the phone number the modem shall call.
Modem String
This parameter can not be stated in this module.
Port
Select communication port.
Parity
Bits
Select parity.
The number of data bits is always 8 in this application.
Stopbits
Select number of stop bits.
Baud
Select baudrate.
Tab. 9-2: Parameter settings for the communication
MAC E300
10 - 7
Loading and saving recipes via the PLC program
10.5
Recipes
Loading and saving recipes via the
PLC program
By using a control block in the PLC system you can load, save and delete recipe files in the terminal. The files saved in the PLC program are compatible with the recipe files saved in the terminal. This means that recipe files saved by the PLC program can be loaded in the terminal and
vice versa. The control block is described in the following table.
Terminal
PLC system
Index
Value
Data register
0
1
2
3
1234
D0
D1
.
.
.
.
.
.
.
.
.
Data
Storage
Control block
.
.
.
n
PLC program
Data
Ctrl
MOV
MOV
MOV
MOV
D8000
Command
Current index
Number of register
First data register number
Fig. 10-7: Control block
MAC E300
10 - 8
Loading and saving recipes via the PLC program
Recipes
Register
Dn0
Content
Description
Command
Command register set by the PLC
Available commands:
0. No command.
1. Save recipe to the terminal.
2. Read recipe from the terminal.
3. Delete recipe from the terminal.
Dn1
Result code
Handshake register set by the terminal.
0. Ready for new command.
1. OK
2. Recipe file write error.
3. Recipe file not found.
Dn2
Dn3
File name char. 1-2
File name char. 3-4
Dn4
File name char. 5-6
Dn5
File name char.7-8
Dn6
Dn7
Start data register
Number of registers
Recipe file name in the terminal.
The first data register to be read/written to/from recipe file.
Number of registers to read/write to/from recipe file.
Tab. 10-1: Register
In the Setup menu, System signals you define the first register in the control register area. This
register and the six following registers are used as a control register.
To perform commands, the following handshake procedure must be carried out:
햵 The handshake register must be 0. If it is not, make sure that the command register is set to 0.
햶 Write the command in the command register.
햷 Wait for completion or error code in the handshake register.
햸 Set the command register to 0. After this, the terminal will set the handshake register to 0.
Example 쑴
The PLC wants to save D100 to D149 as recipe name “RECIPE1” when M0 is activated. The
control block starts at D10. The PLC program should be as follows.
M0
0
=
K
0
D11
ASC RECIPE
MOV
K
100
D12
D16
MOV
K
50
K
1
D10
MOV
K
0
D10
MOV
D17
M0
34
<
K
0
D11
RST
M0
Fig. 10-8: Example of a program
쑶
NOTE
MAC E300
Recipe created in the PLC system can include maximum 1000 registers.
10 - 9
Loading and saving recipes via the PLC program
MAC E300
Recipes
10 - 10
Run-time mode
11
LEDs
LEDs
The E300 has 16 LEDs built in, eight are located near the function keys and eight are independent. The LEDs are connected to a register. The content of the register determines the color
and any blinking of the LED according to the following table.
Register value(Hex)
Register value(Dec)
Blinking frequency(Hz)
Color
00
0
—
None
01
1
—
Green
02
2
—
Red
11
17
5
Green
12
18
5
Red
21
33
2.5
Green
22
34
2.5
Red
31
49
1.2
Green
32
50
1.2
Red
41
65
0.6
Green
42
66
0.6
Red
Tab. 11-1: LED-register
11.1
Run-time mode
The LEDs according to the table above depending on the value in the analog register linked to
the LED. See the Run-time Mode section.
MAC E300
11 - 1
LEDs
11 - 2
Run-time mode
Function keys
12
Function keys
This section describes how to use the function keys. A function key is linked to a signal (e.g.
M100) or a function by writing in its address after each key.
Several functions can be assigned to the digital signal when the linked function key is activated:
Momentary, set, reset, toggle.
The E300 has 8 function keys (F1 to F8) built in.
LED L1–L8
Labeling field
F3
F2
F1
7
8
9
4
5
6
1
2
3
-
0
.
F4
F5
List
F6
Labeling field
LED L9–L16
Function keys F1–F8
F8
F7
Alarm Ack
Ack
Main
Prev
←
↵
Main Menu (Block 0)
Enter
Backspace
Preview
List
Numeric keyfield
Fig. 12-1: Function keys
MAC E300
12 - 1
Function keys
12.1
Definition of function keys
Definition of function keys
There are two ways of defining the function keys; globally or locally. Global function keys are defined and used in the whole application, that is they apply in all the blocks. Local function keys
are defined and used in a single block. A global definition is always available in the run-time
mode assuming that the block shown on the display does not have a local definition for the function key in question. Local definitions have a higher priority than global ones. Function keys are
defined under Function keys in the View menu.
Fig. 12-2: Definition of function keys
Parameter
Description
IO
The digital signal activated with the function key.
Event
How the key affects the current digital signal:
Momentary means that the signal is set as long as the key is active.
Toggle means that the signal is set and reset respectively when the key is activated.
Set means that the signal is set when the key is activated and remains set.
Reset means that the signal is reset when the key is activated and remains reset.
Set analog object to
Sets selected analog object to entered value.
Increment analog
Increases the value of a maneuverable analog object by the entered value or sets a
object with or set digi- selected digital object.
tal object
Decrement analog
object with or reset
digital object
Decreases the value of a maneuverable analog object by the entered value or resets a
selected digital object.
Set digital object
momentarily
Jump to block
Sets selected digital object as long as the key is pressed.
Security level
Function key can be defined with a security level. The security level means that the operator must log in with a password for the same or a higher security level to be able to use the
function key.
F1 – F8
The function key linked to one of the functions.
Jumps to the block with number nnn.
Tab. 12-1: Parameter settings for function keys
12 - 2
Definition of function keys
Function keys
Other functions for function keys
Funktion
Load recipe
Description
Load recipe from the memory of the terminal.
Save recipe
Save recipe into the memory of the terminal.
Delete recipe
Login to specific
security level
Erase recipe from the memory of the terminal.
Login to a specific security level.
Logout
Log out from a specific security level.
Change login password
Change the password.
Scroll one page up
Scrolling the pages in text blocks and in the alarm list.
Scroll one page down
Zoom up text size
Scrolling the pages in text blocks and in the alarm list.
Increase the text size in the alarm list.
Zoom down text size
Decrease the text size in the alarm list.
Save recipe on
memory card
Load recipe from
memory card
Save recipe on the memory card defined as backup.
Erase recipe on
memory card
Erase recipe from the memory card defined as backup.
Save project on
memory card
Save project on the memory card defined as backup.
Load project from
memory card
Load project from the memory card defined as backup.
Erase project on
memory card
Acknowledge alarm
Erase project from the memory card defined as backup.
Acknowledges alarms in the alarm list.
Show alarm list
Shows the alarm list (block 990)
Jump to info block
connected to the
alarm
Jump to a block connected to the alarm. See chapter 7, "Alarms".
Load recipe from the memory card defined as backup.
List alarm groups
Select from which alarm group alarms will be shown in the alarm list.
Return to previous
blocks
Jump to main block
(block 0)
Show the previous block, works for nine levels. When returning to block 0 you can not jump
to the previous block using this function.
Jump to block 0.
Show object info
Shows the minimum and maximum values for analog objects in the text block in the runtime mode.
Enter
[Enter] key
Show diagnostics
page
Shows the information page.
Tab. 12-2: Function and description of built-in function keys
MAC E300
12 - 3
Function keys
12.2
Jump to block with the function keys
Jump to block with the function keys
This function makes it possible to use the function keys for jumping to blocks without using the
Display signal. When the key is defined, locally or globally, you select BlockJump in the list of options. Changing block via function keys is the easiest way to change block. The method do not
occupy any digital signal in the PLC system.
12.3
Keyfield
Keyfields can be defined for the function keys F2–F7. The keyfield is shown on the bottom line
or on the two lowest lines on the display. You may enter a freely defined text. The keyfield is defined in the block header.
Fig. 12-3: Dialog box keyfield
Parameter
Description
Keyfield size
Select if the keyfield shall be disabled or be shown on one or two lines.
Key text
Enter a text for the keys respectively. Maximum six character per field.
Tab. 12-3: Parameter settings for keyfields
12 - 4
Defining the time channels
13
Time control
Time control
Time control is a function for setting and resetting digital signals relative to the real-time clock.
This function is used for controlling events in the process at specific times through the terminal.
The time channels replace the time relays and 7-day clock.
13.1
Defining the time channels
The time channels are defined under Time channels in the View menu.
Fig. 13-1: Dialogbox time channels
Parameter
Description
Interval name
Enter any text for the time channel.
Signal
Interval
A digital signal which is set during the stated time period is stated here.
The day and time for the interval is stated here. Four intervals can be defined for each
time channel.
Tab. 13-1: Parameter settings time channels
In the figure above we have defined one time channels. The time channel has the text Night temperature and is linked to the signal Y30. The signal will be set Monday to Friday 17.30 to 05.00,
Friday 17.30 to 24.00 and Saturday to Sunday between 00.00 and 24.00. During these periods
the temperature in the building will be decreased.
13.2
Run-time mode
The page for the time channels can be found in system block 991. Activate the block through a
digital signal or by jumping there. See the Run-time Mode section. In this block the time channel
settings can be changed in run mode.
MAC E300
13 - 1
Time control
13.3
Real-time clock
Real-time clock
The real-time clock in the terminal is configured under Date/time format in the Setup menu.
Fig. 13-2: Dialog box date / time format
Parameter
Description
Date format
Select the format for the presentation of the date.
Time format
Select the format for the presentation of the time.
Controller register
Start address for storing date/time. Only used if Clock→ Controller is set to YES.
Update interval
Daylight savings
The updating interval in seconds.
Setting for the beginning and end of daylight saving time.
Clock used
Select whether the clock in the terminal or PLC system will be used.
Clock → Controller
State whether the clock in the terminal shall be transferred to the register in the PLC
system.
Tab. 13-2: Functions in the dialogbox date / time format
NOTES
If you want to change the clock in the PLC system from the terminal, this must be done in
run mode.
The terminal automatically adjust the time for daylight savings- and standard time.
13 - 2
Message library
14
Message library
With the function message library you create message tables where values between 0 and
65535 are linked to texts. The function is used for presentation of each step in a sequence control. Another use is presenting error codes. An analog signal generates the error codes which
are linked to texts in a message library. The function can also be used for operator communication.
Message library is one or several message tables containing up to 512 text strings each. Each
text string can have a length of 40 characters.
Fig. 14-1:
Dialog box message library
Parameter
Description
Library
State a number of the message library.
Name
State a name of the message library.
Tab. 14-1: Parameter settings for message libraries
You edit a message library by marking a library and click on Edit. Several editing windows can
be displayed at the same time.
Fig. 14-2:
Editing window
Parameter
Description
Text no
State a number of the text, 0-65535.
Text
Freely defined text which is displayed when current signal includes the text number
for the text.
Tab. 14-2: States in the editing window
MAC E300
14 - 1
Message library
Example 쑴
The following example shows how the function may be used. In a sequence control we want to
display a text for each step in the sequence.
Fig. 14-3:
Sequence and displayed text
D0=0
Put article on the conveyer
D0=1
Mount detail X
D0=2
Mount detail Y
D0=3
Put article off the conveyer
Start by creating a message library named Line1.
햲 Select Message library in the View menu.
햳 Define a number, in this case 0, and a name of the library, in this case Line1.
햴 Click on Add.
Fig. 14-4:
Adding a message library
A message library named Line1 is now created. Thereafter you define the texts in the library.
햵 Mark the library and click on Edit.
14 - 2
Message library
햶 In this dialog you define text number and text. In the field Text no you state a value of the
analog signal linked to the message object. In the field Text state the text displayed in the
message object.
Fig. 14-5:
Text number and text
When the message library is defined, you create a message object in the project. Message objects can be defined in both text and graphic blocks.
햷 Select the Message object in the toolbox. Place the cursor where you want to place the
object and click.
햸 State the analog signal to control which text is to be displayed.
햹 In the field Library you select message library.
햺 In the field Positions you select the number of characters in the display (1–40).
Fig. 14-6:
Link to an analog signal
MAC E300
14 - 3
Message library
14 - 4
The terminal in the transparent mode
15
Communication
Communication
This section describes the various communication configurations in which the terminal can be
used. The terminal has one RS232 series channel and one RS422 series channel.
15.1
The terminal in the transparent mode
The programming/printer port on the terminal is used in the transparent mode to connect a unit
working in parallel with the PLC system. This unit can be another terminal or a personal computer with for example the MELSEC MEDOC programming tool or a superior operating system.
The transparent mode works together with the FX-series CPU port, A-series CPU port, A-series
communication ports with C24 protocol. For more information see the C24 manual concerned.
15.1.1
Connecting a personal computer or other computer system
Personal computers with the MELSEC MEDOC programming tool or other computer system are
connected directly to the terminal’s programming/printer port.
MELSEC MEDOC
MAC
FX-system
RS232
RS422
Fig. 15-1: Terminal with MELSEC MEDOC connected to the programming/printer port
MAC E300
15 - 1
Communication
15.1.2
The terminal in the transparent mode
Settings in the terminal and MELSEC MEDOC/MELSEC MEDOC plus
The following settings must be made in the terminal and MELSEC MEDOC/
MELSEC MEDOC plus for the transparent mode to work.
The terminal
The printer parameters are set in the Setup menu under the menu option Peripherals.
● Connection to an FX system:
9600 baud, 7 databits, 1 stopbit, even parity.
● Connection to a communications module C 24 of the AnS/A series:
19200 baud, 8 databits, 1 stopbit, no parity.
● Connection to an AnS/A CPU
9600 baud, 8 databits, 1 stopbit, odd parity
● Connection to an QnAS/Q CPU:
9600 baud, 8 databits, 1 stopbit, odd parity
MELSEC MEDOC/MELSEC MEDOC plus
The transfer parameters should not be changed in MELSEC MEDOC/MELSEC MEDOC plus for
other projects. See the Installation manual for cable connections.
The settings also apply for other PC-based monitoring systems such as MX SCADA.
15.1.3
Connecting two terminals
RS232 can be used if the distance between the terminals is less than 15 meters. The other terminal’s PLC communication is then set to RS232 in the communication configuration for the PLC
system. In other situations a signal amplifier must be used.
MAC
MAC
A-system
RS422
RS232
Fig. 15-2: PLC system with two terminals
The first terminal is connected in the usual way with the accompanying cable when connecting
two terminals to an FX system or an A-CPU port.
The first terminal is connected according to the instructions in the Installation manual when connecting two terminals to the A-series communication ports.
15 - 2
The terminal in the transparent mode
15.1.4
Communication
Settings for two terminals
The following settings must be made in the terminals for the transparent mode to work.
The first terminal
The settings are made in the Setup menu under the menu option Peripherals. The transfer rate
can vary between 600 and 57600. The other parameters should be set as followsl:
8 data bits, 1 stop bit, no parity.
For highest transfer speed set the highest supported transfer rate.
Among the MAC operator terminals generally set the number of data bits to 8.
The second terminal
The PLC parameters are set under Setup/Peripherals. The communication settings of the second terminal must match with that of the first terminal.
Refer to the installation manual for the required information on the configuration of the connecting cables.
The access time depends on the number of connected terminals (see table below).
Number of terminals
Access time to the PLC
Terminal 1
Terminal 2
Terminal 3
Terminal 4
1
2
100%
50%
—
50%
—
—
—
—
3
50%
25%
25%
—
4
50%
25%
12,5%
12,5%
Tab. 15-1: Access times when connecting several terminals
MAC E300
15 - 3
Communication
15.1.5
The terminal in the transparent mode
E300 as communication interface
(No protocol mode)
The No protocol mode is used to connect different PLC systems, connect external units such as
bar code readers or weighing scales to the PLC system. The PLC system controls what is to be
sent to the communication port. Data coming in to the communication port is written to the PLC
register. Communication takes place with the transfer of the data register area according to the
control block below.
Terminal
Any unit
Data register
D0
D1
.
.
D100
Communication
handling
PLC program
Send buffer
data
D101
Recieve
buffer data
Ctrl
Start send buffer
Command for send
Start receive buffer
Command for receiving
RX End code pattern
RX Message length
Fig. 15-3: Connection of different external units
Register
Description
Dn0
Start register for the transmission data buffer. The first register in the buffer area contains
the total number of bytes to be transmitted. The following register contains the data to be
transmitted. The maximum buffer size is 127 registers = 254 bytes.
Command register for transmission. Set to 1 by the PLC system when transmission is required. Set to 0 by the terminal when transmission is complete.
Start register for the reception data buffer. The first register in the buffer area contains the
total number of bytes received. The following register contains the data received. The maximum buffer size is 127 registers = 254bytes.
Dn1
Dn2
Dn3
앫 Command register for reception.
–
–
–
–
–
–
Dn4
Dn5
End code (1 or 2 bytes) on the message received.
Length of the message received. End code is used if 0.
Tab. 15-2: Registers
15 - 4
Set to 0 by the PLC system when it is ready to receive.
Set to 1 by the terminal when the message is available.
Set to -1 (FFFF) on error message (e.g. too short).
Set to 2 by the PLC system when clearing of the port buffer is required.
Set to 3 by the terminal when clearing of the port buffer has been carried out.
The port buffer is automatically cleared on start up and when switching between
transparent mode and no protocol mode, i.e. the register receives the value 3.
The terminal in the transparent mode
Communication
The settings under "Setup/Peripherals/No protocol mode" define which register will be the first
control register in the transfer area. Drag and drop the "No protocol mode" icon on the desired
interface port and right-click to configure.
Fig. 15-4: Dialog box No protocol mode
The PLC system can switch between no protocol and transparent/printer modes in the run-time
mode. See the command NP in the system signals section in chapter Programming using the PC
software.
Control block
Dn0
Dt0
Dn1
Dn2
Dr0
Dn3
Transmission buffer
Reception buffer
Dt0
Number of bytes
Dr0
Number of bytes
Dt1
Data
Dr1
Data
Dt2
Dr2
Fig. 15-5: Control block, transmission- and reception buffer
MAC E300
15 - 5
Communication
15.1.6
The terminal in the transparent mode
Example of using the no protocol mode
The following example describes the use of the no protocol mode for a weighing system. The diagram below shows the connections as well as a three-step block schedule for communication.
0
Wait state
Transmission start
M100
Queries current
weight
1
Transmission completed
M11
2
Await current weight
Receiving complete
Fig. 15-6: Three-step block schedule for communication
The terminal functions as the master towards the weighing system, that is it continually asks the
weighing system for the current weight. Connection between the PLC system, the terminal and
the scale are shown in the diagram below.
RS422
FX-system
Terminal
Scale
Fig. 15-7: Connecting the scale and the PLC
15 - 6
RS232
The terminal in the transparent mode
Communication
The protocol appears as follows
MAC Terminal
| STX | ? | CR | LF |
Weighing system
| STX | Weight in kg | CR | LF |
The PLC program appears as follows:
Fig. 15-8: PLC program (1)
MAC E300
15 - 7
Communication
The terminal in the transparent mode
Fig. 15-7: PLC program (2)
15 - 8
The terminal in the transparent mode
Communication
Fig. 15-7: PLC program (3)
MAC E300
15 - 9
Communication
The terminal in the transparent mode
Fig. 15-7: PLC program (4)
15 - 10
Expansions card
15.2
Communication
Expansions card
In the terminal there is a possibility to connect different expansion cards to increase the communication possibilities.
15.2.1
IFC PBDP
With the expansion card IFC PBDP the terminal can be connected to and communicate with a
Profibus network. For information about how to setup the card, see the manual for the product.
For information about how to configure a Profibus network, see the manual for Profibus network.
15.2.2
IFC MC
With the expansion card IFC MC you can choice to expand the project memory, use it as backup
or for moving files between terminals. For further information we refer to the manual for IFC MC.
15.2.3
IFC 128E
IFC 128E is an expansion card for connection of external function keys or switches. Up to 128
external function keys/switches can be used. For further information see the manual for the
product.
15.2.4
IFC ETTP und IFC ETCX
The expansion cards IFC ETTP und IFC ETCX are cards for network communication using
TCP/IP via a twisted cable or coaxial cable. For further information, see the manual for the expansion cards.
15.2.5
IFC PI
IFC PI is an expansion card which makes it possible to connect a HP-PCL5 compatible printer
with parallel connection to the terminal. The RS
ber die Erweiterungskarte IFC PI kann parallel zum Bediengerät MAC E300 ein HP-PCL5-fähiger Drucker angeschlossen werden. For further information, see the manual for the expansion
cards.
MAC E300
15 - 11
Communication
15 - 12
Expansions card
Terminal settings
16
Project transfer
Project transfer
The project must be transferred from the PC to the terminal, in order to be used in the terminal.
Connect the PC with MAC Programmer+ to the terminal via the cable MAC-PC-CAB-R2.
MAC Programmer+
Terminal
MAC-PC-CAB-R2
Fig. 16-1: Connection between PC and terminal
16.1
Terminal settings
The transfer parameters are set in the terminal in configuration mode under Setup, Port
Parameters, MP+.
Default settings: 9600 Baud, 8 data bits, 1 system bit, 1 stop bit, no parity.
NOTE
MAC E300
The communication settings must be the same in the PC software as in the terminal.
Pay attention to the connector assignment of the connecting cable MAC-PC-CAB-R2.
16 - 1
Project transfer
16.2
Transfer settings
Transfer settings
The transfer is controlled from the PC software MAC Programmer+. In the menu Transfer/
Project you can select what is to be transferred. In the PC software you make the settings in the
Transfer/Comm Settings menu.
Fig. 16-2: Dialog box project transfer
16 - 2
Transfer settings
Project transfer
Parameter
Percent complete
Description
Shows the status of the transfer during tranfer.
Byte count (kB)
Shows the number of bytes transferred during transfer.
Time elapsed
Status
Shows elapsed time since one of the function´s send, receive or verify was activated.
Shows which part of the project that is transferred. For example Setup, block, alarm
groups, symbols and function keys.
Retries
When the transfer fails, the PC software makes a number of retries before the transfer
is shut down.
When contact is enabled with the terminal, current terminal type and program version
are displayed here.
Terminal version
Test project on send
Automatic terminal RUN/
TRANSFER switching
Tests the project during transfer.
The terminal is automatically put in transfer mode and will return to the previous mode
after transfer.
Send complete
project
Check terminal version
Select, if you want to transfer the complete project.
Checks the terminal version and gives a warning if the project and the terminal don’t
match.
Send complete project
Select if you want to transfer the whole project.
Partial send options
None:
All:
From To:
Alarms:
Symbols:
Time channels:
LEDs:
Message library:
Setup:
Function keys:
Password:
No blocks are sent to the terminal.
All blocks are sent to the terminal.
State an interval of blocks to be sent to the terminal.
Select if alarms shall be sent to the terminal.
Select if symbols shall be sent to the terminal.
Select if time channels shall be sent to the terminal.
Select if LED´s shall be sent to the terminal.
Select if message library shall be sent to the terminal.
Select if setup shall be sent to the terminal.
Select if function keys shall be sent to the terminal.
Select if password shall be sent to the terminal.
Delete
Download driver
Trend data:
Recipe data:
Never:
Always:
Automatic:
Delete all stored trend data in the terminal.
Delete all stored recipe data in tht terminal.
Driver will never be downloaded.
Driver will always be downloaded.
Driver will be downloaded to the terminal when the
driver in the terminal and the driver defined in the current project
are not the same.
Send
Transfer the project to the terminal according to current settings.
Receive
Verify
The PC software loads the project in the terminal. Current project in the PC software
will be overwritten.
Compares the project in the PC software with the project in the terminal.
Stop
Interrupt the transfer.
Settings
Transfer parameter settings. Must be the same as in the terminal. See the following
table.
Tab. 16-1: Parameter settings for project transfer
MAC E300
16 - 3
Project transfer
Transfer settings
The Communication Parameters menu
Fig. 16-3: Dialog box Communication Parameters
Parameter
Description
Use TCP/IP transfer
Select, if the project shall be transferred via TCP/IP.
Use serial transfer
Select this, if you will use serial transfer of the project.
Port
Baudrate
Select communication port.
Baudrate (bits/second).
Timeout
Number of milliseconds between retries.
Retries
Number of retries before the transfer is shut down.
Parity
Databits
Select type of parity control.
Select number of data bits. Must be 8 bits.
Stopbits
Select number of stop bits.
Speed set manually
User for communication via modem. You must set the baudrate in the terminal and PC
softwere manually and they must be the same.
Tab. 16-2: Setting menu
NOTE
16 - 4
Communication can fail if other programs are running under Windows at the same time as
the transfer takes place. Failure is avoided by shutting down the other programs.
During block transfer, links to relevant symbols are included. If the symbols are not transferred, problems may occur.
Pay attention to the connector assignment of the connecting cable MAC-PC-CAB-R2.
Defining security levels
17
Passwords
Passwords
This section describes how to use security levels and passwords in the terminal. This function
makes it possible to create a security system for the terminal. The operators can be given different accessibility to the system.
Blocks, function keys and maneuverable objects can be allocated a security level. Each security
level is given a password. The user must log in with a password for the security level concerned
or a higher one to gain access to the various levels. It is not essential to use this function.
17.1
Defining security levels
Blocks, function keys and maneuverable objects can, when they are defined, be allocated a security level. A security level (0 to 8) is given in the dialog box for the object. Everyone will have
access if the 0 security level is used.
17.2
Defining passwords
The password is defined for security levels 1 to 8 under Passwords in the View menu.
Fig. 17-1: Dialog box password
MAC E300
17 - 1
Passwords
Logging in
Parameter
Description
Login signal
State here the digital signal which when set generates the entry field for logging in. The
entry field for logging in can also be linked to a function key, see the Function keys section.
Logout signal
State here a signal which when set logs out the current user. This function can also be
linked to a function key, see the Function keys section.
Current level reg
State a register where the terminal put the current password level (0–8).
Login timeout
State here the time in minutes during which the terminal can remain unused before the
user is automatically logged out. If 0 is used no logging out takes place.
Password RUN→PROG
Here you can state a password which must be entered when switching from RUN to
PROG manually.
Password sec level
1–8
Enter the password and any comments for security levels 1–8.
Maneuvr confirm
Select if maneuvring should be confirmed by the operator.
Confirm question
Enter a question that should be confirmed by the operator before maneuvring is enabled.
Tab. 17-1: Parameter settings for passwords
17.3
Logging in
Logging in is either controlled from a function key or through a digital signal from the PLC system. The entry field for logging in is shown if the function key linked to the function LOGIN is
pressed or the digital signal is activated. State the password here. The password is linked to the
security level, see above.
17.4
Altering passwords in run-time mode
The password can be changed in run-time mode with the LOGSET function, see the Run-time
Mode section. The LOGSET function must be linked to a function key, see the Function keys section.
17 - 2
Selecting maneuverable objects
18
Run-time mode
Run-time mode
The function of the various objects in run-time mode is described in this section. These do not
respond to any menu option in run-time mode. Block 0 is automatically shown on the display
when switching to run-time mode.
The built-in key board is used to select and change values in run-time mode.
An error message is shown on the display if a communication fault should occur between the terminal and the PLC system. The terminal starts automatically when communication restarts.
18.1
Selecting maneuverable objects
The arrow keys are used to jump between maneuverable objects in graphic blocks. The choice
of object is according to the following principle: The cursor’s position is assumed to be the center
of a cross. Press the right arrow and the first object found in area A according to the diagram below is selected. Should the system not find an object in the narrow field on the right, it searches
in area a. The down arrow searches in areas B and b, the left arrow searches in areas C and c
and the up arrow searches in areas D and d.
c
D
d
A
C
b
Position of the cursor
B
a
Fig. 18-1: Choice of objects
MAC E300
18 - 1
Run-time mode
18.2
Maneuvering Graphicblocks
Maneuvering Graphicblocks
Move between the maneuverable objects with the arrow keys. Objects selected are highlighted
with a blinking frame.
18.2.1
Digital objects
Digital objects, text, symbol and filled objects, switch status when
[ENTER] is pressed. If the INC and DEC functions have been linked to function keys, the signal
linked to the object with these keys is set and reset respectively.
18.2.2
Analog objects
ASCII objects
Mark the object and enter the required text. Finish writing with [ENTER].
Multichoice objects
Place the cursor on the object and press [ENTER]. An option list is now shown with all the
maneuverable states. Move stepwise to the required state and press [ENTER].
Numerical objects
To maneuver numerical objects write in the value and press [ENTER].
Potentiometer objects
The object is maneuvered with the arrow keys by placing the cursor on the object and pressing
[ENTER]. The value can now be increased/decreased with the number that corresponds to the
setting ”Scale Ticks” in the object. End maneuvring with [ENTER].
The object can also be maneuvered with the INC and DEC functions on the condition that they
are linked to the function keys, see the Function keys section.
Bar object
The min/max indicators for bar objects can be set at the current value by pressing [ENTER].
18.2.3
Other objects
Digital clock
The digital clock can be altered by marking the object and giving the required time. Finish with
[ENTER].
NOTE
If you use the clock in the PLC system and you want to change it, this must be done in run
mode.
Jump object
Mark the object and press [ENTER].
18 - 2
Maneuvering Textblocks
18.3
Run-time mode
Maneuvering Textblocks
Textblocks consist of text lines with static and dynamic objects. The dynamic objects show the
current status for those signals to which the object is linked. Certain dynamic objects are maneuverable which means that you can change their status and values in run-time mode.
To alter a maneuverable object you use the arrow keys to move the cursor to the right position
so that the object is marked.
18.3.1
Digital objects
Digital objects are maneuvered by marking the required object. Then press [ENTER] to alter the
status of the object.
18.3.2
Analog objects
Analog and Date/Time
The objects are maneuvered by placing the cursor on the right object. After this the new value
is written in. Finish with [ENTER].
Before [ENTER] is pressed, new value entry can be aborted by leaving the field with [↑] or [↓].
The old value will then be retained.
Text objects
Maneuver a text object by moving to the object and pressing [ENTER]. Then an entry field is
shown. The entry field is either on the first or last line depending where the object is on the display. Scrolling of the entry field takes place if the text is longer than the width of the display. Press
[ENTER] when writing is complete.
Multichoice objects
Maneuver a multichoice object by moving to the object with the arrow keys and press [ENTER].
An option list is now shown with all maneuverable states on the display. Move to the required
state, press [ENTER] and the analog signal linked to this state are forcibly set.
Jump object
Move to the object and press [ENTER].
MAC E300
18 - 3
Run-time mode
18.4
Alarms
Alarms
Alarms are shown in the Textblock and Graphic blocks with the text ALARM in the upper righthand corner of the display (you can select not to have this during configuration).
The alarm is presented in an alarm list with the predefined alarm texts. The alarm list contains
the latest alarms which are listed according to alarm group according to definition and with the
latest alarm at the top of the list. The alarm list’s size in number of kbytes is selected during configuration. The alarm list is shown on jumping to the alarm block. The status for the alarm is also
shown for each alarm.
Alarms can have the following status.
Symbol
Status
*
Active, Not acknowledged
$
Not active, Not acknowledged
-
Active, Acknowledged
<blank>
Not active, Acknowledged
Tab. 18-1: Alarm status
To get to the alarm block you can either press [LIST] or define a jump to system block 990 in a
Textblock or allow the PLC system to produce a list via the Display signal for block 990.
To acknowledge an alarm place the cursor on the line where the alarm is and press [ACK].
Alarms can be printed out directly as they occur or change status if a printer is connected. This
should be stated when the alarm is defined. The alarm is printed out with date, time, status and
the alarm text.
Return to the previous block by pressing [PREV] in the terminal.
The current content of the alarm list can be printed out by giving the Printer signal for block 990.
18.4.1
Block linked to alarms
Text or graphic blocks can be linked to alarms. This means that when the operator press the
INFO key at an alarm in the alarm list a block linked to the alarm is shown. This block can contain
information about the alarm and reccomended actions. It is only possible to press the INFO key
if current alarm is linked to a block.
18 - 4
Graphic alarm page in run-time mode
18.5
Run-time mode
Graphic alarm page in run-time mode
The page is graphic and can be modified by the user. The function keys can be linked to the functions in order to enlarge or reduce the text on the alarm page as well as the function for flipping
through the pages. Furthermore there is the possibility to select the showing of date and time.
Alarms can be sorted into groups and you can select which group is to be shown. In E300 you
select alarm group with the arrow keys left and right.
Alarm symbol
Alarm message
Current alarm line
Alarm symbol
Leave the
alarm page
Decrease the Increase the
font size
font size
Show all
groups
Switch on / off
date / time stamp
Acknowledge
Fig. 18-2: Graphic alarm page
MAC E300
18 - 5
Run-time mode
18.6
Time channels
Time channels
The page with the time channels is shown when system block 991 is activated either through a
jump object or a digital signal linked to the block. The time channel’s values can be read and/or
changed. The option Time channels in the Online settings menu must be set to YES in order to
alter the time channel’s value in run-time mode.
To read or change values for a time channel you move the cursor to required line and press
[ENTER]. Press [DONE] to exit from the time channel’s definition. Exit from the time channel
menu with [PREV]. The block from which the time channel block was activated is then shown.
18.7
Passwords
Passwords can be altered in run-time mode with the LOGSET function. When the function key
linked to LOGSET is pressed a dialog is shown where the passwords for each security level can
be altered.
NOTE
18.8
It is not possible to state the security level for block 0.
Function keys
The digital signal linked to a function key is activated according to the function linked to the key
when it was defined.
According to the programming of the function key the signal linked to the funciton key is set or
reset when activated. The following settings are supported:
Momentary means that the signal is set as long as the key is active.
Toggle means that the signal is set and reset respectively when the key is activated.
Set means that the signal is set when the key is activated and remains set.
Reset means that the signal is reset when the key is activated and remains reset.
18.9
LEDs
The LEDs light according to the value of the analog register which is linked to the LED.
18 - 6
Modes
19
Using the keyboard
Using the keyboard
This section describes how the terminal is constructed as well as how the built-in keyboard is
used.
19.1
Modes
The terminal has three modes
● programming
● run-time
● configuration
Switch between programming, PROG, and run-time, RUN, by simultaneously pressing the [←]
and [MAIN] keys. The possibility to switch between PROG and RUN from the terminal can be
controlled via a password defined under Password settings. For more information see the chapter Programming using the PC software.
The configuration mode is reached by selecting PROG and pressing any key when the start-up
screen is shown.
The basic settings for such things as choice of PLC system, menu language, character set and
date and time format are made in the configuration mode.
The programming mode is the mode where the application is constructed. It is here you create
Text- and Graphic blocks, define the time channels, alarms, recipes and function keys. We recommend that the terminal is programmed using the PC software.
NOTE
Block 0 must be defined in the project in order to be able to run the application.
The application is monitored and run in the run-time mode. You can see how the various objects
change and also maneuver certain objects. This assumes that the terminal is connected to a
PLC system.
MAC E300
19 - 1
Using the keyboard
Keyboard
19.2
Keyboard
19.2.1
Keyfield
LED L1–L8
Labeling field
F3
F2
F1
7
8
9
4
5
6
1
2
3
-
0
.
F4
F5
List
F6
Labeling field
LED L9–L16
Function keys F1–F8
F8
F7
Alarm Ack
Ack
Main
Prev
←
↵
Main Menu (Block 0)
Enter
Backspace
Preview
List
Numeric keyfield
Fig. 19-1: Function keys MAC E300
Numerical keys
The numerical keys have several functions, A to Z as well as special characters which are
reached by pressing 1 to 5 times on a key. The time interval between the pressings can be set.
If the key is not pressed within the time interval the cursor is moved to the next prosition. The keys
C1-C4 is used for national characters.
Arrow keys
The arrow keys are used to move the cursor within a menu or dialog.
Built-in function keys
The [↵] key is used to confirm settings made and go on to the next line/level.
The [PREV] key is used to return to the previous block.
The [LIST] key is used to bring up the alarm list.
The [ACK] key is used to acknowledge an alarm in the alarm list.
The [MAIN] key is used to jump to block 0 in Run-time mode.
The [←] key is used to delete the character to the left of the cursor.
19 - 2
Help line
19.2.2
Using the keyboard
Key sequences
There are three key sequences in the terminal with the following functions.
Key sequence
Function
[←] [MAIN]
Switch between PROG and RUN.
[←] [F1]
Hold this combination pressed during start up to activate the mode for downloading of
system programs, see the Appendix section.
[←] [PREV]
Calls up the information page, see the Appendix section.
Tab. 19-1: Key sequences
19.3
Help line
There is a help line in the terminal which contains functions linked to the function keys located
directly under the line. The functions of the keys changes depending on which level is active. The
help lines are only shown in the programming mode.
Function
Description
NEXT
Used to go to the next level. Settings made are saved.
LEAVE
Return to the previous level.
TOGGLE
LIST
Switch alternately.
Show option list.
INSERT
Insert
DELETE
HELP OFF
Delete
Switch between showing and removing help line.
SELECT
Mark an object.
SNAP OFF/ON
SNAP ON means moving and size change in 8-pixel steps.
OFF = 1-pixel steps.
Create a new object.
NEWOBJ
PREVOBJ
Show previous object.
NEXTOBJ
EDITOBJ
Show the next object.
Edit an object.
DELOBJ
Delete an object.
MOVE
SIZE
Move an object.
Change the size of an object.
ENLARGE
Increase the character size in an object.
REDUCE
Decrease the character size in an object.
Tab. 19-2: Help line
19.4
Menu system
The terminal is based on a menu system which makes it easier for the user to write in to and monitor his system. The following general rule applies when selecting from menus:
Mark an object by moving the cursor to the object with the arrow keys and press [Next] in the help
line. You can scroll the text with the arrow keys if the Text-block holds more information than can
be shown on the display. Press [LEAVE] in the help line to exit from a menu.
MAC E300
19 - 3
Using the keyboard
19.5
Editing graphic objects
Editing graphic objects
The arrow keys are used when editing a graphic object to change the size of or move the object
in 8-pixel steps. Changing/moving pixelwise is done by pressing [SNAP OFF] in the help line.
To move stepwise through all the objects in the editing mode press the [SELECT] key followed
by [NEXTOBJ] in the help line. The object marked is inverted and the object type is shown in a
square.
When an object is marked press [EDITOBJ] to edit the object’s parameters, [DELOBJ] to erase
the object and [LEAVE] to return. Point to an object and press [MOVE] or [SIZE] and make the
changes with the arrow keys to move or change the size of the object.
Set the real time clock
The real time clock in the terminal is set under Setup, Date/Time format.
Select the alternative Set Terminal clock. The date and time is now displayed. Press [SET] to
change the settings. Enter required date and time. In the editing mode you move the cursor with
the arrow keys. Press [NEXT] to return or interrupt the editing before [ENTER] is pressed.
19.6
Set the real time clock
The real time clock in the terminal is set under Setup, Date/Time format.
Select the alternative Set Terminal clock. The date and time is now displayed. Press [SET] to
change the settings. Enter required date and time. In the editing mode you move the cursor with
the arrow keys. Press [NEXT] to return or interrupt the editing before [ENTER] is pressed.
19 - 4
Modem transfer
20
Modem transfer
Sample configuration
A series
Modem
MAC E series
PC
Modem
Fig. 20-2: Sample configuration
AT commands
Command
Description
AT
&F
"Attention". Inform the modem that a command follows. Each command shall be preceded
by "AT".
Load factory settings.
Q1
Command answer off
&D0
Ignore the DTR signal
\N1
S0=1
Flow control disabled
Automatic answer after 1 ring
&W
Save settings
Tab. 20-3: AT commands
Note the following hints:
● Since not all modems use the same AT commands, for the initialization you should refer to
your modem manual.
● If you do not disable the flow control, the communication might abort when transferring
drivers.
MAC E300
20 - 1
Modem transfer
Initializing the modem
On PC: AT &F &D0 \N1 &W (for ELSA 28.8 TQV only)
On terminal: AT &F &D0 \N1 Q1 S0=1 &W
Fig. 20-3: Initializing the modem
Connecting cable (modem to MAC E series)
Modem 25-pin
2
3
7
8
4
5
6
20
2
3
5
7
MAC 9-pin
Fig. 20-4: Connecting cable
Connecting cable (modem to PC)
Use the standard modem cable provided by the modem manufacturer.
Connect
The connect can be established via a terminal program (e.g. Windows HyperTerminal).
20 - 2
Modem transfer
Communication parameters
Set the communication parameters in the "Transfer/Comm.settings".
Fig. 20-5: Dialog box Communication Parameters
NOTE
For the transfer of a MP+ program to the terminal via modem the terminal must be switched
to the transfer mode manually. In addition, activate "Speed set manually" in the communication parameters.
Please note: The option "Automatic terminal RUN/TRANSFER switching" must be activated.
Fig. 20-6: Dialog box Project Transfer
MAC E300
20 - 3
Modem transfer
If you intend to use the function "Automatic terminal RUN/TRANSFER switching", you must set
a baud rate of 2400 baud (throughout the entire modem connection).
The option "Speed set manually" must not be activated
Fig. 20-7: „Speed set manually“ must not be activated
For this function "Automatic terminal RUN/TRANSFER switching" must be activated.
Fig. 20-8: "Automatic terminal RUN/TRANSFER switching" must be activated
20 - 4
Settings in the terminal
21
Connection to an Allen Bradley PLC system
Connection to an Allen Bradley
PLC system
This chapter describes how to connect an Allen Bradley PLC system to the terminals in the E series and how they communicate. Addressing of an item in the Allen Bradley PLC system is done
in the normal Allen Bradley way. It is not possible to maneuver outputs in some PLC systems because they are write protected. For information about Allen Bradley systems we refer to the documentation for the current system.
The terminal supports the following PLC systems
● PLC5 supporting The DF1 commands Protected read/write with 3 address fields.
● SLC 500 series
● MicroLogix 1000 series
21.1
Settings in the terminal
For communication with Allen Bradley PLC systems the following settings must be made in the
terminal.
Project settings
When the project is defined you select which PLC system the terminal should be connected to.
Select Allen Bradley DF1 if you will use an Allen Bradley PLC system.
Port parameters
Parameter
Settings
Port
Baudrate
RS422/RS232
600–19200
Data bits
8
Stop bits
1
Parity
Remote node
None
1, can be changed. For further information we refer to the documentation from Allen
Bradley DF1 node number of the PLC system.
This node
0, can be changed. For further information we refer to the documentation from Allen
Bradley DF1 node number of the terminal.
Tab. 21-1: Port parameter settings
MAC E300
21 - 1
Connection to an Allen Bradley PLC system
21.2
Communication protocol
Communication protocol
The Allen Bradley communication protocol DF1 is used. The communication is full duplex. The
terminal sends commands to the PLC system but does not answer any commands from the PLC
system.
Terminal settings
● Port parameters, see above.
Settings in the PLC system
● CRC-16 check sum
● Full duplex
21.3
Addressing
The Allen Bradley PLC system consists of a number of data files identified by a letter (identifier)
and a file number. File numbers 0 to 7 are the default files created by the PLC. Additional storage
may be appended by specifying the appropriate identifier and a file number from 9 to 255. Identifier B (bit), T (Timer), C (Counter), R (Control) and N (Integer) can be defined.
File type
Identifier
File number
Output
O
0
Input
I
1
Status
S
2
Bit
B
3
Timer
T
4
Counter
C
5
Control
R
6
Integer
N
7
Identifier
File number
Tab. 21-2: Default files
File type
Bit
B
Timer
T
Counter
C
Control
D
Integer
N
Tab. 21-3: Additional files
21.3.1
Addressing example
The general format in addressing
N7:15
N=file type, 7=file number, :=element delimiter, 15=element
21 - 2
9–255
Addressing
Connection to an Allen Bradley PLC system
Addressing words in an element
T4:15.1
T=file type, 4=file number, :=element delimiter, 15=element, .=word delimiter, 1=word
Addressing bits in an element
T4:15/1
T=file type, 4=file number, :=element delimiter, 15=element, /=bit delimiter, 1=bit
Addressing combinations of words and bits
I1:0.1/5
I=file type, 1=file number, :=element delimiter, 0=element number, .=word delimiter, 1=word,
/=bit delimiter, 5=bit
For further information we refer to the manual for the appropriate PLC system.
21.3.2
Syntax for addressing
Inputs
Inputs are addressed as elements in the input file independent of in which slot the input unit is
placed. The element number is the same as the word number in the file. Bit is the same as the
bit number in the element. Word is not used.
Example 왓
PLC SLC 500 with a 2-slot expansion unit equipped with a 16 output card in the first slot and
an 8 input card in the second slot. In this case the input file will look like this:
I0: 0000000000 element 0
I2: 00000000 element 1
Slot one is omitted in the input file. The address for input bit 4 in slot 2 will be I:1/4, element 1, bit 4.
왕
Outputs
Outputs are addressed as elements in the output file independent of in which slot the output unit
is placed. The element number is the same as the word number in the file. Bit is the bit number
in the element. Word is not used.
Example 왓
PLC SLC 500 with a 2-slot expansion unit equipped with an 8 input card in the first slot and
a 16 output card in the second slot. In this case the input file will look like this:
O0: 00000000 element 0
O2: 0000000000000000 element 1
Slot one is omitted in the input file. The address for ouput bit 12 in slot 2 will be O:1/12, element 1, bit 12.
왕
System and integer
The element number for these files is the same as the word number in the file. Bit addressing is
allowed. Word parameter is not allowed.
MAC E300
21 - 3
Connection to an Allen Bradley PLC system
Addressing
Binary
In this file the element number is the same as the word number in the file. Bit number must always
be included. It is possible to write a greater value than 15 as the bit if the element number is omitted. In this case it is possible to address a bit direct. For example B3/100. Bit addressing is allowed. Word parameter is not allowed.
Timers, Counters and Control
An element in these files consists of three words. Valid syntax according to addressing examples
2 and 4. Predefined mnemomics may be used instead of numbers on words and bits. For further
information about mnemonics we refer to the Allen Bradley manuals.
21 - 4
Connection to PLC
21.4
Connection to an Allen Bradley PLC system
Connection to PLC
The connection is of the type “point-to-point” master/slave. The PLC system is connected to one
of the communication ports of the terminal via a cable (see specification below) or modem.
Terminal
DF1
Allen Bradley
PLC system
Fig. 21-1: Connection to Allen Bradley PLC system
21.4.1
MicroLogix
Connect the Allen Bradley 1761-CBL-PM02 cable to the PLC system. A special cable must be
connected between the cable and the terminal. The special cable looks like this.
9-pol D-sub female
9-pol D-sub male
2
3
3
2
5
5
Fig. 21-2: Wiring of the connection cable
To use transparent mode, the PC used for programming must be connected to the 25 pol connector on the terminal via a RS422/RS485 modem.
21.4.2
RS232-C/DH485 interface, 1747-KE (SLC series)
The 1747-KE module is neccessary when using a SLC 500, SLC 5/01 or SLC 5/02 processor.
There is a DF1 connector on the CPU units SLC 5/03 and SLC 5/4, but it is recommended to use
the 1747-KE module. The 1747-C13 cable from Allen Bradley is connected between the DH485
connector on the PLC system and the DH485 connector on the 1747-KE module.
The standard cable MAC-PC-CAB-R2 is connected between the RS232 connector on the terminal and the DF1 connector on the 1747-KE module.
NOTE
MAC E300
Transparent mode is not possible when this module is used.
21 - 5
Connection to an Allen Bradley PLC system
21 - 6
Connection to PLC
System configuration
Appendix
A
Appendix
A.2
System configuration
A.2.1
Erasing the memory
You will find the function Erase memory in the Setup menu. The function erase the terminal’s application memory. All blocks and definitions of alarms, time channels, function keys and system
signals are erased.
Parameter
Description
Enter
The memory is erased. The configuration menu is shown automatically when the erasure is
completed.
Prev
Return to the previous level without erasing the memory.
Tab. 22-1: Erasing the memory
NOTE
MAC E300
All data stored in the terminal is lost when the memory is erased. The language parameter
are not affected by this function. Other parameters are erased or allocated the default setting
values.
A-1
Appendix
A.2.2
System configuration
Downloading the system program
The terminal has a system program (operative system) which is stored in the terminal’s memory
when delivered. The system program can be exchanged, for example when updating to newer
versions. The following is required to transfer the system program to the terminal:
● Personal computer
● PC software ↔ E300 programming cable
● PC software package HMI Tools
(included on the MAC Programmer+ program CD)
● File with the new system program (e.g. E300V4xx.BIN)
Transfer in the following steps:
햲 Connect the cable between the personal computer and the terminal (RS232C).
햳 In E300 you hold the [←] and [F1] keys pressed on start up. A LED should then blink green
and the screen should be off. There are no settings required on the E300.
햴 Start The personal computer program is started when you double click on the icon Sysload
in the program group HMI Tools.
햵 Set the communication settings (Options/Comm.settings).
Fig. 21-3:
Dialog box "Settings" set to
COM2 and 19200 Baud
A-2
System configuration
Appendix
햶 Select the suitable system program.
Abb. 21-4: Example: Selected file "E300V403.BIN"
햷 Click on the "Send" button to transfer the new system program to the terminal.
MAC E300
A-3
Appendix
A.2.3
System configuration
Information page
The terminal contains an information page. The information page is activated by simultaneously
pressing the [←] and [PREV] keys in run mode.
Abb. 21-5: Information page
Parameter
Description
STARTS
Number of times the terminal has been started.
RUN
BL
Number of hours the terminal has been in operation.
Number of hours the backlighting has been switched on.
DYNAMIC MEMORY
Free RAM memory (working memory).
FLASH MEMORY
FLASH ERASE CNT
Free Flash memory (project memory).
Number of times each sector of the Flash memory has been erased.
ALARMS
Number of alarms and alarm groups in the application.
TRENDS
Number of trend IO and trend objects in the application.
RECIPES
DIGITAL IOs
Number of production methods in the application.
Number of digital IOs monitored continuously (static) and number in the current block
(monitor).
ANALOG IOs
Number of analog IOs monitored continuously (static) and number in the current block
(monitor)
IO POLL
Time in ms between two readings of the same IO. Current value, min. time and max.
time.
TIMEOUT
CHKSUM
Number of time-outs in the communication.
Number of check sum errors in the communication.
BYTEERR
Number of byte errors in the communication.
FRAME
OVERRUN
Number of frame errors in each port.
Number of transfer writing errors in each port.
PARITY
Number of parity errors in each port. 1 = RS422 port and 2 = RS232 port.
Tab. 22-2: Parameters of information page
A-4
System configuration
A.2.4
Appendix
Contrast settings
The contrast settings can be made in programming mode in the meny
Setup, Contrast settings or in run-time mode via a jump to the system block 997.
Programming mode
Select Contrast settings in the Setup menu in the terminal. Pressing F5 makes the display
brighter and pressing F6 makes the display darker.
Return to previous level by pressing F7.
Run-time mode
In Run-time mode you make the contrast settings in system block 997.
The settings are made as in Programming mode.
A.2.5
Project memory
The project memory in the terminal is 128 kbytes. These bytes can be freely assigned to different
functions. Information about free memory available is presented on the information page.
MAC E300
A-5
Appendix
A.3
Glossary
Glossary
Alarm group
Alarms can be sorted into groups; e.g. by danger levels.
Alarm handling
Function for detection and presentation of alarms.
Alarm list
A list presenting active, acknowledged and unacknowledged alarms.
Alarm message
Freely defined text linked to a signal that is displayed in the alarm list.
Block
Screens in the MAC/MTA terminal are called blocks. A project is composed of blocks arranged
hierarchically or sequentially.
Block head
Contains the basic definitions of a block.
Block number
The number of a block in the terminal. Can be between 0 and 999.
Block type
There are two types of blocks, graphic and text. Graphic blocks are used to create operator dialogs. Text blocks are used to create reports etc.
Communication port
Communication connections.
Configuration mode
All basic settings for the terminal is made in the configuration mode.
Control block
Number of data registers in the PLC system controlling the communication.
Data type
Type of signal in the PLC system, e.g. input, output, register and memory cell.
Dynamic object
Objects connected to signals in the PLC system.
Fieldbus
Network for vendor-independent communication.
Function key
Key connected to a signal in the PLC system. The signal is affected when the key is pressed.
Graphic block
Blocks created by graphic objects.
A-6
Glossary
Appendix
Historic trending
Analog values from the PLC system are stored in the terminal and presented in a trend object
during run mode.
MAC Programmer+/SW-MTA-WIN
Programming tool for a PC with Windows. The terminals are programmed via the PC software.
Manoeuvring
Manoeuvring means that objects can be affected in run mode.
Master
The master in the network controls the communication.
Menu tree
A project can be built up as a menu tree with one block as an overview and blocks underneath
containing detailed information.
Network
Several connected units which can communicate with each other.
No protocol mode
For communication with external units e.g. bar code readers.
Object
A project is built up with objects. There are predefined objects such as VU meter, bar graph,
trend object and diagram object.
Object oriented work methods
Everything in the terminal is based on objects. The user selects the objects function. All signals
are defined this way.
Operator screen
A screen in the terminal from which the operator supervises/maneuvers the application. A
project normally contains of several operator screens, blocks.
Password
The operator must use a password, to gain access to a block or object. The password can be
connected to blocks and manoeuvrable objects.
PROFIBUS
Vendor-independent communication protocol for communication with PLC systems.
Programming mode
The terminal is programmed in the programming mode.
Project
One project is built up with blocks.
Real time clock
The terminal contains a real time clock.
MAC E300
A-7
Appendix
Glossary
Recipe handling
Function for storing and re-using parameter settings.
Report printout
Via textblocks printouts can be generated; for example, production follow up.
RS-232
Communication interface
RS-485
Communication interface
Run mode
The mode in which the project is running with the PLC system.
Scaling
Scaling of register values to engineering units.
Security level
Block and manoeuvrable object can be assigned a security level. This means that the user must
enter a password to be able to maneuver the object.
Sequence control
A project can be built up as a sequence where the blocks are displayed in a predefined order.
Change of blocks is normally controlled by the PLC system.
Signal format
A suffix added to the signal presenting double register, rounded-off values and/or only positive
values.
Slave
A communication network consists of a master and one or more slaves. The slave follows instructions from the master.
Static graphic object
Objects used to draw static graphic, lines, circles and rectangles etc.
Static text
Text in the block that will not be changed during program execution.
Status word
Affect the look of the display in run-time mode.
Status
The value of the signal in the PLC system is shown on the display.
Symbols
Pictures in BMP format can be created, imported and exported.
System block
Reserved blocks in the terminal used for the alarm list, time channels and function keys etc.
A-8
Glossary
Appendix
Time control
Possibility to control signals related to the real-time clock.
Transparent mode
Communication method. Means that, for example, the PLC system can be programmed from a
PC with the programming tool at the same time as the terminal is connected to the PLC system.
MAC E300
A-9
Appendix
A - 10
Glossary
INDEX
A
E
Alarm . . . . . . . . . . . . . . . . . . . . . . . . . . . . . . 7 - 1
Alarm list . . . . . . . . . . . . . . . . . . . . . . . 4 - 21
Define alarm group . . . . . . . . . . . . . . . . . 7 - 2
Define alarm list . . . . . . . . . . . . . . . . . . . 7 - 4
Define alarm message . . . . . . . . . . . . . . 7 - 3
Maneuvering . . . . . . . . . . . . . . . . . . . . 18 - 4
Alarm banner . . . . . . . . . . . . . . . . . . . . . . . 6 - 22
Alarm group . . . . . . . . . . . . . . . . . . . . . . . . . 7 - 2
Alarm message . . . . . . . . . . . . . . . . . . . . . . 7 - 3
Allen Bradley PLC system
Addressing . . . . . . . . . . . . . . . . . . . . . . 21 - 2
Connection . . . . . . . . . . . . . . . . . . . . . . 21 - 1
Analog signals . . . . . . . . . . . . . . . . . . . . . . . 3 - 6
Application . . . . . . . . . . . . . . . . . . . . . . . . . . 6 - 1
AT-Befehle . . . . . . . . . . . . . . . . . . . . . . . . . 20 - 1
E300 as communication interface . . . . . . . . 15 - 4
Editing graphic objects . . . . . . . . . . . . . . . . 19 - 4
Erasing memory. . . . . . . . . . . . . . . . . . . . . 22 - 1
Expansion card . . . . . . . . . . . . . . . . . . . . 15 - 11
F
Function keys . . . . . . . . . . . . . . . . . . . . . .
Define . . . . . . . . . . . . . . . . . . . . . . . . .
Global . . . . . . . . . . . . . . . . . . . . . . . . .
Jump to block . . . . . . . . . . . . . . . . . . .
Local . . . . . . . . . . . . . . . . . . . . . . . . . .
Maneuvering . . . . . . . . . . . . . . . . . . . .
12 - 1
12 - 1
12 - 1
12 - 4
12 - 1
18 - 6
G
B
Clock . . . . . . . . . . . . . . . . . . . . . . . . . . . . . 6 - 23
Command line . . . . . . . . . . . . . . . . . . . . . . 4 - 18
Communication . . . . . . . . . . . . . . . . . . . . . . 3 - 2
Communication configurations . . . . . . . . . . . 15 - 1
Communication with a PC . . . . . . . . . . . . . . 15 - 1
Communictaion with two terminals . . . . . . . . 15 - 2
Configuration mode. . . . . . . . . . . . . . . . . . . . 1 - 5
Connecting cable . . . . . . . . . . . . . . . . . . . . 20 - 2
Contrast settings. . . . . . . . . . . . . . . . . . . . . 22 - 5
Gain . . . . . . . . . . . . . . . . . . . . . . . . . . . . . . 3 - 9
Graphic alarm page . . . . . . . . . . . . . . . . . . 18 - 5
Graphic blocks . . . . . . . . . . . . . . . . . . . . . . . 3 - 3
Graphic objects
Alarm banner . . . . . . . . . . . . . . . . . . . . 6 - 22
Analog . . . . . . . . . . . . . . . . . . . . . . . . . 6 - 5
Analog clock . . . . . . . . . . . . . . . . . . . . 6 - 24
ASCII object . . . . . . . . . . . . . . . . . . . . 6 - 10
Bar graph . . . . . . . . . . . . . . . . . . . . . . 6 - 17
Diagram . . . . . . . . . . . . . . . . . . . . . . . 6 - 11
Digital . . . . . . . . . . . . . . . . . . . . . . . . . . 6 - 4
Digital clock . . . . . . . . . . . . . . . . . . . . . 6 - 23
Digital symbol . . . . . . . . . . . . . . . . . . . . 6 - 7
Digital text . . . . . . . . . . . . . . . . . . . . . . . 6 - 8
Filled object . . . . . . . . . . . . . . . . . . . . . . 6 - 9
Jump . . . . . . . . . . . . . . . . . . . . . . . . . . 6 - 20
Multiple choice . . . . . . . . . . . . . . . . . . . 6 - 12
Multisymbol . . . . . . . . . . . . . . . . . . . . . 6 - 13
Numeric . . . . . . . . . . . . . . . . . . . . . . . 6 - 14
Slide . . . . . . . . . . . . . . . . . . . . . . . . . . 6 - 15
Speedometer . . . . . . . . . . . . . . . . . . . . 6 - 16
Trend . . . . . . . . . . . . . . . . . . . . . . . . . 6 - 18
VU meter . . . . . . . . . . . . . . . . . . . . . . . 6 - 19
Graphic presentation . . . . . . . . . . . . . . . . . . 6 - 1
D
H
Date format . . . . . . . . . . . . . . . . . . . . . . . . 4 - 19
Define block header, . . . . . . . . . . . . . . . . . . . 4 - 6
Diagram . . . . . . . . . . . . . . . . . . . . . . . . . . . 6 - 11
Digital signals . . . . . . . . . . . . . . . . . . . . . . . . 3 - 6
Help line . . . . . . . . . . . . . . . . . . . . . . . . . . 19 - 3
Hierarchy of menus . . . . . . . . . . . . . . . . . . . 6 - 1
HMI Tools . . . . . . . . . . . . . . . . . . . . . . . . . 22 - 2
Backlight . . . . . . . . . . . . . . . . . . . . . . . . . . 4 - 16
Bar graph . . . . . . . . . . . . . . . . . . . . . . . . . . 6 - 17
Block . . . . . . . . . . . . . . . . . . . . . . . . . . . . . . 3 - 5
Create . . . . . . . . . . . . . . . . . . . . . . . . . . 4 - 4
Edit . . . . . . . . . . . . . . . . . . . . . . . . . . . 4 - 12
Programming . . . . . . . . . . . . . . . . . . . . 4 - 11
Block changes . . . . . . . . . . . . . . . . . . . . . . . 3 - 2
Block header . . . . . . . . . . . . . . . . . . . . . . . 4 - 11
Block Manager
Settings . . . . . . . . . . . . . . . . . . . . . . . . . 4 - 9
C
MAC E300
i-i
I
P
Index addressing . . . . . . . . . . . . . . . . . . . . . 3 - 8
Index register . . . . . . . . . . . . . . . . . . . . . . . . 3 - 8
Information page. . . . . . . . . . . . . . . . . . . . . 22 - 4
Passwords. . . . . . . . . . . . . . . . . . . . . . . . . 17 - 1
Alter . . . . . . . . . . . . . . . . . . . . . . . . . . 17 - 2
Change . . . . . . . . . . . . . . . . . . . . . . . . 17 - 2
Define . . . . . . . . . . . . . . . . . . . . . . . . . 17 - 1
Logging in . . . . . . . . . . . . . . . . . . . . . . 17 - 2
Maneuvering . . . . . . . . . . . . . . . . . . . . 18 - 6
Security levels . . . . . . . . . . . . . . . . . . . 17 - 1
PLC signals . . . . . . . . . . . . . . . . . . . . . . . . . 3 - 2
PLC system . . . . . . . . . . . . . . . . . . . . . . . . . 4 - 2
Profibus-DP . . . . . . . . . . . . . . . . . . . . . . . 15 - 11
Programming mode . . . . . . . . . . . . . . . . . . . 1 - 5
Project
Close . . . . . . . . . . . . . . . . . . . . . . . . . 4 - 12
Create . . . . . . . . . . . . . . . . . . . . . 4 - 1, 4 - 12
Open . . . . . . . . . . . . . . . . . . . . . . . . . . 4 - 12
Programming . . . . . . . . . . . . . . . . . 3 - 1, 4 - 1
Save . . . . . . . . . . . . . . . . . . . . . . . . . . 4 - 12
Transfer . . . . . . . . . . . . . . . . . . 4 - 24, 16 - 1
Project memory . . . . . . . . . . . . . . . . . . . . . 22 - 5
J
Jump to block . . . . . . . . . . . . . . . . . . . . . . . 12 - 4
K
Key board . . . . . . . . . . . . . . . . . . . . . . . . . 19 - 2
Keyfield . . . . . . . . . . . . . . . . . . . . . . . . . . . 12 - 4
L
LEDs . . . . . . . . . . . . . . . . . . . . . . . . . . . . .
Define . . . . . . . . . . . . . . . . . . . . . . . . .
Maneuvering . . . . . . . . . . . . . . . . . . . .
Levels . . . . . . . . . . . . . . . . . . . . . . . . . . . .
11 - 1
11 - 1
18 - 6
. 3-3
M
MAC Programmer+ . . . . . . . . . . . . . . . . . . . . 4 - 1
Edit menu. . . . . . . . . . . . . . . . . . . . . . . 4 - 12
File menu . . . . . . . . . . . . . . . . . . . . . . . 4 - 12
Functions menu . . . . . . . . . . . . . . . . . . 4 - 15
Setup menu . . . . . . . . . . . . . . . . . . . . . 4 - 16
Transfer menu . . . . . . . . . . . . . . . . . . . 4 - 24
View menu . . . . . . . . . . . . . . . . . . . . . . 4 - 13
Maneuverable objects . . . . . . . . . . . . . . . . . 18 - 1
Maneuvering graphicblocks . . . . . . . . . . . . . 18 - 1
Maneuvering textblocks. . . . . . . . . . . . . . . . 18 - 3
MELSEC MEDOC. . . . . . . . . . . . . . . . . . . . 15 - 2
Menu structure . . . . . . . . . . . . . . . . . . . . . . . 3 - 3
Menu system . . . . . . . . . . . . . . . . . . . . . . . 19 - 3
Message library . . . . . . . . . . . . . . . . . . . . . 14 - 1
Message object . . . . . . . . . . . . . . . . 5 - 10, 6 - 21
Method for programming . . . . . . . . . . . . . . . . 3 - 1
Modem transfer . . . . . . . . . . . . . . . . . . . . . 20 - 1
Modes . . . . . . . . . . . . . . . . . . . . . . . . . . . . 19 - 1
Multiple choice . . . . . . . . . . . . . . . . . . . . . . 6 - 12
N
No protocol mode . . . . . . . . . . . . . . . . . . . . 15 - 4
O
Offset . . . . . . . . . . . . . . . . . . . . . . . . . . . . . . 3 - 9
i - ii
R
Real-time clock . . . . . . . . . . . . . . . . . . . . . 13 - 2
Recipe . . . . . . . . . . . . . . . . . . . . . . . . . . . 10 - 1
Create . . . . . . . . . . . . . . . . . . . . . . . . . 10 - 3
Erase . . . . . . . . . . . . . . . . . . . . . . . . . 10 - 4
Files . . . . . . . . . . . . . . . . . . . . . . . . . . 10 - 1
Transfer . . . . . . . . . . . . . . . . . . . . . . . 10 - 3
Via the PLC-program . . . . . . . . . . . . . . 10 - 8
Register type . . . . . . . . . . . . . . . . . . . . . . . . 3 - 7
Report print-outs . . . . . . . . . . . . . . . . . . . . . 9 - 1
Define printout . . . . . . . . . . . . . . . . . . . . 9 - 1
Port parameters . . . . . . . . . . . . . . . . . . . 9 - 4
Printer settings . . . . . . . . . . . . . . . . . . . . 9 - 3
Reserved characters . . . . . . . . . . . . . . . . . . 3 - 9
Run mode . . . . . . . . . . . . . . . . . . . . . . . . . . 1 - 5
S
Scaling . . . . . . . . . . . . . . . . . . . . . . . . . . . . 3 - 9
Security level . . . . . . . . . . . . . . . . . . . . . . . 17 - 1
Define . . . . . . . . . . . . . . . . . . . . . . . . . 17 - 1
Password . . . . . . . . . . . . . . . . . . . . . . 17 - 1
Signal format . . . . . . . . . . . . . . . . . . . . . . . . 3 - 6
Slide . . . . . . . . . . . . . . . . . . . . . . . . . . . . . 6 - 15
Speedometer . . . . . . . . . . . . . . . . . . . . . . . 6 - 16
Switch between RUN/PROG . . . . . . . . 1 - 5, 19 - 1
SW-MTA-WIN . . . . . . . . . . . . . . . . . . . . . . . 4 - 1
Edit menu . . . . . . . . . . . . . . . . . . . . . . 4 - 12
File menu . . . . . . . . . . . . . . . . . . . . . . 4 - 12
Functions menu . . . . . . . . . . . . . . . . . . 4 - 15
Setup menu . . . . . . . . . . . . . . . . . . . . . 4 - 16
Transfer menu . . . . . . . . . . . . . . . . . . . 4 - 24
View menu . . . . . . . . . . . . . . . . . . . . . 4 - 13
Symbol handling . . . . . . . . . . . . . . . . . . . . .
System blocks . . . . . . . . . . . . . . . . . . . . . .
System program . . . . . . . . . . . . . . . . . . . . .
System signals . . . . . . . . . . . . . . . . . . . . . .
4 - 13
. 3-5
22 - 2
4 - 16
T
Terminal options . . . . . . . . . . . . . . . . . . . . . 4 - 20
Textblocks . . . . . . . . . . . . . . . . . . . . . . . . . . 3 - 3
Textobjects
Analog object . . . . . . . . . . . . . . . . . . . . . 5 - 4
Bargraph object . . . . . . . . . . . . . . . . . . . 5 - 8
Date/time object . . . . . . . . . . . . . . . . . . . 5 - 5
Digital object. . . . . . . . . . . . . . . . . . . . . . 5 - 5
Dynamic . . . . . . . . . . . . . . . . . . . . . . . . . 5 - 3
Jump object . . . . . . . . . . . . . . . . . . . . . . 5 - 7
Message . . . . . . . . . . . . . . . . . . 5 - 10, 6 - 21
Multiple choice object . . . . . . . . . . . . . . . 5 - 6
Text object . . . . . . . . . . . . . . . . . . . . . . . 5 - 9
Time channels . . . . . . . . . . . . . . . . . . . . . . 13 - 1
Define . . . . . . . . . . . . . . . . . . . . . . . . . 13 - 1
Maneuvering . . . . . . . . . . . . . . . . . . . . 18 - 6
Time control . . . . . . . . . . . . . . . . . . . . . . . . 13 - 1
Time format . . . . . . . . . . . . . . . . . . . . . . . . 4 - 19
Time object . . . . . . . . . . . . . . . . . . . . . . . . . 5 - 5
Tool box . . . . . . . . . . . . . . . . . . . . . . . . . . . 4 - 11
Transfer
Project . . . . . . . . . . . . . . . . . . . . . . . . . 16 - 1
Transparent mode . . . . . . . . . . . . . . . . . . . 15 - 1
Trend . . . . . . . . . . . . . . . . . . . . . . . . . 6 - 18, 8 - 1
Trend object . . . . . . . . . . . . . . . . . . . . . . 8 - 1
V
VU-meter . . . . . . . . . . . . . . . . . . . . . . . . . . 6 - 19
W
Working area . . . . . . . . . . . . . . . . . . . . . . . 4 - 11
MAC E300
i - iii
i - iv
MITSUBISHI ELECTRIC
Headquarters
European Representatives
EUROPE
MITSUBISHI ELECTRIC EUROPE B.V.
Gothaer Str. 8
D-40880 Ratingen
GERMANY
Phone: +49 (0) 2102/486-0
Fax:
+49 (0) 2102/486-112
ITALY
MITSUBISHI ELECTRIC EUROPE B.V.
C.D. Colleoni - P. Perseo Ing. 2, Via Paracelso 1
I-20041 Agrate Brianza (MI)
ITALY
Phone: +39 (0)39 60 53 1
Fax:
+39 (0) 39 60 53 312
JAPAN
MITSUBISHI ELECTRIC CORPORATION
Mitsubishi Denki Bldg., 2-2-3 Marunouchi
Tokyo 100-8310
JAPAN
Phone: +81 (0) 3/32 18 31 76
Fax:
+81 (0) 3/32 18 24 22
SPAIN
MITSUBISHI ELECTRIC EUROPE B.V.
Carretera de Rubi 76-80
E-08190 Sant Cugat del Vallés (Barcelona)
SPAIN
Phone: +34 9 3/565 31 31
Fax:
+34 9 3/589 29 48
UK
MITSUBISHI ELECTRIC EUROPE B.V.
Travellers Lane
GB-Hatfield Herts. AL10 8 XB
UK
Phone: +44 (0) 1707/27 61 00
Fax:
+44 (0) 1707/27 86 95
USA
MITSUBISHI ELECTRIC AUTOMATION INC.
500, Corporate Woods Parkway
Vernon Hills, Illinois 60061
USA
Phone: +1 (0) 847/478 21 00
Fax:
+1 (0) 847 / 478 22 83
GEVA
Wiener Straße 89
A-2500 Baden
Phone: +43 (0) 2252 / 85 55 20
Fax:
+43 (0) 2252 / 488 60
AUSTRIA
Beijer Electronics AS
Teglverksveien 1
N-3002 Drammen
Phone: +47 32 / 24 30 00
Fax:
+47 32 / 84 85 77
N.V. GETRONICS Belgium S.A.
Pontbeeklaan 43
B-1731 Asse-Zellik
Phone: +32 (0) 2 / 467 17 51
Fax:
+32 (0) 2 / 467 17 45
BELGIUM
MPL Technology Sp. z o.o.
ul. Wroclawska 53
PL-30-011 Kraków
Phone: +48 (0) 12 / 632 28 85
Fax:
+48 (0) 12 / 632 47 82
TELECON CO.
4, A. Ljapchev Blvd.
BG-1756 Sofia
Phone: +359 2 97 44 05 8
Fax:
+359 2 97 44 06 1
BULGARIA
NORWAY
POLAND
ROMANIA
Sirius Trading & Services srl
Bd. Ghica nr. 112, Bl. 41, Sc.2, ap. 98
RO-72235 Bucuresti 2
Phone: +40 (0) 1 / 210 55 11
Fax:
+40 (0) 1 / 210 55 11
INEA CR d.o.o.
Drvinje 63
HR-10000 Zagreb
Phone: +385 (0) 1 / 366 71 40
Fax:
+385 (0) 1 / 366 71 40
CROATIA
Mitsubishi Electric Europe B.V.
12/1 Goncharnaya St, suite 3C
RUS-109240 Moscow
Phone: +7 (0) 95 / 915-8624/02
Fax:
+7 (0) 95 / 915-8603
RUSSIA
AutoCont Control Systems s.r.o.
Nemocnicni 12
CZ-702 00 Ostrava 2
Phone: +420 (0) 69 / 615 21 11
Fax:
+420 (0) 69 / 615 21 12
CZECHIA
NPP Uralelektra
Sverdlova 11A
RU-620027 Ekaterinburg
Phone: +7 (34 32) 53 27 45
Fax:
+7 (34 32) 53 24 61
RUSSIA
louis poulsen
Geminivej 32
DK-2670 Greve
Phone: +45 (0) 43 / 95 95 95
Fax:
+45 (0) 43 / 95 95 91
DENMARK
ACP AUTOCOMP a.s.
Chalupkova 7
SK-81109 Bratislava
Phone: +421 (0) 7 592 2248
Fax:
+421 (0) 7 592 2254
SLOVAKIA
UTU ELEKTROTEHNIKA AS
Pärnu mnt.160i
EE-11317 Tallinn
Phone: +372 6 / 51 72 80
Fax:
+372 6 / 51 72 88
ESTONIA
INEA d.o.o.
Ljubljanska 80
SI-1230 Domzale
Phone: +386 (0) 17 21 80 00
Fax:
+386 (0) 17 24 16 72
SLOVENIA
Beijer Electronics OY
Elannontie 5
FIN-01510 Vantaa
Phone: +358 (0) 9 / 615 20 11
Fax:
+358 (0) 9 / 615 20 500
FINLAND
Beijer Electronics AB
Box 325
S-20123 Malmö
Phone: +46 (0) 40 / 35 86 00
Fax:
+46 (0) 40 / 93 23 01
SWEDEN
IP Systèmes
8, Rue du Colonel Chambonnet
F-69672 Lyon Bron Cedex
Phone: +33 (0) 4 / 72 14 18 00
Fax:
+33 (0) 4 / 72 14 18 01
FRANCE
ECONOTEC AG
Postfach 282
CH-8309 Nürensdorf
Phone: +41 (0) 1 / 838 48 11
Fax:
+41 (0) 1 / 838 48 12
SWITZERLAND
MITSUBISHI ELECTRIC EUROPE B.V
Westgate Business Park, Ballymount
IRL-Dublin 24
Phone: +353 (0) 1 / 419 88 00
Fax:
+353 (0) 1 / 419 88 90
IRELAND
ILAN & GAVISH Automation Service
24 Shenkar St., Qiryat-Arie 49513
IL-49001 Petach-Tikva
Phone: +972 (0) 3 / 922 18 24
Fax:
+972 (0) 3 / 972 39 24 07 61
ISRAEL
TEXEL Electronics Ltd.
P.O. Box 6272
IL-42160 Netanya
Phone: +972 (0) 9 / 863 08 91
Fax:
+972 (0) 9 / 885 24 30
ISRAEL
GTS
Darülaceze Cad. No. 43A KAT: 2
TR-80270 Okmeydani-Istanbul
Phone: +90 (0) 212 / 320 1640
Fax:
+90 (0) 212 / 320 1649
TURKEY
UKRAINE
JV-CSC Automation
15, M. Raskovoyi St., Floor 10, Office 1010
U-02002 Kiev
Phone: +380 (4) 4 / 238 83 16
Fax:
+380 (4) 4 / 238 83 17
Getronics Industrial Automation B.V. NETHERLANDS
Donauweg 10
NL-1043 AJ Amsterdam
Phone: +31 (0) 20 / 586 15 92
Fax:
+31 (0) 20 / 586 19 27
2.5.2001
MITSUBISHI ELECTRIC INDUSTRIAL AUTOMATION
Gothaer Strasse 8 Phone: +49 2102 486-0
Fax:
+49 2102 486-717
www.mitsubishi-automation.de
D-40880 Ratingen Hotline: +49 1805 000-766/765 Faxback: +49 2102 486-485/790 [email protected]
PLC - Printed in Germany