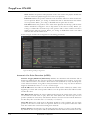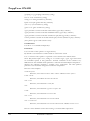
1
ProppFrexx ONAIR Version 4.0 User Manual (under construction) © 2009-2015 RADIO42, Bernd Niedergesäß. All rights reserved. ProppFrexx ONAIR and RADIO42 are registered trademarks in Germany. All other company, brand, and product names may be trademarks of their respective holders. This material is the confidential property of RADIO42 and its subsidiaries or licensors and may be used, reproduced, stored or transmitted only in accordance with a valid RADIO42 license or sublicense agreement. RADIO42 Bernd Niedergesäß Gryphiusstrasse 9 22299 Hamburg Germany Revision Date: August 2015 Table of Contents INTRODUCTION ................................................................................ 11 INSTALLATION .................................................................................. 12 Hardware and Software Requirements .....................................................................................12 Supported Operating Systems..............................................................................................12 Supported Audio Interfaces .................................................................................................12 Hardware Requirements .......................................................................................................12 3rd Party Software Requirements ........................................................................................13 Installing ProppFrexx ONAIR ..................................................................................................15 Directory Structure ................................................................................................................15 Start Menu Structure..............................................................................................................16 Desktop Icons ........................................................................................................................16 Uninstalling ProppFrexx ONAIR .............................................................................................17 Updating ProppFrexx ONAIR ..................................................................................................17 Windows Optimizations for ProppFrexx ................................................................................18 ABOUT ProppFrexx ONAIR ................................................................ 22 Features..........................................................................................................................................23 Tools ..............................................................................................................................................29 ProppFrexx Meta Data Editor.......................................................................................................................... 29 ProppFrexx Media Library Server ................................................................................................................... 29 ProppFrexx Advertising ..................................................................................................................................... 29 ProppFrexx ONAIR Watcher .......................................................................................................................... 29 ProppFrexx Time ................................................................................................................................................ 29 pfremcmd .............................................................................................................................................................. 29 pfpconv ................................................................................................................................................................. 30 Supported Media Formats ..........................................................................................................30 Playback (decoding): ..............................................................................................................30 Recording (encoding): ...........................................................................................................30 Playlists ....................................................................................................................................30 Starting ProppFrexx ONAIR.....................................................................................................32 Registering ProppFrexx ONAIR ..............................................................................................38 Command-Line Options.............................................................................................................41 WORKING WITH ProppFrexx ONAIR .............................................. 44 The Main Window .......................................................................................................................45 The Main Menu ......................................................................................................................47 The Ribbon Bar ......................................................................................................................47 The Header Bar ......................................................................................................................50 The Status Bar ........................................................................................................................51 Internal Players .............................................................................................................................52 Mixer Setup ...................................................................................................................................57 Adding/Removing new Mixer Channels ...........................................................................65 Configuring an Output Mixer Channel ..............................................................................66 Configuring an Input Mixer Channel .................................................................................70 The Main Channel Strip ........................................................................................................72 Saving and Loading a Mixer Setup .................................................................................................................. 73 RADIO42 Confidential 3 Table of Contents Using Mixer Presets ............................................................................................................................................ 73 Using the External Mixer Control ................................................................................................................... 74 Using TalkOver/TalkUser ................................................................................................................................ 75 Using the Remote Control Monitor ................................................................................................................ 78 The Mixer Channel Strip.......................................................................................................81 Using the Fader.................................................................................................................................................... 81 Using the Peak Level Meter .............................................................................................................................. 82 Using Pan and Gain ............................................................................................................................................ 82 Activating/Deactivating the mixer channel (ON) ........................................................................................ 83 Muting/Unmuting the mixer channel (M) ..................................................................................................... 83 Using the Dynamic Amplifier (AGC) ............................................................................................................. 84 Using the EQ ....................................................................................................................................................... 84 Using the Compressor (COMP)....................................................................................................................... 84 Using individual DSPs ........................................................................................................................................ 85 Using the Send To Function (SND)................................................................................................................ 86 Using the Recording Function (REC) ............................................................................................................. 87 Additional Output Mixer Channel Functionality .......................................................................................... 89 Additional Input Mixer Channel Functionality ............................................................................................. 91 General Configuration Settings .................................................................................................92 General Audio Settings .........................................................................................................92 Audio Engine ....................................................................................................................................................... 92 BPM Detection .................................................................................................................................................... 93 Mixer ...................................................................................................................................................................... 93 Application ........................................................................................................................................................... 94 Replay Gain .......................................................................................................................................................... 94 Folder and Library Settings ..................................................................................................95 Media Libraries .................................................................................................................................................... 96 Manage Additional Media Libraries ................................................................................................................. 97 Cartwall Libraries............................................................................................................................................... 100 Manage Additional Cartwall Libraries ........................................................................................................... 100 Library Automation Options .......................................................................................................................... 101 Other Folders and Paths .................................................................................................................................. 101 Player Settings ...................................................................................................................... 102 Player Defaults ................................................................................................................................................... 102 Other Player Settings ........................................................................................................................................ 103 Playlist and Other Settings ................................................................................................. 105 Look And Feel ................................................................................................................................................... 105 TAG Reading & WaveFrom ........................................................................................................................... 106 User Access Control (UAC) ............................................................................................................................ 109 Playlist Defaults ................................................................................................................................................. 115 Mixing and Fading Settings ............................................................................................... 117 Automatic Cue Point Detection (ACPD) .................................................................................................... 118 Manual Fading (Manual Mixing Points) ....................................................................................................... 119 Other Mixing Defaults ..................................................................................................................................... 120 Encoding and Recording Settings .................................................................................... 123 Encoder Setup ................................................................................................................................................... 123 Encoder Profiles ................................................................................................................................................ 126 Encoding Setting ............................................................................................................................................... 133 Recording Setting .............................................................................................................................................. 134 CD Ripping ........................................................................................................................................................ 134 Logging Settings .................................................................................................................. 135 4 RADIO42 Confidential Table of Contents Global and Playlist Logging ............................................................................................................................ 136 Event and Command Settings .......................................................................................... 137 Control Command Builder .............................................................................................................................. 138 Input and Output Settings ................................................................................................. 139 Routing Settings .................................................................................................................. 140 GPIO and Remoting Settings ........................................................................................... 141 TCP Devices ...................................................................................................................................................... 142 MIDI Devices .................................................................................................................................................... 143 Serial I/O Devices ............................................................................................................................................ 146 GamePort Devices ............................................................................................................................................ 148 Keyboard Hotkey Mapping ............................................................................................................................. 149 Open Sound Control (OSC) ........................................................................................................................... 150 IO-Warrior Control .......................................................................................................................................... 152 Velleman Control (K8055) .............................................................................................................................. 152 Streaming Settings ............................................................................................................... 153 Script and Scheduler Settings ............................................................................................ 157 Script Libraries ................................................................................................................................................... 157 Global Song History ......................................................................................................................................... 157 Scheduler Settings ............................................................................................................................................. 158 Manage Additional Script Libraries ............................................................................................................... 160 Editing Scripts .................................................................................................................................................... 161 More Stuff ............................................................................................................................ 170 RSS, Message Center, Web Browser ............................................................................................................. 170 MODStream Monitoring ................................................................................................................................. 170 Any other Stuff .................................................................................................................................................. 171 Overlay and Advertising Management .......................................................................................................... 171 WORKING WITH MEDIA LIBRARIES ........................................... 172 Types of Media Libraries ......................................................................................................... 174 Playlist based Media Libraries ........................................................................................... 174 Folder based Media Libraries ............................................................................................ 175 Database based Media Libraries ....................................................................................... 176 Remote Media Libraries ..................................................................................................... 176 Creating and Editing Media Libraries .................................................................................... 176 About Media Entries ................................................................................................................ 177 Accessing Media Libraries ....................................................................................................... 185 Reloading Media Libraries ....................................................................................................... 185 TAG and Meta Data Reading ................................................................................................. 185 Editing Media Entries .............................................................................................................. 185 The Find Window ..................................................................................................................... 185 The Directory Explorer ........................................................................................................... 185 WORKING WITH PLAYLISTS ......................................................... 186 The Playlist Window................................................................................................................. 186 The DJ Players........................................................................................................................... 186 The PFL Player.......................................................................................................................... 186 The Segue-Editor (Multi-Track-Editor) ................................................................................ 186 The Quick Monitor Player....................................................................................................... 188 The Cross-Fader........................................................................................................................ 188 RADIO42 Confidential 5 Table of Contents The Beat Display ....................................................................................................................... 188 Direct Voice-Tracking .............................................................................................................. 188 Live-Assist Operations ............................................................................................................. 188 Automated and Scheduler Operations .................................................................................. 188 Using the Trackboard ............................................................................................................... 188 WORKING WITH CARTWALLS....................................................... 189 STREAMING TO THE NETWORK ................................................. 190 AUTOMATION................................................................................... 191 Working with the Program Scheduler ................................................................................... 192 Using Scripts .............................................................................................................................. 194 Working with the Overlay Scheduler ..................................................................................... 196 WORKING WITH STANDBY PLAYERS ......................................... 197 REMOTING, EVENTS, COMMANDS AND GPIO ........................ 198 OTHER WINDOWS ........................................................................... 199 Using the ONAIR Time .......................................................................................................... 199 Using the Station Visual ........................................................................................................... 199 Using the Control Room ......................................................................................................... 199 Using the Web Browser ........................................................................................................... 199 USING THE MODSTREAM WATCHER ........................................ 200 THE ADVERTISING MANAGER .................................................... 201 APPENDIX .......................................................................................... 202 Keyboard Shortcuts .................................................................................................................. 202 Main Window: ..................................................................................................................... 202 Playlist Window: .................................................................................................................. 204 Find Window: ...................................................................................................................... 206 Browser Window:................................................................................................................ 207 Trackboard Window: .......................................................................................................... 208 DJ/PFL Player:.................................................................................................................... 209 Database Libraries (SQL) ........................................................................................................ 211 Control Commands .................................................................................................................. 215 Criterion Conditions ................................................................................................................. 281 Control Command Macros ..................................................................................................... 282 Global Macros (always available): .................................................................................................................. 282 Track/Playlist Macros (available for playlist events): ................................................................................. 292 Script/Scheduler Macros (available for scheduler and script events): .................................................... 294 Overlay Macros (available for overlay player events): ................................................................................ 295 Mixer Macros (available for mixer events): .................................................................................................. 295 MIDI Macros (available for MIDI events): ................................................................................................. 296 OSC Macros (available for OSC events): ..................................................................................................... 297 RegEx Macros (available for Serial I/O events): ........................................................................................ 297 Streaming Macros (available for streaming server events): ....................................................................... 297 Playlist File Macros (only available with EXEC_WRITE_PLAYLISTFILE): ..................................... 297 6 RADIO42 Confidential Table of Contents Script-Line/FixTime Macros (‘Entry’ value will be resolved): ................................................................. 299 Overlay Macros (Playing ‘Command’ value will be resolved): ................................................................. 300 GPIO Client Macros ........................................................................................................................................ 300 Control Command Functions ................................................................................................. 302 REPLACE (replaces a source string with a destin string in a given value):................................................. 302 STRING (formats a string value):.................................................................................................................. 303 TOSTRING (converts and formats a numeric value to a string):........................................................... 303 TOFLOAT (converts an integer numeric value to a float representation): .......................................... 304 TOINT (converts a numeric value to an integer): ...................................................................................... 305 MAKEWORD (combines a low and high numeric value): ...................................................................... 306 DATE (converts and formats a datetime value to a string representation): ......................................... 306 TIME (converts and formats a time value to a string representation): .................................................. 307 IF (returns a value depending on a condition): ........................................................................................... 308 Mackie Control Universal Protocol Support ........................................................................ 309 Move Fader (“fader”) ....................................................................................................................................... 309 Set LED (“led”) ................................................................................................................................................. 310 Set V-Pot (“vpot”) ............................................................................................................................................ 311 Set Level Meter (“level”) .................................................................................................................................. 312 Set Time Display (“time”) ............................................................................................................................... 312 Set Time Display Ex (“timex”) ....................................................................................................................... 313 Set Assignment Display (“assignment”) ....................................................................................................... 313 Set Assignment Display Ex (“assignmentx”) ............................................................................................... 314 Update the LCD display (“lcd”) ..................................................................................................................... 314 Device Query (“devicequery”) ........................................................................................................................ 314 Go Offline (“gooffline”) .................................................................................................................................. 315 Version Request (“versionrequest”) .............................................................................................................. 315 Reset Fader (“resetfader”) ............................................................................................................................... 315 Reset LED (“resetled”) .................................................................................................................................... 315 Reset Reboot (“resetreboot”) ......................................................................................................................... 315 Configuration (“config”) .................................................................................................................................. 316 Control Surface Switch/LED IDs ................................................................................................................. 317 RADIO42 Confidential 7 Table of Figures Figure 1: ProppFrexx ONAIR Setup Wizard ............................................................................... 15 Figure 2: ProppFrexx ONAIR Splash Screen ............................................................................... 32 Figure 3: ProppFrexx ONAIR Mixer Setup Wizard .................................................................... 32 Figure 4: ProppFrexx ONAIR Mixer Setup Wizard (Step 1) ..................................................... 33 Figure 5: ProppFrexx ONAIR Mixer Setup Wizard (Step 2) ..................................................... 35 Figure 6: ProppFrexx ONAIR Mixer Setup Wizard (Step 3) ..................................................... 35 Figure 7: ProppFrexx ONAIR Mixer Setup Wizard (Step 4) ..................................................... 36 Figure 8: ProppFrexx ONAIR Mixer Setup Wizard (Step 5, 6) ................................................. 36 Figure 9: ProppFrexx ONAIR Mixer Setup Wizard (Step 7) ..................................................... 37 Figure 10: Registering ProppFrexx ONAIR ................................................................................. 38 Figure 11: USB-Device Registration ............................................................................................... 39 Figure 12: Using the ProppFrexx ONAIR Demo Version......................................................... 40 Figure 13: The Main Window .......................................................................................................... 45 Figure 14: Dragging a Docking Window ....................................................................................... 46 Figure 15: The Main Menu ............................................................................................................... 47 Figure 16: The Main Control Ribbon Page ................................................................................... 47 Figure 17: The Scheduler Control Ribbon Page ........................................................................... 49 Figure 18: The User Control Ribbon Page .................................................................................... 50 Figure 19: The Header Bar ............................................................................................................... 50 Figure 20: The DJ Player (Full Size and Medium Size Layout) .................................................. 52 Figure 21: The PFL Player................................................................................................................ 52 Figure 22: The Segue-Editor ............................................................................................................ 53 Figure 23: The Quick Monitor Player............................................................................................. 53 Figure 24: The Quick Monitor Player............................................................................................. 54 Figure 25: The Standby Player (Medium Size Layout)................................................................. 54 Figure 26: The MODStream Player ................................................................................................ 54 Figure 27: The Main Mixer Window .............................................................................................. 57 Figure 28: Mixer Setup Example 1 .................................................................................................. 58 Figure 29: Mixer Setup Example 2 .................................................................................................. 59 Figure 30: Mixer Setup Example 3 .................................................................................................. 60 Figure 31: Mixer Setup Example 4 .................................................................................................. 62 Figure 32: Mixer Setup Example 5 .................................................................................................. 63 Figure 33: Mixer Setup Example 6 .................................................................................................. 64 Figure 34: Mixer Channel Menu ...................................................................................................... 65 Figure 35: Output Device Configuration Dialog .......................................................................... 66 Figure 36: Output Device Configuration Dialog (Virtual Sub-Bus).......................................... 69 Figure 37: ADM Settings (ASIO Mixer Channel) ........................................................................ 69 Figure 38: Input Device Configuration Dialog ............................................................................. 70 Figure 39: The Main Channel Strip ................................................................................................. 72 Figure 40: Load and Save Mixer Setup ........................................................................................... 73 Figure 41: Using Mixer Presets ........................................................................................................ 73 Figure 42: Creating a new Mixer Preset ......................................................................................... 74 Figure 43: External Mixer Control Window.................................................................................. 74 Figure 44: Configure TalkUser Settings ......................................................................................... 76 8 RADIO42 Confidential Table of Figures Figure 45: The Remote Control Monitor....................................................................................... 78 Figure 46: Add Remote Client ......................................................................................................... 79 Figure 47: The Remote Client Manager ......................................................................................... 79 Figure 48: Mixer Channel Strip........................................................................................................ 81 Figure 49: Peak Level Meter Menu ................................................................................................. 82 Figure 50: The Dynamic Amplifier (AGC).................................................................................... 84 Figure 51: The 10-band EQ ............................................................................................................. 84 Figure 52: The Compressor (COMP) ............................................................................................. 85 Figure 53: Selecting an individual DSP .......................................................................................... 85 Figure 54: VST DSP Settings ........................................................................................................... 86 Figure 55: The SND Menu............................................................................................................... 86 Figure 56: The Recording Menu...................................................................................................... 87 Figure 57: Select Encoder Dialog .................................................................................................... 88 Figure 58: Output Mixer Channel Menu........................................................................................ 89 Figure 59: Adjust External Volume Dialog ................................................................................... 89 Figure 60: Mixer Control Command Events Dialog.................................................................... 90 Figure 61: Instant Recording Dialog............................................................................................... 90 Figure 62: Mixer Channel Visual Window ..................................................................................... 91 Figure 63: Input Mixer Channel Menu ........................................................................................... 91 Figure 64: General/Audio Configuration ...................................................................................... 92 Figure 65: Folders/Libraries Configuration .................................................................................. 95 Figure 66: Additional Media Libraries Dialog ............................................................................... 97 Figure 67: Media Library Database Connection ........................................................................... 98 Figure 68: Remote Media Library Connection.............................................................................. 99 Figure 69: Edit Media Library Properties ...................................................................................... 99 Figure 70: Player Settings Configuration...................................................................................... 102 Figure 71: Playlist/Others Configuration .................................................................................... 105 Figure 72: Define Media Type Colors .......................................................................................... 105 Figure 73: Edit Extended TAG Options ..................................................................................... 107 Figure 74: Edit Album Lookup Options ..................................................................................... 108 Figure 75: Login Dialog .................................................................................................................. 109 Figure 76: Define User Profiles ..................................................................................................... 110 Figure 77: Define User Control Commands ............................................................................... 111 Figure 78: Define ProppFrexx ONAIR Users ............................................................................ 111 Figure 79: Edit User Settings ......................................................................................................... 112 Figure 80: Remote MediaLibrary Settings .................................................................................... 114 Figure 81: Edit Playlist Options .................................................................................................... 116 Figure 82: Mixing/Fading Configuration..................................................................................... 118 Figure 83: Hook Mixing Settings................................................................................................... 120 Figure 84: Define Mixing Settings per Media Type.................................................................... 121 Figure 85: Encoding/Recording Configuration.......................................................................... 123 Figure 86: Encoder Setup ............................................................................................................... 124 Figure 87: Define Encoder Profiles .............................................................................................. 126 Figure 88: WAV Encoder Settings ................................................................................................ 127 RADIO42 Confidential 9 Table of Figures Figure 89: MP3 Encoder Settings ................................................................................................. 127 Figure 90: WMA Encoder Settings ............................................................................................... 128 Figure 91: QuickTime AAC Encoder Settings............................................................................ 129 Figure 92: Nero AAC Encoder Settings ...................................................................................... 129 Figure 93: OGG Encoder Settings ............................................................................................... 130 Figure 94: MP2 Encoder Settings ................................................................................................. 130 Figure 95: AACplus Encoder Settings.......................................................................................... 131 Figure 96: FLAC Encoder Settings ............................................................................................... 131 Figure 97: MPC Encoder Settings................................................................................................. 132 Figure 98: ACM Encoder Settings ................................................................................................ 132 Figure 99: CMDLN Encoder Settings.......................................................................................... 133 Figure 100: Logging Configuration ............................................................................................... 135 Figure 101: Events/Commands Configuration .......................................................................... 137 Figure 102: Direct editing of control-commands ....................................................................... 137 Figure 103: The Control Command Builder ............................................................................... 138 Figure 104: Input/Output Configuration .................................................................................... 139 Figure 105: Routing Configuration ............................................................................................... 140 Figure 106: GPIO/Remoting Configuration .............................................................................. 141 Figure 107: Remote Access Limits ................................................................................................ 143 Figure 108: Define MIDI Message Mapping .............................................................................. 144 Figure 109: Serial I/O Configuration Dialog .............................................................................. 146 Figure 110: Keyboard Event Mapping Dialog ............................................................................ 149 Figure 111: Streaming Configuration............................................................................................ 153 Figure 112: Edit Streaming Server Configuration ...................................................................... 155 Figure 113: Scripts/Scheduler Configuration .............................................................................. 157 Figure 114: Global Song History Options ................................................................................... 157 Figure 115: Additional Script Libraries Dialog ........................................................................... 160 Figure 116: Edit Script Library Dialog ......................................................................................... 161 Figure 117: FixTime Script Elements Dialog .............................................................................. 168 Figure 118: More Stuff Configuration .......................................................................................... 170 Figure 119: The Segue-Editor (Multi-Track-Editor) .................................................................. 186 Figure 120: The Program-Editor ................................................................................................... 192 Figure 121: The Script-Editor ........................................................................................................ 194 10 RADIO42 Confidential INTRODUCTION INTRODUCTION ProppFrexx ONAIR is a comprehensive playlist management and broadcasting tool designed for general On-Air operations (live assist and automation), may it be for a large terrestrial radio stations or smaller web radio stations or even DJs performing live. ProppFrexx ONAIR is designed to serve you with the highest audio quality for a real 24 by 7 by 365 operations. The flexible mixer and routing capabilities, the build in streaming functionalities, the ultimate support for almost any audio format as well as features like embedded playlists, true BWF support, multiple cartwalls, Outlook-like scheduler, full meta data (tag data) support, fast search and preview of media entries, remote control via GPIO, MIDI, Serial-IO, TCP and many more features make this solution the perfect choice. The sexy but rock solid user interface of ProppFrexx ONAIR makes it even more fun to work with. The user interface part of ProppFrexx ONAIR is written in C# (based on the .Net Framework v3.5) whereas the underlying and integrated audio engine is written in C++ to guarantee most reliable and stable playout/recording. The next goal was highest sound quality as well as totally free mixer layout and routing capabilities. It should be possible to use ProppFrexx ONAIR without any external mixer or it should be possible to integrate ProppFrexx ONAIR into any existing studio environment including any remote operations control (eg. via GPIOs or MIDI). In addition ProppFrexx ONAIR comes with an integrated user management and access control which allows you to operate it within a multi user environment even on the same machine. And last but not least ProppFrexx ONAIR should offer all tools which are needed in your daily radio business (eg. an on air clock, integrated web browser and RSS news feed reader, super fast media explorer and finder, full streaming server support etc.). So the combination of the audio engine, the playlist management and the scripting and scheduler engine (which also comes with a fully featured advertising management and overlay system) simply should make your life a lot easier. RADIO42 Confidential 11 ProppFrexx ONAIR INSTALLATION Hardware and Software Requirements Supported Operating Systems Microsoft Windows® XP family 32-bit and 64-bit (SP3 recommended) Microsoft Windows® Server 2003 family 32-bit and 64-bit Microsoft Windows® Vista (SP2) 32-bit and 64-bit (SP1 recommended) Microsoft Windows® 7 32-bit and 64-bit (recommended) Microsoft Windows® Server 2008 family 32-bit and 64-bit (recommended) Microsoft Windows® 8 32-bit and 64-bit (recommended) Microsoft Windows® Server 2012 family 32-bit and 64-bit (recommended) Supported Audio Interfaces Any single or multi-channel soundcard with one of the following drivers is supported: DirectSound (WDM) driver Core Audio (WASAPI) driver Steinberg Audio Stream Input/Output (ASIO) driver (recommended) For best quality we recommend to use a professional audio soundcard which supports full 32-bit or 24-bit processing. Note that you can use any number of soundcards in your system. However, you should try to avoid mixing the type of driver between multiple soundcards (i.e. if available use only ASIO drivers, then use only WASAPI drivers and finally use only WDM drivers). If you discover issues with your existing hardware, please run the provided „ProppFrexx AudioTester.exe“ which can be found in the installation folder. This application generates a file called „ProppFrexx AudioTester.log“ containing information about your audio interfaces and possible errors. Hardware Requirements ProppFrexx ONAIR requires the following hardware: Category Minimum Recommended CPU Dual-Core 2 GHz Quad-Core 2 GHz or higher RAM 2 GB 4 GB or higher Disk space At least 100 MB (the .NET Framework might require additional 150MB) 500 MB or higher Monitor: 1024x768, 32-bit 1680x1050 or higher, 32-bit The hardware requirements might depend on the type of use and the final deployment scenario. However, the system is able to fully scale with your environment, e.g. leveraging multiple CPUs, disk arrays etc. Multi-Core Systems are 12 RADIO42 Confidential INSTALLATION recommended. 3rd Party Software Requirements ProppFrexx ONAIR requires the Microsoft .NET Full Framework in version 4.0 or above. The latest .NET Framework will normally be installed with your Windows Operating System. However, you can obtain the .NET Framework from the Microsoft website: http://msdn.microsoft.com/netframework/default.aspx It is recommended to install the latest service pack for your .NET framework (we recommend using the latest .NET Framework 4.5)! Furthermore the Microsoft Windows Media Audio Codec resp. the Microsoft Windows Media Foundation is required if you intend to playback WMA or MP3 files. The Windows Media Audio Codec will normally be installed with your Windows Operating System, however, you might also install the latest Windows Media Player: http://www.microsoft.com/windows/windowsmedia For certain functionalities it is also recommended to install the latest DirectX version, which can be obtained here: http://www.microsoft.com/downloads/details.aspx?FamilyID=2da43d38-db71-4c1b-bc6a9b6652cd92a3 There should normally be no need to install any of the above mentioned 3rd party software, as this typically already comes installed with your operating system. ProppFrexx might leverage the QuickTime runtime for AAC support, which can be downloaded here (Note: installing iTunes will also install the latest QuickTime version, however iTunes is not required to be installed for AAC support): http://www.apple.com/quicktime/download For streaming AAC+ content (e.g. to a SHOUTcast server) ProppFrexx will use the Winamp media player libraries. So make sure to install Winamp if you plan to stream in the AAC+ format. Winamp can be downloaded here: http://www.winamp.com Credits This software uses portions of TagLib#: Copyright (c) 2006 by Brian Nickel <[email protected]> TagLib# is free software: you can redistribute it and/or modify it under the terms of the GNU Lesser General Public License as published by the Free Software Foundation, either version 2.1 of the License, or (at your option) any later version. TagLib# is distributed in the hope that it will be useful, but WITHOUT ANY WARRANTY; without even the implied warranty of MERCHANTABILITY or FITNESS FOR A PARTICULAR PURPOSE. See the GNU Lesser General Public License for more details. You should have received a copy of the GNU Lesser General Public License along with this program. If not, see http://www.gnu.org/licenses/. This software uses portions of fhgaacenc: Copyright (c) 2011 tmkk <[email protected]> RADIO42 Confidential 13 ProppFrexx ONAIR Permission is hereby granted, free of charge, to any person obtaining a copy of fhgaacenc and associated documentation files, to deal in fhgaacenc without restriction, including without limitation the rights to use, copy, modify, merge, publish, distribute, sublicense, and/or sell copies of fhgaacenc, and to permit persons to whom fhgaacenc is furnished to do so, subject to the following conditions: The above copyright notice and this permission notice shall be included in all copies or substantial portions of fhgaacenc. THE SOFTWARE IS PROVIDED "AS IS", WITHOUT WARRANTY OF ANY KIND, EXPRESS OR IMPLIED, INCLUDING BUT NOT LIMITED TO THE WARRANTIES OF MERCHANTABILITY, FITNESS FOR A PARTICULAR PURPOSE AND NONINFRINGEMENT. IN NO EVENT SHALL THE AUTHORS OR COPYRIGHT HOLDERS BE LIABLE FOR ANY CLAIM, DAMAGES OR OTHER LIABILITY, WHETHER IN AN ACTION OF CONTRACT, TORT OR OTHERWISE, ARISING FROM, OUT OF OR IN CONNECTION WITH THE SOFTWARE OR THE USE OR OTHER DEALINGS IN THE SOFTWARE. fhgaacenc is distributed with libsndfile version 1.0.24, which is released under GNU LGPL. You can get the source code of libsndfile in http://www.mega-nerd.com/libsndfile/. See http://www.gnu.org/licenses/lgpl.txt for GNU LGPL. Copyright (c) 1999-2011 Erik de Castro Lopo <[email protected]> libsndfile is free software: you can redistribute it and/or modify it under the terms of the GNU Lesser General Public License as published by the Free Software Foundation, either version 2.1 of the License, or (at your option) any later version. libsndfile is distributed in the hope that it will be useful, but WITHOUT ANY WARRANTY; without even the implied warranty of MERCHANTABILITY or FITNESS FOR A PARTICULAR PURPOSE. See the GNU Lesser General Public License for more details. You should have received a copy of the GNU Lesser General Public License along with this program. If not, see http://www.gnu.org/licenses/. This software uses a weather service API as provided by World Weather Online: http://www.worldweatheronline.com This software uses portions of SharpDX: Copyright (c) 2010-2012 SharpDX - Alexandre Mutel Permission is hereby granted, free of charge, to any person obtaining a copy of this software and associated documentation files (the "Software"), to deal in the Software without restriction, including without limitation the rights to use, copy, modify, merge, publish, distribute, sublicense, and/or sell copies of the Software, and to permit persons to whom the Software is furnished to do so, subject to the following conditions: The above copyright notice and this permission notice shall be included in all copies or substantial portions of the Software. THE SOFTWARE IS PROVIDED "AS IS", WITHOUT WARRANTY OF ANY KIND, EXPRESS OR IMPLIED, INCLUDING BUT NOT LIMITED TO THE WARRANTIES OF MERCHANTABILITY, FITNESS FOR A PARTICULAR PURPOSE AND NONINFRINGEMENT. IN NO EVENT SHALL THE AUTHORS OR COPYRIGHT HOLDERS BE LIABLE FOR ANY CLAIM, DAMAGES OR OTHER LIABILITY, WHETHER IN AN ACTION OF CONTRACT, TORT OR OTHERWISE, ARISING FROM, OUT OF OR IN CONNECTION WITH THE SOFTWARE OR THE USE OR OTHER DEALINGS IN THE SOFTWARE. 14 RADIO42 Confidential INSTALLATION Installing ProppFrexx ONAIR After you have successfully downloaded the file „ProppFrexx_ONAIR_Setup.zip“, please unzip this file to a directory of your choice, which will result in the following files being created: - setup.exe - ProppFrexx ONAIR Setup.msi - ProppFrexx ONAIR QuickInstallGuide.pdf (this document) Now execute the „setup.exe“ (eg. double-click on it), which will launch the setup wizard. Figure 1: ProppFrexx ONAIR Setup Wizard Follow the instructions of the setup wizard. When prompted click on the „Next“ button to complete and confirm each step and go to the next one. You must: a) Carefully read and agree to the „License Agreement“ b) Select an installation folder and choose the install method During the installation process you might be asked to confirm the Microsoft Windows security policy and accept the installer as a trusted source. As the installer is not signed the publisher is shown as ‘unknown’. Directory Structure Upon successful installation of ProppFrexx ONAIR the following directory structure is created in the selected installation folder: [Installation Folder] : eg. „C:\ProppFrexx ONAIR“ contains all main modules and libraries. The main application is called „ProppFrexx ONAIR.exe“. \AddOns : contains any BASS add-ons to support playback of additional formats. You might place additional BASS add-ons here, as available on http://www.un4seen.com/bass.html#addons \Encoder : contains external command-line encoders which should be used. You might place additional command-line encoders here by yourself. RADIO42 Confidential 15 ProppFrexx ONAIR \log : default folder where log files might be placed into. This folder is empty by default. \Scripts : default folder where script files might be placed into. This folder is empty by default. \Winamp : default folder where Winamp DSP plug-ins might be placed into. You might place additional Winamp DSP plug-ins here by yourself. VST plug-ins (DSPs) will be located in a global VST folder and this folder needs to be specified in the global settings dialog (see below). Start Menu Structure The following start menu structure will be created in the program group under „radio42“ – „ProppFrexx ONAIR“: - ProppFrexx ONAIR ProppFrexx Meta Data Editor ProppFrexx Advertising ProppFrexx MediaLibraryServer ProppFrexx Watcher ProppFrexx Time ProppFrexx ONAIR UserManual : : : : : : : will launch the main onair application will launch the meta data editor (tagger) will launch the advertising manager will launch the media library server will launch the watcher application will launch the clock tool will open this document Desktop Icons The following desktop icon will be created: ProppFrexx ONAIR You might double-click on this icon to launch the main application. 16 RADIO42 Confidential INSTALLATION Uninstalling ProppFrexx ONAIR If you really need to uninstall ProppFrexx ONAIR you might do so by opening the Windows Control Panel and select Software. In the list of installed components select ProppFrexx ONAIR and click on Remove. All installed files will now be removed from your system. After the uninstall process is done some files might be left on your system. These files relate to all user files created after the installation (i.e. your user configuration settings etc.). You can find these files in the following directories: Application User Data Folder: eg. C:\Documents and Settings\username\Application Data\radio42\ProppFrexx ONAIR resp. C:\Users\username\AppData\Roaming\radio42\ProppFrexx ONAIR In order to remove these files also, you need to do so by manually deleting them! Updating ProppFrexx ONAIR For convenience ProppFrexx ONAIR contains a menu item which lets you directly check for available updates without visiting our web-pages or downloading a new version manually. You might click on the „ Check For Updates...“ menu item within the „ Help“ menu (which is located at the top right of the main window) at any time. If a newer version of ProppFrexx ONAIR is available you will be prompted about that new version and might be able to download and install that version on the fly. After confirming to download the new version you will be asked, if you want to directly install it. In this case ProppFrexx ONAIR will automatically shut down and restart itself after successful installation of all required files. Note, that the automatic update process will stop any running program and broadcasting, as a restart of ProppFrexx ONAIR is required. However, this interrupt should normally only take a few seconds. As an alternative you might also download the latest stable release from our web-site (http://www.proppfrexx.radio42.com/v3/download.html). Whenever a new version of ProppFrexx ONAIR is available you might start the installation process like described above by executing the related setup.exe. The installation process automatically detects an existing version of ProppFrexx ONAIR and will take appropriate action (eg. uninstall the previous version and install the newer version). You are not losing any of your configuration or user data, since the installation process only updates necessary application files. When you launch setup.exe, make sure, that you have fully closed and exited any running instance of ProppFrexx ONAIR! RADIO42 Confidential 17 ProppFrexx ONAIR Windows Optimizations for ProppFrexx Here are some general tips to optimize your Windows operating system. Some of them might only be appropriate for Vista/Windows 7. The Windows operating system is often defaulted for consumer usage, as such some settings might not be appropriate for Pro-Audio and 24 by 7 usage which might make it necessary to change them. Do this only, if you effectively experience any issues. In general make your system as slim as possible - meaning install and run only those applications which are really needed. Installing many unused applications might lead to interference and might just use your system resources. Disable all Network Cards and Audio Devices which are not used Disabling network cards and onboard audio devices which are not used prevent any interference and helps freeing up system resources. In the Windows Device Manager window, double-click Network adapters or Sounds, then double-click the Network Adapter or Sound Device card you want to disable. Disable USB Power Management This optimization frees up bandwidth in the USB bus and can help resolve problems with device recognition and driver installation (especially if you are using an USB soundcard or harddisk). In the Windows Device Manager window, double-click on Universal Serial Bus Controllers. Double-click on the first USB Root Hub item; click on the Power Management tab; uncheck the box that says 'Allow the computer to turn off this device to save power.' and click OK. Repeat this process for all other USB Root Hub items. Disable System Startup Items Freeing up system resources, this can resolve conflicts with other applications that automatically start up with your computer. Hold down the Windows Key on your keyboard (or Start Menu button) and press the letter "R" to open up the Run dialog. Type "msconfig" and click OK. Remove all startup items which are not needed. Hard Disk Optimizations Make sure to use a fast I/O sub-system. Playing tracks from slow devices like slow networkdrives or slow USB-drives might lead to playback dropouts. In addition you might: a) Uncheck the drive option Compress this drive to save disk space b) Uncheck the drive option Allow files on this drive to have contents indexed... Turn off User Account Control (UAC) Do this only, if you really experience any problems! Open the Start Menu and then click on Control Panel. In the Large Icon View, click User Accounts. Click on Change User Account Control Settings. Set it to 'Never notify'. Adjust Power Options Prevent the computer from going into Sleep Mode, which can cause playback issues with the audio interface and its drivers. Open the Start Menu and then click on Control Panel. In the 18 RADIO42 Confidential INSTALLATION Large Icon View, click on Power Options. Select the 'High Performance' power plan. Click on the Change plan settings link. Set the display's sleep time to Never. Set the computer's sleep time to Never. Click on the Change advanced power settings link. Click on the + sign next to Hard Disk. Click on the + sign next to Turn Off Hard Disk After. Select the default; the text entry field will now be accessible. In the text entry field, type Never. Click Apply and then OK. Click Save Changes. Close the Power Options window. Disabling Screen Saver Prevent your screen saver from being enabled. Right-click on the Desktop and select Personalize. Click on Screen Saver. In the screen saver menu, select None and click OK. Display Performance On slower computers this frees up system resources. Click on the Start Menu, right-click on Computer. Choose Properties. On the left side of the screen, click on Advanced System Settings. Under Performance, click on Settings. Choose the option to Adjust For Best Performance. Hit Apply and then OK. Disable DEP This might resolves blue screen errors with USB devices and is only needed if you really experience any issues! Hold down the Windows Key on your keyboard (or Start Menu button) and press the letter "R" to open up the Run dialog. Type "cmd" and wait til you get a list of programs displayed (cmd.exe). Right-click on "cmd.exe" and choose Run as Administrator. Click the Allow button if it asks you for permission. Type or copy & paste this into the command prompt window: bcdedit.exe /set {current} nx AlwaysOff Hit the Enter key and you should see the confirmation Operation Completed Successfully. Restart the computer and DEP should be off. If you would like to re-enable DEP enter the following into the command prompt window: bcdedit.exe /set {current} nx OptIn After restarting the computer, DEP will be re-enabled. Disable DEP just for ProppFrexx ONAIR: Open the Start Menu and right-click on Computer. Choose Properties. On the left side of the screen, click on Advanced System Settings. Under Performance, click on Settings. Click on the tab for Data Execution Prevention. Choose the option ‘Turn on DEP for all programs and services except those I select:'. Click on the Add button and navigate to the following location “C:\Program Files\radio42\ProppFrexx ONAIR\3.0”. Choose the executable file for ProppFrexx ONAIR (ProppFrexx ONAIR.exe). Hit Apply and then OK. Restart your computer. Disable any Windows System Sound To prevent any automatic windows notification sound to be played, disable any windows sound. Open the Start Menu and then click on Control Panel. In the Large Icon View select the Systemsound settings under thze Sound options. And. Select the ‘No Sounds’ profile/schema and click OK. Disable Input Devices being monitored in an Output Device Some input devices might directly be monitored (and played back) on an output device by the Windows sound management. When also using these devices from within ProppFrexx RADIO42 Confidential 19 ProppFrexx ONAIR this might result in an unwanted echo effect or duplication of the sound output (depending on your mixer setup). E.g. when you use an input mixer channel and monitor it on a mixer output channel (via the Route To or SND function) and the same used input device is also monitored by the Windows sound management on an output device, you will hear the same input signal twice (but unsynchronized), as ProppFrexx and Windows independently copy the audio signal. So make sure, that only either ProppFrexx or Windows performs such monitoring. To disable the Windows output monitoring of an input device do the following: Open the Start Menu and then click on Control Panel. In the Large Icon View, click on the Sound options or select Manage Audio Devices. In the Sound dialog select the Playback tab. For each playback device listed which you might want to use from within ProppFrexx right-click on it and select Properties. In the properties dialog of that output device select the Level tab. If more than one level control is shown, make sure to Mute any unwanted audio signals coming from other sources (e.g. mute the ‘Microphone’ level for any output device if shown). Adjusting Windows Recording Device Settings When using a certain input device from within ProppFrexx you might want to adjust its system settings in the Windows sound management, e.g. you might want to disable the playback capability of an input device or disable the microphone amplification and or certain input effects. To do so open the Start Menu and then click on Control Panel. In the Large Icon View, click on the Sound options or select Manage Audio Devices. In the Sound dialog select the Recording tab. For each recording device listed which you might want to use from within ProppFrexx right-click on it and select Properties. In the properties dialog of that input device select the Listen, User Defined or Advanced tab and make the necessary changes. Other Things Avoid connecting soundcard devices to USB/FireWire hubs. Avoid running any unneeded programs at the same time as ProppFrexx. Turn off any software utilities that run in the background, such as Windows Messenger, calendars, and disk maintenance programs. Turn off any non-essential USB devices while running ProppFrexx. If your video display card supports it, enable Bus Mastering in the manufacturer’s Control Panel. Finally: Make sure to use a sufficient Playback-Buffer. If you experience dropouts during playback this might be an indication, that your output buffer size is too small. In such case try to increase the output/playback buffer of your soundcard. This can either be done directly within ProppFrexx (using the mixer channel device configuration dialog) or sometime within the soundcards driver panel. Note, that audio processing might significantly leverage your I/O sub-system (harddisks, system bus etc.) especially when using low latency settings with your soundcard driver, as not only the audio data needs to travel through your system, but also the raw audio file data needs to be read in. Please think of the following: the lower the latency (the smaler the playback buffer) the more often a file access to the playing audio file(s) is needed! This means while playing back one or more audio file (especially in parallel) the more often the system needs to read data from these file - and this leverages your I/O sub-system (harddisks). As such, if your I/O sub-system (harddisks) is not fast enough to deliver the data as needed you might experience dropouts and breaks in the sound! 20 RADIO42 Confidential INSTALLATION Another usefull option might be to increase the time interval at which the windows operating system tries to synchronize its system clock with a precise internet time (atomic time). By default Windows synchronizes its system time every 7 days. To change this you can edit the following registry key: HKEY_LOCAL_MACHINE\SYSTEM\CurrentControlSet\Services\W32Time\TimeProvider s\NtpClient Change the SpecialPollInterval key accordingly (which gives the intervall in seconds). E.g. change it from 604800 to 86400 to synchronize the time once a day. If you anyhow discover any issues with your system, please make sure to: use the latest updates and service packs for your operating system use the latest updates and service packs for the .Net Framework use the latest updates for your soundcard/drivers regularly Check for Updates to see if a newer ProppFrexx version is available Furthermore check for any latency spikes within your system! Latency spikes caused by a system component are the main reason for audio drop-outs. You can monitor your system latency with these 2 tools: DCP Latency Checker: http://www.thesycon.de/deu/latency_check.shtml Latency Monitor: http://www.resplendence.com/latencymon Use the 2 above tool to monitor your system for any latency spikes! If running these tools for a couple of minutes reveals any issues, follow the instructions given on their web site. Most of the time it is an enabled WiFi and/or Bloothoth device causing latency spikes. So try to disable any existing WiFi and/or Bloothoth device in your device manager! Also try to disable any other device and service which is not essential to your system resp. the audio processing. RADIO42 Confidential 21 ProppFrexx ONAIR ABOUT ProppFrexx ONAIR The main idea of ProppFrexx ONAIR was to offer perfect playlist management and integration. So whenever we are talking about media libraries we are talking about playlists. Instead of using native, proprietary databases to store references to media file, ProppFrexx ONAIR uses standard playlists. However, playlists can be physical local playlist files (eg. like .m3u, .pls or any other supported playlist format) or even links to database tables representing a playlist. Cartwalls are also seen as playlist, whose entries represent the single carts; whereas the scheduler might create dynamic playlists for live assist or fully automated playout operations etc. In other words you might say: „Almost everything in ProppFrexx ONAIR is a playlist“. This means the first thing you should think of is: „Where are my audio files and how do I organize them“. So here are some notes about playlists… By default, the standard playlist formats (like eg. .m3u or .pls) just contain a reference to the location of the audio file (plus sometimes a short title of the reference), but they typically does not contain additional information about how an individual track should be played (eg. specifying cue-points, if loop points exist, if volume envelops to perform automatic fading exist, if additional meta data is associated with a track etc.). For this reason we have developed our own playlist format called „.pfp“ ProppFrexx Standard Playlist format. This format overcomes these shortens and supports all kind of additional meta data per individual playlist track. It is based on the open Sharable Playlist Format (.xspf) which stores the playlist in an XML format. However, you can still use any other existing and supported playlist format with PorppFrexx ONAIR, just be aware, that in such case some features might not be available. So let us assume you already have various playlists available and each playlist represent your database of playable tracks (audio files). Whenever you want to play a track you can create a logical playlist within ProppFrexx ONAIR. This is where the Playlist window comes into play, in which you can arrange all your tracks (eg. add them from one of your media libraries, drag-drop from the windows explorer etc.). This logical playlist defines the order of tracks to be played. Each logical playlist has up to four DJ Players (by default only 2 DJ Players are configured). The tracks from the playlist are loaded in sequential order from the playlist to these players and can now be played out from there. Each DJ Player can be freely assigned to any output mixer channel strip of the main mixer within ProppFrexx ONAIR. Various options are available to support you with these tasks. This goes from automatic playback and mixing to fully manual operations. As you might not always want to operate ProppFrexx ONAIR in a manual fashion an extensive scheduler and scripting engine is available. You can define any number of scripts, in which you describe how and what tracks should be automatically added to logical playlists; and you can setup programs, which are assigned to a scheduler control and define when new logical playlists should be created and what script should be executed along with it (just like in Outlook). This allows you to completely automate ProppFrexx ONAIR operations and also lets you seamlessly switch between manual (live assist) and automatic mode. Two independent cartwalls provide you with the ability to quickly play jingles, sweepers, whatsoever. In addition ProppFrexx ONAIR allows you to organize tracks in so called embedded playlists, which are smaller playlists which treat their entries as one big logical track. This allows you to pack multiple tracks (eg. a row of advertising tracks) to one single track. To support multiple users on a single broadcasting workstation ProppFrexx ONAIR comes with an integrated user management. This allows you to define any number of individual users working on the same machine without the need to change the operating system user. Each ProppFrexx ONAIR user can customize the look and feel of the user interface to his 22 RADIO42 Confidential ABOUT ProppFrexx ONAIR needs and each user can be granted an individual set of user rights (eg. preventing some user to perform certain actions or changing certain settings). Integrated streaming support is another great feature set. You might directly broadcast live streams from within ProppFrexx ONAIR. You can define any number of streaming servers and such ProppFrexx ONAIR can be a source to external streaming servers or even be the server itself (eg. to support local area network broadcasting). An ONAIR time control, RSS Feed Reader, a Message Center, an integrated Web Browser, a freely configurable list of Standby Players, an extensive Find and Explorer control plus Overlay and MODStream support round up the picture. Features The following list provides an overview of the capabilities of ProppFrexx ONAIR: Support for Windows Vista, Windows 7 and Server 2008 (32- or 64-bit) ProppFrexx ONAIR runs on any modern Microsoft Windows® operating system. Vista, Windows 7, Server 2008 as well as XP and Server 2003 are fully supported. This includes either the 32-bit or the 64-bit versions. 24 by 7 ProppFrexx ONAIR is designed to operate 24 by 7. Stability was one of the major design goals to ensure glitch free daily operations. High Quality Audio Processing ProppFrexx ONAIR is based on the best audio engine available on the market, which is BASS (see www.un4seen.com for details). Internal processing is performed in 32-bit floating point precision. The audio processing chain can be fully controlled by numerous options to guarantee an optimum in sound quality from input to output. Fully ASIO and WASAPI Support ProppFrexx ONAIR supports any modern single or multi-channel soundcard with either a WDM, WASAPI or ASIO 2.0 driver. Therefore you might use almost any professional soundcard (digital or analog) with ProppFrexx ONAIR. Support for almost any Audio Format ProppFrexx ONAIR supports playback of almost any audio format (stereo or multichannel, file based or internet streaming), this includes for example WAV, BWF, MP1/2/3, WMA, OGG, FLAC, APE, MPC, AAC, M4A etc. Full TAG Reading and Writing Support ProppFrexx ONAIR supports almost any meta data format (TAGs), including ID3v1, ID3v2, APE, OGG Vorbis, WMA, M4A (iTunes), BWF etc. Support for almost any Recording Format ProppFrexx ONAIR supports encoding or transcoding from and to almost any audio format via freely configurable command-line encoders. This also includes onthe-fly recording of any mixer channel, eg. for immediate voice tracking, on-air checks or archival purposes. Full Broadcast Wave Format Support ProppFrexx ONAIR fully supports the Broadcast Wave Format (BWF). This includes reading and writing of BEXT and CART chunks as well as RF64. Unlimited Media Library Support ProppFrexx ONAIR supports almost any playlist format (e.g. .m3u, .pls, .wpl, .xspf, iTunes .xml, .smil etc.). Any playlist can serve as a media library representing a RADIO42 Confidential 23 ProppFrexx ONAIR database of tracks, which can be used any time during operations. In addition ProppFrexx ONAIR fully supports embedded playlists (playlists treated as a single continous track). You can also define Folder based media libraries (incl. an automatic synchronization feature) as well as Database based media libraries, allowing you to integrate any existing content on-the-fly. For large setups a remote media library server is available as well. 24 Integrated Streaming Support ProppFrexx ONAIR comes with integrated streaming support for SHOUTcast (v1 and v2), ICEcast and Windows Media Server in either push or pull mode. Any number of (different) streaming servers can be configured and used in parallel. Flexible Mixer and Routing Setup ProppFrexx ONAIR can be configured to work in any hardware environment. Any number of input and output mixer channels can be defined as well as virtual subbusses for handing sum- or group channel strips (this includes freely definable speaker assignment). Any player control within ProppFrexx ONAIR can be freely routed to any of those channel strips. This gives you unmatched flexibility in your digital audio workstation setup and lets you integrate ProppFrexx ONAIR into any given studio environment. Mixer Presets and Profiles ProppFrexx ONAIR allows you to define any number of mixer profiles with up to 5 mixer presets each. This allows you to change your entire mixer setup or only the definition of your mixer control (including effect, gain, pan or volume settings) with just a single click. Local, Harddisk or USB-Stick Registration The ProppFrexx ONAIR registration is by default tied to your local machine (of course you can still use any resource within your local area network). However, a special hard disk or USB-Stick registration allows you bind your registration also to a local hard disk and/or a removable USB-Stick, so that you can carry ProppFrexx ONAIR with you on this single disk resp. single USB-Stickj only (mobile DJ support). Full synchronized PFL ProppFrexx ONAIR allows you to monitor any playback or recording source at any time, fully synchronized. Beside real-time PFL (pre fade listening) an extra PFL player allows you to even monitor any position of a playback control in advance. WaveFrom Display with sophisticated Cue-Points incl. Hooks ProppFrexx ONAIR can visualize any audio track in a WaveForm display which allows you to directly edit any cue-points. You can define standard cue-points (like In, Out, Next, FadeOut, Intro/Ramp, Outro etc.) as well as special hook cue-points for partial playback of track snippets. In addition track insert events will be fully visualized. Graphical Segue-Editor (Multi-Track-Editor) ProppFrexx ONAIR comes with a graphical Segue-Editor which allows you to define the segue/mix of two subsequent tracks in a visual fashion by simply dragging the tracks. This multi-track editor also allows you to directly align your track inserts (voice overs) and supports real-time tempo adjustments as well as instant voice over recording and automatic volume attenuation. Instant Recording (Voice Tracking) ProppFrexx ONAIR supports instant (voice over/tracking) recording from any mixer channel source. This allows you to record takes on-the-fly which can be used e.g. as track inserts or as completely new playlist entries. The instant recorder RADIO42 Confidential ABOUT ProppFrexx ONAIR supports direct cue-point editing, ReplayGain calculation as well as full TAG editing as well as volume attenuation of the overlapping segue audio tracks. Support for Embedded Containers ProppFrexx ONAIR not only allows you to use audio tracks within a playlist. In addition placeholders, document references and embedded containers are supported. An embedded container is a collection of entries, which is treated as one logical unit. An embedded container can be a list of audio tracks, an embedded playlist or even an embedded script, which allows you generate dynamic content. You can create embedded containers on-the-fly and even define hook openers, separators and closers for individual media types. Track Information Moderator Support ProppFrexx ONAIR supports the DJ with his voice over task by displaying all currently relevant track information together with any predefined moderator text and comment in a separate and legibly window. Full Timecode Control ProppFrexx ONAIR not only shows you what time it is. You are also always informed about the current track position, elapsed track time, the remaining time until Cue-Out, until the next track, until Fade-Out as well as the remaining Ramp/Intro and Outro times. Freely configurable (Automatic)Mixing ProppFrexx ONAIR allows you to freely define manual and automatic mixing settings to control how tracks (or type of tracks) are mixed during automation or automatic playback. Cue-Points might be automatically calculated based on these settings for individual tracks (or type of tracks) to ensure non-stop and silence-free play out. In addition you can freely define your own volume curves above that. Full Replay Gain Support ProppFrexx ONAIR fully supports automatic replay gain adjustments (either peak level normalization only and/or adjustment of the perceived psychoacoustic loudness). Full VST and DSP Support ProppFrexx ONAIR supports various DSP formats including VST and Winamp DSPs (32-bit version only). Besides that, ProppFrexx ONAIR comes with an integrated 10-band EQ, Dynamic Amplifier and a Compressor/Limiter per single mixer channel. Automatic BPM Detection ProppFrexx ONAIR comes with an integrated BPM detection allowing you to synchronize and mix tracks with a perfect beat match. Flexible Remote Control Support ProppFrexx ONAIR can be remotely controlled via several freely configurable interfaces, eg. TCP/IP, MIDI, Serial I/O, GamePort, Keyboard Hotkeys, OSC, IOWarrior, Velleman K8055, D&R Airence Mixer etc. This allows you to operate ProppFrexx not only via the user interface, but also via almost any external device (perfect integration with your existing DAW controllers should be guaranteed). Almost everything what you can do via the user interface you can also do via the remote control interfaces. Open Sound Control (OSC) ProppFrexx ONAIR fully supports the Open Sound Control (OSC) protocol. This for example lets you use your iPhone or iPad as a remote controller (using ‘TouchOSC’). Multi Studio Support ProppFrexx ONAIR supports remoting in a multi studio environment. If you RADIO42 Confidential 25 ProppFrexx ONAIR operate multiple studios ProppFrexx ONAIR allows you to fully control each studio remotely from any other studio. This includes scheduler and playlist control as well as controlling any remote mixer channel plus a special master and slave mode. 26 High Precision Synchronization ProppFrexx ONAIR allows you to define control commands and synchronize events with played out streams or to other events happening in the system. This ensures full control over not only ProppFrexx ONAIR but also over other applications. Even any number of track events can be defined which should be triggered if a specific position is reached (eg. to insert tracks within tracks etc.). Full Reporting and Logging Almost anything what ProppFrexx ONAIR is doing can be logged to freely configurable log files. This should allow you to fulfill any internal or external reporting and regulatory requirements. Automatic Recording and Automatic Sensing ProppFrexx ONAIR is capable to automatically record anything which is played out through any mixer channel (input and output); including various automatic sensing modes (eg. to only record if a signal is detected or above a certain threshold). This enables you for example to record your entire program for archival purposes or to record the DJ voice talks only for later on-air checks. Modern User Interface The ProppFrexx ONAIR user interface comes as a modern ribbon control with a multiple document interface and a flexible docking manager. This allows you to arrange any window to any location and of course also supports any multi monitor environment. Skinnable User Interface ProppFrexx ONAIR comes with a skinnable user interface. Over 30 skins allow you to customize the look and feel to your needs. This also includes a high contrast skin for color blind people. High DPI Awareness ProppFrexx ONAIR is high DPI aware. The new Microsoft Windows® operating systems (like Vista, Windows 7 or Server 2008) allow you to change the DPI resolution, which in effect will display the ProppFrexx ONAIR user interface bigger or smaller. This is again a huge advantage for visually handicapped people. Integrated User Access Control ProppFrexx ONAIR comes with an integrated user access control, allowing you to define any number of users and assign them to a user profile. To each user profile you can assign roles, rights and settings. This allows you tailor what a user can do with ProppFrexx ONAIR during his daily operations while still using a single windows operating user account (as every windows operating user sign on/off operations might break the play out of your broadcast). Integrated Scripting ProppFrexx ONAIR comes with an integrated scripting engine. This allows you to define any number of scripts, which tells the system what and how tracks should be played during automation. Make it complex or simple – you define how your station sounds while no operator is doing any live performance, or even run your station fully automated. Integrated Scheduling The ProppFrexx ONAIR scheduler comes in a convenient Outlook-like style. Here you define when and how a script should run (with fixed or soft start time, as an RADIO42 Confidential ABOUT ProppFrexx ONAIR overlay or new program, with or without a fixed end time etc.). In addition the scheduler allows you to also define general reminders, alerts or to simply execute any available control command. Just full control without limits. Full Automation and Live-Assist Support The scripting engine combined with the scheduler allow you to run your station fully automated. In addition you can define when and if media libraries (playlists) should be automatically reloaded and if special folders should be monitored for new content in the background. However, you can of course always operate ProppFrexx ONAIR also in full manual mode or switch at any time between Live-Assist and automation mode. An AutoPlay feature also allows any operator to take a break and resume his live mode at any time later. This guarantees seamless operations in any day to day situation. Flexible Import and Export (Integration with external Schedulers) The used Media-Libraries can easily be exported to a freely definable format (CSV, FixedWidth, Database or Playlist) which allows you a perfect integration with any external scheduler application like Music1, PowerGold, Selector etc. In addition ProppFrexx ONAIR allows you to import external scheduler log-files (e.g. from Traffic 2000 or Music1) and to create on-the-fly appropriate program and/or overlay scheduler entries accordingly Playlist Overlay Support ProppFrexx ONAIR allows you to define overlay playlists to be played out above your regular program at any definable time. An overlay playlist will suspend/pause or really overlay any current program and allows you to define stuff to be played independent from any operator (eg. advertising, news, weather, traffic reports etc.). Integrated Advertising Management ProppFrexx ONAIR allows you to define and manage all your advertising needs, organize your partners and advertising audio, define advertising slots and report what has really being played as the perfect bases for your billing. Advertising playlists are automatically generated and can be integrated into the scripting engine or used as an overlay within the scheduler. External Device Monitoring ProppFrexx ONAIR allows you to monitor your external devices (soundcards), preventing unwanted changes (eg. muting a device or changing the device volume) by other applications or manual user changes. Sophisticated DJ-Players Each playlist window comes with up to four DJ Players. The size and features of these players can be defined from small/simple to medium/average to large/complex. A WaveForm visualization, a Cue-Point section, a Gain/Pan/EQ section, a special FX section, a hot start and event editor section, a loop sampler section, (master) tempo and pitching controls as well as reverse direction and backspin support round up the picture. Additional Standby Players Beside the playlist related DJ Players ProppFrexx ONAIR comes with any number of additional Standby Players. Each Standby Players has the same functionality as the DJ Player plus a track stack mode and can serve manual play out of any track, stream or embedded playlist at any time. Integrated Cartwalls ProppFrexx ONAIR comes with two integrated but independent cartwalls. Each cartwall allows you to quickly play any kind of jingle, sweeper, sample, whatsoever. Jump buttons allow you to quickly change your cartwall playlist. Multiple carts can be played all together or even sequentially in a row. Fading and looping can also be fully controlled. RADIO42 Confidential 27 ProppFrexx ONAIR 28 MODStream Watcher ProppFrexx ONAIR allows you to monitor external streaming sources (eg. SHOUTcast, ICEcast or WMA streams; URLs) in the background at any definable time and if alive any current program might be suspended/paused or overlaid. This allows you to easily integrate external live, moderator broadcasts into your standard program. Integrated Search, Find and Explore ProppFrexx ONAIR comes with super fast search and retrieval tools. Beside scanning and/or monitoring your hard disk respective certain (network)folders all your defined media libraries can be quickly accessed to find relevant tracks on the fly. Depending on your quality of meta data this also includes searching for similar tracks. This allows you to find the right track at the right time (eg. search by artist, album, title, BPM, genre, rating, mood etc.). Integrated Web-Browser ProppFrexx ONAIR comes with an integrated web browser. This web browser can be used to support ONAIR operations (eg. to display station, artist, current track, moderation information etc.) or to display your custom web pages for interactive listener communication. Integrated Message Center with RSS ProppFrexx ONAIR comes with a central message center, which allows you to not only get informed by external events (like scheduler alerts or control room messages) but also to read any internet RSS feed like current news and weather reports or traffic control reports etc. Integrated CD-Ripping and -Burning Support ProppFrexx ONAIR also allows you to directly rip or burn Audio-CDs. Ripping includes automatic track lookup and tagging via MusicBrains, FreeDB.org and Amazon. mAirList/DRS2006 Compatibility For users who have previously used mAirList or DRS2006 we make the switch easy. ProppFrexx ONAIR supports reading .mlp playlist files, .mmd meta data files as well as TXXX:mAirList ID3v2 file TAGs. In addition ProppFrexx supports reading DRS2006 dBase .dbf files. All cue- and hook-points, most options, the type, title, artist, comment, the amplification etc. will be read and converted accordingly. So no need to tag all your files again. And many More… - An ONAIR Time control informs you about the current time (incl. a quarter and hour countdown, an analog and digital clock) - A customizable Station-Visual control (incl. your station logo as well as DJ pictures or live FFT visuals) - A printing system to print your playlists or scheduler setup (incl. PDF, XML or HTML export) - etc. RADIO42 Confidential ABOUT ProppFrexx ONAIR Tools Beside ProppFrexx ONAIR six tools/applications are installed as well (which you can find/start from the Windows Start menu resp. directly from within the installation folder): ProppFrexx Meta Data Editor The ProppFrexx Tagger is a standalone meta data editor which can be used to edit any available TAG data (ID3v1/v2, OGG Vorbis, APE, Monkey, WMA, ASF, M4A, iTunes, RIFF INFO, BWF BEXT and CART etc.) within your audio file. This not only allows your editors to maintain any standard TAGs (like Artist, Title, Composer, ISRC, Grouping, Mood, Genre, CoverArt etc.), but also gives you the ability to pre-define cue- or hookpoints, volume envelops, track/voice inserts etc. Beside storing the meta data directly within your audio file, the ProppFrexx Tagger also allows you to save separate meta data files along with the audio (if you don't want to make any modification to your source files). ProppFrexx Media Library Server This tool runs as a tray application in the background and can run on any machine within your network and can provide so called Remote Media Libraries to any ProppFrexx ONAIR instance. The ProppFrexx Media Library Server manages playlist, folder or database based media libraries defined on a central server repository. A ProppFrexx ONAIR instance can attach to any Media Library Server and use those central libraries, query media entries from those servers just as if they had been defined locally. This allows you to e.g. store all your audio content on a central, secured, shared network drive which is accessible by all ProppFrexx ONAIR instances and let the central Media Library Servers manage those content/libraries. Long running TAG reading, synchronization, refresh and availability tasks can now be moved to a central Media Library Server instead of running within ProppFrexx ONAIR. In addition the Media Library Server allows direct access to the audio files from any attached ProppFrexx ONAIR instance even if they are else not directly accessible from the ProppFrexx ONAIR instance – this by temporarily transferring the audio file from the server to the client. This tool might be essential in larger, multi studio setups where a central audio content server is required which can also be used in a HA environment. ProppFrexx Advertising This tool manages all your advertising needs. It allows you to define and schedule advert slots; manage your advert partners; manage your advert campaigns and assign advert tracks to campaigns as well as assign campaigns to advert slots. In addition this tool offers various statistics and billing reports to fullfill your daily advert planning tasks. As all the advertising data can be stored on a central, secured, shared network folder which is also accessible by all ProppFrexx ONAIR instances, it allows you manage advertising independent from ProppFrexx ONAIR (e.g. operated by your advert team only). ProppFrexx ONAIR Watcher This little tool runs as a small tray application in the background and allows you to constantly monitor the state of ProppFrexx ONAIR. In case of an unattended shut down of ProppFrex ONAIR or any other crash, it will automatically be restarted. ProppFrexx Time This little tool is a standalone Gorgy-Timing inspired clock control in the style of the classic LEDI® layout. pfremcmd This command-line tool allows you to send any control-command(s) to any ProppFrexx ONAIR instance remotely; e.g. to be used with 3rd party software to trigger certain actions. Control-Commands allow you to execute almost any ProppFrexx functionality. RADIO42 Confidential 29 ProppFrexx ONAIR pfpconv This command-line tool allows you to convert any supported playlist format (see below) into the internal ProppFrexx Standard Playlist Format (.pfp). Supported Media Formats ProppFrexx ONAIR supports the following audio and playlist formats (this includes local as well as network files and internet streaming formats in HTTP and FTP): Playback (decoding): Mpeg Layer I-III (MP3*, MP2, MP1) Wave and Broadcast Wave Format (WAV, AIFF, BWF incl. RF64, BEXT, CART) Ogg Vorbis (OGG) Windows Media Format (WMA, WMV)* Free Lossless Audio Codec (FLAC) Monkey’s Audio (APE) Musepack (MPC) Advanced Audio Codec (AAC, AAC+, MP4, M4A)* Dolby Digital (AC3)* Apple Loosless (ALAC)* Speex (SPX) True Type Audio (TTA) Opus Interactive Audio (OPUS) Audio CD (CDA) MIDI MOD Music Recording (encoding): MP3 (via external command-line encoder)* MP2 Wave and Broadcast Wave Format Format (WAV, BWF incl. RF64, BEXT, CART) Ogg Vorbis (OGG) Windows Media Format (WMA) Advanced Audio Codec (AAC(+), MP4, M4A, via external command-line encoder)* Free Lossless Audio Codec (FLAC) Musepack (MPC) Opus Interactive Audio (OPUS) Windows Audio Compression Manager (ACM) Any other external command-line encoder ProppFrexx Standard Playlist (.pfp) Winamp Playlist (.m3u, .m3u8) Standard Playlist (.pls) iTunes Library (.xml) Windows Media Playlist (.wpl) Sharable Playlist Format (.xspf) Playlists 30 RADIO42 Confidential ABOUT ProppFrexx ONAIR Synchronized Multimedia Integration Language (.smil) mAirList Playlist Format (.mpl) CARMEN Access Database Format (.mdb) DRS2006 dBase Database Format (.dbf) *ProppFrexx might leverage the decoding/encoding audio codes as installed on your operating system (e.g. using the Windows Media Foundation libraries respectively the QuickTime libraries). When installed no additional decoding/encoding license is required. RADIO42 Confidential 31 ProppFrexx ONAIR Starting ProppFrexx ONAIR In order to launch ProppFrexx ONAIR double-click on the desktop icon named ProppFrexx ONAIR or choose ProppFrexx ONAIR from the system menu Start – All Programs – radio42 – ProppFrexx ONAIR. Every time you start ProppFrexx ONAIR a splash screen will appear: Figure 2: ProppFrexx ONAIR Splash Screen The splash screen will inform you about the startup process. Once finished the main window of ProppFrexx ONAIR will become visible – respectively you will be asked to register your copy of ProppFrexx ONAIR (if you haven’t done so or started ProppFrexx ONAIR for the very first time). For alternative start methods and command-line options see the following chapter „Command-Line Options“. If you want to start ProppFrexx ONAIR each time your computer starts, you might add „ProppFrexx ONAIR.exe“ to your „Autostart“ group in the Windows Start menu. When you start ProppFrexx ONAIR for the very first time the mixer setup wizard will be launched automatically. The mixer setup wizard simplifies the process of creating your mixer setup (the definition of your output and input mixer channels and their soundcard usage) to integrate ProppFrexx ONAIR into your existing hardware environment and guides you through a series of simple steps. Figure 3: ProppFrexx ONAIR Mixer Setup Wizard 32 RADIO42 Confidential ABOUT ProppFrexx ONAIR In the first step you can select one out of six available integration types, which are listed below. Note, that you can at any time later extend you mixer setup and add new mixer channels and settings manually. So these six integration types just represent some typical setups as a starting point. So you might select the model, which is the closed one to your actual use case. Figure 4: ProppFrexx ONAIR Mixer Setup Wizard (Step 1) 1. No external Mixer, no Microphone: This setup type is the most simplistic model. It creates two mixer output channels. One for standard play out of all default players (DJ, Cartwall, Standby etc.) and one output channel for Pre-Fade-Listening (PFL Player, Quick Monitor and SegueEditor). No mixer input channel is created. The PLAY output mixer channel is set to AutoSND2 at No PFL, which means you will hear the current PLAY signal in the PFL channel when you are not performing any pre-fadelistening. Streaming-Servers might directly use the PLAY output mixer channel. 2. No external Mixer, internal Microphone: Almost identical to the previous model, but a virtual PLAY channel is created which is further routed to a real OUT channel and in addition one input mixer channel is created, which is also routed to the OUT channel. The OUT output mixer channel is set to AutoSND2 at No PFL, which means you will hear the current OUT signal in the PFL channel when you are not performing any pre-fadelistening. Streaming-Servers might directly use the OUT output mixer channel. RADIO42 Confidential 33 ProppFrexx ONAIR 3. No external Mixer, internal Microphone (extra Monitoring): Four output mixer channels and one input mixer channel are created. The default players are routed to the virtual PLAY channel, which is further routed to the real OUT channel. The OUT channel is further copied a MON channel, thus giving 2 independent outputs. The MIC input is routed to the MON output to keep playback and monitoring separate. The OUT output mixer channel is set to AutoSND2 at No PFL, which means you will hear the current OUT signal in the PFL channel when you are not performing any pre-fadelistening. Streaming-Servers might directly use the MON output mixer channel. 4. External Mixer, external Microphone (Simple): Two output mixer channels and one input mixer channel are created. The output is identical to type (1), but in this setup ProppFrexx mainly serves as a play out engine. The mics and other external sources are mixed by the external mixer, which sends his final ‘on-air’ mix down back to a ProppFrexx input mixer channel. Streaming-Servers might directly use the INP input mixer channel. 5. External Mixer, external Microphone (Complex): Four output mixer channels and one input mixer channel are created. The default players are routed to the virtual PLAY channel, which is further routed to the real OUT channel, which serves as the main output to the external mixer. Like in the above mode the external mixer sends the final mix down signal to an INP input mixer channel, which is further routed to a MON output channel, thus giving an independent output for extra monitoring. The OUT output mixer channel is set to AutoSND2 at No PFL, which means you will hear the current OUT signal in the PFL channel when you are not performing any pre-fade-listening. Streaming-Servers might directly use the MON output mixer channel. 6. External Mixer, internal Microphones: Similar to the previous mode, but an additional input mixer channel is created to receive an internal microphone signal. Both the final mix down of the external mixer as well as the internal microphone are routed to the MON output channel for any external monitoring. 34 RADIO42 Confidential ABOUT ProppFrexx ONAIR Streaming-Servers might directly use the MON output mixer channel. In the next step you can define what driver model you want to use with your soundcard. Whenever possible we recommend using ASIO for lowest latency (especially when you want to monitor any mixer input channel to any output channel). If ASIO is not available you might want to use WASAPI (Windows Audio Session API, available on Vista/Win7 only) and if that is also not available you might need to use the classic Direct Sound (WDM) driver model. Figure 5: ProppFrexx ONAIR Mixer Setup Wizard (Step 2) When selecting a driver model the available soundcard devices are automatically listed to the right side. In the next step you can define the sample rate to be used with your soundcard. Figure 6: ProppFrexx ONAIR Mixer Setup Wizard (Step 3) For optimal sound quality and minimum resource usage we recommend using the sample rate you are using with most of your audio files. Eg. if most of your audio files are encoded in 44.100 Hz, you might want to use this sample rate also for your mixer setup. In any case, automatic high-quality resampling will apply, if you select any different sample rate. RADIO42 Confidential 35 ProppFrexx ONAIR In the next step you can define the number of DJ Players you want to use within a playlist window as well as if you want to create individual output mixer channels for each DJ Player. Figure 7: ProppFrexx ONAIR Mixer Setup Wizard (Step 4) It is recommended to use 3 DJ Players within the playlist window but you might also select 2 or 4 at this point. If you select to create individual mixer output channels for each DJ Player, than instead of only one PLAY output mixer channel (to which all players are routed), multiple output mixer channels will be created (one for each player). And in a final step you need to assign the mixer channels to your physical soundcard devices. According to the hardware integration model you have selected you can assign a dedicated soundcard device/channel to the mixer channels created/used by ProppFrexx ONAIR. Figure 8: ProppFrexx ONAIR Mixer Setup Wizard (Step 5, 6) Make sure to select a unique combination for each mixer channel, i.e. do not use the same soundcard device/channel combination for different mixer channels. If you are running the mixer setup wizard manually you have the ability to specify a mixer setup profile name for your configuration settings. This gives you the ability to later switch 36 RADIO42 Confidential ABOUT ProppFrexx ONAIR between different mixer setup profiles. Eg. you might create multiple mixer profiles and onthe-fly switch between these profiles according to your current need. Figure 9: ProppFrexx ONAIR Mixer Setup Wizard (Step 7) The mixer setup wizard will not be able to create a perfect setup for all environments. Eg. some users might want to create an individual real output (instead of virtual) for all DJ Players or even add more mixer channels. In these cases select the best matching setup and adjust the mixer setup manually as explained in the following chapters. Also note, that you might run the mixer setup wizard again at any time later. To do so, just select the "Mixer Setup Wizard..." menu item within the " Help" menu (which is located at the top right of the main window). RADIO42 Confidential 37 ProppFrexx ONAIR Registering ProppFrexx ONAIR When you launch ProppFrexx ONAIR for the very first time or have never so far registered it, you will be asked to register your copy. It is recommended to register your ProppFrexx ONAIR license upon purchase. Note, that there are three different registrations modes available: 1) Normal Registration: The Ident-Number is tied to your local machine. 2) Harddisk Registration: The Ident-Number is tied to your installation hard disk. 3) USB-Device Registration: The Ident-Number is tied to a USB-Device (ie. USB-Stick). Make sure to select the proper registration mode prior to registering! You can enforce a certain registration mode by starting ProppFrexx ONAIR with either the “-fileReg” or the “-usbReg” command-line option (or directly in the following registration dialog). If you don’t specify any command-line option (or have not specified a certain registration mode in the registration dialog) the normal registration mode is selected. Each registration mode will generate an individual Ident-Number and requires a different license (registration keys)! Note, that once you registered ProppFrexx ONAIR with a certain registration mode you should use/run ProppFrexx ONAIR each time with this same option (e.g. if you registered with the USB-Device mode (e.g. by using the “-usbReg” command-line option or by selecting the USB-Device registration mode within the registration dialog) you should run/start ProppFrexx ONAIR each time with this same option)! Else the normal registration mode will be selected for which you haven’t registered and as such your obtained registration keys wouldn’t match! Also note, that the USB-Device registration mode requires the USB-Device to be present at any time during ProppFrexx is running! The following registration dialog will appear (which can also be invoked manually at any time from the general settings dialog by clicking on the ‘Registration…’ button): Figure 10: Registering ProppFrexx ONAIR To perform your registration first select the registration mode you want to use. Select it from the ‘Mode’ combobox as shown above! Note, that when changing the registration mode the Ident-Number will change and the registration data (customer name, email, serial number and registration key might get cleared). When you have selected the ‘USB-Device’ registration mode the following dialog might appear in order to let you select the USB-Device to write the registration data to and to obtain the Ident-Number from: 38 RADIO42 Confidential ABOUT ProppFrexx ONAIR Figure 11: USB-Device Registration In the above dialog select the appropriate USB-Device to use for your registration. The ‘Always start ProppFrexx with the -usbReg option’ check box allows you to specify, that once selected you can enforce ProppFrexx ONAIR to be started with the appropriate ‘-usbReg’ option each time automatically (meaning you wouldn’t need to specify the ‘-usbReg’ option manually as a command-line parameter). Once the correct registration mode was selected you might not have received any registration data yet. To complete your registration process you MUST provide the following information to RADIO42: - Customer Name (your full first and last name) - Customer eMail (your working and permanent email address) - Ident Number (as shown in the registration dialog) - Edition (the edition to register: Basic, Premium, Professional, Enterprise) The following steps are required to complete your registration process: 1. Provide the above information to RADIO42: a) by sending an email to [email protected] b) by entering your name and email to the appropriate fields and by clicking on the „Request Keys…“ button (note an email client must have been installed on your PC in order to work) 2. Wait until you receive an email from RADIO42 containing the payment link or make a direct payment using the purchase links on our web-site. 3. Pay your license fee via PayPal. 4. Wait until you receive back an email from RADIO42 containing your registration data (this will contain a serial number, registration key and validation code). This might take some hours up to a couple of days. 5. Now enter your customer name, email, serial number and registration key in the respective fields exactly as obtained! 6. Click on the „Register…“ button. You will now be prompted to enter your validation code. Click „OK“ to close the dialog. 7. If you entered your registration data correctly you can now use ProppFrexx ONAIR and will not be prompted for registration again. Note, that with the standard registration the „Ident Number“ is tied to your local machine. So it is not possible to run ProppFrexx ONAIR with the same registration data on a different machine. You MUST obtain a valid license (and separate registration data) for each machine you want to run ProppFrexx ONAIR RADIO42 Confidential 39 ProppFrexx ONAIR on! Note, that there are three different registrations modes available (see command-line options below for details): 1) Standard Registration: The Ident-Number is tied to your local machine. 2) Hard-Disk Registration: The Ident-Number is tied to your hard disk. 3) USB-Device Registration: The Ident-Number is tied to your USB-Device. Make sure to select the proper registration mode prior to registering! However, you can and must use the exact same registration data, for each system user. If you have multiple windows users who should use ProppFrexx ONAIR with their Windows account, each user is required to enter the same registration data once again at first startup. Alternatively (or during the time until you actually receive your registration data) you might use the demo version of ProppFrexx ONAIR, which has the limitation that the demo only runs for 4 consecutive hours until it automatically closes (and needs to be restarted manually after) and in addition a short 2 kHz tone will be played every so often in one of your mixer channels. To use the demo version simply click on the „Use DEMO Version“ button. Figure 12: Using the ProppFrexx ONAIR Demo Version When using the demo version you can return to the registration dialog at any time from the general settings dialog by clicking on the ‘Registration…’ button. Summary: 1. 2. 3. 4. 5. 6. 7. 8. 40 Select your Registration-Mode Send Ident-Number, Customer Name, eMail and Edition info to radio42 Use the the demo version until the registration process is completed Pay online or wait for your payment link Pay your license fee Wait for your registration keys… Return to here and (re)select your Registration Mode Enter the registration keys as obtained RADIO42 Confidential ABOUT ProppFrexx ONAIR Command-Line Options By default ProppFrexx ONAIR will start without any command-line options. However, in some cases it might be required to use some of the following command-line options. -scheduler <start|stop> If specified ProppFrexx ONAIR will be enforced to start resp. stop the scheduler at startup. Normally the automatic start of the scheduler is defined in the global system settings (see below). In certain circumstances it might be desired to overwrite these system settings using the given command-line option. -streaming <start|stop> If specified ProppFrexx ONAIR will be enforced to start resp. stop all stream server configurations at startup. Normally the automatic start of the stream servers is defined in their related configuration settings (see below). In certain circumstances it might be desired to overwrite these settings using the given command-line option. -config <path> Defines the location (relative to the executable location or absolute path) to your configuration directory. By default ProppFrexx ONAIR stores any configuration files in the Application User Data Folder, i.e. „C:\Documents and Settings\username\Application Data\radio42\ProppFrexx ONAIR“ resp. „C:\Users\username\AppData\Roaming\radio42\ProppFrexx ONAIR“. By using this command-line option you can enforce ProppFrexx ONAIR to retrieve and store any configuration files at the given path location. This might for example be useful, if you want to share a common configuration for different system users, store the configuration files at a central network location or relative to the executable location on the same hard disk (like required for any hard disk registration). -globalconfig <path> Defines the location (relative to the executable location or absolute path) to certain global configuration files. Namely: Additional Media Libraries (file ProppFrexx ONAIR.medialibs) Additional Cartwall Libraries (file ProppFrexx ONAIR.cartwalllibs) Additional Script Libraries (file ProppFrexx ONAIR.scriptlibs) Global Message Center Messages (file ProppFrexx ONAIR.messages) Mixing configuration (file ProppFrexx ONAIR.mixing) By default ProppFrexx ONAIR stores the above mentioned configuration files in the standard configuration directory (which might be either the default Application User Data Folder or the configuration directory as defined by the -config command-line option, see above). By using this command-line option you can enforce ProppFrexx ONAIR to retrieve and store the above mentioned configuration files at the given path location. This might for example be useful, if you want to share a global and common configuration of your libraries and mixing settings for different ProppFrexx instances (e.g. installed on different machines within a network) at a single central location. When doing so, be careful with making changes to these global config files, as different ProppFrexx instances might overwrite each others changes. To prevent such scenario, make sure to use a single dedicated ProppFrexx instance for making changes to your library collection (add or remove libraries) and for making changes to your mixing settings. RADIO42 Confidential 41 ProppFrexx ONAIR -usbReg By default ProppFrexx ONAIR uses a machine related registration. This means the registration process ties the Ident-Number and the registration data to the local computer and stores the registration information to the users windows registry (HKEY_CURRENT_USER). This means, the registration is only valid on this computer/PC and if the machine configuration changes (e.g. your CPU, motherboard or network settings change) your registration might become invalid as the Ident-Number might change with it. As an alternative you can enforce ProppFrexx ONAIR to tie the registration to almost any removable USB-Device (ie. a USB-Stick). Use the above command-line option to do so. In this case the registration information will be stored on the root path of the selected USB-Device. This registration method has the advantage that you can use this USBStick even on different machines – but only on one at a time and the Ident-Number will not change, if you change your machine configuration! However, the USB-Device must be present all the time ProppFrexx ONAIR is running! Note, that the USB-Device registration will present you a different Ident-Number and therefore requires new registration data to be obtained from RADIO42! This means, if you wish to use both (standard and USB-Device) registrations you need to request two independent registration keys (2 licenses are needed)! If you selected the USB-Device registration method make sure to run/start ProppFrexx ONAIR every time with this command-line option! If you start ProppFrexx ONAIR and omit this option the standard registration will become active (for which you might not have registered so far)! -fileReg By default ProppFrexx ONAIR uses a machine related registration. This means the registration process ties the Ident-Number and the registration data to the local computer and stores the registration information to the users windows registry (HKEY_CURRENT_USER). This means, the registration is only valid on this computer/PC and if the machine configuration changes (e.g. your CPU, motherboard or network settings change) your registration might become invalid as the Ident-Number might change with it. As an alternative you can enforce ProppFrexx ONAIR to tie the registration to the local hard disk it is installed on. Use the above command-line option to do so. In this case the registration information will be stored in an extra file within the configuration path. Note, that the local hard disk registration will present you a different Ident-Number and therefore requires new registration data to be obtained from RADIO42! This means, if you wish to use both (standard and hard disk) registrations you need to request two independent registration keys (2 licenses are needed)! In most cases using the „-fileReg“ command-line option means, that you should also use the „-config“ command-line option in order to specify the configuration path location to be on the same hard disk as your executable. This allows you to install ProppFrexx ONAIR on a certain hard disk and to register ProppFrexx ONAIR for that certain hard disk - so that you can carry this hard disk with you and use it on any machine the hard disk is attached to. 'This is what we call a 'mobile hard disk installation'. A mobile hard disk installation requires you to always use the command-line options given! If you selected the hard disk registration method make sure to run/start ProppFrexx ONAIR every time with this command-line option! If you start ProppFrexx ONAIR and omit this option the standard registration will become active (for which you might not have registered so far)! 42 RADIO42 Confidential ABOUT ProppFrexx ONAIR You might move the ProppFrexx ONAIR installation to a different location by simply copying all files from the current installation directory to the new one including all sub-directories. The same applies to all your configuration files. You might copy all files and subdirectories from your Application User Data Folder to a new PC or location in order to transfer all settings. Note that the files with the extension „.mixer“ contain the mixer setup, so make sure that the machine you are transferring the settings to might not use the same soundcard devices - and such a new setup of the mixer might be required. -slave By default ProppFrexx ONAIR starts in master mode and neither the OnSetMaster nor the OnSetSlave control commands are executed. Using this command-line option enforces to start ProppFrexx ONAIR in the slave mode and such the OnSetSlave control command is triggered at startup. -master By default ProppFrexx ONAIR starts in master mode and neither the OnSetMaster nor the OnSetSlave control commands are executed. Using this command-line option enforces to start ProppFrexx ONAIR in the master mode and such the OnSetMaster control command is triggered at startup. -allowmultiple By default only one instance of ProppFrexx ONAIR can be started at a time on your machine. You might use this command-line option to allow multiple instances to be started. Note, that various issues might arise when starting multiple instances of ProppFrexx ONAIR, eg. the same ASIO device cannot be used twice, the scheduler cannot run in parallel using the same calendar file, etc. So it is recommended to only use this command-line option together with the „config” option. Be sure you know what you are doing. RADIO42 Confidential 43 ProppFrexx ONAIR WORKING WITH ProppFrexx ONAIR The first thing you should think about when using ProppFrexx ONAIR is how you want to use it, meaning in which hardware environment (soundcards, external mixer etc.) you want to embed it. ProppFrexx ONAIR has very flexible capabilities when it comes to using your soundcard inputs and outputs. You can define any number of mixer channels and routings to these channels. Each mixer channel represents one logical audio stream to one of your soundcard I/Os - this is what we call the 'mixer setup'. As ProppFrexx ONAIR has various integrated players (eg. the DJ Players, the PFL Player, the Quick Monitor Player, the Cartwall Players, the Standby Players, the MODStream Player, the Overlay Player etc.) you can freely define to what mixer channel you want to route each of these players. The routing therefore defines what soundcard outputs are being used by each player. Furthermore you might send the audio signal of a mixer channel to other mixer channels and thus clone/copy the audio signal from one mixer channel to others. The same applies to input mixer channels receiving/recording the audio signal from a soundcard input. You might also send any input audio signal to any of the defined output mixer channels. Virtual output mixer channels lets you define group- or sub-busses. And last but not least you can use any mixer channel as a source for a streaming server. As you might guess, it is important to first plan your mixer setup and routing: a) What soundcard inputs and outputs will be required? b) How many mixer channels (input and output) are needed? c) Is an external mixer being used or should only internal mixing be performed? d) Are external audio sources (CD-Players, Turntables, etc.) being used? e) Are inputs being captured (eg. microphones or a final mix from an external mixer)? f) Should the integrated streaming servers being used and if yes, from which mixer channel should they stream? g) Are extra monitoring mixer channels being required (eg. to feed monitor or control room speakers)? All these questions and the related setup is further described in the chapter „Mixer Setup“. But let's first take a look to the ProppFrexx ONAIR main window and its components. 44 RADIO42 Confidential WORKING WITH ProppFrexx ONAIR The Main Window The ProppFrexx ONAIR user interface comes as a modern ribbon control with a multiple document interface and a flexible docking manager. This allows you to arrange any window to any location and of course it also supports any multi monitor environment. The user interface is skinnable and comes with over 30 skins to allow you to customize the look and feel to your needs. This also includes a high contrast skin for color blind people. The new Microsoft Windows® operating systems (like Vista, Windows 7 or Server 2008) allow you to change the DPI resolution, which in effect will display the ProppFrexx ONAIR user interface bigger or smaller. This is again a huge advantage for visually handicapped people. The cutting-edge user interface was designed to let you operate ProppFrexx ONAIR in a simple and intuitive but also efficient way. Here is an overview of the main window elements: Main Menu Button Quick Access Toolbar Header Bar Ribbon Bar Playlist Window Area Tab Window Caption Tab Window Title Bar Figure 13: The Main Window Status Bar Tabbed Docking Windows Main Menu: The main menu can be opened by clicking the main menu button. Ribbon Bar: The ribbon bar contains three groups: the main control bar, the scheduler control bar and the user control bar. You can change the active group by clicking on the RADIO42 Confidential 45 ProppFrexx ONAIR related group header item. The main control bar contains the most frequently used toolbar items. When a playlist window is open additional tool bar items will be shown. Quick Access Tool Bar: The quick access tool bar contains shortcuts to the ribbon bar items and can be customized by right-clicking on any ribbon bar item. Header Bar: The header bar shows the currently logged in user (if user access control is enabled), the on-air status and contains the help menu. Status Bar: The status bar shows the last performed action or related information and displays the CPU usage as well as the current date and time. Playlist Window: In this area playlist windows will be shown. You can open as many playlists in parallel as you want. Playlist windows are always arranged in a tabbed manner on the main window. All other windows can be freely arranged (docked or floating, see below). Tabbed Docking Windows: ProppFrexx ONAIR hosts the following docking windows: 1. Station Visual : displays your station logo or a FFT visual of any mixer channel. 2. ONAIR Time : Displays the current date and time and optional messages. 3. Cartwall I and II : Displays your cartwall items. 4. Control Room Message Center : Displays RSS Feeds and general messages. 5. Network Streaming Monitor : Displays all used broadcast streaming servers. 6. Main Mixer : Displays all mixer channels and the main channel strip. 7. Find Track : Displays a search to find tracks in your libraries. 8. Directory Explorer : Displays an explorer to navigate through any folder. 9. Trackboard : Displays an internal clipboard of tracks you might want to use. 10. Web Browser : Displays the build in web browser. 11. Standby Players : Displays your configured stand-by players. 12. MODStream Player : If used, the MODStream watcher is displayed. 13. Overlay Player : If used, the overlay player is displayed. You can rearrange the position and location of any of the docking windows by dragging the docking window's title bar or caption with the mouse. When dragging, docking icons are displayed which help you arrange the window to a new location and position. A window can either be docked to any other window or it can be floating. You might also rearrange the order of tabbed docking windows by dragging the tab window caption. Docking Icons Docking Preview Area Figure 14: Dragging a Docking Window 46 RADIO42 Confidential WORKING WITH ProppFrexx ONAIR To use ProppFrexx ONAIR in a multi-monitor environment, you might move a docking window to a different monitor on your expanded desktop. Eg. keep the main window (containing the playlists) on your main monitor, but make the cartwall window, the mixer window and any other docking window floating and located these windows on your secondary monitor. The state and location of any window will be saved when you close ProppFrexx ONAIR and restored when you open it again. When using the user access control this is also true for any individual user. The Main Menu To open the main menu click on the main menu button: Main Menu Button Opens a new and empty playlist Opens a most recently used playlist or library Saves the current playlist Closes the current playlist Prints the current playlist Opens the general configuration settings Lets you change the look and feel (skin) Rips tracks from an audio CD Burns tracks to an audio CD Lets you instantly record from any mixer source Changes the user (if user access control is enabled) Closes ProppFrexx ONAIR Figure 15: The Main Menu The individual functions of the main menu are described in the following chapters. The Ribbon Bar The ribbon bar contains three different pages: 1. the Main Control page 2. the Scheduler Control page 3. the User Control page 4. the DJ Control page Depending on the state of ProppFrexx ONAIR (eg. if a playlist window is open or the scheduler is running) the ribbon bars show more or less items. Figure 16: The Main Control Ribbon Page RADIO42 Confidential 47 ProppFrexx ONAIR Open: Opens an existing playlist (Ctrl+O). Click on the arrow to open the most recently used playlists or any of the defined media libraries. New: Creates a new and empty playlist (Ctrl+N). Close: Closes the currently active playlist (Ctrl+F4). Save: Saves the currently active playlist (Ctrl+S). Click on the arrow to open the save submenu. Save Playlist As: Saves the currently active playlist under a new filename to a new location (Ctrl+Shift+S). The playlist entries are left at their original location, just the playlist location will change. Copy Playlist To: Copies the content of the playlist (the tracks of the playlist) to a new target directory (Ctrl+Shift+C). This allows you to place all tracks plus the playlist itself to a single folder. This might be useful for pre-production preparation. Rename Playlist: Changes the name (not the file) of the currently active playlist (Alt+F3). Save Media Libraries: Saves all loaded Media Libraries, if they have been changed. Save Cartwall Libraries: Saves all loaded cartwall libraries, if they have been changed. Save All: Saves all open files, incl. playlists, media and cartwall libraries as well as mixer settings (Alt+Ctrl+S). AutoPlay: Toggles the AutoPlay option. If enabled the current playlist will automatically advance the tracks and play them automatically one after the other. If disabled you have to advance the tracks manually (F4). AutoPlaylist (combo box): Selects which playlist should be used when in automatic playback mode. This can either be the currently active playlist or a loaded media library. AutoTrackMode (combo box): Sequential: Selects a next track in linear order from the selected media library. Random: Selects a next track in random order from the selected media library. Fading: Toogles the fading option. If fading is enabled the players do use any defined volume curve during playback. If disabled the tracks are played without applying any volume curve (F3). This also defines how players are stopped/paused resp. resumed by default, ie. if they fade-out/-in. AutoPlay Caption Arrow: Click on the small arrow icon at the lower right of the AutoPlay caption to open a list of the last recently played tracks. Delay Overlay: Click here to delay the start time of the current overlay, which is about to start (only visible when the MODStream or Overlay player is active). Play Next Track: Starts playback of the next track in the currently active playlist and stops the current playing track. Fades out on UseFading, Eject on AutoUnload (F9). Play Next Track: Immediately starts playback of the next track in the currently active playlist and stops the current playing track. No Fading, Eject on AutoUnload (Shift+F9). Next Track Only: Starts playback of only the next track in the active playlist. Any other currently playing track will not be stopped. Only the next DJ Player will be started. Load Next Track: Loads the next track to the next DJ Player. If Manual Load or Manual Unload is specified and no DJ Player is free, no track will be loaded (Alt+Ctrl+F9). Play/Pause Use Fading: Pauses or resumes playback of the current track in the active playlist. If the current DJ Player is playing it will be paused. If the current DJ Player is paused it will be started. Fades out on UseFading, No Eject (Ctrl+F9). 48 RADIO42 Confidential WORKING WITH ProppFrexx ONAIR Play/Pause No Fading: Immediately pauses or resumes playback of the current track in the active playlist. If the current DJ Player is playing it will be paused. If the current DJ Player is paused it will be started. No Fading, No Eject (Ctrl+Shift+F9). Play/Stop Use Fading: Stops or resumes playback of the current track in the active playlist. If the current DJ Player is playing it will be stopped and ejected. If the current DJ Player is paused it will be started. Fades out on UseFading, Eject on AutoUnload (Alt+F9). Play/Stop No Fading: Immediately stops or resumes playback of the current track in the active playlist. If the current DJ Player is playing it will be stopped and ejected. If the current DJ Player is paused it will be started. No Fading, Eject on AutoUnload (Alt+Shift+F9). PFL: Opens the PFL Player (pre fade listening) for the currently selected track (F2). TalkOver: If enabled the master volume of the main mixer will be lowered to allow talk over. Note: the talk over level can be adjusted in the general settings dialog (F11). Quick Monitor Player: Can be used to quickly play (and pre-listen) any track in a playlist, find window, directory explorer, trackboard etc. (Spacebar: play/stop track; Key-Right: Fast Forward by 10sec.; Key-Left: Fast Rewind by 10sec.). Click on the Quick Monitor Player group's caption button to display the quick list (this list can be used to temporarily store tracks for later quick retrieval). Quick Monitor Position: Indicates the position of the track currently loaded to the quick monitor player. Click to change the position. QM Play: Plays the track currently loaded to the Quick Monitor Player (Ctrl+Q). QM Pause: Pauses the track currently loaded to the Quick Monitor Player (Shift+Ctrl+Q). QM Stop: Stops the track currently loaded to the Quick Monitor Player. QM Fast Rewind: Performs a fast rewind of the track currently loaded to the Quick Monitor Player by 10sec. (Key-Left). QM Fast Forward: Performs a fast forward of the track currently loaded to the Quick Monitor Player by 10sec. (Key-Right). Add to QuickList: Adds the track currently loaded to the Quick Monitor Player to its quick list. Quick Monitor Caption Arrow: Click on the small arrow icon at the lower right of the Quick Monitor Player caption to open the quick player list containing tracks you added to the quick list. Figure 17: The Scheduler Control Ribbon Page Scripts: Shows all defined scripts. Scheduler: Shows the OnAir Scheduler. Run Scheduler: Runs or Stops the Scheduler. If running, the programs/scripts within the scheduler are automatically executed at their defined times (Shift+F4). Current Program: When the scheduler is running the currently active program and script together with their start and end time are shown. Next Program: When the scheduler is running the upcoming, next program and script together with their start and end time are shown. RADIO42 Confidential 49 ProppFrexx ONAIR Figure 18: The User Control Ribbon Page Play/Pause Use Fading (A,B,C,D): Pauses or resumes playback of DJ Player A,B,C,D in the active playlist. If DJ Player A,B,C,D is playing it will be paused. If DJ Player A,B,C,D is paused it will be started. Fades out on UseFading, No Eject (F5,F6,F7,F8). Play/Pause No Fading (A,B,C,D): Immediately pauses or resumes playback of DJ Player A,B,C,D in the active playlist. If DJ Player A,B,C,D is playing it will be paused. If DJ Player A,B,C,D is paused it will be started. No Fading, No Eject (Shift+F5,+F6, +F7,+F8). Pause A,B,C,D: Directly pauses or unpauses the track in DJ Player A,B,C,D. The current track position is maintained, so that unpausing the player will remain exactly from where it was paused. UseFading is ignored (Ctrl+Shift+F5,+F6,+F7,+F8). Rewind A,B,C;D: Rewinds the track in DJ Player A,B,C,D to CueIn and pauses (Alt+Shift+F5,+F6,+F7,+F8). Eject Use Fading A,B,C,D: Stops the current track loaded in DJ Player A,B,C,D and ejects it. If UseFading is specified the track will be fade-out and then ejected (Ctrl+F5,+F6,+F7,+F8). Eject No Fading A,B,C,D: Immediatly stops the current track loaded in DJ Player A,B,C,D and ejects it without fading (Ctrl+Shift+F5,+F6,+F7,+F8). Load A,B,C;D: Loads the selected track from the currently active playlist to DJ Player A,B,C,D. Note: If the player already contains a loaded track, that one will be ejected first (Alt+Ctrl+F5,+F6,+F7,+F8). PFL A,B,C,D: Starts or stops PFL for DJ Player A,B,C,D (Alt+F5,+F6,+F7,+F8). TalkOver: If enabled the master volume of the main mixer will be lowered to allow talk over. Note: the talk over level can be adjusted in the general settings dialog (F11). User Commands: In this gallery all 50 user definable control command assignments will be shown (see the chapter „General Configuration Settings“ for more information on how to assign control commands). This allows you to define 50 shortcuts to any control command(s) available. The Header Bar Figure 19: The Header Bar The header bar at the top right location of the main window displays the currently logged in user (if user access control is enabled), allowing you to change the user settings as well as the user password. It shows the current OnAir/OffAir status and it further it allows you to lock the ProppFrexx ONAIR user interface (eg. to prevent unauthorized access) and provides to the help system. Current User: Shows the currently logged in user name. Click to open the user settings menu. Change Password: Allows you to change the password of the currently logged in user. Change User Settings: Changes the user specific settings of the currently logged in user (Ctrl+F3). Lock: Locks ProppFrexx ONAIR or logs off the current user. 50 RADIO42 Confidential WORKING WITH ProppFrexx ONAIR OnAir Indicator: Either OnAir or OffAir is displayed, depending on, if any of the input mixer channels are 'open' (active, unmuted and fader up). Help: Online Help: Shows the online help in the internal web browser (F1). Keyboard Shortcuts: Displays the Mouse and Keyboard shortcuts (Shift+F1). User Manual: Opens this user manual PDF (Ctrl+F1). Check for Updates: Checks, if a newer version of ProppFrexx ONAIR is available, if an internet connection is available (Alt+F1). If a newer version is available you will be asked, if you want to upgrade (see the chapter „Updating ProppFrexx ONAIR“ for more information). Mixer Setup Wizard: Opens the mixer setup wizard which allows you to easily configure your mixer channels (input and output) and integration within your existing hardware environment. The mixer setup wizard is launched automatically when you start ProppFrexx ONAIR for the first time. Create Backup: Opens the backup dialog, which allows you to save all configuration settings, all media and cartwall libraries, as well as all script libraries. Restore Backup: Opens the restore dialog, which allows you to restore the configuration settings, media and cartwall libraries, as well as all script libraries from a previously created backup. ProppFrexx Homepage: Opens the ProppFrexx ONAIR home page in the internal web browser. About: Opens the about dialog (Ctrl+Shift+F1). The Status Bar The status bar at the bottom of the main window displays a busy indicator and the current resp. last action performed. On the right side the CPU usage and the current date and time is displayed. Busy Indicator: When red, any background task is currently performed (eg. reloading of media libraries, reading or writing of meta data information, running encoder jobs etc.). Click on the indicator to show any running background task incl. the number of outstanding items for it. Status Message: Shows the current resp. last action performed by ProppFrexx ONAIR. Progress Bar: When intensive background tasks are running a progress bar is displayed to indicate its progress. CPU: Shows the current CPU usage in percent. A value in brackets behind the processor usage displays the portion of the audio processing in percent. If any of the values stays above 60-70% over a significant amount of time, this might indicate, that your machine is quite exhausted with the actions performed by ProppFrexx ONAIR. You might click on the CPU value to toggle between processor only usage or processor and audio usage. Date and Time: Displays the current date and time. You might click on the value to bring the ONAIR Time window into your view. About: Click on the exclamation mark to show the about dialog of ProppFrexx ONAIR. RADIO42 Confidential 51 ProppFrexx ONAIR Internal Players ProppFrexx ONAIR has the following internal players. Each player supports playback of any supported audio track (which might be local or network audio files, http or ftp internet streams or even entire embedded playlists or containers): 1. DJ Player: Each playlist window has up to four DJ Players (the actual number of DJ Players per playlist can be configured in the general configuration settings; either 2, 3 or 4 DJ Players are configurable). The DJ Players are the main players of ProppFrexx ONAIR, as they are used to play the tracks contained in a playlist window. During automation these players are automatically used to play the tracks as defined in the related program/script. Each DJ Player can be freely routed independently to any available output mixer channel. Each DJ Player has a multitude of features including tempo adjustments, WaveForm display, cue-point and hot start support, event execution, scratching support, reverse playback, volume envelope support, an own EQ and FX section, a loop sampler etc. Figure 20: The DJ Player (Full Size and Medium Size Layout) 2. PFL Player: The single PFL Player is available at any time and can be used to play any track from almost any location (F11). The main use of the PFL Player is to pre-listen to a track (eg. before it is actually played by a DJ Player) and/or to adjust any track settings in advance (eg. the tempo, the EQ, the FX, the cue-points etc.). Therefore the PFL Player has exactly the same features as the DJ Player – however only one instance of the PFL Player is available at any time and thus only one track can be played by the single PFL Player at any time. The PFL Player can be freely routed to any available output mixer channel (typically to a dedicated output mixer channel, which is different to the output mixer channel(s) used by the DJ Players). Figure 21: The PFL Player 52 RADIO42 Confidential WORKING WITH ProppFrexx ONAIR 3. Segue Editor: This is a special PFL player which can be invoked directly from any playlist window entry (Alt+F11). The segue editor allows you to preview and arrange the mix (cue-points) in a visual fashion via simple drag and move operation. It will always display two main tracks: the current one (first) and the subsequent (next) track - allowing you to quickly navigate through the playlist entries. In addition any track inserts will be shown as well. You can arrange the tracks on the time line by simply dragging them to a new location, directly record new track inserts (voice overs), attenuate the volume of the track inserts, change the tempo of the tracks in real-time (non destructive) etc. Any cuepoints and settings will on-the-fly be calculated and adjusted as needed. Defining a segue/mix was never so easy – this is truly ‘what you see and hear is what you get’. Figure 22: The Segue-Editor 4. Quick Monitor Player: This a special player located in the ribbon bar of ProppFrexx ONAIR. It doesn’t come with the multitude of features as the PFL Player and thus it doesn’t allow you to adjust any track settings (like cue-points, tempo, volume envelope or effects) but it can be used to simply and quickly play any track at any time. The Spacebar and the left and right arrow keys are always assigned to the Quick Monitor Player. So whenever you select an audio track within ProppFrexx ONAIR (may it be in the playlist, find track or the directory explorer window etc.) you might use the Spacebar to start or stop playing that selected track and while playback you might use the left and right arrow keys to skip forward resp. backward within the track. So instead of using the PFL Player to pre-listen to a track you might as an alternative also use this player. The Quick Monitor Player can be freely routed to any available output mixer channel (typically to the same output mixer as the PFL Player). Figure 23: The Quick Monitor Player 5. Cartwall Player: Two cartwall windows (Cartwall I and Cartwall II) are available within ProppFrexx ONAIR. Each cart (entry) in a cartwall actually represents an individual Cartwall Player. The number of Cartwall Players therefore is dynamic and depends on the number of entries a cartwall library (playlist) currently being used has got. The features of the Cartwall Player is also quite limited in respect to the features of the DJ or PFL Player; however the Cartwall Player also supports tempo, gain, volume envelopes, cue-points, looping etc. So you might actually use eg. the PFL Player to define all track settings which are then use by the Cartwall Player. The Cartwall Players can be freely routed to any available output mixer channel independent for the Cartwall I and II (meaning all players of Cartwall I will use the same output mixer channel and all players of Cartwall II will use the same output mixer channel, which might be different from the output used with Cartwall I). RADIO42 Confidential 53 ProppFrexx ONAIR Figure 24: The Quick Monitor Player 6. Standby Player: These players are pretty much like DJ Players, but they are independent from any playlist window. As they are not used directly during automation they are called ‘standby’. The number of Standby Players used is limited to a maximum of 99; you can add new or remove existing Standby Players at any time within the standby player window. You might use a Standby Player to play any tracks at any time independent from any playlist activity. Audio tracks must always be loaded/opened manually to/by the Standby Player. The Standby Player can be freely routed to any available output mixer channel. Figure 25: The Standby Player (Medium Size Layout) 7. MODStream Player: This player is used with the MODStream Watcher functionality. Via a control command (MODSTREAM_WATCHER_START) you might enable the MODStream Player. When enabled the player constantly monitors a given internet stream address (URL) in the background until you stop him via the control command (MODSTREAM_WATCHER_STOP). If the internet stream is available and alive the player automatically connects to it (either immediately or after the currently playing playlist track) and starts playback (while fading-out all DJ Players and Cartwall Players). With this player you might enable external moderator or live broadcast feeds to be automatically inserted into your program as they come available. The MODStream Player can be freely routed to any available output mixer channel (it always shares the same output mixer channel as the Overlay Player). Figure 26: The MODStream Player 8. Overlay Player: This player is used with the Overlay/Advertising functionality. Overlays are playlists which are triggered by a special entry of the Scheduler and are typically used to play out advertising tracks through the Advertising Manager (but of course might also be used for any other tracks which should be overlaid, like news or weather feeds). As the name suggests this player represents an overlay to all other players; meaning, when used all DJ Players, Cartwall Players and also the MODStream Player are faded down to a defined volume level (or even faded out completely) until the overlay playlist has finished. During this time any currently active program/playlist might also be suspended. The Overlay Player can be freely routed to any available output mixer channel (it always shares the same output mixer channel as the MODStream Player). 54 RADIO42 Confidential WORKING WITH ProppFrexx ONAIR RADIO42 Confidential 55 ProppFrexx ONAIR According to the above players the following independent routings to any output mixer channel can be defined: 1. 2. 3. 4. 5. 6. 7. 8. 9. 10. 11. DJ Player A Routing DJ Player B Routing DJ Player C Routing DJ Player D Routing PFL Player Routing Quick Monitor Player Routing Standby Player Routing Cartwall I Player Routing Cartwall II Player Routing MODStream/Overlay Player Routing Input Full-Duplex Routing (Monitoring) These capabilities should allow you to integrate ProppFrexx ONAIR into any existing mixer/console environment or even use ProppFrexx ONAIR without any external mixer. 56 RADIO42 Confidential WORKING WITH ProppFrexx ONAIR Mixer Setup By default (when first installed) ProppFrexx ONAIR creates four output mixer channels and one input mixer channel - all using the windows default soundcard device with the WDM (DirectSound) interface. This is almost not what you really want ;-) The mixer setup contains two different steps: 1. setting up the mixer channels 2. setting up the routing of the players to the mixer channels The first step is described in this chapter. The setup of the routing is further described in the chapter „General Configuration Settings“. Output Mixer Channels Input Mixer Channels Main Channel Strip Figure 27: The Main Mixer Window You can define any number of output mixer channels and any number of input mixer channels. An output mixer channel connects any of the ProppFrexx ONAIR internal players (the DJ Players, the PFL Player, the Quick Monitor Player, the Cartwall Players, the Standby Players, the MODStream Player, the Overlay Player etc.) with a physical soundcard output. An input mixer channel connects a physical soundcard input and servers as a recording channel. The main channel strip hosts additional mixer functionalities and also represents a global volume control (which effects all output mixer channels, but not the inputs). Each mixer channel is identified by a unique name and represents a stereo mixer. Depending on your requirements and how you want to use ProppFrexx ONAIR resp. how you want to embed it to your existing environment you might require more or less mixer channels. Here are some examples: RADIO42 Confidential 57 ProppFrexx ONAIR 1. Simple (internet streaming only, no microphone): Output Mixer Channels: PLAY: all internal players (except the PFL Player and the Quick Monitor Player) are routed to this mixer channel for standard play out. This channel uses eg. the default soundcard device. PLF: the PFL Player and the Quick Monitor Player are routed to this mixer channel for monitoring. This channel uses eg. the headphone soundcard device. Input Mixer Channels: -- (none) Streaming: the PLAY mixer channel serves as the streaming source channel. To Headphones To Main Speakers Soundcard DJ Player Standby Player Cardwall Player Input: -- Output: PFL Output: PLAY Out1 Out2 Streaming via PLAY PFL Player Quick Monitor Player Figure 28: Mixer Setup Example 1 58 RADIO42 Confidential WORKING WITH ProppFrexx ONAIR 2. Simple (using no external mixer, one microphone): Output Mixer Channels: PLAY: all internal players (except the PFL Player and the Quick Monitor Player) are routed to this mixer channel for standard play out. This channel uses eg. the default soundcard device. PLF: the PFL Player and the Quick Monitor Player are routed to this mixer channel for monitoring. This channel uses eg. the headphone soundcard device. Input Mixer Channels: MIC: this input is further routed to the PLAY output mixer channel. This channel uses eg. the microphone soundcard recording device. Monitoring of the microphone via the PFL channel can be done using the SND function of the input mixer channel (or hardware monitoring). To ensure latency free full-duplex operations you should use ASIO! Streaming: the PLAY mixer channel serves as the streaming source channel. To Headphones To Main Speakers From Microphone Soundcard In1 Input: MIC Output: PFL Output: PLAY Out1 Out2 OutputTo Path DJ Player Standby Player Cardwall Player Streaming via PLAY PFL Player Quick Monitor Player Figure 29: Mixer Setup Example 2 In order to prevent any echoes from the microphone on the main speakers you should enable the „Mute On Talkover“ flag on the PLAY output mixer channel as well as the „Unmute On Talkover“ flag on the MIC input mixer channel. This ensures, that the PLAY channel will automatically be muted, whenever the MIC channel is active and that the MIC channel will automatically be activated when using the TalkOver function. In addition you might remove the „Apply Master Volume“ flag from the PFL channel, so that this channel’s volume is not impacted by the master volume. RADIO42 Confidential 59 ProppFrexx ONAIR 3. Complex (using no external mixer, one microphone): Output Mixer Channels: PLAY: all internal players (except the PFL Player and the Quick Monitor Player) are routed to this mixer channel for standard play out. Use the NONE driver to create a virtual sub-bus mixer channel. This channel is further routed to the OUT output mixer channel. Preselect the PFL output channel in the SND function of this channel. OUT: only the PLAY mixer channel is routed to this mixer channel for standard play out. This channel is further copied to MON mixer channel (pre-fading) and uses eg. the 1st soundcard device which is eg. connected to external speakers. MON: the OUT output and the MIC input are routed to this mixer channel and such it carries the final mix down of what is effectively being on aired. This channel uses eg. the 2nd soundcard device which is eg. not connected to any external speakers (alternatively it might also use the 1st soundcard device, but this channel is then muted via the M button). PLF: the PFL Player and the Quick Monitor Player are routed to this mixer channel for monitoring. This channel uses eg. the 3rd (headphone) soundcard device. Input Mixer Channels: MIC: this input is further routed to the MON output mixer channel. This channel uses eg. the microphone soundcard recording device. Monitoring of the microphone via the PFL channel can be done using the SND function of the input mixer channel (or hardware monitoring). To ensure latency free full-duplex operations you should use ASIO! Streaming: the MON mixer channel serves as the streaming source channel. To Headphones Microphone To Speakers Soundcard In1 Input: MIC Output: PFL Output: OUT Output: MON Output: PLAY Out1 Out2 Out3 OutputTo Path DJ Player Standby Player Cardwall Player SND Path Streaming via MON PFL Player Quick Monitor Player Figure 30: Mixer Setup Example 3 You should enable the „Mute On Talkover“ flag on the OUT and MON output mixer channel, but disable it on PLAY and PFL. Also enable the „Unmute On Talkover“ flag on the MIC input mixer channel. Enable the „Apply Master Volume“ flag on PLAY, but disable it for OUT, MON and PFL. Use the SND function on the PLAY and MIC channel to toggle monitoring of these channels also in the PFL channel. 60 RADIO42 Confidential WORKING WITH ProppFrexx ONAIR RADIO42 Confidential 61 ProppFrexx ONAIR 4. Simple (using an external mixer with microphones): Output Mixer Channels: PLAY: all internal players (except the PFL Player and the Quick Monitor Player) are routed to this mixer channel for standard play out. This channel uses eg. the 1st soundcard device which is connected to the external mixer. PLF: the PFL Player and the Quick Monitor Player are routed to this mixer channel for monitoring. This channel uses eg. the 2nd soundcard device which is connected to the external mixer. Input Mixer Channels: IN1: this input is not routed to any output mixer channel. This channel uses eg. the line-in soundcard recording device and receives the final mix down of the external mixer as the input signal. Microphones are connected to the external mixer, monitoring of the mics are done via the external mixer. Streaming: the IN1 mixer channel serves as the streaming source channel. External Mixer Microphone External Players Soundcard DJ Player Standby Player Cardwall Player In1 Input: IN1 Output: PFL Output: PLAY Out1 Out2 Streaming via IN1 PFL Player Quick Monitor Player Figure 31: Mixer Setup Example 4 This scenario might easily be extended by creating more dedicated output mixer channels for the different players (eg. you might create OUT A, OUT B, OUT C, OUT D, CART1, CART2, STDBY, OVRLY etc. output mixer channels). In addition you might create virtual output mixer channels to group certain players in a sub-bus etc. The same would be possible for the input mixer channels. You might add additional input mixer channels to receive independent mix-downs from your external mixer. Multiple inputs might then also be combined into a separate output mixer channel (by routing all or some input mixer channels to this separate output). In such case the separate output might then be used for streaming. 62 RADIO42 Confidential WORKING WITH ProppFrexx ONAIR 5. Complex (using an external mixer with microphones): Output Mixer Channels: OTHR: all internal players (except the DJ Players, the PFL Player and the Quick Monitor Player) are routed to this mixer channel. Use the NONE driver to create a virtual sub-bus mixer channel. This channel is further routed to the PLAY output mixer channel. DJ: the DJ Players are routed to this mixer channel. Use the NONE driver to create another virtual sub-bus mixer channel. This channel is also further routed to the PLAY output mixer channel. PLAY: this channel is used for standard play out, as it receives the signal from the OTHR and PLAY mixer channels. This channel uses eg. the 1st soundcard device which is connected to the external mixer. PLF: the PFL Player and the Quick Monitor Player are routed to this mixer channel for monitoring. This channel uses eg. the 2nd soundcard device which is connected to the external mixer. ONAIR: no players are routed to this mixer channel, but as the inputs are routed to this channel, this output receives the final mix down of the external mixer (it might be connected back to the external mixer to monitor what is effectively being on aired, eg. using the 3rd soundcard device). Input Mixer Channels: IN1: this input receives the 1st mix down group of the external mixer and is further routed to the ONAIR output mixer channel. The external mixer might for example send all external sources to it. IN2: this input receives the 2nd mix down group of the external mixer and is also further routed to the ONAIR output mixer channel. The external mixer might for example send all microphones to it. As microphones are connected to the external mixer, monitoring of the mics are done via the external mixer. Streaming: the ONAIR mixer channel serves as the streaming source channel. External Mixer Microphone External Players Monitor Soundcard Input: IN2 In1 In2 Input: IN1 Output: PFL Output: ONAIR Output: DJ Output: PLAY Output: OTHR Out1 Out2 Out3 OutputTo Path DJ Player Standby Player Cardwall Player Streaming via ONAIR PFL Player Quick Monitor Player Figure 32: Mixer Setup Example 5 RADIO42 Confidential 63 ProppFrexx ONAIR 6. Complex (using an external mixer, but internal microphones): Output Mixer Channels: PLAY: all internal players (except the PFL Player and the Quick Monitor Player) are routed to this mixer channel for standard play out. Use the NONE driver to create a virtual sub-bus mixer channel. This channel is further routed to the OUT output mixer channel. OUT: only the PLAY mixer channel is routed to this mixer channel for standard play out. This channel uses eg. the 1st soundcard device which is connected to the external mixer. MON: all inputs are routed to this mixer channel and such it carries the final mix down (it might be connected back to the external mixer to monitor what is effectively being on aired, eg. using the 2nd soundcard device). PLF: the PFL Player and the Quick Monitor Player are routed to this mixer channel for monitoring. This channel uses eg. the 3rd soundcard device which is connected to the external mixer. Input Mixer Channels: INP: this input is further routed to the MON output mixer channel. This channel uses eg. a line-in soundcard recording device and receives the final mix down of the external mixer as the input signal. MIC1: this input is further routed to the MON output mixer channel. This channel uses eg. the 1st microphone soundcard recording device. Monitoring of the microphone via the PFL channel can be done using the SND function of this input mixer channel (or hardware monitoring). MIC2: this input is also further routed to the MON output mixer channel. This channel uses eg. the 2nd microphone soundcard recording device. Monitoring of the microphone via the PFL channel can be done using the SND function of this input mixer channel (or hardware monitoring). Streaming: the MON mixer channel serves as the streaming source channel. External Mixer Microphone 1 External Players Microphone 2 Monitor Soundcard In2 In3 Input: MIC2 Input: INP In1 Input: MIC1 Output: PFL Output: OUT Output: MON Output: PLAY Out1 Out2 Out3 OutputTo Path DJ Player Standby Player Cardwall Player Streaming via MON PFL Player Quick Monitor Player Figure 33: Mixer Setup Example 6 64 RADIO42 Confidential WORKING WITH ProppFrexx ONAIR Adding/Removing new Mixer Channels To add a new mixer channel (either output or input) right-click on any existing mixer channel's name (at the top of the mixer channel). This will popup the mixer channel menu. Within this menu you'll find an „Add Mixer Channel“ item. Figure 34: Mixer Channel Menu After selecting the „Add Mixer Channel“ item a new mixer channel is added to the right of the list of existing mixer channels. In order to remove an existing mixer channel you might select the „Remove Mixer Channel“ menu item. You need to confirm the removal of an existing mixer channel. After adding/removing a mixer channel it might be required to adjust the size of the mixer window resp. the size of the output or input area in order to see all available mixer channels. If the mixer channels doesn't fit all into their area, scrollbars are automatically displayed. The size of the output and input area can be adjusted individually by using the splitters in between them. You might use the „Move Left“ or „Move Right“ menu items to reorder the mixer channels in their resp. area. Edit Settings…: Select this item to configure the settings of an already existing mixer channel (see below for details). Show OnAir Time (Input only): Check this item to display a running timer in the mixer channel’s name field whenever the input mixer channel is unmuted and online (on air). Adjust External Volume (WASAPI only): Select this item to adjust the external (Windows) volume setting of the associated WASAPI soundcard/device. Edit Control Command Events…: Select this item to configure special control-commands to be associated with the mixer channel (see Appendix for details). Instant Recording…: Select this item to invoke the Instant Recording dialog to record the current audio signal of the mixer channel to a file. Recreate and Reset: If you discover any issues with your soundcard/driver and the mixer channel got somehow broken or any SND function is lagging, you might select this item to try to reinitialize and recreate this mixer channel. If the problem still persists please check your soundcard/driver externally which might result in the need to restart ProppFrexx ONAIR. When a device is disabled/disconnected from the system, it is still retained, but will stop working! If the device is subsequently re-enabled, it may become available again OR the system may add a new device entry for it, which still prevents the old entry from working! When a new device is connected, it can affect the other devices and result in the system moving them to new device entries. If an affected device was used, it will also stop working and will need to be reinitialized. As such adding or removing devices while ProppFrexx ONAIR is running is a RADIO42 Confidential 65 ProppFrexx ONAIR dangerous task and might result in mixer channels to stop working! Unfortunately this is a Windows operating system issue and ProppFrexx can not do much about it. Reset Full-Duplex: If you discover any lags or distortions with the routing (see the Copy To resp. Route To function) or the SND function of this mixer channel you might select this item in order to reset the internal full-duplex monitoring buffer. ADM…: If you are using ASIO and your soundcard supports ASIO Direct Monitoring you might select this item to control your current ADM settings. Move Left: Moves the mixer channel to the left in the list of mixer channels. Move Right: Moves the mixer channel to the right in the list of mixer channels. Visual: Select this item to display a visualisation graph (Spectrum, WaveLine or VoicePrint) of the current audio signal of this mixer channel. Configuring an Output Mixer Channel To configure the settings of an output mixer channel double-click on an existing mixer channel's name (at the top of the mixer channel). This will popup the output mixer device configuration dialog. Alternatively you might also select the „Edit Settings...“ item from the mixer channel menu. Figure 35: Output Device Configuration Dialog In this dialog you can specify the name of the mixer channel as well as the connection to the physical soundcard output (device). In addition various options are available to control the behaviour of the mixer channel. Mixer Name: Unique name of the mixer channel (up to 5 characters). Used to identify the channel in the main mixer window. Output Samplerate: The sample rate of the mixer channel in Hz. If a source (i.e. a track being played by an internal player) using this output mixer channel does not match this frequency it will automatically be re-sampled. Driver Model: Select the driver model to use with this mixer channel. WDM: Windows Driver Model (DirectSound) ASIO: Audio Stream Input/Output (Steinberg) WASAPI: Windows Audio Session API (Vista/Windows7 only) NONE: NoSound (Virtual Sub-Bus, see below) Important Note: Even if your soundcard might support multiple physical channels/devices, you can NOT mix the driver model for one physical soundcard! So when defining output mixer channels make sure, that you use the same driver model for each channel using the same physical soundcard. 66 RADIO42 Confidential WORKING WITH ProppFrexx ONAIR The NONE device might be used to create a virtual pass-through channel. Such channel doesn't use any output device by itself, but can be used to mix any source and then send the result to any another output device. This allows you to create sub-bus groups. Device: The physical soundcard driver resp. device to be used with this output mixer channel. Speaker/Channel Pair: Select the speaker pair resp. channel pair to use with this mixer channel (only relevant, if the selected device is a multi-channel device). WDM: If your soundcard device supports multiple speakers you might assign a certain speaker pair to this mixer channel. ASIO: Select which Asio channel pair should be used with this mixer channel. WASAPI: Select which channel pair should be used with this mixer channel. Important Note: When using ASIO make sure to use a unique device/channel pair for each output mixer channel, as two mixer output channels can not share the same ASIO device/channel pair. Copy To/Output To: If selected, a copy (pre-fading) of the audio-signal processed by this mixer channel will be send to the selected output mixer channel as well. You might select 'NONE', if you don't want to copy the audio-signal to any other mixer. Note: For a Virtual Sub-Bus (NONE driver model) it is mandatory to select an output mixer channel here. Output in 32-Bit: Use 32-Bit floating-point sample data for this mixer channel? The main advantage of floating-point channels, aside from the increased resolution/quality, is that they are not clipped until output. If your soundcard support 24- or 32-Bit output this option will result in highest sound quality. If unchecked 16-Bit audio resolution is used. Note: Internal DSP/FX processing will anyhow use full 32-Bit floating-point precision. So this setting only effects the data send to the output device. Software Mixing: By default hardware mixing is used (whenever available), enable this option to enforce software mixing for this mixer channel. If you discover any trouble with your soundcard (eg. clicks or hops) try to enable this option. Nonstop: When setting the output to Nonstop (default) an output signal will always be generated (at least silence) even if no input (source) is present or paused for this mixer channel. This setting might be useful if you want to use this mixer channel for internet broadcast streaming which requires a constant output stream. The disadvantage of a nonstop output is, that there will be a slight delay (by the buffer size) until a source signal will actually be heard in the output. When disabling this option (non-nonstop) the mixer channel is stalled (not producing any output) when no source is connected or when any source is paused. If a source resumes or is connected again, the output will start instantly even if it was stalled. However, to support synchronized outputs it is recommended to enable this Nonstop option for all physical outputs. Buffer: The buffer length directly defines the latency of the audio signal. A smaller buffer decreases the latency but increases the chance that the playback might break. WDM: The buffer length in milliseconds; 0 = use default length (see global settings). ASIO: The buffer length in samples; 0 = use default length (see device panel). WASAPI: The buffer length in milliseconds; 0 = use default length (see device panel). NONE: No buffer involved! Period: The update period is the amount of time between updates of the playback buffers of the mixer channel. Shorter update periods allow smaller buffers to be set, but as the rate of updates increases, so the overhead of setting up the updates becomes a greater part of the CPU usage. Specify 0 to use the default update period. Auto Start Recording: If selected the mixer channel will automatically be recorded whenever ProppFrexx ONAIR starts-up using the selected encoding profile (see global settings for details). RADIO42 Confidential 67 ProppFrexx ONAIR Apply Master Volume: If checked the main channel volume (master volume) is applied to this mixer channel (the final volume is the product of the volume of this mixer channel and the master volume). If disabled the volume of the output is unaffected by the master volume. Note: The master volume is controlled by the fader of main channel strip. The volume of this mixer channel is controlled by the fader of this mixer channel. Mute On Talkover: If checked this mixer channel is affected by the main talk over functionality. During talk over the output is muted, when talk over has finished it will be unmuted again. Note: This not only applies to TalkOver! Actually the mixer channel will be muted whenever an input mixer channel (having the 'Unmute On Talkover' option set) is active. Mute/Unmute: Defines the type of the mute and unmute operations. Source: mutes/unmutes any source audio signal of the mixer. When muted any recording, streaming and SND routing will be muted as well. Output: mutes/unmutes the output audio signal. When muted any recording and streaming will still process the source audio signal, but any SND routing will be muted as well. External: Like 'Output', but the external device will be muted/unmuted as well (not available for the ASIO and NONE driver model). Enable Silence Detection: If checked the audio level of this mixer channel is constantly monitored. If the level stay for a certain time below a certain threshold the OnDetectSilence event will be raised as well as AutoPlay might automatically be turned on (see general settings). Exclusive Mode: Use the device in exclusive or shared mode (WASAPI only)? Exclusive: The device can only be used exclusively by this application - which allows greater precision and lets you choose the output sample rate. Shared: The device can be shared by multiple applications. Enforces to use the default sample rate and format. Lock On Lock: If not checked this mixer will be excluded from any mixer locking. A mixer might be either locked manually via the main mixer setup window or automatically according to the UAC. When the ASIO driver model is selected you might double-click on the ASIO icon to invoke the soundcards Asio sound control panel (if available). To create a Virtual Sub-Bus (which is a mixer channel, which is not directly connected to any output soundcard device and thus serves as a pure internal mixer channel) select the „NONE“ driver model. Note, that you must select a 'real' output mixer channel to which you want to route the output of this 'virtual' mixer channel to. This is specified in the „Output To“ combo box. 68 RADIO42 Confidential WORKING WITH ProppFrexx ONAIR Figure 36: Output Device Configuration Dialog (Virtual Sub-Bus) Hoover with the mouse over the labels in the dialog to display a tooltip explaining the different settings. ADM…(ASIO Direct Monitoring): Click here to specify further direct monitoring options for this ASIO mixer channel. Figure 37: ADM Settings (ASIO Mixer Channel) Mirror To: Select which ASIO output channel pair should be used to mirror the signal of this mixer to. Note: Direct Mirroring will clone the audio signal directly within the internal ASIO processing before it reaches the ProppFrexx mixer. This means enabling mirroring bypasses any ProppFrexx mixer channel processing and directly clones the audio signal to the mirror channel pair beforehand. The mirrored audio signal will therefore not be 'visible' from within ProppFrexx. ASIO Direct Monitoring (ADM) is a special ASIO 2.0 feature enabling almost zero-latency monitoring, which is performed within the ASIO driver respectively the underlying hardware directly (if supported by your device). Direct Mirroring is a special feature implemented for all cards/drivers not supporting ADM and is software based. Therefore it might only provide the minimum latency your driver/device can offer, but still bypassing any additional ProppFrexx processing. So if ADM is available it is recommended to use that, if you are aiming almost zero-latency monitoring! Start Monitoring with Mixer Channel: If checked ADM will be started with the mixer channel - else it might be enabled or disabled manually (e.g. via the mixers context menu or a control-command). Monitor To: Select which ASIO output channel pair should be used for direct monitoring. Note: Direct Monitoring will clone the audio signal directly within the ASIO soundcard before it reaches ProppFrexx. This means enabling monitoring bypasses any ProppFrexx mixer channel processing and directly clones the audio signal to the monitor channel pair beforehand. The monitored audio signal will therefore not be 'visible' from within ProppFrexx. Not all soundcards/drivers do support this ASIO 2.0 feature! ADM Gain: Lets you specify an optional gain value for the monitored channel pair. Note: Some soundcards/drivers might ignore this value. ADM Pan: Lets you specify an optional panning (balance) value for the monitored channel pair. Note: Some soundcards/drivers might ignore this value. RADIO42 Confidential 69 ProppFrexx ONAIR Configuring an Input Mixer Channel To configure the settings of an input mixer channel double-click on an existing mixer channel's name (at the top of the mixer channel). This will popup the input mixer device configuration dialog. Alternatively you might also select the „Edit Settings...“ item from the mixer channel menu. Figure 38: Input Device Configuration Dialog In this dialog you can specify the name of the mixer channel as well as the connection to the physical soundcard input (device). In addition various options are available to control the behaviour of the mixer channel. Mixer Name: Unique name of the mixer channel (up to 5 characters). Used to identify the channel in the main mixer window. Input Samplerate: The recording sample rate of the mixer input channel in Hz. Driver Model: Select the driver model to use with this mixer channel. WDM: Windows Driver Model (DirectSound) ASIO: Audio Stream Input/Output (Steinberg) WASAPI: Windows Audio Session API (Vista/Windows7 only) Important Note: Even if your soundcard might support multiple physical channels/devices, you can NOT mix the driver model for one physical soundcard! So when defining input mixer channels make sure, that you use the same driver model for each channel using the same physical soundcard. Device: The physical soundcard driver resp. device to be used with this input mixer channel. Input Source/Channel Pair: Select the input source resp. channel pair to use with this mixer channel (only relevant, if the selected device is a multi-channel device). WDM: If your soundcard device supports multiple input sources you might select the input source to use. ASIO: Select which Asio channel pair should be used with this input device. WASAPI: Windows Audio Session API always represents each input as a separate device. Important Note: Make sure to use a unique device/input source for each input mixer channel, as two mixer input channels can not share the same device/input source. Output To: If selected, a copy (pre-fading) of the audio-signal processed by this mixer channel will be send to the selected output mixer channel as well (for full-duplex monitoring). You might select 'NONE', if you don't need any full-duplex monitoring. Mono: By default stereo (2-channels) recording is used, enable this checkbox to force mono (1-channel) recording. 70 RADIO42 Confidential WORKING WITH ProppFrexx ONAIR Input in 32-Bit: Use 32-Bit floating-point sample data for this mixer channel? The main advantage of floating-point channels, aside from the increased resolution/quality, is that they are not clipped. If your soundcard support 24- or 32-Bit input this option will result in highest sound quality. If unchecked 16-Bit audio resolution is used. Note: Internal DSP/FX processing will anyhow use full 32-Bit floating-point precision. So this setting only affects the data received from the input device. Buffer: The buffer length directly defines the latency of the audio signal. A smaller buffer might decrease the latency but increases the chance that the recording might break. WDM: The buffer length in milliseconds; 0 = use default length (see global settings). ASIO: The buffer length in samples; 0 = use default length (see device panel). WASAPI: The buffer length in milliseconds; 0 = use default length (see device panel). Period: The update period is the amount of time between updates of the recording buffer of the mixer channel. Shorter update periods allow smaller buffers to be set, but as the rate of updates increases, so the overhead of setting up the updates becomes a greater part of the CPU usage. Specify 0 to use the default update period. Auto Start Recording: If selected the mixer channel will automatically be recorded whenever ProppFrexx ONAIR starts-up using the selected encoding profile (see global settings for details). Mute On Overlay: If checked this input mixer channel is affected by overlays (and mod streams) being played. During an overlay playback the input is faded-out, when the overlay has finished it will be faded-in again. Unmute On Talkover: If checked this input mixer channel is affected by the main talk over functionality. During talk over the input is unmuted, when talk over has finished it will be muted again. Note: This setting not only applies to TalkOver! Actually having this option set will trigger muting of all output mixer channels having the 'Mute On TalkOver' option set whenever this mixer channel is active. Mute/Unmute: Defines the type of the mute and unmute operations. Input: mutes/unmutes the input audio signal. When muted any recording, streaming and output/SND routing will be muted as well. Output Only: mutes/unmutes any routed output/SND audio signal only. When muted any recording and streaming will still process the input audio signal. External: Like 'Input', but the external input device will be muted/unmuted as well (not available for the ASIO driver model). Enable Silence Detection: If checked the audio level of this mixer channel is constantly monitored. If the level stay for a certain time below a certain threshold the OnDetectSilence event will be raised as well as AutoPlay might automatically be turned on (see general settings). Exclusive Mode:Use the device in exclusive or shared mode (WASAPI only)? Exclusive: The device can only be used exclusively by this application - which allows greater precision and lets you choose the input sample rate. Shared: The device can be shared by multiple applications. Enforces to use the default sample rate and format. Lock On Lock: If not checked this mixer will be excluded from any mixer locking. A mixer might be either locked manually via the main mixer setup window or automatically according to the UAC. ADM…(ASIO Direct Monitoring): Click here to specify further direct monitoring options for this ASIO mixer channel (see ASIO Direct Monitoring above). When the ASIO driver model is selected you might double-click on the ASIO icon to invoke the soundcards Asio sound control panel (if available). RADIO42 Confidential 71 ProppFrexx ONAIR The Main Channel Strip Mixer Preset Slots Left-Click: select the current preset (saves/restores all settings) Right-Click: remove the preset (clear) Load/Save different Mixer Setups (mixer channels incl. presets) Opens the Remote Control Monitor Opens the External Mixer Control (only available on Vista/Windows 7) TalkUser Button: Left-Click: Toggles the talk user state Right-Click: Configures the talk user function Main Fader Double-Click: reset to 0dB TalkOver Button Left-Click: Toggles the talk over state permanently Right-Click: Toggles the talk over state only while pressed Figure 39: The Main Channel Strip The above figure shows the main channel strip, which is always present. With the main fader you can control the overall master volume of all output mixer channels (the final volume of an individual output mixer is the product of the output mixer's volume and this master volume). When changing the master volume, only those output channels are affected, which have their „Apply Master Volume“ flag set in their „Output Device Configuration“. The „TalkOver“ resp. the “TalkUser” button allows you to duck the volume of the configured output mixer channels and optionally unmute the configured input mixer channels (see the chapter „Using TalkOver“ for more information). The external mixer button might be used to slide the master volume to the defined talk over level without actually executing the talk over functionality (right-click). Five mixer preset slots allow you save and restore the FX/DSP settings of all mixer channels with just one click (see the chapter „Using Mixer Presets“ for more information). A preset contains only the FX/DSP settings of the mixer channels (including the mixer channel's fader volume, Pan and Gain settings, the On/Off and the Mute/Unmute state, the SND and REC settings) but not the device configuration of the mixer channels itself. The SETUP button allows you to manage multiple mixer setups in parallel (see the chapter „Saving and Loading a Mixer Setup“ for more information). The mixer setup contains the definition of the output and input mixer channels with their entire device configuration plus all defined presets. 72 RADIO42 Confidential WORKING WITH ProppFrexx ONAIR The RCM (Remote Control Monitor) button allows you to monitor your GPIO/Remoting devices/servers. Remoting allows you to execute/operate almost anything within ProppFrexx ONAIR via almost any general purpose input/output (GPIO), eg. via TCP, MIDI, Serial I/O, GamePort, etc. (see the chapter „Using the Remote Control Monitor“ for more information). In addition you might define here, if this ProppFrexx instance operates as the Master or Slave instance as well as manage your remote clients. And the Mixer button allows you to open the external mixer control window (only available on Vista/Windows 7). Important Note: ProppFrexx ONAIR doesn't change the external volume level of the used soundcard devices itself! In order to change or adjust the volume level of the soundcard output and input devices you can either use the respective sound control panels of those devices/soundcards or the windows sound control panel or you might use the build in external mixer control (which is a better replacement of the windows sound control panel). The faders of the main channel and the mixer channels only change the internal volume level. Saving and Loading a Mixer Setup When you click on the „SETUP“ button of the main channel strip the following popup window will be displayed, allowing you to load and save your mixer setup. Load the entire mixer setup Save the entire mixer setup Figure 40: Load and Save Mixer Setup You might define as many setups as you like. Each setup contains all defined mixer channels (output and input), the mixer presets and all FX/DSP settings for each mixer channel. The setup itself will be saved/loaded to/from a mixer profile. The profile is identified by the name given in the editable combo box. The default profile has the name „Default“. To change the current mixer setup, select a setup name from the combo box and click on the „Load“ icon button to change it. Enter a new mixer setup name (or use any existing name to overwrite it) in the combo box and click on the „Save“ icon button to save the current mixer setup (including all mixer channels, the presets and any FX/DSP settings). Mixer Locked: If checked the mixer channels are locked to prevent any changes to be made (only the channel faders stay active in this case). Using multiple profiles allows you to quickly change the entire setup of your mixer, eg. if you need a different layout for a specialized environment during a specific operations. However, in most situations only one setup is required. Using Mixer Presets Mixer Preset Slots Left-Click: select the current preset (saves/restores all settings) Right-Click: remove the preset (clear) Figure 41: Using Mixer Presets RADIO42 Confidential 73 ProppFrexx ONAIR A mixer preset contains only the FX/DSP settings of all mixer channels (including the mixer channel's fader volume, Pan and Gain settings, the On/Off and the Mute/Unmute state and the SND and REC settings) but not the definition of the mixer channels itself (and their device configuration). Mixer presets are therefore useful, if you want to quickly change between different FX/DSP resp. mixer channel settings (eg. you might have one preset for standard on-air operations and others for specific situations, like phone call operations, live moderations, DJ sets etc.). The five mixer preset slots can be used like this: Left-Click: If a preset is already set, all mixer settings are changed to this preset - else you are asked to enter a new preset name to save all mixer channel settings under this preset name. Figure 42: Creating a new Mixer Preset Right-Click: The current preset settings are cleared and removed (mixer channel settings are not changed). The currently active mixer preset will be shown in red. Using the External Mixer Control The external mixer control window is only available on Vista and Windows 7. As ProppFrexx ONAIR never changes the volume level of the external soundcard devices you might use this window to adjust the external volume level. On the left side the available soundcard output devices are shown. On the right side the available soundcard input devices are shown. You might use the splitter in between to adjust the width of the respective areas. Figure 43: External Mixer Control Window Name: Shows the name and description if the soundcard device. Fader: Use the fader of the soundcard device to change the external volume level (between the device's minimum and maximum level). Changing the volume level will automatically be visible in the windows sound control panel - vice versa. 74 RADIO42 Confidential WORKING WITH ProppFrexx ONAIR Peak Level Meter: The peak level meter displays the current level as provided by the device itself and includes any audio data send/received by the device and such might include audio from non ProppFrexx ONAIR sources. MUTE: Use the mute button to toggle the external state of the device between muted and unmuted. When in muted state the button will be highlighted in red color. Show Used Only: If checked, only those devices are shown, which are used by any of the defined mixer channels - else all available soundcard devices are shown. Note: ASIO devices are not shown in this window. To change the volume level or settings of your ASIO devices you must use the ASIO control panel as provided with your soundcard. Using TalkOver/TalkUser While talk over is active, the volume of the configured output channels (which have their „Apply Master Volume“ flag set in their „Output Device Configuration“) is lowered by the global talk over volume (see the chapter „General Configuration Settings“ on how to define the global talk over volume). In addition the configured input channels (which have their „Unmute on TalkOver“ flag set in their „Input Device Configuration“) are unmuted and the configured output channels (which have their „Mute on TalkOver“ flag set in their „Output Device Configuration“) are muted. This allows you define, that eg. microphone inputs are automatically unmuted and other inputs are unaffected when talk over is active, and monitor speaker outputs are automatically muted, whereas other outputs are either automatically lowering their volume or are unaffected by the talk over functionality: Device Configuration Input: Unmute on TalkOver TalkOver Effect (active/inactive) If set, the input is unmuted when active and muted when inactive. If not set, the input is unaffected by talk over. Output: Apply Master Volume If set, the output lowers the volume when active and is restored when inactive. If not set, the output volume is not changed by talk over. Output: Mute on TalkOver If set, the output is muted when active and unmuted when inactive. If not set, the output is unaffected by talk over. To activate the master talk over function press the „TalkOver“ button at the bottom of the main channel strip, use the „TalkOver“ button in the ribbon bar or press the F11 key. When using the „TalkOver“ button at the bottom of the main channel strip: Left-Click: talk over on/off (locked). Right-Click: talk over while pushed. If you just want to lower the master volume to the defined talk over level without executing the talk over functionality, you might use the „Mixer“ button of the main channel strip. Right-Click on it to slide the master volume to the defined talk over level without actually executing the talk over functionality. RADIO42 Confidential 75 ProppFrexx ONAIR As an alternative to the above talk over functionality the “TalkUser” button might be used, which allows you to define a different talk over behaviour on a per user bases (if UAC is enabled). When using the „TalkUser“ button: Left-Click: talk user on/off. Right-Click: lets you configure the talk user behavior and options. Figure 44: Configure TalkUser Settings On TalkUser ON: The control command(s) to execute if the TalkUser function is activated (defined on a per user bases, if UAC is enabled). On TalkUser OFF: The control command(s) to execute if the TalkUser function is deactivated (defined on a per user bases, if UAC is enabled). TalkUser sets TalkOver: If checked, toggling the TalkUser button also sets TalkOver (however it does not trigger the 'OnTalkover' events). This means: the Master-Level is ducked/unducked (if not supressed); the Mixer-Channels are muted/unmuted. If unchecked, only the 'OnTalkuser' events are triggered and you can/need to control any activity yourself (e.g. with the respective control-commands). Fade Master Volume: If checked the master volume is faded down to the defined TalkOver volume during TalkUser - else the master volume is left unchanged (even if 'TalkUser sets TalkOver' is enabled). Pause Playlist during TalkUser: If checked the current playlist will be paused during talk over. At TalkUser ON: AutoPlay OFF; FadeOut/Pause current track. At TalkUser OFF: AutoPlay ON; Play next track. Fade-Time: The time in milliseconds to use when fading out the current playlist track (at TalkUser ON) resp. the soundbed track (at TalkUser OFF). MixIn-Time: The time in milliseconds to wait when TalkUser is activated before the master volume is faded down and the soundbed track starts to play (e.g. to allow a current playlist track to fade-out). Note: The user specific 'OnTalkUserON' event is triggered after the MixIn-Time. MixOut-Time: The time in milliseconds to wait when TalkUser is deactivated before the master volume is faded back in and the current playlist resumes to play (e.g. to allow the soundbed track to fade-out). Note: The user specific 'OnTalkUserON' event is triggered before the MixOut-Time. Soundbed Track: The soundbed track is an audio track which will be played looped as a background track while TalkUser is active. Attenuation: The dB value to use to lower the volume of the soundbed track. 76 RADIO42 Confidential WORKING WITH ProppFrexx ONAIR The above ‘On TalkUser ON/OFF’ events allow you to assign a complete and individual sequence of control commnds to be executed when the talk user state is changed (e.g. if you don’t want to use the ‘Talkuser sets Talkover’ option). Beside that you might also automatically assign a soundbed track to be played looped in the background while talk user is active (you might directly change the soundbed track to be used by dropping a new track onto the ‘TalkUser’ button in the main mixer channel strip). Note: There are two separate events which can be configured for the talk user function. The global ‘OnTalkuserON/OFF’ event (see general settings, section ‘Events/Commands’) and the user specific ‘OnTalkuserON/OFF’ event (as explained here). Here is the sequence of actions performed at TalkUser: At TalkUser ON: 1. The global/general ‘OnTalkuserON’ event is triggered (not the one defined above) 2. If ‘Pause Playlist during TalkUser’ is set the current playlist track is faded out (using the ‘Fade-Time’) and the current playlist is set to AutoPlay Off 3. If ‘TalkUser sets TalkOver’ is set the resp. Input-Mixer-Channels are unmuted (and related Output-Mixer-Channels are muted) 4. ‘MixIn-Time’ milliseconds are waited here 5. If ‘Fade Master Volume’ is set the master volume is ducked to the TalkOver level 6. If a ‘Soundbed’ track is defined it will start playing looped 7. The specific ‘OnTalkuserON’ event is triggered (the one defined above) At TalkUser OFF: 1. 2. 3. 4. 5. The specific ‘OnTalkuserOFF’ event is triggered (the one defined above) If a ‘Soundbed’ track is defined it will fadeout and stop (using the ‘Fade-Time’) ‘MixOut-Time’ milliseconds are waited here If ‘Fade Master Volume’ is set the master volume is unducked back to 0 dB If ‘TalkUser sets TalkOver’ is set the resp. Input-Mixer-Channels are muted (and related Output-Mixer-Channels are unmuted) 6. If ‘Pause Playlist during TalkUser’ is set the current playlist is resumed (AutoPlay is set to On and a next track will be started playing) 7. The global/general ‘OnTalkuserOFF’ event is triggered (not the one defined above) RADIO42 Confidential 77 ProppFrexx ONAIR Using the Remote Control Monitor The Remote Control Monitor (RCM) allows you to monitor your GPIO/Remoting devices/servers. Remoting allows you to execute/operate almost anything within ProppFrexx ONAIR via almost any general purpose input/output (GPIO), eg. via TCP, MIDI, Serial I/O, GamePort, etc. It also allows you to remotely monitor other instances of ProppFrexx ONAIR within a multi studio setup. In this window you can monitor the state of these remoting devices/servers. Figure 45: The Remote Control Monitor In the first section you can control your master and slave instances of ProppFrexx ONAIR as well as manage your remote clients (more info can be found in the chapter „REMOTING, EVENTS, COMMANDS AND GPIO”). Each ProppFrexx ONAIR instance can be set to a Master or to a Slave mode (by default the Master mode is selected). The mode actually doesn’t change anything in terms of functionality or the mode of operation; it simply allows you to trigger a certain set of control-commands to be executed when changing the mode. In the general configuration dialog in the Events/Comamnds section you will find two application related control-command events called OnSetMaster and OnSetSlave. When changing the mode these control-commands are executed. You might define a set of control-commands to be executed when in Master mode, eg. start the scheduler; and a set of control-commands to be executed when in Slave mode, eg. close all playlists and stop the scheduler. As such you define, through the controlcommands associated, what ProppFrexx OANIR should do when in Master or Slave mode. Toggle Master/Slave: Click this button to toggle this instance between Master and Slave mode, which fires the OnSetMaster resp. OnSetSlave control commands. The next thing you can do is to manage your remote clients in a multi studio setup. Imagine you have multiple studios each equipped with a ProppFrexx ONAIR instance. Each of these ProppFrexx ONAIR instances might be seen as remote clients from the perspective of a single studio. So you might want to monitor the state of the ‘other’ studios from each ProppFrexx ONAIR instance. Or you might have one master control room from which you would like to monitor all your studios. All this can be done via the Remote Client Manager. Manage Remote Clients: Click this button to manage remote clients. Remote clients are instances of ProppFrexx ONAIR running on other machines. You can control the Master/Slave mode, start or stop the scheduler, start or stop any streaming server, control the playlist or even synchronize the scheduler entries of those remote clients over the network via this feature. When opening the Remote Client Manager you must first define the remote client connection. Click on the Add Client button to define your remote connection. 78 RADIO42 Confidential WORKING WITH ProppFrexx ONAIR Figure 46: Add Remote Client Name: Defines the unique name of the remote client/studio. Address: Defines the IP address or DNS name of the remote client to use. Port: Defines the port number to use. Note: This must match the port number of the ProppFrexx ONAIR remote TCP server as configured on the client. Password: Defines the password to use. Note: This must match the password of the ProppFrexx ONAIR remote TCP server as configured on the client. Once a remote client was added successfully it will be shown in the dialog as shown below. Figure 47: The Remote Client Manager The communication with remote clients is handled via the standard control-commands using the ProppFrexx ONAIR TCP server feature (more info can be found in the chapter „REMOTING, EVENTS, COMMANDS AND GPIO”). Right-Click one an entry in the remote client status overview list to invoke the context menu, which allows you to remotely: start or stop the scheduler close all playlists play the next track, pause or stop the current track get playlist info of the current playlist toggle the AutoPlay state of the current playlist Start or stop a streaming server synchronize the scheduler entries RADIO42 Confidential 79 ProppFrexx ONAIR Click on the Master/Slave button to directly toggle the mode of that remote instance, which actually fires the execution of the related OnSetMaster resp. OnSetSlave control-commands on that remote client. Click on the Mixer Channels popup to open and control the mixer channels of the remote clients mixer. This allows you to directly change the mixer channels volume, Mute state, ON/OFF state, SND state and REC mode of the remote mixer. In the next section you can monitor the state of the remote control interfaces of this ProppFrexx ONAIR instance. In general a remoting device/server receives external GPIO commands (eg. MIDI messages) and maps them via filtering rules into so called control commands (see the chapter „REMOTING, EVENTS, COMMANDS AND GPIO“ for more information on how to define the remoting devices/servers and associate the execution of control commands). TCP Remote Control Server: Shows the status of the TCP remote control server and if a client is connected. Double-Click to start/stop the server. TCP Remote Control Client: If a client is connected, the IP address of the remote control client is shown. Double-Click to kick (disconnect) this client. MIDI Remote Control Server: Shows the status of the MIDI Input and MIDI Output remote control server. Double-Click to start/stop the server. SERIAL Remote Control Server: Shows the status of the SERIAL Input and SERIAL Output remote control server. Double-Click to start/stop the server. GamePort Remote Control Server: Shows the status of the GamePort Input remote control server. Double-Click to start/stop the server. IO-Warrior Remote Control Server: Shows the status of the IO-Warrior Input remote control server. Double-Click to start/stop the server. Note: currently IO-Warrior is NOT implemented! 80 RADIO42 Confidential WORKING WITH ProppFrexx ONAIR The Mixer Channel Strip Mixer Channel Name Right-Click: opens the mixer channel menu Double-Click: opens the mixer channel setting dialog DSP Section Left-Click: opens the DSP editor Pan and Gain Section Mixer Channel On/Off Mixer Channel Mute/Unmute Right-Click: slides the fader to the talk over level Mixer Channel Fader Double-Click: reset to 0dB Peak Level Meter Right-Click: opens the level meter menu Send To Button (SND) Right-Click: opens the SND2 menu Recording Button Right-Click: opens the recording menu Figure 48: Mixer Channel Strip The above figure shows a mixer channel strip (either output or input). A mixer channel itself represents a mixer by its own, as it can receive any number of source audio streams in parallel (eg. multiple players can use a single mixer channel in parallel). The mixer channel performs an internal stereo mix-down of all sources (incl. high-quality re-sampling, if needed). With the mixer channel fader together with the Pan and Gain you can control the volume of the related mixer channels. The three build-in DSPs and the four freely definable DSPs allow you to perfectly control the sound of each mixer channel. The DSPs are executed in the following order: AGC, DSP1, EQ, DSP2, COMP, DSP3, DSP4, Pan/Gain. Each mixer channel can be turned off or on and can be muted and unmuted independently. Via the SND function you can route a copy of the mix-down audio signal of each mixer channel to another output mixer channel (eg. you might monitor your audio signal on a PFL mixer channel at any time by a single click). And finally the REC function allows you to record the audio signal at any time. Using the Fader The fader controls the volume of the mixer channel. To select the fader click with the mouse on the fader strip. The fader markers in the corners of the strip will indicate, if the fader is selected. Hovering the mouse over the fader slider will display a tool tip showing the current fader value in dB. Mouse Controls: Drag and Move the fader with the mouse to change the volume. Ctrl+Left: Slides the fader from its current position to the position identified by the click position. Shift+Left: Jumps the fader from its current position directly to the position identified by the click position. Double-Click: Resets the fader to the 0 dB position. RADIO42 Confidential 81 ProppFrexx ONAIR Ctrl+Double-Click: Slides the fader from its current position to the 0 dB position. Mouse-Wheel: Increases or decreases the fader position by small changes. Shift+Mouse-Wheel: Increases or decreases the fader position by large changes. Keyboard Controls: Page-Up: Increases the fader position by large changes. Page-Down: Decreases the fader position by large changes. Up-Arrow: Increases the fader position by small changes. Down-Arrow: Decreases the fader position by small changes. Home: Resets the fader to the 0 dB position. End: Resets the fader to the -∞ dB position. Ctrl+Home: Slides the fader to the 0 dB position. Ctrl+End: Slides the fader to the -∞ dB position. Various other faders are used within ProppFrexx ONAIR at other places (eg. the tempo fader of a DJ Player, the cross-fader of the Playlist etc.). All these fader use exactly the same keyboard and mouse controls - so they are not explained again for the other faders. Using the Peak Level Meter The peak level meter displays the current audio level of the stereo mix-down of the mixer channel. A right-click on the meter opens the peak level meter menu. Figure 49: Peak Level Meter Menu Reset: Resets the peak level meter display and clears the peak hold values. Peak Hold: If checked the maximum peak level value will be permanently displayed. Show RMS: If checked the RMS level value will be displayed as well. Show Level ToolTip: If checked the current level will be displayed as a tool tip when hovering the mouse over the meter. Using Pan and Gain The Pan rotary knob can be used to control the balance of the stereo mix-down of the mixer channel between the left channel, centred and the right-channel. The Gain rotary knob controls the pre-fade audio signal (after all DSPs have been processed). Use the gain to adjust the audio level, so that the maximum fader position will not result in any clipped audio level (above 0 dB). This will ensure that you can use the fader to operate within an optimal range between 0 dB and -∞ dB. Use the peak level meter to monitor the effective audio level and make sure it doesn't stay above 0 dB. Mouse Controls: Drag and Move changes the position according to the mouse movement. 82 RADIO42 Confidential WORKING WITH ProppFrexx ONAIR Ctrl+Left: Slides the position to the position identified by the click location. Shift+Left: Sets the position directly to the position identified by the click position. Double-Click: Sets the position immediately to the default position. Ctrl+Double-Click: Slides the position to the default position. Mouse-Wheel: Increases or decreases the position by small changes. Shift+Mouse-Wheel: Increases or decreases the position by large changes. Keyboard Controls: Page-Up: Increases the position by large changes. Page-Down: Decreases the position by large changes. Up-Arrow/Left-Arrow: Increases the position by small changes. Down-Arrow/Right-Arrow: Decreases the position by small changes. Home: Sets the position to the maximum value. End: Sets the position to the minimum value. Delete: Sets the position to the default value. Ctrl+Home: Slides the position to the maximum value. Ctrl+End: Slides the position to the minimum value. Ctrl+Delete: Slides the position to the default value. Various other rotary knobs are used within ProppFrexx ONAIR at other places (eg. the gain knob of a DJ Player, the knobs of DSPs etc.). All these rotary knobs use exactly the same keyboard and mouse controls - so they are not explained again for the other knobs. Activating/Deactivating the mixer channel (ON) To deactivate a mixer channel you might click on the „ON“ button. Click on the „ON“ button again to activate it. When not active the „ON“ button is displayed in gray. ON: Processing of the mixer channel is active. OFF: Processing of the mixer channel is bypassed (paused). The mixer is offline and does not generate and output signal resp. might only generate silence to the output (when using a nonstop mixer). Muting/Unmuting the mixer channel (M) To mute a mixer channel you might click on the „M“ button. Click on the „M“ button again to activate it. When muted the „M“ button is displayed in red. MUTE: The mixer output generates only silence. UNMUTE: The mixer output is active. Depending on your device configuration (see „Mute/Unmute“) muting might either mute the source(s) of the mixer channel, the mixer channel itself or even the external device. RADIO42 Confidential 83 ProppFrexx ONAIR Using the Dynamic Amplifier (AGC) Click on the AGC button of the mixer channel to open the AGC settings window (a blue button indicates, that the DSP is active). The dynamic amplification DSP allows you to automatically adjust the gain of the audio level being processed (automatic gain control, AGC). The level meter on top shows the applied gain effect when active. Figure 50: The Dynamic Amplifier (AGC) ON/OFF: Turns the dynamic amplifier on or off. Preset: Selects a predefined preset profile. Quiet: Quiet volume level in dB. Rate: Amplification adjustment rate in dB. Target: Target volume level in dB. Delay: Delay in milliseconds before increasing level. Gain: Gain amplification level in dB. Using the EQ Click on the EQ button of the mixer channel to open the EQ settings window (a blue button indicates, that the DSP is active). The 10-band parametric peaking equalizer DSP allows you to adjust ten individual frequency bands. The center frequencies are given in Hz and each band uses a bandwidth of one octave. A pre-amp allows you to adjust the volume of the audio signal, so that the final audio signal doesn't distort. Use the mixer's peak level meter to control the resulting audio level. Figure 51: The 10-band EQ ON/OFF: Turns the equalizer on or off. Preset: Selects a predefined preset profile. Pre-Amp: When you change any of the EQ bands it might be necessary to change this pre amplification value reverse in order to compensate the overall loudness. Band: Changes the gain value of each frequency band in dB. Using the Compressor (COMP) Click on the COMP button of the mixer channel to open the COMP settings window (a blue button indicates, that the DSP is active). This dynamic range compressor can be used to 84 RADIO42 Confidential WORKING WITH ProppFrexx ONAIR reduce the dynamic range of an audio signal by making loud passages quieter and quiet passages louder. The level meter on top shows the applied gain effect when active. Figure 52: The Compressor (COMP) ON/OFF: Turns the compressor on or off. Preset: Selects a predefined preset profile. Threshold: Point at which compression begins, in dB, in the range from -60 to 0 dB. Ratio: Compression ratio, in the range from 1 to 100. Attack: Time in ms before compression reaches its full value, in the range from 0.01 to 500. Release: Speed at which compression is stopped after input drops below threshold, in the range from 50 to 3000 ms. Gain: Make up gain of signal after compression, in the range from -60 to 60 dB. Using individual DSPs ProppFrexx ONAIR allows you use any VST 2.4 DSP or any Winamp DSP plug in with each mixer channel. The location and path to the individual DSPs are defined in the general configuration settings. When you click on one of the four freely assignable DSP buttons you might choose a DSP plug in the following dialog. Select „VST“ to list any of the loaded VST plug ins or select „Winamp“ to list the found Winamp plug ins. Note, that Winamp plug ins can only be used once with a mixer channel. In order to use the same Winamp plug in with multiple mixer channels, you must provide multiple copies of the related .dll library file. Furthermore Winamp plug ins can typically only operate on mixer channels with a sample rate of 44100 Hz (this is a simple limitation of the Winamp plug in itself). In order to achieve highest sound quality we therefore recommend using VST DSP plug ins. Currently VST 3 plug ins are not supported, but this will change in a future version of ProppFrexx ONAIR. Click on one of the four DSP buttons of the mixer channel to open the DSP settings window (a blue button indicates, that the DSP is active). Figure 53: Selecting an individual DSP RADIO42 Confidential 85 ProppFrexx ONAIR After you have selected a DSP plug from the list of available plug ins, click „OK“ to load and start the DSP. Once a DSP was successfully started and assigned to the mixer channel, the following settings window allows you to control the DSP. Figure 54: VST DSP Settings The top tool bar of the DSP settings windows contains the following controls: Bypass: Switches the DSP plug in processing on/off (VST only). Preset: Select a program/module preset of the DSP plug in (if available). Restore: Restore the parameter defaults for the selected program/module preset (VST only). Editor: Opens the external VST or Winamp plug in editor. Close: Removes the DSP plug in from the mixer. The individual parameters of a VST DSP plug in are shown below in the settings window and can directly be controlled/adjusted. Please refer to the DSPs documentation about the parameter values, its use and functionality. Click on the „Editor“ button to show the external VST or Winamp plug in editor. Using the Send To Function (SND) The „SND“ button allows you to send a copy of the audio signal processed by the mixer channel to any other output mixer channel (a blue button indicates, that the SND function is active). This offers you the possibility to route the audio signal to multiple mixer channels and thus use a mixer channel as a group bus receiving multiple audio streams. Right-Click on the „SND“ button to open the send to menu. An output mixer channel can receive and process the audio signals from any of the internal players as well as from any other input or output mixer channel. An input mixer channel can receive and process the audio signal of only the soundcard device input. Figure 55: The SND Menu 86 RADIO42 Confidential WORKING WITH ProppFrexx ONAIR The first entries in the menu allow you to select the output mixer channel(s) to send the audio signal to (a check mark indicate a selected output mixer channel). When you have selected the output mixer channel(s) to send the audio signal to, you might close the menu and click on the „SND“ button to activate or deactivate the SND function. Signal Post/Pre Fading: Click on this menu entry to toggle the state of the SND function. „Post Fading“ means, that the audio signal is send to the other output mixer channels after the mixer channels volume fader (incl. muting) has been applied. „Pre Fading“ means that the audio signal is send to the other output mixer channels before the mixer channels volume fader (incl. muting) has been applied. In any case the audio signal send will always include any FX/DSP applied by this mixer channel. Volume: Allows you to adjust the volume level which is send to the other mixer channels. Pan: Allows you to adjust the panning (balance) which is send to the other mixer channels. Auto SND2: In this sub menu you can configure, if the SND function should be activated/deactivated automatically. Off: The Auto SND function is inactive. Vol. Max: The SND function will automatically be activated when the mixer channel fader is at the maximum position (at 0 dB) and automatically be deactivated if the fader is below the maximum. Vol. Min: The SND function will automatically be activated when the mixer channel fader is at the minimum position (at -∞ dB) and automatically be deactivated if the fader is above the minimum. No PFL: The SND function will automatically be activated when no PFL player is active and automatically deactivated if a PFL player is in use (PFL Player, Segue-Editor or Quick Monitor Player). This option might be useful, if you want to eg. send the standard play out signal of your DJ Players to your headphone mixer channel, but only as long as no PFL is active, as such when you use any PFL function you only want to hear the PFL signal in your headphone. Note: As an alternative to the SND function you might always directly copy the audio signal (pre-fading) of a mixer channel to one other output mixer channel permanently. In order to do so you might select the output mixer channel in the device configuration dialog in the „Copy To/Output To“ combo box. Using the Recording Function (REC) The „REC“ button allows you to manually record the audio signal processed by the mixer channel (note, that automatic recording might be set via the „Auto Start Recording“ settings in the device configuration dialog). Recording is carried out on the audio signal before fading and muting is applied. This offers a one-touch off-air or on-air recording function. Click on the „REC“ button to start or stop the recording (a red button indicates, that recording is active). Right-Click on the „REC“ button to open the recording menu. Figure 56: The Recording Menu Select Encoder: Click on this item to select the encoder to use to record the audio signal (note, that by default the encoder as specified in the general configuration setting is used). To learn more about encoders see the section „Encoding and Recording Settings“ in the „General RADIO42 Confidential 87 ProppFrexx ONAIR Configuration Settings“. In the following dialog you can select the encoder to use and change the encoder settings. Figure 57: Select Encoder Dialog Select Output Folder: Click on this item to select the output directory where to save the recording file(s) (note, that by default the folder as specified in the general configuration setting is used, see the section „Encoding and Recording Settings“ in the „General Configuration Settings“ for more information). Select Output File: Click on this item to select the file name of the recording (note, that by default the file name pattern as specified in the general configuration setting is used, see the section „Encoding and Recording Settings“ in the „General Configuration Settings“ for more information). Pause Recording: Click on this item to pause or resume any active recording temporarily. Auto Sensing: This item allows you to control the way a manual recording should work (see the section „Encoding and Recording Settings“ in the „General Configuration Settings“ on how to define the sensing parameters). Recording sensing means, that a certain action might be carried out, when the audio level of the recording is below resp. above a defined threshold level or when the recording is active for a certain amount of time. If you for example want to only record the audio signal when the channel is actually used (eg. a moderator speaks to the microphone) you might use the auto sensing pause function in order to pause the recording when silence is detected. The following sensing actions are available: Off: No sensing activity (recording is active as long as selected via the „REC“ button). Pause: When the audio level of the recording falls below the defined sensing threshold level the recording will be paused. If it rises again above the threshold the recording will be continued. Stop: The recording will be stopped when the audio level of the recording falls below the defined sensing threshold level. After the recording was stopped, it has to be manually started again via the „REC“ button. Per Sensing New Session: When the audio level of the recording falls below the defined sensing threshold level the recording will start a new session – meaning a new file will be created. Per TimeLimit New Session: Instead of using the general sensing threshold level, a sensing time limit is used. When the recording lasts longer than the defined sensing time, a new recording will be started – meaning a new file will be created. This allows you to split the total recording into smaller files (each with a maximum duration of the defined sensing time limit). 88 RADIO42 Confidential WORKING WITH ProppFrexx ONAIR Additional Output Mixer Channel Functionality To open the output mixer channel menu right-click on the mixer channel name. Figure 58: Output Mixer Channel Menu Edit Settings: Click on this item to open the mixer channel output device configuration dialog (see above for details). Adjust External Volume: As ProppFrexx ONAIR never changes the volume level of the external soundcard devices you might use this item to adjust the external volume level. Figure 59: Adjust External Volume Dialog Note: ASIO devices cannot be adjusted with this option. To change the volume level or settings of your ASIO devices you must use the ASIO control panel as provided with your soundcard. In addition you might select the „Save External Volume“ option. If this option is checked and the „Monitor External Volume“ option in the section „Input and Output Settings“ of the „General Configuration Section“ is selected, the external volume of the soundcard device is constantly monitored. When monitored, the external volume is restored to the level as set in this dialog, whenever the volume is changed outside of ProppFrexx ONAIR (eg. via the windows sound control panel). This allows you to lock off the external volume level and prevent unwanted changes. Edit Control Command Events: Control commands allow you to trigger the execution of almost any activity within ProppFrexx ONAIR (see the chapter „REMOTING, EVENTS, COMMANDS AND GPIO“ for more information). Click on this item to assign control commands to the following predefined mixer channel events: RADIO42 Confidential 89 ProppFrexx ONAIR Figure 60: Mixer Control Command Events Dialog OnFaderStart: triggered when the fader is moved above the minimum position. OnFaderStop: triggered when the fader is moved below the maximum position. OnMute: triggered when the mixer channel is muted (eg. via the „M“ button). OnUnmute: triggered when the mixer channel is unmuted. OnOn: triggered when the mixer channel is activated (eg. via the „ON“ button). OnOff: triggered when the mixer channel is deactivated. OnStartRecording: triggered when recording is started (eg. via the „REC“ button). OnStopRecording: triggered when recording is stopped. OnStartSND2: triggered when SND function is activated (eg. via the „SND“ button). OnStopSND2: triggered when the SND function is deactivated. Select a mixer channel event and click on the „Edit“ button to invoke the control command builder dialog. Instant Recording: Click on this item to open the instant recording dialog for the selected mixer channel. This allows you to directly record new tracks (eg. for voice overs etc.). Figure 61: Instant Recording Dialog Please refer to the Instant Recording chapter for more info. 90 RADIO42 Confidential WORKING WITH ProppFrexx ONAIR Recreate and Reset: Click on this item to recreate and reset the entire mixer channel. Normally this is never needed, but if your external soundcard device driver breaks you might use this item to reset the driver (which might introduce a short break in the audio signal). Move Left/Move Right: Rearranges the position of the mixer channel strip in the mixer window to the left resp. right of the current position. Add Mixer Channel/Remove Mixer Channel: As already explained in the section „Adding/Removing new Mixer Channels“ you might use these items to create a new mixer channel strip or remove this mixer channel strip from the mixer setup. Visual: This item allows you to display a visual FFT representation of the current audio signal processed by the mixer channel. Four different visual styles (Spectrum A/B, WaveLine and VoicePrint) are available. Click on the arrow to open the visual window. Click on the plus sign to change the visual style. Figure 62: Mixer Channel Visual Window Additional Input Mixer Channel Functionality To open the input mixer channel menu right-click on the mixer channel name. Figure 63: Input Mixer Channel Menu In addition to the output mixer channel options you can select the following: Show OnAir Time: If checked, the time the input mixer channel is on-air will be displayed at the mixer channel name. An input mixer channel is on-air, whenever the channel is active (ON), not muted (M) and the fader is up. Reset Full-Duplex: Click on this item to reset the internal full-duplex buffer. Normally this is never needed, but with some soundcards (especially when using different devices for recording and output routing which are not synchronized by a world clock) it might be the case, that the routed output audio signal might drift apart from the original recording. In such case an additional delay might be introduced. If this happens you might use this menu item to clear and reset the internal buffer to bring the audio signal back again in sync. RADIO42 Confidential 91 ProppFrexx ONAIR General Configuration Settings To open the general settings dialog, select „Settings...“ from the main menu or press F3. In the general configuration settings dialog you might configure any settings, preferences and options of ProppFrexx ONAIR. As many operational tasks and functionalities depend on these settings, it is recommended to study this chapter carefully. There are a lot of options you might set, so the settings are arranges within categories. Click on a category to the right of the dialog to change it. General Audio Settings This category contains general audio and application settings. Figure 64: General/Audio Configuration Audio Engine Playback Buffer: The default playback buffer length in milliseconds (WDM driver only). The minimum length is 1ms above the update period. Increasing the length, decreases the chance of the sound possibly breaking-up on slower computers, but also increases the latency for DSP/FX. Note: The buffer size can also be set directly in the device configuration dialog of a mixer channel. This value will only be used when the WDM driver is used and you have not specified any buffer value in the mixer channel device configuration settings (resp. used a buffer value of 0). Recording Buffer: The default buffer length in milliseconds for recording channels (WDM Input driver only). Unlike a playback buffer, where the aim is to keep the buffer full, a recording buffer is kept as empty as possible and so this setting has no effect on latency. Unless processing of the recorded data could cause significant delays there should be no need to increase this. This value will only be used when the WDM driver is used and you have not specified any buffer value in the mixer channel device configuration settings (resp. used a buffer value of 0). Reverse Block-Length: Length of blocks in milliseconds to be used with reverse streams. Larger blocks mean less seeking overhead but larger spikes (used when a track is played reverse). 92 RADIO42 Confidential WORKING WITH ProppFrexx ONAIR Update Period: The update period is the amount of time between updates of the playback buffers of channels (WDM driver only). Shorter update periods allow smaller buffers to be set, but as the rate of updates increases, so the overhead of setting up the updates becomes a greater part of the CPU usage. This value will only be used when the WDM driver is used and you have not specified any period value in the mixer channel device configuration settings (resp. used a period value of 0). Audio Threads: The number of threads to use for updating playback buffers (WDM driver only). The number of update threads determines how many playback buffers can be updated in parallel; each thread can process one stream at a time. Additional threads can be used to take advantage of multiple CPU cores. There is generally nothing much to be gained by creating more threads than there are CPU cores, but one benefit of using multiple threads even with a single CPU core is that a slow updating stream need not delay the updating of other stream. ASIO and WASAPI drivers use their own driver specific threading model. Downmix: If the source (eg. an audio track played with an internal player) has more channels than the mixer output (which is always stereo), then a stereo down mix is created else only the front left and right channels are used. Filter Order: The order of filter used to reduce aliasing in case of resampling. Resampling takes place, if the source (eg. an audio track played with an internal player) has a different sample rate than the mixer output. The filter order determines how abruptly the level drops at the cutoff frequency, or the roll-off. The level rolls off at 6 dB per octave for each order. For example, a 4th order filter will roll-off at 24 dB per octave. A low order filter may result in some aliasing persisting, and sounds close to the cutoff frequency being attenuated. Higher orders reduce those things, but require more processing. Network Buffer: The download buffer length in milliseconds to be used when streaming tracks from the internet. Increasing the buffer length decreases the chance of the stream stalling, but also increases the time taken to create the stream as more data has to be prebuffered. The network buffer length should be larger than the length of the playback buffer, otherwise the stream is likely to stall soon after starting playback. Network Pre Buffer: Amount to pre-buffer when opening internet streams. This setting determines what percentage of the network buffer length should be filled when opening internet streams. The default is 75%. Passive FTP: Use passive mode in FTP connections when playing internet streams? If checked, passive mode is used; otherwise normal/active mode is used. Verification Size: The amount of data in kilobytes to check in order to verify/detect the file format. The verification length excludes any tags that may be at the start of the file. BPM Detection BPM Range: BPM detection can be limited to a certain range of valid BPM values. This slider defines the lower and upper boundaries, the minimum and maximum of a BPM value to detect. BPM Period: Defines the time interval in seconds at which the BPM value will automatically be calculated and updated in the DJ Players. Enable Beat Detection: If checked the individual beat positions will be detected and displayed per track in the DJ Players. This option also enables the beat matching and synchronization function of tracks within DJ Players, but also increases the time for a track to be loaded. Mixer Auto Lock Mixer: If checked the main mixer will be locked whenever a preset is loaded/selected to prevent any undesired user changes. RADIO42 Confidential 93 ProppFrexx ONAIR Save Mixer Preset: If checked the currently selected mixer preset is saved automatically when the application is closed. Decode in 32-Bit: If checked all audio tracks will be decoding in 32-Bit floating-point resolution, else 16-Bit integer resolution will be used. The main advantage of floating-point channels, aside from the increased resolution/quality, is that they are not clipped until output. So even if the output device is not capable of outputting the channel in its full quality, the quality is still improved. Force Speaker Assignment: If checked the windows control panel setting is used to detect the number of speakers for a soundcard (WDM drivers only). Only use this option, if the correct number of supported speakers cannot automatically be detected due to bad drivers. Async WM Decoder: The windows media decoder (wma) can by synchronous (decodes data on demand) or asynchronous (decodes in the background). With the background decoding, the data received from the WM decoder is buffered. Application Application Priority: Defines the thread priority for the user interface. User Agent: The „User-Agent“ request header sent to a server when an internet stream will be opened/played. Proxy Settings: The proxy server settings, in the form of „user:pass@server:port“. Specify „-“ to not use any proxy. Specify an empty string to use the default proxy settings. If only the „user:pass@“ part is specified, then those authorization credentials are used with the default proxy server. If only the „server:port“ part is specified, then that proxy server is used without any authorization credentials. UI Performance: The user interface performance defines the update frequency of various user controls (mainly the peak level meters). More frequent updates means a higher CPU usage. High: UI updates are more frequent. Medium: UI updates are medium frequent. Low: UI updates are less frequent. Note: For some controls the changes take only effect after a restart of the application. Replay Gain Not all audio tracks sound equally loud (eg. because different tracks are mastered at different levels), so when random playing, the volume keeps changing. The solution to this is to store the ideal Replay Gain for each audio track. Replay Gain is a process to normalize the perceived loudness of an audio track. Replay Gain works by first performing a psychoacoustic analysis of an entire audio track to measure peak levels and perceived loudness. The difference between the measured perceived loudness and the desired target loudness is calculated; this is considered the ideal replay gain value (the target loudness is 89 dB SPL). The gain value and the peak value are then stored as metadata in the audio file (TAG data, without altering the original audio data), allowing ProppFrexx ONAIR to automatically attenuate or amplify the signal so that tracks will play at a similar loudness level once calculated. This avoids the common problem of having to manually adjust volume levels when playing audio files from albums that have been mastered at different levels. Should the audio at its original levels be desired (eg. for burning back to hard copy), the metadata can simply be ignored. For most modern tracks the replay gain value leads to an attenuated volume level (so that there is enough head room for quiet tracks, which needs to be amplified). 94 RADIO42 Confidential WORKING WITH ProppFrexx ONAIR Beside the standard replay gain calculation ProppFrexx ONAIR also supports a simple peak level normalization or a combined mode. Whenever replay gain is active the internal players of ProppFrexx ONAIR will use them to adjust their internal volume gain. Relay Gain Mode: Defines the replay gain mode to use for playback. Off: No replay gain will be calculated and applied. Normalization: The peak audio level will be normalized to be at 0 dB (note, that the perceived loudness is not considered here and thus this mode doesn’t result in tracks sounding equally loud). When an audio track is loaded to a player a peak level scan is carried out to adjust the gain, which might slightly increase the time it takes to open/load a track to a player. ReplayGain: Standard replay gain will be applied (for tracks not having a replay gain value set so far in its metadata, one will be calculated automatically and saved to the TAG data of the track, so that it doesn’t need to be calculated again). This might increase the time it takes to open/load an audio track to a player, as a psycho acoustic analysis needs to be carried out first. Normalization + ReplayGain: First normalization will take place, followed by the standard reply gain calculation. Dynamic ReplayGain: Like the standard replay gain calculation, but the effective reply gain value will be adjusted according to the maximum replay gain value calculated so far (eg. if the maximum calculated replay gain value is -2 dB and a track has a replay gain value of -5 dB, the effective replay gain would be -3 dB; see the „Maximum Replay Gain“ value below). Default Replay Gain: Defines the replay gain value in dB to be used for all tracks not having any replay gain values resp. for all tracks where the replay gain value cannot be determined (the default is -6 dB). Maximum Replay Gain: This is the current maximum replay gain value in dB being used so far. This value is used when the „Dynamic ReplayGain“ mode is selected. Folder and Library Settings This category contains the assignment of paths, media- and cartwall libraries. Figure 65: Folders/Libraries Configuration RADIO42 Confidential 95 ProppFrexx ONAIR Media Libraries Media libraries are essential to ProppFrexx ONAIR. A media library is actually an internal collection of media entries, which each represent the (reference to) audio tracks available for playback. All your used media libraries therefore represent your entire database of available tracks (of course you are also allowed to play any other audio manually). Media libraries are used almost everywhere within ProppFrexx ONAIR. You might use media libraries during scripting, e.g. to ‘pick’ random tracks out of a certain media library and add them to your playback playlist automatically or you might add media tracks out of any media library manually. The „Find Track“ window allows you to search through all defined media libraries for certain tracks for quick retrieval etc. So you should organize your audio tracks into multiple media libraries by categories (typically by genre and/or type). In this configuration section you define what media libraries ProppFrexx ONAIR should use, where ProppFrexx ONAIR can find them and if they should be monitored automatically. See the chapter „WORKING WITH MEDIA LIBRARIES“ for more information. Auto. Playlist Path: Specifies a directory which contains playlist files, for which media libraries should automatically be created (playlist based only). Certain supported playlist files (.pfp, .m3u, .m3u8, .pls) within this directory are automatically loaded as individual media libraries. If you leave this entry empty you might manage your media libraries manually by using the „Additional Media Libraries...“ button. Recursive: If checked, all sub-directories of the above folder are scanned as well for media libraries to be loaded. Don't Reload: If checked, all media libraries found in the above path will be excluded from automatic reloading. Instead the media libraries will only be loaded once at startup. Song History Count: The default size of the media library song history. A media library song history ensures, that not the same entry will be queried twice. Set to 0 to disable the song history. Keep Song Histories Persistent: If checked, the song histories of the media libraries will be saved on exit and restored on load of ProppFrexx ONIAR - else they are empty whenever ProppFrexx ONAIR is restarted. Auto Save: If checked, all media libraries will automatically saved (if changed) every 60 minutes. Additional Media Libraries: Click here to manage your media libraries manually and to add individual media libraries (eg. if they are not located within your media library path). Reload: Click here to rescans the media library path and reloads all found media libraries. Info: Shows an information dialog about all loaded media libraries. ProppFrexx actually maintains a separate set of media libraries dedicated for cartwalls only (named Cartwall Libraries). These typically include your jingles, station IDs, promos etc. While maintaining these libraries are separated, the general concept is absolutely the same. So the same applies to Cartwall Libraries as for Media Libraries. 96 RADIO42 Confidential WORKING WITH ProppFrexx ONAIR Manage Additional Media Libraries To manage additional media libraries click on the „Additional Media Libraries...“ button. The following dialog allows you to manually manage your individual media libraries and assign individual parameters to them. This is actually the recommended way of defining media libraries, as it allows you to exactly specify which media libraries to use. Figure 66: Additional Media Libraries Dialog The tree list shows all defined and loaded media libraries grouped by its category, which have been manually added to your collection of media libraries (the number in brackets indicates the total number of tracks found in each library). Use the button row to the right to add additional media libraries (see below). When a media library is selected in the tree list additional info of that media library is shown below. Double-Click on an entry to edit its parameters. Media Libraries which couldn’t currently be accessed (e.g. the drive/folder, database or remote server is unavailable are shown as ‘Broken’ within the tree list). Note: The category assigned to a media library is only used in this dialog and in any dialog which allows you to select certain media libraries and only serves the purpose of grouping media libraries in these dialogs, ie. allowing you to more quickly find a certain media library. There is no other purpose assigned to the category. Information: This box displays some general info about the selected media library. Total Duration: The total duration of all tracks within the library. Avg. Duration: The average duration of a track within the library. Count: The total number of tracks contained in the library. Last Access: The date and time when the library was last used internally. Last Refresh: The date and time when the library was last reloaded. History: The current number of entries in the library song history. Hits: The number of sing history hits occurred so far. Add Playlist: Adds a playlist based media library. Opens a standard file dialog and lets you select any existing and supported playlist file to be added to your media library collection. Such playlist based media library will get the name of the selected playlist file. RADIO42 Confidential 97 ProppFrexx ONAIR Add Folder: Adds a folder based media library. Opens a standard directory dialog and lets you select a folder whose contained audio files (incl. all audio files in all sub-directories) should be added as a new media library to your media library collection. Such folder based media library will get the name of the selected folder. A folder based media library will take longer to (re)load, since all files needs to (re)scanned. Add DB: Adds a new database connection to your media library collection. A database based media library will load the media entries from a database table instead of a playlist file (see the Appendix „Database Librtaries (SQL)“ for a DDL statement to define a database table accordingly). You might use multiple tables to organize multiple DB based playlists. In the following dialog you can specify the database connection as well as the table name to add to your media library collection. Figure 67: Media Library Database Connection Connect String: The connect string can either be an ODBC data source name (DSN) or any valid ODBC driver connect string. Eg.: DSN=dsnname or Driver={Microsoft ODBC for Oracle};Server=ORACLE10i;Persist Security Info=False;Trusted_Connection=Yes Table Name: Specifies the database table name to use for this media library. Base Directory: If specified the media locations (as defined in the column LOCATION) will be relative to this path - else they must be absolute and fully qualified (UNC paths are supported). Test: Click here to test your database connection. You must add an Open Database Connectivity (ODBC) data source to connect ProppFrexx to your database instance (e.g. to an MySQL or SQL Server). To add a data source, you can use ODBC Data Source Administrator, launched by clicking Data Sources (ODBC) under Administrative Tools in the Windows Control Panel, and selecting the appropriate DSN Configuration Wizard. Note: In a 64 bit windows operating system, there are TWO ODBC managers. When you pull up the usual menu for the odbc / dsn system, it is for the 64 bit odbc manager, and 32 bit applications (like ProppFrexx ONAIR) will not work using these DSN's! This is where the 32 bit odbc manager is: C:\Windows\SysWOW64\odbcad32.exe Please refer to your database manual for more details on how to create and manage an ODBC data source. Add Remote: Adds a new connection to a remote Media Library Server allowing you to use a media library from that server. A remote media library will access the media entries from a running Media Library Server instead of the above. The remote media entries are not loaded into memory but only accessed remotely. Note: On the remote host the process „ProppFrexx 98 RADIO42 Confidential WORKING WITH ProppFrexx ONAIR MediaLibraryServer.exe” must be running and properly configured (see the chapter Remote Media Library Server for more information). Figure 68: Remote Media Library Connection Host, Port: Specify the host name (DNS or IP address) as well as the port number of the remote media library server to use. Password: Specify the password to use with the remote media library server. Media Library: Specify the media library name of the remote server to use (click on the three dots to select a remote media library name available on the server specified). Base Directory: If specified the media locations will be relative to this path - else they must be absolute and fully qualified (UNC paths are supported). Note: Make sure to properly configure your media library server settings accordingly. We recommend to not use relative paths for remote libraries, but instead use UNC paths on the remote server. Test: Click here to test your remote connection. Note: In order to use remote media libraries you must have the 'ProppFrexx MediaLibraryServer.exe' application running on the remote host computer. Remove: Removes the selected media library from your media library collection. Reload: Refreshes the selected media libraries (reloads the library content). Rescan: Rebuilds the selected media library (rescans the entire library content) - folder based media libraries only. This might be needed, if for whatever reason the '_synced_.pfp' file got unsynchronized and therefore needs to be resynchronized. Double-Click on a media library entry in the tree list to edit its parameters: Figure 69: Edit Media Library Properties The following parameters are available per media library: Location: The location of the media library (read-only). Defines the access path of the library, e.g. the path to a playlist file or the access parameters to a database based library. RADIO42 Confidential 99 ProppFrexx ONAIR Category: Specify the category under which the new media library should be created (used only as a grouping criteria within the media library management dialogs). Comment: Any descriptive comment text (just for info in the media library management dialogs). History: Defines the size of the library song history. A value of 0 disables the song history. A value of -1 set the song history to the total number of tracks contained in the library. Double-Click: Opens the song history editor dialog. Clear History at Reload: If checked, the selected media library will clear its song history with every load or reload - else the song history will never be cleared and always keep the last used tracks in the history. Don't Reload: If checked, the selected media library will be excluded from automatic reloading. Instead this media library will only be loaded at startup or if a script triggers the reload. Default Media Type: When reading media libraries which doesn't fully support meta data information (such as M3U or Folder libraries) you might use this value to specify a default media entry type for all entries in the library having no media type set so far. The media type is widely used within ProppFrexx ONAIR, e.g. to perform filtering, special mixing and dedicated event execution (eg. Automatic Cue Point Detection might be limited to certain media types only resp. might use different mixing parameters). Sorted: If checked, the media library will automatically be sorted descending by the last modification date when reloading. This is only available/applies to folder based libraries! Auto Watch: If checked, the selected media library will automatically be monitored. In this case any external change to the library will automatically be handled. This is only available/applies to playlist or folder based libraries. This allows you for example to monitor a folder based library (when you now manually copy, delete or rename an audio file within the folder of the library the related track(s) will automatically be added, remove or changed accordingly – as such the library is automatically kept in sync with your physical folder content). For playlist based media libraries this option will reload the entire playlist library whenever the playlist file changes. Cartwall Libraries Cartwall libraries are special media libraries which are only available within the cartwall windows. Each cartwall library displays their entries as carts inside the cartwall. You might select each cartwall library within the cartwall windows. Therefore you should not use libraries with too many entries as a cartwall library (typically a cartwall library should not contain more than 100 entries). For the rest of it, a cartwall library is exactly the same as a media library (except, that a cartwall library never uses a song history) and such the same parameters and options applies to the cartwall libraries as for the media libraries. Manage Additional Cartwall Libraries To manage additional cartwall libraries click on the „Additional Cartwall Libraries...“ button. The same dialog as used to manage additional media libraries allows you to manually manage your individual cartwall libraries and assign individual parameters to them. As this dialog is almost the same as for adding additional media libraries, please refer to the section „Manage Additional Media Libraries“ for more information. The differences are: a) Cartwall libraries don’t actually use the song history (even if defined). b) Cartwall libraries don’t support the „Auto Watch“ feature. 100 RADIO42 Confidential WORKING WITH ProppFrexx ONAIR Library Automation Options These settings allow you to automatically trigger the reloading of all media and cartwall libraries at certain intervals. Note, that you might also trigger a reload of media libraries during scripting. If you only want to reload specific libraries only, make sure to set the „Don't Reload“ flag parameter with the library, which will prevent it from being reloaded here. Automatic Reloading: Specify a value in hours to activate automatic reloading. All Media or Cartwall Libraries are then automatically reloaded in this interval. Specify 0 to deactivate automatic reloading. Starting at: Defines the time when the automatic reloading interval should start. This allows you define the exact time (eg. nightly) when the reload should happen. Other Folders and Paths VST Plugin Path: Specify a directory which contains your VST plug ins. VST plugins might be used as effect plugins in your input or output mixer devices. Click on the „…“ button to open the standard directory dialog in order to navigate to and select the folder containing your VST plugins. Winamp Plugin Path: Specify a directory which contains your Winamp DSP plugins. Winamp DSP plugins might be used as effect plugins in your input or output mixer channels. Click on the „…“ button to open the standard directory dialog in order to navigate to and select the folder containing your Winamp plugins. Note: Winamp DSP plugins are often not as stable as VST plugins and only support an internal processing bitwidth of 16Bits – as such it is only recommended to use Winamp plugins if really needed. Some Winamp DSP plugins might not be supported by ProppFrexx – just try and error. Explorer Paths: Specify the allowed paths to be shown in the directory explorer window as well as to which general access should be granted. Each entry must be separated by a semicolon, e.g.: „C:\; D:\Music“ will limit the access to the specified paths only. Leave empty to give unlimited access to all drives and paths. Note: If specified, a ProppFrexx ONAIR user can only use media entries which reference to a location within these defined paths. As such this option allows you to grant/limit file access to certain folders only! A user might in this case for example only be able to add new playlist entries manually, if the related audio file comes from the defined limit paths. This applies only, if UAC is enabled and you are not the ‘Admin’ user. Rescan: Rescans the VST resp. Winamp plug in directory (for new plugins). Info: Shows information about the loaded VST resp. Winamp plug ins. RADIO42 Confidential 101 ProppFrexx ONAIR Player Settings This category contains the configuration of player settings and defaults. Figure 70: Player Settings Configuration Player Defaults Fader Orientation: Defines if positive values should be at the top or if negative values should be at the top of the tempo slider. Fader Range: Defines the default tempo slider range (which can be either -8% to +8%, 16% to +16% or -30% to +30%). Player Mode: Defines the default tempo mode for the DJ and PFL Players (the CDJ MasterTempo mode is only available if you select „Enable Master Tempo“): CDJ Player: The player operates like a DJ CD-Player. Tempo changes affect the playback speed, tempo and pitch. CDJ MasterTempo: The player operates like a DJ CD-Player. Tempo changes affect the playback tempo but keep the original pitch and speed. Vinyl 33 RPM: The player operates like a 33rpm turntable. Tempo changes affect the playback speed, tempo and pitch, scratching is possible. Vinyl 45 RPM: The player operates like a 45rpm turntable. Tempo changes affect the playback speed, tempo and pitch, scratching is possible. WaveForm: Select how the players should render a visual WaveForm for an audio track. A WaveForm will make it easier to find cue-points and to get an overview about the actual track. Stereo: A stereo wave form with independent left and right channels will be rendered. Mono: A mono wave form with combined left and right channels will be rendered. Dual Mono: Two overlaid mono wave forms with independent left and right channels will be rendered. Half Mono: A mirrored upper-half mono wave form with combined left and right channels will be rendered. Never: A wave form will never be rendered at all. 102 RADIO42 Confidential WORKING WITH ProppFrexx ONAIR WaveForm Limit: Defines the limit in seconds up to which a WaveForm will be rendered. If the track duration is above that limit no WaveForm will be rendered. Player/PFL Zoom Distance: Defines the default zoom windows size in seconds. Meaning when a WaveForm is zoomed (via a double-click on the WaveForm) the WaveForm will show a zoomed window of the defined size. This value also defines when the player should start blinking, if a track comes to its end. E.g. the player starts blinking, if the remaining track time is at this position. Layout: Defines the default layout of the DJ Players when a new playlist is created: Full: All player controls are visible. Full (No Wave): All player controls are visible except the WaveForm. Small: Only the time and WaveForm controls are visible. Small (No Wave): Only the time controls are visible. Medium: The time and WaveForm controls are visible plus simple playback controls. Medium (No Wave): The time controls are visible plus simple playback controls. Smart Wave Zoom: If selected the WaveForm is automatically zoomed in and out according to the current player position (eg. at the beginning and the end of the track). Enable Reverse Playback: If selected reverse playback is supported (allowing you to change the playback direction between forward and backward) - else reverse playback is disabled. Enable Master Tempo: If enabled the CDJ MasterTempo mode will available as a Player Mode. In addition independent key and speed changes are possible to change either the pitch or the tempo or both. Note: When master tempo mode is enabled 'scratching' effects will become mostly unusable due to internal processing side-effects. So if you want better 'scratching' effects you should disable the master tempo. CDJ Pause Does Pause: If enabled the PLAY/PAUSE button of the DJ and PFL Player does really pause the playback - else it will toggle between cueing mode (stuttering) and playback. Auto ReplayGain Calculation: If enabled the replay gain values will automatically be calculated for tracks not having any replay gain values set so far. Note: This applies only to tracks loaded to the DJ or PFL Player. Show Ramp Time when Cued: If the current track position is within the Ramp resp. Outro time the DJ and PFL Player will show the remaining ramp/outro time. If this option is NOT selected it will only be displayed when the current track is actually playing. Double-Click Start CW I/CW II: If checked, the cartwall I resp. II players will be started on a double-click - else the players will start on a single click. Vol/Pan: The default output volume and panning of the DJ Players, PFL Player, Cartwall I and II Players and the Quick Monitor Player. If you for example want that your cartwall jingles always sounds louder than your DJ Players you might adjust that here; else leave these controls to their default (0 dB, centered). Other Player Settings Load Track To Memory: Tries to load the audio track into memory, if the file size is not bigger than the value given. Set to 0 to never load a track into memory and always play the track directly from the file location. Loading tracks into memory might have the advantage, that during playback no I/O activity is performed which might ensure stable playback on slow I/O sub-systems; but might increase the time it takes to open/load an audio track to a player. RADIO42 Confidential 103 ProppFrexx ONAIR DJ Player Memory Limit: Defines the memory limit to use for DJ Players (set to 0 to never load a track into memory). Cartwall Memory Limit: Defines the memory limit to use for cartwall players (set to 0 to never load a track into memory). AutoStart PFL Player: If checked, playback of the PFL Player is automatically started whenever a track is loaded to the PFL Player. AutoHide PFL Player: If checked, the PFL Player is automatically closed whenever a DJ Player starts playing. Standby Players: Defines the number of Standby Players to create by default. Layout: Defines the default layout of the Standby Players: Full: All player controls are visible. Full (No Wave): All player controls are visible except the WaveForm. Small: Only the time and WaveForm controls are visible. Small (No Wave): Only the time controls are visible. Medium: The time and WaveForm controls are visible plus simple playback controls. Medium (No Wave): The time controls are visible plus simple playback controls. BPM Calculation After Loading: If checked, the track's BPM value is automatically calculated after it was loaded to a player. Auto Calculate BPM: If checked, the track's BPM value is permanently calculated during playback, else the BPM value is only calculated manually upon request. Auto Save BPM to Track: If checked, the current BPM value is automatically stored to the track's metadata (but only if the track does not contain a BPM value so far). Execute Control Commands: If checked, the track related control commands are also executed in the PFL, Cartwall resp. Standby Players - else they are only executed in the DJ Players. Set the check mark to the players where you want to execute control commands (PFL Player, Cartwall I, Cartwall II and Standby). 104 RADIO42 Confidential WORKING WITH ProppFrexx ONAIR Playlist and Other Settings This category contains the configuration of the look and feel, TAG reading, UAC and playlist settings. Figure 71: Playlist/Others Configuration Look And Feel Show Tool Tips: When checked help tool tips will be displayed over almost every control element. If unchecked no tool tips will be displayed. Suppress Errors: When checked and errors occur the error notification dialog is suppressed and the error is only logged to the 'error.log' file. Show Notifications when Minimized: When checked a notification popup window will be shown with the current track title being played whenever the main window is minimized. Load Layout on Startup: When checked the layout of all windows are restored when the application is started. Save Layout on Exit: When checked the layout of all windows are saved when the application is closed. Big Font: When checked the font used in the playlist window will be 50% larger. MediaType Colors: Click here to define individual colors for each media entry type to be used within the cartwalls and playlists. Figure 72: Define Media Type Colors RADIO42 Confidential 105 ProppFrexx ONAIR In the above dialog you might first select a media entry type for which you want to define a specific color and then you can specify the foreground and background color to use. The example cartwall cart will display the colors accordingly. Save Layout To: Click here to save the current layout to another user (overwriting the current user's layout). Reset Config: Click here to restore all default settings. This will take effect after the next restart of ProppFrexx ONAIR and will remove all audio, folder, mixing, output, input, routing setting files etc. and thus restore all defaults. Reset Layout: Click here to restore the default layout. This will take effect after the next restart and will remove all custom layout setting files and thus restore all defaults. TAG Reading & WaveFrom Force TAG reading: If checked TAG information will be read immediately whenever a track is loaded to a playlist. This might affect the time it takes to load a playlist or media library significantly. Ask: If checked, you will be asked when adding new entries to a playlist (if you want to read the TAG data for those entries or not). Note: This has no effect, if you have selected to always force TAG reading. Perform TAG reading in Background: If checked, the TAG data reading will be performed in an independent background thread which will not block the user interface. If not checked, TAG data reading will be executed immediately. Read TAG when Track becomes visible: If checked, the track's TAG data will be read once the track becomes visible within a playlist. If not checked, the track's TAG data will be read at least when a playlist entry will be selected. Auto Save MetaData to TAG: If checked, meta data information (cue-points, volumepoints, the media entry type, the entry options etc.) will automatically be saved to a special „ProppFrexx“ TAG within the audio file. Use MetaData Files (.pfmd): If checked, TAG information is also written to and read from a separate file (which will have the same name as the audio file but uses the extension „.pftd“). Auto Save MetaData File (.pfmd): If checked, meta data information (TAG and event data) is automatically written to a separate file (which will have the same name as the audio file but uses the extension .pfmd). Save WaveForm to File (.pfwf): If checked, a rendered WaveForm file will be saved along with the physical track file. The WaveForm file gets the same name as the track with the extension „.pfwf“. Keep WaveForm with Playlist Entry: If checked, a generated WaveForm will be kept into memory along with a playlist entry. This prevents the need to recalculate a WaveForm every time a playlist entry is loaded to a player - but also increases the memory consumption. Extended…: Click here to define further options regarding TAG reading, writing and compatibility settings with other applications. 106 RADIO42 Confidential WORKING WITH ProppFrexx ONAIR Figure 73: Edit Extended TAG Options Save CoverArt as TAG: If checked, any changed track picture image will be saved as a covert art TAG data within the audio file - else it will be saved as a separate album image file by default. Force MetaData Reading: If checked, external meta data has priority over playlist based meta data. Default (unchecked): 1. Playlist based meta data 2. Meta Data File (.pfmd) 3. Meta Data TAG (proppfrexx) Forced (checked): 1. Meta Data TAG (proppfrexx) 2. Meta Data File (.pfmd) 3. Playlist based meta data Note: (2) is only in effect, if the Use MetaData File option is set. Use Broken Latin1: Many media players and taggers incorrectly treat Latin1 fields as "default encoding" fields. As such, a tag may end up with Windows-1250 resp. Windows1252 encoded text. If checked, this program will behave like Windows Media Player and others, who read and write tags with this broken behavior. If unchecked, this program will always use the correct ISO-8859-1 (Latin1) encoding. Riff Info UTF8: Some media players and taggers incorrectly use UTF-8 strings for RIFF INFO (LIST INFO) chunks instead of "Latin1". If checked, this program will also read and write any RIFF INFO (LIST INFO) chunks as UTF-8 strings. If unchecked, this program will always use the correct ISO-8859-1 (Latin1) encoding. Never save TAGs to audio file: With this option selected you can prevent, that ProppFrexx ONAIR writes any changes to your audio file! No TAGs will ever be written to your files. Caution: This setting overwrites any other automatic TAG saving functionality. In this case meta data changes can only be made persistent in a .pfp playlist or in a separat .pfmd file. Ignore older MetaData Files: If checked, meta data files (.pfmd) are ignored, if their file modification date is older than the related audio file. Force Folder TAG Reading: If checked, meta data reading will always be enforced for all folder based media libraries - else the general Force TAG Reading settings will be used. RADIO42 Confidential 107 ProppFrexx ONAIR Auto Save MetaData to TAG: Defines with what ProppFrexx elements the auto save meta data TAG option is active. Auto Save MetaData to .pfmd File: Defines with what ProppFrexx elements the auto save meta data file (.pfmd) option is active. What MetaData to Auto Save: Defines what meta data should be saved during Auto Save. Note: This setting applies to both, the meta data TAG and the (.pfmd) file. Read Meta Data Files (.mmd): If checked, mAirList meta data files (.mmd) will be parsed to take over the track settings like CueDataItems and Options. Read Meta Data TAG: If checked, a present mAirList ID3v2 meta data TAG (TXXX) will be parsed to take over the track settings like CueDataItems and Options. Lookup Options: Click here to define further options regarding CD ripping and TAG searching in order to lookup album information. Figure 74: Edit Album Lookup Options ProppFrexx ONAIR supports lookup of track information and images from Amazon, MusicBrainz and FreeDB when a CD is ripped. In the above dialog you might specify which Amazon server (Locale) you want to use, if you want to use the MusicBrainz lookup and which server to use and if you if you want to use the FreeDB lookup and which server to use. 108 RADIO42 Confidential WORKING WITH ProppFrexx ONAIR User Access Control (UAC) Enable UAC: If checked, the User Access Control is enabled - else UAC is disabled and ProppFrexx ONAIR will always run with Admin rights. Even if you don’t want to use ProppFrexx ONAIR in a multi-user environment it might be beneficial to turn UAC on, as this offers some additional functionality. User Access Control (UAC) allows you to protect ProppFrexx ONAIR from unwanted user access. In addition it allows you to define user roles (profiles) and assign individual rights to them. Using the operating system users and rights doesn’t practically work for broadcast automation software, as changing the OS user requires the current applications to be stopped, which would break the program and audio workflow – that’s why we have integrated our own UAC here. But UAC offers even more. It allows you to also customize various user specific settings including the entire layout and arrangement of all windows, so that each user of ProppFrexx ONAIR gets exactly what he needs, is restricted by what he should not do and has its own look and feel. Master Pasword: The master password might be used to unlock a locked application (even if UAC is disabled). The default master password is “ProppFrexx”. This password is also used if the Advertising Manager is lauched. If the Advertising Manager uses the same master password no additional Advertising login is needed. Whenever UAC is enabled a login dialog will be shown before you can start working with ProppFrexx ONAIR: Figure 75: Login Dialog In the login dialog you first select the user to work with and enter the related password for that user; then click on the „Login“ button to start ProppFrexx ONAIR. You might change the currently active user at any time using the Main Menu resp. the Lock button ( ) in the Header Bar. When changing the currently active user the main window might shortly fade out to change the user interface layout, this however doesn’t impact any audio processing or other operations. User Profiles Click on the “User Profiles…” button to define user profiles and assign rights and general profile settings in the following dialog: RADIO42 Confidential 109 ProppFrexx ONAIR Figure 76: Define User Profiles Profile: Select a profile name from the list of available profiles or clear the text and type in a new name for a new profile. Or click on the „Save“ button to save the current profile under this name. Save: Click here to save the current user profile. Remove: Click here to remove the currently selected user profile. Note: Users with such profile assigned will be elevated to the 'Admin' profile! Description: A descriptive text of the current profile. Rights: Select the rights to apply to this profile. All checked items grant the users the respective right. Limit Paths To: Specify the allowed paths to be shown in the directory explorer window as well as to which general access should be granted. Each entry must be separated by a semicolon, e.g.: „C:\; D:\Music“ will limit the access to the specified paths only. Leave empty to give unlimited access to all drives and paths. Note: If specified, a ProppFrexx ONAIR user can only use media entries which reference to a location within these defined paths. As such this option allows you to grant/limit file access to certain folders only! A user might in this case for example only be able to add new playlist entries manually, if the related audio file comes from the defined limit paths. This applies only, if UAC is enabled and you are not the ‘Admin’ user. Initial Ribbon Page: The ribbon page to display initially for the users. Show Controls: Select the user interface controls which should be available to the users. Control Commands: Click here to define the user definable control commands which will be shown in the „User Control Gallery“ of the Ribbon Bar. This allows you to define 50 shortcuts to any control command(s) available (see the chapter „REMOTING, EVENTS, COMMANDS AND GPIO“ for more information). 110 RADIO42 Confidential WORKING WITH ProppFrexx ONAIR Figure 77: Define User Control Commands Users Click on the “Users…” button to define ProppFrexx users and assign their profile plus additional user settings in the following dialog: Figure 78: Define ProppFrexx ONAIR Users In the upper part of this dialog the available users are listed. Select a user to edit the related user settings below. To add a new user just type in the username, password, select the user profile and click on the „Add“ button. Username: Defines the user (login) name. Password: Defines the login password (cannot be empty and should be a secure password, eg. minimum 8 alpha-numeric characters including special characters). Confirm: Please specify the password again to be sure there was no typo with the initial password. User Profile: Select the profile to assign to this user (defines the user rights). Image: Click on the image to change the user’s (login) image. Save: Click on this button to saves the currently selected user with the current settings. Add: Click on this button to add a new user with the selected settings. RADIO42 Confidential 111 ProppFrexx ONAIR Remove: Click on this button to remove (delete) the currently selected user. More: Click on this button to define more user settings in the following dialog: Figure 79: Edit User Settings In this dialog you can edit individual user settings, which might replace/overwrite any general settings. Active Skin: Select the active skin to use. Reset: Will take effect with the next login of the user and will remove all user layout settings and restore all defaults. Copy Layout From: Copies the layout of another user to this user (overwriting the current user’s layout – Admin only). Big Font: When checked the font used in the playlist window will be 50% larger. Ribbon: Defines the style of the ribbon. Default Player Layout: Defines the default DJ Player layout to be used for the user. 112 RADIO42 Confidential WORKING WITH ProppFrexx ONAIR Stacked Players: If checked, the DJ Players within a playlist window will be stacked in 2 rows (if more than 2 players are used) - else they are aligned horizontally in one row. Show Playlist Moderator Info: If checked, the moderator text and the track information of the currently select track of the current playlist will automatically be displayed in the Moderator Window. Show Overlay Moderator Info: If checked, the moderator text and the track information of the currently select track of the current overlay will automatically be displayed in the Moderator Window. Show Streaming Listeners: If checked, the broadcast server’s listeners are displayed in the streaming server window. Show Playlist Time Columns Left: If checked, the Playtime, Backtime and Schedule time columns are shown fixed at the left of the playlist - else they are shown fixed to the right. Show Info Panel in: Defines for which windows the track info panel should be displayed (within playlists, the find window, the explorer window). Show Tool Tips: When checked help tool tips will be displayed over almost every control element. If unchecked no tool tips will be displayed. You can define the time in seconds a tool tip should be displayed. Show Ramp Time when Cued: If the current track position is within the Ramp resp. Outro time the DJ and PFL Player will show the remaining ramp/outro time. If this option is NOT selected it will only be displayed when the current track is actually playing. Station Name: Specify the name to associate with the station visual window. If empty the default global name will be used. Station URL: Specify the http address to associate with the station visual window. If empty the default global address will be used. Web Start Address: Specify the http address to show in the web browser window at startup. If empty the default global address will be used. Station Image: Left-Click to change the user’s station image to be displayed in the station visual window. Right-Click to remove user’s station image. If empty the default global image will be used. User Media Libraries: Specifies optional user specific media libraries. Specify a directory which contains user specific media libraries. Certain supported playlists (.pfp, .m3u, .m3u8, .pls) within this directory are automatically loaded as media libraries. If you leave this path empty you might manage user specific media libraries manually by using the "Additional User Media Libraries..." button. Note: These user specific media libraries can NOT be used within scheduler scripts - as it can not be guaranteed, that this user is logged in while the scheduler runs! User Cartwall II Library Path: Specifies an optional directory which might contain user specific cartwall media libraries. All supported playlists (.pfp, .m3u, .m3u8, .pls) within this directory are loaded as additional cartwall libraries to the Cartwall II for this user. If empty only the system global cartwall libraries will be used. Use Audio Files for Cartwall II: If checked, audio files contained in the user cartwall path (and its sub-directories) will also be scanned. In this case a user cartwall library will be created for each folder found in the user cartwall path. If not checked, only playlist files will be scanned. RADIO42 Confidential 113 ProppFrexx ONAIR Remote Lib Settings…: Click here to define user specific option when accessing a Remote Media Library Server (only applies, if you are using remote media libraries). Figure 80: Remote MediaLibrary Settings Allow Remote Data Access: If checked it is allowed to retrieve the physical media entry (if not already accessible from this local client). In such case the physical audio file is transmitted from the Remote Media Library Server to this client as a temporary file. Meaning you can fully access and play any remote media entry even if the physical file is not present or can not be accessed locally. Note: Only enable this option if you have a really fast network connection to the Remote Media Library Server, as the physical file is fully transmitted to the client! Cache Size: Specifies the maximum number of temporary files which should be cached on this client for faster access once a remote media entry was transmitted from the Remote Media Library Server to this client. Temp Directory: Specifies the folder location where to store temporary remote files (transmitted from the Remote Media Library Server to this local client). Find Options: Defines the options to use in the find track window. also in Filename: If checked, a key value is also searched within the filename else only the metadata fields are used, i.e. title, artist, album etc. also in Explorer Paths: If checked, any search (Find window) also scans all files in the currently defined explorer window directories (which might take longer) - else only the loaded media libraries entries are scanned. RSS Reader Refresh Rate: Defines the rate in minutes how often the RSS Reader will refresh/read the feed. Set this value to 0 to disable automatic refresh. Open RSS Link in external Browser: If checked, external links to the RSS Feed will be opened in an external browser - else they will be opened in the internal web browser. Playlist Script Template: If specified, the given script will be used as a template whenever a new playlist is created manually. The script is actually executed for one loop only, meaning the defined media entries within the script are automatically added to the new playlist. Instant Recording Path: Specifies the default directory which will be used to save instant recording files. If empty the default recording directory will be used. Clean Up Files after: Specifies the number of days after which any audio files within the instant recording directory (and any sub-directory) will automatically be deleted. If zero (0) files in the recording directory will never be deleted. User Identity Information: Just for info at the moment. Future versions of ProppFrexx ONAIR might leverage this data. 114 RADIO42 Confidential WORKING WITH ProppFrexx ONAIR Images: Just for info at the moment. Future versions of ProppFrexx ONAIR might leverage this data. Description: Just for info at the moment. Future versions of ProppFrexx ONAIR might leverage this data. Show: Just for info at the moment. Future versions of ProppFrexx ONAIR might leverage this data. Playlist Defaults Remove Tracks: If checked, a track will be removed from the playlist after it was played; else it will just be marked as played. Auto Width: If checked, the columns of the playlist window are automatically aligned to fit the total width of the playlist window. Auto Select Next: If checked, the next track within the playlist will automatically be selected and centered as the playlist advances. Auto Load: If checked, the DJ Players of a playlist will automatically be loaded when a player is empty. A player will become empty once a track was played and unloaded. Auto Unload: If checked, the DJ Players of a playlist will automatically be unloaded when a track was played; else the track will remain loaded after it was played. Auto Select Playing: If checked, the currently playing track within the playlist will automatically be selected. Create Backup: When checked a backup (.bak) of the current playlist file is created before saving a new playlist file. Show Info Panel: If checked, a track info panel is shown at the bottom of the playlist; else the info panel will be hidden. The info panel will display the detailed track metadata as well as an available cover image. Show Moderator Text: If checked, the moderator text and the track information of the currently select track of the current playlist will automatically be displayed in the Moderator Window. Next Track Mode: Defines how a next track is determined from a playlist. From Beginning: The first free track from the beginning of the playlist is taken. From Player Position: The first free track from the position of the current player of the playlist is taken. From Last Player Position: The first free track from the last position of any player of the playlist is taken. Save Absolute Paths: If selected the fully qualified absolute paths are used to save any track location when the playlist is saved; else relative paths are used (locations of the tracks are saved relative to the playlist file location). Save UNC Paths: If selected the fully qualified UNC (Universal Naming Convention) paths are used to save any track location when the playlist is saved - which include the machine name instead of a drive letter. Mark Only Sequential: If checked, a played track will only be marked as played, if it is sequentially followed in the playlist order - else a played track will always be marked. Ask Entry Type: If checked and you are adding new entries from a playlist file to the playlist window, you will be asked to specify a default entry type for the playlist which you want to add. RADIO42 Confidential 115 ProppFrexx ONAIR Backtime until: Automatic backtime calculation is only performed for playlists having up to this number of playlist entries. For playlists having more entries you'll need to perform a manual backtime calculation. Number of Players: Defines the number of available DJ Players per playlist window (either 2, 3 or 4). Update Stream in Playlist: If checked, internet stream title changes will also be changed within the playlist. Meaning when an internet stream is playing the playlist entry information will be updated as the stream title changes. More…: Click on this button to define more playlist format dependent options in the following dialog: Figure 81: Edit Playlist Options Change DJ Player with Playlist: If checked, the tracks loaded to a DJ Player will be changed according to the playlist. This means, when you delete an entry from the playlist which was already loaded to a DJ Player (and it is not currently playing), the DJ Player will be ejected accordingly. This setting also impacts the order of tracks within playlist: a) played (marked as played) tracks will be moved to top of the playlist entries which are loaded to a DJ Player b) unplayed tracks should be below the playlist entries which are loaded to a DJ Player c) you can not move the playlist entries which are loaded to a DJ Player d) but you can directly drag&drop tracks to playlist entries which are loaded to a DJ Player - which might replace them (if not playing) e) unplayed tracks can not be moved above the playlist entries which are loaded to a DJ Player f) played (marked as played) tracks might be moved down however (since you might want to toggle their state to play them again) 116 RADIO42 Confidential WORKING WITH ProppFrexx ONAIR Max. Marked: Defines the number of entries which should be kept in the playlist when the option 'Mark Tracks as Played' is activ. Set this to 0 to keep all marked entries within the playlist. Continuous Backtiming: If checked the schedule and backtime of a playlist window will be continuously updated (every 2 seconds) if the backtime is set to 'Start with current Time' and no DJ Player is currently playing. At No-Fading: Defines further options when 'Use Fading' is turned Off. Supress ACPD: If checked, Automatic Cue Point Detection (ACPD) will be supressed when 'Use Fading' is turned Off. No Cue-Points: If checked, no Cue-Points will be used when 'Use Fading' is turned Off. Force Fade-Out: If checked, Fading will be used for the DJ Players regardless of the 'Use Fading' option. Note: This applies to the 'Play Next' and 'Play Current' commands only and only effects fade out operations! Load Recursive: If checked, playlist entries which are itself referencing a playlist file are loaded recursively (meaning those entries are resolved and load their entries again as individual tracks) - else such entries are loaded as a single embedded playlist entry (meaning a playlist reference will be loaded as a single embedded playlist track and played as such, as a single track). Force UTF-8: If checked .m3u or .pls playlist files will always be loaded and saved using UTF-8 encoding. If not checked, it will be loaded and saved using Windows-1252 encoding (which is the standard). Keep “_synced_.pfp” Playlist with Folder: If checked, a .pfp playlist file is kept along with a folder based media library (stored in the main folder using the same name). The .pfp playlist file will keep any already scanned audio file of that folder based media library in sync with the folder content itself. The advantage is, that any meta data already read for audio files in that folder doesn't need to be read again when (re)loading the folder based library. The disadvantage is, that this requires initial and continuous meta data reading for all files contained in that folder (regardless of any TAG reading option). Exclude Hidden Files: If checked, any hidden file will be excluded from any directory scanning. Note: The time taken to scan a directory for files might increase when this option is enabled. Mixing and Fading Settings In Live-Assist or Automatic mode (if AutoPlay is On) ProppFrexx ONAIR might mix subsequent tracks of a playlist automatically. This is done by calculating all relevant cuepoints automatically whenever a track is loaded to a DJ Player – this is called Automatic Cue Point Detection (ACPD). The relevant mixing cue-points are: Cue-In: Defines the position of the track where playback starts (to skip silence at the beginning of a track). When „Use Fading“ is enabled the track will start at this position with a silent volume level and is then ramped to the full-level position. When „Use Fading“ is disabled the track is not ramped at starts here with the full volume level. Full-Level: Defines the position when a fade-in operation should reach the full volume level. When „Use Fading“ is enabled the track is ramped between the cue-in and the fulllevel position. When „Use Fading“ is disabled this cue-point has no effect. RADIO42 Confidential 117 ProppFrexx ONAIR Next: Defines the position when playback of the next track in the playlist should start (the next track starts playback again at its own cue-in position). Fade-Out: Defines the position when the track should be faded out until it reaches the cue-out position. When „Use Fading“ is enabled the track is faded between this and the cue-out position. When „Use Fading“ is disabled this cue-point has no effect. Cue-Out: Defines the position of the track where playback should stop (and the track will be unloaded if configured – this to skip silence at the end of a track). When „Use Fading“ is enabled the track will stop at this position with a silent volume level and is faded from the fade-out position. When „Use Fading“ is disabled the track is not faded and ends with the full volume level. So this category contains the configuration of all mixing parameters. Figure 82: Mixing/Fading Configuration Automatic Cue Point Detection (ACPD) Fade-In Length (Minimum/Maximum): Defines the minimum and maximum fade in duration in milliseconds. The Full-Level position is determined by these settings. A slow rise of the audio level after Cue-In means a short fade in time (minimum is used). An abrupt rise of the audio level means a long fade in time (maximum is used) - resp. any value in between might be determined. Full-Level = Cue-In + Fade-In-Length. Cue-In dB: Defines the audio level in dB which should be used to identify any silence at the beginning of a track. The Cue-In position will be set to the position where the audio level first reaches this value. Mix Delay-Time: Defines the time in milliseconds between the current track starts to fade out and the new track starts to play. Thus this value defines the Fade-Out resp. the Next position (whichever comes first). The distance between Fade-Out and Next will be limited to the Mix-Delay time. Total Mix-Time = Cue-Out(this) - Cue-In(next) Next dB: Defines the audio level in dB which should be used to identify the next track position at the end of a track. The Next position will be set to the position where the audio level first reaches this value when scanning from the back. Priority (Next): If checked the Next dB setting will have priority over the Cue-Out dB setting. By default the Cue-Out position will be determined first and will be fixed and the Next cue 118 RADIO42 Confidential WORKING WITH ProppFrexx ONAIR point will be aligned to it (by seeking backwards from the determined Cue-Out position). With this option set the Next cue point is determined first and fixed and the Cue-Out position is aligned to it (by seeking forward from the determined Next position). Fade-Out Length (Minimum/Maximum): Defines the minimum and maximum fade out duration in milliseconds. The Fade-Out position is determined by these settings. A slow fall of the audio level before Cue-Out means a short fade out time (minimum is used). An abrupt fall of the audio level means a long fade out time (maximum is used) - resp. any value in between might be determined. Fade-Out = Cue-Out + Fade-Out-Length. Cue-Out dB: Defines the audio level in dB which should be used to identify any silence at the end of a track. The Cue-Out position will be set to the position where the audio level first reaches this value when scanning from the back. Manual Fading (Manual Mixing Points) When „AutoPlay“ is disabled or you are advancing to the next track in a playlist manually (eg. by using the „Play Next Use Fading“ button from the Ribbon Bar) manual mixing takes place, which means the automatic mixing cue-points might not be used (because the current track hasn’t reached them yet.). In such case the following settings define how manual mixing (a manual next track advance) should be carried out. When you manually advance to the next track the current position of the currently playing track is considered to be the manual FadeOut cue-point. Mix Delay-Time: Defines the time in milliseconds between a manual Fade-Out position and the manual Next track position, and thus defined the delay between the Fade-Out operation and the effective start of the next track. When „Use Fading“ is enabled the current track will be manually faded out. Fade-In Length: Specifies the length in milliseconds of the manual fade in operation for MODStream and Overlay Players only. Regular tracks of a playlist will always use their defined cue-points (as specified above) to ramp in. Fade-Out Length: Specifies the length in milliseconds of a manual fade out operation of the current track (unless the Cue-Out position is reached first). Cartwall I Fade-Out Length: Specifies the length of the fade out operation for Cartwall I players in milliseconds. When you fade out a cartwall player the track will not be stopped immediately, but faded out by this time. Cartwall II Fade-Out Length: Specifies the length of the fade out operation for Cartwall II players in milliseconds. When you fade out a cartwall player the track will not be stopped immediately, but faded out by this time. Talk Over: The dB value to use when lowering the master volume via the TalkOver function. Fader Speed: The general speed of all mixer faders when performing a slide operation (eg. when TalkOver is used the main fader is slided by this speed). Not Fading: Tracks having a duration which is shorter than this length (in seconds) will not be faded (ACPD will also not apply to these tracks). Hook Mixing: Allows you to define special fading and mixing settings for hooks. A hook is a short passage, that is used to make a song appealing and to „catch the ear of the listener“. Use the hook cue-points to define the hook passage. RADIO42 Confidential 119 ProppFrexx ONAIR Figure 83: Hook Mixing Settings Fade-In Length: Specifies the length in milliseconds of the fade in operation for hooks. Fade-Out Length: Specifies the length in milliseconds of a fade out operation for hooks. Note: When multiple hook files are automatically mixed and no hook next cuepoint is set, the next position is calculated as the middle between the fade-out and the cue-out position. Hook Opener: The hook opener is an audio track which will be used in embedded hook containers as the first track. Click on the ‘…’ button to open a file selection dialog. Click on the ‘>’ button to play the selected audio file on the PFL mixer channel. Hook Separator: The hook separator is an audio track which will be used in embedded hook containers between multiple tracks. Hook Closer: The hook closer is an audio track which will be used in embedded hook containers as the final track. Other Mixing Defaults Use ACPD: Defines which players (DJ, PFL and Standby) should automatically calculate cue-points, if they are not already set for a track. ACPD calculates the effective Cue-In, FullLevel, Fade-Out, Next and Cue-Out positions as described above. If enabled and a track is loaded to one of these players the cue-points are calculated. So you might for example suppress ACPD for certain players here. Adjust. Delay: Some soundcards resp. sound drivers add an additional delay to the output. As ProppFrexx ONAIR cannot determine this latency, you might use this value (positive or negative) to compensate for this latency to achieve perfect beat matching. ACPD Exclude: Select all the media types for which Automatic Cue Point Detection should NOT be executed. Note that cue points can still be manually calculated. This allows you to for example exclude any jingles or advertising tracks from ACPD; and such those tracks will not be automatically faded nor will any silence be detected at the beginning and the end. Use Fading: Specifies, if the respective player (Cartwall I, II and Quick Monitor Player) should perform any ACPD fading. If disabled the players will not use any cue or volume points and just play out the track as is. If disabled and a track having silence at the beginning or end is loaded to such player this silence will not be detected and might result in a delay when playback is started. However, this also guarantees, that tracks are not faded at the beginning and end (eg. to prevent truncating small slices of audio). Mixing per Media Type: Click here to define individual mixing settings per media type, ie. to apply different mixing settings to e.g. jingles, sweepers, advertising tracks etc. as to regular music. Each track can be assigned with an individual media type (see the chapter „Media Libraries“ on how to assign default media types to individual media libraries). The track 120 RADIO42 Confidential WORKING WITH ProppFrexx ONAIR related media type will be used to determine the individual mixing settings. There are over 60 different predefined media types you can choose from, giving you more than enough options to differentiate various track types. In the following dialog you can specify the mixing settings per media type: Figure 84: Define Mixing Settings per Media Type Media Type: Select the type of media entry for which you want to edit the mixing settings. When done, click on the „Save“ button to save these settings. The mixing settings (ACDP and Manual Fading) are actually the same as already described above, so please refer to the above descriptions. In addition the following options are available: Max Play Length: Defines a maximum playback length in seconds. If above 0 any track with this media type assigned will be limited to this maximum playback length when loaded to a DJ, PFL or Standby Player. Track-Insert Transition: Use this setting to automatically convert a media entry into a track-insert event - which starts/ends at the defined position of the previous resp. next track. Note: Make sure to use this setting only with certain media entries! This automatic track-insert transition takes place for tracks within a playlist when they are about to be loaded into a DJ Player. So you might change the media entry type for a track at any time before that happens in order to prevent this automatic transition. In addition you might set the track’s SupressTrackInsertTransition option to suppress the automatic transition within the playlist. Else a playlist entry will automatically be converted to a track-insert event! Maximum Transition Length: Tracks having a duration which is greater than this length (in seconds) will not be considered for any automatic track-insert transition. Track-Insert Attenuation: The dB value to use to lower the volume in case of an automatic track-insert transition (0.0 dB means no attenuation). The automatic attenuation will be applied to the track(s) to which the insert was added! Test File: Select a test file to be used with the ACPD preview. Zoom Factor (slider): Defines how many seconds before and after the first resp. last cue point should be visible in the preview. RADIO42 Confidential 121 ProppFrexx ONAIR PFL: Click here to open the PFL Player to listen to the calculated cue points. 122 RADIO42 Confidential WORKING WITH ProppFrexx ONAIR Encoding and Recording Settings This category contains the configuration of encoding and recording settings. Figure 85: Encoding/Recording Configuration Encoder Setup Beside WAV (incl. BWF/RF64) encoding ProppFrexx ONAIR doesn’t use any internal build-in encoder implementation, instead the use of external command-line encoders are supported. These external command-line encoders must be provided and installed separately by you. In order to do so, there is a special ‘Encoder’ folder underneath your selected installation folder (e.g. “C:\Program Files\radio42\ProppFrexx ONAIR\3.0\Encoder”). So please make sure (if not already done), that you manually copy the respective command-line encoder executable (plus any needed, dependent .dll libraries) to this directory! ProppFrexx ONAIR supports various encoder types out-of-the-box without the need for additional configuration. However note, that each encoder type will require that the physical encoder executable is present on your machine (installed and available in the above mentioned ‘Encoder’ folder). If an encoder is not installed or could not be found on your system, the related encoder type might not be available within ProppFrexx ONAIR. As such ProppFrexx doesn’t force you to use any encoder nor forces you to install a certain one. It leaves it fully to your responsibility and decision to use, purchase and license the encoder of your choice! The following encoder types don’t need any additional configuration (if installed and present on your machine ProppFrexx ONAIR might be able to determine its configuration automatically): WAV: using a build-in encoder (incl. support for BWF and RF64) WMA: using the Windows Media Foundation WMA encoder* OGG: using the Ogg Vorbis encoder (oggenc2.exe) MP2: using the TwoLAME encoder (twolame.exe) AACplus: using the Winamp AAC+ encoder (streaming only)** FLAC: using the FLAC encoder (flac.exe) MPC: using the MPC encoder (mpcenc.exe or mppenc.exe) ACM: using any installed Windows Audio Compression Manager encoder* Some encoders might require a license in order to use them legally (to be obtained by you!) Please make sure to not infringe any patents or licenses! RADIO42 Confidential 123 ProppFrexx ONAIR In addition to the above encoders ProppFrexx ONAIR might support the following encoder types, which might require some additional configuration. These are: MP3: using any MP3 command-line encoder of your choice (e.g. lame.exe or mp3sEncoder.exe or any other encoder which supports reading sample data from STDIN and outputting the encoded data to STDOUT)*** CMDLN: using any other available command-line encoder of your choice (the encoder must at least support receiving sample data from STDIN) AAC: using any AAC command-line encoder of your choice (e.g. neroaacenc.exe*** or qtaacenc.exe**** or any other encoder which supports reading sample data from STDIN) *must already be available on your Operating System, no additional license required **Winamp is required and needs to be installed by you - once installd no additional licence is required ***needs to be installed by yourself and requires an individual licence to be obtained by yourself! ****QuickTime is required and needs to be installed by you - once installd no additional licence is required Some special notes: To support streaming in the AACplus format, ProppFrexx might use the Winamp** AACplus encoder. This requires that you install Winamp manually by yourself on your machine. Once Winamp is installed no additional AACplus license is required, as Winamp has already done so. The Winamp version can be downloaded here: http://www.winamp.com To support AAC file conversion you can for example use QuickTime**** or Nero***. QuickTime can be downloaded here: http://www.apple.com/quicktime/download. Nero can be downloaded here: http://www.nero.com/eng/technologies-aac-codec.html. To setup your external command-line encoder(s) click on the „Encoder Setup...“ button. Figure 86: Encoder Setup 124 RADIO42 Confidential WORKING WITH ProppFrexx ONAIR In this dialog you can enter all the necessary configuration data to setup your MP3 encoder of choice as well as another additional generic command-line encoder (CMDLN) respectively the AAC encoder of choice. Executable: Specify the executable name (.exe) of the MP3 resp. CMDLN resp. AAC command-line encoder to be used. Note: The executable must be placed to the global 'Encoder' directory within your installation folder. CBR String: Defines the command-line arguments to be used with constant bitrates (CBR). Note: You can use any of the predefined macros (see below) within the command-line. VBR String: Defines the command-line arguments to be used with variable bitrates (VBR). Note: You can use any of the predefined macros (see below) within the command-line. Supports STDOUT: Check this option, if the MP3 command-line encoder supports encoding to STDOUT. No HEAD: Don't send a WAVE header to the encoder? If this flag is used then the sample format must be passed to the encoder via command-line parameters. In most cases it is recommended to use this flag in order to support unlimited streaming capabilities. Use 32-Bit Integer: If checked, the sample data is converted to 32-Bit integer data before it is passed on to the encoder. If neither this nor the Use 24-Bit Integer flag is checked, 32-Bit IEEE float sample data is send to the encoder. Use 24-Bit Integer: If checked, the sample data is converted to 24-Bit integer data before it is passed on to the encoder. If neither this nor the Use 32-Bit Integer flag is checked, 32-Bit IEEE float sample data is send to the encoder. Param STDIN: Defines the command-line argument parameter to be used as the input value for STDIN. Param STDOUT: Defines the command-line argument parameter to be used as the output value for STDOUT. Encoder Type: Specifies the encoder type of the selected Command-Line codec (only used for the generic Command-Line encoder setup). Example: Setting up the official „Fraunhofer IIS mp3 Surround command line encoder mp3sEncoder.exe“ Note: In order to use this encoder commercially you need a license! Executable: „mp3sEncoder.exe“ CBR String: „${user} -raw -sr ${Hz} -c ${chan} -res ${res} -q ${option} -br ${bps} -if ${input} -of ${output}“ VBR String: „${user} -raw -sr ${Hz} -c ${chan} -res ${res} -q ${option} -m ${quality} -if ${input} -of ${output}“ Support STDOUT: True No WAVE Header: True Use 32-Bit Integer: False Use 24-Bit Integer: True Encoder Macros: Here is a list of supported encoder setup macros which might be used within the CBR or VBR String parameter: ${user} ${Hz} ${kHz} ${res} ${chan} ${mode} ${quality} ${option} ${kbps} ${bps} : will be replaced with the current USER A or B encoder setting. : will be replaced with the sample rate of the input in Hz. : will be replaced with the sample rate of the input in kHz. : will be replaced with the bit width of the input (eg. 16, 24 or 32). : will be replaced with the number of channels of the input (eg. 2). : will be replaced with the current MODE encoder setting. : will be replaced with the current QUALITY encoder setting. : will be replaced with the current OPTION encoder setting. : will be replaced with the target BITRATE encoder setting in kbps. : will be replaced with the target BITRATE encoder setting in bps. RADIO42 Confidential 125 ProppFrexx ONAIR ${input} ${output} : will be replaced with the current input file of the encoder setting. : will be replaced with the current output file of the encoder setting. Encoder Profiles ProppFrexx ONAIR supports any number of Encoder Profiles. Encoder Profiles are used whenever encoding or recording comes into place. Also when you setup any Streaming Server within ProppFrexx ONAIR you must choose an Encoder Profile within the Streaming Server Configuration to specify the format you want to stream. To setup Encoder Profiles click on the „Define Encoder Profiles...“ button. In this dialog you can define any Encoder Profile. In the upper list all available profiles are listed. Select an Encoder Profile here and the current profile settings are listed below. Click on „New“ to create a new Encoder Profile. Click on „Save“ to save the current Encoder Profile. Click on „Delete“ to remove the current Encoder Profile. It might be useful to create various Encoder Profiles, eg. one for high-quality file encoding and another one for internet streaming etc. Note, that for each different streaming format you want to use with a Streaming-Server you must create a dedicated Encoder Profile. Figure 87: Define Encoder Profiles In the lower list all current profile settings are shown for each supported encoder. Description: A descriptive text of the current profile (this description will be used in further dialogs to select the profile, so make sure to specify a unique description text). Target Samplerate: As many encoders doesn't support resampling you might specify the target sample rate in Hz and the number of channels at which to perform any encoding. Default Encoder: Select the encoder to be used by default with this profile. 126 RADIO42 Confidential WORKING WITH ProppFrexx ONAIR Encoders: The list of supported encoders (as configured in the previous encoder setup). Double-Click on an encoder entry (or select an entry and click on the „Encoder Settings...“ button) to edit the specific options of that selected encoder. When you are done click on the „Save“ button above to save all your profile settings. WAV Encoder Settings Figure 88: WAV Encoder Settings Bits per Sample: Defines the PCM resolution in bits per sample. Use 32-Bit Integer: If checked 32-Bit integer PCM format is used instead of 32-Bit IEEE float. Add RiffInfo: If checked a RIFF INFO LIST chunk is added to the resulting file. Note: The RIFF INFO LIST chunk data is directly taken from the TAG information. Use RF64: If checked a BWF RF64 wave format is generated instead of a standard wave format. Add BEXT: If checked a BWF BEXT chunk is added to the resulting file. Note: The BEXT chunk data is directly taken from the TAG information. Add CART: If checked a BWF CART chunk is added to the resulting file. Note: The CART chunk data is directly taken from the TAG information. MP3 Encoder Settings Figure 89: MP3 Encoder Settings Mode: The general MP3 encoding mode (stereo, joint stereo, mono etc.). RADIO42 Confidential 127 ProppFrexx ONAIR Quality: Encoding quality (eg. Q0 = Highest quality, slow; Q9 = Poor quality, very fast; Quality = Q2 (default); Speed = Q7) Use Variable Bitrate: Use Variable Bitrate (VBR)? If unchecked Constant Bitrate (CBR) will be used. Bitrate: Constant bitrate (CBR) in kbps. Note: When using VBR this value specifies the minimum allowed VBR bitrate value, if you also set the Limit flag. Enforce CBR: Strictly enforce the use of constant bitrate. VBR Quality: The variable bitrate (VBR) quality setting (0=highest quality, 9=lowest). Maximum Bitrate: Specify maximum allowed bitrate in kbps (VBR only). Note: To specify VBR set the Bitrate value to the minimum VBR and the Max value to the maximum VBR bitrate value. Limit the VBR Bitrate: Strictly enforce the minimum and maximum bitrate, for use with players that do not support low bitrate mp3 (only VBR). Average Bitrate: Specifies the average target bitrate (ABR) in kbps desired (VBR only). Note: If set (not 0), only this value will be used as an AVB value (the VBR Quality will be ignored). WMA Encoder Settings Figure 90: WMA Encoder Settings Use Variable Bitrate: Use Variable Bitrate (VBR)? If unchecked Constant Bitrate (CBR) will be used. Bitrate: Constant (or average) bitrate in kbps. Note: Multiple bitrates are supported when using this profile for streaming. In all other cases only the highest selected bitrate will be used. VBR Quality: Set the quality level from 1 (low) to 100 (lossless) for variable bitrate. 10% = approx. 65 kbps 25% = approx. 77 kbps 50% = approx. 89 kbps 75% = approx. 140 kbps 100% = approx. 778 kbps (Lossless) Use WMA Professional: Use the WMA 10 Professional format? Windows Media Audio 10 Professional (WMA 10 Pro) is the most flexible Windows Media audio codec available. If unchecked the most compatible Windows Media Audio 9 codec (WMA 9) is used. Use 24-Bit: Use 24-bit encoding? If checked, the output will be in 24-bit resolution, which requires WMA Pro to be set as well. 128 RADIO42 Confidential WORKING WITH ProppFrexx ONAIR AAC Encoder Settings (QuickTime) Figure 91: QuickTime AAC Encoder Settings Quality: Defines the QuickTime encoder quality to use (Fast, Normal, High). Mode: Defines the QuickTime encoding mode (CBR, ABR, CVBR, TVBR). - Constant Bitrate (CBR) - Average Bitrate (ABR) - Constrained Variable Bitrate (CVBR) - True Variable Bitrate (TVBR) Note: TVBR does not support the HE-AAC profile. Format: Defines the AAC profile to use (LC or HE). Note: True VBR does not support the HE-AAC profile. Bitrate: Defines the constant, average or contrained variable bitrate in kbps (only used for mode CBR, ABR, CVBR). Q-Value: Defines the quality value for True VBR (between 0 and 127). The higher the value the higher the quality, which will result in a higher variable bitrate. Automatic Samplerate Adjustment: If checked, automatically choose the optimum samplerate according to the bitrate and quality. Caution: This might change/overrule the sample rate as choosen in the ProppFrexx encoder profile! If unchecked, keep the samplerate as defined if possible. Note: QuickTime might still change the target samplerate for certain bitrate/quality settings if needed! AAC Encoder Settings (Nero) Figure 92: Nero AAC Encoder Settings Format: Defines the AAC mode to use (LC, HE or HEv2). Normally you should leave this value to default, as the encoder will then choose the best mode depending on the bitrate/samplerate used. Bitrate: Constant (or average) bitrate in kbps. RADIO42 Confidential 129 ProppFrexx ONAIR Use CBR: If checked, Constant Bitrate (CBR) is used, else Variable Bitrate (VBR) is used. OGG Encoder Settings Figure 93: OGG Encoder Settings Mode: The OGG downmix encoding mode (stereo or mono). Quality: Encoding quality (Best = Highest quality, slow; Medium = Good blend; Fast = Poor quality, fast). Use Variable Bitrate: Use Variable Bitrate (VBR)? If unchecked Constant Bitrate (CBR) will be used. Bitrate: Choose a nominal bitrate to encode at. Attempt to encode at a bitrate averaging this. Takes an argument in kbps. Minimum Bitrate: Specify minimum target bitrate in kbps desired (VBR only). Setting this to 0 will generate an AVG (averaged bitrate). Maximum Bitrate: Specify maximum allowed bitrate in kbps (VBR only). Setting this to 0 will generate an AVG (averaged bitrate). MP2 Encoder Settings Figure 94: MP2 Encoder Settings Mode: The general TwoLAME encoding mode (stereo, joint stereo, mono etc.). Model: The psychoacoustic model (PAM) TwoLAME should use. Bitrate: Constant (or minimum allowed) bitrate in kbps. 130 RADIO42 Confidential WORKING WITH ProppFrexx ONAIR Use Variable Bitrate: Use Variable Bitrate (VBR)? If unchecked Constant Bitrate (CBR) will be used. VBR Level: Sets a quality level from -50 to 50. The higher the number the better the quality. Maximum range is -50 to 50 but useful range is -10 to 10. Using negative values will force the encoder to favor the lower bitrate. Whereas using positive values will force the encoder to favor the upper bitrate. Maximum Bitrate: Specify maximum allowed bitrate in kbps (VBR only). AACplus Encoder Settings Figure 95: AACplus Encoder Settings Format: AAC object type. „HE-AAC“ (High Efficiency, default), „HE-AAC+“ (High Efficiency High Bitrate) or „LC-AAC“ (Low Complexity). Mode: Sets the channel mode. By default parametric stereo is used. Bitrate: Constant (or average) bitrate in kbps. Use MP4 Output: If checked the output is written to a MP4 container (.m4a) - else an AAC bitstream output format (.aac) is used. FLAC Encoder Settings Figure 96: FLAC Encoder Settings Compression: Defines the compression level between 0 (fast) and 8 (best). Although FLAC is a lossless format you can adjust the compression level. A higher compression level (max. is 8) means a smaller output, whereas a lower compression level (min. is 0) means faster results. RADIO42 Confidential 131 ProppFrexx ONAIR MPC Encoder Settings Figure 97: MPC Encoder Settings Compression: Defines the compression level between 0 (fast) and 8 (best). Although MPC is a lossless format you can adjust the compression level. A higher compression level (max. is 8) means a smaller output, whereas a lower compression level (min. is 0) means faster results. Use Version 7: If checked Musepack Stream Version 7 will be used - else Musepack Stream Version 8. ACM Encoder Settings Audio Compression Manager (ACM) is the Windows multimedia framework that manages audio codecs (compressor/decompressors). A codec must conform to the implicit ACM specification to work with Windows Multimedia. ACM files can be recognized by their filename extension .acm. You might use ACM to support any arbitrary encoding format. Figure 98: ACM Encoder Settings Encoder Type: Specifies the encoder type of the selected ACM codec. Select ACM Codec: Click here to open the codec selection dialog to select your target codec to be used. CMDLN Encoder Settings 132 RADIO42 Confidential WORKING WITH ProppFrexx ONAIR Figure 99: CMDLN Encoder Settings Use Variable Bitrate: Use Variable Bitrate (VBR)? Note: Defines, if the encoders CBR or VBR command-line string should be used. Bitrate: The general bitrate in kbps. Note: Sets the ${bps} resp. ${kbps} macro value. Mode: The general encoding mode. Note: Sets the ${mode} macro value. Quality: The general encoding quality. Note: Sets the ${quality} macro value. Option: The general encoding option. Note: Sets the ${option} macro value. Use A: If checked, the A value is used - else the B value is used. Note: Sets the ${user} macro value. Encoding Setting Back in the general configuration settings the following encoding and recording settings can be configured: DSP Chain 32-Bit: Use 32-Bit resolution for any encoding task - else encoding will use 16-Bit. DSPs: Here you can specify up to four DSPs which might be used during any encoding run. Note: This DSP chain will not be used for: - Streaming Servers - Mixer Channel Recording Encoding Output Path: Specifies the default directory which to use when encoding audio tracks. Encoding Filename: Specifies the default pattern to be used to create new file names during encoding. Available macros are: ${yyyy}, ${yy}, ${MM}, ${dd}, ${HH}, ${mm}, ${ss}, ${machinename}, ${username}, ${userdomainname}, ${originalfilename}, ${album}, ${albumartist}, ${composer}, ${year}, ${artist}, ${title}, ${tracknumber}, ${genre}, ${publisher}, ${copyright}, ${conductor}, ${grouping}, ${mood}, ${rating}, ${isrc} Profile: Select the default encoding profile which should be used when encoding (converting) audio files. Calculate Replay Gain: If checked Replay Gain values are automatically calculated while recording/encoding (and saved to the tag data of the newly encoded output file). RADIO42 Confidential 133 ProppFrexx ONAIR Recording Setting Recording Output Path: Specifies the default directory to be used when recording audio tracks (ie. recording of a mixer channel or during instant recording). Default Recording Profile: Select the default encoding profile which should be used with the mixer channels. Within each mixer channel you have the option to manually start recording by pressing the REC button, in which case this profile is being used. Recording Filename: Defines how the output folder should be composed by default. Available macros are: ${yyyy}, ${yy}, ${MM}, ${dd}, ${HH}, ${mm}, ${ss}, ${mixer}, ${id}, ${machinename}, ${username}, ${userdomainname} Recording Time Limit: If specified (greater than 00:00:00) the recording time per session is limited to this value (Format is: hh:mm:ss). Recording Sensing: The dB value to use when recording sensing is active. This defines a threshold value which is used to automatically pause and unpause recording or start a new recording session. Note: This applies only to standard recording and not to automatic recording! Auto Recording Profile: Select the default encoding profile which should be used when automatic recording is started. Within each mixer channel you have the option to start automatic recording. If selected this encoding profile is used. Automatic Recording Filename: Defines how the output folder should be composed by default. Available macros are: ${yyyy}, ${yy}, ${MM}, ${dd}, ${HH}, ${mm}, ${ss}, ${mixer}, ${id}, ${machinename}, ${username}, ${userdomainname} Automatic Recording Time Limit: If specified (greater than 00:00:00) the recording time per session is limited to this value (Format is: hh:mm:ss). CD Ripping Ripping Output Path: Specifies the default directory to use when ripping audio tracks from CD. Each CD will then be placed in a sub-folder underneath according to the Output SubFolder setting. Default Ripping Profile: Select the default encoding profile which should be used when ripping CDs. Ripping Filename: Specifies the default pattern to be used to create new file names during ripping. Available macros are: ${yyyy}, ${yy}, ${MM}, ${dd}, ${HH}, ${mm}, ${ss}, ${machinename}, ${username}, ${userdomainname}, ${originalfilename}, ${album}, ${albumartist}, ${composer}, ${year}, ${artist}, ${title}, ${tracknumber}, ${genre}, ${publisher}, ${copyright}, ${conductor}, ${grouping}, ${mood}, ${rating}, ${isrc} Folder: Specifies the pattern to be used to create new (sub)directories during ripping. Available macros are: ${yyyy}, ${yy}, ${MM}, ${dd}, ${HH}, ${mm}, ${ss}, ${machinename}, ${username}, ${userdomainname}, ${originalfilename}, ${album}, ${albumartist}, ${composer}, ${year}, ${artist}, ${title}, ${tracknumber}, ${genre}, ${publisher}, ${copyright}, ${conductor}, ${grouping}, ${mood}, ${rating}, ${isrc} 134 RADIO42 Confidential WORKING WITH ProppFrexx ONAIR Logging Settings This category contains the configuration of log file settings. Figure 100: Logging Configuration Two general log files allowing you to keep track of what tracks have been played: 1. a global log file 2. a playlist specific log file Log files are not generated or written to automatically by means of any application specific logic. No, log file entries are only generated via the general event and control-command mechanism. Within ProppFrexx ONAIR you have the capability to associate numerous predefined events (system related, track related, script related etc.) with so called controlcommands. This means, that whenever an event is raised, the assigned control-command(s) are executed, which allows maximum flexibility. Entries to these log files are created via the following control-commands: EXEC_WRITE_GLOBAL_LOG EXEC_WRITE_PLAYLIST_LOG By default the EXEC_WRITE_PLAYLIST_LOG control-command is assigned to the system related OnTrackPlay event. The above mentioned control-commands take one parameter as an argument, which denote the log filename to write to. Using the same filename subsequently results in appending new entries to that respective log file. Changing the log filename parameter, results in creating a new log file and closing the previously used log file. As such a log file will only be created and written to, if you fire one of the above control-commands from within the ProppFrexx event mechanism. Log files are plain (line oriented) text files which might contain a header and a trailer line as well as any number of detail log entries. The format of each entry is freely configurable via the following settings and macros. The macros which might be used are defined in the „Appendix Control-Command Macros” and are replaced at runtime with the appropriate values from the respective sender (eg. the track’s meta data). If you want to log your playlist or global events to any other target than a text file (eg. a database, web-site or dedicated application) you might e.g. use one of following controlcommands: EXEC_SEND_TCP EXEC_SEND_HTTP_GET RADIO42 Confidential 135 ProppFrexx ONAIR EXEC_SEND_HTTP_POST EXEC_SEND_SQL EXEC_SEND_SQL_UPDATEINSERT EXEC_SEND_SQL_INSERTUPDATE EXEC_WRITE_FILE EXEC_SHELL_COMMAND Please refer to the „Appendix Control-Commands” for details. Global and Playlist Logging Log File Path: Defines the folder to which global resp. playlist log files should be written. Log File Header: Specifies the format of the header row of the log file. Log File Entry: Specifies the format of the regular entry row of the log file. Log File Trailer: Specifies the format of the trailer row of the log file. Don’t log if shorter: Specifies a minimum effective playtime for log entries in seconds. Events having a shorter effective playtime will not be logged. Exclude: Log Entry Filter, select all the media entry types which should NOT be logged. Expand: Select how embedded media entries should be logged. Don't Expand: Embedded entries will be logged as a single entry. Expand Embedded Playlist: Only embedded playlists will be expanded. Each playlist entry will be logged as a separate entry. Expand Embedded Container: Only embedded containers will be expanded. Each container entry will be logged as a separate entry. Expand All Embedded Type: All embedded type will be expanded. Each embedded entry will be logged as a separate entry. Keep: The number of days to keep the log files (house-keeping option). After these days log files will be deleted. Specify 0 to keep log files infinite. 136 RADIO42 Confidential WORKING WITH ProppFrexx ONAIR Event and Command Settings Within ProppFrexx ONAIR you have the capability to associate numerous pre-defined events (system related, track related, script related etc.) with so called control-commands. This means, that whenever an event occurs, the associated control-commands are executed. This category contains the configuration of general system event and control command execution. Figure 101: Events/Commands Configuration Export Events: This allows you to export the current global event assignments to a file. This might be useful to e.g. transfer your event/control-command assignments to another machine. Import Events: Allows you to import events (previously exported) from a file. Note: Your current existing global event entries will not be overwritten - the imported events will be appended, but only, if not already existing. So after any import, double check your event entries above! Exclude: Event filter, here you might select all the media entry types for which control commands should NOT be executed. The pre-defined system related events are grouped into categories (Application, Playlist, etc.) within the above tree. You might expand a category by either clicking on the arrow icon or by double-clicking on the category name. Underneath each category you will find the category related system events which allow you to assign control-command(s) to these events. Just click into the related Command(s) column on an event to directly edit the control command(s) or click on the „Edit” button to invoke the Control Command Builder. Figure 102: Direct editing of control-commands RADIO42 Confidential 137 ProppFrexx ONAIR You can assign multiple control-commands to one event. Each line in the above editor represents one control-command to be executed. So make sure to place all parameters of one control-command within the same line! When multiple control-commands are assigned to one event, they are executed one after the other in the order they appear in the list. Please refer to the „Appendix Control-Commands” for details about the available controlcommands, their use and the needed parameters. Control Command Builder For convenience it is recommended to use the Control Command Builder: Figure 103: The Control Command Builder Within the Control Command Builder you can easily edit any control-command(s). In the upper half the assigned control-commands are listed. Each line represents one controlcommand. Select an entry in this list to display its details in the lower half. When changing any of the parameters of an existing control-command make sure to click on the „Set” button to save these changes. To add a new control-command you might simply select a new action and specify its parameters in the lower half and then click on the „New” button. A ‘Help’ text will be displayed for the selected control-command to guide you through its use. A control command is actually a certain message string (composed out of an action and a parameter part) which is executed by ProppFrexx ONAIR. Each control command has the following format: „action parameter“ (space character in-between). Action: The action associated with the currently selected control command. Parameter: The parameter(s) associated with the currently selected control command, which might contain macros (see „Appendix Control-Command Macros“).Multiple parameters are separated by a pipe-character („|”). Test: Click here to execute the current control command and display the result. New: Click here to create a new command and add it to the end of the current list. Set: Click here to save the current changes back to the currently selected command. Delete: Click here to deletes the currently selected command. 138 RADIO42 Confidential WORKING WITH ProppFrexx ONAIR Input and Output Settings This category contains the definition of input and output mixer channels (devices). Figure 104: Input/Output Configuration In this dialog you can configure the same settings as already described in the chapter „Mixer Setup”. Please refer to this chapter for more information. The section Output Devices lists all defined Mixer Output Channels (as shown in the Mixer Window). The section Input Devices lists all defined Mixer Input Channels (as shown in the Mixer Window). Click on the „Add” button to add a new output resp. input mixer channel. Click on the „Remove” button to remove the selected mixer channel from the mixer. Click on the „Edit” button to invoke the Device Configuration Dialog for the selected mixer channel (or double-click on a mixer channel entry within the list). Click on the arrow buttons to move the mixer channel up resp. down in the list. Click on the „Info” button to display the related soundcard driver information. Press and hold the „Test Tone” button to generate a test tone for the selected mixer channel. Monitor External Volume: If checked, the external volume of each mixer channels will be monitored. Note: Each mixer channel must also have it's 'Save External Mixer' flag set as well within the Device Configuration. In such case, the external volume will be automatically restored, if changed outside this application. This feature can only be applied to WDM or WASAPI devices. Preset: Mixer setups allow you to store and retrieve different presets (number of channels as well as each channel configuration). Select an available setup and click 'Load' to retrieve an already stored preset setup. Or click 'Save' to save the setup to the given name. Just type in a new setup name and click 'Save' to store the current setup to a new preset. RADIO42 Confidential 139 ProppFrexx ONAIR Routing Settings This category contains the routing configuration of player sources to output mixer channels. Figure 105: Routing Configuration As described in the chapter „Internal Players” ProppFrexx ONAIR hosts various different players. In this section you can assign each of these players with a certain Mixer Output Channel (as described in the previous chapter). The audio signal output of the respective player will then be routed to the configured Mixer Output Channel for play out. Each Output Mixer Channel is capable of receiving the input of any number of players. So you can easily route different players to the same Output Mixer Channel. DJ Player A-D: Defines the default routing for the DJ Player A-D. Note, that you can change this routing at any time directly within the DJ Player itself. Standby Player: Defines the default routing for the Standby Players. Note, that you can change this routing at any time directly within the DJ Player itself. Full-Duplex: Defines the default routing for input mixer channels. Select an output mixer channel to which the audio signal of an input mixer channel should by default be send to when in full-duplex mode. PFL Player: Defines the routing for the PFL Player. Quick Monitor: Defines the routing for the Quick Monitor Player. Cartwall I: Defines the routing for all players/carts contained in the Cartwall I. Cartwall II: Defines the routing for all players/carts contained in the Cartwall II. MOD/Overlay: Defines the routing for the MODStream and Overlay Player. 140 RADIO42 Confidential WORKING WITH ProppFrexx ONAIR GPIO and Remoting Settings This category contains the assignment of general purpose IO interfaces and commands (like TCP, MIDI, hotkey or game port mappings etc.). Figure 106: GPIO/Remoting Configuration Remoting via GPIO means, that almost all functions and controls of ProppFrexx ONAIR might remotely be controlled via the above external interfaces. In order to do this the incoming messages of these external interfaces are monitored and mapped against a translation table (mapping). If a relevant mapping entry is found (meaning a certain configured incoming message is properly detected) a control-command is executed to perform the desired action within ProppFrexx ONAIR. E.g. you might enable a MIDI Input Device to listen to incoming MIDI short-messages and if a certain MIDI message arrives you might trigger the execution of a control-command. This for example allows you to use almost any MIDI controller to remotely operate ProppFrexx ONAIR (e.g. operate the mixer fader channels, trigger player start/stop commands etc.). The following GPIO devices are supported: RADIO42 Confidential 141 ProppFrexx ONAIR TCP Devices When activated ProppFrexx ONAIR offers a TCP server on the configured TCP port address. This enables ProppFrexx to receive messages send from any TCP client (e.g. another ProppFrexx ONAIR instance, the pfremcmd.exe tool or your own TCP client application). Note that the IPv4 as well as the IPv6 protocol is fully supported. The TCP client might now send ProppFrexx ONAIR messages (simple binary UTF-8 encoded text strings terminated by a double CRLF; “\r\n\r\n”) in order to remotely control ProppFrexx ONAIR. The messages to be sent are actually the same as already explained in the chapter „Event and Command Settings”. Please also refer to the chapter „Appendix ControlCommands” for a full list and all details about the available control-commands, their use and the needed parameters. This TCP server will now receive these messages and evaluate them. However there are a few additional TCP protocol things you need to know. So here they come: a) The client must as the first command send the AUTHORIZATION command using the password as specified in this dialog. b) Each message string must be UTF-8 encoded and must be terminated by a double CRLF (\r\n\r\n). Subsequent commands which are just separated by a single CRLF (\r\n) are executed directly one after the other until a double CRLF (\r\n\r\n) is detected. c) The client must at least send a PING command every so often in order to keep a server connection alive. If the client doesn’t send any command within the specified timeout period the connection is automatically closed by this server. d) The client should send a BYE command in order to close the connection. Example Protocol: AUTHORIZATION password\r\n\r\n SHOW_ALERT_WINDOW ONLINE|You are now online!\r\n\r\n MIXER_OUTPUT_VOLUME_SET OUT1|0.5\r\n MIXER_OUTPUT_VOLUME_SET OUT2|0.735\r\n\r\n ... PING \r\n\r\n ... MIXER_OUTPUT_VOLUME_SET OUT1|1.0\r\n\r\n BYE \r\n\r\n You can use this protocol to send any number of control-commands to this remote server. ProppFrexx ONAIR allows only one TCP client to be connected at any time. TCP RemoteControl Server Port: The port of the TCP remote control server. TCP remote control commands can be sent to this server whenever started. Timeout: Clients connected to the TCP RemoteControl Server might at least send a "PING" command every so often. This value specifies the timeout in seconds after which clients are automatically disconnected. TCP Control Enabled: If checked the TCP remote control server is automatically start when the application starts. Note, that might in any case start the TCP Server manually by using the Remote Control Monitor (RCM) from within the Main Mixer Channel. Authorization Password: If specified a TCP remote control client must authorize with this password in order to establish a connection. Monitor: Click here to inspect the TCP messages. Watch the incoming TCP messages and how they trigger the defined control command execution. Limit: here to define general remote access limit rules. Note: Only the IP check is supported here! These access limit rules also apply to the OCS remoting. 142 RADIO42 Confidential WORKING WITH ProppFrexx ONAIR Figure 107: Remote Access Limits This dialog allows you to define remote access limit rules (IP check only) for incoming clients trying to connect to the ProppFrexx TCP Server or OSC Server. In the limit list you define rules to check with each client trying to connect. When a client is trying to connect this list of rules is evaluated from top to bottom until a matching rule is found (as such the order of the rules might be important when using wildcards). When using at least one Accept rule type and no rule match is found for a connecting client, the connection will be refused, as in such case it is assumed, that you must explicitly need to define each allowed client IP address range. But if you are only using Deny rule types and no rule match is found for a connecting client than the connection is accepted by default. Check Type: Defines the type of rule check to carry out (in this case only IP checks are supported; meaning the incoming client IP address will be checked). Rule Type: Defines the type of rule to apply. This can be either ‘Accept’ or ‘Deny’; meaning should the incoming connection be denied or accepted if the rule matches. Rule Value: Defines the actual rule value to use; meaning the IP address to validate. Note, that you might use an asterisk at the end of an IP address to specify valid IP address ranges. Also note that the IPv4 as well as the IPv6 protocol is supported! This means, that if a client connects via IPv4 an IPv4 address is transmitted and checked whereas if a client connects via IPv6 an IPv6 address is transmitted and checked. This might enforce you to define two rules if necessary (one using IPv4 and one using IPv6 addresses). Up: Moves the selected rule up in the list. Down: Moves the selected rule down in the list. Add: Adds a new remote access limit rule (to the end of the list). Remove: Removes the currently selected rule. MIDI Devices When activated ProppFrexx ONAIR offers MIDI input and output support. MIDI input enables ProppFrexx to receive short-messages send from any MIDI controller and translate them into control-commands so that the MIDI controller can remotely control any ProppFrexx ONAIR functionality. MIDI output enables ProppFrexx to send MIDI shortmessages to the MIDI device to remotely control this device. ProppFrexx supports 2 different MIDI Input devices to be used and one MIDI output device to be used. Input1/2: Select the MIDI input device to use (this is the MIDI input device which is receiving the MIDI short messages to remotely control this ProppFrexx ONAIR instance). Output: Select the MIDI output device to use (only used, if you want to send MIDI shortmessages via control-commands to a MIDI device). RADIO42 Confidential 143 ProppFrexx ONAIR MIDI Control Enabled: If checked the MIDI remote control server is automatically start when the application starts. Mapping 1/2: Select the MIDI message mapping (file) to use. To create a new mapping definition file, just type in a new name and click on flash icon button – which invokes the MIDI Message Mapping dialog (see below). Auto Pair MIDI Messages 1/2: Some controllers might actually use two sub-sequent short messages to construct a paired message representing a single value range - this to support paired values with a higher resolution (16384 instead of 128 values). Set this option to automatically detect paired messages for coarse/fine resolutions. Monitor: Click here to inspect incoming MIDI short-messages. Watch the incoming MIDI short-messages and how they trigger the defined control command execution. In the MIDI Message Mapping dialog you can now translate any incoming MIDI shortmessage into any ProppFrexx Control-Command. Meaning when a certain MIDI shortmessage arrives it will trigger the execution of the given ProppFrexx control-command. Figure 108: Define MIDI Message Mapping Status: The full MIDI status byte (ranges from x00 to xFF) - which can also be composed out of a status type and a channel number. Data1: The full MIDI data1 byte (ranges from x00 to xFF). However, normally only the range between 0x00 and 0x7F is considered as a valid MIDI short message data1 byte. Data2: Operator and Value(s). The Data2 operator defines how the data2 value will be compared in order to execute the associated command. The MIDI data2 value (ranges from x00 to xFF resp. 0x0000 to 0xFFFF). Note, that you might use a special ‘Any’ operator here to actually ignore the data2 value and just map any value with it. Control Command: The control command to execute if an incoming MIDI short message matches the defined MIDI message filter. Preset: The preset name of the MIDI mapping. 144 RADIO42 Confidential WORKING WITH ProppFrexx ONAIR New: Click here to create a new MIDI message and adds it to the end of the current list. Set: Click here to save the current changes back to the currently selected MIDI message. Delete: Click here to delete the currently selected MIDI message. In order to define a proper mapping you need to know what MIDI short-messages are send by your external MIDI device (controller). A MIDI short-message is composed out of three parts (bytes): - a status byte - a data1 byte - a data2 byte In the following example we assume, that the external MIDI control device sends a ControlChange message along with a channel number as the status byte. The data1 byte will then contain e.g. a MainVolume control change value whereas the data2 byte will finally contain the external fader position: Status = 0xB1 (Type=ControlChange, Channel=1..16) Data1 = 0x07 (MainVolume) Data2 = ANY (between 0 and 255) Note, that the "ANY" entry for Data2 byte will pass the data2 value as is. In the MIDI Message Mapping dialog you can now map this MIDI short-message to the following ProppFrexx control-command: MIXER_OUTPUT_VOLUME_SET OUT1|${mididata2asvol} The control command MIXER_OUTPUT_VOLUME_SET has two parameters: a) <mixername> b) <volume> The <mixername> is the name of the ProppFrexx mixer channels you want to change (in the above example this is "OUT1"). The <volume> represents a decimal number within ProppFrexx and must be between 0.0 (silent) and 1.0 (maximum). So we need to convert the Data2 byte of the MIDI short-message from 0...255 to 0.0...1.0. This can be done via the macro "${mididata2asvol}" - which converts the data2 byte to an appropriate volume value. All available macros can be found in the „Appendix ControlCommand Macros”. Therefore the above mapping: MIDI-Message: "0xB1 0x07" (Data2=Any) to Command: "MIXER_OUTPUT_VOLUME_SET OUT1|${mididata2asvol}" You might use the Control Command Builder dialog (just click on the 'Edit' button) to define the control command(s) to be executed. Each mapping entry therefore works like a filter. For each incoming MIDI short-message all mapping entries are checked. If the incoming MIDI short-message matches one of the defined MIDI messages (status byte, data1 byte and optionally data2 byte is checked), the related control command(s) is executed. For each MIDI short-message you must add a separate mapping entry! If you for example have 4 output mixer channels defined in ProppFrexx (e.g. OUT1, OUT2, OUT3, OUT4) you would need to also define 4 mapping entries, e.g.: 0xB1 0x07 -> MIXER_OUTPUT_VOLUME_SET OUT1|${mididata2asvol} 0xB2 0x07 -> MIXER_OUTPUT_VOLUME_SET OUT2|${mididata2asvol} RADIO42 Confidential 145 ProppFrexx ONAIR 0xB3 0x07 -> MIXER_OUTPUT_VOLUME_SET OUT3|${mididata2asvol} 0xB4 0x07 -> MIXER_OUTPUT_VOLUME_SET OUT4|${mididata2asvol} Use the “Record” button in the MIDI Message Mapping dialog to get a live incoming MIDI short-message. Meaning, the status, data1 and data2 bytes will change according to the live recorded incoming MIDI message. This makes it simple to know what message is send by your external MIDI control device when you change any of its controls. Serial I/O Devices When activated ProppFrexx ONAIR offers serial input and output support for any COM port. Serial input enables ProppFrexx to receive messages send from an external device connected to a COM port and translate them into control-commands so that the external device controller can remotely control any ProppFrexx ONAIR functionality. Serial output enables ProppFrexx to send messages to a serial COM port to remotely control this device. Input: Select the serial input device to use (this is the COM port which is receiving the GPIO messages to remotely control ProppFrexx ONAIR). Click on the property icon to define the COM port settings for this device. Output: Select the serial output device to use (only used, if you want to send messages via control-commands to a COM port). Click on the property icon to define the COM port settings for this device. Figure 109: Serial I/O Configuration Dialog Please refer to your operating system manual and your external serial I/O device connected to the COM port in order to properly set the above COM port properties. Serial Control Enabled: If checked the Serial I/O remote control server is automatically start when the application starts. Mapping: Select the Serial I/O message mapping (file) to use. To create a new mapping definition file, just type in a new name and click on flash icon button – which invokes the Serial I/O Message Mapping dialog (Note: the message mapping is only used for the ‘Regular Expression’ protocol). Protocol: Specifies which protocol should be used to parse and dispatch incoming serial I/O messages in to control-commands. ProppFrexx ONAIR: the same protocol is used as for the TCP RemoteControl server. Regular Expression: The serial I/O message mapping is used based on regular expressions (the message mapping file is used). SAS-Protocol: Currently not implemented. Monitor: Click here to inspect incoming Serial I/O messages. Watch the incoming Serial I/O messages and how they trigger the defined control command execution. 146 RADIO42 Confidential WORKING WITH ProppFrexx ONAIR Serial I/O communication happens via a COM port. The COM port actually receives a series of data bytes, which needs to be interpreted/encoded by the server. ProppFrexx ONAIR simply interprets the data bytes send to a COM port as simple ASCII based text strings. The received message strings might further be inspected to map them into any ProppFrexx control-commands. This inspection is happening based on the selected protocol. If you have selected the “ProppFrexx ONAIR” protocol the same mechanisms are used as already described in the chapter “TCP Devices” (see above). This means the protocol is exactly the same as for TCP messages: a) The client must as the first command send the AUTHORIZATION command using the password as specified in this dialog. b) Each message string must be UTF-8 encoded and must be terminated by a double CRLF (\r\n\r\n). Subsequent commands which are just separated by a single CRLF (\r\n) are executed directly one after the other until a double CRLF (\r\n\r\n) is detected. c) The client must at least send a PING command every so often in order to keep a server connection alive. If the client doesn’t send any command within the specified timeout period the connection is automatically closed by this server. d) The client should send a BYE command in order to close the connection. If you have selected the “Regular Expression” protocol a similar mechanism is used as already described in the chapter “MIDI Devices” (see above, except that for MIDI messages we always receive three fix data bytes, as for serial I/O messages we receive an arbitrary number of data bytes). This means any message string received via the COM port is matched based on regular-expressions against the selected mapping file. Each mapping entry of the mapping file therefore works like a filter. For each incoming serial message string all mapping entries are checked. If the incoming message matches one of the defined regular expressions, the related control command(s) is executed. A regular expression is a special text string for describing a search pattern. You can think of regular expressions as wildcards on steroids. Please refer to the common sources to learn more about regular expressions. Eg. here: http://www.regular-expressions.info/ http://en.wikipedia.org/wiki/Regular_expression By using the “Regular Expression” protocol and the related message mapping you should be able to actually use most of external device supporting serial I/O communication. For “Regular Expressions” the following special control-command macros do exist in order to translate a matching regular expression capture group into a control-command parameter: ${regexasvolGXwithYYY} : results to (GX/withYYY) ${regexaspanGXwithYYY} : results to ((2*GX)/withYYY - 1) ${regexasgainGXwithYYY} : results to ((30*GX)/withYYY - 15) ${regexGX} : results to (GX) Where GX denotes the found capture group index value within the original regular expression match and withYYY a scalar factor value. Example 1: Your external serial I/O device sends the following data: “VOL70” You defined the following regular expression to match this: “VOL([0-9]*)” And assign this control-command (assuming the maximum VOL value is 100): “MIXER_OUTPUT_VOLUME_SET OUT1|${regexasvolG1with100}” Which results to the following: “MIXER_OUTPUT_VOLUME_SET OUT1|0.7” RADIO42 Confidential 147 ProppFrexx ONAIR Explanation: The regular expression “VOL([0-9]*)“ matches the incoming serial I/O message “VOL70” and results in 2 capture groups: 0 = “VOL70” 1 = “70” To translate the capture group index 1 value to a ProppFrexx volume controlcommand parameter we use the macro “${regexasvolG1with100}“. As seen in this macro, G1 will use the capture group index 1 which has a value of “70” whereas with100 specifies, that this value will be scaled by the value “100” – as such the resulting string of the given macro will be “0.7” (=70/100). Example 2: Your external serial I/O device sends the following data: “PAN0.5” You defined the following regular expression to match this: “PAN([0-9\.]*)” And assign this control-command (assuming the maximum PAN value is 1.0): “MIXER_OUTPUT_PAN_SET OUT1|${regexaspanG1with1.0}” Which results to the following: “MIXER_OUTPUT_VOLUME_SET OUT1|0.0” Explanation: The regular expression “PAN([0-9\.]*)“ matches the incoming serial I/O message “PAN0.5” and results in 2 capture groups: 0 = “PAN0.5” 1 = “0.5” To translate the capture group index 1 value to a ProppFrexx balance controlcommand parameter we use the macro “${regexaspanG1with1.0}“. As seen in this macro, G1 will use the capture group index 1 which has a value of “0.5” whereas with1.0 specifies, that this value will be scaled by the value “1.0” – as such the resulting string of the given macro will be “0.0” (=(2*0.5)/1.0-1). GamePort Devices When activated ProppFrexx ONAIR can be controlled by any game port device. A device connected to any game port of your computer sends well defined game port events to the system. ProppFrexx ONAIR might now receive those events and translate them into the already known control-commands – which mean game port events might trigger their execution. Device: Select the game port device to use (this is the game port which is receiving the events to remotely control ProppFrexx ONAIR). Port Control Enabled: If checked the game port remote control server is automatically start when the application starts. Mapping: Select the game port event mapping (file) to use. To create a new mapping definition file, just type in a new name and click on flash icon button – which invokes the GamePort Event Mapping dialog (see below). Monitor: Click here to inspect incoming game port events. Watch the incoming game port events and how they trigger the defined control command execution. A similar mechanism is used for game port events as already described in the chapter “MIDI Devices” (see above). This means any game port device, button and button state change is matched against the selected mapping file. Each mapping entry of the mapping file therefore 148 RADIO42 Confidential WORKING WITH ProppFrexx ONAIR works like a filter. For each button/state all mapping entries are checked. If a button/state matches one of the defined filters, the related control command(s) is executed. Keyboard Hotkey Mapping When activated any keyboard activity can be translated to any ProppFrexx ONAIR controlcommand. So whenever you press a certain key on your keyboard you might trigger the execution of any control-command(s). This allows you to either remap any of the predefined keyboard shortcuts or even use special control keyboards (like programmable cash-register keyboards or any other special design keyboards). Keyboard Hotkey Control Enabled: If checked the Serial I/O remote control server is automatically start when the application starts. Hotkey Mapping: Select the keyboard hotkey mapping (file) to use. To create a new mapping definition file, just type in a new name and click on flash icon button – which invokes the Serial I/O Message Mapping dialog (Note: the message mapping is only used for the ‘Regular Expression’ protocol). Whenever a key pressed on a keyboard a numeric value (between 0 and 65535) is associated with that key. In the hotkey mapping you can therefore assign a control-command(s) to any of these numeric values. Each mapping entry of the mapping file therefore works like a filter. For each key pressed all mapping entries are checked. If the numeric key value matches one of the defined hotkey values, the related control command(s) is executed. Figure 110: Keyboard Event Mapping Dialog Caution! Using some hotkey values might result in ProppFrexx ONAIR not working correctly anymore as some hotkeys might interfere with some standard windows hotkeys. Prevent using any of the following: Back = 8 Tab = 9 Enter = 13 ShiftKey = 16 RADIO42 Confidential 149 ProppFrexx ONAIR ControlKey = 17 Menu = 18 CapsLock = 20 Escape = 27 Space = 32 PageUp = 33 PageDown = 34 End = 35 Home = 36 Left = 37 Up = 38 Right = 39 Down = 40 Insert = 45 Delete = 46 a-z = 65-90 F10 = 121 Also note that using hotkeys might overwrite the standard ProppFrex ONAIR keyboard shortcuts! Open Sound Control (OSC) When activated ProppFrexx ONAIR offers support for the Open Sound Control protocol (OSC) by either TCP, UDP Unicast or UDP Multicast. For more information about OSC see http://opensoundcontrol.org/introduction-osc. This allows you to receive and send OSC messages from and to any OSC enabled client (eg. you might use ‘TouchOSC’ on your iPhone, iTouch or iPad to fully control almost all ProppFrexx ONAIR functionality). Incomming OSC messages are translated into control-commands just with any other remoting functionality. Input: Select your OSC IP address and port number which should be used by OSC clients in order to receive OSC messages (this is one of your internal network adaptor IP addresses and a free port number, eg. “192.168.1.2:9000”). Output: Select the IP address and port number of the remote OSC client in order to send OSC messages. OSC Enabled: If checked the OSC remote control server is automatically start when the application starts. Mapping: Select the OSC message mapping (file) to use. To create a new mapping definition file, just type in a new name and click on flash icon button – which invokes the OSC Message Mapping dialog (which lets you map incoming OSC messages into ProppFrexx control-commands). Transport: Specifies the transport protocol which should be used to receive and send OSC messages from and to the remote client. UDP Unicast: the UDP unicast protocol is used. UDP Multicast: The UDP multicast protocol is used (where the Input designates the multicast IP address to join). TCP Unicast: the TCP protocol is used. Monitor: Click here to inspect incoming OSC messages. Watch the incoming OSC messages and how they trigger the defined control command execution. 150 RADIO42 Confidential WORKING WITH ProppFrexx ONAIR A similar mechanism is used for OSC as already described in the chapter “MIDI Devices” (see above, except that for MIDI messages we always receive three fix data bytes, as for OSC messages we always receive an OSC address string as well as an arbitrary number of data values). This means any OSC message received via the input IP address and port is matched against the selected mapping file. Each mapping entry of the mapping file therefore works like a filter. For each incoming OSC message all mapping entries are checked. If the incoming message matches one of the defined filters, the related control command(s) is executed. Please refer to the common sources to learn more about OSC. Eg. here: http://opensoundcontrol.org/ For OSC messages the following special control-command macros do exist in order to translate a matching OSC message into a control-command parameter: ${oscaddress} : the OSC address string ${oscdata1} : the OSC data1 value as a string ${oscdata2} : the OSC data2 value as a string ${oscdata3} : the OSC data3 value as a string ${oscdata1aspan} : the OSC data1 as a pan value string (-1.0…1.0) ${oscdata2aspan} : the OSC data2 as a pan value string (-1.0…1.0) ${oscdata3aspan} : the OSC data3 as a pan value string (-1.0…1.0) ${oscdata1asgain} : the OSC data1 as a gain value string (-15.0…15.0) ${oscdata2asgain} : the OSC data2 as a gain value string (-15.0…15.0) ${oscdata3asgain} : the OSC data3 as a gain value string (-15.0…15.0) Receive Example: Your external OSC client sends the following data: “/1/fader 0.5” You defined the following mapping to match this: “Address: /1/fader” “Data1: ANY (0)” “Data2: ANY (0)” And assign this control-command: “MIXER_OUTPUT_VOLUME_SET OUT1|${oscdata1}” Which results to the following: “MIXER_OUTPUT_VOLUME_SET OUT1|0.5” Send Example: In order to send a message to a remote OSC client you can use the EXEC_SEND_OSC control-command. When you want to set the fader value of the same OSC address to the current output mixer volume value you might use the following control command: “EXEC_SEND_OSC /1/fader|f:${outputmixer1volume}” Which results to the following OSC message: “/1/fader 0.5” Note, that the ‘f:’ prefix will send a float value as the first data value within the OSC message. In addition you might use the following prefix values here: i: uses an Int32 data value h: uses an Int64 data value f: uses a float (32-bit) data value d: uses a double (64-bit) data value s: uses an ASCII-string data value b: uses a byte array data value RADIO42 Confidential 151 ProppFrexx ONAIR IO-Warrior Control When activated ProppFrexx ONAIR offers support for the first IO-Warrior card found on the system. The IOW24/40/56 as well the PV1/PV2 cards is supported. Pin state changes of any of the digital IO pins of the IO-Warrior card are detected and are translated into control-commands just with any other remoting functionality. IO-Warrior Enabled: If checked the IO-Warrior remote control server is automatically start when the application starts. Mapping: Select the IO-Warrior message mapping (file) to use. To create a new mapping definition file, just type in a new name and click on flash icon button – which invokes the IO-Warrior Message Mapping dialog (which lets you map digital pin state changes into ProppFrexx control-commands). Monitor: Click here to inspect IO-Warrior pin state changes. Watch the pin states and how they trigger the defined control command execution. A similar mechanism is used for IO-Warrior as already described in the chapter “MIDI Devices” (see above). This means any IO-Warrior pin state change is matched against the selected mapping file. Each mapping entry of the mapping file therefore works like a filter. For each pin state all mapping entries are checked. If a pin state matches one of the defined filters, the related control command(s) is executed. Please refer to the common sources to learn more about IO-Warrior. Eg. here: http://www.codemercs.com/index.php?id=127&L=1 Velleman Control (K8055) When activated ProppFrexx ONAIR offers support for up to four Velleman K8055 cards. Pin state changes of any of the digital IO pins of the K8055 card(s) are detected and are translated into control-commands just with any other remoting functionality. Velleman Enabled: If checked the Velleman remote control server is automatically start when the application starts. Mapping: Select the Velleman message mapping (file) to use. To create a new mapping definition file, just type in a new name and click on flash icon button – which invokes the Velleman Message Mapping dialog (which lets you map digital pin state changes into ProppFrexx control-commands). Monitor: Click here to inspect K8055 pin state changes. Watch the pin states and how they trigger the defined control command execution. A similar mechanism is used for Velleman as already described in the chapter “MIDI Devices” (see above). This means any Velleman pin state change is matched against the selected mapping file. Each mapping entry of the mapping file therefore works like a filter. For each pin state all mapping entries are checked. If a pin state matches one of the defined filters, the related control command(s) is executed. Each connected K8055 card is identified by a card address (SK5/6 switch). As up to four cards might be connected in parallel, the 5 IO pins of the card are translated into logical pin ids according to their card address. The card with the address 0 is mapped to the pins 0-5. 152 RADIO42 Confidential WORKING WITH ProppFrexx ONAIR The card with the address 1 is mapped to the pins 8-12. The card with the address 2 is mapped to the pins 16-20. The card with the address 3 is mapped to the pins 24-28. Please refer to the common sources to learn more about the K8055. Eg. here: http://www.velleman.eu/distributor/products/view/?id=351346 Streaming Settings This category contains the configuration of streaming servers (broadcasting). Figure 111: Streaming Configuration ProppFrexx ONAIR has build in support for the following streaming server types: SHOUTcast (or compatible e.g. Live365 – accepting MP3 or AACplus) ICEcast (or compatible – accepting MP3 or OGG) Windows Media Encoder (push or pull mode) HOMEcast (build in WMA or MP3 streaming server) If you want to stream an audio signal to a broadcast server (as defined above) you need to configure a so called streaming server. You can stream to as many broadcast servers as you like (just your outgoing network bandwidth or your machine power might give you a limit). If you for example want to stream to a SHOUTcast server in lets say 128kbps quality and in parallel also in 64kbps quality, this would require to define two streaming servers. Each streaming server streams the audio signal of a mixer channel (one streaming server streams the audio signal of exactly one mixer channel – whereas any other streaming server can stream the audio signal of the same or another mixer channel). Make sure to configure your mixer setup in such a way, that you have a mixer channel available which carries exactly the signal you want to stream. In order to stream in MP3 or AACplus you must have installed (and/or licensed) the appropriate encoder (e.g. lame.exe or Winamp) in order to stream to a broadcast server. See the chapter Encoding and Recording Settings above for more details. The mixer channel being used as the source device for streaming might be muted, RADIO42 Confidential 153 ProppFrexx ONAIR as the streaming server picks up the signal pre-fading but after all DSPs have been applied. Streaming Server: This list contains all configured streaming servers. Each entry represents one stream to be broadcasted. Add: Adds a new streaming server to the list of broadcast servers. Remove: Removes the selected streaming server from the list of available broadcast servers. Edit: Lets you configure all the details of the selected streaming server (like the type of server, the encoder etc. – see below for details). Source Device: Select the default mixer channel which should be used as the source for new streaming servers. Note: You can assign an individul source mixer channel to each streaming server in its configuration dialog. Homecast Server Buffer Size: The buffer size in KB for the internal Homecast Streaming Server (HOMEcast MP3 Server only). Update Status every: Defines the frequency in seconds how often the streaming server status should be updated. Limit Rate: The rate that data is sent to the streaming server(s) might be automatically restricted to what is needed to sustain playback. If this option is checked automatic rate restriction is active. If you experiance any difficulties (e.g. breaks in the source or delays) you might want to check this option to enable the rate restriction - else the data is send to server as processed (with no rate restriction). Use Standby Players: If checked the Standby Players are included in song title updates else playing tracks via the Standby Players will not update any streaming song title. Shoutcast/Icecast Proxy Settings: The Icecast or Shoutcast proxy server settings, in the form of "[user:pass@]server:port". Specify an empty string to not use any proxy when connecting to an Icecast or Shoutcast server. If only the "server:port" part is specified, then that proxy server is used without any authorization credentials. Exclude from Title Update: Select all the media entry types for which streaming title updates should NOT be executed. For excluded media types the initial streaming title (as specified in the Streaming Server Configuration) is used and if this is empty no title update is performed. Title Update Format: Defines the default format to be used with streaming server title updates (any regular track marcros might be used, see Appendix). Note: You can assign an individul title update format to each streaming server in its configuration dialog. To add a new streaming server click on the ‘Add’ button. To editing an existing streaming server click on the ‘Edit’ button or double-click on the entry in the list. The following dialog is used to configure one streaming server instance: 154 RADIO42 Confidential WORKING WITH ProppFrexx ONAIR Figure 112: Edit Streaming Server Configuration Name: The logical name of the streaming server (must be unique for all instances). Type: Defines the type of streaming server: SHOUTcast Client: Use this type, if you want to stream to a SHOUTcast (v1 or v2 or compatible e.g. Live 365) server and use this as a streaming client (ProppFrexx ONAIR is the source). ICEcast Client: Use this type, if you want to stream to an ICEcast server and use this as a streaming client (ProppFrexx ONAIR is the source). WMAcast Client: Use this type, if you want to stream to a publishing point on a Windows Media server and use this as a streaming client (ProppFrexx ONAIR is the source). HOMEcast WMA Server: Use this type, if you want to create a local WMA media server (ProppFrexx ONAIR is the server). HOMEcast MP3 Server: Use this type, if you want to create a local SHOUTcast compatible streaming server (ProppFrexx ONAIR is the server). Connect at Startup: Start the server automatically when the application starts or a global (re)connect is issued. Reconnect on Error: If checked, the server will automatically try to reconnect, if the connection could not be established or is somehow dropped. Specify a time in seconds to wait between each reconnect try. Address: The server IP address, DNS or publishing URL. Note: In case of WMA this specifies the publishing point on a Windows Media server. Port: The port address to be used with this streaming server. Mountpoint: The ICEcast server mount point to use. RADIO42 Confidential 155 ProppFrexx ONAIR Stream ID: The SHOUTcast v2 stream id to use (leave empty to use the legacy SHOUTcast v1 protocol, e.g. required for Live365 servers). Make Public: Make this server public? If checked, the server will be marked as a public available server (e.g. a public SHOUTcast server will be listed in the shoutcast directory). Username: The authorization user name to be used when connecting the streaming source (leave empty to use the server default user). Password: The authorization password to be used when connecting the streaming source. Clients: Number of maximal allowed clients to connect (WMAcast only). Server/Station Identification: Specifies the meta data attributes to use and to publish to the server. Encoder: The type of encoder to use with this streaming server. SHOUTcast: MP3 or AACplus. ICEcast: OGG, MP3 or AACplus. WMAcast: WMA. Force 16-Bit: If checked, only 16-bit sample data will be send to the underlying encoder else the maximum resolution supported by the encoder will be used. Profile: Select the encoder profile to be used with this streaming server. The profile determines the encoding format (like bitrate, quality, resolution etc.). Source: Defines the source for this streaming server, which is the mixer channel from where to pick up the audio signal. Initial Title: Specify a song title to be be used at initial startup of the server. Format: Specify the format to be used with song title updates (any regular track marcros might be used). Leave empty to use the global default streaming server song title format. Auto Update: Automatically update the server song title with the currently playing track of the currently active playlist. Force Update: Updates the song title with the currently playing track, even if the server is not connected. This setting might be useful, if you want to use an external streaming client/encoder, but only want to update the song tiltle from this ProppFrexx instance. UTF-8: Forces to use UTF-8 title updates. Depending on the streaming server and stream format being used title updates might be performed using Windows-1252, Latin1 or UTF8 encoding by default. When selecting this option you can force title updates to be performed using UTF8 encoding. Note: Only set this property if you are sure, that the streaming server supports title updates in UTF8! Artwork: Enables or disables sending of in-stream artwork pictures. This sends artwork from the currently playing track to the server and acts in the same way as the album art view in most media players within ProppFrexx. If there is no artwork for the playing track then the station logo may be sent if applicable. Note: Currently only used for SHOUTcast v2 servers (where a 'Stream ID' is specified)! 156 RADIO42 Confidential WORKING WITH ProppFrexx ONAIR Script and Scheduler Settings This category contains the configuration of script and scheduler settings. Figure 113: Scripts/Scheduler Configuration Script Libraries Script Library Path: Specifies a directory which contains your scripting files (.pfs). Each .pfs file found will automatically be loaded and available within the scheduler programs. Rescan: Reload/Rescans the Script Library Directory and reloads all Script Libraries. Info: Shows information about the loaded Script Libraries. Song History: The default size of the script library song history - to ensure, that not the same entry will be queried twice. Set to 0 to disable the song history. Additional Script Libraries: Click here to manage your loaded script libraries or to add individual script libraries (e.g. if they are not located within your script library path, see below for details). Global Song History Global Song History: The size of the global song history - to ensure, that not the same entry will be queried twice. Set to 0 to disable the global song history. Note: Extended history checking is based on the global song history. A Left-Click opens the Song History Editor allowing you to view and edit the current global song history entries. More Global History Options: Click here to define more options for the global song history checking. Figure 114: Global Song History Options RADIO42 Confidential 157 ProppFrexx ONAIR Use Extended History Check: If checked an extended history check is performed, which also checks for duplicate Artist and/or Album entries. If disable only duplicate Track (file name) entries are checked. Use Strict Checks: If checked the extended history checks are performed using exact casesensitive comparisons - else a relaxed case-insensitive comparisons is used. Examples: Strict: - 'Luther' would not match 'luther'. - 'Luther' would not match 'Luther feat. Jay-Z'. Relaxed: - 'Luther' would match 'luther'. - 'Luther' would match 'Luther feat. Jay-Z'. Force TAG Reading: If checked, reading meta data for tracks having no TAG data read in so far will be enforced - else the extended history will not be performed on tracks having no Album or Artist meta data. Use Extended Check: If checked an extended history check is performed, which also checks for duplicate Artist and/or Album entries. If disable only duplicate track (file name) entries are checked. Albums: Defines the number of history entries which should be checked for duplicate Albums. E.g. when set to 5 this will ensure, that the last 5 tracks will not be taken from any of the same album. Alternatively you might also define the number of minutes which should be checked for duplicate Albums. E.g. when set to 60 this will ensure, that a track will not be taken from the same album within the last 60 minutes. Note: In any case will the check be limited to the size of your global song history! Artists: Defines the number of history entries which should be checked for duplicate Artists. E.g. when set to 5 this will ensure, that the last 5 tracks will not be taken from any of the same artist. Alternatively you might also define the number of minutes which should be checked for duplicate Artists. E.g. when set to 60 this will ensure, that a track will not be taken from the same artist within the last 60 minutes. Note: In any case will the check be limited to the size of your global song history! X-Check Artist: Defines optional meta data fields which might be used to perform an additional check to detect duplicates. Beside the selected meta data field itself, it is also checked, if the Artist is contained in any of the selected meta data fields. Keep Global History Persistent: If checked, the global song history will be saved on exit and restored on load of ProppFrexx ONIAR - else it wil be empty whenever ProppFrexx ONAIR is restarted. Scheduler Settings Auto Start Scheduler: If checked the Scheduler will automatically be started when the application is started. Continuous Mode: If checked, the scheduler is in continuous mode - else it is in isolated mode. Continuous: This mode ensures that the scheduler will always run a program at any time. The end time of a program is therefore actually ignored and a program runs as long as a new program will be started. Isolated: This mode runs the programs as defined in the scheduler taking the start and end time of a program into account. Note: Gaps within your program scheduler might lead to breaks/silence in this case. 158 RADIO42 Confidential WORKING WITH ProppFrexx ONAIR Default User: In case you have UAC enabled and have selected to start the scheduler automatically this user will be used for the initial login. This is needed in order to start ProppFrexx in the background - as otherwise the UAC login would prevent ProppFexx from starting the scheduler automatically. Calendar File: Specifies the fully qualified filename of your calendar file holding all program scheduler entries. Program Mixtime: Is the default mix time in milliseconds between two programs (which is the mixing time of the last track of the current script and the first track of the next script). When a new script is started the first track of that script is played this milliseconds before the last track of the currect script is cued out. Note: This is just the default value, you can assign an individual mix time in the program configuration dialog. Maximum Program Delay: When a program is defined as soft start (so it doesn't have to start at exactly that time) it might be delayed by this maximum number of seconds. When a new script is about to be started the remaining time of the current Track of the current script is checked. If the remaining time is less than this maximum delay time, the Track will be played til the end before the new script is started (which will then result in a delayed script start). But if the remaining time is greater than this maximum delay time the current Track is faded-out immediately and the script start will not be delayed. Note1: Programs defined as fixed start will always start on time. Note2: This is just the default value, you can assign a delay time in the program configuration dialog. Program Start Time: Defines the time in seconds a program starts in advance of its actual start time. This time has several purposes: a) it gives time to (re)load the media libraries and scripts b) it gives time to pre-schedule the first script tracks c) it defines an optional time a program can start early Playlist Look Ahead: Defines the number of entries to look ahead when adding new media entries to the playlist. The minimum is 1, which means there is always at least one media track remaining in the playlist not already being cued to one of the DJ Players. Max. Remain: When a scheduler entry should pause a current playlist (when suspending it) this defines the maximum remaining time for the current track in seconds. If the remaining time of the current track is less than this value the current track will be ejected insead of paused. Set this value to 0 to alway pause the current track independent of its remaining time. Cleanup: Defines the number of days for automatic cleanup of the program scheduler calendar. Old and unused entries (older than these days) will automatically be removed from the calendar. Set to 0 to disable automatic cleanup. Minimum Bridge Time: Defines the minimum time in seconds an optional program bridge track should play. If the remaining time (til the actual start time) of a program is less than this time, the bridge track will not be played and the program will be started early. Blink AutoPlay: If checked the AutoPlay button will blink when the scheduler is running but AutoPlay was turned off. New Auto Rec.: If checked and automatic recording is active on any mixer channel, a new recording session is started with each start of a program. Show Program Alerts: If checked a notification window will be shown whenever a new program is about to be started. Late Start Loop Line: If checked and a program is started later than its defined start time (e.g. because you manually re-started the scheduler) the script will start with the defined loop line instead of from the beginning. Silence Detection (only with Scheduler): If checked the Silence Detection is only active if the Scheduler is also running. RADIO42 Confidential 159 ProppFrexx ONAIR Silence when below: Defines the audio level in dB which should be used to identify silence in a mixer channel. The mixer channel is considered silent, when the level falls below this threshold. Note: If you have enabled multiple mixer channels for silence detection all these mixer channels must be silent before any action is performed. Silence for at least: Defines the time in seconds a mixer channel's level must stay below the defined threshold until silence is effectively detected. Note: If you have enabled multiple mixer channels for silence detection all these mixer channels must be stay below the threshold for the given time until any action is performed. Start AutoPlay: If selected and silence was detected for more than the specified time, AutoPlay will be set automatically. To perform any other custom specific action when silence was detected resp. when noise is back detected, you might use the global OnDetectSilence resp. OnDetectNoise event (see Events/Commands). Manage Additional Script Libraries To manage additional script libraries click on the „Additional Script Libraries...“ button. The following dialog allows you to manually manage your individual script libraries and assign individual parameters to them. Figure 115: Additional Script Libraries Dialog The tree list shows all defined and loaded script libraries grouped by its category, which have been manually added to your collection of script libraries (the name in brackets indicate the filename of the script). Use the button row to the right to add additional script libraries (see below). When a script library is selected in the tree list additional info of that script library is shown below. Double-Click on an entry to edit its parameters. Script Libraries which couldn’t currently be accessed (e.g. the folder/file is unavailable) are shown as ‘Broken’ within the tree list. Note: The category assigned to a script library is only used in this dialog and in any dialog which allows you to select certain script libraries and only serves the purpose of grouping script libraries in these dialogs, i.e. allowing you to more quickly find a certain script library. There is no other purpose assigned to the category. 160 RADIO42 Confidential WORKING WITH ProppFrexx ONAIR New Script: Adds a new script file to your library collection. Add Script: Adds an existing script file to your library collection. Edit Script: Edits the content of the selected script file. This lets you define the script settings and the script lines (see below). Remove: Removes the selected playlist file from your media library collection. Reload: Refresh the view of your additional script libraries. Information: This box displays some general info about the selected script library. Last Access: The date and time when the script was last used. Last Refresh: The date and time when the script was last reloaded. Last Start: The date and time when the script was last started. Last Stop: The date and time when the script was last stopped. History: The current number of entries in the script song history. Hits: The number of song history hits occurred so far. Editing Scripts The following dialog allows you to edit the script settings as well as the individual script lines. Figure 116: Edit Script Library Dialog Name: The name of the script, which identifies it uniquely. Exec. Mode: Defines in which order the script lines are executed: Sequential: The lines are executed one after the other from top to bottom. Once all script-lines have been executed they start from the beginning again (resp. the defined Loop Line, see below). Random: The lines are executed in random order (Loop Line is ignored). RADIO42 Confidential 161 ProppFrexx ONAIR Max. History: Defines the size of the song history for this script library. A value of 0 disables the script song history. Note: This number also defines the maximum number of archive entries. The song history will not be cleared with each new script execution! Left-Click to opens the Song History Editor. Clear History: If checked, the script library will clear its song history with every load or reload - else the song history will never be cleared and always keep the last used tracks in the history. Reload: Defines which media libraries should be reloaded whenever the script is started (check each media library which should be reloaded). Force Synchronously Reloading: If checked, all selected media libraries will always be reloaded synchronously. By default only playlist based media libraries will be reloaded synchronously, whereas folder based and database media libraries will be reloaded asynchronously in the background (which means new entries are only available after the reload is completed – which might be after the script was effectively started). Note: This option should only be enabled when reloading small folder based or database media libraries! Loop Line: Defines the script line which should be used to loop the script. In sequential mode a script is looped once the script end has been reached. This value defines the line number which should be used to reset the script pointer - allowing you to skip certain entries at the beginning of the script (exclude them during looping). In random mode this parameter is ignored. Initial Track: If set, this entry will always be used as the very first track whenever the script is started. Note: Automatic Cue Point Detection (ACPD) is always disabled with this entry! Archive: Defines an optional archive playlist file in which track entries will be saved which have been used during the script execution (this archive playlist file is generated when the script is stopped). Note: You might use the same file as the additional song history file in order to make sure, that any subsequent script execution doesn't contain the same tracks as the previous script execution. Add. History: Defines an optional song history playlist file which will be (re)loaded with each script execution. Note: You might use the same file as the additional song history file in order to make sure, that any subsequent script execution doesn't contain the same tracks as the previous script execution. Advertising: Defines if and how ‘advertising’ entries should be added during the script execution. If a media library is specified here, tracks are taken from it in the frequency range given. E.g. if you specify 4-7, this means, that after each 4 to 7 script tracks an additional entry is taken from this ‘advertising library’ and inserted during script execution. If you specify 2-2 this means, that after every 2 script tracks an ‘advert’ track will be inserted. Note: This has nothing to do with the ‘real’ Advertising modul – here a normal media library is simply selected to pick tracks from, so these doesn’t actually have to be real advertising tracks! Advertising Range: Defines the range for automatic ‘advertising’ track insertion. Advertising Count: Defines the mode and the number of tracks to be inserted for automatic ‘advertising’ track insertion. Jingles: Defines if and how ‘jingle’ entries should be added during the script execution. If a cartwall library is specified here, tracks are taken from it in the frequency range given. E.g. if you specify 4-7, this means, that after each 4 to 7 script tracks an additional entry is taken from this ‘jingle library’ and inserted during script execution. If you specify 2-2 this means, that after every 2 script tracks a ‘jingle’ track will be inserted. Note: Here a normal cartwall library is simply selected to pick tracks from, so these doesn’t actually have to be real jingle tracks! 162 RADIO42 Confidential WORKING WITH ProppFrexx ONAIR Jingles Range: Defines the range for automatic ‘jingle’ track insertion. Jingles Count: Defines the mode and the number of tracks to be inserted for automatic ‘jingle’ track insertion. Script Lines: This list contains all defined script-lines to be use within the script. See below for details. Add: Click here to add a new script-line. Note: You might also the standard Cut&Paste keyboard shortcuts to create new script lines. Remove: Click here to remove the currently selected scrpt-line. Up: Click here to move the currently selected scrpt-line up in the list. Down: Click here to move the currently selected scrpt-line down in the list. FixTime Elements: Click here to define FixTime-Elements for your script (which are special entries to be executed at an exact given time, e.g. at every :30 minute of an hour). See below for details. Script Lines The script lines define how new tracks should be added to a playlist automatically when the script is executed. Note, that a playlist window actually queries (pulls) new tracks from the script (as e.g. started from the program scheduler). This means when a playlist window (which effectively executes a script) is running ‘empty’ and as such ‘needs’ more tracks, it ‘asks’ the script for it to provide them. As such the script lines are evaluated and executed to provide the number of requested new tracks. E.g. if a playlist window asks for 3 new tracks, it might be that multiple script lines are executed up until the requested number of tracks are at least returned. This also means, that more tracks might be returned to the playlist as requested. The above mentioned Playlist Look Ahead parameter controls this behavior (when a playlist is considered ‘empty’): another script line is executed until the playlist has at least this number of remaining tracks. This also means, that if you are adding tracks manually to a playlist (which executes a script) that the resp. playlist might not ‘ask’ for new tracks (might not execute further script lines) up until the playlist is running ‘empty’ again. Each script line has the following parameters: Mode: Defines what this script line should actually do (the content of the Entry field depends on this value). Sequential: Returns new track(s) from the given media library by sequentially picking the next tracks from the given library. Random: Returns new track(s) from the given media library by randomly picking the next tracks from the library. Cartwall: Returns new track(s) from the given cartwall library by randomly picking the next tracks from the library. LoadTrack: Returns an audio track (file) directly. If the referenced file is actually a playlist it will be returned as a single embedded playlist entry. Note: This will not be checked against any song history (but added). LoadPlaylist: Returns the content of a playlist (file) directly. All tracks contained in the referenced playlist will actually be returned. Note: The playlists entries will not be checked against the song history (but added). Execute: Executes another script dynamically (recursive) and returns the entries as returned by that other script. Command: Executes the given control-command(s) and then goes to the next scriptline (returns no media entries). Advert: Returns the tracks as defined in the referenced advertising slot. RADIO42 Confidential 163 ProppFrexx ONAIR Placeholder: Returns a non-playable placeholder entry. Entry: The value of this field depends on the Mode selected. Sequential: References a media library to pick tracks from. Random: References a media library to pick tracks from. Cartwall: References a cartwall library to pick tracks from. LoadTrack: References a physical audio or playlist file to use. LoadPlaylist: References a physical playlist file to use. Execute: References a script library to execute. Command: References any control-command(s) to execute. Advert: References an Advert-Slot (as defined in the Advertising-Manager) to use. Placeholder: References a string defining the placeholder value to use. Count: Defines the number of entries to schedule (only used for mode Sequential, Random, Cartwall, Execute). E.g. if the Action is Random and Count is 3 this means, that 3 random tracks are returned by this script line taken from the media library as referenced by the Entry field. Options: Here you can specify various script line options and specific track related controlcommands to be executed with the tracks returned. Script-Options only: SupressHistoryCheck: Any history check will be supressed for the resulting tracks of that script-line. SupressAddHistory: The resulting tracks of that script-line will not be added to the script resp. global song history. ClearMediaEntryOptions: All existing track options will be cleared for the resulting tracks of that script-line. Note, that you can also define options directly for any given media entry (track) itself. ForceLibraryHistoryCheck: Forces to use the media library song history (if defined) even if the SupressHistoryCheck option is set. AsEmbeddedContainer: The resulting tracks of that script-line will be added as one embedded container (instead of individual entries). AsEmbeddedHookContainer: The resulting tracks of that script-line will be added as one embedded container using the defined tracks hook cue-points and using any defined media entry type related hook opener, closer and separators (instead of individual entries). Track-Options: ClearAllCuePoints (c): When the track is loaded to a DJ Player all the current cuepoints will be removed (which might lead to an ACPD afterwards). ClearAllEventEntries (e): When the track is loaded to a DJ Player all event-entries (incl. track-inserts) will be removed. ClearAllVolumePoints (v): When the track is loaded to a DJ Player all volume points will be removed. SupressACPD (d): When the track is loaded to a DJ Player ACDP (automatic cuepoint detection) will be turned off. RecalcACDP (r): When the track is loaded to a DJ Player ACPD will be forced regardless of existing cue-points. 164 RADIO42 Confidential WORKING WITH ProppFrexx ONAIR LoopEntry (L): The track should be looped once started (forces you to stop it manually). StopAtEnd (E): When 'AutoPlay' is active the playlist should stop after this track regardless (playlist needs to be continued manually from here). SupressFading (f): When the track is loaded to a DJ Player any existing volume-points will be ignored. SupressOverlay (o): When this flag is set and an Overlay or MODStream is about to start with the 'Soft' start type, this track will not be considered and the overlay will be delayed til the next track. SuppressGloablLogging (g): Tracks having this flag set will not be considered for the global log file. SuppressPlaylistLogging (p): Tracks having this flag set will not be considered for the playlist log file. SupressBacktiming (b): Tracks having this flag set will not be considered during the backtime calculation of the playlist. SkipDuringAutoPlay (S): When 'AutoPlay' is active this track should be skipped (not being played). UseHookCuePoints (H): Forces the track to use the defined hook cue-points instead of the regular ones. SupressTrackInsertTransition (i): Tracks having this flag set will not be considered for any automatic track-insert transition, even if their media entry type would qualify for that. AutoPlayNext (N): When 'AutoPlay' is not active and this track ends, the next track will be played automatically regarless. Note, this option can also be used for OverlayEntries (when 'ManualPlayout' is active)! StopAutoPlay (A): 'AutoPlay' will be deactivated. StartAutoPlay (a): 'AutoPlay' will be activated. KeepStreamLoading (l): URL-Tracks having this flag set will continue to try to establish a connection, even if when loaded to a player and the URL stream is unavailable; else the track will immediately return an error (and concidered unplayable). KeepStreamAlive (k): URL-Tracks having this flag set will continue to try to reconnect (after playback has started and the connection has dropped); else the track will immediately return an error (and concidered stopped). * the value in brackets is the short display value being used within the playlist window (option column). Filter: Allows you to define additional selection criterias when querying entries from a media library (only used for mode Sequential, Random, Cartwall). The same expressions are used as already used in the ‘Find Window’. Here is a description with some examples: The filter expression consists of a <prefix> and <criteria> (separated by a colon ‘:’). The <prefix> tells the parser what to search for and the <criteria> contains the actual value to look after. The following <prefix> are supported: 'title' or 't': title contains key (string) 'artist' or 'a': artist contains key (string) 'album' or 'l': album contains key (string) 'mood' or 'm': mood contains key (string) RADIO42 Confidential 165 ProppFrexx ONAIR 'grouping' or 'g': grouping contains key (string) 'isrc' or 'i': isrc contains key (string) 'rating' or 'r': rating contains key (numeric) 'bpm' or 'b': bpm greater than key (numeric) 'year' or 'y': year contains key (string) 'genre' or 'e': genre contains key (string) 'age1': performs a search on the file creation date (age in days, numeric) 'age2': performs a search on the file modification date (age in days, numeric) 'age3': performs a search on the file statistics last play date (age in days, numeric) 'count': performs a search on the file statistics play counter (number of plays, numeric) (if no prefix is given a title search is used) Combinations: Use '&' or '+' to combine multiple keys Exclusions: Use '!' in front of the <prefix> to negate the key. By default a case-insensitive contains match is used for the search. Use '=' in front of the <prefix> to perform a case-sensitive exact match serach. Note: The prefixes ‘bpm’ or ‘b’, ‘rating’ or ‘r’ as well as ‘age1’, ‘age2’, ‘age3’ and ‘count’ are somewhat special, as they perform a numeric evaluation of the <criteria> key. Which means the standard match performs a numeric ‘GreaterOrEqual’ comparison – whereas the exclusion performs a numeric ‘Less’ comparison. All other prefixes perform a case-insensitive string based ‘Contains’ comparison. Here are some examples: 't:hello & a:james' Will match, if the TITLE contains “hello” and the ARTIST contains “james”! 'b:120 + !b:131' Will match, if the BPM is between 120 and 130! 'r:80 + !r:81' Will match, if the RATING is exactly 80! 'r:40' Will match, if the RATING is greater or equal to 40! '!r:100' Will match, if the RATING is less than 100! 'r:40 + !r:61' Will match, if the RATING is between 40 and 60! 'r:40 + !r:61 & a:toto' Will match, if the RATING is between 40 and 60 and the ARTIST contains “toto”! Here is a more detailed overview about string vs. numeric filter expressions: 166 RADIO42 Confidential WORKING WITH ProppFrexx ONAIR a) numeric filter values for 'rating', 'bpm', 'age1', 'age2', 'age3' and 'count': ! : 'tag-value' should be less than 'key' = : 'tag-value' should be equal to 'key' != : 'tag-value' should not be equal to 'key' else 'tag-value' should be greater or equal to 'key' Example: "b:120" : bpm is greater or equal to 120 "!b:120" : bpm is less than 120 "=b:120" : bpm is exactly 120 "!=b:120" : bpm is not exactly 120 b) string filter values for 'title', 'artist', 'album', 'mood', 'grouping', 'isrc' and 'genre': ! : 'tag-value' should not contain 'key' (case-insensitive check) = : 'tag-value' should be equal to 'key' (case-sensitive check) != : 'tag-value' should not be equal to 'key' (case-sensitive check) else 'tag-value' should contain 'key' (case-insensitive check) Example: "t:paul" : title contains 'paul' (case-insensitive) "!t:paul" : title does not contain 'paul' (case-insensitive) "=t:Paul" : title is exactly 'Paul' (case-sensitive) "!=t:Paul" : title is not exactly 'Paul' (case-sensitive) c) string filter values for 'year' (starts with): ! : 'tag-value' should not start with 'key' (case-insensitive check) = : 'tag-value' should be equal to 'key' (case-sensitive check) != : 'tag-value' should not be equal to 'key' (case-sensitive check) else 'tag-value' should start with 'key' (case-insensitive check) Example: "y:197" : year starts with '197' "!y:197" : year does not start with '197' "=y:1970" : year is exactly '1970' "!=y:1970" : year is not exactly '1970' As the script filter rules might not guarantee, that any track at all in your selected media library matches the criteria’s, some maximum within the try-matching algorithm is implement. This means there is an upper limit of 2 times the number of tracks contained in your media lib or a maximum of 300 tries. If the script cannot determine a track which matches the filter criteria, it will take a next track anyhow. This is needed in order to prevent the script from not being able to deliver new tracks to a playlist. If you are using media libraries where the TAG data is not read from the related audio tracks at startup (unless you have specified the Force TAG reading option in the general RADIO42 Confidential 167 ProppFrexx ONAIR settings or using the synced folder feature) or the meta data is not present by any other means, the filter option might not work properly! Note: When using the Filter option you should make sure, that all meta data is available for all media entries in the related media libraries! As such the script evaluates this and might need to read the TAG data on-the-fly if needed. The result might be, that this on-the-fly TAG reading will cost time and performance (which might slow down the script execution significantly) – especially when a lot of tracks needs to be tested. So an advice would be to use the ProppFrexxPlaylist-Format (.pfp) to store your media entries in (and use the .pfp files as your media libraries) – as the .pfp playlist format is able to directly keeps all TAG data within its format and such no extra TAG reading might be needed. FixTime Elements FixTime Elements are items which should be scheduled at a certain time when the script executes. They are defined by a time value (given in minutes and seconds) which is checked whenever a playlist queries new tracks from the script. Meaning the effective system time respectively the calculated scheduled time for the entries queried is given and validated against all defined FixTime Elements. If a FixTime Element is due to be played for the given time it will be used in addition to the regular script line. As such, beside the regular tracks as returned by the script-lines those FixTime Elements might also be returned. The playlist then keeps track of these FixTime Elements and ensures, that they are played on-time as defined. FixTime Elements are therefore usefull, whenever you want to place an item to a playlist at a (repeated) fixed time of the hour, e.g. an hourly sweeper or station id or even a fixed interval of special anouncements etc. FixTime Elements however are not useful, if you want to play items at a certain time of the day (as only the minute and second part qualifies a FixTime Elements and the hour part is determined by the time the script-lines are effectively executed) – in such case you might use regular program scheduler entries or the overlay scheduler. The following dialog allows you to define FixTime Elements for a script. Figure 117: FixTime Script Elements Dialog A FixTime Element has the following properties: Fixed Element Time (mm:ss): The minute and second part at which the element should be scheduled next to the script execution time. E.g.: ‘30:00’ will schedule the element at the next half hour time slot. 168 RADIO42 Confidential WORKING WITH ProppFrexx ONAIR Start Type: Defines, if the element should start exactly at the defined Time (Fixed) or if it might be delayed (Soft). In case of 'Soft' start, the remaining playtime of a currently playing track will be evaluated. If the remaining playtime is less than the given Maximum Delay the current track will play til the end until this element is started. If the remaining time is bigger than the Maximum Delay the current track is stopped immediately and the element starts on time. Maximum Delay: When an element is defined as soft start (so it doesn't have to start at exactly that time) it might be delayed by this maximum number of seconds. When this element is about to be started the remaining time of the current track of the playlist is checked. If the remaining time is less than this maximum delay time, the current track will be played til the end before this element is started (which will then result in a delayed start). But if the remaining time is greater than this maximum delay time the current track is faded-out immediately and the element start will not be delayed. Note: Elements defined as fixed start will always start on time, but in case the element is defined as an Overlay, this value defines, if the current track will be stopped/ejected first or continues to play. Max. Remaining: When an element is defined as soft start (so it doesn't have to start at exactly that time) it might automatically be supressed/skipped. When this element is about to be started the remaining time of the current track of the playlist is checked. If the remaining time is greater than this maximum time, this element will automatically be stopped/ejected (and not even be played). Note: Set this value to 0 to supress this behaviour and always start this element delayed. Elements defined as fixed start will always ignore this value. Skip at Start: If checked, the element will not be executed initially when the script starts but only with the next occurrence. E.g. when you have set this option and the script starts at 15:00:00 and your element should repeat at 00:00 it will first be executed at 16:00:00, but not initially at 15:00:00! Note: Setting an element time to exactly a script start time should be no problem, but setting it close to a script start time might be problematic and might cause timing isues, so that the element is started late after the real first script track (as such elements would always be cued initially as a 2nd track)! E.g. avoid setting the start time to 00:01 if your script starts at e.g. 15:00:00. Repeat: If checked, the element will be repeated at every given next full minute and second else it will only be scheduled at the first occurrence of that time. As Overlay: If checked, the element will be started in parallel to other playlist tracks - else it will be started as a regual and separate entry (like any other playlist entry). An ‘as overlay’ entry will not suspend the current track of the playlist and as such will be played in parallel to the other track(s), whereas a regular element will play as its own (just like any other playlist item). Attenuation: If an element is defined as an overlay you can attenuate the volume of the current tracks playing in parallel. This value defines the attenuation level in dB of the other tracks (not this element). Beside the above options a FixTime Element consists of the same parameters as a regular script line, which are: Mode, Entry, Count, Option, Filter (see above). RADIO42 Confidential 169 ProppFrexx ONAIR More Stuff This category contains even more stuff to configure. Figure 118: More Stuff Configuration RSS, Message Center, Web Browser RSS Feeds: Specify the default RSS Feeds which should be available for all users. Seperate multiple entries with a semicolon (;). Each entry can be either only the http address of the feed or might be preceeded by an optional name of the feed followed by a pipe symbol. E.g.: “http://feeds.reuters.com/reuters/topNews” or “Reuters Top News|http://feeds.reuters.com/reuters/topNews” Refresh RSS every: Defines the rate in minutes how often the RSS Reader will refresh/read the feed. Set this value to 0 to disable automatic refresh. Open RSS Link in external Browser: If checked, external links to the RSS Feed will be opened in an external browser - else they will be opened in the internal web browser. Add Moderator Text to Message Center: If checked and a new track is loaded to a DJ Player and the meta data of that track contains a moderator text this text will be added to the message center. Add Alert Text to Message Center: If checked any new alert and reminder message will be added to the message center. Show Message Center on New Messages: If checked and a new message is added to the message center the message center will be shown. Open Web URLs in external Browser: If checked, web URLs will be opened in an external browser - else they will be opened in the internal web browser. Web URLs: Specify the default Web URLs which should be available for all users in the web browser. Seperate multiple entries with a semicolon (;). Each entry has to be only the http address of the web site to use. E.g.: “http://www.radio42.com; http://www.proppfrexx.de” MODStream Monitoring 170 RADIO42 Confidential WORKING WITH ProppFrexx ONAIR Check MODStream eyery: Defines the interval in seconds how often the MODStream will try to connect to the given URL address when monitoring is started. Start Delay Time: Defines the time in seconds to wait before the MODStream actually starts playing after it was connected. This delay time allows a user to manually cancel the start in order to not interrupt the current program. Delay with: Select all the media types for which a start of a MODStream should automatically be delayed. Show Overlay Countdown: If checked a countdown will be shown in the ONAIR Time clock until the overlay is started. Stream Timeout: Defines the time in seconds until a connected MODStream automatically disconnects and stops the MODStream player in case silence is detected. Set to 0 to disable silence detection for MODStreams. When a MODStream is playing and the level is for more than this time below the defined silence threshold, the MODStream player is closed. Update Song Title: If checked, MODStream title changes will be used to update the streaming server song titles. Any other Stuff Auto Lock ProppFrexx UI: Defines the time in minutes after ProppFrexx ONAIR will automatically lock its user interface when no user activity is present. Set this value to 0 to disable automatic locking. If UAC is disabled the Master Password is used to unlock the User Interface – else the user login will unlock it. Playback History Count: Defines the number of maximum entries in the playback history. Set this value to 0 to disable the playback history. The playback history can be displayed and modified at any time by clicking on caption arrow in the ribbon main header AutoPlay group. Exclude: Select all the media entry types which should NOT be added to the playback history. Overlay and Advertising Management Advertising Storage Path: Specifies the directory which contains your advertising management data, which is the directory used by the ProppFrexx Advertising Manager application and the folder in which the overlay scheduler calendar file is placed. Note: The overlay scheduler calendar file is also placed into this folder. So even when you are not using the advertising functionality (but only the overlay scheduler) you MUST provide a folder here! Stand-Alone Overlays: If checked, the overlay scheduler works independed from the program scheduler. If unchecked, the overlay scheduler only works when also the program scheduer is running. RADIO42 Confidential 171 ProppFrexx ONAIR WORKING WITH MEDIA LIBRARIES A media library is a collection (list) of media entries. Besides keeping a reference to the physical location of the related audio file, a media entry also keeps the meta data associated to it. The meta data for a media entry might come from different sources, e.g. the TAG data of the audio file itself, a dedicated .pfmd meta data file stored along side with the audio file, a dedicated meta data database table or it might come directly from the media library itself (whereas not all types of media libraries do actually support this, see below). Media libraries are used mainly at two places: 1. Within Scripts to automatically query new tracks to a playlist whenever needed 2. Within the Find-Window to quickly find and locate a certain media entry (track). As said: A media library is a collection (list) of media entries. So what is a media entry? A media entry is a single object mainly keeping a reference to the physical location of a playable audio track. At least that’s all it needs. But a media entry is effectively a bit more, as it also keeps the meta data associated with it. Meta Data might be devided into two main groups: a) TAG data assigned to the track (like the title, artist, album, duration, writer etc.) and b) Additional Meta Data (like cue-points, hooks, track options, moderator info etc.) Where a) is typically present for most tracks and commonly available for most standard media players (like Winamp, Windows Media Player, iTunes etc.); b) is very specific to on-air playout systems and often not available as standardized information. As such the additional meta data might also be something very specific for ProppFrexx ONAIR only. A details list of meta data used by ProppFrexx ONAIR is given below. Media libraries might be small or large (depending for what they are actually used). There is no real limit of how many entries one media library might contain (the actual limit is effectively over 2.4 billion entries per library). However, it is typically usefull to group and organize your tracks into multiple media libraries, e.g. grouped by genre, age, type of tracks etc. Therefore the same physical track might also be present within multiple media libraries. As such all your defined media library entries build your entire logical ‘repository’ or ‘database’ (name it as you like) of available tracks which can be used wherever you want. However, you might also operate ProppFrexx ONAIR even without any media library defined at all. In such case you simply can not search for tracks, can not use media libraries within scripts and would have to add tracks to your playlists manually (e.g. by dragging them from the Windows explorer over to a playlist window). However, I assume you want to use media libraries! ProppFrexx ONAIR basically supports three main media library sources to obtain the list of media entries from (types of media libraries; see below for details) which can all be used in parallel: 1. Playlist based Media Libraries A standard playlist (e.g. a .pfp or .m3u) file is used as one media library. Each playlist file entry is used as a media entry within the media library. You can use different playlist files to use multiple/different media libraries. The media library name is taken from the playlist file name. 2. Folder based Media Libraries A certain base folder (directory) is used as one media library. Any audio file within this base folder and any sub-folder is used as a media entry within the media library. You can use different base folders to use multiple/different media libraries. The media library 172 RADIO42 Confidential WORKING WITH MEDIA LIBRARIES name is taken from the base folder name. 3. Database based Media Libraries A certain database table (or view) is used as one media library. Each row within the database table is used as a media entry within the media library. You can use different database tables resp. views to use multiple/different media libraries. The media library name is taken from the database table name. ProppFrexx ONAIR maintains all media libraries inside main memory! When a media library is (re)loaded all related entries are read in from the related source (of course only the reference location, TAG and meta data and NOT the physical audio file itself). Once loaded, the source isn’t touched during normal operation (access). A media library (with all its media entries) is (re)loaded into main memory: initially when the Media Library is defined at initial startup of ProppFrexx ONAIR (for all defined Media Libraries) automatically at a certain time (if enabled/configured) automatically when a Script is started (the list of libraries to reload can be specified) automatically when the ‘AutoWatch’ feature is enabled (only available for playlist and folder based libraries) and the related source is changed externally manually via a specific control-command This means that once a media library is loaded and ProppFrexx is accessing a media library it doesn’t touch the underlying source (e.g. the playlist file, the database table or folder structure); instead ProppFrexx only accesses the cached main memory image (the loaded media library entries). This has noumerous advantages, like: You can change the source of a media library externally (e.g. the playlist file, the database table or folder structure) at any time without affecting the currently loaded media entries. ProppFrexx will continue to use the cached media entries up until the related media library is (re)loaded. E.g. you can define a ‘daily’ media library which can be maintained/updated externally during the day, but is only (re)loaded once in the night. Access to the media entries (e.g. searching, filtering etc.) is much faster than any direct access to the source (e.g. a database table) and is also independent of the type of media library. Once a media library was loaded successfully into memory the external source isn’t needed anymore, e.g. even if your external source would become unavailable (e.g. because of a database backup, maintenance of a storage device etc.) the media entries are still available. But this also means that: External changes to the source of a media library (e.g. the playlist file, the database table or folder structure) are not immediately visible within ProppFrexx, but only available once the media library is (re)loaded (except you are using the ‘AutoWatch’ feature). External changes to the TAG or meta data of a loaded media entry might also not always be immediately visible within ProppFrexx (for search or filter operations), but only available once the media library is (re)loaded. But if your media library wouldn’t contain any TAG or meta data directly those would need to be loaded anyhow once a library entry is accessed (e.g. when a search or filter operation is performed) which might slow down the resp. operation. Note: A media library is kept cached in main memory until (re)loaded. Changes to RADIO42 Confidential 173 ProppFrexx ONAIR the external source will only be ‘visible’ within ProppFrexx once the media library is (re)loaded! Using very large media libraries might therefore result in a higher memory usage. To overcome memory limits (if you experience those – which should rarely be the case) you might use Remote Media Libraries (see below). However, if you make changes to your media library entries from within ProppFrexx ONAIR internally, those changes are immediately available! The question now is: How do I define a media library and where does it get it tracks from? Media Libraries can be created, modified, edited (maintained) directly from within ProppFrexx ONAIR. The standard playlist window is the point where you can do so. E.g. select ‘New’ from the ribbon main menu to open a new and empty playlist. Now you can manually add any numer of tracks to that playlist window and later on save it, e.g. to a supported playlist file. Once a playlist file is created you might use that as a media library. Or if you have already defined a media library, select the ‘Media Libraries’ sub-menu from the ‘Open’ menu of the main ribbon to open an existing media library. This will open a new playlist wndow showing all tracks contained within this media library. You can now change such playlist and as such the underlying media library will be changed accordingly! This is also true for database based media libraries, e.g. just create an empty table and reference this as a new media library. Database based media libraries can as such also be opened and maintained in the playlist window (new tracks added, modified or removed will update the underlying database table accordingly). Folder based media libraries don’t need to be maintained from within ProppFrexx, you simply manage them with your Windows Explorer. Types of Media Libraries ProppFrexx ONAIR supports the following media library types: Playlist based Media Libraries The list of media entries is directly gathered from the playlist file itself. As such a playlist file can be seen as a 'small' but effective list containing all entries for this media library. When a playlist based media library is loaded, the resp. playlist file is read-in with all its information. ProppFrexx supports various different playlist file formats, such as .m3u, .pls, .wpl, .smil, .xml, .xspf, .mpl, .pfp, .dbf. Depending on the playlist file format used, a playlist file might contain none, some or all meta data. E.g. a .m3u playlist file basically only contains the file location of a track, but no additional meta data - as such the meta data must be read-in from any of the other available sources, typically the audio files TAG data. A .pfp (ProppFrexx Playlist Format) playlist on the other hand might contain all meta data as such this is the recommended playlist format to be used with media libraries - as only this playlist format might ensure, that additional TAG reading is not needed during any search and find operation as the meta data might already be stored inside this playlist format! Note: A .pfp playlist format (even if capable of saving all meta data) can of course only save those meta data as available at that time. I.e. if you create a new .pfp playlist and want to make sure, that it really contains all meta data, you need to also make sure, that at the time you save the .pfp file all the TAG data was already readin! Depending on your general TAG reading settings (see above) this might not be the case, as e.g. the default settings only reads in TAG data once a entry becomes visible within a playlist window. As such you might want to perform a manual and 174 RADIO42 Confidential WORKING WITH MEDIA LIBRARIES dedicated TAG reading. You can do this via the playlist windows context menu (Selection – (Re)Read TAGs). Advantages: - very fast loading time can be maintained manually Disadvantages: - might not contain meta data must be maintained manually Folder based Media Libraries The list of media entries is determined by all audio tracks contained in the defined folder incl. any sub-folders. When a folder based media library is loaded, the resp. folder and any sub-folders are scanned and read-in. Any meta data must be read-in in the background for all audio files found. When using the 'Keep _synced.pfp Playlist with Folders' option (which is set by default) a .pfp playlist file is stored in the base folder keeping that information what meta data has been read-in so far to avoid a full (re)scan and TAG reading each time such a media library is (re)loaded. When you initially define a new folder based media library this folder an all its sub-directories are scanned for audio files. In addition for each found audio file the meta data TAGs are being read. This means the TAGs are read for this audio file (as such the file is opened and the TAGs, e.g. ID3, APE, WMA, RIFF, OGG...whatsoever are being read in). This scanning and TAG reading is done only once and initially when using a folder based media library. Note, that this might take some time (depending on your harddisk speed)! Once all files in the respective folder(s) have been read in (according to the above mentioned option) a '_synced_.pfp' file is written to the defined media library folder. This special playlist file now contains all tracks found in the respective folder incl. and meta data read. As such, when you (re)start ProppFrexx ONAIR again, it would reload your folder based media library again. But instead of doing the scanning and TAG reading all over again - this time ProppFrexx will actually first read the '_synced_.pfp' file (if available) and only scan the folder for changes or new audio files. To monitor this background scanning and TAG reading process you might click on the small red Busy Indicator icon at the very left bottom of the main screen. This will open a Worker Thread Status dialog. Here you can monitor the number of outstanding background Entry TAG Reader tasks. They should count down to 0 when all files have been fully read in. As said the TAG reading is an initial task to read in all files initially from a newly defined folder based media library. If you shutdown ProppFrexx ONAIR before this scanning and TAG reading process has been fully finished, ProppFrexx would save 'what it has so far scanned' and continue with the next (re)start. Advantages: - can be maintained automatically incl. an auto watch feature (new files copied to the folder are autom. added) average loading time Disadvantages: - long initial scanning time does not contain any meta data RADIO42 Confidential 175 ProppFrexx ONAIR Database based Media Libraries The list of media entries is determined by a special SQL database table or view (each row in such a table references one media entry). When a database based media library is loaded, the resp. table is selected and read-in. The table structue is defined in the Appendix. Most columns are optional columns and thus could be null. The meta data is defined as well in certain table columns. Advantages: - fast loading time can be maintained manually Disadvantages: - might not contain meta data must be maintained manually additional SQL know how needed Remote Media Libraries A remote media library is a media library defined and existing on a ProppFrexx Media Library Server. The ProppFrexx Media Library Server is a small application shipped with ProppFrexx ONAIR. It’s available only in certain editions. The ProppFrexx Media Library Server can sit/run on the same machine or on a different machine wthin your LAN and hosts any of the above media library types by its own (you define the media libraries on the server and the server loads these media libraries and makes them available for ProppFrexx ONAIR clients). As such ProppFrexx ONAIR would access such media libraries remotely. In large environments this allows you to detach the library management to a dedicated remote server. Advantages: - perfect for large setups decouples playout a media library management allows remote audio access stored on a central server only Disadvantages: - more complex to maintain Creating and Editing Media Libraries You can use ProppFrexx ONAIR to directly create or edit media libraries. Note, that there is a special ‘Open – Media Libraries’ sub-menu contained in the main ribbon which can be used to open an existing media library for direct editing (e.g. to edit a playlist or database based media library). This will actually open the respective media library with its media entries as a playlist window (the entries within the playlist window will represent the entries within the media library). If you now make changes within that playlist window (e.g. add or remove media entries), the underlying media library is modified accordingly when you ‘Save’ it. Note, that when you make changes to the meta data of an entry (e.g. by using the TAG Editor or any Player) those changes will also be saved to the underlying media library as well as might also be saved to the respective media entry file. 176 RADIO42 Confidential WORKING WITH MEDIA LIBRARIES Playlist based media libraries might be created by using the ‘New’ menu item contained in the main ribbon to create a new and empty playlist window. After manually adding entries to such playlist you might save it to a new playlist file – which can then be used as a new media library. Database based media library can not be created directly. You need to manually create an according database table (which might be empty) or even define an appropriate database view manually. Once such table or view exists you might define it as a media library within ProppFrexx ONAIR. Now you can use it as explained above to edit it. Folder based media libraries can also not be created or edited directly, as they just reference a base folder anyhow (any all contained files are seen as its media entries). So you need to maintain the files within that folder manually. However, you can still use the above ‘Open – Media Libraries’ sub-menu to open such library. If you physically delete entries from within such playlist window, that folder based media library is updated accordingly. As remote media libraries are maintained on a ProppFrexx Media Library Server you need to manage the media libraries used on the server accordingly. I.e. you can use ProppFrexx ONAIR to create or edit the media libraries as used by the server. About Media Entries As already mentioned a media entry is a single object containing information about a logial track, e.g. as loaded by a media library. It keeps the following information (the only mandatory attribute is the ‘Filename’ all other attributes are optional). When a media library resp. the related media entries are loaded whatever TAG and meta data is available will be loaded with it as available from the media library source. If no TAG or meta data is available from the related media library source these missing information might need to be obtained at a later stage (see the TAG and Meta Data Reading chapter below). 1. Always available data: Filename: The fully qualified path and filename (location, URI, UNC) of the physical file. The extension of the file name might determine the format and type of media entry. E.g. any supported audio file extension will denote a playable audio entry; any supported playlist extension will denote a playable embedded playlist entry; a recognized document extension (.txt, .rtf, .html, .docx, .odt) or any other extension will denote a non-playable entry. The prefix (http: or ftp:) of an audio file might denote, if the audio should be streamed rather than directly played. Depending on the type of media library being used the file name might be converted into a fully qualified file name and path as needed (in general ProppFrexx ONAIR supports absolute and relative locations as well as UNC paths): Playlist based Media Libraries: If the file name given in the playlist is in relative notations it will be expanded to its fully qualified (absolute) notation by using the directory of the playlist file as the base folder. In any other case the file name is already given in absolute or UNC notation and doesn’t need to be expanded. Folder based Media Libraries: The file name is already scanned as fully qualified and doesn’t need to be expanded. Database based Media Libraries: If the file name given in the table column is in relative notations it will be expanded to its fully qualified (absolute) notation by using the base directory(ies) as specified in the database connection setup dialog. In any other case the file name is already given in absolute or UNC RADIO42 Confidential 177 ProppFrexx ONAIR notation and doesn’t need to be expanded. It is however suggested to use absolute or UNC file names within a database table. Remote Media Libraries: If the file name given by the remote server is in relative notations it will be expanded to its fully qualified (absolute) notation by using the base directory(ies) as specified in the remote connection setup dialog. In any other case the file name is already given in absolute or UNC notation and doesn’t need to be expanded. Note, that you might specify within the ProppFrexx Media Library Server application how a file name should be transmitted to a client. It is however suggested to use absolute or UNC file names within a remote media library. MediaCollection: An optional list of media entries to compose an embedded entry (only used internally). Trackname: The default name of the media entry (if nothing else is available this defaults to the filename without its extension, else it is composed as ‘Artist - Title’). 2. Basic TAG Data: Duration: The duration of the media entry (ie. the nominal length of the track). Title: The title/name of the media entry. Artist: The artist/performer of the media entry. Album: The name of the album of the media entry. Album Artist: The name of the album of the media entry. Track: The track number of the media entry (position and/or total number of a track in the source, e.g. a CD). Disk: The disc number of the media entry (position and/or total number of discs in the source, e.g. a CD). Genre: The genre(s) of the media entry. Year: The release date of the media entry. Grouping: The grouping or category of the media entry. Mood: The mood description of the media entry. Copyright: The copyright string of the media entry. Encoded By: The encoded by value of the media entry. Publisher: The publisher or record label of the media entry. Composer: The composer of the media entry. Conductor: The conductor of the media entry. Lyricist: The lyricist or text writer of the media entry. Remixer: The remixer or special editor of the media entry. Producer: The producer of the media entry. Comment: A general comment description related to the media entry. Rating: The user rating value of the media entry. ProppFrexx expects, that the rating value is numeric and scales from 0 to 100 (0=Unknown, 1-20=Poor, 21-40=Average, 41-60=Good, 61-80=VeryGood, 81-100=Excelent)! This except for the ID3v2 POPM 178 RADIO42 Confidential WORKING WITH MEDIA LIBRARIES frame, which scales from 0 to 255 and is automatically transformed internally to a 0-100 value. ISRC: The international standard recording code of the media entry. BPM: The numeric beat per minute value of the media entry. Replaygain_Track_Gain: The tracks replay gain adjustment value (in dB as a numeric value). Replaygain_Track_Peak: The tracks peak level value as a numeric value (between 0.0, silence and 1.0, maximum – or above). TAGs: Any arbitrary list of all native TAG objects contained in the audio file. Here is a list of fully supported TAG attributes as used by ProppFrexx for the different TAG formats according to the above TAG data (any other available TAG attributes might also be read-in and would be available read-only): Title ID3v2: TIT2, TT2 OGG: TITLE APE: Title MP4: ©nam ASF: WM/Title RIFF: INAM Alternatives: -Artist ID3v2: TPE1, TP1 OGG: ARTIST APE: Artist MP4: ©ART ASF: WM/Author RIFF: IART Alternatives: ISTR, AUTHOR Album ID3v2: TALB, TAL OGG: ALBUM APE: Album MP4: ©alb ASF: WM/AlbumTitle RIFF: IPRD Alternatives: -AlbumArtist ID3v2: TPE2, TP2 OGG: ALBUMARTIST APE: Album Artist MP4: aART ASF: WM/AlbumArtist RIFF: ISBJ Alternatives: H2_ALBUMARTIST, REMIXER, ENSEMBLE, ORCHESTRA, BAND, PERFORMER, iaar Track (numbers) ID3v2: TRCK, TRK OGG: TRACKNUMBER APE: Track MP4: trkn ASF: WM/TrackNumber RIFF: IPRT, ITRK RADIO42 Confidential 179 ProppFrexx ONAIR Alternatives: TRACKNUM Disc (numbers) ID3v2: TPOS, TPA OGG: DISCNUMBER APE: Disc MP4: disk ASF: WM/PartOfSet RIFF: IFRM Alternatives: DISCNUM Year ID3v2: TYER, TYE OGG: DATE APE: Year MP4: ©day ASF: WM/Year RIFF: ICRD Alternatives: TDRC, RELEASEDATE, RELEASE DATE Genre ID3v2: TCON, TCO OGG: GENRE APE: Genre MP4: ©gen ASF: WM/Genre RIFF: IGNR Alternatives: -Copyright ID3v2: TCOP, TCR OGG: COPYRIGHT APE: Copyright MP4: cprt ASF: Copyright RIFF: ICOP Alternatives: PROVIDER, WM/Provider EncodedBy ID3v2: TENC, TEN OGG: ENCODEDBY APE: EncodedBy MP4: ©too ASF: WM/EncodedBy RIFF: ISFT Alternatives: VERSION, ENCODED BY, ENCODED-BY, ENCODER, SOFTWARE, TOOL Publisher ID3v2: TPUB, TPB OGG: LABEL APE: Label MP4: ----:com.apple.iTunes:LABEL ASF: WM/Publisher RIFF: ICMS Alternatives: PUBLISHER, ORIGINALSOURCE, VENDOR Composer ID3v2: TCOM, TCM 180 RADIO42 Confidential WORKING WITH MEDIA LIBRARIES OGG: COMPOSER APE: Composer MP4: ©wrt ASF: WM/Composer RIFF: IENG Alternatives: ORGANIZATION, WRITER, IMUS Conductor ID3v2: TPE3, TP3 OGG: CONDUCTOR APE: Conductor MP4: ----:com.apple.iTunes:CONDUCTOR ASF: WM/Conductor RIFF: ITCH Alternatives: -Lyricist ID3v2: TEXT, TXT OGG: LYRICIST APE: Lyricist MP4: ----:com.apple.iTunes:LYRICIST ASF: WM/Writer RIFF: IWRI Alternatives: TEXTER, SONGWRITER Remixer ID3v2: TPE4, TP4 OGG: REMIXER APE: MixArtist MP4: ----:com.apple.iTunes:REMIXER ASF: WM/ModifiedBy RIFF: IEDT Alternatives: ModifiedBy Producer ID3v2: TIPL, IPL OGG: PRODUCER APE: Producer MP4: ----:com.apple.iTunes:PRODUCER ASF: WM/Producer RIFF: IPRO Alternatives: -Comment ID3v2: COMM, COM OGG: COMMENT APE: Comment MP4: ©cmt ASF: WM/Description RIFF: ICMT Alternatives: DESCRIPTION Grouping ID3v2: TIT1, TT1 OGG: GROUPING APE: Grouping MP4: ©grp ASF: WM/ContentGroupDescription RIFF: ISRF Alternatives: GROUP RADIO42 Confidential 181 ProppFrexx ONAIR Mood ID3v2: TMOO OGG: MOOD APE: Mood MP4: ----:com.apple.iTunes:MOOD ASF: WM/Mood RIFF: IKEY Alternatives: -Rating ID3v2: POPM OGG: RATING APE: Rating MP4: rtng ASF: WM/SharedUserRating RIFF: ISHP Alternatives: TXXX:RATING, IRTD ISRC ID3v2: TSCR OGG: ISRC APE: ISRC MP4: ----:com.apple.iTunes:ISRC ASF: WM/ISRC RIFF: ISRC Alternatives: -BPM ID3v2: TBPM, TBP OGG: BPM APE: BPM MP4: ----:com.apple.iTunes:BPM ASF: WM/BeatsPerMinute RIFF: IBPM Alternatives: TEMPO, IDPI, tmpo, H2_BPM, BEATSPERMINUTE Replaygain_Track_Gain ID3v2: TXXX:replaygain_track_gain OGG: replaygain_track_gain APE: replaygain_track_gain MP4: ----:com.apple.iTunes:replaygain_track_gain ASF: replaygain_track_gain RIFF: IRGG Alternatives: itgl Replaygain_Track_Peak ID3v2: TXXX:replaygain_track_peak OGG: replaygain_track_peak APE: replaygain_track_peak MP4: ----:com.apple.iTunes:replaygain_track_peak ASF: replaygain_track_peak RIFF: IRGP Alternatives: -These TAG attributes have been carefully selected, as they reflect the defacto standard as supported by most tag editing applications, and/or the ProppFrexx Meta Data Editor. 182 RADIO42 Confidential WORKING WITH MEDIA LIBRARIES Note, that if you don't want to write TAG data directly to the audio file, ProppFrexx also supports reading/writing meta data to a separate .pfmd files along with the audio file or even from a dedicated meta data database table. Cover Art (Pictures): An image associated with the media entry. The cover art image is either obtained directly from the audio files TAG data or (if the audio file doesn’t contain any pictures) gathered from the path location of the audio file. In this case the following is tested in the following order: Track-Image: The filename extension is changed to .jpg, .gif, .png or .bmp. Folder-Image: The directory of the audio file is scanned for a ‘Folder.jpg’ or ‘Album*.jpg’ file. Album-Image: The ‘Album’ tag name is extended by ‘.jpg’ and the directory of the audio file is scanned for such file. Other-Image: The directory of the audio file is scanned for any .jpg, .gif, .png or .bmp file. The Basic TAG Data might be obtained/saved from/to the following sources: The audio files standard TAGs (e.g. ID3, WMA, OGG, APE, etc.) A .pfp playlist file A database based media library (columns) A database based meta data table (columns) A separate ProppFrexx Meta Data file (.pfmd) 3. Additional Meta Data: GUID: A global unique identifier of the media entry (might be empty if not available). Might be obtained/saved from/to either a .pfp playlist file, a database based or remote media library, a .pfmd file or the ‘ProppFrexx:’ user TAG. In any case, ProppFrexx might create a GUID for any new entry if not already available. This allows you uniquely identify a media entry either by its Filename or by its GUID. EntryType: The type of media entry used to further classify the track within ProppFrexx ONAIR. This attribute is rather important and a default entry type might be defined per media library for all entries having no type set so far. The entry type might for example be used within ProppFrexx ONAIR to apply different mixing settings; filter certain entries for logging or streaming song title updates; perform automatic track insert transitions; colorize entries within cartwalls and playlists etc. Options: The list of media entry options (see Script-Line Options for details) which are permanently assigned to a media entry. Tempo: The initial track tempo adjustment in percent (default is 0, no tempo change). Gain: The initial track gain adjustment in percent (default is 0, no gain change). TrackEndIndicator: Any single character which might describe the ending of the track (e.g. ‘|’ for a cold, immediate ending or ‘\’ for a faded ending). ModeratorText: An optional info text which might be used by the DJ or presenter. CueIn: The cue-in position of the media entry (the effective start position of the track). FullLevel: The position where the full volume level should be reached. If set, the tracks volume is ramped between CueIn and this position (when UseFading is used). Ramp: The first intro position of the media entry (where the intro part of the track ends). Ramp2: The second intro position of the media entry (where an alternative intro part of the track ends). RADIO42 Confidential 183 ProppFrexx ONAIR Outro: The outro position of the media entry (where the ending part of the track starts). FadeOut: The position where the volume level should start fading out. If set, the tracks volume is ramped between this position and CueOut (when UseFading is used). Next: The position of the media entry where a next track should start playing. CueOut: The cue-out position of the media entry (the effective stop position of the track). CuePoints: A list of an alternative set of cue-points (CueIn, FullLevel, Ramp, Ramp2, Outro, FadeOut, Next, CueOut) – e.g. used to store Hook cue-points. VolumePoints: A list of additional volume points (consisting of a position and a level value) which in total might describe a volume envelope for the media entry. EventEntries: A list of event entries (consisting of a position, an event type and an event parameter value) which might trigger a certain action at the event position. The following event entry types do exist: TempoChange: The tracks tempo will be changed at this position to a new value. FXChange: A special FX (e.g. Chorus, Echo, Flanger etc.) will be turned on or off at that position. TrackInsert: A media entry will be started (played) in parallal (overlayed) at that position. Note, this track insert will fully play til its end, independend of the duration of this track. PlaylistInsert: A playlist file will be started (played) as an embedded entry (all playlist entries as one continuous mix) in parallal (overlayed) at that position. Note, this playlist insert will fully play til its end, independend of the duration of this track. ExecuteCommand: The given control-command(s) will be executed at this position. SoundBed: Defines a general soundbed file to be used for this entire track (plus an optional attenuation value to be used for this entire track). The soundbed file will be played looped as long as the media entry is playling. HotstartPositions: A list of up to ten positions which can be used to quickly jump to that position. LoopPoints: A list of loop entries (consisting of a loop type and a loop start and lopp end position value) which might be used with the integrated Loop Sampler. The loop start and end position denote a range within the media entry which can either be looped in the sampler or skipped while playback. The Additional Meta Data might be obtained/saved from/to the following sources: A .pfp playlist file A database based media library (columns) A database based meta data table (columns) A ProppFrexx Meta Data (.pfmd) file A special ‘proppfrexx:’ user TAG attribute within the audio file Depending on the geneal setting option Force MetaData Reading, additional meta data has priority over playlist based meta data and is performed in the following order until found: Default: 184 RADIO42 Confidential WORKING WITH MEDIA LIBRARIES 1. Playlist based meta data 2. Meta Data File (.pfmd) 3. Meta Data TAG (proppfrexx) Force MetaData Reading: 1. Meta Data TAG (proppfrexx) 2. Meta Data File (.pfmd) 3. Playlist based meta data Note: only in effect, if the Use MetaData File option is set. Accessing Media Libraries Reloading Media Libraries TAG and Meta Data Reading Editing Media Entries The Find Window The Directory Explorer RADIO42 Confidential 185 ProppFrexx ONAIR WORKING WITH PLAYLISTS More to come soon… The Playlist Window The DJ Players The PFL Player The Segue-Editor (Multi-Track-Editor) The Segue-Editor is invoked from the playlist via Alt+F11 or the context menu, starting with the currently selected/focused track in the playlist. It allows you to define the segue/mix of two subsequent tracks in a visual fashion. The first (current) track is shown in green whereas the next track is shown in blue. You might navigate through the tracks within the underlying playlist by using the „Previous” and „Next” button in the upper left of the toolbar. If one of these two ‘main’ playlist tracks contains any track or playlist insert events, those inserts are shown as separate tracks in red. Figure 119: The Segue-Editor (Multi-Track-Editor) You might hover over the icons in the segue editor to see the tooltips and the keyboard short cuts. To start playback (PFL) you might use the „Play/Pause First” (Space) button or the „Play/Pause Next” (Shift+Space) button. 186 RADIO42 Confidential WORKING WITH PLAYLISTS You can position the current playback position by simply clicking to upper-half of the related WaveForm. So using „Space” (Play/Pause First) will then start the PFL playback from the current position of the ‘First’ track, whereas using „Shift+Space” (Play/Pause Next) will start the PFL playback from the current position of the ‘Next’ track. All functions in the bottom toolbar will relate to the currently selected track. You select a track, by simply clicking on it – the selected track will then also be shown in the bottom toolbar (to the very left). Adding new ‘track inserts’ can be performed via Drag&Drop from the windows explorer or you might invoke the WaveForm context menu and select the „Events” item. Moving the tracks can be done via the mouse or via the two arrow buttons in the bottom toolbar (which again relate to the selected track). Note, that you can (of course) not move the ‘First’ track. You might also Drag&Move any WaveForm marker directly, by clicking in the lower-half of the WaveForm. New Volume-Points might be added by double-clicking to the upper-half of the WaveForm. When double-clicking to a location where a volume-point already exists will remove that volume-point. As such, a double-click to the upper-half of WaveForm adds/removes volume-points. When holding the „Alt” key and clicking to the WaveForm you can directly set the Ramp resp. Outro cue-point. If you are in the first part of the track, Ramp will be set. If you are in the last part of the track, Outro will be set. When holding the „Shift” key and clicking to the WaveForm you can directly set the CueIn resp. FadeOut/Next cue-point. If you are in the first part of the track, CueIn will be set. If you are in the last part of the track, FadeOut/Next will be set. So all WaveForm operations are supported as already supported in the DJ/PFLPlayer window. Clicking on the „Trackname” underneath a WaveForm opens the popup window, which lets you directly set: - the initial track tempo (the WaveForm will be adjusted immediately) - the initial track gain - the current track position can be aligned using the JogWheel - the cue-points can be set directly - Automatic Cue-Point Detection (right-click to remove all Cue-Points) - Save Meta Data as TAGs - Save Meta Data as File Note: Setting the tempo and gain is a bit different as in the DJ/PFLPlayer. In the DJ/PFLPlayer this will only change the current gain/tempo, but will not set the initial track gain/tempo permanently. So in the DJ/PFLPlayer you would have to right-click on the gain/tempo to invoke the context menu to permanently set the initial gain/tempo. But here changing the tempo and gain immediately sets the initial tempo/gain permanently! A right-click on the „Trackname” underneath a WaveForm shows the effective playtime of the track as long as clicked. Depending on the power/speed of your machine some operations (like zooming or moving or changing the tempo) might take a bit as the WaveForms and their layout/position is always rendered on-the-fly in real-time. So be a bit patient when you discover some slowmovements. RADIO42 Confidential 187 ProppFrexx ONAIR When you have made changes to an ‘Insert Tracks’ you will be asked, if you want to save those changes to the audio file TAGs resp. to a meta data file. This is because any track insert event just stores the track insert location. So if you made changes to the meta data of such a track insert (eg. to the cue-points), those can only be made persistent by saving them to the TAG data of the audio file or to a separate meta data file! The Quick Monitor Player The Cross-Fader The Beat Display Direct Voice-Tracking Live-Assist Operations Automated and Scheduler Operations Using the Trackboard 188 RADIO42 Confidential WORKING WITH CARTWALLS WORKING WITH CARTWALLS More to come soon… RADIO42 Confidential 189 ProppFrexx ONAIR STREAMING TO THE NETWORK More to come soon… 190 RADIO42 Confidential AUTOMATION AUTOMATION ProppFrexx uses scheduling a bit different than other systems, as it has a complete 'Outlook like' scheduler build in. In this scheduler you can define so called 'Programs'. A 'Program' is a scheduler entry, which defines when (at what time and recurrence) a certain 'Script' should be executed. When a 'Program' executes (because the scheduler is running and the defined start time of it is reached, and as such you are in automation mode), then the 'Program' always automatically opens a new playlist window and closes any other open (older) playlist windows automatically. The scheduler then executes the 'Script' associated with the 'Program' in this newly opened playlist window. This ensures much more precise scheduling to the second and also decouples the playlists - so that only have to care of one program within one playlist window. So the 'Script' (which is defined in the 'Program') now executes in this new playlist window and automatically schedules new tracks to this playlist window. The playlist is then run in 'AutoPlay' mode and as such the scheduled tracks from the 'Script' will be automatically mixed and played one after the other one. So the best is (if you have a hourly program schedule) to define 24 or even more different 'Programs' and as such 24 or more different 'Scripts'. All can be defined on the fly in the Scheduler control, which is invoked from the ribbon page called "Scheduler Control" - just click on the "Program Scheduler" button to open it. In the scheduler control right-click in an empty area to invoke the context menu and e.g. select "New Program" resp. "New recurring Program". This will bring up the 'Program Editor' dialog in which you can define the start and end time, the type and the 'Script' related to this new program. A program "soft start" means, that the program might be delayed by some time (see below for details). A program "fix start" means, that the program will always start accurate on time. In the 'Script Editor' dialog you can then define your scripting. Meaning how new tracks should be added to a playlist automatically when the script executes. Here you can e.g. add random tracks from any of your media library or even load the entries from any playlist file to the new playlist window, execute any control command etc. How is the script executed? When a script executes the script lines are executed one by one - if the last line is reached it starts at the defined loop line again. Each execution of a script line might result in new tracks added to the playlist window. In the global settings dialog under 'Scripts/Scheduler' you can define various options. Max. Program Delay: used when soft start was selected for a program Playlist Look Ahead: a script line is executed until the playlist has this number of remaining tracks E.g. if your first script line loads an entire playlist file, there might be already for example 20 tracks being added and such the scheduler will only execute the next script line, if these tracks have been played out. More to come soon… RADIO42 Confidential 191 ProppFrexx ONAIR Working with the Program Scheduler Figure 120: The Program-Editor A 'Program' is actually an entry within the outlook-like scheduler and defines when and how a script should be started. You can invoke the 'Program Scheduler' from the 'Scheduler Control' ribbon tab by clicking on the 'Program Scheduler' button. A program scheduler entry (when started) does the following: it opens a new playlist window assigns the given 'Script' to that playlist window and starts to AutoPlay this playlist at the defined start time stops/closes any previous running playlist As such the playlist will execute the given script as long as the program runs (which is typically until a new program is started by the scheduler). The playlist's script will (during that time) query new entries to the playlist by executing the script whenever needed. If all script lines have been executed, the script will loop, meaning start from the beginning (resp. the defined LoopLine). Program: Gives any program entry a unique name. Type: Just for info (each program might get a different color in the scheduler). Description: Allows you to further describe the program entry (just for information). Script: Identifies the script to execute when the program is started (select an existing, click on ‘New’ to define a new one or click on the ‘Edit’ button to modify an existing/selected one). Reload Script before Start: If checked the Script content is reloaded before the program will actually start. Start Type: Defines, if the program should start exactly at the given Start Time (fixed) or if it might be delayed (soft). Fixed: When a 'Fixed' start is specified the program will start at exactly this time and any currently playing track will be stopped immediately. Soft: In case of 'Soft' start, the remaining playtime of a currently playing track will be evaluated. If the remaining playtime is less than the given Maximum Delay the track will play til the end until this program is started. If the remaining time is bigger than the Maximum Delay the track is stopped immediately and the program starts on time. 192 RADIO42 Confidential AUTOMATION Manual: The program will be shown right on time but needs to be started manually (also note, that you need to stop and close the current program manually in this case)! Auto: Will use either 'Soft' or 'Manual' depending on the current 'AutoPlay' setting. In case of AutoPlay the 'Soft' start type will be used. In case AutoPlay is turned off, the 'Manual' start type will be used. Fixed/Soft TimeUpdateSync: Instead of starting the program in a new playlist window any existing scheduler playlist window will be reused and a TimeUpdateSync entry is used to change the running script. Start Time: The date and time when the program should start. End Time: The date and time when the program should end. Note: This setting is just for information when in continuous mode, as any program/script runs in this default mode as long as a new program/script is started or as defined in the Overlay! Duration: A duration is automatically determined by the Start and End Time. However, you might alternatively specify a duration here, so that the End Time will be calculated accordingly. Mixing Time: Is the mix time in milliseconds between two programs (which is the mixing time of the last track of the previous script and the first track of this script). When a new script is started the first track of that script is played this milliseconds before the last track of the current script is cued out. Max. Delay: When a program is defined as soft start (so it doesn't have to start at exactly that time) it might be delayed by this maximum number of seconds. When a new script is about to be started the remaining time of the current Track of the current script is checked. If the remaining time is less than this maximum delay time, the Track will be played til the end before the new script is started (which will then result in a delayed script start). But if the remaining time is greater than this maximum delay time the current Track is faded-out immediately and the script start will not be delayed. Note: Programs defined as fixed start will always start on time. Overlay: If a program is defined as an Overlay it will not stop any previous program/script, but just suspend it. Any previous script will be resumed depending on the overlay type (either after one script cycle or at the defined end time of this program). No Overlay: This script runs until a new program is started. Overlay One Cycle: This script executes exactly one cycle (the script lines are not looped). Overlay End Time: This script executes until the defines End Time is reached. Allow Overlay Delay: If checked this Overlay Program can be delayed by the user before it has actually started. Allow Overlay Cancel: If checked this Overlay Program can be cancelled by the user before it has actually started. Recurrence: Click here to (re)define or delete the recurrence settings. A recurring program will be repeated in defined intervals. If a program is not recurring it will only be executed once. Control Commands: Click here to define program specific control commands which will be executed whenever a program is started, suspended, resumed or stopped. RADIO42 Confidential 193 ProppFrexx ONAIR Overlay Programs are somewhat special, as it allows you to define special program entries, which are running in parallel to an existing program, but suspend the currently running one. E.g. if you want to define a news or advertising block, which should start at 14:15:00 a'clock, you might define a second program in parallel to an existing one (which for example starts at 14:00:00 and ends at 15:00:00). This second (parallel) program might now be defined as an "Overlay". As such the currently running program (script) will be suspended for the time of the overlay program. Once the overlay program finishes, the suspended program will be continued. Using Scripts Figure 121: The Script-Editor Name: Defines a unique name of the script (used to identify a script from a Program). Script Mode: Defines in which order the script lines are executed. Sequential: The lines are executed one after the other. Once the end is reached it is started at the beginning again. Random: The lines are executed in random order. Reload: Defines which media libraries should be reloaded whenever the script is started. Loop Script Line: Defines the script line which should be used to loop the script. In sequential mode a script is looped once the script end has been reached. This value defines the line number which should be used to reset the script pointer - allowing you to skip certain entries at the beginning of the script (exclude them during looping). 194 RADIO42 Confidential AUTOMATION In random mode this parameter is ignored. Script History Count: Defines the size of the song history per script library. A value of 0 disables the song history. Note: This number also defines the maximum number of archive entries. The song history will not be cleared with each new script execution! Left-Click: Opens the Song History Editor. Clear History At Reload: If checked, the script library will clear it's SongHistory with every load or reload - else the SongHistory will never be cleared and always keep the last used tracks in the history. Initial Track: If set, this entry will always be used as the very first track whenever the script is started. Note: Automatic Cue Point Detection (ACPD) is always disabled with this entry. Archive: Defines an optional archive playlist file in which track entries will be saved which are being used during the script execution. Note: You might use the same file as an additional song history in order to make sure, that subsequent script executions doesn't contain the same tracks. Additional Song History: Defines an optional song history playlist file which will be (re)loaded with each script execution. Note: You might use the same file as the archive file in order to make sure, that subsequent script executions doesn't contain the same tracks. Advert Inserts: Defines if and how advertising entries should be added during the script execution. If a media library is specified, tracks are taken from it in the frequency range given. E.g. if you specify 4-7, this means, that after each 4 to 7 script tracks an additional entry is taken from the advertising lib and inserted during script execution. Jingle Inserts: Defines if and how jingle entries should be added during the script execution. If a cartwall library is specified, tracks are taken from it in the frequency range given. E.g. if you specify 4-7, this means, that after each 4 to 7 script tracks an additional entry is taken from the jingle lib and inserted during script execution. Script Lines: Each “Script-Line” has the following parameters: (note, that each column contains an edit or button) Mode: Defines what this line should actually do (the content of the Entry-Parameter depends on this one). Sequential: Adds new track(s) from the given media lib to the playlist by sequentially picking the next tracks from the lib. Random: Adds new track(s) from the given media lib to the playlist by randomly picking the next tracks from the lib. LoadTrack: Adds the given audio track directly to the playlist. LoadPlaylist: Adds the content of the given playlist file to the playlist. Execute: Executes another script dynamically. Command: Executes the given Control-Command and then goes to the next script-line. RADIO42 Confidential 195 ProppFrexx ONAIR Cartwall: Adds new track(s) from the given cartwall lib to the playlist by randomly picking the next tracks from the lib. Advert: Adds an advert container to the playlist by selecting tracks from the defined Advert Slot. Container: Adds a dynamic script, advert or overlay container which will be evaluated/resolved at playtime. LoadFolder: Loads all tracks contained within a specified folder in a certain sort order. (Click on the 'T' button to specify an optional trackname for this entry, typically be used with embedded containers). Entry: The value depends on the Mode selected... Sequential: Specify a media library to pick tracks from. Random: Specify a media library to pick tracks from. LoadTrack: Specify a physical path to an audio file which should be taken. LoadPlaylist: Specify a physical path to a playlist file whose content should be added. Execute: Specify a name of any other script to execute. Command: Specify a Control-Command. Cartwall: Specify a media library to pick tracks from. Advert: Specify an Advert Slot to use (all assigned adverts are used). Container: Adds a dynamic script, advert slot or overlay container which will be evaluated/resolved. LoadFolder: Specify a directory (all files within this folder will be used). (Click on the '...' button to open a dialog to select/specify the appropriate entry). Count: Defines the number of entries to schedule (only used for mode Sequential, Random and Cartwall - ignored with other modes). Options: Here you can specify various script-line options and specific track related controlcommands to be executed with the tracks scheduled. (Click on the 'arrow icon' to specify Track Control-Commands incl. a soundbed file to assign to this script line). Filter: Allows you to define additional selection/filter criterias when querying entries from a media library (only used for mode Sequential, Random and Cartwall - ignored with other modes). Working with the Overlay Scheduler 196 RADIO42 Confidential WORKING WITH STANDBY PLAYERS WORKING WITH STANDBY PLAYERS More to come soon… RADIO42 Confidential 197 ProppFrexx ONAIR REMOTING, EVENTS, COMMANDS AND GPIO More to come soon… 198 RADIO42 Confidential OTHER WINDOWS OTHER WINDOWS More to come soon… Using the ONAIR Time Using the Station Visual Using the Control Room Using the Web Browser RADIO42 Confidential 199 ProppFrexx ONAIR USING THE MODSTREAM WATCHER More to come soon… 200 RADIO42 Confidential THE ADVERTISING MANAGER THE ADVERTISING MANAGER More to come soon… RADIO42 Confidential 201 ProppFrexx ONAIR APPENDIX Keyboard Shortcuts Main Window: F1: Online Help Shift+F1: Display Keyboard Shortcuts Ctrl+F1: Display User Manual Alt+F1: Check for Updates Ctrl+Shift+F1: Display About F2: Master TalkOver On/Off Shift+F2: Scheduler On/Off Ctrl+Shift+F4: Follow On/Off Ctrl+F2: Open the Scheduler Alt+F2: TalkUser On/Off F3: Change Global Settings Shift+F3: Logoff/Change User Ctrl+F3: Change User Settings Alt+F3: Rename current Playlist F4: AutoPlay On/Off Shift+F4: Fading On/Off Ctrl+F4: Close current Playlist Alt+F4: Close Application F5: Play or Pause Player A Use Fading Shift+F5: Play or Pause Player A No Fading Ctrl+F5: Stop/Eject Player A Use Fading Ctrl+Shift+F5: Stop/Eject Player A No Fading Alt+F5: Starts or Stops PFL for Player A Alt+Shift+F5: Rewind Player A to CueIn and Pause Alt+Ctrl+F5: Load Next Track to Player A F6: Play or Pause Player B Use Fading Shift+F6: Play or Pause Player B No Fading 202 RADIO42 Confidential APPENDIX Ctrl+F6: Stop/Eject Player B Use Fading Ctrl+Shift+F6: Stop/Eject Player B No Fading Alt+F6: Starts or Stops PFL for Player A Alt+Shift+F6: Rewind Player B to CueIn and Pause Alt+Ctrl+F6: Load Next Track to Player B F7: Play or Pause Player C Use Fading Shift+F7: Play or Pause Player C No Fading Ctrl+F7: Stop/Eject Player C Use Fading Ctrl+Shift+F7: Stop/Eject Player C No Fading Alt+F7: Starts or Stops PFL for Player A Alt+Shift+F7: Rewind Player C to CueIn and Pause Alt+Ctrl+F7: Load Next Track to Player C F8: Play or Pause Player D Use Fading Shift+F8: Play or Pause Player D No Fading Ctrl+F8: Stop/Eject Player D Use Fading Ctrl+Shift+F8: Stop/Eject Player D No Fading Alt+F8: Starts or Stops PFL for Player A Alt+Shift+F8: Rewind Player D to CueIn and Pause Alt+Ctrl+F8: Load Next Track to Player D F9: Play Next Track Use Fading Shift+F9: Play Next Track No Fading Ctrl+F9: Play or Pause Current Track Use Fading Ctrl+Shift+F9: Play or Pause Current Track No Fading Alt+F9: Stop Current Track Use Fading Alt+Shift+F9: Stop Current Track No Fading Alt+Ctrl+F9: Load Next Track to Next Player F11: PFL selected Track Ctrl+N: New Playlist Ctrl+O: Open new Playlist Ctrl+S: Save current Playlist Ctrl+Shift+S: Save current Playlist As… Ctrl+Alt+S: Save All Ctrl+Shift+C: Copy current Playlist To… Ctrl+F: Open Find window RADIO42 Confidential 203 ProppFrexx ONAIR Ctrl+E: Open Explorer window Ctrl+M: Open Mixer window Ctrl+B: Open Trackboard window Ctrl+1: Open Cartwall I window Ctrl+2: Open Cartwall II window Ctrl+Q: Add selected Track to Quick Monitor List Ctrl+Shift+Q: Pause Quick Monitor Player Alt+Q: Eject Quick Monitor Player Alt+R: Opens the Instant Recording Dialog Playlist Window: Space: Play/Stop selected Track in Quick Monitor Left: Fast-Forward Quick Monitor Right: Fast-Backward Quick Monitor F11: PFL selected Track Shift+F11: Mixing PFL of selected and next Track Alt+F11: Opens the Segue-Editor for the selected track(s) Ctrl+F11: Opens the Voice-Tracking dialog Shift+Alt+L: Toggle automatic Loading/manual Loading Shift+Alt+U: Toggle automatic Unloading/manual Unloading Shift+Alt+P: Toggle mark when played/delete when played Ctrl+I: Shows/Hides the info panel. Ctrl+T: Shows/Hides the track info moderator window. Shift+Alt+KeyUp: Move selected tracks up in the Playlist Shift+Alt+KeyDown: Move selected tracks down in the Playlist Alt+Backspace: GoTo/JumpTo next track within the Playlist Ctrl+P: Toggle the play state of the selected Track as played/not played Alt+L: Toggle Loop option for selected Track Alt+E: Toggle PauseAtEnd option for selected Track Alt+H: Toggle Hook option for selected Track Ctrl+Alt+T: (Re)Read Tags for selected Tracks Ctrl+Alt+B: Calculate BPM for selected Tracks Ctrl+Alt+R: Calculate ReplayGain for selected Tracks Ctrl+Alt+P: Calculate AutoCuePoints for selected Tracks 204 RADIO42 Confidential APPENDIX Shift+Alt+P: Clear all CuePoints for selected Tracks Ctrl+Alt+A: Calculate All (Tags, ACPD, ReplayGain) for selected Tracks Ctrl+Insert: Copy selected tracks to Trackboard Ctrl+C: Copy selected tracks to Clipboard Ctrl+V: Paste tracks from Clipboard to current position Ctrl+X: Cut selected tracks to Clipboard Alt+Insert: Add Audio Track to Playlist Shift+Alt+Insert: Opens the generic Add Tracks from dialog Alt+C: Copy selected Tracks to Folder Insert: Add to MediaLibrary Add: Add to other Playlist Alt+Add: Create embedded Container from Selection Shift+Alt+Add: Create embedded Hook Container from Selection Ctrl+Add: Convert Selection to embedded Container Shift+Ctrl+Add: Convert Selection to embedded Hook Container Alt+Subtract: Expand embedded Container (keep) Ctrl+Subtract: Expand embedded Container (replace) Shift+Delete: Remove selected Entries from Playlist Ctrl+Delete: Remove all played tracks from Playlist Shift+Ctrl+Delete: Physically deletes the selected tracks Shift+Enter: Open Windows Explorer at Track-Location Alt+0: Load selected Track to next free Player Alt+1: Load next Track to next free Player Alt+2: Show Info for selected Tracks Alt+3: Open TAG Editor for selected Tracks Ctrl+Alt+3: Toggle direct TAG editing within playlist Alt+5: Play next Track, Use Fading Alt+6: Play next Track, No Fading Alt+7: Play next Track only Alt+8: Play or Pause current Track, Use Fading, No Eject Alt+9: Play or Pause current Track, No Fading, No Eject Ctrl+\: Size the visible columns to best fit the window width Alt+\: Size all columns to best fit the window width Ctrl+G: Open the Goto/Find playlist entry dialog Drag: Move a Track to a player or move a selection inside the playlist Drop: Add audio file(s) or a playlist file to this playlist. RADIO42 Confidential 205 ProppFrexx ONAIR Double-Click: Invokes the PFL Player for the selected Track. Ctrl+Double-Click: Shows the embedded content for the selected Track. Shift+Double-Click: Invoke the TAG Editor for the selected Track. Pressing the Ctrl key in the playlist menu when selecting an add track menu item will add the track to the currently selected position rather than to the end of the playlist. Find Window: Space: Play/Stop selected Track in Quick Monitor Left: Fast-Forward Quick Monitor by 10 sec. Right: Fast-Backward Quick Monitor by 10 sec. F11: Open the PFL Player with the current Track F12: Add selected Track to the current playlist (at end) Shift+F12: Add selected Track to the current playlist (at current position) Alt+2: Show Track Info Alt+3: Open TAG Editor Alt+C: Copy selected Track to Folder Ctrl+Insert: Copy selected tracks to Trackboard Ctrl+C: Copy selected tracks to Clipboard Ctrl+V: Paste tracks from Clipboard to current position Ctrl+X: Cut selected tracks to Clipboard Insert: Add to MediaLibrary Add: Add to other Playlist Alt+Delete: Clear the result (resp. cancel the search) Shift+Delete: Delete entry from library Ctrl+Shift+Delete: Physically deletes the selected track Shift+Enter: Open Windows Explorer at Track-Location Find Options (case-insensitive ‘contains’ search by default): <key 1>+<key 2>: perform an key1 AND key2 search <key 1>+!<key 2>: perform a NOT key2 search key: „title:<key>” or „t:<key>”: performs a search on the Title key: „artist:<key>” or „a:<key>”: performs a search on the Artist 206 RADIO42 Confidential APPENDIX key: „album:<key>” or „l:<key>”: performs a search on the Artist key: „year:<key>” or „y:<key>”: performs a search on the Year key: „genre:<key>” or „e:<key>”: performs a search on the Genre key: „bpm:<key>” or „b:<key>”: performs a search on the BPM key: „mood:<key>” or „m:<key>”: performs a search on the Mood key: „grouping:<key>” or „g:<key>”: performs a search on the Grouping key: „rating:<key>” or „r:<key>”: performs a search on the Rating key: „isrc:<key>” or „i:<key>”: performs a search on the ISRC key: „age1:<key>”: performs a search on the file creation date (age in days) key: „age2:<key>”: performs a search on the file modification date(age in days) key: „age3:<key>”: performs a search on the file statistics last play date(age in days) key: „count:<key>”: performs a search on the file statistics play counter using a preceeding ‘!’ character: negates the search using a preceeding ‘=’ character: performs a case-sensitive exact match search Example: „lucien“ search for any 'lucien' occurance „lucien+jon“ search for any 'lucien' and 'jon' occurance „t:do you wanna“ search for this title occurance „t:please be + a:paul“ search for title and artist „b:123 + b:!127“ search for BPM between 123 and 127 „=e:Pop“ search for the exact genre ‘Pop’ „age2:90“ search for tracks modified in the last 90 days „!age3:7“ search for tracks which have not been played in the last 7 days „count:10“ search for tracks having no more than 10 plays ever Browser Window: Space: Play/Stop selected File in Quick Monitor Left: Fast-Forward Quick Monitor by 10 sec. Right: Fast-Backward Quick Monitor by 10 sec. F11: Open the PFL Player with the current Track F12: Add selected Track to the current playlist Shift+F12: Add selected Track to the current playlist (at current position) Alt+2: Show Track Info Alt+3: Open TAG Editor Ctrl+Insert: Copy selected tracks to Trackboard RADIO42 Confidential 207 ProppFrexx ONAIR Ctrl+C: Copy selected tracks to Clipboard Alt+C: Copy File/Directory To... Ctrl+Alt+C: Move File/Directory To... Insert: Add File To Media Library... Add: Add to other Playlist Ctrl+R: Refresh View (current folders) Shift+Ctrl+R: Refresh View (all folders) Ctrl+Shift+Delete: Physically delete file/directory Trackboard Window: Space: Play/Stop selected Track in Quick Monitor Left: Fast-Forward Quick Monitor Right: Fast-Backward Quick Monitor F11: PFL selected Track F12: Add selected Track to the current playlist Shift+F12: Add selected Track to the current playlist (at current position) Shift+Alt+KeyUp: Move selected tracks up in the Trackboard Shift+Alt+KeyDown: Move selected tracks down in the Trackboard Alt+L: Toggle Loop option for selected Track Alt+E: Toggle PauseAtEnd option for selected Track Alt+H: Toggle Hook option for selected Track Ctrl+C: Copy selected tracks to Clipboard Ctrl+V: Paste tracks from Clipboard to current position Ctrl+X: Cut selected tracks to Clipboard Alt+Insert: Add Audio Track to Trackboard Shift+Alt+Insert: Opens the generic Add Tracks from dialog Insert: Add to MediaLibrary Add: Add to other Playlist Alt+Add: Create embedded Container from Selection Shift+Alt+Add: Create embedded Hook Container from Selection Ctrl+Add: Convert Selection to embedded Container Shift+Ctrl+Add: Convert Selection to embedded Hook Container Alt+Subtract: Expand embedded Container (keep) Ctrl+Subtract: Expand embedded Container (replace) Shift+Delete: Remove selected Entries from Trackboard 208 RADIO42 Confidential APPENDIX Shift+Ctrl+Delete: Physically deletes the selected tracks Alt+Delete: Clear the entire Trackboard Shift+Enter: Open Windows Explorer at Track-Location Alt+2: Show Info for selected Tracks Alt+3: Open TAG Editor for selected Tracks Drag: Move a Track to a player or move a selection inside the playlist Drop: Add audio file(s) or a playlist file to the Trackboard. Double-Click: Invokes the PFL Player for the selected Track. Ctrl+Double-Click: Shows the embedded content for the selected Track. Shift+Double-Click: Invoke the TAG Editor for the selected Track. DJ/PFL Player: CUE: Click: Sets the current Cue-Point to the current position (if not set) Click: Starts playback of the current Cue-Point until clicked (if set) Right-Click: Removes the current Cue-Point PLAY: Click: Start/Holds playback Right-Click: Jumps back to the Cue-In position PFL: Click: Opens the PFL Player (if not open) Click: Closes PFL Player Takes and takeover all settings (if open) WaveForm: Left-Click: In lower half: select the WaveForm only. In upper half: jump to the selected track position. Left-Double-Click: In lower half: changes the zoom between full and 10 seconds Right-Click: Opens the context menu. Ctrl+MouseWheel: changes the zoom distance (zoom in/out) JogWheel: Multi functional 360° rotary knob to control the track position, the playback speed, the effect transition etc. The JogWheel allows two main modes: RADIO42 Confidential 209 ProppFrexx ONAIR Jogging: Left-Mouse drag and drop Scrubbing: Right-Mouse drag and drop until pressed If in cueing mode: Changes the current track position (in both modes). Using the Shift key increases the sensibility. Using the Alt key decreases the sensibility. If playing: Jogging: shortly changes the playback speed (if effects are enabled it changes its depth) Scrubbing: direct pitch changes from -100% to +200% Ctrl+Scrubbing: direct scratching (vinyl mode) If cued: Jogging: changes the current track position (in both modes). Using the Shift key increases the sensibility. Using the Alt key decreases the sensibility. Ctrl+Scrubbing: direct scratching (vinyl mode) CP (Cue-Points): Click: Sets the Cue-Point to the current position (if not set) Click: Starts playback of the Cue-Point until clicked (if set) Right-Click: Remove the Cue-Point (if set) 210 RADIO42 Confidential APPENDIX Database Libraries (SQL) The following SQL statement (DDL) defines the table structure which might be used to load DB based playlists resp. to lookup DB based meta data (here on a MySQL example). You might actually use any ODBC driver to load the content of such database table(s) as a playlist (media or cartwall library). Each table therefore represents one playlist: CREATE TABLE library ( LOCATION varchar(380) NOT NULL, DURATION bigint(20) NOT NULL DEFAULT '0', ENTRYTYPE varchar(20) DEFAULT NULL, GUID varchar(40) DEFAULT NULL, OPTIONS int(11) NOT NULL DEFAULT '0', TITLE varchar(255) DEFAULT NULL, ARTIST varchar(255) DEFAULT NULL, ALBUM varchar(255) DEFAULT NULL, ALBUMARTIST varchar(255) DEFAULT NULL, GENRE varchar(45) DEFAULT NULL, YEAR varchar(10) DEFAULT NULL, GROUPING varchar(45) DEFAULT NULL, MOOD varchar(45) DEFAULT NULL, RATING varchar(45) NOT NULL DEFAULT '0', ISRC varchar(15) DEFAULT NULL, COPYRIGHT varchar(255) DEFAULT NULL, ENCODEDBY varchar(255) DEFAULT NULL, COMPOSER varchar(255) DEFAULT NULL, PUBLISHER varchar(255) DEFAULT NULL, CONDUCTOR varchar(255) DEFAULT NULL, LYRICIST varchar(255) DEFAULT NULL, REMIXER varchar(255) DEFAULT NULL, PRODUCER varchar(255) DEFAULT NULL, TRACKNO varchar(10) DEFAULT NULL, DISCNO varchar(10) DEFAULT NULL, COMMENT varchar(512), MODERATORTEXT text, BPM double NOT NULL DEFAULT '-1', TRACKENDINDICATOR char(1) DEFAULT NULL, AUDIOSAMPLERATE int(11) NULL, AUDIOBITRATE int(11) NULL, AUDIOCHANNELS int(11) NULL, REPLAYGAIN double NOT NULL DEFAULT '-100', REPLAYPEAK double NOT NULL DEFAULT '-1', INITIALTEMPO double DEFAULT NULL, INITIALGAIN double DEFAULT NULL, CUEIN double DEFAULT NULL, FULLLEVEL double DEFAULT NULL, RAMP double DEFAULT NULL, RAMP2 double DEFAULT NULL, OUTRO double DEFAULT NULL, FADEOUT double DEFAULT NULL, NEXT double DEFAULT NULL, CUEOUT double DEFAULT NULL, HOOKCUEIN double DEFAULT NULL, HOOKFULLLEVEL double DEFAULT NULL, HOOKRAMP double DEFAULT NULL, HOOKRAMP2 double DEFAULT NULL, HOOKOUTRO double DEFAULT NULL, HOOKFADEOUT double DEFAULT NULL, HOOKNEXT double DEFAULT NULL, HOOKCUEOUT double DEFAULT NULL, PRIMARY KEY (LOCATION) ) ENGINE=InnoDB DEFAULT CHARSET=ucs2; The only mandatory column is LOCATION, all other columns might be defaulted or can be NULL or doesn’t even have to exist (whatever column is present will however be evaluated)! RADIO42 Confidential 211 ProppFrexx ONAIR You might even use a VIEW to create this table. When using a database view, make sure the view contains SELECT, INSERT and UPDATE rights – otherwise it can only be read in but not saved. Column hints: LOCATION: The either relative or absolute path and filename of the location of track (Note: the location must be accessible from the client and can be a UNC path). For a database connection within ProppFrexx ONAIR you can always specify a so called ‘Base Directory’, which when given, will be use to normalize relative file paths (the ‘Base Directory’ is preceeded the given filename location if neccessary). If the ‘Base Directory’ is omitted for the database connection the filename is assumed to be absolute resp. UNC. DURATION: The total track duration in milliseconds (if the column is of data type int or long) or in seconds (if the column is of data type float or double) or in ‘HH:MM:SS.FFFF’ (if the column is of data type string). ENTRYTYPE: One of the following numeric or string values: Music = 0 Music2 = 1 NewMusic = 2 Jingle = 3 Advertising = 4 Announcement = 5 News = 6 Sports = 7 Weather = 8 Traffic = 9 Report = 10 InternetStream = 11 Show = 12 Home = 13 Hot = 14 Watch = 15 Warning = 16 Green = 17 Yellow = 18 Red = 19 Blue = 20 Bed = 21 SoundBit = 22 Commercial = 23 Contest = 24 Emergency = 25 SoundEffect = 26 Filler = 27 StationID = 28 Intro = 29 Liner = 30 Logo = 31 MagicCall = 32 Promo = 33 Segue = 34 Spot = 35 Stager = 36 Stack = 37 Sweeper = 38 TestTone = 39 Temporary = 40 Overlay = 41 DropIn = 42 DropOut = 43 Outro = 44 Other = 45 212 RADIO42 Confidential APPENDIX Miscellaneous = 46 PhoneCall = 47 Talk = 48 Article = 49 World = 50 Local = 51 Automation = 52 Brand = 53 Pitch = 54 Break = 55 User1 = 56 User2 = 57 User3 = 58 User4 = 59 User5 = 60 User6 = 61 User7 = 62 User8 = 63 User9 = 64 EmbeddedPlaylist = 100 Document = 200 OPTIONS: Any combination (logical OR) of the following flags (either as a numeric value or a comma-separated string-list): None ClearAllCuePoints ClearAllEventEntries ClearAllVolumePoints SupressACPD RecalcACDP KeepStreamLoading LoopEntry StopAtEnd SupressFading KeepStreamAlive SupressOverlay SuppressGloablLogging SuppressPlaylistLogging SupressBacktiming SkipDuringAutoPlay UseHookCuePoints SupressTrackInsertTransition AutoPlayNext StopAutoPlay StartAutoPlay = = = = = = = = = = = = = = = = = = = = = 0 256, 512, 1024, 2048, 4096, 8192, 16384, 32768, 65536, 131072, 262144, 524288, 1048576, 2097152, 4194304, 8388608, 16777216, 33554432, 67108864, 134217728 YEAR: The release date as a string in the format „YYYY-MM-DD“. RATING: ProppFrexx expects, that the rating value is a numeric string and scales from 0 to 100 (0=Unknown, 1-20=Poor, 21-40=Average, 41-60=Good, 61-80=VeryGood, 81100=Excelent)!. BPM: The beats per minute as a double value. REPLAYGAIN: The tracks replay gain value to use as a double value (in dB) between 100.0 and 0.0 (0.0 = maximum or 0.0 dB; -100.0 = silent; -6.0 = -6 dB). REPLAYPEAK: The tracks replay gain peak value to use as a double value (logarithmic) between 0.0 and 1.0 (0.0 = silent; 1.0 = maximum or 0.0 dB; 0.5 = -6 dB). INITIALTEMPO: The initial track tempo to use as a double value (percentage) between 50.0 and +50.0 (0.0 = no tempo change). INITIALGAIN: The initial track gain to use as a double value (logarithmic) between 0.0 and 2.0 (0.0 = silent; 1.0 = no gain change; 2.0 = twice as loud or +6 dB). CUEIN, FULLLEVEL, RAMP, RAMP2, OUTRO, FADEOUT, NEXT, CUEOUT: The cue-point in milliseconds (if the column is of data type int or long) or in seconds (if the RADIO42 Confidential 213 ProppFrexx ONAIR column is of data type float or double) or in ‘HH:MM:SS.FFFF’ (if the column is of data type string). 214 RADIO42 Confidential APPENDIX Control Commands A control command is actually a certain message string (composed out of an action and a parameter part) which is executed by the server. The server will execute the given command and reply to it with a specific reply message. The action identifies which control command should be executed on the server side. Each control command has the following format: „action parameter“. action: is the string representation of one of the CommandAction values. parameter: is the string representation of optional parameter value(s), which might contain macros (explained in the next chapter). To each command a reply will be generated by the server. If an error occurs (eg. an invalid command is send) the server will reply with: „ERROR: errormessage“. So you can recognize a valid reply message, that it does not start with „ERROR:“. Here is a list of possible control commands (action with their respective parameters): Conntrol Command Action Description, Parameter, Reply AUTHORIZATION Client to server authorization. Parameter: (string) password Reply: OK PING A ping needs to be send by the client at least every 10 seconds. Otherwise the connection will be closed. SLEEP Sleeps for the specified milliseconds. Parameter: (int) milliseconds (between 0 and 2000) Reply: OK Might be useful in a sequence of commands to delay the subsequent commands. EXEC_COMMAND Executes another command resp. list of commands. Parameter: (string) command(s) Reply: OK|ERROR EXEC_COMMAND2 Executes another command depending on a condition. Parameter: (string) parameter|criterion|command Reply: OK|ERROR The parameter is evaluated against the criterion. If it meets the condition, the command is executed. Example: “${cplisplaying}|Equals(1)|SHOW_ALERT_WINDOW Currently Playing|${cpltracknamecurrent}” EXEC_ASYNC Executes a command asynchronious in an extra thread. Parameter: (string) command Reply: OK|ERROR EXEC_COMMAND_FILE Executes the commands as contained in a file. Parameter: (string) filename Reply: OK|ERROR EXEC_WRITE_GLOBAL_LOG Writes a log file entry to a global log file. Parameter: (string) logfile Reply: OK|ERROR Note: The filename should be given without any extension, as the default extension .log will be added automatically! EXEC_WRITE_PLAYLIST_LOG Writes a log file entry to a playlist log file. Parameter: (string) logfile Reply: OK|ERROR Note: The filename should be given without any extension, as the default extension .log will be added automatically! EXEC_WRITE_FILE Writes any content to a file. Parameter: (string) filename|mode|content Reply: OK|ERROR Note: Mode can be 'aa'=Append-ASCII, 'au'-Append-UTF8, 'ah'-AppendHTTP, 'ad'-Append-Default or 'na'=New-ASCII, 'nu'=New-UTF8, 'nh'=New-HTTP, 'nd'=New-Default. EXEC_WRITE_PLAYLISTFILE Creates a playlist file based on a template file. Parameter: (string) targetfile|templatefile Reply: OK|ERROR Note: The targetfile will be the file path and location to be RADIO42 Confidential 215 ProppFrexx ONAIR created; the templatefile will be the file containing the playlist macros to be replaced. EXEC_SHELL_COMMAND Executes a shell command (asynchronously). Parameter: (string) command[|style] Reply: OK|ERROR Note1: The shell command will simply be invoked and the process will not wait for any results. Note2: style can be 'minimized', 'hidden' or 'normal' (default). EXEC_SHELL_COMMAND_SYNC Executes an executable file (synchronously) and returns the result. Parameter: (string) command[|style] Reply: StandardOutput|ERROR Note1: The shell command will be invoked and the process waits for the results send to StandardOutput. Note2: All control commands will be blocked until the process exists! Note3: Style can be 'minimized', 'hidden' or 'normal' (default). EXEC_SEND_EMAIL Sends an email message. Parameter: (string) from|to|subject|message Reply: OK|ERROR from: denotes the sender email-address; to: denotes the recipient email-address; subject: the subject text; message: the message text. EXEC_SEND_TCP Sends a string to a TCP server. Parameter: (string) host:port|content Reply: OK|ERROR EXEC_SEND_TCPBIN Sends binary data to a TCP server. Parameter: (string) host:port|bytes Reply: OK|ERROR The bytes must be seperated by a space character and can be any ASCII string (if enclosed in quotes), byte number value or a HEX value (if prefixed with 0x) which will be sent to the output. EXEC_SEND_UDP Sends a string to a UDP server. Parameter: (string) host:port|content Reply: OK|ERROR EXEC_SEND_UDPBIN Sends binary data to a UDP server. Parameter: (string) host:port|bytes Reply: OK|ERROR The bytes must be seperated by a space character and can be any ASCII string (if enclosed in quotes), byte number value or a HEX value (if prefixed with 0x) which will be sent to the output. EXEC_SEND_HTTP_GET Sends a Http request to a Web server (using the GET method). Parameter: (string) [username|password|]uri Reply: OK|ERROR EXEC_SEND_HTTP_POST Sends a Http request to a Web server (using the POST method to send x-www-form-urlencoded content). Parameter: (string) [username|password|]uri|content Reply: OK|ERROR EXEC_SEND_HTTP_POSTPLAIN Sends a Http request to a Web server (using the POST method to send the content natively http encoded). Parameter: (string) [username|password|]uri|content Reply: OK|ERROR EXEC_SEND_MIDI_SETZONE Sets the Midi zone on the 1st MIDI-Server. Parameter: (int) zone Reply: OK|ERROR Note: zone denotes the zone value (-1 = Any Zone). EXEC_SEND_MIDI_GETZONE Gets the Midi zone on the 1st MIDI-Server. Parameter: none Reply: (int) zone|ERROR Note: zone denotes the zone value (-1 = ‘Any Zone’). EXEC_SEND_MIDI_SHORTMSG Sends a Midi short message on the 1st MIDI-Output device. Parameter: (string) status|channel[|data1|data2][|data] or: (string) status [data1 data2][data] Reply: OK|ERROR Note: status and channel will be combined into the status byte of the ShortMessage (so leave channel to 0 if not needed). You might provide data1 and data2 separately or data as a combined 216 RADIO42 Confidential APPENDIX value. Each token can be expressed as a decimal or a hex value (if preceding '0x'). Eg.: „0x90|1|60|0x7F“ means „0x90=NoteOn, 1=Channel 1, 60=Middle C, 0x7F=Velocity 127“. EXEC_SEND_MIDI_SYSEXMSG Sends a Midi system exclusive message on the 1st MIDI-Output device. Parameter: (string) bytes Reply: OK|ERROR The bytes must be seperated by a space character and can be any ASCII string (if enclosed in quotes), byte number value or a HEX value (if prefixed with 0x) which will be sent to the output. EXEC_SEND_MIDI_MCU Sends a Mackie Control Universal command to the 1st MIDI-Output device (see below for details). Parameter: (string) cmd|param1|...|paramN Reply: OK|ERROR Note: 'cmd' denotes the command to send; 'param1' to 'paramN' depend on the 'cmd' (see below for details). EXEC_SEND_MIDI2_SETZONE Sets the Midi zone on the 2nd MIDI-Server. Parameter: (int) zone Reply: OK|ERROR Note: zone denotes the zone value (-1 = Any Zone). EXEC_SEND_MIDI2_GETZONE Gets the Midi zone on the 2nd MIDI-Server. Parameter: none Reply: (int) zone|ERROR Note: zone denotes the zone value (-1 = ‘Any Zone’). EXEC_SEND_MIDI2_SHORTMSG Sends a Midi short message on the 2nd MIDI-Output device. Parameter: (string) status|channel[|data1|data2][|data] or: (string) status [data1 data2][data] Reply: OK|ERROR Note: status and channel will be combined into the status byte of the ShortMessage (so leave channel to 0 if not needed). You might provide data1 and data2 separately or data as a combined value. Each token can be expressed as a decimal or a hex value (if preceding '0x'). Eg.: „0x90|1|60|0x7F“ means „0x90=NoteOn, 1=Channel 1, 60=Middle C, 0x7F=Velocity 127“. EXEC_SEND_MIDI2_SYSEXMSG Sends a Midi system exclusive message on the 2nd MIDI-Output device. Parameter: (string) bytes Reply: OK|ERROR The bytes must be seperated by a space character and can be any ASCII string (if enclosed in quotes), byte number value or a HEX value (if prefixed with 0x) which will be sent to the output. EXEC_SEND_MIDI2_MCU Sends a Mackie Control Universal command to the 2nd MIDI-Output device (see below for details). Parameter: (string) cmd|param1|...|paramN Reply: OK|ERROR Note: 'cmd' denotes the command to send; 'param1' to 'paramN' depend on the 'cmd' (see below for details). EXEC_SEND_SERIAL_WRITEBIN Sends binary data to a serial I/O port. Parameter: (string) bytes Reply: OK|ERROR The bytes must be seperated by a space character and can be any ASCII string (if enclosed in quotes), byte number value or a HEX value (if prefixed with 0x) which will be sent to the output. EXEC_SEND_SERIAL_WRITE Sends a string to a serial I/O port. Parameter: (string) content Reply: OK|ERROR EXEC_SEND_SERIAL_WRITE2 Sends a string to a serial I/O port depending on a condition. Parameter: (string) parameter|criterion|truecontent|falsecontent Reply: OK|ERROR The parameter is evaluated against the criterion. If it meets the condition, the truecontent is send - else the falsecontent is send. Example: “${cplisplayinga}|Equals(1)|PLAYING|NOTPLAYING” EXEC_SEND_OSC Sends an OSC message to the OSC remote server. Parameter: (string) address[|T:data1[|T:data2[|T:data3...]]] Reply: OK|ERROR T: must one of the following: i: for a 32-bit integer, f: for a 32bit floating point, h: for a 64-bit integer, d: for a 64-bit double-precision floating point, s: for a string, b: for a byte array. Eg.: EXEC_SEND_OSC /home/label1|s:my text RADIO42 Confidential 217 ProppFrexx ONAIR EXEC_SEND_IOWARRIOR Sends an IO-Port state change to the IO-Warrior card. Parameter: (string) bytes or pin|state Reply: OK|ERROR The bytes string must be a HEX string (prefixed with 0x) which will be sent to the output or the pin(1..50) and state(true, false) is directly used. Eg.: EXEC_SEND_IOWARRIOR 0xC307 // sets all pins or EXEC_SEND_IOWARRIOR 9|True // sets pin 9 to ON EXEC_SEND_VELLEMAN Sends an Output-Port state change to a Velleman card. Parameter: (string) card|byte or card|pin|state Reply: OK|ERROR The card must be between 0 and 3; the byte string must be a HEX string (prefixed with 0x) which will be used to update the output states or the output pin(1..8) and state(true, false) is directly used. Eg.: EXEC_SEND_VELLEMAN 0|0x07 // sets all ouput pins or EXEC_SEND_VELLEMAN 0|3|True // sets pin 3 to ON EXEC_SEND_DRAIRENCE_SETLED Sends a SetLed command to the D&R Airence mixer. Parameter: (string) lednr|color Reply: OK|ERROR The lednr must be between 1 and 24 (or 255 for all Leds); the color is 0=NONE, 1=RED, 2=GREEN, 3=YELLOW. EXEC_SEND_DRAIRENCE_SETLEDBLINK Sends a SetLedBlink command to the D&R Airence mixer. Parameter: (string) lednr|colorOn|colorOff|speed Reply: OK|ERROR The lednr must be between 1 and 24 (or 255 for all Leds); color is 0=NONE, 1=RED, 2=GREEN, 3=YELLOW; speed is 0=SLOW, 1=NORMAL, 2=FAST. EXEC_SEND_DRAIRLITE_SETLED Sends a SetLed command to the D&R Airlite mixer. Parameter: (string) lednr|color Reply: OK|ERROR The lednr must be between 1 and 16 (or 256 for all Leds); the color is 0=NONE, 1=RED, 2=GREEN. EXEC_SEND_DRAIRLITE_SETLEDBLINK Sends a SetLedBlink command to the D&R Airlite mixer. Parameter: (string) lednr|colorOn|colorOff|speed Reply: OK|ERROR The lednr must be between 1 and 16 (or 256 for all Leds); color is 0=NONE, 1=RED, 2=GREEN; speed is 0=SLOW, 1=NORMAL, 2=FAST. EXEC_SEND_DRAIRLITE_SETTRACKSTA TE Sends a SetTrackState command to the D&R Airlite mixer. Parameter: (string) modulenr|state Reply: OK|ERROR The modulenr must be between 1 and 16 (or 256 for all); state is 0=STOPPED, 1=PLAYING, 2=ENDING. EXEC_SEND_SQL Sends/executes a SQL statement (eg. an INSERT, UPDATE or DELETE or any other DML, DDL statement). Parameter: (string) connectString|sql Reply: NumRowsAffected|ERROR The connectString can either be an ODBC data source name (DSN) or any valid ODBC driver connect string. Eg.: „DSN=dsnname“ or „Driver={Microsoft ODBC for Oracle};Server=ORACLE8i7;Persist Security Info=False;Trusted_Connection=Yes“ EXEC_SEND_SQL_UPDATEINSERT Sends/executes a SQL updatequery and if that fails the insertquery is executed. Parameter: (string) connectString|updatequery|insertquery Reply: NumRowsAffected|ERROR The connectString can either be an ODBC data source name (DSN) or any valid ODBC driver connect string. Eg.: „DSN=dsnname“ or „Driver={Microsoft ODBC for Oracle};Server=ORACLE8i7;Persist Security Info=False;Trusted_Connection=Yes“ 218 RADIO42 Confidential APPENDIX EXEC_SEND_SQL_INSERTUPDATE Sends/executes a SQL insertquery and if that fails the updatequery is executed. Parameter: (string) connectString|insertquery|updatequery Reply: NumRowsAffected|ERROR The connectString can either be an ODBC data source name (DSN) or any valid ODBC driver connect string. Eg.: „DSN=dsnname“ or „Driver={Microsoft ODBC for Oracle};Server=ORACLE8i7;Persist Security Info=False;Trusted_Connection=Yes“ EXEC_SEND_SQL_SELECT Sends/executes a SQL selectquery and returns the first column of the first row. Parameter: (string) connectString|query Reply: QueryResult|ERROR The connectString can either be an ODBC data source name (DSN) or any valid ODBC driver connect string. Eg.: „DSN=dsnname“ or „Driver={Microsoft ODBC for Oracle};Server=ORACLE8i7;Persist Security Info=False;Trusted_Connection=Yes“ EXEC_DOWNLOAD_FILE Downloads a file from the web to your local machine. Parameter: (string) sourceUrl|targetFile[|username|password] Reply: OK|ERROR The 'sourceUrl' specifies the location of the file on the web, the 'targetFile' on your local machine, 'username' and 'password' specify optional network credentials. EXEC_UPLOAD_FILE Uploads a local file from your local machine to the web. Parameter: (string) sourceFile|targetUrl[|username|password] Reply: OK|ERROR The 'sourceFile' specifies the location of the local file, the 'targetUrl' denotes the location on the web, 'username' and 'password' specify optional network credentials. EXEC_PLAY_FILE Plays a File, Url or EmbeddedPlaylist file. Parameter: (string) filename[|mixername][|lengthsec] Reply: OK|ERROR Note: If lengthsec is omitted the file plays til the end. If mixername is omitted Route Standby is used. Once playback has started it cannot be stopped or paused. EXEC_DIRECTPLAYER_CREATE Creates a direct player for a File, Url or EmbeddedPlaylist file. Parameter: (string) name|filename[|mixername|loop|attenuation] Reply: OK|ERROR name: the name of the player to create; filename: name of the media entry to use; mixername: the mixer channel to use, if omitted Route Standby is used; loop: loop playback (true or false); attenuation: volume in dB. Note: This command needs to be issued before any other EXEC_DIRECTPLAYER_ command (the given 'name' is to be specified in any such subsequent commands). Make sure to call EXEC_DIRECTPLAYER_FREE once you are done with it. EXEC_DIRECTPLAYER_FREE Deletes/Frees a player created with EXEC_DIRECTPLAYER_CREATE. Parameter: (string) name Reply: OK|ERROR name: the name of the player to free (as specified with EXEC_DIRECTPLAYER_CREATE). EXEC_DIRECTPLAYER_PLAY Starts playback of a player created with EXEC_DIRECTPLAYER_CREATE. Parameter: (string) name[|loop|attenuation|initialfadein] Reply: OK|ERROR name: the name of the player to start (as specified with EXEC_DIRECTPLAYER_CREATE); loop: loop playback (true or false); attenuation: volume in dB; initialfadein: initial fade-in time in ms. EXEC_DIRECTPLAYER_PAUSE Pauses playback of a player created with EXEC_DIRECTPLAYER_CREATE. Parameter: (string) name[|rewind|fadetime] Reply: OK|ERROR name: the name of the player to pause; rewind: true=rewind to beginning after pause, false=pause here; fadetime: in milliseconds (0=direct). EXEC_DIRECTPLAYER_STOP Stops playback of a player created with EXEC_DIRECTPLAYER_CREATE. Parameter: (string) name[|eject|fadetime] RADIO42 Confidential 219 ProppFrexx ONAIR Reply: OK|ERROR name: the name of the player to stop; eject: true=eject and free, false=rewind to beginning after stop; fadetime: in milliseconds (0=direct). EXEC_CREATEBACKUP Creates a backup of the major configuration settings. Parameter: (string) folder Reply: OK|ERROR The folder denotes the main folder (a sub-folder for each backup day is created automatically). Note macke sure to delete old backups yourself to preserve space! EXEC_COMMAND_USER Executes a user command. Parameter: (int) index Reply: OK|ERROR EXEC_COMMAND_USER_1 Executes the user 1 command. Parameter: none Reply: OK|ERROR EXEC_COMMAND_USER_2 Executes the user 2 command. Parameter: none Reply: OK|ERROR EXEC_COMMAND_USER_3 Executes the user 3 command. Parameter: none Reply: OK|ERROR EXEC_COMMAND_USER_4 Executes the user 4 command. Parameter: none Reply: OK|ERROR EXEC_COMMAND_USER_5 Executes the user 5 command. Parameter: none Reply: OK|ERROR EXEC_COMMAND_USER_6 Executes the user 6 command. Parameter: none Reply: OK|ERROR EXEC_COMMAND_USER_7 Executes the user 7 command. Parameter: none Reply: OK|ERROR EXEC_COMMAND_USER_8 Executes the user 8 command. Parameter: none Reply: OK|ERROR EXEC_COMMAND_USER_9 Executes the user 9 command. Parameter: none Reply: OK|ERROR EXEC_COMMAND_USER_10 Executes the user 10 command. Parameter: none Reply: OK|ERROR EXEC_COMMAND_USER_11 Executes the user 11 command. Parameter: none Reply: OK|ERROR EXEC_COMMAND_USER_12 Executes the user 12 command. Parameter: none Reply: OK|ERROR EXEC_COMMAND_USER_13 Executes the user 13 command. Parameter: none Reply: OK|ERROR EXEC_COMMAND_USER_14 Executes the user 14 command. Parameter: none Reply: OK|ERROR EXEC_COMMAND_USER_15 Executes the user 15 command. Parameter: none Reply: OK|ERROR EXEC_COMMAND_USER_16 Executes the user 16 command. Parameter: none Reply: OK|ERROR EXEC_COMMAND_USER_17 Executes the user 17 command. 220 RADIO42 Confidential APPENDIX Parameter: none Reply: OK|ERROR EXEC_COMMAND_USER_18 Executes the user 18 command. Parameter: none Reply: OK|ERROR EXEC_COMMAND_USER_19 Executes the user 19 command. Parameter: none Reply: OK|ERROR EXEC_COMMAND_USER_20 Executes the user 20 command. Parameter: none Reply: OK|ERROR EXEC_COMMAND_USER_21 Executes the user 21 command. Parameter: none Reply: OK|ERROR EXEC_COMMAND_USER_22 Executes the user 22 command. Parameter: none Reply: OK|ERROR EXEC_COMMAND_USER_23 Executes the user 23 command. Parameter: none Reply: OK|ERROR EXEC_COMMAND_USER_24 Executes the user 24 command. Parameter: none Reply: OK|ERROR EXEC_COMMAND_USER_25 Executes the user 25 command. Parameter: none Reply: OK|ERROR EXEC_COMMAND_USER_26 Executes the user 26 command. Parameter: none Reply: OK|ERROR EXEC_COMMAND_USER_27 Executes the user 27 command. Parameter: none Reply: OK|ERROR EXEC_COMMAND_USER_28 Executes the user 28 command. Parameter: none Reply: OK|ERROR EXEC_COMMAND_USER_29 Executes the user 29 command. Parameter: none Reply: OK|ERROR EXEC_COMMAND_USER_30 Executes the user 30 command. Parameter: none Reply: OK|ERROR EXEC_TAG_FILE Updates one or more TAGs of a file. Parameter: filename|tag=value[|tag=value] Reply: OK|ERROR filename: the fully qualified path to the audio file to update; tag: one of the following 'title', 'artist', 'album', 'albumartist', 'genre', 'comment', 'composer', 'year', 'copyright', 'publisher', 'encodedby'. EXEC_VAR_SET Sets an internal user variable with a certain value. Parameter: name|value Reply: OK|ERROR name: the name of the user variable to set; value: the value to set. Use the ${VAR:name} macro or EXEC_VAR_GET to retrieve it. EXEC_VAR_GET Gets an internal user variable value. Parameter: name Reply: (string) the variable value name: the name of the user variable to get. MAIN_VOLUME_GET Gets the main master volume value. Parameter: none Reply: (float) volume, between 0.0 (silence) and 1.0 (0dB) MAIN_VOLUME_SET Sets the main master volume value. Parameter: (float) volume, between 0.0 (silence) and 1.0 (0dB) Reply: OK|ERROR MAIN_VOLUME_SLIDE Slides the main master volume to a new value. Parameter: (float) volume, between 0.0 (silence) and 1.0 (0dB) RADIO42 Confidential 221 ProppFrexx ONAIR Reply: OK|ERROR MAIN_VOLUME_CHANGE Changes the main master volume by a delta value. Parameter: (float) volume delta, between -1.0 and 1.0 Reply: OK|ERROR MAIN_TALKOVER_GET Gets the main master talkover value. Parameter: none Reply: (bool) True, if set - False, if not MAIN_TALKOVER_TOGGLE Toggles the main master talkover value. Parameter: none Reply: OK MAIN_TALKOVER_ON Sets the main master talkover value to ON. Parameter: none Reply: OK MAIN_TALKOVER_OFF Sets the main master talkover value to OFF. Parameter: none Reply: OK MAIN_ONAIR_GET Gets the main OnAir status. Parameter: none Reply: (bool) True, if on air - False, if off air MAIN_ONAIR_TOGGLE Toggles the main OnAir status. Parameter: none Reply: OK MAIN_ONAIR_ON Sets the main OnAir status to ON. Parameter: none Reply: OK MAIN_ONAIR_OFF Sets the main master OnAir status to OFF. Parameter: none Reply: OK MAIN_ROUTE_DJA_GET Gets the routing for the DJ Player A. Parameter: none Reply: (string) the name of the mixer output channel the DJ Player A is routed to. MAIN_ROUTE_DJB_GET Gets the routing for the DJ Player B. Parameter: none Reply: (string) the name of the mixer output channel the DJ Player B is routed to. MAIN_ROUTE_DJC_GET Gets the routing for the DJ Player C. Parameter: none Reply: (string) the name of the mixer output channel the DJ Player C is routed to. MAIN_ROUTE_DJD_GET Gets the routing for the DJ Player D. Parameter: none Reply: (string) the name of the mixer output channel the DJ Player D is routed to. MAIN_ROUTE_PFL_GET Gets the routing for the PFL Player. Parameter: none Reply: (string) the name of the mixer output channel the PFL Player is routed to. MAIN_ROUTE_STANDBY_GET Gets the routing for the Standby Players. Parameter: none Reply: (string) the name of the mixer output channel the Standby Players are routed to. MAIN_ROUTE_OVERLAY_GET Gets the routing for the Overlay Players. Parameter: none Reply: (string) the name of the mixer output channel the Overlay Players are routed to. MAIN_ROUTE_QUICKMONITOR_GET Gets the routing for the QuickMonitor Player. Parameter: none Reply: (string) the name of the mixer output channel the QuickMonitor Player is routed to. MAIN_ROUTE_CW1_GET Gets the routing for the Cartwall I Players. Parameter: none 222 RADIO42 Confidential APPENDIX Reply: (string) the name of the mixer output channel the Cartwall I Players are routed to. MAIN_ROUTE_CW2_GET Gets the routing for the Cartwall II Players. Parameter: none Reply: (string) the name of the mixer output channel the Cartwall II Players are routed to. MAIN_ROUTE_DJA_SET Changes the routing for the DJ Player A. Parameter: mixername Reply: OK|ERROR mixername: the name of the mixer output channel to route the DJ Player A to MAIN_ROUTE_DJB_SET Changes the routing for the DJ Player B. Parameter: mixername Reply: OK|ERROR mixername: the name of the mixer output channel to route the DJ Player B to MAIN_ROUTE_DJC_SET Changes the routing for the DJ Player C. Parameter: mixername Reply: OK|ERROR mixername: the name of the mixer output channel to route the DJ Player C to MAIN_ROUTE_DJD_SET Changes the routing for the DJ Player D. Parameter: mixername Reply: OK|ERROR mixername: the name of the mixer output channel to route the DJ Player D to MAIN_ROUTE_DJA_SETDELAYED Changes the routing for DJ Player A when it is not playing anymore. Parameter: mixername Reply: OK|ERROR mixername: the name of the mixer output channel to route the DJ Player A to. If the player is currently playing the routing will be delayed and changed once it stopped playing. MAIN_ROUTE_DJB_SETDELAYED Changes the routing for DJ Player B when it is not playing anymore. Parameter: mixername Reply: OK|ERROR mixername: the name of the mixer output channel to route the DJ Player B to. If the player is currently playing the routing will be delayed and changed once it stopped playing. MAIN_ROUTE_DJC_SETDELAYED Changes the routing for DJ Player C when it is not playing anymore. Parameter: mixername Reply: OK|ERROR mixername: the name of the mixer output channel to route the DJ Player C to. If the player is currently playing the routing will be delayed and changed once it stopped playing. MAIN_ROUTE_DJD_SETDELAYED Changes the routing for DJ Player D when it is not playing anymore. Parameter: mixername Reply: OK|ERROR mixername: the name of the mixer output channel to route the DJ Player D to. If the player is currently playing the routing will be delayed and changed once it stopped playing. MAIN_ROUTE_PFL_SET Changes the routing for the PFL Player. Parameter: mixername Reply: OK|ERROR mixername: the name of the mixer output channel to route the PFL Player to MAIN_ROUTE_STANDBY_SET Changes the routing for the Standby Players. Parameter: mixername Reply: OK|ERROR mixername: the name of the mixer output channel to route the Standby Players to MAIN_ROUTE_STANDBY_SETDELAYED Changes the routing for the Standby Players when not playing anymore. Parameter: mixername Reply: OK|ERROR mixername: the name of the mixer output channel to route the RADIO42 Confidential 223 ProppFrexx ONAIR Standby Players to. If a player is currently playing the routing will be delayed and changed once it stopped playing. MAIN_ROUTE_OVERLAY_SET Changes the routing for the Overlay Players. Parameter: mixername Reply: OK|ERROR mixername: the name of the mixer output channel to route the Overlay Players to MAIN_ROUTE_QUICKMONITOR_SET Changes the routing for the QuickMonitor Player. Parameter: mixername Reply: OK|ERROR mixername: the name of the mixer output channel to route the QuickMonitor Player to MAIN_ROUTE_CW1_SET Changes the routing for the Cartwall I Players. Parameter: mixername Reply: OK|ERROR mixername: the name of the mixer output channel to route the Cartwall I Players to MAIN_ROUTE_CW2_SET Changes the routing for the Cartwall II Players. Parameter: mixername Reply: OK|ERROR mixername: the name of the mixer output channel to route the Cartwall II Players to MAIN_LINEIN_FEED_GET Gets the LineIn Feed state (mixer input channel). Parameter: none Reply: (string) the name of the mixer input channel or empty. MAIN_LINEIN_FEED_TOGGLE Toggles the LineIn Feed option (en- or disable mixer input channel). Parameter: mixername[|fadetime|stopplaylist|fadeotherio] Reply: OK|ERROR mixername: the name of the mixer input channel to disable; fadetime: fading time in ms; stopplaylist: true=stop current playlists;fadeotherio: true=fade out all other player outputs and overlay inputs. MAIN_LINEIN_FEED_ON Sets the LineIn Feed option to ON (enable mixer input channel). Parameter: mixername[|fadetime|stopplaylist|fadeotherio] Reply: OK|ERROR mixername: the name of the mixer input channel to disable; fadetime: fading time in ms; stopplaylist: true=stop current playlists;fadeotherio: true=fade out all other player outputs and overlay inputs. MAIN_LINEIN_FEED_OFF Sets the LineIn Feed option to OFF (disable mixer input channel). Parameter: mixername[|fadetime|stopplaylist|fadeotherio] Reply: OK|ERROR mixername: the name of the mixer input channel to disable; fadetime: fading time in ms; stopplaylist: true=stop current playlists;fadeotherio: true=fade out all other player outputs and overlay inputs. MAIN_LOAD_MIXER_SETUP Loads a given main mixer setup. Parameter: (string) setupname Reply: OK|ERROR setupname: the name of the mixer setup to load (e.g. 'Default'). MAIN_LOAD_MIXER_PRESET_1 Loads the main mixer preset 1. Parameter: none Reply: OK MAIN_LOAD_MIXER_PRESET_2 Loads the main mixer preset 2. Parameter: none Reply: OK MAIN_LOAD_MIXER_PRESET_3 Loads the main mixer preset 3. Parameter: none Reply: OK MAIN_LOAD_MIXER_PRESET_4 Loads the main mixer preset 4. Parameter: none Reply: OK MAIN_LOAD_MIXER_PRESET_5 Loads the main mixer preset 5. 224 RADIO42 Confidential APPENDIX Parameter: none Reply: OK MAIN_AUTOPLAYLIST_NAMES_GET Gets all available names which can be selected as an AutoPlaylist. Parameter: none Reply: (string) list of available AutoPlaylistNames (one per line) MAIN_RELOAD_LIBRARY Reloads all or a specific media library (and optionally the script libraries). Parameter: [medialib] Reply: OK|ERROR If no medialib (filename and path) is specified all media libraries are reloaded. MAIN_RESCAN_LIBRARY Rescans or Reloads all or a specific media library. Parameter: [medialib] Reply: OK|ERROR If no medialib (filename and path) is specified all media libraries are rescanned. Note: Only synced folder based media libs are rescanned, others are reloaded. MAIN_RELOAD_MEDIALIBRARY Reloads all or a specific media library. Parameter: [medialib] Reply: OK|ERROR If no medialib (filename and path) is specified all media libraries are reloaded. MAIN_RELOAD_SCRIPTLIBRARY Reloads the entire script library. Parameter: none Reply: OK|ERROR MAIN_USER_LOGOFF Logs off the current user. Parameter: none Reply: OK|ERROR MAIN_SHOW_MIXER Shows the Mixer window. Parameter: none Reply: OK|ERROR MAIN_SHOW_FIND Shows the Find window. Parameter: none Reply: OK|ERROR MAIN_SHOW_EXPLORER Shows the Explorer window. Parameter: none Reply: OK|ERROR MAIN_SHOW_TRACKBOARD Shows the Trackboard window. Parameter: none Reply: OK|ERROR MAIN_SHOW_TIMECODE Shows the TimeCode window. Parameter: none Reply: OK|ERROR MAIN_SHOW_TRACKINFO Shows the TrackInformation window. Parameter: none Reply: OK|ERROR MAIN_SHOW_ONAIRTIME Shows the OnAirTime window. Parameter: none Reply: OK|ERROR MAIN_SHOW_STATIONINFO Shows the StationInfo window. Parameter: none Reply: OK|ERROR MAIN_SHOW_CARTWALL1 Shows the Cartwall I window. Parameter: none Reply: OK|ERROR MAIN_SHOW_CARTWALL2 Shows the Cartwall II window. Parameter: none Reply: OK|ERROR MAIN_SHOW_STANDBYPLAYERS Shows the StandbyPlayers window. Parameter: none Reply: OK|ERROR MAIN_SHOW_WEBBROWSER Shows the WebBrowser window. Parameter: none Reply: OK|ERROR RADIO42 Confidential 225 ProppFrexx ONAIR MAIN_SHOW_STREAMINGMONITOR Shows the NetworkStreamingMonitor window. Parameter: none Reply: OK|ERROR MAIN_SHOW_CONTROLROOM Shows the ControlRoom/MessageCenter window. Parameter: none Reply: OK|ERROR MAIN_SHOW_USERCOMMANDS Shows the UserCommands window. Parameter: none Reply: OK|ERROR MAIN_SHOW_VOICETRACKING Opens the VoiceTracking window. Parameter: none Reply: OK|ERROR MAIN_SHOW_SEGUEEDITOR Opens the SegueEditor window for the current playlist. Parameter: none Reply: OK|ERROR MAIN_SHOW_REMOTECLIENTMANAGER Opens the Remote Client Manager window. Parameter: none Reply: OK|ERROR MAIN_SENDKEY Sends keystrokes to the active application. Parameter: keys Reply: OK|ERROR MAIN_SHUTDOWN Closes and Exists ProppFrexx ONAIR. Parameter: none Reply: OK|ERROR MIXER_OUTPUT_NAMES_GET Gets the list of available output mixers. Parameter: none Reply: (string) list of output mixer names (one per line) MIXER_OUTPUT_SELECT Selects a mixer for all subsequent mixer commands. Parameter: [index|mixername] Reply: OK|ERROR You can either specify a numeric index or a mixername as a parameter. Not giving any parameter selects the next mixer. To get the list of available MixerNames use: MIXER_OUTPUT_NAMES_GET. MIXER_OUTPUT_SELECT_1 Selects the 1st mixer for all subsequent mixer commands. Parameter: none Reply: OK|ERROR MIXER_OUTPUT_SELECT_2 Selects the 2nd mixer for all subsequent mixer commands. Parameter: none Reply: OK|ERROR MIXER_OUTPUT_SELECT_3 Selects the 3rd mixer for all subsequent mixer commands. Parameter: none Reply: OK|ERROR MIXER_OUTPUT_SELECT_4 Selects the 4th mixer for all subsequent mixer commands. Parameter: none Reply: OK|ERROR MIXER_OUTPUT_SELECT_5 Selects the 5th mixer for all subsequent mixer commands. Parameter: none Reply: OK|ERROR MIXER_OUTPUT_SELECT_6 Selects the 6th mixer for all subsequent mixer commands. Parameter: none Reply: OK|ERROR MIXER_OUTPUT_SELECT_7 Selects the 7th mixer for all subsequent mixer commands. Parameter: none Reply: OK|ERROR MIXER_OUTPUT_SELECT_8 Selects the 8th mixer for all subsequent mixer commands. Parameter: none Reply: OK|ERROR MIXER_OUTPUT_SELECT_9 Selects the 9th mixer for all subsequent mixer commands. Parameter: none Reply: OK|ERROR MIXER_OUTPUT_SELECT_10 Selects the 10th mixer for all subsequent mixer commands. Parameter: none 226 RADIO42 Confidential APPENDIX Reply: OK|ERROR MIXER_OUTPUT_SELECT_11 Selects the 11th mixer for all subsequent mixer commands. Parameter: none Reply: OK|ERROR MIXER_OUTPUT_SELECT_12 Selects the 12th mixer for all subsequent mixer commands. Parameter: none Reply: OK|ERROR MIXER_OUTPUT_SELECT_13 Selects the 13th mixer for all subsequent mixer commands. Parameter: none Reply: OK|ERROR MIXER_OUTPUT_SELECT_14 Selects the 14th mixer for all subsequent mixer commands. Parameter: none Reply: OK|ERROR MIXER_OUTPUT_SELECT_15 Selects the 15th mixer for all subsequent mixer commands. Parameter: none Reply: OK|ERROR MIXER_OUTPUT_SELECT_16 Selects the 16th mixer for all subsequent mixer commands. Parameter: none Reply: OK|ERROR MIXER_OUTPUT_SELECT_GET Gets the currently selected mixer for all subsequent mixer commands. Parameter: none Reply: mixername|ERROR MIXER_OUTPUT_VOLUME_GET Gets a mixers volume value. Parameter: [mixername] Reply: (float) volume, between 0.0 (silence) and 1.0 (0dB) If no parameter is given the last selected output mixer is used (see MIXER_OUTPUT_SELECT). MIXER_OUTPUT_VOLUME_SET Sets a mixers volume value. Parameter: [mixername|]volume (between 0.0 and 1.0) Reply: OK|ERROR If no mixername is given the last selected output mixer is used (see MIXER_OUTPUT_SELECT). MIXER_OUTPUT_VOLUME_SLIDE Slides the mixers volume to a new value. Parameter: [mixername|]volume (between 0.0 and 1.0) Reply: OK|ERROR If no mixername is given the last selected output mixer is used (see MIXER_OUTPUT_SELECT). MIXER_OUTPUT_VOLUME_CHANGE Changes a mixers volume by a delta value. Parameter: [mixername|]volumedelta (between -1.0 and 1.0) Reply: OK|ERROR If no mixername is given the last selected output mixer is used (see MIXER_OUTPUT_SELECT). MIXER_OUTPUT_PAN_GET Gets a mixers balance value. Parameter: [mixername] Reply: (float) pan, between -1.0 (left) and 1.0 (right) If no parameter is given the last selected output mixer is used (see MIXER_OUTPUT_SELECT). MIXER_OUTPUT_PAN_SET Sets a mixers balance value. Parameter: [mixername|]pan (between -1.0 and 1.0) Reply: OK|ERROR If no mixername is given the last selected output mixer is used (see MIXER_OUTPUT_SELECT). MIXER_OUTPUT_PAN_CHANGE Changes a mixers balance by a delta value. Parameter: [mixername|]pandelta (between -1.0 and 1.0) Reply: OK|ERROR If no mixername is given the last selected output mixer is used (see MIXER_OUTPUT_SELECT). MIXER_OUTPUT_SND2VOLUME_GET Gets a mixers SND2 volume value. Parameter: [mixername] Reply: (float) volume, between 0.0 (silence) and 1.0 (0dB) If no parameter is given the last selected output mixer is used (see MIXER_OUTPUT_SELECT). MIXER_OUTPUT_SND2VOLUME_SET Sets a mixers SND2 volume value. Parameter: [mixername|]volume (between 0.0 and 1.0) Reply: OK|ERROR If no mixername is given the last selected output mixer is used RADIO42 Confidential 227 ProppFrexx ONAIR (see MIXER_OUTPUT_SELECT). MIXER_OUTPUT_SND2VOLUME_CHANGE Changes a mixers SND2 volume by a delta value. Parameter: [mixername|]volumedelta (between -1.0 and 1.0) Reply: OK|ERROR If no mixername is given the last selected output mixer is used (see MIXER_OUTPUT_SELECT). MIXER_OUTPUT_SND2PAN_GET Gets a mixers SND2 balance value. Parameter: [mixername] Reply: (float) pan, between -1.0 (left) and 1.0 (right) If no parameter is given the last selected output mixer is used (see MIXER_OUTPUT_SELECT). MIXER_OUTPUT_SND2PAN_SET Sets a mixers SND2 balance value. Parameter: [mixername|]pan (between -1.0 and 1.0) Reply: OK|ERROR If no mixername is given the last selected output mixer is used (see MIXER_OUTPUT_SELECT). MIXER_OUTPUT_SND2PAN_CHANGE Changes a mixers SND2 balance by a delta value. Parameter: [mixername|]pandelta (between -1.0 and 1.0) Reply: OK|ERROR If no mixername is given the last selected output mixer is used (see MIXER_OUTPUT_SELECT). MIXER_OUTPUT_GAIN_GET Gets a mixers gain value. Parameter: [mixername] Reply: (float) gain, between -15.0 dB and 15.0 dB If no parameter is given the last selected output mixer is used (see MIXER_OUTPUT_SELECT). MIXER_OUTPUT_GAIN_SET Sets a mixers gain value. Parameter: [mixername|]gain (between -15.0 and 15.0) Reply: OK|ERROR If no mixername is given the last selected output mixer is used (see MIXER_OUTPUT_SELECT). MIXER_OUTPUT_GAIN_CHANGE Changes a mixers gain by a delta value. Parameter: [mixername|]gaindelta (between -15.0 and 15.0) Reply: OK|ERROR If no mixername is given the last selected output mixer is used (see MIXER_OUTPUT_SELECT). MIXER_OUTPUT_ON_GET Gets a mixers ON value. Parameter: [mixername] Reply: (bool) True, if set - False, if not If no parameter is given the last selected output mixer is used (see MIXER_OUTPUT_SELECT). MIXER_OUTPUT_ON_TOGGLE Toggles a mixers ON value. Parameter: [mixername] Reply: OK|ERROR If no parameter is given the last selected output mixer is used (see MIXER_OUTPUT_SELECT). MIXER_OUTPUT_ON_ON Sets a mixer to ON. Parameter: [mixername] Reply: OK|ERROR If no parameter is given the last selected output mixer is used (see MIXER_OUTPUT_SELECT). MIXER_OUTPUT_ON_OFF Sets a mixer to OFF. Parameter: [mixername] Reply: OK|ERROR If no parameter is given the last selected output mixer is used (see MIXER_OUTPUT_SELECT). MIXER_OUTPUT_LOCK_GET Gets a mixers LOCK value. Parameter: [mixername] Reply: (bool) True, if locked - False, if unlocked If no parameter is given the last selected output mixer is used (see MIXER_OUTPUT_SELECT). MIXER_OUTPUT_LOCK_TOGGLE Toggles a mixers LOCK value. Parameter: [mixername] Reply: OK|ERROR If no parameter is given the last selected output mixer is used (see MIXER_OUTPUT_SELECT). 228 RADIO42 Confidential APPENDIX MIXER_OUTPUT_LOCK Sets a mixer to LOCKED. Parameter: [mixername] Reply: OK|ERROR If no parameter is given the last selected output mixer is used (see MIXER_OUTPUT_SELECT). MIXER_OUTPUT_UNLOCK Sets a mixer to UNLOCKED. Parameter: [mixername] Reply: OK|ERROR If no parameter is given the last selected output mixer is used (see MIXER_OUTPUT_SELECT). MIXER_OUTPUT_MUTE_GET Gets a mixers MUTE value. Parameter: [mixername] Reply: (bool) True, if set - False, if not If no parameter is given the last selected output mixer is used (see MIXER_OUTPUT_SELECT). MIXER_OUTPUT_MUTE_TOGGLE Toggles a mixers MUTE value. Parameter: [mixername] Reply: OK|ERROR If no parameter is given the last selected output mixer is used (see MIXER_OUTPUT_SELECT). MIXER_OUTPUT_MUTE_ON Sets a mixer to MUTE. Parameter: [mixername] Reply: OK|ERROR If no parameter is given the last selected output mixer is used (see MIXER_OUTPUT_SELECT). MIXER_OUTPUT_MUTE_OFF Sets a mixer to NOT MUTE. Parameter: [mixername] Reply: OK|ERROR If no parameter is given the last selected output mixer is used (see MIXER_OUTPUT_SELECT). MIXER_OUTPUT_DUCK Toggles the volume of the mixer to the talkover level resp. the maximum volume. Parameter: [mixername] Reply: OK|ERROR If no parameter is given the last selected output mixer is used (see MIXER_OUTPUT_SELECT). MIXER_OUTPUT_RESET_FULLDUPLEX Resets a mixers Full-Duplex buffers. Parameter: [mixername] Reply: OK|ERROR If no parameter is given the last selected output mixer is used (see MIXER_OUTPUT_SELECT). MIXER_OUTPUT_RECREATERESET Recreates and Resets a mixer. Parameter: [mixername] Reply: OK|ERROR If no parameter is given the last selected output mixer is used (see MIXER_OUTPUT_SELECT). MIXER_OUTPUT_SND2_GET Gets a mixers SND2 value. Parameter: [mixername] Reply: (bool) True, if set - False, if not If no parameter is given the last selected output mixer is used (see MIXER_OUTPUT_SELECT). MIXER_OUTPUT_SND2_TOGGLE Toggles a mixers SND2 value. Parameter: [mixername] Reply: OK|ERROR If no parameter is given the last selected output mixer is used (see MIXER_OUTPUT_SELECT). MIXER_OUTPUT_SND2_ON Sets a mixer to SND2. Parameter: [mixername] Reply: OK|ERROR If no parameter is given the last selected output mixer is used (see MIXER_OUTPUT_SELECT). MIXER_OUTPUT_SND2_OFF Sets a mixer to NOT SND2. Parameter: [mixername] Reply: OK|ERROR If no parameter is given the last selected output mixer is used (see MIXER_OUTPUT_SELECT). MIXER_OUTPUT_SND2POSTFADING_GET Gets a mixers SND2 Pre/Post-Fading value. Parameter: [mixername] Reply: (bool) True, if Post-Fading - False, if Pre-Fading RADIO42 Confidential 229 ProppFrexx ONAIR If no parameter is given the last selected output mixer is used (see MIXER_OUTPUT_SELECT). MIXER_OUTPUT_SND2POSTFADING_TOG GLE Toggles a mixers SND2 Pre/Post-Fading value. Parameter: [mixername] Reply: OK|ERROR If no parameter is given the last selected output mixer is used (see MIXER_OUTPUT_SELECT). MIXER_OUTPUT_SND2POSTFADING_ON Sets a mixer to SND2 Post-Fading. Parameter: [mixername] Reply: OK|ERROR If no parameter is given the last selected output mixer is used (see MIXER_OUTPUT_SELECT). MIXER_OUTPUT_SND2POSTFADING_OFF Sets a mixer to SND2 Pre-Fading. Parameter: [mixername] Reply: OK|ERROR If no parameter is given the last selected output mixer is used (see MIXER_OUTPUT_SELECT). MIXER_OUTPUT_REC_GET Gets a mixers REC value. Parameter: [mixername] Reply: (bool) True, if set - False, if not If no parameter is given the last selected output mixer is used (see MIXER_OUTPUT_SELECT). MIXER_OUTPUT_REC_TOGGLE Toggles a mixers REC value. Parameter: [mixername] Reply: OK|ERROR If no parameter is given the last selected output mixer is used (see MIXER_OUTPUT_SELECT). MIXER_OUTPUT_REC_ON Sets a mixer to REC. Parameter: [mixername][|filename] Reply: OK|ERROR If no parameter is given the last selected output mixer is used (see MIXER_OUTPUT_SELECT). If an optional filename is given that one is used. MIXER_OUTPUT_REC_OFF Sets a mixer to NOT REC. Parameter: [mixername] Reply: OK|ERROR If no parameter is given the last selected output mixer is used (see MIXER_OUTPUT_SELECT). MIXER_OUTPUT_REC_AUTOSENSING_GE T Gets a mixers REC AUTOSENSING value. Parameter: [mixername] Reply: (string) Off, Pause, Stop or NewSession If no parameter is given the last selected output mixer is used (see MIXER_OUTPUT_SELECT). MIXER_OUTPUT_REC_AUTOSENSING_SE T Sets a mixers REC AUTOSENSING value. Parameter: [mixername|]mode (Off, Pause, Stop or NewSession) Reply: OK|ERROR If no mixername is given the last selected output mixer is used (see MIXER_OUTPUT_SELECT). MIXER_OUTPUT_REC_PAUSE_GET Gets a mixers REC PAUSE value. Parameter: [mixername] Reply: (bool) True, if set - False, if not If no parameter is given the last selected output mixer is used (see MIXER_OUTPUT_SELECT). MIXER_OUTPUT_REC_PAUSE_TOGGLE Toggles a mixers REC PAUSE value. Parameter: [mixername] Reply: OK|ERROR If no parameter is given the last selected output mixer is used (see MIXER_OUTPUT_SELECT). MIXER_OUTPUT_REC_PAUSE_ON Sets a mixer to REC PAUSE. Parameter: [mixername] Reply: OK|ERROR If no parameter is given the last selected output mixer is used (see MIXER_OUTPUT_SELECT). MIXER_OUTPUT_REC_PAUSE_OFF Sets a mixer to NOT REC PAUSE. Parameter: [mixername] Reply: OK|ERROR 230 RADIO42 Confidential APPENDIX If no parameter is given the last selected output mixer is used (see MIXER_OUTPUT_SELECT). MIXER_OUTPUT_ADM_GET Gets a mixers ASIO Direct Monitoring state. Parameter: [mixername] Reply: (bool) True, if set - False, if not If no parameter is given the last selected output mixer is used (see MIXER_OUTPUT_SELECT). Note: ASIO only, not all soundcards/drivers support ADM! MIXER_OUTPUT_ADM_TOGGLE Toggles a mixers ASIO Direct Monitoring state. Parameter: [mixername] Reply: OK|ERROR If no parameter is given the last selected output mixer is used (see MIXER_OUTPUT_SELECT). Note: ASIO only, not all soundcards/drivers support ADM! MIXER_OUTPUT_ADM_ON Sets a mixer to ASIO Direct Monitoring ON. Parameter: [mixername] Reply: OK|ERROR If no parameter is given the last selected output mixer is used (see MIXER_OUTPUT_SELECT). Note: ASIO only, not all soundcards/drivers support ADM! MIXER_OUTPUT_ADM_OFF Sets a mixer to ASIO Direct Monitoring OFF. Parameter: [mixername] Reply: OK|ERROR If no parameter is given the last selected output mixer is used (see MIXER_OUTPUT_SELECT). Note: ASIO only, not all soundcards/drivers support ADM! MIXER_INPUT_NAMES_GET Gets the list of available input mixers. Parameter: none Reply: (string) list of input mixer names (one per line) MIXER_INPUT_SELECT Selects a mixer for all subsequent mixer commands. Parameter: [index|mixername] Reply: OK|ERROR You can either specify a numeric index or a mixername as a parameter. Not giving any parameter selects the next mixer. To get the list of available MixerNames use: MIXER_INPUT_NAMES_GET. MIXER_INPUT_SELECT_1 Selects the 1st mixer for all subsequent mixer commands. Parameter: none Reply: OK|ERROR MIXER_INPUT_SELECT_2 Selects the 2nd mixer for all subsequent mixer commands. Parameter: none Reply: OK|ERROR MIXER_INPUT_SELECT_3 Selects the 3rd mixer for all subsequent mixer commands. Parameter: none Reply: OK|ERROR MIXER_INPUT_SELECT_4 Selects the 4th mixer for all subsequent mixer commands. Parameter: none Reply: OK|ERROR MIXER_INPUT_SELECT_5 Selects the 5th mixer for all subsequent mixer commands. Parameter: none Reply: OK|ERROR MIXER_INPUT_SELECT_6 Selects the 6th mixer for all subsequent mixer commands. Parameter: none Reply: OK|ERROR MIXER_INPUT_SELECT_7 Selects the 7th mixer for all subsequent mixer commands. Parameter: none Reply: OK|ERROR MIXER_INPUT_SELECT_8 Selects the 8th mixer for all subsequent mixer commands. Parameter: none Reply: OK|ERROR MIXER_INPUT_SELECT_9 Selects the 9th mixer for all subsequent mixer commands. Parameter: none Reply: OK|ERROR MIXER_INPUT_SELECT_10 Selects the 10th mixer for all subsequent mixer commands. Parameter: none Reply: OK|ERROR MIXER_INPUT_SELECT_11 Selects the 11th mixer for all subsequent mixer commands. RADIO42 Confidential 231 ProppFrexx ONAIR Parameter: none Reply: OK|ERROR MIXER_INPUT_SELECT_12 Selects the 12th mixer for all subsequent mixer commands. Parameter: none Reply: OK|ERROR MIXER_INPUT_SELECT_13 Selects the 13th mixer for all subsequent mixer commands. Parameter: none Reply: OK|ERROR MIXER_INPUT_SELECT_14 Selects the 14th mixer for all subsequent mixer commands. Parameter: none Reply: OK|ERROR MIXER_INPUT_SELECT_15 Selects the 15th mixer for all subsequent mixer commands. Parameter: none Reply: OK|ERROR MIXER_INPUT_SELECT_16 Selects the 16th mixer for all subsequent mixer commands. Parameter: none Reply: OK|ERROR MIXER_INPUT_SELECT_GET Gets the currently selected mixer for all subsequent mixer commands. Parameter: none Reply: mixername|ERROR MIXER_INPUT_VOLUME_GET Gets a mixers volume value. Parameter: [mixername] Reply: (float) volume, between 0.0 (silence) and 1.0 (0dB) If no parameter is given the last selected input mixer is used (see MIXER_INPUT_SELECT). MIXER_INPUT_VOLUME_SET Sets a mixers volume value. Parameter: [mixername|]volume (between 0.0 and 1.0) Reply: OK|ERROR If no mixername is given the last selected input mixer is used (see MIXER_INPUT_SELECT). MIXER_INPUT_VOLUME_SLIDE Slides the mixers volume to a new value. Parameter: [mixername|]volume (between 0.0 and 1.0) Reply: OK|ERROR If no mixername is given the last selected input mixer is used (see MIXER_INPUT_SELECT). MIXER_INPUT_VOLUME_CHANGE Changes a mixers volume by a delta value. Parameter: [mixername|]volumedelta (between -1.0 and 1.0) Reply: OK|ERROR If no mixername is given the last selected input mixer is used (see MIXER_INPUT_SELECT). MIXER_INPUT_PAN_GET Gets a mixers balance value. Parameter: [mixername] Reply: (float) pan, between -1.0 (left) and 1.0 (right) If no parameter is given the last selected input mixer is used (see MIXER_INPUT_SELECT). MIXER_INPUT_PAN_SET Sets the mixers balance value. Parameter: [mixername|]pan (between -1.0 and 1.0) Reply: OK|ERROR If no mixername is given the last selected input mixer is used (see MIXER_INPUT_SELECT). MIXER_INPUT_PAN_CHANGE Changes the mixers balance by a delta value. Parameter: [mixername|]pandelta (between -1.0 and 1.0) Reply: OK|ERROR If no mixername is given the last selected input mixer is used (see MIXER_INPUT_SELECT). MIXER_INPUT_GAIN_GET Gets a mixers gain value. Parameter: [mixername] Reply: (float) gain, between -15.0 dB and 15.0 dB If no parameter is given the last selected input mixer is used (see MIXER_INPUT_SELECT). MIXER_INPUT_GAIN_SET Sets a mixers gain value. Parameter: [mixername|]gain (between -15.0 and 15.0) Reply: OK|ERROR 232 RADIO42 Confidential APPENDIX If no mixername is given the last selected input mixer is used (see MIXER_INPUT_SELECT). MIXER_INPUT_GAIN_CHANGE Changes a mixers gain by a delta value. Parameter: [mixername|]gaindelta (between -15.0 and 15.0) Reply: OK|ERROR If no mixername is given the last selected input mixer is used (see MIXER_INPUT_SELECT). MIXER_INPUT_ON_GET Gets a mixers ON value. Parameter: [mixername] Reply: (bool) True, if set - False, if not If no parameter is given the last selected input mixer is used (see MIXER_INPUT_SELECT). MIXER_INPUT_ON_TOGGLE Toggles a mixers ON value. Parameter: [mixername] Reply: OK|ERROR If no parameter is given the last selected input mixer is used (see MIXER_INPUT_SELECT). MIXER_INPUT_ON_ON Sets a mixer to ON. Parameter: [mixername] Reply: OK|ERROR If no parameter is given the last selected input mixer is used (see MIXER_INPUT_SELECT). MIXER_INPUT_ON_OFF Sets a mixer to OFF. Parameter: [mixername] Reply: OK|ERROR If no parameter is given the last selected input mixer is used (see MIXER_INPUT_SELECT). MIXER_INPUT_LOCK_GET Gets a mixers LOCK value. Parameter: [mixername] Reply: (bool) True, if locked - False, if unlocked If no parameter is given the last selected input mixer is used (see MIXER_INPUT_SELECT). MIXER_INPUT_LOCK_TOGGLE Toggles a mixers LOCK value. Parameter: [mixername] Reply: OK|ERROR If no parameter is given the last selected input mixer is used (see MIXER_INPUT_SELECT). MIXER_INPUT_LOCK Sets a mixer to LOCKED. Parameter: [mixername] Reply: OK|ERROR If no parameter is given the last selected input mixer is used (see MIXER_INPUT_SELECT). MIXER_INPUT_UNLOCK Sets a mixer to UNLOCKED. Parameter: [mixername] Reply: OK|ERROR If no parameter is given the last selected input mixer is used (see MIXER_INPUT_SELECT). MIXER_INPUT_MUTE_GET Gets a mixers MUTE value. Parameter: [mixername] Reply: (bool) True, if set - False, if not If no parameter is given the last selected input mixer is used (see MIXER_INPUT_SELECT). MIXER_INPUT_MUTE_TOGGLE Toggles a mixers MUTE value. Parameter: [mixername] Reply: OK|ERROR If no parameter is given the last selected input mixer is used (see MIXER_INPUT_SELECT). MIXER_INPUT_MUTE_ON Sets a mixer to MUTE. Parameter: [mixername] Reply: OK|ERROR If no parameter is given the last selected input mixer is used (see MIXER_INPUT_SELECT). MIXER_INPUT_MUTE_OFF Sets a mixer to NOT MUTE. Parameter: [mixername] Reply: OK|ERROR If no parameter is given the last selected input mixer is used (see MIXER_INPUT_SELECT). MIXER_INPUT_DUCK Toggles the volume of the mixer to the talkover level resp. the RADIO42 Confidential 233 ProppFrexx ONAIR maximum volume. Parameter: [mixername] Reply: OK|ERROR If no parameter is given the last selected output mixer is used (see MIXER_INPUT_SELECT). MIXER_INPUT_RESET_FULLDUPLEX Resets a mixers Full-Duplex buffers. Parameter: [mixername] Reply: OK|ERROR If no parameter is given the last selected input mixer is used (see MIXER_INPUT_SELECT). MIXER_INPUT_RECREATERESET Recreates and Resets a mixer. Parameter: [mixername] Reply: OK|ERROR If no parameter is given the last selected input mixer is used (see MIXER_INPUT_SELECT). MIXER_INPUT_SND2_GET Gets a mixers SND2 value. Parameter: [mixername] Reply: (bool) True, if set - False, if not If no parameter is given the last selected input mixer is used (see MIXER_INPUT_SELECT). MIXER_INPUT_SND2_TOGGLE Toggles a mixers SND2 value. Parameter: [mixername] Reply: OK|ERROR If no parameter is given the last selected input mixer is used (see MIXER_INPUT_SELECT). MIXER_INPUT_SND2_ON Sets a mixer to SND2. Parameter: [mixername] Reply: OK|ERROR If no parameter is given the last selected input mixer is used (see MIXER_INPUT_SELECT). MIXER_INPUT_SND2_OFF Sets a mixer to NOT SND2. Parameter: [mixername] Reply: OK|ERROR If no parameter is given the last selected input mixer is used (see MIXER_INPUT_SELECT). MIXER_INPUT_REC_GET Gets a mixers REC value. Parameter: [mixername] Reply: (bool) True, if set - False, if not If no parameter is given the last selected input mixer is used (see MIXER_INPUT_SELECT). MIXER_INPUT_REC_TOGGLE Toggles a mixers REC value. Parameter: [mixername] Reply: OK|ERROR If no parameter is given the last selected input mixer is used (see MIXER_INPUT_SELECT). MIXER_INPUT_REC_ON Sets a mixer to REC. Parameter: [mixername][|filename] Reply: OK|ERROR If no parameter is given the last selected input mixer is used (see MIXER_INPUT_SELECT). If an optional filename is given that one is used. MIXER_INPUT_REC_OFF Sets a mixer to NOT REC. Parameter: [mixername] Reply: OK|ERROR If no parameter is given the last selected input mixer is used (see MIXER_INPUT_SELECT). MIXER_INPUT_REC_AUTOSENSING_GET Gets a mixers REC AUTOSENSING value. Parameter: [mixername] Reply: (string) Off, Pause, Stop or NewSession If no parameter is given the last selected input mixer is used (see MIXER_INPUT_SELECT). MIXER_INPUT_REC_AUTOSENSING_SET Set the mixer REC AUTOSENSING value. Parameter: [mixername|]mode (Off, Pause, Stop, NewSession) Reply: OK|ERROR If no mixername is given the last selected input mixer is used (see MIXER_INPUT_SELECT). 234 RADIO42 Confidential APPENDIX MIXER_INPUT_REC_PAUSE_GET Gets a mixers REC PAUSE value. Parameter: [mixername] Reply: (bool) True, if set - False, if not If no parameter is given the last selected input mixer is used (see MIXER_INPUT_SELECT). MIXER_INPUT_REC_PAUSE_TOGGLE Toggles a mixers REC PAUSE value. Parameter: [mixername] Reply: OK|ERROR If no parameter is given the last selected input mixer is used (see MIXER_INPUT_SELECT). MIXER_INPUT_REC_PAUSE_ON Sets a mixer to REC PAUSE. Parameter: [mixername] Reply: OK|ERROR If no parameter is given the last selected input mixer is used (see MIXER_INPUT_SELECT). MIXER_INPUT_REC_PAUSE_OFF Sets a mixer to NOT REC PAUSE. Parameter: [mixername] Reply: OK|ERROR If no parameter is given the last selected input mixer is used (see MIXER_INPUT_SELECT). MIXER_INPUT_ADM_GET Gets a mixers ASIO Direct Monitoring state. Parameter: [mixername] Reply: (bool) True, if set - False, if not If no parameter is given the last selected input mixer is used (see MIXER_INPUT_SELECT). Note: ASIO only, not all soundcards/drivers support ADM! MIXER_INPUT_ADM_TOGGLE Toggles a mixers ASIO Direct Monitoring state. Parameter: [mixername] Reply: OK|ERROR If no parameter is given the last selected input mixer is used (see MIXER_INPUT_SELECT). Note: ASIO only, not all soundcards/drivers support ADM! MIXER_INPUT_ADM_ON Sets a mixer to ASIO Direct Monitoring ON. Parameter: [mixername] Reply: OK|ERROR If no parameter is given the last selected input mixer is used (see MIXER_INPUT_SELECT). Note: ASIO only, not all soundcards/drivers support ADM! MIXER_INPUT_ADM_OFF Sets a mixer to ASIO Direct Monitoring OFF. Parameter: [mixername] Reply: OK|ERROR If no parameter is given the last selected input mixer is used (see MIXER_INPUT_SELECT). Note: ASIO only, not all soundcards/drivers support ADM! MIXER_OUTPUT_SND2AUTO_GET Gets a mixers AUTO SND2 value. Parameter: [mixername] Reply: (int) 0=Off, 1=SND2 at Maximum or 2=SND2 at Minimum If no parameter is given the last selected output mixer is used (see MIXER_OUTPUT_SELECT). MIXER_OUTPUT_SND2AUTO_SET Set the mixer AUTO SND2 value. Parameter: [mixername|]mode (0=Off, 1=SND2 at Maximum or 2=SND2 at Minimum) Reply: OK|ERROR If no mixername is given the last selected output mixer is used (see MIXER_OUTPUT_SELECT). MIXER_INPUT_SND2AUTO_GET Gets a mixers AUTO SND2 value. Parameter: [mixername] Reply: (int) 0=Off, 1=SND2 at Maximum or 2=SND2 at Minimum If no parameter is given the last selected input mixer is used (see MIXER_INPUT_SELECT). MIXER_INPUT_SND2AUTO_SET Set the mixer AUTO SND2 value. Parameter: [mixername|]mode (0=Off, 1=SND2 at Maximum or 2=SND2 at Minimum) Reply: OK|ERROR If no mixername is given the last selected input mixer is used (see MIXER_INPUT_SELECT). MIXER_OUTPUT_SND2MIXER_GET Gets a mixers SND2 Mixer value (list of mixer names currently SND2). Parameter: [mixername] RADIO42 Confidential 235 ProppFrexx ONAIR Reply: (string) list of SND2 mixer names (seperated by '|') If no parameter is given the last selected output mixer is used (see MIXER_OUTPUT_SELECT). MIXER_OUTPUT_SND2MIXER_SET Set the mixer SND2 Mixer value (adds a new SND2 mixer or removes it when already set). Parameter: [mixername|]snd2mixer Reply: OK|ERROR If no mixername is given the last selected output mixer is used (see MIXER_OUTPUT_SELECT). Note: if the snd2mixer is already assigned it will be removed. MIXER_INPUT_SND2MIXER_GET Gets a mixers SND2 Mixer value (list of mixer names currently SND2). Parameter: [mixername] Reply: (string) list of SND2 mixer names (seperated by '|') If no parameter is given the last selected input mixer is used (see MIXER_INPUT_SELECT). MIXER_INPUT_SND2MIXER_SET Set the mixer SND2 Mixer value (adds a new SND2 mixer or removes it when already set). Parameter: [mixername|]snd2mixer Reply: OK|ERROR If no mixername is given the last selected input mixer is used (see MIXER_INPUT_SELECT). Note: if the snd2mixer is already assigned it will be removed. MIXER_OUTPUT_SILENCEDETECTION_O N Temporarily enables the silence detection for the mixer channel. Parameter: [mixername|] Reply: OK|ERROR If no mixername is given the last selected input mixer is used (see MIXER_INPUT_SELECT). MIXER_OUTPUT_SILENCEDETECTION_O FF Temporarily disables the silence detection for the mixer channel. Parameter: [mixername|] Reply: OK|ERROR If no mixername is given the last selected input mixer is used (see MIXER_INPUT_SELECT). MIXER_INPUT_SILENCEDETECTION_ON Temporarily enables the silence detection for the mixer channel. Parameter: [mixername|] Reply: OK|ERROR If no mixername is given the last selected input mixer is used (see MIXER_INPUT_SELECT). MIXER_INPUT_SILENCEDETECTION_OF F Temporarily disables the silence detection for the mixer channel. Parameter: [mixername|] Reply: OK|ERROR If no mixername is given the last selected input mixer is used (see MIXER_INPUT_SELECT). MIXER_OUTPUT_DSP_SET Sets a mixer DSPs parameter value. Parameter: [mixername|]dspname|param|value Reply: OK|ERROR If no mixername is given the last selected output mixer is used (see MIXER_OUTPUT_SELECT). dspname:AGC,EQ,COMP or DSP1..4; param:the parameter name to change; value:the new value (depends on param). Here is a list of param names and their value range: AGC: ON : (float) 0.0=Off, 1.0=On PRESET : (string) preset name QUIET : (float) 0.0...1.0 RATE : (float) 0.0...1.0 TARGET : (float) 0.0...1.0 DELAY : (float) 0.0...1.0 GAIN : (float) 0.0...1.0 EQ: ON : (float) 0.0=Off, 1.0=On PRESET : (string) preset name AMP : (float) -1.0...1.0 BAND0 : (float) -1.0...1.0 BAND1 : (float) -1.0...1.0 BAND2 : (float) -1.0...1.0 BAND3 : (float) -1.0...1.0 BAND4 : (float) -1.0...1.0 BAND5 : (float) -1.0...1.0 BAND6 : (float) -1.0...1.0 236 RADIO42 Confidential APPENDIX BAND7 : (float) -1.0...1.0 BAND8 : (float) -1.0...1.0 BAND9 : (float) -1.0...1.0 COMP: ON : (float) 0.0=Off, 1.0=On PRESET : (string) preset name THRESHOLD : (float) 0.0...1.0 RATIO : (float) 0.0...1.0 ATTACK : (float) 0.0...1.0 RELEASE : (float) 0.0...1.0 GAIN : (float) -1.0...1.0 DSP1..DSP4 (VST only): SET : (string) vst plugin filename REMOVE : -BYPASS : (float) 0.0=Off, 1.0=On EDITOR : (float) 0.0=Hide, 1.0=Show PROGRAM : (float) program index to set RESTORE : -<idx> : (float) 0...N (updates the idx-th vst param) Examples: “MIXER_OUTPUT_DSP_SET Out 1|EQ|BAND2|0.2” “MIXER_OUTPUT_DSP_SET MON|DSP1|7|0.842” MIXER_INPUT_DSP_SET Sets a mixer DSPs parameter value. Parameter: [mixername|]dspname|param|value Reply: OK|ERROR If no mixername is given the last selected input mixer is used (see MIXER_INPUT_SELECT). dspname:AGC,EQ,COMP or DSP1..4; param:the parameter name to change; value:the new value (depends on param). See abopve for a list of param names and their value range. MIXER_OUTPUT_STEREOTOOL_SETPSTE XT Sets a mixer StereoTool-VSTs RDS PS Text (StereoTool VST). Parameter: [mixername|]dspidx|pstext Reply: OK|ERROR If no mixername is given the last selected output mixer is used (see MIXER_OUTPUT_SELECT). dspidx:1..4; pstext:the rds program service text to set. MIXER_INPUT_STEREOTOOL_SETPSTEX T Sets a mixer StereoTool-VSTs RDS PS Text (StereoTool VST). Parameter: [mixername|]dspidx|pstext Reply: OK|ERROR If no mixername is given the last selected input mixer is used (see MIXER_INPUT_SELECT). dspidx:1..4; pstext:the rds program service text to set. MIXER_OUTPUT_STEREOTOOL_SETRADI OTEXT Sets a mixer StereoTool-VSTs RDS Radio Text (StereoTool VST). Parameter: [mixername|]dspidx|enabled|radiotext Reply: OK|ERROR If no mixername is given the last selected output mixer is used (see MIXER_OUTPUT_SELECT). dspidx:1..4; enabled:0=off/1=on; radiotext:the rds radio text to set. MIXER_INPUT_STEREOTOOL_SETRADIO TEXT Sets a mixer StereoTool-VSTs RDS Radio Text (StereoTool VST). Parameter: [mixername|]dspidx|enabled|radiotext Reply: OK|ERROR If no mixername is given the last selected input mixer is used (see MIXER_INPUT_SELECT). dspidx:1..4; enabled:0=off/1=on; radiotext:the rds radio text to set. MIXER_OUTPUT_STEREOTOOL_SETTPTA Sets a mixer StereoTool-VSTs RDS TP and TA (StereoTool VST). Parameter: [mixername|]dspidx|tp|ta Reply: OK|ERROR If no mixername is given the last selected output mixer is used (see MIXER_OUTPUT_SELECT). dspidx:1..4; tp:0=off/1=on; ta:0=off/1=on. MIXER_INPUT_STEREOTOOL_SETTPTA Sets a mixer StereoTool-VSTs RDS TP and TA (StereoTool VST). Parameter: [mixername|]dspidx|tp|ta Reply: OK|ERROR If no mixername is given the last selected input mixer is used (see MIXER_INPUT_SELECT). dspidx:1..4; tp:0=off/1=on; ta:0=off/1=on. PLS_CLOSE_ALL Closes all currently open playlists (without saving). Reply: OK|ERROR PLS_CLOSE_ALL_NOPROGRAM Closes all currently open playlists (without saving), except those started and used by the scheduler. Reply: OK|ERROR PLS_CURRENT_NAME_GET Gets the current playlist name. Parameter: none RADIO42 Confidential 237 ProppFrexx ONAIR Reply: (string) playlistname PLS_CURRENT_FILENAME_GET Gets the current playlist filename. Parameter: none Reply: (string) playlistfilename PLS_FILENAME_GET Gets the filename of an open playlist. Parameter: playlistname Reply: (string) playlistfilename PLS_CURRENT_TOTALLENGTH_GET Gets the current playlist total length in seconds. Parameter: none Reply: (long) totallength PLS_TOTALLENGTH_GET Gets the total length in seconds of an open playlist. Parameter: playlistname Reply: (long) totallength PLS_CURRENT_REMAININGLENGTH_GET Gets the current playlist remaining length in seconds. Parameter: none Reply: (long) remainlength PLS_REMAININGLENGTH_GET Gets the remaining length in seconds of an open playlist. Parameter: playlistname Reply: (long) remainlength PLS_CURRENT_TRACKCOUNT_GET Gets the current playlist total track count. Parameter: none Reply: (int) trackcount PLS_TRACKCOUNT_GET Gets the total track count of an open playlist. Parameter: playlistname Reply: (int) trackcount PLS_CURRENT_TRACKREMAINING_GET Gets the current playlist remaining track count. Parameter: none Reply: (int) trackcount PLS_TRACKREMAINING_GET Gets the remaining track count of an open playlist. Parameter: playlistname Reply: (int) trackcount PLS_CURRENT_OPENED_GET Gets a list of currently opened playlist names. Parameter: none Reply: (string) list of opened playlist names (one per line) PLS_CURRENT_SELECT Sets the current playlist (make it the current one). Parameter: playlistname Reply: OK|ERROR To get the list of available PlaylistNames use: PLS_CURRENT_OPENED_GET. PLS_CURRENT_ADVANCE_TO_CURRENTT IME Advances the current playlist (marks all tracks as played) until the scheduled time matches the current time. Parameter: none Reply: OK|ERROR The playlist must not be playing, a scheduled one and not use continous backtiming PLS_ADVANCE_TO_CURRENTTIME Advances a playlist (marks all tracks as played) until the scheduled time matches the current time. Parameter: playlistname Reply: OK|ERROR The playlist must not be playing, a scheduled one and not use continous backtiming PLS_CURRENT_CLOSE Close the current playlist (without saving). Parameter: none Reply: OK|ERROR PLS_CLOSE Close an open playlist (without saving). Parameter: playlistname Reply: OK|ERROR PLS_CURRENT_NEW Creates a new and empty playlist (and makes it the current one). Parameter: none Reply: OK|ERROR PLS_CURRENT_AUTOPLAY_GET Gets the current playlist AUTOPLAY value. Parameter: none 238 RADIO42 Confidential APPENDIX Reply: (bool) True, if set - False, if not PLS_AUTOPLAY_GET Gets the AUTOPLAY value of an open playlist. Parameter: playlistname Reply: (bool) True, if set - False, if not PLS_CURRENT_AUTOPLAY_TOGGLE Toggles the current playlist AUTOPLAY value. Parameter: none Reply: OK|ERROR PLS_AUTOPLAY_TOGGLE Toggles the AUTOPLAY value of an open playlist. Parameter: playlistname Reply: OK|ERROR PLS_CURRENT_AUTOPLAY_ON Sets the current playlist to AUTOPLAY. Parameter: none Reply: OK|ERROR PLS_AUTOPLAY_ON Sets an open playlist to AUTOPLAY. Parameter: playlistname Reply: OK|ERROR PLS_CURRENT_AUTOPLAY_OFF Sets the current playlist to NOT AUTOPLAY. Parameter: none Reply: OK|ERROR PLS_AUTOPLAY_OFF Sets an open playlist to NOT AUTOPLAY. Parameter: playlistname Reply: OK|ERROR PLS_CURRENT_USEFADING_GET Gets the current playlist USEFADING value. Parameter: none Reply: (bool) True, if set - False, if not PLS_USEFADING_GET Gets the USEFADING value of an open playlist. Parameter: playlistname Reply: (bool) True, if set - False, if not PLS_CURRENT_USEFADING_TOGGLE Toggles the current playlist USEFADING value. Parameter: none Reply: OK|ERROR PLS_USEFADING_TOGGLE Toggles the USEFADING value of an open playlist. Parameter: playlistname Reply: OK|ERROR PLS_CURRENT_USEFADING_ON Sets the current playlist to USEFADING. Parameter: none Reply: OK|ERROR PLS_USEFADING_ON Sets an open playlist to USEFADING. Parameter: playlistname Reply: OK|ERROR PLS_CURRENT_USEFADING_OFF Sets the current playlist to NOT USEFADING. Parameter: none Reply: OK|ERROR PLS_USEFADING_OFF Sets an open playlist to NOT USEFADING. Parameter: playlistname Reply: OK|ERROR PLS_CURRENT_AUTOPLAYRANDOM_GET Gets the current playlist AUTOPLAYRANDOM value. Parameter: none Reply: (bool) True, if set - False, if not PLS_CURRENT_AUTOPLAYRANDOM_TOGG LE Toggles the current playlist AUTOPLAYRANDOM value. Parameter: none Reply: OK|ERROR PLS_CURRENT_AUTOPLAYRANDOM_ON Sets the current playlist to AUTOPLAY RANDOM. Parameter: none Reply: OK|ERROR PLS_CURRENT_AUTOPLAYRANDOM_OFF Set the current playlist to AUTOPLAY SEQUENTIAL. Parameter: none Reply: OK|ERROR PLS_CURRENT_AUTOPLAYLIST_GET Gets the current playlist AUTOPLAYLIST value. Parameter: none Reply: (string) autoplaylistname PLS_CURRENT_AUTOPLAYLIST_SET Set the current playlist AUTOPLAYLIST value. Parameter: autoplaylistname RADIO42 Confidential 239 ProppFrexx ONAIR Reply: OK|ERROR To get the list of available AutoPlaylistNames use: MAIN_AUTOPLAYLIST_NAMES_GET. PLS_CURRENT_TRACKNEXT_GET Gets the position of the next track in the current playlist. Parameter: none Reply: (int) trackposition Can be used together with PLS_CURRENT_TRACKCOUNT_GET and PLS_CURRENT_TRACKREMAINING_GET. PLS_CURRENT_ISPLAYING_GET Gets if the current playlist is playing. Parameter: none Reply: (bool) True, if set - False, if not PLS_ISPLAYING_GET Gets if an open playlist is playing. Parameter: playlistname Reply: (bool) True, if set - False, if not PLS_CURRENT_ISCROSSFADER_GET Gets if the cross fader is active in current playlist. Parameter: none Reply: (bool) True, if set - False, if not PLS_CURRENT_CHANGETIMECODE Changes the timecode display of the current playlist.. Parameter: none Reply: OK|ERROR PLS_CURRENT_NUMBEROFPLAYERS_GET Gets the number of available players in the current playlist. Parameter: none Reply: (int) either 2, 3 or 4 PLS_CURRENT_PLAYPAUSE_CURRENT Plays/Pauses the current track in the current Player of the current playlist (FadesOut on UseFading, Eject on AutoUnloading). Parameter: [fadetime] Reply: OK|ERROR The fadetime parameter is optional, if given it denotes the fade out time in ms. PLS_PLAYPAUSE_CURRENT Plays/Pauses the current track in the current Player of an open playlist (FadesOut on UseFading, Eject on AutoUnloading). Parameter: playlistname[|fadetime] Reply: OK|ERROR The fadetime parameter is optional, if given it denotes the fade out time in ms. PLS_CURRENT_PLAYPAUSEONLY_CURRE NT Plays/Pauses the current track in the current Player of the current playlist (FadesOut on UseFading, no Eject). Parameter: [fadetime] Reply: OK|ERROR The fadetime parameter is optional, if given it denotes the fade out time in ms PLS_PLAYPAUSEONLY_CURRENT Plays/Pauses the current track in the current Player of an open playlist (FadesOut on UseFading, no Eject). Parameter: playlistname[|fadetime] Reply: OK|ERROR The fadetime parameter is optional, if given it denotes the fade out time in ms PLS_CURRENT_PLAYPAUSENOFADE_CUR RENT Plays/Pauses the current track in the current Player of the current playlist (no Fading, Eject on AutoUnloading). Parameter: none Reply: OK|ERROR PLS_PLAYPAUSENOFADE_CURRENT Plays/Pauses the current track in the current Player of an open playlist (no Fading, Eject on AutoUnloading). Parameter: playlistname Reply: OK|ERROR PLS_CURRENT_PLAYPAUSENOFADEONLY _CURRENT Plays/Pauses the current track in the current Player of the current playlist (no Fading, no Eject). Parameter: none Reply: OK|ERROR PLS_CURRENT_PLAY_CURRENT Plays the current track in the current Player of the current playlist (if paused). Parameter: none Reply: OK|ERROR PLS_PLAY_CURRENT Plays the current track in the current Player of an open playlist 240 RADIO42 Confidential APPENDIX (if paused). Parameter: playlistname Reply: OK|ERROR PLS_CURRENT_PAUSE_CURRENT Pauses the current track in the current Player of the current playlist (FadesOut on UseFading, no eject). Parameter: [fadetime] Reply: OK|ERROR The fadetime parameter is optional, if given it denotes the fade out time in ms PLS_PAUSE_CURRENT Pauses the current track in the current Player of an open playlist (FadesOut on UseFading, no eject). Parameter: playlistname[|fadetime] Reply: OK|ERROR The fadetime parameter is optional, if given it denotes the fade out time in ms PLS_CURRENT_PAUSENOFADE_CURRENT Pauses the current track in the current Player of the current playlist (no Fading, no Eject). Parameter: none Reply: OK|ERROR PLS_PAUSENOFADE_CURRENT Pauses the current track in the current Player of an open playlist (no Fading, no Eject). Parameter: playlistname Reply: OK|ERROR PLS_CURRENT_PLAY_NEXT Plays the next track and ejects the current track of the current playlist (FadesOut on UseFading). Parameter: none Reply: OK|ERROR PLS_PLAY_NEXT Plays the next track and ejects the current track of an open playlist (FadesOut on UseFading). Parameter: playlistname Reply: OK|ERROR PLS_CURRENT_PLAY_NEXTNOFADE Plays the next track and ejects the current track of the current playlist (no Fading). Parameter: none Reply: OK|ERROR PLS_PLAY_NEXTNOFADE Plays the next track and ejects the current track of an open playlist (no Fading). Parameter: playlistname Reply: OK|ERROR PLS_CURRENT_PLAY_NEXTONLY Plays the next track only of the current playlist (does not stop current). Parameter: none Reply: OK|ERROR PLS_PLAY_NEXTONLY Plays the next track only of an open playlist (does not stop current). Parameter: playlistname Reply: OK|ERROR PLS_CURRENT_EJECT_CURRENT Ejects the current track in the current Player of the current playlist (FadesOut on UseFading). Parameter: [fadetime] Reply: OK|ERROR The fadetime parameter is optional, if given it denotes the fade out time in ms PLS_EJECT_CURRENT Ejects the current track in the current Player of an open playlist (FadesOut on UseFading). Parameter: playlistname[|fadetime] Reply: OK|ERROR The fadetime parameter is optional, if given it denotes the fade out time in ms PLS_CURRENT_EJECTNOFADE_CURRENT Ejects the current track in the current Player of the current playlist (no Fading). Parameter: none Reply: OK|ERROR PLS_EJECTNOFADE_CURRENT Ejects the current track in the current Player of an open playlist (no Fading). Parameter: playlistname Reply: OK|ERROR RADIO42 Confidential 241 ProppFrexx ONAIR PLS_CURRENT_REWIND_CURRENT Rewinds the current track in the current Player of the current playlist to the Cue-In position. Parameter: none Reply: OK|ERROR PLS_REWIND_CURRENT Rewinds the current track in the current Player of an open playlist to the Cue-In position. Parameter: playlistname Reply: OK|ERROR PLS_CURRENT_RESET_CURRENT Rewinds and Resets the current track in the current Player of the current playlist to all defaults. Parameter: none Reply: OK|ERROR PLS_RESET_CURRENT Rewinds and Resets the current track in the current Player of an open playlist to all defaults. Parameter: playlistname Reply: OK|ERROR PLS_CURRENT_LOAD_NEXT Loads a next track to the next Player of the current playlist. Parameter: none Reply: OK|ERROR PLS_LOAD_NEXT Loads a next track to the next Player of an open playlist. Parameter: playlistname Reply: OK|ERROR PLS_CURRENT_LOAD_SELECTED Loads the currently selected track to the next Player of the current playlist. Parameter: none Reply: OK|ERROR PLS_LOAD_SELECTED Loads the currently selected track to the next Player of an open playlist. Parameter: playlistname Reply: OK|ERROR PLS_CURRENT_PLAYPAUSE_A Plays/Pauses the current track in Player A of the current playlist (FadesOut on UseFading, Eject on AutoUnloading). Parameter: none Reply: OK|ERROR PLS_PLAYPAUSE_A Plays/Pauses the current track in Player A of an open playlist (FadesOut on UseFading, Eject on AutoUnloading). Parameter: playlistname Reply: OK|ERROR PLS_CURRENT_PLAYPAUSE_B Plays/Pauses the current track in Player B of the current playlist (FadesOut on UseFading, Eject on AutoUnloading). Parameter: none Reply: OK|ERROR PLS_PLAYPAUSE_B Plays/Pauses the current track in Player B of an open playlist (FadesOut on UseFading, Eject on AutoUnloading). Parameter: playlistname Reply: OK|ERROR PLS_CURRENT_PLAYPAUSE_C Plays/Pauses the current track in Player C of the current playlist (FadesOut on UseFading, Eject on AutoUnloading). Parameter: none Reply: OK|ERROR PLS_PLAYPAUSE_C Plays/Pauses the current track in Player C of an open playlist (FadesOut on UseFading, Eject on AutoUnloading). Parameter: playlistname Reply: OK|ERROR PLS_CURRENT_PLAYPAUSE_D Plays/Pauses the current track in Player D of the current playlist (FadesOut on UseFading, Eject on AutoUnloading). Parameter: none Reply: OK|ERROR PLS_PLAYPAUSE_D Plays/Pauses the current track in Player D of an open playlist (FadesOut on UseFading, Eject on AutoUnloading). Parameter: playlistname Reply: OK|ERROR PLS_CURRENT_PLAYPAUSEONLY_A Plays/Pauses the current track in Player A of the current playlist (FadesOut on UseFading, no Eject). 242 RADIO42 Confidential APPENDIX Parameter: none Reply: OK|ERROR PLS_PLAYPAUSEONLY_A Plays/Pauses the current track in Player A of an open playlist (FadesOut on UseFading, no Eject). Parameter: playlistname Reply: OK|ERROR PLS_CURRENT_PLAYPAUSEONLY_B Plays/Pauses the current track in Player B of the current playlist (FadesOut on UseFading, no Eject). Parameter: none Reply: OK|ERROR PLS_PLAYPAUSEONLY_B Plays/Pauses the current track in Player B of an open playlist (FadesOut on UseFading, no Eject). Parameter: playlistname Reply: OK|ERROR PLS_CURRENT_PLAYPAUSEONLY_C Plays/Pauses the current track in Player C of the current playlist (FadesOut on UseFading, no Eject). Parameter: none Reply: OK|ERROR PLS_PLAYPAUSEONLY_C Plays/Pauses the current track in Player C of an open playlist (FadesOut on UseFading, no Eject). Parameter: playlistname Reply: OK|ERROR PLS_CURRENT_PLAYPAUSEONLY_D Plays/Pauses the current track in Player D of the current playlist (FadesOut on UseFading, no Eject). Parameter: none Reply: OK|ERROR PLS_PLAYPAUSEONLY_D Plays/Pauses the current track in Player D of an open playlist (FadesOut on UseFading, no Eject). Parameter: playlistname Reply: OK|ERROR PLS_CURRENT_PLAYPAUSENOFADE_A Plays/Pauses the current track in Player A of the current playlist (no Fading, Eject on AutoUnloading). Parameter: none Reply: OK|ERROR PLS_PLAYPAUSENOFADE_A Plays/Pauses the current track in Player A of an open playlist (no Fading, Eject on AutoUnloading). Parameter: playlistname Reply: OK|ERROR PLS_CURRENT_PLAYPAUSENOFADE_B Plays/Pauses the current track in Player B of the current playlist (no Fading, Eject on AutoUnloading). Parameter: none Reply: OK|ERROR PLS_PLAYPAUSENOFADE_B Plays/Pauses the current track in Player B of an open playlist (no Fading, Eject on AutoUnloading). Parameter: playlistname Reply: OK|ERROR PLS_CURRENT_PLAYPAUSENOFADE_C Plays/Pauses the current track in Player C of the current playlist (no Fading, Eject on AutoUnloading). Parameter: none Reply: OK|ERROR PLS_PLAYPAUSENOFADE_C Plays/Pauses the current track in Player C of an open playlist (no Fading, Eject on AutoUnloading). Parameter: playlistname Reply: OK|ERROR PLS_CURRENT_PLAYPAUSENOFADE_D Plays/Pauses the current track in Player D of the current playlist (no Fading, Eject on AutoUnloading). Parameter: none Reply: OK|ERROR PLS_PLAYPAUSENOFADE_D Plays/Pauses the current track in Player D of an open playlist (no Fading, Eject on AutoUnloading). Parameter: playlistname Reply: OK|ERROR PLS_CURRENT_PLAYPAUSENOFADEONLY _A Plays/Pauses the current track in Player A of the current playlist (no Fading, no Eject). Parameter: none Reply: OK|ERROR RADIO42 Confidential 243 ProppFrexx ONAIR PLS_PLAYPAUSENOFADEONLY_A Plays/Pauses the current track in Player A of an open playlist (no Fading, no Eject). Parameter: playlistname Reply: OK|ERROR PLS_CURRENT_PLAYPAUSENOFADEONLY _B Plays/Pauses the current track in Player B of the current playlist (no Fading, no Eject). Parameter: none Reply: OK|ERROR PLS_PLAYPAUSENOFADEONLY_B Plays/Pauses the current track in Player B of an open playlist (no Fading, no Eject). Parameter: playlistname Reply: OK|ERROR PLS_CURRENT_PLAYPAUSENOFADEONLY _C Plays/Pauses the current track in Player C of the current playlist (no Fading, no Eject). Parameter: none Reply: OK|ERROR PLS_PLAYPAUSENOFADEONLY_C Plays/Pauses the current track in Player C of an open playlist (no Fading, no Eject). Parameter: playlistname Reply: OK|ERROR PLS_CURRENT_PLAYPAUSENOFADEONLY _D Plays/Pauses the current track in Player D of the current playlist (no Fading, no Eject). Parameter: none Reply: OK|ERROR PLS_PLAYPAUSENOFADEONLY_D Plays/Pauses the current track in Player D of an open playlist (no Fading, no Eject). Parameter: playlistname Reply: OK|ERROR PLS_CURRENT_PLAY_A Starts playback of the current track in Player A of the current playlist. Parameter: none Reply: OK|ERROR PLS_PLAY_A Starts playback of the current track in Player A of an open playlist. Parameter: playlistname Reply: OK|ERROR PLS_CURRENT_PLAY_B Starts playback of the current track in Player B of the current playlist. Parameter: none Reply: OK|ERROR PLS_PLAY_B Starts playback of the current track in Player B of an open playlist. Parameter: playlistname Reply: OK|ERROR PLS_CURRENT_PLAY_C Starts playback of the current track in Player C of the current playlist. Parameter: none Reply: OK|ERROR PLS_PLAY_C Starts playback of the current track in Player C of an open playlist. Parameter: playlistname Reply: OK|ERROR PLS_CURRENT_PLAY_D Starts playback of the current track in Player D of the current playlist. Parameter: none Reply: OK|ERROR PLS_PLAY_D Starts playback of the current track in Player D of an open playlist. Parameter: playlistname Reply: OK|ERROR PLS_CURRENT_PLAYFADE_A Starts playback of the current track in Player A of the current playlist (using fading). Parameter: none Reply: OK|ERROR 244 RADIO42 Confidential APPENDIX PLS_PLAYFADE_A Starts playback of the current track in Player A of an open playlist (using fading). Parameter: playlistname Reply: OK|ERROR PLS_CURRENT_PLAYFADE_B Starts playback of the current track in Player B of the current playlist (using fading). Parameter: none Reply: OK|ERROR PLS_PLAYFADE_B Starts playback of the current track in Player B of an open playlist (using fading). Parameter: playlistname Reply: OK|ERROR PLS_CURRENT_PLAYFADE_C Starts playback of the current track in Player C of the current playlist (using fading). Parameter: none Reply: OK|ERROR PLS_PLAYFADE_C Starts playback of the current track in Player C of an open playlist (using fading). Parameter: playlistname Reply: OK|ERROR PLS_CURRENT_PLAYFADE_D Starts playback of the current track in Player D of the current playlist (using fading). Parameter: none Reply: OK|ERROR PLS_PLAYFADE_D Starts playback of the current track in Player D of an open playlist (using fading). Parameter: playlistname Reply: OK|ERROR PLS_CURRENT_PAUSE_A Pauses the current track in Player A of the current playlist (FadesOut on UseFading). Parameter: none Reply: OK|ERROR PLS_PAUSE_A Pauses the current track in Player A of an open playlist (FadesOut on UseFading). Parameter: playlistname Reply: OK|ERROR PLS_CURRENT_PAUSE_B Pauses the current track in Player B of the current playlist (FadesOut on UseFading). Parameter: none Reply: OK|ERROR PLS_PAUSE_B Pauses the current track in Player B of an open playlist (FadesOut on UseFading). Parameter: playlistname Reply: OK|ERROR PLS_CURRENT_PAUSE_C Pauses the current track in Player C of the current playlist (FadesOut on UseFading). Parameter: none Reply: OK|ERROR PLS_PAUSE_C Pauses the current track in Player C of an open playlist (FadesOut on UseFading). Parameter: playlistname Reply: OK|ERROR PLS_CURRENT_PAUSE_D Pauses the current track in Player D of the current playlist (FadesOut on UseFading). Parameter: none Reply: OK|ERROR PLS_PAUSE_D Pauses the current track in Player D of an open playlist (FadesOut on UseFading). Parameter: playlistname Reply: OK|ERROR PLS_CURRENT_PAUSENOFADE_A Pauses the current track in Player A of the current playlist (no Fading). Parameter: none Reply: OK|ERROR PLS_PAUSENOFADE_A Pauses the current track in Player A of an open playlist (no Fading). Parameter: playlistname RADIO42 Confidential 245 ProppFrexx ONAIR Reply: OK|ERROR PLS_CURRENT_PAUSENOFADE_B Pauses the current track in Player B of the current playlist (no Fading). Parameter: none Reply: OK|ERROR PLS_PAUSENOFADE_B Pauses the current track in Player B of an open playlist (no Fading). Parameter: playlistname Reply: OK|ERROR PLS_CURRENT_PAUSENOFADE_C Pauses the current track in Player C of the current playlist (no Fading). Parameter: none Reply: OK|ERROR PLS_PAUSENOFADE_C Pauses the current track in Player C of an open playlist (no Fading). Parameter: playlistname Reply: OK|ERROR PLS_CURRENT_PAUSENOFADE_D Pauses the current track in Player D of the current playlist (no Fading). Parameter: none Reply: OK|ERROR PLS_PAUSENOFADE_D Pauses the current track in Player D of an open playlist (no Fading). Parameter: playlistname Reply: OK|ERROR PLS_CURRENT_EJECT_A Ejects the current track in Player A of the current playlist (FadesOut on UseFading). Parameter: none Reply: OK|ERROR PLS_EJECT_A Ejects the current track in Player A of an open playlist (FadesOut on UseFading). Parameter: playlistname Reply: OK|ERROR PLS_CURRENT_EJECT_B Ejects the current track in Player B of the current playlist (FadesOut on UseFading). Parameter: none Reply: OK|ERROR PLS_EJECT_B Ejects the current track in Player B of an open playlist (FadesOut on UseFading). Parameter: playlistname Reply: OK|ERROR PLS_CURRENT_EJECT_C Ejects the current track in Player C of the current playlist (FadesOut on UseFading). Parameter: none Reply: OK|ERROR PLS_EJECT_C Ejects the current track in Player C of an open playlist (FadesOut on UseFading). Parameter: playlistname Reply: OK|ERROR PLS_CURRENT_EJECT_D Ejects the current track in Player D of the current playlist (FadesOut on UseFading). Parameter: none Reply: OK|ERROR PLS_EJECT_D Ejects the current track in Player D of an open playlist (FadesOut on UseFading). Parameter: playlistname Reply: OK|ERROR PLS_CURRENT_EJECTNOFADE_A Ejects the current track in Player A of the current playlist (no Fading). Parameter: none Reply: OK|ERROR PLS_EJECTNOFADE_A Ejects the current track in Player A of an open playlist (no Fading). Parameter: playlistname 246 RADIO42 Confidential APPENDIX Reply: OK|ERROR PLS_CURRENT_EJECTNOFADE_B Ejects the current track in Player B of the current playlist (no Fading). Parameter: none Reply: OK|ERROR PLS_EJECTNOFADE_B Ejects the current track in Player B of an open playlist (no Fading). Parameter: playlistname Reply: OK|ERROR PLS_CURRENT_EJECTNOFADE_C Ejects the current track in Player C of the current playlist (no Fading). Parameter: none Reply: OK|ERROR PLS_EJECTNOFADE_C Ejects the current track in Player C of an open playlist (no Fading). Parameter: playlistname Reply: OK|ERROR PLS_CURRENT_EJECTNOFADE_D Ejects the current track in Player D of the current playlist (no Fading). Parameter: none Reply: OK|ERROR PLS_EJECTNOFADE_D Ejects the current track in Player D of an open playlist (no Fading). Parameter: playlistname Reply: OK|ERROR PLS_CURRENT_LOAD_A Loads the currently selected track to Player A of the current playlist. Parameter: none Reply: OK|ERROR PLS_LOAD_A Loads the currently selected track to Player A of an open playlist. Parameter: playlistname Reply: OK|ERROR PLS_CURRENT_LOAD_B Loads the currently selected track to Player B of the current playlist. Parameter: none Reply: OK|ERROR PLS_LOAD_B Loads the currently selected track to Player B of an open playlist. Parameter: playlistname Reply: OK|ERROR PLS_CURRENT_LOAD_C Loads the currently selected track to Player C of the current playlist. Parameter: none Reply: OK|ERROR PLS_LOAD_C Loads the currently selected track to Player C of an open playlist. Parameter: playlistname Reply: OK|ERROR PLS_CURRENT_LOAD_D Loads the currently selected track to Player D of the current playlist. Parameter: none Reply: OK|ERROR PLS_LOAD_D Loads the currently selected track to Player D of an open playlist. Parameter: playlistname Reply: OK|ERROR PLS_CURRENT_LOAD_A_NEXT Loads the next free track to Player A of the current playlist. Parameter: none Reply: OK|ERROR PLS_LOAD_A_NEXT Loads the next free track to Player A of an open playlist. Parameter: playlistname Reply: OK|ERROR PLS_CURRENT_LOAD_B_NEXT Loads the next free track to Player B of the current playlist. Parameter: none Reply: OK|ERROR PLS_LOAD_B_NEXT Loads the next free track to Player B of an open playlist. Parameter: playlistname Reply: OK|ERROR RADIO42 Confidential 247 ProppFrexx ONAIR PLS_CURRENT_LOAD_C_NEXT Loads the next free track to Player C of the current playlist. Parameter: none Reply: OK|ERROR PLS_LOAD_C_NEXT Loads the next free track to Player C of an open playlist. Parameter: playlistname Reply: OK|ERROR PLS_CURRENT_LOAD_D_NEXT Loads the next free track to Player D of the current playlist. Parameter: none Reply: OK|ERROR PLS_LOAD_D_NEXT Loads the next free track to Player D of an open playlist. Parameter: playlistname Reply: OK|ERROR PLS_CURRENT_REWIND_A Rewinds the current track of Player A of the current playlist to the Cue-In position. Parameter: none Reply: OK|ERROR PLS_REWIND_A Rewinds the current track of Player A of an open playlist to the Cue-In position. Parameter: playlistname Reply: OK|ERROR PLS_CURRENT_REWIND_B Rewinds the current track of Player B of the current playlist to the Cue-In position. Parameter: none Reply: OK|ERROR PLS_REWIND_B Rewinds the current track of Player B of an open playlist to the Cue-In position. Parameter: playlistname Reply: OK|ERROR PLS_CURRENT_REWIND_C Rewinds the current track of Player C of the current playlist to the Cue-In position. Parameter: none Reply: OK|ERROR PLS_REWIND_C Rewinds the current track of Player C of an open playlist to the Cue-In position. Parameter: playlist Reply: OK|ERROR PLS_CURRENT_REWIND_D Rewinds the current track of Player D of the current playlist to the Cue-In position. Parameter: none Reply: OK|ERROR PLS_REWIND_D Rewinds the current track of Player D of an open playlist to the Cue-In position. Parameter: playlistname Reply: OK|ERROR PLS_CURRENT_RESET_A Rewinds and Resets the current track of Player A of the current playlist to all defaults. Parameter: none Reply: OK|ERROR PLS_RESET_A Rewinds and Resets the current track of Player A of an open playlist to all defaults. Parameter: playlistname Reply: OK|ERROR PLS_CURRENT_RESET_B Rewinds and Resets the current track of Player B of the current playlist to all defaults. Parameter: none Reply: OK|ERROR PLS_RESET_B Rewinds and Resets the current track of Player B of an open playlist to all defaults. Parameter: playlistname Reply: OK|ERROR PLS_CURRENT_RESET_C Rewinds and Resets the current track of Player C of the current playlist to all defaults. Parameter: none Reply: OK|ERROR 248 RADIO42 Confidential APPENDIX PLS_RESET_C Rewinds and Resets the current track of Player C of an open playlist to all defaults. Parameter: playlistname Reply: OK|ERROR PLS_CURRENT_RESET_D Rewinds and Resets the current track of Player D of the current playlist to all defaults. Parameter: none Reply: OK|ERROR PLS_RESET_D Rewinds and Resets the current track of Player D of an open playlist to all defaults. Parameter: playlistname Reply: OK|ERROR PLS_CURRENT_AUTOLOAD_GET Gets the current playlist AUTOLOAD value. Parameter: none Reply: (bool) True, if set - False, if not PLS_AUTOLOAD_GET Gets an open playlist AUTOLOAD value. Parameter: playlistname Reply: (bool) True, if set - False, if not PLS_CURRENT_AUTOLOAD_TOGGLE Toggles the current playlist AUTOLOAD value. Parameter: none Reply: OK|ERROR PLS_AUTOLOAD_TOGGLE Toggles an open playlist AUTOLOAD value. Parameter: playlistname Reply: OK|ERROR PLS_CURRENT_AUTOLOAD_ON Sets the current playlist to AUTOLOAD. Parameter: none Reply: OK|ERROR PLS_AUTOLOAD_ON Sets an open playlist to AUTOLOAD. Parameter: playlistname Reply: OK|ERROR PLS_CURRENT_AUTOLOAD_OFF Sets the current playlist to MANUAL LOAD. Parameter: none Reply: OK|ERROR PLS_AUTOLOAD_OFF Sets an open playlist to MANUAL LOAD. Parameter: playlistname Reply: OK|ERROR PLS_CURRENT_AUTOUNLOAD_GET Gets the current playlist AUTOUNLOAD value. Parameter: none Reply: (bool) True, if set - False, if not PLS_AUTOUNLOAD_GET Gets an open playlist AUTOUNLOAD value. Parameter: playlistname Reply: (bool) True, if set - False, if not PLS_CURRENT_AUTOUNLOAD_TOGGLE Toggles the current playlist AUTOUNLOAD value. Parameter: none Reply: OK|ERROR PLS_AUTOUNLOAD_TOGGLE Toggles an open playlist AUTOUNLOAD value. Parameter: playlistname Reply: OK|ERROR PLS_CURRENT_AUTOUNLOAD_ON Sets the current playlist to AUTOUNLOAD. Parameter: none Reply: OK|ERROR PLS_AUTOUNLOAD_ON Sets an open playlist to AUTOUNLOAD. Parameter: playlistname Reply: OK|ERROR PLS_CURRENT_AUTOUNLOAD_OFF Sets the current playlist to MANUAL UNLOAD. Parameter: none Reply: OK|ERROR PLS_AUTOUNLOAD_OFF Sets an open playlist to MANUAL UNLOAD. Parameter: playlistname Reply: OK|ERROR PLS_CURRENT_REMOVEWHENPLAYED_GE T Gets the current playlist REMOVEWHENPLAYED value. Parameter: none Reply: (bool) True, if set - False, if not PLS_REMOVEWHENPLAYED_GET Gets an open playlist REMOVEWHENPLAYED value. RADIO42 Confidential 249 ProppFrexx ONAIR Parameter: playlistname Reply: (bool) True, if set - False, if not PLS_CURRENT_REMOVEWHENPLAYED_TO GGLE Toggles the current playlist REMOVEWHENPLAYED value. Parameter: none Reply: OK|ERROR PLS_REMOVEWHENPLAYED_TOGGLE Toggles an open playlist REMOVEWHENPLAYED value. Parameter: playlistname Reply: OK|ERROR PLS_CURRENT_REMOVEWHENPLAYED_ON Set the current playlist to REMOVEWHENPLAYED. Parameter: none Reply: OK|ERROR PLS_REMOVEWHENPLAYED_ON Set an open playlist to REMOVEWHENPLAYED. Parameter: playlistname Reply: OK|ERROR PLS_CURRENT_REMOVEWHENPLAYED_OF F Sets the current playlist to MARKWHENPLAYED. Parameter: none Reply: OK|ERROR PLS_REMOVEWHENPLAYED_OFF Sets an open playlist to MARKWHENPLAYED. Parameter: playlistname Reply: OK|ERROR PLS_CURRENT_LOAD_PLAYLIST Loads a new playlist file to the current playlist (clears all old entries). Parameter: filename (on server) Reply: OK|ERROR Should normally only be used directly after PLS_CURRENT_NEW. PLS_CURRENT_APPEND_PLAYLIST Appends a playlist file to the current playlist. Parameter: filename (on server) Reply: OK|ERROR Must denote a server sided filename. PLS_CURRENT_APPEND_FILE Appends an audio file to the current playlist. Parameter: filename (on server) Reply: OK|ERROR Must denote a server sided filename or guid. PLS_APPEND_FILE Appends an audio file to a playlist. Parameter: playlistname|filename Reply: OK|ERROR Must denote a server sided filename or guid. PLS_CURRENT_APPEND_RANDOM Appends random audio file(s) from a media library to the current playlist. Parameter: autoplaylistname|count Reply: OK|ERROR To get the list of available AutoPlaylistNames use: MAIN_AUTOPLAYLIST_NAMES_GET. PLS_CURRENT_ADDSELECTED_TOPLS Adds the currently selected tracks from the current playlist to another playlist. Parameter: playlistname Reply: OK|ERROR The playlistname to add the selected track to. PLS_CURRENT_SAVE Saves the current playlist. Parameter: none Reply: OK|ERROR PLS_SAVE Saves an open playlist. Parameter: playlistname Reply: OK|ERROR PLS_CURRENT_SAVEAS Saves the current playlist under a given name. Parameter: filename Reply: OK|ERROR PLS_SAVEAS Saves an open playlist under a given name. Parameter: playlistname|filename Reply: OK|ERROR PLS_CURRENT_CROSSFADER_POSITION _GET Gets the cross fader position of the current playlist. Parameter: none Reply: (float) faderposition, between -1.0 (left) and 1.0 (right) 250 RADIO42 Confidential APPENDIX PLS_CURRENT_CROSSFADER_POSITION _SET Sets the cross fader position of the current playlist. Parameter: (float) faderposition, between -1.0 (left) and 1.0 (right) Reply: OK|ERROR PLS_CURRENT_CROSSFADER_POSITION _SLIDE Slides the cross fader position of the current playlist to a new value. Parameter: (float) faderposition, between -1.0 (left) and 1.0 (right) Reply: OK|ERROR PLS_CURRENT_CROSSFADER_MODE_GET Gets the cross fader mode of the current playlist. Parameter: none Reply: (int) mode, 0=LinearFull, 1=Logarithmic, 2=LinearHalf, 3=Off PLS_CURRENT_CROSSFADER_MODE_SET Sets the cross fader mode of the current playlist. Parameter: (int) mode, 0=LinearFull, 1=Logarithmic, 2=LinearHalf, 3=Off Reply: OK|ERROR PLS_CURRENT_CROSSFADER_LEFT_GET Gets the left cross fader assignment of the current playlist. Parameter: none Reply: (string) player, A, B or C PLS_CURRENT_CROSSFADER_LEFT_SET Sets the left cross fader assignment of the current playlist. Parameter: (string) player, A, B or C Reply: OK|ERROR PLS_CURRENT_CROSSFADER_LEFT_TOG GLE Toggles the left cross fader assignment of the current playlist. Parameter: none Reply: OK|ERROR PLS_CURRENT_CROSSFADER_RIGHT_GE T Gets the right cross fader assignment of the current playlist. Parameter: none Reply: (string) player, A, B or C PLS_CURRENT_CROSSFADER_RIGHT_SE T Set the right cross fader assignment of the current playlist. Parameter: (string) player, A, B or C Reply: OK|ERROR PLS_CURRENT_CROSSFADER_RIGHT_TO GGLE Toggles the right cross fader assignment of the current playlist. Parameter: none Reply: OK|ERROR PLS_CURRENT_CROSSFADER_START_GE T Gets the cross fader start mode of the current playlist. Parameter: none Reply: (bool) True, if set - False, if not PLS_CURRENT_CROSSFADER_START_TO GGLE Toggles the cross fader start mode of the current playlist. Parameter: none Reply: OK|ERROR PLS_CURRENT_CROSSFADER_START_ON Sets the cross fader start mode of the current playlist to FaderStart. Parameter: none Reply: OK|ERROR PLS_CURRENT_CROSSFADER_START_OF F Sets the cross fader start mode of the current playlist to Off. Parameter: none Reply: OK|ERROR PLS_CURRENT_GET_ENTRIES Gets a list of all entries of the current playlist. Parameter: none Reply: (string) list of available playlist entries (one per line: player|#|filename|trackname|duration|playtime|schedule|status|elaps edtime|remaintime|album|year|genre|ramp|outro). PLS_CURRENT_SELECT_ENTRY Selects a certain entry in the current playlist. Parameter: (int) index Reply: OK|ERROR The index must be between 1 and TrackCount (see PLS_CURRENT_TRACKCOUNT_GET) PLS_CURRENT_SELECT_NEXTPLAYABLE Selects the next playable entry in the current playlist. Parameter: none Reply: OK|ERROR PLS_CURRENT_SELECT_NEXT Selects the next entry in the current playlist. Parameter: none Reply: OK|ERROR PLS_CURRENT_SELECT_PREVIOUS Selects the previous entry in the current playlist. Parameter: none RADIO42 Confidential 251 ProppFrexx ONAIR Reply: OK|ERROR PLS_CURRENT_MOVE_UP Moves the current entry in the current playlist up. Parameter: none Reply: OK|ERROR PLS_CURRENT_MOVE_DOWN Moves the current entry in the current playlist down. Parameter: none Reply: OK|ERROR PLS_CURRENT_MOVE_TOBEGINNING Moves the current entry in the current playlist to the beginning. Parameter: none Reply: OK|ERROR PLS_CURRENT_MOVE_TOEND Moves the current entry in the current playlist to the end. Parameter: none Reply: OK|ERROR PLS_CURRENT_TOGGLE_MARKASPLAYED Toggles the current entry in the current playlist between mark as played or not played. Parameter: none Reply: OK|ERROR PLS_CURRENT_TOGGLE_OPTIONSTOP Toggles the StopAtEnd option for the current entry in the current playlist between. Parameter: none Reply: OK|ERROR PLS_CURRENT_TOGGLE_OPTIONLOOP Toggles the LoopTrack option for the current entry in the current playlist between. Parameter: none Reply: OK|ERROR PLS_CURRENT_TOGGLE_OPTIONHOOK Toggles the Hook option for the current entry in the current playlist between. Parameter: none Reply: OK|ERROR PLS_CURRENT_SHOWMODWINDOW_TOGGL E Toggles the show moderator window for the current playlist. Parameter: none Reply: OK|ERROR PLS_CURRENT_SHOWINFOPANEL_TOGGL E Toggles the show info panel for the current playlist. Parameter: none Reply: OK|ERROR PLS_CURRENT_GET_ENTRY Gets a certain entry of the current playlist. Parameter: (int) index Reply: (string) the playlist entry (player|#|filename|trackname|duration|playtime|schedule|status|elap sedtime|remaintime|album|year|genre|ramp|outro). The index must be between 1 and TrackCount (see PLS_CURRENT_TRACKCOUNT_GET). PLS_CURRENT_GET_SELECTEDENTRY Gets the currently selected entry of the current playlist. Parameter: none Reply: (string) the playlist entry (player|#|filename|trackname|duration|playtime|schedule|status|elap sedtime|remaintime|album|year|genre|ramp|outro). PLS_CURRENT_GET_SELECTEDINDEX Gets the index of the currently selected entry of the current playlist. Parameter: none Reply: (int) the index of the selected playlist entry. PLS_CURRENT_QUICKMONITOR Starts the Quick Monitor of the currently selected track in the current playlist. Parameter: none|hotstartIndex(0..9) Reply: OK|ERROR An optional HotStart index might be given between 0 and 9, if given playback starts at that HotStart index PLS_CURRENT_QUICKMONITOR_FFWD Fast Forwards the Quick Monitor. Parameter: none Reply: OK|ERROR PLS_CURRENT_QUICKMONITOR_FRWD Fast Rewind the Quick Monitor. Parameter: none Reply: OK|ERROR 252 RADIO42 Confidential APPENDIX PLS_CURRENT_REMOVE_ENTRY Removes a certain entry from the current playlist. Parameter: (int) index Reply: OK|ERROR PLS_CURRENT_DELETE_SELECTED Deletes the currently selected entries from the current playlist. Parameter: none Reply: OK|ERROR PLS_CURRENT_PFL_START Opens the PFL Player for the currently selected entry in the current playlist (monitoring the entry from start). Parameter: none Reply: OK|ERROR PLS_CURRENT_PFL_END Opens the PFL Player for the currently selected entry in the current playlist (monitoring the entry at the end). Parameter: none Reply: OK|ERROR PLS_CURRENT_PFL_STOP Closes/Hides the PFL Player. Parameter: none Reply: OK|ERROR PLS_CURRENT_PFL_MIXING Performs PFL Mixing on the currently selected entries in the current playlist. Parameter: none Reply: OK|ERROR PLS_CURRENT_SEGUE_EDIT Opens the Segue Editor for the currently selected entry in the current playlist. Parameter: none Reply: OK|ERROR PLS_CURRENT_TAG_EDIT Opens the TAG Editor for the currently selected entry in the current playlist. Parameter: none Reply: OK|ERROR PLS_CURRENT_PLAYER_A_STATUS_GET Gets the status of Player A of the current playlist. Parameter: none Reply: (string) status (Empty, Playing or Cued) PLS_CURRENT_PLAYER_B_STATUS_GET Gets the status of Player B of the current playlist. Parameter: none Reply: (string) status (Empty, Playing or Cued) PLS_CURRENT_PLAYER_C_STATUS_GET Gets the status of Player C of the current playlist. Parameter: none Reply: (string) status (Empty, Playing or Cued) PLS_CURRENT_PLAYER_D_STATUS_GET Gets the status of Player D of the current playlist. Parameter: none Reply: (string) status (Empty, Playing or Cued) PLS_CURRENT_PLAYER_A_OUTPUT_GET Gets the output mixer of Player A of the current playlist. Parameter: none Reply: (string) output mixer name PLS_CURRENT_PLAYER_B_OUTPUT_GET Gets the output mixer of Player B of the current playlist. Parameter: none Reply: (string) output mixer name PLS_CURRENT_PLAYER_C_OUTPUT_GET Gets the output mixer of Player C of the current playlist. Parameter: none Reply: (string) output mixer name PLS_CURRENT_PLAYER_D_OUTPUT_GET Gets the output mixer of Player D of the current playlist. Parameter: none Reply: (string) output mixer name PLS_CURRENT_PLAYER_A_OUTPUT_SET Sets the output mixer of Player A of the current playlist. Parameter: (string) mixername Reply: OK|ERROR To get a list of available output mixernames see MIXER_OUTPUT_NAMES_GET. PLS_CURRENT_PLAYER_B_OUTPUT_SET Sets the output mixer of Player B of the current playlist. Parameter: (string) mixername Reply: OK|ERROR To get a list of available output mixernames see MIXER_OUTPUT_NAMES_GET. PLS_CURRENT_PLAYER_C_OUTPUT_SET Sets the output mixer of Player C of the current playlist. Parameter: (string) mixername RADIO42 Confidential 253 ProppFrexx ONAIR Reply: OK|ERROR To get a list of available output mixernames see MIXER_OUTPUT_NAMES_GET. PLS_CURRENT_PLAYER_D_OUTPUT_SET Sets the output mixer of Player D of the current playlist. Parameter: (string) mixername Reply: OK|ERROR To get a list of available output mixernames see MIXER_OUTPUT_NAMES_GET. PLS_CURRENT_PLAYER_A_OUTPUTVOLU ME_GET Gets the output volume value of Player A of the current playlist. Parameter: none Reply: (float) volume, between 0.0 (silence) and 1.0 (0dB) PLS_CURRENT_PLAYER_A_OUTPUTVOLU ME_SET Sets the output volume value of Player A of the current playlist. Parameter: (float) volume, between 0.0 (silence) and 1.0 (0dB) Reply: OK|ERROR PLS_CURRENT_PLAYER_B_OUTPUTVOLU ME_GET Gets the output volume value of Player B of the current playlist. Parameter: none Reply: (float) volume, between 0.0 (silence) and 1.0 (0dB) PLS_CURRENT_PLAYER_B_OUTPUTVOLU ME_SET Sets the output volume value of Player B of the current playlist. Parameter: (float) volume, between 0.0 (silence) and 1.0 (0dB) Reply: OK|ERROR PLS_CURRENT_PLAYER_C_OUTPUTVOLU ME_GET Gets the output volume value of Player C of the current playlist. Parameter: none Reply: (float) volume, between 0.0 (silence) and 1.0 (0dB) PLS_CURRENT_PLAYER_C_OUTPUTVOLU ME_SET Sets the output volume value of Player C of the current playlist. Parameter: (float) volume, between 0.0 (silence) and 1.0 (0dB) Reply: OK|ERROR PLS_CURRENT_PLAYER_D_OUTPUTVOLU ME_GET Gets the output volume value of Player D of the current playlist. Parameter: none Reply: (float) volume, between 0.0 (silence) and 1.0 (0dB) PLS_CURRENT_PLAYER_D_OUTPUTVOLU ME_SET Sets the output volume value of Player D of the current playlist. Parameter: (float) volume, between 0.0 (silence) and 1.0 (0dB) Reply: OK|ERROR PLS_CURRENT_PLAYER_A_OUTPUTPAN_ GET Gets the output balance value of Player A of the current playlist. Parameter: none Reply: (float) pan, between -1.0 (left) and 1.0 (right) PLS_CURRENT_PLAYER_A_OUTPUTPAN_ SET Sets the output balance value of Player A of the current playlist. Parameter: (float) pan, between -1.0 (left) and 1.0 (right) Reply: OK|ERROR PLS_CURRENT_PLAYER_B_OUTPUTPAN_ GET Gets the output balance value of Player B of the current playlist. Parameter: none Reply: (float) pan, between -1.0 (left) and 1.0 (right) PLS_CURRENT_PLAYER_B_OUTPUTPAN_ SET Sets the output balance value of Player B of the current playlist. Parameter: (float) pan, between -1.0 (left) and 1.0 (right) Reply: OK|ERROR PLS_CURRENT_PLAYER_C_OUTPUTPAN_ GET Gets the output balance value of Player C of the current playlist. Parameter: none Reply: (float) pan, between -1.0 (left) and 1.0 (right) PLS_CURRENT_PLAYER_C_OUTPUTPAN_ SET Sets the output balance value of Player C of the current playlist. Parameter: (float) pan, between -1.0 (left) and 1.0 (right) Reply: OK|ERROR PLS_CURRENT_PLAYER_D_OUTPUTPAN_ GET Gets the output balance value of Player D of the current playlist. Parameter: none Reply: (float) pan, between -1.0 (left) and 1.0 (right) PLS_CURRENT_PLAYER_D_OUTPUTPAN_ SET Sets the output balance value of Player D of the current playlist. Parameter: (float) pan, between -1.0 (left) and 1.0 (right) Reply: OK|ERROR PLS_CURRENT_PLAYER_A_SND2VOLUME _GET Gets the SND2PFL output volume value of Player A of the current playlist. Parameter: none Reply: (float) volume, between 0.0 (silence) and 1.0 (0dB) PLS_CURRENT_PLAYER_A_SND2VOLUME _SET Sets the SND2PFL output volume value of Player A of the current playlist. 254 RADIO42 Confidential APPENDIX Parameter: (float) volume, between 0.0 (silence) and 1.0 (0dB) Reply: OK|ERROR PLS_CURRENT_PLAYER_B_SND2VOLUME _GET Gets the SND2PFL output volume value of Player B of the current playlist. Parameter: none Reply: (float) volume, between 0.0 (silence) and 1.0 (0dB) PLS_CURRENT_PLAYER_B_SND2VOLUME _SET Sets the SND2PFL output volume value of Player B of the current playlist. Parameter: (float) volume, between 0.0 (silence) and 1.0 (0dB) Reply: OK|ERROR PLS_CURRENT_PLAYER_C_SND2VOLUME _GET Gets the SND2PFL output volume value of Player C of the current playlist. Parameter: none Reply: (float) volume, between 0.0 (silence) and 1.0 (0dB) PLS_CURRENT_PLAYER_C_SND2VOLUME _SET Sets the SND2PFL output volume value of Player C of the current playlist. Parameter: (float) volume, between 0.0 (silence) and 1.0 (0dB) Reply: OK|ERROR PLS_CURRENT_PLAYER_D_SND2VOLUME _GET Gets the SND2PFL output volume value of Player D of the current playlist. Parameter: none Reply: (float) volume, between 0.0 (silence) and 1.0 (0dB) PLS_CURRENT_PLAYER_D_SND2VOLUME _SET Sets the SND2PFL output volume value of Player D of the current playlist. Parameter: (float) volume, between 0.0 (silence) and 1.0 (0dB) Reply: OK|ERROR PLS_CURRENT_PLAYER_A_SND2PAN_GE T Gets the SND2PFL output balance value of Player A of the current playlist. Parameter: none Reply: (float) pan, between -1.0 (left) and 1.0 (right) PLS_CURRENT_PLAYER_A_SND2PAN_SE T Sets the SND2PFL output balance value of Player A of the current playlist. Parameter: (float) pan, between -1.0 (left) and 1.0 (right) Reply: OK|ERROR PLS_CURRENT_PLAYER_B_SND2PAN_GE T Gets the SND2PFL output balance value of Player B of the current playlist. Parameter: none Reply: (float) pan, between -1.0 (left) and 1.0 (right) PLS_CURRENT_PLAYER_B_SND2PAN_SE T Sets the SND2PFL output balance value of Player B of the current playlist. Parameter: (float) pan, between -1.0 (left) and 1.0 (right) Reply: OK|ERROR PLS_CURRENT_PLAYER_C_SND2PAN_GE T Gets the SND2PFL output balance value of Player C of the current playlist. Parameter: none Reply: (float) pan, between -1.0 (left) and 1.0 (right) PLS_CURRENT_PLAYER_C_SND2PAN_SE T Sets the SND2PFL output balance value of Player C of the current playlist. Parameter: (float) pan, between -1.0 (left) and 1.0 (right) Reply: OK|ERROR PLS_CURRENT_PLAYER_D_SND2PAN_GE T Gets the SND2PFL output balance value of Player D of the current playlist. Parameter: none Reply: (float) pan, between -1.0 (left) and 1.0 (right) PLS_CURRENT_PLAYER_D_SND2PAN_SE T Sets the SND2PFL output balance value of Player D of the current playlist. Parameter: (float) pan, between -1.0 (left) and 1.0 (right) Reply: OK|ERROR PLS_CURRENT_PLAYER_A_TEMPOMODE_ GET Gets the tempo mode value of Player A of the current playlist. Parameter: none Reply: (string) tempomode (CDJ, CDJ_MT, Vinyl33 or Vinyl45). PLS_CURRENT_PLAYER_A_TEMPOMODE_ SET Sets the tempo mode value of Player A of the current playlist. Parameter: (string) tempomode(CDJ,CDJ_MT,Vinyl33,Vinyl45) Reply: OK|ERROR PLS_CURRENT_PLAYER_B_TEMPOMODE_ GET Gets the tempo mode value of Player B of the current playlist. Parameter: none RADIO42 Confidential 255 ProppFrexx ONAIR Reply: (string) tempomode (CDJ, CDJ_MT, Vinyl33 or Vinyl45). PLS_CURRENT_PLAYER_B_TEMPOMODE_ SET Sets the tempo mode value of Player B of the current playlist. Parameter: (string) tempomode(CDJ,CDJ_MT,Vinyl33,Vinyl45) Reply: OK|ERROR PLS_CURRENT_PLAYER_C_TEMPOMODE_ GET Gets the tempo mode value of Player C of the current playlist. Parameter: none Reply: (string) tempomode (CDJ, CDJ_MT, Vinyl33 or Vinyl45). PLS_CURRENT_PLAYER_C_TEMPOMODE_ SET Sets the tempo mode value of Player C of the current playlist. Parameter: (string) tempomode(CDJ,CDJ_MT,Vinyl33,Vinyl45) Reply: OK|ERROR PLS_CURRENT_PLAYER_D_TEMPOMODE_ GET Gets the tempo mode value of Player D of the current playlist. Parameter: none Reply: (string) tempomode (CDJ, CDJ_MT, Vinyl33 or Vinyl45). PLS_CURRENT_PLAYER_D_TEMPOMODE_ SET Sets the tempo mode value of Player D of the current playlist. Parameter: (string) tempomode(CDJ,CDJ_MT,Vinyl33,Vinyl45) Reply: OK|ERROR PLS_CURRENT_PLAYER_A_SYNCBEAT Tries to sync the Player A of the current playlist with the currently playing player. Parameter: none Reply: OK|ERROR PLS_CURRENT_PLAYER_B_SYNCBEAT Tries to sync the Player B of the current playlist with the currently playing player. Parameter: none Reply: OK|ERROR PLS_CURRENT_PLAYER_C_SYNCBEAT Tries to sync the Player C of the current playlist with the currently playing player. Parameter: none Reply: OK|ERROR PLS_CURRENT_PLAYER_D_SYNCBEAT Tries to sync the Player D of the current playlist with the currently playing player. Parameter: none Reply: OK|ERROR PLS_CURRENT_PLAYER_A_SND2PFL_GE T Gets if Player A of the current playlist is currently in SND2PFL mode. Parameter: none Reply: (bool) True, if set - False, if not PLS_CURRENT_PLAYER_B_SND2PFL_GE T Gets if Player B of the current playlist is currently in SND2PFL mode. Parameter: none Reply: (bool) True, if set - False, if not PLS_CURRENT_PLAYER_C_SND2PFL_GE T Gets if Player C of the current playlist is currently in SND2PFL mode. Parameter: none Reply: (bool) True, if set - False, if not PLS_CURRENT_PLAYER_D_SND2PFL_GE T Gets if Player D of the current playlist is currently in SND2PFL mode. Parameter: none Reply: (bool) True, if set - False, if not PLS_CURRENT_PLAYER_A_SND2PFL Toggles the SND2PFL mode of Player A of the current playlist. Parameter: none Reply: OK|ERROR PLS_CURRENT_PLAYER_B_SND2PFL Toggles the SND2PFL mode of Player B of the current playlist. Parameter: none Reply: OK|ERROR PLS_CURRENT_PLAYER_C_SND2PFL Toggles the SND2PFL mode of Player C of the current playlist. Parameter: none Reply: OK|ERROR PLS_CURRENT_PLAYER_D_SND2PFL Toggles the SND2PFL mode of Player D of the current playlist. Parameter: none Reply: OK|ERROR PLS_CURRENT_PLAYER_A_SND2PFLMUT E Toggles the SND2PFL mode of Player A of the current playlist (mutes the main output). 256 RADIO42 Confidential APPENDIX Parameter: none Reply: OK|ERROR PLS_CURRENT_PLAYER_B_SND2PFLMUT E Toggles the SND2PFL mode of Player B of the current playlist (mutes the main output). Parameter: none Reply: OK|ERROR PLS_CURRENT_PLAYER_C_SND2PFLMUT E Toggles the SND2PFL mode of Player C of the current playlist (mutes the main output). Parameter: none Reply: OK|ERROR PLS_CURRENT_PLAYER_D_SND2PFLMUT E Toggles the SND2PFL mode of Player D of the current playlist (mutes the main output). Parameter: none Reply: OK|ERROR PLS_CURRENT_PLAYER_A_PFL Starts the PFL Player for the current track in Player A of the current playlist. Parameter: none Reply: OK|ERROR PLS_CURRENT_PLAYER_B_PFL Starts the PFL Player for the current track in Player B of the current playlist. Parameter: none Reply: OK|ERROR PLS_CURRENT_PLAYER_C_PFL Starts the PFL Player for the current track in Player C of the current playlist. Parameter: none Reply: OK|ERROR PLS_CURRENT_PLAYER_D_PFL Starts the PFL Player for the current track in Player D of the current playlist. Parameter: none Reply: OK|ERROR PLS_CURRENT_CURRENT_SELECTHOTST ART Selects a HotStart of the current DJ Player. Parameter: index(0..9)[|play(True,False)] Reply: OK|ERROR index: the hot start point to select (0..9); play: start playback True|False. PLS_CURRENT_PLAYER_A_SELECTHOTS TART Selects a HotStart of the DJ Player A. Parameter: index(0..9)[|play(True,False)] Reply: OK|ERROR index: the hot start point to select (0..9); play: start playback True|False. PLS_CURRENT_PLAYER_B_SELECTHOTS TART Selects a HotStart of the DJ Player B. Parameter: index(0..9)[|play(True,False)] Reply: OK|ERROR index: the hot start point to select (0..9); play: start playback True|False. PLS_CURRENT_PLAYER_C_SELECTHOTS TART Selects a HotStart of the DJ Player C. Parameter: index(0..9)[|play(True,False)] Reply: OK|ERROR index: the hot start point to select (0..9); play: start playback True|False. PLS_CURRENT_PLAYER_D_SELECTHOTS TART Selects a HotStart of the DJ Player D. Parameter: index(0..9)[|play(True,False)] Reply: OK|ERROR index: the hot start point to select (0..9); play: start playback True|False. PLS_CURRENT_CURRENT_PLAYLOOPSAM PLE Starts/Stops playback of the sample recorded with the loop sampler of the current DJ Player. Parameter: loopPoint(1,2,3,A,B)|loop(True,False) Reply: OK|ERROR loopPoint: selects the loop sampler to play/stop (either 1, 2, 3, A or B); loop: play the sample looped True|False. PLS_CURRENT_PLAYER_A_PLAYLOOPSA MPLE Starts/Stops playback of the sample recorded with the loop sampler of the DJ Player A. Parameter: loopPoint(1,2,3,A,B)|loop(True,False) Reply: OK|ERROR loopPoint: selects the loop sampler to play/stop (either 1, 2, 3, A or B); loop: play the sample looped True|False. RADIO42 Confidential 257 ProppFrexx ONAIR PLS_CURRENT_PLAYER_B_PLAYLOOPSA MPLE Starts/Stops playback of the sample recorded with the loop sampler of the DJ Player B. Parameter: loopPoint(1,2,3,A,B)|loop(True,False) Reply: OK|ERROR loopPoint: selects the loop sampler to play/stop (either 1, 2, 3, A or B); loop: play the sample looped True|False. PLS_CURRENT_PLAYER_C_PLAYLOOPSA MPLE Starts/Stops playback of the sample recorded with the loop sampler of the DJ Player C. Parameter: loopPoint(1,2,3,A,B)|loop(True,False) Reply: OK|ERROR loopPoint: selects the loop sampler to play/stop (either 1, 2, 3, A or B); loop: play the sample looped True|False. PLS_CURRENT_PLAYER_D_PLAYLOOPSA MPLE Starts/Stops playback of the sample recorded with the loop sampler of the DJ Player D. Parameter: loopPoint(1,2,3,A,B)|loop(True,False) Reply: OK|ERROR loopPoint: selects the loop sampler to play/stop (either 1, 2, 3, A or B); loop: play the sample looped True|False. PLS_CURRENT_CURRENT_SELECTLOOPP OINT Selects a loop point of the current DJ Player. Parameter: loopPoint(1,2,3,A,B)[|loopType(0=Off,1=Loop,2=Skip, -1=unchanged)] Reply: OK|ERROR loopPoint: selects the loop point to select (either 1, 2, 3, A or B); loopType: the optional loopType to set or -1 to leave unchanged; play=start playback. PLS_CURRENT_CURRENT_SETLOOPPOIN TTYPE Sets/Toggles a loop point type of the current DJ Player. Parameter: loopPoint(1,2,3,A,B)[|loopType(0=Off,1=Loop,2=Skip, -1=toggle)|play(True,False)] Reply: OK|ERROR loopPoint: selects the loop point to select (either 1, 2, 3, A or B); loopType: the optional loopType to set or -1 to toggle the current type between Off and Loop; play=start playback. PLS_CURRENT_PLAYER_A_SELECTLOOP POINT Selects a loop point of the DJ Player A. Parameter: loopPoint(1,2,3,A,B)[|loopType(0=Off,1=Loop,2=Skip, -1=unchanged)|play(True,False)] Reply: OK|ERROR loopPoint: selects the loop point to select (either 1, 2, 3, A or B); loopType: the optional loopType to set or -1 to leave unchanged; play=start playback. PLS_CURRENT_PLAYER_A_SETLOOPPOI NTTYPE Sets/Toggles a loop point type of the DJ Player A. Parameter: loopPoint(1,2,3,A,B)[|loopType(0=Off,1=Loop,2=Skip, -1=toggle)|play(True,False)] Reply: OK|ERROR loopPoint: selects the loop point to select (either 1, 2, 3, A or B); loopType: the optional loopType to set or -1 to toggle the current type between Off and Loop; play=start playback. PLS_CURRENT_PLAYER_B_SELECTLOOP POINT Selects a loop point of the DJ Player B. Parameter: loopPoint(1,2,3,A,B)[|loopType(0=Off,1=Loop,2=Skip, -1=unchanged)|play(True,False)] Reply: OK|ERROR loopPoint: selects the loop point to select (either 1, 2, 3, A or B); loopType: the optional loopType to set or -1 to leave unchanged; play=start playback. PLS_CURRENT_PLAYER_B_SETLOOPPOI NTTYPE Sets/Toggles a loop point type of the DJ Player B. Parameter: loopPoint(1,2,3,A,B)[|loopType(0=Off,1=Loop,2=Skip, -1=toggle)|play(True,False)] Reply: OK|ERROR loopPoint: selects the loop point to select (either 1, 2, 3, A or B); loopType: the optional loopType to set or -1 to toggle the current type between Off and Loop; play=start playback. PLS_CURRENT_PLAYER_C_SELECTLOOP POINT Selects a loop point of the DJ Player C. Parameter: loopPoint(1,2,3,A,B)[|loopType(0=Off,1=Loop,2=Skip, -1=unchanged)|play(True,False)] Reply: OK|ERROR loopPoint: selects the loop point to select (either 1, 2, 3, A or B); loopType: the optional loopType to set or -1 to leave unchanged; play=start playback. PLS_CURRENT_PLAYER_C_SETLOOPPOI Sets/Toggles a loop point type of the DJ Player C. 258 RADIO42 Confidential APPENDIX NTTYPE Parameter: loopPoint(1,2,3,A,B)[|loopType(0=Off,1=Loop,2=Skip, -1=toggle)] Reply: OK|ERROR loopPoint: selects the loop point to select (either 1, 2, 3, A or B); loopType: the optional loopType to set or -1 to toggle the current type between Off and Loop; play=start playback. PLS_CURRENT_PLAYER_D_SELECTLOOP POINT Selects a loop point of the DJ Player D. Parameter: loopPoint(1,2,3,A,B)[|loopType(0=Off,1=Loop,2=Skip, -1=unchanged)] Reply: OK|ERROR loopPoint: selects the loop point to select (either 1, 2, 3, A or B); loopType: the optional loopType to set or -1 to leave unchanged; play=start playback. PLS_CURRENT_PLAYER_D_SETLOOPPOI NTTYPE Sets/Toggles a loop point type of the DJ Player D. Parameter: loopPoint(1,2,3,A,B)[|loopType(0=Off,1=Loop,2=Skip, -1=toggle)|play(True,False)] Reply: OK|ERROR loopPoint: selects the loop point to select (either 1, 2, 3, A or B); loopType: the optional loopType to set or -1 to toggle the current type between Off and Loop; play=start playback. PLS_CURRENT_PLAYER_A_TIME_GET Gets the status, the elapsed and remaining time of Player A of the current playlist. Reply: (string) status|duration|elapsedtime|remaintime|rampoutro. PLS_CURRENT_PLAYER_B_TIME_GET Gets the status, the elapsed and remaining time of Player B of the current playlist. Reply: (string) status|duration|elapsedtime|remaintime|rampoutro. PLS_CURRENT_PLAYER_C_TIME_GET Gets the status, the elapsed and remaining time of Player C of the current playlist. Reply: (string) status|duration|elapsedtime|remaintime|rampoutro. PLS_CURRENT_PLAYER_D_TIME_GET Gets the status, the elapsed and remaining time of Player D of the current playlist. Reply: (string) status|duration|elapsedtime|remaintime|rampoutro. PLS_CURRENT_TIME_GET_CURRENT Gets the status, the elapsed and remaining time of the current Player of the current playlist. Reply: (string) status|duration|elapsedtime|remaintime|rampoutro. PLS_CURRENT_NEXTSCHEDULEDTIME_G ET Gets the next item due to be scheduled. Reply: (string) elementName|elementTime. elementName: FT=FixTimeElement, OL=Overlay, PG=Program. STANDBY_PFL Starts/Stops the PFL Player for the current track in a StandbyPlayer. Parameter: standby(1..99) Reply: OK|ERROR standby: denotes the standby player to use between 1 and 99. STANDBY_PLAYPAUSE Plays/Pauses the current track in a Standby-Player (FadesOut on UseFading, No Eject). Parameter: standby(1..99) Reply: OK|ERROR standby: denotes the standby player to use between 1 and 99. STANDBY_PLAYSTOP Plays/Stops the current track in a Standby-Player (FadesOut on UseFading, Eject). Parameter: standby(1..99) Reply: OK|ERROR standby: denotes the standby player to use between 1 and 99. STANDBY_PLAYPAUSENOFADE Plays/Pauses the current track in a Standby-Player (No FadeOut, No Eject). Parameter: standby(1..99) Reply: OK|ERROR standby: denotes the standby player to use between 1 and 99. STANDBY_PLAYSTOPNOFADE Plays/Stops the current track in a Standby-Player (No FadeOut, Eject). Parameter: standby(1..99) Reply: OK|ERROR standby: denotes the standby player to use between 1 and 9. STANDBY_PLAY Plays the current track in a Standby-Player (FadesIn on UseFading). Parameter: standby(1..99) Reply: OK|ERROR standby: denotes the standby player to use between 1 and 99. RADIO42 Confidential 259 ProppFrexx ONAIR STANDBY_PLAYNOFADE Plays the current track in a Standby-Player (No FadeIn). Parameter: standby(1..99) Reply: OK|ERROR standby: denotes the standby player to use between 1 and 99. STANDBY_PAUSE Pauses the current track in a Standby-Player (FadesOut on UseFading). Parameter: standby(1..99) Reply: OK|ERROR standby: denotes the standby player to use between 1 and 99. STANDBY_PAUSENOFADE Plays the current track in a Standby-Player (No FadeOut). Parameter: standby(1..99) Reply: OK|ERROR standby: denotes the standby player to use between 1 and 99. STANDBY_EJECT Stops/Ejects the current track in a Standby-Player (FadesOut on UseFading). Parameter: standby(1..99) Reply: OK|ERROR standby: denotes the standby player to use between 1 and 99. STANDBY_EJECTNOFADE Stops/Ejects the current track in a Standby-Player (No FadeOut). Parameter: standby(1..99) Reply: OK|ERROR standby: denotes the standby player to use between 1 and 9. STANDBY_REWIND Rewinds the current track in a Standby-Player to the Cue-In position. Parameter: standby(1..99) Reply: OK|ERROR standby: denotes the standby player to use between 1 and 99. STANDBY_RESET Rewinds and Resets the current track in a Standby-Player to all defaults. Parameter: standby(1..99) Reply: OK|ERROR standby: denotes the standby player to use between 1 and 99. STANDBY_LOADTRACK Loads a track to a Standby-Player. Parameter: standby(1..99)|filename Reply: OK|ERROR standby: denotes the standby player to use between 1 and 99; filename=fully qualified path to the audio track to load. If in StackMode the track will be added to the stack – else it will replace any current track. STANDBY_STACK_MODE_TOGGLE Toggles the StackMode of a Standby-Player. Parameter: standby(1..99) Reply: OK|ERROR standby: denotes the standby player to use between 1 and 99. The standby player must be empty to toggle the stack mode. STANDBY_STACK_MODE_ON Sets the StackMode of a Standby-Player. Parameter: standby(1..99) Reply: OK|ERROR standby: denotes the standby player to use between 1 and 99. The standby player must be empty to toggle the stack mode. STANDBY_STACK_MODE_OFF Removes the StackMode of a Standby-Player. Parameter: standby(1..99) Reply: OK|ERROR standby: denotes the standby player to use between 1 and 99. STANDBY_STACK_MODELOOP_TOGGLE Toggles the Loop StackMode of a Standby-Player. Parameter: standby(1..99) Reply: OK|ERROR standby: denotes the standby player to use between 1 and 99. STANDBY_STACK_MODELOOP_SET Sets the Loop StackMode of a Standby-Player. Parameter: standby(1..99) Reply: OK|ERROR standby: denotes the standby player to use between 1 and 99; loopmode: 0=LoopOnce, 1=LoopEndless, 2=NoLoop STANDBY_STACK_SELECT Selects a certain stack track in a Standby-Player. Parameter: standby(1..99) |index(1..max) Reply: OK|ERROR standby: denotes the standby player to use between 1 and 99; index: 260 RADIO42 Confidential APPENDIX the index number of the track to select between 1 and number of tracks loaded. STANDBY_STACK_SELECTNEXT Selects the next stack track in a Standby-Player. Parameter: standby(1..99) Reply: OK|ERROR standby: denotes the standby player to use between 1 and 99. STANDBY_STACK_SELECTPREVIOUS Selects the previous stack track in a Standby-Player. Parameter: standby(1..99) Reply: OK|ERROR standby: denotes the standby player to use between 1 and 99. STANDBY_LOADSTACK Loads a playlist to the stack of a Standby-Player. Parameter: standby(1..99)|filename Reply: OK|ERROR standby: denotes the standby player to use between 1 and 99; filename=fully qualified path to a playlist file to load to the stack. STANDBY_LOADSTACKSCRIPT Loads a script to the stack of a Standby-Player. Parameter: standby(1..99)|scriptname[|count] Reply: OK|ERROR standby: denotes the standby player to use between 1 and 99; scriptname=the name of the script to use; count=number of track to take from the script (0=one loop). STANDBY_OUTPUT_GET Gets the output mixer of a Standby-Player. Parameter: standby(1..99) Reply: (string) output mixer name standby: denotes the standby player to use between 1 and 99. STANDBY_OUTPUT_SET Sets the output mixer of a Standby-Player. Parameter: standby(1..99)|mixername Reply: OK|ERROR standby: denotes the standby player to use between 1 and 99; mixername: the name of the output mixer to use. STANDBY_OUTPUTVOLUME_GET Gets the output volume value of a Standby-Player. Parameter: standby(1..99) Reply: (float) volume, between 0.0 (silence) and 1.0 (0dB) standby: denotes the standby player to use between 1 and 99. STANDBY_OUTPUTVOLUME_SET Sets the output volume value of a Standby-Player. Parameter: standby(1..99)|volume(0.0...1.0) Reply: OK|ERROR standby: denotes the standby player to use between 1 and 99; volume: between 0.0 (silence) and 1.0 (0dB). STANDBY_OUTPUTPAN_GET Gets the output balance value of a Standby-Player. Parameter: standby(1..99) Reply: (float) pan, between -1.0 (left) and 1.0 (right) standby: denotes the standby player to use between 1 and 99. STANDBY_OUTPUTPAN_SET Sets the output balance value of a Standby-Player. Parameter: standby(1..99)|pan(-1.0...1.0) Reply: OK|ERROR standby: denotes the standby player to use between 1 and 99; pan: between -1.0 (left) and 1.0 (right). QUICKMONITOR_STOP Stops the Quick Monitor and ejects the current track. Parameter: none Reply: OK|ERROR FIND_QUICKMONITOR Starts the Quick Monitor of the currently selected track in the current find result window. Parameter: none|hotstartIndex(0..9) Reply: OK|ERROR An optional HotStart index might be given between 0 and 9, if given playback starts at that HotStart index EXPLORER_QUICKMONITOR Starts the Quick Monitor of the currently selected track in the current browser explorer window. Parameter: none|hotstartIndex(0..9) Reply: OK|ERROR An optional HotStart index might be given between 0 and 9, if given playback starts at that HotStart index TRACKBOARD_TOGGLE Toggles the trackboard content according to the hot buttons. Parameter: hotbuttonIndex(1..5) Reply: OK|ERROR The HotButton index might be between 1 and 5 and relates to the RADIO42 Confidential 261 ProppFrexx ONAIR five toggle buttons (1 being the Default). TRACKBOARD_LOAD Loads the trackboard content with either a folder or playlist. Parameter: folderorfile Reply: OK|ERROR The folderorfile parameter must be a fully qualified path to either a folder or playlist file. PROGRAM_SCHEDULER_GET Gets the program scheduler value. Parameter: none Reply: (bool) True, if ON - False, if OFF PROGRAM_SCHEDULER_TOGGLE Toggles the program scheduler value. Parameter: none Reply: OK PROGRAM_SCHEDULER_ON Sets the program scheduler to ON. Parameter: none Reply: OK PROGRAM_SCHEDULER_OFF Sets the program scheduler to OFF. Parameter: none Reply: OK PROGRAM_MANUALOPERATION_GET Gets the manual operation value. Parameter: none Reply: (bool) True, if ON - False, if OFF PROGRAM_MANUALOPERATION_TOGGLE Toggles the manual operation value. Parameter: none Reply: OK PROGRAM_MANUALOPERATION_ON Sets the manual operation to ON. Parameter: none Reply: OK PROGRAM_MANUALOPERATION_OFF Sets the manual operation to OFF. Parameter: none Reply: OK PROGRAM_STARTSCRIPT Starts a script in a new or given playlist at the given time. Parameter: (string) playlistname|scriptname|starttime|stopimmediate Reply: OK|ERROR playlistname: leave empty to open a new playlist; scriptname: leave empty to use the current one; startTime: in format yyyy-MM-dd HH:mm:ss; stopimmediate: True|False. Note: This also stops any other running script. PROGRAM_STOPSCRIPT Stops script in the current or given playlist with the given options. Parameter: (string) playlistname|stopplayers|stopimmediate|closeafterstop Reply: OK|ERROR playlistname: leave empty to stop the current playlist; stopplayers, stopimmediate, closeafterstop: True|False PROGRAM_RELOADSCRIPT Reloads a given script. Parameter: (string) scriptname Reply: OK|ERROR scriptname: the name of the script to reload. PROGRAM_CURRENT_GET Gets the current program running. Reply: (string) one line: programname|scriptname|scripttime PROGRAM_NEXT_GET Gets the next program which will be due. Reply: (string) one line: programname|scriptname|scripttime PROGRAM_IMPORT Performs an automatic import of an external program scheduler logfile. Parameter: format[|logFilename|trackBaseFolder|options|splitOption|separatePro gramAndOverlay|playlistOutputFolder] Reply: OK|ERROR. format: the import format name to use; logFilename: the path and filename of the log-file to import; trackBaseFolder: the folder containing the audio tracks; options: the import options to use; splitOption: to create separate scheduler entries; separateProgramAndOverlay: how to handle spot break groups; playlistOutputFolder: the folder where the resulting playlist files 262 RADIO42 Confidential APPENDIX should be created. PFL_ISOPEN Gets if the PFL Player is open. Parameter: none Reply: (bool) True, if set - False, if not PFL_OUTPUTVOLUME_GET Gets the output volume value of the PFL Player. Parameter: none Reply: (float) volume, between 0.0 (silence) and 1.0 (0dB) PFL_OUTPUTVOLUME_SET Sets the output volume value of the PFL Player. Parameter: (float) volume, between 0.0 (silence) and 1.0 (0dB) Reply: OK|ERROR PFL_OUTPUTPAN_GET Gets the output balance value of the PFL Player. Parameter: none Reply: (float) pan, between -1.0 (left) and 1.0 (right) PFL_OUTPUTPAN_SET Sets the output balance value of the PFL Player. Parameter: (float) pan, between -1.0 (left) and 1.0 (right) Reply: OK|ERROR PFL_OUTPUT_GET Gets the output mixer of the PFL Player. Parameter: none Reply: (string) output mixer name PFL_OUTPUT_SET Sets the output mixer of the PFL Player. Parameter: (string) mixername Reply: OK|ERROR To get a list of available output mixernames see MIXER_OUTPUT_NAMES_GET. PFL_CLOSE Closes/Hides the PFL Player. Parameter: none Reply: OK|ERROR PFL_CURRENT Starts the PFL Player for the currently selected media entry. Parameter: none Reply: OK|ERROR PFL_CURRENTPLAYLIST_CURRENT Starts the PFL Player for the current track of the currently active playlist. Parameter: none Reply: OK|ERROR PFL_CURRENTPLAYLIST_NEXT Starts the PFL Player for the next track of the currently active playlist. Parameter: none Reply: OK|ERROR PFL_FILE Starts the PFL Player for a given filename or Guid. Parameter: (string) filename|guid Reply: OK|ERROR PFL_GOTO_HOTSTART Sets the track position of the PFL Player to a HotStart index (0..9). Parameter: hotstartIndex(0..9) Reply: OK|ERROR QUICKMONITOR_GOTO_HOTSTART Sets the track position of the QuickMonitor Player to a HotStart index (0..9). Parameter: hotstartIndex(0..9) Reply: OK|ERROR CW1_OUTPUTVOLUME_GET Gets the output volume value of the Cartwall I. Parameter: none Reply: (float) volume, between 0.0 (silence) and 1.0 (0dB) CW1_OUTPUTVOLUME_SET Sets the output volume value of the Cartwall I. Parameter: (float) volume, between 0.0 (silence) and 1.0 (0dB) Reply: OK|ERROR CW1_OUTPUTPAN_GET Gets the output balance value of the Cartwall I. Parameter: none Reply: (float) pan, between -1.0 (left) and 1.0 (right) CW1_OUTPUTPAN_SET Sets the output balance value of the Cartwall I. Parameter: (float) pan, between -1.0 (left) and 1.0 (right) Reply: OK|ERROR CW1_OUTPUT_GET Gets the output mixer of the Cartwall I. Parameter: none Reply: (string) output mixer name RADIO42 Confidential 263 ProppFrexx ONAIR CW1_OUTPUT_SET Sets the output mixer of the Cartwall I. Parameter: (string) mixername Reply: OK|ERROR To get a list of available output mixernames see MIXER_OUTPUT_NAMES_GET. CW1_PLAYLIST_NAMES_GET Gets all available names which can be selected as a Cartwall I Playlist. Parameter: none Reply: (string) list of available Cartwall Playlist names (one per line). CW1_PLAYLIST_SET Selects a Cartwall I Playlist. Parameter: cartwallplaylistname Reply: OK|ERROR To get the list of available Cartwall Playlist names use: CW1_PLAYLIST_NAMES_GET. CW1_PLAYLIST_SET_SHORTCUT Selects a Cartwall I Playlist from a shortcut. Parameter: 1|2|3|4 Reply: OK|ERROR You can select a cartwall playlist either from shortcut 1, 2, 3 or 4. CW1_PLAYLIST_GET_SHORTCUT Gets the Cartwall I Playlist from a shortcut. Parameter: 1|2|3|4 Reply: (string) the shortcut cartwall playlist name. CW1_CART_NAMES_GET Gets all available Carts in the Cartwall I. Parameter: none Reply: (string) list of available Carts in the Cartwall I (one per line: ID|trackname|filename|effectiveplaytime). CW1_CART_COUNT_GET Gets the number of available Carts in the Cartwall I. Parameter: none Reply: (int) number of available Carts in the Cartwall I. CW1_SELECT_CART_NAMES_GET Gets all selected Carts in the Cartwall I. Parameter: none Reply: (string) list of selected Carts in the Cartwall I (one per line: ID|trackname|filename|effectiveplaytime). CW1_SELECT_CART_COUNT_GET Gets the number of selected Carts in the Cartwall I. Parameter: none Reply: (int) number of selected Carts in the Cartwall I. CW1_SELECT_CART Selects certain Cart(s) in the Cartwall I. Parameter: cartid[|cartid]..[|cartid] Reply: OK|ERROR To get the list of available Carts and IDs use: CW1_CART_NAMES_GET. Note: The IDs are the positions of the Carts in the Cartwall starting with 1. CW1_SELECT_CART_TOGGLE Toggles the select state of certain Cart(s) in the Cartwall I. Parameter: cartid[|cartid]..[|cartid] Reply: OK|ERROR To get the list of available Carts use: CW1_CART_NAMES_GET. Note: The IDs are the positions of the Carts in the Cartwall starting with 1. CW1_DESELECT_CART Deselects certain Cart(s) in the Cartwall I. Parameter: cartid[|cartid]..[|cartid] Reply: OK|ERROR To get the list of available Carts and IDs use: CW1_CART_NAMES_GET. Note: The IDs are the positions of the Carts in the Cartwall starting with 1. CW1_DESELECT_ALL Deselects all Carts in the Cartwall I. Parameter: none Reply: OK|ERROR To get the list of available Carts use: CW1_CART_NAMES_GET. CW1_SELECT_CART_1 Selects the 1st Cart in the Cartwall I (and only this one). Parameter: none Reply: OK|ERROR CW1_SELECT_CART_2 Selects the 2nd Cart in the Cartwall I (and only this one). Parameter: none Reply: OK|ERROR 264 RADIO42 Confidential APPENDIX CW1_SELECT_CART_3 Selects the 3rd Cart in the Cartwall I (and only this one). Parameter: none Reply: OK|ERROR CW1_SELECT_CART_4 Selects the 4th Cart in the Cartwall I (and only this one). Parameter: none Reply: OK|ERROR CW1_SELECT_CART_5 Selects the 5th Cart in the Cartwall I (and only this one). Parameter: none Reply: OK|ERROR CW1_SELECT_CART_6 Selects the 6th Cart in the Cartwall I (and only this one). Parameter: none Reply: OK|ERROR CW1_SELECT_CART_7 Selects the 7th Cart in the Cartwall I (and only this one). Parameter: none Reply: OK|ERROR CW1_SELECT_CART_8 Selects the 8th Cart in the Cartwall I (and only this one). Parameter: none Reply: OK|ERROR CW1_SELECT_CART_9 Selects the 9th Cart in the Cartwall I (and only this one). Parameter: none Reply: OK|ERROR CW1_SELECT_CART_10 Selects the 10th Cart in the Cartwall I (and only this one). Parameter: none Reply: OK|ERROR CW1_SELECT_CART_11 Selects the 11th Cart in the Cartwall I (and only this one). Parameter: none Reply: OK|ERROR CW1_SELECT_CART_12 Selects the 12th Cart in the Cartwall I (and only this one). Parameter: none Reply: OK|ERROR CW1_SELECT_CART_13 Selects the 13th Cart in the Cartwall I (and only this one). Parameter: none Reply: OK|ERROR CW1_SELECT_CART_14 Selects the 14th Cart in the Cartwall I (and only this one). Parameter: none Reply: OK|ERROR CW1_SELECT_CART_15 Selects the 15th Cart in the Cartwall I (and only this one). Parameter: none Reply: OK|ERROR CW1_SELECT_CART_16 Selects the 16th Cart in the Cartwall I (and only this one). Parameter: none Reply: OK|ERROR CW1_SELECT_CART_17 Selects the 17th Cart in the Cartwall I (and only this one). Parameter: none Reply: OK|ERROR CW1_SELECT_CART_18 Selects the 18th Cart in the Cartwall I (and only this one). Parameter: none Reply: OK|ERROR CW1_SELECT_CART_19 Selects the 19th Cart in the Cartwall I (and only this one). Parameter: none Reply: OK|ERROR CW1_SELECT_CART_20 Selects the 20th Cart in the Cartwall I (and only this one). Parameter: none Reply: OK|ERROR CW1_SELECT_CART_21 Selects the 21th Cart in the Cartwall I (and only this one). Parameter: none Reply: OK|ERROR CW1_SELECT_CART_22 Selects the 22th Cart in the Cartwall I (and only this one). Parameter: none Reply: OK|ERROR CW1_SELECT_CART_23 Selects the 23th Cart in the Cartwall I (and only this one). Parameter: none Reply: OK|ERROR RADIO42 Confidential 265 ProppFrexx ONAIR CW1_SELECT_CART_24 Selects the 24th Cart in the Cartwall I (and only this one). Parameter: none Reply: OK|ERROR CW1_SELECT_CART_25 Selects the 25th Cart in the Cartwall I (and only this one). Parameter: none Reply: OK|ERROR CW1_SELECT_CART_26 Selects the 26th Cart in the Cartwall I (and only this one). Parameter: none Reply: OK|ERROR CW1_SELECT_CART_27 Selects the 27th Cart in the Cartwall I (and only this one). Parameter: none Reply: OK|ERROR CW1_SELECT_CART_28 Selects the 28th Cart in the Cartwall I (and only this one). Parameter: none Reply: OK|ERROR CW1_SELECT_CART_29 Selects the 29th Cart in the Cartwall I (and only this one). Parameter: none Reply: OK|ERROR CW1_SELECT_CART_30 Selects the 30th Cart in the Cartwall I (and only this one). Parameter: none Reply: OK|ERROR CW1_PLAY_CART Plays/Pauses certain Cart(s) in the Cartwall I. Parameter: cartid[|cartid]..[|cartid] Reply: OK|ERROR To get the list of available Carts use: CW1_CART_NAMES_GET. Note: The IDs are the positions of the Carts in the Cartwall starting with 1. CW1_PLAYONLY_CART Plays certain Cart(s) in the Cartwall I if not already playing. Parameter: cartid[|cartid]..[|cartid] Reply: OK|ERROR To get the list of available Carts use: CW1_CART_NAMES_GET. Note: The IDs are the positions of the Carts in the Cartwall starting with 1. CW1_STOPONLY_CART Stops certain Cart(s) in the Cartwall I if not already stopped. Parameter: cartid[|cartid]..[|cartid] Reply: OK|ERROR To get the list of available Carts use: CW1_CART_NAMES_GET. Note: The IDs are the positions of the Carts in the Cartwall starting with 1. CW1_FADEOUT_CART FadesOut/Stops certain Cart(s) in the Cartwall I. Parameter: cartid[|cartid]..[|cartid] Reply: OK|ERROR To get the list of available Carts use: CW1_CART_NAMES_GET. Note: The IDs are the positions of the Carts in the Cartwall starting with 1. CW1_FADEOUTSLOW_CART Slowly FadesOut/Stops certain Cart(s) in the Cartwall I. Parameter: cartid[|cartid]..[|cartid] Reply: OK|ERROR To get the list of available Carts use: CW1_CART_NAMES_GET. Note: The IDs are the positions of the Carts in the Cartwall starting with 1. CW1_FADEOUTFAST_CART Quickly FadesOut/Stops certain Cart(s) in the Cartwall I. Parameter: cartid[|cartid]..[|cartid] Reply: OK|ERROR To get the list of available Carts use: CW1_CART_NAMES_GET. Note: The IDs are the positions of the Carts in the Cartwall starting with 1. CW1_PLAY_CART_1 Plays/Pauses the 1st Cart in the Cartwall I (and only this one). Parameter: none Reply: OK|ERROR CW1_PLAY_CART_2 Plays/Pauses the 2nd Cart in the Cartwall I (and only this one). Parameter: none Reply: OK|ERROR CW1_PLAY_CART_3 Plays/Pauses the 3rd Cart in the Cartwall I (and only this one). 266 RADIO42 Confidential APPENDIX Parameter: none Reply: OK|ERROR CW1_PLAY_CART_4 Plays/Pauses the 4th Cart in the Cartwall I (and only this one). Parameter: none Reply: OK|ERROR CW1_PLAY_CART_5 Plays/Pauses the 5th Cart in the Cartwall I (and only this one). Parameter: none Reply: OK|ERROR CW1_PLAY_CART_6 Plays/Pauses the 6th Cart in the Cartwall I (and only this one). Parameter: none Reply: OK|ERROR CW1_PLAY_CART_7 Plays/Pauses the 7th Cart in the Cartwall I (and only this one). Parameter: none Reply: OK|ERROR CW1_PLAY_CART_8 Plays/Pauses the 8th Cart in the Cartwall I (and only this one). Parameter: none Reply: OK|ERROR CW1_PLAY_CART_9 Plays/Pauses the 9th Cart in the Cartwall I (and only this one). Parameter: none Reply: OK|ERROR CW1_PLAY_CART_10 Plays/Pauses the 10th Cart in the Cartwall I (and only this one). Parameter: none Reply: OK|ERROR CW1_PLAY_CART_11 Plays/Pauses the 11th Cart in the Cartwall I (and only this one). Parameter: none Reply: OK|ERROR CW1_PLAY_CART_12 Plays/Pauses the 12th Cart in the Cartwall I (and only this one). Parameter: none Reply: OK|ERROR CW1_PLAY_CART_13 Plays/Pauses the 13th Cart in the Cartwall I (and only this one). Parameter: none Reply: OK|ERROR CW1_PLAY_CART_14 Plays/Pauses the 14th Cart in the Cartwall I (and only this one). Parameter: none Reply: OK|ERROR CW1_PLAY_CART_15 Plays/Pauses the 15th Cart in the Cartwall I (and only this one). Parameter: none Reply: OK|ERROR CW1_PLAY_CART_16 Plays/Pauses the 16th Cart in the Cartwall I (and only this one). Parameter: none Reply: OK|ERROR CW1_PLAY_CART_17 Plays/Pauses the 17th Cart in the Cartwall I (and only this one). Parameter: none Reply: OK|ERROR CW1_PLAY_CART_18 Plays/Pauses the 18th Cart in the Cartwall I (and only this one). Parameter: none Reply: OK|ERROR CW1_PLAY_CART_19 Plays/Pauses the 19th Cart in the Cartwall I (and only this one). Parameter: none Reply: OK|ERROR CW1_PLAY_CART_20 Plays/Pauses the 20th Cart in the Cartwall I (and only this one). Parameter: none Reply: OK|ERROR CW1_PLAY_CART_21 Plays/Pauses the 21th Cart in the Cartwall I (and only this one). Parameter: none Reply: OK|ERROR CW1_PLAY_CART_22 Plays/Pauses the 22th Cart in the Cartwall I (and only this one). Parameter: none Reply: OK|ERROR CW1_PLAY_CART_23 Plays/Pauses the 23th Cart in the Cartwall I (and only this one). Parameter: none Reply: OK|ERROR CW1_PLAY_CART_24 Plays/Pauses the 24th Cart in the Cartwall I (and only this one). RADIO42 Confidential 267 ProppFrexx ONAIR Parameter: none Reply: OK|ERROR CW1_PLAY_CART_25 Plays/Pauses the 25th Cart in the Cartwall I (and only this one). Parameter: none Reply: OK|ERROR CW1_PLAY_CART_26 Plays/Pauses the 26th Cart in the Cartwall I (and only this one). Parameter: none Reply: OK|ERROR CW1_PLAY_CART_27 Plays/Pauses the 27th Cart in the Cartwall I (and only this one). Parameter: none Reply: OK|ERROR CW1_PLAY_CART_28 Plays/Pauses the 28th Cart in the Cartwall I (and only this one). Parameter: none Reply: OK|ERROR CW1_PLAY_CART_29 Plays/Pauses the 29th Cart in the Cartwall I (and only this one). Parameter: none Reply: OK|ERROR CW1_PLAY_CART_30 Plays/Pauses the 30th Cart in the Cartwall I (and only this one). Parameter: none Reply: OK|ERROR CW1_CART_ISPLAYING Gets the play state of a certain Cart in the Cartwall I. Parameter: cartid Reply: (bool) True, if playing - False, if paused. To get the list of available Carts use: CW1_CART_NAMES_GET. Note: The IDs are the positions of the Carts in the Cartwall starting with 1. CW1_CART_ISLOOPED Gets the loop state of a certain Cart in the Cartwall I. Parameter: cartid Reply: (bool) True, if looped - False, if not. To get the list of available Carts use: CW1_CART_NAMES_GET. Note: The IDs are the positions of the Carts in the Cartwall starting with 1. CW1_CART_ISSTOPOTHERS Gets the Stop Others On Play state of a certain Cart in the Cartwall I. Parameter: cartid Reply: (bool) True, if Stop Others On Play - False, if not. To get the list of available Carts use: CW1_CART_NAMES_GET. Note: The IDs are the positions of the Carts in the Cartwall starting with 1. CW1_CART_LOOP_ON Sets the loop state of a certain Cart in the Cartwall I to LOOP. Parameter: cartid Reply: OK|ERROR To get the list of available Carts use: CW1_CART_NAMES_GET. Note: The IDs are the positions of the Carts in the Cartwall starting with 1. CW1_CART_LOOP_OFF Sets the loop state of a certain Cart in the Cartwall I to NOT LOOP. Parameter: cartid Reply: OK|ERROR To get the list of available Carts use: CW1_CART_NAMES_GET. Note: The IDs are the positions of the Carts in the Cartwall starting with 1. CW1_CART_LOOP_TOGGLE Toggles the loop state of a certain Cart in the Cartwall I. Parameter: cartid Reply: OK|ERROR To get the list of available Carts use: CW1_CART_NAMES_GET. Note: The IDs are the positions of the Carts in the Cartwall starting with 1. CW1_CART_STOPOTHERS_TOGGLE Toggles the Stop Others On Play state of a certain Cart in the Cartwall I. Parameter: cartid Reply: OK|ERROR To get the list of available Carts use: CW1_CART_NAMES_GET. Note: The IDs are the positions of the Carts in the Cartwall starting with 1. 268 RADIO42 Confidential APPENDIX CW1_CART_PFL Starts the PFL Player for a certain Cart in the Cartwall I. Parameter: cartid Reply: OK|ERROR To get the list of available Carts use: CW1_CART_NAMES_GET. Note: The IDs are the positions of the Carts in the Cartwall starting with 1. CW1_PLAY_ALLSELECTED_PARALLEL Plays all selected Carts in the Cartwall I (in parallel). Parameter: none Reply: OK|ERROR CW1_PLAY_ALLSELECTED_ONEBYONE Plays all selected Carts in the Cartwall I (one after the other). Parameter: none Reply: OK|ERROR CW1_FADEOUT_ALLSELECTED Fades Out all selected Carts in the Cartwall I (if playing). Parameter: none Reply: OK|ERROR CW1_FADEOUT_ALL Fades Out all Carts in the Cartwall I (if playing). Parameter: none Reply: OK|ERROR CW1_STOP_ALLSELECTED Stops/Pauses all selected Carts in the Cartwall I (if playing). Parameter: none Reply: OK|ERROR CW1_STOP_ALL Stops/Pauses all Carts in the Cartwall I (if playing). Parameter: none Reply: OK|ERROR CW1_TOGGLE_LOOP_ALLSELECTED Toggles the loop state for all selected Carts in the Cartwall I. Parameter: none Reply: OK|ERROR CW2_OUTPUTVOLUME_GET Gets the output volume value of the Cartwall II. Parameter: none Reply: (float) volume, between 0.0 (silence) and 1.0 (0dB) CW2_OUTPUTVOLUME_SET Sets the output volume value of the Cartwall II. Parameter: (float) volume, between 0.0 (silence) and 1.0 (0dB) Reply: OK|ERROR CW2_OUTPUTPAN_GET Gets the output balance value of the Cartwall II. Parameter: none Reply: (float) pan, between -1.0 (left) and 1.0 (right) CW2_OUTPUTPAN_SET Sets the output balance value of the Cartwall II. Parameter: (float) pan, between -1.0 (left) and 1.0 (right) Reply: OK|ERROR CW2_OUTPUT_GET Gets the output mixer of the Cartwall II. Parameter: none Reply: (string) output mixer name CW2_OUTPUT_SET Sets the output mixer of the Cartwall II. Parameter: (string) mixername Reply: OK|ERROR To get a list of available output mixernames see MIXER_OUTPUT_NAMES_GET. CW2_PLAYLIST_NAMES_GET Gets all available names which can be selected as a Cartwall II Playlist. Parameter: none Reply: (string) list of available Cartwall Playlist names (one per line). CW2_PLAYLIST_SET Selects a Cartwall II Playlist. Parameter: cartwallplaylistname Reply: OK|ERROR To get the list of available Cartwall Playlist names use: CW2_PLAYLIST_NAMES_GET. CW2_PLAYLIST_SET_SHORTCUT Selects a Cartwall II Playlist from a shortcut. Parameter: 1|2|3|4 Reply: OK|ERROR You can select a cartwall playlist either from shortcut 1, 2, 3 or 4. CW2_PLAYLIST_GET_SHORTCUT Gets the Cartwall II Playlist from a shortcut. Parameter: 1|2|3|4 Reply: (string) the shortcut cartwall playlist name. RADIO42 Confidential 269 ProppFrexx ONAIR CW2_CART_NAMES_GET Gets all available Carts in the Cartwall II. Parameter: none Reply: (string) list of available Carts in the Cartwall II (one per line: ID|trackname|filename|effectiveplaytime). CW2_CART_COUNT_GET Gets the number of available Carts in the Cartwall II. Parameter: none Reply: (int) number of available Carts in the Cartwall II. CW2_SELECT_CART_NAMES_GET Gets all selected Carts in the Cartwall II. Parameter: none Reply: (string) list of selected Carts in the Cartwall II (one per line: ID|trackname|filename|effectiveplaytime). CW2_SELECT_CART_COUNT_GET Gets the number of selected Carts in the Cartwall II. Parameter: none Reply: (int) number of selected Carts in the Cartwall II. CW2_SELECT_CART Selects certain Cart(s) in the Cartwall II. Parameter: cartid[|cartid]..[|cartid] Reply: OK|ERROR To get the list of available Carts use: CW2_CART_NAMES_GET. Note: The IDs are the positions of the Carts in the Cartwall starting with 1. CW2_SELECT_CART_TOGGLE Toggles the select state of certain Cart(s) in the Cartwall II. Parameter: cartid[|cartid]..[|cartid] Reply: OK|ERROR To get the list of available Carts use: CW2_CART_NAMES_GET. Note: The IDs are the positions of the Carts in the Cartwall starting with 1. CW2_DESELECT_CART Deselects certain Cart(s) in the Cartwall II. Parameter: cartid[|cartid]..[|cartid] Reply: OK|ERROR To get the list of available Carts use: CW2_CART_NAMES_GET. Note: The IDs are the positions of the Carts in the Cartwall starting with 1. CW2_DESELECT_ALL Deselects all Carts in the Cartwall II. Parameter: none Reply: OK|ERROR To get the list of available Carts use: CW2_CART_NAMES_GET. CW2_SELECT_CART_1 Selects the 1st Cart in the Cartwall II (and only this one). Parameter: none Reply: OK|ERROR CW2_SELECT_CART_2 Selects the 2nd Cart in the Cartwall II (and only this one). Parameter: none Reply: OK|ERROR CW2_SELECT_CART_3 Selects the 3rd Cart in the Cartwall II (and only this one). Parameter: none Reply: OK|ERROR CW2_SELECT_CART_4 Selects the 4th Cart in the Cartwall II (and only this one). Parameter: none Reply: OK|ERROR CW2_SELECT_CART_5 Selects the 5th Cart in the Cartwall II (and only this one). Parameter: none Reply: OK|ERROR CW2_SELECT_CART_6 Selects the 6th Cart in the Cartwall II (and only this one). Parameter: none Reply: OK|ERROR CW2_SELECT_CART_7 Selects the 7th Cart in the Cartwall II (and only this one). Parameter: none Reply: OK|ERROR CW2_SELECT_CART_8 Selects the 8th Cart in the Cartwall II (and only this one). Parameter: none Reply: OK|ERROR CW2_SELECT_CART_9 Selects the 9th Cart in the Cartwall II (and only this one). Parameter: none Reply: OK|ERROR 270 RADIO42 Confidential APPENDIX CW2_SELECT_CART_10 Selects the 10th Cart in the Cartwall II (and only this one). Parameter: none Reply: OK|ERROR CW2_SELECT_CART_11 Selects the 11th Cart in the Cartwall II (and only this one). Parameter: none Reply: OK|ERROR CW2_SELECT_CART_12 Selects the 12th Cart in the Cartwall II (and only this one). Parameter: none Reply: OK|ERROR CW2_SELECT_CART_13 Selects the 13th Cart in the Cartwall II (and only this one). Parameter: none Reply: OK|ERROR CW2_SELECT_CART_14 Selects the 14th Cart in the Cartwall II (and only this one). Parameter: none Reply: OK|ERROR CW2_SELECT_CART_15 Selects the 15th Cart in the Cartwall II (and only this one). Parameter: none Reply: OK|ERROR CW2_SELECT_CART_16 Selects the 16th Cart in the Cartwall II (and only this one). Parameter: none Reply: OK|ERROR CW2_SELECT_CART_17 Selects the 17th Cart in the Cartwall II (and only this one). Parameter: none Reply: OK|ERROR CW2_SELECT_CART_18 Selects the 18th Cart in the Cartwall II (and only this one). Parameter: none Reply: OK|ERROR CW2_SELECT_CART_19 Selects the 19th Cart in the Cartwall II (and only this one). Parameter: none Reply: OK|ERROR CW2_SELECT_CART_20 Selects the 20th Cart in the Cartwall II (and only this one). Parameter: none Reply: OK|ERROR CW2_SELECT_CART_21 Selects the 21th Cart in the Cartwall II (and only this one). Parameter: none Reply: OK|ERROR CW2_SELECT_CART_22 Selects the 22th Cart in the Cartwall II (and only this one). Parameter: none Reply: OK|ERROR CW2_SELECT_CART_23 Selects the 23th Cart in the Cartwall II (and only this one). Parameter: none Reply: OK|ERROR CW2_SELECT_CART_24 Selects the 24th Cart in the Cartwall II (and only this one). Parameter: none Reply: OK|ERROR CW2_SELECT_CART_25 Selects the 25th Cart in the Cartwall II (and only this one). Parameter: none Reply: OK|ERROR CW2_SELECT_CART_26 Selects the 26th Cart in the Cartwall II (and only this one). Parameter: none Reply: OK|ERROR CW2_SELECT_CART_27 Selects the 27th Cart in the Cartwall II (and only this one). Parameter: none Reply: OK|ERROR CW2_SELECT_CART_28 Selects the 28th Cart in the Cartwall II (and only this one). Parameter: none Reply: OK|ERROR CW2_SELECT_CART_29 Selects the 29th Cart in the Cartwall II (and only this one). Parameter: none Reply: OK|ERROR CW2_SELECT_CART_30 Selects the 30th Cart in the Cartwall II (and only this one). Parameter: none Reply: OK|ERROR RADIO42 Confidential 271 ProppFrexx ONAIR CW2_PLAY_CART Plays/Pauses certain Cart(s) in the Cartwall II. Parameter: cartid[|cartid]..[|cartid] Reply: OK|ERROR To get the list of available Carts use: CW2_CART_NAMES_GET. Note: The IDs are the positions of the Carts in the Cartwall starting with 1. CW2_PLAYONLY_CART Plays certain Cart(s) in the Cartwall II if not already playing. Parameter: cartid[|cartid]..[|cartid] Reply: OK|ERROR To get the list of available Carts use: CW2_CART_NAMES_GET. Note: The IDs are the positions of the Carts in the Cartwall starting with 1. CW2_STOPONLY_CART Stops certain Cart(s) in the Cartwall II if not already stopped. Parameter: cartid[|cartid]..[|cartid] Reply: OK|ERROR To get the list of available Carts use: CW2_CART_NAMES_GET. Note: The IDs are the positions of the Carts in the Cartwall starting with 1. CW2_FADEOUT_CART FadesOut/Stops certain Cart(s) in the Cartwall II. Parameter: cartid[|cartid]..[|cartid] Reply: OK|ERROR To get the list of available Carts use: CW2_CART_NAMES_GET. Note: The IDs are the positions of the Carts in the Cartwall starting with 1. CW2_FADEOUTSLOW_CART Slowly FadesOut/Stops certain Cart(s) in the Cartwall II. Parameter: cartid[|cartid]..[|cartid] Reply: OK|ERROR To get the list of available Carts use: CW2_CART_NAMES_GET. Note: The IDs are the positions of the Carts in the Cartwall starting with 1. CW2_FADEOUTFAST_CART Quickly FadesOut/Stops certain Cart(s) in the Cartwall II. Parameter: cartid[|cartid]..[|cartid] Reply: OK|ERROR To get the list of available Carts use: CW2_CART_NAMES_GET. Note: The IDs are the positions of the Carts in the Cartwall starting with 1. CW2_PLAY_CART_1 Plays/Pauses the 1st Cart in the Cartwall II (and only this one). Parameter: none Reply: OK|ERROR CW2_PLAY_CART_2 Plays/Pauses the 2nd Cart in the Cartwall II (and only this one). Parameter: none Reply: OK|ERROR CW2_PLAY_CART_3 Plays/Pauses the 3rd Cart in the Cartwall II (and only this one). Parameter: none Reply: OK|ERROR CW2_PLAY_CART_4 Plays/Pauses the 4th Cart in the Cartwall II (and only this one). Parameter: none Reply: OK|ERROR CW2_PLAY_CART_5 Plays/Pauses the 5th Cart in the Cartwall II (and only this one). Parameter: none Reply: OK|ERROR CW2_PLAY_CART_6 Plays/Pauses the 6th Cart in the Cartwall II (and only this one). Parameter: none Reply: OK|ERROR CW2_PLAY_CART_7 Plays/Pauses the 7th Cart in the Cartwall II (and only this one). Parameter: none Reply: OK|ERROR CW2_PLAY_CART_8 Plays/Pauses the 8th Cart in the Cartwall II (and only this one). Parameter: none Reply: OK|ERROR CW2_PLAY_CART_9 Plays/Pauses the 9th Cart in the Cartwall II (and only this one). Parameter: none Reply: OK|ERROR CW2_PLAY_CART_10 Plays/Pauses the 10th Cart in the Cartwall II (and only this one). 272 RADIO42 Confidential APPENDIX Parameter: none Reply: OK|ERROR CW2_PLAY_CART_11 Plays/Pauses the 11th Cart in the Cartwall II (and only this one). Parameter: none Reply: OK|ERROR CW2_PLAY_CART_12 Plays/Pauses the 12th Cart in the Cartwall II (and only this one). Parameter: none Reply: OK|ERROR CW2_PLAY_CART_13 Plays/Pauses the 13th Cart in the Cartwall II (and only this one). Parameter: none Reply: OK|ERROR CW2_PLAY_CART_14 Plays/Pauses the 14th Cart in the Cartwall II (and only this one). Parameter: none Reply: OK|ERROR CW2_PLAY_CART_15 Plays/Pauses the 15th Cart in the Cartwall II (and only this one). Parameter: none Reply: OK|ERROR CW2_PLAY_CART_16 Plays/Pauses the 16th Cart in the Cartwall II (and only this one). Parameter: none Reply: OK|ERROR CW2_PLAY_CART_17 Plays/Pauses the 17th Cart in the Cartwall II (and only this one). Parameter: none Reply: OK|ERROR CW2_PLAY_CART_18 Plays/Pauses the 18th Cart in the Cartwall II (and only this one). Parameter: none Reply: OK|ERROR CW2_PLAY_CART_19 Plays/Pauses the 19th Cart in the Cartwall II (and only this one). Parameter: none Reply: OK|ERROR CW2_PLAY_CART_20 Plays/Pauses the 20th Cart in the Cartwall II (and only this one). Parameter: none Reply: OK|ERROR CW2_PLAY_CART_21 Plays/Pauses the 21th Cart in the Cartwall II (and only this one). Parameter: none Reply: OK|ERROR CW2_PLAY_CART_22 Plays/Pauses the 22th Cart in the Cartwall II (and only this one). Parameter: none Reply: OK|ERROR CW2_PLAY_CART_23 Plays/Pauses the 23th Cart in the Cartwall II (and only this one). Parameter: none Reply: OK|ERROR CW2_PLAY_CART_24 Plays/Pauses the 24th Cart in the Cartwall II (and only this one). Parameter: none Reply: OK|ERROR CW2_PLAY_CART_25 Plays/Pauses the 25th Cart in the Cartwall II (and only this one). Parameter: none Reply: OK|ERROR CW2_PLAY_CART_26 Plays/Pauses the 26th Cart in the Cartwall II (and only this one). Parameter: none Reply: OK|ERROR CW2_PLAY_CART_27 Plays/Pauses the 27th Cart in the Cartwall II (and only this one). Parameter: none Reply: OK|ERROR CW2_PLAY_CART_28 Plays/Pauses the 28th Cart in the Cartwall II (and only this one). Parameter: none Reply: OK|ERROR CW2_PLAY_CART_29 Plays/Pauses the 29th Cart in the Cartwall II (and only this one). Parameter: none Reply: OK|ERROR CW2_PLAY_CART_30 Plays/Pauses the 30th Cart in the Cartwall II (and only this one). Parameter: none Reply: OK|ERROR CW2_CART_ISPLAYING Gets the play state of a certain Cart in the Cartwall II. RADIO42 Confidential 273 ProppFrexx ONAIR Parameter: cartid Reply: (bool) True, if playing - False, if paused. To get the list of available Carts use: CW2_CART_NAMES_GET. Note: The IDs are the positions of the Carts in the Cartwall starting with 1. CW2_CART_ISLOOPED Gets the loop state of a certain Cart in the Cartwall II. Parameter: cartid Reply: (bool) True, if looped - False, if not. To get the list of available Carts use: CW2_CART_NAMES_GET. Note: The IDs are the positions of the Carts in the Cartwall starting with 1. CW2_CART_ISSTOPOTHERS Gets the Stop Others On Play state of a certain Cart in the Cartwall II. Parameter: cartid Reply: (bool) True, if Stop Others On Play - False, if not. To get the list of available Carts use: CW2_CART_NAMES_GET. Note: The IDs are the positions of the Carts in the Cartwall starting with 1. CW2_CART_LOOP_ON Sets the loop state of a certain Cart in the Cartwall II to LOOP. Parameter: cartid Reply: OK|ERROR To get the list of available Carts use: CW2_CART_NAMES_GET. Note: The IDs are the positions of the Carts in the Cartwall starting with 1. CW2_CART_LOOP_OFF Sets the loop state of a certain Cart in the Cartwall II to NOT LOOP. Parameter: cartid Reply: OK|ERROR To get the list of available Carts use: CW2_CART_NAMES_GET. Note: The IDs are the positions of the Carts in the Cartwall starting with 1. CW2_CART_LOOP_TOGGLE Toggles the loop state of a certain Cart in the Cartwall II. Parameter: cartid Reply: OK|ERROR To get the list of available Carts use: CW2_CART_NAMES_GET. Note: The IDs are the positions of the Carts in the Cartwall starting with 1. CW2_CART_STOPOTHERS_TOGGLE Toggles the Stop Others On Play state of a certain Cart in the Cartwall II. Parameter: cartid Reply: OK|ERROR To get the list of available Carts use: CW2_CART_NAMES_GET. Note: The IDs are the positions of the Carts in the Cartwall starting with 1. CW2_CART_KEYSTATE_TOGGLE Toggles the key state of a certain Cart in the Cartwall II. Parameter: cartid Reply: OK|ERROR To get the list of available Carts use: CW2_CART_NAMES_GET. Note: The IDs are the positions of the Carts in the Cartwall starting with 1. CW2_CART_PFL Starts the PFL Player for a certain Cart in the Cartwall II. Parameter: cartid Reply: OK|ERROR To get the list of available Carts use: CW2_CART_NAMES_GET. Note: The IDs are the positions of the Carts in the Cartwall starting with 1. CW2_PLAY_ALLSELECTED_PARALLEL Plays all selected Carts in the Cartwall II (in parallel). Parameter: none Reply: OK|ERROR CW2_PLAY_ALLSELECTED_ONEBYONE Plays all selected Carts in the Cartwall II (one after the other). Parameter: none Reply: OK|ERROR CW2_FADEOUT_ALLSELECTED Fades Out all selected Carts in the Cartwall II (if playing). Parameter: none Reply: OK|ERROR CW2_FADEOUT_ALL Fades Out all Carts in the Cartwall II (if playing). 274 RADIO42 Confidential APPENDIX Parameter: none Reply: OK|ERROR CW2_STOP_ALLSELECTED Stops/Pauses all selected Carts in the Cartwall II (if playing). Parameter: none Reply: OK|ERROR CW2_STOP_ALL Stops/Pauses all Carts in the Cartwall II (if playing). Parameter: none Reply: OK|ERROR CW2_TOGGLE_LOOP_ALLSELECTED Toggles the loop state for all selected Carts in the Cartwall II. Parameter: none Reply: OK|ERROR GPIO_KEYBOARD_CHANGE_MAPPING Loads a different Keyboard Mapping file to the Remote Control Keyboard Server. Parameter: mappingname Reply: OK|ERROR Specify just the mapping name without any path or extension! GPIO_MIDI_CHANGE_MAPPING Loads a different MIDI Mapping file to the Remote Control MIDI Server. Parameter: mappingname Reply: OK|ERROR Specify just the mapping name without any path or extension! GPIO_SERIAL_CHANGE_MAPPING Loads a different SERIAL Mapping file to the Remote Control SERIAL Server. Parameter: mappingname Reply: OK|ERROR Specify just the mapping name without any path or extension! GPIO_OSC_CHANGE_MAPPING Loads a different OSC Mapping file to the Remote Control OSC Server. Parameter: mappingname Reply: OK|ERROR Specify just the mapping name without any path or extension! GPIO_GAMEPORT_CHANGE_MAPPING Loads a different GAMEPORT Mapping file to the Remote Control GAMEPORT Server. Parameter: mappingname Reply: OK|ERROR Specify just the mapping name without any path or extension! GPIO_VELLEMAN_CHANGE_MAPPING Loads a different Velleman Mapping file to the Remote Control Velleman Server. Parameter: mappingname Reply: OK|ERROR Specify just the mapping name without any path or extension! GPIO_IOWARRIOR_CHANGE_MAPPING Loads a different IO-Warrior Mapping file to the Remote Control IOWarrior Server. Parameter: mappingname Reply: OK|ERROR Specify just the mapping name without any path or extension! GPIO_DRAIRENCE_CHANGE_MAPPING Loads a different DRAirence Mapping file to the Remote Control DRAirence Server. Parameter: mappingname Reply: OK|ERROR Specify just the mapping name without any path or extension! GPIO_DRAIRLITE_CHANGE_MAPPING Loads a different DRAirlite Mapping file to the Remote Control DRAirlite Server. Parameter: mappingname Reply: OK|ERROR Specify just the mapping name without any path or extension! GPIO_START_TCPSERVER Starts the TCP Remote Control Server Reply: OK|ERROR If the TCP Server was already running it will be restarted GPIO_STOP_TCPSERVER Stops the TCP Remote Control Server Reply: OK|ERROR GPIO_START_MIDI1SERVER Starts the 1st MIDI Remote Control Server Reply: OK|ERROR If the 1st MIDI Server was already running it will be restarted GPIO_STOP_MIDI1SERVER Stops the 1st MIDI Remote Control Server Reply: OK|ERROR RADIO42 Confidential 275 ProppFrexx ONAIR GPIO_START_MIDI2SERVER Starts the 2nd MIDI Remote Control Server Reply: OK|ERROR If the 2nd MIDI Server was already running it will be restarted GPIO_STOP_MIDI2SERVER Stops the 2nd MIDI Remote Control Server Reply: OK|ERROR GPIO_START_SERIALSERVER Starts the Serial-I/O Remote Control Server Reply: OK|ERROR If the Serial-I/O Server was already running it will be restarted GPIO_STOP_SERIALSERVER Stops the Serial-I/O Remote Control Server Reply: OK|ERROR GPIO_START_OSCSERVER Starts the OSC Remote Control Server Reply: OK|ERROR If the OSC Server was already running it will be restarted GPIO_STOP_OSCSERVER Stops the OSC Remote Control Server Reply: OK|ERROR GPIO_START_GAMEPORTSERVER Starts the GamePort Remote Control Server Reply: OK|ERROR If the GamePort Server was already running it will be restarted GPIO_STOP_GAMEPORTSERVER Stops the GamePort Remote Control Server Reply: OK|ERROR GPIO_START_IOWARRIORSERVER Starts the I/O-Warrior Remote Control Server Reply: OK|ERROR If the I/O-Warrior Server was already running it will be restarted GPIO_STOP_IOWARRIORSERVER Stops the I/O-Warrior Remote Control Server Reply: OK|ERROR GPIO_START_VELLEMANSERVER Starts the Velleman Remote Control Server Reply: OK|ERROR If the Velleman Server was already running it will be restarted GPIO_STOP_VELLEMANSERVER Stops the Velleman Remote Control Server Reply: OK|ERROR GPIO_START_DRAIRENCESERVER Starts the DRAirence Remote Control Server Reply: OK|ERROR If the DRAirence Server was already running it will be restarted GPIO_STOP_DRAIRENCESERVER Stops the DRAirence Remote Control Server Reply: OK|ERROR GPIO_START_DRAIRLITESERVER Starts the DRAirlite Remote Control Server Reply: OK|ERROR If the DRAirlite Server was already running it will be restarted GPIO_STOP_DRAIRLITESERVER Stops the DRAirlite Remote Control Server Reply: OK|ERROR WEB_GOTO_ADDRESS Loads a web page to the integrated web browser. Parameter: url Reply: OK|ERROR SHOW_ALERT_WINDOW Shows an alert window with a certain caption and text. Parameter: [caption|]text Reply: OK|ERROR SET_MESSAGECENTER_MESSAGE Adds a text to the message center. Parameter: message Reply: OK|ERROR SET_TRACKINFO_TEXT Shows the content of a file into the track info window. Parameter: filename Reply: OK|ERROR The text content of the given filename will be shown in the track info window. SHOW_COUNTDOWN Shows a countdown window til the given time with a certain text. Parameter: time[|text] Reply: OK|ERROR time: the time (either HH:MM:SS or in MS) til the the countdown should be shown; text: the optional text to display with the countdown. 276 RADIO42 Confidential APPENDIX WDM_INPUT_GET Gets the settings of a WDM recording input source. Parameter: device|input Reply: (string) the input settings (name|type|status|volume) device: 0=first,...; input: 0=first,...,-1=master WDM_INPUT_SET Adjusts the settings of a WDM recording input source. Parameter: device|input| status(ON,OFF,NONE)|volume(0.0...1.0,-1) Reply: OK|ERROR device: 0=first,...; input: 0=first,...,-1=master; status: ON|OFF|NONE; volume: 0.0...1.0,-1=leave WDM_INPUT_SET_ON Sets a WDM recording input source to ON. Parameter: device|input Reply: OK|ERROR device: 0=first,...; input: 0=first,...,-1=master WDM_INPUT_SET_OFF Sets a WDM recording input source to OFF. Parameter: device|input Reply: OK|ERROR device: 0=first,...; input: 0=first,...,-1=master WDM_INPUT_SET_TOGGLE Toggles a WDM recording input source status. Parameter: device|input Reply: OK|ERROR device: 0=first,...; input: 0=first,...,-1=master WDM_OUTPUT_VOLUME_SET Adjusts the volume of a WDM output device. Parameter: device|volume(0.0...1.0) Reply: OK|ERROR device: 1=first,...; volume: 0.0...1.0 WDM_OUTPUT_VOLUME_GET Gets the volume of a WDM output device. Parameter: device Reply: (float) volume, between 0.0 (silence) and 1.0 (0dB). device: 1=first,... WDM_OUTPUT_VOLUME_INCREASE Increases the volume of a WDM output device. Parameter: device Reply: OK|ERROR device: 1=first,... WDM_OUTPUT_VOLUME_DECREASE Decreases the volume of a WDM output device. Parameter: device Reply: OK|ERROR device: 1=first,... MODSTREAM_WATCHER_START Starts the MODStream Watcher to monitor a certain URL. Parameter: url[|length|stopPlaylist|startWithNextTrack[|songTitle[|playonce[|i ntrofile[|outrofile[|url2]]]]]] Reply: OK|ERROR url: the URL address to monitor; length: max. playtime in seconds; stopPlaylist: true to turn AutoPlay off; startWithNextTrack: false to start immediate; songTitle: optional initial song title; playonce: true to only play the stream once (no MODSTREAM_WATCHER_STOP needed); introfile: an optional audio file to play right before the modstream plays; outrofile: an optional audio file to play right after the midstream played; url2: alternative 2nd url MODSTREAM_WATCHER_STOP Stops the MODStream Watcher and closes any active or playing MODStreams. Reply: OK|ERROR MODSTREAM_STATUS_GET Gets the status of the MODStream player. Reply: (string) status (None, Paused, Connected, Waiting or Playing) OVERLAY_DOPLAY Starts playback of the currently opened overlay player. Reply: OK|ERROR Only effective if an overlay is currently active and can be played. OVERLAY_DODELAY Delays the start of the currently opened overlay. Reply: OK|ERROR Only effective if an overlay is currently active and can be delayed. OVERLAY_DOCANCEL Cancels a currently opened overlay. Reply: OK|ERROR Only effective if an overlay is currently active and can be cancelled. RADIO42 Confidential 277 ProppFrexx ONAIR OVERLAY_STATUS_GET Gets the status of the overlay player. Reply: (string) status (Hidden, Shown, Waiting, Running, Playing or Stopping) OVERLAY_CREATE Creates an overlay manually and starts it now. Parameter: commandType|command[|startType|maxDelay|mixTime|suspendOthers|pause OnSuspend|attenuation|manualPlayout] Reply: OK|ERROR. commandType: AdvertSlot|Script|Playlist; command: the related slot, script or playlist to use. All other parameters are optional in the order they appear. startType: Fixed|Soft|Auto|Manual (default: Manual)* maxDelay: in seconds (default 120) mixTime: in milliseconds (default 1000) suspendOthers: True|False (default True) pauseOnSuspend: True|False (default False) attenuation: in dB (default -18.0) manualPlayout: True|False (default False) *when the Manual startType is defined you MUST issue an additional OVERLAY_DOPLAY control-command to effectively start this overlay! OVERLAY_TRIGGER Triggers an overlay manually and starts it now (if not already played) suspending a current playlist, pausing the player here. Parameter: overlayName Reply: OK|ERROR. overlayName: the name of the overlay (or its reference name) to tigger. OVERLAY_IMPORT Performs an automatic import of an external overlay scheduler logfile. Parameter: format[|logFilename|trackBaseFolder|options|playlistOutputFolder] Reply: OK|ERROR. format: the import format name to use; logFilename: the path and filename of the log-file to import; trackBaseFolder: the folder containing the audio tracks; options: the import options to use; playlistOutputFolder: the folder where the resulting playlist files should be created. OVERLAY_DEACTIVATE_GET Gets if the automatic processing of overlays is deactivated. Parameter: none Reply: Reply: (bool) True, if deactive - False, if active. OVERLAY_DEACTIVATE_ON Deactivates the automatic processing of overlays. Parameter: none Reply: OK|ERROR OVERLAY_DEACTIVATE_OFF Activates the automatic processing of overlays. Parameter: none Reply: OK|ERROR Note: if processing is really performed also depends on your StandAlone overlay setting as well as if the Scheduler is running. STREAMING_SERVER_START_ALL Starts all streaming servers. Reply: OK|ERROR STREAMING_SERVER_STOP_ALL Stops all streaming servers. Reply: OK|ERROR STREAMING_SERVER_START Starts a streaming server. Parameter: servername Reply: OK|ERROR servername: the name of the streaming server to start. STREAMING_SERVER_STOP Stops a streaming server. Parameter: servername Reply: OK|ERROR servername: the name of the streaming server to stop. STREAMING_SERVERS_GET Gets a list of all streaming server names. Reply: (string) list of streaming server names (one per line). STREAMING_SERVER_ISCONNECTED Gets if a streaming server is currently started and connected. Parameter: servername Reply: (bool) True, if connected - False, if not. servername: the name of the streaming server to check. STREAMING_SERVER_CHANGESOURCE Changes the source mixer channel of a streaming server. 278 RADIO42 Confidential APPENDIX Parameter: mixername[|servername] Reply: OK|ERROR mixername: the mixer channel name to use; servername: the name of the streaming server to change (if missing all servers are changed). STREAMING_SETSONGTITLE Sets the song title for streaming servers. Parameter: songtitle[|servername] Reply: OK|ERROR. songtitle: the song title to set; servername: the name of the streaming server to update (if missing all servers are updated). STREAMING_SETSONGTITLE2 Sets the song title for streaming servers based on individual attributes. Parameter: Attribute=value[|Attribute=value...][|Servername=servername] Reply: OK|ERROR. Attribute=value: the song title attribute to set (e.g. Title=titlevalue or Artist=artistvalue); Servername=servername: the name of the streaming server to update (if missing all servers are updated). STREAMING_SETSONGTITLEFORMAT Sets the song title format to use for title updates. Parameter: songtitleformat[|servername] Reply: OK|ERROR. songtitleformat: the song title format to use (if empty the default format will be used); servername: the name of the streaming server to set the format for (if missing the default format will be set). THIS_SET_MASTER Sets this instance as the Master (executes the OnSetMaster control commands). Reply: OK|ERROR THIS_SET_SLAVE Sets this instance as the Slave (executes the OnSetSlave control commands). Reply: OK|ERROR THIS_ISMASTER Gets if this instance is set as the Master. Reply: (bool) True, if set - False, if not. THIS_MACHINENAME Gets the machine name of this instance. Reply: (string) machine name. THIS_CURRENTUSER Gets the currently logged in user name. Reply: (string) user name. THIS_SEND_CHAT_MESSAGE Sends a chat message to all connected GPIO service clients. Parameter: message Reply: OK|ERROR Message: the text message to send. SCHEDULER_GET_FILE Gets the current scheduler calendar file path and loaction. Reply: (string) the scheduler calendar file path and location. SCHEDULER_REFRESH Forces an immediate update of the scheduler calendar storage. Reply: OK|ERROR SCHEDULER_CHECKSTATIONVOICEFILE S_GET Gets if automatic station voice file processing is active. Parameter: none Reply: Reply: (bool) True, if deactive - False, if active. SCHEDULER_CHECKSTATIONVOICEFILE S_ON Activates automatic station voice file processing. Reply: OK|ERROR SCHEDULER_CHECKSTATIONVOICEFILE S_OFF Deactivates automatic station voice file processing. Reply: OK|ERROR OSCSERVER_ADDRESSSTATE_SET Sets the address state of the internal OSC server. Parameter: addressstate Reply: OK|ERROR The AddressState is a string which will suffix the regular OSC input message address if set OSCSERVER_ADDRESSSTATE_GET Gets the address state of the internal OSC server. Reply: (string) the current addresstate. The AddressState is a string which will suffix the regular OSC input message address if set. OSCSERVER_BEGINBUNDLE Begins an OSC message bundle for the internal OSC server. Reply: OK|ERROR All subsequent calls to EXEC_SEND_OSC will be collected in this bundle and send to the remote client when calling OSCSERVER_ENDBUNDLE. RADIO42 Confidential 279 ProppFrexx ONAIR OSCSERVER_ENDBUNDLE Ends an OSC message bundle (started with OSCSERVER_BEGINBUNDLE) and sends the bundle to the OSC client. Reply: OK|ERROR OSCSERVER_BEGINBUNDLE and OSCSERVER_ENDBUNDLE must be used in pairs! Any calls to EXEC_SEND_OSC in between will be collected in this bundle. ADVERTLIB_GET_FILE Gets the current advertising calendar file path and loaction. Reply: (string) the advertising calendar file path and location. ADVERTLIB_REFRESH Forces an immediate reload of the advertising library. Reply: OK|ERROR VT_LOCALCARTWALL_BUTTON Shows/Hides the local Cartwall if the VoiceTracking window is shown. Reply: OK VT_REC_BUTTON Emulates a REC button click if the VoiceTracking window is shown. Reply: OK VT_FADESTOP_BUTTON Emulates a FADE/STOP button click if the VoiceTracking window is shown. Reply: OK VT_RESETALL_BUTTON Emulates a ResetAll button click if the VoiceTracking window is shown. Reply: OK VT_ATTVOLUME_BUTTON Emulates an AttenuateVolume button click if the VoiceTracking window is shown. Reply: OK VT_PRELISTEN_BUTTON Emulates a PreListen button click if the VoiceTracking window is shown. Reply: OK VT_NEXTENTRY_BUTTON Emulates a NextPlaylistEntry button click if the VoiceTracking window is shown. Reply: OK VT_NEXTPLACEHOLDER_BUTTON Emulates a NextPlaylistPlaceholder button click if the VoiceTracking window is shown. Reply: OK VT_CLOSE_CANCEL Closes the VoiceTracking without saving if it was shown. Reply: OK VT_CLOSE_SAVE Closes the VoiceTracking with saving if it was shown. Reply: OK IR_INVOKE_MAIN Invokes (opens) a new general InstanceRecording dialog. Reply: OK IR_STARTSTOP_REC Starts or stops the recording for the selected source and output. Reply: OK IR_CLOSE_CANCEL Closes the InstanceRecording without saving. Reply: OK IR_CLOSE_SAVE Closes the InstanceRecording with saving. Reply: OK SEGUE_SELECT_CURRENT Selects the current main track within the SegueEditor. Reply: OK|ERROR Subsequent SegueEditor commands are related to the select track. SEGUE_SELECT_NEXT Selects the next main track within the SegueEditor. Reply: OK|ERROR Subsequent SegueEditor commands are related to the select track. SEGUE_SELECT_NEXTAFTER Selects the last main track within the SegueEditor. Reply: OK|ERROR Subsequent SegueEditor commands are related to the select track. SEGUE_INVOKE_IR Invokes (opens) the general InstanceRecording dialog from within the SegueEditor. Reply: OK|ERROR SEGUE_PLAYPAUSE Starts or Stops playback of the SegueEditor. Reply: OK|ERROR 280 RADIO42 Confidential APPENDIX SEGUE_STOPALL Stops any playback and resets the positions Reply: OK|ERROR SEGUE_SELECTED_MOVELEFT Moves the selected track to the left. Reply: OK|ERROR SEGUE_SELECTED_MOVERIGHT Moves the selected track to the right. Reply: OK|ERROR SEGUE_NEXT Selects the next playlist tracks into the SegueEditor. Reply: OK|ERROR SEGUE_PREVIOUS Selects the previous playlist tracks into the SegueEditor. Reply: OK|ERROR SEGUE_CLOSE Closes the SegueEditor. Reply: OK|ERROR Criterion Conditions Some control commands (eg. the EXEC_COMMAND2 or the EXEC_SEND_SERIAL_WRITE2) or the control-command function *[IF:…] use a criterion in order to evaluate a parameter against a condition. Conditions are expressions enclosed in brackets which can be nested and are evaluated from inner to outer. The parameter and the condition might again contain any control-command macros. The following criterion conditions exist: Logical Conditions: AND(left, right) OR(left, right) NOT(expr) : left, right denote a criterion. : left, right denote a criterion. : expr denote a criterion. Abstract Conditions: StartsWith(value) : check if the parameter starts with a certain value. EndsWith(value) : checks if the parameter ends with a certain value. Contains(value) : check if the parameter contains a certain value. : checks if a substring parameter equals a certain value. start and length denote the position in the parameter. Substring(start, length, value) : checks if the parameter is within a list of values, the valuelist is seperated by ';' (eg. “One;Two;Three”). InList(valuelist) : checks the parameter for equality against the value. The type is optional (default is string) and can be “int32”, “int64”, “float”, “double”, “time” or “string”. Equals(value[, type]) : checks if the parameter is greater than a certain value. The type is optional (default is double) and can be “int32”, “int64”, “float”, “double”, “time” or “string”. Greater(value[, type]) : checks if the parameter is greater or equal than a certain value. The type is optional (default is double) and can be “int32”, “int64”, “float”, “double”, “time” or “string”. GreaterEq(value[, type]) : checks if the parameter is less than a certain value. The type is optional (default is double) and can be “int32”, “int64”, “float”, “double”, “time” or “string”. Less(value[, type]) : checks if the parameter is less or equal than a certain value. The type is optional (default is double) and can be “int32”, “int64”, “float”, “double”, “time” or “string”. LessEq(value[, type]) RADIO42 Confidential 281 ProppFrexx ONAIR Exists() : checks the filename parameter exists physically on the file system. Example 1: “${cplisplaying}|Equals(1)” The criterion “Equals(1)” would eval TRUE, if the parameter macro “${cplisplaying}” resolves to “1”. Example 2: “${cplisplaying}|NOT(Equals(1))” The criterion “NOT(Equals(1))” would eval TRUE, if the parameter macro “${cplisplaying}” resolves to “0”. Example 3: “${mainvolume}|AND(Greater(0.5), LessEq(1.0))” The criterion “AND(Greater(0.5), LessEq(1.0))” would eval TRUE, if the parameter macro “${mainvolume}” resolves to a value which is greater than 0.5 and less or equal to 1.0. Example 4: “C:\test.txt|Exists()” The criterion “Exists()” would eval TRUE, if the parameter “C:\test.txt” denotes a physically existing file. Control Command Macros Each control command parameter might contain any number of macros, which are replaced at the time the command is executed. A macro has the format: „${macro}”. Depending on the caller of the control-command not all macros might be available at any time. Here is a list of possible macros: Global Macros (always available): ${now} : the current date and time in format ‘yyyy-MM-dd HH:mm:ss’ ${yyyy} : the current year (4-digits) ${yy} : the current year (2-digits) ${MM} : the current month (2-digits, 01-12) ${dow} : the current day of the week (1=Monday…7=Sunday) ${week} : the current Iso8601 week number 2-digits (00-53) ${dd} : the current day (2-digits, 01-31) ${HH} : the current hour (2-digits, 00-23) ${mm} : the current minute (2-digits, 00-59) ${ss} : the current second (2-digits, 00-59) ${onair} : the on-air status (1/True=on air, 0/False=off air) ${talkover} : the talk over status (1/True=active, 0/False=inactive) ${talkuser} : the talk user status (1/True=active, 0/False=inactive) ${autoplay} : the AutoPlay status (1/True=active, 0/False=inactive) ${usefading} : the UseFading status (1/True=active, 0/False=inactive) ${ismaster} : the Master/Slave mode (1/True=master, 0/False=slave) 282 RADIO42 Confidential APPENDIX ${schedulerrunning} : the Scheduler status (1/True=active, 0/False=inactive) ${isoverlayshown} : the Overlay status (1/True=yes, 0/False=no) ${isoverlaywaiting} : the Overlay status (1/True=yes, 0/False=no) ${isoverlayplaying} : the Overlay status (1/True=yes, 0/False=no) ${isoverlaymanualplayout} : the Overlay status (1/True=enabled, 0/False=disabled) ${lineinfeed} : the line in feed mixer name ${islineinfeed} : the line in feed status (1/True=enabled, 0/False=disabled) ${mainvolume} : the main volume as a string (0.0…1.0) ${cplname} : the name of the currently active playlist ${cplfilename} : the location of the currently active playlist file ${cpltotalsec} : the total length of the playlist in whole seconds ${cplremainsec} : the remaining length of the playlist in whole seconds ${cpltotalcount} : the number of tracks in the playlist ${cplremaincount} : the number of remaining (unplayed) tracks in the playlist ${cplcurrenttrack} : the index of the track in the playlist ${cpltracknamecurrent} : the current track’s meta data track name (i.e. ‘artist – title’) ${cpltracknamenext} : the next track’s meta data track name (i.e. ‘artist – title’) ${cpltracknamea} : the track’s meta data track name of DJ Player A (i.e. ‘artist – title’) ${cpltracknameb} : the track’s meta data track name of DJ Player B (i.e. ‘artist – title’) ${cpltracknamec} : the track’s meta data track name of DJ Player C (i.e. ‘artist – title’) ${cpltracknamed} : the track’s meta data track name of DJ Player D (i.e. ‘artist – title’) ${cpltracktitlecurrent} : the current track’s meta data title name ${cpltracktitlenext} : the next track’s meta data title name ${cpltracktitlea} : the track’s meta data title name of DJ Player A ${cpltracktitleb} : the track’s meta data title name of DJ Player B ${cpltracktitlec} : the track’s meta data title name of DJ Player C ${cpltracktitled} : the track’s meta data title name of DJ Player D ${cpltrackartistcurrent} : the current track’s meta data artist name ${cpltrackartistnext} : the next track’s meta data artist name ${cpltrackartista} : the track’s meta data artist name of DJ Player A ${cpltrackartistb} : the track’s meta data artist name of DJ Player B ${cpltrackartistc} : the track’s meta data artist name of DJ Player C ${cpltrackartistd} : the track’s meta data artist name of DJ Player D ${cpltrackalbumcurrent} : the current track’s meta data album name ${cpltrackalbumnext} : the next track’s meta data album name ${cpltrackalbuma} : the track’s meta data album name of DJ Player A ${cpltrackalbumb} : the track’s meta data album name of DJ Player B ${cpltrackalbumc} : the track’s meta data album name of DJ Player C ${cpltrackalbumd} : the track’s meta data album name of DJ Player D ${cpltrackgenrecurrent} : the current track’s meta data genre string ${cpltrackgenrenext} : the next track’s meta data genre string ${cpltrackgenrea} : the track’s meta data genre string of DJ Player A ${cpltrackgenreb} : the track’s meta data genre string of DJ Player B ${cpltrackgenrec} : the track’s meta data genre string of DJ Player C ${cpltrackgenred} : the track’s meta data genre string of DJ Player D ${cpltrackyearcurrent} : the current track’s meta data year string ${cpltrackyearnext} : the next track’s meta data year string ${cpltrackyeara} : the track’s meta data year string of DJ Player A ${cpltrackyearb} : the track’s meta data year string of DJ Player B ${cpltrackyearc} : the track’s meta data year string of DJ Player C ${cpltrackyeard} : the track’s meta data year string of DJ Player D ${cpltrackgroupingcurrent} : the current track’s meta data grouping string ${cpltrackgroupingnext} : the next track’s meta data grouping string ${cpltrackmoodcurrent} : the current track’s meta data mood string ${cpltrackmoodnext} : the next track’s meta data mood string ${cpltrackratingcurrent} : the current track’s meta data rating string ${cpltrackratingnext} : the next track’s meta data rating string RADIO42 Confidential 283 ProppFrexx ONAIR ${cpltrackisrccurrent} : the current track’s meta data ISRC ${cpltrackisrcnext} : the next track’s meta data ISRC ${cpltracktypecurrent} : the current track’s meta data media entry type string ${cpltracktypenext} : the next track’s meta data media entry type string ${cpltracktypea} : the track’s meta data media entry type string of DJ Player A ${cpltracktypeb} : the track’s meta data media entry type string of DJ Player B ${cpltracktypec} : the track’s meta data media entry type string of DJ Player C ${cpltracktyped} : the track’s meta data media entry type string of DJ Player D ${cpltrackbpmcurrent} : the current track’s meta data BPM ${cpltrackbpmnext} : the next track’s meta data BPM ${cpltrackbpma} : the track’s meta data BPM of DJ Player A ${cpltrackbpmb} : the track’s meta data BPM of DJ Player B ${cpltrackbpmc} : the track’s meta data BPM of DJ Player C ${cpltrackbpmd} : the track’s meta data BPM of DJ Player D ${cpltrackdurationcurrent} : the current track’s effective duration (CueIn to CueOut) ${cpltrackdurationnext} : the next track’s effective duration (CueIn to CueOut) ${cpltrackdurationa} : the track’s effective duration (CueIn to CueOut) of DJ Player A ${cpltrackdurationb} : the track’s effective duration (CueIn to CueOut) of DJ Player B ${cpltrackdurationc} : the track’s effective duration (CueIn to CueOut) of DJ Player C ${cpltrackdurationd} : the track’s effective duration (CueIn to CueOut) of DJ Player D ${cpltrackplaytimecurrent} : the current track’s effective play time (CueIn to CueOut) ${cpltrackplaytimenext} : the next track’s effective play time (CueIn to CueOut) ${cpltrackplaytimea} : the track’s effective play time (CueIn to CueOut) of DJ Player A ${cpltrackplaytimeb} : the track’s effective play time (CueIn to CueOut) of DJ Player B ${cpltrackplaytimec} : the track’s effective play time (CueIn to CueOut) of DJ Player C ${cpltrackplaytimed} : the track’s effective play time (CueIn to CueOut) of DJ Player D ${cpltrackramptimecurrent} : the current track’s ramp time (CueIn to Ramp/2) ${cpltrackramptimenext} : the next track’s ramp time (CueIn to Ramp/2) ${cpltrackramptimea} : the track’s ramp time (CueIn to Ramp/2) of DJ Player A ${cpltrackramptimeb} : the track’s ramp time (CueIn to Ramp/2) of DJ Player B ${cpltrackramptimec} : the track’s ramp time (CueIn to Ramp/2) of DJ Player C ${cpltrackramptimed} : the track’s ramp time (CueIn to Ramp/2) of DJ Player D ${cpltrackoutrotimecurrent} : the current track’s outro time (Outro to Next/CueOut) ${cpltrackoutrotimenext} : the next track’s outro time (Outro to Next/CueOut) ${cpltrackoutrotimea} : the track’s outro time (Outro to Next/CueOut) of DJ Player A ${cpltrackoutrotimeb} : the track’s outro time (Outro to Next/CueOut) of DJ Player B ${cpltrackoutrotimec} : the track’s outro time (Outro to Next/CueOut) of DJ Player C ${cpltrackoutrotimed} : the track’s outro time (Outro to Next/CueOut) of DJ Player D ${cpltrackalbumartcurrent} : the current track’s album art picture (base64 encoded) ${cpltrackalbumartnext} : the next track’s album art picture (base64 encoded) ${cpltrackalbumarta} : the track’s album art picture (base64 encoded) of DJ Player A ${cpltrackalbumartb} : the track’s album art picture (base64 encoded) of DJ Player B ${cpltrackalbumartc} : the track’s album art picture (base64 encoded) of DJ Player C ${cpltrackalbumartd} : the track’s album art picture (base64 encoded) of DJ Player D ${cplautoplay} : the AutoPlay status (1/True=auto, 0/False=manual) ${cplusefading} : the UseFading status (1/True=fading, 0/False=none) ${cplautoload} : the AutoLoad status (1/True=auto, 0/False=manual) ${cplautounload} : the AutoUnload status (1/True=auto, 0/False=manual) ${cplremovewhenplayed} : remove tracks when played (1/True=remove, 0/False=mark) ${cplremovewhenplayedtext} : remove tracks when played (Remove,Mark) ${cplshowmoderatorwindow} : the moderator window (1/True=shown, 0/False=hidden) ${cplisplaying} : is any DJ Player playing (1/True=yes, 0/False=no) ${cplisplayinga} : is DJ Player A playing (1/True=yes, 0/False=no) ${cplisplayingb} : is DJ Player B playing (1/True=yes, 0/False=no) ${cplisplayingc} : is DJ Player C playing (1/True=yes, 0/False=no) 284 RADIO42 Confidential APPENDIX ${cplisplayingd} : is DJ Player D playing (1/True=yes, 0/False=no) ${cplhassourcea} : is a track loaded to DJ Player A (1/True=yes, 0/False=no) ${cplhassourceb} : is a track loaded to DJ Player B (1/True=yes, 0/False=no) ${cplhassourcec} : is a track loaded to DJ Player C (1/True=yes, 0/False=no) ${cplhassourced} : is a track loaded to DJ Player D (1/True=yes, 0/False=no) ${cplrelposbytea} : the track position in bytes of DJ Player A relative to CueIn ${cplrelposbyteb} : the track position in bytes of DJ Player B relative to CueIn ${cplrelposbytec} : the track position in bytes of DJ Player C relative to CueIn ${cplrelposbyted} : the track position in bytes of DJ Player D relative to CueIn ${cplrelposseca} : the track position time of DJ Player A relative to CueIn ${cplrelpossecb} : the track position time of DJ Player B relative to CueIn ${cplrelpossecc} : the track position time of DJ Player C relative to CueIn ${cplrelpossecd} : the track position time of DJ Player D relative to CueIn ${cplremainbytea} : the remaining bytes of DJ Player A relative to CueOut ${cplremainbyteb} : the remaining bytes of DJ Player B relative to CueOut ${cplremainbytec} : the remaining bytes of DJ Player C relative to CueOut ${cplremainbyted} : the remaining bytes of DJ Player D relative to CueOut ${cplremainseca} : the remaining time of DJ Player A relative to CueOut ${cplremainsecb} : the remaining time of DJ Player B relative to CueOut ${cplremainsecc} : the remaining time of DJ Player C relative to CueOut ${cplremainsecd} : the remaining time of DJ Player D relative to CueOut ${cplremainmsa} : the remaining milliseconds of DJ Player A relative to CueOut ${cplremainmsb} : the remaining milliseconds of DJ Player B relative to CueOut ${cplremainmsc} : the remaining milliseconds of DJ Player C relative to CueOut ${cplremainmsd} : the remaining milliseconds of DJ Player D relative to CueOut ${cplplayerisendinga} : is the DJ Player A of the current playlist almost ending ${cplplayerisendingb} : is the DJ Player B of the current playlist almost ending ${cplplayerisendingc} : is the DJ Player C of the current playlist almost ending ${cplplayerisendingd} : is the DJ Player D of the current playlist almost ending ${cplcurrentplayerisending} : is the current player of the current playlist almost ending ${cpltimecode} : the timecode string of the current playlist ${cpltimeremain} : the remaining track time in seconds of the current playlist (0.0…) ${cpltimeremainsec} : the remaining track time of the current playlist ([HH:]MM:SS) ${cpltimeremainms} : the remaining track time of the current playlist ([HH:]MM:SS.F) ${cpltimeremainsmpte} : the remaining track time of the current playlist (HH:MM:SS.F) ${cpltimepos} : the track position in seconds of the current playlist (0.0…) ${cpltimepossec} : the track position of the current playlist ([HH:]MM:SS) ${cpltimeposms} : the track position of the current playlist ([HH:]MM:SS.F) ${cpltimepossmpte} : the track position of the current playlist (HH:MM:SS.F) ${cplplayercurrent} : the name of the current player of the current playlist ${cplplayernext} : the name of the next player of the current playlist ${cpllogfilenamecurrent} : the full filename of the currently used playlist log filename ${cpllogfilenamelast} : the full filename of the last used playlist log filename ${globallogfilenamecurrent} : the full filename of the currentl global log filename ${globallogfilenamelast} : the full filename of the last used global log filename ${progcurrentname} : the name of the currently running scheduler program ${prognextname} : the name of the next running scheduler program ${progcurrentscript} : the script name of the currently running scheduler program ${prognextscript} : the script name of the next running scheduler program ${progcurrenttime} : the time of the currently running scheduler program ${prognexttime} : the time of the next running scheduler program ${progcurrentdesc} : the description of the currently running scheduler program ${prognextdesc} : the description of the next running scheduler program ${machinename} : the local machine name ${username} : the currently logged in user name ${password} : the password of the currently logged in user ${userdomainname} : the windows user domain name RADIO42 Confidential 285 ProppFrexx ONAIR ${stationname} : your configured station name ${stationurl} : your configured station Url address ${userstationname} : the users configured station name ${userstationurl} : the users configured station Url address ${userfirstname} : the users configured first name ${userlastname} : the users configured last name ${usernickname} : the users configured nick name ${userphone} : the users configured phone ${useremail} : the users configured email ${userim} : the users configured IM ${useraddress} : the users configured address ${userdescription} : the users configured description ${userdescriptionshow} : the users configured show description ${userimageuser} : the users configured user image filename ${userpictureuser} : the users configured user picture (base64 encoded) ${userimageshow} : the users configured web image filename ${userpictureshow} : the users configured web picture (base64 encoded) ${userimageweb} : the users configured show image filename ${userpictureweb} : the users configured show picture (base64 encoded) ${userotherpage} : the users configured other page ${userirecfilenamelast} : the users last instant recording filename ${uservtfilenamelast} : the users last voice track recording filename ${TAB} : the tab character (\t) ${PIPE} : the pipe character (|) ${CRLF} : the carriage return (\r) and line feed (\n) character ${CR} : the carriage return (\r) character ${LF} : the line feed (\n) character ${routedja} : the routing for DJ Player A ${routedjb} : the routing for DJ Player B ${routedjc} : the routing for DJ Player C ${routedjd} : the routing for DJ Player D ${routepfl} : the routing for PFL Player ${routestandby} : the routing for Standby Players ${routeoverlay} : the routing for Overlay Players ${routequickmonitor} : the routing for QuickMonitor Player ${routecw1} : the routing for Cartwall I Players ${routecw2} : the routing for Cartwall II Players ${outputmixer1name} : the name of the 1st output mixer ${outputmixer2name} : the name of the 2nd output mixer ${outputmixer3name} : the name of the 3rd output mixer ${outputmixer4name} : the name of the 4th output mixer ${outputmixer5name} : the name of the 5th output mixer ${outputmixer6name} : the name of the 6th output mixer ${outputmixer7name} : the name of the 7th output mixer ${outputmixer8name} : the name of the 8th output mixer ${outputmixer9name} : the name of the 9th output mixer ${outputmixer1volume} : the volume of the 1st output mixer as a string (0.0…1.0) ${outputmixer2volume} : the volume of the 2nd output mixer as a string (0.0…1.0) ${outputmixer3volume} : the volume of the 3rd output mixer as a string (0.0…1.0) ${outputmixer4volume} : the volume of the 4th output mixer as a string (0.0…1.0) ${outputmixer5volume} : the volume of the 5th output mixer as a string (0.0…1.0) ${outputmixer6volume} : the volume of the 6th output mixer as a string (0.0…1.0) ${outputmixer7volume} : the volume of the 7th output mixer as a string (0.0…1.0) ${outputmixer8volume} : the volume of the 8th output mixer as a string (0.0…1.0) ${outputmixer9volume} : the volume of the 9th output mixer as a string (0.0…1.0) 286 RADIO42 Confidential APPENDIX ${outputmixer1snd2volume} : the SND2 volume of the 1st output mixer (0.0…1.0) ${outputmixer2snd2volume} : the SND2 volume of the 2nd output mixer (0.0…1.0) ${outputmixer3snd2volume} : the SND2 volume of the 3rd output mixer (0.0…1.0) ${outputmixer4snd2volume} : the SND2 volume of the 4th output mixer (0.0…1.0) ${outputmixer5snd2volume} : the SND2 volume of the 5th output mixer (0.0…1.0) ${outputmixer6snd2volume} : the SND2 volume of the 6th output mixer (0.0…1.0) ${outputmixer7snd2volume} : the SND2 volume of the 7th output mixer (0.0…1.0) ${outputmixer8snd2volume} : the SND2 volume of the 8th output mixer (0.0…1.0) ${outputmixer9snd2volume} : the SND2 volume of the 9th output mixer (0.0…1.0) ${outputmixer1pan} : the 1st mixer channel pan as a string (-1.0…1.0) ${outputmixer2pan} : the 2nd mixer channel pan as a string (-1.0…1.0) ${outputmixer3pan} : the 3rd mixer channel pan as a string (-1.0…1.0) ${outputmixer4pan} : the 4th mixer channel pan as a string (-1.0…1.0) ${outputmixer5pan} : the 5th mixer channel pan as a string (-1.0…1.0) ${outputmixer6pan} : the 6th mixer channel pan as a string (-1.0…1.0) ${outputmixer7pan} : the 7th mixer channel pan as a string (-1.0…1.0) ${outputmixer8pan} : the 8th mixer channel pan as a string (-1.0…1.0) ${outputmixer9pan} : the 9th mixer channel pan as a string (-1.0…1.0) ${outputmixer1snd2pan} : the 1st mixer channel SND2 pan as a string (-1.0…1.0) ${outputmixer2snd2pan} : the 2nd mixer channel SND2 pan as a string (-1.0…1.0) ${outputmixer3snd2pan} : the 3rd mixer channel SND2 pan as a string (-1.0…1.0) ${outputmixer4snd2pan} : the 4th mixer channel SND2 pan as a string (-1.0…1.0) ${outputmixer5snd2pan} : the 5th mixer channel SND2 pan as a string (-1.0…1.0) ${outputmixer6snd2pan} : the 6th mixer channel SND2 pan as a string (-1.0…1.0) ${outputmixer7snd2pan} : the 7th mixer channel SND2 pan as a string (-1.0…1.0) ${outputmixer8snd2pan} : the 8th mixer channel SND2 pan as a string (-1.0…1.0) ${outputmixer9snd2pan} : the 9th mixer channel SND2 pan as a string (-1.0…1.0) ${outputmixer1panasfloat} : the 1st mixer channel pan as a string (0.0…1.0) ${outputmixer2panasfloat} : the 2nd mixer channel pan as a string (0.0…1.0) ${outputmixer3panasfloat} : the 3rd mixer channel pan as a string (0.0…1.0) ${outputmixer4panasfloat} : the 4th mixer channel pan as a string (0.0…1.0) ${outputmixer5panasfloat} : the 5th mixer channel pan as a string (0.0…1.0) ${outputmixer6panasfloat} : the 6th mixer channel pan as a string (0.0…1.0) ${outputmixer7panasfloat} : the 7th mixer channel pan as a string (0.0…1.0) ${outputmixer8panasfloat} : the 8th mixer channel pan as a string (0.0…1.0) ${outputmixer9panasfloat} : the 9th mixer channel pan as a string (0.0…1.0) ${outputmixer1gain} : the 1st mixer channel gain as a string (-15.0…15.0) ${outputmixer2gain} : the 2nd mixer channel gain as a string (-15.0…15.0) ${outputmixer3gain} : the 3rd mixer channel gain as a string (-15.0…15.0) ${outputmixer4gain} : the 4th mixer channel gain as a string (-15.0…15.0) ${outputmixer5gain} : the 5th mixer channel gain as a string (-15.0…15.0) ${outputmixer6gain} : the 6th mixer channel gain as a string (-15.0…15.0) ${outputmixer7gain} : the 7th mixer channel gain as a string (-15.0…15.0) ${outputmixer8gain} : the 8th mixer channel gain as a string (-15.0…15.0) ${outputmixer9gain} : the 9th mixer channel gain as a string (-15.0…15.0) ${outputmixer1gainasfloat} : the 1st mixer channel gain as a string (0.0…1.0) ${outputmixer2gainasfloat} : the 2nd mixer channel gain as a string (0.0…1.0) ${outputmixer3gainasfloat} : the 3rd mixer channel gain as a string (0.0…1.0) ${outputmixer4gainasfloat} : the 4th mixer channel gain as a string (0.0…1.0) ${outputmixer5gainasfloat} : the 5th mixer channel gain as a string (0.0…1.0) ${outputmixer6gainasfloat} : the 6th mixer channel gain as a string (0.0…1.0) ${outputmixer7gainasfloat} : the 7th mixer channel gain as a string (0.0…1.0) ${outputmixer8gainasfloat} : the 8th mixer channel gain as a string (0.0…1.0) ${outputmixer9gainasfloat} : the 9th mixer channel gain as a string (0.0…1.0) ${outputmixer1on} : the 1st mixer status (1/True=On, 0/False=Off) ${outputmixer2on} : the 2nd mixer status (1/True=On, 0/False=Off) ${outputmixer3on} : the 3rd mixer status (1/True=On, 0/False=Off) RADIO42 Confidential 287 ProppFrexx ONAIR ${outputmixer4on} : the 4th mixer status (1/True=On, 0/False=Off) ${outputmixer5on} : the 5th mixer status (1/True=On, 0/False=Off) ${outputmixer6on} : the 6th mixer status (1/True=On, 0/False=Off) ${outputmixer7on} : the 7th mixer status (1/True=On, 0/False=Off) ${outputmixer8on} : the 8th mixer status (1/True=On, 0/False=Off) ${outputmixer9on} : the 9th mixer status (1/True=On, 0/False=Off) ${outputmixer1mute} : is the 1st output mixer muted (1/True=yes, 0/False=no) ${outputmixer2mute} : is the 2nd output mixer muted (1/True=yes, 0/False=no) ${outputmixer3mute} : is the 3rd output mixer muted (1/True=yes, 0/False=no) ${outputmixer4mute} : is the 4th output mixer muted (1/True=yes, 0/False=no) ${outputmixer5mute} : is the 5th output mixer muted (1/True=yes, 0/False=no) ${outputmixer6mute} : is the 6th output mixer muted (1/True=yes, 0/False=no) ${outputmixer7mute} : is the 7th output mixer muted (1/True=yes, 0/False=no) ${outputmixer8mute} : is the 8th output mixer muted (1/True=yes, 0/False=no) ${outputmixer9mute} : is the 9th output mixer muted (1/True=yes, 0/False=no) ${outputmixer1snd} : is SND active for the 1st output mixer (1/True=yes, 0/False=no) ${outputmixer2snd} : is SND active for the 2nd output mixer (1/True=yes, 0/False=no) ${outputmixer3snd} : is SND active for the 3rd output mixer (1/True=yes, 0/False=no) ${outputmixer4snd} : is SND active for the 4th output mixer (1/True=yes, 0/False=no) ${outputmixer5snd} : is SND active for the 5th output mixer (1/True=yes, 0/False=no) ${outputmixer6snd} : is SND active for the 6th output mixer (1/True=yes, 0/False=no) ${outputmixer7snd} : is SND active for the 7th output mixer (1/True=yes, 0/False=no) ${outputmixer8snd} : is SND active for the 8th output mixer (1/True=yes, 0/False=no) ${outputmixer9snd} : is SND active for the 9th output mixer (1/True=yes, 0/False=no) ${outputmixer1rec} : is REC active for the 1st output mixer (1/True=yes, 0/False=no) ${outputmixer2rec} : is REC active for the 2nd output mixer (1/True=yes, 0/False=no) ${outputmixer3rec} : is REC active for the 3rd output mixer (1/True=yes, 0/False=no) ${outputmixer4rec} : is REC active for the 4th output mixer (1/True=yes, 0/False=no) ${outputmixer5rec} : is REC active for the 5th output mixer (1/True=yes, 0/False=no) ${outputmixer6rec} : is REC active for the 6th output mixer (1/True=yes, 0/False=no) ${outputmixer7rec} : is REC active for the 7th output mixer (1/True=yes, 0/False=no) ${outputmixer8rec} : is REC active for the 8th output mixer (1/True=yes, 0/False=no) ${outputmixer9rec} : is REC active for the 9th output mixer (1/True=yes, 0/False=no) ${outputmixer1autorec} : is AutoRec active for 1st mixer (1/True=yes, 0/False=no) ${outputmixer2autorec} : is AutoRec active for 2nd mixer (1/True=yes, 0/False=no) ${outputmixer3autorec} : is AutoRec active for 3rd mixer (1/True=yes, 0/False=no) ${outputmixer4autorec} : is AutoRec active for 4th mixer (1/True=yes, 0/False=no) ${outputmixer5autorec} : is AutoRec active for 5th mixer (1/True=yes, 0/False=no) ${outputmixer6autorec} : is AutoRec active for 6th mixer (1/True=yes, 0/False=no) ${outputmixer7autorec} : is AutoRec active for 7th mixer (1/True=yes, 0/False=no) ${outputmixer8autorec} : is AutoRec active for 8th mixer (1/True=yes, 0/False=no) ${outputmixer9autorec} : is AutoRec active for 9th mixer (1/True=yes, 0/False=no) ${outputmixer1level} : the peak level of the 1st output mixer as a string (0.0…1.0) ${outputmixer1levelhui} : the peak level of the 1st output mixer as a string (0…12) ${outputmixer1levell} : the left level of the 1st output mixer as a string (0.0…1.0) ${outputmixer1levellhui} : the left level of the 1st output mixer as a string (0…12) ${outputmixer1levelr} : the right level of the 1st output mixer as a string (0.0…1.0) ${outputmixer1levelrhui} : the right level of the 1st output mixer as a string (0…12) ${outputmixer2level} : the peak level of the 2nd output mixer as a string (0.0…1.0) ${outputmixer2levelhui} : the peak level of the 2nd output mixer as a string (0…12) ${outputmixer2levell} : the left level of the 2nd output mixer as a string (0.0…1.0) ${outputmixer2levellhui} : the left level of the 2nd output mixer as a string (0…12) ${outputmixer2levelr} : the right level of the 2nd output mixer as a string (0.0…1.0) ${outputmixer2levelrhui} : the right level of the 2nd output mixer as a string (0…12) ${outputmixer3level} : the peak level of the 3rd output mixer as a string (0.0…1.0) 288 RADIO42 Confidential APPENDIX ${outputmixer3levelhui} : the peak level of the 3rd output mixer as a string (0…12) ${outputmixer3levell} : the left level of the 3rd output mixer as a string (0.0…1.0) ${outputmixer3levellhui} : the left level of the 3rd output mixer as a string (0…12) ${outputmixer3levelr} : the right level of the 3rd output mixer as a string (0.0…1.0) ${outputmixer3levelrhui} : the right level of the 3rd output mixer as a string (0…12) ${outputmixer4level} : the peak level of the 4th output mixer as a string (0.0…1.0) ${outputmixer4levelhui} : the peak level of the 4th output mixer as a string (0…12) ${outputmixer4levell} : the left level of the 4th output mixer as a string (0.0…1.0) ${outputmixer4levellhui} : the left level of the 4th output mixer as a string (0…12) ${outputmixer4levelr} : the right level of the 4th output mixer as a string (0.0…1.0) ${outputmixer4levelrhui} : the right level of the 4th output mixer as a string (0…12) ${outputmixer5level} : the peak level of the 5th output mixer as a string (0.0…1.0) ${outputmixer5levelhui} : the peak level of the 5th output mixer as a string (0…12) ${outputmixer5levell} : the left level of the 5th output mixer as a string (0.0…1.0) ${outputmixer5levellhui} : the left level of the 5th output mixer as a string (0…12) ${outputmixer5levelr} : the right level of the 5th output mixer as a string (0.0…1.0) ${outputmixer5levelrhui} : the right level of the 5th output mixer as a string (0…12) ${outputmixer6level} : the peak level of the 6th output mixer as a string (0.0…1.0) ${outputmixer6levelhui} : the peak level of the 6th output mixer as a string (0…12) ${outputmixer6levell} : the left level of the 6th output mixer as a string (0.0…1.0) ${outputmixer6levellhui} : the left level of the 6th output mixer as a string (0…12) ${outputmixer6levelr} : the right level of the 6th output mixer as a string (0.0…1.0) ${outputmixer6levelrhui} : the right level of the 6th output mixer as a string (0…12) ${outputmixer7level} : the peak level of the 7th output mixer as a string (0.0…1.0) ${outputmixer7levelhui} : the peak level of the 7th output mixer as a string (0…12) ${outputmixer7levell} : the left level of the 7th output mixer as a string (0.0…1.0) ${outputmixer7levellhui} : the left level of the 7th output mixer as a string (0…12) ${outputmixer7levelr} : the right level of the 7th output mixer as a string (0.0…1.0) ${outputmixer7levelrhui} : the right level of the 7th output mixer as a string (0…12) ${outputmixer8level} : the peak level of the 8th output mixer as a string (0.0…1.0) ${outputmixer8levelhui} : the peak level of the 8th output mixer as a string (0…12) ${outputmixer8levell} : the left level of the 8th output mixer as a string (0.0…1.0) ${outputmixer8levellhui} : the left level of the 8th output mixer as a string (0…12) ${outputmixer8levelr} : the right level of the 8th output mixer as a string (0.0…1.0) ${outputmixer8levelrhui} : the right level of the 8th output mixer as a string (0…12) ${outputmixer9level} : the peak level of the 9th output mixer as a string (0.0…1.0) ${outputmixer9levelhui} : the peak level of the 9th output mixer as a string (0…12) ${outputmixer9levell} : the left level of the 9th output mixer as a string (0.0…1.0) ${outputmixer9levellhui} : the left level of the 9th output mixer as a string (0…12) ${outputmixer9levelr} : the right level of the 9th output mixer as a string (0.0…1.0) ${outputmixer9levelrhui} : the right level of the 9th output mixer as a string (0…12) ${inputmixer1name} : the name of the 1st input mixer ${inputmixer2name} : the name of the 2nd input mixer ${inputmixer3name} : the name of the 3rd input mixer ${inputmixer4name} : the name of the 4th input mixer ${inputmixer5name} : the name of the 5th input mixer ${inputmixer1volume} : the volume of the 1st input mixer as a string (0.0…1.0) ${inputmixer2volume} : the volume of the 2nd input mixer as a string (0.0…1.0) ${inputmixer3volume} : the volume of the 3rd input mixer as a string (0.0…1.0) ${inputmixer4volume} : the volume of the 4th input mixer as a string (0.0…1.0) ${inputmixer5volume} : the volume of the 5th input mixer as a string (0.0…1.0) ${inputmixer1pan} : the 1st mixer channel pan as a string (-1.0…1.0) ${inputmixer2pan} : the 2nd mixer channel pan as a string (-1.0…1.0) ${inputmixer3pan} : the 3rd mixer channel pan as a string (-1.0…1.0) ${inputmixer4pan} : the 4th mixer channel pan as a string (-1.0…1.0) ${inputmixer5pan} : the 5th mixer channel pan as a string (-1.0…1.0) ${inputmixer1panasfloat} : the 1st mixer channel pan as a string (0.0…1.0) RADIO42 Confidential 289 ProppFrexx ONAIR ${inputmixer2panasfloat} : the 2nd mixer channel pan as a string (0.0…1.0) ${inputmixer3panasfloat} : the 3rd mixer channel pan as a string (0.0…1.0) ${inputmixer4panasfloat} : the 4th mixer channel pan as a string (0.0…1.0) ${inputmixer5panasfloat} : the 5th mixer channel pan as a string (0.0…1.0) ${inputmixer1gain} : the 1st mixer channel gain as a string (-15.0…15.0) ${inputmixer2gain} : the 2nd mixer channel gain as a string (-15.0…15.0) ${inputmixer3gain} : the 3rd mixer channel gain as a string (-15.0…15.0) ${inputmixer4gain} : the 4th mixer channel gain as a string (-15.0…15.0) ${inputmixer5gain} : the 5th mixer channel gain as a string (-15.0…15.0) ${inputmixer1gainasfloat} : the 1st mixer channel gain as a string (0.0…1.0) ${inputmixer2gainasfloat} : the 2nd mixer channel gain as a string (0.0…1.0) ${inputmixer3gainasfloat} : the 3rd mixer channel gain as a string (0.0…1.0) ${inputmixer4gainasfloat} : the 4th mixer channel gain as a string (0.0…1.0) ${inputmixer5gainasfloat} : the 5th mixer channel gain as a string (0.0…1.0) ${inputmixer1on} : the 1st mixer status (1/True=On, 0/False=Off) ${inputmixer2on} : the 2nd mixer status (1/True=On, 0/False=Off) ${inputmixer3on} : the 3rd mixer status (1/True=On, 0/False=Off) ${inputmixer4on} : the 4th mixer status (1/True=On, 0/False=Off) ${inputmixer5on} : the 5th mixer status (1/True=On, 0/False=Off) ${inputmixer1mute} : is the 1st input mixer muted (1/True=yes, 0/False=no) ${inputmixer2mute} : is the 2nd input mixer muted (1/True=yes, 0/False=no) ${inputmixer3mute} : is the 3rd input mixer muted (1/True=yes, 0/False=no) ${inputmixer4mute} : is the 4th input mixer muted (1/True=yes, 0/False=no) ${inputmixer5mute} : is the 5th input mixer muted (1/True=yes, 0/False=no) ${inputmixer1snd} : is SND active for the 1st input mixer (1/True=yes, 0/False=no) ${inputmixer2snd} : is SND active for the 2nd input mixer (1/True=yes, 0/False=no) ${inputmixer3snd} : is SND active for the 3rd input mixer (1/True=yes, 0/False=no) ${inputmixer4snd} : is SND active for the 4th input mixer (1/True=yes, 0/False=no) ${inputmixer5snd} : is SND active for the 5th input mixer (1/True=yes, 0/False=no) ${inputmixer1rec} : is REC active for the 1st input mixer (1/True=yes, 0/False=no) ${inputmixer2rec} : is REC active for the 2nd input mixer (1/True=yes, 0/False=no) ${inputmixer3rec} : is REC active for the 3rd input mixer (1/True=yes, 0/False=no) ${inputmixer4rec} : is REC active for the 4th input mixer (1/True=yes, 0/False=no) ${inputmixer5rec} : is REC active for the 5th input mixer (1/True=yes, 0/False=no) ${inputmixer1autorec} : is AutoRec active for 1st input mixer (1/True=yes, 0/False=no) ${inputmixer2autorec} : is AutoRec active for 2nd input mixer (1/True=yes, 0/False=no) ${inputmixer3autorec} : is AutoRec active for 3rd input mixer (1/True=yes, 0/False=no) ${inputmixer4autorec} : is AutoRec active for 4th input mixer (1/True=yes, 0/False=no) ${inputmixer5autorec} : is AutoRec active for 5th input mixer (1/True=yes, 0/False=no) ${inputmixer1level} : the peak level of the 1st input mixer as a string (0.0…1.0) ${inputmixer1levelhui} : the peak level of the 1st input mixer as a string (0…12) ${inputmixer1levell} : the left level of the 1st input mixer as a string (0.0…1.0) ${inputmixer1levellhui} : the left level of the 1st input mixer as a string (0…12) ${inputmixer1levelr} : the right level of the 1st input mixer as a string (0.0…1.0) ${inputmixer1levelrhui} : the right level of the 1st input mixer as a string (0…12) ${inputmixer2level} : the peak level of the 2nd input mixer as a string (0.0…1.0) ${inputmixer2levelhui} : the peak level of the 2nd input mixer as a string (0…12) ${inputmixer2levell} : the left level of the 2nd input mixer as a string (0.0…1.0) ${inputmixer2levellhui} : the left level of the 2nd input mixer as a string (0…12) ${inputmixer2levelr} : the right level of the 2nd input mixer as a string (0.0…1.0) ${inputmixer2levelrhui} : the right level of the 2nd input mixer as a string (0…12) ${inputmixer3level} : the peak level of the 3rd input mixer as a string (0.0…1.0) ${inputmixer3levelhui} : the peak level of the 3rd input mixer as a string (0…12) ${inputmixer3levell} : the left level of the 3rd input mixer as a string (0.0…1.0) ${inputmixer3levellhui} : the left level of the 3rd input mixer as a string (0…12) 290 RADIO42 Confidential APPENDIX ${inputmixer3levelr} : the right level of the 3rd input mixer as a string (0.0…1.0) ${inputmixer3levelrhui} : the right level of the 3rd input mixer as a string (0…12) ${inputmixer4level} : the peak level of the 4th input mixer as a string (0.0…1.0) ${inputmixer4levelhui} : the peak level of the 4th input mixer as a string (0…12) ${inputmixer4levell} : the left level of the 4th input mixer as a string (0.0…1.0) ${inputmixer4levellhui} : the left level of the 4th input mixer as a string (0…12) ${inputmixer4levelr} : the right level of the 4th input mixer as a string (0.0…1.0) ${inputmixer4levelrhui} : the right level of the 4th input mixer as a string (0…12) ${inputmixer5level} : the peak level of the 5th input mixer as a string (0.0…1.0) ${inputmixer5levelhui} : the peak level of the 5th input mixer as a string (0…12) ${inputmixer5levell} : the left level of the 5th input mixer as a string (0.0…1.0) ${inputmixer5levellhui} : the left level of the 5th input mixer as a string (0…12) ${inputmixer5levelr} : the right level of the 5th input mixer as a string (0.0…1.0) ${inputmixer5levelrhui} : the right level of the 5th input mixer as a string (0…12) ${cartid} : the ID of the related cartwall cart ${carttrackname} : the track name of the related cartwall cart ${cartduration} : the track duration as a string of the related cartwall cart ${cartisplaying} : is the related cart playing (1/True=yes, 0/False=no) ${cartisselected} : is the related cart selected (1/True=yes, 0/False=no) ${cartislooped} : is the related cart looped (1/True=yes, 0/False=no) ${cw1shortcut1} : the Cartwall I library name of the 1st shortcut ${cw1shortcut2} : the Cartwall I library name of the 2nd shortcut ${cw1shortcut3} : the Cartwall I library name of the 3rd shortcut ${cw1shortcut4} : the Cartwall I library name of the 4th shortcut ${cw2shortcut1} : the Cartwall II library name of the 1st shortcut ${cw2shortcut2} : the Cartwall II library name of the 2nd shortcut ${cw2shortcut3} : the Cartwall II library name of the 3rd shortcut ${cw2shortcut4} : the Cartwall II library name of the 4th shortcut ${cw1cartXtrackname} : the track name of cartX of Cartwall I ${cw1cartXduration} : the track duration as a string of cartX of Cartwall I ${cw1cartXisplaying} : is cartX of Cartwall I playing (1/True=yes, 0/False=no) ${cw1cartXisselected} : is cartX of Cartwall I selected (1/True=yes, 0/False=no) ${cw1cartXislooped} : is cartX of Cartwall I looped (1/True=yes, 0/False=no) ${cw2cartXtrackname} : the track name of cartX of Cartwall II ${cw2cartXduration} : the track duration as a string of cartX of Cartwall II ${cw2cartXisplaying} : is cartX of Cartwall II playing (1/True=yes, 0/False=no) ${cw2cartXisselected} : is cartX of Cartwall II selected (1/True=yes, 0/False=no) ${cw2cartXislooped} : is cartX of Cartwall II looped (1/True=yes, 0/False=no) ${standbyXisplaying} : is standby player X playing (1/True=yes, 0/False=no) ${streamingstartedservers} : the number of started streaming servers ${streamingisanyconnected} : is any streaming server connected (1/True=yes, 0/False=no) ${streamingtotallisteners} : the total number of connected listeners (if available) ${overlaystatus} : the overlay player status (Hidden,Shown,Waiting,Running,Playing,Stopping) ${overlaystatusid} : the overlay player status (0,1,2,3,4,5) ${overlayisplaying} : is the overlay player playing (1/True, 0/False) ${overlayremainsec} : the overlay players remaining time in whole seconds ${overlayremainms} : the overlay players remaining time in whole milliseconds ${modstreamstatus} : the MODStream player status (None,Paused,ConnectedWaiting,Playing) ${modstreamstatusid} : the MODStream player status (0,1,2,3,4) ${modstreamisrunning} : is the MODStream player running (1/True, 0/False) ${modstreamisplaying} : is the MODStream player playing (1/True, 0/False) ${weathercurrenttemperature} : is current weather temperature (as a string) ${weathercurrentcondition} : is current weather condition (as a string) ${GUID:00000000-0000-0000-0000-000000000000} : will be replaced by the file name and path of the media entry identified by the given global unique identifier. ${VAR:name} : will be replaced by the content of the specific name (see EXEC_VAR_SET). RADIO42 Confidential 291 ProppFrexx ONAIR Track/Playlist Macros (available for playlist events): ${event} : the name of the event (eg. ‘TrackPlay’) ${effectiveload} : the event’s load date and time in format ‘yyyy-MM-dd HH:mm:ss’ ${effectivestart} : the event’s start date and time in format ‘yyyy-MM-dd HH:mm:ss’ ${effectivesec} : the event’s play time (duration) in whole seconds ${effectivems} : the event’s play time (duration) in whole milliseconds ${uniqueid} : an internal unique id of the track event ${playername} : the name of the player (eg. ‘A’, ‘B’, ‘C’ or ‘D’) ${playerisplaying} : is the related player playing (1/True, 0/False) ${playerstatus} : the status string of the related player (Empty,Cued,Playing,Loading) ${playerstatusid} : the status of the related player (0,1,2) ${plsname} : the name of the playlist ${plsfilename} : the location of the playlist file ${plstotalsec} : the total length of the playlist in whole seconds ${plsremainsec} : the remaining length of the playlist in whole seconds ${plstotalcount} : the number of tracks in the playlist ${plsremaincount} : the number of remaining (unplayed) tracks in the playlist ${plscurrenttrack} : the index of the track in the playlist ${plstracknamecurrent} : the current track’s meta data track name (i.e. ‘artist – title’) ${plstracknamenext} : the next track’s meta data track name (i.e. ‘artist – title’) ${plstracktitlecurrent} : the current track’s meta data title name ${plstracktitlenext} : the next track’s meta data title name ${plstrackartistcurrent} : the current track’s meta data artist name ${plstrackartistnext} : the next track’s meta data artist name ${plstrackalbumcurrent} : the current track’s meta data album name ${plstrackalbumnext} : the next track’s meta data album name ${plstrackgenrecurrent} : the current track’s meta data genre string ${plstrackgenrenext} : the next track’s meta data genre string ${plstrackyearcurrent} : the current track’s meta data year string ${plstrackyearnext} : the next track’s meta data year string ${plstrackgroupingcurrent} : the current track’s meta data grouping string ${plstrackgroupingnext} : the next track’s meta data grouping string ${plstrackmoodcurrent} : the current track’s meta data mood string ${plstrackmoodnext} : the next track’s meta data mood string ${plstrackratingcurrent} : the current track’s meta data rating string ${plstrackratingnext} : the next track’s meta data rating string ${plstrackisrccurrent} : the current track’s meta data ISRC ${plstrackisrcnext} : the next track’s meta data ISRC ${plstracktypecurrent} : the current track’s meta data media entry type string ${plstracktypenext} : the next track’s meta data media entry type string ${plstrackbpmcurrent} : the current track’s meta data BPM ${plstrackbpmnext} : the next track’s meta data BPM ${plstrackdurationcurrent} : the current track’s effective duration (CueIn to CueOut) ${plstrackdurationnext} : the next track’s effective duration (CueIn to CueOut) ${plstrackplaytimecurrent} : the current track’s effective play time (CueIn to CueOut) ${plstrackplaytimenext} : the next track’s effective play time (CueIn to CueOut) ${plstrackramptimecurrent} : the current track’s ramp time (CueIn to Ramp/2) ${plstrackramptimenext} : the next track’s ramp time (CueIn to Ramp/2) ${plstrackoutrotimecurrent} : the current track’s outro time (Outro to Next/CueOut) ${plstrackoutrotimenext} : the next track’s outro time (Outro to Next/CueOut) ${plstrackalbumartcurrent} : the current track’s album art picture (base64 encoded) ${plstrackalbumartnext} : the next track’s album art picture (base64 encoded) ${filenameandpath} : the track’s location and file name 292 RADIO42 Confidential APPENDIX ${filename} : the track’s filename ${filenamewithoutext} : the track’s filename without the extension ${filenameext} : the track’s filename extension only (including the period ‘.’) ${directoryname} : the track’s directory only ${rootdirectoryname} : the track’s root path (e.g. ‘C:\’ or ‘\\Computer\Folder’) ${guid} : the track’s global unique identifier (e.g ‘F9168C5E-CEB2-4FAA-B6BF-329BF39FA1E4’) ${trackname} : the track’s track name (i.e. ‘artist – title’) ${title} : the track’s meta data title name ${artist} : the track’s meta data artist name ${album} : the track’s meta data album name ${year} : the track’s meta data year string ${genre} : the track’s meta data genre string ${grouping} : the track’s meta data grouping string ${mood} : the track’s meta data mood string ${isrc} : the track’s meta data ISRC string ${rating} : the track’s meta data rating string ${bpm} : the track’s meta data BPM value as a string ${albumartist} : the track’s meta data album artist string ${composer} : the track’s meta data composer string ${copyright} : the track’s meta data copyright string ${encodedby} : the track’s meta data encoded by string ${tracknumber} : the track’s meta data track number string ${discnumber} : the track’s meta data disc number string ${publisher} : the track’s meta data publisher string ${conductor} : the track’s meta data conductor string ${lyricist} : the track’s meta data lyricist string ${remixer} : the track’s meta data remixer string ${producer} : the track’s meta data producer string ${comment} : the track’s meta data comment text ${albumart} : the track’s album art picture (base64 encoded) ${replaygaingain} : the track’s meta data replay gain value in dB (-60.0…60.0) ${replaygainpeak} : the track’s meta data replay gain peak float value (0.0…1.0) ${bitrate} : the track’s audio bit rate string ${format} : the track’s audio format string ${tracktype} : the track’s meta data media entry type string ${options} : the track’s meta data media entry options as a comma-separated string ${trackendindicator} : the track’s meta data track end indicator character ${moderatortext} : the track’s meta data moderator text ${length} : the track’s total length (duration) as a string ([HH:]MM:SS) ${lengthsec} : the track’s total length (duration) in seconds (3 decimal places) ${lengthms} : the track’s total length (duration) in whole milliseconds ${duration} : the track’s effective duration (CueIn to CueOut) as a string ([HH:]MM:SS) ${durationsec} : the track’s effective duration (CueIn to CueOut) in seconds ${durationms} : the track’s effective duration (CueIn to CueOut) in whole milliseconds ${playtime} : the track’s effective play time (CueIn to Next) as a string ([HH:]MM:SS) ${playtimesec} : the track’s effective play time (CueIn to Next) in seconds ${playtimems} : the track’s effective play time (CueIn to Next) in whole milliseconds ${ramptime} : the track’s ramp time (CueIn to Ramp/2) as a string ([HH:]MM:SS[/[HH:]MM:SS]) ${outrotime} : the track’s outro time (Outro to Next/CueOut) as a string ([HH:]MM:SS[/[HH:]MM:SS]) ${cuein} : the track’s CueIn position as a string ([HH:]MM:SS) ${cueinsec} : the track’s CueIn position in seconds (3 decimal places) ${cueinms} : the track’s CueIn position in whole milliseconds ${fulllevel} : the track’s FullLevel position as a string ([HH:]MM:SS) ${fulllevelsec} : the track’s FullLevel position in seconds (3 decimal places) ${fulllevelms} : the track’s FullLevel position in whole milliseconds ${ramp} : the track’s Ramp position as a string ([HH:]MM:SS) ${rampsec} : the track’s Ramp position in seconds (3 decimal places) RADIO42 Confidential 293 ProppFrexx ONAIR ${rampms} : the track’s Ramp position in whole milliseconds ${ramp2} : the track’s Ramp2 position as a string ([HH:]MM:SS) ${ramp2sec} : the track’s Ramp2 position in seconds (3 decimal places) ${ramp2ms} : the track’s Ramp2 position in whole milliseconds ${outro} : the track’s Outro position as a string ([HH:]MM:SS) ${outrosec} : the track’s Outro position in seconds (3 decimal places) ${outroms} : the track’s Outro position in whole milliseconds ${fadeout} : the track’s FadeOut position as a string ([HH:]MM:SS) ${fadeoutsec} : the track’s FadeOut position in seconds (3 decimal places) ${fadeoutms} : the track’s FadeOut position in whole milliseconds ${next} : the track’s Next position as a string ([HH:]MM:SS) ${nextsec} : the track’s Next position in seconds (3 decimal places) ${nextms} : the track’s Next position in whole milliseconds ${cueout} : the track’s CueOut position as a string ([HH:]MM:SS) ${cueoutsec} : the track’s CueOut position in seconds (3 decimal places) ${cueoutms} : the track’s CueOut position in whole milliseconds ${hookcuein} : the track’s Hook-CueIn position as a string ([HH:]MM:SS) ${hookcueinsec} : the track’s Hook-CueIn position in seconds (3 decimal places) ${hookcueinms} : the track’s Hook-CueIn position in whole milliseconds ${hookfulllevel} : the track’s Hook-FullLevel position as a string ([HH:]MM:SS) ${hookfulllevelsec} : the track’s Hook-FullLevel position in seconds (3 decimal places) ${hookfulllevelms} : the track’s Hook-FullLevel position in whole milliseconds ${hookramp} : the track’s Hook-Ramp position as a string ([HH:]MM:SS) ${hookrampsec} : the track’s Hook-Ramp position in seconds (3 decimal places) ${hookrampms} : the track’s Hook-Ramp position in whole milliseconds ${hookramp2} : the track’s Hook-Ramp2 position as a string ([HH:]MM:SS) ${hookramp2sec} : the track’s Hook-Ramp2 position in seconds (3 decimal places) ${hookramp2ms} : the track’s Hook-Ramp2 position in whole milliseconds ${hookoutro} : the track’s Hook-Outro position as a string ([HH:]MM:SS) ${hookoutrosec} : the track’s Hook-Outro position in seconds (3 decimal places) ${hookoutroms} : the track’s Hook-Outro position in whole milliseconds ${hookfadeout} : the track’s Hook-FadeOut position as a string ([HH:]MM:SS) ${hookfadeoutsec} : the track’s Hook-FadeOut position in seconds (3 decimal places) ${hookfadeoutms} : the track’s Hook-FadeOut position in whole milliseconds ${hooknext} : the track’s Hook-Next position as a string ([HH:]MM:SS) ${hooknextsec} : the track’s Hook-Next position in seconds (3 decimal places) ${hooknextms} : the track’s Hook-Next position in whole milliseconds ${hookcueout} : the track’s Hook-CueOut position as a string ([HH:]MM:SS) ${hookcueoutsec} : the track’s Hook-CueOut position in seconds (3 decimal places) ${hookcueoutms} : the track’s Hook-CueOut position in whole milliseconds ${TAG:tagid} : will be replaced by the content of the specific TAG identifier. Script/Scheduler Macros (available for scheduler and script events): ${programname} : the name of the program ${programtype} : the type of the program ${programstart} : the program start date and time in format ‘yyyy-MM-dd HH:mm:ss’ ${programend} : the program end date and time in format ‘yyyy-MM-dd HH:mm:ss’ ${programstarttype} : the start type of the program (Fixed,Soft) ${programstarttypeid} : the start type of the program (0,1) ${programoverlay} : the overlay type of the program (None,OneCycle,EndTime) ${programoverlayid} : the overlay type of the program (0,1,2) ${programmaxdelay} : the maximum delay time in whole seconds of the program ${programmixtime} : the mix time in whole milliseconds of the program 294 RADIO42 Confidential APPENDIX ${scriptname} : the name of the current script ${scriptpointer} : the current script pointer index ${scriptlineentry} : the data of the current script line entry ${scriptlinemode} : the mode of the current script line ${scriptlinecount} : the number of script line entries ${scriptlaststart} : the last start date and time in format ‘yyyy-MM-dd HH:mm:ss’ ${scriptlaststop} : the last stop date and time in format ‘yyyy-MM-dd HH:mm:ss’ ${start} : the program start date and time in format ‘yyyy-MM-dd HH:mm:ss’ ${end} : the program end date and time in format ‘yyyy-MM-dd HH:mm:ss’ ${start_yyyy} : the program start year 4-digits (0000-9999) ${start_yy} : the program start year 2-digits (00-99) ${start_MM} : the program start month 2-digits (00-12) ${start_dd} : the program start day 2-digits (00-31) ${start_dow} : the program start day of the week (1=Monday…7=Sunday) ${start_week} : the program start Iso8601 week number 2-digits (00-53) ${start_HH} : the program start hour 2-digits (00-23) ${start_mm} : the program start minute 2-digits (00-59) ${start_ss} : the program start second 2-digits (00-59) ${end_yyyy} : the program end year 4-digits (0000-9999) ${end_yy} : the program end year 2-digits (00-99) ${end_MM} : the program end month 2-digits (00-12) ${end_dow} : the program end day of the week (1=Monday…7=Sunday) ${end_week} : the program end Iso8601 week number 2-digits (00-53) ${end_dd} : the program st end art day 2-digits (00-31) ${end_HH} : the program end hour 2-digits (00-23) ${end_mm} : the program end minute 2-digits (00-59) ${end_ss} : the program end second 2-digits (00-59) Overlay Macros (available for overlay player events): ${overlayname} : the name of the overlay ${overlaydescription } : the description of the overlay ${overlayreference} : the reference class name of the overlay ${overlaystart} : the overlay start date and time in format ‘yyyy-MM-dd HH:mm:ss’ ${overlayend} : the overlay end date and time in format ‘yyyy-MM-dd HH:mm:ss’ ${overlaystarttype} : the start type of the overlay (Fixed,Soft,Auto,Manual) ${overlaystarttypeid} : the start type of the overlay (0,1,2,3) ${overlaycommandtype} : the type of the overlay command (AdvertSlot,Script,Playlist) ${overlaycommandtypeid} : the type of the overlay command (0,1,2) ${overlaycommand} : the name of the overlay command (slot, script, playlist name) ${overlayoriginalcommand} : the name of the unparsed original overlay command ${overlaytype} : the type name of the overlay ${overlayallowcancel} : is cancel allowed (1/True, 0/False) ${overlayallowdelay} : is delay allowed (1/True, 0/False) ${overlayallowediting} : is editing allowed (1/True, 0/False) ${overlayallowmoderatorchanges} : are moderator changes allowed (1/True, 0/False) ${overlaymanualplayout} : is manual playout active (1/True, 0/False) ${overlaysuspendothers} : should the overaly suspend other programs (1/True, 0/False) ${overlaypauseonsuspend} : should the overaly pause other playlists (1/True, 0/False) ${overlaymaxdelay} : the maximum delay time in whole seconds of the overlay ${overlaymixtime} : the mix time in whole milliseconds of the overlay Mixer Macros (available for mixer events): ${mixerid} : the index of the mixer channel as a string (1…) RADIO42 Confidential 295 ProppFrexx ONAIR ${mixername} : the name of the mixer channel ${mixervolume} : the current mixer channel volume as a string (0.0…1.0) ${mixervolumeXXX} : the current mixer channel volume as an integer* ${mixersnd2volume} : the current mixer channel SND2 volume as a string (0.0…1.0) ${mixersnd2volumeXXX} : the current mixer channel volume as an integer* ${mixerpan} : the current mixer channel pan as a string (-1.0…1.0) ${mixerpanasfloat} : the current mixer channel pan as a string (0.0…1.0) ${mixersnd2pan} : the current mixer channel SND2 pan as a string (-1.0…1.0) ${mixersnd2panasfloat} : the current mixer channel SND2 pan as a string (0.0…1.0) ${mixergain} : the current mixer channel gain as a string (-15.0…15.0) ${mixergainasfloat} : the current mixer channel gain as a string (0.0…1.0) ${mixeron} : the current mixer status (1/True=On, 0/False=Off) ${mixermute} : the current mixer mute state (1/True=Muted, 0/False=Unmuted) ${mixersnd} : the current mixer SND state (1/True=On, 0/False=Off) ${mixerrec} : the current mixer REC state (1/True=On, 0/False=Off) ${mixerautorec} : the current mixer auto.rec. state (1/True=On, 0/False=Off) ${mixersilencedetection} : the mixer silence detection state (1/True=On, 0/False=Off) ${mixerrecfilenamecurrent} : the current mixer recording filename ${mixerrecfilenamelast} : the last mixer recording filename ${mixerautorecfilenamecurrent} : the current mixer auto recording filename ${mixerautorecfilenamelast} : the last mixer auto recording filename ${mixerlevel} : the current mixer channel’s peak level meter value (0.0…1.0) ${mixerlevelhui} : the current mixer channel’s peak level meter value (0…12) ${mixerlevell} : the current mixer channel’s left level meter value (0.0…1.0) ${mixerlevellhui} : the current mixer channel’s left level meter value (0…12) ${mixerlevelr} : the current mixer channel’s right level meter value (0.0…1.0) ${mixerlevelrhui} : the current mixer channel’s right level meter value (0…12) ${mixerlevelXXX} : the current mixer channel’s peak level meter value as an integer* ${mixerlevellXXX} : the current mixer channel’s left level meter value as an integer* ${mixerlevelrXXX} : the current mixer channel’s right level meter value as an integer* * where XXX denotes the maximum value to be used for the conversion. MIDI Macros (available for MIDI events): ${midistatus} : the MIDI status byte value as a string ${midistatustype} : the MIDI status type value as a string ${midichannel} : the MIDI channel number value as a string ${midicontroller} : the MIDI controller value as a string ${mididata1} : the MIDI data1 byte value as a string ${mididata2} : the MIDI data2 byte value as a string ${mididata} : the combined MIDI data1/2 integer value as a string (0…16383) ${midipaireddata2} : the paired MIDI data integer value as a string (0…16383) ${mididata2asvol} : the paired MIDI data as a volume value string (0.0…1.0) ${mididataasvol} : the combined MIDI data1/2 as a volume value string (0.0…1.0) ${mididata2asvolXXX} : the paired MIDI data as a volume value string (0.0…1.0)* ${mididataasvolXXX} : the combined MIDI data1/2 as a volume value string (0.0…1.0)* ${mididata2aspan} : the paired MIDI data as a pan value string (-1.0…1.0) ${mididataaspan} : the combined MIDI data1/2 as a pan value string (-1.0…1.0) ${mididata2aspanXXX} : the paired MIDI data as a pan value string (-1.0…1.0)* ${mididataaspanXXX} : the combined MIDI data1/2 as a pan value string (-1.0…1.0)* ${mididata2asgain} : the paired MIDI data as a gain value string (-15.0…15.0) ${mididataasgain} : the combined MIDI data1/2 as a gain value string (-15.0…15.0) ${mididata2asgainXXX} : the paired MIDI data as a gain value string (-15.0…15.0)* ${mididataasgainXXX} : the combined MIDI data1/2 as a gain value string (-15.0…15.0)* 296 RADIO42 Confidential APPENDIX * where XXX denotes the maximum Midi Data2 value to be used for the conversion (else 127 or 16383 is used) Note: the combined MIDI data1/2 value derives from a single midi message (using the data1 and data2 byte) whereas the paired MIDI data value might derive from either one or two subsequent midi messages (in case a continuous controller sends LSB and MSB info). OSC Macros (available for OSC events): ${oscaddress} : the OSC address string ${oscdata1} : the OSC data1 value as a string ${oscdata2} : the OSC data2 value as a string ${oscdata3} : the OSC data3 value as a string ${oscdata1aspan} : the OSC data1 as a pan value string (-1.0…1.0) ${oscdata2aspan} : the OSC data2 as a pan value string (-1.0…1.0) ${oscdata3aspan} : the OSC data3 as a pan value string (-1.0…1.0) ${oscdata1asgain} : the OSC data1 as a gain value string (-15.0…15.0) ${oscdata2asgain} : the OSC data2 as a gain value string (-15.0…15.0) ${oscdata3asgain} : the OSC data3 as a gain value string (-15.0…15.0) ${oscdata1asvolXXX} : the OSC data1 as a volume value string (0.0…1.0)* ${oscdata2asvolXXX} : the OSC data2 as a volume value string (0.0…1.0)* ${oscdata3asvolXXX} : the OSC data3 as a volume value string (0.0…1.0)* ${oscdata1aspanXXX} : the OSC data1 as a pan value string (-1.0…1.0)* ${oscdata2aspanXXX} : the OSC data2 as a pan value string (-1.0…1.0)* ${oscdata3aspanXXX} : the OSC data3 as a pan value string (-1.0…1.0)* ${oscdata1asgainXXX} : the OSC data1 data as a gain value string (-15.0…15.0)* ${oscdata2asgainXXX} : the OSC data2 data as a gain value string (-15.0…15.0)* ${oscdata3asgainXXX} : the OSC data3 data as a gain value string (-15.0…15.0)* * where XXX denotes the maximum OSC data value to be used for the conversion (e.g. 100 to define a data range from 0 to 100). RegEx Macros (available for Serial I/O events): ${regexasvolGXwithXXX} : the matched capture group value as a volume value string ${regexaspanGXwithXXX} : the matched capture group value as a pan value string ${regexasgainGXwithXXX} : the matched capture group value as a gain value string ${regexGX} : the matched capture group value Streaming Macros (available for streaming server events): ${streamingservername} : the name of the streaming server ${streamingserveraddress} : the address of the streaming server ${streamingserverport} : the port of the streaming server ${streamingserverisconnected} : is the streaming server connected (1/True=On, 0/False=Off) ${streamingserverlistenercount} : the number of listener connected (if available) Beside the above macros any environment variables might also be used. Each environment variable is quoted with the percent sign character (%). Eg. „%SystemDrive%” will be replaced by the current system drive letter. Playlist File Macros (only available with EXEC_WRITE_PLAYLISTFILE): The following macros are only available inside a playlist template file being used by EXEC_WRITE_PLAYLISTFILE (note, that the 01 macros relate to the current track): RADIO42 Confidential 297 ProppFrexx ONAIR ${nexttrackname} : the next track’s meta data track name (i.e. ‘artist – title’) ${01trackname} : the 1st history track’s meta data track name (i.e. ‘artist – title’) ${02trackname} : the 2nd history track’s meta data track name (i.e. ‘artist – title’) ${03trackname} : the 3rd history track’s meta data track name (i.e. ‘artist – title’) ${04trackname} : the 4th history track’s meta data track name (i.e. ‘artist – title’) … ${99trackname} : the 99th history track’s meta data track ${nexttitle} : the next track’s meta data track title ${01title} : the 1st history track’s meta data track title ${02title} : the 2nd history track’s meta data track title ${03title} : the 3rd history track’s meta data track title ${04title} : the 4th history track’s meta data track title name (i.e. ‘artist – title’) … ${99title} : the 99th history track’s meta data track title ${nextartist} : the next track’s meta data track artist ${01artist} : the 1st history track’s meta data track artist ${02artist} : the 2nd history track’s meta data track artist ${03artist} : the 3rd history track’s meta data track artist ${04artist} : the 4th history track’s meta data track artist … ${99artist} : the 99th history track’s meta data track artist ${nextalbum} : the next track’s meta data track album ${01album} : the 1st history track’s meta data track album ${02album} : the 2nd history track’s meta data track album ${03album} : the 3rd history track’s meta data track album ${04album} : the 4th history track’s meta data track album … ${99album} : the 99th history track’s meta data track album ${nextyear} : the next track’s meta data track year ${01year} : the 1st history track’s meta data track year ${02year} : the 2nd history track’s meta data track year ${03year} : the 3rd history track’s meta data track year ${04year} : the 4th history track’s meta data track year … ${99year} : the 99th history track’s meta data track year ${nextgenre} : the next track’s meta data track genre ${01genre} : the 1st history track’s meta data track genre ${02genre} : the 2nd history track’s meta data track genre ${03genre} : the 3rd history track’s meta data track genre ${04genre} : the 4th history track’s meta data track genre … ${99genre} : the 99th history track’s meta data track genre ${nextduration} : the next track’s duration as a string ${01duration} : the 1st history track’s duration as a string ${02duration} : the 2nd history track’s duration as a string ${03duration} : the 3rd history track’s duration as a string ${04duration} : the 4th history track’s duration as a string … ${99duration} ${01playedat} ${02playedat} ${03playedat} ${04playedat} … ${99playedat} 298 : the 99th history track’s duration as a string : the 1st history track’s duration as a string : the 2nd history track’s duration as a string : the 3rd history track’s duration as a string : the 4th history track’s duration as a string : the 99th history track’s duration as a string RADIO42 Confidential APPENDIX Note: All other “Track/Playlist Macros” (as listed above can be used in the same way), e.g. ${01albumart}, ${02composer}, ${03albumartist} or ${04comment} etc. Script-Line/FixTime Macros (‘Entry’ value will be resolved): ${now} : the current date and time in format ‘yyyy-MM-dd HH:mm:ss’ ${yyyy} : the current year (4-digits) ${yy} : the current year (2-digits) ${MM} : the current month (2-digits, 01-12) ${dow} : the current day of the week (1=Monday…7=Sunday) ${week} : the current Iso8601 week number 2-digits (00-53) ${dd} : the current day (2-digits, 01-31) ${HH} : the current hour (2-digits, 00-23) ${mm} : the current minute (2-digits, 00-59) ${ss} : the current second (2-digits, 00-59) ${TAB} : the tab character (\t) ${PIPE} : the pipe character (|) ${CRLF} : the carriage return (\r) and line feed (\n) character ${CR} : the carriage return (\r) character ${scriptname} : the name of the script ${programname} : the name of the program ${programtype} : the type of the program ${start} : the program start date and time in format ‘yyyy-MM-dd HH:mm:ss’ ${end} : the program end date and time in format ‘yyyy-MM-dd HH:mm:ss’ ${start_yyyy} : the program start year 4-digits (0000-9999) ${start_yy} : the program start year 2-digits (00-99) ${start_MM} : the program start month 2-digits (00-12) ${start_dd} : the program start day 2-digits (00-31) ${start_dow} : the program start day of the week (1=Monday…7=Sunday) ${start_week} : the program start Iso8601 week number 2-digits (00-53) ${start_HH} : the program start hour 2-digits (00-23) ${start_mm} : the program start minute 2-digits (00-59) ${start_ss} : the program start second 2-digits (00-59) ${end_yyyy} : the program end year 4-digits (0000-9999) ${end_yy} : the program end year 2-digits (00-99) ${end_MM} : the program end month 2-digits (00-12) ${end_dow} : the program end day of the week (1=Monday…7=Sunday) ${end_week} : the program end Iso8601 week number 2-digits (00-53) ${end_dd} : the program st end art day 2-digits (00-31) ${end_HH} : the program end hour 2-digits (00-23) ${end_mm} : the program end minute 2-digits (00-59) ${end_ss} : the program end second 2-digits (00-59) ${fixstart} : the elements start date and time in format ‘yyyy-MM-dd HH:mm:ss’ ${fix_yyyy} : the elements start year 4-digits (0000-9999) ${fix_yy} : the elements start year 2-digits (00-99) ${fix_MM} : the elements start month 2-digits (00-12) ${fix_dow} : the elements start day of the week (1=Monday…7=Sunday) ${fix_week} : the elements start Iso8601 week number 2-digits (00-53) ${fix_dd} : the elements start day 2-digits (00-31) ${fix_HH} : the elements start hour 2-digits (00-23) ${fix_mm} : the elements start minute 2-digits (00-59) ${fix_ss} : the elements start second 2-digits (00-59) RADIO42 Confidential 299 ProppFrexx ONAIR Overlay Macros (Playing ‘Command’ value will be resolved): ${now} : the current date and time in format ‘yyyy-MM-dd HH:mm:ss’ ${yyyy} : the current year (4-digits) ${yy} : the current year (2-digits) ${MM} : the current month (2-digits, 01-12) ${dow} : the current day of the week (1=Monday…7=Sunday) ${week} : the current Iso8601 week number 2-digits (00-53) ${dd} : the current day (2-digits, 01-31) ${HH} : the current hour (2-digits, 00-23) ${mm} : the current minute (2-digits, 00-59) ${ss} : the current second (2-digits, 00-59) ${TAB} : the tab character (\t) ${PIPE} : the pipe character (|) ${CRLF} : the carriage return (\r) and line feed (\n) character ${CR} : the carriage return (\r) character ${overlayname} : the name of the overlay ${overlaytype} : the start type of the overlay ${start} : the overlay start date and time in format ‘yyyy-MM-dd HH:mm:ss’ ${start_yyyy} : the overlay start year 4-digits (0000-9999) ${start_yy} : the overlay start year 2-digits (00-99) ${start_MM} : the overlay start month 2-digits (00-12) ${start_dd} : the overlay start day 2-digits (00-31) ${start_dow} : the overlay start day of the week (1=Monday…7=Sunday) ${start_week} : the overlay start Iso8601 week number 2-digits (00-53) ${start_HH} : the overlay start hour 2-digits (00-23) ${start_mm} : the overlay start minute 2-digits (00-59) ${start_ss} : the overlay start second 2-digits (00-59) ${end} : the overlay start date and time in format ‘yyyy-MM-dd HH:mm:ss’ ${end_yyyy} : the overlay start year 4-digits (0000-9999) ${end_yy} : the overlay start year 2-digits (00-99) ${end_MM} : the overlay start month 2-digits (00-12) ${end_dd} : the overlay start day 2-digits (00-31) ${end_dow} : the overlay start day of the week (1=Monday…7=Sunday) ${end_week} : the overlay start Iso8601 week number 2-digits (00-53) ${end_HH} : the overlay start hour 2-digits (00-23) ${end_mm} : the overlay start minute 2-digits (00-59) ${end_ss} : the overlay start second 2-digits (00-59) Note: AlbumArt pictures will result in a base64 encoded string. To convert that back to an image on a receiver side you can simply decode that string back to a byte array and take the data to create a JPEG image. The original album art picture will in any case automatically be scaled to a max. 200x200 image and converted to JPEG (keeping the original aspect ratio, as such the resulting image might be smaller but either the width or height will be 200 pixel). GPIO Client Macros The following macros are only available within the GPIO Client Application (e.g. when triggering control-commands within its event mapping). ${airencestate1} : the state of the Airence SW_LED_1 … ${airencestate24} 300 : the state of the Airence SW_LED_24 RADIO42 Confidential APPENDIX ${airencestatenonstop} : the state of the Airence SW_NONSTOP ${airencestateusb1cue} : the state of the Airence SW_USB1_CUE ${airencestateusb1fader} : the state of the Airence SW_USB1_FADERSTART ${airencestateusb1on} : the state of the Airence SW_USB1_ON … ${airencestateusb4cue} : the state of the Airence SW_USB4_CUE ${airencestateusb4fader} : the state of the Airence SW_USB4_FADERSTART ${airencestateusb4on} : the state of the Airence SW_USB4_ON ${airlitestate1a} … ${airlitestate8a} ${airlitestate1b} … : the state of the Airlite 1A switch : the state of the Airlite 8A switch : the state of the Airlite 1B switch ${airlitestate8b} : the state of the Airlite 8B switch ${airlitestate1on} : the state of the Airlite Module1 … ON switch ${airlitestate8on} : the state of the Airlite Module8 ON switch ${airlitestate1cue} : the state of the Airlite Module1 CUE switch … ${airlitestate8cue} : the state of the Airlite Module8 CUE switch ${airlitestate1fader} : the state of the Airlite Module1 FADER … ${airlitestate8fader} : the state of the Airlite Module8 FADER ${airlitestate1sourcesel} : the state of the Airlite Module1 Source … Selection ${airlitestate8sourcesel} : the state of the Airlite Module8 Source Selection ${airlitestateautocuecrm} : the state of the Airlite AutoCueCRM switch ${airlitestateautocueannouncer} : the state of the Airlite AutoCueAnnouncer switch ${airlitestatenonstop} : the state of the Airlite NonStop switch ${airlitestatemicon} : the state of the Airlite MicOn indicator ${airlitestategpo1} : the state of the Airlite GPO1 indicator ${airlitestategpo2} : the state of the Airlite GPO2 indicator ${airlitestateonair1} : the state of the Airlite OnAir1 indicator ${airlitestateonair2} : the state of the Airlite OnAir2 indicator ${airlitestate1module} : the state of the Airlite Module1 … ${airlitestate8module} : the state of the Airlite Module8 ${airlitestatecrmmute} : the state of the Airlite CRM Mute switch ${airlitestate1track} : the state of the Airlite Track1 play mode … ${airlitestate8track} : the state of the Airlite Track8 play mode ${airlitestate1comm} : the state of the Airlite Comm1 switch … ${airlitestate3comm} : the state of the Airlite Comm3 switch ${airlitestate1vt} : the state of the Airlite VT1 mode … ${airlitestate8vt} : the state of the Airlite VT8 mode ${airlitestatephonering} : the state of the Airlite Phone ${velleman1pin} … Ring indicator : the state of the Velleman Pin1 ${velleman16pin} ${iowarrior1pin} : the state of the Velleman Pin16 : the state of the IO-Warrior Pin1 … ${iowarrior16pin} : the state of the IO-Warrior Pin16 RADIO42 Confidential 301 ProppFrexx ONAIR Control Command Functions Beside control command macros you might also use functions inside your control command, which are executed at the time the command is executed. A function has the format: *[FUNCTION:{param1}:{param2}..:{paramN}] Here is a list of possible functions: Note: If a param contains macros, these are evaluated first! However macros which resolve by itself to macros are not replaced recursively. You might only include regular macros within the parameters of a function. Example: *[FUNCTION:{param1}:{${macro}}..:{paramN}] Nested functions are only supported up to one level in depth, in this case the nested function notation will change (‘[‘/’]’ is replaced by ‘<‘/’>’): *<FUNCTION:{param1}:{param2}..:{paramN}> Example: *[FUNC1:{*<FUNC2:{param1}..:{paramN}>}..:{paramN}] REPLACE (replaces a source string with a destin string in a given value): Returns a new string in which all occurrences of the specified source string in the value instance are replaced with the specified destin string. Syntax: *[REPLACE:{value}:{source}:{destin}] Parameters: {value} the original string to perform the replace on {source} the string contained within value which should be replaced by destin {destin} the string which should replace any occurrences of source Example 1: *[REPLACE:{C:\My Music\north\${yyyy}_test.wav}:{\north\}:{\south\}] Will result to: C:\MyMusic\south\2011_test.wav Assuming the macro ${yyyy} will resolve to 2011. Example 2: *[REPLACE:{C:\My Music\north\2011_test.wav}:{${yyyy}}:{${yy}${MM}}] Will result to: C:\MyMusic\north\1103_test.wav Assuming the macro ${yyyy} will resolve to 2011 and ${MM} will resolve to 03. Example 3: *[REPLACE:{${overlayoriginalcommand}}:{\north\}:{\south\}] Will result to: C:\ImportLog\south\${start_yyyy}${start_MM}${start_dd}.pfp Assuming the macro ${overlayoriginalcommand} will resolve to C:\ImportLog\north\${start_yyyy}${start_MM}${start_dd}.pfp. 302 RADIO42 Confidential APPENDIX STRING (formats a string value): Returns a new string which is formatted according to a given conv function. Syntax: *[STRING:{value}:{conv}:{p1}:{p2}] Parameters: {value} the original string to format to a certain length {conv} the conversion function name to apply to the string value ‘rpad’ : right-pads or truncates value to a certain length p1 : the length the result string should get p2 : not used ‘lpad’ : left-pads or truncates value to a certain length p1 : the length the result string should get p2 : not used ‘reverse’ : reverts the characters of value p1 : the length the result string should get (left-padded) p2 : not used ‘sub’ : retrieves a substring from value p1 : the zero-based starting position p2 : the number of characters to extract starting from p1 {p1} the 1st numeric (float) parameter value to use with the conv function {p2} the 2nd numeric (float) parameter value to use with the conv function Example 1: *[STRING:{${mixername}}:{rpad}:{7}] Will result to: “OUT 1 ” assuming the macro ${mixername} will resolve to “OUT 1”. Example 2: *[STRING:{${mixername}}:{lpad}:{7}] Will result to: “ PFL” assuming the macro ${mixername} will resolve to “PFL”. Example 3: *[STRING:{HELLO}:{reverse}] Will result to: “OLLEH”. Example 4: EXEC_SEND_MIDI_SYSEXMSG 0xF0 0x00 0x00 0x66 0x10 0x12 0x00 "*[STRING:{${outputmixer1name}}:{rpad}:{6}] " "*[STRING:{${outputmixer2name}}:{rpad}:{6}] " "*[STRING:{${outputmixer3name}}:{rpad}:{6}] " "*[STRING:{${outputmixer4name}}:{rpad}:{6}] " " " "*[STRING:{${inputmixer1name}}:{rpad}:{6}] " 0xF7 Will display the string “PLAY OUT MON PFL MIC1 ” to a Mackie Control Universal/Logic Control surface’s LED assuming the above mixer name macros will reolve as displayed. TOSTRING (converts and formats a numeric value to a string): Returns a new string by optionally converting a num value plus formats the output. Syntax: *[TOSTRING:{num}:{conv}:{p1}:{format}] Parameters: RADIO42 Confidential 303 ProppFrexx ONAIR {num} the original numeric value to format {conv} the conversion function name to apply to the num ‘todb’ : converts num from a float value to a dB value p1: the maximum value allowed (e.g. 1.0) ‘fromdb’ : converts num from a dB value to a float value p1: the maximum value allowed (e.g. 1.0) ‘add’ : adds a value to num p1: the value to add (e.g. 5.0) ‘multi’ : multiplies a value to num p1: the value to multiply (e.g. 2.0) ‘odd’ : makes the num value odd; num = (num * p1) - 1 p1: the value to multiply (e.g. 2.0) ‘none’ : uses num unmodified p1: not used {p1} see the above notes for the conv parameter {format} the style to format the output, which can contain the following placeholders: 0 : replaces with the corresponding digit if one is present; otherwise 0 # : replaces with the corresponding digit if one is present; otherwise, no digit % : multiplies num by 100 and inserts a percentage symbol in the result string ‰ : multiplies num by 1000 and inserts a per mille symbol in the result string ; : defines sections with separate format strings for positive, negative, and zero You might use the literal (.) as the standard decimal separator and the literal (,) as the standard group separator, else enclose any other characters within a literal ('). Example 1: *[TOSTRING:{${outputmixer1volume}}:{todb}:{1.0}:{0.0'dB'}] Will result to: -6.0dB assuming the macro ${outputmixer1volume} will resolve to 0.5. -12.0dB assuming the macro ${outputmixer1volume} will resolve to 0.25. Example 2: *[TOSTRING:{${outputmixer1pan}}:{none}:{0}:{R00%' ';L00%' ';'center '}] Will result to: R50% assuming the macro ${outputmixer1pan} will resolve to 0.5. L50% center assuming the macro ${outputmixer1pan} will resolve to -0.5. assuming the macro ${outputmixer1pan} will resolve to 0.0. TOFLOAT (converts an integer numeric value to a float representation): Returns a float value by applying a numeric conversion on a given integer num value using and optional bitmask, shift operation plus an optional conversion format. Syntax: *[TOFLOAT:{num}:{mask}:{shift}:{conv}:{p1}:{p2}] Parameters: {num} the numerical integer value to perform the conversion on {mask} an optional bitmask to apply to the num value (if 0 no mask is applied) {shift} the number of bits to shift the num value after applying the mask (>0:right-shift, <0:left-shift, 0:no shift) 304 RADIO42 Confidential APPENDIX {conv} the conversion function name to apply to the num value after applying the shift ‘linear’ : linear conversion to a float value (0.0...p2) p1 : the max. value num might get (not be zero) p2 : scale factor (multiplier; must be greater than zero) ‘centered’ : centered conversion to a float value (-p2...+p2) p1 : the max. value num might get (not be zero) p2 : the max. result value (must be greater than zero) Note: p1/2 represents the centered position. If num is below this centered value a negative value is returned; if num is above this centered value a positive value is returned; if num is equal to the centered value zero is returned. ‘signed’ : signed conversion to a float value (-p2...+p2) p1 : the max. value num might get (not be zero) p2 : the max. result value (must be greater than zero) Note: p1 represents the centered position. If num is below this centered value a positive value is returned; if num is above this centered value a negative value is returned; if num is equal to the centered value zero is returned. If no conv function is given the result is the plain integer representation of the num value after applying the mask and shift. {p1} the 1st numeric (float) parameter value to use with the conv function {p2} the 2nd numeric (float) parameter value to use with the conv function Example 1: *[TOFLOAT:{${mididata2}}:{0x7F}:{0}:{linear}:{127}:{1.0}] Will result to: 0.49606299 assuming the macro ${mididata2} will resolve to 63 (0x3F). 1.0 assuming the macro ${mididata2} will resolve to >= 127 (0x7F). Example 2: *[TOFLOAT:{${mididata}}:{0}:{0}:{centered}:{16384}:{15.0}] Will result to: -15.0 assuming the macro ${mididata} will resolve to 0. 0.0 assuming the macro ${mididata} will resolve to 8192. Example 3: *[TOFLOAT:{${mididata2}}:{0x7F}:{0}:{signed}:{64}:{1.0}] Will result to: 0.5 assuming the macro ${mididata2} will resolve to 32 (0x20). -0.109375 assuming the macro ${mididata2} will resolve to 71 (0x47). TOINT (converts a numeric value to an integer): Returns a new string by converting a num value. Syntax: *[TOINT:{num}:{conv}:{p1}] Parameters: {num} the original numeric value to format {conv} the conversion function name to apply to the num ‘round’ : rounds num to the nearest integral value RADIO42 Confidential 305 ProppFrexx ONAIR p1: not used ‘add’ : adds a value to num p1: the value to add (e.g. 5) ‘multi’ : multiplies a value to num p1: the value to multiply (e.g. 2.0) ‘div’ : devides num by a value p1: the divisor (e.g. 2.0) ‘mod’ : reminder after division; num = num % p1 p1: the divisor (e.g. 2.0) ‘odd’ : makes the num value odd; num = (num * p1) - 1 p1: the value to multiply (e.g. 2.0) ‘none’ : uses num unmodified p1: not used {p1} see the above notes for the conv parameter Example: *[TOINT:{${cartid}}:{add}:{7.0}] Will result to: 8 assuming the macro ${cartid} will resolve to 1. MAKEWORD (combines a low and high numeric value): Returns a new numeric value by combining a low and high numeric value using an optional bitmask, shift operation plus an optional conversion format. Syntax: *[MAKEWORD:{high}:{low}:{mask}] Parameters: {high} the high numeric value to use (i.e. a byte or word) {low} the low numeric value to use (i.e. a byte or word) {mask} the bitmask to apply to the result value (which also defines the result) Example 1: *[MAKEWORD:{0x0F}:{0x0A}:{0xFF}] Will result to a byte value 0xFA Example 2: *[MAKEWORD:{0x01}:{${mixerlevelhui}}:{0x7F}] Will result to a byte value 0x1A assuming the macro ${mixerlevelhui} will resolve to 10. Example 3: *[MAKEWORD:{0x07}:{0x3C}:{0xFFFF}] Will result to an Int16 value 0x073C DATE (converts and formats a datetime value to a string representation): Returns a new string by optionally adding num units to a given datetime value plus formats the output. Syntax: 306 RADIO42 Confidential APPENDIX *[DATE:{value}:{add}:{num}:{format}] Parameters: {value} the original datetime to format (must be in 'yyyy-MM-dd HH:mm:ss') {add} the conversion function name to apply to the value ‘seconds’ : adds num number of seconds ‘minutes’ : adds num number of minutes ‘hours’ : adds num number of hours ‘days’ : adds num number of days ‘months’ : adds num number of months ‘years’ : adds num number of years ‘none’ : uses the datetime value unmodified {num} the number of units to add (a negative number subtracts) {format} the style to format the output, which can contain the following placeholders: yy : the year, from 00 to 99 yyyy : the year as a four-digit number M : the month, from 1 through 12 MM : the month, from 01 through 12 MMM : the abbreviated name of the month MMMM : the full name of the month d : the day of the month, from 1 through 31 dd : the day of the month, from 01 through 31 ddd : the abbreviated name of the day of the week dddd : the full name of the day of the week dow : the day of the week from 1=Monday through 7=Sunday week : the week of the year from 01 through 53 h : the hour, using a 12-hour clock from 1 to 12 hh : the hour, using a 12-hour clock from 01 to 12 H : the hour, using a 24-hour clock from 0 to 23 HH : the hour, using a 24-hour clock from 00 to 23 m : the minute, from 0 through 59 mm : the minute, from 00 through 59 s : the second, from 0 through 59 ss : the second, from 00 through 59 t : the first character of the AM/PM designator tt : the AM/PM designator You might use the literal (/) as the standard date separator and the literal (:) as the standard time separator, else enclose any other characters within a literal ('). Example 1: *[DATE:{${now}}:{days}:{1}:{yyyy_week}] Will result to: 2013_03 assuming the macro ${now} will resolve to 2013-01-14 09:07:57. Example 2: *[DATE:{${start}}:{days}:{-1}:{dow_HHmm}] Will result to: 7_1705 assuming the macro ${start} will resolve to 2013-01-14 17:05:00. TIME (converts and formats a time value to a string representation): Returns a new string by optionally adding num units to a given time value plus formats the output. Syntax: RADIO42 Confidential 307 ProppFrexx ONAIR *[TIME:{value}:{add}:{num}:{format}] Parameters: {value} the original time format (as a floating number in sec. or in '[d.]hh:mm:ss[.ff]') {add} the conversion function name to apply to the value ‘ms’ : adds num number of milliseconds ‘seconds’ : adds num number of seconds ‘minutes’ : adds num number of minutes ‘hours’ : adds num number of hours ‘abs’ : takes the absolute time (in case value is negative) ‘none’ : uses the time value unmodified {num} the number of units to add (a negative number subtracts) {format} the style to format the output, which can contain the following placeholders: d : the number of whole days in the time interval h : the number of whole hours in the time interval (0-23) hh : the number of whole hours in the time interval (00-23) m : the number of whole minutes in the time interval (0-59) mm : the number of whole minutes in the time interval (00-59) s : the number of whole seconds in the time interval (0-59) ss : the number of whole seconds in the time interval (00-59) f : the tenths of a second in a time interval (0-9) ff : the hundredths of a second in a time interval (00-99) fff : the milliseconds in a time interval (000-999) mackie : a dedicated Mackie/Logic time code display format mode Enclose any other characters within a literal ('). Example 1: *[TIME:{63.2}:{none}:{0}:{hh':'mm':'ss}] *[TIME:{63.2}:{none}:{0}:{hh':'mm':'ss'.'f}] Will result to 00:01:03 respectively 00:01:03.2. IF (returns a value depending on a condition): Returns the truevalue or the falsevalue depending on evaluating the parameter against the criterion condition. Syntax: *[IF:{parameter}:{criterion}:{truevalue}:{falsevalue}] Parameters: {parameter} the parameter to evaluated against the criterion {criterion} the criterion condition to match {truevalue} the value to return if the condition is true {falsevalue} the value to return if the condition is false Example 1: *[IF:{${VAR:display}}:{Equals(smpte)}:{0x71}:{0x72}] Will result to a string value 0x71, if the macro ${VAR:display} resolves to the string smpte – else the result would be the string value 0x72. Example 2: *[IF:{${mididata2}}:{Equals(127)}:{shift}:{none}] 308 RADIO42 Confidential APPENDIX Will result to a string value shift, if the macro ${mididata2} resolves to the string 127 – else the result would be the string value none. Mackie Control Universal Protocol Support If you are using a Midi controller which supports the Mackie Control Universal (MCU) protocol you might use the EXEC_SEND_MIDI_MCU resp. EXEC_SEND_MIDI2_MCU controlcommand to transmit specific midi messages to the Midi controller to update its state (e.g. to update the LCD display, the timecode display or to set the state of an LED etc.). Receiving messages from a MCU controller is like receiving a MIDI short message from any other Midi controller, meaning you can simply perform a standard mapping between an incoming Midi short message and control-command(s) to be triggered with that message. As such this chapter mainly focuses on transmitting midi messages from ProppFrexx ONAIR to a MCU. Also note, that a MCU controller was mainliy designed to remotely control multitrack recording and arranging applications like Cubbase, ProLogic, ProTools, Ableton Live etc. As such the MCU protocol contains many features and specifics which doesn’t perfectly map or even apply to a playlist management and broadcasting application like ProppFrexx (e.g. it is specialized on working with individual and parallel sound tracks to be recorded and arranged). But the MCU doesn’t contain features which are specific to broadcasting and playlist management (like PFL, TalkOver, VoiceTracking, multiple players, cartwalls, meta data editing, playlist playback control and editing etc.). As a result there is no perfect way to provide a direct 1:1 mapping of the MCU protocol to the ProppFrexx functionality. As such we have decided to leave the mapping of the Midi messages to related ProppFrexx control-commands up to you (this means more initial setup work for you, but offers more flexibility and a better integration suited to your needs). As said, you might use the EXEC_SEND_MIDI_MCU resp. EXEC_SEND_MIDI2_MCU controlcommand to transmit specific midi messages to the MCU Midi controller to update its state. Here is the list of modes/commands supported by this control-command. General Syntax: EXEC_SEND_MIDI_MCU cmd|param1|...|paramN EXEC_SEND_MIDI2_MCU cmd|param1|...|paramN Parameters: cmd: the command to send to the MCU controller param1: the 1st parameter related to the command paramN: the Nth parameter related to the command As you can see, the command describes the action to perform and each command has a variable list of parameters to be used along with the command. Here comes the list of supported commands and its dedicated parameters to be used. Move Fader (“fader”) The MCU has 7 channel faders (identified by the ID 0 thru 7) and one master fader (identified by the ID 8). Use this command to move a fader to a certain position (0.0=minimum/bottom thru 1.0=maximum/top). Syntax: RADIO42 Confidential 309 ProppFrexx ONAIR EXEC_SEND_MIDI_MCU fader|id|vol[|max] EXEC_SEND_MIDI2_MCU fader|id|vol[|max] Parameters: id: (int) fader id (0...7 or 8=master) vol: (float) fader position/volume (0.0=min. thru 1.0=max.) max: optional, (int) the maximum fader midi value representing 0 dB (or 1.0)* *If not given a maximum midi value of 16383 is assumed. A fader volume within ProppFrexx ranges from –infinite dB (silent or 0.0) to 0 dB (maximum or 1.0). The MCU midi fader volume range is always between 0 and 16383, however MCU doesn’t define any specific upper fader range. While a midi value of 0 always represents –infinite dB (silent or 0.0) the upper range limit (16383) might even define values above 0 dB! To compensate for this fact you might specify a max parameter defining this upper fader range midi value representing the 0 dB value. When given this max value is used as the maximum midi value to be send to the MCU controller reflecting the maximum ProppFrexx volume level of 0 dB (1.0). Example 1: EXEC_SEND_MIDI_MCU fader|8|${mainvolume} Moves the master fader to the position as reflected by the macro ${mainvolume}. Example 2: EXEC_SEND_MIDI_MCU fader|0|${outputmixer1volume}|14463 Moves the 1st channel fader to the position as reflected by the macro ${outputmixer1volume} and assumes a midi value of 14463 to represent the 0 dB value. Set LED (“led”) Switches and LEDs use the same midi message. This ensures that an LED always shares an ID with its corresponding switch. However, clicking a switch on a MCU doesn’t change its associated LED automatically! As such you must manually set the state of an LED correspondingly in a separate message. E.g. you might use the switch ID 0x10 (MUTE Ch. 1) to trigger changing the mute state of your 1st mixer-output-channel (for example in your GPIO midi event mapping you might trigger the MIXER_OUTPUT_MUTE_TOGGLE OUT1 control-command when you receive the midi message 0x90 0x10 0x7F. But within your mixer-channel configuration you might set the Mute LED according via the OnMute resp. OnUnmute events and use this command to do so). Syntax: EXEC_SEND_MIDI_MCU led|id|state EXEC_SEND_MIDI2_MCU led|id|state Parameters: id: (int) led id (see Control Surface Switch/LED IDs below) state: (int) led state (0 or false=OFF, 1 or true=ON, 2 or flash=FLASHING) Example: EXEC_SEND_MIDI_MCU led|16|${mixermute} Enables or disables the MUTE Ch. 1 LED depending on the ${mixermute} macro which might resolve to either 1 or 0 (e.g. if the above command is used within the mixer channel’s OnMute or OnUnmute event). 310 RADIO42 Confidential APPENDIX Set V-Pot (“vpot”) Each V-Pot has an LED ring containing 11 segments plus a centered LED (c). Use this command to set the LED ring of a V-Pot using various display modes. Syntax: EXEC_SEND_MIDI_MCU vpot|id|mode|value EXEC_SEND_MIDI2_MCU vpot|id|mode|value Parameters: id: (int) v-pot id (0…7) mode: the display and conversion mode, one of the following: pan : value must be between -1.0 and +1.0; c is on if value = 0.0 gain : value must be between -15.0 and +15.0; c is on if value = 0.0 vol : value must be between 0.0 and +1.0; c is on if value > 0.0 single : value must be between 0.0 and +1.0; c is on if value = 0.0 spread : value must be between -1.0 and +1.0; c is on if value = 0.0 value: (float) the position value (depending on mode) Examples: EXEC_SEND_MIDI_MCU vpot|0|pan|${mixerpan} EXEC_SEND_MIDI_MCU vpot|0|gain|${mixergain} Sets the 1st V-Pot LED ring depending on the ${mixerpan} macro (-1.0…+1.0) resp. the ${mixergain} macro (-15.0…+15.0) (e.g. if the above commands are used within the mixer channel’s OnPan resp. OnGain event). When receiving midi data from the V-Pots note, that the V-Pots use a relative position movement value. The midi short message received has the following format: Status: 176 (0xB0) Data1: 0x1i (i=0…7, the V-Pot ID) Data2: the data value in form (0 s v v v v v v) s=direction (0=clockwise; 1=counter clockwise) v=number of ticks As such a data2 value between 0 and 63 represent a clockwise position change and a value between 65 and 127 represent a counter clockwise position change. You might use the following macro function to resolve the transmitted V-Pot position change (contained in the midi data2 byte): *[TOFLOAT:{${mididata2}}:{0x7F}:{0}:{signed}:{64}:{1.0}] The last parameter determines the granularity. In the example above values between -1.0 and +1.0 are returned. As such the following macro function would return values between -0.5 and +0.5 resp. -15.0 and +15.0: *[TOFLOAT:{${mididata2}}:{0x7F}:{0}:{signed}:{64}:{0.5}] *[TOFLOAT:{${mididata2}}:{0x7F}:{0}:{signed}:{64}:{15.0}] As such you typically might want to use relative control-commands to change e.g. a volume, gain or pan value. E.g. use one of the following control-comamnds: MAIN_VOLUME_CHANGE MIXER_OUTPUT_VOLUME_CHANGE / MIXER_INPUT_VOLUME_CHANGE MIXER_OUTPUT_PAN_CHANGE / MIXER_INPUT_PAN_CHANGE MIXER_OUTPUT_GAIN_CHANGE / MIXER_INPUT_GAIN_CHANGE MIXER_OUTPUT_SND2VOLUME_CHANGE MIXER_OUTPUT_SND2PAN_CHANGE Examples: RADIO42 Confidential 311 ProppFrexx ONAIR MIXER_OUTPUT_PAN_CHANGE OUT1|*[TOFLOAT:{${mididata2}}:{0x7F}:{0}:{signed}:{64}:{0.5}] MIXER_OUTPUT_GAIN_CHANGE OUT1|*[TOFLOAT:{${mididata2}}:{0x7F}:{0}:{signed}:{64}:{3.0}] Set Level Meter (“level”) Each channel has a peak level meter display (some devices provide a 12 or 13 segment LED strip and some other devices only provide a single signal indicator; however updating the peak level is the same in all cases). Only transmit peak levels. MCU automatically decreases the level meter bars, and switches off the signal present LED (over time). This approach ensures that MIDI bandwidth takes only a fraction of that required by implementations where the current level (and peak level) is transmitted constantly. Decay rate is approximately 300ms per meter division (1.8 seconds to fall from 100% to 0%) – as such a good update interval is somewhere around 150ms. Syntax: EXEC_SEND_MIDI_MCU level|id|peak EXEC_SEND_MIDI2_MCU level|id|peak Parameters: id: (int) fader id (0...7) peak: (float) the peak level (0.0=min. thru 1.0=max.) Example: EXEC_SEND_MIDI_MCU level|0|${mixerlevel} Sets the peak level on the 1st channel based on the ${mixerlevel} macro value (e.g. if the above command is used within the mixer channel’s OnTimer event using a 150ms update period). Set Time Display (“time”) The MCU provides a TimeCode/BBT display, which contains up to 10 characters and is typically used to display the current track position resp. remaining time. Use this command together with a decimal value representing the seconds (and fractions of seconds) to display the time code (e.g. use the macros ${cpltimeremain} or ${cpltimepos} within the global OnTime event using an update period of 100ms). The time code is by formatted to the display like this: 987 65 43 210 hh.mm.ss. ff (character position) (hh=hours, mm=minutes, ss=seconds, ff=frame, .=point) Syntax: EXEC_SEND_MIDI_MCU time|pos EXEC_SEND_MIDI2_MCU time|pos Parameters: pos: the time as a floating number in seconds or in '[d.]hh:mm:ss[.ff]' Note: if pos doesn’t denote a valid time the plain text is used. Any ‘.’ or ‘:’ character will be used to lit the decimal dot on the display for the preceding character. Caution, the text is written from right-to-left, if the text is shorter than 10 characters, the remaining left-most characters on the display remain unchanged! Examples: EXEC_SEND_MIDI_MCU time|${cpltimeremain} EXEC_SEND_MIDI_MCU time|${cpltimepos} 312 RADIO42 Confidential APPENDIX EXEC_SEND_MIDI_MCU time|63.2 EXEC_SEND_MIDI_MCU time|00:03:17.31 Displays the time represented by the ${cpltimeremain} resp. ${cpltimepos} macro on the TimeCode display. Set Time Display Ex (“timex”) Works exactly like the “time” command above, but uses internally an alternative method to update the time code display. Namely, the “time” command uses (for maximum compatibility) a single digit transfer mode, whereas this “timex” command uses a multicharacter update mode, which is more efficient. Depending on your MCU, you might try this command and if that fails, use the “time” command instead. Syntax: EXEC_SEND_MIDI_MCU timex|pos EXEC_SEND_MIDI2_MCU timex|pos Parameters: pos: the time as a floating number in seconds or in '[d.]hh:mm:ss[.ff]' Note: if pos doesn’t denote a valid time the plain text is used. Any ‘.’ or ‘:’ character will be used to lit the decimal dot on the display for the preceding character. Caution, the text is written from right-to-left, if the text is shorter than 10 characters, the remaining left-most characters on the display remain unchanged! Examples: EXEC_SEND_MIDI_MCU timex|${cpltimeremain} EXEC_SEND_MIDI_MCU timex|${cpltimepos} EXEC_SEND_MIDI_MCU timex|63.2 EXEC_SEND_MIDI_MCU timex|00:03:17.31 Displays the time represented by the ${cpltimeremain} resp. ${cpltimepos} macro on the TimeCode display. EXEC_SEND_MIDI_MCU timex|${cpltrackramptimecurrent}@@@ As the pos parameter can not be resolved to a valid time code the plain text is used to update the display. In this example ‘00.42 ‘ will be displayed, assuming the macro ${cpltrackramptimecurrent} will be resolved to 00:42 (note, that @ character resolves to a blank digit on the display; in the example above the last 3-digits are unused). Set Assignment Display (“assignment”) The MCU provides an Assignment display, which contains up to 2 characters. Use this command together with any text value representing the code to display. Syntax: EXEC_SEND_MIDI_MCU assignment|text EXEC_SEND_MIDI2_MCU assignment|text Parameters: text: the 2-char text to display Note: Any ‘.’ character will be used to lit the decimal dot on the display for the preceding character. Caution, the text is written from right-to-left, if the text is shorter than 2 characters, the remaining left-most character on the display remain unchanged! RADIO42 Confidential 313 ProppFrexx ONAIR Examples: EXEC_SEND_MIDI_MCU assignment|OA. Displays ‘oA.‘ on the assignment display. Set Assignment Display Ex (“assignmentx”) Works exactly like the “assignment” command above, but uses internally an alternative method to update the assignment display. Namely, the “assignment” command uses (for maximum compatibility) a single digit transfer mode, whereas this “assignmentx” command uses a multi-character update mode, which is more efficient. Depending on your MCU, you might try this command and if that fails, use the “assignment” command instead. Syntax: EXEC_SEND_MIDI_MCU assignmentx|text EXEC_SEND_MIDI2_MCU assignmentx|text Parameters: text: the 2-char text to display Note: Any ‘.’ character will be used to lit the decimal dot on the display for the preceding character. Caution, the text is written from right-to-left, if the text is shorter than 2 characters, the remaining left-most character on the display remain unchanged! Examples: EXEC_SEND_MIDI_MCU assignmentx|AP Displays ‘AP‘ on the assignment display. Update the LCD display (“lcd”) The MCU LCD display contains 2 lines having 55 resp. 56 characters each (2 x 56 = 112 characters maximum). Typically there are 7 displayed characters per channel (with the exception on certain controllers of channel 8, which is limited to displaying the first 6 characters, internally however, the LCD always stores 2 x 56 characters). A line wrap is automatically carried out, if the text written to the upper line ‘overflows’. Syntax: EXEC_SEND_MIDI_MCU lcd|line|pos|text[|length] EXEC_SEND_MIDI2_MCU lcd|line|pos|text[|length] Parameters: line: (int) line (0=upper line, 1=lower line) pos: (int) pos (0=1st char...55=last of line) text: (string) text (max. 112 char, 56 per line, capped to 112 if needed) length: optional, (int) length (1...112 right-pads/truncates the text to length, 0=none) Example: EXEC_SEND_MIDI_MCU lcd|1|0|${outputmixer1name}|7 Writes the name of the 1st output mixer channel to the lower line of the display at position 0 (left most) and truncates or right-pads the mixer name to a total length of 7 characters. Device Query (“devicequery”) 314 RADIO42 Confidential APPENDIX Sends a device query command to the Midi controller. Syntax: EXEC_SEND_MIDI_MCU devicequery EXEC_SEND_MIDI2_MCU devicequery Parameters: none Go Offline (“gooffline”) Once the connection between the Midi controller and ProppFrexx has been made, it stays in online mode until it receives a Go Offline message. This command is typically never needed. Syntax: EXEC_SEND_MIDI_MCU gooffline EXEC_SEND_MIDI2_MCU gooffline Parameters: none Version Request (“versionrequest”) Requests the version information from the Midi controller. This command is typically never needed. Syntax: EXEC_SEND_MIDI_MCU versionrequest EXEC_SEND_MIDI2_MCU versionrequest Parameters: none Reset Fader (“resetfader”) Sets all faders to minimum (sends all faders to the bottom of their throw). Syntax: EXEC_SEND_MIDI_MCU resetfader EXEC_SEND_MIDI2_MCU resetfader Parameters: none Reset LED (“resetled”) All LEDs off (turns off all LEDs on MCU). Syntax: EXEC_SEND_MIDI_MCU resetled EXEC_SEND_MIDI2_MCU resetled Parameters: none Reset Reboot (“resetreboot”) Reset (re-boots the MCU into offline mode). This command is typically never needed. RADIO42 Confidential 315 ProppFrexx ONAIR Syntax: EXEC_SEND_MIDI_MCU resetreboot EXEC_SEND_MIDI2_MCU resetreboot Parameters: none Configuration (“config”) Used to configure the MCU with certain default values. Syntax: EXEC_SEND_MIDI_MCU config|what|p1|p2 EXEC_SEND_MIDI2_MCU config|what|p1|p2 Parameters: what: (string) the setting to configure… transport : configure the transport button click p1: 0=no transport button click, 1=transport button click p2: not used lcd : configure the LCD back light p1: 0=LCD back light off, 1...127=back light on with time out in min. p2: not used touch : configure the touchless movable faders p1: 0=movement only if touched, 1=also if not recognized as touched p2: not used sensitivity : configure the faders touch sensitivity p1: fader id (0...7 or 8=master) p2: touch sensitivity (0...5) gmeter : configure the global LCD meter mode p1: 0=horizontal; 1=vertical p2: not used cmeter : configure the channel meter mode p1: channel id (0...7) p2: mode (0...7) 0=all off 1=enable signal LED 2=enable peak hold display (horizontal only) 4=enable level meter on LCD 3=enable signal LED and peak hold display 5=enable level meter on LCD and enable signal LED 6=enable level meter on LCD and peak hold display 7=enable all p1: (int) see above p2: (int) see above Example 1: EXEC_SEND_MIDI_MCU config|transport|0 Turns off the transport button click. Example 2: EXEC_SEND_MIDI_MCU config|lcd|15 Turns on the LCD back light with a time out of 15 minutes. 316 RADIO42 Confidential APPENDIX Example 3: EXEC_SEND_MIDI_MCU config|touch|1 Configure the faders, so that they send movement messages also if not recognized as touched (e.g. if moved with a pencil or finger nail). Example 4: EXEC_SEND_MIDI_MCU config|sensitivity|0|3 Configure the 1st fader touch sensitivity to 3 (which is the default). Control Surface Switch/LED IDs The following IDs (hex values in brackets) might be used when either receiving a Mackie Control Universal midi message (a switch was pressed or released) or to enable/disable the related LED. Received (Switch) Midi Short Message: Status: 144 (0x90) Data1: ID (see table below) Data2: 127 (0x7F) = switch/fader pressed; 0 (0x00) = switch/fader released Send (LED) Midi Short Message: Status: 144 (0x90) Data1: ID (see table below) Data2: 127 (0x7F) = LED On; 0 (0x00) = LED Off ID 0 1 2 3 4 5 6 7 8 9 10 11 12 13 14 15 16 17 18 19 20 21 22 23 24 25 26 27 28 29 30 31 (hex) (0x00) (0x01) (0x02) (0x03) (0x04) (0x05) (0x06) (0x07) (0x08) (0x09) (0x0A) (0x0B) (0x0C) (0x0D) (0x0E) (0x0F) (0x10) (0x11) (0x12) (0x13) (0x14) (0x15) (0x16) (0x17) (0x18) (0x19) (0x1A) (0x1B) (0x1C) (0x1D) (0x1E) (0x1F) Switch • • • • • • • • • • • • • • • • • • • • • • • • • • • • • • • • LED • • • • • • • • • • • • • • • • • • • • • • • • • • • • • • • • Name/Function REC/RDY REC/RDY REC/RDY REC/RDY REC/RDY REC/RDY REC/RDY REC/RDY SOLO SOLO SOLO SOLO SOLO SOLO SOLO SOLO MUTE MUTE MUTE MUTE MUTE MUTE MUTE MUTE SELECT SELECT SELECT SELECT SELECT SELECT SELECT SELECT RADIO42 Confidential Ch. 1 Ch. 2 Ch. 3 Ch. 4 Ch. 5 Ch. 6 Ch. 7 Ch. 8 Ch. 1 Ch. 2 Ch. 3 Ch. 4 Ch. 5 Ch. 6 Ch. 7 Ch. 8 Ch. 1 Ch. 2 Ch. 3 Ch. 4 Ch. 5 Ch. 6 Ch. 7 Ch. 8 Ch. 1 Ch. 2 Ch. 3 Ch. 4 Ch. 5 Ch. 6 Ch. 7 Ch. 8 317 ProppFrexx ONAIR ID 32 33 34 35 36 37 38 39 40 41 42 43 44 45 46 47 48 49 50 51 52 53 54 55 56 57 58 59 60 61 62 63 64 65 66 67 68 69 70 71 72 73 74 75 76 77 78 79 80 81 82 83 84 85 318 (hex) (0x20) (0x21) (0x22) (0x23) (0x24) (0x25) (0x26) (0x27) (0x28) (0x29) (0x2A) (0x2B) (0x2C) (0x2D) (0x2E) (0x2F) (0x30) (0x31) (0x32) (0x33) (0x34) (0x35) (0x36) (0x37) (0x38) (0x39) (0x3A) (0x3B) (0x3C) (0x3D) (0x3E) (0x3F) (0x40) (0x41) (0x42) (0x43) (0x44) (0x45) (0x46) (0x47) (0x48) (0x49) (0x4A) (0x4B) (0x4C) (0x4D) (0x4E) (0x4F) (0x50) (0x51) (0x52) (0x53) (0x54) (0x55) Switch • • • • • • • • • • • • • • • • • • • • • • • • • • • • • • • • • • • • • • • • • • • • • • • • • • • • • • LED • • • • • • • • • • • • • • • • • • Name/Function V-Select V-Select V-Select V-Select V-Select V-Select V-Select V-Select ASSIGNMENT: ASSIGNMENT: ASSIGNMENT: ASSIGNMENT: ASSIGNMENT: ASSIGNMENT: FADER BANKS: FADER BANKS: FADER BANKS: FADER BANKS: FLIP GLOBAL VIEW NAME/VALUE SMPTE/BEATS F1 F2 F3 F4 F5 F6 F7 F8 GLOBAL VIEW: GLOBAL VIEW: GLOBAL VIEW: GLOBAL VIEW: GLOBAL VIEW: GLOBAL VIEW: GLOBAL VIEW: GLOBAL VIEW: SHIFT OPTION CONTROL CMD/ALT AUTOMATION: AUTOMATION: AUTOMATION: AUTOMATION: AUTOMATION: GROUP UTILITIES: UTILITIES: UTILITIES: UTILITIES: MARKER NUDGE RADIO42 Confidential Ch. 1 Ch. 2 Ch. 3 Ch. 4 Ch. 5 Ch. 6 Ch. 7 Ch. 8 TRACK SEND PAN/SURROUND PLUG-IN EQ INSTRUMENT BANK Left BANK Right CHANNEL Left CHANNEL Right MIDI TRACKS INPUTS AUDIO TRACKS AUDIO INSTRUMENT AUX BUSSES OUTPUTS USER READ/OFF WRITE TRIM TOUCH LATCH SAVE UNDO CANCEL ENTER APPENDIX ID (hex) Switch LED 86 (0x56) • • 87 (0x57) • • 88 (0x58) • • 89 (0x59) • • 90 (0x5A) • • 91 (0x5B) • • 92 (0x5C) • • 93 (0x5D) • • 94 (0x5E) • • 95 (0x5F) • • 96 (0x60) • 97 (0x61) • 98 (0x62) • 99 (0x63) • 100 (0x64) • • 101 (0x65) • • 102 (0x66) • 103 (0x67) • 104 (0x68) • 105 (0x69) • 106 (0x6A) • 107 (0x6B) • 108 (0x6C) • 109 (0x6D) • 110 (0x6E) • 111 (0x6F) • 112 (0x70) • 113 (0x71) • 114 (0x72) • 115 (0x73) • 118 (0x76) • •=applicable; -=not applicable Name/Function CYCLE DROP REPLACE CLICK SOLO REWIND FAST FWD STOP PLAY RECORD Cursor Up Cursor Down Cursor Left Cursor Right Zoom Scrub User Switch User Switch Fader Touch Fader Touch Fader Touch Fader Touch Fader Touch Fader Touch Fader Touch Fader Touch Fader Touch SMPTE LED BEATS LED RUDE SOLE Relay Click RADIO42 Confidential A B Ch. 1 Ch. 2 Ch. 3 Ch. 4 Ch. 5 Ch. 6 Ch. 7 Ch. 8 Master 319