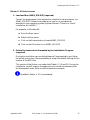
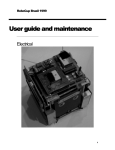
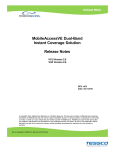
1
Introduction The purpose of this guide is to provide instructions for installing the Veterans Health Information Systems and Technology Architecture (VISTA) Remote Procedure Call (RPC) Broker (also referred to as "Broker") Version 1.1. Various symbols are used throughout the documentation to alert the reader of special information. The following table gives a description of each of these symbols: Symbol Description Used to inform the reader of general information including references to additional reading material Used to caution the reader to take special notice of critical information Used to inform the reader of specific instructions for virgin installations only Table 1: Documentation Symbol Descriptions This version of the Broker provides programmers with the capability to develop new VISTA client/server software using the Broker Delphi component (i.e., TRPCBroker) in the 32-bit environment. When completely installed, this distribution of the Broker will create a separate Broker Development Kit (BDK) directory (i.e., BDK32). To develop VISTA applications in a 32-bit environment you must have Delphi V. 2.0 or greater. This version of the RPC Broker component will not allow you to develop applications in Delphi V. 1.0. However, the Broker routines on the M server will continue to support VISTA applications previously developed in the 16bit environment. Please note that version 1.1 of the Broker supports Delphi V. 3.0 as well as Delphi V. 2.0. However, the next version of the Broker will no longer provide support for Delphi V. 2.0. Because the Broker is run on both the client and the server, the RPC Broker installation is a two-part process involving both the client workstation and the M server. September 1997 RPC Broker V. 1.1 Installation Guide 1 Introduction The RPC Broker comprises the following: • RPC Broker Delphi TRPCBroker Component (Client) For a complete description of the RPC Broker component, please refer to the Online RPC Broker Developer's Guide (i.e., BROKER.HLP). • BAPI32.DLL (Client) The BAPI32.DLL contains all of the 32-bit Broker DLL functions. It provides an interface to the Broker component. For a complete description of the RPC Broker Dynamic Link Library (DLL) functions, please refer to the Online RPC Broker Developer's Guide (i.e., BROKER.HLP). • RPC Broker Diagnostic/Debugging Tools (Client) For a complete description of the RPC Broker diagnostic/debugging tool, please refer to the Chapter 3, "Troubleshooting," topic in the RPC Broker V. 1.1 Systems Manual. • RPC Broker Routines (Server) For a complete list of RPC Broker routines, please refer to the "Routine List" chapter in the RPC Broker V. 1.1 Technical Manual. • ^XWB Global (Server) The ^XWB global stores the REMOTE PROCEDURE file (#8994) and the new RPC BROKER SITE PARAMETERS file (#8994.1). • The REMOTE PROCEDURE file contains the remote procedure calls (RPCs) used by the RPC Broker. • The RPC BROKER SITE PARAMETERS file holds the site parameters for this installation of the RPC Broker. It will have only one entry: the domain name of the installation site. For a complete description of these files, please refer to the "File List" chapter in the RPC Broker V. 1.1 Technical Manual. For a complete description of RPCs, please refer to the Online RPC Broker Developer's Guide (i.e., BROKER.HLP). 2 RPC Broker V. 1.1 Installation Guide September 1997 Introduction The Kernel Installation and Distribution System (KIDS) will be used to install the server portion of the RPC Broker. For more information on KIDS please refer to the KIDS documentation in HTML format on the Kernel Home Page at the following web address: http://www.vista.med.va.gov/softserv/infrastr.uct/kernel/docs/kids/ kids_index.html Readers who wish to learn more about the RPC Broker should consult these related materials: • RPC Broker V. 1.1 Release Notes • RPC Broker V. 1.1 Systems Manual • RPC Broker V. 1.1 Technical Manual • RPC Broker V. 1.1 Getting Started with the Broker Development Kit (written for programmers) • Online RPC Broker Developer's Guide (i.e., BROKER.HLP, designed for programmers) • RPC Broker Home Page at the following web address: http://www.vista.med.va.gov/softserv/infrastr.uct/broker/index.html This site contains additional information and documentation (e.g., Frequently Asked Questions [FAQs]) available in Hypertext Markup Language (HTML). Broker documentation is made available online, on paper, and in Adobe Acrobat Portable Document Format (.PDF). The .PDF documents must be read using the Adobe Acrobat Reader (i.e., ACROREAD.EXE), which is freely distributed by Adobe Systems Incorporated at the following web address: http://www.adobe.com/ To load the Reader, run the .EXE file (i.e., ACROREAD.EXE) and follow the online installation instructions. Once you have completed the installation of the Reader, you can now open any of the .PDF documents on the programmer client workstation. September 1997 RPC Broker V. 1.1 Installation Guide 3 Introduction For more information on the use of the Adobe Acrobat Reader, please refer to the "Adobe Acrobat Quick Guide" at the following web address: http://www.vista.med.va.gov/softserv/infrastr.uct/acrobat/index.html 4 RPC Broker V. 1.1 Installation Guide September 1997 Installing the RPC Broker V. 1.1 PRELIMINARY CONSIDERATIONS Prior to the installation of the RPC Broker V. 1.1, certain environmental requirements for both the M server and the client workstation must be satisfied. These requirements are described below. M Server Requirements The following minimum software tools are required on your M server in order to install and use the RPC Broker: One of the following operating systems: • Digital Standard M (DSM) V6.3-031 for OpenVMS AXP or greater • InterSystems OpenM for NT version 7 The RPC Broker installation and configuration procedures for OpenM are exactly the same as for DSM, except where indicated. • Micronetics Standard M (MSM) for Windows NT, V. 4.3 or greater September 1997 RPC Broker V. 1.1 Installation Guide 5 Installing the RPC Broker V. 1.1 A development Test and a Production account for the Broker software. The account(s) must contain the fully patched versions of Kernel V. 8.0, Kernel Toolkit V. 7.3, and VA FileMan V. 21.0. These packages must be properly installed and fully patched prior to installing the RPC Broker server software distribution. Patches must be installed in published sequence: • Kernel V. 8.0 Install Patch #59 (i.e., XU*8*59), if you haven't already installed it, after you have installed the RPC Broker V. 1.1. • Kernel Toolkit V. 7.3 • VA FileMan V. 21.0 Network communications software Your server needs to have TCP/IP running. 6 RPC Broker V. 1.1 Installation Guide September 1997 Installing the RPC Broker V. 1.1 Client Workstation Requirements The following minimum hardware and software tools are required on your client workstation in order to install and use the RPC Broker: 80x86-based client workstation One of the following 32-bit operating systems: • Microsoft Windows 95 • Microsoft Windows NT Workstation V. 3.51 or greater The VA has made the decision to go to a 32-bit Microsoft Windows environment. Therefore, this version of the Broker will not operate on Windows 3.1 or Windows 3.1 with WIN32S. Network communications software The Broker requires networked client workstations running Microsoft's native TCP/IP stack. Currently only Winsock compliant TCP/IP protocol is supported on the LAN or remotely as Point-to-Point Protocol (PPP) or Serial Line Internet Protocol (SLIP). You must use RAS (Remote Access Service) or Dialup Networking to connect to the server using PPP or SLIP. For the setup of RAS or Dialup Networking please refer to the appropriate operating system's documentation. For more information on telecommunications support, please visit the Telecommunications Support Office Home Page at the following address: http://vaww.va.gov/tso/default.htm Borland's Delphi V. 2.0 or greater (programmer workstations only) Only required on workstations that will be used for development of 32bit VISTA client/server applications. September 1997 RPC Broker V. 1.1 Installation Guide 7 Installing the RPC Broker V. 1.1 Skills required to perform the installation are listed below. Instructions for performing these functions are provided in vendor-supplied operating system manuals as well as VISTA publications. DSM for OpenVMS sites should refer to the most recent Computer Operations Management and Procedures for AXP Systems (COMPAS) manual. OpenM sites should refer to the "Configuring OpenM" chapter in the VISTA-NT Conversion Checklist. MSM sites should refer to the most recent 486 Cookbook and MSM System Managers Guide. You need to know how to do the following: 8 • Log onto the system [both the client workstation and the M server system console] • Back up the system [both the client workstation and the M server] • Create directories on the host file system [client workstation only] • Copy files using commands of the host file system [both the client workstation and the M server] • Load routines from: diskettes, tapes, and/or host files [both the client workstation and the M server] • Switch User Class Identification (UCI) from Manager (MGR) to Production (VAH) [server only] • Enable/Disable routine mapping and journaling [server only] • Manage globals, including global placement, protection, and translation [server only] • Run a system status and restore a job [server only] RPC Broker V. 1.1 Installation Guide September 1997 Installing the RPC Broker V. 1.1 ADVANCE PREPARATION Items listed in the Advance Preparation section are tasks that need to be performed in order for the RPC Broker to install successfully. These tasks, however, should be performed prior to the main installation of the RPC Broker. They can be performed without disabling access to the system or impacting the running system (with the possible exception of backing up the system). 1. Confirm Distribution Files for the RPC Broker The RPC Broker V. 1.1 software and documentation distribution consists of the following files: File Name Approx. Size XWB_DFLT.INI 1KB (ASCII file) XWB1_1IG.PDF Initialization file: Used for non-interactive installation of the Broker on end-user client workstations (client file). 196KB Installation Guide to be used in conjunction with the XWB1_1RM.TXT Readme text file (client file). 107KB A KIDS-based distribution of server software (server file): (Binary file) XWB1_1.KID Description (ASCII file) 1 Global (^XWB) - 2 files 11 Server Routines XWB1_1RM.TXT 5KB (ASCII file) XWB1_1WS.EXE (Binary file) 679KB A Readme text file providing any preinstallation instructions, last minute changes, new instructions, and additional information to supplement the manuals. Read all sections of this file prior to the installation of the Broker (client file). A self-installing executable for the enduser client workstation that contains the following (client file): Software: Client files for the 32-bit operating system including stand-alone Help files Table 2: RPC Broker File Distribution Information September 1997 RPC Broker V. 1.1 Installation Guide 9 Installing the RPC Broker V. 1.1 Table 2 (continued): File Name Approx. Size XWB1_1PG.EXE (Binary) 1.7MB Description A self-installing executable for the programmer client workstation that contains the following development tools (client file): Software: Client files for the RPC Broker Development Kit (BDK) Documentation: Help files to be compiled with Delphi's Help for the 32-bit operating system (i.e., Delphi V. 2.0 or greater) Documentation Files (Adobe Acrobat .PDF format) Table 2: RPC Broker File Distribution Information For a complete listing of client and server files, please refer to the "File List" chapter in the RPC Broker V. 1.1 Technical Manual. For security reasons, Broker source code is not being distributed with this release of the RPC Broker. However, source code for the Broker Example program (i.e., BrokerExampleFrm.PAS) is included. The RPCBI.DLL and Client Manager (i.e., CLMAN.EXE) previously distributed and installed in the vista/broker directory on the client workstation (i.e., via Broker V. 1.0) are not used by this version of the Broker. However, they should not be removed. Previous 16-bit Broker-based applications (e.g., PCMM) still require the RPCBI.DLL and Client Manager. 10 RPC Broker V. 1.1 Installation Guide September 1997 Installing the RPC Broker V. 1.1 2. Save Broker Routines and Global as a Safeguard Before the Installation You should save the Broker routines and global (i.e., XWB namespace) on the M server prior to performing the main RPC Broker installation. It is best to save the Broker routines and global immediately prior to performing the RPC Broker main installation. If this is a virgin installation proceed directly to Step 3. 3. Place the ^XWB Global The RPC Broker V. 1.1 contains one global, ^XWB. This global is used by the RPC Broker to store the REMOTE PROCEDURE file (#8994) and the RPC BROKER SITE PARAMETERS file (#8994.1). 4. Review Global Protection, Translation, and Journaling Check the global protection, translation, and journaling characteristics of the RPC Broker ^XWB global on your system. An outline of a possible scheme for the management of the Broker global is presented in Table 3. Protection Global Name DSM for OpenVMS OpenM ^XWB System: RWD Owner: RWD System: RWD World: RW Group: N World: RWD Group: RW World: N Group: RWD User: RW Network: RWD User: RWD MSM-DOS Translate? Journal? YES NO Table 3: RPC Broker Global Information This global has the potential to be read-intensive as more and more remote procedures are added to it in the future. September 1997 RPC Broker V. 1.1 Installation Guide 11 Installing the RPC Broker V. 1.1 Step 4 (continued): For DSM and OpenM Systems: It would be best to translate the global to a volume set other than ROU. In order for translation to take effect on DSM and OpenM systems, DSM and OpenM must be rebooted. The ^XWB global, for the most part (except during the addition of new applications), will be static, so journaling can be disabled if so desired. Cookbook recommendations should also be consulted regarding journaling, translation, and replication: • DSM for OpenVMS sites should consult the most recent Computer Operations Management and Procedures for AXP Systems (COMPAS) manual. • OpenM sites should refer to the "Configuring OpenM" chapter in the VISTA-NT Conversion Checklist. The information here may not apply. For MSM Systems: It would be best to translate the global to a file server Cookbook recommendations should also be consulted. MSM sites should consult the most recent 486 Cookbook and MSM System Managers Guide for instructions and recommendations regarding journaling, translation, and replication; the information here may not apply. 12 RPC Broker V. 1.1 Installation Guide September 1997 Installing the RPC Broker V. 1.1 MAIN INSTALLATION PROCEDURES The installation of the RPC Broker is a two-part process involving both your client workstation and M server. Each part of the installation consists of a few basic steps that are described below. There are two methods of installing the RPC Broker on the client workstation: • Interactive – user input required • Non-interactive – "silent," no user input required The installation procedures for these methods are described separately. Please note that the client workstation installation does more than copy files into directories. Specifically, entries are made into the Windows Registry by referencing existing .INI files (e.g., VISTA.INI). Thus, simply doing a mass copy of files from a server to various client workstations is insufficient. We strongly recommend the following: 1. Install the client software on at least one client workstation prior to installing the server software. Thus, the PDF documentation files will be available for consultation. The PDF documentation is only available through a programmer workstation installation (i.e., XWB1_1PG.EXE) or the RPC Broker Home Page at the following web address: http://www.vista.med.va.gov/softserv/infrastr.uct/broker/index.html 2. Install the server software in a Test account prior to installing it in a Production account. In addition to the interactive and non-interactive end-user client workstation installation instructions, programmer client workstations require additional steps be taken to fully install the RPC Broker Development Kit (BDK). These additional installation instructions are found in the "Programmer Client Workstation Installation Instructions" topic that follows. September 1997 RPC Broker V. 1.1 Installation Guide 13 Installing the RPC Broker V. 1.1 14 RPC Broker V. 1.1 Installation Guide September 1997 Installing the RPC Broker V. 1.1 Interactive Installation Instructions for End-User Client Workstations 1. START WINDOWS (REQUIRED) Start Windows if it is not already running on the end-user client workstation. Prior to beginning the installation, however, we recommend you shut down all other Windows-based applications running on the workstation. Specifically, you must not be running the Broker Client Agent or any application that uses the Broker during the installation. 2. LOAD AND RUN XWB1_1WS.EXE (REQUIRED) To start the interactive end-user client workstation installation setup program, run XWB1_1WS.EXE. Follow the procedures on how to run a program as described in your operating system Systems Manual. For example, in Windows 95: a. Go to the Start menu b. Select the Run option c. Click on the Browse button to locate XWB1_1WS.EXE d. Click on the OK button to run XWB1_1WS.EXE September 1997 RPC Broker V. 1.1 Installation Guide 15 Installing the RPC Broker V. 1.1 3. FOLLOW THE INSTRUCTIONS PRESENTED BY THE INSTALLATION PROGRAM (REQUIRED) During the installation various dialog boxes will be presented to you, please follow the online instructions. We strongly recommend the following: • When prompted to accept the default Broker Directories, click on the OK button. This version of the Broker runs in the 32-bit environment. Therefore, we strongly recommend you load it in a separate directory from the previously distributed 16-bit version of the Broker. • When given the option to always start the Broker Client Agent, click on the "Yes" button. Thus, it will automatically begin running when starting up the Windows operating system. 4. RESTART WINDOWS (RECOMMENDED) After completing the required steps, it is recommended that you restart Windows so that the latest version of the Broker Client Agent is running. 5. MODIFICATION OF THE HOSTS FILE (OPTIONAL) The HOSTS file is an ASCII text file that contains a list of the servers and their IP addresses. If IRM wishes to add, modify, or delete servers and IP addresses to be used by the Broker, please refer to the "HOSTS File" topic in Chapter 1 of the RPC Broker V. 1.1 Systems Manual. 6. ADDING LISTENERS/PORTS TO THE REGISTRY (OPTIONAL) If IRM wishes to add, modify, or delete servers and ports to be used by the Broker, please refer to the "Edit Broker Servers Program" topic in Chapter 1 of the RPC Broker V. 1.1 Systems Manual. *** You have now completed the RPC Broker installation on the end-user client workstation *** 16 RPC Broker V. 1.1 Installation Guide September 1997 Installing the RPC Broker V. 1.1 Non-Interactive Installation Instructions for End-User Client Workstations 1. START WINDOWS (REQUIRED) Start Windows if it is not already running on the end-user client workstation. Prior to beginning the installation, however, we recommend you shut down all other Windows-based applications running on the workstation. Specifically, you must not be running the Broker Client Agent or any application that uses the Broker during the installation. 2. MODIFY THE XWB_DFLT.INI FILE FOR SITE-SPECIFIC SETTINGS (OPTIONAL) The non-interactive installation uses entries in the XWB_DFLT.INI file when installing the Broker software. This file must be in the same directory from which you run XWB1_1WS.EXE. Prior to the installation, installers can use a text editor (e.g., Microsoft Notepad) to edit this file and change the default settings for the following entries: • BrokerDirectory - Broker client files directory location The default Broker client files directory is as follows: c:\Program Files\Vista\Broker If you wish to locate the Broker client files into a different directory, edit this entry to reflect the directory of your choice. • MakeBackUps - Backup your Broker files This is a Yes or No entry. The default answer is Yes, automatically backs up Broker client files into the directory specified in BackUpDirectory. • BackUpDirectory - Backup Broker client files directory location The default Broker backup client files directory is as follows: c:\Program Files\Vista\Broker\Backup If you wish to locate the Broker backup client files into a different directory, edit this entry to reflect the directory of your choice. • AutoStartClientAgent - Automatic startup of the Client Agent September 1997 RPC Broker V. 1.1 Installation Guide 17 Installing the RPC Broker V. 1.1 The Version entry in the XWB_DFLT.INI file should be 1.1. Do not edit this entry. 3. LOAD AND RUN XWB1_1WS.EXE WITH SWITCHES (REQUIRED) To start the non-interactive end-user client workstation installation setup program, run XWB1_1WS.EXE with switches: /S AUTO. Follow the procedures on how to run a program as described in your operating system Systems Manual. For example, in Windows 95: a. Go to the Start menu b. Select the Run option c. Click on the Browse button to locate XWB1_1WS.EXE d. Add the following switches after the executable in the Open box: /S AUTO e. Click on the OK button to run XWB1_1WS.EXE /S AUTO To complete the non-interactive installation, please refer to Steps 4 – 6 listed under the "Interactive Installation Instructions for EndUser Client Workstations" topic previously listed. 18 RPC Broker V. 1.1 Installation Guide September 1997 Installing the RPC Broker V. 1.1 Programmer Client Workstation Installation Instructions The programmer client workstation installation should only be done after the end-user client workstation installation has completed successfully. Please refer to the "Interactive (or Non-Interactive) Installation Instructions for End-User Client Workstations" topic(s) previously listed. The following steps only apply to those workstations that will be used for development of 32-bit VISTA client/server applications (i.e., Broker Development Kit [BDK]). This version of the Broker has been compiled and tested in both Delphi V. 2.0 and 3.0. Installation instructions for both versions of Delphi are included. DELPHI V. 2.0 INSTRUCTIONS 1. Load and Run XWB1_1PG.EXE (required) To start the programmer client workstation installation setup program, run XWB1_1PG.EXE. Follow the procedures on how to run a program as described in your operating system Systems Manual. (There is no "silent" installation for the BDK.) For example, in Windows 95: a. Go to the Start menu b. Select the Run option c. Click on the Browse button to locate XWB1_1PG.EXE d. Click on the OK button to run XWB1_1PG.EXE 2. Follow the Instructions Presented by the Installation Program (required) During the installation various dialog boxes will be presented to you, follow the online instructions. We recommend you accept the default settings for the location of the BDK files. September 1997 RPC Broker V. 1.1 Installation Guide 19 Installing the RPC Broker V. 1.1 Step 2 (continued): This version of the Broker runs under both Delphi V. 2.0 and 3.0. During the installation you will be given the opportunity to include the necessary files for development under either or both of these environments. For Delphi V. 2.0, deselect the D3 box and check the D2 box. By default, Delphi V. 3.0 is pre-selected. You will also be given the opportunity to load all or a portion of the Broker documentation to the newly created BDK32\DOC directory. The following documentation files are included: • RPC Broker V. 1.1 Release Notes (XWB1_1RN.PDF) • RPC Broker V. 1.1 Installation Guide (XWB1_1IG.PDF) • RPC Broker V. 1.1 Systems Manual (XWB1_1SM.PDF) • RPC Broker V. 1.1 Technical Manual (XWB1_1TM.PDF) • RPC Broker V. 1.1 Getting Started with the Broker Development Kit (XWB1_1DG.PDF) • Online RPC Broker Developer's Guide (BROKER.HLP) By default, the Online RPC Broker Developer's Guide is preselected. You may choose to only load the documentation by unchecking all other boxes except the Documentation box. 3. Start Delphi V. 2.0 (required) Run Delphi and close any open projects. 20 RPC Broker V. 1.1 Installation Guide September 1997 Installing the RPC Broker V. 1.1 4. Install/Update the TRPCBroker Component Files in Delphi (required) If this is a virgin installation proceed directly to Step 4b. a. If you are upgrading from a previous version of the Broker, from the Delphi menu, select the following: Component | Install… Remove any of the previous versions of the following Broker files from the Installed Units: TRPCB.DCU RPCBEDTR.DCU VCEDIT.DCU (if present) To remove these files, perform the following steps in sequence for each file: 1. In the "Install…" dialog box, verify the specific directory is listed in the Search path directory (i.e., …\BDK32\D2) and the file(s) to be removed are listed in the installed units (i.e., TRPCB.DCU, RPCBEDTR.DCU, or VCEDIT.DCU). You should also update the Search path and remove any old Broker directories. 2. Choose a file and click on the Remove button. When you have removed all of the files, click on the OK button in the "Install…" dialog box. Proceed to Step 4b to add in the new versions of these files. September 1997 RPC Broker V. 1.1 Installation Guide 21 Installing the RPC Broker V. 1.1 Step 4 (continued): b. To add in components, select the following option from the Delphi menu: Component | Install… Add the following Broker files to the Installed Units: TRPCB.DCU RPCBEDTR.DCU To add these files, perform the following steps in sequence for each file: 1. In the "Install…" dialog box, verify the specific directory is listed in the Search path directory (i.e., …\BDK32\D2) and click on the Add button. You should also update the Search path and remove any old Broker directories. 2. In the "Add Module" dialog box, click on the Browse button and navigate to the 32-bit Delphi V. 2.0 Broker directory (i.e., …\BDK32\D2) and set the "Files of type" to DCU. 3. Select the desired file to be added (i.e., TRPCB.DCU or RPCBEDTR.DCU). 4. Click on the Open button in the "Add Module" dialog box. When you have added both files, click on the OK button in the "Install…" dialog box. Answer "No" to any Delphi prompts to save the project. (Since you aren't actually creating a project at this time, no data will be lost.) 22 RPC Broker V. 1.1 Installation Guide September 1997 Installing the RPC Broker V. 1.1 Step 4 (continued): Delphi automatically rebuilds the Delphi Component Palette creating/updating a Kernel page tab with the RPC Broker component (i.e., TRPCBroker) as well as any previously installed components: TRPCBroker 32 Bit Component on the Kernel Page Tab in Delphi Delphi V. 2.0 Component Palette right scroll arrow key (You may need to select this to view the Kernel page tab.) Figure 1: Kernel page tab on the Delphi V. 2.0 Component Palette 5. Install the Broker Help Files with Delphi's Help (recommended) This version of the RPC Broker provides context-sensitive help. By merging the RPC Broker Component help with Delphi's help, you are able to get context-sensitive help on the RPC Broker component (i.e., TRPCBroker) and its properties while working in Delphi. Simply make the Broker component or property the active object in Delphi, and press the F1 key. In order to integrate the Broker context-sensitive help with the Delphi context-sensitive help on the programmer client workstation, you should perform the following steps: a. Exit Delphi, if it is running on your machine. b. Copy the BROKER.CNT, BROKER.HLP, BROKER.KWF, BROKERSM.CNT, and BROKERSM.HLP files (i.e., located in the …\BDK32\DOC directory) into the …\Delphi 2.0\HELP directory. c. Run Delphi's HELPINST.EXE program from the …\Delphi 2.0\HELP\TOOLS folder. d. From the HELPINST's File menu, choose Open. Select the \BIN subdirectory below the main DELPHI directory. Open the file DELPHI.HDX. September 1997 RPC Broker V. 1.1 Installation Guide 23 Installing the RPC Broker V. 1.1 Step 5 (continued): e. Ordinarily, several keyword files should be listed when you open DELPHI.HDX, including the following: DELPHI.KWF CWG.KWF Do not be concerned if HELPINST reports the files as "* Not Found *". Delete any previous or earlier versions of the Broker help files (e.g., BROKER.KWF): 1. Click the file once to highlight it 2. Click on the HELPINST's red "-" button to delete it 3. Answer "Yes" in the Confirm dialog box Repeat these steps for any previously loaded Broker help files that should be deleted. This process removes the old files from the Delphi list in DELPHI.HDX. f. To add in or replace the Broker help, do the following: 1. Click on the HELPINST's green "+" button 2. Select BROKER.KWF (located in the …\HELP directory) 3. Click on the OK button This process adds the latest version of the Broker keyword file into HELPINST's list of .KWF files. g. To save the changes made to the DELPHI.HDX file, choose Save from the HELPINST's file menu. This completes the merging of this help file into Delphi's help. h. Exit the HELPINST application. i. Start Delphi. On a blank form, add the TRPCBroker component from the component palette to your form. Select the TRPCBroker component on your form and press the F1 key for help. If the help for the TRPCBroker component comes up, you are all set. However, you may get the following message: "Cannot find the BROKER.HLP file. Do you want to try to find this file yourself?" 24 RPC Broker V. 1.1 Installation Guide September 1997 Installing the RPC Broker V. 1.1 Step 5 (continued): If you get this message, click YES. Navigate to the \HELP subdirectory of the main Delphi directory, choose BROKER.HLP and click on the Open button. Windows opens the help file, and the path to the help file should be remembered in the future. You can find related information about merging help into Delphi's help in Delphi's Component Writer's Guide manual (Delphi Version 2.0: pp. 77-81). After you merge the Broker help files (i.e., BROKER.HLP and BROKERSM.HLP) with Delphi's help, you may want to make a Windows icon or shortcut for the BROKER.HLP and BROKERSM.HLP files. The Broker help files contain the documentation on how to use the RPC Broker component in Delphi V. 2.0. *** You have now completed the installation of the RPC Broker component in Delphi V. 2.0 on the programmer client workstation *** September 1997 RPC Broker V. 1.1 Installation Guide 25 Installing the RPC Broker V. 1.1 26 RPC Broker V. 1.1 Installation Guide September 1997 Installing the RPC Broker V. 1.1 DELPHI V. 3.0 INSTRUCTIONS 1. Load and Run XWB1_1PG.EXE (required) To start the programmer client workstation installation setup program, run XWB1_1PG.EXE. Follow the procedures on how to run a program as described in your operating system Systems Manual. (There is no "silent" installation for the BDK.) For example, in Windows 95: a. Go to the Start menu b. Select the Run option c. Click on the Browse button to locate XWB1_1PG.EXE d. Click on the OK button to run XWB1_1PG.EXE 2. Follow the Instructions Presented by the Installation Program (required) During the installation various dialog boxes will be presented to you, follow the online instructions. We recommend you accept the default settings for the location of the BDK files. This version of the Broker runs under both Delphi V. 2.0 and 3.0. During the installation you will be given the opportunity to include the necessary files for development under either or both of these environments. By default, Delphi V. 3.0 is pre-selected. September 1997 RPC Broker V. 1.1 Installation Guide 27 Installing the RPC Broker V. 1.1 Step 2 (continued): You will also be given the opportunity to load all or a portion of the Broker documentation to the newly created BDK32\DOC directory. The following documentation files are included: • RPC Broker V. 1.1 Release Notes (XWB1_1RN.PDF) • RPC Broker V. 1.1 Installation Guide (XWB1_1IG.PDF) • RPC Broker V. 1.1 Systems Manual (XWB1_1SM.PDF) • RPC Broker V. 1.1 Technical Manual (XWB1_1TM.PDF) • RPC Broker V. 1.1 Getting Started with the Broker Development Kit (XWB1_1DG.PDF) • Online RPC Broker Developer's Guide (BROKER.HLP) By default, the Online RPC Broker Developer's Guide is preselected. You may choose to only load the documentation by unchecking all other boxes except the Documentation box. 3. Start Delphi V. 3.0 (required) Run Delphi and close any open projects. 4. Install/Update the TRPCBroker Component Files in Delphi (required) If this is a virgin installation proceed directly to Step 4b. a. If you are upgrading from a previous version of the Broker, from the Delphi menu, select the following: Component | Install Packages… Remove the previous version of the following Broker file from the Installed Units: VistaBroker.DPL 28 RPC Broker V. 1.1 Installation Guide September 1997 Installing the RPC Broker V. 1.1 Step 4a (continued): To remove this file, perform the following steps in sequence: 1. In the "Project Options" dialog box, verify that the file to be removed is listed in the Design Packages (i.e., VistaBroker.DPL). 2. Click on the Remove button. Say Yes in the confirmation dialog box. 3. Click on the OK button in the "Project Options" dialog box to remove the specific package. When you have removed the file, proceed to Step 4b to add in the new version of this file. b. To add in packages, select the following option from the Delphi menu: Component | Install Packages… Add the following Broker files to the Design Packages: VistaBroker.DPL To add this file, perform the following steps in sequence: 1. In the "Project Options" dialog box, choose the Packages tab and click on the Add button. 2. In the "Add Design Packages" dialog box, navigate to the 32-bit Delphi V. 3.0 Broker directory (i.e., …\BDK32\D3). 3. Select the desired package to be added (i.e., VistaBroker.DPL) and click on the Open button. VistaBroker.DPL should now be listed as a checked item in the list of Design Packages. 4. Click on the OK button in the "Project Options" dialog box. September 1997 RPC Broker V. 1.1 Installation Guide 29 Installing the RPC Broker V. 1.1 Step 4b (continued): Delphi automatically rebuilds the Delphi Component Palette creating/updating a Kernel page tab with the RPC Broker component (i.e., TRPCBroker) as well as any previously installed components: TRPCBroker 32 Bit Component on the Kernel Page Tab in Delphi Delphi V. 3.0 Component Palette right scroll arrow key (You may need to select this to view the Kernel page tab.) Figure 2: Kernel page tab on the Delphi V. 3.0 Component Palette 5. Install the Broker Help Files with Delphi's Help (recommended) This version of the RPC Broker provides context-sensitive help. By merging the RPC Broker Component help with Delphi's help, you are able to get context-sensitive help on the RPC Broker component (i.e., TRPCBroker) and its properties while working in Delphi. Simply make the Broker component or property the active object in Delphi, and press the F1 key. In order to integrate the Broker context-sensitive help with the Delphi context-sensitive help on the programmer client workstation, you should perform the following steps: a. Exit Delphi, if it is running on your machine. b. Copy the BROKER.CNT, BROKER.HLP, BROKERSM.CNT, and BROKERSM.HLP files (i.e., located in the …\BDK32\DOC directory) into the …\Delphi 3\HELP directory. 30 RPC Broker V. 1.1 Installation Guide September 1997 Installing the RPC Broker V. 1.1 Step 5 (continued): c. Using a text editor (e.g., Windows Notepad), open the DELPHI3.CFG file in the …\Delphi 3\HELP directory. In the "Third-Party Help" section of DELPHI3.CFG, add the following statements: :LINK BROKER.HLP Save DELPHI3.CFG. d. Delete the hidden file DELPHI3.GID in the …\Delphi 3\HELP directory: • From Windows Explorer: If you have the option turned on to view hidden files, you can select this file and then delete it. • From the command line: Use ATTRIB to change the file attribute to not hidden, then delete the following files: C:\Program Files\Borland\Delphi 3\HELP>attrib -h delphi3.gid C:\Program Files\Borland\Delphi 3\HELP>del delphi3.gid e. To access BROKER.HLP's table of contents or index, do the following: 1. Close any open help files. 2. Using a text editor, open the DELPHI3.CNT file in the ...\DELPHI 3\HELP directory. 3. In DELPHI3.CNT's Index section (top of the file), add the following line: :Index RPC Broker Developer's Guide =broker.hlp 4. In DELPHI3.CNT's Include section (bottom of the file), add the following line: :Include broker.cnt 5. Save your changes to DELPHI3.CNT and close the file. f. Start Delphi. On a blank form, add the TRPCBroker component from the component palette to your form. Select the TRPCBroker component on your form and press F1 for help. If the help for the TRPCBroker component comes up, you are all set. If you press the HELP TOPICS button, you should see the Broker manual listed as one of the Delphi manuals (see Step 5e). Also, broker topics will be available in the index and full text search tabs as well. September 1997 RPC Broker V. 1.1 Installation Guide 31 Installing the RPC Broker V. 1.1 After you merge the Broker help files (i.e., BROKER.HLP and BROKERSM.HLP) with Delphi's help, you may want to make a Windows icon or shortcut for the BROKER.HLP and BROKERSM.HLP files. The Broker help files contain the documentation on how to use the RPC Broker component in Delphi V. 3.0. *** You have now completed the installation of the RPC Broker component for Delphi V. 3.0 on the programmer client workstation *** 32 RPC Broker V. 1.1 Installation Guide September 1997 Installing the RPC Broker V. 1.1 M Server Instructions The following instructions are applicable for the Test/Production accounts in the DSM, OpenM, or MSM environments. 1. DO NOT RUN ANY CLIENT/SERVER SOFTWARE DURING THE INSTALLATION (REQUIRED) No Broker-based client/server software should be running while the Broker installation on the server is taking place. If this is a virgin installation, proceed directly to Step 5. 2. SHUT DOWN THE BROKER LISTENER ON THE SERVER (REQUIRED) Check the system status and verify if the XWBTCPL routine is running (i.e., Broker Listener). If it is running stop it. To shut down the Listener, do the following: a. Log into your M server b. Enter the following at the M prompt: >D STOP^XWBTCP(Listener port) (Typically, the Listener port is 9200.) Alternatively, after you have installed the RPC BROKER SITE PARAMETERS file (#8994.1), you can use VA FileMan to set the STATUS field in this file for the appropriate port to STOP. Assuming that TaskMan is running, the Listener will be stopped on that port. 3. SAVE SERVER BROKER ROUTINES (OPTIONAL) If you did not already save the Broker server routines in Step 2 of the Advance Preparations section, use the appropriate operating system utility to save the XWB* routines. 4. DELETE XWB* ROUTINES FROM SERVER (REQUIRED) Delete the XWB* routines to eliminate all previous copies of the XWBINITS. September 1997 RPC Broker V. 1.1 Installation Guide 33 Installing the RPC Broker V. 1.1 5. COPY XWB1_1.KID TO THE M SERVER TEST AND PRODUCTION ACCOUNTS (REQUIRED) XWB1_1.KID is the M server software in Kernel V. 8.0 KIDS format. 6. VERIFY YOU HAVE AN HFS DEVICE (REQUIRED) Verify you have a Host File Server (HFS) device in the DEVICE file (#3.5) named "HFS". If you have performed KIDS installations on your server before, you probably already have an appropriate HFS device set up. If you don't have an entry for this device, you must create one. For information on how to create an HFS device, please refer to "Chapter 18 Host Files" in the Kernel V. 8.0 Systems Manual. 7. USING KIDS, INSTALL BROKER ROUTINES AND REMOTE PROCEDURES (REQUIRED) In the PACKAGE file (#9.4), verify the NAME field (#.01) for any package with the XWB namespace. The NAME should be RPC BROKER. If the NAME is incorrect, you must change it to read RPC BROKER. If no entry exists, the KIDS install will create the entry for you. Using KIDS, load and install the Broker routines and remote procedures. Make sure you have installed all of the Kernel V. 8.0, VA FileMan V. 21.0, and Toolkit V. 7.3 patches. Install Kernel patch XU*8*59, if you haven't already installed it, after version 1.1 of the Broker. You do not need a previous version of the Broker to install this latest version. For more information on KIDS please refer to the KIDS documentation in HTML format on the Kernel Home Page at the following web address: http://www.vista.med.va.gov/softserv/infrastr.uct/kernel/docs/kids/ kids_index.html). You should have previously placed the ^XWB global containing the REMOTE PROCEDURE file (#8994) as indicated in Step 3 of the "Advance Preparation" topic in this guide. 34 RPC Broker V. 1.1 Installation Guide September 1997 Installing the RPC Broker V. 1.1 Step 7 (continued): The following is an example of a KIDS installation performed on a server at the San Francisco Chief Information Office (CIO) Field Office, the actual dialog at your site may vary: Select Systems Manager Menu Option: PROgrammer Options KIDS NTEG PG Kernel Installation & Distribution System ... Build an 'NTEG' routine for a package Programmer mode Calculate and Show Checksum Values Delete Unreferenced Options Error Processing ... Global Block Count List Global Map Pointer Relations Number base changer Routine Tools ... Test an option not in your menu Verifier Tools Menu ... Select Programmer Options Option: KIDS <RET> Kernel Installation & Distribution System Edits and Distribution ... Utilities ... Installation ... Select Kernel Installation & Distribution System Option: Installation 1 2 3 4 5 6 Load a Distribution Verify Checksums in Transport Global Print Transport Global Compare Transport Global to Current System Backup a Transport Global Install Package(s) Restart Install of Package(s) Unload a Distribution Select Installation Option: 1 <RET> Load a Distribution Enter a Host File: XWB1_1.KID KIDS Distribution saved on Jul 08, 1997@@08:37:39 Comment: RPC Broker version 1.1 September 1997 RPC Broker V. 1.1 Installation Guide 35 Installing the RPC Broker V. 1.1 Step 7, sample KIDS installation (continued): This Distribution contains Transport Globals for the following Package(s): RPC BROKER 1.1 Want to Continue with Load? YES// <RET> Loading Distribution... YES Want to RUN the Environment Check Routine? YES// <RET> RPC BROKER 1.1 Use INSTALL NAME: RPC BROKER 1.1 to install this Distribution. 1 2 3 4 5 6 Load a Distribution Verify Checksums in Transport Global Print Transport Global Compare Transport Global to Current System Backup a Transport Global Install Package(s) Restart Install of Package(s) Unload a Distribution Select Installation Option: 2 <RET> Verify Checksums in Transport Global Select INSTALL NAME: RPC BROKER 1.1 <RET> Loaded from Distribution 7/24/97@08:40:33 => RPC Broker 1.1. ;Created on Jul 08, 1997@08:37: DEVICE: HOME// <RET> Telnet terminal PACKAGE: RPC BROKER 1.1 Jul 24, 1997 8:40 am PAGE 1 -------------------------------------------------------------------- 11 Routine checked, 0 failed. 1 2 3 4 5 6 Load a Distribution Verify Checksums in Transport Global Print Transport Global Compare Transport Global to Current System Backup a Transport Global Install Package(s) Restart Install of Package(s) Unload a Distribution Select Installation Option: 6 <RET> Install Package(s) Select INSTALL NAME: RPC BROKER 1.1 <RET> Loaded from Distribution 7/24/97@08:40:33 => RPC Broker 1.1. ;Created on Jul 08, 1997@08:37: This Distribution was loaded on Jul 24, 1997@08:40:33 with header of Remote Procedure Call Broker version 1.1 ;Created on Jul 08, 1997@08:37:39 It consisted of the following Install(s): RPC BROKER 1.1 36 RPC Broker V. 1.1 Installation Guide September 1997 Installing the RPC Broker V. 1.1 Step 7, sample KIDS installation (continued): Install Questions for RPC BROKER 1.1 Incoming Files: 8994 REMOTE PROCEDURE Note: You already have the 'REMOTE PROCEDURE' File. 8994.1 RPC BROKER SITE PARAMETERS Note: You already have the 'RPC BROKER SITE PARAMETERS' File. Want to DISABLE Scheduled Options, Menu Options, and Protocols? YES// NO Enter the Device you want to print the Install messages. You can queue the install by enter a 'Q' at the device prompt. Enter a '^' to abort the install. DEVICE: HOME// <RET> Telnet terminal (Status bar is displayed here, will indicate 100% complete) RPC BROKER 1.1 Install Started for RPC BROKER 1.1 : Jul 24, 1997@08:41:53 Installing Routines: (Status bar is displayed here, will indicate 100% complete) Jul 24, 1997@08:41:54 Installing Data Dictionaries: (Status bar is displayed here, will indicate 100% complete) Jul 24, 1997@08:41:58 Installing PACKAGE COMPONENTS: Installing PRINT TEMPLATE (Status bar is displayed here, will indicate 100% complete) Installing REMOTE PROCEDURE (Status bar is displayed here, will indicate 100% complete) Installing OPTION (Status bar is displayed here, will indicate 100% complete) Jul 24, 1997@08:42 Updating Routine file... (Status bar is displayed here, will indicate 100% complete) Updating KIDS files... (Status bar is displayed here, will indicate 100% complete) RPC BROKER 1.1 Installed. Jul 24, 1997@08:42:36 (Status bar is displayed here, showing 100% complete) Install Completed September 1997 RPC Broker V. 1.1 Installation Guide 37 Installing the RPC Broker V. 1.1 Step 7 (continued): The KIDS installation of the server routines automatically verifies checksum values for you and reports any discrepancies. If you have received a patched routine set, those patched routines are identified as being off by the number of bytes that correspond to the patch and the affected routine(s) and should have been noted in a cover letter. Exceptions to this should be reported to your CIO Field Office. 8. MAKE THE NECESSARY FILE ENTRIES (REQUIRED) If you are an MSM 4.3.0 site or greater and will be using MSERVER instead of the Broker Listener or you are a DSM site not running TaskMan in a DCL context, skip to Step #8d below. For more information about the MSERVER and how to configure it, please refer to the "MSM for NT 4.3.0 MSERVER Replaces RPC Broker Listener Process" topic in the RPC Broker V. 1.1 Systems Manual. If you are an OpenM or DSM site running TaskMan in a DCL context, do the following: a. Use VA FileMan V. 21.0 to edit the BOX-VOLUME PAIR field (#.01) in the TASKMAN SITE PARAMETERS file (#14.7) for each Box-Volume pair where you plan to run the Broker Listeners. For more information on configuring TaskMan, please refer to Chapter 23, "Task Manager System Management: Configuration," in the Kernel V. 8.0 Systems Manual. b. Type the following at the programmer prompt: >S XWBCHK="ALLOW" 38 RPC Broker V. 1.1 Installation Guide September 1997 Installing the RPC Broker V. 1.1 Step 8b (continued): Invoke VA FileMan V. 21.0 using Q^DI and edit the new RPC BROKER SITE PARAMETERS file: • Enter your site domain in the DOMAIN NAME field (#.01); only one entry is allowed here. • Add all the Box-Volume pairs in the BOX-VOLUME PAIRS subfield (#.01) of the LISTENER multiple (#7) where you plan to run Broker Listeners. 1. For each Box-Volume pair enter all the ports in the PORT subfield (#.01) of the PORT multiple that you plan to use for the Listeners. 2. Also, enter the UCI in the UCI field (#1) of the PORT multiple where the Listener should run. c. For OpenM sites only, invoke VA FileMan V. 21.0 using Q^DI and review/modify the TYPE field values in the DEVICE file (#3.5) for the TCP and NULL device entries: Device TYPE Field Value TCP VIRTUAL TERMINAL NULL HOST FILE SERVER (HFS) or TERMINAL d. All sites should invoke VA FileMan V. 21.0 using Q^DI and review/modify the AUTO SIGN-ON field value in the NEW PERSON file (#200) and the KERNEL SYSTEM PARAMETERS file (#8989.3). The default value for both fields is null. These AUTO SIGN-ON fields, in conjunction with the existing multiple signon fields, give the sites control of the implementation of single signon for users in both the GUI and roll-and-scroll environments. The fields in the NEW PERSON file are checked first. If the user fields in the NEW PERSON file are null, the values in the KERNEL SYSTEM PARAMETERS file will be used. Single signon is not supported on MSM systems. All MSM sites must set the DEFAULT AUTO SIGN-ON field in the KERNEL SYSTEM PARAMETERS file (#8989.3) to Disabled. September 1997 RPC Broker V. 1.1 Installation Guide 39 Installing the RPC Broker V. 1.1 Step 8d (continued): The values in the AUTO SIGN-ON and MULTIPLE SIGN-ON fields in the NEW PERSON file take precedence over the values in the AUTO SIGN-ON and DEFAULT MULTIPLE SIGN-ON fields in the KERNEL SYSTEM PARAMETERS file. For more specific information on setting the single signon site parameters, please refer to the "Integrated Single Signon for Multiple User Sessions" topic in Chapter 1 of the RPC Broker V. 1.1 Systems Manual. 9. START THE BROKER LISTENER ON THE SERVER (REQUIRED) Version 1.1 of the RPC Broker uses an M Listener that should always be running in the background, listening to a known port. To start or monitor the Listener port (e.g., 9200), do the following: a. Log into your M server b. Enter the following at the M prompt: >D STRT^XWBTCP(Listener port) As a convention, the RPC Broker uses 9200, however, sites can choose any available port greater than 1024 (i.e., sockets 1 to 1024 are reserved for standard, well-known services such as SMTP, FTP, Telnet, etc.). Alternatively, with DSM and OpenM, you can invoke VA FileMan V. 21.0 using Q^DI and edit the new RPC BROKER SITE PARAMETERS file (#8994.1). Set the STATUS field to START and, assuming that TaskMan is running, the Listener will be started. The STATUS field will change to RUNNING. 40 RPC Broker V. 1.1 Installation Guide September 1997 Installing the RPC Broker V. 1.1 10. AUTOMATICALLY START THE BROKER LISTENER(S) (OPTIONAL) The XWB LISTENER STARTER option can be used to start one or more Broker Listeners at one time. Additionally, this option can be used to automatically start all of the Listener processes you need when TaskMan starts up, such as after the system is rebooted or configuration is restarted. For information on automatically starting the Broker Listener(s) via the XWB LISTENER STARTER option, please refer to the "Broker Listeners and Ports" topic in Chapter 1 of the RPC Broker V. 1.1 Systems Manual. 11. VERIFY THE CLIENT/SERVER INSTALLATION OF THE BROKER (RECOMMENDED) After the server installation is complete and the Listener has been started, verify that everything was installed correctly. Locate and run the new Broker diagnostic tool (i.e., RPCTEST.EXE) on the client workstation to test the client connection to the server. The installation is successful, if you can signon to the server. Follow the procedures on how to run a program as described in your operating system Systems Manual. For more information on RPCTEST.EXE, please refer to the "Test the Broker Using the RPC Broker Diagnostic Program" in Chapter 3 of the RPC Broker V. 1.1 Systems Manual. *** You have now completed the RPC Broker installation on the M server * Upon completing the installation of the RPC Broker on both the M server and the client workstation(s), you are now ready to work with the RPC Broker interface. September 1997 RPC Broker V. 1.1 Installation Guide 41 Installing the RPC Broker V. 1.1 Please note that with the release of this version of the RPC Broker, Response Time Monitor (RTM) is turned on for the Broker only. The VISN CIO Council endorses monitoring the amount of resources consumed by client/server applications that use the Broker. The anticipated use of the RPC Broker for client/server applications is not expected to impact system performance. The data collected will be used to better gauge the performance of VISTA Broker-based client/server applications. If the Response Time Global is getting too large, IRM may purge this global using the Response Time Monitor utilities. In the future, once a baseline has been established, data collection will be turned off via a Broker patch. For more specific information on Response Time Monitoring and the Response Time Global, please refer to the Kernel Toolkit V. 7.3 User Manual. 42 RPC Broker V. 1.1 Installation Guide September 1997 RPC BROKER INSTALLATION GUIDE Version 1.1 September 1997 Department of Veterans Affairs VISTA Software Development OpenVISTA Product Line Table of Contents Introduction ................................................................................................................ 1 Installing the RPC Broker V. 1.1 ............................................................................ 5 Preliminary Considerations..................................................................................... 5 M Server Requirements...................................................................................... 5 Client Workstation Requirements ..................................................................... 7 Advance Preparation................................................................................................ 9 1. Confirm Distribution Files for the RPC Broker ........................................... 9 2. Save Broker Routines and Global as a Safeguard Before the Installation .................................................................................................. 11 3. Place the ^XWB Global ............................................................................... 11 4. Review Global Protection, Translation, and Journaling ........................... 11 Main Installation Procedures ................................................................................ 13 Interactive Installation Instructions for End-User Client Workstations....... 15 1. Start Windows (required)....................................................................... 15 2. Load and Run XWB1_1WS.EXE (required) .......................................... 15 3. Follow the Instructions Presented by the Installation Program (required) ................................................................................................ 16 4. Restart Windows (recommended) .......................................................... 16 5. Modification of the HOSTS File (optional)............................................ 16 6. Adding Listeners/Ports to the Registry (optional) ................................ 16 Non-Interactive Installation Instructions for End-User Client Workstations................................................................................................ 17 1. Start Windows (required)....................................................................... 17 2. Modify the XWB_DFLT.INI file for Site-specific Settings (optional) .. 17 3. Load and Run XWB1_1WS.EXE with Switches (required) .................. 18 Programmer Client Workstation Installation Instructions ............................ 19 Delphi V. 2.0 Instructions ........................................................................... 19 1. Load and Run XWB1_1PG.EXE (required) ................................ 19 2. Follow the Instructions Presented by the Installation Program (required)...................................................................................... 19 3. Start Delphi V. 2.0 (required) ..................................................... 20 September 1997 RPC Broker V. 1.1 Installation Guide iii Table of Contents 4. Install/Update the TRPCBroker Component Files in Delphi (required)...................................................................................... 21 5. Install the Broker Help Files with Delphi's Help (recommended) ............................................................................. 23 Delphi V. 3.0 Instructions ........................................................................... 27 1. Load and Run XWB1_1PG.EXE (required) ................................ 27 2. Follow the Instructions Presented by the Installation Program (required)...................................................................................... 27 3. Start Delphi V. 3.0 (required) ..................................................... 28 4. Install/Update the TRPCBroker Component Files in Delphi (required)...................................................................................... 28 5. Install the Broker Help Files with Delphi's Help (recommended) ............................................................................. 30 M Server Instructions....................................................................................... 33 1. Do Not Run any Client/Server Software During the Installation (required) ................................................................................................ 33 2. Shut Down the Broker Listener on the Server (required) .................... 33 3. Save Server Broker Routines (optional)................................................ 33 4. Delete XWB* Routines From Server (required).................................... 33 5. Copy XWB1_1.KID to the M Server Test and Production Accounts (required) ................................................................................................ 34 6. Verify You Have an HFS Device (required) .......................................... 34 7. Using KIDS, Install Broker Routines and Remote Procedures (required) ................................................................................................ 34 8. Set the Site Parameters (required)........................................................ 38 9. Start the Broker Listener on the Server (required).............................. 40 10. Automatically Start the Broker Listener(s) (optional) ........................ 41 11. Verify the Client/Server Installation of the Broker (recommended) ... 41 iv RPC Broker V. 1.1 Installation Guide September 1997