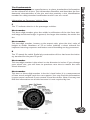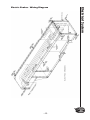
1
Wilson Trailer Company
GOOSENECK LIVESTOCK
TRAILER OWNERS MANUAL
This manual has been prepared to help you operate your new Wilson trailer
successfully, economically, and safely. Should you have any questions, we ask
that you contact a Wilson Trailer Company factory representative immediately
for a clear explanation.
We thank you for expressing your confidence in us through the purchase of
your new Wilson Gooseneck trailer.
We want you to know that it was designed to meet your specific needs for a
livestock trailer and was built for long life and low cost operation. With
regular, proper maintenance and your common sense use, we are confident
that it will do so.
Additional owner’s manuals and decal kits for this trailer are available without charge.
This manual Includes:
n
n
Certificate of Limited Warranty
Disclaimer and Exclusive Remedies to Which the Sale is Subject
MODEL NO.
SERIAL NO.
This safety alert symbol is to raise your awareness to
important messages in this manual. When you see this
symbol, be alert to the possibility of personal injury and
carefully read the message that follows.
TABLE OF CONTENTS by SECTION
GENERAL INFORMATION
Normal Trailer Operation ....................................................................4
Loading and Unloading of Livestock ..............................................4
Modification of Trailer ..........................................................................5
Table of Contents
SAFETY
Decals and Emblems..............................................................................5
Over-the-Road Safe Handling ............................................................7
Wheel Torques ........................................................................................8
Tire Safety Information..........................................................................9
Steps for Determining Correct Load Limit ......................................9
Glossary of Tire Terminology ..............................................................11
Tire Safety - Everything Rides on it....................................................17
Safety First - Basic Tire Maintenance ................................................18
Tire Safety Tips ........................................................................................25
Tire Safety Checklist................................................................................25
OPERATION
Inspection Procedure Before Trip.....................................26
Safety Chains ...........................................................................................26
Coupler Attachment .............................................................................26
Brake and Electrical Controls .............................................................27
Brake Controls.........................................................................................27
Tires ...........................................................................................................27
Gates .........................................................................................................28
Wheels and Rims ...................................................................................28
Door Locks ...............................................................................................29
Side Structure .........................................................................................29
Operating Instructions .......................................................30
Operation of Brakes .............................................................................30
Operation of Gates ...............................................................................30
Operation of Coupler ...........................................................................31
Fifth Wheel & King Pin Engagement .............................................31
-2-
CONSUMER INFORMATION
Reporting Safety Defects ......................................................................55
Keep Informed ........................................................................................55
Customer Assistance ..............................................................................55
Authorized Repair Facilities..................................................
.......56
Certificate of Limited Warranty ..........................................................64
Extended Warranty Schedule ............................................................66
Vendor Warranties ................................................................................66
Bulldog Gooseneck Coupler ..............................................................70
Square Jack, 12,000 lb ..........................................................................75
Index............................................................................................................76
-3-
Table of Contents
GENERAL MAINTENANCE
Fastenings ................................................................................................32
Floor ............................................................................................................32
Gate and Ramp Hinges ........................................................................32
Operating Slam Lock ............................................................................32
Wheel Bearings ......................................................................................33
Oil or Grease Seals..................................................................................33
Optional Oil Bath Bearings..................................................................33
Washout Notice ......................................................................................33
Brakes ....................................................................................34
Brake Adjustment ..................................................................................34
Wheels and Tires..................................................................36
Torque Requirements .............................................................................36
Electrical System ..................................................................38
Breakaway Battery Charger Instructions ........................................38
12 V Sealed Lead-Acid Battery ..........................................................39
Electric/Hyd. Brake Application - Wiring Dia.................................39
Electrical Connector - Wiring Diagram ............................................40
Electrical Junction Box ..........................................................................40
Electric Brakes - Wiring Diagram ......................................................40
Vacuum/Hydraulic Brakes - Wiring Diagram ................................41
Electric/Hydraulic Brakes - Wiring Diagram ..................................42
Electrical Troubleshooting ..................................................................43
Troubleshooting Guide ......................................................47
Troubleshooting Guide/Vacuum/Hyd. Brakes ............................47
Troubleshooting Guide/Electric Brakes ..........................................53
Normal Trailer Operation
This Wilson trailer is designed for
operation within legal highway
speed limits on reasonable road
surfaces for the type of service it
was built to perform, in accordance
with the noted weight restrictions.
Normal use means the loading,
unloading and transportation of
uniformly distributed legal loads, in a manner which does not subject the
trailer to stresses or impacts greater than imposed by reasonable use.
This trailer was built to carry cargo within the two weight ratings on the
identification plate located on the road side of the trailer near the front.
The GAWR (gross axle weight rating) is the structural capability of the lowest
rated member of the running gear component: suspension and spring
system, hub, wheels and drums, rims, bearings, brakes, axles, or tires.
The GVWR (gross vehicle weight rating) is the structural capability of the
trailer when supported by the kingpin and axles with the load uniformly
distributed throughout the cargo space.
General Information
CAUTION
The maximum load indicated on the identification plate may
not be a legal load on the highway you plan to use. States have
differing laws and regulations affecting vehicle lengths and
weights on roads that are not a part of the primary interstate
road system.
Loading and Transport of Livestock
The loading of the trailer is important! Keep the center of gravity as low as
possible. Proper placement of the larger animals should be considered.
Because load types vary, the driver needs to drive with appropriate care and
within the limits of the load.
The well being of the gooseneck livestock trailer is dependent on the stock
density, ventilation, skill of driving, and quality of roads. Frequent
inspection of livestock and careful driving cannot be overemphasized!
-4-
Any modification made to the trailer must comply with DOT and NHTSA
regulations and must not compromise the gross vehicle weight rating
(GVWR) of the trailer.
(Rev. 12-98)
WARNING
Any operation of the trailer outside the limitations stated in
this manual will void any responsibility of Wilson Trailer
Company for any of its results.
CAUTION
Personal Injury, death, and property damage may result from
improper operation or unsafe practices. Be sure to read and follow all decals and emblems carefully.
Decals and Emblems
The following section contains the decals and emblems used on Wilson
Livestock Trailers. Due to differences in configurations and equipment, your
trailer may or may not use all the decals and emblems listed. Newer trailers
may also have decals and emblems that differ from older trailers. Replace
damaged or missing decals promptly.
ABB-01505-B
AAA-05604-C
8
19
8 - 201
ABB-01505-F/G
3
H
N
T
D
TH
AAA-05604
E
L
I V
E S
T O C K
B
R
A
AAA-06891-LQ
AAA-05564
AAA-06462-CK
AAA-06891-GP
AAA-06462-BV
AAA-06891-AK
AAA-06462-BT
AAA-06462-AW
-5-
Safety
Modification of Trailer
AAA-06891-C
AAB-01545-A
AAA-06462-CD
AAA-06492-BL
AAA-06891-GT
AAA-06891-AH
AAA-06891-CZ
AAA-06891-GC
AAA-06492-BP
AAA-06462-BD
AAA-06492-BQ
AAA-06891-MA
B-02395-C*
Safety
AAA-06462-BO
(Rev. 8-15)
Note: Emblems will vary with trailer. Please check
GVWR rating when ordering emblem. Other
emblems available per trailer rating.
-6-
AAA-06891-KW
7-WAY RV
WTC 10-09 AAA-6891-KW
AAA-06891-EC
AAA-06891-KX
6-WAY RV
WTC 10-09 AAA-6891-KK
AAA-06891-EB
AAA-06891-KY
JUNCTION BOX
ELECTRIC BRAKES
WTC 06-10 AAA-6891-KK
Over-The-Road Safe Handling
IMPORTANT: Like any other vehicles, semi-trailers can tip or slide out
of control if turns are negotiated at too high a speed or when making
violent maneuvers such as abrupt lane changes or other evasive actions
to avoid obsacles.
YOU AND YOUR SAFETY
1. You - the OPERATOR - have control of the most important factors that
affect vehicle stability. Trailers are important tools in our transportation
industry and, like any tool, are safe in the hands of a properly qualified
operator.
2. The fifth wheel should be securely mounted to the tractor frame.
3. The driver should be familiar with the characteristics of the particular
trailer and the load being transported.
4. The driver should be familiar with the nature of the roads and traffic
which may be encountered during the trip.
5. Stability:
Within the relatively narrow confines of road laws limiting vehicle size
and weight, together with the characteristics of available tires, suspensions, and other components, there is little that a manufacturer can do
to affect the inherent stability of a trailer other than keeping the loading
decks as low as feasible, considering the requirements for loading space
and adequate tire clearance. This means that the major factors affecting operational stability are the knowledge and skill of the driver. The
predominant causes of the rollover accidents are:
�
�
�
�
Excessive speed.
Violent swerving or turning.
Application of brakes or tractor power while turning.
Entering curves at too high a speed may be caused by one of the
following factors:
-7-
Safety
AAA-06891-GB
Over-The-Road Safe Handling
a. Traveling at freeway speeds for long periods of time and failing
to recognize the high speed of travel and reducing it before
entering freeway interchanges or other curves requiring a reduced
and controlled speed.
b. Lack of familiarity with the vehicle characteristics to recognize its
safe speed with relation to posted speed limits on curves, which are
usually determined with automobile traffic in mind.
c. Failure to reduce speed sufficiently when approaching
congested traffic such as might be found at traffic signals on
highways. With the advent of today’s more powerful and higher
torque engines, the original practice of maintaining momentum to
avoid acceleration in traffic is outmoded.
6.
Tire Characteristics: High pressure truck/trailer tires have different characteristics under high speed cornering conditions than do passenger
car tires. As an extreme example, it is fairly common knowledge that a
skilled race car driver can consistently “drift” his racer around tight turns
where very high lateral “g” forces are encountered. However,
truck/trailer tires which are designed for carrying high loads over long
distances have substantially different characteristics, and their lateral
stability becomes unpredictable when lateral forces approach 0.4 g.
This means that commercial vehicles must be operated in a conservative
manner when cornering.
7.
Braking and Acceleration: Either braking or accelerating while cornering can significantly reduce the stability of the vehicle and should be
avoided. The best driving practice is to decelerate to a safe conservative
speed before entering a corner or approaching congested traffic, and
then to apply only moderate power until a straight path has been
reestablished.
(Rev. 6-02)
Wheel Torques
Safety
Proper torquing and retorquing the wheel nuts are critical to prevent the
premature loss of wheel equipment
Wheels must be checked and retorqued after 50 to 100 miles of use. This is
important every time you change a wheel.
-8-
Determining the load limits of a trailer includes more than understanding
the load limits of the tires alone. On all trailers there is a Federal certification/VIN label that is located on the forward half of the left (road) side of the
unit. This certification/VIN label will indicate the trailer's Gross Vehicle
Weight Rating (GVWR). This is the most weight the fully loaded trailer can
weigh. It will also provide the Gross Axle Weight Rating (GAWR). This is the
most a particular axle can weigh. If there are multiple axles, the GAWR of
each axle will be provided.
If your trailer has a GVWR of 10,000 pounds or less, there is a vehicle placard located in the same location as the certification label described above.
This placard provides tire and loading information. In addition, this placard
will show a statement regarding maximum cargo capacity. Cargo can be
added to the trailer, up to the maximum weight specified on the placard.
The combined weight of the cargo is provided as a single number. In any
case, remember: the total weight of a fully loaded trailer can not exceed the
stated GVWR
For trailers with living quarters installed, the weight of water and propane
also need to be considered. The weight of fully filled propane containers is
considered part of the weight of the trailer before it is loaded with cargo,
and is not considered part of the disposable cargo load. Water however, is
a disposable cargo weight and is treated as such. If there is a fresh water
storage tank of 100 gallons, this tank when filled would weigh about 800
pounds. If more cargo is being transported, water can be off-loaded to keep
the total amount of cargo added to the vehicle within the limits of the
GVWR so as not to overload the vehicle. Understanding this flexibility will
allow you, the owner, to make choices that fit your travel needs.
When loading your cargo, be sure it is distributed evenly to prevent overloading front to back and side to side. Heavy items should be placed low
and as close to the axle positions as reasonable. Too many items on one side
may overload a tire. The best way to know the actual weight of the vehicle
is to weigh it at a public scale. Talk to your dealer to discuss the weighing
methods needed to capture the various weights related to the trailer. This
would include the weight empty or unloaded, weights per axle, wheel,
hitch or king-pin, and total weight.
Excessive loads and/or underinflation cause tire overloading and, as a result,
abnormal tire flexing occurs. This situation can generate an excessive
amount of heat within the tire. Excessive heat may lead to tire failure. It is
the air pressure that enables a tire to support the load, so proper inflation is
critical. The proper air pressure may be found on the certification/VIN label
and/or on the Tire Placard. This value should never exceed the maximum
cold inflation pressure stamped on the tire.
-9-
Tire Safety Information
Steps for Determining Correct Load Limit - Trailer
Steps for Determining Correct Load Limit - Trailer
Trailers 10,000 Pounds GVWR or Less
TIRE AND LOADING INFORMATION
The weight of cargo should never exceed 907 kg or 2000 lbs.
TIRE
FRONT
SIZE
20.5x8.0-10(E)
COLD TIRE PRESSURE
621kPA or 90 PSI
SEE OWNER’S
MANUAL FOR
REAR
ADDITIONAL
SPARE
INFORMATION
1. Locate the statement, "The weight of cargo should never exceed XXX kg
or XXX lbs.," on your vehicle's placard.
2. This figure equals the available amount of cargo and luggage load capacity.
3. Determine the combined weight of luggage and cargo being loaded on
the vehicle. That weight may not safely exceed the available cargo and luggage load capacity.
The trailer's placard refers to the Tire Information Placard attached adjacent
to or near the trailer's VIN (Certification) label at the left front of the trailer.
Tire Safety Information
Trailers Over 10,000 Pounds GVWR
NOTE: These trailers are not required to have a tire information
placard on the vehicle.
Determine the empty weight of your trailer by weighing the trailer using a
public scale or other means. This step does not have to be repeated.
Locate the GVWR (Gross Vehicle Weight Rating) of the trailer on your trailer's VIN (Certification) label.
Subtract the empty weight of your trailer from the GVWR stated on the VIN
label. That weight is the maximum available cargo capacity of the trailer
and may not be safely exceeded.
- 10 -
1. Locate the statement, "The combined weight of occupants and cargo
should never exceed XXX lbs.," on your vehicle's placard.
2. Determine the combined weight of the driver and passengers who will
be riding in your vehicle.
3. Subtract the combined weight of the driver and passengers from XXX
kilograms or XXX pounds.
4. The resulting figure equals the available amount of cargo and luggage
capacity. For example, if the "XXX" amount equals 1400 lbs. and there will
be five 150 lb. passengers in your vehicle, the amount of available cargo and
luggage capacity is 650 lbs. (1400-750 (5 x 150) = 650 lbs.).
5. Determine the combined weight of luggage and cargo being loaded on
the vehicle. That weight may not safely exceed the available cargo and
luggage capacity calculated in Step # 4.
6. If your vehicle will be towing a trailer, load from your trailer will be
transferred to your vehicle. Consult the tow vehicle's manual to determine
how this weight transfer reduces the available cargo and luggage capacity
of your vehicle.
Glossary of Tire Terminology
Accessory weight
The combined weight (in excess of those standard items which
may be replaced) of automatic transmission, power steering, power brakes,
power windows, power seats, radio and heater, to the extent that these
items are available as factory-installed equipment (whether installed or not).
Bead
The part of the tire that is made of steel wires, wrapped or reinforced by ply cords and that is shaped to fit the rim.
Bead separation
This is the breakdown of the bond between components in the
bead.
Bias ply tire
A pneumatic tire in which the ply cords that extend to the beads
are laid at alternate angles substantially less than 90 degrees to the centerline of the tread.
Carcass
The tire structure, except tread and sidewall rubber which, when
inflated, bears the load.
- 11 -
Tire Safety Information
Steps for Determining Correct Load Limit -Tow Vehicle
Glossary of Tire Terminology
Chunking
The breaking away of pieces of the tread or sidewall.
Cold inflation pressure
The pressure in the tire before you drive.
Cord
The strands forming the plies in the tire.
Cord separation
The parting of cords from adjacent rubber compounds.
Cracking
Any parting within the tread, sidewall, or inner liner of the tire
extending to cord material.
CT
A pneumatic tire with an inverted flange tire and rim system in
which the rim is designed with rim flanges pointed radially inward and the
tire is designed to fit on the underside of the rim in a manner that encloses
the rim flanges inside the air cavity of the tire.
Tire Safety Information
Curb weight
The weight of a motor vehicle with standard equipment including
the maximum capacity of fuel, oil, and coolant, and, if so equipped, air conditioning and additional weight optional engine.
Extra load tire
A tire designed to operate at higher loads and at higher inflation
pressures than the corresponding standard tire.
Groove
The space between two adjacent tread ribs.
Gross Axle Weight Rating
The maximum weight that any axle can support, as published on
the Certification / VIN label on the front left side of the trailer. Actual weight
determined by weighing each axle on a public scale, with the trailer
attached to the towing vehicle.
Gross Vehicle Weight Rating
The maximum weight of the fully loaded trailer, as published on
the Certification / VIN label. Actual weight determined by weighing trailer
on a public scale, without being attached to the towing vehicle.
- 12 -
Innerliner
The layer(s) forming the inside surface of a tubeless tire that
contains the inflating medium within the tire.
Innerliner separation
The parting of the innerliner from cord material in the carcass.
Intended outboard sidewall
The sidewall that contains a white-wall, bears white lettering or
bears manufacturer, brand, and/or model name molding that is higher or
deeper than the same molding on the other sidewall of the tire or the
outward facing sidewall of an asymmetrical tire that has a particular side
that must always face outward when mounted on a vehicle.
Light truck (LT) tire
A tire designated by its manufacturer as primarily intended for use
on lightweight trucks or multipurpose passenger vehicles.
Load rating
The maximum load that a tire is rated to carry for a given inflation
pressure.
Maximum load rating
The load rating for a tire at the maximum permissible inflation
pressure for that tire.
Maximum permissible inflation pressure
The maximum cold inflation pressure to which a tire may be inflated.
Maximum loaded vehicle weight
The sum of curb weight, accessory weight, vehicle capacity
weight, and production options weight.
Measuring rim
The rim on which a tire is fitted for physical dimension requirements.
Pin Weight
The downward force applied to the 5th wheel or gooseneck ball,
by the trailer kingpin or gooseneck coupler.
- 13 -
Tire Safety Information
Hitch Weight
The downward force exerted on the hitch ball by the trailer
coupler.
Glossary of Tire Terminology
Non-pneumatic rim
A mechanical device which, when a non-pneumatic tire assembly
incorporates a wheel, supports the tire, and attaches, either integrally or
separably, to the wheel center member and upon which the tire is attached.
Non-pneumatic spare tire assembly
A non-pneumatic tire assembly intended for temporary use in
place of one of the pneumatic tires and rims that are fitted to a passenger
car in compliance with the requirements of this standard.
Non-pneumatic tire
A mechanical device which transmits, either directly or through a
wheel or wheel center member, the vertical load and tractive forces from
the roadway to the vehicle, generates the tractive forces that provide the
directional control of the vehicle and does not rely on the containment of
any gas or fluid for providing those functions.
Non-pneumatic tire assembly
A non-pneumatic tire, alone or in combination with a wheel or
wheel center member, which can be mounted on a vehicle.
Normal occupant weight
This means 68 kilograms (150 lbs.) times the number of occupants
specified in the second column of Table I of 49 CFR 571.110.
Tire Safety Information
Occupant distribution
The distribution of occupants in a vehicle as specified in the third
column of Table I of 49 CFR 571.110.
Open splice
Any parting at any junction of tread, sidewall, or innerliner that
extends to cord material.
Outer diameter
The overall diameter of an inflated new tire.
Overall width
The linear distance between the exteriors of the sidewalls of an
inflated tire, including elevations due to labeling, decorations, or protective
bands or ribs.
Ply
A layer of rubber-coated parallel cords.
- 14 -
Production options weight
The combined weight of those installed regular production
options weighing over 2.3 kilograms (5 lbs.) in excess of those standard
items which they replace, not previously considered in curb weight or accessory weight, including heavy duty brakes, ride levelers, roof rack, heavy duty
battery, and special trim.
Radial ply tire
A pneumatic tire in which the ply cords that extend to the beads
are laid at substantially 90 degrees to the centerline of the tread.
Recommended inflation pressure
This is the inflation pressure provided by the vehicle manufacturer
on the Tire Information label and on the Certification / VIN tag.
Reinforced tire
A tire designed to operate at higher loads and at higher inflation
pressures than the corresponding standard tire.
Rim
A metal support for a tire or a tire and tube assembly upon which
the tire beads are seated.
Rim diameter
This means the nominal diameter of the bead seat.
Rim size designation
This means the rim diameter and width.
Rim type designation
This means the industry of manufacturer's designation for a rim by
style or code.
Rim width
This means the nominal distance between rim flanges.
Section width
The linear distance between the exteriors of the sidewalls of an
inflated tire, excluding elevations due to labeling, decoration, or protective
bands.
- 15 -
Tire Safety Information
Pneumatic tire
A mechanical device made of rubber, chemicals, fabric and steel or
other materials, that, when mounted on an automotive wheel, provides the
traction and contains the gas or fluid that sustains the load.
Glossary of Tire Terminology
Sidewall
That portion of a tire between the tread and bead.
Sidewall separation
The parting of the rubber compound from the cord material in the
sidewall.
Special Trailer (ST) tire
The "ST" is an indication the tire is for trailer use only.
Test rim
The rim on which a tire is fitted for testing, and may be any rim listed as appropriate for use with that tire.
Tread
That portion of a tire that comes into contact with the road.
Tread rib
A tread section running circumferentially around a tire.
Tread separation
Pulling away of the tread from the tire carcass.
Tire Safety Information
Treadwear indicators (TWI)
The projections within the principal grooves designed to give a
visual indication of the degrees of wear of the tread.
Vehicle capacity weight
The rated cargo and luggage load plus 68 kilograms (150 lbs.)
times the vehicle's designated seating capacity.
Vehicle maximum load on the tire
The load on an individual tire that is determined by distributing to
each axle its share of the maximum loaded vehicle weight and dividing by
two.
Vehicle normal load on the tire
The load on an individual tire that is determined by distributing to
each axle its share of the curb weight, accessory weight, and normal occupant weight (distributed in accordance with Table I of CRF 49 571.110) and
dividing by 2.
- 16 -
Wheel center member
In the case of a non-pneumatic tire assembly incorporating a
wheel, a mechanical device which attaches, either integrally or separably, to
the non-pneumatic rim and provides the connection between the nonpneumatic rim and the vehicle; or, in the case of a non-pneumatic tire
assembly not incorporating a wheel, a mechanical device which attaches,
either integrally or separably, to the non-pneumatic tire and provides the
connection between tire and the vehicle.
Wheel-holding fixture
The fixture used to hold the wheel and tire assembly securely during testing.
Tire Safety - Everything Rides On It
The National Traffic Safety Administration (NHTSA) has published a
brochure (DOT HS 809 361) that discusses all aspects of Tire Safety, as
required by CFR 575.6. This brochure is reproduced in part below. It can be
obtained and downloaded from NHTSA, free of charge, from the following
web site:
http://www.nhtsa.dot.gov/cars/rules/TireSafety/ridesonit/tires_index.html
Studies of tire safety show that maintaining proper tire pressure, observing
tire and vehicle load limits (not carrying more weight in your vehicle than
your tires or vehicle can safely handle), avoiding road hazards, and inspecting tires for cuts, slashes, and other irregularities are the most important
things you can do to avoid tire failure, such as tread separation or blowout
and flat tires
These actions, along with other care and maintenance activities, can also:
improve vehicle handling, help protect you and others from avoidable
breakdowns and accidents, improve fuel economy, and increase the life of
your tires.
This booklet presents a comprehensive overview of tire safety, including
information on the following topics: basic tire maintenance, uniform tire
quality grading system, fundamental characteristics of tires, and tire safety
tips.
Use this information to make tire safety a regular part of your vehicle maintenance routine. Recognize that the time you spend is minimal compared
with the inconvenience and safety consequences of a flat tire or other tire
failure.
- 17 -
Tire Safety Information
Weather side
The surface area of the rim not covered by the inflated tire.
Safety First - Basic Tire Maintenance
Properly maintained tires improve the steering, stopping, traction, and loadcarrying capability of your vehicle. Underinflated tires and overloaded
vehicles are a major cause of tire failure. Therefore, as mentioned above, to
avoid flat tires and other types of tire failure, you should maintain proper tire
pressure, observe tire and vehicle load limits, avoid road hazards, and
regularly inspect your tires.
Finding Your Vehicle’s Recommended Tire Pressure and Load
Limits
Tire information placards and vehicle certification labels contain
information on tires and load limits. These labels indicate the vehicle
manufacturer's information including:
·
·
·
·
Recommended tire size
Recommended tire inflation pressure
Vehicle capacity weight (VCW-the maximum occupant and cargo
weight a vehicle is designed to carry)
Front and rear gross axle weight ratings (GAWR- the maximum
weight the axle systems are designed to carry).
Tire Safety Information
Both placards and certification labels are permanently attached to the trailer
near the left front.
Understanding Tire Pressure and Load Limits
Tire inflation pressure is the level of air in the tire that provides it with loadcarrying capacity and affects the overall performance of the vehicle. The tire
inflation pressure is a number that indicates the amount of air pressuremeasured in pounds per square inch (psi)-a tire requires to be properly
inflated. (You will also find this number on the vehicle information placard
expressed in kilopascals (kpa), which is the metric measure used
internationally.)
Manufacturers of passenger vehicles and light trucks determine this number
based on the vehicle's design load limit, that is, the greatest amount of
weight a vehicle can safely carry and the vehicle's tire size. The proper tire
pressure for your vehicle is referred to as the "recommended cold inflation
pressure." (As you will read below, it is difficult to obtain the recommended
tire pressure if your tires are not cold.)
Because tires are designed to be used on more than one type of vehicle, tire
manufacturers list the "maximum permissible inflation pressure" on the tire
sidewall. This number is the greatest amount of air pressure that should ever
be put in the tire under normal driving conditions.
- 18 -
·
·
·
Most tires may naturally lose air over time.
Tires can lose air suddenly if you drive over a pothole or other
object or if you strike the curb when parking.
With radial tires, it is usually not possible to determine
underinflation by visual inspection.
For convenience, purchase a tire pressure gauge to keep in your vehicle. Gauges can be purchased at tire dealerships, auto supply stores,
and other retail outlets.
The recommended tire inflation pressure that vehicle manufacturers
provide reflects the proper psi when a tire is cold. The term cold does
not relate to the outside temperature. Rather, a cold tire is one that has
not been driven on for at least three hours. When you drive, your tires
get warmer, causing the air pressure within them to increase.
Therefore, to get an accurate tire pressure reading, you must measure
tire pressure when the tires are cold or compensate for the extra pressure in warm tires.
Steps for Maintaining Proper Tire Pressure
·
Step 1: Locate the recommended tire pressure on the vehicle's tire
information placard, certification label, or in the owner's manual.
·
Step 2: Record the tire pressure of all tires.
·
Step 3: If the tire pressure is too high in any of the tires, slowly
release air by gently pressing on the tire valve stem with the edge
of your tire gauge until you get to the correct pressure.
·
Step 4: If the tire pressure is too low, note the difference
between the measured tire pressure and the correct tire
pressure. These "missing" pounds of pressure are what you will
need to add.
·
Step 5: At a service station, add the missing pounds of air
pressure to each tire that is underinflated.
·
Step 6: Check all the tires to make sure they have the same air
pressure (except in cases in which the front and rear tires are
supposed to have different amounts of pressure).
- 19 -
Tire Safety Information
Checking Tire Pressure
It is important to check your vehicle's tire pressure at least once a
month for the following reasons:
Safety First - Basic Tire Maintenance
If you have been driving your vehicle and think that a tire is underinflated,
fill it to the recommended cold inflation pressure indicated on your vehicle's
tire information placard or certification label. While your tire may still be
slightly underinflated due to the extra pounds of pressure in the warm tire,
it is safer to drive with air pressure that is slightly lower than the vehicle manufacturer's recommended cold inflation pressure than to drive with a significantly underinflated tire. Since this is a temporary fix, don't forget to recheck
and adjust the tire's pressure when you can obtain a cold reading.
Tire Size
To maintain tire safety, purchase new tires that are the same size as the vehicle's original tires or another size recommended by the manufacturer. Look
at the tire information placard, the owner's manual, or the sidewall of the
tire you are replacing to find this information. If you have any doubt about
the correct size to choose, consult with the tire dealer.
Tire Safety Information
Tire Tread
The tire tread provides the gripping action and traction that prevent your
vehicle from slipping or sliding, especially when the road is wet or icy. In
general, tires are not safe and should be replaced when the tread is worn
down to 1/16 of an inch. Tires have built-in treadwear indicators that let you
know when it is time to replace your tires. These indicators are raised sections spaced intermittently in the bottom of the tread grooves. When they
appear "even" with the outside of the tread, it is time to replace your tires.
Another method for checking tread depth is to place a penny in the tread
with Lincoln's head upside down and facing you. If you can see the top of
Lincoln's head, you are ready for new tires.
Tire Balance and Wheel Alignment
To avoid vibration or shaking of the vehicle when a tire rotates, the tire must
be properly balanced. This balance is achieved by positioning weights on
the wheel to counterbalance heavy spots on the wheel-and-tire assembly. A
wheel alignment adjusts the angles of the wheels so that they are positioned correctly relative to the vehicle's frame. This adjustment maximizes
the life of your tires. These adjustments require special equipment and
should be performed by a qualified technician.
Tire Repair
The proper repair of a punctured tire requires a plug for the hole and a
patch for the area inside the tire that surrounds the puncture hole.
Punctures through the tread can be repaired if they are not too large, but
punctures to the sidewall should not be repaired. Tires must be removed
from the rim to be properly inspected before being plugged and patched.
- 20 -
Information on Passenger Vehicle Tires:
P
The "P" indicates the tire is for passenger vehicles.
Next number
This three-digit number gives the width in millimeters of the tire from sidewall edge to sidewall edge. In general, the larger the number, the wider the
tire.
Next number
This two-digit number, known as the aspect ratio, gives the tire's ratio of
height to width. Numbers of 70 or lower indicate a short sidewall for
improved steering response and better overall handling on dry pavement.
R
The "R" stands for radial. Radial ply construction of tires has been the industry standard for the past 20 years.
Next number
This two-digit number is the wheel or rim diameter in inches. If you change
your wheel size, you will have to purchase new tires to match the new
wheel diameter.
Next number
This two- or three-digit number is the tire's load index. It is a measurement
of how much weight each tire can support. You may find this information
in your owner's manual. If not, contact a local tire dealer. Note: You may not
find this information on all tires because it is not required by law.
- 21 -
Tire Safety Information
Tire Fundamentals
Federal law requires tire manufacturers to place standardized information
on the sidewall of all tires. This information identifies and describes the fundamental characteristics of the tire and also provides a tire identification
number for safety standard certification and in case of a recall.
Safety First - Basic Tire Maintenance
Information on Passenger Vehicle Tires:
M+S
The "M+S" or "M/S" indicates that the tire
has some mud and snow capability.
Most radial tires have these markings;
hence, they have some mud and snow
capability.
Speed Rating
The speed rating denotes the speed at
which a tire is designed to be driven for
extended periods of time. The ratings
range from 99 miles per hour (mph) to
186 mph. These ratings are listed
below. Note: You may not find this
information on all tires because it is not
required by law.
Tire Safety Information
Letter Rating
Speed Rating
Q
R
S
T
U
H
V
W
Y
99 mph
106 mph
112 mph
118 mph
124 mph
130 mph
149 mph
168* mph
186* mph
* For tires with a maximum speed capability over 149 mph, tire
manufacturers sometimes use the letters ZR. For those with a maximum
speed capability over 186 mph, tire manufacturers always use the letters ZR.
U.S. DOT Tire Identification Number
This begins with the letters "DOT" and indicates that the tire meets all federal
standards. The next two numbers or letters are the plant code where it was
manufactured, and the last four numbers represent the week and year the
tire was built. For example, the numbers 3197 means the 31st week of 1997.
The other numbers are marketing codes used at the manufacturer's
discretion. This information is used to contact consumers if a tire defect
requires a recall.
- 22 -
Tire Ply Composition and Materials Used
The number of plies indicates the number of layers of rubber-coated fabric
in the tire. In general, the greater the number of plies, the more weight a tire
can support. Tire manufacturers also must indicate the materials in the tire,
which include steel, nylon, polyester, and others.
Maximum Load Rating
This number indicates the maximum load in kilograms and pounds that can
be carried by the tire.
Maximum Permissible Inflation Pressure
This number is the greatest amount of air pressure that should ever be put
in the tire under normal driving conditions.
UTQGS Information:
Treadwear Number
This number indicates the tire's wear rate. The higher the treadwear number is, the longer it should take for the tread to wear down. For example, a
tire graded 400 should last twice as long as a tire graded 200.
Traction Letter
This letter indicates a tire's ability to stop on wet pavement. A higher graded tire should allow you to stop your car on wet roads in a shorter distance
than a tire with a lower grade. Traction is graded from highest to lowest as
"AA","A", "B", and "C".
Temperature Letter
This letter indicates a tire's resistance to heat. The temperature grade is for a
tire that is inflated properly and not overloaded. Excessive speed, underinflation or excessive loading, either separately or in combination, can cause
heat build-up and possible tire failure. From highest to lowest, a tire's resistance to heat is graded as "A", "B", or "C".
R
The “R” stands for radial. Radial ply construction of tires has been the industry standard for the past 20 years.
Next Number
This two-digit number is the wheel or rim diameter in inches. If you change
your wheel size, you will have to purchase new tires to match the new
wheel diameter.
- 23 -
Tire Safety Information
Information on Passenger Vehicle Tires:
Safety First - Basic Tire Maintenance
UTQGS Information:
Next Number
This two-or three-diget number is the tire’s load index. It is a measurement
of how much weight each tire can support. You may find this information
in your owner’s manual. If not, contact a local tire dealer. You may not find
this information on all tire’s because it is not required by law.
M+S
The “M+S” or “M/S” indicates that the tire has some mud and snow capability. Most radial tires have these markings; hense, they have some mud and
snow capability.
Speed Rating
The speed rating denotes the speed at which a tire is designed to be driven
for extended periods of time. The ratings range from 99 miles per hour
(mph) to 186 mph. These ratings are listed below. You may not find this
information on all tires because it is not required by law.
Tire Safety Information
Letter Rating
Speed Rating
Q
R
S
T
U
H
V
W
Y
99 mph
106 mph
112 mph
118 mph
124 mph
130 mph
149 mph
168* mph
186* mph
Additional Information on Light
Truck Tires:
Tires for light trucks have other
markings besides those found on
the sidewalls of passenger tires.
LT
The "LT" indicates the tire is for light
trucks or trailers.
ST
An "ST" is an indication the tire is
for trailer use only.
- 24 -
Max. Load Dual kg (lbs) at kPa (psi) Cold
This information indicates the maximum load and tire pressure when the
tire is used as a dual, that is, when four
tires are put on each rear axle (a total
of six or more tires on the vehicle).
Max. Load Single kg (lbs) at kPa
(psi) Cold
This information indicates the maximum load and tire pressure when the
tire is used as a single.
Load Range
This information identifies the tire’s load-carrying capabilities and it’s
inflation limits.
Tire Safety Tips
Preventing Tire Damage
·
Slow down if you have to go over a pothole or other object in the road.
·
Do not run over curbs or other foreign objects in the roadway, and try
not to strike the curb when parking.
Tire Safety Checklist
·
·
·
·
·
Check tire pressure regularly (at least once a month), including the
spare.
Inspect tires for uneven wear patterns on the tread, cracks, foreign
objects, or other signs of wear or trauma.
Remove bits of glass and foreign objects wedged in the tread.
Make sure your tire valves have valve caps.
Check tire pressure before going on a long trip.
Do not overload your vehicle. Check the Tire Information and Loading
Placard or User's Manual for the maximum recommended load for the
vehicle.
- 25 -
Tire Safety Information
Additional Information on Light Truck Tires:
WARNING
Be careful when making inspections, hookups, and repairs to
avoid personal injury. Make sure parking brakes are properly
activated or that wheel chocks are in place to avoid sudden
or unexpected movement of the trailer which could result in
bodily injury.
IMPORTANT: It is the Operator’s responsibility to conduct a safe and accurate pre-trip inspection of the vehicle including brake condition and proper
adjustments and be satisfied that the vehicle is in safe operating condition.
See 49 CFR Parts 383 and 396.
Inspection Procedure Before Trip
Safety Chains
The safety chains should cross
behind the coupler and hook individually to the attachment points in
the tow vehicle (shown in photo to
the left). They MUST NOT be
attached to the ball.
Coupler Attachment
After hook-up, check for positive engagement of the hitch ball and coupler.
Be certain that coupler lock handle is completely engaged before towing the
trailer. Also, check to insure that coupler adjustment set screws are torqued
to a minumum 125 FT/LBS. (Rev. 4-12)
CAUTION
Do not attach cable to hitch ball. Cable must be
attached to the towing vehicle for the proper operation of the vehicle. (A-6462-BO)
Be sure that coupler lock handle is completely engaged
before towing trailer. (A-6462-BP)
Coupler bolts must be torqued to a minumum
125 FT/LBS. (Vendor supplied decal) Rev. 4-12
- 26 -
Connect the 6-way plug and check for proper
operation of stop lights, turn signals, and
running lights. Repair malfunctioning light
equipment prior to trip. Check and clean all
lights and reflectors.
Proper operation
requires clean and positive contact between
electrical connections. Be sure the plug on the
light cable and the trailer connector are free of
corrosion. Inspect all wiring to see it is not
frayed.
Brake Controls
Check brakes for proper operation before each
trip. On trailers with electric or electric/hydraulic
brakes, fasten the breakaway switch actuating
cable securely to the towing vehicle. Make certain
the breakaway battery is fully charged. Your
breakaway battery kit contains a tow charger
which can keep your battery charged. The
charger is hooked to the clearance light circuit
and will charge while running lights are being
used.
CAUTION
Check battery before towing. Charged battery required
for proper operation of the breakaway brake
application. (A-6462-BQ)
On trailers with vacuum brakes, drain moisture from the system air tank
daily. If the trailer is equipped with hydraulic brakes, check the brake fluid
level before each trip.
(Rev. 7-02)
Tires
Check tires frequently for cuts and abrasions.
Check air pressure before each trip and keep
inflated as recommended by the tire
maufacturer. Remove foreign objects that
may be lodged in tire treads.
- 27 -
Inspection Procedure Before Trip
Brake and Electrical Controls
Gates
Before traveling, be sure that all divide gates are
locked in either a fully open or fully closed position. All roll-up gates must be closed and ropes
secured.
CAUTION
Make certain rollup, swing and
half slide gates at the rearend
are closed while trailer is being
operated or parked.
( A - 6 4 6 2 - C D ) (Rev. 1-02)
Wheels and Rims
Inspection Procedure Before Trip
Check all wheel nuts for the proper
torque after the first 50 to 100 miles of
service and before each succeeding trip.
Refer to the torque requirements for the
correct procedure and specifications if
necessary.
Check all metal surfaces thoroughly while making tire inspections and
during tire changes and look for cracks or distortions in the wheel studs. Do
not move the trailer when any of these conditions exist. If your axles are
equipped with oil lubricated hubs, check the oil level and fill to the required
level indicated on the oil cap if necessary.
(Rev. 3-93)
WARNING
Check wheel nuts after initial 50 to 100 miles of service.
See Owner’s manual for correct torque requirements.
Failure to do so may result in equipment damage and
personal injury. (A-6891-C)
Insufficient mounting torque can cause wheel shimmy,
resulting in damage to parts and extreme tire wear.
Excessive mounting torque can cause studs and capnuts
to break and discs to crack in stud hole area.
- 28 -
Check all gate locks, access door locks,
side door locks, and rear door locks
before each trip to insure that they are in
proper working order. Any doors, gate
locks or keepers which show excessive
wear should be replaced immediately.
Care should be taken to keep the area
around the door frame clear of any
debris or animal wastes. A build-up of
animal waste may result in more pressure
being applied to locks than they were
designed to withstand.
CAUTION
Door and gate locks which
show excessive wear should
be replaced immediately. (A6462-AW)
Side Structure
Check the trailer sides for inconspicuous damage to the top and bottom rails as well as the
side structure. Any problems observed in the
side structure should be corrected immediately
to prevent the damage from extending futher.
Unrepaired damage could affect the safe load
carrying capacity of the side structure.
Punched side trailers are built with aluminum
side skin. Do Not use the holes to hang heavy
objects on the side. Do Not use the holes to tie
animals. This could damage the side skin.
Contact Wilson Trailer Company immediately
for information on proper support of mounting
brackets for such applications.
WARNING
Failure to follow these procedures may result in
unnecessary wear and part malfunction. It may
also create difficulties with the mechanical
operation of the trailer, and, could possibly result
in personal injury and/or property damage.
- 29 -
Inspection Procedure Before Trip
Door Locks
Operation of Brakes
Your trailer brakes are designed to work
together with your towing vehicle
brakes to stop the combined load.
When one does the stopping for both,
the overload causes heat build-up which
can result in brake wear, a direct loss of
braking power and increased brake
lining wear.
WARNING
Jack-knifing can occur if the tow vehicle brakes are used
alone, allowing the trailer to push the vehicle. This can result
in equipment damage and personal injury.
Complete details for making adjustments on or replacement within your
braking system can be found in the brake manufacturer's supplement
provided with this manual. See Notice: Gooseneck Trailer Brakes. (Page 45) Proper synchronization of tow vehicle to trailer braking can only be
accomplished by road testing. Follow the instructions found in the
manufacturer's supplement for correct synchonization procedures.
Operation of Gates
Operating Instuctions
All divide gates are provided with two
locks. Be sure both locks are completely engaged before towing the trailer.
All divide gates with an outside
release is provided with an additional pin & eye or pin & bar.
(Rev. 4-12)
- 30 -
To prevent personal injury, stand clear of
swinging gates until slam locks are engaged.
(A-6462-BL) (Rev. 1-02)
Operation of Coupler
The coupler installed on your trailer is of steel pipe
design and is adjustable in height to meet different
vehicle hitch heights (maximum extension is eight
inches). The coupler should be adjusted so that
your trailer is level when towed, not nose up or
nose down. To adjust the coupler, back towing
vehicle under the coupler. Level your trailer using
the trailer landing gear, then loosen the two coupler set screws and lower the inner unit over the
tow vehicle hitch ball. Tighten the coupler set
screws to 125 foot pounds minimum of torque. The
coupler is now set to the correct height for your
vehicle. (Rev. 4-12)
CAUTION
Be certain that coupler lock handle is completely engaged
before towing trailer.
(A-6462-BP) (Rev. 1-02)
Fifth Wheel and King Pin Engagement
(If equipped with a King Pin)
After hook-up, check for positive engagement of the lower fifth wheel and
king pin. Apply trailer brakes and attempt to move the tractor forward to
ensure that the fifth wheel and king pin are positively locked.
CAUTION
Plastic king pin liners (lube plate) cannot be installed
on Wilson Trailer Company king pin assemblies. A lube
plate changes the king pin interface dimensions of the
fifth wheel lock. This may result in coupling difficulties,
premature lock wear and, potentially, a dropped trailer.
- 31 -
Operating Instructions
WARNING
Fastenings
Floors, deck rails, coupler assemblies, and tandem
sub-assemblies are attached to the trailer side with
zinc plated and stainless steel fasteners.
CAUTION
Each month, check to see that all zinc
plated steel fasteners are in place. If
any are missing or loose, they should
be replaced immediately.
Floor
Your Wilson gooseneck trailer is constructed with aluminum treadplate
floors to reduce slipping. Never use
sand or abrasive materials for animal
bedding as this will cause excessive floor
wear. The most important part of floor
maintenance is cleaning.
Gate and Ramp Hinges
General Maintenance
Gate and ramp hinges are provided with grease
fittings. They should be lubricated on a regular
basis in order to avoid unnecessary wear.
Operating Slam Catch
Slam catch is not a lock. Make sure lock
rod is enaged before moving trailer.
CAUTION
Engage lock rod
moving trailer.
Rear Slam Catch
- 32 -
before
Wheel bearings and cups should be inspected for
corrosion or wear every 12 months or 12,000 miles.
Bearing adjustment and proper lubrication is essential
to the function and reliability of your trailer axles. Please
refer to the Dexter Axle "Operations Maintenance
Service Manual" for the proper lubricant specifications.
When new bearings are needed,
they must always be replaced in
sets of a cone and a cup.
CAUTION
Oil or Grease Seals
7,000 lb Torflex axles are standard with E-Z Lube
spindles. This feature allows the bearings to
periodically lubricate without removing hubs from
the axle. Please refer to the Dexter Axle "Operation
Maintenance Service Manual" for additional details.
The 8,000 - 10,000 lb Torflex axles and wheel
bearings must be manually lubricated. The bearings
and cups should be inspected and/or lubricated
every 12 months or 12,000 miles. Please refer to the
Dexter Axle "Operation Maintenance Service
Manual" for additional details.
Optional Oil Bath Bearings
The oil level should be checked prior to each trip.
IMPORTANT NOTICE - WASHOUT REQUIRED
Feed companies are manufacturing feeds for livestock that produce highly corrosive
acids in the animal waste. These animal acids are highly corrosive to aluminum.
Even with the best materials and design, you must wash out your trailer thoroughly
as often as possible, or at least once a week to minimize corrosion damage to your
trailer.
(Rev. 2-93)
NOTICE
Please be aware that staining and discoloration can and may appear on aluminum
trailers. This can appear at anytime for various reasons and is beyond the control of
Wilson Trailer.
Exposure to cleansers, highway treatment, and de-icing chemicals along with general
weather conditions or a combination of the above can be cause for staining and
corrosion.
Wilson Trailer is not responsible for these occurrences and any staining or
discoloration is not covered by Wilson Trailer warranty.
(Rev. 8-15)
- 33 -
General Maintenance
Wheel Bearings
Brakes
See Notice: Gooseneck Trailer Brakes (Page 4-5).
Adjust your trailer brakes after the first 200 miles
and then after every 3,000 miles or 3 months of
use. The brake drum should be inspected every
12 months or 12,000 miles. Inspect the drum surface for excessive wear or heavy scoring. If worn
more than .020", oversized drums should be
turned. The maximum rebore should not exceed
.090".
On trailers with electric brakes, also inspect the
inner surface of the brake drum that contacts the
brake magnet. If the surface is scored or worn
unevenly, it should be refaced by removing not
more than .030" of material.
Check the brake magnet for wear and current
draw every 6 months or 6,000 miles.
CAUTION
It is important that the wheel bearing bores are not
contaminated by metallic chips resulting from drum
turning or refacing. Make certain that wheel bearing
cavities are clean before reinstalling bearings and seals.
The presence of contaminants will cause premature
wheel bearing failure.
Brake Adjustment*
Brakes
NOTICE
GOOSENECK TRAILER BRAKES
•
All 7,000 lb axles have automatic forward adjusting
brakes.
•
Manual adjusting brakes require proper maintenance
to prevent problems from developing.
•
All 8,000 - 10,000 lb axles have automatic forward
adjusting brakes.
•
The automatic forward adjusting brakes still require
periodic inspection and adjustment as necessary.
- 34 -
1.
Jack up trailer and secure on adequate jack stands. Check that the
wheel and drum rotate freely.
2.
Remove the adjusting hole cover from the adjusting slot on the bottom
of the brake backing plate.
3.
With a screwdriver or standard adjusting tool, rotate the star wheel
of the adjuster assembly to expand the brake drums. Adjust the brake
shoes out until the pressure of the linings against the drum make the
wheel difficult to turn.
4.
Then rotate the star wheel in the opposite direction until the wheel
turns freely with a lining drag.
5.
Replace the adjusting hole cover and lower the wheel to the ground.
6.
Repeat the above procedure on all brakes.
*
This section applicable to trailers
equipped with Dexter Axles. Taken
from Dexter Axle Service Manual.
- 35 -
Brakes
Brakes need to be adjusted (1) after the
first 200 miles of operation when the
brake shoes have “seated”, (2) at 3,000
mile intervals, (3) or as use and performance requires. The brakes should be
adjusted in the following manner:
Wheels and Tires
Wheels are a critical component of your
running gear system. When replacing
the trailer wheels it is critical to match
the capacity ratings and to ensure that
they are equal or greater than the
original equipment supplied by the
manufacturer.
(Rev. 3-93)
WARNING
Do not attempt to repair or modify a wheel. Even minor
modifications can have a great effect. Do not install a
tube to correct a leak through the rim. If the rim is
cracked, the air pressure in the tube may cause the
pieces of the rim to explode with great force and can
cause serious injury or death.
Torque Requirements
Wheels and Tires
It is extremely important to apply and
maintain proper wheel mounting
torque to your trailer axle. Torque is a
measure of the amount of tightening
applied to a fastener (nut or bolt) and is
expressed as length times force. A force
of 90 pounds applied at the end of a
wrench one foot long will yield 90 foot
pounds of torque. Torque wrenches
are the best method to assure that the
proper amount of torque is being
applied to a fastener.
Be sure to use only the fasteners matched to the cone angle of your wheel
(usually 60 or 90 degrees).
The proper procedure for attaching your wheels is as follows:
1. Start all bolts or nuts by hand to prevent cross threading.
2. Tighten bolts or nuts in the sequence detailed below.
3. The tightening of the fasteners should be done in stages. Following the
recommended sequence, first tighten all the fasteners to 20-25 ft.lb., and
finally to the required torque based on the size of the wheel nut (see chart).
4. Wheel nuts/bolts should be torqued before first road use and after each
wheel removal. Check and retorque after the first 50-100 miles.
- 36 -
Nut Size
1/2”-20 (Cone)
9/16”-18 (Cone)
9/16”-18 (Cone)
Torque (ft.lbs.)
90-120
90-120 Steel
120-140 Aluminum
(Note 1) 5/8”-18 (Cone) 190-210
5/8”-18 (flanged nut) 275-325 (One-Piece)
(Note 2) 5/8”-18 (flanged nut) 140-160 (Two-Piece)
Note 1:
Note 2:
This is when nut is used in conjuction with the reinforcing ring.
This two piece flange nut is used on the Alcoa Aluminum Dual wheel application.
TORQUE
SEQUENCE
8-BOLT
- 37 -
Wheels and Tires
Wheel Nut Torque Guide
Breakaway Battery Charger Installation Instructions
(for ABCD: Accelerated Battery Charging Device)
IMPORTANT
Check condition of battery prior to installation and prior
to each trip.
IMPORTANT FACTS TO REMEMBER
1.
Improper installation of the breakaway battery will destroy the brake
control. The negative terminal must attach to ground and positive
terminal must attach to the breakaway switch.
2.
Check your breakaway system periodically to insure that wiring and
connections are secure. A short or an open circuit can result in a
no-brake condition.
3.
If excessive discharging of the breakaway battery occurs, check battery
and recharge using a Heavy Duty Two Stage/Maintenance Charger. If
using a commercial (AC to DC) make certain the 12 volt charge is
limited to 1.2 amps or less.
4.
The breakaway battery charger is connected to the Clearance Light
Circuit. Therefore the breakaway battery charges only when the
clearance lights are on.
(Rev. 6-02)
l
l
l
Electrical System
l
l
l
l
l
l
l
- 38 -
Battery Data Chart
12 Volt
P/N 2023-5 amp/hr-max
discharge current 20 hr. rate = 250 mA
Max Discharge Current - 40 amps
Max charge current must be limited to
1.2 amps
Length = 3.54”
Width = 2.76”
Height = 4.13”
Weight = 3.8 lbs.
Terminals: Fasten Tab .187”x.032”
Service Life: Under normal
operating conditions, 4-5 years in
standby applications or 200-1000
charge/discharge cycles depending
upon depth of discharge and rate of
charge.
To maximize the life of the battery the following
conditions should be met:
1.
Avoid over or undercharge. This is the single worst enemy of lead-acid
batteries.
2.
Batteries should be stored in a discharged state or at elevated room
temperatures.
3.
Avoid exposing batteries to heat! Service life is shortened
considerably at ambients above 30o C (86oF).
4.
Due to the characteristics of this battery, after six to nine months of
storage, the battery should be recharged.
5.
Charge the battery at the proper rate. Current should be limited to
less than 1.2 amps. Charge current above 1.2 amps will result in
shortened service life. Ideal charging is provided by Tekonsha
Tow Charger, P/N 2024.
6.
Provide adequate air circulation when charging battery. DO NOT
charge battery in any other container besides a TEKONSHA P/N 2018,
battery box.
7.
DO NOT PLACE BATTERIES IN CLOSE PROXIMITY
TO OBJECTS WHICH CAN PRODUCE SPARKS OR
FLAMES.
8.
Do not expose battery case to organic solvents or adhesives.
9.
DO NOT ATTEMPT TO DISASSEMBLE BATTERIES.
CONTACT WITH SULFURIC ACID MAY CAUSE HARM.
10. FASTEN BATTERIES TIGHTLY AND MAKE PROVISIONS
FOR SHOCK ABSORPTION IF EXPOSURE TO SHOCK OR
VIBRATION IS LIKELY.
11. Do not throw batteries into fire; batteries so disposed may rupture or
explode.
- 39 -
Electrical System
12 Volt Sealed Lead-Acid Battery (Breakaway Battery)
Electrical System
Electric/Hydraulic Brake Application System
- 40 -
A 7-way plug may be installed on the power cable on your trailer. Each wire
carries current from your vehicle's electrical source, through a circuit, to the
various electrical devices on the trailer. Individual circuits may be traced by
the various wire colors shown on the following wiring diagrams, which
show the wire color and the electrical device it serves.
3GRN = Interior & Exteior Lights (black)
1WHT = Ground (white)
5RED = Left Turn (yellow)
6BRN = Right Turn (green)
2BLU = Electric Brakes ONLY (brown)
YEL7 = Back-up Lights (red) optional
4BLK = AUXILARY (Blue)
- 41 -
Electrical System
Electrical Connector Wiring Diagram (Standard 7-way RV)
Electrical Connector Wiring Diagram (Optional 6-way)
A 6-way plug is attached to the front of the power cable on your trailer.
Each wire carries current from your vehicle's electrical source, through a circuit, to the various electrical devices on the trailer. Individual circuits may be
traced by the various wire colors shown on the following wiring diagrams,
which show the wire color and the electrical device it serves.
To Junction Box
TM =
View from Backside of Connector Plug
Electrical System
Electrical Junction Box
- 42 -
GD
LT
RT
S
=
=
=
=
A
=
Interior & Exteior Lights
(black)
Ground (white)
Left Turn (yellow)
Right Turn (green)
Electric Brakes ONLY
(brown)
Accessory Back-up Lights
(red) optional
- 43 -
Electrical System
Electric Brakes - Wiring Diagram
Electrical System
Vacuum/Hydraulic Brakes - Wiring Diagram
- 44 -
IMPORTANT NOTICE
Be sure all electrical connections are in a clean and
dry location and all connections are complete.
DO NOT cut into the system. Cutting any part of
the electrical system will void electrical warranty.
Be sure all electrical connections are greased
properly for clean and secure connections.
TOOLS NEEDED:
Flat Screw Driver
Black Tape
Wire Connectors
Dielectric Grease ONLY
Test Light
Wiring Pliers
Shrink Tube
No Lights
1. Check 6-way plug to see if plugged in.
2. Inspect all lights and connections for power. One light with no power
could short out entire system.
3.
Trace wire on light with no power back to starting point. Check for
bare, pinched, or corroded wires.
(Rev. 1-95)
Dim Lights
1. Check 6-way plug to see if plugged in.
2.
Check all grounds. Make sure you have clean grounds.
3.
Check for corrosion. Corrosion may occur on wires, connections,
lights (bulbs), and light.
- 45 -
Electrical System
Electrical Troubleshooting
Electrical Troubleshooting
Clearance Light Not Working
1. Check for power at 6-way plug.
2.
Check for proper ground behind light. Make sure you have a
clean ground.
3.
Check for corrosion. Corrosion may occur on wires,
connections, lights (bulbs), and light.
4.
Check for burned out light.
5.
Check for unplugged wires. Make sure connections are
complete.
Turn Signal (Rear) Not Working
1. Check for power at 6-way plug.
Check for proper ground behind light. Make sure you have a
clean ground.
3.
Check for corrosion. Corrosion may occur on wires,
connections, lights (bulbs), and light.
4.
Check for unplugged wires. Make sure connections are
complete.
5.
Check for burned out light.
Electrical System
2.
- 46 -
2.
Check for proper ground behind light. Make sure you have a
clean ground.
3.
Check for corrosion. Corrosion may occur on wires,
connections, lights (bulbs), and light.
4.
Check for unplugged wires. Make sure connections are
complete.
5.
Check for burned out light.
Interior Light Not Working
1. Check for power at 6-way plug.
2.
Check for proper ground behind light. Make sure you have a
clean ground.
3.
Check for corrosion. Corrosion may occur on wires,
connections, lights (bulbs), and light.
4.
Check for unplugged wires. Make sure connections are
complete.
5.
Check for burned out light.
License Plate Light Not Working
1. Check for power at 6-way plug.
2.
Check for proper ground behind light. Make sure you have a
clean ground.
3.
Check for corrosion. Corrosion may occur on wires,
connections, lights (bulbs), and light.
4.
Check for burned out light.
5.
Check for unplugged wires. Make sure connections are
complete.
- 47 -
Electrical System
Stop Light Not Working
1. Check for power at 6-way plug.
Electrical Troubleshooting
Only One Side Working
1. Check all grounds on side not working. Make sure you have a clean
ground.
2.
Check for damaged or pinched wires.
Lighted Sign Not Working (Optional)
1. Check for power at 6-way plug.
2.
Check for proper ground behind light. Make sure you have a clean
ground.
3.
Check for corrosion. Corrosion may occur on wires, connections,
lights (bulbs), and light.
4.
Check for unplugged wires. Make sure connections are complete and
sealed.
5.
Check for burned out light.
Back Up Lights Not Working (Optional)
1. Check 6-way plug. Check connections from 6-way plug all the way to
wire that connects to back up lights.
2.
Check all grounds connected to back up lights. Make sure you have a
clean ground.
3.
Check lights.
Electrical System
(Rev. 1-95)
- 48 -
Trailer Brakes Do Not Apply
Malfunction
Corrective Action
a.
Slave booster on trailer
out of hydraulic fluid
a.
Refill reservoir.
b.
Excessive air in trailer
hydraulic system.
b.
Rebleed trailer hydraulic
system.
c.
Vacuum supply line not
connected orcrossed; or
vacuum control and supply
lines crossed.
c.
Reconnect correctly.
d.
Slave booster works, but puts
out no pressure.
d.
Hydraulic piston pushed off
push rod in booster, repair
or replace booster.
e.
Brake pads worn out.
e.
Replace brake pads.
f.
Combo or relay valve filter
clogged with dirt.
f.
Clean or install new filter
element.
g.
Slave booster not functioning.
g.
Replace booster.
h.
Combo valve not operating
properly.
h.
Remove and replace
i.
Combo valve tied into low
pressure side of frame
mounted booster.
i.
Connect to line from output
end of truck booster (line
to truck brakes).
Combo Valve Will Not Decrease Vacuum in Control Line
When Truck Brakes are Applied
Malfunction
Corrective Action
a.
Supply and control reversed.
a.
Reverse vaccum line hookup.
b.
Combo diaphragm leaking.
b.
Remove and replace valve.
c.
Restricted or plugged hydraulic
line to combo.
c.
Replace line.
d.
Master cylinder out of hydraulic
fluid.
d.
Refill.
- 49 -
Troubleshooting Guide
Troubleshooting Guide for Vacuum/Hydraulic Brakes
Trailer Brake Application Lags Behind Application of
Brakes on Towing Vehicle.
Malfunction
Corrective Action
a.
Booster stroking too far, due to
air in trailer hydraulic system.
a.
Rebleed trailer hydraulic
system.
b.
Control line restricted.
b.
Remove restriction.
c.
Booster mounted too far from
relay valve and/or relay valve
too far from vacuum tank.
c.
Relocate valve to within 3
feet of booster. Relay valve
should be mounted on
vacuum tank or within 2 feet
of tank.
Troubleshooting Guide
Trailer Brakes Drag After Release.
Malfunction
Corrective Action
a.
Breakaway check valve
malfunctioning.
a.
Replace spring and clean
breakaway valve.
b.
Hand control partially applied.
b.
Release hand control or
adjust.
c.
Control vacuum line restricted.
c.
Remove restriction or relace
line.
d.
Caliper or wheel cylinder frozen.
d.
Repair or replace.
e.
Dash or engine check valve
missing or not holding vacuum.
e.
Clean and check valve or
replace with new.
f.
Mashed or crimped hydraulic
lines on trailer.
f.
Replace mashed or crimped
section.
Trailer Brakes Drag on Acceleration.
Malfunction
Corrective Action
a.
No closed check valve on truck
a.
or valve leaking, causing break
away check valve to go shut before
trailer booster completely releases.
Clean or replace engine
check valve or clean.
b.
Spring too weak in trailer break
away valve.
Remove check valve, clean,
replace spring or open check
valve assembly.
- 50 -
b.
Malfunction
Corrective Action
a.
Trailer overloaded.
a.
Reduce load carried.
b.
Incorrect size combo valve.
b.
Install proper size valve.
c.
Air in trailer hydraulic system.
c.
Rebleed hydraulic system.
d.
Booster at maximum stroke.
d.
Rebleed hydraulic system or
replace booster.
e.
Vacuum low.
e.
Stop vacuum leak or repair
truck engine.
f.
Slave booster out of hydraulic
fluid.
f.
Refill reservoir and check
for leaks.
g.
Combo valve connected into low
pressure side of frame mounted
booster.
g.
Connect into high pressure
side of booster.
Combo Valve Chatters and/or Brake Pedal Surges When
Truck Brakes are Applied.
Malfunction
Corrective Action
a.
Air not completely eliminated
from truck hydraulic system.
a.
Rebleed system.
b.
Combo valve mounted in such a
position that it will not allow
bleeding.
b.
Remount with hydraulic
port up.
c.
Dirt under poppet seat of
combo valve.
c.
Remove and replace valve.
d.
Truck booster or hydraulic
boost unit faulty.
d.
Replace or repair vacuum
booster or hydraulic boost.
- 51 -
Troubleshooting Guide
Trailer Brakes Will Not Lock Up.
Troubleshooting Guide
Trailer Brakes Lock Up and Will Not Release.
Malfunction
Corrective Action
a.
No closed check valve on truck
or valve not holding, causing
trailer break away check valve
to lock closed.
a.
Clean or replace truck
closed check valve.
b.
Caliper or wheel cylinder frozen.
b.
Repair or replace.
c.
Trailer hydraulic lines mashed
or crimped.
c.
Repair or replace mashed or
or crimped section.
d.
Hand control on combo valve
applied.
d.
Release hand control.
e.
Combo valve stuck in the applied
position.
e.
Remove or replace.
f.
Vacuum control line broken,
disconnected, or plugged
f.
Remove line, connect line,
or remove restriction.
g.
Trailer break away valve spring
too weak, causing valve to close
as booster tries to release, or
valve installed backwards.
g.
Replace spring and install
open check seat toward
booster.
When Trailer Brakes are in Full Application, Truck Brakes
Only Partially Apply; or When Truck Brakes are Full
Application, the Trailer Brakes Only Partially Apply.
Malfunction
Corrective Action
a.
Incorrect size combo valve
installed on truck.
a.
Remove and replace.
b.
Excessive air in trailer brake
system would result in partial
trailer brake application.
b.
Rebleed trailer hydraulic
system.
- 52 -
Malfunction
Corrective Action
a.
Vacuum leak in truck or trailer
vacuum system.
a.
Stop leak.
b.
Engine out of tune or burned
valves.
b.
Tune engine valves.
c.
Dust plugs not installed in
quick couplers.
c.
Install plugs.
Trailer Brakes can be Applied with Hand Control But Not
with Foot Control.
Malfunction
Corrective Action
a.
Incorrect size of combo valve.
a.
Replace with proper valve.
b.
Combo valve not connected
to truck master cylinder.
b.
Connect hydraulic line from
combo to truck master
cylinder.
c.
Combo valve not tied into high
pressure side of frame mounted
booster.
c.
Connect into high pressure
side.
d.
Master cylinder out of hydraulic
fluid.
d.
Refill master cylinder.
Trailer Brakes can be Applied with Foot Controls But Not
with Hand Controls.
Malfunction
Corrective Action
a.
Hand control not traveling
full stroke.
a.
Eliminate restriction. Lever
should travel 1-7/8” at pull
cable eye.
b.
Cable has pulled out of lever
on valve.
b.
Replace cable.
c.
Cable kinked.
c.
Replace cable.
- 53 -
Troubleshooting Guide
Engine Will Not Reach Normal Vacuum, or it Runs Rough
After Combo Valve Installation.
Truck System will Not Hold a Vacuum After Engine has
Been Stopped.
Malfunction
Corrective Action
a.
Dash check valve leaking.
a.
Replace check valve.
b.
Leak in existing truck vacuum
system.
b.
Stop leak.
c.
Leak in truck trailer vacuum
system.
c.
Stop leak.
d.
Hand control in applied position.
d.
Release hand control.
e.
Quick couplers leaking.
e.
Replace plugs.
Troubleshooting Guide
Master Cylinder on Towing Vehicle Loses Fluid.
Malfunction
Corrective Action
a.
Hydraulic fittings or lines
leaking.
a.
Tighten and rebleed.
b.
Leaking master cylinder on
truck.
b.
Remove and replace.
c.
Caliper or wheel cylinder
leaking on truck.
c.
Repair or replace.
d.
Seal failure in combo valve.
d.
Remove and replace.
- 54 -
Brakes Do Not Apply.
Malfunction
Corrective Action
a.
Open circuits.
a.
Check all connections and
trace circuit for break.
b.
Severe under adjustment.
b.
Adjust brakes.
c.
Faulty controller.
c.
Test and correct.
d.
Short circuit.
d.
Trace circuit for shorts and
check ground.
Weak Brakes.
Malfunction
Corrective Action
a.
Grease or oil on magnets
or linings.
a.
Clean or replace.
b.
Loose or corroded connections.
b.
Clean and correct cause of
corrosion.
c.
Worn linings or magnets.
c.
Replace.
d.
Worn brake drums.
d.
Machine or replace.
e.
Improper synchronization.
e.
Re-synchronize.
f.
Under adjustment.
f.
Adjust brakes.
g.
Excessive trailer load.
g.
Reduce trailer load.
- 55 -
Troubleshooting Guide
Troubleshooting Guide for Electric Brakes
Locking or Dragging Brakes.
Malfunction
Corrective Action
a.
Incorrect adjustment.
a.
Adjust brakes.
b.
Improper synchronization.
b.
Re-synchronize.
c.
Faulty controller.
c.
Test and correct.
d.
Loose, bent or broken brake
components.
d.
Replace components.
e.
Out of round brake drums.
e.
Machine or replace.
f.
Faulty break away switch.
f.
Repair or replace.
g.
Loose or worn wheel bearings.
g.
Replace bearings and
examine hub.
Troubleshooting Guide
Intermittent or Surging Brakes.
Malfunction
Corrective Action
a.
Faulty controller.
a.
Test and correct.
b.
Loose wire connections.
b.
Check all connections.
c.
Shorts in wiring.
c.
Trace and repair wiring.
d.
Improper ground.
d.
Check ground. Do not
replace through hitch.
e.
Broken magnet leads.
e.
Check magnets and replace
if necessary.
f.
Out of round drums.
f.
Machine or replace.
g.
Loose wheel bearings.
g.
Check and adjust bearings.
- 56 -
If you believe that your vehicle has a defect which could cause a crash or
could cause injury or death, you should immediately inform the National
Highway Traffic Safety Administration (NHTSA), in addition to notifying
Wilson Trailer Company.
If NHTSA receives similar complaints, it may open an investigation, and if it
finds that a safety defect exists in a group of vehicles, it may order a recall
and remedy campaign. However, NHTSA cannot become involved in
individual problems between you, your dealer, or Wilson Trailer Company.
To contact NHSTA, you may call the Vehicle Safety Hotline toll-free 888-3274236 (TTY: 1-800-424-9153); go to http://www.safercar.gov: or write to:
Administrator, NHTSA, 1200 New Jersey Avenue S.E., Washington DC
20590. You can also obtain other information about motor vehicle safety
from http://www.safercar.gov.
(Rev. 8-08)
Keep Informed
All information contained in this manual, including illustrations, dimensions,
and specifications are based on the latest product information available at
the time of publication approval.
Changes are being made continually to improve the product. The right is
reserved to make changes in materials, equipment, design, specifications,
and models, and to discontinue models without additional notice or
obligations.
Keep informed about continued product changes by remaining in contact
with a Wilson Trailer Company authorized gooseneck representative on a
regular basis.
Customer Assistance
When it comes to service, repair and parts, remember that your Wilson
Trailer Company authorized gooseneck representative knows your vehicle
best. Contact him to help you with these matters. He is sincerely interested
in seeing that your trailer needs are completely satisfied.
If you need help in locating the Wilson Trailer Company authorized
gooseneck representative nearest you, call us at 800-798-2002 and ask for
Dealer Information Services.
If you are looking for the nearest Wilson repair facility refer to the following
Authorized Repair Facility list.
- 57 -
Consumer Information
Reporting Safety Defects
Authorized Repair Facilities
Utility Trailer Sales of Alabama
2800 Pinson Valley Parkway
PO Box 170698
Birmingham
AL
Utility Trailer Sales of Alabama
522 Ross Clark Circle
Dothan
AL
Arkansas Trailer
3200 South Elm St.
Little Rock
Ater Warehouse
3235 Hwy 49 West
West Helena
AR
AR
Liberty Trailer Company
10120 Hwy 70
North Little Rock
AR
Utility Trailer Sales Arizona
1402 North 22nd Ave.
Phoenix
AZ
Utility Trlr Sales Co of Arizona
751 E 48th St PO Box 7215
Tucson
AZ
D C Trailer Repair
11601 Santa Fa Ave E
Hesperia
CA
Consumer Information
The Trailer Company
234 Mt. Vernon Ave
Bakersfield
CA
California Custom Trailers
10391 E Stockton Blvd.
Elk Grove
CA
Dean Allen
Ph #205-849-7418
Fax #205-841-8417
35217
36303
Earl Dollar
Ph #334-794-7345
Fax #334-794-1728
72204
Mike Lauderdale
Ph #800-666-5417
Fax #501-686-1787
72390
Jeremy
Ph #870-572-1717
Fax #870-572-5212
72117
Buddy Whitfield
Ph #501-945-7679
Fax #501-945-7699
85009
Russ Kline
Ph #602-254-7213
Fax #602-271-4128
85725
Katie Schwartz
Ph #520-884-5959
Fax #520-622-0703
92345
David Clark
Ph #760-956-9643
Fax #760-956-9605
93307
Joe Huberty
Ph #661-324-7377
Fax #661-324-3984
95624
GOOSENECK ONLY
Ph #800-524-3689
Fax #916-714-7995
Andres Trailer Sales & Rentals Inc.
4 Miles East of Lethbridge on Hwy 3
RR 8 Site 32 Comp 52
Lethbridge, Alberta
CN
T1J 4P4
Jim Dudas
Ph #403-328-8434
Fax #403-329-3460
Ocean Trailer
7288 84th Street SE
Calgary, Alberta
T2C 3W5
Rick Featherstone
Ph #403-720-7100
Fax #403-720-5794
T5V 0A4
Pete Parsons
Ph #780-447-7373
Fax #780-447-7377
V4G 1B5
Brian Mann
Ph #604-940-0210
Fax #604-940-0610
Ocean Trailer
15205 - 131th Ave
Edmonton, Alberta
Ocean Trailer
9076 River Road
Delta, BC
CN
CN
CN
- 58 -
Trans East Trailer LTD
368 Urquhart Ave.
Moncton, NB
Trailers Canada
5185 Fountain Street
Breslau, Ontario
CN
CN
CN
Trans East Trailer LTD
821 Cumberland Ave.
Burlington, Ontario
CN
Ulch Trailer Sales LTD.
RR1 1719 Road 164
Kirkton, Ontario
CN
Select Trailer Sales (East)
6145 Nertherhart Road
Mississauga, Ontario
CN
Golden West Trailer Sales
1802 Stadacona St West
Moose Jaw, Sask.
CN
Beck’s Trailer Repair
22080 Hwy 34
Fort Morgan
Trailer Service Inc.
5200 E 78th Ave
Commerce City
CO
CO
Colt Western Leasing
515 East Chestnut, PO Box 529
Sterling
CO
Utility/Eastern Shore
US Hwy 13 & County Rd 40
Bridgeville
DE
JCS Enterprises
4390 Old McDonough
Conley
GA
Olsen’s Outdoor Power
2800 E 7th Street
Atlantic
IA
Central Trailer Service, LTD
316 Adventureland Drive
Altoona
IA
Des Moines - Jim Hawk
3515 Adventureland Dr
PO Box 217
Altoona
IA
Seegers Truck & Trailer
1125 - 66th Ave SW
Cedar Rapids
IA
R3C 2E6
Brad Martens
Ph #204-940-7364
Fax #204-940-7360
E1H 2R6
Jim Mullett
Ph #877-854-2225
Fax #506-854-2353
N0B 1M0
Steve Walda
Ph #519-648-2273
Fax #519-648-3631
L7N 3J7
Andrew Black
Ph #800-361-0529
Fax #905-331-4510
N0K 1K0
Steve Ulch/Steve Coward
Steve Obrien
Ph #519-229-6827
Fax #519-229-8938
L5T 1G5
Mike Thomas
Ph #905-696-9762
Fax #905-696-9805
S6H 4N8
Andrew Nagel
Ph #306-692-7402
Fax #306-694-0607
80701
Troy
Ph #970-542-2325
Fax #970-542-2700
80022
Dick or Kay Hinchliff
Ph #303-295-7556
Fax #303-292-3856
80751
Mike Hradecky
Ph #970-522-4830
Fax #970-522-2216
19933
Curtis Bell
Ph #302-337-7400
Fax #302-337-7554
30027
L. Holley
Ph #404-608-0890
Fax # None
GOOSENECK ONLY
Ph #800-383-4108
50022
50009
Randy Frisk
Ph #800-288-3032
Fax #515-957-0301
Kevin Ranard
Ph #515-967-3800
Fax #515-967-0284
50009
52404
John
Ph #319-363-5581
Fax #319-363-9435
- 59 -
Consumer Information
Ocean Trailer
415 Lucas Ave.
Winnipeg, Manitoba
Authorized Repair Facilities
Jim Hawk Council Bluffs
3119 S 9th St
Council Bluffs
IA
51501
Randy Wilson
Ph #712-366-2241
Fax #712-366-3441
51503
Virgil Whitehill
Ph #712-325-0408
Fax #712-325-0422
52806
Brad Robinson
Ph #563-386-2990
Fax #563-386-2982
51442
GOOSENECK ONLY
Ph #712-263-5824
Fax #712-252-9862
50651
Chad Meyer
Ph #319-342-3192
Fax #319-342-2742
52057
Greg Lahr
Ph #563-927-8106
Fax #563-927-9537
50563
Dave
Ph #712-469-2777
Fax #712-469-3017
Curry’s R.D. Truck & Trailer Repair
4200 Hwy 61 South
Muscatine
IA
52761
Duane Hook
Ph #563-263-4100
Fax #563-263-4101
Carroll Distributing Trailer
205 South Iowa Ave
Ottumwa
IA
52501
GOOSENECK ONLY
Ph #641-684-4052
Fax #641-684-4622
52039
GOOSENECK ONLY
Ph #800-866-1552
Fax #563-552-1555
Hitches Trailers & More
3404 Hwy 75 North
Sioux City
IA
51106
GOOSENECK ONLY
Ph #800-478-1660
Fax #712-252-9862
Wilson Trailer Company - Parts
2400 Leech Ave.
Sioux City
IA
51106
Whitehill Trailer
251 - 29th Ave.
Council Bluffs
IA
Jim Hawk Trk & Trailer
900 W 76th St
Davenport
IA
Stock Trailer City
144 North 7th Street
Denison
Buckshot Repair
1400 Poplar Street
La Porte City
Lahr Repair Inc.
2113 Hwy 38
Manchester
Consumer Information
Dave’s Diesel
27901 - 620th St
Manson
IA
IA
IA
IA
Avalon Service Center Inc.
20756 Hwy 52 N
Rickardsville
IA
Ph #800-728-5334
Wilson Trailer Company - Service
2400 Leech Ave.
Sioux City
IA
51106
Bob Hickson
Ph #800-397-5331
Wilson Trailer Company - Warranty
4400 So. Lewis Blvd.
Sioux City
IA
51106
Ph #800-798-2002
R & R Services Inc.
4125 S Eagleson Road
Boise
ID
Ron Tipton - Service Mg
Ph #208-362-7510
Fax #208-362-7514
83705
- 60 -
Ed Frostman
Ph #208-552-0575
Fax #208-552-0619
Wagner Transportation Co
410 Locust St N PO Box 192
Twin Falls
ID
83301
Bruce Major
Ph #208-733-7671
Fax #208-733-9262
61611
Adam Rusk
Ph #800-421-6559
Fax #309-694-0036
61739
Jerrold Haas
Ph #815-692-2210
Fax #815-692-6603
61032
Dan McWorthy
Ph #815-235-9835
Fax #815-235-4816
61046
Mike Sweitzer
Ph #815-493-8399
Fax #815-493-8499
61342
Tim Kennedy
Ph #815-539-5033
Fax #815-539-9664
62265
Marvin Spaeth
Ph #618-588-3596
Fax #618-588-3824
61470
Danny Mahr
Ph #309-775-3333
Fax #309-775-3336
61550
John Anderson
Ph #309-263-4644
Fax #309-263-4880
61201
Al Chandler
Ph #309-787-6177
Fax #309-787-8393
62702
Jim Weekly
Ph #217-789-2673
Fax #217-789-2686
Jim Hawk Truck Trailers Inc.
4001 Main
East Peoria
IL
Blue Line Shop Service
12096 N 2400 East Road
Fairbury
IL
Freeport Metal Specialites Co
1552 Illinois RT 75 E
Freeport
IL
Eastland Fabrication
14273 ILL Route 73
Lanark
Illinois Frame, Inc.
496 East Route 34
Mendota
Spaeth Welding
321 W Missouri
New Baden
IL
IL
IL
Hiel Enterprises
22842 IL Hwy 41 PO Box 110
Prairie City
IL
K C M Truck & Repair
225 W Courtland St
Morton
IL
Thermo King Quad Cities
3900 - 81st Ave. West
Rock Island
IL
Springfield Trlr
3370 Singer Ave
Springfield
IL
Schwarze Trailer Repair, Inc
5925 State Route 3
Waterloo
IL
WTS Indiana
417 Ransdell Road
Lebanon
IN
Wilson Trailer Sales of Kansas
2730 East Trail St PO Box 297
Dodge City
KS
Double “O” Trailer Service Inc.
225 E 19th Street
Paris
KY
Karen Schwarze
Ph #618-458-7706
62298
46052
Eric Clanton
Ph #765-482-4684
Fax #765-485-0195
68701
Shawn Barnes
Ph #620-225-6220
Fax #620-227-8627
40361
Sid Wells
Ph #859-987-4200
Fax #859-987-4247
- 61 -
Consumer Information
Utility Trailer Sales of Idaho Falls
4306 West Andco Drive
Idaho Falls
ID
83402-0127
Authorized Repair Facilities
Ater Warehouse, Inc
6554 Hwy 84 E PO Box 906
Ferriday
LA
Hudsonville Truck & Trlr Serv Co
3308 Hudson Trail Drive
Hudsonville
MI
Lum Hughston Trucking LLC
3701 W Stoney Corners Rd
PO Box 36
McBain
MI
49426
Mark Duimstra
Ph #616-896-8900
Fax #616-896-8067
GOOSENECK ONLY
Ph #231-825-2424
Fax #231-825-2449
49657
Scientific Brake & Equipment Co.
314 W. Genesee Avenue
Saginaw
MI
48602
Al Schreur
Ph #800-292-0235
Fax #
Albert Lea Trailer Repair
2101 Consul
Albert Lea
MN
Wayne Borneman
Ph #507-377-1671
Fax #507-373-2713
Ironside Trailer Sales Inc
345 2nd Ave NW
PO Box 273
Harmony
MN
Wilson Trailer Sales of MN
Hwy 14 E PO Box 337
Lamberton
MN
Wilson Trailer Sales of MN
1294 N River Dr PO Box 1996
Mankato
MN
Stenberg’s Supply
32530 US 10
Motley
Consumer Information
71334
Kris Foreman
Ph #318-757-4128
Fax #318-757-2726
Arena Trailer Sales
28195 Harry Ave
Randolph
Dahlberg Sales Inc
East Hwy 12
PO Box 203
Willmar
MN
MN
Trailer Connection
5408 Hwy 43
Joplin
GOOSENECK ONLY
Ph #507-886-4600
Fax #507-886-4602
55939
56152
Gary Pilaczynski
Ph #507-752-7833
Fax #507-752-7379
56001
Kurt Aarons
Ph #507-388-2907
Fax #507-625-6013
56466
GOOSENECK ONLY
Ph #218-352-6598
Fax #218-352-6309
55065
GOOSENECK ONLY
Ph #507-263-4488
Fax #507-263-4225
GOOSENECK ONLY
Ph #320-235-4180
Fax #320-235-4180
MN
Mo-Kan Trailer Sales
13196 State Hwy 171
Asbury
MO
Joplin Trailer Inc
2430 Davis Blvd.
Joplin
56007
MO
MO
56201
64832
GOOSENECK ONLY
Ph #417-642-5852
Fax #417-642-5853
64804
Joe Sullenger
Ph #417-782-2702
Fax #417-782-8613
64804
Dwight Payton
Ph #417-659-9999
Fax #417-659-8020
- 62 -
King City Motors
110 S Connecticut
PO Box 506
King City
GOOSENECK ONLY
Ph #660-535-4814
Fax #660-535-4823
MO
Martens Trailer Sales
25043 Dogwood Lane
PO Box 609
Kirksville
MO
Lawrence Trailer Rebuilders
321 E 3rd St
Montgomery City
MO
Evans Trailer & Equipment Inc
8575 E Hwy 60
Rogersville
MO
Springfield Trailer Service
2929 E Blaine
Springfield
MO
Utility Trailers
345 Hwy 495
Richland
MS
KR Rauch Company
1705 Old Hardin Road
Billings
MT
C.R.T.S. Inc.
3301 Integrity Drive
Garner
NC
C.R.S.T. Inc
2956 Amity Hill Road
Statesville
NC
Wilson Trailer Sales & Service
1825 Thorne Ave PO Box 3637
Wilson
NC
Johnsen Trailer Sales
2100 Industrial Dr PO Box 1562
Bismarck
ND
Johnsen Trailer Sales
3631 - 38th St PO Box 9493
Fargo
ND
Napoleon Oil
102 Broadway
PO Box 237
Napoleon
64120
Bruce Siders/Lonnie
Ph #800-224-5045
Fax #816-241-2380
64463
GOOSENECK ONLY
Ph #660-665-2660
Fax #660-665-2660
63501
63361
Don Lawrence
Ph #573-564-3791
Fax #573-564-3792
65742
GOOSENECK ONLY
Ph #866-387-0433
Fax #417-753-7260
65803
Shawn Lacey
Ph #417-864-8511
Fax #417-864-6424
39218
Jimmy Thompson
Ph #800-844-9100
Fax #601-932-7037
59101
Kevin Rauch
Ph #406-259-2053
Fax #406-259-4587
27529
Steve Eger
Ph #800-662-7026
Fax #919-773-4008
28677
Jerry Wright
Ph #877-754-4329
Fax #704-838-1709
27893
Bud Futch
Ph #252-237-6186
Fax #252-237-4145
58502
Roger Johnsen
Ph #701-255-0480
Fax #701-255-3991
58106
Robbie Fetsch
Ph #701-282-3790
Fax #701-282-3593
GOOSENECK ONLY
Ph #701-754-2684
ND
Wilson Trailer/Grand Island
2314 E Hwy 30 PO Box 2421
Grand Island
NE
58561
68802
Scott Lamb
Ph #308-381-1800
Fax #308-381-4845
- 63 -
Consumer Information
Jim Hawk Truck Trailers/Kansas
7500 NE Gardner Ave
Kansas City
MO
Authorized Repair Facilities
Cow Country Sales and Service LLC
902 West Hwy 2
Box 200
Hyannis
NE
GOOSENECK ONLY
Ph #877-450-2356
Fax #308-458-2591
69350
Northwest Nebraska Tire
54603 Hwy 20
PO Box 28
Osmond
NE
GOOSENECK ONLY
Ph #800748-3514
Fax #402-748-3316
68765
Ship’s Cycle
1375 Mountain City Hwy
Elko
NV
89801
E & R Trailer Sales & Service
20186 LIncoln Hwy
Middle Point OH
45863
Jason Will
Ph #419-968-2115
Fax #419-968-2712
Fullenkamps Frenchtown
11465 Mangen Rd
Varsailles
OH
45380
GOOSENECK ONLY
Ph #866-217-7440
Fax #937-526-9120
Wilson Trailer / Oklahoma
14100 So. Meridan
Oklahoma City
OK
Ronnie Burnside
Ph #800-522-9919
73173
Fax #405-691-4932
Pacific Truck & Trailer
4826 Monument Dr
Grants Pass
OR
97526
EMM Sales & Service Inc.
141 Zooks Mill Road
Brownstown PA
17508
Kevin Wimer
Ph #800-288-2081
Fax #717-859-3294
Carl’s Trailer Sales Inc
10958 US Hwy 212
PO Box 98
Belle Fourche
M & J Auto Inc
121 West Hwy 18
PO Box 308
Gregory
Consumer Information
GOOSENECK ONLY
Ph #888-860-8171
Fax #509-837-2346
Todd Singleton
Ph #541-471-4450
Fax #541-471-4452
GOOSENECK ONLY
Ph #800-861-4032
Fax #605-892-4272
SD
57717
GOOSENECK ONLY
Ph #605-835-9909
Fax #605-835-9908
SD
57533
Pioneer Garage Inc
525 Commerical Ave NE
PO Box 129
Highmore
SD
57345
A-Bar-K Trailer Sales
1003 E Rice Street
Sioux Falls
SD
57103
GOOSENECK ONLY
Ph #605-335-8934
Fax #605-335-3091
57104
Chuck Bagley
Ph #605-334-3033
Fax #605-334-6241
57106
Vern Feekes
Ph #605-368-5217
Fax #605-368-2199
Crossroads Trailer
4801 N. National Ave
Sioux Falls
Larson Truck Sales Inc
27115 Parklane Drive
Sioux Falls
GOOSENECK ONLY
Ph #800-666-5176
Fax #605-852-2795
SD
SD
Schuchards Westside GMC Truck
1800 9th Ave SW
PO Box 1506
Watertown
SD
Transport Parts Inc
3370 Fontaine Road
Memphis
TN
GOOSENECK ONLY
Ph #800-526-0078
Fax #605-886-8055
57201
38116
Ken Carter
Ph #901-396-3615
Fax #901-396-1375
- 64 -
37224
American Equipment & Trailer Inc
610 N Grand PO Box 32190
Amarillo
TX
79120
American Equipment & Trailer Inc
3707 Martin Luther King Blvd
PO Box 2010
Lubbock
TX
S & W Trailer Service
4803 Emil Road
San Antonio TX
Poulsen Trailer Sales Inc
2900 S Hwy 89-91
Logan
Allstate Truck & Trailer
35 N 700 W
North Salt Lake City
Raymond Estes
Ph #615-259-3301
Fax #615-726-2369
DeWight Stewart
Ph #806-383-8831
Fax #806-383-0662
Danny Jones
Ph #806-747-2991
Fax #806-747-3715
79404
78219
Gene Carrion
Ph #210-661-4691
Fax #210-666-0975
UT
84321
GOOSENECK ONLY
Ph #800-752-5636
Fax #435-753-8835
84054
Tony Martinez
Ph #801-936-1811
Fax #801-936-2754
UT
Meade Tractor Company
19209 Lee Hwy
PO Box 2497
Abingdon
VA
Utility Trailer Sales of Virginia
Division of C.R.T.S. Inc.
711 North Washington Hwy
Ashland
VA
Utility Trailers Sales of Virginia
Division of C.R.T.S. Inc.
146 Simmons Drive
Cloverdale
VA
GOOSENECK ONLY
Ph #800-245-2024
Fax #276-628-9231
24212
John Eddy
Ph #800-443-5254
Fax #804-798-2685
23005
Ph #877-992-9850
Fax #540-992-2878
24077
Freedom Truck Centers, Inc.
10310 Westbow
Spokane
WA
99224
Allen Feider
Ph #509-744-0390
Fax #509-363-3109
Northwest Trailer Center
6518 E Dean
Spokane
99212
Craig Stelling
Ph #509-535-3007
Fax #509-535-2017
99211
Darryl Heath
Ph #509-535-0291
Fax #509-535-0294
99212
Craig Stelling
Ph #509-535-3007
Fax #509-535-2017
WA
Leland Trailer Equipment
N 616 Lake Road PO Box 11217
Spokane
WA
Northwest Trailer Center
6518 E Dean
Spokane
WA
Freedom Truck Centers, Inc.
1901 Rudkin Road
Union Gap
WA
98903
Mike Hubbard
Ph #509-248-3718
800-378-9478
Precision Repair & Accessories
2101 Center Drive
Darlington
WI
53530
Ron Ray
Ph #608-776-8789
Fax #608-776-3838
Trudell Sales of Green Bay
Hwy 41 & 2049 Creamery Road
DePere
WI
54115
Ph #920-336-0601
Fax #920-336-1881
Badger Utility Inc of Wisconsin
4334 Daentel Road
DeForest
WI
53532
Dale Sturdevart
Ph #800-362-7370
Fax #608-249-5301
53812
Brian Hartl
Ph #608-568-7265
Fax #608-568-3229
Kieler Service Center
3722 Contractor Lane
Kieler
WI
Consumer Information
Trailer Sales of Tennessee Inc
414 Woodycrest Ave
PO Box 100894
Nashville
TN
Jeff Hendzel
- 65 -
Fax #509-575-1255
Certificate of Limited Warranty
The following warranty is given to the owner of
each new Wilson trailer sold by Wilson Trailer
Company or its authorized dealers in the United
States and Canada during the period of time and
upon the conditions set out in the Extended
Warranty Schedule.
Warranty Coverage
Wilson Trailer Company will repair or replace, at its option, any factoryinstalled part that is defective in material or factory workmanship under
normal use, maintenance and service. Normal use excludes any operation
in excess of GWVR (gross vehicle weight rating) and any use the Owner’s
Manual states is not recommended. Warranty repairs will be made and
adjusted in accordance with the Extended Warranty Schedule as it appears
on the following page. Any repaired or replaced parts are covered only for
the remainder of this warranty. All parts replaced under this warranty
become the property of Wilson Trailer Company.
This warranty begins on the date the trailer is delivered to the first retail
purchaser or the date it is first placed into service as a demonstrator or leased
trailer, whichever comes first.
Consumer Information
The warranty registration must be completed and returned to Wilson Trailer
Company within 14 days after the day the trailer is delivered to the owner.
Failure to return the warranty registration to Wilson Trailer Company within
the specified time will void the warranty.
This coverage applies only to Gooseneck trailers from 16’ - 32’ belly floor
lengths with GVWR of 25,000 pounds or less. The trailers must be towed by
trucks rated at no greater than a 2 ton rating. Use of tow vehicles other than
specified voids all warranty.
Non-coverage Items
This warranty does not cover the following items:
l
Tires.
l
Axles, wheels, tires, suspension, trailer frame and other components
and structure damaged through the use of single axle dump valves.
l
Non-standard features or items specified by the purchaser.
l
Parts that fail due to lack of required maintenance or use of nonequivalent parts.
l
Normal wear or deterioration on any part.
l
Any trailer normally driven outside the United States or Canada.
l
The replacement of expendable maintenance items when the replacement is not due to a defect in material or factory workmanship.
- 66 -
Owner’s Responsibility
As the owner of this trailer, you have the responsibility to perform the
required maintenance at the proper intervals and make reasonable
and normal use of the trailer.
Limitations and Disclaimers
Wilson Trailer Company disclaims any responsibility for any loss of
time or use of the parts or trailers in which the parts are installed,
transportation, cargo loss, or other incidental or consequential
damage. Any implied warranties, including the implied warranty of
merchantability and fitness for a particular purpose, are limited to the
duration of this written warranty. Wilson Trailer Company makes no
warranty as to quality or performance of its trailer other than set forth
above.
Some states do not allow limitations on how long an implied warranty
lasts, or the exclusion or limitation of incidental or consequential
damages, so the above limitations or exclusions may not apply to you.
This warranty gives you special legal rights, and you may also have
other rights which vary from state to state.
- 67 -
Consumer Information
To Get Warranty Service
Parts claimed to be defective in material or workmanship must be
brought to the attention of Wilson Trailer Company or the selling
dealer by taking the trailer to the dealer or by written notification
within ten (10) days of discovery, and any repairs or replacement must
be commenced within forty-five (45) days thereafter. Wilson Trailer
Company has the right to inspect the claimed defect and determine
whether the part is covered by this warranty. If you cannot get
warranty service, or you are dissatisfied with the service or with a
warranty decision, contact Technical Service and Claims Manager,
Wilson Trailer Company, P.O. Box 6300, Sioux City, IA 51106.
Extended Warranty Schedule
Per Written Warranty Conditions Covering Defect in
Material and Workmanship as to Construction and
Assembly and Installation Only
Use Vendor’s warranty
schedule for:
Axles
Hubs & Drums
Electric Brake Components
Hydraulic Brake Components
Wheels
Ball Type Couplers
5th Wheel Couplers
Contact Local Tire
Representative for:
Tires
NOTE
Consumer Information
% Allowable to owner (from date in service to original purchaser) for Material
and Labor excluding component parts and accessories.
1 - 60 Months
(100%)
Bottom Rail
Floor Crossbars
Roof Header
Roof Bows
Undercarriage Assemblies
1 - 12 Months
(100%)
Side Panels
Metal Flooring
Front Assembly
Rear Assembly
Metal Doors
Metal Gates
Metal Roof Skin
Lights and Wiring
This warranty shall not apply from owner operation
exceeding GVWR rating of the trailer.
Wilson Trailer Company
- 68 -
CARLISLE WHEELS
Structural
Coatings
Out of round or bent lip
Lifetime
90 days
1-24 months
100% Parts ONLY
100% Parts ONLY
100% Parts ONLY
DEXTER AXLE
Torflex
Bearings for Torflex
Spring
1-60 months
1-24 months
1-24 months
100% Parts & Labor
100% Parts & Labor
100% Parts & Labor
DEXTER HUB & DRUMS
1-12 months
100% Parts & Labor
DEXTER BRAKE COMPONENTS
1-12 months
100% Parts & Labor
DEXTER WHEELS
1-12 months
100% Parts & Labor
GROTE LIGHTS
120 months/original owner/
Parts ONLY
ALL GROTE LIGHT WARRANTY MUST BE RUN THROUGH GROTE
DIRECT, NOT WILSON TRAILER AT 1-800-628-0809
Ext. 300 CUSTOMER SERVICE.
REDLINE VAC OVER
HYDRAULIC BRAKES
1-12 months
100% Parts & Labor
REDLINE AIR OVER
HYDRAULIC BRAKES
1-12 months
100% Parts & Labor
DEXTER ELECTRIC/HYDRAULIC BRAKES
Brake Actuators
1-24 months
100% Parts ONLY
BALL TYPE COUPLER
(Gooseneck Coupler)
1-12 months
100% Parts & Labor
REDNECK
(Bulldog Brand)
1-60 months
100% Parts ONLY
BINKLEY JACK STAND
1-24 months
25-60 months
100% Parts & Labor
100% Parts
- 69 -
Vendor Warranties
Vendor Warranties for PSGN (08/01/2012)
C E Q U E N T Bulldog Gooseneck Coupler
TM
TRAILER PRODUCTS
Read, Understand, Follow and Save These Instructions
•
•
•
•
Read, understand and follow all instructions before installing and
using this product. Never allow anyone unfamiliar with these
instructions to use this product.
Read, understand and follow all instructions provided by the
manufacturer of the product(s) on which this product will be installed.
Installation of this product must conform to the following mounting
instructions.
Save these instsrtuctions for use as a reference in the future.
WARNING
Failure to follow these warnings and instructions may result in
property damage, serious bodily injury, and/or death.
•
•
•
Bulldog Gooseneck Coupler
•
•
•
•
•
•
•
Purchaser/owner must ensure that product is installed according to
these instructions.
Purchaser/owner must not alter or modify the product.
Operator and bystanders should never position any body part under
any portion of this product or the load being supported.
Do Not allow children to play on or around this product or the load
being supported.
Weigh your trailer plus added load. Do not exceed the lesser of
coupler, hitch, vehicle, ball, or trailer weight ratings (including load).
Use only a 2-5/16” ball rated equal to or greater than the capacity of
this coupler. If uncertain, contact Cequent Trailer Products at 800604-9466 or www.cequentgroup.com.
Always secure load, vehicle and trailer (by blocking wheels) before
latching/unlatching coupler.
If equipped with a load bearing pin, set screw must be torqued to 75100 ft.lbs. Otherwise set screws must be torqued to 150-170 ft.lbs.
Jam nut(s) must be torqued to 80-90 ft.lbs. Periodically check for
proper torque and tighten if necessary. Check for wear on inner tube
if retightening is needed.
If equipped with a load bearing pin, it must be fully inserted through
both the inner and outer tubes in order for the coupler to support
its rated load.
Do not tow unless the load bearing pin is fully inserted and
retaining pin is installed.
- 70 -
•
•
•
Do not exceed 8” maximum extension for this gooseneck coupler.
Measure the coupler extension as the difference between fully
retracted and fully extended positions. Couplers with properly
installed load bearing pins and square adjustable gooseneck
couplers only extend within this range.
Keep the ball pocket, latch, and handle clean.
All welding must be performed by an AWS certified welder.
This product rated according to SAE J2638.
Before Towing:
• Check vehicle, hitch, ball and coupler for signs of wear or damage.
Ensure that the coupler opens, closes, and the handle springs closed
when released.
• Replace bent, broken, or worn parts before using this product.
• Ensure that the hitch ball is fully seated in the coupler ball pocket and
the latch is closed.
• Make sure that the trailer safety chains are properly connected to the
towing vehicle and trailer.
• Make sure that all trailer lighting is hooked up and working properly.
Installation Instructions
WARNING
Failure to follow all installation instructions could result in
coupler failure.
Before mounting the coupler confirm that there will be no interferences
from the tow vehicle, tongue, ground, and any other mounted accessories
while stationary or in motion. The set screw(s) must be facing the towing
vehicle. Before installing, check for interference in extended and retracted
positions. Check for interference again after installation is complete. Weld
size, gusseting requirements, coupler height, and orientation are dependent
on trailer design and customer requirements, however, the outer tube must
be supported completely by attaching gussets as low as possible to the outer
tube. Avoid heat damage to coupler during welding, and do not weld over
or near any holes or hardware on the coupler. All welding must be performed by an AWS certified welder. The outer tube must be rigidly attached
to the trailer in order for the coupler to support its maximum rated load
according to SAE J2638. Coupler must remain vertical after installation to
ensure proper pivoting. After installation, check to make sure that coupler
operation has not been impaired in any way. Do not use coupler if its operation has been impaired. After assembly and painting, but prior to being
used, any enclosed labels must be affixed to the coupler and
premask removed.
- 71 -
Bulldog Gooseneck Coupler
•
25,000# & 30,000# Gooseneck Coupler Installation Guidelines:
1) Be sure that the coupler will reach the towing vehicle to couple with the
hitch ball while the load bearing pin is installed
properly, or within the extension of the coupler
if the coupler is a square adjustable gooseneck.
If equipped with a load bearing pin, it must be
fully inserted through both the inner and outer
tubes and the retaining pin installed in order for
the coupler to support its rated load.
2) Tighten the set screw and jam nut to minimize vibrations in the coupler during towing.
Set screw must be torqued to 75-100 ft.lbs. Jam
nut(s) must be torqued to 80-90 ft.lbs.
3) Never use the set screw as a replacement for
the load bearing.
Bulldog Goosenck Coupler
Gusseting:
To support the coupler’s rated load, reinforcements must extend down the
outer tube within 3” above the bottom of the outer tube. The coupler must
be held rigid and vertical, and must not be damaged by heat during installation. Note: Reinforcement for non-adjustable couplers must be
within 20” above locking
plates.
20,000# Round 25,000# Square
Gooseneck Coupler Installation
Guidelines:
1) Do not exceed 8” maximum extension for this
gooseneck coupler.
2) Tighten the set screws and jam nut to secure
the coupler during towing. If equipped with a
load bearing pin and single set screw, the set
screw must be torqued to 75-100 ft.lbs. For
non-load bearing pin models with two set
screws, torque set screws to 150-170 ft.lbs.
Jam nut(s) must be torqued to 80-90 ft.lbs.
3) Never use the set screw or any other device
as a replacement for the load bearing pin.
- 72 -
To Couple:
1) Block trailer wheels.
2) Align hitch ball beneath
coupler.
3) Set the locking pin in the
open position.
4) Slide the locking plate into
the open position and lower
the trailer onto the hitch ball.
5) Visually check that the hitch
ball is fully seated in the coupler.
6) Slide the locking plate into the closed position.
7) Set the lock pin in the closed position to close the coupler.
To Uncouple:
1) Block trailer wheels.
2) Set the locking pin in the open position.
3) Slide the locking plate into the open position and raise the trailer from the
hitch ball.
Maintenance
Keep ball pocket and mechanism
clean. The following procedures
should be performed at least
annually:
•Check set screw torque
•Grease ball pocket
•Oil pivot points with SAE 30 wt.
motor oil.
•Inspect retaining pin and
replace if necessary.
How to Order
Use only Cequent Trailer Products’ parts. Replacement parts are available
through Cequent Trailer Products’ Customer Service Department, 715-6931700 or 800-604-9466. Please specify product model number.
- 73 -
Bulldog Gooseneck Coupler
Operation
Bulldog Goosenck Coupler
Limited Three Year Warranty
Warranty. Cequent Trailer Products, Inc. (“We”) warrants to the original
purchaser (“You”) that the product will be free from defects in material and
workmanship for a period of three years under normal use and service, ordinary wear and tear excepted. If the product does not comply with this warranty, We will replace the product without charge to You and within a reasonable time or, at Cequent’s option, refund the purchase price. This warranty is not transferable.
Limitations on the Warranty. The warranty does not cover the following: (a) normal wear and tear; (b) damage through abuse, neglect, misuse,
or as a result of any accident or in any other manner; (c) damage from misapplication, overloading, or improper installation; (d) improper maintenance; (e) a product altered in any manner by anyone other than us.
Obligations of Purchaser. To make a claim, contact us at 1050
Indianhead Drive, Mosinee, WI 54455, 1-800-604-9466, identify the product,
and follow the instructions that will be provided. Any returned product that
is replaced or refunded becomes the property of Cequent. You will be
responsible for shipping costs to us. Please retain your purchase receipt to
verify date of purchase. This must be produced to honor warranty claim.
Remedy Limits. Repair or replacement is the purchaser’s sole remedy
under this or any other warranty on the product, whether express or
implied. We shall not be liable for service or labor charges incurred in removing or replacing product or any incidental or consequential damages of any
kind. We expressly disclaim any implied warranty of merchantability or fitness for particular purpose after the three-year warranty period. Some states
do not allow the exclusion of incidental or consequential damages or limitation of an implied warranty so the above exclusion and limitation may not
apply to you.
Legal Rights. This warranty gives you specific legal rights, and You may
have rights other which vary from state to state. ANY IMPLIED WARRANTY OF MERCHANTABILITY OR FITNESS FOR A PARTICULAR PURPOSE ON ANY PRODUCT SHALL BE LIMITED TO THREE YEARS
FROM THE DATE OF RETAIL PURCHASE TO YOU. Some states do not
allow limitations on how long an implied warranty lasts, so the above limitation may not apply to you.
This warranty is governed by the laws of the United States of America and is
void where prohibited.
Cequent Trailer Products
1050 Indianhead Dr., P.O. Box 8 Mosinee, WI 54455-0008
800/604-9466 715/693-1700 Fax 715/693-1799
[email protected]
www.cequentgroup.com
- 74 -
TM
TRAILER PRODUCTS
Read, Understand, Follow and Save These Instructions
•
•
•
•
Read, understand and follow all instructions before installing and
using this product. Never allow anyone unfamiliar with these
instructions to use this product.
Read, understand and follow all instructions provided by the
manufacturer of the product(s) on which this product will be installed.
Installation of this product must conform to the following mounting
instructions.
Save these instsrtuctions for use as a reference in the future.
WARNING
Failure to follow these warnings and instructions may result in
property damage, serious bodily injury, and/or death.
•
•
•
•
•
•
•
•
•
•
•
•
•
•
•
•
Purchaser/owner must ensure that product is installed according to
these instructions. Purchaser/owner must not alter or modify the
product.
Operator and bystanders should never position any body part under
any portion of this product or the load being supported.
Do Not allow children to play on or around this product or the load
being supported.
Fully retract and/or rotate jack before towing.
When using the drop leg, make certain the drop leg pin is fully
inserted before using the jack.
Secure the load, vehicle and trailer from rolling (by blocking wheels)
when operating jack or coupling trailer.
Jack capacity is limited to the lesser of the jack, footplate, or caster
wheel capacity.
Never exceed maximum rated capacity. Refer to stamped markings
or decals on product to obtain capacity. If uncertain, contact Cequent
Trailer Products at 800-604-9466 or www.cequentgroup.com
These jacks are designed for vertical loading. Excessive side forces
may cause jack failure and must be avoided.
If this product has a pivot tube mount, make certain the pivot pin is
fully inserted through both sides on the pivot tube and the pivot
mount.
If this product has a drop leg, never attempt to adjust the drop leg
when the jack is under load.
These jacks are designed for mounting to flat surfaces only.
Keep clear of pinch point at drop leg pin. The drop leg will naturally
drop or retract very quickly depending on model.
Keep clear of holes in drop leg.
All welding must be performed by an AWS certified welder.
Always replace bent, broken, or worn parts before using
product.
- 75 -
12,000 lb Square Jack
C E Q U E N T 12,000 lb Square Jack
Installation Instructions
Before mounting the jack confirm that there will be no interference from the
tow vehicle, tongue, ground, and any other mounted accessories while stationary or in motion. Before installing, check for interference in all positions
including handle swing (in both gears, if applicable) and swivel positions if
applicable. Check for interference again after installation is complete.
Direct Mount to Load-Bearing Member:
1) All welding must be performed by an AWS certified
welder.
2) Three 2” long 1/4” fillet welds must be placed on both
sides of the jack along the contacting surface. The welds
should be as far apart as possible to maximize strength
under load.
3) If mounting in a tandem application, align the jacks
carefully so they raise and lower together and share the
load equally.
2-Speed Shift Pattern:
The jack handle moves 5/8”-3/4” while
shifting. This clearance must be accounted
for during installation.
•High gear is engaged when the shaft is
pushed in.
•Low gear is engaged when the shaft is
pulled out.
12,000 lb Square Jack
Non-Spring Return Drop Leg
(Equipped w/handles)
Spring Return Drop Leg
(Not Equipped w/handles)
CAUTION: Spring return drop leg has high tension return spring
Direct Mount:
1) All welding must be performed by an AWS
certified welder.
2) Place the jack at the desired location. Weld
3” in 2 locations on both sides of the jack using
a 1/4” fillet weld.
- 76 -
4) Mate the jack to the pivot tube and
secure the supplied pin.
Drop Leg Operation
Spring Return Drop Leg Operation:
WARNING: Drop leg will naturally retract very quickly.
1) Verify that the jack is not supporting any load.
2) If extended, place your foot on foot plate to control
the return of the drop leg.
3) Disengage drop leg pin by rotating to the disengaged position.
4) Carefully move the drop leg to the desired position
using your foot.
5) Engage the drop leg pin by rotating it to the
engaged position and into the desired adjustment hole.
6) Verify that the drop leg pin is fully inserted into the
jack by checking for no clearance between the drop leg
pin and housing. If you see clearance, you must adjust
the drop leg to fully seat the pin into the hole location.
You may need to lubricate the drop leg pin assembly as
described in the maintenance section. If you are unable
to fully seat the pin DO NOT USE.
Non-Spring Return Drop Leg Operation.
WARNING: Drop leg will naturally fall.
1) Verify that the jack is not supporting any load.
2) If retracted, grasp the handle of foot plate to control the fall of the drop leg.
3) Disengage drop leg pin by rotating to the disengaged position.
4) Carefully move the drop leg to the desired position.
5) Engage the drop leg pin by rotating it to the engaged position and into the desired
adjustment hole.
6) Verify that the drop leg pin is fully inserted into the jack by checking for no clearance between the drop leg pin and housing. If you see clearance, you must adjust the
drop leg to fully seat the pin into the hole location. You may need to lubricate the
drop leg pin assembly as described in the maintenance section. If you are unable to
fully seat the pin DO NOT USE.
- 77 -
12,000 Square Jack
Weld-on Pivot Tube Mounting
Instructions:
1) All welding must be performed by an AWS
certified welder.
2) The non-beveled side of the pivot tube is
welded to the tongue.
3) Place the weld-on pivot tube against the
tongue and weld all around with a 1/4” fillet
weld. Align one set of pivot mount holes vertically.
Maintenance
The following procedures should be performed at least annually:
The gears, bushings, and screw of the jack must be kept lubricated. For sidewind models, apply a small amount of automotive grease with a grease gun
at the lubrication points found on the side of the jack near the input shaft.
Rotate the jack handle to distribute the grease evenly. A lightweight oil must
be applied to the input shaft bushings at both sides of the jack or gear box.
For top-wind models, the screw-stem should be lubricated with a lightweight oil. If equipped, the drop leg pin and spring must be kept clean and
lubricated with a light-weight oil.
How to Order
12,000 Square Jack
Use only Cequent Trailer Products’ parts. Replacement parts are available
through Cequent Trailer Products’ Customer Service Department, 715-6931700 or 800-604-9466. Please specify product model number.
- 78 -
Warranty. Cequent Trailer Products, Inc. (“We”) warrants to the original
purchaser (“You”) that the product will be free from defects in material and
workmanship for a period of three years under normal use and service, ordinary wear and tear excepted. If the product does not comply with this warranty, We will replace the product without charge to You and within a reasonable time or, at Cequent’s option, refund the purchase price. This warranty is not transferable.
Limitations on the Warranty. The warranty does not cover the following: (a) normal wear and tear; (b) damage through abuse, neglect, misuse,
or as a result of any accident or in any other manner; (c) damage from misapplication, overloading, or improper installation; (d) improper maintenance; (e) a product altered in any manner by anyone other than us.
Obligations of Purchaser. To make a claim, contact us at 1050
Indianhead Drive, Mosinee, WI 54455, 1-800-604-9466, identify the product,
and follow the instructions that will be provided. Any returned product that
is replaced or refunded becomes the property of Cequent. You will be
responsible for shipping costs to us. Please retain your purchase receipt to
verify date of purchase. This must be produced to honor warranty claim.
Remedy Limits. Repair or replacement is the purchaser’s sole remedy
under this or any other warranty on the product, whether express or
implied. We shall not be liable for service or labor charges incurred in removing or replacing product or any incidental or consequential damages of any
kind. We expressly disclaim any implied warranty of merchantability or fitness for particular purpose after the three-year warranty period. Some states
do not allow the exclusion of incidental or consequential damages or limitation of an implied warranty so the above exclusion and limitation may not
apply to you.
Legal Rights. This warranty gives you specific legal rights, and You may
have rights other which vary from state to state. ANY IMPLIED WARRANTY OF MERCHANTABILITY OR FITNESS FOR A PARTICULAR PURPOSE ON ANY PRODUCT SHALL BE LIMITED TO THREE YEARS
FROM THE DATE OF RETAIL PURCHASE TO YOU. Some states do not
allow limitations on how long an implied warranty lasts, so the above limitation may not apply to you.
This warranty is governed by the laws of the United States of America and is
void where prohibited.
Cequent Trailer Products
1050 Indianhead Dr., P.O. Box 8 Mosinee, WI 54455-0008
800/604-9466 715/693-1700 Fax 715/693-1799
[email protected]
www.cequentgroup.com
- 79 -
12,000 Square Jack
Limited Three Year Warranty
A
G
Adjustment, Brake . . . . . . . . . . . . . . . . . . . . . . .34
Assistance, Customer . . . . . . . . . . . . . . . . . . . . .57
Attachment, Coupler . . . . . . . . . . . . . . . . . . . . .26
Authorized Repair Facilities . . . . . . . . . . . . . . .58
B
Bearings, Optional Oil Bath . . . . . . . . . . . . . . .33
Bearings, Wheel . . . . . . . . . . . . . . . . . . . . . . . . .32
Box, Electrical Junction . . . . . . . . . . . . . . . . . . .42
Brake Application System . . . . . . . . . . . . . . . . .39
Brake Adjustment . . . . . . . . . . . . . . . . . . . . . . . .34
Brake Controls . . . . . . . . . . . . . . . . . . . . . . . . . . .27
Brake & Electrical Controls . . . . . . . . . . . . . . . .27
Brakes . . . . . . . . . . . . . . . . . . . . . . . . . . . . . . . . . .34
Brakes, Operation of . . . . . . . . . . . . . . . . . . . . .32
Brakes, Troubleshooting Guide . . . . . . . . . . . .49
Bulldog Gooseneck Coupler . . . . . . . . . . . . . .68
C
Catch, Rear Slam . . . . . . . . . . . . . . . . . . . . . . . . .32
Certificate of Limited Warranty . . . . . . . . . . . .64
Chains, Safety . . . . . . . . . . . . . . . . . . . . . . . . . . .26
Checklist, Tire Safety . . . . . . . . . . . . . . . . . . . . . .25
Connector Wiring Diagram, Electrical . . . . . .42
Consumer Information . . . . . . . . . . . . . . . . . . .57
Controls, Brake . . . . . . . . . . . . . . . . . . . . . . . . . .27
Controls, Brake & Electrical . . . . . . . . . . . . . . .27
Coupler Attachment . . . . . . . . . . . . . . . . . . . . .26
Coupler, Bulldog Gooseneck . . . . . . . . . . . . . .68
Coupler, Operation of . . . . . . . . . . . . . . . . . . . .31
Customer Assistance . . . . . . . . . . . . . . . . . . . . .57
Gate and Ramp Hinges . . . . . . . . . . . . . . . . . . .32
Gates . . . . . . . . . . . . . . . . . . . . . . . . . . . . . . . . . . .28
Gates, Operation of . . . . . . . . . . . . . . . . . . . . . .30
General Maintenance . . . . . . . . . . . . . . . . . . . .32
Glossary of Tire Terminology . . . . . . . . . . . . . .11
Gooseneck Coupler, Bulldog . . . . . . . . . . . . . .68
Grease Seals, Oil or . . . . . . . . . . . . . . . . . . . . . . .33
Guide, Troubleshooting . . . . . . . . . . . . . . . . . .49
H
Handling, Over-The-Road Safe . . . . . . . . . . . . . .7
Hinges, Gate and Ramp . . . . . . . . . . . . . . . . . .32
I
Index . . . . . . . . . . . . . . . . . . . . . . . . . . . . . . . . . . .74
Information, Consumer . . . . . . . . . . . . . . . . . . .57
Information, Tire Safety . . . . . . . . . . . . . . . . . . . .9
Informed, Keep . . . . . . . . . . . . . . . . . . . . . . . . . .57
Inspection Procedure Before Trip . . . . . . . . . .26
Instructions, Operating . . . . . . . . . . . . . . . . . . .30
J
Jack, 12,000 lb Square . . . . . . . . . . . . . . . . . . . .73
Junction Box, Electrical . . . . . . . . . . . . . . . . . . .42
K
Keep Informed . . . . . . . . . . . . . . . . . . . . . . . . . . .57
King Pin Engagement, 5th Wheel & . . . . . . .31
L
D
Decals and Emblems . . . . . . . . . . . . . . . . . . . . . .5
Defects, Reporting Safety . . . . . . . . . . . . . . . . .57
Diagram, Electric Brakes Wiring . . . . . . . . . . .43
Diagram, Vacuum/Hyd. Wiring . . . . . . . . . . .44
Door Locks . . . . . . . . . . . . . . . . . . . . . . . . . . . . . .29
Limited Warranty, Certificate of . . . . . . . . . . .64
Loading & Transport of Livestock . . . . . . . . . . .4
Load Limit, Steps for Determining . . . . . . . . . .9
Locks, Door . . . . . . . . . . . . . . . . . . . . . . . . . . . . .28
M
Maintenance, General . . . . . . . . . . . . . . . . . . . .32
Modification of Trailer . . . . . . . . . . . . . . . . . . . . .5
E
Index
Electric Brakes, Troubleshooting Guide . . . .55
Electric Brakes - Wiring Diagram . . . . . . . . . .42
Electric/Hydraulic Brake Appl. System . . . . 40
Electrical Connector Wiring Diagram . . . . . .42
Electrical Controls, Brake and . . . . . . . . . . . . .27
Electrical Junction Box . . . . . . . . . . . . . . . . . . .43
Electrical System . . . . . . . . . . . . . . . . . . . . . . . . .38
Electrical Troubleshooting . . . . . . . . . . . . . . . .42
Emblems, Decals and . . . . . . . . . . . . . . . . . . . . . .5
Engagement, Fifth Wheel & King Pin . . . . . .31
Extended Warranty Schedule . . . . . . . . . . . . .66
F
Facilities, Authorized Repair . . . . . . . . . . . . . . .58
Fastenings . . . . . . . . . . . . . . . . . . . . . . . . . . . . . .32
Fifth Wheel & King Pin Engagement . . . . . . .31
First, Safety . . . . . . . . . . . . . . . . . . . . . . . . . . . . . .18
N
Normal Trailer Operation . . . . . . . . . . . . . . . . . .4
Notice, Washout . . . . . . . . . . . . . . . . . . . . . . . . .33
O
Oil or Grease Seals . . . . . . . . . . . . . . . . . . . . . . .33
Operating Instructions . . . . . . . . . . . . . . . . . . .30
Operating Slam Catch . . . . . . . . . . . . . . . . . . . .32
Operation . . . . . . . . . . . . . . . . . . . . . . . . . . . . . . .26
Operation of Brakes . . . . . . . . . . . . . . . . . . . . . .30
Operation of Coupler . . . . . . . . . . . . . . . . . . . .31
Operation of Brakes . . . . . . . . . . . . . . . . . . . . . .30
Operation of Gates . . . . . . . . . . . . . . . . . . . . . .30
Operation, Normal Trailer . . . . . . . . . . . . . . . . . .4
Optional Oil Bath Bearings . . . . . . . . . . . . . . .33
Over-The-Road Safe Handling . . . . . . . . . . . . . .7
- 80 -
W
Q
R
Rear Slam Catch . . . . . . . . . . . . . . . . . . . . . . . . .32
Repair Facilities, Authorized . . . . . . . . . . . . . . .58
Reporting Safety Defects . . . . . . . . . . . . . . . . . .57
Requirements, Torque . . . . . . . . . . . . . . . . . . . .36
Rims, Wheels and . . . . . . . . . . . . . . . . . . . . . . . .28
S
Warranty, Certificate of Limited . . . . . . . . . . .62
Warranty Schedule, Extended . . . . . . . . . . . . .64
Warranties, Vendor . . . . . . . . . . . . . . . . . . . . . .65
Washout Notice . . . . . . . . . . . . . . . . . . . . . . . . .33
Wheels . . . . . . . . . . . . . . . . . . . . . . . . . . . . . . . . . .36
Wheels and Rims . . . . . . . . . . . . . . . . . . . . . . . .28
Wheels and Tires . . . . . . . . . . . . . . . . . . . . . . . .36
Wheel Bearings . . . . . . . . . . . . . . . . . . . . . . . . . .32
Wheel Torques . . . . . . . . . . . . . . . . . . . . . . . . . . .8
Wiring Diagram, Electric Brakes . . . . . . . . . . .41
Wiring Diagram, Electric Connector . . . . . . .40
Wiring Diagram, Vacuum/Hyd. Brakes . . . . .42
Safe Handling, Over-The-Road . . . . . . . . . . . . . .7
Safety . . . . . . . . . . . . . . . . . . . . . . . . . . . . . . . . . . . .5
Safety Chains . . . . . . . . . . . . . . . . . . . . . . . . . . . .26
Safety Checklist, Tire . . . . . . . . . . . . . . . . . . . . . .25
Safety Defects, Reporting . . . . . . . . . . . . . . . . .57
Safety First . . . . . . . . . . . . . . . . . . . . . . . . . . . . . .18
Safety Information, Tire . . . . . . . . . . . . . . . . . . . .9
Safety Tips, Tire . . . . . . . . . . . . . . . . . . . . . . . . . .25
Schedule, Extended Warranty . . . . . . . . . . . . .66
Seals, Oil or Grease . . . . . . . . . . . . . . . . . . . . . . .33
Side Structure . . . . . . . . . . . . . . . . . . . . . . . . . . . .29
Slam Catch, Operating . . . . . . . . . . . . . . . . . . .32
Square Jack, 12,000 lb . . . . . . . . . . . . . . . . . . . .73
Steps for Determining Load Limit . . . . . . . . . . .9
System, Electrical . . . . . . . . . . . . . . . . . . . . . . . . .38
System, Electric/Hyd. Brake Application . . . .40
T
Tires . . . . . . . . . . . . . . . . . . . . . . . . . . . . . . . . . . . .27
Tire Safety . . . . . . . . . . . . . . . . . . . . . . . . . . . . . . . .9
Tire Safety Checklist . . . . . . . . . . . . . . . . . . . . . .25
Tire Safety Information . . . . . . . . . . . . . . . . . . . .9
Tire Safety Tips . . . . . . . . . . . . . . . . . . . . . . . . . . .25
Tire Terminology, Glossary of . . . . . . . . . . . . .11
Tires, Wheels and . . . . . . . . . . . . . . . . . . . . . . . .36
Torque Requirements . . . . . . . . . . . . . . . . . . . .36
Torques, Wheels . . . . . . . . . . . . . . . . . . . . . . . . . .8
Trailer, Modification of . . . . . . . . . . . . . . . . . . . . .5
Trailer Operation, Normal . . . . . . . . . . . . . . . . . .4
Transport of Livestock, Loading & . . . . . . . . . .4
Troubleshooting, Electrical . . . . . . . . . . . . . . . .45
Troubleshooting Guide . . . . . . . . . . . . . . . . . . .49
U
V
Vacuum/Hyd. Brakes Troubleshooting . . . . .49
Vacuum/Hyd. Brakes - Wiring . . . . . . . . . . . . .44
Vendor Warranties . . . . . . . . . . . . . . . . . . . . . . .67
- 81 -
X
Y
Z
Index
P
Procedure Before Trip, Inspection . . . . . . . . .26
Wilson Trailer Company
4400 So. Lewis Boulevard l Sioux City, Iowa 51106
Telephone l 712-252-6500
www.wilsontrailer.com
E-Mail: [email protected]
GN1.013 Printed August 2015
Wilson Trailer Company
4400 So. Lewis Boulevard l Sioux City, Iowa 51106
Telephone l 712-252-6500
www.wilsontrailer.com
E-Mail: [email protected]
GN1.013 Printed January 2015