1
LCXW32HD1
LCXW37HD1
TV Safety Warning
Damage
Never use your TV if it is damaged in any way. Always place your TV on a flat level surface avoiding
anywhere that may be subject to strong vibration.
Weather
It is advisable to unplug the aerial during an electrical storm.
Temperature
Avoid extremes of temperature, either hot or cold, place your TV well away from heat sources such as
radiators or gas/electric fires.
Naked Flames
Naked flames such as candles and night-lights should not be placed on or near your TV.
Ornaments
Vases and other water containers or lamps should not be put on top of your TV set.
Moisture
Do not allow your TV to be exposed to rain, moisture, dust. If any liquid is spilt into your TV it can cause
serious damage. If you spill any liquid into your TV switch it off at the mains immediately. Contact your store.
Ventilation
The TV must be well ventilated. Do not cover your TV or place it inside a small confined space. Make sure
that there is a gap of at least 10cm on both sides and 20 cms at the top.
Interference
Do not place your TV on or near appliances that may cause electromagnetic interference (TV or Hi-Fi
speakers). If you do, it may adversely affect the working of the unit, and cause a distorted picture or sound.
Batteries
Young children easily swallow batteries. Do not allow young children to play with the remote control unit.
Covers
Do not remove any fixed covers as this may expose dangerous voltages.
Standby
The standby button on the remote control doesn't switch off the TV completely and the TV will continue to
draw electricity from the mains supply. Therefore in the interests of safety and to avoid unnecessary energy
consumption, never leave your TV in standby while unattended for long periods of time, eg. overnight, while
on holiday or while out of the house.
Power Cord
Make sure your TV or TV stand is not resting on top of the power cord, as the weight of the TV may damage
the cord and create a safety hazard.
Packaging
If you can store the packaging it will prove useful should you need to transport the TV to protect it while it is in
transit. Try to reuse packaging wherever you can. If you cannot store it, contact your local authority for details
of your nearest recycling facilities.
-1-
Contents
TV Safety Warning……………………………………………………………………………………………………………..….1
Accessory List…………………………………………………………………………………………………………………..….4
Where to place the TV……………………………………………………………………………………………………………..4
Overview Description
Panel Description……………………………………………………………………………………………………………..…….57
Bake Panel Description…………………………………………………………………………………………………………..…8
6
Remote Control Unit……………………………………………………………………………………………………...……….7-8
Inserting The Batteries……………………………………………………………………………………………………………9
Connections
10
Antenna Connections………………………………………………………………………………………………………………12
11
YPbPr/YCbCr (Component) Connections ……………………………………………………………………………….……….13
11
Select viewing source ………………………………………………………………………………………………………..……..13
12
S-Video and Video(Component) Connections…………………………………………………………………………..………..14
12
PC Connections ………………………………………………………………………………………………………………..……14
13
Scart Connections ………………………………………………………………………………………………………..…………15
14
HDMI/DVI Connections ……………………………………………………………………………………………………..……...16
Basic Operation(TV) …………………………………………………………………………………………………….…….15-20
Menu Operation
Picture Menu…………………………………………………………………………………………………………………….. 21
Sound Menu……………………………………………………………………………………………………………………… 22
Channel Menu…………………………………………………………………………………………………………………… 23-27
Window Menu……………………………………………………………………………………………………………………. 28
Setting Menu…………………………………………………………………………………………………………………….. 29-31
VOG………………………………………………………………………………………………………………………………….32
Teletext…………………………………………………………………………………………………………………………….33-34
Section of DVB-T
Preparation
Connection………………………………………………………………………………………………………………………... 35
Switching On…………………………………………………………………………………………………………………….… 35
Tuning In………………………………………………………………………………………………………………………..… 35
-2-
Contents
Base operation (DTV)
Change Channel…………………………………………………………………………………………………………………….. 36
Information Banner………………………………………………………………………………………………………………….. 36
Audio Control………………………………………………………………………………………………………………………… 37
Digital Teletext………………………………………………………………………………………………………………………… 37
Remote Control………………………………………………………………………………………………………………………. 38
Channel List Management……………………………………………………………………… ……………………………...39-40
Favourite List Management………………………………………………………………………………………………………...41
Using EPG(Electronic Programme Guide)
Now/Next EPG…………………………………………………………………………………………………………………………42
List Schedule EPG…………………………………………………………………………………………………………………….42
Timeline Schedule EPG……………………………………………………………………………………………………………….43
Common Interface…………………………………………………………………………………………………………………...44
Timers………………………………………………………………………………………………………………………………….45
Setting
Configuration……………………………………………………………………………………………………………………….46-48
Language……………………………………………………………………………………………………………………………….49
Installation…………………………………………………………………………………………………………………………..49-50
Trouble Shooting……………………………………………………………………………………………………………………. 51
Screen Burn………………………………………………………………………………………………………………………… 52
Maintenance………………………………………………………………………………………………………………………… 53
Specifications……………………………………………………………………………………………………………………….. 54
Visit Partmaster.co.uk today for the easiest way to buy electrical spares and accessories.
With over 50,000 products in stock we can deliver direct to your door the very next day.
Visit www.partmaster.co.uk
or call
0870 6001 338
(UK customers only)
Calls charged at National Rate.
-3-
Accessory List
U s er
Power Cord (×1)
*062227/8
Remote control unit (×1)
*VURRC301V5
's ma
nu a l
Operation manual
Antenna cable (×1)
(Aerial)
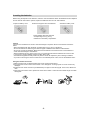
Where to place the TV
1.First select the location where to place the TV.
Selecting the location of the TV
2.Setting the TV
Handling the Display
4 inches
(10 cm)
or more
Caution:
• Select a place with no direct sunlight and good ventilation.
• Do not remove the stand from the display unless using a proper bracket to mount it.
• Keep enough space above and behind the display.
• Make sure to move the TV with two or more people.
• When you move the display, hold the part of the display, not the speaker.
-4-
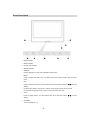
Panel Description
①
Bottom speaker
②
Bottom speaker
③
Remote control sensor
④
Standby indicator
⑤
SOURCE
Press to display the menu of the available viewing source.
⑥
MENU
Press to display the OSD menu. The button also acts as select button ‘’OK’’ in source
menu.
⑦
CH+/in menu
Press to change the channel. The two buttons also act as direction buttons
display.
Under the DTV station, only the CH+/- button on the remote control can be worked
for channels changing; the CH+/- button on the front board can't work.
⑧
VOL+/Press to adjust volume. The two buttons also act as direction buttons
display.
⑨
STANDBY
Turn on/standby the TV.
-5-
in menu
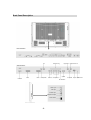
Back Panel Description
Rear interface:
RF
PCMCIA Plug
Digital Out
Digital Antenna In
Side interface:
POWER
EXT1
EXT2
DVB Update
Audio In Component In
Optical
PC Audio In
Video in put
Audio input
S-Video input
Headphone Output
Power Switch
-6-
TV Update PC IN HDMI/DVI IN
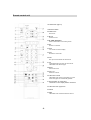
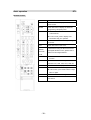
Remote control unit
1 STANDBY
Turn on/standby the TV.
2 SOURCE
Select an input source. (TV, AV, PC,EXT1, EXT2, DTV, HDMI,
Component)
3 LAST SOURCE
4 DTV/TV
Switch to Digital-TV mode / TV mode .
5 MENU
Display the menu screen.
6 Colour (RED/GREEN/YELLOW/BLUE)
TELETEXT mode: Select a page.
DTV input mode: The coloured buttons are used to select
correspondingly to the coloured items in the menu screen.
7 DTV MENU
DTV input mode: Display the digital TV menu screen.
8 TXT/MIX
Select the TELETEXT mode.
9 GUIDE
DTV input mode: To Display EPG
(Electronic Programme Guide) screen.
10 DISPLAY
Display the programme information.
11 SUBTITLE
To turn the subtitles on and off.
12 VOG
VOG means video on graphic.
13 LAST
Press to return to the previous channel.
14 VOL-/VOL+
Set the volume.
15 ASPECT
Picture proportion.
16 Teletext Sub page
17 FREEZE
TV/External input mode: Change the still image mode.
-7-
Remote control unit
18 Teletext Sub page up
19 Workless button
20 VIDEO OFF
Nor-Picture
21 MUTE
Mute the sound.
22 ▲▼◄► (Direction)
Select a desired item on the setting screen.
23 OK
Execute a command.
24 EXIT
Turn off the On Screen Display.
25 LIST
Browse the channel list.
26 FAV
DTV input mode: Browse the favourite list.
27 0-9
TV/DTV/External input mode: Set the channel.
TELETEXT mode: Set the page.
28 DUAL
Set the dual mode.
29 CH+/ CH Select the channel.
30 TELETEXT HOLD
TELETEXT mode: Freeze a multi-page on screen
while other pages are automatically updated.
31 Reveal hidden for TELETEXT
TELETEXT mode: Display hidden characters.
32 TELETEXT Sub page down
33 PAGE
34 SIZE
TELETEXT mode: Teletext Characters zoom in.
-8-
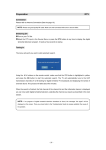
Inserting the batteries
Before using the System for the first time, insert two “AA” size batteries. When the batteries become depleted
and the remote control fails to operate, replace the batteries with new “AA” size batteries.
1 Open the battery cover.
2 Insert two supplied “AA” size batteries.
3 Close the battery cover.
• Place batteries with their terminals
corresponding to the (+) and (-)
indications in the battery compartment.
Caution
Improper use of batteries can result in chemical leakage or explosion. Be sure to follow the instructions
below.
• Place the batteries with their terminals corresponding to the (+) and (-) indications.
• Do not mix batteries of different types. Different types of batteries have different characteristics.
• Do not mix old and new batteries. Mixing old and new batteries can shorten the life of new batteries or
cause chemical leakage in old batteries.
• Remove batteries as soon as they have worn out. Chemicals that leak from batteries can cause a rash.
If you find any chemical leakage, wipe thoroughly with a cloth.
• The batteries supplied with this product may have a shorter life expectancy due to storage conditions.
• If you will not be using the remote control unit for an extended period of time, remove the batteries from it.
Using the remote control unit
1 Make sure there are no objects between the remote control and its sensor.
2 Don't place the remote control near a heater or in a damp place. A strong impact on remote control may
damage it.
3 Signal from the remote control may be disturbed by sun light or other strong light. In this case, darken the
room.
4 When using the remote control, please aim at the sensor within 7 meters and don't deflect angle more than
30 degrees.
-9-
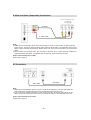
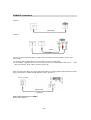
Antenna(Aerial) Connections
To enjoy a clearer picture, use an outdoor antenna. The following is a brief explanation of the types of
connections that are used for coaxial cable.
For Example: For viewing both analog and digital broadcasts
75 ohm Round Cable
For viewing only digital broadcasts, you do not need to connect the
antenna cable (supplied).
For Example: For viewing analog broadcasts
75 ohm Round Cable
*If you have a 75 ohm round cable, insert the bronze wire and then tighten the connection nut.
*When using 75 ohm round cable, please do not bend the bronze wire, it may make the video quality poor.
- 10 -
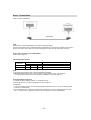
YPbPr/YCbCr (Component) Connections
Audio
YPbPr/YCbCr
Note:
Please refer to the illustration above to connect TV with DVD player or other component signal sources.
Connect YPbPr/YCbCr Cable and Audio Cable to corresponding jacks of DVD player or other component
signal sources.
Please choose "Component" in the Source menu when you connect component signal source.
Select viewing source:
Press the "SOURCE" button to display the sources list.
Please use numerical buttons directly to select desired signal, or use the direction to select desired signal and
then press the "OK" button to confirm.
- 11 -
S-Video and Video (Composite) Connections
S-Video or composite signal output
AV Cable
S- Video Cable
Note:
1.Please refer to the illustration above and in the last page to connect TV with S-Video or other composite
signal sources. Connect S-Video/composite video cable and audio cable to corresponding jacks of DVD
player or other composite signal sources. Please choose "AV" in the Source menu when you connect DVD
player.
2.When S-Video and composite video are connected at the same time, S-Video would be employed to
approach the best video effect. If composite video is necessary, please disconnect S-Video.
How to select viewing source (''AV'')
Please refer to page 11.
PC Connection
VGA Cable
Audio Cable
Note:
1.Please refer to the illustration above to connect TV with PC or DVD player. Connect VGA Cable and
Audio Cable to the corresponding jacks of PC and select the signal source as "PC".
2.If you connect VGA Cable to disc player or STB, please select "PC" and set the output mode as "PC".
Please choose PC in the Source menu when you connect disc player or STB with VGA source out.
How to select viewing source (''PC'')
Please refer to page 11.
- 12 -
Scart
Connections
Scart connections (Example)
Scart Cable
Note:
Please refer to the above illustration to connect TV with DVD player.
Connect Scart Cable to the corresponding jacks of DVD player or other devices. Please choose "EXT1",
EXT2 in the Source menu when you connect DVD player or other sources with Scart connection.
How to select viewing source (''EXT1/EXT2'')
Please refer to page 11.
Input/Output Specification:
Connector
EXT1
EXT2
CVBS
√
√
Input
S-Video
√
RGB
√
Output
CVBS
TV
TV/AV(CVBS)/EXT1(CVBS)/EXT2(CVBS)
Note:
1.The signal type inputted to EXT1 will be detected automatically.
2.Select the desired signal type on "Source Setting” in the "Setting" menu---only for EXT2.
The setting will be stored and can be viewed on "SOURCE" menu.(See page 30)
Scart Auto Playback Function:
1. Support the Auto Playback between TV and EXT sources.
2. When signal is lost , the searching preference: EXT1,EXT2,TV.
For example:
1. If you connect EXT 2 when you are watching program signal from EXT 1, the TV will display signal
from EXT 2 automatically.
2.If you disconnect EXT 1 when you are watching program from it (or turn off the signal source from
EXT 1, and there are no signals from EXT 2, the TV will play TV source automatically).
- 13 -
HDMI/DVI Connections
Picture A
HDMI Cable
Picture B
HDMI/DVI
Audio Cable
Connect TV with corresponding jacks on DVD or STB, and switch the source to HDMI in Source menu.
(Picture A/B)
1.If connecting with an HDMI cable, it is not necessary to connect an audio cable.
2.If connecting to equipment that has only a DVI output terminal, DVI -HDMI adapter cable and an
cable are necessary. Audio cable is necessary (Picture B).
audio
When connecting with HDMI, you can get better audio effect by connecting digital audio signal device to other
playing devices like an amplifier through Optical connector. (Picture C)。
DIGITAL OUT (HDMI)
Optical Cable
(PictureC)
How to select viewing source (''HDMI'')
Please refer to page 11.
- 14 -
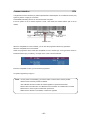
Basic Operation
Power on/Power off
1.Plug the power cable into the jack; make sure the output voltage and frequency of the power is consistent
with this machine.
2.Power on the switch on the side cover, the red light on the front board will be lighted, then the TV enter
standby mode. Press " STANDBY " button in remote control or "STANDBY" touch key on the front board,
the indicator change into green. The TV enter Play mode.
3.Press " STANDBY " button on the remote control to power off the TV, and the TV will enter standby mode,
the indicator change from green to red. Close the main power switch and it will stop working.
Note: Please draw out the plug when you won't use it for long time.
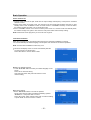
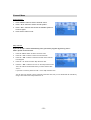
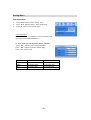
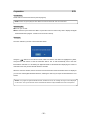
Initial Auto Installation
When the TV powers on for the first time after purchase, the Initial Auto Installation is involved.
You can automatically set teletext language, sound system and channels in successive operations.
Note: The initial auto installation functions only once.
1.This menu will display on the TV screen automatically after the
TV being turned on for the first time.
Press "OK" button to choose "Next" to start.
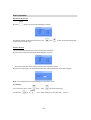
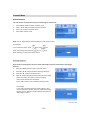
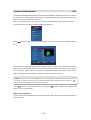
2.Setting the teletext language
Press "▲/▼/◄/►" button to select your teletext language on the
screen.
Press "OK "to enter the setting.
Then select the "Next" and press "OK" button to enter
next the setting,
3. Set sound system
Press "▲/▼/◄/►" buttons to choose the optimum
sound system among locally receivable broadcasting systems
"DK/BG/I/L’/L". Then press "OK" to confirm.
Press "►" to enter "Next" and then press "OK" to enter the setting,
or press "◄/►" to choose "Cancel" or "Back".
- 15 -
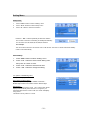
Basic Operation
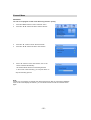
4.Channel Preset
Press "OK" to start the auto search, or press " ◄/► " to choose
"Back" or "No".
You do not need to do anything during the auto search.
5. Auto Search
Press "EXIT" to stop the auto search, but you are recommended
not to stop it during the search process since the initial auto
installation functions only once.
6. After the auto search finished, the finishing sign menu will display on the screen. Then the TV will stop at
channel one.
7. Watching TV
The set up menu disappears and you can watch the program on channel 1. To arrange these channels into
your chosen order please see "Exchange Channel" on page 24.
- 16 -
Basic Operation
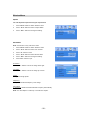
Channel Shift
● In TV mode, press "
" button to select next channel, and press "
" button to select previous
channel. Or use the touch button "CH+/- " to adjust (P7).
● Press "
" button to return to the previous channel which you were watching just now.
For example:
Channel 5 is the previous one you just watched, and channel 10 is the current one you are watching. If you
press the button, the TV set will skip to channel 5. Press it again to return to channel 10.
Direct Select
● Select a one-digit channel: Press (1-9) directly to select your desired channel.
● Select two-digit channel: Press (1-9 )to input the first digit and press 0-9 to input the second digit.
● Select three-digit channel: Press (0-9) to input the three digits in turn(100-199).
Volume Adjust
● Press "
/
" button to increase or decrease the speaker volume.
Or use the touch button "VOL+/- " to adjust (P5).
Earphone Volume Adjust
In Earphone works:
● Press "
/
" button to increase or decrease the earphone volume.
Or use the touch button "VOL+/- " to adjust (P5).
- 17 -
Basic Operation
Display Status
● In TV mode, press the "
" button, the screen will display the Current channel number/Channel
name/Sound System/Dual Mode/Mute Status/Freeze Status.
● In PC / Component / HDMI mode, press the ''
'' button, the screen will display Resolution/
Source/Mute Status/Freeze Status.
●In DTV mode, press "
" at any time will display the information banner, Press the "
" key again
removes the banner.
● In other modes different from above, the screen will display Source/Mute Status/Freeze Status.
Aspect Ratio
● Press "
" button, the following window will be displayed on the screen.
Aspect Ratio
Full Screen
Press '' ◄/► '' buttons or ''Aspect'' button to select your favourite mode. Seven options:
Full Screen/4:3/Wide/Subtitle/zoom 14:9/zoom 16:9 / Standard.
Note:
1. Support "Auto Scale Mode".
2. Auto scale mode: In " Standard" mode, AV,TV,EXT source will change the aspect ratio automatically
according to the input signal to get perfect aspect ratio.
Close video
● Press "
" button to enjoy music without video. Press again to recover video.
- 18 -
Basic Operation
Browse the channel list
● Press "
" button, the Channel list will display on screen.
Use direction buttons to select specific channel. Use "
Press the "EXIT" button to quit.
" and "
" button to switch the listing page.
Rename Channel
You can rename the channel when you are browsing the channel list.
● Press "LIST" button, the Channel list will be displayed on screen.
Use direction buttons to select specific channel. Press "OK" button confirm.
● Press "OK" button again, the Rename Channel window will be displayed on the screen as follows.
Note: You can input letters by numerical buttons on the remote control.
For example:
If you want enter "AV01", press
then enter the
once &
twice,
press
four times continuously,
once . When finishing, you can press ''OK''
- 19 -
to save it.
Basic Operation
Freeze Image
● Press "
" button to freeze the current image, press it again to exit the freeze mode.
Last source
● Press this button to switch between the last signal source and the current one.
For example, when the signal source is TV, last source is PC, press this button to switch to PC and again to
return to TV.
DUAL
● The options of Dual setting in single picture is as follows:
In the NICAM TV
broadcasts
In the TV mode of A2
TV broadcasts
●
Source
Options
A stereo signal
Mono
Nicam stereo
A bilingual signal
Mono
Nicam Dual_A
Nicam Dual_B
Nicam Dual_AB
A monaural signal
Mono
Nicam Mono
Mono
Stereo
A stereo signal
A bilingual signal
Dual_A
Dual_B
Dual_AB
A monaural signal
Mono
The default setting of "Dual" is "Mono" if without signal.
View menu
● Press "MENU" button on the remote control or "MENU" button on the front board to display OSD menu.
Press “MENU" button continuously, it will shift among Picture, Sound, Channel, Window and Setting
menu.
- 20 -
Picture Menu
Picture Setting
1.
Press the ''MENU'' button to enter Picture menu.
2.
Press '' ▲/▼ '' buttons to select ''Picture Mode''.
3.
Press '' ◄/► '' buttons to adjust the "Picture mode".
(Four options : Standard/Bright/Soft/User)
4.
Press '' EXIT'' button to quit.
In ''User'' picture mode, you can adjust Brightness, Contrast, Color, Tint, Sharpness.
Press '' ▲/▼ '' buttons to select "Brightness/ Contrast /Color/ Tint/ Sharpness''.
Press '' ◄/► '' buttons to reach the desired setting.
Press '' EXIT'' button to quit.
Selected item
◄ button
►button
Brightness
For less brightness
For more brightness
Contrast
For less contrast
For more contrast
Color
For less colour intensity
For more colour intensity
Tint
Skin tones become purplish
Skin tones become greenish
Sharpness
For less sharpness
For more sharpness
1.
"Color/ Tint" are not adjustable when the Input Source is PC.
2.
In HDMI mode: "Tint" is not adjustable.
When receiving RGB signal "Color" is not adjustable.
3.
IN "TV/AV/EXT (CVBS/S-Video),"Tint" is adjustable only when receiving NTSC signal.
4.
"Color" "Tint" is not adjustable when the input source is EXT (RGB).
- 21 -
Sound Menu
Sound Mode
You can use this function to adjust to get a perfect audio effect.
1.
Press "MENU" button to select "Sound" menu.
2.
Press " ▲/▼ " buttons to select sub items.
3.
Press " ◄/► " buttons to change the setting.
4.
Press ''EXIT '' button to quit.
Sound Mode:
Press " ◄/► " buttons to change the sound mode.
(Five options: Standard/Soft/Music/Cinema/User)
In '' User '' sound mode, you can adjust ''Simulated Stereo/BBE/Bass/Treble/Balance''.
1.
Press '' ▲/▼ '' buttons to select ''Simulated Stereo/BBE/Bass/Treble/Balance''.
2.
Press '' ◄/► '' buttons to change the setting.
3.
Press ''EXIT'' button to quit.
Simulated Stereo:
Press " ◄/► " buttons to to switch Simulated Stereo ON/OFF.
Simulated stereo: Change mono sound effect to stereo sound effect.
BBE Setting:
Press " ◄/► " buttons to change the BBE setting.
(Four options: Off/Low/Middle/High)
BBE feature is designed to make the sound more balanced, full, and clear. This technology is able to
adaptively correct the sound distortion resulting from every cause inside the system; thereby the original
voice is retrieved as accurate as possible.
Selected item
◄button
►button
Bass
For weaker bass
For stronger bass
Treble
For weaker treble
For stronger treble
Balance
Decrease audio from
Decrease audio from
the right speaker
the left speaker
- 22 -
Channel Menu
Sound System
1. Press "MENU" button to select "Channel" menu.
2. Press " ▲/▼ " buttons to select "Sound System''.
3. Press " ◄/► " buttons and choose the suitable system for
local TV signal.
4. Press ''EXIT'' button to exit.
Skip Channel
If you' like to skip a channel automatically when you browse programs by pressing "CH+/-"
button, please use this function.
1.
Press the "MENU" button to select "Channel'' menu.
2.
Press the '' ▲/▼ '' buttons to select "Current Channel".
3.
Press the '' ◄/► '' buttons to select the number of the channel
to be skipped.
4.
5.
Press the " ▼ " button to select ''Skip Channel'' item.
Press the " ◄/► '' buttons to set ''On'' on the ''Skip Channel'' item
Then, the channel will be hidden when you select channel with
''CH+/-''.
If you want to cancel it, please set ''Off '' on the ''Skip Channel'' item.
You can skip one channel or many channels at the same time, but you can still browse all channels by
using ''LIST'' button when ''Skip Channel'' is on.
- 23 -
Channel Menu
Rename Channel
You can rename the channel when you are browsing the channel list.
1.
Press "MENU" button to select "Channel" menu.
2.
Press " ▲/▼ " buttons to select "Rename Channel''.
3.
Press " ► " button to enter this menu.
4.
Press ''EXIT'' button to quit.
Note: You can input letters by numerical buttons on the remote control.
For example:
If you want enter "AV01", press
times continuously, then press the
twice, press
once &
four
once .
When finishing, you can press ''OK'' to save it.
Exchange Channel
If you'd like to exchange the current channel with another channel, please refer to "Exchange
Channel ".
1.
Press the "MENU" button to select "Channel" menu.
2.
Press the " ▲/▼ " buttons to select “Exchange Channel ''.
3.
Press the " ► " button to enter this menu.
4.
Input the Channel Exchange number (the maximum number
is199), then press “OK” button to save your setting.
Then the two channels are exchanged.
Press " EXIT" button to exit "Channel Exchange" mode.
For example:
If you want to exchange channel 12 with channel 1, first
move to channel 12 and then enter the "Channel Exchange"
window. Input "1" with the numerical buttons and press the
"OK" button to confirm.
Current Channel
- 24 -
Exchange channel
Channel Menu
Auto search
You can set TV program list with "Auto Searching function" quickly.
1.
Press the "MENU" button to select "Channel" menu.
2.
Press the " ▲/▼ " buttons to select "Channel Preset".
3.
Press the " ► " button to enter "Channel Preset".
4.
Press the " ▲/▼ " buttons to select "Auto Search".
5.
Press " ► " button to enter ''Auto Search'', the TV will
search channels automatically.
All channels will be saved once searching finished.
In the course of auto searching, you can press "EXIT" to
stop the searching process.
Note:
Actually it is not necessary to operate "Auto Searching function" after the “Initial Auto Installation”.
If the TV still cannot display all channels, you can use this function to start the channels search
again.
- 25 -
Channel Menu
Manual search
You can also set program list again one by one by "Manual Search" function.
1.
Press the "MENU" button to select "Channel" menu.
2.
Press the " ▲/▼ " buttons to select "Channel Preset".
3.
Press the " ► " button to enter " Channel Preset".
4.
Press the " ▲/▼ " buttons to select "Manual Search".
5.
Press the " ► " button to enter "Manual Search".
Press '' ◄/► '' buttons to search channels.
When a channel is found, the searching process will stop,
the channel will be saved with current channel number.
If the program is not your expected one,
Please press '' ◄/► '' buttons to continue the searching.
6.
Press ''EXIT'' button to quit.
- 26 -
Channel Menu
Fine tuning
"Fine tune" helps you adjust specific programs image and sound quality.
1.
Press the "MENU" button to select "Channel" menu.
2.
Press the " ▲/▼ " buttons to select "Channel Preset".
3.
Press the " ► " button to enter "Channel Preset".
4.
Press the " ▲/▼ " buttons to select "Fine Tune".
5.
Press " ► " button to enter "Fine Tune".
6.
Press " ◄/► " to get satisfying effect,
7.
Press "EXIT" to quit "Fine Tune".
- 27 -
Window Menu
Aspect
You can adjust the aspect to meet your requirement.
1.
Press "MENU" button to select "Window" menu.
2.
Press " ▲/▼ " buttons to select ''Aspect Ratio''.
3.
Press " ◄/► " buttons to change the setting.
PC window
Note: This function is only valid in PC mode.
1.
Press "MENU" button to select "Window" mode.
2.
Press " ▲/▼ " buttons to select "PC window".
3.
Press " ► " button to enter.
4.
Press " ▲/▼ " buttons to select the sub items.
5.
Press " ◄/► " buttons to change the setting.
6.
Press ''EXIT'' button to quit.
H Position:
Press " ◄/► " buttons to move the image left or right.
V Position:
Press " ◄/► " buttons to move the image up or down.
Phase:
To adjust the image phase.
Frequency:
To adjust the horizontal frequency of the image.
Auto adjust:
To verify the H Position/V Position/Phase Frequency automatically.
Note: The “Auto Adjust” is valid only in "Full Screen" aspect.
- 28 -
Setting Menu
Teletext Language
1.
Press "MENU" button to select "Setting" menu.
2.
Press " ▲/▼ " buttons to select ''Teletext Language''.
3.
Press " ◄/► " buttons to change the setting.
4.
Press '' EXIT'' button to quit.
Sound Source
1.
Press "MENU" button to select "Setting" menu.
2.
Press " ▲/▼ " buttons to select ''Sound Source''.
3.
Press " ◄/► " buttons to change the setting.
Two options: Main Window/Sub Window.
4.
Press '' EXIT'' button to quit.
EXT 2
1.
Press '' MENU'' button to select ''Setting'' menu.
2.
Press '' ▲/▼ '' buttons to select ''EXT 2''.
3.
Press " ◄/► " buttons to change the setting.
1.
Press '' EXIT'' button to quit.
Two options: S-Vide/CVBS.
- 29 -
Setting Menu
Color Temperature
1.
Press "MENU" button to select "Setting" menu.
2.
Press " ▲/▼ " buttons to select '' Color Temperature''.
3.
Press " ► " button to enter the sub menu.
Color Temperature:
Press " ◄/► " buttons to change the Color Temperature mode.
(Four options: Warm/Normal/Cold/User.)
In ''User'' mode, you can adjust Red, Green, and Blue.
Press '' ▲/▼ '' buttons to select ''Red/ Green/Blue''.
Press '' ◄/► '' buttons to reach the desired setting.
Press '' EXIT'' button to quit.
Selected item
◄button
►button
Red
For weaker red
For stronger red
Green
For weaker green
For stronger green
Blue
For weaker blue
For stronger blue
- 30 -
Setting Menu
Sleep Timer
1.
Press '' MENU'' button to select ''Setting’' menu.
2.
Press '' ▲/▼ '' buttons to select ''Sleep Timer''.
3.
Press '' ► '' button to enter the sub menu.
Press the '' ◄/► '' buttons repeatedly to select the duration
from current to the time TV switching to standby automatically.
You can select 0,10,20,30,60,90,120,180,240 minutes.
For example:
The current time is 8:25.You can set the Timer of 30 minutes. Then the TV will be switched to Standby
mode in 8:55 automatically.
Other Setting
1.
Press "MENU" button to select "Setting" menu.
2.
Press " ▲/▼ " buttons to Select "Other Setting" item,
then press " ►" button to enter.
3.
Press " ▲/▼ " buttons to select the sub item.
4.
Press " ◄/► " buttons to change the setting.
Two options of OSD Background:
Two options: Opaque / Translucent.
Nine options of OSD Position:
Top Left / Top Center / Top Right / Middle Left /Center /
Middle Right / Bottom Left / Bottom Center / Bottom Right.
Blue Screen:
If you set the "Blue Screen" mode "On", a blue screen will be
displayed automatically when there is no TV signal. If you
switch the "Blue Screen" mode to "Off" ,the screen will display
noisy picture .
This function is only valid in TV mode.
- 31 -
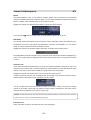
VOG
VOG means video on graphic. Enjoy two image on the screen at the same time. This machine has
VOG Functions.
Press " VOG" button once to show as below:
Sub picture
Main picture
You can Press '' VOG'' button to exit the VOG mode.
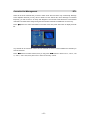
Select sub signal source
Press "Source" button to show the menu:
Press the navigation button to select the sub signal source, then press "OK" button to confirm your choice
and the sub picture will display the channel you chose; or press the numeric button to enter the signal source
channel.
Note:
1. Some high definition signal can't be displayed normally in the small window.
2. The main source can be "PC" only in the VOG mode.
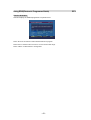
Adjust the position of sub picture
In VOG mode, press "MENU" button to select "Window" showed as below:
" button to select "VOG Position".
Press "
Press "
" button to set VOG position,
Press '' EXIT'' button to quit.
- 32 -
Teletext
Teletext is an information system broadcast by certain channels which can be consulted like a newspaper. It
also offers access to subtitles for viewers with hearing problems or who are not familiar with the transmission
language (cable networks, satellite channels, etc.).
Teletext Language Selection.
The default Teletext Language is Western Europe. If the Teletext language is not Western Europe in your
region, please kindly change the language according to the instruction in P29.
TXT/MIX
Press the TXT/Mix button to activate the Teletext mode. Press again to view the TV program with teletext
page. You can return to normal viewing by press the TXT/MIX button for the third time.
SIZE
Repeatedly pressing the SIZE button doubles the character size in the following order:
Upper half of the page-> Lower half of the page-> Return to normal size.
REVEAL
Press the button once to reveal hidden information (solutions to puzzles, riddles, etc).
This button is applicable only to teletext page with puzzles, riddles, etc.)
SUBPAGE---Viewing of sub page.
Pressing the sub page button to enter the sub page mode. You can use sub page up/sub page down to
displayed sub page.
To exit, press SUBPAGE button again.
COLOUR BUTTONS
Red, green, yellow and blue fields are shown at the bottom of the screen.
- 33 -
Teletext
HOLD
Press this button once to hold page and the second time to release holding of page.
NUMBER (0-9)
Selecting a page by numeric buttons directly
You can select a page by numeric buttons directly in TXT/MIX mode.
PAGE DOWN/UP
Use the this direction buttons to page up/down.
Use the "OK" button to go to the index page .
Notes:
1.
The buttons for Teletext function are invalid when menu displaying. You can activate the teletext function
buttons by pressing the "TXT/MIX" button.
- 34 -
Preparation
DTV
Connection
Please refer to Antenna Connection (See the page10).
NOTE: Please use good-quality RF cable. Make sure well connected with tuner to ensure effect.
Switching On
XTurn on your TV Set.
YSelect the DTV input in the Source Menu or press the "DTV/TV" button at any time to display the digital
terrestrial television program. It needs a few seconds to startup.
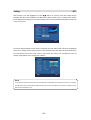
Tuning In
The menu will ask if you want to start automatic search.
Using the "
" buttons on the remote control, make sure that the YES button is highlighted in yellow,
and press the "OK" button to start the automatic search. The TV will automatically tune to the UHF
transmission channels 21 to 68 looking for digital terrestrial TV broadcasts and displaying the names of
channels found. This process will take about five minutes.
When the search is finished, the first channel of the channel list and the information banner is displayed
you can now watch digital terrestrial television, selecting the channel you require as described in the next
section.
NOTE: If no program of digital terrestrial television broadcast is found, the message “No signal” will be displayed
on the screen. Then you should refer to the Troubleshooter Guide to analyse establish the cause of the problem.
- 35 -
Basic operation
DTV
Change Channel
You can select the channel you desired in one of four ways - stepping using "CH+" or "CH-" button,
selection by number, from the on-screen channel list, and using the electronic programme guide (EPG).
X Pressing the "CH+" button will select the next channel. Pressing the "CH-" button will select the
previous channel.
Y You can also select the required channel using its channel list number. Channel numbers are entered
using the number buttons on the remote control handset and can be up to three digits long.
When you press a number button on the remote control, a small box appears in the top left of the
screen to show the entered number. After each digit is entered, the receiver will wait up to two seconds
for the next digit to be pressed until either three digits have been entered or you do not press a digit in
time. The channel corresponding to the entered number in the box will then be selected.
NOTE: If you enter a number which does not correspond to a stored channel, the next valid channel number is
selected instead. If you enter a number greater than the maximum one in the channel list, the TV will select the last
channel in the list.
Z You may change channel from Channel List menu, see page39.
[ You may select the required channel from EPG, see page42.
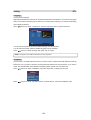
Information Banner
Whenever you change channel, using the "CH+" and "CH-" buttons or the number buttons, will display
the channel picture along with an information banner at the bottom of the screen. This will remain on the
screen for approximately three seconds. The information banner can also be displayed at any time while
watching TV by pressing the "DISPLAY" button on the remote control. Pressing the "DISPLAY" button
again removes the banner.
The information banner gives a number of facts on the channel selected and the programmes on it. The
name of the channel is displayed, along with its channel list number and an indication of the strength of
the signal received on this tuning channel.
The channel name and the start and finish time of the programme currently showing on the selected
channel are given, and the current time.
- 36 -
Basic operation
DTV
Audio Control
You can altered the volume level of the sound from the " VOL+" and " VOL-" buttons on the remote
control handset. Pressing either button a bar graph of the sound volume will be displays on the TV
screen.
You can silence the sound from the receiver by pressing the "MUTE" button.
The sound remains mute until the "MUTE" button is pressed again.
You may set the audio language. (For details about language list see page49)
Digital Teletext
Many digital terrestrial television channels not only broadcast pictures and sound for programmes but
also pages of information on the programmes, the weather, news and many other topics. This digital
teletext can be displayed by the TV.
Some channels are entirely given over to digital teletext and carry no normal TV programme at all. These
dedicated digital teletext channels will not give a quarter- screen image in the EPG or the Channel List
screen. When such a channel is selected, after a brief pause, they will usually display the opening page
information automatically.
Other channels have digital teletext pages broadcast alongside the television programme and often
include a reduced-size broadcast picture within digital teletext pages. These usually require the
"TXT/MIX" button to be pressed to activate the digital teletext pages.
In both cases, moving through the different pages of information is accomplished in a variety of ways,
dependent on the individual broadcasters, but including use of the "W/ X/ S /T " and "OK" buttons to
select items from on- screen menus, you can press the coloured buttons on the remote control to jump
directly to particular pages.
You can exit any digital teletext channel by changing channel in any of the normal ways. You can leave
the digital teletext function of a combined digital teletext/programme channel, to return to normal
television viewing of that channel, by pressing the "TXT/MIX" button.
- 37 -
Basic operation
DTV
Remote Control
DTV/TV
Press this button to shift DTV/TV mode.
DTV MENU
Press this button to display the DTV main
menu screen.
GUIDE
Press this button to display the electronic
programme guide (EPG) menu.
DISPLAY
XPress this button to show or hide the infor
-mation banner.
YIn menu mode, press to display more
information help your operation.
MUTE
Press this button to mute audio, press again
to resume.
EXIT
RED
GREEN
YELLOW
BLUE
TXT/MIX
Press this button to exit menu.
These buttons using the EPG function and
the Digital Teletext function, please refer to
EPG menu and Digital Teletext .
XPress this button to enter or exit teletext
function.
FAV
Press this button continuously to select
favourite List1, List2, List3, List4, List5, Off.
LIST
Press this button to display the channel list.
0-9NUMBER
X Press these buttons to change channel.
Y In DTV menu, press these buttons to input
letter or digital.
CH+/CH-
Press these buttons to change channel.
VOL+/VOL-
Press these buttons to increase or decrease
the volume.
- 38 -
Channel List Management
DTV
The digital terrestrial television channels found when first installed are stored in its memory as a channel
list. This list can be altered and amended to remove unwanted channels and to suit your own preferences.
There are two ways to display the channel list:
First, you may directly press "LIST" button on the remote control handset to enter Channel List menu.
The second, press "DTV MENU" button to display the main menu.
Press "
" buttons to select "Channel List" in the main menu, then press "OK" button to display channel
list.
The Channel List screen displays the list of channels in the TV's memory, with a quarter-screen image
window showing the selected channel, and can be used to change channels for viewing, delete channels
from the memory, edit the name of the channel as it appears in the list and on-screen, lock a channel
against viewing by younger members of the family, and set up favourite channels.
NOTE: Many of the menu screens displayed by the TV have reminders as to which keys do what, at the base of
the screen. In addition, many screens have further help available which is displayed when the "DISPLAY" (
i+
)
key is pressed, as prompted at the bottom right of the screen.
Press "
" buttons to select Channel, then you may press "
" buttons to select "OK", "Delete", "Edit
Name", "Lock", " Favourite" item.
Watch The Programme
You may select the required channel from Channel List menu, then Select "OK" and press "OK" button to
view the channel.
- 39 -
Channel List Management
DTV
Delete
The initial installation of the TV can produce duplicate entries in the channel list from transmitters
operating at different frequencies in adjacent areas, you may wish to delete these duplicate entries from
the list. In addition, other channels which you do not want in the list.
Highlight the channel to be deleted, select "Delete" to delete the current channel.
You may press "
" buttons to select "Yes" to confirm delete or select "No" to cancel.
Edit Name
The channel names which appear in the channel list and the information banner are assigned by the
broadcasters and some longer names are abbreviated to become unrecognizable. You can edit the
names to suit your preferences with the Edit Name function.
Highlight the channel to be renamed, Select "Edit Name" to edit the current channel name.
The highlighted channel name appears on the right of the screen with the first character highlighted by a
cursor. You can input letters by numerical buttons on the remote control. Then you can press "OK" button
to save it.
Channel Lock
Some channels broadcast material which you do not want younger members of the family to watch. Any
channel can be 'locked' so that it cannot be selected for viewing without first a four-digit PIN code being
entered. In this way any channel not suitable for younger viewers can be protected.
Highlight the channel to be locked, select "Lock" to lock up the current channel.
A window requesting the PIN code is displayed and the four-digit code should be entered using the
number buttons on the remote control, followed by the "OK" button.
You can now leave the Channel List screen and return to normal TV viewing. Any attempt to change
channel to the locked channel will now display the same window requesting the PIN code and the
channel will only be displayed on entry of the correct code.
NOTE: The default PIN is 0000. This code should be reset (as described below) to another sequence of numbers,
known only to you, when you have finished setting up the DTV.
Favourite List
Select "Favourite" to enter the Favourite List menu (See the page43).
- 40 -
Favourite List Management
DTV
There will be some channels that you tend to watch more often and some only occasionally. Although
some duplicate channels you may want to delete from the channel list, others although not watched
frequently, you will not want to do away with altogether. The favourite mode allows the most-watched
channels to accessed more easily, leaving the less-watched channels accessible but out of the way.
Press "
" buttons to select "Favourites" in the main menu, then press "OK" button to display favourite
list.
Any channel can be a favourite channel and the Channel List menu is used to label those channels you
want as favourites.
Press "
" buttons to select Channel, then you may press "
" buttons to select "List 1", "List 2", "List
3", "List 4", "List 5" item, then press "OK" to add or remove any one list.
- 41 -
Using EPG(Electronic Programme Guide)
DTV
The EPG screen displays a list of the stored channels along with information on what programmes are
being broadcast.
You have two ways to display the EPG:
First, you may continuously press "GUIDE" button on the remote controller to enter EPG menu.
The second, press "
" buttons to select "Gudies" in the main menu, then press "OK" button to display
submenu.
Press "
" buttons to select "Now/Next EPG", "List Schedule EPG", "Timeline Schedule" item, then
press "OK" button.
Now/Next EPG
This item displays current and next program for every channel.
Press "W / X /S / T" buttons to select desired channel, then press "OK" to watch the current channel.
Press "Yellow" or "Blue" button to display the detailed information schedule.
List Schedule EPG
This item display more detail program list for every channel, including of program name and time.
Press "W / X /S / T" buttons to select channel.
Press "Red" or "Green" button to change time.
Press "Yellow" or "Blue" button to change date.
- 42 -
Using EPG(Electronic Programme Guide)
Timeline Schedule
This item displays the detailed program list at a period of time.
Press "W / X /S / T" buttons to select desired channel or program.
Press "Red" or "Green" button to zoom in or zoom out the time range.
Press "Yellow" or "Blue" button to change date.
- 43 -
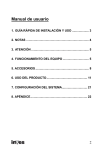
DTV
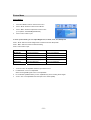
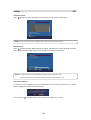
Common Interface
DTV
A single DVB Common Interface (CI) will be implemented to allow adoption of a Conditional Access (CA)
system by means of a plug-in CA module.
Scrambled Broadcasting service can be routed via the CA system.
If the CA system on the CI module requires a smart- card reader, this reader shall be part of the CI
module.
Insert CI card
When the compatible CA card is inserted, you can view the programme without any operations.
When the compatible card is not inserted:
Select the programme which needs the compatible CA card, and the sign of encrypt will be shown in
information banner (Fig. as follows), no image and no voice a few seconds later.
Insert the compatible CA card, you can view the programme.
CA system supported by Topup TV.
NOTE: •To view paid TV broadcasting, you need to make a contract with a service provider.
Please contact a service provider for details.
•The CI Module and the CA Card are neither supplied nor optional accessories.
•Please refer to the instruction of CI Module for the connection of CI Module and CA Card.
•Please don’t to insert or pull CA Card when powered on.
•Make sure the direction of CI Module, it couldn’t be opposite.
- 44 -
Timers
DTV
You can also set a timer to switch the receiver to any channel without your intervention.
Press "
" buttons to select "Times" in the main menu, then press "OK" button to display programme
timer menu.
Up to five separate timer events can be set and each is displayed in the Timer screen, showing the event
number, the channel to be selected, the start time, end time, date and the mode – no matter that event is
active (and will be acted on) or not.
Press "
" buttons to select "Inactive" or "Active".
Press "OK" button to enter setting timer state.
Press "
" buttons to select "Name", "Start", "End", "Mode", "Password" item.
You can input letters by numerical buttons on the remote control.
Press "OK" button to confirm.
You may watch an other channel program on time when you set the time.
NOTE:
If an invalid number for the start or end times or the date is entered, the highest valid number is automatically
entered in its place. So, entering 28:30 as the time will automatically change to 23:30.
If you are watching digital terrestrial TV at the time the timer event starts, a message will flash onto the screen
announcing that the receiver is "Switching to timer channel" so you understand what is happening.
- 45 -
Setting
DTV
Many aspects of your DTV can be set up to reflect your circumstances and preferences.
Press "
" buttons to select "Setting" in the main menu, then press "OK" button to display the submenu.
Press "
" buttons to select "Configuration", "Language", "Installation" item, then press "OK" button to
enter the submenu.
Configuration
Press "
" buttons to select "Default Guide list", "Subtitle", "Banner", "Favourite Mode", "Channel List",
"Receiver Upgrade", "Parental Setting" item.
Default Guide list
You may alter the information banner display mode.
You may press "
" buttons to select "List", "Timeline", "Now/Next".
Subtitle
Digital terrestrial television channels can broadcast with subtitles displayed on-screen for the
hard-of-hearing. This function selects the desired subtitle language and enables the automatic display of
subtitles whenever subtitle information is broadcast.
You may press "
" buttons to select "Off", "On".
Banner
You may set the time (in second) to display the banner.
You may press "
" buttons to select "1 second", "2 seconds", "4 seconds", "8 seconds", "Off".
Favourite Mode
This function set the favourite channel list mode. Press "OK" button to display the submenu. You may
press "
" buttons to select "List 1", "List 2", "List 3", "List 4", "List 5", "Off".
When you watching programme you could press “FAV” button continuously to select among "List 1", "List
2", "List 3", "List 4", "List 5", "Off".
- 46 -
Setting
DTV
Channel List
You may select the channel list display mode.
You may press "
" buttons to select "Show all", "TV only", "Radio only", "Text only".
Receiver Upgrade
Ensure that your DTV always has the most up to date information.
You may set Auto Upgrade on or off. Press "
" buttons to select "Off", "On".
You may set Manual Upgrade: highlight Manual Upgrade, then press "OK" button to start manual
upgrade. Please refer to window hint.
Parental Setting
Simply locking a channel will not deflect a determined would-be viewer. Re-installing the complete
channel list, for example, will bypass the channel lock. However, the menus can be locked out of use too,
prevent this.
Press "OK" button to display the submenu. Here the menu lock-out can be set and the PIN code can be
changed.
- 47 -
Setting
DTV
With the Menu Lock line highlighted, use the "
" buttons to cycle the menu lock setting through
Disabled, Main Menu and Installation. The Main Menu setting will lock out the complete menu system;
the Installation Menu setting locks only the Installation menu; and the Disabled setting allows free access
to any of the menus.
The same Parental Settings menu is used to change the PIN code. With the Set Lock Key line highlighted,
press "OK" to display the Set Lock Key window. This requests the new four-digit code to be entered twice
(for confirmation) and the new code comes in effect when you return to the Configuration menu by
pressing Configuration menu, pressing "DTV MENU".
NOTE:
If you want the channel and menu locks to work efficiently and actually protect channels from access, do change
the PIN code from the factory default. Make sure that you choose a number that is not obvious to others but one
that can be remembered by you.
- 48 -
Setting
DTV
Language
You may set the language.
Digital terrestrial television channels can broadcast simultaneous soundtracks in more than one language.
This function selects which language soundtrack you will hear when switching to a channel broadcasting
with multiple soundtracks.
Press "
" buttons to select " Preferred" or "Current", then press "OK" to enter the submenu.
You can select the preferred audio and subtitle language from the submenu.
You can select the current audio and subtitle language from the submenu.
Press "
" buttons to select language, then press "OK" to confirm.
NOTE: Languages may be different depending on each programme.
Installation
You may wish to re-install channel because you have moved to a different area with different broadcast
frequencies, and you wish to reinstate a channel previously deleted from the channel list, or you want to
watch new channels which have started broadcasting, please operate via to the follow step.
Press "
" buttons to select "Installation", then press "OK" button to display the submenu.
Press "
" buttons to select "Automatic Search", "Manual Search", "First Time Installation" item.
- 49 -
Setting
DTV
Automatic Search
Press "
" buttons to select "Automatic Search", then press "OK" button to start search.
NOTE: You must perform First Time Installation step before selecting "Automatic Search".
Manual Search
Press "
" buttons to select "Manual Search", and press "OK" button, the screen will display as follows.
Then input the channel number that you want, and press "OK" button to start search.
NOTE: You must perform First Time Installation step before selecting "Manual Search".
The new channels will cover the old ones after you finish the "Manual Search" step.
First Time Installation
To reset the receiver, highlight the First Time Installation line in the menu and press "OK". A warning
screen is displayed in case of accidental operation.
You may press "
" buttons to select "Yes" to confirm or to select "No" to cancel.
- 50 -
Trouble Shooting
Please read this user's manual before using the TV Set. If you have any troubles in using this TV Set,
try to solve it by the suggestions mentioned below. If you can not remove the trouble after adopting
corresponding suggestions, please contact the technical service center or dealer authorized by us.
For the sake of your safety, please do not open the cover and repair it by yourself or it may cause
further damage to the TV set, electric shock or fire.
No signal found
1.
Check antenna when antenna is disconnected, damage and misaligned.
2.
Ensure the unit is inside the digital signal area.
There is no sound but picture is normal
1.
Ensure that the volume is turned down to the least.
2.
Check whether the TV set works in mute mode.
There is no picture or sound
1.
Ensure that the power cord has a good connection.
2.
Ensure that the power switch is on.
3.
The contrast and the brightness are adjusted properly.
4.
Make sure the current channel is not the encrypted one and no CA Card inserted.
Picture is black and white or colorless
1.
Adjust the color setup.
2.
Check whether the broadcast system selection is correct.
Picture is blurred or there is snowflake or noise
1.
Adjust direction and position of the right antenna.
2.
The feedback cord of antenna is damaged or broken.
Sound and picture are interfered
1.
Check whether the TV set is very near to other electrical appliance. If so, remove it.
Picture is not stable and rolling in PC mode
1.
Check whether the display frequencies and bandwidth of computer or video source are fit for TV.
2.
Check the display setup of control panel in computer. If the setup is incorrect, change it by computer
programming tools.
Screen displays to check signal cords
1.
Check whether the signal cords are connected to PC or video source.
2.
Check whether PC or video source is in work.
Remote control is insensitive or does not work
1.
Check the batteries of the remote control and make sure that they are powerful and well conductive.
2.
Direct the remote control to the IR sensor of the TV.
3.
Check whether there are some obstacles between the remote control and IR sensor.
- 51 -
Screen Burn
A characteristic of Plasma and LCD TV Panels is that displaying the same image for a long time may
cause a permanent after-image to remain on the screen. This is called screen burn. Most pictures
shown on your TV will be constantly moving and fill the screen.
Examples of images that you need to watch out for are as follows (this is not an all-inclusive
list):
1.Black Bars: If black bars appear at the left/right or top/bottom of the screen it is recommended to
change the format so that the picture fills the entire screen.
2.TV Channel Logos: e.g. Shopping channel logos and pricing displays - especially if they are bright
and stationary. Moving or low-contrast graphics are less likely to cause ageing of the screen.
3.PIP and Multipip: Do not view for long periods of time using the PIP or Multipip functions.
4.Time Displays
5.Teletext: Do not view a stationary page for long periods of time.
6.TV/DVD Menus: e.g. Listings of DVD disk content.
7.Pause Mode: Do not leave the screen in pause mode for long periods of time, e.g. When watching
DVDs or videos.
Note: To prevent screen burn if viewing any of the above for long periods of time, reduce contrast and
brightness when viewing. Once burn-in occurs it will never disappear completely.
- 52 -
Maintenance
Care for your TV
Early malfunctions can be prevented. Careful and regular cleaning can extend the amount of time you will
have with your TV. Be sure to turn the power off and pull out the plug before you begin any cleaning.
Screen Cleaning
1. Here is a great way to keep the dust off your screen for a while. Wet a soft cloth in a mixture of
lukewarm water and a little fabric softener or dish washing detergent. Wring the cloth until it is almost
dry, and then use it to wipe the screen.
2. Make sure not be excess water put on the screen, let it air-dry before you turn on your TV.
Cabinet Cleaning
1. Use a soft cloth with a mild soap solution to wipe the cabinet.
2. Rinse the cloth and wipe the cabinet again.
3. Let the cabinet air-dry before turning your TV on.
Extended Absence
If you leave your TV unused for a long time (such as a vacation), it is a good idea to unplug the power
cord to protect against possible damage from lightning or power surges. If you use an antenna, you may
also need to disconnect it from the back of your TV before leaving.
- 53 -
Specifications
TV
MODEL
LCXW32HD1
LCXW37HD1
Input Voltage
100V~240V AC ,
100V~240V AC ,
Input Frequency
50/60 Hz
50/60 Hz
Power
Standby: < 1W
Standby: < 1W
Consumption
Rating:150W
Rating:190W
Audio System
BG/DK/I /L/L'
BG/DK/I /L/L'
TV System
PAL/SECAM
PAL/SECAM
VGA
Audio
Sync.: H/V Separate, TTL, P. or N.
Sync.: H/V Separate, TTL, P. or N.
Video Signal: 0.7Vp-p, 75ohm
Video Signal:
Audio in: RCA JACK (L&R),0.5Vrms (-9dB)
Audio in: RCA JACK (L&R),0.5Vrms (-9dB)
Frequency Response: 80Hz-15KHz (at-3dB)
Frequency Response: 80Hz-15KHz (at-3dB)
Earphone out:
Earphone out:
Max.10mW Output (Φ3.5mmStereo Jack,32Ω)
Max.10mW Output (Φ3.5mmStereo Jack,32Ω)
0.7Vp-p, 75ohm
Environmental
Operating Temperature: 5℃-40℃
Operating Temperature: 5℃-40℃
Considerations
Operating Humidity:
Operating Humidity:
10%-80% Relative Humidity
10%-80% Relative Humidity
Color range: 16.7M
Color range: 16.7M
Display resolution:1366 × 768 pixel
Display resolution:1366 × 768 pixel
Pixel Pitch:0.51(H)×0.51(V)
Pixel Pitch:0.6(H)×0.6(V)
Specification
Viewing angle:176º H / 176º V
Viewing angle:176º H / 176º V
of Panel
Contrast ratio:
Contrast ratio:
800:1
Brightness: 500cd/m2
Brightness: 500cd/m2
Response time:8ms
Response time:8 ms
Aspect Ratio: 16:9
Aspect Ratio: 16:9
Lamp Life: ≥ 60000
Size
1000:1
hours
Lamp Life: ≥ 60000
hours
Dimension(WxDxH)(mm):
Dimension(WxDxH)(mm):
Without stand :825*102*586
Without stand : 950*105*670
With stand: 825*295*636
With stand: 950*340*730
Wall mounting
Hole spacing: 334.5mm(H)X200mm(V)
Hole spacing: 400mm(H)X200mm(V)
interface spec.
Hole size: 4-M6 Depth: 10mm Max
Hole size: 4-M6 Depth: 10mm Max
Weight(Kg)
Gross Weight:23
Gross Weight:32
Net Weight:18.3
Net Weight:25.5
DTV
MODEL
LCXW32HD1/ LCXW37HD1
Channel Range
21~68
Input Level
-60~-20 dBm
Input Impedance
75 Ω
Channel Bandwidth
8M
Demodulator Mode
COFDM: 2K&8K
Interactive digital broadcast
Services: MHEG-5
Video Decoder
Video Decoder : MPEG-2
MP@ML
Resolving Power(Max): 720×576
Audio Decoder
Decompression: MPEG Layer I&II
Decompression
MPEG Layer I&II
NOTE: Specifications subject to change without notice. Weight and dimensions are approximate.
- 54 -
This symbol on the product or in the instructions means that your
electrical and electronic equipment should be disposed at the end of life
separately from your household waste. There are separate collection
systems for recycling in the EU. For more information, please contact the
local authority or your retailer where you purchased the product.
6850 0002 2300