1
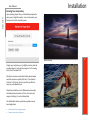
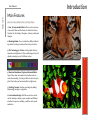
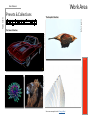
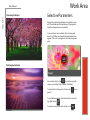
Topaz Glow
User Manual
I. Installation
A. How to Install
B. Plugin Compatibility
C. Host-Specific Installation
1. Photoshop, PSE, PSCC
2. Lightroom
3. PaintShop Pro
4. PhotoPlus
3
3
3
3
4
4
5
D. Uninstalling
E. License Key
5
6
II. Introduction
A. About Topaz Glow
B. Main Features
C. User Interface.
7
8
9
III. Work Area
A. Presets & Collections
B. Selective Parameters
1. Primary Glow
2. Secondary Glow
3. Color
4. Finishing Touches
5. Menu
6. Blending Modes
7. Saving
10
12
13
15
15
16
17
17
18
IV. Tutorials
A. Create a Neon Look
B. Create a Graphic Effect
C. Emphasizing Fur and Feathers
D. The Subtle Side of Glow
19
21
23
25
V. Additional Resources
A. FAQ’s
B. Connect
C. Company Info
26
28
29
2
By David Chesterfield
Installation
Topaz Glow
User Manual
Topaz Glow works as both a standalone editor and
plugin. This means a compatible host editor is not
required to use Topaz Glow, although you may access it
as a plugin in a few compatible host editors.
System Requirements
Mac OS X 10.8 or higher
Windows 7/8 x64 + Open GL 2.1
*Does not support Windows 32bit
Download Instructions
• To download Glow please visit topazlabs.com/
downloads.
• Locate Topaz Glow and click on the appropriate
Mac or Windows button beneath that product to
start your download.
• The download should start automatically, however
if prompted, select ‘Save’.
• The downloaded installer will then be located in
your Downloads folder or desktop as an .exe file
(Windows) or a .dmg file (Mac).
Mac dmg Windows exe
The program will then install as a standalone editor to:
Mac: Applications folder
Win: C:\Program Files\Topaz Labs\Topaz Glow
Compatibility
Glow can be accessed as a plugin in:
•
•
•
•
•
•
•
Photoshop CS4+
Photoshop Creative Cloud
Photoshop Elements 6+
Corel Paintshop Pro X
Serif PhotoPlus X5+
Lightroom as an external editor
NOT compatible with photoFXlab or Fusion Express
Accessing Glow in Ps, PsCC, and Pse
To use Glow as a plugin in Ps, Pse and PsCC you must
first run it as a standalone editor (Mac only). Glow will
then be available to use in Photoshop via the Filter
menu. For Windows, the plugin should automatically
appear in the Filter list.
Should Glow not appear in the Filter menu, you may
need to exit out of Photoshop and then re-open it.
I can’t find Glow in the Photoshop Filter menu
Important: Your image will need to be 8-bit or 16-bit
and in RGB mode. Go to Image-> Mode to change this.
3
User Manual
Topaz Glow
Accessing Glow in Lightroom
Topaz Glow can be accessed as an external editor in Lightroom by going to Photo-> Edit In-> Topaz Glow.
Installation
Accessing Glow in Corel PaintShop Pro X
To configure Glow as a plugin in PaintShop Pro:
1. Go to File-> Preferences-> File Locations...
2. Scroll to select ‘Plugins’ from the File types list and click
‘Add’
Important: For optimal use of Glow, go to Lightroom-> Preferences-> External Editing.
4
3. Navigate to C:\Program Files\Topaz Labs\Topaz Glow. Select the Topaz Glow folder and click OK.
Make sure that ‘TIFF’ is selected under File Format. In addition, select 16 bits/component for bit depth and the color
space ProPhoto RGB for optimal editing.
Topaz Glow
User Manual
4. Click OK again to return back to your main screen.
5. Go to Effects-> Plugins-> Topaz Labs-> Topaz Glow and
select it to start the program.
Accessing Glow in Serif PhotoPlus
Installation
4. Select the Topaz Labs folder and press OK.
5. Press OK again to return back to your main screen.
6. Exit out of Serif and then re-open it.
7. To access Glow open an image and go to
Effects-> Plugin Filters-> Topaz Labs-> Topaz Glow
To use Glow as a plugin in Serif Photo Plus:
1. Go to File-> Preferences
2. Select Plug-ins from the list and then click Browse.
5
3. Navigate to: C:\Program Files\Topaz Labs
To uninstall Topaz Glow please follow these instructions:
Mac
1. Quit Photoshop (or other editing program).
2. Navigate to the Applications folder: Macintosh HD ->
Library -> Applications-> Topaz Glow.
3. Locate the Topaz Glow folder and move it to the trash.
You will need to enter your system password to OK this
change.
Windows
1. Quit Photoshop (or other editing program).
2. Click on the Start Menu and select Control Panel -> Programs -> Programs and Features (or Uninstall a Program).
3. Select Topaz Glow and click uninstall.
Installation
User Manual
Topaz Glow
Entering Your License Key
Upon opening Topaz Glow you should be prompted to
enter your 30 digit license key. You can also enter your
license key from the top Help menu.
By Mike Hardisty
Simply copy and paste your 30 digit license key into the
provided space to activate the program. Or, if running
a trial, click ‘Continue Trial’.
Should you receive an activation failure, please make
sure that you have copied (ctrl/cmd + C) and pasted
(ctrl/cmd + V) the key. Also be sure that you did not
copy any extra blank spaces.
Please know that there is no difference between the
trial and purchased version of Glow. Glow does not
require a trial key, it is a clock based trial.
For additional license key assistance, please see our
knowledge base:
• My license key is not being accepted
• Common License Key Questions
By Joe Reardon
6
Introduction
User Manual
Topaz Glow
About Topaz Glow
Electrify Your Photos with Brilliant Effects
Topaz Glow is an editor designed to transform your
photos from dull to dazzling. Containing more than fifty
unconventional and quirky filters, with Glow you can alter
your images using neon, graphic, liquid and other electrifying designs and brilliant artistic effects.
The technology in Topaz Glow expands upon what can be
found in any other editor. With Glow an array of different
looks can be achieved - neon looks, for instance, darken
the background and make the subject in focus appear to
be illuminated with glowing and vivid colors.
The graphic looks within Glow can help to give a sketchlike or flattened effect. When used lightly, these effects
are perfect for removing unwanted details or adding
something special to the image that otherwise wasn’t
there before.
7
If working with intricate details, presets within the Fur and
Feathers collection are perfect for helping to distinguish
and emphasize small details.
And then there’s the effects in the Fantasy collection such
as Mysterious II and Bliss. When applied with a soft light
blending mode or reduced opacity, these filters can give
your image a hip, contemporary feel about them.
As always, ultimate artistic control is gained by creating
your own look, which can be achieved by working with the
selective parameter sliders for custom effects. With Glow,
otherworldly looks that you’ve never seen before will
soon be in your vision and creative control!
By Per Grunditz
Topaz Glow
User Manual
Introduction
Main Features
Here are some notable features in Topaz Glow:
1. Over 70 Customizable Effects. Choose from an array
of eccentric filters within these six collections: Neon,
Graphic, Fur & Feathers, Afterglow, Fantasy and Liquid
Designs.
2. Blending Modes. Glow contains five different blending modes to help you achieve the look you’re after.
3. HSL Technology in 8 Colors. Easily adjust the hue,
saturation and lightness of the overall image or by individually selecting one of 8 different colors.
8
4. Works as Standalone, Plugin and External Editor.
Topaz Glow does not require a host editor and can
work free standing. It is also possible to use it as a plugin in Photoshop and external editor in Lightroom.
5. Finishing Touches. Finalize your image by adding
sharpening, smudge or a vignette.
6. User Interface Design. With Glow we have continued to develop a cleaner, more modern and efficient
interface to improve usability, workflow and overall
aesthetics.
User Manual
Work Area
Topaz Glow
User Interface
There are two main areas to Glow: presets and custom sliders. Upon entering the program you will see a list of presets by default. This is a good starting point for finding the look you want.
Access the custom
sliders here (or press
ctrl/cmd + P)
Browse through several
different collections from
the top pull down menu.
9
Tip: to save a custom effect, click on the
icon
within the parameters.
Use the shortcut key ctrl/cmd + P to switch back and forth between the selective parameters and presets. You can also decide if
you want the presets or selective parameters to open each time you enter the program. In the top left corner go to Topaz Glow->
Preferences to make these changes.
Work Area
User Manual
The Graphic Collection
By Per Grunditz
There are six collections in Topaz Glow: Neon, Graphic,
Liquid Designs, Fur & Feathers, Fantasy and Afterglow
By Carmen Mazza
The Neon Collection
10
By Cindy Cone
Topaz Glow
Presets & Collections
View more examples in the Glow gallery!
Work Area
Topaz Glow
User Manual
The Liquid Designs Collection
The Fur & Feathers Collection
Air Brush II
Fur & Feathers II
Squiggly Lines I
Fur & Feathers I
11
Work Area
User Manual
Selective Parameters
Topaz Glow
The Fantasy Collection
Navigate to selective parameters to customize a preset. These sliders are the backbone of the program
(and how the presets were created).
To access these custom sliders, click on the actual
preset. You’ll then see the selective parameters icon
appear. Click on it to navigate to the selective parameters.
12
Mysterious II
By Mike Hardisty
The Afterglow Collection
You can also click on this
icon in the top right
corner or press the P key to access the sliders.
To return back to the presets, click on the
press P.
icon or
To reset all parameters, click on the reset icon in the
top right corner.
To create a new preset, click on the + icon.
Soft Bloom II
Work Area
User Manual
Topaz Glow
Selective Parameters
There are four modules within Glow: Primary Glow,
Secondary Glow, Color and Finishing Touches.
PRIMARY GLOW
The Primary Glow area allows you to create a variety of
glowing effects using the contained sliders.
Glow Type
Start by choosing a light or dark glowing effect. Click on
the Light or Dark button to make your selection.
Glow Strength
Controls how much glow is added to your image. Add
a soft and subtle glow by moving the slider slightly to
the right. Continue to increase the strength to achieve
a strong, yet soft effect with defined streaks of light
(based on the lines in your image).
Glow Strength: 0.45, Effect Sharpness: 0.27,
Electrify: 0.19, Brightness: -0.17
Effect Sharpeness
Increases the edge definition of the overall glow effect.
This will help to bring back the shape and form of your
image and further increase the definition of the streaks
of light added with the Glow Strength.
Electrify
Increases the edge contrast of the streaks of light in
your applied glow effect. Higher values will help to
make these streaks of light more prominent and is used
to help create neon effects.
(Note: This slider is only viewable if the Effect Sharpness slider has a value higher than 0.)
Simplify Details
Increase this slider to start removing and refining the
effects created with the Electrify slider. Higher values
will help to isolate only the strongest lines and forms
in your image by eliminating the small distracting lines,
allowing for a more focused lighting effect.
(Note: This slider is only viewable if the Effect Sharpness slider has a value higher than 0.)
Simplify Details: 0
Simplify Details: 0.50
13
Work Area
Topaz Glow
User Manual
Edge Color
Controls the saturation of all edges in the image, including
the streaks of light/lines added by the sliders above. Small
values will produce more natural color shifts, while higher
values will add a strongly saturated neon effect.
Detail Size
Controls the size of the details in your image. Increasing this
slider will make image details larger (decreasing the number of
details) and decreasing the slider will make image details smaller (increasing the the number of details).
(Note: This slider is only viewable if the Effect Sharpness
slider has a value higher than 0.)
(Note: This slider is only viewable if the Detail Strenght slider
has a value higher or lower than 0.)
14
Edge Color: 0
Edge Color: 0.17
Detail Strength
Controls the definition and sharpness of image details. Increasing this slider will increase the defnition of details and
decreasing the slider will reduce the definition of details.
This parameter helps to control how many streaks of light
are added to your glow effect. Increasing will start to produce more light streaks, resulting in a fibrous effect, while
decreasing will reduce the amount of light streaks, resulting
in a less busy, softer effect.
Detail Strength: 0, Detail Size: 0
Detail Strength: 0.31, Detail Size: 0.43
Brightness
Determines how bright or dark the image is. Tip: Decrease this
slider to darken the image, allowing the streaks of light produced by the glow effect to stand out in contrast...this is how
neon effects are created!
Work Area
Topaz Glow
User Manual
Contrast
Determines the separation between the lightness and
darkest tones (or values) in the image. Tip: If working on
a neon effect, increasing the contrast will create brighter
more intense neon colors against a less detailed dark background, while decreasing the slider will create less intense
neon lights with more neon glow showing in the dark areas.
Hue
Allows you to alter the color of the selected or overall hue.
For instance, you can change a yellow flower to a red one.
Saturation
Determines how vivid and intense the image colors are.
Line Rotation
Controls which way the tips of light streaks turn. (Note: This
slider is only viewable if the Glow Strength slider has a value
higher or lower than 0.)
Glow Spread
Controls how wide and spread out the glow effect appears.
(Note: This slider is only viewable if the Glow Strength slider
has a value higher or lower than 0.)
Original
Bliss preset, strength: 54%
Hue shift in magenta: 0.31
Saturation
Changes the color’s vividness and intesity.
15
S E C O N D AR Y G L O W
The Secondary Glow area allows you to create a variety of
glowing effects using the contained sliders. Use with the
Primary Glow module to produce a stronger or dual glow
effect.
The sliders within the seconday glow module perform the
same tasks as defined in the primary glow module.
Blue saturation: 0.40
Blue saturation: 0
Lightness
Changes the brightness or darkness of the color.
COLOR
The color section is an HSL (hue-saturation-lighting) panel
where you may adjust the overall or individual colors of 8
different hues: red, orange, yellow, green, aqua, blue, purple
and magenta.
Blue lightness: -0.40
Blue lightness: 0.30
User Manual
Topaz Glow
FINISHING TOUCHES
Effect Coverage
Controls how much of the Effect Sharpness is seen on
the image edges. Tip: Use this parameter to have softer
effects and less streaks of light on the image edges, allowing for the focus to be on the middle of the image.
Coverage Transition
Determines how harsh the effect coverage transition is.
Smudge
Blurs and smooths the edges and color transitions in
the image. Tip: Increae to create airbrush or smooth
lined effects.
Sharpness
Increases the sharpness of the overall image and effect. Tip: Use with the Smudge slider to create smooth
yet defined line designs.
Sharp Radius
Increases the edge contrast width on areas of strong
tonal transitions. (Note: This slider is only viewable if
the Sharpness slider has a value higher or lower than
0.)
Vignette Size
Controls the darkening of the image’s corners. Use a
vignette to draw the eyes towards the center of the
image, adding emphasis to it.
Vignette Shade
Determines whether the vignette is white or black.
Vignette Transition
Determines how harsh the vignette’s transition is.
(Note: This slider is only viewable if the Vignette Size
slider has a value higher or lower than 0.)
Smudge: 0
Smudge: 0.06
Vignette Center
Choose where the vignette is centered on an x & y axis.
(Note: This slider is only viewable if the Vignette Size
slider has a value higher or lower than 0.)
16
Work Area
User Manual
Topaz Glow
Other Menu Items
There are a few other options in the Glow interface
that you may use.
Zooming
There are several ways to zoom within Topaz Glow. The
easiest way is to use the shortcut keys Ctrl/Cmd -,+. The
tools for zooming are located in the top left menu, with
a magnifying glass, percentage entry form and zooming slider.
View Modes
To view the edited and original image, simply press the
spacebar to toggle between the two. Glow’s interface
also allows for multiple split screen modes, which can
be accessed in the top menu.
Navigator
When zooming in our out, you’ll notice a small navigation screen appear in the top right of the interface. You
can use this to navigate around the image. To make it
dissapear, simply click on the ‘-’ symbol.
Strength
Use the strength slider to reduce the opacity of the applied effect.
Single Split Vertical View:
Drag the white line to
the left or the right to
see more of the original or edited image.
Eternity preset, Strength: 50%
17
Work Area
Topaz Glow
User Manual
Blending Modes
Choose from a vareity of blending modes. The blending mode you choose will affect how the original image
interacts with the choosen effect.
Saving Your Image
Normal Blend Mode
This is the standard blending mode, which only affects
the top image without blending in the original.
The second way to save your image is to go to the top
menu and select File-> Save As.
If working with the standalone version of Glow, there
are two ways to save your image. The first is to click
‘Save As’ in the bottom right corner.
Multiply
Darkens the image. A dark blend color will produce
darker base colors. Lighter blend colors will only be
tinted
18
Screen
Lightens the image. Will produce lighter, bleached base
colors. Darker blend colors will lighten the base colors
less.
Soft Light
Applies a light tint and softens the base color. Preserves the luminosity of base colors.
Hard Light
Lightens (screens) the base colors for lighter blend
colors. Darkens (multiplies) darker base colors. Also
increases the contrast of the blend color.
Overlay
Multiplies (darkens) dark base colors and screens
(lightens) light base colors while preserving luminosity.
If working with Glow as a plugin or external editor you
will not be able to save your image within Glow. You
must press OK to return back to your host editor where
you can save the image.
Topaz Glow
User Manual
Tutorials
Create a Neon Effect
To start, open your image either in the standalone editor or within a compatible host editor like Photoshop.
In this tutorial learn how to create a custom neon look
using one-click presets as well as the custom sliders
within Topaz Glow.
1. From the top pull down menu in Glow, select the
Neon collection.
Original
2. Browse through the effects until you find one that
catches your eye. For this demo the preset ‘Blazing
Neon I’ was selected.
After Glow
19
Tutorials
User Manual
Topaz Glow
If you wish to customize the effect, press P, or click on
the preset twice to access the custom sliders.
Click on the parameter
icon in the top right menu
to show the custom sliders (or press Ctrl/Cmd + P) .
Play around with each slider, moving it up or down a
tiny amount to see the effect it has on your image. This
is the best way to learn how to use the custom settings
with Topaz Glow.
To create a custom neon look, press the reset button.
With a light glow type selected, increase the Glow
Type, Effect Sharpness and Electrify sliders.
Then, decrease the Brightness slider and increase the
Edge Color slider. You may also choose to increase the
Simplify Details slider to remove excess details.
Here’s the settings that were used to create the final
custom look:
20
User Manual
Topaz Glow
Create a Graphic Effect
In this tutorial learn how to create an illustrative look
using the available features and settings in Glow.
Original
Tutorials
1. Open your image in Topaz Glow. From the top pull
down list you’ll see there is a Graphic collection. Select
it to see a list of various graphic related presets.
2. Choose one of the ‘Brilliant on White’ presets, or
the ‘Sketch Outline’ preset. For this demo ‘Brilliant on
White II’ was selected.
21
After Glow
While this preset is a good starting point, there are
some distractions in the background. To smoothen it,
Press P to access to the custom sliders.
Unwanted smudge
Topaz Glow
User Manual
To reduce the amount of details within the background,
increase the Simplify Details slider. This will reduce weak
details. You may also decide to boost the Saturation, or
decrease it to zero for black and white conversion.
If you find that there is still leftover background, this can
always be eliminated using Photoshop’s clone stamp tool.
Tip: To compare and contrast between the original image and the edited
version, use the different
split view modes in the top
menu.
You can also toggle between the before and after
by pressing the spacebar.
Tutorials
Additional sharpening may be applied by going to the Finishing Touches module and increasing the Sharpness slider.
Another way to apply sharpening is to increase the
Effect Sharpness slider under the Secondary and Primary
Glow modules.
Here are the settings that were used to achieve the final
look:
22
User Manual
Topaz Glow
Emphasizing Fur and Feathers
The Fur and Feathers collection within Topaz Glow can be used
to give your image just the touch it needs. While suitable for
photos of animals, the collection can also be used for bringing
out intricate details in other objects, like flowers and macro
images.
Original
Tutorials
In this demo we’ll be working with Glow as a plugin through
Photoshop so that we can use layers and masking.
1. Access Topaz Glow through the Filter menu in Photoshop.
Once inside Glow, navigate to the Fur and Feathers collection.
2. Select the ‘Fur and Feathers I’ preset. When applied, you may
notice that the effect is too strong. Simply reduce the strength
slider in the bottom left corner to lighten the effect.
3. You may also want to customize the effect, so navigate to
the selective parameters panel by pressing P.
4. For this example, the Smudge slider was increased a tad to
smoothen the lines out more. You can access the Smudge slider
under the Finishing Touches module.
After Glow
5. The Simplify Details slider was also increased a tiny amount
in both Secondary and Primary Glow modules to help reduce
excess details, giving the dog a surreal appearance.
6. When finished making adjustments, you may decide that you
want to save the custom effect as a new one. To do this, simply
click on the
icon in the top right menu. You can then save
the effect to the proper collection.
23
Topaz Glow
User Manual
Once finished, press the OK button in the bottom right corner
to return back to Photoshop. You may decide that the background of your image appears to be unnatural or distracting
and wish to revert it back to the original.
Hit the Enter key to then compute the mask.
24
To remove the background, bring the image into Topaz ReMask. Use the Blue Primary Brush to outline the subject and
the Red Fill Tool to fill in the background.
Make additional refinements to your mask as needed. Simply
use the Green (keep) and Red (cut) Primary brushes to dab in
areas that should be kept or removed.
Back in Photoshop under the layers panel uncheck the eye symbol underneath the ReMask layer to see the edited Glow image
with the original background.
Tip: To enable the Layer Mask function in ReMask, go to the
bottom left Menu-> Preferences to select the Enable Layer
Mask function.
User Manual
Topaz Glow
The Subtle Side of Glow
The key to subtle effects with Glow is to take advantage of the
Strength and Blend Modes.
The chosen preset will also play a part. Effects such as
Mysterious II, Dream, Bliss and so on can all produce light
results when applied accordingly.
Try applying a preset such as Mysterious II with a Soft or Hard
blending light...you’ll be surprised at how natural and beautiful
the transformation is!
Brilliant on Black - Screen blend mode
Here are some examples of subtle looks that can be achieved
within Topaz Glow:
25
Original
Dream II - Strength 70%
Tip: For a more natural look, decrease the Edge Color. To bring the subject more in focus, increase the Sharpness slider under Finishing Touches.
Eternity - Strength 80%
FAQ’s
Topaz Glow
User Manual
“I need a Topaz Glow trial key.”
Topaz Glow does not require a trial key. The 30 day
activation will be automatic upon downloading the
software.
“Do you have any Glow tutorials?”
You can find Glow tutorials on our blog at blog.topazlabs.com and on YouTube at youtube.com/topazlabs.
“I don’t have Photoshop, will Glow work with my Elements, Lightroom or Paint Shop Pro?”
Yes, Glow is a standalone editor and doesn’t require a
host editor to be used. See page 3 for where the software installs to and how to access it as a plugin.
“Why is Glow grayed out in the Filter menu?”
Please make sure that your image is 8bit or 16bit and in
RGB mode. To detect your image’s settings, go to Image-> Mode.
Please also be sure that your layer is selected in the layers panel and that an adjustment layer is not selected.
“If I use the 30-day trial version will I need to uninstall
the trial version before I upgrade to a full version?”
No, there is no difference between the purchased software and trial software.
“Can I use the purchased software on both Mac and
PC?”
Yes, you may use the purchased software on two
operating systems at a time. Your license key will work
on both versions. The correct software can be down-
loaded from our downloads page at topazlabs.com/
downloads.
“I can’t find Glow in the Photoshop Filter menu”
To access Glow in the Filter menu, you will first need
to run Glow as a standalone editor (Mac only). After
that, restart Photoshop and Glow should then appear
in your Filter menu. Should that fail to work, please do
the following to resolve the issue:
Mac:
1. Go to Applications folder and right click on the Glow
icon
2. Click on ‘Show Package Contents’-> Contents->
Resources
3. Then copy the Topaz_Glow.plugin to your PSCC 2014
(or Photoshop, PSE) plugins folder
4. Restart PSCC 2014 (or Photoshop, PSE) and Glow
should show up in the Filter menu
Windows:
1. Go to C:\Program Files\Topaz Labs\Topaz Glow and
right click on the Glow icon
2. Click on ‘Show Package Contents’-> Contents->
Resources
3. Then copy the Topaz_Glow.plugin to your PSCC 2014
(or Photoshop, PSE) plugins folder.
4. Restart PSCC 2014 (or Photoshop, PSE) and Glow
should show up in the Filter menu
“Does Glow work with Fusion Express or photoFXlab?”
No, Topaz Glow does not work with either.
26
Topaz Glow
User Manual
“Does Glow work with Aperture or iPhoto?”
No. After the update to Yosemite, the Topaz plugins
ceased to work with Aperture or iPhoto.
“Why doesn’t my Topaz Collection key work with
Glow?”
Glow requires its own license key to be activated, so
Topaz Collection or Bundle license keys will not activate
Glow
“Does my Topaz Collection come with Glow?”
If you purchased a Topaz collection before the release
of Glow, then no, it doesn’t come with Glow. While
individual product upgrades with Topaz are complimentary, collection upgrades are not free and you will have
to purchase Glow to obtain a license key.
“How do I save a custom effect?”
To save a preset of your own click on the ‘+’ icon. You
can then fill in the required info and assign the preset
to a collection.
“Does Glow contain masking?”
The current version of Glow does not contain a masking module. We plan to implement this in a future
update.
“Why can’t I undo the effect?”
Glow currently does not have an undo function. We
plan to implement this in a future update.
“I have a question not listed here.”
Please visit our knowledge base online at topazlabs.
com/support.
27
Topaz Glow
User Manual
Connect
Connect with Topaz
Follow us on Twitter (@topazlabs)
for notifications of recent news and
easily get in touch with us whenever
you feel like it!
Find us on our Facebook page and
network with other Topaz users!
Participate in the entirely user-led
Topaz Flickr group for a helpful and
highly active community for Topaz
Photoshop plug-ins!
Subscribe to our YouTube channel
to keep up with any newly released
product video tutorials!
Check out our blog for tutorials, tips
and updates from Topaz Labs!
And don’t forget to check out our
other social media outlets including:
Instagram (@topazlabs), Pinterest,
LinkedIn and Google+!
28
Topaz Glow
User Manual
Contact Information
Headquarters
Topaz Labs, LLC
4100 Spring Valley Road
Suite 103
Dallas, TX 75244
Topaz Labs, LLC
904 West Ave
Suite 102
Austin, TX 78701
29
Technical Support
Visit: topazlabs.com/support
Email: [email protected]
Topaz Labs LLC, a privately owned company headquartered in Dallas, Texas, focuses on developing advanced image enhancement technology. With today’s widespread use of digital still cameras, the need for high-quality digital images has
greatly increased. Topaz Labs’ mission is to bring practical state-of-the-art image enhancement technology to both professionals and consumers.
Copyright © 2014 Topaz Labs, LLC. All rights reserved. www.topazlabs.com
User Manual
Topaz Glow
Be sure to check out the complete line-up of Topaz products.
Photo Enhancement Plug-ins
Ultimate control over
image exposure,
detail, and color gives
you the power to
make your photos
pop.
Develop unique and
compelling photography with the
most technologically
advanced software
available.
Create powerful
photos & flawless
image definition.
Intelligently and
dynamically enhance
image contrast.
Specializes in creating
crisp and stylized
images. Also features
extensive smoothing
capabilities.
Advanced JPEG
artifact reduction
filters eliminate JPEG
compression artifacts
while preserving image detail like never
before.
Advanced high-ISO
noise reduction technology that eliminates
noise while effortlessly maximizing and
retaining image detail.
Output & creative
sharpening with three
levels of intricate
and specific detail
enhancement.
The superior capturesharpening solution
that actually recovers
lost detail and refines
with micro-contrast
detail enhancement.
Your virtual camera
bag of effects simulated from real lenses
and filters. Effects include creamy bokeh,
old school filters and
more!
Remove unwanted
backgrounds from
your digital images
quickly and easily with
ReMask.
Expand your creativity
alter your image’s
look by applying one
of over a thousand
color filters.
Create beautifully
rendered and natural
lighting effects in
seconds!
Our standalone editor
that is a one stop
workshop for accessing all of your Topaz
plugins. Can also work
as an external editor
(replacing Fusion).
Our free external editor required to use Topaz Labs in Lightroom,
iPhoto and Aperture.
PhotoFXlab can be
used in its place as the
external editor.
30
Go to topazlabs.com/downloads to get your 30-day free trial!
Transform your
regular photo into a
beautiful work of art,
such as an oil painting,
watercolor, line & ink
drawing and more!