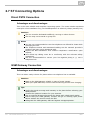
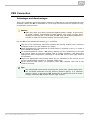
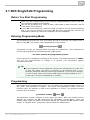
1
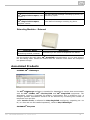
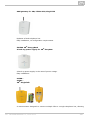
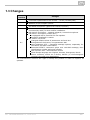
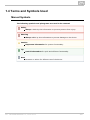
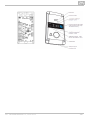
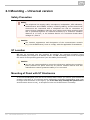
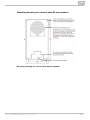
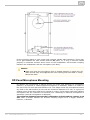
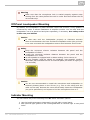
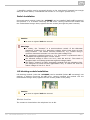
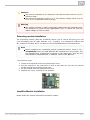
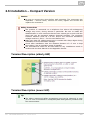
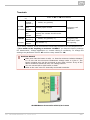
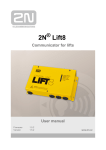
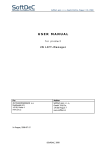
2N® SingleTalk
Lift Communicator
User Manual
Version
6.1.0
www.2n.cz
The 2N TELEKOMUNIKACE joint-stock company is a Czech manufacturer and supplier of
telecommunications equipment.
The product family developed by 2N TELEKOMUNIKACE a.s. includes GSM gateways, private
branch exchanges (PBX), and door and lift communicators. 2N TELEKOMUNIKACE a.s. has
been ranked among the Czech top companies for years and represented a symbol of
stability and prosperity on the telecommunications market for almost two decades. At
present, we export our products into over 120 countries worldwide and have exclusive
distributors on all continents.
2N® is a registered trademark of 2N TELEKOMUNIKACE a.s.. Any product and/or other
names mentioned herein are registered trademarks and/or trademarks or brands protected
by law.
2N TELEKOMUNIKACE administers the FAQ database to help you quickly find information
and to answer your questions about 2N products and services. On www.faq.2n.cz you can
find information regarding products adjustment and instructions for optimum use and
procedures „What to do if...“.
2N TELEKOMUNIKACE hereby declares that the 2N ® SingleTalk product complies with all
basic requirements and other relevant provisions of the 1999/5/EC directive. For the full
wording of the Declaration of Conformity see the CD-ROM enclosed and at www.2n.cz.
The 2N TELEKOMUNIKACE company is the holder of the ISO 9001:2009 certificate. All
development, production and distribution processes of the company are managed by this
standard and guarantee a high quality, technical level and professional aspect of all our.
Content
Content
1. Product Overview . . . . . . . . . . . . . . . . . . . . . . . . . . . . . . . . . . 4
1.1 Product Description . . . . . . . . . . . . . . . . . . . . . . . . . . . . . . . . . . . . . . . . . . . . . . 5
1.2 Components and Associated Products . . . . . . . . . . . . . . . . . . . . . . . . . . . . . . . 6
1.3 Changes . . . . . . . . . . . . . . . . . . . . . . . . . . . . . . . . . . . . . . . . . . . . . . . . . . . . . . . 12
1.4 Terms and Symbols Used . . . . . . . . . . . . . . . . . . . . . . . . . . . . . . . . . . . . . . . . . 13
2. Description and Installation . . . . . . . . . . . . . . . . . . . . . . . . . . 14
2.1 Product Description . . . . . . . . . . . . . . . . . . . . . . . . . . . . . . . . . . . . . . . . . . . . . . 15
2.2 Before You Start . . . . . . . . . . . . . . . . . . . . . . . . . . . . . . . . . . . . . . . . . . . . . . . . . 17
2.3 Mounting – Universal version . . . . . . . . . . . . . . . . . . . . . . . . . . . . . . . . . . . . . . . 19
2.4 Mounting – Compact version . . . . . . . . . . . . . . . . . . . . . . . . . . . . . . . . . . . . . . . 24
2.5 Installation – Universal version . . . . . . . . . . . . . . . . . . . . . . . . . . . . . . . . . . . . . . 25
2.6 Installation – Compact Version . . . . . . . . . . . . . . . . . . . . . . . . . . . . . . . . . . . . . . 34
2.7 ST Connecting Options . . . . . . . . . . . . . . . . . . . . . . . . . . . . . . . . . . . . . . . . . . . 42
3. Configuration 2N® SingleTalk . . . . . . . . . . . . . . . . . . . . . . . . 44
3.1 2N® SingleTalk Programming . . . . . . . . . . . . . . . . . . . . . . . . . . . . . . . . . . . . . . 45
3.2 Review of Programming Functions . . . . . . . . . . . . . . . . . . . . . . . . . . . . . . . . . . . 50
4. Function and Use . . . . . . . . . . . . . . . . . . . . . . . . . . . . . . . . . . 54
4.1 Function Description . . . . . . . . . . . . . . . . . . . . . . . . . . . . . . . . . . . . . . . . . . . . . . 55
4.2 Non-Stop Service Instructions for Use . . . . . . . . . . . . . . . . . . . . . . . . . . . . . . . . 60
5. Technical parameters . . . . . . . . . . . . . . . . . . . . . . . . . . . . . . . 64
5.1 Technical parameters . . . . . . . . . . . . . . . . . . . . . . . . . . . . . . . . . . . . . . . . . . . . . 65
6. Supplementary Information . . . . . . . . . . . . . . . . . . . . . . . . . . 66
6.1 Troubleshooting . . . . . . . . . . . . . . . . . . . . . . . . . . . . . . . . . . . . . . . . . . . . . . . . . 67
6.2 List of Abbreviations . . . . . . . . . . . . . . . . . . . . . . . . . . . . . . . . . . . . . . . . . . . . . . 68
6.3 Regulations and Directives . . . . . . . . . . . . . . . . . . . . . . . . . . . . . . . . . . . . . . . . . 69
6.4 General Instructions and Cautions . . . . . . . . . . . . . . . . . . . . . . . . . . . . . . . . . . . 70
1. Product Overview
In this section, we introduce the 2N® SingleTalk product, outline its application
options and highlight the advantages following from its use.
Here is what you can find in this section:
1.1
1.2
1.3
1.4
Product Description
Components and Associated Products
Changes
Terms and Symbols Used
2N® TELEKOMUNIKACE a.s., www.2n.cz
4
1.1 Product Description
Basic Features
The SingleTalk (ST) is intended primarily for lifts – especially in buildings,
where there is just one lift and no internal communication between the lift car
and the machine room/shaft bottom/lift car roof is needed ( 2N® LiftNet is
designed for more complex applications).
The ST is a Speakerphone in principle. This means that, built-in behind the lift
panel (wall surface), the ST microphone and loudspeaker are used for
bi--directional voice communication.
The ST can be connected directly to a PSTN line, being supplied from this line.
Thus, it requires no battery and no maintenance. It can be connected to any
local PBX line or a GSM gateway too (refer to the Associated products).
The ST cannot be misused to someone else's debit because it can dial the
pre-programmed numbers only.
On the top of it, the ST can be provided with various extending modules as
needed either on purchase, or any time later.
Advantages of use
Basic messages even without the voice recording module
Messages of a variable length of 0 to 30 seconds – with the voice recording
module only
Checking Call once in 3 days
Digitally adjustable acoustic properties (remote setting)
Function indication – two LEDs compliant with applicable lift regulations
Phone-based programming and checking
Hang-up and busy line detection
Automatic repeated dialing of multiple numbers
Protection against unintentional or unneeded initiation (CANCEL)
Call control from the dispatching center
No need of power supply
Easy installation onto any panel
Approved for connection to the PSTN
New features
Amplifier module
Lift blocking module
Optional indication elements – backlit pictograms(incl. incandescent lamps)
2N® TELEKOMUNIKACE a.s., www.2n.cz
5
1.2 Components and Associated Products
Basic Unit – Universal version
These units are designed for mounting behind the lift panel, which is pre-drilled for
installation.
Part No., Name
913640E
2N® SingleTalk –basic version
913641E
2N® SingleTalk –full version
913642E
2N® SingleTalk –basic vision +
blocking module
913643E
2N® SingleTalk –full vision +
blocking module
2N® TELEKOMUNIKACE a.s., www.2n.cz
Description
successor to 913401
basic model (fully upgradeable)
provides automatic dialling of two numbers
without extending
reproduces
manufacturer-recorded
messages
successor to 913408
contains module 913647
enables to record and reproduce own
messages
extends automatic dialling up to 6 numbers
contains module 913649E
enables to block the lift in case of telephone
line silure
contains modules 913647 and 913649E
enables to record and reproduce own
messages
extends automatic dialling up to 6 numbers
enables to block the lift in the case of
telephone line failure
6
Extending modules for Basic Unit 91364x
Part No., Name
913647E
2N®
SingleTalk –
Extending
Module
913648E
2N®
SingleTalk –
Switch Module
913649E
2N®
SingleTalk –
Blocking Module
913650E
Description
Enables to record and reproduce messages
Extends automatic dialling up to 6 numbers
DTMF remote controlled universal switch (during connection).
Up to 2 switches, or one switch plus one blocking module can
be used.
A special switch used for blocking the lift in case of telephone
line failure.
Speaker amplifier for noisy environment.
2N®
Adjustable gain.
SingleTalk –
Amplifier Module
913621E
2N®
SingleTalk –
Induction Loop
Induction Loop for people with a hearing aid.
Coil in a holder with 1 m cable.
2N® TELEKOMUNIKACE a.s., www.2n.cz
7
Basic Unit – Compact Version
The Compact communicator is designed for quick and easy installation into any lift
without advance preparation.
2N® TELEKOMUNIKACE a.s., www.2n.cz
8
Order No., Name
Description
913644E
no user-defined message recording by phone, no
2N® Single Talk Compact, basic extending option
version
913645E
2N® Single Talk Compact,
complete version
user-defined message recording by phone
Extending Modules – External
Order No. Name
913646E
lift blocking module, external
Description
lift blocking in the event of telephone line failure
Use the product also with other 2N® SingleTalk communicators, e.g. to save wires in
the lift trailing cable. Install the module into the machine room which the telephone
line passes through.
Associated Products
913630E 2N® LiftManager
The 2N® LiftManager software is intended for dispatcher's centres that communicate
with the 2N® LiftNet, 2N® Lift EasyTalk and 2N® SingleTalk equipment. The
application requires a standard PC-modem configuration and a telephone line. A
multiple operator workstation network can be achieved by increasing the number of
telephone lines and PCs.
Note: Service Tools, a software for 2N® SingleTalk configuring, upgrading etc. via
PC, is a free and can be installed separately, without 2N® LiftManager.
5013002N® EasyGate
2N® TELEKOMUNIKACE a.s., www.2n.cz
9
GSM gateway for 2N® LiftNet 2N® SingleTalk
Replaces a fixed telephone line.
Easy installation, no configuration requirements.
501399 2N® EnergyBank
A back-up power supply for 2N® EasyGate
A back-up power supply in the case of power outage.
Easy installation.
91360...
91361...
2N® SingleTalk
A communicator designed to connect multiple lifts to a single telephone line, allowing
2N® TELEKOMUNIKACE a.s., www.2n.cz
10
for local communication between the lift cabin, machine room and other places.
2N® TELEKOMUNIKACE a.s., www.2n.cz
11
1.3 Changes
Manual
Version
1.0
4.0
5.0
6.1
Changes
First versions of the product and User Manual
Functional replacement of the 91340.... series (Lift EasyTalk)
Addition of the Compact version.
Changed default values of parameters 902 and 915
On-board microphone (apart from custom versions)
All communicators, produced since half of 2010, has a loudspeaker
connected by cable, to alow amlifier installation.
HW issue 5 and higher – optional onboard / external microphone
HW issue 7 and higher (model 2011):
is equipped with a powerfull 50 mm speaker
amplifier installation is easier.
SW version 10-08-24:
Changed default values of parameters 913 and 914
Recognizes all dual tones, new parameter 946.
New parameter 975 – extended message options, separately for
call before and after confirmation.
Extended DTMF 3 command: plays user recorded message, then
identification number and serial number.
New function 995 – tells software version
West Europe language set: English, German, Portuguese, Dutch.
Phone numbers, stored as a factory default (in client-designed
versions) are hold over initialization.
The manufacturer reserves the right to modify the product in order to improve its
qualities.
2N® TELEKOMUNIKACE a.s., www.2n.cz
12
1.4 Terms and Symbols Used
Manual Symbols
The following symbols and pictograms are used in the manual:
Safety
Always abide by this information to prevent persons from injury.
Warning
Always abide by this information to prevent damage to the device.
Caution
Important information for system functionality.
Tip
Useful information for quick and efficient functionality.
Note
Routines or advice for efficient use of the device.
2N® TELEKOMUNIKACE a.s., www.2n.cz
13
2. Description and Installation
This section describes the 2N® SingleTalk product and its installation.
Here is what you can find in this section:
2.1
2.2
2.3
2.4
2.5
2.6
2.7
Product Description
Before You Start
Mounting – Universal version
Mounting – Compact version
Installation – Universal version
Installation – Compact Version
ST Connecting Options
2N® TELEKOMUNIKACE a.s., www.2n.cz
14
2.1 Product Description
In principle, 2N® SingleTalk (hereinafter referred to as ST) is a Speakerphone. It is
equipped with a microphone, loudspeaker, telephone line terminals, ALARM buttons,
backlit pictograms (as required by the applicable standard) and an optional CANCEL
input for door opening indication.
ST is available in two versions. The Universal version is designed for mounting
behind the pre-drilled (according to the drawing, see the Mounting section) lift panel.
The Compact version is provided with a metal case and can be installed quickly and
easily without advance preparation.
Operation
Push the ALARM button to activate the device. The "Wait" pictogram goes on
immediately, followed by the "Connection established" pictogram after communication
has been established.
Universal Version
The board with electronics is placed between the mounting panel and the printed cover
(see Fig.). The total dimensions are 65×130×24 mm. The loudspeaker and microphone
are fitted to the panel. Basic (slide-on) terminals are to the left and extending modules
(lift blocking and switch modules) to the right.
The extending module 913647 is under the cover (having no terminals). Small
connectors at the bottoms are intended for the induction loop (for people with bad
hearing) and LED indicators. Typically, backlit pictograms (even with incandescent
lamps) are connected to the product. Neither the pictograms nor the ALARM button are
included in the standard delivery (they are lift design elements).
Compact Version
The Compact version is provided with a robust metal case of the size of 100×185×16
mm. The built-in ALARM button is equipped with a yellow plastic pictogram (a bell) and
an ALARM sign for the blind on its sides. The backlit pictograms and induction loop for
people with bad hearing are in a window made of unbreakable glass. The microphone
and loudspeaker are vandal-proof too. Once installed, the product screws are invisible
from the lift cabin.
Caution
The Compact version does not include the lift blocking module in the case
of telephone line failure. You can connect the module parallel to the
telephone line, e.g. in the machine room.
2N® TELEKOMUNIKACE a.s., www.2n.cz
15
2N® TELEKOMUNIKACE a.s., www.2n.cz
16
2.2 Before You Start
Product Completeness Check – Universal version
Check the product for completeness before installation please.
Main board with covers – equipped with modules according to the following table:
Order
No.
913640
Extending Module (Message
Recording)
Lift Blocking
Module
913641
913642
913643
Four terminal blocks (line, ALARM, CANCEL, pictograms) have been slided on the
left-hand side;
The loudspeaker and microphone (in client-designed versions, the second
microphone can be connected by cable);
CD with a full manual, Service Tools and 2N® LiftManager
This brief manual and a warranty certificate
Product Completeness Check – Compact version
Check the product for completeness before installation please:
Two terminal blocks (line, CANCEL) should be present on the pins at the lower
case connector.
The following fitting accessories should be enclosed:
four M4×30 bolts
four M4×8 bolts
four fan-shaped washers
four M4 nuts
CD with a full manual, Service Tools and 2N® LiftManager
This brief manual and a warranty certificate
ST Installation Conditions
ST is not designed for outdoor applications.
The product is connected to a telephone line where life-endangering voltage may
occur. Therefore, be sure to keep the safety precautions – refer to the Electric
Installation section.
It is forbidden to connect ST parallel to another terminal on a line.
The lift wall must be perfectly flat.
2N® TELEKOMUNIKACE a.s., www.2n.cz
17
Tip
Use a portable telephone to check the telephone line function.
Do you know the telephone line number to be used? Check its
functionality.
For a PBX line connection, check other relevant conditions as included in
the Ways of ST Connection section.
Make sure that the lift panel has been prepared properly for ST mounting.
Universal version
Check the lift panel for advance preparation for ST mounting.
Compact version
It is advisable to mount ST where the lift cabin wall is also accessible from the
outside (from the lift shaft).
2N® TELEKOMUNIKACE a.s., www.2n.cz
18
2.3 Mounting – Universal version
Safety Precaution
Safety
The telephone line supply cable, microphone, loudspeaker, LED indicators,
ALARM button and CANCEL contact, including cabling, and the board with
electronics are connected with a telephone line and so remember to
ensure during installation that the user cannot touch these product parts
and is protected against an electrical accident by a minimum isolation
distance of 1.5 mm, or an isolation barrier of a minimum break-down
voltage of 1,500 V!
Caution
The location, appearance and designation of the communicator controls
(e.g. the ALARM button) have to comply with the applicable lift standards.
ST Location
ST may be mounted into any position as needed, the optimum elevation being
approximately the height of an adult's mouth. The ST mounting place must be beyond
the reach of the operating personnel (see the Safety Precautions).
Caution
You are not recommended to mount the electronics without the mounting
panel because the panel works as an electric isolation barrier and the
manufacturer cannot guarantee safety if it is not used.
Mounting of Panel with ST Electronics
To mount the ST panel onto the lift car interior wall surface you need 4 spot-welded M4
screws in the pitch of 57×122 mm and a sufficiently perforated loudspeaker area (may
be larger than as shown on the figure, yet in no case may overlap the panel size to
avoid acoustic short-circuit), a microphone hole and 2 LED holes if necessary.
2N® TELEKOMUNIKACE a.s., www.2n.cz
19
Mounting drawing for version with 50 mm speaker
Mounting drawing for version with 40 mm speaker
2N® TELEKOMUNIKACE a.s., www.2n.cz
20
Fit the mounting panel in such a way that it cannot vibrate while operation. There may
be no gap between the wall surface and the ST panel, or, if any, it must be sealed
properly to eliminate acoustic short-circuit of the loudspeaker and acoustic coupling
between the loudspeaker and the microphone (see later).
Caution
Make sure that the microphone hole is sealed properly to sense the lift
cabin sounds only and suppress the noise coming from the shaft or cavity
behind the wall!
Off-Panel Microphone Mounting
By default, the microphone is placed directly on board (see drawing for microphone
position). If required, a cable-equipped microphone is available, fitted to a holder of
the size of 25×25 mm with self-adhesive foil. This helps mount the microphone behind
any hole in the wall surface (a hole with the minimum diameter of 3 mm, or a group of
smaller holes of the same total area). Board of version 5 and higher has both onboard
microphone and the connector for external one. Switching to external microphone is
automatic (external microphone is detected).
The minimum distance between the loudspeaker and microphone centers is 90
mm. With a smaller distance an acoustic coupling might occur. A bigger distance,
however, is allowed.
2N® TELEKOMUNIKACE a.s., www.2n.cz
21
Warning
Make sure that the microphone hole is sealed properly against noise
coming from the cavity behind the wall in order and thus senses the lift
car sounds only!
Off-Panel Loudspeaker Mounting
By default, the loudspeaker is panel-mounted. Since half of 2010, every speaker is
connected by cable. It allows installation of amplifier module. You can also slide the
loudspeaker out of its panel bed and place separately, if necessary. See safety notice
in this case, see bellow!
Caution
In that case seal the loudspeaker properly to eliminate acoustic
short-circuit between the front and back loudspeaker sides (the grid may
in no case overreach the loudspeaker area to avoid acoustic short-circuit.
Safety
Keep the minimum electric isolation between the panel and the
loudspeaker of 1500 V
Keep the minimum isolation distance between the panel and the
loudspeaker of 1.5 mm.
40 mm speaker is equipped with a rubber sealing. Do'nt remove it!
50 mm speaker must be placed at insulating (non-metallic) surface.
Otherwise, ask manufacturer for an external panel, as shown at right (it is
n ot included)
Caution
You are not recommended to install the microphone and loudspeaker on
relatively distant places in the lift car (e.g. one on the ceiling and the
other on the wall) because the users should easily locate the loudspeaker
(its grid or perforation) and expect to find the microphone close to it.
Indicator Mounting
You can choose any of the following three ST status indication options:
1. Use the backlit pictograms integrated in the lift cabin control panel.
2. Add optional light guides to the existing ST LEDs to conduct light to two panel
holes.
3.
2N® TELEKOMUNIKACE a.s., www.2n.cz
22
3. Connect two optional LEDs to ST with a cable.
Safety
If the LEDs are cable connected, make sure that the electric isolation
between the panel and the loudspeaker is 1,500 V at least.
Make sure that the isolation distance between the
panel and the loudspeaker is 1.5 mm at least.
You are prohibited to use standard metal LED holders (for an example
see the figure to the right).
Note
Make sure that your way of indication complies with the applicable legal
regulations. Indicators, however, are unnecessary for ST operation
(communication).
2N® TELEKOMUNIKACE a.s., www.2n.cz
23
2.4 Mounting – Compact version
Safety
Installing the telephone line cable, ensure that the user cannot touch the
conductors and is protected against an electrical accident by a minimum
isolation distance of 1.5 mm, or an isolation barrier of a minimum
break--down voltage of 1,500.
Prior to Mounting
Drill holes into the lift cabin wall as shown in the drawing or as printed 1:1 on the
product package. The larger hole is intended for cable passage. Round the hole edges
to avoid cable damage!
Note: The two 2.5 mm large holes in the window area are used where the mounting
panel rear is inaccessible. The 2.5 mm diameter is suitable for all wall mounting
options using plywood, chipboard, laminated plastic etc. with the aid of the screws
included. For front metal panel wall mounting drill M4 threaded holes.
The product mounting procedure may not be commenced until all electrical installations
have been completed, refer to Mounting Completion.
2N® TELEKOMUNIKACE a.s., www.2n.cz
24
2.5 Installation – Universal version
Layout of Terminals, Jumpers and Connectors
You can see on the picture below layout of terminals.
Note
The terminals are accessible without removing the cover.
2N® TELEKOMUNIKACE a.s., www.2n.cz
25
Jumper Settings
Left-hand jumper (ALARM INPUT)
Right-hand jumper (PROGR
AMMING)
inverted ALARM input
disabled PROGRAMMING
up (NORMA closing contact or voltage
L)
connection activation
up (ENABLED)
enabled
down(DISABLED)
disabled
down(NEG.)
breaking contact or voltage
disconnection activation
Connectors accessible after cover removal
Tip
To access connectors at the bottom edge of the board without cover
removal, just loosen cover screws gently and slide the cover upward.
Applies to HW version 7 and higher, when amplifier module is not
mounted.
2N® TELEKOMUNIKACE a.s., www.2n.cz
26
Description of terminals
Telephone line
ALARM
Polarity does not matter. Can be connected directly to a
private telephone network (PSTN), PBX or GSM gateway
line.
CAUTION – more than one unit may not be connected to a
single line!!!
voltage
control *)
12 – 24V DC voltage,any
polarity
contact
control
switching or breaking contact
voltage
CANCEL control *)
contact
control
Emergency call activation
12 – 24V DC voltage,any
polarity
switching or breaking contact
Emergency call
deactivation
Indicator connecting
terminals *)
Indicators (backlit pictograms), max. 24 V / 2× 200 mA,
supplied from an external power supply, the connection
layout must be maintained.
External microphone
connector
External microphone is available on request. Switching
between onboard and external microphone is automatic
(external microphone is detected). ***)
External loudspeaker
connector
For a request, loudspeaker can be equpped with cable. In
this case, it is connected here.
The induction loop is not a part of standard packing.
It has to be placed behind a non-metal, non-magnetic cover
in the control panel because the magnetic field of the
induction loop cannot go through the metal lift control panel.
Notes:
Inductionloopconnector
Lift blocking contact *)
**)
Switch 2 contact *)
**)
Switch 1 contact *)
**)
If loudspeaker is placed behind a non-metal,
non-magnetic cover, it works as the induction loop too.
Output is short circuit resistant. Output power is limited
by resistor.
In the event of telephone line failure, the contact opens, the
lift goes to the nearest floor and the door opens. The lift
should not go on until the telephone line function is restored.
The switches can be used as needed and are remotely
controlled using a digital password (DTMF). The switches are
not designed for 230V!
*) These terminals are safely electrically isolated from the telephone line.
**) Extending module terminals. The lift blocking module can be mounted only if
switch 2 is absent.
***) Applies to boards of version 5 and higher. These boards has both onboard
microphone and the connector for external one.
2N® TELEKOMUNIKACE a.s., www.2n.cz
27
ST Telephone Line Connection
The ST works regardless of polarity or line parameters in a wide range (see Technical
Parameters). The line is connected to the LINE terminals. A great advantage of the ST i
s that it needs no other power supply for its operation. Details on the ST connection to
PSTN, PBX and GSM gateway lines are available in the "ST Connecting Options" secti
on.
ALARM Button Connection – Button control
Safety
Make sure that the button is safe – the isolation distance must be 1.5 mm
at least and the break-down voltage may not fall below 1500V. The button
contacts may not be connected to any other circuits. In case the above
mentioned conditions cannot be met, use voltage control.
Connect the button contacts to the ALARM terminal, leaving it in the low
position.
The button can have both the switching and breaking contacts. With the breaking
contact, switch the ALARM INPUT jumper into position NEG.
ALARM Button Connection – Voltage control
Tip
12 to 24V DC voltage of any polarity can be applied. However, the source
must be backed-up in case of power outage.
Slide the ALARM terminal out and put it in the upper position to ensure the
required isolation against the telephone line circuits.
Activation is controlled by voltage connection/disconnection. If voltage
disconnection activation is used, switch the ALARM INPUT jumper into position
NEG.
Indicator Connection
Basic connection
In this type of connection, any indication elements can be used (backlit pictograms,
e.g.). An external power supply provides a sufficient indicator intensity.
2N® TELEKOMUNIKACE a.s., www.2n.cz
28
Requirements
a 12 – 24 V power supply (backed up if necessary)
steady state current of 200 mA maximum (incandescent lamps may be
connected)
Both indicators must be connected!
Warning
Remember to keep the correct power supply polarity!
LEDs mounted onto the ST electronics board
Nothing is connected in this case.
For this purpose, use light guides to conduct light to two panel holes (refer to Section
Mounting of Panel with ST Electronics). These light guides are not included in the
standard accessories.
Cable-connected LEDs (optional accessories
Cable-connected LEDs can be used where backlit pictograms are unavailable. The LEDs
are not included in the standard accessories, they are available as a separate delivery
or as part of a client-defined solution. The LEDs have the diameter of 5 mm and a very
high luminance.
2N® TELEKOMUNIKACE a.s., www.2n.cz
29
Requirements
Keep the LED polarity (see the cover printing)
Keep colors: request confirmation – yellow, connection confirmation – green
Note
The PCB LED is not on in this type of connection.
CANCEL Input Connection (Door Control, Optional)
Caution
The door switch or door opening signal must indicate an open door only if
both the internal and external lift doors are open and the lift car can be
left safely.
Note
If the CANCEL input is used, be sure to program parameter 914 for a
period longer than the maximum lift running time (i.e. while the door is
closed). If parameter 914 is set at 0, it is useless to connect the CANCEL
input.
Switch control
Safety
The CANCEL input is connected with the telephone line circuits. Therefore,
the air distance between the switch and the other lift parts must be 1.5
mm at least and the break-down voltage may not be less than 1500V. The
switch contacts may not be connected to any other circuits. In case the
above mentioned conditions cannot be met, use the voltage control.
Connect the switch to the CANCEL terminal, leaving it in the low position.
By default, the ST is set for a switch that is closed when the door is open. If the
switch is closed when the door is closed, select parameter 916 – see
Programming.
Voltage control
DC voltage of any polarity ranging between 12 and 24V can be applied.
Slide the CANCEL terminal out and switch it in the upper position to ensure the
required isolation against the telephone line circuits.
In the event of voltage disconnection activation select parameter 916 – see
Programming.
By default, the ST is ready to accept a sensor that applies voltage when the door
is open. If it gives voltage when the door is closed, select parameter 916 – see
Programming.
2N® TELEKOMUNIKACE a.s., www.2n.cz
30
Caution
If voltage presence indicates that the door is closed, this source must be
backed-up against power outage.
Induction Loop Connection
The regulations that apply to communicator installations may require a mandatory loop
for persons with defective hearing in the lift cabin. In that case, connect the loop to the
connector with any polarity as shown in the drawing. The loop including a 1 m long
cable can be part of the delivery if agreed so in advance.
Requirements
The induction loop has to be placed behind a non-metal, non-magnetic cover in
the control panel because the magnetic field of the induction loop cannot go
through the metal lift control panel.
The induction loop has to be labelled with an appropriate pictogram (ear) and
placed according to applicable standards.
Installation of Extending Modules
Extending Modules Location
2N® TELEKOMUNIKACE a.s., www.2n.cz
31
*) Amplifier module cam be mounted directly to the main board (inserted into margin
slots) as shown above, if mainboard HW version is 7 or higher (model 2011).
Switch Installation
Universal switch module (order No. 913648E) can be installed (before ST mounting!)
into position 1 or 2 without removing the ST cover. Having inserted the module into
the motherboard margin slots, tighten the two screws (through the panel cutouts).
Caution
Be sure to tighten both the screws!
Warnings
In reality, the "Contact" is a semiconductor switch of the ON-state
resistance of about 0.5 Ω. Switching voltage values lower than 9V may
bring troubles – the switch function cannot be, e.g., tested using a
common ohmmeter because it is used for small voltage only.
The maximum switched current is 1 A. The switch is protected with a
resettable fuse against higher current values
The allowed voltage is from 9 to 24 V, both DC and AC. The switch is
equipped with overvoltage protection against voltage peaks.
The switch "contact" is safely electrically isolated from the telephone line,
yet designed for weak-current applications only. It cannot be used for
mains voltage of 230 V or 120 V.
Lift blocking module Installation
Lift blocking module (order No. 913649E) can be installed (before ST mounting!) into
position 2 without removing the ST cover. Having inserted the module into the
motherboard margin slots, tighten the two screws (holes in the panel).
Caution
Be sure to tighten both the screws!
Module function
The contact is closed when the telephone line is OK.
2N® TELEKOMUNIKACE a.s., www.2n.cz
32
Cautions
The module responds to the telephone line disconnection with an up to 2
minutes' delay.
The maximum switched current is 1 A. The allowed voltage value is up to
24 V. It is a mechanical contact (relay)).
Warning
The module "contact" is safely electrically isolated from the telephone line,
yet designed for weak-current applications only. It cannot be used for
mains voltage of 230V or 120V.
Extending module Installation
The extending module (Part No. 913647E) allows you to record and play your own
voice messages (the lift cabin address, e.g.). Typically, it is integrated in ST as Part
No. 913641 or 913643. But it can also be mounted additionally as described below.
Note
Before installing an extending module produced earlier, check it for
compatibility with your ST! Modules No.913402E are very similar, but
are equipped with a diagnostic connector on the upper side. They are not
fully software-compatible and, if installed, result in the ST error.
Installation steps
1. Loosen 4 screws and remove the electronics cover.
2. Put the module on the connector in such a way that you can see the column
thread through the module corner hole.
3. Fit the module with the attached M3 screw.
4. Replace the cover, screwing it into position.
Amplifier Module Installation
Please follow the manual enclosed to amplifier module.
2N® TELEKOMUNIKACE a.s., www.2n.cz
33
2.6 Installation – Compact Version
Caution
Be sure to connect the wires before wall mounting. The connectors are
separable – remove them, connect the wires, tighten the screws and
replace the connectors.
Safety Precautions
The product is connected to a telephone line where life-endangering
voltage may occur, during storms in particular. Be sure to install the
ALARM button in such a manner that the user cannot get in touch with the
wires and can be protected against electrical accident. The minimum
isolation distance must be 1.5 mm and/or the minimum breakdown
voltage must be 1,500 V – for the used button too!
Make sure that the cables cannot get in contact with sharp edges during
installation to avoid insulation damage.
Check after installation that the isolation distance of 1.5 mm is kept
everywhere. Use an insulation meter if possible.
The manufacturer shall not be held liable for any installations made in
conflict with the User Manual or the Appendix thereto.
Terminal Description (elderly HW)
Terminal Description (newer HW)
Tip
The above mentioned safety precautions need not be observed in case
your ST unit is connected to a 2N® EasyGate GSM gateway installed near
the communicator.
2N® TELEKOMUNIKACE a.s., www.2n.cz
34
Terminals
Telephone line / LN b
us
DC =
voltage
control *)
N.O. =
N/O
terminals contact
Refer to ST or LN User Manual
5 – 24Vdc, any polarity
ALARM
normally open contact
N.C. =
N/C
contact
Normally closed contact WARNING! If
unused, the contact should not be
opened!
CANCEL
voltage
control *)
5 – 24Vdc, any polarity **)
terminal
contact
control
any contact **)
Emergency call
activation
Emergency call
deactivation upon
door opening
*) For safety reasons, these terminals are electrically isolated from the telephone line.
*) You need not do anything to activate *ALARM if you keep the factory settings.
For deactivation, voltage application or contact closing is necessary. To change the
settings use parameter 916 for ST and the rotary switch for LN.
Accident Hazard
Make sure that the button is safe, i.e. that the minimum isolation distance
is 1.5 mm and the minimum breakdown voltage value is 1,500 V. The
button contacts may not be connected to any other circuits. If any of the
above conditions cannot be met, use voltage control.
You can use an N/O or N/C button or both.
Refer to the rear cover for internally connected terminals.
ALARM Button Connection with N/O Contact
2N® TELEKOMUNIKACE a.s., www.2n.cz
35
ALARM Button Connection with N/C Contact
Notes
The ALARM button mounted on the cover is still functional when an
external button is connected.
2N® TELEKOMUNIKACE a.s., www.2n.cz
36
Voltage Activation
Notes
5 - 24 dc voltage of any polarity can be used. Make sure that the power
supply is backed up properly.
Where activation from multiple places is necessary, voltage control can be
combined with buttons.
A buzzer or horn can be connected in parallel, see the figure to the right.
Inversion Voltage Control
The figure to the right shows a configuration where voltage is present and activation is
caused by non-presence of voltage.
Warning
It is impossible to connect multiple devices to a single line!!!
2N® TELEKOMUNIKACE a.s., www.2n.cz
37
Tip
The Compact version is very easy to install because the ALARM button,
backlit picrograms and induction loop are part of the product. All you have
to do is connect a telephone line. The CANCEL input connection is
optional.
Telephone Line Connection
ST works regardless of polarity and/or line parameters in a wide range (see the
Technical Parameters section). It is connected via the LINE terminals. A great
advantage is that ST requires no additional power supply for operation. For details on
ST connection to PSTN, PBX and GSM gateway lines refer to the ST Connecting Options
section.
2N® TELEKOMUNIKACE a.s., www.2n.cz
38
CANCEL Input Connection (Door Contact, Optional)
The connection is the same as with the Universal version. Follow the instructions
included in the Installation – universal version section, The only difference is that the
terminal is in the upper position for contact control and in the low position for voltage
control as printed on the rear cover at the terminals.
Induction Loop Connection
It is unnecessary to install the induction loop. It is integrated in the product, located to
the right in the window area and labelled with the prescribed blue pictogram.
Mounting Completion
Having connected the wires, you can complete the ST wall mounting. The mounting is
easier if you can access the cabin wall from the outside. In this case, the screws are
inaccessible from the cabin and ST cannot be stolen. If the cabin wall is accessible from
the outside, follow the instructions in item a) or b). If not, follow item c).
a. If the cabin wall is thin (stainless steel sheet), use four 8 mm long M4
screws and fan washers from the accessories. Apply ST on the pre-drilled
place and screw the M4 screws including the washers from the rear panel
side.
b. If the cabin wall is thick (up to 20 mm – laminated chipboard, e.g.), use
four headless 30 mm long M4 screws from the accessories. First screw
them into the ST back holes and tighten. Then get the set through the
pre-drilled holes and apply the fan washers and nuts from the rear.
c. If the cabin wall is inaccessible from the rear, follow instructions on the
next page. TIP: If you have pre-drilled corner holes, find four headless M4
screws of the length of 30 mm in the package. Drive the screws into the
holes on the rear side of the audio unit and tighten as mentioned in item b)
above. Though unprovided with nuts, the screws fix the product reliably,
preventing it from sliding or turning.
2N® TELEKOMUNIKACE a.s., www.2n.cz
39
Mounting Completion – withour rear access
1. Insert the hex wrench (included in the delivery) in the bottom unit edge hole;
turn left about 10 times until it puts up resistance.
2. The window slides down by itself or with little assistance, showing its upper brim.
3. Tilt the window forwards and remove.
4. Now you have access to two holes in the window corners. Put ST (including the
connected wires) on the pre-drilled lift cabin wall. Drive and tighten the included
screws for plywood, chipboard, laminated plastic etc. wall mounting or short M4
screws with fan-shaped washers (intended for metal plate mounting with
pre-drilled M4 threaded holes).
5.
2N® TELEKOMUNIKACE a.s., www.2n.cz
40
5. Replace the window.
6. Insert the hex wrench (included in the delivery) in the bottom unit edge hole,
turn right about 10 times until the window slides under the panel edge and
tighten applying light force.
2N® TELEKOMUNIKACE a.s., www.2n.cz
41
2.7 ST Connecting Options
Direct PSTN Connection
Advantages and disadvantages
This is the most reliable and simplest connecting option. The costs include acquisition
costs plus a line installation fee, yet the ST operation is relatively cheap (monthly fee).
Cautions
The line must be dedicated to ST only, serving no other devices.
The line may not be serial or group line.
Notes
You are not recommended to use the telephone set offered for lease while
arranging the line.
The telephone socket and associated cabling are the network provider's
property and may not be tampered with.
Report the ST installation and submit compliance certification upon
request.
Your follow-up cabling must be in conformity with the relevant safety
regulations.
You are recommended to secure your line against piracy,e. g. use a
telephone lock.
GSM Gateway Connection
Advantages and disadvantages
This is a rather costly solution for places where no telephone line is available.
Cautions
Back up the GSM gateway reliably in case of power outage.
With a pre-paid SIM card, ensure credit monitoring and on-time charging.
Tips
Verify the signal coverage and intensity in the place before selecting your
GSM provider.
Choose the optimum location for your antenna.
Use an external directional antenna for places with a bad signal quality.
Ensure that your GSM gateway function will go on working upon power
failure without the need to enter the PIN.
Safeguard the GSM gateway SIM card against misappropriation.
2N® TELEKOMUNIKACE a.s., www.2n.cz
42
PBX Connection
Advantages and disadvantages
This is the cheapest connecting option wherever a PBX and an unoccupied PBX line are
available. Where the ST is connected to a non-stop well-trained service personnel only,
its operation costs are zero.
Caution
Make sure that your PBX is protected against power outage. In the event
of power outage, non-backed-up PBXs switch over some of their lines
directly to CO lines and, in that case, the ST may call another subscriber if
a prefix is used! For a smart solution see the Tips below.
For the ST to call outside the building (i.e. via PSTN):
The line to be used must have the relevant call barring status (use a common
telephone and try to call "outside" for check)
While programming, add prefixes for PSTN seizure (typically a zero), or select a
direct PSTN line seizure.
To enable dispatcher center – ST calling, identify the line (extension) to be used
and how to reach it from the outside (dial-in, DISA, operator), and select the
appropriate PBX configuration (allowing to call the ST even in the night without
an operator).
Select the appropriate call barring status for the extension to be used if any of
the pre-programmed numbers is a mobile (GSM) one.
Agree with the PBX owner on operation costs ( ST outgoing calls are at the
owner's account).
Tips
The operational costs can be solved by the "green line" (prefix 0800) calls.
The so-called automatic CO line seizure (without dial-in) is a practical
solution, which, in the case of ST switchover to a PSTN line due to power
outage, makes the ST always call the right number.
2N® TELEKOMUNIKACE a.s., www.2n.cz
43
3. Configuration
2N® SingleTalk
This section describes configuration of the product 2N® SingleTalk.
Here is what you can find in the section:
3.1 2N® SingleTalk Programming
3.2 Review of Programming Functions
2N® TELEKOMUNIKACE a.s., www.2n.cz
44
3.1 2N® SingleTalk Programming
Before You Start Programming
Make sure that programming is not restricted (PROGRAMMING jumper) and that
your telephone supports tone dialing.
Use the pre-prepared form, which is also a clear table of basic functions, and fill
in all values to be changed.
If your ST is not brand new, make sure that you have a correct service password
and, if you are not entirely sure of how ST has been programmed, execute full
initialisation (Warning! The service password is also initialised!).
Entering Programming Mode
The programming mode can only be entered during an incoming call (calling from a
phone to the ST). For access, enter the password in the format:
service password
(remember to enter an asterisk before and after the password!). If the password is
correct and programming is allowed (jumper), ST reports:
"You have entered the programming menu"
and a help menu is displayed according to the context. The default password is 12345
and you are recommended to change it to protect your equipment against
unauthorized access.
Tip
If you forget the service password, contact the manufacturer in order not
to lose your data. You have a 5-second (or as selected from 1 to 9
seconds) password-entering timeout per character; if you do not manage
to enter a digit within this timeout, ST rejects the digits dialled by you –
in that case, re-enter the password or function.
Programming
Once entering the programming mode, you can change any programmable value(s) in
any order. The procedure is simple – first enter the parameter number, then the
function value. An asterisk is used as the separator or "Enter". The general function
format is thus as follows:
parameter number
value
.
The parameter number consists of three digits (see later). After the number and an
asterisk are entered, the ST announces the parameter number/name, value and
allowed range. After the value and another asterisk are entered, the ST reports "Value
saved", or "Invalid value" in case the value exceeds the allowed limit.
2N® TELEKOMUNIKACE a.s., www.2n.cz
45
Tip
To check programmed values: enter parameter number and
the parameter value and press
, listen
for return to the main menu.
Caution
Unfortunately, some telephone sets become "mute" for a second after
sending the DTMF signal. Try to use another telephone in this case.
Programming Error
If you make an error while entering a number (whether a wrong function number
or value) and you recognise it before entering an asterisk, push
to cancel the
number and enter a new one.
If the ST rejects the selected parameter number or value, the programming
procedure can continue – the function number must be re-entered even if only
the value was wrong.
If you program a false value and it gets stored, you can re-enter the value of
course.
Programming Termination
Having stored all values you needed to change, terminate programming by
pressing
. The ST sends a hang-up signal and hangs up.
If you do not use
, the ST hangs up later without influencing your storage
(the values are stored immediately upon entering).
In doubts, make sure that the programmed ST behaves according to your
assumptions.
Keep the filled-in programming form on a safe place.
How to Record a Message
(for models 913641, 913643 and 913645, or 913640 and 913642 with extending
module 913647 only)
A message can only be recorded in the programming mode (see the respective
chapter) and if the voice recording module is present. It is protected with a password
and, optionally, with a programming barring jumper.
You can check the message during an incoming call (not during programming). To play
back the message, press
.
Caution
To play recorded message automatically during the outgoing call, you
must change parameter 975.
If a voice recording module is installed and you have not recorded a
message of your own, the test record is replayed. This record contains the
"Wait please" message but without any language selection!
2N® TELEKOMUNIKACE a.s., www.2n.cz
46
Steps
1. Enter the programming mode:
service password
.
2.
3.
4.
5.
Enter the message recording command:
972
service password
.
Listen to the permanent tone (up to 15 s). Wait until it stops.
Now, a new message is being recorded. The maximum time is 30 s.
If the message is shorter, terminate recording by pressing a digit (DTMF) on the
phone.
6. Having completed recording, ST hangs up.
Notes
The maximum message length is 30 seconds. You are recommended to
prepare the message text in advance and check its length. Remember to
identify the lift and keep in mind that the lift may be used by foreigners,
too, e.g. at hotels. Articulate distinctly and, if the message is rather long,
monitor the time in order not to be surprised by the message end.
Message quality: depends on the speaker (you are recommended to hire a
professional speaker for representative purposes), telephone set (do not
use handsfree or obsolete carbon-insert apparatuses), surrounding noise
and connection quality (the best solution is to record the message in
advance on the PBX).
Message check: after the message is recorded, the ST quits programming
automatically and hangs up because it expects you to check the action.
Call the ST again and play the message back (command 3).
Setting Acoustic Parameters
The ST automatic handsfree mode works as follows: if there is silence on both
sides, the sound channel is muted; if a threshold sound level is exceeded, the
loudspeaker or the microphone goes on depending on which party starts talking,
or is talking more loudly.
The optimum acoustic parameters are set by default. You are not recommended
to change them unless under exceptional circumstances. For a change, use
parameters 931 through 938.
Switch programming
Each of the 3 switches has its predefined password (00, 11 and 22) according to
the table. If you use a new password, do not forget to remove the old one
Up to 10 various passwords can be programmed for each switch. Thanks to it,
different persons can use different passwords and all you have to do to "block"
one person later , is to remove the person's password and keep the other
passwords valid.
All passwords are checked during programming, i.e. it is forbidden to enter one
password twice.
If you wish to use a faster switch control method (a password without
), be
careful while entering passwords of variable lengths: if a shorter password is
identical with the beginning of a longer one, you cannot control the switch with
the longer one. Moreover, if you use Automatic dialing with confirmation, your
passwords may not start with 1 to 5.
2N® TELEKOMUNIKACE a.s., www.2n.cz
47
Communication Equipment – Abbrev. Programming Form
2N® TELEKOMUNIKACE a.s., www.2n.cz
48
2N® TELEKOMUNIKACE a.s., www.2n.cz
49
3.2 Review of Programming Functions
You can see on the table below all programming functions.
2N® TELEKOMUNIKACE a.s., www.2n.cz
50
2N® TELEKOMUNIKACE a.s., www.2n.cz
51
2N® TELEKOMUNIKACE a.s., www.2n.cz
52
1
) To parameter 904: The Automatic dialing without confirmation types 3 and (newly) 4
differ from each other in processing very short calls. Dialing 4 regards a call as
successful in all cases while dialing 3 only if the switch was activated. Since the switch
is not practically used for the ST, this difference is irrelevant.
2
) A new implicit value, a lower probability of unintentional detection.
3
)In the event of automatic dialing without confirmation, the ringing tone is detected
and terminated before the selected count of periods is reached, the call is regarded as
successful.
Note
Unless the ST is damaged electrically, the EEPROM guarantees 10 years of
reliable data storing at least.
2N® TELEKOMUNIKACE a.s., www.2n.cz
53
4. Function and Use
This section describes the basic and extending functions of the product 2N®
SingleTalk.
Here is what you can find in the section:
4.1 Function Description
4.2 Non-Stop Service Instructions for Use
2N® TELEKOMUNIKACE a.s., www.2n.cz
54
4.1 Function Description
Note
The information in this section is intended for those who are familiar with
the foundations of telecommunications equipment and need to know
detailed processes taking place in ST. It is unnecessary for common ST
installations.
Outgoing Call
The ST is activated by pressing the ALARM button. After that, the ST "seizes" the line
and establishes connection with the hotline or dispatching center personnel (for details
see Automatic Dialing). During the call establishing, the person in the lift hears the
dialing tone, then the DTMF dialing tones and the ringing tone, or "Wait please,
connection is being made", or any other suitable message. The message usually starts
with the "Wait please, connection is being made" statement and may include the ST id
entification (address, lift number, etc.). Once the dispatching service answers the
phone, the parties can start talking with each other.
Checking Call
The Checking Call is an automatic outgoing call whose purpose is to check the ST functi
on. If activated, the function runs every 72 hours (3 days). The procedure is similar to
that of an outgoing call. The difference lies in that a different message is played back,
e.g. "Checking call", and a different set of numbers may be used.
Checking calls are typically received automatically – in case the dispatcher's centre is
equipped with the 2N® LiftManager software. A standard PC with an analog modem
can be used for running the program.
Incoming Call
The dispatching center can also call the ST number. The ST answers the call after two
rings (the count of rings is parameter-defined) and sends a sound signal. Now, for
example, the person trapped in the lift keeps informed about rescue operations. Also, it
can be checked remotely whether the ST has been connected and works.
Protection against Unintentional Initiation
Since the main purpose of the ST is to call help in case of emergency (whenever a
person gets trapped in the lift), any call can be regarded as unnecessary, if the lift
cabin door is open. So, where available, a door contact can be connected to the ST inp
ut labeled as CANCEL and a delay can be programmed for the ST to make connection
after the ALARM button is pressed. Therefore, in case someone presses the ALARM
button by mistake, the lift gets to a certain floor during this delay, the door opens and
the call is cancelled. Or, it is possible to set the minimum button pressing time to avoid
most false ALARM cases.
2N® TELEKOMUNIKACE a.s., www.2n.cz
55
Automatic Repeated Multiple Numbers Dialing with
Confirmation
Caution
This a default ST mode set by the manufacturer, which provides the
highest possible connection reliability. Automatic dialling can disabled or
switched into the 'no-confirmation' mode but, in that case, the
manufacturer assumes no liability for subsequent damage if any.
Up to 6 telephone numbers and the count of dialing repetitions can be stored in the ST
memory for the ALARM button (or 2 numbers where no voice recording module is
available). The ST thus tries to get through to all numbers stored. Tone dialing (DTMF)
is used as the most reliable connection-confirming criterion. The dispatcher must press
button
on its telephone (in the DTMF mode). If the called number is busy or
nobody answers the phone within a defined timeout, or in other cases (as defined in
the table), the ST tries to call the following number from the list until it completes the
pre-defined number of cycles. If the number of cycles is 0, automatic dialing is turned
off and the ST calls to one number only.
In this mode, the ST repeats the "Wait please…" message (or any relevant
user-recorded message) so many times as preset. The message can be muted by
pressing button
, or confirming connection with button
.
The ST default mode is "Speakerphone automatic dialing with confirmation". There are
some other modes designed for specific applications, one of them being "Speakerphone
automatic dialing without confirmation"; see later.
2N® TELEKOMUNIKACE a.s., www.2n.cz
56
Evaluation of Situations during Speakerphone Automatic Dialing
with Confirmation
Situation
Silence or busy
tone is heard upon
seizure
ST Activity
This has no influence on the operation; the ST executes dialing
with any line status and only then evaluates the situation.
Busy tone (after
dialing)
The ST hangs up in approximately 2 seconds and dials the
following number.
Talk or silence
The ST waits for a defined timeout (logon time), then hangs up
and dials the following number.
Ringing tone
The ST waits for a defined count of rings, then hangs up and
dials the following number.
Continuous tone
(PBX)
The ST hangs up in approximately 2 seconds and dials the
following number.
DTMF char
or
The ST hangs up immediately and dials the following number.
The ST confirms receipt (2 beeps), mutes the message playback
and the call continues for the defined period of time (maximum
call time).
DTMF char
ST sends identification but the connection is not confirmed. Used
for 2N® LiftManager applications.
DTMF sign
These digits are interpreted as control characters.
Caution
The quality of PSTN connection does not always allow for a reliable
recognition of all the situations mentioned above. Any excessive noise in
the lift car can have a negative impact too, slowing down, yet never
discontinuing, automatic dialing (the busy tone is not detected). It holds
true in general that the DTMF is the most reliable way of signaling and so
is preferred for confirmation. However, the connection is established (yet
for a shorter period of time) even in extreme cases, e.g. when the ST is
unable to recognize the DTMF).
Automatic Repeated Multiple Numbers Dialing without
Confirmation
This mode can be used wherever no trained staff for automatic dialing with
confirmation is available. The called person need not press any button. The two modes
have a common set of numbers, count of cycles, identical responses to the busy tone,
and so on.
The difference is that the non-confirmation mode detects the ringing tone and, if this
tone is terminated before the pre-defined count of rings is reached, it assumes that the
called party has answered and the connection has been established successfully.
2N® TELEKOMUNIKACE a.s., www.2n.cz
57
Warning
If you select this mode, make sure that it works reliably. Remember that
different countries and networks may use different dial tones and your dial
tone may not be recognised correctly.
Note
In this mode, the ST does not repeat the "Wait please..." message (or any
relevant user-recorded message) after the dialing end because this would
make it impossible to recognize the ringing tone reliably. The message is
reproduced once shortly after the called party answers. The ST cannot be
controlled using buttons
to
Evaluation of Situations during Speakerphone Automatic Dialing
without Confirmation
Situation
Silence or busy tone is
heard upon seizure
ST Activity
This has no influence on the operation; the ST execute
s dialing with any line status and only then evaluates
the situation
Busy tone
The ST hangs up in approximately 2 seconds and dials
the following number
Talk or silence
The ST waits for a defined timeout (logon time), then
hangs up and dials the following number
Continuous tone (PBX)
The ST hangs up in approximately 2 seconds and dials
the following number
Ringing tone is terminated
before 10 rings (or as
programmed) are reached
This is considered as a successful call, the call
continues for the defined period of time (maximum call
time). The message is played back once.
Ringing tone with 10 rings
(the count can be defined)
The ST hangs up and dials the following number
to
,
These digits are interpreted as the switch control
password beginning
Dialing type 3 hangs up and calls next number,
Dialing type 4 hangs up and stops calling.
valid switch password(switch Dialing type 4 consider such call as a successfull, even
activation)
if ringing tone is not detected.
Warning
Be sure to disable your voice mailbox, fax machine or any other
equipment connected to the called numbers to avoid premature
answering. This would terminate the dialing automatically.
2N® TELEKOMUNIKACE a.s., www.2n.cz
58
Call Termination (Outgoing and Incoming Calls)
The busy or continuous tone*) is detected (for PBX call termination).
10 ringing tone*) periods are detected (for a change use parameter 954). This is
an innovation compared with the earlier model.
The maximum call length has elapsed – the ST plays back the "Attention, your
call is being terminated" message 10 seconds before the end; the call may be
prolonged.
vyprší nastavená maximální délka hovoru – 10 sekund před vypršením ST
přehraje hlášení „Pozor, končí hovor", hovor lze prodloužit.
The
or
character is received.
The timeout has expired during programming, or upon message recording.
30 seconds after switch activation.
The same button is pressed during an outgoing call that was used for making the
call (this function is disabled in the lift version).
Note
The ST is able to detect the continuous, busy and ringing tones even if the
tone has two frequency components as the case is in the UK and USA
(BTT) and in Canada. This new function requires no parameter. One of the
tone components must be 440 Hz
2N® TELEKOMUNIKACE a.s., www.2n.cz
59
4.2 Non-Stop Service Instructions for Use
DTMF Control during the Call
Where Automatic dialing with confirmation is enabled, it is possible to use tone dialing
during the call to control the ST in accordance with the table below. For convenience,
commands 1 to 5 are arranged in the order they are usually used in.
DTMF
char
FUNCTION DESCRIPTION
It is a confirmation notifying SingleTalk (hereinafter referred to as ST)
that the call was successful. ST mutes the message playback,
sends out the confirmation signal and the call continues until the end of the
timeout and the following commands can be used
Message playback muting. CAUTION: Now that the SW has been changed,
it is no more necessary for the call!
Repeated playback of the voice recording module for 1 message repetition
or
Call prolongation: the call is prolonged up to 30 seconds after this
command in case it ended earlier. It can be used repeatedly.
or
Call termination.
ST sends identification but the connection is not confirmed. Used for the
LiftManager only.
t
o
and
These digits are interpreted as the switch control password beginning.
(Automatic dialling with confirmation)
2N® TELEKOMUNIKACE a.s., www.2n.cz
60
Note
When the message is being played back, it is impossible to speak into
the ST microphone! Hence, to talk with the person in the lift, the service
must always use function 2 (muting) or wait till the ST stops repeating
the message.
The above-stated commands may not be accepted in case they are sent
during the message and the connection is of a poor quality. Therefore,
the ST inserts a 3-second pause between the repeated message, during
which the receiving of DTMF commands is absolutely undisturbed.
Switch Control
The switch (if available) can be used during outgoing and incoming calls. The switch
can be activated using a pre-defined password; the format is
password
(the
maximum password length is 16 digits). The ST confirms the switch activation and
turns it on for the pre-defined period of time (1 to 10 seconds). It is not possible to
talk during the switch on-status and the ST signals this action with tones as per the
signaling review table. The call is terminated 30 seconds after the switch activation.
Tip
The switch can be used, for example, for resetting the lift Each switch can
be controlled with up to 10 variable passwords. A new feature is that the
password can be entered without asterisks too if it starts with 6 to 9, or 0.
(This limit applies to the use of Automatic dialing with confirmation.)
ST Signalling Overview
ST uses variable signals to communicate with the operating personnel during
programming, calls, and so on. For an overview of the signals including meanings refer
to the table below:
2N® TELEKOMUNIKACE a.s., www.2n.cz
61
SIGNAL
Long continuous
tone
NAME
MEANING
Sent during an incoming call to the line immediately
Confirmation after off-hook (the calling party hears it).
Remote switch activation.
Rejection
Whenever a non-programmed button is pressed.
Heard from the loudspeaker to signal line
connection.
Sent during an incoming call instead of
confirmation, indicating that the ST has not been
programmed or its memory has been damaged.
Storing
Remote switch activation end.
Hang-up
Sent close before the call end (in all cases).
Deleting
Sent during dialing memory clearing, or full
initialization
"Attention, your
call is being
terminated"
Signals during an outgoing or incoming call that the
maximum call duration will elapse in 10 seconds.
"Wait please..."
Programmable connection-waiting message.
"Communicator
No. ... is calling
."
Programmable identification message.
Survey of Messages
The table below includes a survey of language versions for standard announcements.
English is selected by default. To select another language use parameters 976 and 977.
2N® TELEKOMUNIKACE a.s., www.2n.cz
62
Value of
Parameter
976
Language
selection
– English
version
Outgoing call message
ID
Confirmation
message.Parameter
message.
End of
Checking
975
call
call
Parameter
message
message
must contain digit
975last digit
2, 3 or 5
=5
Tone
signal
0
1 (default
value)
English
2
German
off
Attention,
your call is Communicator
number.......... is
being
calling
terminated
Achtung,
das
Gespräch
wird
beendet
off
off
Connection
confirmed
Checking
Call
Es ruft das
Notruftelefon
Nummer……an.
Der
Kontrollanruf
3
Portuguese .............
.............
.............
4
Dutch
.............
.............
.............
0
Language
Outgoing
selection
call
– English
message
version
Tone signal off
1 *)
English
Wait
please
2
German
Warten
Sie bitte
3
Portuguese .............
4
Dutch
Value of
Parameter
977
Note
To play this message, parameter 975 must
start with digit 5.
Parameter 977 has a range 0 – 99. On
customer's request, adiitional messages can
be added; e.g. another languages or more
alternative messages in the same language.
.............
Caution
The Czech version and custom specific models has another set of
languages.
ST Identification
If parameter 974 is filled with a number, and parameter 975 contains digit 2, 3 or 5,
ST identifies itself automatically by replaying "Communicator number... is calling". Use
parameter 976 to set the language for lift number identification.
2N® TELEKOMUNIKACE a.s., www.2n.cz
63
5. Technical parameters
This section describes the technical parameters of the product 2N® SingleTalk.
5.1 Technical parameters
2N® TELEKOMUNIKACE a.s., www.2n.cz
64
5.1 Technical parameters
Electric Parameters
Parameter
Minimal off-hook line current
15 mA
Value
Conditions
Off-hook
Minimal on-hook line voltage
22 V
Off-hook
DC voltage drop (off-hook)
< 8 V< 16 V
I = 25 mA
I = 50 mA
Off-hook resistance
>1MΩ
U=
25..100 V
Off-hook AC impedance
220 Ω + 820 Ω paral. 115 nF
20 to 60
mA
Return loss
> 14 dB
20 to 60
mA
Bandwidth
300 to 3500 Hz
20 to 60
mA
Ringing impedance
> 2 kΩC = 0.47 μF
25 to 50 Hz
Ringing detector sensitivity
10 to 20 V
25 to 50 Hz
Pulse dialing
40 / 60 ms
DTMF dialing level
-9.0 +2.0/-2.5 dB a -11.0 dB
+2.5/-2.0 dB
20 to 60
mA
Overvoltage protection –
between A, B
1000 V
8 / 20 μs
Notes:
1) Whichever ringing form is accepted.
Switch Parameters
Minimum voltage
9 V AC or DC
Maximum voltage
24V AC or DC
Maximum current
1A AC or DC
Resistance – breaking
min. 400 kΩ
Resistance – closing
cca 0,5 Ω
Fuse
resettable
Other Parameters
Universal dimensions
65×130×24 mm
Compact dimensions
100×185×16 mm
Working temperature range
-20 to +70 ˚C
2N® TELEKOMUNIKACE a.s., www.2n.cz
65
6. Supplementary Information
This section describes supplementary information of the product 2N® SingleTalk.
Here is what you can find in this section:
6.1
6.2
6.3
6.4
Troubleshooting
List of Abbreviations
Regulations and Directives
General Instructions and Cautions
2N® TELEKOMUNIKACE a.s., www.2n.cz
66
6.1 Troubleshooting
For the most frequently asked questions refer to faq.2n.cz.
2N® TELEKOMUNIKACE a.s., www.2n.cz
67
6.2 List of Abbreviations
ST – 2N® SingleTalk
Incoming call – A call from the dispatching centre to the central unit
Outgoing call – A call from the central unit to the dispaching centre
Checking call – An automatically activated call from the central unit to the
dispatching centre
Dispatching centre – A workplace that receives emergency calls, checking calls,
and lift error reports if any. There may be separate workplaces, each for one type
of calls, even mobile ones
LM, LiftManager – 2N® TELEKOMUNIKACE dispatcher software
PBX – A private branch exchange (equipped with a PSTN line and local analog
lines)
PSTN – The public switched telephone network. It is assumed for simplification
that ST is connected to the PSTN although it works on a PBX line in the same
way
2N® TELEKOMUNIKACE a.s., www.2n.cz
68
6.3 Regulations and Directives
Europe
2N® SingleTalk conforms to the following directives and regulations:
Directive 1999/5/EC of the European Parliament and of the Council, of 9 March 1999 –
on radio equipment and telecommunications terminal equipment and the mutual
recognition of their conformity
Directive 2006/95/EC of the European Parliament and of the Council of 12 December
2006 on the harmonisation of the laws of Member States relating to electrical
equipment designed for use within certain voltage limits
Directive 2004/108/EC of the Council of 15 December 2004 on the harmonisation of
the laws of Member States relating to electromagnetic compatibility
Commission Regulation (EC) No. 1275/2008, of 17 December 2008, implementing
Directive 2005/32/EC of the European Parliament and of the Council with regard to
ecodesign requirements for standby and off mode electric power consumption of
electrical and electronic household and office equipment
Directive 2011/65/EU of the European Parliament and of the Council of 8 June 2011 on
the restriction of the use of certain hazardous substances in electrical and electronic
equipment
Regulation (EC) No. 1907/2006 of the European Parliament and of the Council of 18
December 2006 concerning the Registration, Evaluation, Authorisation and Restriction
of Chemicals (REACH), establishing a European Chemicals Agency, amending Directive
1999/45/EC and repealing Council Regulation (EEC) No. 793/93 and Commission
Regulation (EC) No. 1488/94 as well as Council Directive 76/769/EEC and Commission
Directives 91/155/EEC, 93/67/EEC, 93/105/EC and 2000/21/EC
Directive 2002/96/EC of the European Parliament and of the Council of 27 January
2003 on waste electrical and electronic equipment.
2N® TELEKOMUNIKACE a.s., www.2n.cz
69
6.4 General Instructions and Cautions
General Instructions and Cautions:
Please read this User Manual carefully before using the product. Follow all
instructions and recommendations included herein.
Any use of the product that is in contradiction with the instructions provided
herein may result in malfunction, damage or destruction of the product.
The manufacturer shall not be liable and responsible for any damage incurred as
a result of a use of the product other than that included herein, namely undue
application and disobedience of the recommendations and warnings in
contradiction herewith.
Any use or connection of the product other than those included herein shall be
considered undue and the manufacturer shall not be liable for any consequences
arisen as a result of such misconduct.
Moreover, the manufacturer shall not be liable for any damage or destruction of
the product incurred as a result of misplacement, incompetent installation and/or
undue operation and use of the product in contradiction herewith.
The manufacturer assumes no responsibility for any malfunction, damage or
destruction of the product caused by incompetent replacement of parts or due to
the use of reproduction parts or components.
The manufacturer shall not be liable and responsible for any loss or damage
incurred as a result of a natural disaster or any other unfavourable natural
condition.
The manufacturer shall not be held liable for any damage of the product arising
during the shipping thereof.
The manufacturer shall not make any warrant with regard to data loss or
damage.
The manufacturer shall not be liable and responsible for any direct or indirect
damage incurred as a result of a use of the product in contradiction herewith or a
failure of the product due to a use in contradiction herewith.
All applicable legal regulations concerning the product installation and use as well
as provisions of technical standards on electric installations have to be obeyed.
The manufacturer shall not be liable and responsible for damage or destruction of
the product or damage incurred by the consumer in case the product is used and
handled contrary to the said regulations and provisions.
The consumer shall, at its own expense, obtain software protection of the
product. The manufacturer shall not be held liable and responsible for any
damage incurred as a result of the use of deficient or substandard security
software.
The consumer shall, without delay, change the access password for the product
after installation. The manufacturer shall not be held liable or responsible for any
damage incurred by the consumer in connection with the use of the original
password.
The manufacturer also assumes no responsibility for additional costs incurred by
the consumer as a result of making calls using a line with an increased tariff.
2N® TELEKOMUNIKACE a.s., www.2n.cz
70
Electric Waste and Used Battery Pack Handling
Do not place used electric devices and battery packs into municipal waste containers.
An undue disposal thereof might impair the environment!
Deliver your expired electric appliances and battery packs removed from them to
dedicated dumpsites or containers or give them back to the dealer or manufacturer for
environmental-friendly disposal. The dealer or manufacturer shall take the product
back free of charge and without requiring another purchase. Make sure that the devices
to be disposed of are complete.
Do not throw battery packs into fire. Battery packs may not be taken into parts or
short-circuited either.
2N® TELEKOMUNIKACE a.s., www.2n.cz
71
2N TELEKOMUNIKACE a.s.
Modřanská 621, 143 01 Prague 4, Czech Republic
Tel.: +420 261 301 500, Fax: +420 261 301 599
E-mail: [email protected]
Web: www.2n.cz
DR1514 v6.1.0
2N® TELEKOMUNIKACE a.s., www.2n.cz
72