1
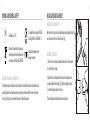
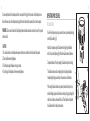
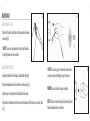
User Manual • Benutzerhandbuch • Manuel de l’utilisateur • Manuale per l’utente
Manual del Usuario • Manual do Usuário •
_
SymmetryHandpieceCVR.indd 1
3/19/07 5:32:51 PM
Thank you for purchasing the Hu-Friedy Symmetry IQ handpiece. This product is intended to be operated by dental
professionals only. The Symmetry IQ handpiece must be used with a Hu-Friedy® Symmetry IQ control unit. This device
generates ultrasonic vibrations intended for use in dental applications such as scaling, periodontal therapy, root canal
treatment and cavity preparation. Read this operation manual carefully before use and retain for reference.
2
3
SYMBOLS AND GENERAL SAFETY
INSTALLATION AND ASSEMBLY
CE marking: Refers to directive 93/42 EEC,
including EN 60601-1 and EN 60601-1-2
Sterilizable up to 135˚C
Dispose of this device and its accessories via
methods approved for electronic devices and
in compliance with the Directive 2002/96/CE
EC REP
Authorized representative in the
European community.
CAUTIONS FOR HANDLING AND OPERATION
Read these instructions carefully and use only as intended or instructed. Safety instructions are intended to avoid
potential hazards that could result in personal injury or damage to the device. Refer to the user manual for your
Symmetry IQ control unit or go to www.hu-friedy.com for additional information.
HANDPIECE CORD CONNECTION
Align the marks on the control unit and the handpiece cord plug. Gently push the plug
into the connector at the front of the control unit. (Fig. 1)
HANDPIECE CONNECTION
Confirm there is no moisture in the handpiece connector. If moisture is present,
dry it with cloth or air syringe.
Align the marks on the handpiece with the marks on the handpiece hose to
properly align the electrical contacts. (Fig. 2) Gently push straight to connect.
Do not twist handpiece connector to connect.
Place the handpiece in the handpiece cradle on the control unit.
4
5
To remove handpiece from the handpiece cord, first remove tip, then firmly grip the front section of the handpiece in one
hand and the rear section of the handpiece cord plug with the other hand and pull to separate. Do not twist to separate.
WARNING: Do not touch the back end of the handpiece (where electrical connections are made to the cord). It may result
in electric shock.
CAUTION:
1 Do not disconnect the cord handpiece when power to the device is switched on and the footswitch is depressed.
2. Detach tip before removing handpiece.
3. Push handpiece against handpiece cord plug to connect.
4. Grip the plug of the handpiece cord when removing handpiece.
OPERATING PROCEDURES
TIP CONNECTION
Your Hu-Friedy Symmetry piezo tip comes with its own tip carrier/torque limiting
wrench (the Guardian, Fig. 3).
Attach tip to handpiece using the Guardian wrench by aligning the threaded
end of the tip to the handpiece. (Fig. 4) Rotate the Guardian wrench clockwise.
Complete installation of the tip by rotating the Guardian until you hear clicking.
The Guardian must be used to completely tighten the tip during installation.
Incomplete tightening may cause the tip to become loose or lack vibration.
When using the Guardian without a tip previously inserted into the tip carrier,
take the following step: place the Guardian over the tip by slipping tip through the
small hole in the bottom, closed end of the tool. This will position the tip within
the Guardian wrench for safety and convenience.
6
7
TIP REMOVAL
Hold the handpiece vertically. Insert the tip through the hole in the bottom of the Guardian wrench.
Depress wrench slightly while rotating to fully secure tip to wrench.
Turn the Guardian counter-clockwise to loosen and remove tip from handpiece.
Once removed from handpiece, do not remove the tip from the Guardian carrier.
CAUTION: Proper vibration of a tip depends on correct attachment to the handpiece. Always use the torque-limiting
Guardian wrench to ensure proper tip attachment and to eliminate over tightening or inadequate attachment of the tip.
Over tightening of the tip may result in damage to the handpiece or tip.
CLEANING AND STERILIZATION
Clean and sterilize prior to first use and after each patient as noted below.
1. Clean the outer surface of the handpiece by wiping with a soft cloth dampened with pH neutral surface disinfection
solution (not containing phenols). Do not spray the cleaning solution directly on the handpiece.
2. Wipe debris off the end of the optic fibers at the handpiece with an alcohol soaked cotton swab.
3. Place the handpiece in a cassette or sterilization pouch and seal.
4. Autoclave the handpiece for 20 min. at 250˚F/121˚C, or 15 min. at 273˚F/134˚C.
* Detailed care and maintenance instructions are available upon request or go to www.hu-friedy.com
CAUTION: Do not place the handpiece on the bottom shelf of the sterilizer. To prevent exposure to excess heat, place
handpiece and tips on the middle and top shelves of the sterilizer.
8
9
MAINTENANCE
CLEANING FIBER-OPTIC LIGHT
Wipe debris off the end of the optic fibers at the handpiece with an alcohol soaked
cotton swab. (Fig. 5)
CAUTION: Do not use any sharp pointed tools to clean the optic fiber end face.
In case the light becomes dim, contact your dealer.
CHANGING FIBER-OPTIC LIGHT
Disassemble the handpiece from the handpiece cord. (See Installation & Assembly)
Remove the handpiece sleeve. Use a small screw driver to push the lamp out. (Fig. 6)
Align the lamp pins of the new lamp with the holes and push the lamp into place.
Align the mark on the handpiece sleeve with the same mark on the handpiece cord. Push the sleeve to the cord until it clicks.
(Fig. 7)
CAUTION: Do not touch glass part of new lamp and exercise care when
mounting a new lamp to avoid dislodging the o-ring from the groove.
WARNING: Do not use the device if it appears to be defective.
NOTE: If a failure occurs, contact the supplier of your Symmetry IQ product.
Repair by unauthorized person may void warranty.
10
11
SERVICE
Please send your Symmetry IQ handpiece to your dealer or an authorized Hu-Friedy repair center. Shipping your product
in its original packaging will offer the best protection against damage during shipping. If sending directly to an authorized
Hu-Friedy repair center, please include the name and address of your dealer. All items must be cleaned, disinfected and
sterilized as described in the operating instructions before shipment.
TROUBLESHOOTING
See User Manual of your Symmetry IQ Control Unit for details or go to www.hu-friedy.com
DISPOSAL AND RECYCLING
Dispose of this device and its accessories via methods approved for electronic devices and in compliance with the Directive
2002/96/CE. At the end of their life, tips should be discarded in safety containers designed for this purpose.
HELPFUL INFORMATION
The use of higher than recommended power setting may cause excessive wear or tip breakage.
Always remember to properly tighten the tip to handpiece using the Guardian wrench.
Scaling efficiency can diminish significantly with worn tips. Inferior performance and poor water
delivery can result from worn, damaged, bent or altered tips. For optimal scaling efficiency, we
recommend checking tips regularly for signs of wear.
CHECKING SYMMETRY TIPS FOR WEAR:
1. Locate the diagram of the tip to be measured on the Symmetry Wear Guide (HF-469).
2. Rotate the tip until it is flat against the card.
3. Evaluate tip condition, comparing length to red/blue lines.
1mm loss can result in 25% efficiency loss
2mm loss can result in 50% efficiency loss
12
13
GUARANTEE
Hu-Friedy, at its sole option, will repair or replace for a period of one year following the date of the first purchase as new
item, any Symmetry IQ piezo generator unit (“Unit”) that fails as a result of a defect in materials or workmanship. Purchaser
must return the defective Unit (postage prepaid) and must provide Hu-Friedy with the guarantee registration card.
Excluded from this guarantee are damages in cases of:
• the Unit having been used outside of normal operating conditions;
• the Unit being damaged in transit;
• Non-compliance with the manufacturer’s installation instructions (water pressure, mains voltage);
• use with an electrical system that does not comply with regulations in force;
• uses other than those specified in this manual;
• non-compliance with instructions contained in this manual;
• service to the Unit being provided by non-authorized persons;
• components exhibiting normal wear from usage;
• damages/defects being caused by force majeure or any other condition that is beyond the control of Hu-Friedy.
Repair service or replacement provided under the guarantee neither extend the guarantee period nor begin new guarantee
period. Damages from breach of the guarantee described herein are limited to the cost of repair or replacement of the Unit
at Hu-Friedy’s sole option. Consequential or incidental damages resulting from breach of the guarantee described herein are
hereby excluded. Any statutory warranty rights shall remain unaffected by the guarantee provided herein.
Please contact Hu-Friedy for instructions on obtaining warranty service.
©2007 Hu-Friedy Mfg. Co., Inc. Hu-Friedy and First Because We Last are trademarks of Hu-Friedy Mfg. Co., Inc. registered in the USPat&TMOff.
U.S. Patent No. 7,159,494.
www.hu-friedy.com
Hu-Friedy Mfg. Co., Inc.
3232 North Rockwell Street
Chicago, Il 60618
USA
EC
REP
Hu-Friedy Mfg. Co., Inc.
Zweigniederlassung Deutschland
Rudolf-Diesel-Str. 8
D-69181 Leimen
UPMANUALHP/Q7
SymmetryHandpieceCVR.indd 4
3/19/07 5:32:53 PM