1
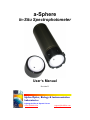
a-Sphere In-Situ Spectrophotometer User’s Manual Revision D Hydro-Optics, Biology & Instrumentation Laboratories Lighting the Way in Aquatic Science www.hobilabs.com [email protected] Revisions: D, October 2011: Add SAVEPARAMS command (section 6.3.8), expand maintenance recommendations (section 9.1) C, March 2011: Formatting; add note about Teflon sealing tape in section 4.2; clarify command syntax in section 6; Add section 9. B, January 2011: Formatting; change Igor “project” to “experiment.”; add BAUD command (section 6.3.2) A, November 2009: Major reorganization, adopt content from quick-start manual -2- 1 PRECAUTIONS .................................................................................................................................... 5 2 INTRODUCTION ................................................................................................................................. 6 2.1.1 2.1.2 2.1.3 2.1.4 3 Integrating Cavity ...................................................................................................................... 6 Light Source............................................................................................................................... 6 Thermal Regulation ................................................................................................................... 6 Internal Memory and Logging ................................................................................................... 6 QUICK START ..................................................................................................................................... 7 3.1 SOFTWARE INSTALLATION ................................................................................................................ 7 3.2 UNPACKING AND SETUP .................................................................................................................... 7 3.3 STARTUP............................................................................................................................................ 8 3.4 DATA SAMPLING ............................................................................................................................... 9 3.5 OTHER CONSOLE SOFTWARE FUNCTIONS.......................................................................................... 9 3.5.1 File Management ....................................................................................................................... 9 3.5.2 Baud Rate................................................................................................................................... 9 3.5.3 Real-Time Clock ........................................................................................................................ 9 3.5.4 Calibration Checks .................................................................................................................... 9 4 SETUP AND OPERATION................................................................................................................ 10 4.1 CONNECTIONS AND CONTROLS ....................................................................................................... 10 4.1.1 Standard Connectors ............................................................................................................... 10 4.1.2 Other Connector Configurations ............................................................................................. 11 4.1.3 Power Supply ........................................................................................................................... 11 4.1.4 Pump Power and Switch Control............................................................................................. 12 4.1.5 Data interface .......................................................................................................................... 12 4.2 WATER FLOW AND PUMP PLUMBING ............................................................................................... 12 4.3 SPHERE DISASSEMBLY AND CLEANING ........................................................................................... 14 4.3.1 Opening and Closing the Sphere ............................................................................................. 14 4.3.2 Cleaning................................................................................................................................... 15 4.4 ABOUT THERMAL REGULATION ...................................................................................................... 16 4.5 DEPLOYMENT .................................................................................................................................. 17 4.5.1 Mounting.................................................................................................................................. 17 4.5.2 Real-time cable connection...................................................................................................... 17 4.5.3 Battery-powered deployment ................................................................................................... 17 4.6 MONITORING CALIBRATION WITH READINGS IN AIR ....................................................................... 18 4.6.1 Preparation.............................................................................................................................. 18 4.6.2 Collecting Data........................................................................................................................ 19 4.6.3 Processing and Comparison .................................................................................................... 19 5 DATA DISPLAY AND PROCESSING ............................................................................................. 20 5.1 5.2 5.3 5.4 5.5 5.6 6 IGOR PRO OVERVIEW ...................................................................................................................... 20 OPENING THE PROCESSING TEMPLATE ............................................................................................ 20 LOADING THE CALIBRATION FILE ................................................................................................... 21 HANDLING DATASETS ..................................................................................................................... 21 CALIBRATION CHECKS .................................................................................................................... 23 HANDLING FILES ON THE A-SPHERE ................................................................................................ 24 FIRMWARE COMMANDS............................................................................................................... 26 6.1 COMMAND SCRIPTS ......................................................................................................................... 26 6.2 SYNTAX ........................................................................................................................................... 26 6.3 COMMANDS ..................................................................................................................................... 26 6.3.1 ACQUIRE [AUTO/FIXED] count average baseName process format dest ............................ 27 6.3.2 BAUD [rate] [STORE] ............................................................................................................ 27 -3- 6.3.3 6.3.4 6.3.5 6.3.6 6.3.7 6.3.8 6.3.9 6.3.10 6.3.11 6.3.12 6.3.13 6.3.14 6.3.15 6.3.16 6.3.17 7 SUPPLIES AND SPARE PARTS....................................................................................................... 31 7.1 7.2 8 PLUMBING ....................................................................................................................................... 31 CLEANING ....................................................................................................................................... 31 A-SPHERE BINARY DATA FORMAT ........................................................................................... 32 8.1 8.2 8.3 9 CASTNUMBER [number]........................................................................................................ 27 CASTPARAMS [period] [averaging] [SendData]................................................................... 28 DIR [filespec] [/V]................................................................................................................... 28 INTTIME [time] ....................................................................................................................... 28 PRESSURE .............................................................................................................................. 28 SAVEPARAMS [filename] ....................................................................................................... 28 START [period] [command…] [?] .......................................................................................... 28 STARTCAST........................................................................................................................... 29 STOP or control-C................................................................................................................. 29 SWITCH [pump] [startcast] [stop]........................................................................................ 29 TEMP..................................................................................................................................... 29 TIME [hh:mm:ss] [mm/dd/yyyy] ........................................................................................... 30 VER........................................................................................................................................ 30 VIN......................................................................................................................................... 30 WARMUP .............................................................................................................................. 30 C PACKET ........................................................................................................................................ 32 F PACKET ........................................................................................................................................ 33 FIELD DEFINITIONS.......................................................................................................................... 34 MAINTENANCE, SERVICE AND SUPPORT................................................................................ 36 9.1 9.2 9.3 MAINTENANCE ................................................................................................................................ 36 SERVICE AND SUPPORT.................................................................................................................... 36 EQUIPMENT RETURN ....................................................................................................................... 36 -4- 1 PRECAUTIONS Do not use harsh solvents, such as acetone, that can damage acrylic and acetal plastics. Keep the power/data connector lightly lubricated with a silicone-based (not petroleum-based) lubricant. Be careful to keep the lubricant away from the sphere. Do not over-tighten the inlet and outlet fixtures on the sphere, or apply excessive force to them. Do not use them as handles. Use only your hands to tighten the retaining nuts on the removable hemisphere. Avoid ambient temperatures above 30 C. When it is outdoors, shade the a-Sphere from extended exposure to direct sun. Do not run the pump dry. When it is necessary to run the pump on deck at the beginning of a cast, first fill the pump impeller with water, and minimize the running time. Rinse the instrument thoroughly with fresh water after each deployment, and dry it before storing it. -5- 2 INTRODUCTION The a-Sphere is a revolutionary instrument that applies the well-known advantages of a spherical integrating cavity to the measurement of water absorption insitu or in the laboratory. The integrating-sphere approach combines high sensitivity with virtual immunity to scattering errors. The sphere creates a uniformly diffuse internal light field in which multiple reflections increase the effective path length of the measurement, while also overwhelming the effect of scattering by the water. Thus it requires no scattering correction, even in highly turbid waters. 2.1.1 Integrating Cavity The spherical cavity, key to the a-Sphere’s performance, is made of a solid plastic that has high diffuse reflectivity. But unlike materials such as Spectralon, it is impervious to water and other substances, so the fluid under test can be pumped directly into the sphere. The sphere is shielded against external light by an opaque shell, and divided into two hemispheres, one of which is removable for easy cleaning. The fluid inlet and outlet are configured for easy connection to a submersible pump (see section 4.2), and a streamlined flow path prevents trapping of air. In addition, the sphere’s immunity to scattering means that small bubbles do not contaminate the measurements. 2.1.2 Light Source The a-Sphere is also distinguished by its solid-state light source. An array of light-emitting diodes provides efficiency, reliability, and ease of electronic control. By carefully selecting a set of LEDs and adjusting their drive, we balance the spectral output to complement the response of the detector and level it over the full spectral range. This eliminates the drastic spectral imbalance found with incandescent sources, whose output may vary by an order of magnitude or more from one end of the spectrum to the other, with lowest output at short wavelengths. 2.1.3 Thermal Regulation To provide the best stability, the a-Sphere regulates the temperature of both its light source and detector. This is discussed in Section 4.4. 2.1.4 Internal Memory and Logging The a-Sphere includes nonvolatile flash memory (128 MB standard, larger available) that can hold data and other types of files. -6- 3 QUICK START 3.1 Software Installation The a-Sphere requires some or all of the following software for operation and data processing. Each of these has a straightforward installation process and is delivered on a CD. Drivers for a USB-serial port adapter (unless your computer has a built-in serial port, which is very unusual). The HOBI Labs program a-Sphere Console, which handles basic communication with the instrument under Microsoft Windows (using the USB-serial adapter). Simply run the program InstallaSphereConsole.exe on the supplied HOBI Labs CD. IGOR Pro from Wavemetrics, Inc., which is used to process and present calibrated data from the a-Sphere. This is not required in order to test basic operation, but is necessary for viewing data graphically. Igor Pro can be installed on either Windows or Mac OS X, by running the installer on the appropriate CD. 3.2 Unpacking and Setup When moving the a-Sphere, do not use any plastic fittings for lifting—grasp the instrument around its main body, or use the metal lifting eye on the end cap. It is safe to stand the a-Sphere vertically, resting on the three metal nuts that hold the removable part of the sphere in place. However we strongly recommend you secure it to a sturdy object when it is in this position, since it could easily be toppled if accidentally bumped. The inlet and outlet ports on the a-Sphere (see Figure 4) are normally plugged with small threaded fittings during shipping. You can gently unscrew these, and replace them with the supplied barbed tube fittings (see Figure 10). Tighten these only with moderate hand force. Connect the PDI cable. If your a-Sphere has a 4-pin connector, be careful that the stainless steel guide pin on the male connector does not accidentally get caught in one of the four large sockets. Connect the a-Sphere Power/Data Interface (PDI) cable’s DB-9 connector to the computer’s serial port. -7- Connect the PDI cable’s power terminals to a regulated power supply capable of producing 12 to 24 VDC at up to 35 W (3 A at 12V, or 1.5 A at 24V). 3.3 Startup Start the a-Sphere Console software. It will attempt and fail to find an a-Sphere, but this will verify that it is properly installed. Leave it displaying this window: Turn on the 12-to-24V power to the a-Sphere. Within about 15 seconds, the lights in the sphere should turn on, and their light will be visible through the inlet and outlet. If the power supply has a current readout, see that the total power does not exceed 35 W after the lights turn on. It may be much lower, and should decrease as the instrument warms up. As soon as the a-Sphere lights turn on, click Search Again in the dialog box. Within a few seconds it should find the a-Sphere and state that it is connected. Within another 5 to 10 seconds you should see the thermal control indicators in the upper right panes update. The actual indications depend on the temperature in your location. The text “Cooling (1.5C)” at right indicates that the thermally-controlled portion of the a-Sphere is 1.5 C above its set point and is cooling. The “Ambient” temperature shown is the temperature of the circuitry that is not thermally controlled. In a laboratory environment where the outside temperature is close to the set point, it typically takes a few minutes for the a-Sphere to stabilize very close to its target temperature. Because it can sometimes take longer than that for the light source to reach its equilibrium, you may see a continued yellow light and countdown displayed in the Light Source pane after the Thermal Control indicator turns green. -8- 3.4 Data Sampling The a-Sphere can be instructed to take single spectral samples, take multiple samples and average them into one, and also to take single or averaged samples automatically at regular intervals. These functions are controlled within the Sampling pane. Note that these parameters control only real-time operation while connected to the computer. For autonomous, self-logging data casts, see section 4.5.3. Click Show Terminal, and see that a window opens in which you can see the communications between the a-Sphere and the Console software. The sampling controls are self-explanatory. Feel free to experiment with them. Note that you must use the New File… button to open a file before data sent to the computer will be stored. When you sample with no file open, the program highlights this fact in the display. 3.5 Other Console Software Functions 3.5.1 File Management See Section 5.6 for information about handling files in the a-Sphere flash memory. 3.5.2 Baud Rate Communication -> Set Baud Rate…, allows setting the baud rate immediately, as well as setting the rate that will be used when the instrument starts up. 3.5.3 Real-Time Clock a-Sphere -> Set Clock… sets the battery-backed real-time clock in the instrument. You can either set the time to match your computer’s clock, or enter a time manually. 3.5.4 Calibration Checks a-Sphere -> Collect Cal Check Data…. is used for evaluating changes in instrument response, and is described in Section 4.6.4.6.2 -9- 4 SETUP AND OPERATION 4.1 Connections and Controls 4.1.1 Standard Connectors Series-200 instruments (those shipped starting in November 2009) have three connectors, as shown in Figure 1 and Figure 2 Earlier instruments had single connector of either four or eight pins. Figure 1. Standard connectors for Series-200 a-Spheres: 2-pin male for power input, 4-pin male for power and data, and 2-pin female for driving a pump. Power Input MCBH2M (male) Power/Data MCBH4M (male) Pump Power MCBH2F (female) Figure 2 Face views of standard connectors on Series 200 a-Sphere 4-pin power/Data Pin Function 1 RS232 transmit 2 Common 3 RS232 receive 4 Power input 8-pin Power/Data Pin Function 1 Power Input 1 2 Common 3 RS232 receive 4 RS232 transmit 5 Power Input 2 6 Reserved 7 Reserved 8 Reserved Power input & Pump Pin Function 1 Common 2 V+ - 10 - 4.1.2 Other Connector Configurations Some instruments have a single 8-pin connector as shown in Figure 3. The mate for this connector is SubConn MCIL8F, and it is compatible with cables for most other HOBI Labs instruments with 8-pin connectors. This configuration has identical power inputs that can safely be connected to different sources. Pins 6, 7 and 8 are reserved for future system expansion. Figure 3. Face view, MCBH8M 4.1.3 Power Supply The a-Sphere requires a power supply of 10 V to 24 V, capable of supplying up to 35 W peak (not including a pump; see section 4.1.4). The a-Sphere’s actual power consumption depends on the ambient temperature, which affects the load on the thermal regulation circuitry inside the instrument (also see section 4.4). Generally the power consumption will be highest when the instrument is first turned on, and will decline as it approaches thermal equilibrium. The minimum power of about 7W is drawn when the ambient temperature is a few degrees below the internal set point, which is usually 25 C. Power consumption increases rapidly at higher ambient temperatures which require the electronics to be cooled. An SBE-5 pump running at maximum flow can consume up to 8 W in addition to the a-Sphere’s power. The pump power will be lower if its flow is restricted by plumbing, filters, etc. The input supply voltage can be applied through binding posts on the power/data interface (PDI) cable, or through a customer-supplied connection to the bulkhead connector. Be sure to observe the correct polarity, as marked on the cable. To measure the voltage the a-Sphere is receiving from its supply, type the VIN command in a-Sphere Console’s terminal window. If supplying power through a cable of more than roughly 10 meters, it is advisable to use 24 V supply to reduce the effect of voltage drops caused by cable resistance. On instruments with multiple power inputs, the individual inputs are isolated by diodes so that sources with different voltages can safely be connected simultaneously. Current will be drawn only from the source with the highest voltage. - 11 - 4.1.4 Pump Power and Switch Control The two-pin female bulkhead connector, if present, provides power suitable for a Seabird SBE-5 or similar pump, under the control of the switch on the back end cap. When the switch is on (pushed in the direction of the arrows marked on the actuator) voltage is applied to this connector. The voltage is approximately equal to the input voltage minus 0.3 V, but the output is limited to a maximum of about 16 V. This allows safe operation of a Seabird pump even when the a-Sphere power supply is above the pump’s maximum input. You should switch off the pump whenever it is out of water. However, brief periods of operation out of water are not damaging as long as the pump mechanism is wet. Thus it is safe for the pump to run while the instrument is being maneuvered into or out of the water when profiling. If the pump may be dry, for example when starting a cast after it has been out of water for some time, squirt some water into it before starting it. You can program the a-Sphere to delay turn-on of the pump for a fixed time after you activate the switch. See the SWITCH command in Section 6. 4.1.5 Data interface Commands and data are transmitted via RS232. The default baud rate is 57600 baud, but can be varied from 9600 to 115200. In the a-Sphere Console software, the baud rate can be changed from the Communication menu. See section 6 for information about commands, and Section 8 for data formats. 4.2 Water flow and Pump Plumbing The inlet and outlet ports on the sphere are threaded with ¼-18 NPT pipe threads. These threads are machined directly into the plastic sphere material. To prevent damage to the sphere, use only plastic fittings, and tighten them only by hand. These seals only need to be tight enough to prevent water from dripping out at atmospheric pressure; they do not have to withstand any pressure differential during deployment. We supply compatible straight and right-angle fittings with the a-Sphere. These adapt the pipe threads to barbed fittings suitable for tubing with ½-inch or 12-13 mm internal diameter. If you find it difficult to achieve leak-free operation in a laboratory setting, instead of over-tightening the fittings, apply Teflon plumber’s sealing tape to the male fitting threads. Note that your plumbing must be configured so as to block any light from shining through the inlet and outlet holes. One of the best ways to do this is to use the black - 12 - right-angle fittings we supply. But when the right-angle fittings are not appropriate, black tubing is also effective. For good water flow the a-Sphere is best used vertically, with water pumped through the sphere whenever it is sampling. We recommend the Seabird SBE-5T or -5P for this purpose, with the instrument and pump configured as shown in Figure 4. To give maximum flow rate, the plumbing should be kept short and direct, as shown. Vertical orientation allows air to easily leave the sampling cavity through the top outlet when the cavity is being filled, and also for any bubbles that are introduced later to clear very quickly. The a-Sphere’s measurements are not sensitive to small bubbles, but it is still important to avoid large volumes of trapped air. When using the a-Sphere in a laboratory setting, it is possible to stand it upright on the sphere-tightening nuts, which leaves enough clearance for connecting to a rightangle fitting on the inlet. Alternatively, it is possible to operate the a-Sphere horizontally, as shown on the right of Figure 4. To provide an escape path for air in this orientation, a small tube opens near the equator of the sphere (where the hemispheres separate) and connects to the main outlet tube. To take advantage of this flow path and ensure the sphere does not trap a large quantity of air, you must ensure that the outlet is vertical, and the instrument is level so that air will naturally float to the small outlet hole. For in-situ applications at depths greater than 10 meters, the pressure is sufficient to collapse any bubbles and ensure complete filling. The a-Sphere can also be used to measure discrete samples. In such cases each sample must be at least 550 ml to fill the sphere, plus the volume of tubing necessary to fill the tubing without trapping air. In either orientation, the sphere should be filled through the inlet tube on the end of the a-Sphere. For field deployments, the water inlet should normally be fitted with a wire-mesh strainer to keep large particles and debris from entering the sphere. - 13 - Figure 4. a-Sphere water flow configurations. Vertical orientation (left) provides the best flow-through path and rapid filling of the sphere. Normally for field deployments the inlet would also be fitted with a short tube and wire-mesh strainer to keep large debris out of the sphere. Horizontal orientation (right) can be used if the instrument is carefully oriented so its axis is level and the outlet is vertical. 4.3 Sphere Disassembly and Cleaning 4.3.1 Opening and Closing the Sphere To make cleaning easy, the sphere is split into two halves. The removable half is held in place by three thumb screws. To open it, simply loosen the three screws by hand as shown in Figure 5. While loosening the screws, cradle the removable hemisphere in one hand to prevent it from dropping. - 14 - To close the sphere, place the removable hemisphere loosely against the instrument, and rotate it until the thumb screws align with the threaded holes in the fixed half. Engage all three screws in their matching threads for alignment before fully tightening them. The sphere has an o-ring seal around the equator, making it water-tight for laboratory use, and to ensure water flows properly through the sphere. However unlike o-rings that provide primary seals against ocean depths, this one does not have to withstand large pressure differentials, and does not normally need to be lubricated. Oring lubricants should be avoided because they can leave stubborn contamination on the sphere. 4.3.2 Cleaning The sphere is constructed of solid plastic that does not readily absorb contaminants, but it is still very important to keep its surface, and the surfaces of the windows inside the sphere, clean. NOTE: The windows are made of acrylic plastic, and can be seriously damaged by strong solvents such as acetone. Too-frequent and too-vigorous rubbing of the windows can also take a toll. We recommend cleaning primarily with a mild cleaning solution for optics, such as Edmund Optics Lens Cleaner (part number NT54828 at http://edmundoptics.com), and soft, non-abrasive optical tissues (e.g. Edmund Pec-Pad, part number NT59637). For conditions with heavy contamination, a dilute laboratory-grade detergent solution such as Alconox or Liqui-nox can be used as a first cleaning step. Isopropyl alcohol, preferably at 50% or lower dilution, can also be used in case of substances that are not readily soluble in water. The final cleaning step in all cases should be flushing with generous quantities of distilled or deionized water. Often when the sphere has not been subjected to severe contamination, pure water alone will be sufficient. - 15 - Figure 5. Sphere removal. To open the sphere, loosen the three thumb nuts and gently pull the halves apart. When replacing the removable hemisphere, tighten the screws only by hand. 4.4 About Thermal Regulation The a-Sphere contains circuitry that precisely regulates the temperatures of the light source and signal spectrometer to minimize thermal effects on the measurements. The instrument firmware includes commands to set the regulated temperature, and to monitor the actual temperature of the instrument subsystems. The thermally-regulated portions of the instrument are typically set to a temperature of 25 C. The thermal regulation has more capacity to heat than to cool, and is much more efficient in heating mode, so it is desirable to set the internal temperature near the highest likely operating temperatures. (If the instrument is expected to operate within a limited range of temperatures, the set point can be tailored to that temperature in order to reduce the power requirements for thermal regulation.) It is especially important to protect the a-Sphere from prolonged exposure to direct sun that could drive its temperature far above its setpoint and exceed its cooling capacity. In extreme cases, this could put serious stress on the electronics and light source. To avoid this situation it is sufficient to simply cover the instrument with a lightcolored towel when it is in the sun for long periods. This is even more effective if the towel is kept wet. In order to collect the most accurate data, you should wait until the internal temperatures have stabilized to their target values. The time required depends on the - 16 - ambient temperature the instrument has been in. After applying power to the a-Sphere and establishing communication, the a-Sphere Console software monitors the status of the thermal regulation and indicates when the instrument is fully stabilized. While the instrument is stabilizing, it displays how far the temperature is from the set point, or how many minutes remain until the LEDs have stabilized. If communicating directly to a-Sphere through a terminal program, or through aSphere Console’s terminal window, you can use the warmup command at any time to check its thermal status. For details, see WARMUP in Section 6. 4.5 Deployment 4.5.1 Mounting If clamping the a-Sphere to a structure or frame, pad any metal mounting hardware with plastic to protect the case from scarring and corrosion, clamp only around the metal body of the a-Sphere, not the black plastic shell around the sphere, and as a backup, connect a safety line between the a-Sphere’s mounting eye and the structure. 4.5.2 Real-time cable connection With an appropriate cable you can collect data from the a-Sphere in real time, using the a-Sphere Console software and the same controls as described in Section 3.4. Note that the usable cable length is limited by the need to provide power of up to 40 W peak to the a-Sphere and pump. For common underwater cables, length will probably by limited to a few tens of meters, although this can be improved by driving the cable at the a-Sphere’s maximum voltage of 24 V. Consult with HOBI Labs if you need assistance determining the appropriate cable type or length. 4.5.3 Battery-powered deployment The a-Sphere can be deployed with suitable external batteries, for example HOBI Labs HydroPacks. Contact HOBI Labs about options for autonomous deployment packages. Because the a-Sphere requires time to thermally stabilize prior to deployment (see section 4.4), and because its power consumption is highest during that time, we recommend you provide an external source of power to preserve battery capacity while operating the instrument on deck. It is safe to connect separate power sources to both the - 17 - 2-pin power input and the 4-pin power/data connector (see section 4.1), and the a-Sphere will draw its power from the source with the highest voltage. If the external supply is not higher in voltage than the battery pack, you can also simply unplug the batteries during the time the external source is on. Following is a typical sequence for battery-power deployment. Connect to computer and, preferably, external power supply. If external supply is less than 16 V, disconnect the batteries. If desired, set the data collection parameters using the CASTPARAMS and SWITCH commands (section 6). Monitor a-Sphere stabilization in Console When ready to start the cast, connect the batteries then disconnect from the power supply Start the cast with the a-Sphere switch just before instrument enters water After cast, turn off the switch as soon as it is accessible. If you wish to remain ready for another cast, connect the external power supply and return to the beginning of the sequence. If not, disconnect the batteries and power down the system completely. 4.6 Monitoring Calibration with Readings in Air Absorption measurements are inherently sensitive to small changes in signal brought about by contamination, mechanical wear, or gradual changes in instrument components. To keep track of these effects, and to determine when factory recalibration is appropriate, we recommend regular Cal Checks made with the spherical cavity clean and dry. During intensive data collection in the field we recommend checks daily. The a-Sphere Console software has a command designed specifically for collecting Cal Check data, and the Igor procedures include commands for processing and displaying the results. The results are evaluated by comparing them to previous cal checks, including one that is performed at the time of calibration and included with the calibration file. 4.6.1 Preparation The accuracy of the cal checks depends directly on the cleanliness of the sampling cavity. Carefully clean it with lens cleaner, then distilled or deionized water. If it has been subject to high concentrations of absorbing materials that require stronger solvents, use laboratory detergent or diluted alcohol. - 18 - The cavity must also be completely dry after cleaning. It is best to dry it with compressed air, to avoid leaving contamination from towels or tissues. Especially beware of water that may be trapped in the small spaces around the windows, or in the inlet and outlet tubes where they might drip into the sphere. After drying the sphere, place black caps over the inlet and outlet so no external light can enter them. 4.6.2 Collecting Data After preparing the instrument as above, connect to it with the a-Sphere Console program, and wait for it to thermally stabilize. Then select Collect Cal Check Data… from the a-Sphere menu. Follow the on-screen instructions, including naming the data file at the appropriate time. The software automatically closes the data file when it is complete. The data collection takes about three minutes, and because it includes turning off the light source for some time to make dark measurements, it may take as much as four minutes for the light source to fully stabilize afterward. This will be indicated by the standard status display in the software. 4.6.3 Processing and Comparison You view the results of the calibration check using Igor Pro, as described in Section 5.2. - 19 - 5 DATA DISPLAY AND PROCESSING 5.1 Igor Pro Overview Igor Pro from Wavemetrics, Inc. is an extremely powerful data processing and display program that can also be customized and extended with its built-in programming environment. We take advantage of these features to support and automate the handling of a-Sphere data. Igor runs on both Windows and Mac OS platforms, and our customizations also run on both platforms. Although it is not necessary in order for you to perform a-Sphere processing, we recommend you review the introductory material in Igor’s online help for an introduction its capabilities, which will enhance your use of the a-Sphere routines. Igor Experiments Igor organizes work into files called experiments. An experiment can contain many types of data, graphics, programs, and text files. When working with the a-Sphere this means you can gather multiple samples, casts, or even entire cruises in one experiment file, although you are not required to do so. But the ability to compare and contrast data within a single experiment is often very useful and our add-ons to Igor are designed with this in mind. Igor Graphs Igor is especially capable at producing publication-quality graphs, and the graphs produced by our routines can easily be modified by the user to serve scientific needs as well as personal preferences. An important difference between Igor and some other programs is that its graphs exist independently of the data they show. You can graph the same data in multiple windows, and you can also close all the windows showing the data without discarding the data from the experiment. This offers a great deal of power but also can be confusing for those not accustomed to it. 5.2 Opening the Processing Template The starting point for a-Sphere processing is an experiment template called “aSphereTemplate.pxt”. After installing Igor Pro, open this file. It will open as blank and untitled, and look like any standard Igor experiment. All the controls of the program are standard, except for the menu titled a-Sphere. This is where you access all the a- - 20 - Sphere related features, but you are always free to use Igor’s standard functions in the other menus as well. 5.3 Loading the Calibration File The a-Sphere calibration file is itself an Igor experiment file but it is not used as an independent experiment. It is loaded into the experiment template using Load Calibration File…, the first item on the a-Sphere menu in Igor. All the other a-Sphere functions depend on information in the calibration file. After opening the template to start a new experiment, select Load Calibration File… and browse to the location of the file named in the form “SPXXXXXX Cal 20YY-MM-DD.pxp”, where XXXXXX is the instrument serial number, and YY-MM-DD is the date of calibration. Select Show Calibration Info to view the dates of the dye and pure water calibration steps, the temperature of the pure water calibration, and the calibrated wavelength range. 5.4 Handling Datasets By “dataset” we simply mean data loaded from a file into the a-Sphere experiment file, but it is also possible to load the same file several times with different bandwidths, as explained below, resulting in multiple datasets. Load and Graph Dataset As you would expect, this command prompts you to specify a file from which to load. Then it prompts you to choose the width of the spectral bands into which data will be averaged. You can load more than one dataset from the same file, but only if you select different bandwidths for the loads. After the dataset has been loaded, this command presents the same Graph Dataset dialog found in the next command. Graph Loaded Dataset This command presents a list of all the loaded datasets and offers several ways to graph them. Because the datasets are essentially 3-dimensional (absorption as a function of wavelength and depth or time), we present them on graphs that include “slider” controls. When you select a dataset to graph, you also select which parameter will be plotted on the independent axis, and - 21 - which will be assigned to the slider. For example, if you select wavelength for the axis and time for the slider, the graph will show the absorption spectrum versus wavelength, at a particular time. The slider selects which time is displayed, and you can move back and forth through the data set to see how the spectra change, or focus on a particular time of interest. If you select depth for the axis and wavelength for the slider, you will see a vertical profile of the absorption versus depth at a particular wavelength. The slider lets you select which wavelength to view at the moment, and again you can scroll through the data set. You can move the slider either by dragging it with the mouse, or using the arrow keys on the keyboard. Figure 6. Plot of Absorption versus Time, with the slider selecting the wavelength 376 nm Delete Dataset This command removes the dataset from your Igor experiment, but does not affect the original file from which it was loaded. Export Dataset Export Dataset saves the data as tab-delimited text. The data are saved in two blocks of lines. The first block has two columns containing the time and depth associated with each sample in the dataset. The time values are given in seconds since midnight, January 1, 1904. Depths are in meters. The second block of data contains the same number of lines, with a column for the absorption at each wavelength. A header line gives the wavelength values for each column. The Nth line in the first block gives the time and depth of the absorption data in the Nth line of the second block. - 22 - Figure 7. The same dataset as in Figure 6, plotted versus depth with the slider selecting 471nm 5.5 Calibration Checks Load Cal Check… and Compare Cal Checks… are used with checkup data collected with the sphere clean and dry. This process of collect the data is described in section 4.6. After collecting the data, open a new or existing Igor experiment from the aSphere Template. If necessary, load the calibration file. Then select Load Cal Check… from the a-Sphere menu. After the file loads, select Compare Cal Checks…. This presents a dialog box in which you can select two checks to compare. For comparison, the program presents a graph (see Figure 8) that shows the raw spectra from the two checks plotted on the same axes, as well as a plot of the ratio between them. - 23 - Figure 8. Example Cal Check Comparison Graph. The black trace shows the ratio of the two raw spectra, which almost perfectly overlap. The Igor procedures keep track of cal checks you have previously loaded, which allows you to collect many in one experiment file. This will allow you to do comparisons over various time spans and check for trends. 5.6 Handling Files on the a-Sphere The a-Sphere contains 128M (or more) of flash memory for storing data and, occasionally, other types of files. You can view a directory of files, and move files between the a-Sphere and your computer by selecting Manage Files on a-Sphere… from the a-Sphere menu. This presents the dialog box shown in Figure 9. - 24 - Figure 9. File Management dialog box When you first open this window, it may take some time to retrieve the directory information from the a-Sphere depending on the number of files and the baud rate. To sort the directory by name, modification date, size or type, click on the heading of the corresponding column. Click again to reverse the sorting order. To copy files from the a-Sphere to the computer, first check the Location for Saved Files frame at the bottom of the window. This is the directory to which files will be saved. If necessary, click on the Browse… button to select a different location. Then select a file or files in the directory list and click Get Files. A progress reading will appear below the button, showing the percentage completion of the currently loading file. You can abort the transfer by clicking the Stop button (which is the Close button at other times). Note that if the destination directory contains files with the same names as ones you are transferring, they will be overwritten without notice. Similarly to getting files, you can delete one or more files by selecting them in the list and clicking Delete Files. If you select a large number of files, you can click the Stop button to halt the deletions (but not to recover files already deleted). The Send File… button allows you to send a text file from the computer to the aSphere. This is used primarily for sending small command files (see Section 6). The Refesh button reloads the file directory from the a-Sphere. This is not required often because the directory is normally updated automatically after each operation. - 25 - 6 FIRMWARE COMMANDS The a-Sphere’s operation can be controlled with commands sent through its serial port. To use these commands you must connect to the a-Sphere with the a-Sphere Console program and type them into its terminal window, or use any other terminal program that can communicate through the serial port. 6.1 Command Scripts Commands can also be saved in files on the a-Sphere flash to form scripts. For example one could create a file called UPDATE.CMD with these lines: TIME VIN PRESSURE then type UPDATE at the a-Sphere> prompt, which would cause the time, input voltage and pressure to be displayed. One could also type START UPDATE to cause this to execute repeatedly. 6.2 Syntax In the command descriptions, words in italic represent numeric (or in a few cases, string) arguments. Words in UPPER CASE represent literal text. Arguments in brackets ( [ ] ) are optional. Every command line must end with a carriage-return or linefeed character. Multiple commands can be entered on one line, separated by semicolons (;). 6.3 Commands The a-Sphere has a large set of command, only a small subset of which is needed for most applications. We describe the common commands here. This section includes some commands that are new in version 2.60 of the aSphere firmware. To see which version of the firmware you have, use the VER command. Contact HOBI Labs if you wish to upgrade your firmware. - 26 - 6.3.1 ACQUIRE [AUTO/FIXED] count average baseName process format dest ACQUIRE provides comprehensive control over sampling and storage of aSphere data. It includes some further options not described here, but these are the most important and useful ones. Each invocation of ACQUIRE produces count samples, or if average is nonzero, a single average of count samples. The AUTO or FIXED keywords select automatic or fixed integration times. The default is AUTO. FIXED indicates that spectra should be collected with the integration time set by a previous command, which can be viewed or changed with the INTTIME command. Process is not used and should be set to zero. Format controls in what format the data are sent or stored. See section 8 for a description of the binary formats. A format value of -1 indicates binary data in the “C” format, which is the preferred format for most applications. 0 indicates “F” format binary, and 1 indicates ASCII text. Dest controls whether data are sent to the serial port, stored in files, or both. The default is serial transmission only. Standard values are 1: file only 2: serial port only (default for Acquire command) 4: both serial port and file If Dest specifies that files should be stored, they will be named basename.bin for either binary format, or basename.asc for ASCII text. If basename is omitted, the base name will be the date, in the form MMDDYY. Data are always appended to existing files, rather than overwriting existing data. 6.3.2 BAUD [rate] [STORE] Sets the baud rate for serial communication. Standard rates from 9600 to 115200 are available. The rate will change immediately, unless the word “STORE” is included. In that case, the specified rate will be saved as the default, and will be used the next time the a-Sphere is reset (typically at power-up). The BAUD command’s reply indicates both the current rate and the default rate. 6.3.3 CASTNUMBER [number] Displays the current cast number used by the STARTCAST command. If a cast is not in progress, this is the number of the previous cast, and it will be incremented before - 27 - the start of the next. Beware that if you set the cast number to a value lower than existing cast files, those files will be overwritten when their cast number is reused. 6.3.4 CASTPARAMS [period] [averaging] [SendData] Sets the parameters of the STARTCAST command. Period is the minimum number of seconds from the start of one sample to the start of the next. The actual period may be longer, depending on the length of time to store and (optionally) transmit the data, or to perform the requested amount of averaging. Averaging indicates how many spectra are to be averaged together to make one sample. If averaging is 0 or 1, no averaging will be performed. SendData controls whether data will be sent via the serial port in addition to being stored in flash files. The command replies with the current settings of all parameters as well as the current cast number. The parameters you set remain in effect until the a-Sphere is powered down and reset. To store them permanently, use the SAVEPARAMS command (section 6.3.8) 6.3.5 DIR [filespec] [/V] Displays a list of files in the a-Sphere flash memory. FileSpec is a string that may contain * and ? wild cards. The /V flag causes the directory listing to include modification dates and times, as well as a display of the total free space left in the memory. Without the /V flag, only the file names and sizes are displayed. 6.3.6 INTTIME [time] Displays the current integration time, or if time is specified, sets it to that value. The time is in milliseconds and must typically be within the range 21 to 3500 ms. 6.3.7 PRESSURE Displays the raw digital reading from the pressure transducer. 6.3.8 SAVEPARAMS [filename] Saves the parameters set by CASTPARAMS, described section 6.3.4, and other operating parameters, in a file. Normally you should use this command without the optional file name; the parameters will then be stored in a file called PARAMS.INI, which is automatically loaded each time the a-Sphere starts up. 6.3.9 START [period] [command…] [?] Command is any valid a-Sphere command, possibly including arguments and flags. START causes the given command to repeat at the given period, or if no period is - 28 - specified, the period entered by a previous command. START ? prompts a display of the period and command specified in a previous START command, if any. 6.3.10 STARTCAST Starts collecting data and saving into a cast file in internal flash memory, according to settings entered with CASTPARAMS. The data file will be named “CSTXXXX.BIN” where XXXX is a number that is incremented with each STARTCAST command. 6.3.11 STOP or control-C Stops any repeating command initiated by the START command, or a cast that was started by STARTCAST. Can also halt some time-consuming operations such as averaging of spectra by an ACQUIRE command. The single-key control-C works best in cases where the typing of STOP might be interrupted by the operation you are attempting to stop. 6.3.12 SWITCH [pump] [startcast] [stop] Controls how the a-Sphere responds to the switch on its back end cap. When the switch is turned on, it can start the pump, start logging data in a cast file, or both. If pump is 1, the switch will immediately turn the pump on or off. If pump is a value greater than 1, the pump activation will be delayed by that many seconds. There is never any delay in turning the pump off. If pump is 0, the switch will not control the pump. Similarly, startcast controls whether the switch starts a cast, and if startcast is greater than 1 the start will be delayed by that number of seconds. This delay, if any, is in addition to the delay specified for the pump. Even if no delay is indicated by startcast, if the pump is delays the cast will not start until after the pump. Stop indicates whether the switch will send a STOP command when switched off. If so, it will stop any cast in progress as well as any other command that was initiated by the START command. The default is for pump, startcast and stop all to equal 1. 6.3.13 TEMP Displays measurements of various internal temperatures: the LED thermal block; Spectrometer; secondary LED temperature; secondary spectrometer temperature; unregulated electronics temperature - 29 - 6.3.14 TIME [hh:mm:ss] [mm/dd/yyyy] Displays the current date and time, and sets the clock if the date or time is specified. You may enter either the date, time, or both, as long as you enter them in the format specified. 6.3.15 VER Displays the current firmware version. 6.3.16 VIN Shows the supply voltage powering the a-Sphere. The a-Sphere can operate with input voltages from 10 V to 24 V. 6.3.17 WARMUP Indicates the status of the a-Sphere’s thermal regulation (also see Section 4.4). If the instrument is stable, it will reply Warmup: READY 10:23:18 where the time given is the time at which it first reached its stable point. If it is not yet ready, it will indicate how far the temperature is from its set point, for example Warmup: temp. -2.1 from setpoint., or if the temperature is stable but the light source has not yet fully stabilized, it will indicate how much time remains before it will be ready. For example: Warmup: light stable in 2.8 min. Note that the temperature may appear to hover very close to the set point (within a few tenths of a degree) for some time before it is considered stable. Typically this phase will only last one minute, but in some cases it may require several minutes. - 30 - 7 SUPPLIES AND SPARE PARTS 7.1 Plumbing The following parts are commonly used for plumbing the a-Sphere, and a small assortment is included with the instrument. Additional parts are available from McMaster-Carr Supply Company (www.mcmaster.com) in the U.S.A., and many others. Note that these fittings are all plastic (nylon) to avoid damaging the threads on the sphere inlet and outlet. They are black to reduce the chance of external light contamination. The inlet strainers are used during in-situ deployments to prevent large debris from entering the sphere. A fairly coarse mesh such as the one supplied with the aSphere provides the least obstruction to water flow. If using a fine mesh in biologically active water, check the mesh frequently for clogging. Description Supplied with a-Sphere Inlet strainer, ¼” NPT female thread, extra-fine mesh (100 per inch) Inlet strainer, ¼” NPT female thread, fine mesh (60 per inch) Inlet strainer, ¼” NPT female thread, medium mesh (40 per inch) Inlet strainer, ¼” NPT female thread, coarse mesh (20 per inch) Cap for ½” barb fittings Tube fitting, ¼” NPT to ½” barb, straight Tube fitting, ¼” NPT to ½” barb, right-angle Black tubing, ½” internal diameter Thread sealant tape Yes Yes Yes Yes Yes No McMaster-Carr Part Number 9877K862 9877K892 9877K721 9877K521 9753K44 5463K249 5463K315 5231K88 4591K12 Figure 10. Right-angle and straight tube fittings for the sphere inlet and outlet. 7.2 Cleaning Solvent fluid: Edmund Optics Lens Cleaner, part number NT54-828 at http://edmundoptics.com. Cleaning tissue: Edmund Optics Pec-Pad, part number NT59-637, or similar soft, non-abrasive wipes. Avoid generic tissue-like wipes that may be abrasive to the acrylic windows. - 31 - 8 A-SPHERE BINARY DATA FORMAT This information is provided for users designing their own data systems. It is not required for routine use. The a-Sphere can produce two binary packet formats, referred to as “F” and “C” packets (named for the initial byte that identifies them). The C format is a superset of the F format, adding a number of additional fields containing auxiliary information, as well as a 16-bit cyclic redundancy check (CRC) for error detection. C format is preferred for most applications, but the F format may also be used in order to conserve data space. Various fields in the C packet are included for future applications and are not needed for routine data processing. Both packet formats accommodate a varying number of pixels. Present a-Spheres use 2048-pixel detectors, and raw data packets typically include 2047 pixels numbered 1 through 2047. However future models may include different-sized detectors, and the aSphere can also be set up to produce spectra containing a subset of the available pixels, as indicated by the FirstPix, PixInc and NumPix fields. Binary packets collected in field data may be interspersed with ASCII messages and other data. The binary packets must be identified by scanning for 16-bit packet flags, then testing for valid values in some header fields to verify whether the flag actually indicates a packet. Suitable fields for validity-checking include Model, Serial, Version, IntTime, FirstPix, PixInc and NumPix. All numeric values use Big Endian byte order. Any unused bytes in character arrays are set to null (0). Floating-point values are in IEEE-standard format. 8.1 C Packet Start Address (hex) Size (bytes) PacketFlag 00 2 Model Serial 4 12 Channel 02 06 12 FilterType 13 1 FilterSize CalSource 14 16 22 2A 2 12 8 12 Name ChanName ChanUnits 1 Type Values or Units unsigned int 0x0CC0 char array char array “SP1” or “SR1” e.g. “SR080504” or “SP080504” Byte Short char array 0 for current a-Spheres 0 for current a-Spheres, may be 1 or 2 in future 0 or 1 for no filtering Usually null for raw data char array char array Usually null for raw data Usually null for raw data - 32 - Process N Start Address (hex) 36 3A 3E 42 46 4A 4E 52 56 5A 5C Version 5E 4 Reserved 4 NumPix 62 66 6A 6E 70 72 Spectral data 74 Name Reserved Reserved Reserved Reserved Reserved Time Temp Voltage Pressure Reserved IntTime FirstPix PixInc CRC Size (bytes) Type Values or Units 4 4 4 4 4 4 4 unsigned int Float degrees C 4 4 Float Float V Integer counts for raw data 2 2 Int Int Float 0=raw 1 for raw data Always 1.0 for this format version. Other values may indicate changes in the definition of some fields. May have random value 4 4 May have random value Int 2 2 Int Int 2 Int if process < 2, array of short integers (2 bytes); else array of floats (4 bytes); 2 unsigned int 16-bit cyclic redundancy check 8.2 F Packet Start Address (hex) Size (bytes) 2 2 unsigned int 0x0FF0 4 4 unsigned int Float degrees C 4 4 Float Float V Integer counts for raw data Process N 6 A E 12 14 16 2 2 Int Int Version 1A 4 Float 0=raw 1 for raw data Always 1.0 for this format version. Other values may indicate changes in the definition of some fields. Reserved 1E 22 26 28 4 Float 4 4 Float Int 2 Int Name PacketFlag Time Temp Voltage Pressure Reserved IntTime FirstPix Type - 33 - Values or Units Name PixInc NumPix Spectral data Start Address (hex) 2A 2C 2 Size (bytes) Type 2 Int 2 Int Array of 16-bit ints or 32-bit floats Values or Units if process < 2, array of short integers (2 bytes); else array of floats (4 bytes); 8.3 Field Definitions Packet Flag: Always either 0x0CC0 or 0x0FF0. Model: Abbreviated model identifier. depending on firmware mode). May be either SP1 or SR1 (and may vary Serial: Instrument’s unique identifier in the form SPNNNNNN or SRNNNNNN where each N is an ASCII digit. The second character depends on the instrument’s firmware mode and has no bearing on the interpretation of the data. Channel: A byte indicating which of several instrument channels generated the data. For future expansion; in current a-Spheres this is always zero. FilterType: Indicates the type of spectral filtering, if any, applied to the data. Raw data should not have any filtering applied, except in special circumstances where the data must be reduced in size. A value of 1 indicates boxcar filtering, and 2 indicates Gaussian. FilterSize: Indicates the width of the spectral filter, if any, in pixels. 0 or 1 indicates no filtering, the norm for raw data. CalSource: A string of up to 12 characters indicating the file or other source from which calibration data (if any) were loaded. Presently set to all nulls in a-Sphere raw data. ChanName: A string of up to 8 characters containing the name of the measured parameter. Presently set to all nulls in a-Sphere raw data. ChanUnits: A string of up to 12 characters, padded with nulls if necessary, giving the measurement units of the data. Presently set to all nulls in a-Sphere raw data. Time: The time at the end of the sample integration, according to the a-Sphere’s realtime clock, expressed in seconds since the UNIX epoch (midnight Jan. 1, 1970). Temp: The approximate internal temperature of the instrument (outside the thermallyregulated portion), in degrees C. Voltage: The input supply voltage, in volts. - 34 - Pressure: The output of the pressure transducer. For raw data, expressed in digital counts. Process: Indicates the degree of processing applied to the data. Equals zero for raw data. N: An integer indicating the number of spectra averaged into the current sample. A value of 1 indicates no averaging. Version: Always set to 1.0 for this version of the packet format. IntTime: The integration time used for the present spectrum, in milliseconds. If N > 1, indicating multiple spectra were averaged, this is the average of their integration times. FirstPixel, PixelInc: In the data array, the Nth value represents pixel number FirstPixel + N * PixelInc. Typically both values are set to 1 for raw data, but higher values may be used in special cases where data must be sub-sampled. NumPix: Indicates the number of pixels contained in the PixelArray. For present aSpheres, its maximum value is 2047. PixelArray: The size of the pixel array depends on NumPix as well as Process. If Process is 0 or 1, each pixel is represented with a 2-byte integer. If Process is 2 or greater, the values are 32-bit floating-point numbers. The number of pixels in the array is equal to NumPix. CRC: 16-bit cyclic redundancy check calculated from all the preceding fields. - 35 - 9 MAINTENANCE, SERVICE AND SUPPORT 9.1 Maintenance Cleaning is the most important maintenance for users to perform. Cleaning of the sphere, which affects measurement accuracy, is described in section 4.3. Overall cleaning is also important for protecting the instrument against corrosion. Rinse the entire instrument thoroughly with fresh water after each use in salt water. Be sure the instrument is dry before packing it for extended storage. For best accuracy and to provide the longest life for your a-Sphere, we recommend you return it to HOBI Labs for maintenance and calibration every six months or 200 hours of operation, whichever comes first. Between calibrations, we recommend periodically collecting calibration checks in air, as described in section 4.6. Also observe all the precautions listed in section 1. 9.2 Service and Support For help and advice regarding the operation of your a-Sphere, contact HOBI Labs at [email protected]. You can also download manuals, software and other technical information from our website, www.hobilabs.com. 9.3 Equipment Return To return your a-Sphere to HOBI Labs for any reason, first contact us for a returned material authorization (RMA) number. You can fill out an RMA request form at our web site, or email us directly at [email protected]. The RMA is very important for tracking your equipment. Please be prepared to provide us with the instrument serial number, the address to which it should be returned after service, and any special requests. Upon issuing the RMA we will send you shipping instructions. After we receive the equipment, we will inspect and test it, and send a description and cost estimate for any service required. We will not proceed with service until we receive your authorization for the cost. Always ship your a-Sphere in its original container, which is designed to protect it against rough handling. - 36 -