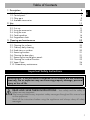
1
Table of Contents
1.1
1.2
1.3
1.4
8
General Description
Control panel
Other parts
Available accessories
2 Use
2.1
2.2
2.3
2.4
2.5
2.6
EN
1 Description
8
8
9
10
11
Instructions
First use
Using the accessories
Using the oven
Cooking advice
Programmer clock
3 Cleaning and maintenance
3.1 Instructions
3.2 Cleaning the surfaces
3.3 Ordinary daily cleaning
3.4 Food stains or residues
3.5 Removing the door
3.6 Cleaning the door glass
3.7 Removing the internal glass panels
3.8 Cleaning the inside of the oven
3.9 Vapor Clean
3.10 Extraordinary maintenance
11
11
12
12
14
16
20
20
20
20
20
21
21
22
23
24
25
Important Safety Instructions
WARNING: If the instructions contained in this manual are not followed
precisely, fire or explosion may result causing property damage, personal
injury or loss of life.
READ AND SAVE THESE INSTRUCTIONS - Your safety and the safety of
others are very important.
We have provided many important safety messages throughout this manual and
on the appliance.
Read all the instructions before using the appliance and always obey all safety
messages.
3
Important Safety Instructions
RECOGNIZE SAFETY INFORMATION
This is a safety alert symbol. This symbol alerts you to potential hazards that can
result in severe personal injury or loss of life.
UNDERSTAND SIGNAL WORDS
A signal word - DANGER, WARNING or CAUTION - is used with the safety alert
symbol. DANGER denotes the most serious hazards. It means you could lose your
life or be seriously injured if you do not immediately follow the instructions.
WARNING means you could lose your life or be seriously injured if the instructions
are not followed. CAUTION indicates a potentially hazardous situation which, if
not avoided, could result in minor to moderate injury.
WARNING
• This appliance is intended for use in the home only.
• Use this appliance only for its intended purpose. The
manufacturer cannot be held liable for damage caused by
improper use of this appliance.
• This appliance complies with current safety regulations.
Improper use of this appliance can result in personal injury
and material damage.
• Read all the instructions before installing or using the
appliance for the first time.
• Keep these operating instructions in a safe place and pass
them on to any future user.
The safety messages will inform you of potential hazards, on how to avoid the risk of injury
and what can occur if the instructions are not followed.
IMPORTANT: Observe all codes and ordinances in force.
WARNING: For your safety, the instructions contained in this manual must be
followed to minimize the risk of fire or explosion and to prevent property damage,
personal injury or loss of life.
Do not store or use gasoline or other flammable vapors, liquids or materials near this or any
other appliance.
NOTE: This appliance is NOT designed for installation in manufactured (mobile)
homes or in recreational vehicles (RVs).
DO NOT install this appliance outdoors.
4
WARNING
To reduce the risk of fire, electrical shock, personal injury, or
damage when using the appliance, follow basic safety
precautions, including the following:
• Read all instructions.
• Proper installation is your responsibility.
Have a qualified technician install and
ground this appliance in accordance
with these installation instructions.
• It is the responsibility of the installer to
comply with installation information
specified on the model/serial ID plate.
The ID plates are visibly located on the
back of the appliance and on the oven
door frame. These ID plates must never
be removed.
• Proper installation is your responsibility.
Make sure your appliance is properly
installed and grounded by a qualified
installer.
• WARNING: NEVER use this appliance
as a space heater to heat or warm the
room. Doing so may result in overheating
of the oven.
• DO NOT LEAVE CHILDREN
UNATTENDED: Children should not be
left alone or unattended in the area
where the appliance is being used.
Never allow children to sit or stand on
any part of the appliance.
• CAUTION: Do not store items of interest
to children in cabinets above a range or
on the backguard of a range - children
climbing on the range to reach items
could be seriously injured.
• WEAR PROPER APPAREL: Loose-fitting or
hanging garments should never be worn
while using the appliance.
• For safety reasons and to avoid damage
to your appliance, never sit, stand or
lean on the oven door.
• FLAMMABLE MATERIALS SHOULD
NEVER BE STORED IN THE OVEN.
• DO NOT TOUCH THE INSIDE OF THE
APPLIANCE: Heating elements may be
hot even though they are dark in color.
The oven cavity can be hot enough to
cause burns. During and after use, do not
touch areas inside of the oven until they
have had sufficient time to cool. Do not
allow garments or any flammable
material to come into contact with hot
surfaces. If personal clothing or hair
catches on fire, drop and roll
immediately to extinguish the flames.
• PLACE THE OVEN RACKS IN THE
DESIRED POSITION WHILE THE OVEN
IS COOL: If a rack must be removed
while the oven is hot, do not allow the
potholders to come in contact with the
broiler burner.
• USE CAUTION WHEN OPENING
THE OVEN DOOR: Allow hot air or
steam to escape before removing or
placing foods in the oven.
• Do not leave the packing materials
around the home. Sort the various items
of waste and take them to the nearest
specialized waste collection facility.
• Do not obstruct oven vents or openings
for air intake.
5
EN
Important Safety Instructions
Important Safety Instructions
• ELECTRICAL GROUNDING IS
REQUIRED. It is the customer’s
responsibility:
1. To contact a qualified electrician.
2. To ensure that the electrical system is
adequate and in compliance with the
National Electrical Code ANSI / NFPA
70 Electrical Code – latest edition – or
the CANADIAN ELECTRICAL CODE,
C22.11 – 1982 and C22.2 No.
01982 – or latest edition – and all local
codes and ordinances.
• Always check that the controls are in the
"zero" (off) position when the oven is not
in use.
• Do not attempt to repair or replace any
part of this appliance unless specifically
recommended in this manual. All other
servicing should be done by a qualified
technician.
• Never use any part of the oven for
storage. Flammable materials can ignite
and plastic items may melt or burst into
flame.
• Do not hang articles on any part of the
appliance or place anything against the
oven. Some fabrics are extremely
flammable and could ignite.
• DO NOT USE ALUMINUM FOIL TO
LINE ANY PART OF THE OVEN. Use of
a foil liner can result in an electrical
shock or fire hazard or obstruct the flow
of heat and air. Foil is an excellent heat
insulator, allowing heat to be trapped
under it. This can interfere with cooking
and can damage the enamel of the
oven.
• Prevent aluminum foil from contacting the
heating elements.
• DO NOT HEAT UNOPENED FOOD
CONTAINERS: A buildup of pressure
can cause the containers to burst.
• DO NOT USE FLAMMABLE
PRODUCTS TO CLEAN THE OVEN.
• Do not clean, rub, damage or remove
the oven door gasket. It is essential for a
good, tight seal during baking and when
the self-clean cycle is engaged. Replace
the oven door gasket if it becomes
damaged or encrusted with food
residue.
• ONLY QUALIFIED SERVICE
PERSONNEL SHOULD PERFORM
REPAIRS. Service personnel must
disconnect the power supply before
servicing this unit.
NOTE: The California Safe Drinking Water and Toxic Enforcement Act requires the
Governor of California to publish a list of substances known to the State of
California to cause cancer, birth defects or other reproductive harm, and requires
businesses to warn customers of potential exposure to such substances.
WARNING: This product contains a chemical known by the State of California to
cause cancer, birth defects or other reproductive harm.
This appliance can cause low-level exposure to some of the substances listed,
including benzene, formaldehyde, carbon monoxide, toluene, and soot.
6
• Do Not Use Water on Grease Fires Smother fire or flame or use dry chemical
or foam-type extinguisher.
• Use Only Dry Potholders - Moist or
damp potholders on hot surfaces may
result in burns from steam. Do not let
potholder touch hot heating elements.
Do not use a towel or other bulky cloth.
• Do not stand or sit on the oven door.
• Remove all packing materials and
temporary labels from the oven.
• Record the Model and Serial number on
Page 2 of this booklet. The Model and
Serial numbers are on the appliance ID
plate. The ID plates are visibly located
on the oven door frame. THE ID PLATE
MUST NOT BE REMOVED.
• BEFORE BAKING FOR THE FIRST TIME,
turn on the oven to burn off any dirt, oil or
grease remaining from the manufacturing
process. Turn the oven on and set to
450°F (230°C) for 20 to 30 minutes.
How to read the user manual
This user manual uses the following reading
conventions:
Instructions
General information on this user
manual, on safety and final
disposal.
Description
Description of the appliance and its
accessories.
Use
Information on the use of the
appliance and its accessories,
cooking advice.
Cleaning and maintenance
Information for proper cleaning and
maintenance of the appliance.
Safety instructions
Information
Advice
1. Use instruction sequence.
• Single use instruction.
SAVE THESE INSTRUCTIONS
7
EN
Important Safety Instructions
Description
1 Description
1.1 General Description
1 Control panel
2 Oven light
3 Seal
4 Door
1.2 Control panel
8
5 Fan
6 Rack/tray support frames
Frame shelf
1 Temperature knob
1.3 Other parts
This knob allows you to select the cooking
temperature and the Vapor Clean
temperature (on some models only).
Turn the knob clockwise to the required
value, between the minimum and maximum
settings.
Oven shelves
2 Thermostat indicator light
When the indicator light is flashing, it
indicates that the oven is heating up to
reach the set temperature. Once the
temperature has been reached, the light
remains lit until the oven is turned off.
In pyrolytic models, the light switches on
when the automatic cleaning cycle
(pyrolysis) starts and remains lit until the
cycle is complete.
3 Programmer clock
Useful for displaying the current time, setting
programmed cooking operations and
setting the timer.
4 Function knob
The oven's various functions are suitable for
different cooking modes. After selecting the
required function, set the cooking
temperature using the temperature knob.
EN
Description
The oven features shelves for positioning
trays and racks at different heights. The
insertion heights are indicated from the
bottom upwards (see 1.1 General
Description).
Cooling fan
The fan cools the oven and comes into
operation during cooking.
The fan causes a steady outflow of air from
above the door which may continue for a
brief period of time even after the appliance
has been turned off.
Internal light
The oven light comes on when the door is
opened or any function is selected.
9
Description
1.4 Available accessories
Deep tray
Some models are not provided
with all accessories.
Rack
Useful for collecting fat from foods placed
on the rack above and for cooking pies,
pizzas and baked desserts.
Useful for holding cooking containers.
Tray rack
The oven accessories intended to
come into contact with food are
made of materials that comply with
the provisions of current legislation.
Original and optional accessories
can be requested to Authorized
Assistance Centers. Use only
original accessories supplied by
the manufacturer.
To be placed over the top of the oven tray;
for cooking foods which may drip.
10
Use
2.1 Instructions
High temperature inside the oven
during use
Danger of burns
• Keep the oven door closed during
cooking.
• Protect your hands using heat resistant
gloves when moving food inside the
oven.
• Do not touch the heating elements inside
the oven.
• Do not pour water directly on very hot
trays.
• Do not allow children to get near the
oven when it is in operation.
High temperature inside the oven
during use
Danger of fire or explosion
• Do not spray any spray products near
the oven.
• Do not use or leave flammable materials
near the oven.
• Do not use plastic kitchenware or
containers when cooking food.
• Do not put sealed cans or containers in
the oven.
• Do not leave the oven unattended
during cooking operations where fats or
oils could be released.
• Remove from the oven compartment all
trays and racks not used during cooking.
Improper use
Risk of damage to enamelled
surfaces
EN
2 Use
• Do not cover the bottom of the oven with
aluminum or tin foil sheets.
• If you wish to use greaseproof paper,
place it so that it will not interfere with the
hot air circulation inside the oven.
• Do not place pans or trays directly on
the bottom of the cooking compartment.
• Do not pour water directly on very hot
trays.
2.2 First use
1. Remove any protective film from the
outside or inside of the appliance,
including accessories.
2. Remove any labels (apart from the
technical data plate) from trays, dripping
pans and the cooking compartment.
3. Remove and wash all the appliance
accessories (see 3 Cleaning and
maintenance).
4. Heat the empty oven at the maximum
temperature to burn off any residues left
by the manufacturing process.
11
Use
2.3 Using the accessories
Tray rack
Racks and trays
The tray rack must be inserted into the tray.
In this way fat can be collected separately
from the food which is being cooked.
Racks and trays must be inserted into the
side guides until they come to a complete
stop.
• The mechanical safety locks that prevent
the rack from being taken out
accidentally must face downwards and
towards the oven back.
2.4 Using the oven
Turning the oven on
To turn the oven on:
1. Select the cooking function using the
function knob.
2. Select the temperature using the
temperature knob.
Gently insert racks and trays into
the oven until they come to a stop.
Clean the trays before using them
for the first time to remove any
residues left by the manufacturing
process.
12
Functions list
Static
As the heat comes from above and
below at the same time, this system
is particularly suitable for certain
types of food. Traditional cooking,
also known as static cooking, is
suitable for cooking just one dish at
a time. Perfect for all types of roasts,
bread and cakes and particularly
suitable for fatty meats such as
goose and duck.
Broiler
The heat coming from the broiler
element gives perfect broiling results
above all for thin and medium
thickness meat and, in combination
with the rotisserie (where fitted),
gives the food an even browning at
the end of cooking. Perfect for
sausages, ribs and bacon. This
function enables large quantities of
food, particularly meat, to be grilled
evenly.
Bottom
The heat coming just from the
bottom allows you to complete the
cooking of foods that require a
higher bottom temperature, without
affecting their browning. Perfect for
cakes, pies, tarts and pizzas.
Turbo
The combination of convection
cooking and traditional cooking
allows different foods to be cooked
on several levels extremely quickly
and efficiently, without odors and
flavors mingling. Perfect for large
volumes that call for intense
cooking.
Defrost
Rapid defrosting is helped by
switching on the fan provided and
the top heating element that ensure
uniform distribution of low
temperature air inside the oven.
Static + fan
The operation of the fan, combined
with traditional cooking, ensures
uniform cooking even with complex
recipes. Perfect for cookies and
cakes, even when simultaneously
cooked on several levels. (For
multiple-level cooking, we
recommend using the 2nd and 4th
shelves.)
Convection broil
The air produced by the fan softens
the strong heatwave generated by
the broiler, roasting even very thick
foods perfectly. Perfect for large
cuts of meat (e.g. pork shank).
13
EN
Use
Use
Convection bake
The combination of the fan and the
convection heating element
(incorporated in the rear of the
oven) allows you to cook different
foods on several levels, as long as
they need the same temperatures
and same type of cooking. Hot air
circulation ensures instant and
uniform distribution of heat. It will be
possible, for instance, to cook fish,
vegetables and cookies
simultaneously (on different levels)
without mixing odors and flavors.
Small broiler + convection
Through the combined action of the
fan and the heat of the central
element only, this function is perfect
for rapid cooking and au gratin
cooking of small quantities of food
(particularly meats), by bringing
together the dietary advantages of
the broiler and the even cooking of
the fan.
Bottom + fan
The combination of the fan with just
the bottom heating element allows
cooking to be completed more
rapidly. This system is
recommended for sterilizing or for
finishing off the cooking of foods
which are already well-cooked on
the surface, but not inside, and
therefore need a little more heat.
Perfect for any type of food.
In pyrolytic models, the special
defrost and proofing functions are
brought together under the same
function.
14
Vapor Clean
This function makes cleaning easier
using the steam produced by a little
quantity of water poured onto the
appropriate drawing placed on the
bottom.
2.5 Cooking advice
General advice
• Use a convection function to achieve
uniform cooking at several levels.
• It is not possible to shorten cooking times
by increasing the temperature (the food
could be overcooked on the outside and
undercooked on the inside).
Advice for cooking meat
• Cooking times vary according to the
thickness and quality of the food and to
consumer taste.
• Use a meat thermometer when roasting
meat, or simply press on the roast with a
spoon. If it is hard, it is ready; if not, it
needs another few minutes of cooking.
Advice for cooking with the Broiler and
Convection broil
• Meat can be grilled even when it is put
into the cold oven or into the preheated
oven if you wish to change the effect of
the cooking.
• With the Convection broil function, we
recommend that you preheat the oven
before grilling.
• We recommend placing the food at the
center of the rack.
• With the Broiler function, we recommend
that you turn the temperature knob to the
maximum value near the
symbol to
optimize cooking.
Advice for cooking desserts/pastries and
cookies
• Use dark metal baking pans/sheets:
they help to absorb the heat better.
• The temperature and the cooking time
depend on the quality and consistency
of the dough.
• To check whether the dessert is cooked
right through: at the end of the cooking
time, put a toothpick into the highest point
of the dessert. If the dough does not stick
to the toothpick, the dessert is cooked.
• If the dessert collapses when it comes
out of the oven, next time reduce the set
temperature by about 50°F, selecting a
longer cooking time if necessary.
Advice for defrosting and proofing
• Place frozen foods without their
packaging in a lidless container on the
first shelf of the oven.
• Avoid overlapping the food.
• To defrost meat, use the rack placed on
the second level and a tray on the first
level. In this way, the liquid from the
defrosting food drains away from the
food.
• The most delicate parts can be covered
with aluminum foil.
• For successful proofing, a container of
water should be placed in the bottom of
the oven.
To save energy
• Stop cooking a few minutes before the
time normally used. Cooking will
continue for the remaining minutes with
the heat which has accumulated inside
the oven.
• Reduce any opening of the door to a
minimum to avoid heat dispersal.
• Keep the inside of the appliance clean
at all times.
15
EN
Use
Use
2.6 Programmer clock
Timed cooking
Timed cooking is the function that
allows a cooking operation to be
started and then ended after a
specific length of time set by the
user.
1. After selecting a cooking function and
temperature, press the key
. The
pointer moves to position 12 and the
symbol
will flash on the display.
1 Timer key
2 End of cooking key
3 Time setting and reset key
4 Value decrease key
5 Value increase key
Setting the time
On the first use, or after a power failure, the
display flashes at regular intervals. Press
to stop the flashing. Press
again for two
seconds to start the procedure for setting
the current time. Use the keys
or
to
increase or decrease the time value by one
minute each time you press until the correct
time has been set. The clock starts working
5 seconds after the last key press.
2. To set the cooking time, press the key
or
within 5 seconds: each pressure
on
adds 1 minute to the cooking
time, and every 12 minutes a new
internal segment will light up (the
example below shows a cooking time of
1 hour).
3. Once the required time is obtained,
cooking will start about 5 seconds after
the last press on
or
.
16
4. The display will show the current time,
represented by the constantly illuminated
segments, and the minutes left to the end
of cooking, represented by the flashing
segments (each flashing segment means
12 minutes of cooking time left).
5. At the end of cooking, the timer will
switch the oven heating elements off, the
buzzer will start to sound and the
numbers on the dial will flash.
6. The set program can be cancelled: press
the key
for 2 seconds to cancel the
set time and switch the oven off manually
if a cooking operation is in progress.
It is not possible to set a cooking
time of more than 12 hours.
Programmed cooking
Programmed cooking is the
function that allows a cooking
operation to be started at a set
time and then ended after a
specific length of time set by the
user.
1. Set the cooking time as described in the
previous point “Timed cooking”.
2. Within 5 seconds of last pressing the key
or , press the key
again to set
the cooking end time. The symbol
will flash on the display together with the
current time, with the internal segments
illuminated to show the end of cooking
time.
3. Press the key
or
to set the
cooking end time.
4. 5 seconds after the last key is pressed,
the display will show the current time and
the cooking start and end times, which
will be represented by the illuminated
internal segments. As soon as the current
time reaches the set cooking start time,
the internal segments will flash and the
oven will start cooking.
5. At the end of cooking, the timer will
switch the oven heating elements off, the
buzzer will start to sound and the
numbers on the dial will flash.
6. The set program can be cancelled: press
the key
for 2 seconds to cancel the
set time and switch the oven off manually
if a cooking operation is in progress.
• In the example below, the current time is
7.06 and cooking is programmed to
start at 8.00 and end at 9.00.
• At 8 o'clock, the internal segments
between 8 and 9 will start to flash.
For the oven to start cooking after
the programming procedures just
described, the knobs must be
correctly set on the required
temperature and function.
17
EN
Use
Use
Reducing display brightness
To reduce energy consumption in stand-by,
briefly press the key
to reduce the
display brightness. To restore the normal
brightness, press
again.
3. Five seconds after last pressing the key,
the countdown begins, at the end of
which the buzzer activates.
4. During the countdown, the current time
can be displayed by pressing
.
5. Press
again to return to the timer
display.
Timer
This function only activates the
buzzer, without stopping cooking.
1. Press
and the display will light up as
shown in the figure below.
At the end of the countdown, turn
the temperature and function
knobs to O to manually stop the
cooking operation.
It is not possible to set a cooking
time of more than 4 hours.
2. Within 5 seconds, press the key
or
to set the timer. Each time a key is
pressed, an outer segment representing
1 minute of cooking is lit or switched off
(the example below shows a countdown
of 1 hour and 10 minutes).
18
Use
Food
Weight
(lbs.)
Function
Lasagna
Baked pasta
6,6 - 8,8
6,6 - 8,8
Static
Static
Roast veal
Pork
Sausages
Roast beef
Roast rabbit
Turkey breast
Roast pork neck
Roast chicken
4,4
Turbo
4,4
Turbo
3,3
Convection broil
2,2
Turbo
3,3
Convection bake
6,6
Turbo
4,4 - 6,6
Turbo
2,6
Turbo
Runner posi- Temperature
tion from the
(°F)
bottom
1
410 - 450
1
410 - 450
2
2
4
2
2
2
2
2
360
360
500
500
360
360
360
360
EN
Cooking information chart
Time (minutes)
45 - 50
45 - 50
90 - 100
70 - 80
15
40 - 45
70 - 80
110 - 120
170 - 180
65 - 70
1st surface
2nd surface
15
10
7
10
10
5
10
8
5
7
Pork chops
Spare ribs
Bacon
Pork fillet
Beef fillet
3,3
3,3
1,5
3,3
2,2
Convection broil
Convection broil
Broiler
Convection broil
Broiler
4
4
5
4
5
500
500
500
500
500
Salmon trout
Monkfish
Turbot
2,6
3,3
3,3
Turbo
Turbo
Turbo
2
2
2
300
300
300
35 - 40
60 - 65
45 - 50
Pizza
Bread
Focaccia
2,2
2,2
2,2
Turbo
Convection bake
Turbo
2
2
2
500
360 - 410
360
8-9
25 - 30
20 - 25
Sponge cake
Jam tart
Ricotta cake
Jam tarts
Paradise cake
Cream puffs
Light sponge cake
Rice pudding
Brioches
2,2
2,2
2,2
2,2
2,6
2,6
2,2
2,2
1,3
Convection bake
Convection bake
Convection bake
Turbo
Convection bake
Turbo
Convection bake
Turbo
Convection bake
2
2
2
2
2
2
2
2
2
300
300
300 - 360
300
300
360
300 - 360
300
300
55 - 60
35 - 40
55 - 60
20 - 25
55 - 60
80 - 90
55 - 60
55 - 60
30 - 35
The times indicated in the table do not include preheating times and are provided as a guide only.
19
Cleaning and Maintenance
3 Cleaning and maintenance
3.1 Instructions
Improper use
Risk of damage to surfaces
• Do not use steam jets for cleaning the
appliance.
• Do not use cleaning products containing
chlorine, ammonia or bleach on steel
parts or parts with metallic finishes on the
surface (e.g. anodizing, nickel- or
chromium-plating).
• Do not use abrasive or corrosive
detergents on glass parts (e.g. powder
products, stain removers and metallic
sponges).
• Do not use rough or abrasive materials
or sharp metal scrapers.
• Keeping appliance area clear and free
from combustible materials, gasoline
and other flammable vapors and liquids.
• Not obstructing the flow of combustion
and ventilation air.
3.2 Cleaning the surfaces
To keep the oven surfaces in good
condition, they should be cleaned regularly
after use. Let them cool first.
20
3.3 Ordinary daily cleaning
Always use only specific products that do
not contain abrasives or chlorine-based
acids.
Pour the product onto a damp cloth and
wipe the surface, rinse thoroughly and dry
with a soft cloth or a microfiber cloth.
3.4 Food stains or residues
Do not use metallic sponges or sharp
scrapers as they will damage the surfaces.
Use ordinary non-abrasive products with
the aid of wooden or plastic utensils if
necessary. Rinse thoroughly and dry with a
soft cloth or a microfiber cloth.
Do not allow residues of sugary foods (such
as jam) to set inside the oven. If left to set for
too long, they might damage the enamel
lining of the oven.
3.5 Removing the door
For easier cleaning, the door can be
removed and placed on a cloth.
To remove the door proceed as follows:
1. Open the door completely and insert two
pins into the holes on the hinges
indicated in the figure.
2. Grasp the door on both sides with both
hands, lift it forming an angle of around
30° and remove it.
3. To reassemble the door, put the hinges in
the relevant slots in the oven, making sure
that grooved sections A are resting
completely in the slots. Lower the door
and once it is in place remove the pins
from the holes in the hinges.
3.6 Cleaning the door glass
The glass in the door should always be kept
thoroughly clean. Use absorbent paper
towels. In case of stubborn dirt, wash with a
damp sponge and an ordinary detergent.
We recommend the use of
cleaning products distributed by
the manufacturer.
21
EN
Cleaning and Maintenance
Cleaning and Maintenance
3.7 Removing the internal glass
panels
For easier cleaning the door internal glass
panels can be disassembled.
1. Remove the internal glass panel by
pulling the rear part gently upwards,
following the movement indicated by the
arrows (1).
2. Then, pull the front part upwards (2). In
this way, the 4 pins attached to the glass
detach from their housings in the oven
door.
4. Clean the external glass panel and the
panels previously removed. Use
absorbent kitchen roll. In case of
stubborn dirt, wash with a damp sponge
and neutral detergent.
5. Replace the panels in the reverse order in
which they were removed.
6. Reposition the internal glass panel. Take
care to centre and insert the 4 pins into
their housings in the oven door by
applying slight pressure.
3. Some multifunction models have an
intermediate glass panel. Remove the
intermediate glass panel by lifting it
upwards.
22
3.8 Cleaning the inside of the oven
Removing racks/trays support frames
For the best oven upkeep, clean it regularly
after allowing it to cool.
Take out all removable parts.
Removing the guide frames enables the
sides to be cleaned more easily. This
operation should be performed each time
the automatic cleaning cycle is used (only
on some models).
To remove the guide frames, pull the frame
towards the inside of the oven to unhook it
from its groove A, then slide it out of the
seats B at the back.
When cleaning is complete, reverse the
above procedures to put the guide frames
back in.
Clean the oven racks with warm water and
non-abrasive detergent. Carefully rinse and
dry the damp parts.
The oven should be operated at
the maximum temperature for
about 15-20 minutes after the use
of specific products to burn off the
residues left inside the oven.
For easier cleaning, remove the
door.
23
EN
Cleaning and Maintenance
Cleaning and Maintenance
3.9 Vapor Clean
Vapor Clean is an assisted
cleaning procedure which
facilitates the removal of dirt. With
this process, it is possible to clean
the inside of the oven very easily.
The dirt residues are softened by
the heat and water vapor for
easier removal afterwards.
• Pour approx. 40 cc of water onto the
floor of the oven. Make sure it does not
overflow out of the cavity.
Improper use
Risk of damage to surfaces
• Remove from the inside of the oven any
food residues or large spills from
previous cooking operations.
• Carry out assisted oven cleaning
operations only when the oven is cold.
• Spray a water and mild liquid detergent
inside the oven using a spray nozzle.
Direct the spray against the side walls,
upwards, downwards and towards the
deflector.
Preliminary operations
Before starting the Vapor Clean cycle:
• Completely remove all accessories from
inside the oven. The roof lining can be
left inside the oven.
• Close the door.
We recommend spraying approx.
20 times at the most.
24
Cleaning and Maintenance
1. Turn the function knob and the
temperature knob to the
symbol.
2. Set a cooking time of 18 minutes using
the cooking time procedure described in
more detail in “Programmed cooking”.
3. The Vapor Clean cycle starts
approximately 6 seconds after the last
press on the programmer's keys.
4. At the end of the Vapor Clean cycle, the
timer will deactivate the oven heating
elements, the buzzer will start to sound
and the numbers on the dial will flash.
3.10 Extraordinary maintenance
EN
Vapor Clean setting
Live parts
Danger of electrocution
• Disconnect the oven power supply.
Replacing the internal light bulb
1. Completely remove all accessories from
inside the oven.
2. Remove the racks/trays support frames.
3. Remove the bulb cover using a tool (e.g.
a screwdriver).
End of the Vapor Clean cycle
5. Open the door and wipe away the less
stubborn dirt with a microfiber cloth.
6. Use an anti-scratch sponge with brass
filaments on tougher encrustations.
7. In case of grease residues, use specific
oven cleaning products.
8. Remove the water left inside the oven.
9. For improved hygiene and to avoid food
being affected by any unpleasant odors,
we recommend drying the oven using a
convection function at 320°F for
approximately 10 minutes.
4. Slide out and remove the light bulb.
We recommend that you use
rubber gloves for these operations.
For easier manual cleaning of the
parts that are difficult to reach, we
recommend that you remove the
door.
Do not touch the halogen light
bulb directly with your fingers.
Wrap it in an insulating material.
25
Cleaning and Maintenance
5. Replace the bulb with one of the same
type (40W).
6. Replace the cover correctly, so that the
shaped part of the glass is facing the
door.
7. Press the cover down as far as it will go
so that it attaches completely to the bulb
support.
Removing the door seal
To permit thorough cleaning of the oven, the
door seal may be removed. There are
fasteners on all four sides to attach it to the
edge of the oven. Pull the 4 edges of the
seal outwards to detach the fasteners.
26