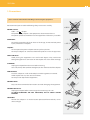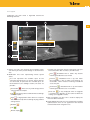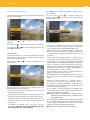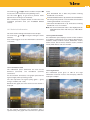
1
Ref. 511501
HD DTT Set-top Box with TV on demand Access “zAs Hbb”
User Manual
w w w. t e l e v e s . c o m
Index
6
7
7
7
8
9
10
10
12
12
12
12
12
13
14
14
14
14
15
15
15
16
16
16
16
17
17
18
18
19
19
20
20
21
22
22
22
22
23
23
24
24
EN
ENGLISH
1. Precautions . . . . . . . . . . . . . . . . . . . . . . . . . . . . . . . . . . . . . . . . . . . . . . . . . . . . . . . . . . . . . . . . . . . . . . . . . .
2. General information . . . . . . . . . . . . . . . . . . . . . . . . . . . . . . . . . . . . . . . . . . . . . . . . . . . . . . . . . . . . . . . . . .
2. 1. Main characteristics . . . . . . . . . . . . . . . . . . . . . . . . . . . . . . . . . . . . . . . . . . . . . . . . . . . . . . . . . . . .
2. 2. Contents
.....................................................................
3. Description of connections . . . . . . . . . . . . . . . . . . . . . . . . . . . . . . . . . . . . . . . . . . . . . . . . . . . . . . . . . . .
3.1. Remote control unit . . . . . . . . . . . . . . . . . . . . . . . . . . . . . . . . . . . . . . . . . . . . . . . . . . . . . . . . . . . .
4. Installation of equipment . . . . . . . . . . . . . . . . . . . . . . . . . . . . . . . . . . . . . . . . . . . . . . . . . . . . . . . . . . . .
4.1. Connecting to a TV . . . . . . . . . . . . . . . . . . . . . . . . . . . . . . . . . . . . . . . . . . . . . . . . . . . . . . . . . . . . .
5. Installation wizard . . . . . . . . . . . . . . . . . . . . . . . . . . . . . . . . . . . . . . . . . . . . . . . . . . . . . . . . . . . . . . . . . . .
5. 1. Language selection . . . . . . . . . . . . . . . . . . . . . . . . . . . . . . . . . . . . . . . . . . . . . . . . . . . . . . . . . . .
5. 2. Menu Positioning . . . . . . . . . . . . . . . . . . . . . . . . . . . . . . . . . . . . . . . . . . . . . . . . . . . . . . . . . . . . . . .
5. 3. Country Selection . . . . . . . . . . . . . . . . . . . . . . . . . . . . . . . . . . . . . . . . . . . . . . . . . . . . . . . . . . . . . . .
5. 4. Region Selection (if the country has several time zones) . . . . . . . . . . . . . . . . . . . . . . . . .
5. 5. Terrestrial Scanning . . . . . . . . . . . . . . . . . . . . . . . . . . . . . . . . . . . . . . . . . . . . . . . . . . . . . . . . . . . .
6. Basic functions . . . . . . . . . . . . . . . . . . . . . . . . . . . . . . . . . . . . . . . . . . . . . . . . . . . . . . . . . . . . . . . . . . . . . . . .
6. 1. Channel selection . . . . . . . . . . . . . . . . . . . . . . . . . . . . . . . . . . . . . . . . . . . . . . . . . . . . . . . . . . . . . .
6. 2. Volume control . . . . . . . . . . . . . . . . . . . . . . . . . . . . . . . . . . . . . . . . . . . . . . . . . . . . . . . . . . . . . . . .
6. 3. Standby mode . . . . . . . . . . . . . . . . . . . . . . . . . . . . . . . . . . . . . . . . . . . . . . . . . . . . . . . . . . . . . . . . .
6. 4. Teletext . . . . . . . . . . . . . . . . . . . . . . . . . . . . . . . . . . . . . . . . . . . . . . . . . . . . . . . . . . . . . . . . . . . . . . . .
6. 5. Pop-ups . . . . . . . . . . . . . . . . . . . . . . . . . . . . . . . . . . . . . . . . . . . . . . . . . . . . . . . . . . . . . . . . . . . . . . .
6. 5. 1. Interactive pop-ups . . . . . . . . . . . . . . . . . . . . . . . . . . . . . . . . . . . . . . . . . . . . . . . . . . . . . .
6. 5. 2. Informational pop-ups . . . . . . . . . . . . . . . . . . . . . . . . . . . . . . . . . . . . . . . . . . . . . . . . . . .
7. LiveTV banner . . . . . . . . . . . . . . . . . . . . . . . . . . . . . . . . . . . . . . . . . . . . . . . . . . . . . . . . . . . . . . . . . . . . . . .
7. 1. Open / close . . . . . . . . . . . . . . . . . . . . . . . . . . . . . . . . . . . . . . . . . . . . . . . . . . . . . . . . . . . . . . . . . .
7. 2. Content . . . . . . . . . . . . . . . . . . . . . . . . . . . . . . . . . . . . . . . . . . . . . . . . . . . . . . . . . . . . . . . . . . . . . . .
7. 3. Detailed programme information . . . . . . . . . . . . . . . . . . . . . . . . . . . . . . . . . . . . . . . . . . . . . .
7. 4. Options . . . . . . . . . . . . . . . . . . . . . . . . . . . . . . . . . . . . . . . . . . . . . . . . . . . . . . . . . . . . . . . . . . . . . . .
8. Timeshifting . . . . . . . . . . . . . . . . . . . . . . . . . . . . . . . . . . . . . . . . . . . . . . . . . . . . . . . . . . . . . . . . . . . . . . . . .
8. 1. Switching from Live to TimeShifting . . . . . . . . . . . . . . . . . . . . . . . . . . . . . . . . . . . . . . . . . . . .
8. 2. TimeShifting banner . . . . . . . . . . . . . . . . . . . . . . . . . . . . . . . . . . . . . . . . . . . . . . . . . . . . . . . . . . .
8. 3. Trick modes . . . . . . . . . . . . . . . . . . . . . . . . . . . . . . . . . . . . . . . . . . . . . . . . . . . . . . . . . . . . . . . . . .
9. Main menu . . . . . . . . . . . . . . . . . . . . . . . . . . . . . . . . . . . . . . . . . . . . . . . . . . . . . . . . . . . . . . . . . . . . . . . . . .
9. 1. Structure . . . . . . . . . . . . . . . . . . . . . . . . . . . . . . . . . . . . . . . . . . . . . . . . . . . . . . . . . . . . . . . . . . . . .
9. 2. Layout . . . . . . . . . . . . . . . . . . . . . . . . . . . . . . . . . . . . . . . . . . . . . . . . . . . . . . . . . . . . . . . . . . . . . . . .
9. 3. Navigation . . . . . . . . . . . . . . . . . . . . . . . . . . . . . . . . . . . . . . . . . . . . . . . . . . . . . . . . . . . . . . . . . . .
10. Channels list . . . . . . . . . . . . . . . . . . . . . . . . . . . . . . . . . . . . . . . . . . . . . . . . . . . . . . . . . . . . . . . . . . . . . . .
10. 1. Channel selection . . . . . . . . . . . . . . . . . . . . . . . . . . . . . . . . . . . . . . . . . . . . . . . . . . . . . . . . . . . .
10. 2. Options . . . . . . . . . . . . . . . . . . . . . . . . . . . . . . . . . . . . . . . . . . . . . . . . . . . . . . . . . . . . . . . . . . . . . .
11. Electronic programme guide (epg) . . . . . . . . . . . . . . . . . . . . . . . . . . . . . . . . . . . . . . . . . . . . . . . . . .
11. 1. Events list . . . . . . . . . . . . . . . . . . . . . . . . . . . . . . . . . . . . . . . . . . . . . . . . . . . . . . . . . . . . . . . . . . . .
11. 2. Detailed programme information . . . . . . . . . . . . . . . . . . . . . . . . . . . . . . . . . . . . . . . . . . . . . .
11. 3. Options . . . . . . . . . . . . . . . . . . . . . . . . . . . . . . . . . . . . . . . . . . . . . . . . . . . . . . . . . . . . . . . . . . . . . .
ZAS Hbb
4
12. Recording . . . . . . . . . . . . . . . . . . . . . . . . . . . . . . . . . . . . . . . . . . . . . . . . . . . . . . . . . . . . . . . . . . . . . . . . . .
12.1. Start
.........................................................................
12.1.1. From LiveTV banner . . . . . . . . . . . . . . . . . . . . . . . . . . . . . . . . . . . . . . . . . . . . . . . . . . . . . . . . . .
12.1.2. From channels list . . . . . . . . . . . . . . . . . . . . . . . . . . . . . . . . . . . . . . . . . . . . . . . . . . . . . . .
12.1.3. From EPG . . . . . . . . . . . . . . . . . . . . . . . . . . . . . . . . . . . . . . . . . . . . . . . . . . . . . . . . . . . . . . . .
12.2. End time modification . . . . . . . . . . . . . . . . . . . . . . . . . . . . . . . . . . . . . . . . . . . . . . . . . . . . . . . . .
12.2.1. From LiveTV banner
......................................................
12.2.2. From channels list
......................................................
12.2.3. From EPG
...............................................................
12.3. Stop . . . . . . . . . . . . . . . . . . . . . . . . . . . . . . . . . . . . . . . . . . . . . . . . . . . . . . . . . . . . . . . . . . . . . . . . . .
12.3.1. From livetv banner . . . . . . . . . . . . . . . . . . . . . . . . . . . . . . . . . . . . . . . . . . . . . . . . . . . . . .
12.3.2. From channels list
......................................................
12.3.3. From EPG . . . . . . . . . . . . . . . . . . . . . . . . . . . . . . . . . . . . . . . . . . . . . . . . . . . . . . . . . . . . . . . .
12.4. “My recordings” menu
........................................................
12.4.1. Manage schedules . . . . . . . . . . . . . . . . . . . . . . . . . . . . . . . . . . . . . . . . . . . . . . . . . . . . . . . .
12.4.2. Manage recordings . . . . . . . . . . . . . . . . . . . . . . . . . . . . . . . . . . . . . . . . . . . . . . . . . . . . . . .
12.4.3. Add a schedule . . . . . . . . . . . . . . . . . . . . . . . . . . . . . . . . . . . . . . . . . . . . . . . . . . . . . . . . . . .
12.5. Conflicts . . . . . . . . . . . . . . . . . . . . . . . . . . . . . . . . . . . . . . . . . . . . . . . . . . . . . . . . . . . . . . . . . . . . . .
12.6. Failures management . . . . . . . . . . . . . . . . . . . . . . . . . . . . . . . . . . . . . . . . . . . . . . . . . . . . . . . . .
13. Media center . . . . . . . . . . . . . . . . . . . . . . . . . . . . . . . . . . . . . . . . . . . . . . . . . . . . . . . . . . . . . . . . . . . . . . .
13.1. Media selection
..............................................................
13.2. Video banner . . . . . . . . . . . . . . . . . . . . . . . . . . . . . . . . . . . . . . . . . . . . . . . . . . . . . . . . . . . . . . . . .
13.2.1. Open / close . . . . . . . . . . . . . . . . . . . . . . . . . . . . . . . . . . . . . . . . . . . . . . . . . . . . . . . . . . . . .
13.2.2. Content . . . . . . . . . . . . . . . . . . . . . . . . . . . . . . . . . . . . . . . . . . . . . . . . . . . . . . . . . . . . . . . . . .
13.2.3. Detailed information . . . . . . . . . . . . . . . . . . . . . . . . . . . . . . . . . . . . . . . . . . . . . . . . . . . . .
13.2.4. Options . . . . . . . . . . . . . . . . . . . . . . . . . . . . . . . . . . . . . . . . . . . . . . . . . . . . . . . . . . . . . . . . .
13.2.5. Preview browsing . . . . . . . . . . . . . . . . . . . . . . . . . . . . . . . . . . . . . . . . . . . . . . . . . . . . . . . . .
13.2.6. Trick modes . . . . . . . . . . . . . . . . . . . . . . . . . . . . . . . . . . . . . . . . . . . . . . . . . . . . . . . . . . . . .
13.2.7. End of playback . . . . . . . . . . . . . . . . . . . . . . . . . . . . . . . . . . . . . . . . . . . . . . . . . . . . . . . . .
13.3. Audio banner
................................................................
13.3.1. Open / close . . . . . . . . . . . . . . . . . . . . . . . . . . . . . . . . . . . . . . . . . . . . . . . . . . . . . . . . . . . . . .
13.3.2. Content . . . . . . . . . . . . . . . . . . . . . . . . . . . . . . . . . . . . . . . . . . . . . . . . . . . . . . . . . . . . . . . . .
13.3.3. Detailed information
....................................................
13.3.4. Options . . . . . . . . . . . . . . . . . . . . . . . . . . . . . . . . . . . . . . . . . . . . . . . . . . . . . . . . . . . . . . . . . .
13.3.5. Preview browsing . . . . . . . . . . . . . . . . . . . . . . . . . . . . . . . . . . . . . . . . . . . . . . . . . . . . . . . . .
13.3.6. Trick modes . . . . . . . . . . . . . . . . . . . . . . . . . . . . . . . . . . . . . . . . . . . . . . . . . . . . . . . . . . . . . .
13.3.7. End of playback . . . . . . . . . . . . . . . . . . . . . . . . . . . . . . . . . . . . . . . . . . . . . . . . . . . . . . . . . . .
13.4. Photo banner
................................................................
13.4.1. Open / close . . . . . . . . . . . . . . . . . . . . . . . . . . . . . . . . . . . . . . . . . . . . . . . . . . . . . . . . . . . . .
13.4.2. Content
................................................................
13.4.3. Detailed information
....................................................
13.4.4. Options . . . . . . . . . . . . . . . . . . . . . . . . . . . . . . . . . . . . . . . . . . . . . . . . . . . . . . . . . . . . . . . . .
13.4.5. Zoom
..................................................................
13.4.6. Preview browsing
.......................................................
13.4.7. Trick modes
............................................................
13.4.8. End of playback . . . . . . . . . . . . . . . . . . . . . . . . . . . . . . . . . . . . . . . . . . . . . . . . . . . . . . . . .
14. HbbTV content . . . . . . . . . . . . . . . . . . . . . . . . . . . . . . . . . . . . . . . . . . . . . . . . . . . . . . . . . . . . . . . . . . . .
14.1. How to access/exit HbbTV
....................................................
14.2. HbbTV navigation . . . . . . . . . . . . . . . . . . . . . . . . . . . . . . . . . . . . . . . . . . . . . . . . . . . . . . . . . . . . .
25
25
25
25
26
26
26
26
26
26
26
27
27
27
27
29
29
30
30
31
31
32
32
32
32
32
33
33
34
34
34
34
34
35
35
35
35
35
35
36
36
36
36
37
37
37
38
38
38
5
15. Settings . . . . . . . . . . . . . . . . . . . . . . . . . . . . . . . . . . . . . . . . . . . . . . . . . . . . . . . . . . . . . . . . . . . . . . . . . . .
15.1. Structure
....................................................................
15.2. Favorites lists . . . . . . . . . . . . . . . . . . . . . . . . . . . . . . . . . . . . . . . . . . . . . . . . . . . . . . . . . . . . . . . . . .
15.2.1. List selection . . . . . . . . . . . . . . . . . . . . . . . . . . . . . . . . . . . . . . . . . . . . . . . . . . . . . . . . . . . . .
15.2.2. Add / remove . . . . . . . . . . . . . . . . . . . . . . . . . . . . . . . . . . . . . . . . . . . . . . . . . . . . . . . . . . . .
15.2.3. Reorder . . . . . . . . . . . . . . . . . . . . . . . . . . . . . . . . . . . . . . . . . . . . . . . . . . . . . . . . . . . . . . . . .
15.2.4. Re-scanning . . . . . . . . . . . . . . . . . . . . . . . . . . . . . . . . . . . . . . . . . . . . . . . . . . . . . . . . . . . . . .
15.3. Video & audio . . . . . . . . . . . . . . . . . . . . . . . . . . . . . . . . . . . . . . . . . . . . . . . . . . . . . . . . . . . . . . . . . .
15.3.1. Screen ratio . . . . . . . . . . . . . . . . . . . . . . . . . . . . . . . . . . . . . . . . . . . . . . . . . . . . . . . . . . . . . .
15.3.2. HDMI resolution . . . . . . . . . . . . . . . . . . . . . . . . . . . . . . . . . . . . . . . . . . . . . . . . . . . . . . . . . .
15.3.3. Scart video format . . . . . . . . . . . . . . . . . . . . . . . . . . . . . . . . . . . . . . . . . . . . . . . . . . . . . . .
15.3.4. Picture format . . . . . . . . . . . . . . . . . . . . . . . . . . . . . . . . . . . . . . . . . . . . . . . . . . . . . . . . . . . .
15.3.5. Audio output . . . . . . . . . . . . . . . . . . . . . . . . . . . . . . . . . . . . . . . . . . . . . . . . . . . . . . . . . . . . .
15.4. User preferences . . . . . . . . . . . . . . . . . . . . . . . . . . . . . . . . . . . . . . . . . . . . . . . . . . . . . . . . . . . . . .
15.4.1. Menu language . . . . . . . . . . . . . . . . . . . . . . . . . . . . . . . . . . . . . . . . . . . . . . . . . . . . . . . . . .
15.4.2. Audio language . . . . . . . . . . . . . . . . . . . . . . . . . . . . . . . . . . . . . . . . . . . . . . . . . . . . . . . . . .
15.4.3. Subtitle language . . . . . . . . . . . . . . . . . . . . . . . . . . . . . . . . . . . . . . . . . . . . . . . . . . . . . . . .
15.4.4. Interface configuration . . . . . . . . . . . . . . . . . . . . . . . . . . . . . . . . . . . . . . . . . . . . . . . . . . .
15.4.5. HbbTV . . . . . . . . . . . . . . . . . . . . . . . . . . . . . . . . . . . . . . . . . . . . . . . . . . . . . . . . . . . . . . . . . . .
15.4.6. Low power consumption . . . . . . . . . . . . . . . . . . . . . . . . . . . . . . . . . . . . . . . . . . . . . . . . . .
15.5. Storage & recording . . . . . . . . . . . . . . . . . . . . . . . . . . . . . . . . . . . . . . . . . . . . . . . . . . . . . . . . . . .
15.5.1. Storage . . . . . . . . . . . . . . . . . . . . . . . . . . . . . . . . . . . . . . . . . . . . . . . . . . . . . . . . . . . . . . . . . .
15.5.2. Start padding . . . . . . . . . . . . . . . . . . . . . . . . . . . . . . . . . . . . . . . . . . . . . . . . . . . . . . . . . . . .
15.5.3. End padding . . . . . . . . . . . . . . . . . . . . . . . . . . . . . . . . . . . . . . . . . . . . . . . . . . . . . . . . . . . . .
15.5.4. Default recording duration . . . . . . . . . . . . . . . . . . . . . . . . . . . . . . . . . . . . . . . . . . . . . . . .
15.5.5. Timeshifting . . . . . . . . . . . . . . . . . . . . . . . . . . . . . . . . . . . . . . . . . . . . . . . . . . . . . . . . . . . . .
15.6. Advanced settings . . . . . . . . . . . . . . . . . . . . . . . . . . . . . . . . . . . . . . . . . . . . . . . . . . . . . . . . . . . . .
15.6.1. Parental control . . . . . . . . . . . . . . . . . . . . . . . . . . . . . . . . . . . . . . . . . . . . . . . . . . . . . . . . . .
15.6.2. Network configuration . . . . . . . . . . . . . . . . . . . . . . . . . . . . . . . . . . . . . . . . . . . . . . . . . . . .
15.6.3. Time zone . . . . . . . . . . . . . . . . . . . . . . . . . . . . . . . . . . . . . . . . . . . . . . . . . . . . . . . . . . . . . . . .
15.6.4. Channels search . . . . . . . . . . . . . . . . . . . . . . . . . . . . . . . . . . . . . . . . . . . . . . . . . . . . . . . . . .
15.6.5. Logical channel number . . . . . . . . . . . . . . . . . . . . . . . . . . . . . . . . . . . . . . . . . . . . . . . . . .
15.6.6. Upgrade . . . . . . . . . . . . . . . . . . . . . . . . . . . . . . . . . . . . . . . . . . . . . . . . . . . . . . . . . . . . . . . . .
15.6.7. Factory reset . . . . . . . . . . . . . . . . . . . . . . . . . . . . . . . . . . . . . . . . . . . . . . . . . . . . . . . . . . . . .
15.7. Technical information . . . . . . . . . . . . . . . . . . . . . . . . . . . . . . . . . . . . . . . . . . . . . . . . . . . . . . . . . .
15.7.1. Connections state . . . . . . . . . . . . . . . . . . . . . . . . . . . . . . . . . . . . . . . . . . . . . . . . . . . . . . . . .
15.7.2. System information . . . . . . . . . . . . . . . . . . . . . . . . . . . . . . . . . . . . . . . . . . . . . . . . . . . . . . . .
15.7.3. Legal notices . . . . . . . . . . . . . . . . . . . . . . . . . . . . . . . . . . . . . . . . . . . . . . . . . . . . . . . . . . . . . .
16. Software ugrade . . . . . . . . . . . . . . . . . . . . . . . . . . . . . . . . . . . . . . . . . . . . . . . . . . . . . . . . . . . . . . . . . . . .
16.1. Through USB . . . . . . . . . . . . . . . . . . . . . . . . . . . . . . . . . . . . . . . . . . . . . . . . . . . . . . . . . . . . . . . . . .
16.2. Through IP . . . . . . . . . . . . . . . . . . . . . . . . . . . . . . . . . . . . . . . . . . . . . . . . . . . . . . . . . . . . . . . . . . . .
Appendix A. Operating instructions for Remote Control Unit . . . . . . . . . . . . . . . . . . . . . . . . . . . . .
Appendix B. TV brand codes . . . . . . . . . . . . . . . . . . . . . . . . . . . . . . . . . . . . . . . . . . . . . . . . . . . . . . . . . . . . .
Appendix C. Brand codes . . . . . . . . . . . . . . . . . . . . . . . . . . . . . . . . . . . . . . . . . . . . . . . . . . . . . . . . . . . . . . . .
Troubleshooting . . . . . . . . . . . . . . . . . . . . . . . . . . . . . . . . . . . . . . . . . . . . . . . . . . . . . . . . . . . . . . . . . . . . . . . .
Technical Characteristics . . . . . . . . . . . . . . . . . . . . . . . . . . . . . . . . . . . . . . . . . . . . . . . . . . . . . . . . . . . . . . . .
39
39
40
40
40
41
41
42
42
42
42
42
43
43
43
43
44
45
45
45
46
46
47
47
47
47
47
48
49
49
49
50
50
50
51
51
51
51
52
52
52
53
55
58
60
62
EN
ZAS Hbb
6
1. Precautions
¡Please read this manual before handling or connecting the equipment!
We recommend you to read the following safety instructions carefully.
> 80 %
POWER SUPPLY:
adapter.
230V~ / 12V
The power supply adapter is the equipment’s disconnection device.
The power input base should be near the equipment and be easily accessible.
OVERLOAD:
To avoid the possibility of fire or electrical discharge, do not overload power
inputs, extensions or adapters.
> 45 ºC
LIQUIDS:
Do not expose the power adapter to water spills or splashes.
Do not place objects or containers filled with liquid on or near the apparatus.
SMALL OBJECTS:
Avoid placing the equipment near small metal objects. They could enter
through the grooves or connectors on the adapter and cause serious damage.
CLEANING:
Unplug the adapter from the mains before cleaning.
Use a soft, damp cloth (without detergent) to clean the outside of the adapter.
VENTILATION:
Place the adapter in a well ventilated place with the grooves uncovered.
Avoid exposure to sun, heat sources or flames.
Do not place on top of other equipment.
CONNECTIONS:
Only use the recommended connections to avoid damaging the equipment.
CONNECTION TO TV:
Unplug the adapter before connecting or disconnecting it to a TV.
IF THESE GUIDELINES ARE NOT FOLLOWED, THE TV COULD SUFFER
DAMAGE.
LOCATION:
Position the adapter in an inside location protected from overloads, rain or
direct sunlight.
< -5 ºC
7
2. General information
The ZAS Hbb is a hybrid DVB-T and IP, PVR over USB* ready,
set-top box.
DVB-T is the international standard for DVB (Digital Video
Broadcasting) terrestrial digital television. This standard
allows the transmission of multiple television services with
an extraordinary sound and image quality.
The reception of these programmes can be carried out
simply through an external or internal antenna, an ZAS
Hbb adapter and a television set.
In addition, to receive IP programmes, the ZAS Hbb must
be connected to the internet.
The ZAS Hbb is also compliant with the new HbbTV
standard.
Hybrid Broadcast Broadband TV or “HbbTV” is a major panEuropean initiative aimed at providing both broadcast and
broadband/web content on a flat panel screen in the living
room.
Through the adoption of HbbTV, consumers will be able
to access new services from entertainment providers such
as broadcasters, online providers and CE manufacturers –
including catch-up TV, video on demand (VoD), interactive
advertising, personalization, voting, games and social
networking as well as programme-related services such as
digital text and EPGs.
Container
AVI (.avi, .divx)1
MKV (.mkv)
ISOM (.mp4, .mov,
.m4v, m4a, .3gp,
.3gp2, .3gpp, .3gpp2).
MPEG TS (.ts)
Video codec
Audio codec
MPEG-2 Part 2
H.264/MPEG-4 AVC
Xvid (MPEG-4 ASP)
AC-3
AAC
MPEG audio (1,2,3)
MPEG-2 Part 2
H.264/MPEG-4 AVC
AC-3
AAC
MPEG audio (1,2,3)
MPEG-2 Part 2
AC-3
AAC
MPEG audio (1,2,3)
M2TS / M2T (.m2ts,
.m2t)
MPEG PS (.mpg,
.mpeg, .m2v, .m2p,
.vob, .ps)
1 Non indexed AVI files are not supported
HDMI/SCART video output.
Support of 8 interface languages (English, French,
Spanish, Italian, Polish, German, Portuguese and
Russian).
Support of LCN (Logical Channel Number).
7 lists of favourites (All TV, All Radio, A, B, C, D, E).
Up to 1000 channels.
Electronic Programme Guide (EPG).
To receive HbbTV services, the ZAS Hbb must be connected
to the internet.
Parental control.
This manual explains to you how to carry out the ZAS Hbb
installation and the necessary steps for using its different
functions.
Subtitles (ETSI EN 300 743 V1.2.1 & ETSI 300 472 V1.3.1).
OSD Teletext full and transparent.
Automatically saves last channel.
Low power consumption.
Fast and simple software upgrade via USB or IP.
2.1. Main characteristics
Free to Air channels (FTA) adapter.
Compatible with MPEG2 and MPEG4/H.264
HbbTV 1.1.1 compliant.
PVR over USB* ready: allows recording directly onto
external disk (formatted in FAT32, NTFS or ext3).
Recordings can be scheduled and recurrent.
Advanced reproduction functions (slow and fast
forward/rewind, pause, skip, go to).
USB Timeshifting function (manual or automatic).
Easy-to-use menu.
Initial installation is guided.
Multimedia function compatible with mp2/mp3 for
audio files, jpeg/jpg for photos and the following
formats for videos:
* Televés does not guarantee 100% compatibility with all USB
devices.
2.2. Contents
Verify that the following components are included in the
packaging:
- 1 x ZAS Hbb adapter.
- 1 x remote control.
- 1 x antenna cable.
- 1 x HDMI cable.
- 1 x power adapter.
- 2 x type ”AAA” batteries.
- Instructions for use.
EN
ZAS Hbb
8
3. Description of connections
Front panel
1
No.
2 3
Name
Function
1
HOST USB
Connection for a pen drive, memory card reader or external hard drive (FAT 32, NTFS and
EXT3). Some HDD models could require external power.
2
LED
Operation Led. (Green: On, Red: Standby, Orange: No input signal).
3
IR
IR sensor.
Back panel
4
No.
5
6
7
Name
8
Function
4
RF-IN
Signal input of terrestrial antenna.
5
RF-OUT
RF signal output to connect to a TV or VCR.
6
LAN
Ethernet connector.
7
SCART TV-OUT
To connect to a TV via SCART (Euro) connector.
8
HDMI
Interface for high definition signal connection.
9
OPTICAL
Optical digital audio output.
10
DC-IN 12V
Input to connect the 12V AC adapter.
9
10
9
3.1. Remote control unit
Button
Function description
Switches between “power ON” and “STANDBY” mode.
To select a desired program number.
Direct data entry on the menu.
0 ... 9
This button is operative only in TV mode.
Return to the previous channel.
Go to the previous page in some interactive applications.
Guide
Activates the EPG to the current program level.
Information about the TV program watched, and additional
contextual information.
Info
MENU
Activates the main menu on the screen.
Quick Menu
Shortcut to contextual options.
(OPT)
/
/
/
OK
Users
Lets you move through the different menus and options in
each menu.
Confirm an option or a value in the menu.
Button not operative in this model*.
(iTV)
Shortcut to the Media Center menu (video, music, photos).
(TV)
Change to TV mode or show the list of channels.
(Radio)
Change to Radio mode or show the list of channels.
FAV
Activates favourite list.
Vol +/(Exit)
(Mute)
Ch
/
Adjusts volume.
Exit from menu or open window.
Switch-off the sound (Mute).
Changes channel in TV or Radio modes.
Starts recording the selected channel.
Play the selected file.
It pauses the live program or pauses the file being played.
Stops either recording or playing.
Fast reverse play mode.
Fast or slow forward play mode
(Txt)
PiP
Activates teletext for the displayed channel.
Button not operative in this model*.
Functional buttons with interactive applications.
*Reserved for future use.
STB: Indicates operation in STB mode.
TV: Indicates operation in TV mode (Universal Remote Control Unit, see appendix
A: Operating instructions).
Note: The following keys are not active if the menu is opened or if the option panel
of a banner is opened:
,
,
and FAV.
EN
ZAS Hbb
10
4. Installation of equipment
Different types of televisions and other equipment can be
connected to ZAS Hbb.
The most common forms of connecting it are shown in
this manual. If you have any problems connecting your
adapter, please contact your vendor.
There are two ways to connect the ZAS Hbb adapter to
your TV: by SCART lead or HDMI cable. If your TV has a
HDMI connector, use this type of connection to obtain the
best quality image.
When the connection is made using a SCART cable, the
ZAS Hbb can supply RGB or CVBS signals. By default, the
ZAS Hbb is already configured to supply the CVBS signal,
as some TVs do not support the RGB output. However, for
optimum image quality, it is recommended to select the
RGB option (as long as your TV is compatible with these
signals). To change the configuration from CVBS to RGB, do
it through the “Video Scart format” (see 15.3.3.- Scart video
format).
4.1. Connecting to a TV
- Connect the antenna signal to the RF IN connector of the
ZAS Hbb.
- Connect the audio and video between the ZAS Hbb
and the TV via SCART cable or HDMI connection
(recommended).
- Connect the RJ45 output (Ethernet output) to your
Internet router using an RJ45 patch cable.
- Switch on equipment sets (TV).
- Power the ZAS Hbb through the mains adapter.
11
EN
Internet
Router
ADSL
- All the cables used for the adapter connections shall be shielded type.
- DO NOT PLUG IN the adapter to the mains before finishing all the unit connections.
- If you are using an inside antenna, verify that it is connected to the power supply.
- Televés recommends using a HDMI cable category 2.
- If your TV only has a DVI connector, use a HDMI-DVI adapter. Connect an audio cable for the sound output.
ZAS Hbb
12
5. Installation wizard
Press OK key to do so and use arrow keys , ,
adjust the position of the menu.
Once all equipment connections have been made and the
adapter has been plugged into the electricity mains, when
powering on your product for the first time after purchase,
the installation wizard will operate automatically.
Press OK key again to confirm the new position.
Note: The installation wizard can be rerun from the beginning
by performing a reset to factory settings (see “Factory
reset” section).
Press arrow key
and
to
to move to next screen.
Note: The positioning area is limited to ± 90 pixels compared
to the factory position.
5.3 Country selection
On the next screen you must indicate the country where
the adapter is installed.
5.1 Language selection
First you must select the language in which you would like
the screen menus to be displayed.
Select the menu language using the arrow keys
Press arrow key
and
Select the country using the arrow keys
Press arrow key
and
.
to confirm the selection.
.
to confirm the selection.
Note: Countries supported are England, France, Spain, Italy,
Germany, Poland, Portugal, Russia and Other.
Note: Default audio language is set according to language
selection.
Note: Languages supported are English, French, Spanish,
Italian, Polish, German, Portuguese and Russian.
5.4 Region selection (if the country has several
time zones)
Note: In all the screens of the installation wizard (except the
first one), press arrow key to go back to previous
screen.
This screen is only displayed if you have chosen a country
with several time zones.
Select the region using the arrow keys
Press arrow key
and
.
to confirm the selection.
5.2 Menu Positioning
Then you have the possibility to fine-tune the position of
the main menu on the screen.
Note: If you selected the country “Other”, instead of choosing
a region you have to choose your time zone.
13
5.5 Terrestrial scanning
You can then apply filters to the channels scanning.
In a first screen you can filter between radio and TV
channels.
By default, all channels types are scanned. To change that,
select a filter using the arrow keys and and press OK
to uncheck it.
EN
Press arrow key on the top item to confirm the filters and
move to next screen.
When this is done you can navigate through the channels
list using arrow keys and .
Pressing OK exits the installation wizard and zaps to the
channel currently focused.
In the second filtering screen you can filter between free to
air and scrambled channels.
By default, all channels types are scanned. To change that,
select a filter using the arrow keys and and press OK
to uncheck it.
Press arrow key on the top item to confirm the filters and
start the scanning.
Note: You can cancel the search and go back to previous
screen at anytime by pressing arrow key .
Note: If the adapter has not found any channels at the end of
the search, a warning message is displayed. Once the
connections have been checked, press OK key to make
another search.
Then channels search starts automatically.
This process may take some time. Please wait.
At the end of the search, channels are re-ordered and
numbered according to country LCN (Logical Channel
Number) if available.
ZAS Hbb
14
In case of signal loss the following image is displayed.
6. Basic functions
This chapter describes some basic functions the product
provides such as channel selection, volume control and
standby mode.
6.1 Channel selection
You can switch the current channel by pressing the CH+/
CH- keys or entering the channel number directly using the
NUMERIC (0..9) keys.
6.2 Volume control
Press VOL+/VOL- keys to adjust the audio volume.
Press mute key (
) to stop the audio temporarily.
Press this key again, or VOL+/VOL- to restore the sound.
VOL+/VOL- and mute keys are always active, except when
a pop-up is displayed.
Note: If there is no channel corresponding to the number
entered, the zapping is done on the first lower channel
available in the channels list.
Note: The zapping sequence using CH+/CH- keys corresponds
to the order of the channels in the current favorites list.
Note: The channel number is coded on 4 digits maximum.
Note: You can also switch channels from the channels list or
EPG of the main menu.
To return to the previous channel, press
key.
In case of scrambled channel the following image is
displayed.
Note: The mute function remains set while you switch
channels.
Note: 20 steps are defined to reach the maximum volume
level from the minimum one.
6.3 Standby mode
You can switch off the adapter (standby mode) using the
standby key .
When the adapter is in standby mode, press standby key
to activate it. The last viewed channel is then displayed.
When you start the adapter from power off, the adapter
goes into the state (standby or running) that was active
before the power cut. The last viewed channel before the
last standby is then displayed.
15
Low Power Consumption (LPC) mode:
LPC mode is a mode in which most of the adapter elements
(A/V tuner, ethernet port, etc…) are cut to decrease the
adapter consumption below 1W.
After 5 minutes in standby mode, the adapter goes
automatically to LPC mode (this function can be
deactivated, see “Low power consumption” section).
Note:
EN
Pressing the standby key while recording does not stop the
recording, the adapter goes to standby until the recording
completion then goes to LPC.
When entering standby, if a recording is scheduled in less
than 5 minutes, the adapter does not go to LPC. As described
above, it will only go to LPC after the recording completion.
Interactive pop-ups can be displayed in the following
situations:
When the adapter is in LPC, 5 minutes before the start of
a scheduled record, it goes to standby mode, in which the
recording is possible.
Conflict management: A choice has to be made between
a zapping and a recording, or between two or more
schedules.
A recording will start in 3 minutes and there is no proper
storage device connected.
6.4 Teletext
On channels supporting Teletext, press successively TXT
key to start Teletext:
1. Start broadcast Teletext in full mode.
2. Start broadcast Teletext in transparent mode.
3. Close Tetelext.
A new recording is scheduled in less than 3 minutes from
“My recordings…Add a schedule” or from the EPG and
there is no proper storage device connected.
Removal of a channel from “All TV” or “All radio” favorites
lists, when this channel is in another favorites list, or a
recording is in progress or scheduled on this channel.
Favorites lists reorder confirmation.
Password input.
File suppression confirmation.
File suppression error: An error as occurred during file
deletion, you have to acknowledge.
Recording lock confirmation.
Storage device ejection confirmation (when recording/
timeshifting/playback in progress).
Formatting confirmation.
Recording in progress while starting formatting.
Formatting progression/result: Pop-up during formatting
progression, and to acknowledge the completion.
Note: Teletext subtitles can be accessed on a particular
teletext page (for instance, usually page 888 in France).
OSD positioning instructions: You have to confirm when
OSD is positioned as desired.
Video resolution modification confirmation.
6.5 Pop-Ups
Playback resume: Start from last stopping point/start
from beginning.
Playback stop / end.
6.5.1 Interactive pop-ups
System update available: Update/Later.
Pop-up windows can be displayed at any time to allow
you to make a choice between alternative behaviors, to
enter information needed by the adapter or to actively
acknowledge a situation.
System update confirmation.
ZAS Hbb
16
6.5.2 Informational pop-ups
Informational pop-ups are displayed when an event occurs,
but no direct user interaction is needed.
7. LiveTV banner
The LiveTV banner is the navigation interface you use to
navigate and interact with the adapter when watching live
content.
7.1 Open / Close
While watching live content, the LiveTV banner is displayed
keys, or when
when zapping using CH+/CH-, 0...9 or
pressing INFO, OPT, FAV or (record) keys.
These pop-ups are displayed in the following situations:
A storage device has been plugged.
A storage device is installed and ready to be used.
The storage device can be safely unplugged.
A storage device has been unplugged.
Note: 0...9 and
keys could be caught by an HbbTV
application (note that the red button popup IS an
HbbTV application) and hence could not work as
described above in some cases.
To close the LiveTV banner:
Wait for a few seconds, the banner closes automatically
(duration configurable, see “Banner display duration”
section).
A recording has started.
Press EXIT key.
A recording is finished.
Press arrow key or . This closes the banner and opens
the main menu on the EPG of the current channel.
A recording has failed. This pop-up is displayed for
instance when a recording or timeshifting cannot start
because there is no proper storage device connected or
when a recording is stopped because the storage device
is unplugged during the recording.
The recording medium has reached a low threshold.
The recording medium is full.
7.2 Content
The LiveTV banner contains the following information:
The media being played has changed.
Channel number and name (displayed only after a
zapping).
The current favorites list has changed.
Channel logo.
You try to record or activate timeshifting function on a
radio channel (not allowed).
Event name.
Radio key is pressed whereas there are no radio channels.
A remote control key reserved for a future functionality, is
pressed (for instance Users or PiP keys).
Start and end time of the event and a progress bar
indicating the elapsed time of the current event in
relation to the total duration.
Note: The progress bar is displayed only if the banner
corresponds to the event currently watched.
17
Icons indicating some of the event attributes (displayed
only if the banner corresponds to the event currently
watched):
or
- Video format:
- If the event is in HD:
- Age classification (possible values depend on country):
,
,
, ...
EN
- If event is streamed in Dolby Digital Plus audio format:
Note: Recording and timeshifting functions remain available.
- If the channel has Teletext:
- If the event is streamed in various audio formats:
- If the event has subtitles: one
or more
- If subtitles for impaired hearing are available:
Event cover or a logo of the event type if the cover is not
available. Nothing is displayed if neither is available.
Note: If there is no programme information available, only
the channel number, name and logo are displayed.
Preview browsing:
When watching a channel with the LiveTV banner
displayed, if you press arrow keys or , the content of
the banner is changed to display the information of next or
previous event (passed events are not displayed). However,
the full screen video does not change.
7.4 Options
While watching live content or while the LiveTV banner is
displayed, press OPT key to display the options available
for the current programme.
The selected option appears highlighted. Use arrow keys
and to move about and select another option.
For each option, use arrow keys and to move about
the possible values (current value is highlighted), and press
OK to select one.
When the banner is not on the current event, if you press
OPT key, record key or stop key , the focus comes back
to the current event, if an action corresponding to the key
pressed is applicable for the current event.
7.3 Detailed programme information
While the LiveTV banner is displayed, press INFO key to get
detailed programme information.
If the text occupies more than one page, use arrow keys
and to scroll up and down.
Press INFO again to close the detailed programme
information.
Available options are:
Audio language (if several languages are available).
Subtitle language (if subtitles are available).
Note: For audio and subtitles, both available languages
and special options (see “Special options” section of
the settings) are proposed. If an unknown language/
special option is available (means with an unknown
ISO 639 code), the ISO 639 code is displayed
unchanged. For instance it could be “v.o” or “org”, etc...
Picture format (if applicable).
Note: Persistency of the options audio language, subtitle
language and picture format is limited to the media
currently watched.
ZAS Hbb
18
Favorites list (if at least 2 non empty favorites lists are
available; only non empty lists are displayed).
Changing of favorites list zaps on the first channel of
the newly selected favorites list, if the channel currently
watched is not in the newly selected favorites list.
Note: While watching live content or while the LiveTV
banner is displayed, press FAV key to display the
LiveTV banner with the option panel and the focus
sets on the favorites list’s field.
This key is not active if there is only one non empty
favorites list.
Enable / disable (default) slideshow (only for radio
channels). This option is available if a photo or folder has
been previously selected as background slideshow (see
options on photo files in “Media Selection” section). When
enabled, the slideshow is played in loop mode. Press OPT
key again to close the options panel.
8. Timeshifting
For this function to be possible a storage device
formatted in FAT 32, NTFS or ext3, not read-only, with a
minimal available space of 3,6 Gb must be connected to
the adapter.
This storage device must be set as “default storage
device” in the settings (see “Storage” section).
If such a medium, properly configured in the settings,
is not connected to the adapter, an information pop-up
is displayed when you try to activate the timeshifting
function, indicating that the timeshifting is not possible.
The timeshifting buffer is a circular buffer limited to 50% of
the available space on the storage device; with a high limit
set to 18,8 Go. 3 modes are available (see “Timeshifting”
section of the settings):
Disabled: timeshifting function is not available.
Press INFO key to replace the option panel by the detailed
programme information panel.
Manual (default): buffering starts only when you press pause
key . Going back to live resets the timeshifting buffer.
Note: Options remain available during timeshifting, and
changes done during timeshifting remains when going
back to live.
Automatic: the programme is automatically buffered
(temporarily) on the storage device as soon as you zap
onto the channel.
8.1 Switching from live to Timeshifting
While watching live content, press pause key to freeze
the image and switch to timeshifting. The timeshifting
banner is then displayed.
Pause makes the time gap or delay between the
broadcasting (live) point and watching point. The time
gap is equivalent to the period the programme has been
paused. Operations such as slow motion and fast rewind
also make the time gap.
Note: If the automatic mode is activated, you can also switch
from live to timeshifting by pressing directly the rewind
key
.
To stop the timeshifting and go back to live:
Press stop key
.
Use fast forward function until the current reading
position reaches the live point.
Perform a zapping using CH+/CH-, 0...9 or
also resets the timeshifting buffer.
keys. This
19
8.2 Timeshifting banner
8.3 Trick modes
The timeshifting banner is displayed each time you use trick
modes, or when you press INFO key during timeshifting.
To continue watching the programme from the same point
where it was paused, press play key .
EN
Note: Pressing INFO key when the banner is already displayed
has no effect as detailed programme information is not
available during timeshifting.
Note: Whatever the watching speed in progress, pressing play
key will always go back to normal speed.
To navigate the time bar to search for a particular scene:
The timeshifting
information:
banner
contains
the
following
An icon on the channel logo indicating the operation in
progress (pause, play, forward, rewind) and the image
speed.
A timeline indicating the filling level of the timeshifting
buffer.
A cursor indicating the position of the live in the
timeshifting buffer.
A cursor indicating the current reading position and the
delay compared to the live.
As with the LiveTV banner, to close the timeshifting banner:
Wait for a few seconds, the banner closes automatically
(same duration as the LiveTV banner, see “Banner display
duration” section)
Press EXIT key.
Press arrow key or . This closes the banner and opens
the main menu on the EPG of the current channel.
Press OPT key to display the options available for the
current programme.
Available options are the ones described in the LiveTV
banner section.
When video is playing (at normal speed or more):
Use the key
for a fast rewind. Each time you press
the key, the rewind speed increases in the following
sequence: x-1, x-2, x-4, x-8, x-16, x-32, x-MAX (x-64).
Note: You can fast rewind back to the start point. If
you reach the start point while rewinding, the
programme is automatically played at normal
speed from that point.
Use the key
for a fast forward. Each time you press
the key, the speed increases in the following sequence:
x2, x4, x8, x16, x32, xMAX (x64).
When video is paused (or in slow motion mode):
for a slow forward. Each time you press
- Use the key
the key, the speed increases in the following sequence:
x1/8, x1/4, x1/2, x1.
Note: When reaching normal speed (x1 or x-1), you exit the
slow motion mode.
Skip function (jump of 30 seconds) can be activated by:
or
. In this case a unique jump
- A long press on key
forward or backward is done.
- Using skip keys. In this case a jump is done each time
the key is pressed.
To watch the programme frame by frame, press the pause
key successively.
Note: Frame by frame function is only available when the
video is playing at a speed of x1/8, x1/4, x1/2, x1, x2 or
x4.
ZAS Hbb
20
9. Main menu
Press MENU key to activate the main menu.
Press MENU or EXIT key to close the main menu.
9.1 Structure
The following diagram describes the main menu’s structure.
TELEVISION
LIVE TV
MEDIA CENTER
MY
RECORDINGS
SETTINGS
CHANNEL LIST
EVENT LIST
MANAGE
SCHEDULES
SCHEDULES
LIST
MANAGE
RECORDINGS
ADD A
SCHEDULE
VIDEOS
MUSIC
PHOTOS
RECORDING
LIST
DEVICE LIST
VIDEO LIST
DEVICE LIST
PLAY LIST
DEVICE LIST
PICTURE BROWSER
FAVORITES LISTS
VIDEO & AUDIO
USER
PREFERENCES
USB &
RECORDING
ADVANCED
SETTINGS
TECHNICAL
INFORMATION
The settings sub-menus are described in details in the “Settings” section.
21
9.2 Layout
Graphically, the main menu is organized around the
following elements:
3
4
EN
1
2
1. History area: This area presents the navigation status;
each menu you have passed through is stacked in this
area.
2. Notification area: Icons representing various system
states:
First icon represents the available space on the
connected storage device. If several storage devices
are connected, it represents the available space on
the default one (see “Storage” section). Six states are
possible:
Unavailable
: There isn’t any valid storage device
connected to the adapter.
Full
: The storage device is full. No more recordings
will be accepted.
High
: A high portion of the device is occupied.
You should clean up some recordings or plug another
storage device.
Medium
Low
.
.
Almost empty
.
Second icon represents internet connection state (see
also “Connections state” section). 3 possible states:
Error
: Broadband link is down. Any feature
involving broadband access will fail.
Limited
: Broadband link is up, but either
the bandwidth is low or high level protocol are
unavailable. Some features involving broadband
access may fail.
Connected
: Broadband link is up. All features
involving broadband access are available.
Third icon
is only displayed when an upgrade
is available. The upgrade can be launched from the
settings (see “Upgrade” section).
3. Main navigation area: This area is used to display the
menus and final elements.
4. Action/Option Area: This area is used to display available
options/actions that can be applied on the focused
element of the main navigation area.
ZAS Hbb
22
9.3 Navigation
Use arrow keys
,
10. Channels list
, ,
to navigate in the menus.
An arrow on the right of an element means this element
has a sub-menu.
Final elements (means elements without sub-menu) can
be selected by pressing OK key.
If OK or OPT keys can be used with the current element,
they are displayed on the right of the element.
While in the main menu, zapping remains possible using
keys, except when editing/reordering
CH+/CH- or
favorites lists or when performing a scanning.
Zapping is not possible using 0...9 keys that are reserved to
enter values, such as passwords, etc....
10.1 Channel selection
To access the channels list:
Press MENU key.
Select “Television” and press arrow key .
Select “LiveTV” and press arrow key .
All available channels of the current favorites list are listed
with the focus on the channel currently watched.
You can navigate in the channels list using arrow keys ,
or by entering a channel number using 0...9 keys. Note
that navigating like this just change the focus position in
the channels list, no zapping is performed.
Press OK key to perform a zapping and close the menu.
Press arrow key
to access the EPG of the focused channel.
Note: When the focus is on the items “Television” or “LiveTV”
of the main menu, and you are not watching live
content, press OK key to zap to the last viewed channel
and close the menu.
Timeshifting remains available while in the main menu.
Note: Doing a zapping using CH+/CH- or
keys does not
change the focus position in the channels list.
Note: Scrambled channels are represented with a specific
background (hatched).
10.2 Options
While the focus is on a channel of the channels list, press
OPT key to display the options available for the channels.
The selected option appears highlighted. Use arrow keys
and to move about and select another option.
For each option, use arrow keys and to move about
the possible values (current value is highlighted), and press
OK to select one.
23
11. Electronic Programme Guide (EPG)
The adapter provides a “Programme Guide” function
giving the user access to the TV (or radio) guide showing
information on the current or following events on the
different channels, such as name, start and end times, a
short summary...
EN
11.1 Events list
Available options are:
Start a recording on this channel, if there is no recording
in progress on this channel.
Note: You can also start a recording by pressing the record
key .
If a recording is in progress on this channel:
Modify the recording end time.
Note: You can also modify the recording end time, by
pressing the record key again.
Stop the recording.
Note: You can also stop the recording by pressing stop
key .
To access the information on the electronic programme
guide (EPG):
When in the channels list, press arrow key
EPG of the focused channel.
to access the
When the LiveTV banner is displayed, press arrow key
or .
This closes the banner and opens the main menu on the
EPG of the current channel.
For the selected channel, the EPG is displayed as a list of
events of the selected day, ordered chronologically from
the top to the bottom. The first event corresponds to the
event currently broadcasted or to the first event of the day
(if the selected day is not the current one).
Watch the channel, if this channel is not the one currently
displayed (equivalent to pressing OK key from the
channels list).
Favorites list (if at least 2 non empty favorites lists are
available; only non empty lists are displayed). Changing
of favorites list, refreshes the channels list (the menu
remains opened) and zaps on the first channel of the
newly selected favorites list, if the channel currently
watched is not in the newly selected favorites list.
Sort (by name, number (default)).
Note: Change on this option is applied to all favorites lists, to
the zapping sequence and is persistent to standby and
power on/off.
Press OPT key again to close the options panel.
You can navigate in the events list using arrow keys
.
and
You can also move to a specific hour in the next 24 hours
by entering a time using 0...9 keys. With this method, there
is no visual feedback of the time seized and only 2 digits
corresponding to the hour are taken into account. If there
is not event at the seized hour or after it, the focus does
not move.
Press OK key on an event currently broadcasted to perform
a zapping on it and close the menu.
Note: Doing a zapping using CH+/CH- or
keys does not
change the focus position in the events list.
Note: The information that appears in the guide is supplied by
the service provider, and is sometimes unavailable. In
this case, the message “No data available” is displayed.
ZAS Hbb
24
Stop the recording.
11.2 Detailed programme information
Press INFO key to get detailed programme information.
If the text occupies more than one page, use arrow keys
and to scroll up and down.
If the option panel is displayed, it remains opened.
Press INFO again to close the detailed programme
information.
Note: You can also stop the recording by pressing stop
key .
Watch the channel, if this channel is not the one currently
displayed and the event is the current one (equivalent to
pressing OK key from the channels list).
Change the day of the displayed events (from today
(default) to the 6 upcoming days).
Note: Persistency of this option is limited to the current
events list browsing.
Press OPT key again to close the options panel.
11.3 Options
Press OPT key to display the options available for the
events.
The selected option appears highlighted. Use arrow keys
and to move about and select another option.
For each option, use arrow keys and to move about
the possible values (current value is highlighted), and press
OK to select one.
Available options are:
Start / schedule a recording on this event.
Note: You can also start a recording by pressing the record
key .
If a recording is in progress or scheduled on this event:
Modify the recording end time.
Note: You can also modify the recording end time, by
pressing the record key again.
25
12. Recording
For this function to be possible a storage device formatted
in FAT 32, NTFS or ext3, not read-only, must be connected
to the adapter.
If such a storage device is not connected when you try
to start a recording, a notification popup is displayed to
inform you that the recording cannot be done.
Note: 3 minutes before the starting of a scheduled recording,
if such a storage device is not connected, a popup is
displayed informing you that the recording will fail if
you do no plug in a storage device. This popup closes
after the 3 minutes or if you press OK key.
Warning: This popup is not displayed if you power on the
adapter or goes out of standby, in the interval
between 3 and 0 minutes before the starting of a
scheduled recording.
When several medium are connected to the adapter, the
one configured as “default storage device” is preferred (see
“Storage” section).
There are no requirements regarding the size of the storage
device or the available space on it. If the free space on the
hard disk drive is insufficient, recording will stop.
Note: Recording a one-hour programme may require up to
two or three GB of hard disk space. The space necessary
for recording a one-hour programme may be different
depending on the programme.
Note: On a device formatted in FAT32, the size of a file is
limited to 4 GB.
Note: Timeshifting function remains available while a
recording is in progress.
Note: Only 1 recording can be done at a time, in addition to
timeshifting.
EN
Possible values are:
Current event duration (if programme information is
available).
Default value if available.
30 min, 1h, 2h, 3h, 4h, 5h, 6h, 8h and 12h. If programme
information is not available, default value proposed is
configurable (see “Default recording duration” section).
Cancel
Press OK key to validate the duration. The recording
starts immediately (except if cancel is selected), and the
recording icon
is displayed in the top right corner of
the LiveTV banner.
12.1.2 From channels list
While in the channels lists, press OPT key to display the
option panel.
After choosing the recording duration and pressing OK,
the recording starts immediately, the option panel is closed
and the recording icon
of the channel name.
is displayed in the right corner
12.1 Start
12.1.1 From LiveTV banner
While watching live content (main menu is closed), press
record key to record the programme you are viewing.
The LiveTV banner is then displayed with a specific panel.
Select the recording duration using arrow keys
and .
Note: You can also start a recording by pressing the record key
. In this case, the recording duration is automatically
set to the current event duration (if programme
information is available), or to the default recording
duration (see “Default recording duration” section)
otherwise.
ZAS Hbb
26
12.1.3 From EPG
To start a recording from the EPG, press OPT key to display
the option panel and select the record option, or press
directly the record key .
by displaying the option panel (by pressing the OPT key),
select the end time option and change the value using
arrow keys and and OK to validate.
This starts or schedules (if the event is in the future) a
recording on the selected event. The option panel is then
closed and the recording icon
corner of the event name.
is displayed in the right
Note: Time-based recordings (means recordings started with
duration different from “Current event”) can extend on
several events or on parts of events. For this reason, in
the EPG, the recording icon
is not displayed on
events covered by a time based recording. The icon
is only displayed on events on which an event based
recording was started.
Note: If the event is in the future, should start in less than
3 minutes, and there is no proper storage device
connected, a popup is displayed informing you that the
recording will fail if you do not plug in a proper storage
device. This popup closes if you press OK key or at the
start time of the recording.
You can also modify the recording end time by pressing
directly the record key again. In this case, a specific panel
is displayed (see picture above), where you can change
the end time value using arrow keys and and OK to
validate.
12.2.3 From EPG
12.2 End time modification
End time can be modified by steps of 10 minutes in a range
of -/+4h.
Note: If you modify the end time of a recording by event, the
recording name remains the name of the event, even if
the duration is no more synchronized with the event.
While in the EPG with the focus on a event being recorded
or scheduled, you can modify the recording end time, by
displaying the option panel (by pressing the OPT key),
select the end time option and change the value using
arrow keys and and OK to validate.
You can also modify the recording end time by pressing
directly the record key again. In this case, a specific panel
is displayed, where you can change the end time value
using arrow keys and and OK to validate.
12.2.1 From LiveTV banner
To modify the duration of a recording in progress, press
record key again on the channel being recorded.
The LiveTV banner is then displayed with a panel where
you can change the end time of the record. Use arrow keys
and to choose the end time and OK to validate.
Note: Time-based recordings are not visible in the EPG and
hence cannot be modified from the EPG.
12.3 Stop
12.3.1 From LiveTV banner
12.2.2 From channels list
To stop a recording, press stop key
While in the channels list with the focus on a channel
being recorded, you can modify the recording end time,
The LiveTV banner is then displayed with a confirmation
panel.
.
27
Choose “yes” or “no” (default) using arrow keys
and validate your choice with OK key.
and
,
If you choose “yes”, the recording is immediately stopped
and the recording icon
banner.
is removed from the LiveTV
EN
You can also stop the recording by pressing directly the
stop key . In this case, a confirmation panel is displayed
(see picture above), where you can choose “yes” or “no”
and , and validate your
(default) using arrow keys
choice with OK key.
Note: If a timeshifting is performed during a recording,
pressing stop key stops the timeshifting. Press stop
key again to stop the recording.
Note: Time-based recordings are not visible in the EPG and
hence cannot be stopped from the EPG.
12.4 “My recordings” Menu
12.3.2 From channels list
While in the channels list with the focus on a channel being
recorded, you can stop the recording by displaying the
option panel (by pressing the OPT key), select the stop
recording option and press OK.
In addition to the LiveTV banner, the channels list and
the EPG, recordings can be managed through the “My
Recordings” menu.
To access the “My Recordings” menu:
Press MENU key.
You can also stop the recording by pressing directly the
stop key . In this case, a confirmation panel is displayed,
where you can choose “yes” or “no” (default) using arrow
keys and , and validate your choice with OK key.
Select “Television” and press arrow key .
Select “My Recordings” and press arrow key .
You then have access to 3 sub-menus:
“Manage schedules”
12.3.3 From EPG
“Manage recordings”
While in the EPG with the focus on an event being recorded
or scheduled, you can stop the recording, by displaying the
option panel (by pressing the OPT key), select the stop
recording option and press OK.
“Add a schedule”
12.4.1 Manage Schedules
Select “Manage schedules” and press arrow key .
The list of scheduled recordings (including recordings in
progress) is displayed.
ZAS Hbb
28
For simple recordings available options are:
Delete (if failed recording).
Stop (if recording is in progress).
The recording can then be played through the “Manage
recordings” menu.
Cancel (if start time is in the future).
Modify. Only the duration can be modified in this version.
For each recording the following information is displayed:
Channel logo.
Event name if the recording is on an event or a name with
recording start and end time if the recording is based on
time.
A progress bar if the recording is in progress.
Date and start time of the recording.
An icon indicating that this is a recurrent recording.
Recording duration.
For recurrent recordings templates available options are:
There are 3 “kinds” of scheduled recordings: simple
recordings, recurrent recordings templates and recurrent
recordings occurrences.
When a recurrent recording template is selected, use arrow
key to access the list of corresponding occurrences (next
2 months are displayed).
Schedules that failed to start (for instance because there
was no storage device connected) at the expected time
remains listed here during 15 days and are tagged as failed.
Note: A recurrent recording template is not tagged as failed,
even if one of its occurrences is failed.
Use arrow keys
recording.
and
to move about and select a
Press OPT key to display the options available for the
recording. Use arrow keys and to navigate among the
options and press OK key to select one and execute the
corresponding action.
Stop (if one occurrence of the recurrent recording is in
progress).
This stops the occurrence in progress that can then be
played through the “Manage recordings” menu.
Modify. Only the recording duration can be modified in
this version.
Cancel all occurrences. To remove completely a recurrent
recording.
For recurrent recordings occurrences available options are:
Delete (if failed recording).
Stop (if recording is in progress).
The recording can then be played through the “Manage
recordings” menu.
Cancel/restore (if start time is in the future).
29
in particular when the channel logo is not available
(except if the channel is not in “All TV” / “All radio”).
Press OPT key to display the options available for the
recording. Use arrow keys and to navigate among the
options and press OK key to select one and execute the
corresponding action.
EN
12.4.2 Manage Recordings
Select “Manage recordings” and press arrow key .
The list of completed recordings (including recordings in
progress) is displayed.
Available options are:
Stop (if recording is in progress).
Delete (with a confirmation pop-up).
This option is not available if the recording is in progress
or if a playback of the recording is in progress.
Lock (with a confirmation pop-up) or unlock (with a popup requiring to enter a password)
For each recording the following information is displayed:
Sort by recording name, date (default) or channel.
Note: Change on this option is persistent to standby and
power on/off.
Channel logo.
Event name if the recording is on an event or a name with
recording start and end time if the recording is based on
time.
A red progress bar if the recording is in progress.
A orange progress bar, if a playback of the recording is
in progress .
12.4.3 Add a schedule
Select “Add a schedule” and press OK key.
An input form is then displayed so that you can schedule
a recording and define the different parameters of the
schedule.
The selected parameter appears highlighted.
and
to move about and select another
If neither a playback nor the recording is in progress: date,
start time and duration of the recording.
Use arrow keys
parameter.
Note: If you do a playback of the recording while the
recording is in progress, the orange progress bar is
displayed over the red progress bar.
For each parameter, use arrow keys and to move about
the possible values (current value is highlighted), and press
OK or arrow keys and to confirm one.
Broken recording icon, if the recording is not complete,
due to signal loss or power cut during the recording for
instance.
Use arrow keys
recording.
and
to move about and select a
Press OK key to play the recording.
Press INFO key to display additional information on the file,
including the broken reason for an incomplete recording
and the detailed programme information if available.
Note: Channel name is part of the additional information,
ZAS Hbb
30
Parameters to define a schedule are:
Channel name. Channels list corresponds to “All TV”. You
can enter a channel number to browse more rapidly the
list.
Date.
Time.
Duration (30 min, 1h, 2h, 3h, 4h, 5h, 6h, 8h or 12h). Default
value can be configured in the settings (see “Default
recording duration” section).
automatically and the recording starts. If the channel on
which the zapping is done is not in the current favorites
list, a switch to “All TV” / “All radio” favorites list is done.
While a recording is in progress, you perform a zapping
on a channel of another multiplex.
In case of conflict between 2 recurrent recordings, the
recurrent recording that you do not choose to keep is
totally cancelled, even if the frequency of occurrences is
different (for instance if a daily recurrent recording is in
conflict with a weekly recurrent recording).
If the schedule is recurrent (no, daily, weekly, working
days).
If this recording will be locked (password required to read
it) (not available in this version).
Select “OK” or “Cancel” button to close the input form.
Note: If the recording is scheduled to start in less than
3 minutes, and there is no proper storage device
connected, a popup is displayed informing you that the
recording will fail if you do not plug in a proper storage
device. This popup closes if you press OK key or at the
start time of the recording.
12.6 Failures Management
If the signal level lowers or disappears during the recording,
the signal loss image is displayed and the recording is
paused. The recording will resume automatically once the
signal returns.
12.5 Conflicts
When a conflict is detected, a pop-up is displayed so that
you can choose the action to perform to solve the conflict.
You can only record a programme at the same time, but
while recording a programme, you can view another one
which belongs to the same multiplex.
The recording duration is set to the total recording
duration, including period of time when the signal was
lost. When running a playback of the record, period of time
when the signal was lost are jumped.
The recording is tagged as broken.
In case of power cut, ongoing recording is stopped and
tagged as broken.
If you go to standby while a recording is in progress, the
recording is not stopped. The adapter will only go to low
power consumption after the recording completion.
Possible conflicts are:
You start/schedule a recording that overlaps with an
existing recording.
You start a recording whereas you are watching a channel
on another multiplex (possible only when starting a
recording from the channels list or EPG of the main
menu). To start the recording a zapping is required.
A scheduled recording will start in 3 minutes whereas
you are watching a channel on another multiplex. To start
the recording a zapping is required. You have 30 seconds
to make your choice, otherwise the zapping is done
31
13. Media Center
For this function to be possible a storage device formatted
in FAT 32, NTFS or ext3, with the recordings or files on it,
must be connected to the adapter.
The list of files (of the selected media type) on the storage
device is then displayed with the same hierarchy of folders
than on the drive.
Note: Files with a container that is not supported, are not
displayed.
Use arrow keys
folders.
The media center allows you:
to watch video recorded using the adapter or video files
in different formats,
,
,
,
to navigate in the files and
Press OK key to play a file.
to listen audio files,
to display image files.
Note: Depending on the type of compression, not all files in
the formats above can be played.
13.1 Media selection
To access a file in the media center:
Press MENU key.
Select the media type (Video, Music or Photo) you want to
consult and press arrow key .
Press INFO key to display additional information on the
file.
Press OPT key to display the options available for the file
/ folder. Use arrow keys and to navigate among the
options and press OK key to select one and execute the
corresponding action.
The list of storage devices connected to the adapter is
then displayed. The name displayed corresponds to the
slot on which the storage device is connected.
The size of the storage device is displayed in parenthesis.
Available options are:
Select “Media Center” and press arrow key .
Select one using arrow keys
key .
and
and press arrow
Delete the file / folder (with a confirmation pop-up).
This option is not available if the file is a recording
in progress or if a playback of the file is in progress
(applicable for recordings, videos and audio files, but
not applicable for photos). Note: If you try to delete a
folder that is not empty, the delete will fail.
For audio files, choose the file as audio background.
Hence the audio background option will be available
while watching photos. When enabled, the audio
background plays in sequence all the audio files in
the same folder than the file selected. If a folder is
selected instead of a file, the files used are the ones
of the folder.
For picture files, choose the file as background
slideshow. Hence the slideshow option will be
EN
ZAS Hbb
32
available while listening to audio files. When enabled,
the slideshow displays in sequence all the picture
files in the same folder than the file selected. If a
folder is selected instead of a file, the files used are
the ones of the folder.
An icon indicating that shuffle mode is enabled, when
this mode is enabled (displayed only if the banner
corresponds to the recording / video file currently
played).
13.2 Video Banner
The video banner is the navigation interface you use to
navigate and interact with the adapter when watching
recordings or video files.
Note: When starting a playback, if the file was partially
played previously, a pop-up is displayed to propose to
resume the play where it was stopped.
13.2.1 Open / Close
13.2.3 Detailed Information
The video banner is displayed in the following cases:
While the video banner is displayed, press INFO key to
display additional information on the file.
When playing a recording or a video file from the media
center.
When switching to next or previous recording or video
file using CH+/CH-.
If the text occupies more than one page, use arrow keys
and to scroll up and down.
Press INFO key again to close the information panel.
When pressing INFO key while a recording or video file is
being played and the video banner is not displayed.
When using trick modes.
When pressing arrow keys
and .
To close the video banner:
Wait for a few seconds, the banner closes automatically
(duration configurable, see “Banner display duration”
section).
Press EXIT key.
Press arrow key
and . This closes the banner and
opens the main menu on the list of recordings / videos
of the current folder.
13.2.4 Options
13.2.2 Content
The video banner contains the following information:
An icon indicating the operation in progress (pause, play,
forward, rewind) and the image speed.
Channel logo for a record.
For a video, a logo of the video type.
Recording / video name.
If the banner corresponds to the recording / video file
currently played, then a progress bar with elapsed time
and total duration of the recording / video is displayed. If
the banner corresponds to another recording / video file
than the one currently played (possible by using preview
browsing), then instead of the progress bar:
Date, start time and duration are displayed for a
recording.
Size of the file is displayed for a video.
While watching a recording or a video file, press OPT key
to display the options available for the current recording
/ video.
The selected option appears highlighted. Use arrow keys
and to move about and select another option.
For each option, use arrow keys and to move about
the possible values (current value is highlighted), and press
OK to select one.
33
13.2.6 Trick Modes
While watching a recording / video, press pause key
freeze the image.
to
To continue watching the recording / video from the same
point where it was paused, press play key .
EN
Available options are:
Audio language (if several languages are available).
Subtitle language (if subtitles are available).
Note: For audio and subtitles, if an unknown language is
available (means with an unknown ISO 639 code), the
ISO 639 code is displayed as is. For instance it could be
“v.o” or “org”, etc...
Note: Whatever the watching speed in progress, pressing play
key will always go back to normal speed.
Picture format.
Note: Persistency of options audio language, subtitle
language and picture format is limited to the media
currently watched.
Jump to a particular time.
Enable / disable (default) shuffle mode.
Playlist mode that determine the behavior at the end of
the playback:
“Ask” (default) means that a pop-up is displayed, so
that you can choose what to do next.
“Next” means that the next file is played.
“Repeat” means that the file is played again.
“Live” means that you go back to the live.
Press OPT key again to close the options panel.
Press INFO key to replace the option panel by the detailed
information panel.
To navigate the time bar to search for a particular scene:
For recordings only, when video is playing (at normal
speed or more):
Use the key
for a fast rewind. Each time you press
the key, the rewind speed increases in the following
sequence: x-1, x-2, x-4, x-8, x-16, x-32, x-MAX (x-64).
Note: You can fast rewind back to the start point. If you
reach the start point while rewinding, the file is
automatically played at normal speed from that
point.
Use the key
for a fast forward. Each time you
press the key, the speed increases in the following
sequence: x2, x4, x8, x16, x32, xMAX (x64).
Note: A few seconds before reaching the end of the
playback, the speed is automatically switch to
normal speed.
For recordings only, when video is paused (or in slow
motion mode):
13.2.5 Preview browsing
When watching a recording / video, if you press arrow keys
and , the video banner is displayed and its content is
changed to display the information of next or previous
recording / video in the current folder on the hard disk.
However, the full screen video does not change. Press
OK key to launch the playback of the recording / video
currently browsed in the video banner.
When the banner is not on the recording / video currently
played, if you press OPT key and options are available
on the file being played, the focus comes back to the
recording / video currently played.
Use the key
for a slow forward. Each time you
press the key, the speed increases in the following
sequence: x1/8, x1/4, x1/2, x1.
Note: When reaching normal speed (x1 or x-1), you exit the
slow motion mode.
Skip function (jump of 30 seconds) can be activated by:
A long press on key
or
. In this case a unique
jump forward or backward is done.
Using skip keys. In this case a jump is done each time
the key is pressed. With video files, as fast forward/
rewind is not available, pressing
and
keys has
the same effect than pressing skip keys.
To watch the programme frame by frame, press pause key
successively.
ZAS Hbb
34
Note: Frame by frame function is only available when pause is
done while the video is playing at a speed of x1/8, x1/4,
x1/2, x1, x2 or x4.
Note: For non indexed MPEG TS files, trick modes are limited
to speed from 0 (pause) to x4. Frame by frame function
is also available; however skip function is not available.
the main menu on the list of audio files of the current
folder.
10.3.2 Content
The audio banner contains the following information:
An icon indicating the operation in progress (pause, play,
forward, rewind) and the speed.
13.2.7 End of Playback
When you press stop key or when you reach the end of
the recording / video and the playlist mode is set to “Ask”.
The video is frozen and a pop-up is displayed proposing:
to go back to the recording manager or the media center,
to go back to live TV,
to play next file (except if the current file is the last one
of the folder),
to delete the file. Not available if the playback is a
playback of a recording in progress.
A generic audio.
Song title if available or file name without the extension
otherwise.
If the banner corresponds to the audio file currently
played, then a progress bar with elapsed time and total
duration of the audio file is displayed. If the banner
corresponds to another audio file than the one currently
played (possible by using preview browsing), then
instead of the progress bar, the artist and album name are
displayed if available or the file name otherwise.
A file number in the folder represented as X/Y, where X
is the index of the current file and Y the total number of
files in the folder.
An icon indicating that shuffle mode is enabled, when
this mode is enabled (displayed only if the banner
corresponds to the audio file currently played).
13.3 Audio Banner
The audio banner is the navigation interface you use to
navigate and interact with the adapter when listening to
audio files.
10.3.1 Open / Close
13.3.3 Detailed Information
The audio banner is displayed in the following cases:
When playing an audio file from the media center.
While the audio banner is displayed, press INFO key to
display additional information on the file.
When switching to next or previous audio file using CH+/
CH-.
If the text occupies more than one page, use arrow keys
and to scroll up and down.
When pressing INFO key while an audio file is being
played and the audio banner is not displayed.
Press INFO key again to close the information panel.
When using trick modes.
When pressing arrow keys
and .
To close the audio banner:
Wait for a few seconds, the banner closes automatically
(duration configurable, see “Banner display duration”
section).
Press EXIT key.
Press arrow key
or
. This closes the banner and opens
35
10.3.4 Options
13.3.6 Trick Modes
While listening to an audio file, press OPT key to display the
options available for the current audio file.
While listening to an audio file, press pause key
the sound.
The selected option appears highlighted. Use arrow keys
and to move about and select another option.
To continue listening to the audio file from the same point
where it was paused, press play key .
For each option, use arrow keys and to move about
the possible values (current value is highlighted), and press
OK to select one.
To navigate the time bar to search for a particular moment:
to pause
Skip function (jump of 30 seconds) can be activated by:
A long press on key
or
. In this case a unique
jump forward or backward is done.
Using skip keys. In this case a jump is done each time
the key is pressed.
13.3.7 End of Playback
or when you reach the end
When you press stop key
of the audio file and the playlist mode is set to “Ask”. The
sound is cut and a pop-up is displayed proposing:
to go back to the media center,
to go back to live TV,
Available options are:
Jump to a particular time.
Enable / disable (default) shuffle mode.
to play next file (except if the current file is the last one
of the folder),
to delete the file.
Playlist mode that determine the behavior at the end of
the playback:
“Ask” means that a pop-up is displayed, so that you can
choose what to do next.
13.4 Photo Banner
“Next” (default) means that the next file is played.
The photo banner is the navigation interface you use to
navigate and interact with the adapter when looking at
picture files.
“Repeat” means that the file is played again.
“Live” means that you go back to the live.
Enable / disable (default) slideshow. This option is
available if a photo or folder has been previously selected
as background slideshow (see options on photo files in
“Media Selection” section). When enabled, the slideshow
is played in loop mode.
Press OPT key again to close the options panel.
Press INFO key to replace the option panel by the detailed
information panel.
13.4.1 Open / Close
The photo banner is displayed in the following cases:
When selecting a photo file from the media center.
When switching to next or previous photo using CH+/
CH-.
When pressing INFO key while a photo is being displayed
and the photo banner is not displayed.
When using trick modes.
When pressing arrow keys
and .
13.3.5 Preview browsing
When listening to an audio file, if you press arrow keys or
, the audio banner is displayed and its content is changed
to display the information of next or previous audio file in
the current folder on the hard disk.
However, the audio file being played does not change.
Press OK key to listen to the audio file currently browsed
in the audio banner.
When the banner is not on the audio file currently played,
if you press OPT key and options are available on the
file being played, the focus comes back to the audio file
currently played.
To close the photo banner:
Wait for a few seconds, the banner closes automatically
(duration configurable, see “Banner display duration”
section).
Press EXIT key.
Press arrow key or . This closes the banner and opens
the main menu on the list of photos of the current folder.
EN
ZAS Hbb
36
13.4.2 Content
The photo banner contains the following information:
An icon indicating the operation in progress: play or
pause.
A thumbnail of the photo.
Photo name (file name without the extension).
A file number in the folder represented as X/Y, where X
is the index of the current file and Y the total number of
files in the folder.
An icon indicating that shuffle mode is enabled (when
this mode is enabled) (displayed only if the banner
corresponds to the photo currently displayed).
Available options are:
When slideshow mode is active:
Slideshow speed (slow, normal (default), fast).
If an information pop-up is displayed (yes by default) at
the transition to another photo of the slideshow.
When the slideshow is not active:
Jump to picture file number X in the folder, by entering
index value of the photo (X/Y).
Animation type between 2 photos: Fade in/out (default),
bounce, translation from right to left, from left to right,
from bottom to top and from top to bottom.
Enable / disable (default) shuffle mode.
13.4.3 Detailed Information
While the photo banner is displayed, press INFO key to
display additional information on the file.
If the text occupies more than one page, use arrow keys
and to scroll up and down.
Perform a rotation: None (default), 90° clockwise, 180°
and 90° counter-clockwise. Not available during a zoom.
Enable / disable (default) audio background. This option
is available if an audio file or folder has been previously
selected as audio background (see options on audio files
in “Media Selection” section). When enabled, the audio
background is played in loop mode.
Press INFO key again to close the information panel.
Press OPT key again to close the options panel.
Press INFO key to replace the option panel by the detailed
information panel.
13.4.5 Zoom
When the photo banner is not displayed, press OK key to
zoom x2. Press OK key again to cycle through the zooming
factors (x2, x4, x8, x1, etc…).
13.4.4 Options
While looking at a photo, press OPT key to display the
options available for the current photo.
The selected option appears highlighted. Use arrow keys
and to move about and select another option.
For each option, use arrow keys and to move about
the possible values (current value is highlighted), and press
OK to select one.
37
Note: If the photo banner is displayed, first OK closes the
banner.
When zoom mode is active (means zoom > x1) use arrow
keys , , and to move the displayed window in the
zoomed photo.
A specific banner is displayed when changing the zoom
factor or when moving the displayed window in the
zoomed photo. This banner displays the zoom factor value
and the position of the displayed window in the zoomed
photo.
When switching to next or previous photo using CH+/CH-,
the zoom factor is reset to x1.
13.4.6 Preview browsing
When looking at a photo, if you press arrow keys or ,
the photo banner is displayed and its content is changed
to display the information of next or previous photo in the
current folder on the hard disk.
However, the photo being displayed does not change.
Press OK key to display the photo currently browsed in the
photo banner.
When the banner is not on the photo currently displayed,
if you press OPT key and options are available on the
photo being displayed, the focus comes back to the photo
currently displayed.
13.4.7 Trick Modes
While looking at a photo, press play key
slideshow of all pictures in the current folder.
to start a
Press pause key to pause the slideshow, and play key
again to continue looking at the slideshow.
13.4.8 End of Playback
When you press stop key
proposing:
a pop-up is displayed
to go back to the media center,
to go back to live TV,
to play next file (except if the current file is the last one
of the folder),
to delete the file.
EN
ZAS Hbb
38
14. HbbTV CONTENT
What is HbbTV?
HbbTV is a technology platform that allows access to ondemand content and interactive services via DTT signal
and an Internet connection.
Thus, the user can watch TV programs that have already
been issued (Video on Demand) and participate in voting,
game shows, access to social networks, etc.
14.1 How to access/exit HbbTV
When you change channels, you’ll see a logo on the screen
indicating that the channel has HbbTV services available.
To access these services, as shown in the logo, press the red
button on the remote control unit. This same button is also
used to exit the HbbTV content, by pressing it again.
14.2 HbbTV navigation
This function depends on the content and design of each
TV channel, and it is provided by each operator through
the Internet connection.
Use arrow buttons
menus.
,
,
,
, 0...9, to navigate in the
An arrow on the right of an element means this element
has a sub-menu.
Final elements (means elements without sub-menu) can
be selected by pressing OK key.
39
15. SETTINGS
To access the “Settings” menu:
Press MENU key.
Select “Settings” and press arrow key .
EN
15.1 Structure
The following diagram describes the settings menu’s
structure.
FAVORITES LISTS
SCREEN RATIO
MENU
LANGUAGE
1st PREFERRED
VIDEO & AUDIO
HDMI
RESOLUTION
AUDIO
LANGUAGE
2nd PREFERRED
USER
PREFERENCES
SCART VIDEO
FORMAT
SUBTITLE
LANGUAGE
SPECIAL OPTION
USB &
RECORDING
PICTURE
FORMAT
INTERFACE
CONFIGURATION
ADVANCED
SETTINGS
AUDIO OUTPUT
HBBTV
1st PREFERRED
LOW POWER
CONSUMPTION
2nd PREFERRED
TECHNICAL
INFORMATION
SPECIAL OPTION
STORAGE
START
PADDING
PARENTAL
CONTROL
END PADDING
NETWORK
CONFIGURATION
DEFAULT RECORD.
DURATION
TIMEZONE
TIMESHIFTING
CHANNELS
SEARCH
LOGICAL CHANNEL
NUMBER (LCN)
UPGRADE
FACTORY
RESET
CONNECTIONS
STATE
SYSTEM
INFORMATION
LEGAL
NOTICES
BANNER DISPLAY
DURATION
MENU
POSITIONING
LOCK EVENT
LOCK
CHANNEL
CHANGE
PASSWORD
ZAS Hbb
40
15.2 Favorites Lists
Change the type of the list (TV or radio). This action
automatically cleans the list of all channels it contains.
This chapter will help you manipulate the favorites lists.
Clean the list. After cleaning a list, if this list is the active
one, “All TV” (or “All radio” depending on the list type)
becomes automatically the new active list.
15.2.1 List selection
When entering the favorites lists menu in the “Settings”
menu, all available favorites lists are displayed:
“All TV” contains all the TV channels (free to air +
scrambled) found during scanning.
“All radio” contains all the radio channels found during
scanning.
“Favorites A”, “Favorites B”, “Favorites C”, “Favorites D” and
“Favorites E” are pre-named favorites that are empty after
first time installation.
Mixing TV and radio channels in the same list is not
allowed, hence favorites lists A, B, C, D and E are tagged as
list of TV channels or list of radio channels. The icon on the
left of the list name is different.
Use arrow key
to edit a list. You can then choose between:
Adding/removing channels in the list.
Reordering the list (available only when LCN is OFF).
Use arrow key
to make you choice.
After first installation:
If there are no radio channels available in the service plan,
“All radio” list is not available and favorites lists A, B, C, D
and E are tagged as TV channels lists.
If radio channels are available in the service plan, favorites
lists A, B and C are tagged as TV channels lists, favorites
lists D and E are tagged as radio channels lists.
Below the favorites list name, the number of channels in
the list is displayed.
Use arrow keys
and
to navigate among the lists.
Note: During the edition / reordering of a list, zapping using
keys is not allowed.
CH+/CH- or
15.2.2 Add / Remove
If you select the menu to add / remove channels, a list of
channels is then displayed.
If the list with the focus is not the one currently used, press
OK key to switch to it.
Note: You can also switch off favorites list from the options
of the LiveTV banner or the options of the channels list.
Press OPT key to display the options available for a list. Use
arrow keys and to navigate among the options and
press OK key to select one and execute the corresponding
action.
There are no options available for “All TV” and “All radio”
lists.
For favorites lists A to E, available options are:
If the favorites list is “All TV” or “All radio”, the list of channels
41
displayed is the list of channels found during scanning.
Channels numbers and positions are the ones at the end
of the scanning.
For favorites lists A to E, the list of channels displayed is the
one of “All TV” or “All radio”, depending of the list type.
To add or remove a channel from the list, select the channel
using the arrow keys and , and press OK key to check /
uncheck the check-box.
If you remove a channel currently watched:
If the current favorites list is “All TV” or “All radio”, a zapping
is done in the next channel of the favorites list.
Note: To avoid conflicts, if a recording is in progress on a
channel of the same multiplex, a zapping is done to
the recorded channel instead of the next one.
If the current favorites list is a favorites list from A to E, a
switch of favorites list is done to “All TV” or “All radio”. The
channel currently watched remains the same.
corresponding action.
Available options are:
Check all channels. Available only if at least one channel
in the channel list is not checked.
Uncheck all channels.
Note: “All TV” list cannot be completely empty. If you uncheck
all channels, the channel currently watched remains in
the list.
Same behavior with “All radio” when radio channels are
available.
15.2.3 Reorder
This menu is available only when Logical Channel Number
(LCN) is set to OFF (see “Logical channel number” section).
If the current favorites list is a favorites list from A to E,
and you remove its last channel, a switch of favorites list is
done to “All TV” or “All radio”. The channel currently watched
remains the same.
Note: - When LCN is OFF, when a channel is removed or
added, channels are renumbered automatically.
Channels number corresponds to the index of the channel
in the list. One consequence is that one channel can have
different numbers in the different lists. When LCN is ON,
when a channel is removed or added, channels are not renumbered. Channels number always remains at the LCN
value.
Note: If you remove a channel from “All TV” or “All radio”, this
channel is removed from all other lists. A pop-up is
displayed to warn you when the channel is in another
list. A similar pop-up is displayed if a recording is in
progress or scheduled on this channel. If you choose
to remove the channel, then recordings in progress or
scheduled on this channel are stopped/cancelled.
Press OPT key to display the options available.
If you select the menu to reorder channels, the list of
“checked” channels of the selected favorites list is then
displayed.
and
to move in
To move a channel, use arrow keys
the list and press OK key to select a channel. The channel
is then highlighted.
Once the channel has been highlighted, use arrow keys
and to move it to the desired position. At each move the
channel is switched with the preceding or following one
and the channel number is updated.
When the channel is at the desired position, press OK key
again to save the change and remove the highlight on the
channel.
Press arrow key
instead of OK to cancel the move.
When exiting the menu (using left arrow , MENU or EXIT
keys), a pop-up is displayed so that you can re-confirm or
cancel the changes.
15.2.4 Re-scanning
If a scanning is done, all favorites lists are updated:
If a channel is removed from the service plan, this channel
is removed from all lists. If LCN is OFF, channels are
renumbered accordingly in all lists.
Use arrow keys
and
to navigate among the
options and press OK key to select one and execute the
If a channel is added to the service plan, then it is added in
“All TV” or “All Radio”, at the end of the list when LCN is OFF
EN
ZAS Hbb
42
and at the appropriate position when LCN is ON.
Favorites lists A to E are not cleaned, and moves done in
all lists are not reset.
15.3 Video & Audio
This menu allows you to set settings related to video and
audio.
Possible values depend on the screen capabilities.
“Automatic” (the adapter adapts to the native resolution of
the screen automatically) is set by default.
Once a value has been selected, the video output is
temporarily modified and a confirmation pop-up is
displayed. If you do not confirm the resolution after a few
seconds, the previous resolution is re-applied.
15.3.3 Scart video format
Use arrow keys
settings.
and
to navigate among the list of
This setting allows you to select the video output format
for the Scart connection.
Use arrow keys and to navigate among the values and
press OK to select one.
When the connection is made using a Scart cable, the
adapter can supply RGB or CVBS signals. By default, the
adapter is already configured to supply the CVBS signal, as
some TVs do not support the RGB output.
15.3.1 Screen ratio
However, for optimum image quality, it is recommended
to select the RGB option Possible values are: CVBS (default)
and RGB.
Press arrow key
to access possible values for a setting.
This setting allows you to select the ratio of the screen. This
setting, combined with the picture format setting and the
format of the stream played, is used to determine the final
output format.
Note: Scart resolution is always set to 720x576i.
15.3.4 Picture format
Possible values are: 16/9 (default), 4/3 and 14/9.
15.3.2 HDMI resolution
This setting allows you to select the video resolution on the
screen connected through HDMI.
In combination with the screen ratio, this setting
determines
the
final
video
output
format.
43
15.4 User preferences
This menu allows you to personalize some functions of
your adapter.
Use arrow keys
elements.
Press arrow key
and
to navigate among the menu
to access possible values for an element.
Use arrow keys and to navigate among the values and
press OK to select one.
Effects of possible values depend on the screen ratio and
format of the stream played:
Letter-box = Preserve the video aspect and add black
borders on top and bottom or on left and right sides, if
needed.
Pan & Scan = Preserve the video aspect and cut the video
on left and right sides or on top and bottom, if needed.
Zoom = Combination of letter-box and pan & scan.
Panoramic = Letter-box if the format of the stream is
larger than the screen ratio. If the screen ratio is larger
than the format of the stream, then a horizontal non
linear stretching is applied.
15.4.1 Menu language
Original (default) = Horizontal narrowing or stretching to
fit the screen.
This setting allows you to select the language of the
adapter interface and event information.
Note: If the screen ratio and the format of the stream are the
same, then this parameter has no impact.
Possible values are: English, French, Spanish, Italian, Polish,
German, Portuguese and Russian.
Note: Icons are the same whatever the screen ratio, and
represent the case “screen ratio is larger than the
format of the stream”.
15.3.5 Audio output
This setting allows you to select the audio output used.
Possible values are: HDMI (default) and S/PDIF.
15.4.2 Audio language
The audio language sub-menu allows you to access settings
for first preferred audio language, second preferred audio
language and special option for audio.
15.4.2.1 First preferred audio language
This setting allows you to select which audio track will be
used by default on a multi-track channel.
EN
ZAS Hbb
44
15.4.3 Subtitle language
The subtitle language sub-menu allows you to access
settings for first preferred subtitle language, second
preferred subtitle language and special option for subtitles.
15.4.3.1 First preferred subtitle language
This setting allows you to select which subtitle track will be
used by default.
Possible values are: English, French, Spanish, Italian, Polish,
German, Portuguese and Russian, plus regional languages
of the country, selected during first time installation, if
available, for example Catalan, Basque and Galician for
Spain.
Changes will be taken into account at next zapping.
15.4.2.2 Second preferred audio language
This setting allows you to select which audio track will
be used by default on a multi-track channel, if the first
preferred audio language is not present (typically used for
regional languages).
Available languages are the same than for first preferred
audio language.
Possible values are: None (default), English, French,
Spanish, Italian, Polish, German, Portuguese and Russian,
plus regional languages of the country, selected during
first time installation, if available.
Changes will be taken into account at next zapping.
15.4.2.3 Special option
15.4.3.2 Second preferred subtitle language
This setting allows you to select which audio type will be
used by default on a multi-track channel.
This setting allows you to select which subtitle track will be
used by default if the first preferred subtitle language is not
present (typically used for regional languages).
Possible values are: None (default) and audio description
for visual impaired.
Available languages are the same than for first preferred
subtitle language.
15.4.3.3 Special option
This setting allows you to select which type of subtitle will
be used by default.
Possible values are: None (default) and hard of hearing.
Note: The track selection in a multi-track channel is done in
the following priority order:
1) Track with 1st preferred audio language + special option.
2) Track with 2nd preferred audio language + special
option.
3) Track with 1st preferred audio language.
4) Track with 2nd preferred audio language.
5) First track.
Note: The track selection in a multi-track channel is done in
the following priority order:
1) Track with 1st preferred subtitle language + special
option.
45
2) Track with 2nd preferred subtitle language + special
option.
3) Track with 1st preferred subtitle language.
15.4.5 HbbTV
This setting allows you to enable (default) or disable the
HbbTV function.
4) Track with 2nd preferred subtitle language.
5) First track.
EN
15.4.4 Interface configuration
The interface configuration sub-menu allows you to access
banner display duration and menu positioning settings.
11.4.4.1 Banner display duration
This setting allows you to set the duration after which
banners (LiveTV, video, audio or photo) are closed
automatically without user’s interaction.
Possible values are: 1s, 2s, 4s, 8s (default) and 12s.
15.4.4.2 Menu positioning
This setting is used to fine-tune the position of the main
menu on the screen.
When the focus is on this setting, press OK key. A pop-up
is then displayed.
Use arrow keys , , and to adjust the position of the
menu and press OK key to confirm the new position.
The positioning area is limited to ± 90 pixels compared to
the factory position.
15.4.6 Low power consumption
This setting allows you to enable (default) or disable the
low power consumption function.
ZAS Hbb
46
15.5 Storage & Recording
Press OPT key to display the options available for a
connected slot.
This menu allows you to manage settings related to storage
devices and recordings.
and
to navigate among the
Use arrow keys
options and press OK key to select one and execute the
corresponding action.
Use arrow keys
elements.
Press arrow key
and
to navigate among the menu
Available options are:
to access possible values for an element.
Use arrow keys and to navigate among the values and
press OK to select one.
15.5.1 Storage
The storage sub-menu is used to get information and do
operations on storage devices. It contains the list of storage
slots available on the adapter.
Use arrow keys
storage slots.
and
to navigate among the list of
If the storage slot is connected to a storage device, the
following information is displayed:
The name of the storage slot with the total size of the
connected storage device.
A progress bar indicating the percentage of space used
on the storage device, with the exact percentage value.
If this slot is the default one. The default slot is the one
used for recording in case several storage devices are
connected.
In addition, the default slot is the one used for
timeshiting. If there is no device connected to this slot,
timeshifting function is not available.
Set the slot as default one (if this slot is not already
the default one). This change is taken into account at
next recording start or at timeshifting buffer reset.
After a factory reset, or when the adapter is used for the
first time, the internal disk is set as default. If there is no
internal disk on the adapter, the first front USB slot is set
as default.
Safely remove the storage device (if a storage device
is connected to the slot). This closes all accesses to the
storage device, so that you can unplug it without risk of
data corruption. If a recording, timeshifting, or reading of
media is in progress on this storage device, a pop-up is
displayed so that you can choose between going on the
action, and hence stop the recording, timeshifting, , or
reading of media, or cancel the action.
If you confirm the action while a reading of media is in
progress, a zapping is done to the live.
An information pop-up is displayed when all the accesses
are closed and the storage device can be unplugged
safely.
Format the storage device (if a storage device is
connected to the slot). If you execute this action, a
first pop-up is displayed asking for a password. If the
password is correct, a second pop-up is displayed asking
you to confirm the formatting.
If you confirm, a progression pop-up is displayed, that
closes automatically at the end of the formatting and is
replaced by a confirmation popup.
Note: If a recording is in progress on the storage device, an
additional confirmation popup is displayed before
starting formatting.
The storage device is formatted in ext3 format. This format
is more robust (than FAT32 or NTFS formats) to storage
device pull out, but requires the installation of an ext3
reader to be readable on Windows platforms.
Note: No action is allowed during the formatting.
47
15.5.2 Start padding
This setting allows you to set the duration of the margin
used before a schedule’s start date.
EN
15.5.5 Timeshifting
This setting allows you to set the timeshifting mode used.
Possible values are: None, 15min (default), 30min, 1h and
2h.
A scheduled recording (based on time or by event) starts at
the planned time minus the start padding.
If 2 recordings have their paddings that overlap, the
padding added (at the end for one recording and at the
beginning for the other one) will be half of the available
time between the recordings.
If there is no time available between 2 recordings, padding
will be set to 0.
Note: The start padding is automatically set to 0 if the
recording is scheduled during the padding timeframe.
For instance, if the start padding is set to 15 minutes
and the recording is scheduled to start in 10 minutes,
then the start padding is automatically set to 0 for this
recording.
15.5.3 End padding
This setting allows you to set the duration of the margin
used after a schedule’s end date.
Possible values are:
Disabled: timeshifting function is not available.
Manual (default): buffering starts only when you press
pause key .
Going back to live resets the timeshifting buffer.
Automatic: the programme is automatically buffered
(temporarily) on the storage device as soon as you zap
onto the channel.
Possible values are: None, 15min (default), 30min, 1h and
2h.
A scheduled recording (based on time or by event) stops at
the planned time plus the end padding.
15.6 Advanced Settings
This menu is protected by a password.
15.5.4 Default recording duration
This setting allows you to set the default duration for
recordings based on time.
Possible values are: 30min, 1h, 2h and 4h (default).
Once entered, use arrow keys
the menu elements.
Press arrow key
element.
and
to navigate among
to access to the screen related to an
ZAS Hbb
48
15.6.1 Parental control
Possible values depend on the country selected during first
time installation:
The parental control sub-menu allows you to access
lock event and lock channel settings and to change the
adapter’s password.
For France: None, -10, -12, -16 and -18 years old.
In case of locked channel, event or recording, the following
pop-up is displayed, audio and video are cut.
For the other countries: None and from -7 to -18 years old.
Use the numeric keys of the remote control to enter the
password. Use left arrow key to remove last digit entered.
If you enter the correct password, the pop-up closes and
audio and video are resumed.
The pop-up can be closed using the EXIT key. In this case a
new unlock option is then available in the LiveTV or video
banner, to display this pop-up again.
For Spain and Italy: None, -7, -13 and -18 years old.
For Portugal: None, -7, -10, -12 and -16 years old.
Note: In a stream, several age classification information can
be transmitted (one per country). If during the first time
installation, you have selected the country “Other”, the
most restrictive age classification of the stream is used.
Note: A recording (or the timeshifting buffer) can contain
several events with different age classification. During
the playback, the most restrictive age classification
encountered in this recording (or the timeshifting
buffer) applies.
Use arrow keys and to navigate among the values and
press OK to select one.
15.6.1.2 Lock channel
This setting allows you lock/unlock channels.
When a channel is locked, a password is requested to
watch it when you zap on it.
Note: If a transition from a locked to a not locked event
occurs while the pop-up is displayed, the pop-up is
automatically closed and video and audio are resumed.
15.6.1.1 Lock event
This setting allows you to select the limit over which an
event will be locked.
When a programme is transmitted with the age classification
information, the adapter requests the password if
the programme surpasses the selected limitation.
Note: The password is not required if you switch to
timeshifting mode.
Use arrow keys and to navigate among the channels
and press OK to lock/unlock one.
Locked channels are represented with a padlock.
A recording done on a locked channel is automatically
locked.
49
15.6.1.3 Change password
Note: Default password is “1 2 3 4”.
This screen allows you to change the password value. The
same unique password of 4 digits is used for all protected
actions with the adapter interface.
Use the numeric keys of the remote control to set the value.
Use left arrow key to remove last digit entered.
4 numeric fields IP, Mask, Gateway and DNS. Use arrow
keys , ,
and
to navigate in the fields and the
numeric keys of the remote control to set the values.
While setting a value, use left arrow key to remove last
digit entered, use arrow keys , and or OK key to
validate a value.
and
to move among the different
Use arrow keys
elements of the form, then confirm or cancel your changes
by pressing OK key on “Cancel” or “Confirm” buttons.
If the form is empty, by default the focus is positioned on
the check box. Otherwise it is on the “Cancel” button.
When the focus is on the check box, on the “Cancel” or
“Confirm” buttons, or on the numeric fields when they are
all empty, use left arrow key to go back to previous menu
without changes.
If DHCP is selected when you confirm, in case of success,
the fields IP, Mask, Gateway and DNS are updated with the
values allocated to the adapter, and you can go back to the
previous menu using the “Close” button or the left arrow
key.
Once you have entered the new password in the first
edition box, the focus is automatically set to the second
edition box to enter it a second time.
In case of error or invalid value (“0000” for instance) you can
choose to try again or to cancel.
If DHCP is not selected when you confirm, in case of
success, you go back automatically to the previous menu.
Note: This setting is not impacted by a factory reset.
15.6.3 Time zone
In case of success, a message is displayed indicating that
the password was changed with success, and you can go
back to the previous menu using the “Close” button or the
left arrow key.
This setting allows you to change the time zone specified
during first time installation.
Possible values are from GMT -12 to GMT +14. By default
the focus is on the offset corresponding to the current date.
Note: When both edition boxes are empty, pressing left arrow
key goes back to previous menu.
Note: As long as the password was not entered twice, you can
cancel the change by selecting the “Cancel” button.
15.6.2 Network configuration
This screen allows you to configure your internet
connection.
15.6.4 Channels search
Through this menu, you can execute a new scanning.
The sequence of screens (and the associated actions) is
similar to one displayed during the first time installation
(see “Installation Wizard” section).
The screen is a form made of the following elements:
A check box. Check it (using OK key) to specify that you
want to use DHCP (default). In this case, the other fields
(IP, Mask, Gateway and DNS) are not accessible anymore.
EN
ZAS Hbb
50
Channels are numbered incrementally and ordered by
order of discovery during the scanning.
If you disable the LCN for a country that supports the LCN,
channels are renumbered incrementally. Their order does
not change.
15.6.6 Upgrade
This menu is only displayed when a software upgrade, to
a higher version than the one currently installed on the
adapter, is available (on a connected USB device or through
IP, see “Software Ugrade” section).
In addition, once you have chosen the scanning filters, an
additional confirmation screen is displayed.
This screen is made of 2 buttons:
“Cancel” to cancel the scanning and keep your current
service plan (button selected by default when entering
the form).
“Confirm”, to confirm the scanning.
Use arrow keys and to choose a button and press OK
to select it and execute the corresponding action.
Use left arrow
key to go back to previous screen.
Once confirmed, the scanning starts as described in the
scanning phase of the Installation Wizard section.
During this new scanning, the service plan is updated, but
customizations that you did on favorites lists (see “Favorites
lists” section) or locked channels are not lost.
Note: Before starting a scanning, recordings in progress are
stopped. In addition, a scheduled recording planned to
start during the scanning, will fail.
This screen is made of 2 buttons:
“Confirm”, to confirm the upgrade.
“Cancel” to cancel the upgrade (button selected by
default when entering the form).
Use arrow keys and to choose a button and press OK
to select one and execute the corresponding action.
key to go back to previous menu
Use left arrow
(equivalent to selecting “Cancel” button).
15.6.7 Factory reset
15.6.5 Logical channel number
This setting allows you to enable or disable the logical
channel number (LCN).
This screen allows you to reset the settings to default
factory values. This action also clears the favorite lists and
cancels all schedules.
LCN is enabled by default for the countries that support it,
namely: France, Italy, Portugal, UK and Poland.
It is made of 2 buttons:
Channels are numbered and ordered according to the LCN.
For Germany, Spain, Russia and the country “Other” LCN is
not available and hence always disabled.
“Confirm”, to confirm the reset.
“Cancel” to cancel the reset (button selected by default
when entering the form).
51
Use arrow keys and to choose a button and press OK
to select one and execute the corresponding action.
key to go back to previous menu
Use left arrow
(equivalent to selecting “Cancel” button).
Once confirmed, the adapter reboots and the first time
installation procedure starts (see “Installation Wizard”
section).
15.7 Technical Information
states:
Error: Broadband link is down. Any feature involving
broadband access will fail.
Limited: Broadband link is up, but either the bandwidth is
low or high level protocol are unavailable. Some features
involving broadband access may fail.
Connected: Broadband link is up. All features involving
broadband access are available.
Note: The internet connection state is also displayed in the
notification area of the main menu (see “Main Menu”
section).
This menu allows viewing information on the adapter.
Use arrow keys
elements.
Press arrow key
an element.
and
to navigate among the menu
to access the information associated to
15.7.2 System information
This information panel displays versions of the hardware
and software components of the adapter: Manufacturer,
hardware model, hardware revision, bootloader version,
loader version, kernel version, firmware version, interface
version, MAC address and serial number.
15.7.1 Connections state
This information panel summarizes the state of the
broadcast (terrestrial) and broadband (internet)
connections.
For the terrestrial connection, a bar graph represents the
signal strength, with a percentage value.
The color represents the signal quality (green = good,
orange = medium, red = bad).
Below the bar graph, the name of the current channel is
displayed.
For the internet connection, the connection state is
represented by a bar graph and a text. There are 3 possible
15.7.3 Legal notices
This information panel gives an URL to the legal
information related to licenses and third party software
used by the adapter.
EN
ZAS Hbb
52
16. Software Ugrade
16.2 Through IP
An upgrade can also be available on a remote IP server.
16.1 Through USB
To upgrade the adapter, copy the new software version on
a USB key (formatted in FAT32, NTFS or ext3) and plug it in
one USB slot of the adapter.
A notification pop-up is displayed after a few seconds, so
that you can start the upgrade.
Select “Upgrade now” to start the upgrade.
The adapter checks the availability of such an upgrade 5
minutes after power on or when going out of low power
consumption, and then every 12 hours.
When an upgrade is available (corresponding to the
hardware model and the firmware version), as in the USB
key case, a popup is displayed so that you can chose to
start the upgrade now or later.
When you start an upgrade through IP, first the loader is
downloaded with HTTP and flashed in the adapter. Then
the firmware is downloaded and installed.
Note: HTTP download can take several minutes depending
on the bandwidth available on your internet access.
If you do not want to do the upgrade now, select “Upgrade
later” or wait for the pop-up to close automatically after a
few seconds.
In this case, an icon is displayed in the notification area
, indicating that a new version is
of the main menu
available for installation. This icon remains displayed as
long as the upgrade is not done and the USB key remains
plugged.
The upgrade can be started at any time through the
advanced settings (see “Upgrade” section).
Note: If several upgrades are available, only the most recent
one will be proposed.
53
Appendix A. Operating instructions
for Remote Control Unit
A. General Description
The remote has a RC5 STB level with a set of punch-through
key using a TV database.
8. Point the remote control towards your TV and press the
key. If your TV does not respond by going into StandBy mode then repeat steps 3 to 8 and enter the next code
in the list.
9. If your TV goes into Stand-By mode when the
key is pressed, then your remote control has found a
compatible code. Next test all of the other function
buttons. If certain functions are not working correctly
then restart the process moving on to the next code
number as this may well improve the situation.
10. If the codes in the list fail to operate your TV then next
move on to the automatic brand search function (see
below).
TV Database
The TV Database contains the following functions:
Standby (TV- POWER)
AV
C. Brand search
Volume +/Mute
If programming using the codes in the enclosed list failed
to work, then you can try the brand code scan.
Cursor navigation + OK (only in AV menu)
After pressing
key, the navigation keys / / and
(cursor) and OK are activated and will send also TV
commands. The “AV mode” is signalized by LED flashes. This
mode will be exit after 3 sec. of inactivity, after pressing OK
(to confirm the item chosen with the cursor keys) or any
other key.
2. Switch ON your TV SET.
3. Enter the programming mode.
4. After the 2 flashes enter the 3-digit code of the brand/
manufacturer. After entering the code the LED will flash
twice indicating that the code has been accepted.
5. Press and hold the
Programming Mode
To enter programming mode, press together
keys for 5 sec., until the TV LED lights twice.
1. Ensure that the remote control is equipped with 2 new
batteries (see step one of easy programming procedure).
and
The programmed code is retained during batteries change.
B. Easy programming for the control of your TV
SET
1. Insert 2 new 3 V batteries of type “AAA”.
2. Switch ON your TV SET.
3. In the enclosed code list, find your TV brand or
manufacturer (e.g. Sony).
4. Beside the manufacturer’s name, you will find one or
more 3-digit codes. These codes must be entered into
the remote to enable it to work with your particular TV
SET.
5. Enter the programming mode.
6. After seeing the 2 flashes and within 5 seconds, enter the
3-digit numerical code from the list.
7. After entering the code, the TV LED will flash twice
indicating that the code has been accepted, or will light
for 2 sec. in the case of a typing error.
key until your TV switches off.
During the brand code scanning you can release the
key and test other functions. If no key is pressed within
10 sec. then the brand search will be quitted and the
remote returns to the normal mode, signalising it by a 2
sec. long lighting of the red LED.
If your TV switches into Stand-By mode during the
automatic process, then immediately remove your finger
key and press the OK key to memorize the
from the
found table. The TV LED will flash twice to signalise that
the code has been stored.
6. In some cases, during the brand search, the remote
control might find several codes that appear to operate
your TV etc; however, some of the buttons will fail to
work properly. In this case the remote has found only a
partially compatible code and you will need to restart
the brand search process (steps 2. to 6.) until a better
code is found.
Please note that once the brand search is restarted, the
remote continues from the last saved code.
After all saved codes have been scanned, the LED flashes 5
times and the brand search quits.
EN
ZAS Hbb
54
D. 0 0 1 - All Code scan
E. 0 0 2 - Querying the stored 3-digit code
If programming using the codes in the enclosed list and
the brand search failed to work then you must next try the
automatic all code scan.
1. Enter the programming mode.
1. Ensure that the remote control is equipped with 2 new
batteries (see step one of easy programming procedure).
2. Switch ON your TV SET.
3. Enter the programming mode.
4. After seeing the 2 flashes and within 5 seconds, enter
the code 0 0 1. After entering the code the LED will flash
twice indicating that the code has been accepted.
5. Press and hold the
key until your TV switches off.
Please note that this process might take up to 10 minutes.
During the automatic scanning you can release the
key and test other functions. If no key is pressed within
10 sec. then the automatic code scan will be quitted and
the remote returns to the normal mode, signalising it by
a 2 sec. long lighting of the red LED.
If your TV switches into Stand-By mode during the
automatic process, then immediately remove your finger
from the
key and press the OK key to memorize the
found table. The red LED will flash twice to signalise that
the code has been stored.
6. In some cases, during the automatic scanning search, the
remote control might find several codes that appear to
operate your TV etc, however, some of the buttons will
fail to work properly. In this case the remote has found
only a partially compatible code and you will need to
restart the automatic scanning process (steps 2. to 5.)
until a better code is found.
Please note that once the automatic process is restarted,
the remote continues from the last saved code and not at
the beginning of code database.
After all saved codes have been scanned, the LED flashes 5
times and the automatic code scan quits.
Note: In Step 5: During the whole code scan procedure you
key up to 5 times in order to select
can press the
previous codes. This can be helpful if you have pressed
key by mistake or too long. Press the key to
the
search forwards again.
2. Using the number keys enter the 3-digit query code 0
0 2. The TV LED will flash twice to confirm the entered
code.
3. To query the currently saved code, press “1” for first digit,
“2” for second digit and “3” for third digit.
After each digit key has been pressed, count the number
of times the LED flashes. You can repeat the reading by
pressing “1”, “2”, or “3” until you are sure that you have the
correct code written down.
Note: If the LED does not flash, the respective code digit is 0.
Example:
Press key for hundreds. The LED flashes three times. The
first digit of your 3-digit code is thus 3.
Press key for tens. The LED flashes once. The second
digit of your 3-digit code is thus 1.
Press key for units. The LED flashes six times. The last
digit of your 3-digit code is thus 6.
In this example, the code is thus 316.
The programmed code will be retained during batteries
change.
F. 0 0 0 - Reset the RC
1. Enter the programming mode.
4. Using the number keys enter the 3-digit code 0 0 0. The
LED will flash twice to confirm the entered code.
The RC returns to the default settings (TV not programmed).
55
Appendix B. TV brand codes
Brand
A.R.Systems
Acer
Action
Ad notam
Admiral
Advent
Adyson
Aeg
Code
264, 270, 426, 430, 505, 523, 917
467, 871
137, 265, 426, 765
936, 937
137, 180, 270, 426, 903
331, 860
277, 426
395, 438, 482, 484, 485, 486, 502,
503, 516, 526, 531, 533, 887
Agath
654
AgfaPhoto
638, 723
Airis
616, 733, 779, 788, 831
Aiwa
152, 425, 426, 554, 562, 877
Akai
137, 370, 372, 383, 409, 418, 423,
424, 425, 426, 430, 438, 466, 467,
468, 482, 484, 489, 494, 596, 700,
717, 721, 763, 801, 927
Akira
425, 809, 810, 879
Akura
137, 270, 426, 466, 482
Alba
142, 270, 318, 320, 397, 418, 423,
424, 426, 431, 759, 824, 858,
890, 903
Albiral
426, 906
Allstar
426, 505
Alphatronics 601
Alphatronik 681
Altek
810
Altus
401, 438, 482, 483, 484, 518, 896
Amoi
845
Amstrad
137, 365, 628, 912
Andersson
468
Anitech
137, 270, 277, 426, 430, 505
Aoc
426, 798
Apro
786
Arc En Ciel
922, 926
Arcelik
401, 438, 482, 484, 488, 501, 896
Arctic
438, 482, 484
Arena
418, 438, 466, 482, 484
Aristona
395, 422, 426, 430, 456
Arthur-Martin 502, 503, 526, 531
Astra
137, 426, 438, 482, 484
Atec
329
Audiosonic 137, 270, 401, 425, 426, 438, 482,
483, 484
Aver Media 812
Bang &
425, 426, 565
Olufsen
Basic Line
140, 418, 423, 424, 426, 466, 482,
484, 485, 486, 689, 887, 890
Bauer
180, 272, 426, 929
Baur
137, 365, 425, 426, 430, 439, 487,
550, 561, 562, 695, 709
Baysonic
270
Beaulieu
426
Beko
398, 401, 418, 438, 442, 482, 483,
484, 486, 488, 489, 501, 502, 508,
512, 518, 725, 767, 768, 890, 893,
896, 927
Belson
396, 432, 466, 567, 599, 611, 644,
658, 721, 729, 772, 784, 810, 844,
862, 887
Benq
771
Bestar
137, 426
Blaupunkt
142, 426, 430, 459, 502, 503, 526,
531, 775, 922, 926, 929
Blue Sky
142, 357, 397, 418, 423, 424, 426,
432, 438, 444, 466, 468, 482, 484,
485, 486, 488, 516, 533, 779, 847,
887, 890, 896
Blusens
603, 604, 631, 633, 635, 636, 637,
666, 667, 668, 672, 680, 783, 854
Bosch
426, 503, 526, 531
Boxford
Brandt
Brandt
Electronique
Braun
Brionvega
Brother
Bruder
Bush
495, 500, 836
180, 357, 397, 425, 439, 466, 482,
518, 800, 922, 926, 927, 931, 932
922, 926, 931, 932
439, 493, 930
425, 426, 525, 909
270
530
142, 261, 266, 270, 320, 395, 398,
401, 418, 423, 424, 426, 431, 437,
438, 482, 484, 488, 824, 890, 896
Campomatic 706
Canon
426
Caratec
725
Casio
448, 505, 660
Centrum
401
Cge
137, 903
Changhong 699, 710, 779
Charisma
575
Charpy
739
Cie
137, 140, 628
Cinex
485, 486, 516, 533
Clarivox
426, 894, 899, 919
Clatronic
137, 426, 438, 482, 483, 484, 903
Claud
425
CMX/
608, 656, 777, 780, 781, 807
Commax
Combi
616
Computec
509
Condor
137, 426, 505, 903
Conia
482
Conic
426, 765
Conrac
896, 897
Constructa
430
Contec
137
Continental 142, 438, 482, 484
Continental 142, 922, 926, 931
Edison
Crosley
426, 765
Crosswood
418, 423, 424, 438, 482, 484, 518
Crown
137, 180, 401, 425, 426, 438, 444,
482, 484, 488, 508, 739, 779,
896, 906
Curtis
265, 426, 524, 690, 709, 903
Cybercom
401
Cyberpix
466
Daewoo
137, 140, 146, 147, 148, 150, 151,
152, 153, 395, 401, 426, 431,
434, 448, 482, 484, 501, 505, 786,
863, 940
Dalco
879, 880
Dangaard
629, 630, 638, 672, 673, 721,
810, 816
Dantax
397, 401, 438, 454, 482, 484
Davis
425
Daytek
865
Dce
418, 423, 424, 426, 438, 482, 484
Decca
426, 452, 516, 533, 911
Dell
883
Denon
158, 562, 743, 753, 872
Denver
137, 614, 630, 669, 674, 801
Diboss
504, 509
Digihome
397, 466
Digiline
430, 890
Digiloc
609, 710
Digital
401, 482
Digital+
401
Digitech
365, 418
DLD
738
Dmtech
397, 418, 423, 424, 466, 467, 470,
529, 624, 821
DQT
Dual
Dumont
Durabrand
Dynatron
DYNEX
Easy touch
Ecron
Elbe
Elbit
Electric
Mirror
Electrohome
Elekta
Elektronika
Elemis
Elfunk
Elin
Elite
Elmak
Elman
Elta
E-Max
Emerson
E-motion
Enox
Erres
Esc
Essentiel b
Eternity
Etron
Euroline
Europa
Europhon
Excelsior
Fenner
Ferguson
Finlandia
Finlux
First Line
Fisher
Force
Formenti
Frontech
Fujitsu
Fujitsu
Siemens
Funai
Galaxis
Galeria
Gbc
Gec
Geloso
643, 885
137, 365, 401, 425, 426, 431, 438,
440, 442, 444, 445, 455, 466, 482,
488, 824
903, 905
401, 418, 438, 466, 482, 484 ,488
832
838, 839
788
418, 423, 424, 444, 482
397, 401, 418, 423, 424, 426 ,430,
438, 466, 482, 485, 486, 501,
509, 516, 605, 618, 779, 835, 840,
865, 907
426, 447, 450
859
466, 690, 765
137, 270, 401
426, 442
418, 466, 516, 533
397, 418
137, 426, 505
265, 426, 690, 709
442, 454, 464, 887
905, 927
137, 426, 438, 482, 484
788, 865
418, 423, 424, 426, 438, 482 ,484,
485, 486, 832, 890, 919
774, 775, 779, 787
721
395, 422, 426, 430, 547, 931
137, 426
397, 405, 444, 466, 700, 721 ,802,
864, 887
774, 775, 865
137, 426
401, 418, 438, 448, 466, 482
,484, 816
438, 482, 484
426, 745, 905, 907
395
137, 401, 426, 438, 482, 484 ,890
163, 357, 361, 391, 393, 425, 426,
430, 433, 521, 550, 561 ,562, 695,
709, 715, 759, 760 ,765, 767, 768,
774, 820, 910 ,911, 926, 927, 929,
931, 932 ,935
689, 932
137, 370, 371, 372, 373, 375, 377,
379, 383, 385, 397, 418, 425,
426, 430, 438, 452, 466, 467, 482,
483, 484, 485, 516, 533, 868, 895,
903, 909
137, 140, 401, 418, 423, 424, 425,
426, 430, 438, 466, 482, 484, 505,
550, 689, 807, 890, 896
144, 562, 689, 690, 695, 900, 901
865
425, 426
137, 270, 932
217, 560, 896, 897
675
137, 270, 399, 401, 409, 418, 438,
466, 482, 484, 560, 639, 832,
833, 886
426, 903
137
137, 426
426, 430, 562, 765
137
EN
ZAS Hbb
56
General
Gericom
Goldhand
Goldstar
137, 502, 503, 526, 531, 879
328, 851, 896
137
135, 137, 142, 265, 270, 292, 425,
426, 427, 458, 482, 484, 491, 505,
507, 627, 675, 678, 679, 765, 908
Goldy
879
Goodmans
137, 140, 150, 152, 157, 261, 298,
316, 320, 357, 397, 401, 407, 418,
423, 424, 425, 426, 428, 430, 434,
438, 455, 466, 482, 484, 505, 517,
613, 625, 659, 717, 722, 790, 817,
865, 890, 896
Gpm
137
Graetz
397, 401, 418, 423, 424, 432, 438,
466, 467, 482, 483, 695
Gran Prix
516, 533, 803, 804, 805, 806
Granada
163, 180, 211, 375, 376, 383, 395,
425, 426, 430, 452, 456, 689,
690, 709, 753, 755, 759, 760, 763,
911, 932
Grandin
397, 401, 418, 423, 424, 438, 444,
466, 482, 484, 627, 835, 890, 896
Grundig
138, 142, 218, 219, 220, 221, 222,
223, 224, 318, 396, 401, 426, 430,
442, 444, 456, 469, 472, 482, 488,
501, 502, 503, 508, 513, 526, 531,
532, 564, 659, 662, 675, 824, 865,
887, 889, 929
Grunkel
418, 423, 424, 466, 779
H&B
418, 423, 424, 896
Haier
170, 267, 271, 276, 456, 664, 689,
782, 798, 809
Hannspree
685, 842
Hanseatic
137, 150, 152, 153, 425, 426, 431,
438, 442, 446, 482, 483, 505, 512,
908, 909
Hantarex
137, 425, 426, 720
Hb
401, 418, 482
Hb Ingelen
418, 423, 424, 484
Hcm
137, 270
Hinari
137, 426, 505
Hisawa
482
Hisense
807, 808
Hitachi
150, 152, 180, 370, 375, 397, 418,
423, 424, 426, 427, 431, 434, 441,
448, 452, 456, 459, 466, 467, 468,
695, 709, 742, 743, 745, 746, 747,
748, 749, 750, 751, 752, 753, 754,
755, 756, 757, 758, 759, 760, 761,
762, 763, 764, 765, 766, 767, 768,
769, 799, 870, 922, 931
Hitachi Fujian 743
Höher
401, 418, 423, 424, 444, 466, 468,
482, 484
Home
836, 887
Electronics
Horizont
426, 438, 482, 484
Hq
426
Humax
145, 792, 793, 794, 795, 796, 850
Hyper
137, 448
Hypson
137, 270, 426, 432, 438, 466, 482
Hyundai
149, 169, 267, 268, 397, 401, 438,
482, 484, 513, 810, 860, 866, 867,
879, 884, 887
Ice
137, 270, 426
Iekei
657
Ikusi
496
Imperial
425, 426, 513, 653, 702, 704, 903
Indesit
929
Infratex
269, 321, 426, 431, 873, 878, 887,
890, 898, 913, 917, 918
Ingelen
438, 482, 484, 835, 893
Ingersoll
137
Inno Hit
137, 425, 426, 432, 466
Insignia
566, 839
InterACTV
478
Interbay
Interbuy
Interfunk
Intertronic
Intervision
Ipure
Irradio
Iskra
Isp
Its
Itt
137
270, 277
425, 426, 430, 695, 903, 926
442
137, 270, 277, 430, 869, 908
600, 700, 725, 865
137, 401, 425, 426, 482, 484, 505
438, 482, 484
395
137
137, 180, 358, 370, 375, 383, 426,
438, 466, 467, 482, 484, 503, 526,
531, 689, 690, 695, 824, 895, 922
Itv
270, 505
Jdb
836
Jetpoint
265, 425, 426
John Lewis
649
Jvc
168, 182, 183, 184, 185, 186, 187,
188, 189, 190, 191, 425, 426, 675,
689, 690, 895
Karcher
137, 401, 425, 426, 505, 516,
533, 907
Kendo
137, 357, 358, 397, 409, 418, 423,
424, 426, 462, 466, 467, 482, 483,
484, 505, 824, 835, 909, 923
Kenmark
407, 789
Kenstar
650, 730
Kenwood
662, 670
Keymat
330, 652, 713, 740, 741
Kishu
810
Kneissel
140, 426, 434, 618, 835, 890, 899
Konka
156, 274, 874
KOPERNIKUS 443, 706
Kortek
853
Kotron
609
Kriminal
490
Forsorgen
KTC
862
Latona
850
Lavis
140, 426, 442, 444, 899
Lcd
626
Lenco
137, 138, 140, 155, 270, 426,
431, 482
Lenuss
296, 308
Level
814
Lg
444, 466, 482, 484, 491, 505, 506,
507, 627, 660, 662, 663, 670, 675,
676, 677, 678, 679, 683, 730, 916
Lifetec
137, 140, 270, 418, 423, 424, 426,
431, 438, 482, 505, 561, 890
Listo
397, 418, 466
Lodos
424
Loewe
211, 400, 415, 421, 425, 426, 439,
452, 453, 462, 481, 493, 890
Logik
426, 659, 665, 730, 820
Logix
775
Luma
137, 426
Lumatron
409, 418, 423, 424, 624, 809,
810, 890
Luxor
137, 370, 372, 375, 377, 379, 380,
385, 397, 418, 423, 424, 426, 432,
452, 466, 467, 499, 519, 895
M Electronics 137, 375, 377, 379, 383, 385,
426, 927
Magasin
466, 675, 676
Magnadyne 137, 425, 426, 448, 505, 903, 905
Magnafon
448, 905, 907
Magnasonic 180, 426, 505, 690
Magnavox
426, 430, 451, 765
Magnum
401, 438, 444, 482, 484, 485,
486, 528
Manhattan
397, 418, 423, 424, 466
Marantz
395, 420, 422, 426, 743
Mark
140, 418, 423, 424, 425, 426, 438,
482, 484, 896
Mascom
Matsui
516, 533
137, 142, 152, 261, 320, 322, 324,
326, 397, 418, 423, 424, 505,
560, 628, 659, 689, 715, 820, 824,
826, 828
Maxwell
896
Mcperson
517
Media Station 716
Media Tv
431
Medialine
938
Medion
370, 371, 401, 418, 423, 424, 426,
431, 438, 466, 482, 484, 485, 486,
505, 516, 518, 527, 621, 659, 717,
890, 896, 897
Melbox
894
Melectronic 375, 377, 378, 383, 438, 482, 484
Memorex
270, 520, 690
Memory
466
Metz
214, 336, 386, 387, 388, 389, 390,
418, 423, 424, 426, 467, 505, 593,
594, 595, 890, 896, 929
Micromaxx
418, 423, 424, 482, 887
Microspot
397, 714
Minerva
142, 220, 718
Minsonic
138
Mirage
482, 484
Mirai
553, 560, 620, 841
Mitsai
787
Mitsubishi
137, 160, 161, 162, 163, 164, 165,
418, 423, 424, 425, 426, 434, 456
Mivar
813, 891
Mtc
265, 425
Multichoice 472, 834, 882, 934
Multitech
137, 425, 426, 516
Mustek
733
Mx Onda
260, 490, 509, 616, 734
Naim
473
National
206, 426
Nec
137, 265, 328, 647, 648, 848,
849, 850
Neckermann 137, 184, 425, 426, 430, 431, 448,
454, 482, 484, 505, 547, 550, 561,
562, 824, 825
Nei
425, 426, 919
NEO
138, 141, 401, 438, 482, 484, 875,
876, 879, 888
Neovia
312, 515, 851
Nevir
656
Nikkai
270, 401, 426, 438, 482, 709
Nikkei
438, 482, 484, 650, 810
Nikko
505, 920
Nissan
265
Nobliko
905
Nokia
137, 261, 265, 270, 370, 372, 374,
375, 376, 377, 378, 379, 380, 382,
383, 384, 385, 426, 448, 689, 690,
695, 824, 895, 903
Nordmende 180, 326, 357, 401, 425, 427, 438,
482, 484, 652, 658, 730, 856, 922,
926, 927, 928, 931, 932
Northern Star 850, 852
Nova
426
Novox
623, 727
Oceanic
180, 375, 377, 379, 383, 385,
689, 690
ODYS
610, 612, 619, 656, 682, 723, 724,
725, 726, 736, 815, 837, 846,
938, 939
Okano
137, 902
Oki
397, 401, 418, 431, 466, 501, 508
Olympic
137
Olympus
426
Onkyo
314
Onn
401, 786
Onwa
825
57
Opera
Orbit
Orbitech
Orian
Orion
426, 436, 810
426
427
880
137, 158, 166, 169, 270, 275, 289,
317, 320, 321, 323, 324, 325, 326,
337, 401, 418, 423, 424, 425, 426,
430, 432, 448, 450, 454, 466, 482,
484, 485, 486, 561, 628, 659, 824,
825, 828, 865, 896, 921
Otake
325, 824, 825
Otava
457, 505, 522, 523
Others
418, 426, 788
Otrum
425
Otto Versand 137, 180, 211, 365, 425, 426, 430,
431, 439, 448, 454, 505, 547, 550,
561, 562, 695, 709, 824, 825, 908,
921, 927, 932
Ovp
497, 498
Pacific
326, 482, 484
Palladium
401, 409, 418, 423, 424, 425, 426,
438, 482, 516
Panasonic
205, 206, 207, 208, 209, 210, 211,
212, 213, 214, 215, 216, 397, 425,
426, 430, 562, 929
Panavision
438, 482, 484, 881
Pathe
922, 926
Marconi
Peacock
329, 624, 771
Philco
137, 426, 765, 899, 903
Philex
425
Philips
150, 180, 395, 399, 402, 403, 404,
407, 408, 412, 414, 417, 419, 420,
422, 425, 426, 427, 429, 430, 433,
442, 444, 456, 462, 463, 505, 510,
521, 539, 540, 541, 542, 543, 544,
545, 546, 547, 562, 709, 765, 798,
922, 927, 929, 931
Phocus
220, 401, 438, 482, 484, 488,
518, 896
Phonola
426, 430, 482, 484
Pioneer
211, 332, 333, 334, 335, 336, 338,
339, 425, 426, 430, 575, 576, 577,
578, 579, 580, 581, 582, 583, 584,
709, 931
PKS
442
Platinium
818
Playsonic
401, 418, 423, 424, 438, 482, 484,
488, 508
Powerpoint 426, 482, 809
Prandoni
505
Prince
Prima
137, 265, 270, 426, 690, 709
Princess
137, 401, 482, 484, 489
Pro Basic
827
Profectis
466
Profex
137
Profilo
474, 475, 485, 486, 516, 530,
533, 710
Profitronic
426, 505
Proline
152, 395, 397, 418, 423, 424, 432,
434, 438, 452, 466, 482, 484, 490,
534, 613, 642, 786, 789, 909
Promethean 686
Prosonic
397, 401, 418, 438, 466, 467, 482,
484, 488, 501, 502, 523, 630, 632,
638, 672, 673, 776, 778, 782, 810
Protek
466, 779
Proview
722
Provision
430, 482, 484, 505
Pye
422, 425, 426, 430, 456
Quadro
167, 397, 409, 418, 423, 424, 426,
442, 460, 466, 468, 788, 822, 892
Quelle
137, 184, 211, 365, 375, 377, 379,
383, 385, 409, 418, 422, 423, 424,
425, 426, 430, 439, 442, 448, 453,
454, 505, 547, 550, 561, 562, 628,
695, 709, 824, 825, 890, 901, 902,
932935
Radiola
395, 422, 425, 426, 430, 433,
456, 540
Radiomarelli 426
Radiotone
137, 270, 418, 423, 424, 426,
505, 890
Radix
695
Rca
265, 425, 570, 571
Record
134, 426, 444, 448
Red Star
516, 533
Reflexion
725
Regal
482, 484
Relisys
722
Rft
406, 416, 427, 431, 900
Roadstar
137, 270, 320, 401, 409, 418, 423,
424, 426, 430, 438, 444, 454, 482,
484, 488, 522, 896
Saba
154, 357, 358, 361, 393, 397, 418,
466, 482, 484, 518, 800, 905, 922,
926, 927, 931, 932, 933
Sagem
819, 829, 835
Saisho
425, 426, 628, 824
Sakio
137, 270
Salora
370, 371, 375, 377, 378, 379, 381,
383, 385, 426, 439, 444, 466, 467,
485, 486, 501, 516, 689, 690, 700,
725, 779, 887, 889, 895
Sambers
505, 905, 907
Samsung
137, 138, 143, 144, 174, 265, 270,
273, 291, 292, 293, 294, 295,
299, 300, 301, 302, 303, 304, 305,
306, 307, 309, 310, 311, 312, 313,
314, 315, 395, 413, 425, 426, 428,
465, 467, 487, 492, 505, 514, 521,
526, 535, 536, 537, 538, 548, 709,
779, 902
Sansui
137, 265, 270, 425, 426
Sanyo
137, 397, 418, 423, 424, 466, 468,
482, 484, 516, 533, 684, 687, 688,
689, 690, 691, 692, 693, 694, 695,
715, 900, 901
Scansonic
482, 567, 568
Schaub
401, 418, 423, 424, 438, 466, 467,
Lorenz
482, 483, 484, 501, 502, 508, 645,
700, 732, 809, 810, 896
Schneider
137, 261, 270, 365, 394, 395, 397,
418, 422, 423, 424, 425, 426, 430,
431, 433, 435, 436, 438, 441, 442,
443, 444, 448, 449, 451, 456, 466,
477, 482, 484, 485, 486, 504, 505,
509, 514, 515, 516, 528, 533,
540, 890
Scientific
426, 485
Labs
Scott
466, 602, 655, 674, 864
Sea
466
Sec
261
Seg
137, 270, 397, 409, 418, 423, 424,
426, 431, 432, 437, 466, 476, 482,
501, 561, 725, 813, 890, 900
Seleco
426, 430, 478, 909, 914, 922, 923,
932, 934
Sencor
401, 502, 700, 810
Sentra
709
Sharp
171, 172, 173, 174, 175, 176, 177,
178, 179, 180, 181, 426, 430, 466,
583, 697, 709, 758, 768, 798, 799,
927, 932
Shintom
505
Shintoshi
505
Shivaki
134, 401, 425, 426, 505
Siarem
905
Siemens
426, 447, 455, 456, 516, 533, 547,
760, 919, 922, 926
Siera
Sierra
Silva
Schneider
426, 444
426, 430, 444
137, 418, 426, 431, 444, 451, 466,
474, 475, 485, 486, 501, 504, 505,
509, 516, 530, 533, 607, 615, 700,
701, 710, 725, 732, 782, 803, 805,
806, 887, 889
SilverCrest
397, 418, 432, 466
Singer
137, 425, 426, 905
Sinudyne
326, 401, 425, 426, 427, 448, 450,
452, 454, 482, 484, 518, 562, 628,
824, 887, 905, 907, 921
Sky
272, 331, 617, 641, 659, 843, 865
Sky Media
272, 328, 331, 597, 598, 617, 622,
641, 651, 659, 714, 725, 730,
773, 774, 775, 783, 785, 787, 791,
823, 865
Skyworth
180
Smaragd
142
Sogo
438, 482, 484, 485, 486
Sole
139
SONiX
712, 865
Sonolor
689, 690
Sontec
426
Sony
158, 159, 180, 211, 332, 426, 430,
466, 547, 548, 549, 550, 551, 552,
554, 555, 556, 557, 558, 559, 560,
561, 562, 563, 708, 709, 931
Soundcolor 401, 418, 438, 482, 484, 516, 518,
533, 896
Spectra
140
Splash Vision 797
Star
267, 401, 426, 521, 822, 879
Star General 880
Starlite
137, 505
Starlux
137
Strato
270, 401, 810
Sungoo
718
Sunkai
438, 482, 484, 628, 824
Sunny
779
Sunstar
137
Sunstech
638
Supertech
137, 426, 448
Supratech
606, 725, 731, 735, 737, 738,
826, 855
Sweex
596, 621, 725
Swisstec
272, 328, 331, 482, 617, 622, 634,
640, 641, 651, 659, 705, 714, 730,
783, 785, 787, 791, 823, 842, 843,
851, 861, 865
Sylvania
426, 832
Symphonic 832
Tadistar
505
Tandberg
418, 728, 926
Targa
314
Tatung
142, 297, 395, 425, 426, 452, 454,
493, 500, 516, 519, 523, 533,
768, 911
Tauras
701
TCL
360, 466, 572
Tcm
401, 483
Teac
432, 598
Tec
137, 140, 919
Techline
397, 409, 418, 466, 501
Technica
265, 418, 423, 424, 466, 485,
486, 887
Technical
397, 418, 432, 466
Technics
206, 211, 425, 426, 550
Technika
397, 418, 466, 597, 598, 634, 773,
774, 775, 785, 787, 940
Technisat
406, 410, 416, 426, 427, 430,
887, 915
Technisson
438, 482, 484, 488
Technosonic 426
Technotrend 426, 861
EN
ZAS Hbb
58
Techwood
Tecnimagen
Tecnison
Teco
Tekon
Teleavia
Teleco
Telefunken
Teleopta
Telerent
Telestar
Telesystem
Teletech
Teleview
Telra
Tensai
TERRA
Tesco
Tesla
Tevion
Thomson
177, 265, 396, 397, 418, 423, 424,
432, 466, 467
422, 426, 444, 482
137, 505
725
137, 265
922, 926, 927, 929, 931
479
357, 383, 392, 393, 397, 399, 411,
418, 426, 466, 467, 474, 475, 482,
484, 518, 800, 896, 922, 924, 925,
926, 927, 928, 929, 931, 932, 935
137
425
137, 427, 485, 516, 533, 926
401
137, 397, 418, 423, 424, 466, 467,
534, 890
485, 486, 516, 533
516, 533
137, 425, 426, 482, 484, 489, 505,
518, 896, 908
399, 664, 770
774
401, 426, 438, 480, 482, 484, 488,
505, 518, 887
397, 401, 418, 423, 424, 431, 438,
482, 484, 488, 516, 533, 651, 717,
774, 775, 810, 847, 850, 890
150, 152, 153, 154, 180, 356, 357,
358, 359, 360, 361, 362, 363, 364,
393, 435, 436, 482, 515, 518, 572,
652, 658, 730, 785, 800, 910, 922,
925, 926, 927, 929, 931, 932, 935
Thorn
163, 262, 425, 426, 433, 521, 562,
694, 695, 709, 715, 760, 765, 910,
926, 927, 929, 931, 932, 933
Time
401
Tokai
397, 422, 426
Tokyo
143, 265
Toshiba
137, 152, 211, 220, 265, 292, 318,
319, 320, 401, 418, 423, 424, 425,
426, 430, 466, 482, 484, 690, 695,
696, 697, 698, 703, 707, 708, 709,
711, 715, 719, 743
Triax
359, 516
Trilux
395, 426, 434, 700, 890
TWF
810, 847
Uher
425, 426, 561
Ultravox
426
UMC
328, 597, 598, 617, 622, 634, 659,
714, 725, 730, 773, 774, 775, 783,
785, 787
United
320, 397, 401, 418, 438, 442, 466,
482, 483, 484, 488, 621, 629, 630,
638, 672, 673, 721, 810, 896
UnityDigitalTV 312
Universum
137, 270, 371, 373, 383, 409, 418,
423, 424, 425, 426, 430, 437,
442, 466, 505, 560, 561, 562, 890,
903, 926
Vanguard
137, 466
Veseg
397, 466
Vestel
395, 397, 409, 418, 423, 424, 426,
432, 437, 466, 467, 468, 476,
709, 890
Videoseven 560, 865
Videoton
466, 903, 924, 931
Viewpia
ViewSonic
Vision
Vision Plus
Visual
Innovations
VIVAX
Jvc
Lg
Loewe
Medion
Metz
Mitsubishi
Nokia-Salora
Orion
Panasonic
Philips
Pioneer
Proline
Prosonic
Samsung
Sanyo
Schneider
Seg
Sharp
Sony
Swisstec
Tatung
Telefunken
Thomson
Toshiba
860
327, 425, 830
137, 482, 484
774, 787
787
401, 511, 513, 518, 706, 710, 732,
739, 811
661, 671, 857
657
426
461, 466
401, 426, 438, 482, 484, 505
397, 418, 423, 424, 466
137, 409, 418, 423, 424, 426, 438,
448, 466, 482, 484, 641, 717, 890
Wattradio
505, 903, 905, 907
Welltech
482, 484
Wharfedale 397, 401
White
415, 418, 423, 424, 425, 426, 447,
Westinghouse 690, 903
Wilson
779
Windsor
397, 418, 423, 424, 466, 890, 927
World Of
290, 328, 482
Vision
Yalos
847
Yamaha
709, 744, 753, 757
Yoko
137, 140, 270, 426, 448, 466, 689,
690, 926
Zanussi
466, 660
Zenith
426, 569
Vizio
Vogells
Vortec
VOX
Voxson
Waltham
Watson
Appendix C. Brand Codes
Brand
Akai
Beko-Grundig
Belson
Blaupunkt
Daewoo
Ferguson
Finlux-Vestel
First Line
Goodmans
Hitachi
Hyundai
Brand Nr.
066
080
053
050
060
070
075
067
074
081
054
055
058
051
063
057
067
076
077
056
078
061
072
059
079
064
082
072
062
068
065
052
069
073
071
59
EN
ZAS Hbb
60
Troubleshooting
Before contacting your local technical service, make sure you follow the following instructions.
If your adapter stops working correctly after reading the list of possible solutions, please contact your local distributor or
technical service.
Problem
Possible causes
What to do
The LED front panel
does not light up.
(I) Power cable not connected.
(I) Check that the current adapter is plugged in
and connected to the adapter.
The LED is red.
(I) The adapter is in stand-by mode.
(I) Press the ( ) key on the remote control to
switch on the adapter.
The remote control
does not work.
(I) Battery exhausted.
(I) Check the battery status
(II) The remote control is not pointing
towards the adapter
(II) Aim the remote control towards the adapter.
(I) Your antenna is not connected
correctly.
(I) Ensure that your antenna is connected to the
antenna correctly.
(II) Your antenna installation may not
be adequate for receiving digital
channels.
(II) Consult with your installer about the
possibility of receiving digital channels.
When the adapter is
installed for the fir st
time, the message
“No channels found”
appear or some of
the channels do not
appear on the list of
channels.
(III) Check with your installer that
digital channels are being
transmitted in your area.
(IV) The antenna is not receiving power
from the mains.
There is no picture.
(I) The adapter is switched off.
(II) The HDMI and/or SCART cables are
not connected securely.
(III) The antenna is not connected to
the adapter.
(III) Check there are no obstacles between the
adapter and the remote control.
(III) Digital channels are not transmitted in your
area.
(IV) Connect a power supply between the
external antenna or amplifier and the
adapter.
(I) Press the button on the remote control to
switch on the adapter.
(II) Ensure the correct and secure connection of
all cables of equipment connected.
(III) Check if the adapter is connected to the
adapter.
You have moved your
adapter to a different
house and you cannot
view the digital
channels.
(I) The antenna at the new location is
aimed at another booster station.
(I) Carry out a new search (see section 11.5. Channel search)
(II) The antenna in the new house may
not be suitable for receiving digital
channels.
(II) Consult with your installer about the type of
antenna necessary.
The image is
interrupted and
appears in blocks
(pixels)
(I) If your installation is too complex,
there is a chance the signal power is
insufficient.
(II) Some objects such as trees,
buildings or traffic can affect the
quality of the signal.
(I) Try to connect your adapter as simply as
possible (adapter + TV) connecting the
antenna directly to your adapter. If the image
is not interrupted then your signal does not
have sufficient power to use such a complex
installation. Consult with your installer.
(III) Damaged connectors and cables
can affect the quality of the signal.
(II) You need to adequate you’re your antenna.
Consult with your installer.
(IV) If the interruption is temporary
but repeats often, there could
be interference caused by other
appliances in the house.
(III) Change the cable connectors.
(IV) Consult with a qualified electrician.
61
Problem
Possible causes
What to do
There is no sound or
the sound is very low.
(I) The volume of your TV and/or
adapter is very low or on minimum.
(I) Check the volume of your TV and/or adapter.
(II) Your TV and/or adapter is on Mute
mode.
(III) Ensure you connect the cables of
all connected equipment correctly
and securely.
(II) Press the Mute button on your TV and/or
adapter
(III) The SCART connector is not connected
securely.
EN
The image sometimes
appears distorted
or appears blurred
towards the sides.
(I) Screen format configured as 4.3.
If it is transmitting a programme
in 16.9 some televisions lose
synchronisation.
(I) Change the screen format to Letterbox or Pan
& Scan with the the output menu.
The image appears in
pixels (as in blocks)
every few seconds.
(I) You have the amplifier antenna
connected to the power supply
when it is not necessary and it
saturates the signal.
(I) Connect the antenna directly to the adapter.
ZAS Hbb
62
Technical Characteristics
Synchronization and channel
Input connector . . . . . . . . . . . . . . . . . . . . . .
Output connector . . . . . . . . . . . . . . . . . . . .
Input frequency . . . . . . . . . . . . . . . . . . . . . .
Frequency input link . . . . . . . . . . . . . . . . . .
Signal level . . . . . . . . . . . . . . . . . . . . . . . . . . .
Input impedance . . . . . . . . . . . . . . . . . . . . .
RF channel bandwidth . . . . . . . . . . . . . . . .
Demodulation . . . . . . . . . . . . . . . . . . . . . . . .
Transmission mode . . . . . . . . . . . . . . . . . . .
Constellations . . . . . . . . . . . . . . . . . . . . . . . . .
FEC . . . . . . . . . . . . . . . . . . . . . . . . . . . . . . . . . . .
Stand-by interval . . . . . . . . . . . . . . . . . . . . .
Digital video
Compatible with . . . . . . . . . . . . . . . . . . . . . .
Profile and level . . . . . . . . . . . . . . . . . . . . . .
Video bit Rate . . . . . . . . . . . . . . . . . . . . . . . .
Image format . . . . . . . . . . . . . . . . . . . . . . . . .
Video resolution . . . . . . . . . . . . . . . . . . . . . .
1 x CEI (female)
1 x CEI (male)
174 MHz to 862 MHz
147 MHz to 862 MHz
45 to 90 dBμV
75 Ohm
7/8 MHz
COFDM
2K FFT, 8K FFT
16QAM, 64QAM
1/2, 2/3, 3/4, 5/6, 7/8
1/4, 1/8, 1/16, 1/32
MPEG-2 and MPEG-4/H.264
MPEG-2 MP@HL, MPEG-4.2 ASP@L5, MPEG-4.10 (H.264) BP@L3, [email protected]
and [email protected]
40 Mbit/s Max.
4:3, 16:9
1080p, 1080i, 720p, 576p, 576i
Audio
Audio decoder . . . . . . . . . . . . . . . . . . . . . . . .
MPEG-1 Layers I, II and III, AAC, HE-AAC, Dolby Digital, Dolby Digital+
Teletext . . . . . . . . . . . . . . . . . . . . . . . . . . . . . . . . . .
Compatible with DVB
Memory
Flash Memory . . . . . . . . . . . . . . . . . . . . . . . .
RAM . . . . . . . . . . . . . . . . . . . . . . . . . . . . . . . . . .
4Gbit NAND Flash
2 x 2Gbit DDR2 SDRAM
Input/output A/V
Scart TV x 1:
- Video output RGB . . . . . . . . . . . . . . . . . . . .
- Video output CVBS . . . . . . . . . . . . . . . . . .
- Analogical audio output . . . . . . . . . . . . .
Optical . . . . . . . . . . . . . . . . . . . . . . . . . . . . . . . .
HDMI . . . . . . . . . . . . . . . . . . . . . . . . . . . . . . . . .
LAN . . . . . . . . . . . . . . . . . . . . . . . . . . . . . . . . . .
1 x socket Scart TV
1 x socket Scart TV
1 x socket Scart TV
Optical (TOSLINK)
Digital Video/Audio output
1 Gbit Ethernet - RJ45
Multimedia format
Video . . . . . . . . . . . . . . . . . . . . . . . . . . . . . . . .
Audio . . . . . . . . . . . . . . . . . . . . . . . . . . . . . . . .
Photo . . . . . . . . . . . . . . . . . . . . . . . . . . . . . . . .
MP4, MKV, AVI, MPEG, TS
MP3
JPEG
Power supply
Input voltage . . . . . . . . . . . . . . . . . . . . . . . . .
Type . . . . . . . . . . . . . . . . . . . . . . . . . . . . . . . . .
Max electrical consumption . . . . . . . . . . .
Max Stand-by consumption . . . . . . . . . . .
12 V. DC
AC adapter (230 V, 50/60 Hz.)
480 mA
80 mA
Physical specifications
Dimensions (L x H x D) . . . . . . . . . . . . . . . . .
Approx weight . . . . . . . . . . . . . . . . . . . . . . . .
180 mm x 29 mm x 130 mm
300 gms
Environmental specifications
Operating temperature range . . . . . . . . .
From -5ºC to 45ºC
63
EN
ZAS Hbb
64
Dolby and the double D symbols are registered trademarks of Dolby
Laboratories.
Manufactured under license from Dolby Laboratories.
The acronym HDMI, the HDMI logo and High Definition Multimedia
Interface are trademarks of HDMI Licensing LLC.
Treatment of electrical and electronic equipment at the end of
its useful life (applicable in the European Union and European
countries with selective residual collection systems).
This symbol on the equipment or packaging indicates that this
product may not be treated as conventional household waste, but
may be delivered to the corresponding collection point for electrical
and electronic equipment. Please ensure that this product is disposed
of correctly. This way you will be helping to protect the environment
and avoid the negative effects on human health and safety that could
derive from inappropriate handling of this product. Recycling materials
helps preserve natural resources. To receive detailed information on
recycling this product, please contact your local authorities, your
nearest collection point or the distributor where you purchased this
product.
Guarantee
Televés S.A. offers a two year guarantee from the date of purchase for
EU countries. In non EU member countries legal guarantee is currently
in force at the time of purchase. Please keep the receipt to determine
this date.
Televés S.A. under the terms of this guarantee undertakes to repair or
substitute any defective equipment.
Damage caused by incorrect use, wear and tear, third party handling,
catastrophes or any other cause out of the control of Televés S.A.
65
EN
ZAS Hbb
66
67
EN
511501_000_EN