1
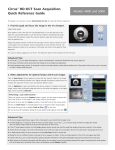
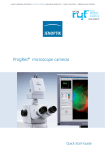
flij~ëíÉê=RMM=J=nìáÅâ=áåëíêìÅíáçåë=
WARNING - GENERAL HAZARDS
These quick instructions are intended as an overview. Instructions for the safe operation of the instrument are to be found in the user manual.
)
Always perform measurements in the correct sequence! All device measurements must be performed before any undertaking any measurements
involving direct contact with the eye.
Checking the calibration
•
•
•
Always check the calibration daily before carrying out measurements on patients!
•
If the measured values are not within the tolerance range given on the test eye, remove the device from service
and contact the Carl Zeiss service department.
Use the test eye (ensure that the test eye is clean).
Now carry out the measurements on the test eye. The measuring results from the check of measurement functions
are saved under patient name !CHECK,DEVICE!. The test eye is ideally suited to practicing operating the IOLMaster.
Useful button functions
<N> key: creates a new patient.
<A> key: activates DUAL measurement mode
<D> key: activates anterior chamber depth measurement mode
<M> key: switches between automatic and manual measurement
<K> key: switches between dual, axis length and keratometer measurement modes
... further short cuts can be found in the user manual.
New patient | <N>
•
A new patient can be entered manually. Enter the patient's name and date of birth, separated by points (.). The year of birth should
consist of 4 figures, e.g. 07.03.1965 (7 March 1965).
•
An existing data record can also be selected from the patient list. The ultrasound tab is used for importing and exporting ultrasound and
patient data (only with Sonolink option).
•
After entering the data, use the navigation bar or the <Enter> key to change to the Overview mode.
Overview mode | <O>
•
Ask the patient whether she/he can see the fixation lamp. Ask the patient to look straight into the yellow light and blink,
then to open his/her eyes as wide as possible.
•
Center the 6 illumination LEDs around the pupil (Fig. 1). A traffic light display serves as a quick and simple method
of obtaining the optimum measurement setting. When the optimum measurement position has been reached,
the traffic light will change from red to yellow to green.
•
If Automatic is activated, measurement will start automatically using the optimum settings and change to
Dual measurement mode.
•
If the automatic measuring function has not been activated, press the joystick button, the <A> button or the <space bar> or click on the
Dual icon in the navigation bar to change to Dual measurement mode for axial length and keratometry.
Fig. 1
Automatic dual measurement mode (Twin technology) | <A>
•
The IOLMaster 500 is equipped with the latest twin technology which combines measurement of the axis length and corneal curvature.
This is referred to as Dual measurement mode.
•
If Automatic is activated, the measurement will start automatically using the optimum settings and change to Dual measurement mode
(the eye is measured and the anterior chamber depth shown as the next step).
•
In some cases it may be necessary to measure the axis length manually. To do this, press the <M> key. The Automatic display will
disappear. It is also possible to deactivate automatic measurement on the Settings - Measurement tab.
Keratometer (corneal curvature) measurement
•
Cyclic change of the measurement modes Dual, Axial length measurement and Keratometer measurement is possible by clicking on
the <K> key if Automatic is deactivated. Select Keratometer measurement mode.
•
Focus the eye so that all six peripheral measurement points are shown sharply in the display. Trigger the measurement by pressing the
button on the joystick.
•
Three consecutive measurements of the corneal curvature are taken automatically.
Keratometer measurements may be repeated as often as desired; however, only the mean value of
the last three measurements will be displayed.
•
If a measurement point is not correctly identified, a blue flashing dot will appear. A further
measurement should be taken as a precaution. (Fig. 2).
•
Fig. 2
If the system detects any measurement errors (e.g. deviations within the last three measurements), "Evaluation" appears in the display. In
this case, check the tear film of the eye being examined and repeat the measurements until the results are within the tolerances.
flij~ëíÉê=RMM=J=nìáÅâ=áåëíêìÅíáçåë=
Axial length measurement
•
Cyclic change of the measurement modes Dual, Axial length measurement and Keratometer measurement
is possible by clicking on the <K> key if Automatic is deactivated. Select Axial length measurement mode.
•
Ask the patient to focus on the fixation light and check the tear film of the eye (in case of doubt, ask the patient
to blink). Then trigger the measurement using the joystick.
•
Five individual measurements of the axis length are made. The overall evaluation curve (blue) is calculated from
this and displayed (Fig. 3). If no axial length can be determined after the first five single measurements, further
measurements will be required.
•
With stronger lens opacities, it may be advisable to defocus the instrument. In this case it is useful to select an area
within the circular mark with less clouding (segments 3 and 4 in Fig. 4).
•
The Signal-Noise-Ratio (SNR) is shown alongside the overall evaluation curve (blue). This value is a gauge of
the quality of measurement (Fig. 5).
•
If the overall evaluation curve has multiple peaks, it may be advisable to carry out post-processing.
Use the left mouse button for automatic positioning above a removed peak. Using the right mouse button
you can dispense with automatic determining of the peak and position the measurement cursor manually
(always use the zoomed view for this).
Fig. 3
Fig. 4
Fig. 5
Measurement of anterior chamber depth <D>
•
Ask the patient to look straight into the yellow light. Inform the patient that a white light will be introduced from the side, but that she/he
should continue to look at the yellow light only.
•
The best measurement results will be obtained with dilated pupils and minimum possible reflection from other light sources (darkened
room).
•
As a rule, the image of the fixation point should lie between the images of the cornea and the crystalline lens. In Automatic mode the
measurement is triggered as soon as the optimum measurement adjustment (green traffic light) has been achieved. In manual mode
trigger the measurement by pressing the button on the joystick.
•
Clicking on Video help will play a video showing the steps required to set the optimum measurement position
Determination of "white-to-white" | <W>
•
•
Ask the patient to look straight into the yellow light, blink, then open his/her eyes as wide as possible.
•
•
Start the measurement by pressing the joystick button.
Align the instrument so that the six peripheral light spots are symmetrical to the cross hairs and the iris structure or
the edge of the pupil appears optimally focused. The image of the central fixation point will not generally be at
the center of the pupil and iris.
Check the position of the marked edges of the iris. Repeat the measurement if required. The measurements
are not valid and cannot be edited until they have been confirmed by clicking on OK (Fig. 6).
Fig. 6
Measuring the other eye
•
•
The system automatically registers when the device is positioned in front of the other eye.
After each change of side, the Overview mode is automatically activated. Measurements of the other eye must be performed analogously to
the previous eye.
Shut-down | <E>
•
•
•
)
When all measurements have been completed, exit the program by clicking on the Exit icon or pressing <E>.
Then confirm by clicking on OK or pressing <Enter>. The readings for the last patient will be saved automatically.
Switch the instrument off at the power switch. The instrument may not be switched on again until the switch light goes off.
Give us the benefit of your experience with the IOLMaster 500!
News and regular updates from the independent User Group for Laser Interference Biometry can be found at:
•
•
www.augenklinik.uni-wuerzburg.de/ulib
www.iolmaster-online.com
000000-1692-983-KurzGA01-GB-230611
IOLMaster 500
© Carl Zeiss Meditec AG, Jena
Specifications subject to change
Carl Zeiss Meditec AG
Goeschwitzer Str. 51-52
07745 Jena
Germany
Phone:
Fax
Email:
Internet:
+49 3641 220 333
+49 3641 220 112
[email protected]
www.meditec.zeiss.com