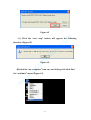
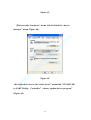
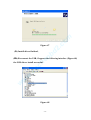
1
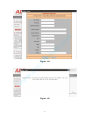
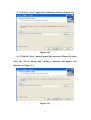
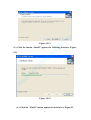
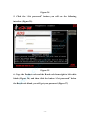
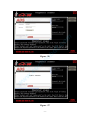
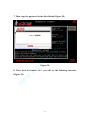
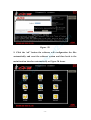
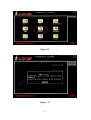
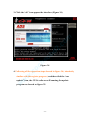
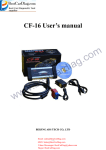
w
w
w
.c
oc
he
ob
d2
.
co
m
CF-16 User’s manual
BEIJING ADS TECH CO, .LTD
-1-
1、
、How to become a member .............................................................- 3 2、
、How to install the software............................................................- 6 3、
、How to active the software ..........................................................- 13 4、
、How to update the software ........................................................- 20 -
w
w
w
.c
oc
he
ob
d2
.
co
m
5、
、How to kill the FAQ .....................................................................- 24 -
-2-
1、
、How to become a member
Dear Sir or Madam:
Before you use CF-16 diagnostic your car, you should become our
member firstly, we designed the software like this just for fighting
the copy products and safeguard your legal rights.
You can
co
m
become our esteemed user member as the following steps.
ob
d2
.
Step 1: Please visit our official website at www.adsscan.com you will
w
w
w
.c
oc
he
see the following the interface. (Figure 01)
Figure-01
Step 2: Click the English language to visit the English version of our
official website. (Figure 02)
-3-
co
m
ob
d2
.
Figure -02
Step 3: If it is the first time for you to use this product you should
register to be our member firstly in the user area.(Figure
oc
he
03),click the “register” button you will enter the following
interface(Figure 04), fill in all the needed information and
w
w
w
05.
.c
click the “continue” button you will see the interface as figure
Figure -03
-4-
co
m
ob
d2
.
oc
he
w
w
w
.c
Figure -04
Figure -05
-5-
2、
、How to install the software
You can install the CF-16 software in two ways, by CD or download it
co
m
use your member ID from our official website at www.adsscan.com
(1) By CD
ob
d2
.
Inset the CD into your PC and running it you will see the following
interface (Figure 06), click “setup” icon appear the interface
oc
he
(Figure 07)
w
w
w
.c
Figure -06
Figure -07
-6-
ob
d2
.
co
m
(3.) Click the “Next” appear the following interface (Figure 08)
Figure -08
oc
he
(4.) Click the “Next” button appear the interface (Figure 09), then
click the “Next” button and waiting a moment will appear the
w
w
w
.c
interface as Figure 9-1.
Figure -09
-7-
co
m
ob
d2
.
Figure -09-1
(5.) Click the button “Install” appear the following interface (Figure
w
w
w
.c
oc
he
9-2)
Figure -09-2
(6.) Click the “Finish” button appear the interface as Figure 11.
-8-
co
m
ob
d2
.
Figure -10
(6.) Click the button “install” as the following picture shows
Figure-11
w
w
w
.c
oc
he
(Figure 11), then will appear the interface as Figure 12 shows
Figure-12
Click the button “OK”, the whole install progress finished and on
your PC desktop will add three function icons, as Figure 13 shows
-9-
ob
d2
.
Through the three function icons you can:
co
m
Figure-13
Open the diagnostic software directly
Visit our official website
oc
he
Install the CF-16 USB driver
2. Download the software from internet
(1.) Visit our website at www.adsscan.com and choose the English
w
w
w
.c
language (Figure 14) appear the interface as Picture 15 shows.
Figure -14
- 10 -
co
m
Figure -15
ob
d2
.
(4.) Login in use you member ID in the user’s area as Figure 16
shows, if you are not the member please register to be a
w
w
w
.c
oc
he
member firstly and do the similar operations.
Figure -16
(5.) Login in use your ID member you will enter into the interface
(Figure 17), click the “download install software” enter into
software list interface as shows as Figure 18 (if you are not a
member or forget your member ID please become a member or
re-register to be a new member firstly)
- 11 -
co
m
Figure -18
w
.c
oc
he
ob
d2
.
Figure -17
w
(6.) Choose the right software and download it to your PC
w
(Figure-19) and the after progress is similar with the install
progress by CD.
Figure -19
- 12 -
3、
、How to active the software
1. Double click the software icon on you desktop open the diagnostic
oc
he
ob
d2
.
co
m
software main function interface as show as Figure 20.
Figure-20
2. The diagnostic software can work normal only when you active the
.c
software successfully by register the software. Before you active the
w
w
software (register the software) you must make sure that the
w
diagnostic box connect well with your computer through USB line
and make sure that the diagnostic box is connect to the power, also,
your computer can visit the internet when you do these operations.
Double click the “REGIST” icon (Figure 21) appears the interface as
Figure 22 shows.
- 13 -
co
m
w
w
w
.c
oc
he
ob
d2
.
Figure-21
Figure-22
3. Click the “ok” button appear the following interface (Figure 23)
- 14 -
co
m
ob
d2
.
oc
he
Figure-23
w
w
w
.c
4. Use your ID login in you will see the interface figure 24.
- 15 -
Figure-24
5. Click the “Get password” button you will see the following
oc
he
ob
d2
.
co
m
interface (Figure 25).
.c
Figure-25
w
6. Copy the Product code and the Rand code from right to left white
w
blank (Figure 26) and then click the button “Get password” below
w
the Rand code blank, you will get your password (Figure 27)
- 16 -
co
m
ob
d2
.
w
w
w
.c
oc
he
Figure -26
Figure -27
- 17 -
oc
he
ob
d2
.
co
m
7. Then copy the password to the third blank (Figure 28)
Figure-28
w
w
w
(Figure 29)
.c
8. Then click the button “ok”, you will see the following interface
- 18 -
co
m
ob
d2
.
Figure -29
9. Click the “ok” button the software will configuration the files
oc
he
automatically and reset the software system and then back to the
w
w
w
.c
main function interface automatically as Figure 30 shows.
- 19 -
Figure-30
4、
、How to update the software
1. Double click the software icon and open the functions menu
Figure-31
w
w
.c
oc
he
ob
d2
.
co
m
interface as showed as Figure 31.
w
2. Click the “UPDATE” icon (Figure 32) appears the interface as the
figure 33 shows.
- 20 -
co
m
ob
d2
.
w
w
w
.c
oc
he
Figure-32
Figure -33
- 21 -
oc
he
ob
d2
.
co
m
3. Click the “ok” icon appear the interface (Figure 34)
Figure-34
w
.c
4. Following all the operation steps showed in figure 34 ( absolutely
w
similar with the register progress ) and then click the “car
w
update” icon, the CF-16 software will running the update
program as showed as figure 35.
- 22 -
co
m
ob
d2
.
Figure-35
oc
he
5. Click the “update” button you will see the following interface
w
w
w
.c
(Figure 36) and then the figure 37.
Figure-36
- 23 -
co
m
ob
d2
.
Figure-37
oc
he
4、
、How to kill the FAQ
w
w
w
.c
1. Communication failure as the following interface (Figure 30)
Figure-38
Possible problems
- 24 -
(1.)
)wire test
A. check whether the USB line work well connect the your
computer and the smartbox.
B. check whether the USB driver installed well
C. check whether the smartbox power indicator is ok
co
m
(2.)
)wireless test
A. check whether the smartbox power indicator is ok
ob
d2
.
B. check whether the red minibox power indicator is ok
C. check whether the green minibox indicator is ok? If not,
please adjust the direction of both the ninibox and the antenna of
oc
he
smartbox or adjust the distance between the both.
D. check whether the CF-16 USB driver is working
.c
normal.
w
2. Check whether the USB driver install progress have finished, if yes,
w
w
you will see the following interface as showed as figure 39.
- 25 -
co
m
ob
d2
.
Figure -39
3. Install USD driver program again
w
w
w
.c
oc
he
(1.) Back to your desktop as show as Figure -40
Figure-40
(2.) Click the “install” icon will appear the following interface
(Figure 41)
- 26 -
co
m
Figure-41
(3.) Click the “next step” button will appear the following
oc
he
ob
d2
.
interface (Figure 42)
Figure-42
.c
(4
4.)click the “my computer” icon on your desktop, left click find
w
w
w
the “attribute” menu (Figure 43)
- 27 -
Figure-43
(5
5.)choose the “hardware” menu, left click find the “device
Figure-44
w
w
w
.c
oc
he
ob
d2
.
co
m
manager” menu (Figure 44)
(6
6.) right click, choose the “other device” menu find “CP2102 USB
to UART Bridge Controller” , choose “update driver program”
(Figure 45)
- 28 -
co
m
ob
d2
.
Figure-45
(7
7.) click the “next step” button appear the following interface
w
w
w
.c
oc
he
(Figure 46)
Figure-46
(8
8.) Click the “Yes” button, the system will search CP2102 USB
driver (Figure 47)
- 29 -
(9
9.) Install driver finished,
co
m
ob
d2
.
Figure-47
oc
he
(10
10.)
10 Re-connect the USB, if appear the following interface (Figure 48)
w
w
w
.c
the USB driver install successful.
Figure-48
- 30 -