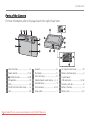
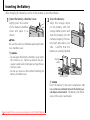
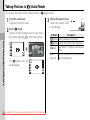
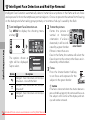
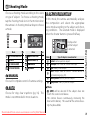
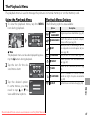
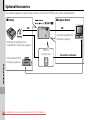
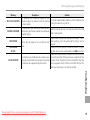
1
BL00840-200
E
Before You Begin
First Steps
Owner’s Manual
Thank you for your purchase of this
product. This manual describes
how to use your FUJIFILM FinePix
Z300 digital camera and the supplied software. Be sure that you
have read and understood its contents before using the camera.
Basic Photography and Playback
More on Photography
More on Playback
Movies
Connections
For information on related products, visit our website at
http://www.fujifilm.com/products/index.html
Menus
Technical Notes
Troubleshooting
Appendix
Downloaded From camera-usermanual.com Fujifilm Manuals
For Your Safety
IMPORTANT SAFETY INSTRUCTIONS
• Read Instructions: All the safety and operating instructions should be read
before the appliance is operated.
• Retain Instructions: The safety and
operating instructions should be
retained for future reference.
• Heed Warnings: All warnings on the
appliance and in the operating instructions should be adhered to.
• Follow Instructions: All operating and
use instructions should be followed.
Alternate Warnings: This video product is equipped with a three-wire
grounding-type plug, a plug having
a third (grounding) pin. This plug
will only fit into a grounding-type
power outlet. This is a safety feature.
If you are unable to insert the plug
into the outlet, contact your electrician to replace your obsolete outlet.
Do not defeat the safety purpose of
the grounding type plug.
Water and Moisture: Do not use this
video product near water—for example, near a bath tub, wash bowl,
kitchen sink, or laundry tub, in a wet
basement, or near a swimming pool,
and the like.
Power-Cord Protection: Power-supply cords should be routed so that
they are not likely to be walked on
or pinched by items placed upon
or against them, paying particular
Overloading: Do not overload wall out- attention to cords at plugs, conveInstallation
Power Sources: This video product lets and extension cords as this can nience receptacles, and the point
should be operated only from the result in a risk of fire or electric shock. where they exit from the appliance.
type of power source indicated on Ventilation: Slots and openings in Accessories: Do not place this video
the marking label. If you are not sure the cabinet are provided for ventila- product on an unstable cart, stand,
of the type of power supply to your tion, to ensure reliable operation of tripod, bracket, or table. The video
home, consult your appliance dealer the video product and to protect it product may fall, causing serious inor local power company. For video from overheating, and these open- jury to a child or adult, and serious
products intended to operate from ings must not be blocked or cov- damage to the appliance. Use only
battery power, or other sources, refer ered. The openings should never with a cart, stand, tripod, bracket, or
to the operating instructions.
be blocked by placing the video table recommended by the manufacGrounding or Polarization: This video product on a bed, sofa, rug, or other turer, or sold with the video product.
Any mounting of the appliance should
product is equipped with a polar- similar surface.
ized alternating-current line plug (a This video product should not be follow the manufacturer’s instructions,
plug having one blade wider than placed in a built-in installation such and should use a mounting accessory
the other). This plug will fit into the as a bookcase or rack unless proper recommended by the manufacturer.
power outlet only one way. This is a ventilation is provided or the manu- An appliance and
safety feature. If you are unable to facturer’s instructions have been ad- cart combination
insert the plug fully into the outlet, hered to. This video product should should be moved
try reversing the plug. If the plug never be placed near or over a radia- with care. Quick
should still fail to fit, contact your tor or heat register.
stops, excessive
electrician to replace your obsolete
force, and uneven
outlet. Do not defeat the safety pur- Attachments: Do not use attachments surfaces
may
not recommended by the video
pose of the polarized plug.
cause the appliance and cart combiproduct manufacturer as they may
nation to overturn.
cause hazards.
Downloaded From camera-usermanual.com Fujifilm Manuals
ii
Antennas
Outdoor Antenna Grounding: If an
outside antenna or cable system is
connected to the video product, be
sure the antenna or cable system is
grounded so as to provide some protection against voltage surges and
built-up static charges. Section 810
of the National Electrical Code, ANSI/
NFPA No. 70, provides information
with respect to proper grounding
of the mast and supporting structure, grounding of the lead-in wire
to an antenna discharge unit, size of
grounding conductors, location of
antenna discharge unit, connection
to grounding electrodes, and requirements for the grounding electrode.
EXAMPLE OF ANTENNA GROUNDING AS
PER NATIONAL ELECTRICAL CODE
Ground
Clamp
Electric
Service
Equipment
Ground
Clamps
Antenna Lead
in Wire
Antenna
Discharge
Unit (NEC
SECTION
810-20)
Grounding
Power Service Grounding Conductors
Electrode System (NEC (NEC SECTION
810-21)
ART 250. PART H)
Power Lines: An outside antenna system should not be located in the
vicinity of overhead power lines or
other electric light or power circuits,
For Your Safety
or where it can fall into such power
lines or circuits. When installing an
outside antenna system, extreme
care should be taken to keep from
touching such power lines or circuits
as contact with them might be fatal.
Use
Cleaning: Unplug this video product
from the wall outlet before cleaning. Do not use liquid cleaners or
aerosol cleaners. Use a damp cloth
for cleaning.
Object and Liquid Entry: Never push
objects of any kind into this video
product through openings as they
may touch dangerous voltage points
or short out parts that could result in a
fire or electric shock. Never spill liquid
of any kind on the video product.
Lightning: For added protection for
this video product receiver during
a lightning storm, or when it is left
unattended and unused for long periods of time, unplug it from the wall
outlet and disconnect the antenna
or cable system. This will prevent
damage to the video product due to
lightning and power-line surges.
and refer servicing to qualified service personnel under the following
conditions:
• When the power-supply cord or
plug is damaged.
• If liquid has been spilled, or objects
have fallen into the video product.
• If the video product has been exposed to rain or water.
• If the video product has been
dropped or the cabinet has been
damaged.
If the video product does not operate normally follow the operating
instructions.
Adjust only those
controls that are covered by the operating instructions as an improper
adjustment of other controls may result in damage and will often require
extensive work by a qualified technician to restore the video product to
its normal operation.
Be sure to read these notes before use
Safety Notes
• Make sure that you use your camera correctly. Read these safety notes and
your Owner’s Manual carefully before use.
• After reading these safety notes, store them in a safe place.
About the Icons
The icons shown below are used in this document to indicate the severity of
the injury or damage that can result if the information indicated by the icon
is ignored and the product is used incorrectly as a result.
WARNING
CAUTION
This icon indicates that personal injury or material damage can result if the
information is ignored.
The icons shown below are used to indicate the nature of the instructions
which are to be observed.
Triangular icons tell you that this information requires attention (“Important”).
When the video product exhibits a
distinct change in performance—
this indicates a need for service.
Replacement Parts: When replacement
parts are required, be sure the service
technician has used replacement
parts specified by the manufacturer
or have the same characteristics as
Service
the original part. Unauthorized subServicing: Do not attempt to service
stitutions may result in fire, electric
this video product yourself as openshock or other hazards.
ing or removing covers may expose
you to dangerous voltage or other Safety Check: Upon completion of any
hazards. Refer all servicing to quali- service or repairs to this video prodfied service personnel.
uct, ask the service technician to
perform safety checks to determine
Damage Requiring Service: Unplug this
that the video product is in proper
video product from the wall outlet
operating condition.
This icon indicates that death or serious injury can result if the information
is ignored.
Downloaded From camera-usermanual.com Fujifilm Manuals
Circular icons with a diagonal bar tell you that the action indicated is prohibited (“Prohibited”).
Filled circles with an exclamation mark indicate an action that must be performed (“Required”).
WARNING
Unplug from
power socket
If a problem arises, turn the camera off, remove the battery, and disconnect and unplug the
AC power adapter. Continued use of the camera when it is emitting smoke, is
emitting any unusual odor, or is in any other abnormal state can cause a fire
or electric shock. Contact your FUJIFILM dealer.
Do not allow water or foreign objects to enter the camera. If water or foreign objects
get inside the camera, turn the camera off, remove the battery, and disconnect and unplug the AC power adapter. Continued use of the camera can
cause a fire or electric shock. Contact your FUJIFILM dealer.
iii
For Your Safety
WARNING
Do not use in
the bathroom
or shower
Do not
disassemble
Do not use the camera in the bathroom or shower. This can cause a fire or electric
shock.
Never attempt to change or take apart the camera. (Never open the casing.) Do not use the
camera when it has been dropped or the casing is damaged. This can cause a fire or
electric shock. Contact your FUJIFILM dealer.
Do not change, heat or unduly twist or pull the connection cord and do not place heavy objects on the connection cord. These actions could damage the cord and cause a
fire or electric shock. If the cord is damaged, contact your FUJIFILM dealer.
Do not place the camera on an unstable surface. This can cause the camera to fall or
tip over and cause injury.
Never attempt to take pictures while in motion. Do not use the camera while you
are walking or driving a vehicle. This can result in you falling down or being
involved in a traffic accident.
Do not leave this camera in places subject to extremely high temperatures. Do not leave
the camera in locations such as a sealed vehicle or in direct sunlight. This
can cause a fire.
Keep out of the reach of small children. This product could cause injury in the
hands of a child.
Do not place heavy objects on the camera. This can cause the heavy object to tip
over or fall and cause injury.
Do not move the camera while the AC power adapter is still connected. Do not pull on the
connection cord to disconnect the AC power adapter. This can damage the power
cord or cables and cause a fire or electric shock.
Do not cover or wrap the camera or the AC power adapter in a cloth or blanket. This can
cause heat to build up and distort the casing or cause a fire.
Do not touch any metal parts of the camera during a thunderstorm. This can cause an
electric shock due to induced current from the lightning discharge.
When you are cleaning the camera or you do not plan to use the camera for an extended
period, remove the battery and disconnect and unplug the AC power adapter. Failure to
do so can cause a fire or electric shock.
Do not use the battery except as specified. Load the battery as shown by the indicator.
When charging ends, unplug the charger from the power socket. Leaving the charger
plugged into the power socket can cause a fire.
Do not heat, change or take apart the battery. Do not drop or subject the battery to impacts. Do not store the battery with metallic products. Any of these actions can cause
the battery to burst or leak and cause fire or injury as a result.
Use only the battery or AC power adapters specified for use with this camera. Do not use
voltages other than the power supply voltage shown. The use of other power sources
can cause a fire.
Using a flash too close to a person’s eyes may temporarily affect the eyesight. Take particular care when photographing infants and young children.
If the battery leaks and fluid gets in contact with your eyes, skin or clothing, flush the affected
area with clean water and seek medical attention or call an emergency number right away.
Do not use the charger to charge batteries other than those specified here. The supplied
battery charger is for use only with the type of battery supplied with the camera. Using the charger to charge conventional batteries or other types of
rechargeable batteries can cause the battery to leak fluid, overheat or burst.
When carrying the battery, install it in a digital camera or keep it in the hard case. When
storing the battery, keep it in the hard case. When discarding, cover the battery terminals
with insulation tape. Contact with other metallic objects or batteries could
cause the battery to ignite or burst.
Keep memory cards out of the reach of small children. Because memory cards are
small, they can be swallowed by children. Be sure to store memory cards out
of the reach of small children. If a child swallows a memory card, seek medical
attention or call an emergency number.
Downloaded From camera-usermanual.com Fujifilm Manuals
iv
CAUTION
Do not use this camera in locations affected by oil fumes, steam, humidity or dust. This
can cause a fire or electric shock.
When a memory card is removed, the card could come out of the slot too quickly. Use your
finger to hold it and gently release the card.
Request regular internal testing and cleaning for your camera. Build-up of dust in your
camera can cause a fire or electric shock. Contact your FUJIFILM dealer to
request internal cleaning every two years. Please note that this service is not
free of charge.
For Your Safety
The Battery and Power Supply
The following describes the proper
use of the battery and how to
prolong its life. Incorrect use can
shorten battery life or cause leakage,
overheating, fire, or explosion.
The battery is not charged at shipment. Charge the battery before
use. Keep the battery in its case
when not in use.
Notes on the Battery
The battery gradually loses its charge
when not in use. Charge the battery
one or two days before use.
Battery life can be extended by turning the camera off when not in use.
Battery capacity decreases at low temperatures; a depleted battery may not
function at when cold. Keep a fully
charged spare battery in a warm place
and exchange as necessary, or keep
the battery in your pocket or other
warm place and insert it in the camera
only when shooting. Do not place the
battery in direct contact with hand
warmers or other heating devices.
Charging the Battery
Charge the battery in the supplied battery charger (pg. 7). Charging times
will increase at ambient temperatures
below +10 °C (+50 °F) or above +35 °C
(+95 °F). Do not attempt to charge the
battery at temperatures above 40 °C
(+104 °F); at temperatures below 0 °C
(+32 °F), the battery will not charge.
Do not attempt to recharge a fully • Do not expose to water.
charged battery. The battery does • Keep the terminals clean.
not however need to be fully dis- • The battery and camera body may
become warm to the touch after
charged before charging.
extended use. This is normal.
The battery may be warm to the
touch immediately after charging or AC Adapters (Available Separately)
Use only FUJIFILM AC adapters desiguse. This is normal.
nated for use with this camera. Other
Battery Life
adapters could damage the camera.
At normal temperatures, the battery
• The AC adapter is for indoor use only.
can be recharged about 300 times.
• Be sure the DC plug is securely
A noticeable decrease in the length
connected to the camera.
of time the battery will hold a charge
• Turn the camera off before disconindicates that it has reached the end
necting the adapter. Disconnect the
of its service life and should be readapter by the plug, not the cable.
placed.
• Do not use with other devices.
• Do not disassemble.
Storage
Performance may be impaired if the • Do not expose to high heat and
humidity.
battery is left unused for extended
periods when fully charged. Run the • Do not subject to strong physical
shocks.
battery flat before storing it.
• The AC adapter may hum or beIf the camera will not be used for an
come hot to the touch during use.
extended period, remove the batThis is normal.
tery and store it in a dry place with
• If the AC adapter causes radio inan ambient temperature of from
terference, reorient or relocate the
+15 °C to +25 °C (+59 °F to +77 °F). Do
receiving antenna.
not store in locations exposed to extremes of temperature.
Using the Camera
To ensure that images are recorded
Cautions: Handling the Battery
• Do not transport or store with correctly, do not subject the camera
metal objects such as necklaces or to impact or physical shocks while
images are being recorded.
hairpins.
• Do not expose to flame or heat.
Electrical Interference
• Do not disassemble or modify.
This camera may interfere with hos• Use with designated chargers only. pital or aviation equipment. Consult
• Dispose of used batteries promptly. with hospital or airline staff before
• Do not drop or subject to strong using the camera in a hospital or on
physical shocks.
an aircraft.
Downloaded From camera-usermanual.com Fujifilm Manuals
Liquid Crystal
In the event that the monitor is damaged, care should be taken to avoid
contact with liquid crystal. Take the
urgent action indicated should any
of the following situations arise:
• If liquid crystal comes in contact with
your skin, clean the area with a cloth
and then wash thoroughly with
soap and running water.
• If liquid crystal enters your eyes, flush
the affected eye with clean water
for at least 15 minutes and then
seek medical assistance.
• If liquid crystal is swallowed, rinse
your mouth thoroughly with water.
Drink large quantities of water and
induce vomiting, then seek medical assistance.
Take Test Shots
Before taking photographs on important occasions (such as at weddings
or before taking the camera on a trip),
take a test shot and view the result in
the monitor to ensure that the camera is functioning normally. FUJIFILM
Corporation can not accept liability
for damages or lost profits incurred
as a result of product malfunction.
v
For Your Safety
NOTICES
To prevent fire or shock hazard, do not expose the unit to rain or moisture.
For Customers in Canada
Please read the “Safety Notes” (pages iii–v) and make sure you understand CAUTION: This Class B digital apparatus complies with Canadian ICES-003.
them before using the camera.
EC Declaration of Conformity
Perchlorate Material—special handling may apply. See http://www.dtsc. We
Name:
FUJIFILM Electronic Imaging Europe GmbH
ca.gov/hazardouswaste/perchlorate.
Address:
Benzstrasse 2
For Customers in the U.S.A.
47533 Kleve, Germany
Tested To Comply With FCC Standards
declare that the product
FOR HOME OR OFFICE USE
Product Name:
FUJIFILM DIGITAL CAMERA FinePix Z300
Manufacturer’s Name: FUJIFILM Corporation
FCC Statement
This device complies with Part 15 of the FCC Rules. Operation is subject to Manufacturer’s Address: 7-3, AKASAKA 9-CHOME, MINATO-KU, TOKYO,
107-0052 JAPAN
the following two conditions: (1) This device may not cause harmful interference, and (2) this device must accept any interference received, including conforms to the following Standards:
Safety:
EN60065: 2002 + A1: 2006
interference that may cause undesired operation.
EMC:
EN55022: 1998 + A1: 2000 + A2: 2003 Class B
CAUTION
EN55024: 1998 + A1: 2001 + A2: 2003
This equipment has been tested and found to comply with the limits for a
EN61000-3-2: 2000 + A2: 2005
Class B digital device, pursuant to Part 15 of the FCC Rules. These limits are
EN61000-3-3: 1995 + A1: 2001 + A2: 2005
designed to provide reasonable protection against harmful interference in
following the provision of the EMC Directive (2004/108/EC)
a residential installation. This equipment generates, uses, and can radiate
and Low Voltage Directive (2006/95/EC).
radio frequency energy and, if not installed and used in accordance with
the instructions, may cause harmful interference to radio communications.
However, there is no guarantee that interference will not occur in a particular installation. If this equipment does cause harmful interference to radio or
television reception, which can be determined by turning the equipment
Kleve, Germany
May 1, 2009
off and on, the user is encouraged to try to correct the interference by one
Place
Date
Signature, Managing Director
or more of the following measures:
• Reorient or relocate the receiving antenna.
• Increase the separation between the equipment and receiver.
• Connect the equipment into an outlet on a circuit different from that to
which the receiver is connected.
• Consult the dealer or an experienced radio/TV technician for help.
You are cautioned that any changes or modifications not expressly approved
in this manual could void the user’s authority to operate the equipment.
Notes on the Grant
To comply with Part 15 of the FCC Rules, this product must be used with a
FUJIFILM-specified ferrite-core USB cable and DC supply cord.
Downloaded From camera-usermanual.com Fujifilm Manuals
vi
For Your Safety
Notes on Copyright
Unless intended solely for personal use, images recorded using your digital
camera system cannot be used in ways that infringe copyright laws without the consent of the owner. Note that some restrictions apply to the
photographing of stage performances, entertainments, and exhibits, even
when intended purely for personal use. Users are also asked to note that
the transfer of memory cards containing images or data protected under
Instead it should be taken to an applicable collection point
copyright laws is only permissible within the restrictions imposed by those
for the recycling of electrical and electronic equipment.
copyright laws.
By ensuring this product is disposed of correctly, you will
help prevent potential negative consequences to the en- Trademark Information
vironment and human health, which could otherwise be Macintosh, QuickTime, and Mac OS are trademarks of Apple Inc. in the U.S.A.
and other countries. Microsoft, Windows, the Windows logo, Windows
caused by inappropriate waste handling of this product.
Vista and the Windows Vista logo are trademarks or registered trademarks
This symbol on the batteries or accumulators indicates that of Microsoft Corporation in the United States and/or other countries. “Winthose batteries shall not be treated as household waste.
dows” is an abbreviation used in reference to the Microsoft Windows operIf your equipment contains easy removable batteries or ac- ating system. Adobe and Adobe Reader are either trademarks or registered
cumulators please dispose these separately according to trademarks of Adobe Systems Incorporated in the U.S.A. and/or other countries. The SDHC logo is a trademark. ACCESS and Netfront are trademarks
your local requirements.
or registered trademarks of ACCESS CO., LTD in the United States, Japan,
The recycling of materials will help to conserve natural resources. For more and/or other countries.
detailed information about recycling this product, please contact your local
city office, your household waste disposal service or the shop where you Note: The “Designed for Microsoft® Windows® XP” and “CERTIFIED FOR Windows
Vista™” logos apply only to the camera and camera hardware driver.
purchased the product.
Disposal of Electrical and Electronic Equipment in Private Households
Disposal of Used Electrical and Electronic Equipment (Applicable in the European
Union, Norway, Iceland and Liechtenstein)
This symbol on the product, or in the manual and in the
warranty, and/or on its packaging indicates that this product shall not be treated as household waste.
In Countries Outside the European Union, Norway, Iceland and Liechtenstein
If you wish to discard this product, including the batteries or accumulators, please contact your local authorities and ask for the correct way of
disposal.
Downloaded From camera-usermanual.com Fujifilm Manuals
vii
About This Manual
Before using the camera, read this manual and the warnings on pages ii–vii. For information on specific
topics, consult the sources below.
✔ Camera Q & A ....................................................pg.
.................................................... pg. ix
Know what you want to do but don’t know the
name for it? Find the answer in “Camera Q & A.”
✔ Table of Contents .............................................
.............................................pg.
pg. xii
The “Table of Contents” gives an overview of the
entire manual. The principal camera operations
are listed here.
✔ Troubleshooting ..............................................
..............................................pg.
pg. 81
Having a specific problem with the camera?
Find the answer here.
✔ Warning Messages and Displays .......................
.......................pg.
pg. 88
Find out what’s behind that flashing icon or error
message in the monitor.
✔ Glossary ..........................................................
..........................................................pg.
pg. 92
The meanings of some technical terms may be
found here.
Memory Cards
Pictures can be stored in the camera’s internal memory or on SD and SDHC memory cards. In this manual, SD
memory cards are referred to as “memory cards.” For more information, see page 13.
Downloaded From camera-usermanual.com Fujifilm Manuals
viii
Camera Q & A
Find items by task.
Camera Setup
Question
How do I set the camera clock?
Can I set the clock to local time when I travel?
How do I use the touch panel display?
How do I keep the display from turning off automatically?
How do I make the display brighter or darker?
How do I stop the camera beeping and clicking?
Can I change the sound the shutter makes?
What are the parts of the camera called?
What do the icons in the display mean?
How do I use the menus?
What’s behind that flashing icon or error message?
How much charge is left in the battery?
How do I calibrate the touch panel?
Key phrase
Date and time
Time difference
Touch panel display
Auto power off
LCD brightness
Volume
Silent mode
Sound
Parts of the camera
Displays
Menus
Messages and displays
Battery level
Calibration
See page
15
76
4
75
74
74
20
74
2
3, 5
60
88
16
77
Sharing Pictures
Question
Can I print pictures on my home printer?
Can I copy my pictures to my computer?
Downloaded From camera-usermanual.com Fujifilm Manuals
Key phrase
See page
Printing pictures
52
Viewing pictures on a computer
54
ix
Camera Q & A
Taking Pictures
Question
How many pictures can I take?
Is there a quick and easy way to take snapshots?
How can I avoid blurred pictures?
How can I make good portraits?
Can I choose my own settings for different scenes?
Can the camera automatically adjust settings for different scenes?
How do I shoot close-ups?
How do I keep the flash from firing?
How do I stop my subjects’ eyes glowing red when I use the flash?
How do I “fill-in” shadows on back-lit subjects?
How do I take a series of pictures in a single burst?
How do I take a group portrait that includes the photographer?
How do I frame pictures with the subject off to one side?
How do I adjust exposure?
How do I shoot movies?
Can I use the touch panel to take pictures?
Downloaded From camera-usermanual.com Fujifilm Manuals
x
Key phrase
Memory capacity
B mode
Dual IS mode
Intelligent Face Detection
H (scene position)
Y mode
Macro mode (close-ups)
See page
93
16
20
22
33
31
28
Flash mode
24
Continuous shooting
Self-timer mode
Focus lock
Exposure compensation
Recording movies
Touch and shoot
62
26
29
63
49
32
Camera Q & A
Viewing Pictures
Question
Can I put a password on my private folder?
How do I view my pictures?
How do I delete the current picture?
Can I select other pictures for deletion?
Can I zoom in on pictures during playback?
How do I view a lot of pictures at once?
Can I protect my pictures from accidental deletion?
Can I view my pictures in a slide show?
Can I crop unwanted elements out of my pictures?
How do I rotate pictures?
Can I make small copies of pictures?
Can I create a collage?
How do I move or copy pictures to another folder?
How do I organize my pictures into folders?
How do I find pictures?
Downloaded From camera-usermanual.com Fujifilm Manuals
Key phrase
Password
Single-frame playback
The icon
Deleting pictures
Playback zoom
Multi-frame playback
Protect
Slide show
Crop (trimming)
Rotate
Resize
Collage
Move/copy
Folder management
Image search
See page
47
35
21
38
36
37
69
68
43
42
43
41
48
47
45
xi
Table of Contents
For Your Safety ................................................................................. ii
IMPORTANT SAFETY INSTRUCTIONS ...................................... ii
Safety Notes .................................................................................... iii
NOTICES ............................................................................................ vi
About This Manual .......................................................................viii
Camera Q & A .................................................................................... ix
Before You Begi
Begin
n
Introduction....................................................................................... 1
Symbols and Conventions .......................................................... 1
Supplied Accessories .................................................................... 1
Parts of the Camera ....................................................................... 2
Camera Displays (Touch Panel) ............................................. 3
The Touch Panel Display ............................................................. 4
Touch Panel Icons ....................................................................... 5
First Steps
Steps
Charging the Battery ..................................................................... 7
Inserting the Battery...................................................................... 8
Inserting a Memory Card ........................................................... 11
Turning the Camera on and Off...............................................14
Shooting Mode .............................................................................14
Playback Mode ..............................................................................14
Basic Setup .......................................................................................15
Downloaded From camera-usermanual.com Fujifilm Manuals
xii
Basic Photography and Playbac
Playback
k
Taking Pictures in B (Auto) Mode ........................................16
Viewing Pictures ............................................................................21
More on Photography
Photography
g Intelligent Face Detection and Red-Eye Removal ...22
N Using the Flash (Super-Intelligent Flash) ......................24
h Using the Self-Timer ...............................................................26
F Macro Mode (Close-ups) ......................................................28
Focus Lock ........................................................................................29
A Shooting Mode ........................................................................31
I MANUAL ...................................................................................31
B AUTO ..........................................................................................31
Y SCENE RECOGNITION ...........................................................31
J TOUCH & SHOOT....................................................................32
C NATURAL & N........................................................................32
D NATURAL LIGHT ...................................................................33
H SCENE POSITION..................................................................33
Table of Contents
More on Playbac
Playback
k
Connectionss
Connection
Playback Options...........................................................................35
Playback Zoom..............................................................................36
Multi-Frame Playback.................................................................37
e Deleting Pictures ......................................................................38
c Edit ................................................................................................40
f COLLAGE................................................................................41
C IMAGE ROTATE .....................................................................42
G TRIMMING .............................................................................43
O RESIZE .....................................................................................43
B RED EYE REMOVAL .............................................................44
b Image Search ............................................................................45
Image Search: Deleting Pictures .........................................46
Image Search: Folder Management...................................46
g Folder Management .............................................................47
Moving Pictures .........................................................................48
Copying Pictures .......................................................................48
Printing Pictures via USB ...........................................................52
Connecting the Camera ............................................................52
Printing Selected Pictures ........................................................53
Viewing Pictures on a Computer............................................54
Installing FinePixViewer ............................................................54
Connecting the Camera ............................................................58
Moviess
Movie
F Recording Movies ...................................................................49
a Viewing Movies .......................................................................51
Downloaded From camera-usermanual.com Fujifilm Manuals
Menuss
Menu
The Shooting Menu ......................................................................60
Using the Shooting Menu.........................................................60
Shooting Menu Options ............................................................61
R CONTINUOUS ......................................................................62
d EXP. COMPENSATION ........................................................63
D WHITE BALANCE .................................................................64
O QUALITY .................................................................................64
N ISO ............................................................................................65
P G COLOR...............................................................65
F AF MODE................................................................................66
The Playback Menu.......................................................................67
Using the Playback Menu .........................................................67
Playback Menu Options.............................................................67
I SLIDE SHOW ..........................................................................68
D PROTECT ................................................................................69
xiii
Table of Contents
The Setup Menu .............................................................................70
Using the Setup Menu ...............................................................70
Setup Menu Options...................................................................71
A IMAGE DISP. ..........................................................................72
B FRAME NO. ............................................................................73
Q DIGITAL ZOOM ....................................................................74
I VOLUME .................................................................................74
b SOUND....................................................................................74
J LCD BRIGHTNESS ................................................................74
K FORMAT..................................................................................75
M AUTO POWER OFF ..............................................................75
N TIME DIFFERENCE ...............................................................76
h CALIBRATION .......................................................................77
Downloaded From camera-usermanual.com Fujifilm Manuals
xiv
Technical Notes
Notes
Optional Accessories ...................................................................78
Accessories from FUJIFILM .......................................................79
Caring for the Camera .................................................................80
Troubleshooting
Troubleshootin
g
Troubleshooting ............................................................................81
Warning Messages and Displays ............................................88
Appendix
Appendi
x
Glossary .............................................................................................92
Internal Memory/Memory Card Capacity ..........................93
Specifications ..................................................................................94
FUJIFILM Digital Camera Worldwide Network ................98
Introduction
Symbols and Conventions
Menus and other text in the camera monitor are shown in bold. In the illustrations in this manual, the
monitor display may be simplified for explanatory purposes.
Before You Begin
The following symbols are used in this manual:
3 Caution: This information should be read before use to ensure correct operation.
1Note: Points to note when using the camera.
2 Tip: Additional information that may be helpful when using the camera.
Supplied Accessories
The following items are included with the camera:
NP-45 rechargeable
battery
BC-45W battery
charger
USB cable
Attaching the Strap
Attach the strap as shown.
Strap
Downloaded From camera-usermanual.com Fujifilm Manuals
FinePix software CD
(IMPORTANT: read license agreement on the
last page of this manual
before opening)
• Owner’s Manual
(contains this
manual)
• Stylus
1
Introduction
Parts of the Camera
For more information, refer to the page listed to the right of each item.
1
2
3
4
5
6
7
Shutter button ...........................................18 8 Speaker ...........................................................51
Zoom control.......................................17, 36 9 Illuminator ....................................................71
Self-timer lamp ..........................................27
p (HOME) button ...........................14, 60
Microphone .................................................49 10 Monitor/touch panel display .........3–5
Flash..................................................................24 11 Indicator lamp ............................................19
On/off switch and lens cover ...........14 12 Terminal cover....................................52, 58
Lens ...................................................................94 13 Strap eyelet .................................................... 1
Downloaded From camera-usermanual.com Fujifilm Manuals
2
14
15
16
17
18
19
20
DC coupler cable cover........................79
Battery-chamber cover .......................... 8
Tripod mount
USB connector ...................................52, 58
Memory card slot .....................................12
Battery chamber ......................................... 8
Battery latch ............................................. 8, 9
Introduction
■ Shooting
*
MENU
12 / 31 / 2050
10:00 AM
+1 3
ISO 400
127
N
DISP
* a: indicates that no memory card is inserted and that pictures will be stored in the
camera’s internal memory (pg. 11).
Blur warning ......................20, 24, 88 10 Internal memory indicator * .....11
Focus warning .........................18, 88 11 Current folder ...................................47
Continuous mode .........................62 12 Exposure compensation ...........63
White balance ................................. 64 13 Date and time........................... 15, 71
Silent mode .......................................19 14 Focus frame ...............................18, 29
Intelligent Face Detection
15 Number of available frames......93
indicator .............................................. 20 16 Quality .................................................. 64
7 Dual IS mode ................................... 20 17 Battery level .......................................16
8 Sensitivity ............................................65
9 FinePix color ......................................65
1
2
3
4
5
6
Before You Begin
Camera Displays (Touch Panel)
The following indicators may appear during shooting and playback. The indicators displayed vary with
camera settings.
■ Playback
1
2
3
4
100-0001
MENU
Gift image ...........................................35
Edit.......................................................... 40
Red-eye removal indicator .... 44
Intelligent Face Detection
indicator .............................................. 22
5
6
7
8
Silent mode indicator................. 20
Playback mode indicator ... 21, 35
Protected image ............................ 69
Frame number ................................ 73
DISP
Downloaded From camera-usermanual.com Fujifilm Manuals
3
Introduction
The Touch Panel Display
The touch panel display can be operated by tapping the display or gliding the stylus or a finger over
the panel. The panel responds to pressure; use a firm touch, but do NOT use excessive force.
■ Tap
Lightly tap the display to
adjust settings or select pictures or menu options.
MENU
DISP
■ Scroll
Glide lightly over the display
to scroll through pictures
during playback.
During playback zoom, touch
the picture and scroll to view
areas not currently visible in
the monitor.
MENU
DISP
BACK
DISP
■ Drag and Drop
Touch a picture and glide to
drag the image over an icon
when moving pictures to a
folder or creating a collage.
MOVE
COPY
OK
3 Cautions
To avoid damaging the monitor and touch panel display, observe the following precautions:
• Do not affix plastic covers, stickers, or other objects to
the panel.
• Use only your fingers or the supplied stylus to operate the panel. Do not use excessive force.
• Do not sit on the camera (by, for example, leaving it
in a back pocket when sitting down), place it under
heavy objects, or attempt to force it into a small space
(such as a suitcase that is already full).
• Do not attach objects to the camera strap that might
place pressure on the monitor.
The Touch Panel Display
The actual displays may differ from those shown in this manual.
Downloaded From camera-usermanual.com Fujifilm Manuals
4
FOLDER MANAGEMENT
Introduction
Touch Panel Icons
Flash mode:
Choose a flash
mode (pg. 24).
Shooting mode: Choose a shooting
mode (pg. 31).
Self-timer: Use
the self-timer
(pg. 26).
MENU
Macro mode:
Shoot in macro
mode (pg. 28).
Shooting menu: View
the shooting menu
(pg. 60).
DISP
Playback:
View
pictures
(pg. 21,
35).
Display: Turn
indicators on
or off (pg. 17).
■ Playback
Tap the icons in the playback display to perform
the operations listed below. The icons displayed
vary with the type of picture and the current
playback mode; the illustration below shows the
three-frame view displayed by tapping a picture
in full-screen playback.
(edit): Create collages or retouched
copies of pictures (pg. 40).
Playback
menu: View
the playback menu
(pg. 67).
MENU
(delete): Delete
pictures (pg. 21, 38).
Downloaded From camera-usermanual.com Fujifilm Manuals
Before You Begin
■ Shooting
Tap the icons in the shooting display to perform
the operations listed below. The icons displayed
vary with the options currently selected.
(image search):
Find pictures
(pg. 45).
(multiframe): View
multiple
pictures
(pg. 37).
Folder management: Move or copy
pictures between folders (pg. 47).
5
Introduction
Using the Supplied Stylus
The stylus can be used in place of your finger to operate the touch panel. To avoid losing the
stylus, attach it to the camera strap.
Use this end of
the stylus
WARNINGS
• The stylus may present a choking hazard. Keep out of reach of pets and young children.
• Do not carry the camera by objects attached to the strap. The camera could become detached, causing damage or injury.
3 Cautions
• Do not use excessive force.
• Do not store the stylus on the panel.
• Use the stylus only with the camera touch panel.
• Do not use a damaged or modified stylus.
Downloaded From camera-usermanual.com Fujifilm Manuals
6
Charging the Battery
The battery is not charged at shipment. Charge
the battery before use.
Batteries
The camera uses an NP-45 rechargeable battery.
charger as shown, making sure that the battery is in the orientation indicated by the
C B D label.
Charge lamp
Battery
Arrow
B
C D
label
The
charging indicator will light.
The Charging Indicator
The charging indicator shows battery charge
status as follows:
Charging indicator Battery status
Action
Battery not
Insert the
inserted.
battery.
Off
Battery fully Remove the
charged.
battery.
Battery
On
—
charging.
Unplug the
charger and
Blinks
Battery fault.
remove the
battery.
First Steps
Place the battery in the charger.
1 Insert
the battery into the supplied battery
Plug the charger in.
2 Plug
the charger into a power outlet.
B
Battery charger
C D
label
3 Cautions
• Unplug the charger when it is not in use.
• Remove dirt from the battery terminals with a
clean, dry cloth. Failure to observe this precaution could prevent the battery from charging.
• Charging times increase at low temperatures.
Downloaded From camera-usermanual.com Fujifilm Manuals
Charge the battery.
3 Remove
the battery when charging is complete.
7
Inserting the Battery
After charging the battery, insert it in the camera as described below.
Open the battery-chamber cover.
1 Lightly
press the center
of the battery-chamber
cover and open it as
shown.
1 Note
Be sure the camera is off before opening the battery-chamber cover.
3 Cautions
• Do not open the battery-chamber cover when
the camera is on. Failure to observe this precaution could result in damage to image files or
memory cards.
• Do not use excessive force when handling the
battery-chamber cover.
Insert the battery.
2 Align
the orange
stripe
on the battery with the
orange battery latch and
slide the battery into the
camera, keeping the battery latch pressed to one
side. Confirm that the
battery is securely latched.
Orange
stripe
Battery latch
3 Caution
Insert the battery in the correct orientation. Do
NOT use force or attempt to insert the battery upside down or backwards. The battery will slide in
easily in the correct orientation.
Downloaded From camera-usermanual.com Fujifilm Manuals
8
Inserting the Batteries
Close the battery-chamber cover.
3 Close
the battery-cham-
3 Cautions
• Do not affix stickers or other objects to the battery.
Failure to observe this precaution could make it impossible to remove the battery from the camera.
• Do not short the battery terminals. The battery could
overheat.
• Read the cautions on page v.
• Use only battery chargers designated for use with the
battery. Failure to observe this precaution could result in product malfunction.
• Do not remove the labels from the battery or attempt
to split or peel the outer casing.
• The battery gradually loses its charge when not in
use. Charge the battery one or two days before use.
Downloaded From camera-usermanual.com Fujifilm Manuals
Battery latch
First Steps
ber cover and then
lightly press it down and
slide it in to latch.
Removing the Battery
After turning the camera off, open the battery-chamber cover, press the battery latch to the side, and slide
the battery out of the camera as shown.
3 Caution
Turn the camera off before removing the battery.
9
Inserting the Batteries
2 Tips: Using an AC Adapter
• The camera can be powered by an optional AC adapter and DC coupler (sold separately).
When inserting the DC coupler, open the cable cover on the camera and pass the DC
coupler power cord through the cable channel. See the manuals provided with the AC
adapter and DC coupler for details.
• If the camera is powered by an AC adapter, demo mode instructions will be displayed when the camera is
turned on. Selecting demo mode starts a slide show; to cancel, press the shutter button. To prevent the demo
from being displayed in future, press p for a few seconds while holding the zoom control to T.
Downloaded From camera-usermanual.com Fujifilm Manuals
10
Inserting a Memory Card
Although the camera can store pictures in internal memory, optional SD memory cards (sold separately) can be used to store additional pictures.
First Steps
When no memory card is inserted, a appears in the monitor and internal memory is used for recording
and playback. Note that because camera malfunction could cause internal memory to become corrupted, the pictures in internal memory should periodically be transferred to a computer and saved on
the computer hard disk or on removable media such as CDs or DVDs. The pictures in internal memory
can also be copied to a memory card (see page 48). To prevent internal memory from becoming full,
be sure to delete pictures when they are no longer needed.
When a memory card is inserted as described below, the card will be used for recording and playback.
■ Compatible Memory Cards
SanDisk SD and SDHC memory cards have been approved for use in the camera. A complete list of approved memory cards is available at http://www.fujifilm.com/products/digital_cameras/index.html. Operation is not guaranteed with other cards. The camera can not be used with MultiMediaCard (MMC)
or xD-Picture Card cards.
3 Caution
SD memory cards can be locked, making it impossible to format the card or to record or
delete images. Before inserting an SD memory card, slide the write-protect switch to the
unlocked position.
Write-protect switch
Downloaded From camera-usermanual.com Fujifilm Manuals
11
Inserting a Memory Card
■ Inserting a Memory Card
Open the battery-chamber cover.
Lightly press the center
of the battery-chamber
cover and open it as
shown.
1
1 Note
Be sure the camera is off before opening the battery-chamber cover.
Insert the memory card.
2 Holding
the memory card in the orientation
shown below, slide it all the way in.
Be sure card is in correct
orientation; do not insert
at an angle or use force.
Downloaded From camera-usermanual.com Fujifilm Manuals
12
Close the battery-chamber cover.
3 Close
the battery-chamber cover and then
lightly press it down and
slide it in to latch.
Removing Memory Cards
After confirming that the camera is off, press the card in and
then release it slowly. The card
can now be removed by hand.
3 Cautions
• The memory card may spring out if you remove
your finger immediately after pushing the card in.
• Memory cards may be warm to the touch after being removed from the camera. This is normal and
does not indicate a malfunction.
Inserting a Memory Card
Downloaded From camera-usermanual.com Fujifilm Manuals
First Steps
3 Cautions
• Do not turn the camera off or remove the memory card while the memory card is being formatted or data are being recorded to or
deleted from the card. Failure to observe this precaution could damage the card.
• Format SD memory cards before first use, and be sure to reformat all memory cards after using them in a computer or other device. For more information on formatting memory cards, see page 75.
• Memory cards are small and can be swallowed; keep out of reach of children. If a child swallows a memory card,
seek medical assistance immediately.
• Do not use miniSD or microSD adapters that expose the back of the card. Failure to observe
this precaution may cause damage or malfunction. Adapters that are larger or smaller than
the standard dimensions of an SD card may not eject normally; if the card does not eject, take
the camera to an authorized service representative. Do not forcibly remove the card.
• Do not affix labels to memory cards. Peeling labels can cause camera malfunction.
• Movie recording may be interrupted with some types of SD memory card.
• The data in internal memory may be erased or corrupted when the camera is repaired. Please note that the
repairer will be able to view pictures in internal memory.
• Formatting a memory card or internal memory in the camera creates a folder in which pictures are stored. Do
not rename or delete this folder or use a computer or other device to edit, delete, or rename image files. Always
use the camera to delete pictures from memory cards and internal memory; before editing or renaming files,
copy them to a computer and edit or rename the copies, not the originals.
13
Turning the Camera on and Off
Shooting Mode
Playback Mode
To turn the camera on, open the lens cover fully. The camera turns off when the lens cover is
closed.
If the lens cover is closed, the camera can be
turned on in playback mode by pressing the
p button for about a second.
Camera on
Camera off
2 Tip: Switching to Playback Mode
Touch the a icon to start playback. Press the shutter
button halfway to return to shooting mode.
3 Cautions
• Pictures can be affected by fingerprints and other
marks on the lens. Keep the lens clean.
• Closing the cover does not completely cut power to
the camera.
Press the p button for about a second to turn the
camera off.
2 Tip: Switching to Shooting Mode
To exit to shooting mode, press the shutter button
halfway. Touch the a icon to return to playback.
3 Caution
The indicator lamp lights when the camera is turned
off. Do not remove the battery while the lamp is lit.
The camera can not be turned on again until the lamp
turns off.
2 Tip: Auto Power Off
The camera will turn off automatically if no operations are performed for the length of time selected in the
M AUTO POWER OFF menu (pg. 75). To turn the camera on, close and reopen the lens cover or press the p
button for about a second.
Downloaded From camera-usermanual.com Fujifilm Manuals
14
Basic Setup
A language-selection dialog is displayed the first time the camera is turned on. Set up the camera as
described below (for information on resetting the clock or changing languages, see page 71).
Choose a language.
1 Tap
to select a language.
2
Set the date.
Tap the – or + signs to
set the year, month, and
day and then tap OK.
AM or
PM, tap the – or + signs
to set the time and tap
OK.
1/2
START MENU
NO
BACK
DATE/TIME
2007
11
30
2008
12
31
2009
1
1
2010
2
2
2011
YY
3
MM
3
DD
START MENU
AM
PM
BACK
Choose a shooting mode.
4 Tap
to select.
START MENU
YY. MM. DD
NO
2 Tip: “BACK”
Select BACK to return to the previous step.
1 Note
To change the order in which the year, month,
and day are displayed, tap YY.MM.DD.
Downloaded From camera-usermanual.com Fujifilm Manuals
02
1
01
12
00
11
59
10
hh
58
mm
OK
FACE DETECTION
SCENE RECOGNITION
Selects optimum camera
setting for certain scenes
TOUCH & SHOOT
Focus on the touched
area and shoot.
OK
2 Tip: “NO”
Tap NO to skip the current step. Any steps you
skip will be displayed the next time the camera
is turned on.
DATE/TIME
2
NO
First Steps
Tap 6 or 7 to view additional languages.
Set the time.
3 After
selecting
START MENU
BACK
The camera immediately enters the selected
mode.
MENU
DISP
2 Tip: The Camera Clock
If the battery is removed for an extended period, the
camera clock will be reset and the language-selection
dialog will be displayed when the camera is turned on.
If the battery is left in the camera or an optional AC
adapter connected for about a day, the battery can be
removed for about a week without resetting the clock
or language selection.
15
Taking Pictures in B (Auto) Mode
This section describes how to take pictures in B (auto) mode.
Turn the camera on.
1 Fully
open the lens cover.
Check the battery level.
3 Check
the battery level
B mode.
2 Select
Tap the shooting mode icon to view shooting modes and tap
to select auto mode.
Basic Photography and Playback
SHOOTING MODE
MENU
DISP
BACK
The B (auto) icon will
be displayed.
MENU
DISP
Downloaded From camera-usermanual.com Fujifilm Manuals
16
in the display.
DISP
Indicator
Description
D (white) Battery partially discharged.
C (white) Battery more than half discharged.
Low battery. Charge as soon as posB (red)
sible.
Battery exhausted. Turn camera off
A
(blinks red) and charge battery.
Taking Pictures in B (Auto) Mode
Frame the picture.
4 Position
the main subject in the focus frame
and use the zoom control to frame the picture in the display.
Select W to zoom out
Zoom indicator
DISP
MENU
DISP
By default, the camera uses
optical zoom only. If desired,
digital zoom (pg. 74) can be
used to zoom in closer.
2 Tip: Focus Lock
Use focus lock (pg. 29) to focus on subjects that
are not in the focus frame.
Downloaded From camera-usermanual.com Fujifilm Manuals
To prevent pictures that are
out of focus or too dark (underexposed), keep your fingers
and other objects away from
the lens and flash.
Hiding and Viewing Indicators
To hide indicators in the display, tap the DISP icon.
Tap again to display indicators.
MENU
127
N
DISP
Indicators displayed
DISP
Indicators hidden
Basic Photography and Playback
MENU
Select T to zoom in
Holding the Camera
Hold the camera steady with
both hands and brace your elbows against your sides. Shaking or unsteady hands can blur
your shots.
17
Taking Pictures in B (Auto) Mode
5 Focus.
Press the shutter button halfway to focus on
the main subject in the focus frame.
Press
halfway
MENU
DISP
Focus frame
Camera selects small focus
frame and focuses on subject
1 Note
The lens may make a noise when the camera focuses. This is normal.
6 Shoot.
Smoothly press the shutter button
the rest of the way down to take
the picture.
1 Note
If the subject is poorly lit, the flash may fire when
the picture is taken. To take pictures without the
flash, choose another flash mode (pg. 24).
2 Tip: The Shutter Button
The shutter button has two positions. Pressing the
shutter button halfway (q) sets focus and exposure;
to shoot, press the shutter button the rest of the way
down (w).
If the camera is able to focus, it will beep twice
and the indicator lamp will glow green.
If the camera is unable to focus, the focus frame
will turn red, s will be displayed, and the
indicator lamp will blink green. Change the
composition or use focus lock (pg. 29).
Downloaded From camera-usermanual.com Fujifilm Manuals
18
Double
beep
q
Press halfway
Click
w
Press the rest of
the way down
Taking Pictures in B (Auto) Mode
Where Are My Pictures Stored?
Pictures will be stored in internal memory if no memory card is inserted. When a memory card is inserted,
pictures are stored in the “ ” (“my pictures”) folder.
Use folder management (pg. 47) to organize pictures
into other folders after shooting.
The Indicator Lamp
Indicator lamp
The indicator lamp shows camera status as follows:
2 Tip: Warnings
Detailed warnings appear in the display. See pages
88–91 for more information.
Downloaded From camera-usermanual.com Fujifilm Manuals
Basic Photography and Playback
Indicator lamp
Camera status
Glows green Focus locked.
Blur, focus, or exposure warning. Picture
Blinks green
can be taken.
Blinks green Recording pictures. Additional pictures can
and orange be taken.
Recording pictures. No additional pictures
Glows orange
can be taken at this time.
Flash charging; flash will not fire when picBlinks orange
ture is taken.
Lens or memory error (internal memory or
Blinks red memory card full or not formatted, format
error, or other memory error).
19
Taking Pictures in B (Auto) Mode
Avoiding Blurred Pictures
If the subject is poorly lit, blurring caused by camera shake
or subject movement can be
reduced by selecting f ON
for the L DUAL IS MODE option in the shooting menu (pg.
61). The type of blur reduction
can be selected in the setup
menu (pg. 71).
Sensitivity is raised when dual
IS is in effect. Note that blurring may still occur depending
on the scene.
Best Framing
To display a framing guide
(“best framing”), select ON for
the c FRAMING GUIDELINE
option in the shooting menu.
DUAL IS MODE
ON
OFF
BACK
MENU
DISP
Icon is displayed
when dual IS is on.
127
MENU
N
DISP
To use best framing, position the main subject at the
intersection of two lines or align one of the horizontal lines with the horizon. Use focus lock (pg. 29) to
focus on subjects that will not be in the center of the
frame in the final photograph.
Silent Mode
In situations in which camera
sounds or lights may be unwelcome, select h ON for the
a SILENT MODE option in
the shooting menu (pg. 61).
SILENT MODE
ON
OFF
BACK
The camera speaker, flash, and illuminator turn off;
flash and volume settings (pg. 74) can not be adjusted (note that the flash will still fire in C mode). To
restore normal operation, turn silent mode off.
Downloaded From camera-usermanual.com Fujifilm Manuals
20
Viewing Pictures
Pictures can be viewed in the monitor. When taking important photographs, take a test shot and
check the results.
the a icon.
1 Tap
The most recent picture will be displayed.
MENU
DISP
DISP
View additional pictures.
2 Scroll
left or right or tap 8 or 9.
MENU
DISP
MENU
Tap picture to display icons (to return to full-screen
playback at any time, tap picture)
or
ERASE OK?
BACK
MENU
DISP
MENU
OK
DISP
MENU
Press the shutter button to exit to shooting mode.
Tap
to display confirmation dialog
To delete the picture, tap OK. To exit without deleting the picture, tap BACK.
Basic Photography and Playback
MENU
Deleting Pictures
To delete the current picture, tap it once to display
playback icons (pg. 35), then tap the icon. A confirmation dialog will be displayed.
2 Tip: The Playback Menu
Pictures can also be deleted from the playback menu
(pg. 38).
Downloaded From camera-usermanual.com Fujifilm Manuals
21
g Intelligent Face Detection and Red-Eye Removal
Intelligent Face Detection automatically detects human faces anywhere in the frame and sets focus
and exposure for shots that emphasize portrait subjects. Choose to prevent the camera from focusing
on the background when taking group portraits, or to remove “red-eye” caused by the flash.
Turn Intelligent Face Detection on.
1 Tap
MENU to display the shooting menu
and tap
.
SHOOTING MENU
Frame the picture.
2 Frame
the picture
in
vertical or horizontal
orientation. If a face is
detected, it will be indiGreen border
cated by a green border.
If there is more than one
face in the frame, the camera will select the
face closest to the center; other faces are indicated by white borders.
MENU
More on Photography
MENU
DISP
The options shown at
right will be displayed.
Tap to select.
BACK
FACE DETECTION
FACE DETECTION ON
RED EYE REMOVAL ON
FACE DETECTION ON
RED EYE REMOVAL OFF
OFF
BACK
Option
q
g
OFF
Description
Intelligent Face Detection and red-eye
removal on. Use with the flash.
Intelligent Face Detection on; red-eye
removal off.
Intelligent Face Detection and red-eye
removal off.
Downloaded From camera-usermanual.com Fujifilm Manuals
22
DISP
3 Focus.
Press the shutter button halfway
to set focus and exposure for the
subject in the green border.
3 Caution
If no face is detected when the shutter button is
pressed halfway (pg. 83), the camera will focus on
the subject at the center of the display and redeye will not be removed.
g Intelligent Face Detection and Red-Eye Removal
4 Shoot.
Press the shutter button all the
way down to shoot.
3 Caution
If the subject moves as the shutter
button is pressed, their face may not be in the
area indicated by the green border when the picture is taken.
REMOVING
Downloaded From camera-usermanual.com Fujifilm Manuals
7
BACK
When a picture taken with Intelligent Face Detection
is displayed, the camera can automatically select faces for red-eye removal (pg. 44), playback zoom (pg.
36), slide shows (pg. 68), and trimming (pg. 43).
More on Photography
If q FACE DETECTION
ON RED EYE REMOVAL
ON is selected, the picture will be processed to
reduce red-eye before it is recorded.
Intelligent Face Detection
Intelligent Face Detection is
recommended when using
the self-timer for group- or
self-portraits (pg. 26).
23
N Using the Flash (Super-Intelligent Flash)
When the flash is used, the camera’s Super-Intelligent Flash system instantly analyzes the scene based
on such factors as the brightness of the subject, its position in the frame, and its distance from the
camera. Flash output and sensitivity are adjusted to ensure that the main subject is correctly exposed
while preserving the effects of ambient background lighting, even in dimly-lit indoor scenes. Use the
flash when lighting is poor, for example when shooting at night or indoors under low light.
Choose a flash mode.
1 Tap
the flash mode icon to display a menu of flash modes and tap to select
the desired mode.
MENU
Option
Q (auto flash)
N (fill flash)
P (off )
O (slow sync)
Description
The flash fires when required. Recommended in most situations.
The flash fires whenever a picture is taken. Use for backlit subjects or for natural coloration when shooting in bright light.
The flash does not fire even when the subject is poorly lit. k will appear in the
monitor at slow shutter speeds to warn that pictures may be blurred. Use of a tripod
is recommended.
Capture both the main subject and the background under low light (note that brightly lit scenes may be overexposed).
Downloaded From camera-usermanual.com Fujifilm Manuals
24
DISP
N Using the Flash (Intelligent Flash)
2 Focus.
Press the shutter button halfway to focus. If the flash will fire, p will be displayed when
the shutter button is pressed halfway. At slow shutter speeds, k will appear in the
display to warn that pictures may be blurred; use of a tripod is recommended.
3 Shoot.
Press the shutter button the rest of the way down to shoot.
Red-Eye Removal
When q FACE DETECTION ON RED EYE REMOVAL ON is selected for Intelligent Face Detection
(pg. 22), red-eye removal (J) is available in auto (K), fill flash (L), and slow sync (M) modes.
Red-eye removal minimizes “red-eye” caused when light from the flash is reflected from the subject’s
retinas as shown in the illustration at right.
Downloaded From camera-usermanual.com Fujifilm Manuals
More on Photography
3 Caution
The flash may fire several times with each shot. Do not move the camera until shooting is complete.
25
h Using the Self-Timer
The camera offers a “couple timer” for self-portraits taken with a friend, a “group timer” for group portraits, a ten-second timer (pg. 27) that allows photographers to appear in their own photographs, and
a two-second timer (pg. 27) that can be used to avoid blur caused by the camera moving when the
shutter button is pressed.
Tap the self-timer icon to display self-timer options and
tap to select.
MENU
Option
a (couple)
g (group)
S (10 seconds)
R (2 seconds)
T (off )
DISP
Description
For self-portraits taken with a friend.
For group portraits.
Ten-second timer.
Two-second timer.
Self-timer off.
■ a COUPLE TIMER
The camera will start the timer when it detects
two portrait subjects close together. Tap 6 or
7 to choose how close the subjects must be together before the timer starts. To stop the timer
before the picture is taken, press the shutter button halfway.
COUPLE TIMER
CLOSE UP
Select
MENU
1 Note
Turn macro mode on when shooting self-portraits with
the camera held at arm’s length.
2
DISP
■ g GROUP TIMER
The camera will start the timer when it detects
the selected number of portrait subjects. Tap 6
or 7 to choose the number of subjects. To stop
the timer before the picture is taken, press the
shutter button halfway.
GROUP TIMER
2
2 persons
Select number
MENU
Downloaded From camera-usermanual.com Fujifilm Manuals
26
Choose 1 (b), 2 (bb), or 3
(bbb). The higher the number,
the closer the subjects must be together.
DISP
Choose the number of subjects
from 1–4. Timer duration is 1 s for
single subjects, 2 s for groups of
two or more.
h Using the Self-Timer
■ S (Ten Seconds) / R (Two Seconds)
The camera will start the timer ten or two seconds after the shutter button is pressed all the
way down.
1 Focus.
Press the shutter button
halfway to focus.
Start the timer.
2 Press
the shutter
button the rest of the way
down to start the timer.
The display in the monitor shows the number of
seconds remaining until
the shutter is released.
More on Photography
3 Caution
Stand behind the camera when using the shutter
button. Standing in front of the lens can interfere
with focus and exposure.
The self-timer lamp on the
front of the camera will blink
immediately before the picture is taken. If the two-second timer is selected, the
self-timer lamp will blink as
the timer counts down.
7
BACK
Downloaded From camera-usermanual.com Fujifilm Manuals
27
F Macro Mode (Close-ups)
Use macro mode for close-ups.
Tap the macro mode icon (q) and tap F (w) to
turn macro mode on.
w
q
MENU
To exit macro mode, tap the macro mode icon to
display the macro mode menu and tap H.
DISP
MENU
DISP
F is displayed when
macro mode is on.
Downloaded From camera-usermanual.com Fujifilm Manuals
28
When macro mode is in effect, the camera focuses on subjects near the center of the frame. Use
the zoom control to compose pictures.
1 Notes
• Use of a tripod is recommended to prevent blur
caused by camera shake.
• The flash may fail to light the entire subject at very
short ranges. Increase the distance to the subject
and try again.
Focus Lock
To compose photographs with off-center subjects:
1 Position the subject in the focus frame.
Recompose the picture.
3 Keeping
the shutter button pressed halfway,
recompose the picture.
MENU
DISP
2 Focus.
Press the shutter button halfway to set fo-
Press
halfway
4 Shoot.
Press the shutter-release button the rest of
the way down to take the picture.
Press the rest of
the way down
More on Photography
cus and exposure. Focus and exposure will
remain locked while the shutter button is
pressed halfway (AF/AE lock).
Repeat steps 1 and 2 as desired to refocus
before taking the picture.
Downloaded From camera-usermanual.com Fujifilm Manuals
29
Focus Lock
Autofocus
Although the camera boasts a high-precision autofocus system, it may be unable to focus on the subjects listed
below. If the camera is unable to focus using autofocus, use focus lock (pg. 29) to focus on another subject at
the same distance and then recompose the photograph.
• Very shiny subjects such as mirrors or car bodies.
• Fast-moving subjects.
•
•
•
•
Subjects photographed through a window or other reflective object.
Dark subjects and subjects that absorb rather than reflect light, such as hair or fur.
Insubstantial subjects, such as smoke or flame.
Subjects that show little contrast with the background (for example, subjects in clothing that is the same color
as the background).
• Subjects positioned in front of or behind a high-contrast object that is also in the focus frame (for example, a
subject photographed against a backdrop of highly contrasting elements).
Downloaded From camera-usermanual.com Fujifilm Manuals
30
A Shooting Mode
Choose a shooting mode according to the scene
or type of subject. To choose a shooting mode,
tap the shooting mode icon in the monitor when
the camera is in shooting mode and tap to choose
a mode.
SHOOTING MODE
MENU
Y SCENE RECOGNITION
In this mode, the camera automatically analyzes
the composition and selects the appropriate
scene mode according to the subject and shooting conditions. The selected mode is displayed
when the shutter button is pressed halfway.
Mode
See
Y SCENE RECOGNITION 31
31
B AUTO
Mode
D NATURAL LIGHT
See
33
CNATURAL & N
32
J TOUCH & SHOOT
32
I MANUAL
31
H SCENE POSITION
33
F MOVIE
49
I MANUAL
Choose for complete control of camera settings.
B AUTO
Choose for crisp, clear snapshots (pg. 16). This
mode is recommended in most situations.
Downloaded From camera-usermanual.com Fujifilm Manuals
MENU
DISP
Mode
Type of subject or scene detected
b Portrait: Human portrait subject.
c Landscape: Man-made or natural landscape.
d Night: Poorly lit landscape.
Macro: Subject close to camera. Camera focuses in
e
F (macro) range (pg. 94).
g Back-lit portrait: Back-lit portrait subject.
f Night portrait: Poorly lit portrait subject.
More on Photography
Display when
portrait subject
is detected.
BACK
DISP
1 Notes
• a (AUTO) will be selected if the subject does not
match the scenes listed above.
• The camera focuses continuously, increasing the
drain on the battery. The sound of the camera focusing may be audible.
31
A Shooting Mode
J TOUCH & SHOOT
C NATURAL & N
Choose this mode to take pictures by touching
the display instead of pressing the shutter button.
Touch anywhere inside the “touch and shoot”
area to focus on the selected subject and take a
picture.
This mode helps ensure good results with backlit subjects and in other situations with difficult
lighting. Each time the shutter button is pressed,
the camera takes two shots: one shot without the
flash to preserve natural lighting, followed immediately by a second shot with the flash. Do not
move the camera until shooting is complete.
MENU
DISP
Touch and shoot area
Touch subject to shoot
Flash off
Flash on
1 Notes
• Do not use where flash photography is prohibited.
The flash will fire even in silent mode.
• Only available if memory remains for two pictures.
Downloaded From camera-usermanual.com Fujifilm Manuals
32
A Shooting Mode
D NATURAL LIGHT
H SCENE POSITION
Capture natural light indoors,
under low light, or where the
flash can not be used. The
flash turns off and sensitivity
is raised to reduce blur.
This mode offers a choice of
“scenes,” each adapted to particular shooting conditions or
a specific type of subject. Select (SCENE POSITION) in the shooting mode
menu (pg. 31) and tap an icon to select a scene.
Tap BACK to exit.
SCENE POSITION
BACK
More on Photography
Downloaded From camera-usermanual.com Fujifilm Manuals
33
A Shooting Mode
Scene
SCENE POSITION
BACK
R SNOW
o
S BEACH
!0
U PARTY
!1
V FLOWER
!2
W TEXT
Scene
q
w
e
r
t
y
u
Description
Choose for soft-toned portraits with
L PORTRAIT
natural skin tones.
Choose for crisp, clear daylight shots of
M LANDSCAPE
buildings and landscapes.
Choose for fast shutter speeds when
N SPORT
photographing moving subjects.
Choose this mode for poorly lit twilight
or night scenes. Sensitivity is automatically raised to reduce blur caused by
O NIGHT
camera shake. Use a tripod to prevent
blur.
Choose this mode for slow shutter
H NIGHT
(TRIPOD) speeds when shooting at night.
Slow shutter speeds are used to capture the expanding burst of light from
a firework. Shutter speed can be seP FIREWORKS
lected by tapping the left and right
arrows (8 and 9). Use a tripod to
prevent blur.
Record the vivid colors in sunrises and
Q SUNSET
sunsets.
i
Downloaded From camera-usermanual.com Fujifilm Manuals
34
Description
Choose for crisp, clear shots that capture the brightness of scenes dominated by shining white snow.
Choose for crisp, clear shots that capture the brightness of sunlit beaches.
Capture indoor background lighting
under low-light conditions.
Choose for vivid close-ups of flowers. The camera focuses in the macro
range.
Take clear pictures of text or drawings
in print. The camera focuses in the
macro range.
Playback Options
To view the most recent picture, tap the a icon.
MENU
MENU
DISP
DISP
Scroll left or right or tap 8 or 9 to view additional pictures.
or
MENU
DISP
To view icons for such playback-mode options as
deleting and editing pictures, tap the center of
the display.
MENU
DISP
MENU
DISP
MENU
Full-screen playback
Playback icons displayed
To view additional pictures when playback icons
are displayed, tap the edges of the display or scroll
left or right.
or
MENU
MENU
100-0100
To return to full-screen playback, tap the center of
the display again.
12 / 31 / 2050 10:00 AM
1000 F3. 9 ISO 1600
MENU
BACK
DISP
Indicators displayed
More on Playback
Hiding Indicators
Tap DISP to hide or view indicators.
DISP
Indicators hidden
1 Note
Pictures taken using other cameras are indicated by a
m (“gift image”) icon.
Downloaded From camera-usermanual.com Fujifilm Manuals
35
Playback Options
Playback Zoom
To zoom a picture in or out,
display the picture full screen
and tap k.
MENU
DISP
A zoom slider will be displayed; tap k to zoom
in, n to zoom out (you can also select T with the
camera zoom control to display the zoom slider
and use the zoom control to zoom in and out).
Zoom slider
BACK
DISP
Tap k to zoom in
BACK
DISP
Tap n to zoom out
Downloaded From camera-usermanual.com Fujifilm Manuals
36
When the picture is zoomed
in, it can be scrolled by gliding your finger over the display.
BACK
DISP
Tap BACK to exit zoom.
1 Notes
• The maximum zoom ratio varies with image size.
• If the zoom slider clears from the display, tap the picture to view the slider again.
Playback Options
Multi-Frame Playback
To view pictures nine at a time, tap the center of
the current picture to display playback icons and
then tap
.
MENU
DISP
MENU
The number of pictures displayed changes each
time you tap
.
Three frames
Nine frames
1 Notes: Folder View
• The current folder is selected when you tap a picture
to display it in three-frame view.
• Selecting the private folder displays the contents of
all folders on the memory card, including the private
folder.
More on Playback
MENU
Scroll left or right to view
more pictures. In nine-frame
and folder views, you can tap
a picture to view it in threeframe view. To exit to full
screen playback, press the p button.
Entire folder
Downloaded From camera-usermanual.com Fujifilm Manuals
37
e Deleting Pictures
The e ERASE option in the playback menu can be used to delete still pictures and movies, increasing
the amount of space available on the memory card or in internal memory (for information on deleting
pictures in single-frame playback, see page 21). Note that deleted pictures can not be recovered. Copy
important pictures to a computer or other storage device before proceeding.
MENU during playback to display the play1 Tap
back menu and tap .
PLAYBACK MENU
MENU
DISP
Tap FRAME or ALL
2 FRAMES
to display options for the selected item
(pg. 39).
BACK
ERASE
FRAME
ALL FRAMES
BACK
Downloaded From camera-usermanual.com Fujifilm Manuals
38
2 Tips: Deleting Pictures
• When a memory card is inserted, pictures will be deleted from the memory card; otherwise, pictures will
be deleted from internal memory.
• Protected pictures can not be deleted. Remove protection from any pictures you wish to delete (pg. 69).
e Deleting Pictures
■ FRAME
FRAME:: Deleting Selected Images
Selecting FRAME displays
the dialog shown at right.
Scroll left or right (or tap the
pictures to the left or right) to
display a picture you wish to delete and tap
ERASE.
ERASE
BACK
■ ALL FRAMES
FRAMES:: Deleting All Images in a Folder
Selecting ALL FRAMES displays a confirmation
dialog. Tap OK to delete all unprotected pictures
in the current folder.
ERASE
ERASE OK?
BACK
OK
Tap BACK to exit when all the desired pictures
have been deleted.
Downloaded From camera-usermanual.com Fujifilm Manuals
BACK
More on Playback
A confirmation dialog will be
displayed; tap OK to delete
the current picture and return to the picture-selection
dialog. To continue without deleting the picture,
tap BACK.
The dialog shown at right is
displayed during deletion.
Tap BACK to cancel before all
pictures have been deleted
(any pictures deleted before BACK was selected
can not be recovered).
39
c Edit
To rotate pictures, make collages, or create
cropped or resized copies of pictures, tap the center of the current picture to display playback icons
and then tap .
MENU
DISP
The menu shown at right will
be displayed; tap 6 or 7 to
scroll through the menu and
tap an option to select it.
Option
f COLLAGE
C IMAGE ROTATE
G TRIMMING
O RESIZE
B RED EYE
REMOVAL
MENU
EDIT
COLLAGE
1/2
IMAGE ROTATE
TRIMMING
BACK
RESIZE
Description
Create collages (pg. 41).
Rotate pictures (pg. 42).
Create cropped copies of pictures (pg. 43).
Create small copies of pictures (pg. 43).
Create copies with reduced red eye (pg.
44).
Downloaded From camera-usermanual.com Fujifilm Manuals
40
2 Tip
Edit options can also be accessed from the playback
menu (pg. 67).
c Edit
f COLLAGE
Selecting f COLLAGE displays the dialog shown in Step 1.
1 Tap the desired template for the collage.
COLLAGE
COLLAGE STYLE
BACK
up and down to scroll through the pictures at the right side of the display,
2 Glide
and then drag the pictures into the desired locations in the template. Repeat
COLLAGE
until the template is filled.
OK
BACK
3 Tap OK to complete the collage (to exit without creating a collage, tap BACK).
Image size options will be displayed. Tap an option to create a collage at the
4 selected
size and save it as a new file.
Downloaded From camera-usermanual.com Fujifilm Manuals
COLLAGE
OK
BACK
More on Playback
2 Tip
To rotate or crop an image for display in a collage, tap its frame in the collage template.
Rotation and crop tools will appear at the edges of the display. To rotate the picture,
tap V. The picture is rotated 90 ° clockwise each time you tap the icon. Tap k or n
to zoom the selected picture in or out and drag the picture to position it in the frame.
Note that depending on the template, you may not be able to rotate or crop the image.
COLLAGE
SELECT IMAGE SIZE
41
c Edit
C IMAGE ROTATE
This option creates rotated copies of pictures for display in the monitor. It has no effect on pictures
displayed on a computer or other device.
Tap the left and right arrows (8 and 9) to select the picture you wish to ro1 tate.
IMAGE ROTATE
BACK
W to rotate the picture 90 ° clockwise, X to rotate it 90 ° counterclockwise.
2 Tap
Pictures can also be rotated by tapping them and then dragging them clockwise
OK
IMAGE ROTATE
or counterclockwise.
BACK
3 Tap OK to create the rotated copy (to exit without rotating the picture, tap BACK).
The next time the picture is played back, the rotated copy will be displayed.
1 Note
The camera may not be able to rotate pictures created with other devices.
Downloaded From camera-usermanual.com Fujifilm Manuals
42
OK
c Edit
G TRIMMING
Selecting G TRIMMING displays the dialog
shown in Step 1.
O RESIZE
Selecting O RESIZE displays the dialog shown in
Step 1.
the left and right ar1 Tap
rows (8 and 9) to select
Tap the left and right ar1 rows
(8 and 9) to select
TRIMMING
the picture you wish to
crop.
OK
BACK
Tap k or n to zoom in and out and glide to
2 scroll
the picture until the desired portion is
TRIMMING
BACK
OK
Zoom in and out.
BACK
BACK
2 Tip
To rotate the picture before creating a resized copy,
tap V. The picture is rotated 90 ° clockwise each
time you tap the icon.
Tap a or b to copy
2 the
picture at the selected
size (to exit without creating a small copy, tap
BACK).
TRIMMING
N
RESIZE
N
BACK
More on Playback
displayed in the blue frame (tap the picture
to redisplay the zoom slider as needed; to exit
without creating a cropped copy, tap BACK).
Larger crops produce smaller copies.
the picture you wish to
crop.
RESIZE
OK
Glide to scroll.
OK to save the cropped copy to a separate
3 fiTap
le.
Downloaded From camera-usermanual.com Fujifilm Manuals
43
c Edit
B RED EYE REMOVAL
This option is used with pictures taken using Intelligent Face Detection to create copies that have been
processed to remove red eye.
B RED EYE
1 Selecting
REMOVAL displays the
dialog shown at right. Tap
the left and right arrows
(8 and 9) to select a picture.
REMOVAL OK?
BACK
OK
OK. The message shown below at left will
2 Tap
be displayed while the camera analyses the image; if red-eye is detected, the message shown
below at right will be displayed while the camera processes the image to create a copy with
reduced red-eye.
DETECTING
REMOVING
CANCEL
Downloaded From camera-usermanual.com Fujifilm Manuals
44
1 Notes
• Red eye may not be removed if the camera is unable
to detect a face or the face is in profile. Results may
differ depending on the scene. Red eye can not be
removed from pictures that have already been processed using red-eye removal or pictures created
with other devices.
• The amount of time needed to process the image
varies with the number of faces detected.
• Copies created with B RED EYE REMOVAL are indicated by a e icon during playback.
b Image Search
Search for pictures by date, subject, scene, and file type.
the center of the cur1 Tap
rent picture to display
playback icons (pg. 35)
and then tap .
2
Choose from the following options:
the desired search conditions. Only
3 Select
pictures in the current folder that match the
search conditions will be displayed.
MENU
BY DATE
BY DATE
BACK
01 / 02 / 2051
BACK
BACK
01 / 15 / 2051
BY TYPE OF DATA
Description
Find all pictures taken on a selected date.
Find all portraits of a selected type.
Find all pictures that match a selected scene.
Find all still pictures or all movies.
2 Tip
Searches can also be performed from the playback
menu (pg. 67).
1 “BACK”
Tap BACK at any time to return to the previous display.
Thumbnail wheel
Drag the thumbnail wheel left or right to view
more pictures. To make a new search, click the
tab showing the current search conditions.
view pictures full frame, tap a picture in the
4 To
center column. Tap 8 or 9 to view more pictures.
BY DATE
12/31/2050
BACK
BY DATE
BACK
More on Playback
Option
BY DATE
BY FACE
BY SCENE
BY TYPE OF
DATA
12/31/2050
12 / 31 / 2050
BY FACE
BY SCENE
BY DATE
11 / 03 / 2050
11 / 24 / 2050
IMAGE SEARCH
OK
Tap OK to end the search.
Downloaded From camera-usermanual.com Fujifilm Manuals
45
b Image Search
Image Search: Deleting Pictures
To delete the picture currently displayed in the search
results dialog, tap the A icon.
BY DATE
BY DATE
BACK
A confirmation dialog will be
displayed; tap OK to delete
the picture. To exit without deleting the picture, tap
BACK.
Image Search: Folder Management
To copy or move the pictures
in the search results dialog
into folders, tap the
icon.
The dialog shown in Step 1
will be displayed.
OK
BY DATE
ERASE OK?
BACK
OK
BACK
8 or 9 to display
1 Tap
the desired picture (glide
MOVE
COPY
MOVE
COPY
MOVE
COPY
BACK
copying the picture, tap
BACK).
the picture to display
3 aTapthumbnail
and drag and
drop the thumbnail into
the folder of your choice.
46
BY DATE
scroll is not available).
MOVE or COPY (to
2 Tap
exit without moving or
Downloaded From camera-usermanual.com Fujifilm Manuals
OK
BY DATE
BACK
BY DATE
BACK
g Folder Management
Organize pictures into folders.
To view the g FOLDER MANAGEMENT dialog,
tap the center of the current picture to display
playback icons (pg. 35) and then tap the folder
icon.
1 Note
Folder management is only available when a memory
card is inserted in the camera. Folders on memory
cards from other cameras may not be organized as
shown above.
FOLDER MANAGEMENT
MOVE
COPY
OK
MENU
Folder
a Internal memory
My pictures
Theme (1)
Theme (2)
Private
Default folder name
—
110_FUJI
101FETC1
102FETC2
100FPRIV
To choose a folder for playback, tap the icon at
the bottom of the display. Tap OK to return to
single-frame playback.
Downloaded From camera-usermanual.com Fujifilm Manuals
The Folder
The folder is password protected. Tapping the
icon
displays a password entry dialog; tap the – and + signs to
enter the four-digit password.
In all other respects the folder functions as a normal folder.
ENTER PASSWORD
8
8
8
8
9
9
9
9
0
0
0
0
1
1
1
1
2
2
2
2
BACK
OK
The password can be freely changed using the
g PASSWORD option in the setup menu (pg. 71).
Note that password protection applies on the camera only; files are not encrypted and can be viewed
normally on other devices.
More on Playback
Folders are identified by icons at the bottom of
the display:
2 Tip: Folder Management
Folder management can also be accessed from the
playback menu (pg. 67).
47
g Folder Management
Moving Pictures
To move pictures between folders:
Select the folder contain1 ing
the pictures you wish
Copying Pictures
To copy pictures to another folder:
FOLDER MANAGEMENT
MOVE
COPY
to move.
Select the folder contain1 ing
the pictures you wish
FOLDER MANAGEMENT
MOVE
to copy.
OK
8 or 9 to display
2 Tap
the desired pictures (glide
FOLDER MANAGEMENT
MOVE
COPY
scroll is not available).
OK
8 or 9 to display
2 Tap
the desired pictures (glide
FOLDER MANAGEMENT
MOVE
FOLDER MANAGEMENT
MOVE
COPY
OK
3 Tap COPY.
FOLDER MANAGEMENT
MOVE
OK
and drop the pic4 Drag
tures into the destination
FOLDER MANAGEMENT
MOVE
COPY
folder.
COPY
OK
and drop the pic4 Drag
tures into the destination
FOLDER MANAGEMENT
MOVE
COPY
folder.
OK
OK
3 Caution
Copying ends when the destination is full.
Downloaded From camera-usermanual.com Fujifilm Manuals
48
COPY
scroll is not available).
OK
3 Tap MOVE.
COPY
F Recording Movies
Shoot short movies. Sound is recorded via the built in microphone; do not cover the microphone during the recording.
the shooting mode icon
1 Tap
to view a menu of shooting
modes and tap
.
the scene using the
3 Frame
zoom control.
SHOOTING MODE
BACK
Zoom indicator
F mode icon
Time available is
displayed in monitor
STANDBY
MENU
Zoom can not be adjusted once recording begins.
STANDBY
MENU
26s
MENU and select
2 Tap
a frame size from the
26s
QUALITY
2m00s
8m30s
BACK
Downloaded From camera-usermanual.com Fujifilm Manuals
Movies
O QUALITY menu. Tap
a (640 × 480 pixels) for
higher quality or b (320 × 240 pixels) for longer
movies. If desired, you can also turn L DUAL
IS MODE (pg. 20) and a SILENT MODE (pg.
20) on or off before shooting movies.
49
F Recording Movies
the shutter button all the way
4 Press
down to start recording.
REC
20s
z REC and time
remaining are
displayed in monitor
1 Note
Exposure and white balance are adjusted automatically
throughout recording. The color and brightness of the
image may vary from that displayed before recording
begins.
2 Tip
There is no need to keep the shutter button pressed
during recording.
Downloaded From camera-usermanual.com Fujifilm Manuals
50
the shutter button all the way
5 Press
down to end recording. Recording
ends automatically when the movie
reaches maximum length or memory is full.
3 Caution
The indicator lamp lights while movies are being recorded. Do not open the battery chamber during
shooting or while the indicator lamp is lit. Failure to
observe this precaution could prevent the movie from
being played back.
1 Note
The monitor will automatically dim after ten minutes of
continuous recording.
a Viewing Movies
To view a movie, display it in playback mode and follow the steps below.
Tap the movie to display it
1 full
screen.
MENU
2 Tap
DISP
to start playback.
MENU
2 Tip: Playback Icons
If playback icons are displayed,
icon appears at the botthe
tom of the display.
MENU
1m15s
Progress bar
Operation
Description
End playback Tap 3 to end playback.
Pause
Tap 2 to pause playback. Tap 1
playback to resume.
Movies
Progress is shown in the
monitor during playback.
The following operations
can be performed while
playback is in progress:
DISP
3 Cautions
• Do not cover the speaker during playback.
• White vertical or dark horizontal streaks may appear
in movies containing very bright subjects. This is normal and does not indicate a malfunction.
Playback ends automatically when the entire
movie has been played.
Downloaded From camera-usermanual.com Fujifilm Manuals
51
Printing Pictures via USB
If the printer supports PictBridge, the camera can be connected directly to the printer and
pictures can be printed without first being copied to a computer. Note that depending on
the printer, not all the functions described below may be supported.
Connecting the Camera
1 Connect the supplied USB cable as shown and turn the printer on.
Press the p button for about a second to turn the camera on. t USB will be displayed in the
2 monitor,
followed by the PictBridge display shown below at right.
USB
PICTBRIDGE
TOTAL: 00000
MENU
Connections
Downloaded From camera-usermanual.com Fujifilm Manuals
52
00
PRINT
Printing Pictures via USB
Printing Selected Pictures
Tap 8 or 9 to select a picture you wish to
1 print.
+ or – to choose the number of copies (up
2 Tap
to 99).
steps 1–2 to select
3 Repeat
additional pictures. Tap
PRINT to display a confirmation dialog when settings are complete.
PICTBRIDGE
TOTAL: 00010
MENU
2 Tip: Printing the Date of Recording
To print the date of recording on pictures, tap MENU
in steps 1–2 to display the PictBridge menu (see below)
and select WITH DATE s. To ensure that the date is
correct, set the camera clock before taking pictures.
PICTBRIDGE
10
PRINT
PRINT WITH DATE
PRINT WITHOUT DATE
BACK
OK
• WITH DATE s: Print date of
recording on pictures.
• WITHOUT DATE: Print pictures
without date.
1 Note
If no pictures are selected when you tap PRINT, the
camera will print one copy of the current picture.
Downloaded From camera-usermanual.com Fujifilm Manuals
Connections
OK to start printing. To end printing be4 Tap
fore all pictures have printed, tap CANCEL.
53
Viewing Pictures on a Computer
The supplied FinePixViewer software can be used to copy pictures to a computer, where they can be
stored, viewed, organized, and printed. Before proceeding, install FinePixViewer as described below.
Do NOT connect the camera to the computer until installation is complete.
Installing FinePixViewer
FinePixViewer is available in Windows and Macintosh versions. Installation instructions for Windows
are on pages 54–55, those for the Macintosh on pages 56–57.
Installing FinePixViewer: Windows
Confirm that the computer meets the following system requirements:
1
Preinstalled versions of Windows Vista, Windows XP Home Edition (Service Pack 2), Windows XP Professional
(Service Pack 2), or Windows 2000 Professional (Service Pack 4)
• Windows Vista: 800 MHz Pentium 4 or better (3 GHz Pentium 4 or better recommended)
CPU • Windows XP: 800 MHz Pentium 4 or better (2 GHz Pentium 4 or better recommended)
• Windows 2000: 200 MHz Pentium or better
• Windows Vista: 512 MB or more (1 GB or more recommended)
RAM • Windows XP: 512 MB or more
• Windows 2000: 128 MB or more
Free disk A minimum of 450 MB required for installation with 600 MB available when FinePixViewer is running (15 GB or
space more recommended under Windows Vista, 2 GB or more recommended under Windows XP).
Video 800 × 600 pixels or more with 16-bit color or better (1,024 × 768 pixels or more with 32-bit color recommended)
• Built-in USB port recommended. Operation is not guaranteed with other USB ports.
Other • Internet connection (56 kbps or faster recommended) required to use FinePix Internet Service; Internet connection and e-mail software required to use e-mail option.
OS
3 Caution
Other versions of Windows are not supported. Operation is not guaranteed on home-built computers or
computers that have been upgraded from earlier versions of Windows.
Downloaded From camera-usermanual.com Fujifilm Manuals
54
Viewing Pictures on a Computer
2 Start the computer. Log in to an account with administrator privileges before proceeding.
3 Exit any applications that may be running and insert the installer CD in a CD-ROM drive.
Windows Vista
If an AutoPlay dialog is displayed, click SETUP.exe. A “User Account Control” dialog will then be displayed;
click Allow.
The installer will start automatically; click Installing FinePixViewer and follow the on-screen instructions to install FinePixViewer. Note that the Windows CD may be required during installation.
If the Installer Does Not Start Automatically
If the installer does not start automatically, select Computer or My Computer from the Start menu
(Windows Vista/XP) or double-click the My Computer icon on the desktop (Windows 2000), then doubleclick the FINEPIX CD icon to open the FINEPIX CD window and double-click SETUP or SETUP.exe.
If prompted to install Windows Media Player, QuickTime, or DirectX, follow the on-screen instruc4 tions
to complete installation.
the software. The version number is printed at the top of the CD label for reference when updating
the software or contacting customer support.
Connections
prompted, remove the installer CD from the CD-ROM drive and click Restart to restart the
5 When
computer. Store the installer CD in a dry location out of direct sunlight in case you need to re-install
Installation is now complete. Proceed to “Connecting the Camera” on page 58.
Downloaded From camera-usermanual.com Fujifilm Manuals
55
Viewing Pictures on a Computer
Installing FinePixViewer: Macintosh
Confirm that the computer meets the following system requirements:
1
CPU
PowerPC or Intel
Pre-installed versions of Mac OS X version 10.3.9–10.4
OS
(for the latest information, visit http://www.fujifilm.com/)
RAM
256 MB or more
Free disk space A minimum of 200 MB required for installation with 400 MB available when FinePixViewer is running
Video
800 × 600 pixels or more with thousands of colors or better
• Built-in USB port recommended. Operation is not guaranteed with other USB ports.
Other
• Internet connection (56 kbps or faster recommended) required to use FinePix Internet Service; Internet
connection and e-mail software required to use e-mail option.
After starting the computer and quitting any applications that may be running, insert the installer
2 CD
in a CD-ROM drive. Double-click the FinePix CD icon on the desktop and double-click Installer
for Mac OS X.
installer dialog will be displayed; click Installing FinePixViewer to start installation. Enter an
3 An
administrator name and password when prompted and click OK, then follow the on-screen instructions to install FinePixViewer. If prompted to install QuickTime, follow the on-screen instructions.
Click Exit to quit the installer when installation is complete.
Downloaded From camera-usermanual.com Fujifilm Manuals
56
Viewing Pictures on a Computer
the installer CD from the CD-ROM drive. Note that you may be unable to remove the CD
4 Remove
if Safari is running; if necessary, quit Safari before removing the CD. Store the installer CD in a dry
location out of direct sunlight in case you need to re-install the software. The version number is
printed at the top of the CD label for reference when updating the software or contacting customer
support.
Applications in the Finder Go menu to open the applications folder.
5 Select
Double-click the Image Capture icon and select Preferences… from the Image Capture application menu.
The Image Capture preferences dialog will be displayed. Choose Other… in
the When a camera is connected, open menu, then select FPVBridge in the
“Applications/FinePixViewer” folder and click Open.
Installation is now complete. Proceed to “Connecting the Camera” on page 58.
Downloaded From camera-usermanual.com Fujifilm Manuals
Connections
Select Quit Image Capture from the Image Capture application menu.
57
Viewing Pictures on a Computer
Connecting the Camera
the pictures you wish to copy are stored on a 3 Press the p button for about a second to turn
1 Ifmemory
card, insert the card into the camera
the camera on. FinePixViewer will start auto(pg. 12). If no card is inserted, pictures will be
copied from internal memory.
3 Caution
Loss of power during transfer could result in loss of
data or damage to internal memory or the memory
card. Charge the battery before connecting the
camera.
Turn the camera off and connect the supplied
2 USB
cable as shown, making sure the connectors are fully inserted. Connect the camera directly to the computer; do not use a USB hub
or keyboard.
matically and the “Save Image Wizard” will be
displayed. Follow the on-screen instructions
to copy pictures to the computer. To exit without copying pictures, click Cancel.
3 Caution
If FinePixViewer does not start automatically, the
software may not be correctly installed. Disconnect the camera and reinstall the software.
For more information on using FinePixViewer,
select How to Use FinePixViewer in the
FinePixViewer Help menu.
1 Note
The camera will not turn off automatically while connected to a computer.
Downloaded From camera-usermanual.com Fujifilm Manuals
58
Viewing Pictures on a Computer
Downloaded From camera-usermanual.com Fujifilm Manuals
Disconnecting the Camera
After confirming that the indicator lamp is out, follow
the on-screen instructions to turn the camera off and
disconnect the USB cable.
Updating FinePixViewer
The latest version of FinePixViewer can be downloaded from http://www.fujifilm.com/.
Uninstalling FinePixViewer
Only uninstall FinePixViewer before reinstalling the
software or when it is no longer required. After quitting FinePixViewer and disconnecting the camera,
drag the “FinePixViewer” folder from “Applications”
into the Trash and select Empty Trash in the Finder
menu (Macintosh), or open the control panel and use
“Programs and Features” (Windows Vista) or “Add or
Remove Programs” (other versions of Windows) to
uninstall FinePixViewer, FinePix Resource, and FinePix
Studio. Under Windows, one or more confirmation
dialogs may be displayed; read the contents carefully
before clicking OK.
Connections
3 Cautions
• Use only memory cards that have been formatted
in the camera and contain pictures taken with the
camera. If a memory card containing a large number of images is inserted, there may be a delay before
FinePixViewer starts and FinePixViewer may be unable to import or save images. Use a memory card
reader to transfer pictures.
• Make sure the indicator lamp is out before turning the
camera off or disconnecting the USB cable. Failure to
observe this precaution could result in loss of data or
damage to internal memory or the memory card.
• Disconnect the camera before inserting or removing
memory cards.
• In some cases, it may not be possible to access pictures saved to a network server using FinePixViewer
in the same way as on a standalone computer.
• The user bears all applicable fees charged by the
phone company or Internet service provider when
using services that require an Internet connection.
59
The Shooting Menu
The shooting menu is used to adjust settings for a wide range of shooting conditions.
Using the Shooting Menu
view the shooting menu, tap the MENU 2 Tap the icon for the de1 To
icon when the camera is in shooting mode.
sired menu item.
SHOOTING MENU
MENU
DISP
BACK
1 Notes
• The shooting menu can also be displayed by
pressing the p button during shooting.
• The options displayed in the shooting menu vary
depending on the shooting mode.
Menus
Downloaded From camera-usermanual.com Fujifilm Manuals
60
SHOOTING MENU
BACK
the desired option.
3 Tap
In some menus, you may
need to tap 6 or 7 to
view additional options.
FACE DETECTION
FACE DETECTION ON
RED EYE REMOVAL ON
FACE DETECTION ON
RED EYE REMOVAL OFF
OFF
BACK
The Shooting Menu
Shooting Menu Options
Menu item
Description
Adjust exposure for bright, dark, or high-contrast scenes (pg.
d EXP. COMPENSATION
63).
Adjust ISO sensitivity (pg. 65). Choose higher values when the
N ISO
subject is poorly lit.
O QUALITY
P G COLOR
D WHITE BALANCE
R CONTINUOUS
b FACE DETECTION
F AF MODE
L DUAL IS MODE
Choose image size and quality (pg. 64).
Options
Default
–2 EV to +2 EV
±0
in increments of 1/3 EV
A/ 1600 / 800 / 400 /
A
200 / 100
BF/BN/D16:9/G/
BN
H/I/I16:9/J
Shoot pictures in standard or saturated color or in black-andSTD/a/b
white (pg. 65).
Adjust color for different light sources (pg. 64).
A/i/j/k/l/m/n
Shoot a series of pictures (pg. 62).
ON / OFF
Choose whether the camera automatically detects and sets
focus and exposure for human portrait subjects. Can be comq / g /OFF
bined with red-eye removal (pg. 22).
Control how the camera focuses (pg. 66).
r/s
Reduce blur (pg. 20).
ON / OFF
Downloaded From camera-usermanual.com Fujifilm Manuals
A
OFF
OFF
r
ON
ON / OFF
OFF
ON / OFF
OFF
—
—
Menus
c FRAMING GUIDELINE Display best framing guides to help compose pictures (pg. 20).
Select h ON in situations in which camera sounds or lights
a SILENT MODE
may be unwelcome (pg. 20).
Perform basic camera setup such as choosing a language and
M SET-UP
setting the time and date (pg. 70).
STD
61
The Shooting Menu
R CONTINUOUS
Select ON to capture motion in a series of pictures. The camera takes up to five
pictures while the shutter button is pressed.
CONTINUOUS
ON
OFF
BACK
Downloaded From camera-usermanual.com Fujifilm Manuals
62
The Shooting Menu
d EXP. COMPENSATION
Use exposure compensation when photographing very bright, very dark, or high-contrast subjects.
An exposure indicator appears at the right side of the
display; tap 6 to increase exposure, 7 to reduce.
EXP. COMPENSATION
+2
EV
+1
0
0
-1
-2
BACK
OK
Exposure indicator
Tap 6 to increase exposure
+2
EV
+1
0
-1
-2
Tap 7 to reduce exposure
Choosing an Exposure Compensation Value
• Backlit subjects: choose values
from +2/3 EV to +12/3 EV (for an
explanation of the term “EV”,
see the Glossary on page 92)
• Highly reflective subjects or very
bright scenes (e.g., snowfields):
+1 EV
• Scenes that are mostly sky: +1 EV
• Spotlit subjects (particularly if photographed against
dark backgrounds): –2/3 EV
• Subjects with low reflectivity (pine trees or dark-colored foliage): –2/3 EV
Downloaded From camera-usermanual.com Fujifilm Manuals
Menus
1 Note
At settings other than ±0, a d icon is displayed in the
monitor. Exposure compensation is not reset when
the camera is turned off; to restore normal exposure
control, choose a value of ±0.
63
The Shooting Menu
D WHITE BALANCE
For natural colors, choose a setting that matches
the light source (for an explanation of “white balance,” see the Glossary on page 92).
Option
A
i
j
k
l
m
n
Displayed in
White balance adjusted automatically.
For subjects in direct sunlight.
For subjects in the shade.
Use under “daylight” fluorescent lights.
Use under “warm white” fluorescent lights.
Use under “cool white” fluorescent lights.
Use under incandescent lighting.
If AUTO does not produce the desired results (for
example, when taking close-ups), choose the option that matches the light source.
1 Notes
• Turn the flash off (pg. 24) to take pictures that reflect
the color of the original light source.
• Results vary with shooting conditions. Play pictures
back after shooting to check colors in the monitor.
Downloaded From camera-usermanual.com Fujifilm Manuals
64
O QUALITY
Choose the size and quality at which still pictures
are recorded. Large pictures can be printed at
large sizes with no drop in quality; small pictures
require less memory, allowing more pictures to
be recorded.
Option
BF
BN
D16 : 9
G
H
I
I16 : 9
J
Prints at sizes up to
31 × 23 cm (12 × 9 in.). Choose BF for highquality prints.
31 × 21 cm (12 × 8 in.). Aspect ratio is 16 : 9.
22 × 16 cm (8.5 × 6.5 in.).
17 × 13 cm (7 × 5 in.).
14 × 10 cm (5.3 × 4 in.).
14 × 9 cm (5.3 × 3.5 in.). Aspect ratio is 16 : 9.
5 × 4 cm (2 × 1.5 in.). Suited to e-mail or the
web.
The number of pictures that can be taken at current settings (pg. 93) is displayed to the right of
the quality icon in the monitor.
1 Note
Image quality is not reset when the camera is turned
off or another shooting mode is selected.
The Shooting Menu
N ISO
Control the camera’s sensitivity to light. Higher
values can be used to reduce blur when lighting
is poor; note, however, that mottling may appear
in pictures taken at high sensitivities. If AUTO is
selected, the camera will adjust sensitivity automatically in response to shooting conditions.
Settings other than AUTO
are shown by an icon in the
monitor.
P G COLOR
Enhance contrast and color saturation or take pictures in black and white.
Option
Displayed in
Standard contrast and saturation.
F-STANDARD
Recommended in most situations.
Vivid contrast and color. Choose for
F-CHROME vivid shots of flowers or enhanced
greens and blues in landscapes.
Take pictures in black and white.
F-B&W
ISO 400
MENU
DISP
Settings other than F-STANDARD are shown by
an icon in the monitor.
1 Notes
• P G COLOR is not reset when the camera is
turned off or another shooting mode is selected.
• Depending on the subject, the effects of F-CHROME
may not be visible in the monitor.
Menus
Downloaded From camera-usermanual.com Fujifilm Manuals
65
The Shooting Menu
F AF MODE
This option controls how the
camera focuses when Intelligent Face Detection is off (pg.
22). Regardless of the option
selected, the camera will focus on the subject in
the center of the monitor when macro mode is
on (pg. 28).
AF MODE
CENTER
MULTI
BACK
■ F AF MODE: r CENTER
The camera focuses on the
subject in the center of the
monitor. This option can be
used with focus lock.
Press
halfway
MENU
DISP
MENU
DISP
Focus frame
MENU
DISP
Downloaded From camera-usermanual.com Fujifilm Manuals
66
■ F AF MODE: s MULTI
When the shutter button is pressed halfway, the
camera detects high-contrast subjects near the
center of the monitor and selects the focus area
automatically.
The Playback Menu
The playback menu is used to manage the pictures in internal memory or on the memory card.
Using the Playback Menu
Playback Menu Options
To view the playback menu, tap the MENU
1 icon
during playback.
The following options are available:
PLAYBACK MENU
BACK
MENU
DISP
1 Note
The playback menu can also be displayed by pressing the p button during playback.
Tap the icon for the de2 sired
menu item.
PLAYBACK MENU
BACK
need to tap 6 or 7 to
view additional options.
ERASE
FRAME
ALL FRAMES
BACK
Downloaded From camera-usermanual.com Fujifilm Manuals
Menus
the desired option.
3 Tap
In some menus, you may
Option
Description
g FOLDER
Organize pictures into folders (pg. 47).
MANAGEMENT
Search for pictures by date, subject,
b IMAGE SEARCH
scene, or file type (pg. 45).
Rotate pictures, make collages, or create cropped or resized copies of picc EDIT
tures (pg. 40).
I SLIDE SHOW View pictures in a slide show (pg. 68).
Protect pictures from accidental deleD PROTECT
tion (pg. 69).
Delete all or selected pictures (pg.
e ERASE
38).
Use in situations in which camera
a SILENT MODE sounds or lights may be unwelcome
(pg. 20).
Perform basic camera setup (pg. 70).
M SET-UP
67
The Playback Menu
I SLIDE SHOW
View pictures in an automated slide show. After choosing
the background music, tap
the desired option to start
the show. When a movie is displayed, movie playback will begin automatically, and the slide show
will continue when the movie ends.
SLIDE SHOW
NORMAL
1/2
NORMAL
Option
NORMAL
FADE-IN
BACK
FADE-IN
FADE-IN
NORMAL g
FADE-IN g
MULTIPLE
SCRAP
BOOK VIEW
SELECT BGM
Displayed in
Press selector left or right to go back or
skip ahead one frame. Select FADE-IN
for fade transitions between frames.
As above, except that camera automatically zooms in on faces selected
with Intelligent Face detection.
Display several pictures at once.
As for MULTIPLE, except that the pictures are chosen randomly.
Choose background music.
1 Note
The camera will not turn off automatically while a slide
show is in progress.
Downloaded From camera-usermanual.com Fujifilm Manuals
68
The Playback Menu
D PROTECT
Protect pictures from accidental deletion. The following options are available.
■ FRAME
Protect selected pictures.
1
Scroll left or right (or tap the pictures to the left
or right) to select the desired picture.
PROTECT
BACK
PROTECT
SET
BACK
Picture not protected
RESET
Protected picture
SET to protect the picture. If the picture is
2 Tap
already protected, tapping RESET will remove
protection from the image.
Repeat steps 1–2 to protect additional images.
3 Tap
BACK to exit when the operation is com-
SET ALL OK?
IT MAY TAKE A WHILE
BACK
■ RESET ALL
Tap OK to remove protection
from all pictures, or tap BACK
to exit without changing picture status.
OK
RESET ALL OK?
IT MAY TAKE A WHILE
BACK
OK
If the number of pictures affected is very large, the display at right will appear in the
monitor while the operation
is in progress. Tap BACK to exit before the operation is complete.
BACK
3 Caution
Protected pictures will be deleted when the memory
card or internal memory is formatted (pg. 75).
Downloaded From camera-usermanual.com Fujifilm Manuals
Menus
plete.
■ SET ALL
Tap OK to protect all pictures,
or tap BACK to exit without
changing picture status.
69
The Setup Menu
Using the Setup Menu
Tap the MENU icon to display the menu for 3 Tap 6 or 7 to display the
1 the
current mode.
desired menu item and
SHOOTING MENU
SET-UP
1/5
tap to select.
DISP
4 Tap the desired option.
BACK
1.5 SEC
FRAME NO.
CONT.
DUAL IS MODE
ILLUMINATION
BACK
MENU
IMAGE DISP.
IMAGE DISP.
3
SEC
1. 5 SEC
ZOOM (CONTINUOUS)
2
Tap
(SET-UP).
SHOOTING MENU
BACK
Downloaded From camera-usermanual.com Fujifilm Manuals
70
BACK
ON
The Setup Menu
Setup Menu Options
Menu item
A IMAGE DISP.
B FRAME NO.
Downloaded From camera-usermanual.com Fujifilm Manuals
Default
1.5 SEC
CONT.
l
ON
OFF
—
—
—
0
—
ENGLISH
2 MIN
h
—
—
—
—
Menus
Description
Options
Choose how long pictures are displayed after shooting (pg. 72).
3 SEC / 1.5 SEC /ZOOM
Choose how files are named (pg. 73).
CONT. / RENEW
Choose whether image stabilization is performed at all times when the
camera is in shooting mode (l CONTINUOUS), or only when the shutL DUAL IS MODE
l /m
ter button is pressed halfway (m SHOOTING ONLY).
If ON is selected, the shooting indicator will light when the camera is
ON / OFF
a ILLUMINATION turned on. It will also light after a picture is taken to let the subjects know
that shooting is complete.
Enable or disable digital zoom (pg. 74).
ON / OFF
D DIGITAL ZOOM
Set the camera clock (pg. 15).
—
F DATE/TIME
Adjust volume for the shutter, controls, and playback (pg. 74).
—
I VOLUME
Choose shutter, start-up, and control sounds (pg. 74).
—
b SOUND
—
J LCD BRIGHTNESS Control the brightness of the monitor (pg. 74).
Format internal memory or memory cards (pg. 75).
—
K FORMAT
Choose a language (pg. 15).
See page 95
La
5 MIN / 2 MIN / OFF
M AUTO POWER OFF Choose the auto power off delay (pg. 75).
h/g
N TIME DIFFERENCE Set the clock to local time (pg. 76).
Reset all settings except FRAME NO., DATE/TIME, and TIME DIFFERENCE to de—
R RESET
fault values. A confirmation dialog will be displayed, tap OK to reset.
—
Protect the folder with a password (pg. 47).
g PASSWORD
Calibrate the touch panel (pg. 77).
—
h CALIBRATION
View the current camera firmware version.
—
i VERSION INFO
71
The Setup Menu
A IMAGE DISP.
Choose how long pictures are displayed in the monitor after shooting.
• 3 SEC: Pictures are displayed for about 3 s before being recorded to the memory
card.
• 1.5 SEC: Pictures are displayed for about 1.5 s before being recorded to the memory card.
• ZOOM (CONTINUOUS): Pictures are displayed in playback zoom until you tap OK. Note that this option is
disabled in C mode and when ON is selected for R CONTINUOUS (pg. 62).
IMAGE DISP.
3
SEC
1. 5 SEC
ZOOM (CONTINUOUS)
BACK
1 Note
The colors displayed at settings of 3 SEC and 1.5 SEC may differ from those in the final picture.
Downloaded From camera-usermanual.com Fujifilm Manuals
72
The Setup Menu
B FRAME NO.
Frame number
New pictures are stored in image files named using a four-digit file number assigned by adding one to the last file number used. The file number is displayed
during playback as shown at right. B FRAME NO. controls whether file numberDirectory File
ing is reset to 0001 when a new memory card is inserted or the current memory
number
number
card or internal memory is formatted.
• CONTINUOUS: Numbering continues from the last file number used or the first available file number,
whichever is higher. Choose this option to reduce the number of pictures with duplicate file names.
• RENEW: Numbering is reset to 0001 after formatting or when a new memory card is inserted.
100-0001
1 Notes
• If the frame number reaches 999-9999, the shutter release will be disabled (pg. 90).
• Selecting R RESET (pg. 71) sets B FRAME NO. to CONTINUOUS but does not reset the file number.
• Frame numbers for pictures taken with other cameras may differ.
Menus
Downloaded From camera-usermanual.com Fujifilm Manuals
73
The Setup Menu
Q DIGITAL ZOOM
If ON is selected, selecting T at the maximum
optical zoom position will trigger digital zoom,
further magnifying the image. To cancel digital
zoom, zoom out to the minimum digital zoom
position and select W.
Zoom
indicator
MENU
DISP
Zoom indicator,
DIGITAL ZOOM off
W
Zoom indicator,
DIGITAL ZOOM on
T W
Optical zoom
Optical zoom
T
Digital
zoom
3 Caution
Digital zoom produces lower quality images than optical zoom.
Downloaded From camera-usermanual.com Fujifilm Manuals
74
I VOLUME
Adjust volume for the shutter, controls, and playback. Tap an option and choose a volume, either
by selecting an option in a menu (shutter and
control volume) or by tapping + and – to choose a
setting between f and 10 (playback volume).
Tap OK when settings are complete, or tap BACK
to exit without changing volume settings.
b SOUND
Choose the sounds used for the shutter, at startup, and for camera controls. Tap an option and
then tap an icon to choose the sound. Tap OK
when settings are complete, or tap BACK to exit
without changing sound settings.
J LCD BRIGHTNESS
Tap 6 or 7 to adjust monitor brightness. Tap OK when
settings are complete, or tap
BACK to exit without changing monitor brightness.
LCD BRIGHTNESS
0
BACK
OK
The Setup Menu
K FORMAT
Format internal memory or a
memory card. If a memory
card is inserted in the camera, this option will format
the memory card. If no memory card is inserted,
this option will format internal memory. Tap OK
to begin formatting. To exit without formatting,
tap BACK.
FORMAT
FORMAT OK?
ERASE ALL DATA
BACK
OK
3 Cautions
• All data—including protected pictures—will be deleted from the memory card or internal memory. Be
sure important files have been copied to a computer
or other storage device.
• Do not open the battery cover during formatting.
M AUTO POWER OFF
Choose the length of time
before the camera turns off
automatically when no operations are performed. Shorter
times increase battery life; if OFF is selected, the
camera must be turned off manually. Note that
regardless of the option selected, the camera will
not turn off automatically when connected to a
printer (pg. 52) or computer (pg. 58) or when a
slide show is in progress (pg. 68).
AUTO POWER OFF
5 MIN
2 MIN
OFF
BACK
2 Tip: Reactivating the Camera
To reactivate the camera after it has turned off automatically, close and reopen the lens cover or press and
hold the p button (pg. 14).
Menus
Downloaded From camera-usermanual.com Fujifilm Manuals
75
The Setup Menu
N TIME DIFFERENCE
When traveling, use this option to switch the camera clock instantly from your home time zone to the
local time at your destination.
the difference between local time
1 Specify
and your home time zone.
1.1 Tap g LOCAL.
TIME DIFFERENCE
HOME
LOCAL
BACK
1.2 Use the + and – buttons to the left of the
display to specify
whether local time is
ahead of or behind the time in your home
time zone.
TIME DIFFERENCE
12 / 31 / 2050 10 : 00 AM
12 / 31 / 2050 11 : 15 AM
BACK
0
0
1
15
2
hh
30
mm
Switch between local time and your home
2 time
zone.
To set the camera clock to local time, tap
h LOCAL. To set the clock to the time
in your home time zone, tap h HOME. If
g LOCAL is selected, g will be displayed
in the monitor for three seconds after the
camera enters shooting mode, and the date
will be displayed in yellow.
OK
12 / 31 / 2050
11:15 AM
MENU
1.3 Tap the – and + icons
above and below the
numbers to choose
the time difference.
The minimum increment is 15 minutes.
Tap OK when settings are complete.
TIME DIFFERENCE
12 / 31 / 2050 10 : 00 AM
12 / 31 / 2050 11 : 15 AM
BACK
0
0
1
15
2
hh
30
mm
OK
Downloaded From camera-usermanual.com Fujifilm Manuals
76
DISP
After changing time zones, check that the
date and time are correct.
The Setup Menu
h CALIBRATION
Calibrate the touch panel. Using the stylus, tap the blue “+” symbol in the top left corner display; the
icon will then be displayed at the top right corner (if you did not tap the “+”, an error will be displayed).
Continue to tap the icon each time it is displayed in a new position; when calibration is complete the
message shown below at right will be displayed. Tap OK to exit.
1
CALIBRATION
2
5
4
BACK
CALIBRATION
CALIBRATION COMPLETED
OK
3
Menus
Downloaded From camera-usermanual.com Fujifilm Manuals
77
Optional Accessories
The camera supports a wide range of accessories from FUJIFILM and other manufacturers.
■ Printing
■ Computer Related
USB
USB
Computer (available from
third-party suppliers)
PictBridge-compatible printer
(available from third-party suppliers)
SD/SDHC
memory card
Printer (available from
third-party suppliers)
Technical Notes
Downloaded From camera-usermanual.com Fujifilm Manuals
78
SD card slot or card reader
Optional Accessories
Accessories from FUJIFILM
The following optional accessories are available from FUJIFILM. For the latest information on the accessories available in your region, check with your local FUJIFILM representative or visit http://www.fujifilm.
com/products/digital_cameras/index.html.
• NP-45 rechargeable Li-ion battery (supplied): Additional NP-45 slimline batteries can be purchased as required.
• BC-45 battery charger: Replacement battery chargers can be purchased as required. The
BC-45 charges an NP-45 battery in about 100 minutes at +23 °C (+73 °F).
• AC Power Adapter AC-5VX (requires DC coupler CP-45): Use for extended playback or when copying
pictures to a computer (shape of adapter and plug vary with region of sale).
Downloaded From camera-usermanual.com Fujifilm Manuals
Technical Notes
• DC coupler CP-45: Connect the AC-5VX to the camera.
79
Caring for the Camera
To ensure continued enjoyment of the product, observe the following precautions.
Storage and Use
If the camera will not be used for an extended period, remove the battery and memory card. Do
not store or use the camera in locations that are:
• exposed to rain, steam, or smoke
• very humid or extremely dusty
• exposed to direct sunlight or very high temperatures, such as in a closed vehicle on a sunny day
• extremely cold
• subject to strong vibration
• exposed to strong magnetic fields, such as near
a broadcasting antenna, power line, radar emitter, motor, transformer, or magnet
• in contact with volatile chemicals such as pesticides
• next to rubber or vinyl products
■ Water and Sand
Exposure to water and sand can also damage the
camera and its internal circuitry and mechanisms.
When using the camera at the beach or seaside,
avoid exposing the camera to water or sand. Do
not place the camera on a wet surface.
Downloaded From camera-usermanual.com Fujifilm Manuals
80
■ Condensation
Sudden increases in temperature, such as occur
when entering a heated building on a cold day,
can cause condensation inside the camera. If this
occurs, turn the camera off and wait an hour before turning it on again. If condensation forms on
the memory card, remove the card and wait for
the condensation to dissipate.
Cleaning
Use a blower to remove dust from the lens and
monitor, then gently wipe with a soft, dry cloth.
Any remaining stains can be removed by wiping
gently with a piece of FUJIFILM lens-cleaning paper to which a small amount of lens-cleaning fluid
has been applied. Care should be taken to avoid
scratching the lens or monitor. The camera body
can be cleaned with a soft, dry cloth. Do not use
alcohol, thinner, or other volatile chemicals.
Traveling
Keep the camera in your carry-on baggage.
Checked baggage may suffer violent shocks that
could damage the camera.
Troubleshooting
Power and Battery
Problem
Possible cause
The battery is exhausted.
The camera does
The battery is not in the correct orientation.
not turn on.
The AC adapter and DC coupler are not connected properly.
The battery is cold.
Power
supply
The battery runs There is dirt on the battery terminals.
down quickly.
Y is selected for shooting mode.
The battery has been charged many times.
Battery
charger
The battery is exhausted.
The AC adapter or DC coupler has been disconnected.
Charging does The battery is not correctly inserted.
not start.
The battery is not in the correct orientation.
Charging is slow. The temperature is low.
There is dirt on the battery terminals.
The charging
lamp lights, but
the battery does The battery has been charged many times.
not charge.
Downloaded From camera-usermanual.com Fujifilm Manuals
Troubleshooting
The camera
turns off suddenly.
Solution
Page
Charge the battery or insert a fully-charged
7, 8
spare battery.
Reinsert the battery in the correct orientation.
8
Make sure that the AC adapter and DC coupler
—
are properly connected.
Warm the battery by placing it in a pocket or
other warm place and reinsert it in the camera v, 8
immediately before taking a picture.
Clean the terminals with a soft, dry cloth.
—
Select other shooting modes to reduce the
31
drain on the battery.
The battery has reached the end of its charging
—
life. Purchase a new battery.
Charge the battery or insert a fully-charged
7, 8
spare battery.
Make sure that the AC adapter and DC coupler
—
are properly connected.
Reinsert the battery in the charger.
7
Reinsert the battery in the correct orientation.
7
Charge the battery at room temperature.
v
Clean the terminals with a soft, dry cloth.
—
The battery has reached the end of its charging
life. Purchase a new battery. If the battery still 98
fails to charge, contact your FUJIFILM dealer.
81
Troubleshooting
Menus and Displays
Problem
Possible cause
Solution
Menus and displays are English is not selected for the a
Select ENGLISH.
not in English.
option in the setup menu.
Page
15, 71
Shooting
Problem
Taking
pictures
Possible cause
Memory is full.
Memory is not formatted.
No picture is
There is dirt on the memory card contacts.
taken when the
The memory card is damaged.
shutter button is
pressed.
The battery is exhausted.
The camera has turned off automatically.
The monitor
goes dark after
shooting.
Focus
Close-ups
The flash has fired.
The subject is close to the camera.
The camera does
The subject is far away from the camera.
not focus.
The subject is not suited to autofocus.
Macro mode is Macro mode is not available in the current
not available.
shooting mode.
Downloaded From camera-usermanual.com Fujifilm Manuals
82
Solution
Page
Insert a new memory card or delete pictures. 12, 38
Format the memory card or internal memory. 75
Clean the contacts with a soft, dry cloth.
—
Insert a new memory card.
12
Charge the battery or insert a fully-charged
7, 8
spare battery.
Turn the camera on.
14, 75
The monitor may darken while the flash
charges. Wait for the flash to charge.
24
Select macro mode.
Cancel macro mode.
Use focus lock.
29
Choose a different shooting mode.
31
28
Troubleshooting
Problem
Face detection
not available.
Intelligent
No face is deFace
tected.
Detection
Wrong subject
selected.
The flash does
not fire.
The battery is exhausted.
Solution
Choose a different shooting mode.
Downloaded From camera-usermanual.com Fujifilm Manuals
31
Remove the obstructions.
Change the composition so that the subject’s 22
face occupies a larger area of the frame.
Ask the subject to hold their head straight.
Hold the camera straight.
17
Shoot in bright light.
—
Recompose the picture or turn face detection
22, 29
off and frame the picture using focus lock.
Choose a different shooting mode.
Charge the battery or insert a fully-charged
spare battery.
Select OFF for R CONTINUOUS.
Turn silent mode off.
Choose a different flash mode.
The camera is in continuous mode.
The camera is in silent mode.
The flash is off (P).
The desired flash mode is not available in
Choose a different shooting mode.
the current shooting mode.
The camera is in silent mode.
Turn silent mode off.
Some flash
modes are not
available.
The flash does The subject is not in range of the flash.
not fully light the
The flash window is obstructed.
subject.
Page
31
7, 8
62
20
24
31
20
Position the subject in range of the flash.
95
Hold the camera correctly.
17
Troubleshooting
Flash
Possible cause
Intelligent Face Detection is not available in
the current shooting mode.
The subject’s face is obscured by sunglasses, a hat, long hair, or other objects.
The subject’s face occupies only a small
area of the frame.
The subject’s head is tilted or horizontal.
The camera is tilted.
The subject’s face is poorly lit.
The selected subject is closer to the center
of the frame than the main subject.
The flash is not available in the current
shooting mode.
83
Troubleshooting
Problem
Problem
images
Recording
Possible cause
The lens is dirty.
The lens is blocked.
Pictures are
s is displayed during shooting and the
blurred.
focus frame is displayed in red.
k is displayed during shooting.
Pictures are
Slow shutter speed selected at high temmottled.
peratures.
Vertical lines ap- The camera has been used continuously at
pear in pictures. high temperatures.
Pictures are not
recorded.
Power was interrupted during shooting.
Downloaded From camera-usermanual.com Fujifilm Manuals
84
Solution
Clean the lens.
Keep objects away from the lens.
Check focus before shooting.
Use the flash or a tripod.
This is normal and does not indicate a malfunction.
Turn the camera off and wait for it to cool
down.
Turn the camera off before connecting the AC
adapter/DC coupler. Leaving the camera on
can result in corrupted files or damage to the
memory card or internal memory.
Page
80
17
18, 29,
88
24
65
14
14
Troubleshooting
Playback
Problem
Pictures are
grainy.
Pictures
Audio
Playback zoom
unavailable.
No sound in
movie playback.
Possible cause
Solution
The pictures were taken with a different
—
make or model of camera.
The pictures were taken, at an image size
of J, or with a different make or model
—
of camera.
Playback volume is too low.
Adjust playback volume.
The microphone was obstructed.
Hold the camera correctly during recording.
The speaker is obstructed.
Hold the camera correctly during playback.
Selected pictures Some of the pictures selected for deletion Remove protection using the device with
Deletion
are not deleted. are protected.
which it was originally applied.
Page
—
—
74
49
51
69
Troubleshooting
Downloaded From camera-usermanual.com Fujifilm Manuals
85
Troubleshooting
Connections
Computer
PictBridge
AC adapter
DC coupler
Problem
The computer
does not recognize the camera.
Pictures can not
be printed.
Only one copy is
printed.
The date is not
printed.
Help text is
displayed.
Possible cause
Page
The camera is not properly connected.
Connect the camera correctly.
58
The camera is not properly connected.
The printer is off.
Connect the camera correctly.
Turn the printer on.
52
—
The printer is not PictBridge-compatible.
Some printers may only print one copy or may
not print the date.
—
The camera was turned on while being Follow the on-screen instructions to enter demo
powered by an AC adapter.
mode or press the shutter button to cancel.
—
Downloaded From camera-usermanual.com Fujifilm Manuals
86
Solution
Troubleshooting
Miscellaneous
Problem
The camera is unresponsive.
The camera does not
function as expected.
No sound.
The camera does not
respond to the touch
panel, or does not
perform the expected
action when the touch
panel is used.
Possible cause
Temporary camera malfunction.
The battery is exhausted.
Temporary camera malfunction.
The camera is in silent mode.
The touch panel requires calibration.
Solution
Remove and reinsert the battery or disconnect
and reconnect the AC adapter/DC coupler.
Charge the battery or insert a fully-charged
spare battery.
Remove and reinsert the battery or disconnect
and reconnect the AC adapter/DC coupler. If
the problem persists, contact your FUJIFILM
dealer.
Turn silent mode off.
Calibrate the touch panel.
The hand that is holding the camera is Adjust your grip so that the hand that is holdtouching the panel.
ing the camera is not touching the panel.
Page
8–10
7, 8
8–10,
98
20
77
—
Troubleshooting
Downloaded From camera-usermanual.com Fujifilm Manuals
87
Warning Messages and Displays
The following warnings are displayed in the monitor:
Warning
B (red)
A (blinks red)
k
Description
Solution
Low battery.
Charge the battery or insert a fully-charged spare battery.
Battery exhausted.
Slow shutter speed. Picture may be blurred. Use the flash or mount the camera on a tripod.
• Use focus lock to focus on another subject at the
same distance, then recompose the picture (pg. 29).
s
• If the subject is poorly lit, try focusing at a distance of
(displayed in red with The camera can not focus.
about 2 m (6 ft. 7 in.).
red focus frame)
• Use macro mode to focus when taking close-ups.
Aperture or shutter The subject is too bright or too dark. The picIf the subject is dark, use the flash.
speed displayed in red ture will be over- or under-exposed.
Attempted to take photograph with lens
LENS COVER
Open lens cover before taking photographs.
cover closed.
FOCUS ERROR
Turn the camera off and then on again, taking care not
ZOOM ERROR
Camera malfunction.
to touch the lens. If the message persists, contact a
FUJIFILM dealer (pg. 98).
LENS CONTROL ERROR
No memory card inserted when using folder
Insert a memory card.
NO CARD
management.
The memory card or internal memory is not
Format the memory card or internal memory (pg. 75).
formatted.
Clean the contacts with a soft, dry cloth. If the mesCARD NOT INITIALIZED
The memory card contacts require cleaning. sage is repeated, format the memory card (pg. 75). If
the message persists, replace the memory card.
Camera malfunction.
Contact a FUJIFILM dealer (pg. 98).
Downloaded From camera-usermanual.com Fujifilm Manuals
88
Warning Messages and Displays
Warning
PROTECTED CARD
BUSY
b CANNOT RESIZE
CARD ERROR
Description
The memory card is locked.
The memory card is incorrectly formatted.
An attempt was made to resize a b picture.
The memory card is not formatted for use in
the camera.
Solution
Unlock the memory card (pg. 11).
Use the camera to format the memory card (pg. 75).
b pictures can not be resized.
Format the memory card (pg. 75).
Clean the contacts with a soft, dry cloth. If the mesThe memory card contacts require cleaning
sage is repeated, format the memory card (pg. 75). If
or the memory card is damaged.
the message persists, replace the memory card.
Incompatible memory card.
Use a compatible memory card (pg. 11).
Camera malfunction.
Contact a FUJIFILM dealer (pg. 98).
Downloaded From camera-usermanual.com Fujifilm Manuals
Troubleshooting
a MEMORY FULL
The memory card or internal memory is full; Delete pictures or insert a memory card with more
b MEMORY FULL
free space (pg. 12, 38).
INTERNAL MEMORY IS FULL pictures can not be recorded or copied.
INSERT A NEW CARD
Reinsert the memory card or turn the camera off
Memory card error or connection error.
and then on again. If the message persists, contact a
FUJIFILM dealer (pg. 98).
WRITE ERROR
Not enough memory remaining to record ad- Delete pictures or insert a memory card with more
ditional pictures.
free space.
The memory card or internal memory is not
Format the memory card or internal memory (pg. 75).
formatted.
89
Warning Messages and Displays
Warning
READ ERROR
FRAME NO. FULL
FILE NUMBER FULL
PROTECTED FRAME
PASSWORD INCORRECT
J CAN NOT TRIM
CAN NOT TRIM
CAN NOT ROTATE
F CAN NOT ROTATE
CAN NOT EXECUTE
F CAN NOT EXECUTE
Description
Solution
The file is corrupt or was not created with the
The file can not be played back.
camera.
Clean the contacts with a soft, dry cloth. If the mesThe memory card contacts require cleaning. sage is repeated, format the memory card (pg. 75). If
the message persists, replace the memory card.
Camera malfunction.
Contact a FUJIFILM dealer (pg. 98).
Format the memory card and select RENEW for
The camera has run out of frame numbers B FRAME NO. in the setup menu. Take a picture to
(current frame number is 999-9999).
reset frame numbering to 100-0001, then select CONTINUOUS for B FRAME NO (pg. 73).
Memory card contains 30,000 images. No
Delete files or insert new memory card.
new pictures can be recorded.
An attempt was made to delete or rotate a Remove protection before deleting or rotating picprotected picture.
tures (pg. 69).
Enter the correct password or make a new password
The password you entered is not correct.
(pg. 47).
An attempt was made to crop a J picture.
The picture selected for cropping is damaged These pictures can not be cropped.
or was not created with the camera.
The picture can not be rotated.
—
Movies can not be rotated.
—
Red-eye removal can not be applied to the
—
selected picture or movie.
Downloaded From camera-usermanual.com Fujifilm Manuals
90
Warning Messages and Displays
Warning
DEACTIVATE SILENT MODE
COMMUNICATION ERROR
PRINTER ERROR
PRINTER ERROR
RESUME?
CAN NOT BE PRINTED
Description
An attempt was made to choose a flash
mode or adjust the volume with the camera
in silent mode.
A connection error occurred while pictures
were being printed or copied to a computer
or other device.
Solution
Exit silent mode before choosing a flash mode or adjusting the volume (pg. 20, 74).
Confirm that the device is turned on and that the USB
cable is connected.
Check printer (see printer manual for details). To resume printing, turn the printer off and then turn it
Printer out of paper or ink, or other printer
back on.
error.
Check printer (see printer manual for details). If printing does not resume automatically, tap OK to resume.
Movies and some pictures created with other devices
An attempt was made to print a movie, a pic- can not be printed. If the picture was created with the
ture not created with the camera, or a picture camera, check the printer manual to confirm that the
in a format not supported by the printer.
printer supports the JFIF-JPEG or Exif-JPEG format. If it
does not, the pictures can not be printed.
Troubleshooting
Downloaded From camera-usermanual.com Fujifilm Manuals
91
Glossary
Digital zoom: Unlike optical zoom, digital zoom does not increase the amount of visible detail. Instead, details visible using optical zoom are simply enlarged, producing a slightly “grainy” image.
EV (Exposure Value): The exposure value is determined by the sensitivity of the image sensor and the amount
of light that enters the camera while the image sensor is exposed. Each time the amount of light doubles, EV
increases by one; each time the amount of light is halved, EV decreases by one. The amount of light entering the
camera can be controlled by adjusting aperture and shutter speed.
Exif Print: A standard that allows information stored with pictures to be used for optimal color reproduction during printing.
JPEG (Joint Photographic Experts Group): A compressed file format for color images. The higher the compression
rate, the greater the loss of information and more noticeable drop in quality when the picture is displayed.
Motion JPEG: An AVI (Audio Video Interleave) format that stores images and sound in a single file, with the images
recorded in JPEG format. Motion JPEG files can be played in QuickTime 3.0 or later.
Smear: A phenomenon specific to CCDs which causes white streaks to appear when very bright light sources, such
as the sun or reflected sunlight, appear in the frame.
WAV (Waveform Audio Format): A standard Windows audio file format. WAV files have the extension “*.WAV” and
may be compressed or uncompressed. The camera uses uncompressed WAV. WAV files can be played using
Windows Media Player or QuickTime 3.0 or later.
Appendix
White balance: The human brain automatically adapts to changes in the color of light, with the result that objects
that appear white under one light source still appear white when the color of the light source changes. Digital
cameras can mimic this adjustment by processing images according to the color of the light source. This process
is known as “white balance.”
Downloaded From camera-usermanual.com Fujifilm Manuals
92
Internal Memory/Memory Card Capacity
The following table shows the recording time or number of pictures available at different image qualities. All figures are approximate; file size varies with the scene recorded, producing wide variations in
the number of files that can be stored. The number of exposures or length remaining may not diminish
at an even rate.
Image size (pixels)
File size
Internal memory
(approx. 31 MB)
512 MB
SD card
1 GB
2 GB
4 GB
8 GB
SDHC card
16 GB
32 GB
BF
BN
3648 × 2736
5.0 MB
2.5 MB
D 16:9
G
H
I 16:9
I
J
3648 × 2056 2592 × 1944 2048 × 1536 1920 × 1080 1600 × 1200 640 × 480
1.9 MB
1.5 MB
780 KB
720 KB
630 KB
130 KB
6
12
16
24
39
44
47
201
100
200
400
800
1610
3200
6440
190
390
790
1590
3190
6330
12720
260
520
1050
2100
4220
8370
16810
380
770
1540
3100
6220
12350
24800
600
1210
2380
4770
9570
19000
30000
680
1370
2690
5390
10820
21480
30000
730
1470
2950
5900
11850
23530
30000
3090
6190
12400
24810
30000
30000
30000
a
640 × 480
—
b
320 × 240
—
26 s
54 s
6 min.
14 min.
28 min.
56 min. *
112 min. *
224 min. *
450 min. *
13 min.
27 min.
55 min.
111 min. *
223 min. *
743 min. *
891 min. *
* Total length of all movie files. Individual movies can not exceed 2 GB in size.
Appendix
Downloaded From camera-usermanual.com Fujifilm Manuals
93
Specifications
System
Model
Effective pixels
CCD
Storage media
File system
File format
Image size (pixels)
File size
Lens
Focal length
Digital zoom
Aperture
Focus range (distance from
front of lens)
Sensitivity
Metering
Exposure control
Exposure compensation
Shooting modes
Scene modes
Image stabilization
Intelligent Face Detection
Digital Camera FinePix Z300
10 million
½.3 -in., Bayer CCD with primary color filter
• Internal memory (approx. 31 MB)
• SD/SDHC memory cards (see page 11)
Compliant with Design Rule for Camera File System (DCF), and Exif 2.2
• Still pictures: Exif 2.2 JPEG (compressed)
• Movies: Motion JPEG AVI
• Audio: Monaural WAV
• BF: 3,648 × 2,736
• BN: 3,648 × 2,736 • D16:9 : 3,648 × 2,056 • G : 2,592 × 1,944
• H : 2,048 × 1,536
• I16:9 : 1,920 × 1,080 • I : 1,600 × 1,200
• J : 640 × 480
See page 93
Fujinon 5 × optical zoom lens, F/3.9 (wide angle)
f=6.4 mm–32 mm (35-mm format equivalent: 36 mm–180 mm)
4 : 3 approx. 5.4 × (up to 27 × when combined with optical zoom)
F/3.9 (wide angle), F/6.4 (telephoto)
Approx. 60 cm (2 ft.)–infinity (wide angle/telephoto)
Macro mode: approx. 9 cm–80 cm/0.3 ft.–2.6 ft. (wide angle); 40 cm–80 cm/1.3 ft.–2.6 ft. (telephoto)
Equivalent to ISO 100, 200, 400, 800, 1600; AUTO (Standard Output Sensitivity)
256-segment through-the-lens (TTL) metering using CCD image sensor
Programmed auto exposure
–2 EV – +2 EV in increments of 1/3 EV (I mode)
F MOVIE, I MANUAL, B AUTO, Y SCENE RECOGNITION, J TOUCH & SHOOT,
C NATURAL & N, D NATURAL LIGHT, H SCENE POSITION
L PORTRAIT, M LANDSCAPE, N SPORT, O NIGHT, H NIGHT (TRIPOD), P FIREWORKS,
Q SUNSET, R SNOW, S BEACH, U PARTY, V FLOWER, W TEXT
Optical stabilization (CCD shift)
Available
Downloaded From camera-usermanual.com Fujifilm Manuals
94
Specifications
System
Shutter speed
Continuous
Focus
White balance
Self-timer
Flash
Range
Flash modes
Monitor
Movies
Shooting menu
Playback mode
Other options
USB 2.0 High Speed with MTP/PTP connection
Downloaded From camera-usermanual.com Fujifilm Manuals
Appendix
Input/output terminals
Digital input/output
• P: 4 s–1/2 s
• H: 3 s–1/500 s
• O: 1/8 s–1/500 s
• Other modes: 1/4 s–1/1,000 s
Up to five frames at a maximum of approximately 0.6 fps
• Mode: Single AF
• Autofocus system: Contrast-detect TTL AF
• Focus-area selection: AF CENTER and AF MULTI
Automatic scene detection; six manual preset modes for direct sunlight, shade, daylight fluorescent, warm white fluorescent, cool white fluorescent, and incandescent lighting
Couple timer; group timer; timer with approx. 2 s delay; timer with approx. 10 s delay; OFF
Auto flash
Approx. 30 cm–3.5 m/1.0 ft.–11.5 ft. (wide angle), 30 cm–2.8 m/1.0 ft.–9.2 ft. (telephoto)
Auto, fill flash, off, auto slow sync (red-eye removal off ); auto with red-eye reduction, fill flash with
red-eye reduction, off, slow sync with red-eye reduction (red-eye removal on)
3.0-in., 230k-dot amorphous silicon TFT color LCD monitor; frame coverage approx. 100%; aspect
ratio 16 : 9
Camera can record movies with monaural sound and a frame size of 640 × 480 (a) or 320 × 240
(b) at a frame rate of 30 fps; zoom not available during recording
Silent mode, Intelligent Face Detection with red-eye removal, continuous shooting, framing guide,
FinePix color
Edit, image search, and folder management
PictBridge, Exif Print, language selection (Simplified Chinese, Traditional Chinese, Czech, Dutch,
English, French, German, Hungarian, Italian, Japanese, Korean, Polish, Portuguese, Russian, Spanish,
Swedish, Thai, and Turkish), time difference
95
Specifications
Power supply/other
Power sources
Battery life (NP-45)
Camera dimensions
Camera weight
Shooting weight
Operating conditions
• NP-45 rechargeable battery
• AC-5VX AC power adapter and CP-45 DC coupler (sold separately)
Approx. 170 frames based on CIPA (Camera and Imaging Products Association) standard; measured at 23 °C
(73 °F) with the monitor on, pictures recorded to an SD memory card, the camera zoomed from widest angle to maximum zoom and back once every 30 s, the flash fired at full power with every other
shot, and the camera turned off and then on again every 10 shots. Note that the number of shots
that can be taken with a fully-charged battery varies with temperature and shooting conditions.
92 mm × 56.5 mm × 18.5 mm/3.6 in. × 2.2 in. × 0.7 in. (W × H × D), excluding projections
Approx. 130 g/4.6 oz., excluding battery, accessories, and memory cards
Approx. 150 g/5.3 oz., including battery and memory card
• Temperature: 0 °C – +40 °C/+32 °F – +104 °F
• Humidity: 10%–85% (no condensation)
NP-45 rechargeable battery
Nominal voltage
DC 3.7 V
Nominal capacity
740 mAh
Operating temperature 0 °C – +40 °C/+32 °F – +104 °F
Dimensions (W × H × D) 31 mm × 39.4 mm × 5.7 mm/
1.2 in. × 1.6 in. × 0.2 in.
Weight
Approx. 15 g/0.5 oz.
BC-45W battery charger
Rated input
100 V–240 V AC, 50/60 Hz
Input capacity
8.0 VA (100 V) 12 VA (240 V)
Rated output
4.2 V DC, 550 mA
Supported batteries
NP-45 rechargeable batteries
Charging time
Approx. 110 minutes
Dimensions (W × H × D) 91 mm × 62 mm × 23 mm/
3.6 in. × 2.4 in. × 0.9 in.
Weight
Approx. 67 g/2.4 oz., excluding battery
Operating temperature 0 °C – +40 °C/+32 °F – +104 °F
Weight and dimensions vary with the country or region of sale.
Downloaded From camera-usermanual.com Fujifilm Manuals
96
Specifications
Notices
• Specifications subject to change without notice. FUJIFILM shall not be held liable for damages resulting from
errors in this manual.
• Although the monitor is manufactured using advanced high-precision technology, small bright points and
anomalous colors (particularly in the vicinity of text) may appear. This is normal for this type of monitor and
does not indicate a malfunction; images recorded with the camera are unaffected.
• Digital cameras may malfunction when exposed to strong radio interference (e.g., electric fields, static electricity, or line noise).
• Due to the type of lens used, some distortion may occur at the periphery of images. This is normal.
Appendix
Downloaded From camera-usermanual.com Fujifilm Manuals
97
FUJIFILM Digital Camera Worldwide Network
Contact your local distributor (see list below) for repairs and technical support. Please present the warranty and purchase receipt when requesting repairs; refer to the warranty card for the conditions of the
warranty. Technical support may not be available for models not handled by the local distributor. The
following information is subject to change without notice.
NORTH AMERICA
Canada
FUJIFILM Canada Inc.
U.S.A.
FUJIFILM U.S.A., Inc.
Technical support
Repair service
Technical support
Repair service
TEL 1-866-818-FUJI (3854) http://www.fujihelp.ca
TEL 1-800-263-5018 http://www.fujihelp.ca
TEL 800-800-3854 [email protected]
TEL 800-659-3854
Technical support & repairs
Technical support & repairs
Technical support & repairs
Technical support & repairs
Technical support & repairs
Technical support & repairs
Technical support & repairs
Technical support
Repair service
Technical support & repairs
Technical support & repairs
Technical support & repairs
Technical support & repairs
Technical support & repairs
TEL +54-11-4836-1000 [email protected]
TEL +591 33 44 1129 [email protected]
TEL 0800-12-8600 [email protected]
TEL 56-2-6781200 [email protected]
TEL +57 1 338-0299 [email protected]
TEL 593-72-835526
TEL +593 783 5526 [email protected]
TEL (52-55) 5263-55000 [email protected]
TEL (52-55) 5366-5150/56/57 [email protected]
TEL +595 21 444256 [email protected]
TEL +51 14 33 5563 [email protected]
TEL +598-2-9002004 [email protected]
TEL (05982) 419 4542 [email protected]
TEL 0212-2022300 [email protected]
Technical support & repairs
Technical support & repairs
Technical support
Repair service
TEL 0043 1 6162606/51 or 52 [email protected]
TEL 3210242090 [email protected]
TEL 38512319060 [email protected]
TEL 38512316228 [email protected]
CENTRAL AND SOUTH AMERICA
Argentina
Bolivia
Brazil
Chile
Colombia
Ecuador
Mexico
Paraguay
Peru
Uruguay
Venezuela
Imagen e informacion S.A.
Reifschneider Bolivia Ltda.
FUJIFILM do Brasil Ltda.
Reifschneider SA
Animex de Colombia Ltda.
Espacri Cia Ltda
Importaciones Espacri Cia. Ltda.
Fujifilm de Mexico, S.A. de C.V.
Errece S.R.L.
Procesos de Color S.A.
Fotocamara S.R.L.
Kiel S.A.
C. Hellmund & Cia Sa
EUROPE
Austria
Belgium
Croatia
Fuji Film Oesterreich
Belgian Fuji Agency
I&I d.o.o.
Downloaded From camera-usermanual.com Fujifilm Manuals
98
EUROPE
Cyprus
Czech Republic
Denmark
Finland
France
Germany
Greece
Hungary
Iceland
Italy
Lithuania
Malta
Norway
Poland
Portugal
Slovakia
Spain
Technical support & repairs TEL 35722746746 [email protected]
Technical support & repairs TEL 35722314719 [email protected]
FUJIFILM HELLAS S.A.
Fujifilm Hungary Ltd.
Technical support & repairs
Technical support
Repair service
Technical support & repairs
Call center
Repair service
Technical support & repairs
Technical support & repairs
Technical support
Technical support
Repair service
Technical support & repairs
Technical support & repairs
Technical support & repairs
Technical support & repairs
TEL 00420 234 703 411 [email protected]
TEL 00420 222 721 525 [email protected]
TEL 0045 45662244 [email protected]
TEL +358 9 825951 www.fuji.fi [email protected]
[email protected]
Tel 0180 / 589 89 80* [email protected]
*
0,14 EUR pro Minute aus dem deutschen Festnetz, abweichende
Preise aus Mobilfunknetzen möglich,Stand bei Drucklegung.
TEL 0030 210 9404100 [email protected]
TEL 3612389410 [email protected]
TEL 3613633777
Icephoto (Ljosmyndavorur)
TEL 354 568 0450 [email protected]
FujiFilm Italia S.r.l.
TEL 039-0267978181 [email protected]
TEL 039-6058294 FAX 039-6058295
Fujifilm Lithuania
TEL 370-5-2130121 [email protected]
Ciancio (1913) Co.Ltd.
TEL 0356-21-480500 [email protected]
Fujifilm Norge AS
TEL 0047-02273
http://www.fujifilm.no/ mailto:[email protected]
Repair service
TEL 0047-55393880
http://www.camera.no/mailto:[email protected]
Fujifilm Polska Distribution Sp.
Technical support
TEL +48-22-517-66-00 [email protected]
z o.o.
Repair service
TEL +48-22-886-94-40 [email protected]
Fujifilm Portugal, Lda
Technical support
TEL (351) 226 194 237 [email protected]
Repair service
TEL (351) 226 194 200 [email protected]
CTS-Cardinal Top Systems Ltd
Technical support & repairs TEL 4021-230-09-82 [email protected]
Fujifilm Electronic Imaging Europe Technical support & repairs TEL 8 800 200 3854 (Для бесплатных звонков из России)
*
Для звонков из других стран набирайте +7 800 200 3854
GmbH
http://www.fujifilm-digital.ru/ [email protected]
Fujifilm Slovakia s.r.o.
Technical support
TEL 00421 2 33 595 107 [email protected]
Repair service
TEL 00421 2 33 595 119 [email protected]
Fujifilm Espana S.A.
Technical support & repairs TEL 902012535
http://www.fujifilm.es/soporte/ [email protected]
Downloaded From camera-usermanual.com Fujifilm Manuals
Appendix
Romania
Russia
PMS IMAGING LTD
Doros Neophytou
CAMERA REPAIRS
Fujifilm Cz., s.r.o.
AWH servis
Fujifilm Danmark A/S
Fuji Finland Oy
FUJIFILM France
FUJIFILM Electronic Imaging Europe
GmbH
99
EUROPE
Sweden
Fujifilm Sverige AB
Switzerland /
Liechtenstein
The Netherlands
Fujifilm (Switzerland) AG
Turkey
FUJIFILM Electronic Imaging
Nederland
Fujifilm Turkiye Sinfo A.S.
U.K.
FUJIFILM UK Ltd.
Ukraine
Image Ukraine CJSC
Technical support
TEL 46 8 506 141 70 [email protected]
Repair service
TEL 46 8 506 141 00 [email protected]
Technical support & repairs TEL +41 44 855 5154 [email protected]
Technical support
Repair service
Technical support
Repair service
Technical support
Repair service
Technical support & repairs
TEL +31(0)102812500 [email protected]
TEL +31(0)102812520 [email protected]
TEL +90 212 696 5090 [email protected]
TEL +90 212 696 5090 [email protected]
TEL +44 (0)8700 841310 [email protected]
TEL +44 (0)8700 841314 [email protected]
TEL +380-44-4909075 [email protected]
Technical support & repairs
Technical support
Repair service
Technical support & repairs
TEL (+98-21)2254810-19 [email protected]
TEL (+ ) 972 3 9250666 [email protected]
TEL (+ ) 972 3 9250666 [email protected]
TEL 009626-4646387 [email protected]
Technical support & repairs
Technical support
Technical support
Technical support
Repair service
Technical support & repairs
Technical support
Repair service
TEL +961 1 252474 [email protected]
TEL 00974 44 66 175 [email protected]
TEL 96626978756 [email protected]
TEL + 963 11 2218049 [email protected]
TEL + 963 21 4641903 [email protected]
TEL + 971-4-2823700 [email protected]
TEL 00967-1-503980
TEL 00967-1-503977
MIDDLE EAST
Iran
Israel
Tehran Fuka Co.
Shimone Group Ltd.
Jordan
Lebanon
Qatar
Saudi Arabia
Syria
Grand Stores Al- Abdali,
Amman / Jordan
Fototek S.A.R.L.
Techno Blue
Emam Distribution Co. Ltd.
Film Trading Company
U.A.E.
Yemen
Grand Stores
Al-Haidary Trading
AFRICA
Egypt
Kenya
South Africa
Foto Express Egypt
Fuji Kenya Ltd
Cameratek CC.
Technical support & repairs TEL (202) 7762062 [email protected]
Repair service
TEL (254-20)4446265-8 [email protected]
Technical support & repairs TEL +27 11 251 2400 www.cameratek.co.za
FUJIFILM Australia Pty Ltd
Brijlal & Co. Ltd
Phocidis SARL
Technical support & repairs TEL 1800 226 355 [email protected]
Technical support & repairs TEL (679)3304133 [email protected]
Technical support & repairs TEL (00 687) 25-46-35 [email protected]
OCEANIA
Australia
Fiji
New Caledonia
Downloaded From camera-usermanual.com Fujifilm Manuals
100
OCEANIA
New Zealand
Papua New
Guinea
Fujifilm NZ Ltd
Oceania PNG Limited
Technical support & repairs TEL +64-9-4140400 [email protected]
Technical support
TEL +675 3256411 [email protected]
Fuji Photo Products Co., Ltd.
PT. Modern Internasional, Tbk.
FUJIFILM (Malaysia) Sdn. Bhd.
Technical support & repairs
Technical support & repairs
Technical support
Repair service
Technical support
ASIA
Hong Kong
Indonesia
Malaysia
Philippines
Singapore
South Korea
Taiwan
Thailand
Vietnam
TEL (852)2406 3287 [email protected]
TEL +62 021 45867187 [email protected]
TEL 603-55698388 [email protected]
TEL 603-55698388 [email protected]
YKL Development & Trdg. Corp.
TEL 632-7436601~06
[email protected] [email protected]
Repair service
TEL 632-7436601~06 [email protected]
FUJIFILM (Singapore) Pte Ltd
Technical support & repairs TEL 65-6380 5557 [email protected]
Korea Fujifilm Co., Ltd.
Technical support
TEL +82-2-3282-7363 [email protected]
Yonsan AS Center (Fujidigital)
Repair service
TEL +82-2-701-1472 [email protected]
Kangnam AS Center (Digitalgallery) Repair service
TEL +82-2-2203-1472 [email protected]
Busan AS Center (Digital-Sewon)
Repair service
TEL +82-51-806-1472 [email protected]
Hung Chong Corp.
Technical support & repairs TEL 886-2-6602-8988 [email protected]
FUJIFILM (Thailand) Ltd.
Technical support
TEL +662-2706000 ext. 751,752
[email protected] [email protected]
Repair service
TEL +662-2706000 ext.761,762 [email protected]
International Minh Viet Co., Ltd.
Technical support & repairs TEL +84-8-4135740 ext. 322 [email protected]
Appendix
Downloaded From camera-usermanual.com Fujifilm Manuals
101
IMPORTANT NOTICE: Read Before Using the Software
BEFORE OPENING THE CD-ROM PROVIDED BY FUJIFILM CORPORATION, PLEASE READ THIS END USER
LICENSE AGREEMENT CAREFULLY. YOU SHOULD USE THE SOFTWARE ON THE CD-ROM ONLY IF YOU CON SENT TO THIS AGREEMENT. BY OPENING THE PACKAGE, YOU ACCEPT AND AGREE TO BE BOUND BY THIS
AGREEMENT.
End User License Agreement
This End User License Agreement (“Agreement”) is an agreement between FUJIFILM
Corporation (“FUJIFILM”) and you, which sets forth the terms and conditions of the license granted for you to use the software provided by FUJIFILM.
The CD-ROM contains third-party software. In case a separate agreement is provided
by a third party supplier for its software, the provisions of such separate agreement shall
apply to the use of such third party software, prevailing over those of this Agreement.
1. Definitions.
(a) “Media” means the CD-ROM titled “Software for FinePix” which is provided to you
together with this Agreement.
(b) “Software” means the software which is recorded on Media.
(c) “Documentation” means the operation manuals of Software and other related
written materials which are provided to you together with Media.
(d) “Product” means Media (including Software) and Documentation collectively.
2. Use of Software.
FUJIFILM grants to you a nontransferable, nonexclusive license:
(a) to install one copy of Software onto one computer in binary machine executable
form;
(b) to use Software on the computer onto which Software is installed; and
(c) to make one backup copy of Software.
3. Restrictions.
3.1 You shall not distribute, rent, lease or otherwise transfer all or any part of Software,
Media or Documentation to any third party without FUJIFILM’s prior written consent. You also shall not sublicense, assign or otherwise transfer all or any part of
the rights granted to you by FUJIFILM under this Agreement without FUJIFILM’s
prior written consent.
3.2 Except as expressly granted by FUJIFILM hereunder, you shall not copy or reproduce all or any part of Software or Documentation.
3.3 You shall not modify, adapt or translate Software or Documentation. You also
shall not alter or remove copyright and other proprietary notices that appear on
or in Software or Documentation.
3.4 You shall not, or shall not have any third party, reverse-engineer, decompile, or
disassemble Software.
7-3, AKASAKA 9-CHOME, MINATO-KU, TOKYO 107-0052, JAPAN
4. Ownership.
All copyrights and other proprietary rights to Software and Documentation are
owned and retained by FUJIFILM or the third party suppliers as indicated on or in
Software or Documentation. Nothing contained herein shall be construed, expressly
or implicitly, as transferring or granting any right, license, or title to you other than
those explicitly granted under this Agreement.
5. Limited Warranty.
FUJIFILM warrants to you that Media is free from any defect in material and workmanship under normal use for ninety (90) days from the date of your receipt of Media.
Should Media not meet the foregoing warranty, FUJIFILM shall replace such defective
Media with other Media bearing no defect. FUJIFILM’s entire liability and your sole
and exclusive remedy with regard to any defect in Media shall be expressly limited to
such FUJIFILM’s replacement of Media as provided herein.
6. DISCLAIMER OF WARRANTY.
EXCEPT AS PROVIDED IN SECTION 5 HEREIN, FUJIFILM PROVIDES PRODUCT “AS IS”
AND WITHOUT WARRANTIES OF ANY KIND, EXPRESS OR IMPLIED. FUJIFILM SHALL
MAKE NO WARRANTY, EXPRESS, IMPLIED OR STATUTORY, AS TO ANY OTHER MATTERS, INCLUDING, BUT NOT LIMITED TO NON-INFRINGEMENT OF ANY COPYRIGHT,
PATENT, TRADE SECRET, OR ANY OTHER PROPRIETARY RIGHTS OF ANY THIRD PARTY,
MERCHANTABILITY, OR FITNESS FOR ANY PARTICULAR PURPOSE.
7. LIMITATION OF LIABILITY.
IN NO EVENT SHALL FUJIFILM HAVE ANY LIABILITY FOR ANY GENERAL, SPECIAL, DIRECT, INDIRECT, CONSEQUENTIAL, INCIDENTAL, OR OTHER DAMAGES (INCLUDING
DAMAGES FOR LOSS OF PROFITS OR LOST SAVINGS) INCURRED FROM THE USE OF OR
INABILITY TO USE PRODUCT EVEN IF FUJIFILM HAS BEEN ADVISED OF THE POSSIBILITY
OF SUCH DAMAGES.
8. No export.
You acknowledge that neither Software nor any part thereof, will be transferred, or
exported to any country or used in any manner in violation of any export control laws
and regulations to which Software is subject.
9. Termination.
In case you breach any of the terms and conditions hereof, FUJIFILM may immediately
terminate this Agreement without any notice.
10. Term.
This Agreement is effective until the date when you cease to use Software, unless
earlier terminated in accordance with Section 9 hereof.
11. Obligation upon termination.
Upon termination or expiration of this Agreement, you shall, at your own responsibility and expense, delete or destroy immediately all Software (including its copies),
Media and Documentation.
12. Governing Law.
This Agreement shall be governed by and construed in accordance with laws of Japan.
Downloaded
From camera-usermanual.com Fujifilm Manuals
http://www.fujifilm.com/products/digital_cameras/index.html