1
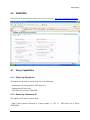
Animal Expression Database
USER’S MANUAL
Revision Sheet
Revision Sheet
Release No.
Date
Author
Revision Description
Rev. 0
Rev. 1
Rev. 2
12/15/08
12/25/08
01/05/09
Sushain Pandit
Sushain Pandit
Sushain Pandit
User’s Manual First-cut
Added Section 3
Added Sections 4 & 5
User’s Manual
Pagei
1.0 General Information
USER'S MANUAL
TABLE OF CONTENTS
Page #
1.0
GENERAL INFORMATION ..........................................................................................................1-1
1.1
1.2
1.3
1.4
1.5
2.0
GETTING STARTED .....................................................................................................................2-1
2.1
2.2
2.3
3.0
Submitting an experiment ......................................................................................................3-1
Uploading associated files......................................................................................................3-2
Hybridizations page................................................................................................................3-3
Review page ...........................................................................................................................3-4
QUERYING .....................................................................................................................................4-1
4.1
5.0
Logging On.............................................................................................................................2-1
Dashboard...............................................................................................................................2-2
Exiting the System .................................................................................................................2-3
USING THE SYSTEM ....................................................................................................................3-1
3.1
3.2
3.3
3.4
4.0
System Overview ...................................................................................................................1-1
References ..............................................................................................................................1-1
Authorized Use Permission....................................................................................................1-1
Points of Contact ....................................................................................................................1-1
Acronyms and Abbreviations.................................................................................................1-1
Query Capabilities..................................................................................................................4-1
IMPORTANT INSTRUCTIONS AND FAQS................................................................................5-1
5.1
5.2
5.3
5.4
Submission and Finalization process .....................................................................................5-1
Regarding SOFT files and zip archives..................................................................................5-2
Submitting the experiment to GEO........................................................................................5-2
Updating the SOFT after submission (if required). ...............................................................5-3
User’s Manual
1.0 General Information
1.0
User’s Manual
GENERAL INFORMATION
1.0 General Information
1.0
GENERAL INFORMATION
1.1
System Overview
ANEXdb allows scientists to store and analyze gene expression data in the form of microarray
experiments. Currently Affymetrix is the only platform supported. The ANEXdb database
schema is available here.
•
The underlying functions performed by the system are storage and query-based retrieval.
•
The system is broadly based on a web-based, 3-tier architecture.
•
User access mode is essentially restricted via the web-based client.
•
System status is Operational.
1.2
References
This document was prepared as is by the ANEXdb core development team. Refer
www.anexdb.org .
1.3
Authorized Use Permission
This system is protected from unauthorized usage and/or making unauthorized copies of data,
software pieces, etc. For further information on this, please get in touch with the point of
contact(s) (Refer 1.4).
1.4
Points of Contact
Please drop a note to [email protected] for queries or feedback.
1.5
Acronyms and Abbreviations
ANEXdb
NSF
USDA
User’s Manual
Animal Expression Database
National Science Foundation
United States Department of Agriculture
Page 1-1
1.0 General Information
User’s Manual
Page 1-2
3.0 Getting Started
2.0
User’s Manual
GETTING STARTED
3.0 Getting Started
2.0
GETTING STARTED
2.1
Logging On / Registering
Depending on whether the system is being used for the first time, you may need to register by
clicking ‘Register’ at the top-right part on the landing page at www.anexdb.org .
Filling in all the fields (besides mandatory) is recommended so that the admin can track the
submissions. When you register, it is only required that you enter an email address and password,
but the more of the other details you enter here, the less you will have to enter later when
submitting sample information.
User’s Manual
Page 2-1
3.0 Getting Started
2.2
Dashboard
After you register, login using your email address and password. After logging into the system,
the user will be presented with a dashboard, where he can create new experiments.
2.2.1 Start New Submission
This may be used to start the new submission. Click on the "Start New Submission" link to begin
entering a new experiment.
2.2.1 Your Submissions / Experiments
These boxes enlist all the submissions done under one particular used-id along with other useful
information on the current status of submissions.
2.2.1 Account Info / Groups
User’s Manual
Page 2-2
3.0 Getting Started
These enlist your profile information and whether you’ve any group privileges as determined by
the ANEXdb admin.
2.3
Exiting the System
Make sure you logout properly by clicking ‘logout’ on the top right. Any incomplete submissions
can be located within ‘Your Submissions’ box when you log into the system the next time.
User’s Manual
Page 2-3
3.0 Using the System
3.0
User’s Manual
USING THE SYSTEM
3.0 Using the System
3.0
USING THE SYSTEM
3.1
Submitting an experiment
Clicking ‘Start New Submission’ on your dashboard starts a new experiment.
Following is a general guideline for experiment submissions.
Title: The experiment title is the same as what you would see in GEO. An example would be
"Expression data from non-infected and Salmonella Typhimurium infected mesenteric lymph
nodes".
Description: This is a longer text description of the experiment and its design. You should
probably mention the factors and methods used in the experiment here.
Visibility: Here you will set whether you would like the experiment to be available to the public.
Public visibility is the default setting and allows anyone to view your experiment and data.
Private keeps the experiment hidden so that only you can view it. If you are a member of a Group
you will also be able to choose group visibility and that group so that only you and other
members of your group can view the experiment.
User’s Manual
Page 3-1
3.0 Using the System
GEO accession number (optional): If your experiment has already been submitted and
reviewed by NCBI GEO, you can enter the GDS or GSE accession number here.
Experiment Design: Enter the Factors and Levels of your experiment here. For example, if your
experiment is a time course experiment with four time steps, you would enter "Time" in the
Factor box, and "4" in the Number of Levels box. If you have only this factor, you would then
click "Refresh Factors" to enable 4 text boxes so that you could enter your levels (e.g. 4 hours, 8
hours, 16 hours, 24 hours).
Publications (optional): If a journal article related to this experiment has already been
published, you can enter the article details here.
Links (optional): If you have a website with supplementary material about this experiment, you
can enter that link here.
3.2
Uploading associated files
Once the plugin loads, click "Browse..." and select the .CEL files and .CHP files from your experiment.
You should probably have some way of identifying by the filename which chip it belongs to so that you
can associate it on the next page. When you are done selecting the files, be sure to click the "Upload"
button. Once the upload is done, move on to the next page.
User’s Manual
Page 3-2
3.0 Using the System
3.3
Hybridizations page
Following is a general guideline for entering the data on this page.
Array Design: This drop-down menu lists all of the Affymetrix chips currently loaded. If your
experiment used a chip that is not listed, please contact an administrator using the email address
at the bottom of this page.
GEO Accession Number: If your experiment has already been submitted and reviewed by NCBI
GEO, you can enter the GSM accession number associated with this particular chip here.
CEL File: This drop-down will contain a list of the CEL files you uploaded on the previous
page. Select the one for which you would like to add details.
CHP file: This drop-down will contain a list of the CHP files you uploaded on the previous page.
Select the one for which you would like to add details.
Factors: Select the levels of the factors related to the chip you selected. If you selected
pig_4hours.cel, select "4 hours" in the "Time" drop-down menu here.
Organism: Select the organism from which your sample came.
Organism part: Enter the type of tissue from which the sample came. Examples are liver, lung,
MLN.
User’s Manual
Page 3-3
3.0 Using the System
Sample molecule: The molecule type extracted from the sample.
Labeling compound: This is usually biotin for Affymetrix experiments. In dual-color
experiments this is often Cy3 or Cy5.
Sample description: A short description of this particular sample. An example would be
"mesenteric lymph nodes, non-infected pig, rep 1".
Treatment protocol: Describe the sample treatment. You can find an example of this at this
link.
Extract, Scan, Label, Hybrid Protocols: These drop-down menus allow you to quickly select a
complete description of your protocol. If you do not find your particular protocol in the list,
please contact us.
When you are done with that page, you have several options: a) Cancel - This will not submit your current hybridization and will bring you back to the main
page.
b) Save - This will save the hybridization you are working on, but will keep you on that page.
c) Add another hybridization - Saves your current hybridization and lets you add another .
d) Save & Continue - If this is your last hybridization, click this to save and move on to the last
review step.
e) Continue without Saving - If this is your last hybridization, click this to move on to the last
review step without saving this hybridization.
3.4
Review page
This last page allows you to look at what you've submitted and make sure it's correct. When you
are ready to submit, click the Complete Submission button and it will be approved by an
administrator before being submitted to the public database. You should now see your
experiment in the Your Submission table in "Pending" status.
User’s Manual
Page 3-4
4.0 Querying
4.0
User’s Manual
QUERYING
4.0 Querying
4.0
QUERYING
The system can be queried using varied criteria on the search page - http://www.anexdb.org/search.php
4.1
Query Capabilities
4.1.1 Search by Experiment
This option can be used to search using any of the following:
- Experiment Accession number (ANX.species.#)
- Experiment title keywords
- GEO Data Set or Series (GDS/GSE)
4.1.2 Search by Consensus ID
This option can be used to search using:
- Enter Cluster number followed by Contig number, i.e. ITC.1.1 - GEO Data Set or Series
(GDS/GSE)
User’s Manual
4.0 Querying
4.1.3 Search by Hybridization
This option can be used to search using any of the following:
- Hybridization accession number (ANX.species.#.#)
- GEO Sample Number (GSM)
- Sample description
- Sample tissue
4.1.4 Search by Gene or Sequence ID
This option can be used to search using any of the following:
- Gene Name
- Affymetrix Id
- NCBI RefSeq ID
4.1.5 Search by Affymetrix Probe ID
This option can be used to search using affymetrix probe id. For instance - Ssc.10082.1.A1_at.
4.1.6 Browse by Organism
This option can be used to search using any of the organism types using the drop-down menu
given.
User’s Manual
4.0 Querying
5.0
User’s Manual
IMPORTANT INSTRUCTIONS AND FAQS
5.0 Important Instructions and FAQs
5.0
IMPORTANT INSTRUCTIONS AND FAQS
This section contains some important observations that may come handy to the users.
5.1
Submission and Finalization process
-
Once an experiment is submitted, it is temporarily stored in an intermediate database and
remains there until the admin finalizes it.
-
The finalization process is essentially controlled by the system admin and it is his
responsibility to ensure that the experiment submission is proper and in accordance to
guidelines, however, to make his job easier, it is recommended that submissions be made
as per the above specified guidelines.
-
Once the experiment gets finalized, it is queued and gets processed within a predetermined time-slot by a server-based cron process. This process runs 12 am – 7 am due
to server load constraints and thus, it is not recommended to browse / click / review your
experiment until a day after it is finalized and appears in the Search Results. This will
ensure that the data has been processed and the soft files will be properly generated.
Failure to conform with the above guideline will result in incorrectly populated soft
file references.
-
Once the experiment is finalized (can be viewed in the Search Results) and the above
mentioned time-period has elapsed, one may go ahead and click on the corresponding
experiment on the search page.
User’s Manual
Page 5-1
5.0 Important Instructions and FAQs
5.2
Regarding soft files and zip archives
Upon clicking on the experiment in Search Results, you will be presented by the
experiment page with download links for soft and a zip archive.
-
The soft file is accordance with GEO guidelines. This file refers other experiment-related
files like .chp and .cel.
-
In case of any missing valules that the system couldn’t find, there would be a placeholder
–anexdb_admin insert value here.
This field would indicate that there has been some missing information in the experiment
submission and you should either change it to the correct value manually, or re-submit the
experiment with the correct value / files.
-
The zip archive would contain soft, .cel, .chp files for the experiment submission. All
these would be needed since soft refer to them and they’re all needed to conform to GEO
submission requirements.
-
It is highly recommended to cross-check the zip contents before submitting it to GEO. In
case, any of the experiment-related files (.cel, .chp) is found missing, you should either
manually add it to the archive, or check your experiment submission (on the experiments
page) to ensure that you indeed submitted the file during the submission process.
-
If you find that the file is absent in the zip even though it appears in the submission,
please drop a note to one of the points of contact (refer 1.4).
5.3
Submitting the experiment to GEO
For successful submission to GEO, one would need to submit a zip archive of the
generated SOFT file and the CEL/CHP files using the Direct deposit option at the Direct
Deposit page.
-
Select 'File format' SOFT, 'Submission kind' new and enter an appropriate 'Release date'
for your data, before clicking the 'Submit' button.
User’s Manual
Page 5-2
5.0 Important Instructions and FAQs
5.4
Updating the soft after submission (if required)
For performing batch updates in the submitted SOFT, follow these guidelines: -
-
Include the attribute "!Sample_GEO_accession = GSMxxx" where GSMxxx indicates the
accession number of the record to be updated (similarly, use !Platform_GEO_accession =
GPLxxx, and !Series_GEO_accession = GSExxx).
-
You can provide the entire SOFT record with the necessary revisions. Alternatively, you
can simply provide the revised attributes and/or data table. Data table updates are 'all-ornothing', e.g., to revise data in one column of a table, it is necessary to update the whole
table.
-
Submit your SOFT update file by selecting the 'SOFT' option on the Direct Deposit page.
Make sure to check the 'Update' box. Successful updates will be reflected immediately on
your GEO records.
Refer the following examples (data tables, if any, truncated at 20 rows) for creating SOFT
update files:
•
An example of a file updating Series attributes.
•
An example of a file updating an attribute in multiple Samples.
•
An example of a file updating data tables in multiple Samples.
•
An example of a file updating data tables and attributes in multiple Samples.
•
An example of a file updating Samples using complete SOFT records.
User’s Manual
Page 5-3