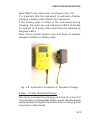
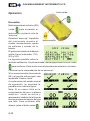
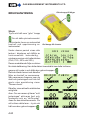
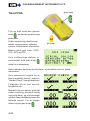
1
V!SA
(4-Gas Version)
User Handbook
Issue 6
07/08/2013
Part Number: 66094
GMI welcomes comments on all our publications.
Your comments can be of great value in helping
us to improve our customer publications. Please
send any comments that you have to our Sales
Department at GMI. Contact details are provided
inside the back cover of this handbook.
Instrument Service / Repair contact details are also
provided inside the back cover of this handbook.
Copyright © Gas Measurement Instruments Ltd 2005
COPYRIGHT
This User Handbook is copyright of Gas Measurement Instruments Ltd (GMI)
and the information contained within is for use only with the GMI V!SA.
Reproduction, in whole or in part, including utilisation in machines capable of
reproduction or retrieval without written permission of Gas Measurement
Instruments Ltd. is prohibited. Reverse engineering is not permitted.
LIABILITY
Every care has been taken in the preparation of this Handbook, but GMI Ltd.
do not accept any responsibility for errors or omissions and their consequences.
Information in this Handbook is subject to change without notice. This Handbook
does not constitute a specification or basis for a contract. Your statutory rights
under law are not affected.
MODIFICATION NOTICES
GMI aim to notify customers of relevant changes in the product operation and
maintain this Handbook up to date. In view of the policy of continuous product
improvement there may be operational differences between the latest product
and this Handbook.
This Handbook is an important part of the V!SA product. Please note the
following points:
•
It should be kept with the instrument for the life of the product
•
Amendments should be attached to this Handbook
•
This Handbook should be passed on to any subsequent owner/user of
the instrument
•
Although every care is taken in the preparation of this Handbook it does
not constitute a specification for the instrument.
SOFTWARE
Software supplied on EPROM or similar device for use in a particular product,
may only be used in that product and may not be copied without the written
permission of Gas Measurement Instruments Ltd. Reproduction or disassembly
of such embodied programmes or algorithms is prohibited. Ownership of such
software is not transferable and Gas Measurement Instruments Ltd. does not
warrant that the operation of the software will be error free or that the software
will meet the customer’s requirements.
DISPOSAL ADVICE
When no longer in use, dispose of the instrument carefully and with respect for
the environment. GMI will dispose of the instrument without charge if returned
to the factory.
i
V!SA - USER HANDBOOK
SAFETY
•
The instrument must be regularly serviced and calibrated by fully
trained personnel in a safe area.
•
Batteries: Alkaline batteries or *Rechargeable battery pack must be
exchanged (*and recharged) in a safe area and fitted correctly before
use. Never use damaged batteries or expose to extreme heat.
See Section 4 : OPERATOR MAINTENANCE.
•
Only GMI replacement parts should be used.
•
If the instrument detects gas, follow your own organisation’s procedures
and operational guidelines.
•
Gas can be dangerous and care should always be taken in its use.
•
This equipment is designed and manufactured to protect against other
hazards as defined in paragraph 1.2.7 of Annex II of the ATEX Directive
94/9/EC
Any right of claim relating to product liability or consequential damage to any
third party against GMI is removed if the above warnings are not observed.
AREAS OF USE
Exposure to certain chemicals can result in a loss of sensitivity of the flammable
sensor. Where such environments are known or suspected it is recommended
that more frequent response checks are carried out. The chemical compounds
that can cause loss of sensitivity include Silicones, Lead, Halogens and Sulphur.
Do not use instrument in potentially hazardous atmospheres containing greater
than 21% Oxygen.
STORAGE, HANDLING AND TRANSIT
The batteries in the rechargeable pack contain considerable energy and care
should be taken in their handling and disposal.
The instrument is designed to handle harsh environments. The instrument is sealed
to IP65 and the sensing elements, sample inlet and charging socket sealed to IP54.
If not subject to misuse or malicious damage, the instrument will provide many years
of reliable service.
The instrument can contain electrochemical sensors. Under conditions of prolonged
storage these sensors should be removed. The sensor contains potentially corrosive
liquid and care should be taken when handling or disposing of the sensor, particularly
when a leak is suspected.
There is no special precautions to be taken when the instrument is in transit.
WARRANTY
The GMI V!SA instrument has a warranty against faulty goods or workmanship
of 5 years. Consumable and Mechanical parts are not included in this. These
are covered under GMI standard warranty conditions. For details, please contact
GMI Ltd (UK).
ii
DECLARATION OF CONFORMITY
Refer to current
Declaration of Conformity
document Part No. 66250
(supplied with product)
iii
V!SA - USER HANDBOOK
iv
REVISION RECORD
Date
Issue
Description Of Change
06/06/2003
1
New User Handbook.
12/01/2004
2
Revised to include effect of
CN 2435, CN 2443, CN 2459,
CN 2493, CN 2494, CN 2496,
CN 2544 and CN 4014.
12/06/2006
3
Revised to include translations
update and effect of CN 4099,
CN 4137, CN 4146, CN 4178,
CN 4224 and CN 4226.
24/08/2010
4
Revised to include Declaration
of Conformity and effect of
CN 4271, CN 4302, CN 4479,
CN 4573, CN 4788, CN 4789,
CN 4836, CN 4851, CN 4857,
CN 4906 and CN 4957.
28/05/2012
5
Revised to include Marine
Equipment Directive (MED) and
effect of CN 4926.
v
V!SA - USER HANDBOOK
07/08/2013
vi
6
Revised to include effect of
CN 6280.
CONTENTS
TABLE OF CONTENTS
COPYRIGHT
i
LIABILITY
i
MODIFICATION NOTICES
i
SOFTWARE
i
DISPOSAL ADVICE
i
SAFETY
i
AREAS OF USE
i
STORAGE, HANDLING AND TRANSIT
i
WARRANTY
i
DECLARATION OF CONFORMITY
iii
REVISION RECORD
v
vii
V!SA - USER HANDBOOK
INTRODUCTION
1-1
1.1 GENERAL DESCRIPTION
1-1
1.2 FEATURES
1-3
1.3 DATA LOGGING
1.3.1 Viewing Data Logged Readings
1-5
1-5
1.4 HYDROPHOBIC TYPE FILTER(S)
1-5
1.5 CONSTRUCTION
1-6
1.6 IDENTIFICATION LABEL
1.7 PHYSICAL PROPERTIES
1-6
1-6
1.7.1 Environment
1-6
1.7.2 Typical Flow Rate Information
1-6
1.7.3 Warm-up / Stabilization Time
1-6
1.7.4 Response Time (T90)
1-6
1.8 CERTIFICATION
1.8.1 Identification of Symbols
1-7
1-7
1.8.2 Performance
OPERATION
1-8
2-1
2.1 OPERATING PROCEDURE
2-1
2.2 SWITCHING THE INSTRUMENT ON
2.2.1 Instrument Identification
2-2
2-3
viii
CONTENTS
2.2.2 Battery Status
2-3
2.2.3 Time and Date
2-4
2.2.4 Calibration Due Date
2-4
2.2.5 Select Calibration Gas
2-6
2.2.6 Sensor Confirmation Check
2-7
2.2.7 Normal Operating Display
2-9
2.3 SWITCHING THE DISPLAY BACKLIGHT ON / OFF
2-10
2.4 VIEWING THE MAXIMUM AND MINIMUM
RECORDED VALUES SINCE SWITCH ON
2-10
2.5 ALARMS RESET OR ACKNOWLEDGE
2.5.1 Confidence Signal
2-13
2-15
2.6 SWITCHING THE INSTRUMENT OFF
2-15
2.7 REMOTE SAMPLING (with pump option)
2.7.1 Pump Option:
2-16
2-16
2.7.2 Assisted Diffusion Option:
ALARMS
3.1 GAS ALARMS
3.1.1 Flammable LEL Alarm Limit
2-17
3-1
3-1
3-1
3.1.2 Over-Range Flammable Gas Alarm Function
3-1
3.1.3 Oxygen (O2) Alarm Limits
3-2
ix
V!SA - USER HANDBOOK
3.1.4 Toxic Alarm Limits
3.2 ACKNOWLEDGE GAS ALARMS
3-2
3-5
3.3 HIGH FLAMMABLE GAS OVER-RANGE ALARM
3-6
3.4 FAULT ALARMS
3.4.1 Low Battery
3-8
3-8
3.4.2 Zero Fault
3-8
3.4.3 Zero Fault - Only applicable to instruments
with CO2 sensor fitted
3-10
3.4.4 Sensor Fault
3-12
3.4.5 Sample Fault (Pumped Instruments Only)
3-14
3.4.6 Low Flow - Only applicable to pumped
instruments supplied with this option. 3-14
3.4.7 Calibration Expired
3-15
3.4.8 Calibration Required
3-15
OPERATOR MAINTENANCE
4-1
4.1 CLEANING
4-1
4.2 FILTER REPLACEMENT
4.2.1 Sensor Grille Filter
4-1
4-2
4.2.2 Sample Inlet Filter
4-4
4.2.3 In-line Hydrophobic Filter (Accessory)
4-6
x
CONTENTS
4.3 BATTERY PACKS
4-8
4.3.1 Removing and Replacing a Battery Pack
4-10
4.3.2 Charging (Rechargeable) Battery Packs
4-12
4.3.3 Replacing Alkaline Batteries
CALIBRATION
4-17
5-1
5.1 GENERAL DESCRIPTION
5-1
5.2 CALIBRATION VALIDITY
5-2
ACCESSORIES
6-1
ADDITIONAL INFORMATION
7-1
7.1 TRAINING
7-1
7.2 WORLD WIDE WEB
7-1
OPERATING INSTRUCTIONS
A-1
xi
V!SA - USER HANDBOOK
INDEX
xii
i
1
INTRODUCTION
1.1 GENERAL DESCRIPTION
The GMI V!SA combines quality, ruggedness and
advanced technology in a user friendly, portable gas
detector. Small and lightweight, it is suitably certified to
recognised International Standards.
Fig. 1.1 V!SA Instrument
The V!SA is used for confined space monitoring, for
example, in sewers, underground piping or within tanks,
and other personal monitoring applications. Its high intensity
audible and bright visual alarms provide early warning of
dangerous gas levels.
1-1
V!SA - USER HANDBOOK
The instrument is operated via a single push button,
providing the user with a simple to use gas detector.
From one (1) up to four (4) gases can be monitored from
the following list:
Note: A five (5) gas version is also available. For details,
contact GMI Ltd.
•
•
•
•
•
•
•
•
•
•
•
0 to 100% LEL Hydrocarbons
0 to 25% Oxygen (O2)
0 to 100 ppm Hydrogen Sulphide (H2S)
0 to 1000 ppm Carbon Monoxide (CO)
0 to 30 ppm Sulphur Dioxide (SO2)
0 to 100 ppm Sulphur Dioxide (SO2)
0 to 10 ppm Chlorine (Cl2)
0 to 20 ppm Nitrogen Dioxide (NO2)
0 to 100 ppm Ammonia (NH3)
0 to 300 ppm Nitric Oxide (NO)
0 to 5% Carbon Dioxide (CO2)
The instrument display identifies the gas(es) the instrument
is monitoring. An example of a four gas instrument display
is shown in Fig. 1.2:
Fig. 1.2 (4-Gas) Display Example
1-2
INTRODUCTION
The display details the current gas readings and
operational / status information (as shown above) or the
instrument can be set up to display a simple ‘OK’ message.
Note: This Handbook describes the operation of a four
gas instrument configured in the most common format.
On other models, operation is similar to the example shown.
Operational differences are highlighted if and where they
exist. Configurable options are available that allow the
instrument to be set up to suit your particular requirements.
These options are detailed in italic text, where applicable,
and are also detailed in the ‘CONFIGURATION HANDBOOK’.
1.2 FEATURES
The main features of the V!SA instrument are:
•
Integral impact resistant housing.
•
Single button user operation.
•
From one (1), up to four (4) gases detected
simultaneously. (A five gas version is also available).
•
Alphanumeric display with screen light.
•
High intensity audible and visual alarms.
•
Confidence signal (green LED’s and/or sounder).
•
Built-in electric pump (optional).
•
Automatic data logging (optional).
•
Three types of battery pack: Long Duration, Fast
Charge, and Alkaline. Each type of pack provides a
different operational lifetime. These times can be found
in Table 1.1 and display battery life in hours, allowing
five (5) minutes of alarm per day.
1-3
V!SA - USER HANDBOOK
•
Instrument sealed to IP65 and sensing elements,
sample inlet and charging socket sealed to IP54,
making the instrument suitable for outdoor use
•
A comprehensive range of accessories.
I NS TRUMENT
OPERATI NG
MODE
BATTERY TYPE / LI FE
LONG DURATI ON /
FA S T C HA RG E
A LKA LI NE
LE L
>16
>16
IR (INFRARED)
>16
>16
PUMP
>16
>16
LEL + IR
12
13
LEL + PUMP
12
13
IR + PUMP
15
>16
LEL + IR + PUMP
9
10
>16
>16
TOXIC SENSOR ONLY
Table 1.1 Battery Life
1-4
INTRODUCTION
1.3 DATA LOGGING
Optional data logging allows gas values, summary logs
and calibration details to be logged at regular intervals
and later downloaded to a Personal Computer (PC).
Datalogging is available as an option when ordering. It
cannot be retrofitted without returning the instrument to
GMI.
Note: If the Data logging option is selected, refer to
‘CONFIGURATION HANDBOOK’ for further information on
data logging and overwriting set up options.
1.3.1 Viewing Data Logged Readings
Data logged readings can be downloaded from the
instrument into a PC using GMI software and communication
adaptor. Contact our Sales Department at GMI for further
details.
1.4 HYDROPHOBIC TYPE FILTER(S)
A hydrophobic filter would normally be fitted to the
instrument but may be removed in certain applications,
for example, when the instrument is used to detect Chlorine
or other reactive gases.
The filter(s), if fitted, should be checked regularly and
replaced if contaminated.
See ‘FILTER REPLACEMENT’ in Chapter 4, ‘OPERATOR
MAINTENANCE’, for further information.
1-5
V!SA - USER HANDBOOK
1.5 CONSTRUCTION
The instrument is housed in a tough, impact resistant
moulded case. The instrument is sealed to IP65 and the
sensing elements, sample inlet and charging socket sealed
to IP54. The instrument withstands physical impact testing
to EN 61779.
1.6 IDENTIFICATION LABEL
Each instrument has a unique serial number that appears
on the label along with the instrument’s certification details.
This serial number also appears on the instrument display
after switch on, during warm-up.
1.7 PHYSICAL PROPERTIES
Weight: 0.4 kg
Dimensions: 140 x 85 x 45 mm
1.7.1 Environment
Temperature Limits -20oC to + 50oC
Humidity: 0 to 95% R.H. non-condensing.
1.7.2 Typical Flow Rate Information
Pumped Instruments:
Nominal pump flow rate is 0.5 to
0.7 litres per min. Max. 30 metres
(97ft.) sample line.
Typical flow fail rate is 0.1 to 0.2
litres per min.
1.7.3 Warm-up / Stabilization Time
< 40 seconds.
1.7.4 Response Time (T90)
Typical Oxygen (O2) response time: < 10 seconds.
1-6
INTRODUCTION
1.8 CERTIFICATION
The V!SA instrument is certified as follows:
Note: Check instrument labels for actual certification.
ATEX
II 1 G EEx ia IIB T3
or
ATEX
II 2 G EEx ia d IIC T3
or
ATEX
II 2 G EEx ia d IIC T4
1.8.1 Identification of Symbols
Certification No. DEMKO03 ATEX 133803X
EEx ia IIB T3
1-7
V!SA - USER HANDBOOK
Sira 05 ATEX 2295
EEx ia d IIC T3
or
EEx ia d IIC T4
0038/YY Marine Equipment Directive (Module B&E)
(European mark of Conformity)
1.8.2 Performance
This apparatus conforms to standard EN 50104.
Complies with:
EN 61779 (Flammable)
EN 45544 (Toxic)
Classified as to intrinsic safety only:
UL 913 Class I, Groups A, B, C and D
WARNING
The instrument is not for use in Oxygen enriched
atmospheres.
WARNING
Rechargeable battery pack must be recharged and
replaced in a non-hazardous area.
WARNING
To prevent ignition of flammable or combustible
atmospheres, disconnect power (i.e. remove battery
pack) before servicing.
1-8
WARNING
Replace battery pack only with GMI Part No. 66056 ; 66210
or 66335.
WARNING
To reduce the risk of explosion, do not mix new batteries
with used batteries, or mix batteries from different
manufacturers.
These conditions apply to
UL approved product
use only
1-9
V!SA - USER HANDBOOK
1-10
2
OPERATION
2.1 OPERATING PROCEDURE
Check the following:
•
The instrument is clean and in good condition.
•
The battery pack is in good condition, fully charged
and fitted correctly.
•
The hydrophobic filter, if fitted, is clean and in good
condition.
•
The sample line and any other accessories used are
in good condition and leak-free.
•
All gas ranges are operational and the instrument is
zeroed.
•
The instrument is within the calibration period you
have decided is necessary for your application.
Each time you use the instrument carry out the following
procedure:
Caution: The GMI V!SA can be supplied with a flammable
gas sensor. This sensor is designed for use in
concentrations of gas not exceeding the Lower Explosive
Limit (LEL). Exposing the sensor to high concentrations of
flammable gas above the LEL can cause damage to the
sensor and inhibit its proper operation. The GMI V!SA has
an inbuilt safety alarm feature to prevent this. Refer to
ALARMS section of this handbook for details.
2-1
V!SA - USER HANDBOOK
•
Switch instrument on in fresh air and check that the
battery pack is charged.
•
Check there are no faults.
•
Attach optional accessories, as required.
•
If oxygen sensor is fitted, check oxygen readings to
ensure correct operation. The oxygen sensor
responds to the user breathing on the instrument
front grille by displaying a decreased value,
i.e. below 20.9%.
•
Switch the instrument off, in fresh air, after use.
2.2 SWITCHING THE INSTRUMENT ON
Press and hold the green Right Hand (RH) button
for
one second to switch the instrument on.
DISPLAY
GREEN (RH) BUTTON
YELLOW (LH) BUTTON
Fig. 2.1 V!SA Button Operation
2-2
OPERATION
The instrument begins its warm-up routine, which lasts
30 seconds. During the warm-up, a countdown timer
appears in the top (RH) corner of the display.
Note: The display backlight illuminates and remains on
during warm-up. When warm-up is completed, the screen
light automatically switches off.
2.2.1 Instrument Identification
During warm-up, the instrument display identifies the
model, serial number, software version, datalogging option
and battery status information as shown in Fig. 2.2:
Fig. 2.2 Instrument Identification
Note: The instrument configuration may not include
datalogging, if required, it can be retrofitted by GMI at a
later date. Contact GMI Ltd. for details.
2.2.2 Battery Status
Provides the user with the Battery charge level, as shown
in previous display. This will be indicated by a battery
symbol with a bar graph showing FULL, 75%, 50% and
25%, which is shown for approximately five (5) seconds
during warm up, then on the top of the display during
normal operation.
2-3
V!SA - USER HANDBOOK
2.2.3 Time and Date
The time and date from the instrument’s built-in clock is
displayed on the screen during warm-up, as shown in
Fig. 2.3.
Fig. 2.3 Time and Date
If datalogging is being used, the time and date is set from
this clock. This may be important when viewing the logged
data.
2.2.4 Calibration Due Date
The calibration due date appears on the display, as shown
in Fig. 2.4.
A configurable option is available not to display this
screen.
Fig. 2.4 Calibration Due Date
2-4
OPERATION
If the Calibration Due Date has expired, the audible and
visual alarm activates and the screen, as shown in Fig.
2.5, is displayed during warm-up:
Fig. 2.5 Calibration Expired
Press and hold the green (RH) button
once, to
acknowledge the calibration due date is overdue, cancel
the audible / visual alarm, and continue to the next display.
A configurable option is available to force the user to
switch off the instrument.
Note: Further details are available in ‘CONFIGURATION
HANDBOOK’.
2-5
V!SA - USER HANDBOOK
2.2.5 Select Calibration Gas
This configurable option is available to allow the user to
select a different flammable gas from that which was
originally used to calibrate the instrument.
This action allows the instrument software to compensate
and thus display more accurate readings when detecting
the re-selected gas type.
When this option is displayed, as shown in Fig. 2.6, the
gas that was originally used to calibrate the instrument
is identified between two arrowheads.
Note:
The instrument calibration certificate also
identifies the original calibration gas type.
Fig. 2.6 Cal Gas Selection
To select a different gas type, press the yellow Left Hand
(LH) button
to scroll through the available options
from Methane, Butane, Propane, Pentane and Ethanol.
When the required option is highlighted, press and hold
the green (RH) button
to select.
Note: Accuracy for the re-selected gas type is + 20%.
2-6
OPERATION
2.2.6 Sensor Confirmation Check
The symbol ◆ appears above each sensor type to confirm
that the sensor has been recognised, is working correctly,
and is being zeroed. When sensors are zeroed correctly,
a symbol ✔ appears above each sensor.
Refer to Fig. 2.7 for example.
followed by
Fig. 2.7 Sensor Check Displays
If sensor(s) fail the zero check at the end of warm-up,
the audible and visual alarm activates and the instrument
display will show a spanner symbol and pause, as shown
in Fig. 2.8:
2-7
V!SA - USER HANDBOOK
Fig. 2.8 Failed Sensor
To acknowledge the alarm, press the green (RH) button
once. This will clear the audible / visual alarm and
display a flashing spanner symbol, *alternating with the
faulty sensor zero reading (*LEL sensor only). An example
is shown in Fig 2.9:
alternating with
Fig. 2.9 Acknowledge Alarm
2-8
OPERATION
A configurable option is available to force the user to
switch the instrument off if a zero fault is detected, as
shown in Fig. 2.10:
Fig. 2.10 Switch OFF
Note: If a sensor fault is detected during normal operation
of the instrument, an audible / visual alarm is activated
immediately and a spanner symbol is shown adjacent to
the faulty sensor type in the display.
2.2.7 Normal Operating Display
When warm-up is completed successfully, the screen
light switches off and the normal operating display is
shown, as in example Fig. 2.11:
Fig. 2.11 Normal Operating Display
2-9
V!SA - USER HANDBOOK
Each gas the instrument can measure is shown in the
display. In the previous example, the instrument is a four
gas model that can measure LEL, Oxygen (O2), Hydrogen
Sulphide (H2S) and Carbon Monoxide (CO).
Note: The instrument display varies for each model as
one, two, three or four gas. Versions measuring a range
of different gases are available.
2.3 SWITCHING THE DISPLAY BACKLIGHT ON / OFF
The display screen light can be manually switched on
when surveying in poor lighting conditions.
Press the green (RH) button
once to switch the screen
light on. It remains on for 20 seconds and then
automatically switches off.
2.4 VIEWING THE MAXIMUM AND MINIMUM
RECORDED VALUES SINCE SWITCH ON
The instrument records the maximum and minimum gas
values for each sensor, since switch-on.
To view max / min values, proceed as follows:
1)
Start from the normal operating display, as shown in
Fig. 2.12. Press the green (RH) button
switch the instrument screen light on.
2-10
once to
OPERATION
Fig. 2.12 Normal Operating Display
Press the green (RH) button
again, while the
screen light is on, to view the maximum gas values
stored in the instrument.
The example shown in Fig. 2.13 illustrates the maximum
gas values stored in a four gas instrument: LEL, Oxygen
(O2), Hydrogen Sulphide (H2S) and Carbon Monoxide (CO).
Fig. 2.13 Maximum Gas Values
2)
Press the green (RH) button
again to view the
minimum gas values stored in the instrument.
Note: This screen is only displayed when an Oxygen
sensor is fitted in the instrument.
2-11
V!SA - USER HANDBOOK
The following example, Fig. 2.14, illustrates the
minimum gas values stored in a four gas instrument:
LEL, Oxygen (O 2), Hydrogen Sulphide (H2S) and
Carbon Monoxide (CO).
Fig. 2.14 Minimum Gas Values
3)
After these readings have been noted, they can be
removed from the memory by pressing and holding
the green (RH) button
for two (2) seconds if the
instrument is clear of all alarms. This will return
instrument to the normal operating screen.
If a new set of readings are required, return to
paragraph (1).
Fig. 2.15 Normal Operation
2-12
OPERATION
Note: The maximum and minimum values are cleared from
the instrument’s memory when you press and hold the
green (RH) button
in non-alarm state. The display
returns to the normal operating display if no button is
pressed.
2.5 ALARMS RESET OR ACKNOWLEDGE
When the instrument detects an alarm set point has been
reached, the audible and visual alarm will be activated to
alert the user.
Caution: Never remove the battery to silence an
alarm as this can damage the instrument.
The alarms are individually programmable to be either
Latching, (i.e. alarm will stay on until the user resets by a
press and hold of the green (RH) button
when the gas
reading has returned within the preset alarm limits), or
Non-Latching (i.e. the audible and visual alarm will reset
automatically when the reading returns within the preset
alarm limits).
Note: Default alarms are set in accordance with current
international standards.
2-13
V!SA - USER HANDBOOK
ALARM TYPE
LEL 1 (Hi)
LATCHING
Y(es) or N(o)
MUTE
Y(es) or N(o)
AUDIBLE
INDICATION
VISUAL
(RED LED)
INDICATION
Disabled
Disabled
High Pitch Tone
All Slow Flashing
LEL 2 (Hi Hi)
Y
N
Continuous
Warble
(2) Inner / Outer
Siren Flash
O2 1
Y
N
Continuous
Warble
(2) Inner / Outer
Siren Flash
Disabled
Disabled
High Pitch Tone
All Slow Flashing
Y
N
Continuous High
Pitch Warble
(2) Inner / Outer
Siren Flash
(Hi Hi)
O2 2
(Lo)
O2 3
(Lo Lo)
Disabled
Disabled
High Pitch Tone
All Slow Flashing
Toxic 2 (Hi Hi)
Toxic 1 (Hi)
Y
N
Continuous High
Pitch Warble
(2) Inner / Outer
Siren Flash
Toxic 3 (STEL)
Y
N
Continuous High
Pitch Warble
(2) Inner / Outer
Siren Flash
Toxic 4 (LTEL / TWA)
Y
N
Continuous High
Pitch Warble
(2) Inner / Outer
Siren Flash
Low Battery Fault
N/A
N/A
Low Pitch Tone
All Slow Flashing
Zero Fault
N/A
N/A
Low Pitch Tone
All Slow Flashing
Sensor Fault
N/A
N/A
Low Pitch Tone
All Slow Flashing
Sample Fault
(Pumped Instr. Only)
N/A
N/A
Low Pitch Tone
All Slow Flashing
Low Flow
(Pumped Instr. Only)
N/A
N/A
Low Pitch Tone
All Flashing
Calibration Required
N/A
N/A
Low Pitch Tone
All Slow Flashing
Calibration Expired
N/A
N/A
Low Pitch Tone
All Slow Flashing
Over Range (LEL)
Y
N/A
Continuous Wail
All Fast Flashing
N / A = Not Applicable
Table. 2.1 V!SA Alarms
A configurable option is available that disables user
ability to mute the audible alarm only.
2-14
OPERATION
2.5.1 Confidence Signal
During normal operation, the instrument sounds a
confidence beep and illuminates the green LED’s briefly
every 15 seconds. This function is programmable in the
instrument setup software. This function makes the user
aware that the instrument is operating correctly:
Note: The confidence beep and/or LED’s can be disabled.
See the ‘CONFIGURATION HANDBOOK’ for further
information.
2.6 SWITCHING THE INSTRUMENT OFF
Press and hold both the yellow Left Hand (LH) button
and the green (RH) button
together to switch the
instrument Off.
The instrument screen will now start a countdown from
three (3) to OFF. Both buttons must be pressed together
until the display goes blank.
Fig. 2.16 Switch OFF
While both buttons are pressed, the audible alarm sounds
every second to alert user that the instrument is switching
OFF.
2-15
V!SA - USER HANDBOOK
2.7 REMOTE SAMPLING (with pump option)
Warning (Hand Aspirator): The V!SA is primarily
designed to be used with a built-in pump for remote
sampling. The hand aspirator can be used for indicative
sampling, but it must be noted that when using a
hand aspirator, a reading error in the region of +
20% is possible. In addition, whereas the pump can
sample quickly and accurately with up to 30 metres
of sample line, the hand aspirator must only be
used with up to 10 metres of sample line and the
sample time is extended. The sample line must be
intact and the proper flow established.
Remote sensing is carried out with the inbuilt electric pump
option, or by the hand aspirator for non-reactive gases,
using the sample connector at the bottom of the instrument
and sample tubing supplied with your instrument. On
pumped models the pump is off after start-up.
2.7.1 Pump Option:
Press and hold the green (RH) button
to start or stop
the pump. The pump will run at normal speed for remote
sampling.
When the pump is running at normal speed, a pump symbol
rotates in the display as shown in Fig. 2.17.
Note: It is only possible to switch the pump ON / OFF
when instrument alarms are inactive.
2-16
OPERATION
Fig. 2.17 Pump Symbol Displayed
2.7.2 Assisted Diffusion Option:
If assisted diffusion is the configured option, after
instrument warm-up, the pump remains ON at low speed.
This setting is used for reactive gases (*see note).
A press and hold of the green (RH) button
re-sets the
pump to run at normal speed. When the pump is running at
normal speed, a pump symbol
rotates in the display
as illustrated in Fig. 2.17. Press and hold the green (RH)
button
again to switch the pump OFF. A further press
and hold of the green (RH) button
re-sets the pump to
run at low speed.
* Note: GMI strongly recommend that pumped instruments,
configured with reactive gases, use assisted diffusion
mode in preference to diffusion mode.
Note: It is only possible to switch the pump ON / OFF
when instrument alarms are inactive.
2-17
V!SA - USER HANDBOOK
2-18
3
ALARMS
3.1 GAS ALARMS
Gas alarms are enabled when the instrument is switched
on.
Note: Alarms are disabled during warm-up.
All gas ranges have alarm limits that trigger the alarm if
the measured gas value exceeds the set level. If a preset
alarm level is exceeded, the audible alarm sounds, the
LED’s flash RED and the gas range in alarm flashes on
the display.
3.1.1 Flammable LEL Alarm Limit
Up to two (2) alarm levels are programmable, each with
different pitch and tone. All alarms are user configurable
to meet the specific needs of different companies.
3.1.2 Over-Range Flammable Gas Alarm Function
The flammable sensor is designed for use in the LEL
range only. Exposure to high concentrations of flammable
gas, such as lighter fuel, can damage the flammable sensor.
If the flammable gas readings exceed 120% LEL, a safety
alarm will be activated. The instrument must now be
switched off and returned to clean air.
3-1
V!SA - USER HANDBOOK
3.1.3 Oxygen (O2) Alarm Limits
Up to one (1) upper and two (2) lower alarm limits are
programmable, each with different pitch and tone. All
alarms are user configurable to meet the specific needs
of different companies.
3.1.4 Toxic Alarm Limits
When operating normally, the instrument records minimum
and maximum readings for each gas and calculates the
Short Term Exposure Limit (STEL) and Long Term Exposure
Limit (LTEL), known as Time Weighted Average (TWA)
readings , for each toxic gas range as appropriate. Up to
two (2) instantaneous and two (2) TWA alarms are
programmable for each toxic range fitted to the instrument.
Note: A Time Weighted Average (TWA) value is the mean
average gas level over a specific period. The STEL is 15
minutes and the LTEL is 8 hours. In accordance with UK
legislation, this requires the time weighted averages to be
averaged over a full 24 hour period whether the instrument
is On or Off. Such averaging essentially makes the
instrument single user applicable. The option is available
to restart the averaging after each instrument switch-off,
thus allowing for multiple user application.
All alarms are user configurable to meet the specific needs
of different companies.
Note: The toxic gas alarm levels – instantaneous, STEL
and LTEL are set at the time of instrument manufacture. It
is important that the user ensures that the levels are in
accordance with their company’s alarm levels and with
health and safety legislation. The alarm levels may be
3-2
ALARMS
changed, if required, via the instrument set up software,
or as detailed in the ‘CONFIGURATION HANDBOOK’.
In the following two examples, Fig. 3.1 shows a four-gas
instrument signalling a ‘Lo Lo’ Oxygen alarm and Fig. 3.2
shows a four-gas instrument signalling a ‘Hi Hi’ LEL alarm.
If more than one gas alarm level is exceeded, the gas
value will flash for each gas type in alarm.
toggles to
Fig. 3.1 ‘LoLo’ Alarm
toggles to
3-3
V!SA - USER HANDBOOK
Fig. 3.2 ‘HiHi’ Alarm
Each alarm can be latching or non-latching. Latching alarms
must be cleared by the user when the gas level returns to
within the preset alarm limits. Non-latching alarms clear
automatically when the gas level returns to within the
preset alarm limits.
Note: See the ‘CONFIGURATION HANDBOOK’ for further
information.
3-4
ALARMS
3.2 ACKNOWLEDGE GAS ALARMS
Caution: Never remove the battery to silence /
mute an alarm as this can damage the
instrument.
Once in a safe gas free area, or the gas reading has
returned within the preset limits, press and hold the
green (RH) button
to silence / mute the alarm sounder
and extinguish the gas LED’s.
Mute ‘enabled’ silences alarm for 60 seconds.
Mute ‘disabled’ cannot silence the alarm until gas falls
below alarm level.
If alarm configuration allows muting of audible alarm,
(Refer to table in paragraph ‘ALARMS RESET OR
ACKNOWLEDGE’), the following applies:
Non-latching: Once alarm has been muted, the audible
alarm is cancelled for a period of 60 seconds, and if gas
concentration during that time falls below alarm set point,
the visual alarm clears automatically.
Latching: If audible alarm has been muted and if gas
concentration during that time falls below alarm set point,
visual alarm requires to be acknowledged to clear.
3-5
V!SA - USER HANDBOOK
3.3 HIGH FLAMMABLE GAS OVER-RANGE ALARM
Caution: Exposing the LEL sensor to
concentrations of flammable gas above 100% LEL
can damage the sensor.
In order to protect the user from danger in the event of the
flammable gas (LEL) sensor being over exposed to a high
concentration of flammable gas, the instrument has an
over-range alarm.
If the LEL sensor is exposed to a gas reading above
120% LEL, the displayed value will change to four (4)
rising arrows, the tone of the audible alarm will change,
and the visual alarm will flash quickly. The flashing
message ‘DANGER OVER RANGE’ is displayed, as shown
in Fig 3.3:
Fig. 3.3 Over Range Alarm
The instrument must be returned to a gas free area or
sample clean air. The instrument must now be switched
off.
Note: To avoid accidental switch-off in the dangerous
state, the off cycle is increased to 10 seconds.
3-6
ALARMS
Switch off by a press and hold of both buttons together.
A count timer, from 10 seconds to zero, will appear on the
display together with the message ‘GET OUT’ alternating
with ‘HIGH GAS’, as shown in Fig. 3.4:
then
and so on, alternating until zero is reached
Fig. 3.4 ‘High Gas’ / ‘Get Out’ Timer
After switching the instrument off, when the flammable
sensor has been exposed to potentially damaging high
flammable gas concentrations, it is important that the
instrument is only switched on again in clean fresh air.
3-7
V!SA - USER HANDBOOK
3.4 FAULT ALARMS
Refer to Alarms Table, on page 2-14 of this handbook, to
identify the audible / visual indication for any of the
following faults.
3.4.1 Low Battery
The “LOW
BATTERY” flag is displayed,
intermittently on the screen, when the instrument’s battery
power is low (i.e. approximately 30 minutes operating
time remaining). The audible alarm sounds, once every
two seconds, and the Red LED’s flash. Recharge the
battery or replace the alkaline batteries if using alkaline
batteries.
The “BAT
FAULT” flag shows constantly when
approximately three (3) minutes operating time remains.
The audible alarm sounds continuously and the Red LED’s
illuminate constantly. After three (3) minutes the instrument
automatically switches off.
Note: Both audible and visual gas alarms continue to
operate after the low battery warning message,
“LOW
BATTERY”, appears.
3.4.2 Zero Fault
Note:
For instruments with CO2 sensor fitted, refer to
paragraph 3.4.3 for details.
A “ZERO FAULT” flag and a flashing spanner symbol
appears after warm-up if the instrument is switched on
in the presence of gas or the instrument has been unable
to zero all sensors correctly.
3-8
ALARMS
The audible alarm sounds, once every two seconds, and
the Red LED’s flash.
It is strongly recommended the instrument is returned to a
gas free area. Switch the instrument off and then switch
on again in clean air. If the fault persists, return the
instrument for service.
The instrument can however still be used to detect and
alarm on the other sensor(s) fitted. Press the green (RH)
button
, as per the screen prompt, to continue.
The faulty sensor will cause the instrument to display a
flashing spanner symbol to warn the user that this sensor
is not working correctly, as shown in Fig. 3.5:
alternating with
Fig. 3.5 Zero Fault
3-9
V!SA - USER HANDBOOK
Note: The flashing spanner symbol will only alternate with
the faulty sensor reading in the LEL range. If this occurs,
the instructions in section 3.4.4 ‘Sensor Fault’, paragraphs
(2) and (3), should be followed .
3.4.3 Zero Fault - Only applicable to instruments
with CO2 sensor fitted
If a CO2 range spanner symbol
appears after warmup, as illustrated in Fig. 3.6, together with the audible
alarm sounding once every two seconds, and the Red
LED’s flashing, the instrument has been switched on in
the presence of gas or the instrument has been unable to
zero the CO2 sensor correctly.
It is strongly recommended the instrument is returned to a
gas free area. Switch the instrument off and then switch
on again in clean air. If this is not possible / convenient,
the alarm can be acknowledged and the instrument can
still be used to detect CO2 gas.
Fig. 3.6 CO2 Sensor - Zero Fault
Press the green (RH) button
to acknowledge CO2
alarm and continue using instrument.
3-10
ALARMS
Note:
If a “ZERO FAULT” flag is displayed together with
a flashing spanner symbol on any of the
other sensors, follow instructions detailed in
paragraph 3.4.2.
The faulty CO2 sensor will cause the instrument to display
a flashing ‘ZERO FAULT’ flag alternating with a gas value
to warn the user that this sensor is not correctly zeroed,
as shown in Fig. 3.7:
alternating with
Fig. 3.7 CO2 Sensor - Zero Fault
3-11
V!SA - USER HANDBOOK
3.4.4 Sensor Fault
There are three types of sensor fault as illustrated in the
following displays:
1) If a “ZERO FAULT” flag and a spanner symbol appears
above gas type, as shown in Fig. 3.8, then the sensor
requires replacement or an electrical fault exists. Return
instrument to an approved Service / Repair facility.
Fig. 3.8 Sensor Fault
2) If a “ZERO FAULT” flag and a flashing spanner symbol
appear, alternating with a zero LEL reading as shown in
Fig. 3.9, apply test gas for two minutes to allow the display
to return to zero then switch instrument Off and On again.
If fault remains, return instrument to an approved Service
/ Repair facility.
alternating with
3-12
ALARMS
Fig. 3.9 Check Fault
3) If a “ZERO FAULT” flag and a flashing spanner symbol
appear, alternating with an LEL gas value as shown in
Fig. 3.10, leave instrument on for 30 to 60 minutes then
switch instrument Off and On again. If fault remains, return
instrument to an approved Service / Repair facility.
alternating with
Fig. 3.10 Check Fault
3-13
V!SA - USER HANDBOOK
3.4.5 Sample Fault (Pumped Instruments Only)
If the pump symbol changes to the symbol shown in Fig.
3.11, a “FLOW FAULT” flag is displayed and an audible
alarm and Red LED’s are activated, then a sample fault or
flow fail exists.
Fig. 3.11 Sample Fault
Check sample line, sample filter or probe for blockage, if
applicable. Clear blockage then restart the pump by a
press and hold of the green (RH) button
.
3.4.6
Low Flow - Only applicable to pumped
instruments supplied with this option.
Note: Feature is automatically disabled if air temperature
is below 5oC (41oF)
If a “LOW FLOW” flag flashes in the display and an audible
alarm and Red LED’s are activated, then a low flow exists.
In this alarm condition, the pump symbol is not displayed.
Refer to example Fig. 3.12.
Fig. 3.12 Low Flow
3-14
Check maximum sample line length (30 metres) is not
exceeded, check sample filter or probe for blockage, if
applicable.
3.4.7 Calibration Expired
During normal operation of the instrument where the
calibration date has expired, a “CAL EXPIRED” warning
flag will flash on the display every 30 seconds to alert the
user of the fact that the expiry date has been exceeded.
Fig. 3.13 Calibration Expired
3.4.8 Calibration Required
During warm-up, if the ‘CALIBRATION REQUIRED’ flag is
displayed and an audible alarm and Red LED’s are
activated, the instrument has detected a fault in the
calibration memory during start-up and is unable to
continue without re-calibration.
Fig. 3.14 Calibration Required
3-15
V!SA - USER HANDBOOK
The instrument must be switched off immediately. Follow
appropriate action required by your company for
calibration.
3-16
4
OPERATOR MAINTENANCE
4.1 CLEANING
CAUTION: Do not use polishes containing silicon or
solvent to clean the instrument as these may damage
the flammable gas sensor (if fitted). Do not use
abrasive materials or strong volatile chemical
solutions as these could damage the impact resistant
casing.
The outer, impact resistant, rubber casing of the V!SA
instrument may be cleaned using a non-abrasive moist
cloth. Rub the cloth over the outer casing to remove any
dirt and grime.
In extreme cases, a mild soap solution may be used with
a non-abrasive cloth to remove more stubborn marks.
4.2 FILTER REPLACEMENT
The instrument has two filters protecting the instrument
sensors. The Sensor Grille (Hydrophobic) Filter is located
behind sensor grille on front of the instrument and the
Sample Inlet (Dust) Filter is located in the sample inlet
connector at the bottom of the instrument. The filters
should be inspected periodically for signs of damage.
To inspect / replace the filters, proceed as follows:
4-1
V!SA - USER HANDBOOK
4.2.1 Sensor Grille Filter
1)
Unscrew the cover screw, in a counter clockwise
direction, using the Battery / Sensor Grille Key
(Part No. 66166), then remove the cover by sliding
it away from the instrument and up towards the
display screen.
Fig. 4.1 Key in Cover Screw
4-2
OPERATOR MAINTENANCE
Fig. 4.2 Filter and Cover Removed
2)
Fit a new Sensor Grille Filter (Part No. 66083), if
required.
Note: The filter is keyed and therefore can only be
fitted in one direction.
3)
Replace the sensor cover assembly by first
positioning the location feet, then pressing the cover
down on to the filter.
4)
Replace and secure the cover screw, in a clockwise
direction, using the Battery / Sensor Grille Key
(Part No. 66166).
Note: Care must be taken not to overtighten the
cover screw.
4-3
V!SA - USER HANDBOOK
4.2.2 Sample Inlet Filter
1)
Unscrew the two (2) retaining screws, in a counter
clockwise direction, using the Inlet Filter Key
(Part No. 66165), then remove the sample line
connector.
Fig. 4.3 Key in Connector Retaining Screw
2)
Push the sample inlet filter disc out by inserting the
hexagonal key into the sample nozzle. Refer to image
on next page.
3)
Fit a new Sample Inlet Filter (Part No. 66084).
4)
Replace the sample line connector. The sample line
connector is moulded to fit in one direction only.
Make sure that it is the correct way round to slip
easily into the instrument.
5)
Replace then tighten the two retaining screws, in a
clockwise direction, using the Inlet Filter Key
(Part No. 66165).
Note: Care must be taken not to overtighten the
screws.
4-4
OPERATOR MAINTENANCE
Fig. 4.4 Filter and Connector Removed
4-5
V!SA - USER HANDBOOK
4.2.3 In-line Hydrophobic Filter (Accessory)
The in-line hydrophobic filter assembly consists of the
filter and a luer fitting on one side of the filter and a slideon connection on the other, and is available as an
accessory (Part No. 66485). The filter assembly is used
to protect the instrument from the ingress of water when
sampling in moist conditions.
The filter is located between two lengths of ‘Tygon’ tubing
(Part No. 66118) and attached to the instrument via a
Sample Line Connector (Part No. 66045) as illustrated in
Fig. 4.5.
Fig. 4.5 In-line Hydrophobic Filter
To replace the filter, proceed as follows:
1)
4-6
Unscrew the luer fitting from one side of the the filter
in a counter clockwise direction, detach the tubing
from the other side then remove the hydrophobic
filter.
OPERATOR MAINTENANCE
Note: If re-fitting the same filter, make sure that filter
direction of flow orientation is maintained. This can
be easily identified by position of yellow label on
filter, i.e. facing instrument.
2)
Fit a new In-line Hydrophobic Filter (Part No. 66484).
Note that the filter should be fitted with the yellow
label facing the instrument.
3)
Attach the luer fitting, with sample line attached, to
the mating side of the filter then tighten in a clockwise
direction to secure. Do not overtighten the fitting.
4)
Attach the sample line to the other side of the filter
making sure that it is securely fitted.
4-7
V!SA - USER HANDBOOK
4.3 BATTERY PACKS
Battery packs provide the instrument with the power it
requires to operate.
Three types of battery pack are available:
Long Duration, Fast Charge, and Alkaline.
Each type of pack provides a different operational lifetime.
These times can be found in Table 4.1 and display battery
life in hours, allowing five (5) minutes of alarm per day.
I NS TRUMENT
OPERATI NG
MODE
BATTERY TYPE / LI FE
LONG DURATI ON /
FA S T C HA RG E
A LKA LI NE
LE L
>16
>16
IR (INFRARED)
>16
>16
PUMP
>16
>16
LEL + IR
12
13
LEL + PUMP
12
13
IR + PUMP
15
>16
LEL + IR + PUMP
9
10
>16
>16
TOXIC SENSOR ONLY
Table 4.1 Battery Life
The battery pack should be recharged (rechargeable
battery pack), or the batteries replaced (alkaline battery
pack), in the following situations:
•
The ‘Low Battery’ flag
•
The instrument will not switch On
4-8
appears on the display
OPERATOR MAINTENANCE
When the ‘Low Battery’ flag appears on the display, there
is approximately 30 minutes operation left at normal
temperatures. The instrument will then switch Off
automatically.
The ‘Long Duration’ battery pack can be charged using
the following GMI chargers:
Standard Charger: The battery pack can be removed from
the instrument then connected to the standard charger
or, it can be charged while fitted to the instrument.
5-Way / 10-Way Standard Charger: The battery pack(s)
can be removed from the instrument(s) then connected
to the standard charger lead(s) or, it / they can be charged
while fitted to the instrument(s).
12V / 24V Vehicle Charger: The battery pack can be
removed from the instrument then connected to the vehicle
charger or, it can be charged while fitted to the instrument.
Fast Charger: The battery pack must be removed from
the instrument then ‘docked’ the fast charger.
10-Way Fast Charger with (up to 9) Slave Unit(s): The
battery pack(s) must be removed from the instrument(s)
then ‘docked’ the fast charger / slave unit(s).
The ‘Fast Charge’ battery pack can be charged using
the following GMI chargers:
Fast Charger: The instrument can be docked in the fast
charger with the battery pack fitted or, the battery pack
can be removed from the instrument then ‘docked’ in the
fast charger.
10-Way Fast Charger with (up to 9) Slave Unit(s): The
instrument(s) can be docked in the fast charger / slave
unit(s) with the battery pack(s) fitted or, the battery
pack(s) can be removed from the instrument then ‘docked’
in the fast charger / slave unit(s).
4-9
V!SA - USER HANDBOOK
4.3.1 Removing and Replacing a Battery Pack
CAUTION
1) Always switch the instrument off before
removing the battery pack.
2) Always replace the protective cap in the Long
Duration battery pack charging socket before use
WARNING
1) Rechargeable battery pack must be recharged
and replaced in a non-hazardous area.
2) Replace alkaline / rechargeable battery pack
only with genuine GMI Parts
1)
Unscrew the captive screw, in a counter clockwise
direction, using the Battery / Sensor Grille Key
(Part No. 66166) as shown in Fig. 4.6.
Fig. 4.6 Key in Battery Pack Captive Screw
4-10
OPERATOR MAINTENANCE
Note:
2)
Long Duration battery pack is fitted with a captive
screw and protective cap.
Pull the battery pack down from the instrument to
disconnect, as shown in Fig. 4.7.
Fig. 4.7 Battery Pack Removed
3a) RECHARGEABLE:
Replace with a fully charged battery pack.
Refer to ‘Charging (Rechargeable) Battery Pack’, in
section 4.3.2.
3b) ALKALINE:
Replace alkaline batteries.
Refer to ‘Replacing Alkaline Batteries’, in section
4.3.3.
4)
Replace battery pack in instrument. Make sure it is
correctly aligned then push connector together.
4-11
V!SA - USER HANDBOOK
5)
Tighten the captive screw, in a clockwise direction,
using the Battery / Sensor Grille Key (Part No. 66166).
Note:
6)
Care must be taken not to overtighten the captive
screw.
Fit the protective cap in the Long Duration battery
pack charging socket before use.
4.3.2 Charging (Rechargeable) Battery Packs
There are two (2) types of rechargeable battery pack, as
follows:
A ‘Long Duration’ nickel metal hydride (NiMH) battery pack
(Part No. 66056).
or
A ‘Fast Charge’ nickel metal hydride (NiMH) battery pack
(Part No. 66335).
Make sure that rechargeable battery packs are recharged
using only GMI chargers.
CAUTION 1:
CAUTION 2:
Never attempt to recharge an
alkaline battery pack.
Switch the instrument off when
charging a battery pack fitted to an
instrument.
Standard Charger
The ‘Long Duration’ battery pack should be left overnight
connected to the standard charger to recharge a
discharged battery pack. This period may vary depending
upon operational conditions such as temperature and the
condition of the battery pack in terms of capacity. The
battery pack can be removed from the instrument and
connected to the charger on its own or it can be charged
4-12
OPERATOR MAINTENANCE
while fitted to the instrument, as shown in Fig. 4.8.
It is important that the instrument is switched off when
charging a battery pack fitted to the instrument.
If the battery pack is fitted to the instrument during
charging, the outer two red instrument LED’s illuminate
for a period of 14 hours, after which time are replaced by
the green LED’s
Note: This is a timer function only, and does not indicate
charged condition of battery pack.
Fig. 4.8 Instrument Connected to Standard Charger
5-Way / 10-Way Standard Charger
This option provides the charging up to five (5) or ten (10)
‘Long Duration’ rechargeable battery packs simultaneously
using standard charger connections and re-charging from
one power outlet socket.
4-13
V!SA - USER HANDBOOK
The ‘Long Duration’ rechargeable battery pack can be
removed from the instrument or alternatively, can be
charged while fitted to the instrument and connected to
the 5-Way or 10-Way Standard Charger. (5-Way adaptor
option illustrated in Fig. 4-9).
It is important that the instrument is switched off when
charging a battery pack fitted to the instrument.
Fig. 4.9 5-Way Charging Adaptor Option
The rechargeable battery packs should be left overnight
connected to the Standard Charger to recharge
discharged battery packs. This period may vary depending
upon operational conditions such as temperature and the
condition of the battery packs in terms of capacity.
If the battery pack is fitted to the instrument during
charging, a small battery symbol on the V!SA screen will
display charging operation as a flashing bar graph, also,
the outer two red instrument LED’s illuminate for a period
4-14
OPERATOR MAINTENANCE
of 14 hours, after which time are replaced by the green
LED’s
Note: This is a timer function only, and does not indicate
charged condition of battery pack.
Fast Charger
The ‘Fast Charge’ or ‘Long Duration’ battery pack can be
removed from the instrument and located in the Fast
Charger as illustrated below. The ‘Fast Charge’ battery
pack can also be charged while fitted to the instrument by
‘docking’ the instrument in the Fast Charger as illustrated
below. It is important that the instrument is switched off
when charging a battery pack fitted to the instrument.
Fig. 4.10 Battery Pack / Instrument
‘Docked’ in Fast Charger
A battery pack will take approximately 31/2 hours to charge
from an exhausted condition. Note that the period of
charging may vary depending upon operational conditions
such as temperature and the condition of the battery pack
in terms of capacity.
4-15
V!SA - USER HANDBOOK
A green LED on the front of the charger indicates ‘charging
in progress’. This LED is extinguished when charging is
complete.
10-Way Fast Charger with (up to 9) Slave Unit(s)
The ‘Fast Charge’ or ‘Long Duration’ battery pack can be
removed from the instrument and located in the Fast
Charger master or slave unit. The ‘Fast Charge’ battery
pack can also be charged while fitted to the instrument by
‘docking’ the instrument in the Fast Charger master or
slave unit. It is important that the instrument is switched
off when charging a battery pack fitted to the instrument.
A battery pack will take approximately 31/2 hours to charge
from an exhausted condition. Note that the period of
charging may vary depending upon operational conditions
such as temperature and the condition of the battery pack
in terms of capacity.
A green LED on the front of the charger master or slave
indicates ‘charging in progress’. Each LED is extinguished
when charging is complete.
Fig. 4.11 Battery Pack / Instrument
‘Docked’ in Fast Charger / Slave Unit(s)
4-16
4.3.3 Replacing Alkaline Batteries
CAUTION: To be in compliance with the
certification regulations of this product, use only
alkaline batteries from the following
manufacturers:
- Energizer / Energizer Industrial
- Panasonic
- Sony.
WARNING: When replacing batteries in the alkaline
battery pack, make sure that you are in a safe area
and the instrument is switched Off. Do not open an
alkaline battery compartment cover or replace the
batteries in a hazardous area. Never attempt to
charge an alkaline battery pack and never use
rechargeable batteries in an alkaline battery pack.
To reduce the risk of explosion, do not mix new
batteries with used batteries, or mix batteries from
different manufacturers.
The alkaline battery pack (Part No. 66210) allows the
instrument to be powered using three LR6 (AA) size
batteries.
Always switch the instrument Off before changing the
battery pack.
•
Release the cover plate retaining screw, securing
the battery pack cover, by turning it in a counter
clockwise direction. Use the Battery / Sensor Grille
Key (Part No. 66166).
4-17
V!SA - USER HANDBOOK
Fig. 4.12 Key in Cover Plate Retaining Screw
•
Replace the three LR6 (AA) size batteries, as shown
in Fig. 4.13.
Fig. 4.13 Alkaline Batteries Removed
4-18
Note: Always use three new LR6 (AA) size batteries. Do
not mix old and new batteries.
•
Make sure that the batteries are replaced using
correct polarity for + and -
•
Replace the battery cover plate then tighten the
retaining screw in a clockwise direction using the
Battery / Sensor Grille Key (Part No.66166).
Note: Care must be taken not to overtighten the
retaining screw.
4-19
V!SA - USER HANDBOOK
4-20
5
CALIBRATION
5.1 GENERAL DESCRIPTION
The instrument has been calibrated for particular gases.
Where any doubt exists the product should be returned
to GMI or an authorised distributor for calibration.
WARNING: The instrument must be calibrated and
configured by authorised personnel only.
Four methods of calibration are possible:
•
Field Calibration. See ‘CONFIGURATION HANDBOOK’
for further details.
•
The GMI Manual Calibration software allows the
instrument to be linked to a PC running Calibration
software and applying gas manually.
•
The GMI Automatic Calibration System provides
controlled delivery of gases allowing you to calibrate
in a controlled manner and maintain a record of
calibration results on a PC.
•
The GMI Instrument Management System (IMS)
provides all the facilities of the Automatic Calibration
System with the added feature of instrument
database management.
5-1
V!SA - USER HANDBOOK
Note: The detailed calibration methods, consisting of both
hardware and software, are manufactured by GMI. For
more detail contact GMI or an authorised distributor.
5.2 CALIBRATION VALIDITY
Calibration validity is the responsibility of the user. Under
normal operating conditions a 12 month period can be
expected. This is no guarantee, however, as the precise
application of the product is unknown to GMI. Individual
codes of practice may dictate shorter periods.
Regular checking establishes a pattern of reliability and
enables the calibration check period to be modified in line
with operational experience. The higher the risk, the more
frequently calibration should be checked.
5-2
6
ACCESSORIES
Accessories available for V!SA instrument
Std. Accessories
Part Number
66123
66478
66118
66112
66136
66930
66485
66484
66546
66017
66545
66349
66165
Description
Hand Aspirator (can be used for
non-reactive gases only)
Hand Aspirator
(c/w 3.0 metres Tygon Tubing)
Sample Line (per metre)
Sample Line Extender
(to connect sample lines together)
3.0 metres Tygon Tubing
(c/w sample connector)
3.0 metres Reactive Gas (e.g. Cl2
; NH3) Tubing Kit
(c/w sample connector)
In-line Hydrophobic Filter Assy.
Hydrophobic Filter
(use with 66485)
Neck & Chest Harness with Clip
Probe Assembly
Ball Float
Carry Case
Inlet Nozzle Filter Key
(1.5mm. A/F)
6-1
V!SA - USER HANDBOOK
Part Number
Description
66166
Battery / Sensor Grille Key
(2mm. A/F)
Instrument Key
Sensor Hydrophobic Filter
Sample Inlet Filter
Alkaline (Drycell) Battery Pack
Long Duration Rechargeable
(NiMH) Battery Pack
66167
66083
66084
66210
66056
66335
Fast Charge Rechargeable
(NiMH) Battery Pack
66094
User Handbook
66203
Configuration and Field Calibration
Instruction Manual CD-ROM
Standard Chargers
Part Number
66140
66200
Description
66206
Std. Charger c/w Universal Plug
5-way Std. Charger c/w
Universal Plug
10-way Std. Charger c/w
Universal Plug
12v / 24v Vehicle Charger Lead
Fast Chargers
Part Number
Description
66207
66513
66516
66514
6-2
Fast Charger c/w Universal Plug
10-way Fast Charger
(Master Unit) c/w Universal Plug
10-way Fast Charger
(Slave Unit). Maximum 9 units
per set-up
ACCESSORIES
66510
66511
Fast Charger c/w Data
Download Communications Pack
Fast Charger c/w Set-up
Communications Pack
Communication Options
Part Number
Description
66208
66300
66445
66448
66500
66501
66209
Data Downloading Package c/w
CD-ROM, Communications Adaptor &
User Instructions
Data Downloading Package c/w
Charger (Universal Plug)
V!SACAL (Calibration) Package
c/w CD-ROM, Communications
Adaptor & User Instructions
V!SACAL (Calibration) Package
c/w Charger (Universal Plug)
Data Downloading & V!SACAL
Dual Package c/w 2 x CD-ROM,
Communications Adaptor & User
Instructions
Data Downloading & V!SACAL
Dual Package c/w Charger
(Universal Plug)
USB Adaptor - can be used for
above items.
Note: The Interface Adaptor replaces the battery pack while
calibrating or downloading data from the instrument,
therefore, a standard charger is required to power the
instrument. If a charger is required, order as appropriate
from list.
6-3
V!SA - USER HANDBOOK
6-4
7
ADDITIONAL INFORMATION
7.1 TRAINING
Training courses are available on all GMI products.
Contact GMI Marketing Department for further details:
Tel: +44 (0) 141 812 3211
Fax: +44 (0) 141 812 7820
e-mail: [email protected]
7.2 WORLD WIDE WEB
Visit GMI web site at www.gmiuk.com
7-1
V!SA - USER HANDBOOK
7-2
A
OPERATING INSTRUCTIONS
The following multi-language instructions provide the user
with a quick operation guide for the . .
V!SA (4-Gas) instrument.
Each language and pages reference is as follows:
•
English - pages A-2 to A-5
•
Français (French) - pages A-6 to A-9
•
Italiano (Italian) - pages A-10 to A-13
•
Español (Spanish) - pages A-14 to A-17
•
Svensk (Swedish) - pages A-18 to A-21
•
Dansk (Danish) - pages A-22 to A-25
•
Nederlands (Dutch) - pages A-26 to A-29
•
Deutsch (German) - pages A-30 to A-33
•
Greek - pages A-34 to A-37
•
Russian - pages A-38 to A-41
A-1
GAS MEASUREMENT INSTRUMENTS LTD.
CHECKLIST
1.
2.
3.
4.
5.
6.
Check the instrument has no obvious faults.
Check accessories.
Read and understand handbook before use.
Switch ON
Check battery levels.
Check “ZERO” in fresh air.
SAFETY
•
The instrument must be regularly serviced and calibrated by fully trained
personnel in a safe area.
•
The rechargeable battery pack must only be recharged in a safe area.
•
Never use a damaged battery pack.
•
Make sure that the battery pack is fitted correctly before use.
•
Never expose the battery pack or instrument to extreme heat.
•
Only GMI replacement parts should be used.
•
If the instrument detects gas, follow your own organisation’s procedures
and operational guidelines.
•
Gas can be dangerous and care should always be taken in its use.
•
The V!SA instrument is certified as follows:
ATEX
II 1 G EEx ia llB T3;
ATEX
II 2 G EEx ia d llC T3;
ATEX
II 2 G EEx ia d llC T4.
Certification No. DEMKO03
ATEX 133803X EEx ia IIB T3
Sira 05 ATEX 2295
EEx ia d IIC T3 or T4
UL 913 Class I, Groups A, B, C and D
0038/YY Marine Equipment Directive (Module B&E)
Any right of claim relating to product liability or consequential damage to any third
party against GMI is removed if the warnings are not observed.
AREAS OF USE
Exposure to certain chemicals can result in a loss of sensitivity of the flammable
sensor. Where such environments are known or suspected it is recommended that
more frequent response checks are carried out. The chemical compounds that can
cause loss of sensitivity include Silicones, Lead, Halogens and Sulphur. Do not use
instrument in potentially hazardous atmospheres containing greater than 21%
Oxygen.
A-2
FAULT ALARMS
‘LOW
BATTERY’ Displayed intermittently when approximately 30 minutes
operating time remains. The audible alarm sounds, once every two seconds, and the
Red LED’s flash.
Note: Both audible and visual gas alarms continue to operate after the low battery
warning message appears.
‘BAT
FAULT’ Displayed constantly when approximately three minutes
operating time remains. The audible alarm sounds continuously and the Red LED’s
illuminate constantly. After three minutes the instrument automatically switches off.
‘CAL REQUIRED’ This warning flag will be displayed during warm-up if the
instrument has detected a fault in the calibration memory during start-up and
is unable to continue without re-calibration. The audible alarm and the Red
LED’s are also activated. Switch off immediately then follow appropriate action
required by your company for calibration.
‘CAL EXPIRED’ This warning flag will flash on the display every 30 seconds
if calibration expiry date has been exceeded. The audible alarm and Red
LED’s are also activated, during start-up only.
‘ZERO FAULT’ and flashing
symbol Appears after warm-up if the
instrument is switched on in the presence of gas or the instrument has been
unable to zero all sensors correctly. The audible alarm sounds, once every
two seconds, and the Red LED’s flash, at start-up only. The instrument can
however still be used to detect and alarm on the other sensor(s) fitted.
1) If a spanner symbol appears above gas type, then the sensor requires
replacement or an electrical fault exists. Return instrument to an approved
Service / Repair facility.
2) If a flashing spanner symbol appears alternating with a zero reading, apply test
gas for two minutes to allow the display to return to zero then switch instrument Off
and On again. If fault remains, return instrument to an approved Service / Repair
facility.
3) If a flashing spanner symbol appears alternating with a gas value, leave instrument
on for 30 to 60 minutes then switch instrument Off and On again. If fault remains,
return instrument to an approved Service / Repair facility.
‘FLOW
FAULT’ (Pumped Instruments) If the rotating pump symbol
changes to
, an audible alarm and the Red LED’s are activated, indicating a
sample fault or flow fail. Check sample line, sample filter or probe for blockage, if
applicable. Clear blockage then restart the pump by a press and hold of the green
(RH) button
.
A-3
English
V!SA - Operating Instructions
GAS MEASUREMENT INSTRUMENTS LTD.
GREEN (RH) BUTTON
OPERATION
Switch ON
Press and Hold green
(RH) button
to switch
instrument ON and
initiate warm-up cycle.
YELLOW (LH) BUTTON
During warm-up, the instrument
display identifies model, serial
number, software version and
battery status information:
Battery status bargraph indicates
Full (shown), 75%, 50% and 25%
This display is followed by Calibration Due date. If expired, press
and Hold green (RH) button
, to acknowledge.
This action cancels audible / visual alarm and continues with sensor
check display sequence.
If sensors are working OK and
have been zeroed correctly, the
‘Sensor Check’ screen is
displayed.
Followed by the normal operating
screen, as shown:
Note: If a sensor fails zero check,
the audible / visual alarm activates
and a spanner symbol is displayed
above faulty sensor gas type. To
acknowledge this alarm, press
green (RH) button
A-4
.
Display Backlight On / Off
Press green (RH) button
once to switch screen backlight on. It remains
on for 20 seconds then automatically switches off.
Alarms Reset / Acknowledge
Once in a safe gas free area, or the gas reading has returned within preset
limits, press and hold green (RH) button
to silence / mute the alarm
sounder and extinguish gas LED’s.
View Max / Min Recorded Values Since Switch On
While normal operating screen is displayed, press green (RH) button
once to switch screen backlight on. While screen backlight is on, press
green (RH) button
again to view max values. Press green (RH) button
again to view min values.
To remove readings from memory, press and hold green (RH) button
for two (2) seconds if the instrument is clear of all alarms. This will return
instrument to normal operating display.
Remote Sampling (pumped instruments)
Press and hold green (RH) button
to start pump at low speed (assisted
diffusion for reactive gases). Press and hold green (RH) button
again
and the pump will run at normal speed (for remote sampling).
When the pump is running, a pump symbol
rotates in the display.
Switch OFF
Press and hold both yellow Left Hand (LH) button
button
and green (RH)
, for 3 seconds, to switch instrument Off.
A-5
English
V!SA - Operating Instructions
GAS MEASUREMENT INSTRUMENTS LTD.
Vérifications
1.
2.
3.
4.
5.
6.
Vérifier que l’appareil n’a pas de défauts évidents
Vérifier les accessoires
Lire et assimiler le mode d’emploi
Démarrer l’appareil
Vérifier le niveau des piles ou accus
Vérifier les zéro « hors gaz »
Sécurité
•
L’appareil doit être régulièrement entretenu et étalonné par du personnel
compétent et dans une zone « hors gaz »
•
Alimentation: Les piles alcalines ou les packs rechargeables* doivent
être échangées (*ou rechargés) dans une zone saine et installés
correctement. Ne jamais utiliser de batteries endommagées ou les exposer à une chaleur extrême.
•
Seules les pièces d’origine GMI doivent être utilisées.
•
Si l’appareil détecte du gaz, suivez les procédures propres à votre
entreprise.
•
Le gaz peut être dangereux, des précautions doivent être prises lors de
son utilisation.
•
Le VISA est certifié:
ATEX
II 1 G EEx ia llB T3;
ATEX
II 2 G EEx ia d llC T3;
ATEX
II 2 G EEx ia d llC T4.
Certification No. DEMKO03
ATEX 133803X EEx ia IIB T3
Sira 05 ATEX 2295
EEx ia d IIC T3 or T4
UL 913 Class I, Groups A, B, C and D
0038/YY Marine Equipment Directive (Module B&E)
Aucun droit de réclamation relatif à la fiabilité du produit ou aux conséquences pour
une 3ème partie ne peut être retenu si ces avertissements n’ont pas été respectés.
Zone d’utilisation
L’exposition à certains produits chimiques peut occasionner une perte de
sensibilité du capteur inflammable. Quand ce type d’environnement est
connu ou suspecté, il est recommandé que des vérifications de sensibilité
soit faites plus souvent. Les constituants chimiques qui peuvent causer une
perte de sensibilité incluent les silicones, plombs, Halogènes et sulfures. Ne
pas utiliser l’appareil dans des atmosphères contenant plus de 21% d’oxygène.
A-6
Alarmes de défaut
‘LOW
BATTERY’ S’affiche de manière intermittente quand il reste environ
30 minutes de fonctionnement. L’alarme sonore s’active toutes les 2 secondes et les
LED rouges s’illuminent.
Note: L’alarme sonore et visuelle continue de fonctionner après l’apparition du
message de niveau bas des batteries.
‘BAT
FAULT’ S’affiche de façon permanente quand il reste environ
3 minutes de fonctionnement. L’alarme sonore s’active en permanence et les
LED rouges s’illuminent en permanence. Après 3 minutes, l’appareil s’arrête
automatiquement.
‘CAL REQUIRED’ Ce message d’alerte sera affiché pendant le démarrage,
si l’appareil a détecté une erreur dans la mémoire d’étalonnage et qu’il est
impossible de continuer sans ré-étalonnage. L’alarme sonore et les LED
rouges sont aussi activées. Arrêtez l’appareil immédiatement et suivez la
procédure d’étalonnage de votre entreprise pour l’étalonnage.
‘CAL EXPIRED’ Ce message d’alerte apparaîtra sur l’écran toutes les 30
secondes, si l’échéance de la date d’étalonnage a été atteinte ou dépassée.
L’alarme sonore et les LED rouges sont aussi activées, pendant le démarrage
uniquement.
‘ZERO FAULT’ et le symbole
apparaissent après le démarrage si
l’appareil est démarré en présence de gaz ou si l’appareil est incapable de
mettre à zéro les capteurs. L’alarme sonore s’active toutes les 2 secondes et
les LED rouges sont aussi activées, pendant le démarrage uniquement.
L’appareil peut cependant être utilisé pour détecter une alarme sur les autres
gaz fonctionnels.
1) Si un symbole apparaît associé à un gaz particulier, alors le capteur doit être
remplacé ou une panne électrique existe. Retourner immédiatement l’appareil
à un service de maintenance autorisé.
2) Si un symbole apparaît en alternance avec une lecture à zéro, appliquer le
gaz de test pendant 2 minutes pour permettre à l’appareil de retourner au zéro
et redémarrer l’appareil. Si le défaut persiste, retourner l’appareil à un service
de maintenance autorisé.
3) Si un symbole apparaît avec en alternance avec une valeur de gaz, laissez
l’appareil en marche pendant 30 à 60 minutes, puis redémarrer l’appareil. Si
le défaut persiste, retourner l’appareil à un service de maintenance autorisé.
‘FLOW
change pour
FAULT’ (appareils à pompe) Si le symbole de rotation
une alarme sonore et les LED rouges s’activent indiquant
un défaut de débit. Vérifier les accessoires et les filtres puis pressez et
maintenez le bouton vert
pour annuler le défaut.
A-7
Français
V!SA - Mode d'emploi
GAS MEASUREMENT INSTRUMENTS LTD.
le bouton vert
Fonctionnement
Mise en marche
Pressez et maintenir le bouton vert
Pour lancer le cycle de
démarrage.
le bouton jaune
Pendant le démarrage, l’affichage
indique le modèle, le numéro de
série, la version logiciel et l’état de
la batterie.
Le barregraphe de batterie indique
100%, 75%, 50% et 25%.
L’affichage est suivi par la date du prochain étalonnage. Si la date est
dépassée, pressez et maintenir le bouton vert
pour valider.
Cette action annule l’alarme
visuelle et sonore et le cycle
continue avec la séquence de
vérification des capteurs.
Si les capteurs sont OK et qu’ils
ont été mis à zéro correctement,
l’affichage « Sensor Check »
apparaît.
Suivi de l’affichage standard, cicontre.
Note: Si un capteur présente une
anomalie de zéro, l’alarme visuelle
et sonore s’active et un symbole
est associé au capteur en défaut.
Pour valider cette alarme, pressez le bouton vert
A-8
.
Eclairage de l’affichage ON/OFF
Pressez le bouton vert
, une fois pour activer l’éclairage de
l’écran. Il reste actif 20 secondes puis, s’arrête automatiquement.
Acquittement des alarmes
Dés que l’appareil est de nouveau en zone saine, ou que la mesure
de gaz est descendue en dessous du seuil d’alarme, pressez et
maintenez le bouton vert
pour rendre silencieux le signal sonore
et éteindre les LED.
Consulter les MAX/MIN des valeurs enregistrées depuis
la mise en marche
En fonctionnement normal, pressez lele bouton vert
pour activer
l’éclairage. Quand l’affichage est éclairé, pressez de nouveau le
bouton vert
pour afficher le maximum. Pressez de nouveau le
bouton vert
pour afficher le minimum.
Pour effacer les valeurs de la mémoire, pressez et maintenez le le
bouton vert
pendant 2 secondes, si il n’y a pas d’alarmes.
L’appareil retourne dans son mode de fonctionnement standard.
Prélèvement à distance
Pressez et maintenez le le bouton vert
pour démarrer la pompe
à basse vitesse (diffusion assistée pour les gaz réactifs). Pressez
et maintenez le le bouton vert
à nouveau pour passer la pompe
en vitesse normale (Prélèvement à distance). Quand la pompe est
en marche, le symbole suivant tourne sur l’écran
Arrêt
Pressez et maintenez ensemble, le bouton jaune
vert
et le bouton
, pendant 3 secondes pour arrêter l’appareil.
A-9
Français
V!SA - Mode d'emploi
GAS MEASUREMENT INSTRUMENTS LTD.
PRIMA DELL’USO
1.
2.
3.
4.
5.
6.
Verificare che lo strumento non abbia dei guasti.
Verificare gli accessori.
Leggere il manuale d’uso.
Accendere lo strumento.
Verifica della carica della batteria.
Verificare lo “ZERO” in aria pulita.
SICUREZZA
•
Lo strumento deve essere regolarmente calibrato in area sicura da
personale istruito.
•
Ricaricare il pacco batteria solo con il ricaricatore GMI in una
area sicura.
•
Non utilizzare mai batterie danneggiate.
•
Assicurarsi che il pacco batteria sia ben fissato allo strumento.
•
Non esporre il pacco batteria o lo strumento ad alta temperatura.
•
Utilizzare solamente i ricambi GMI.
•
Se lo strumento rivelasse del gas, seguire le procedure
organizzative e le indicazioni operative del caso.
•
Il gas può essere pericoloso, si dovrebbe sempre averne cura nell’uso.
•
Il V!SA è uno strumento certificato con:
ATEX
II 1 G EEx ia llB T3;
ATEX
II 2 G EEx ia d llC T3;
ATEX
II 2 G EEx ia d llC T4.
Certification No. DEMKO03
ATEX 133803X EEx ia IIB T3
Sira 05 ATEX 2295
EEx ia d IIC T3 or T4
UL 913 Class I, Groups A, B, C and D
0038/YY Marine Equipment Directive (Module B&E)
Ogni diritto di reclamo, relativo alla responsabilità del prodotto o a danni verso
terzi, contro GMI non è da considerarsi valido se non vengono osservate le norme
di sicurezza.
AREE D’USO
L’esposizione dello strumento ad agenti chimici condiziona la sensibilità del sensore
del gas. Quando tali ambienti sono conosciuti o sospettati è raccomandabile una
verifica più frequente della misura. I componenti che possono causare la perdita di
sensibilità sono a base di silicone, piombo, alogeno e solfuri. Lo strumento non deve
essere usato in una area potenzialmente pericolosa contenente più del 21% di
Ossigeno.
A-10
V!SA - Istruzioni Operative
‘LOW
BATTERY’ E’ visualizzato ad intermittenza quando rimangono
circa 30 minuti di autonomia della batteria. L’allarme sonoro suona, una ogni due
secondi, e il LED rosso lampeggia. Nota: Entrambi gli allarmi del gas, sonoro e
visibile, rimangono operativi dopo che il messaggio di carica insufficiente della
batteria compare.
‘BAT
FAULT’ E’ visualizzato costantemente quando rimangono 3 minuti
di autonomia della batteria. L’allarme sonoro e il LED rosso rimangono
costantemente attivi. Dopo tre minuti lo strumento si spegne in automatico.
‘CAL REQUIRED’ Questo messaggio viene visualizzato durante la fase di
riscaldamento, lo strumento rileva un guasto nella memoria della calibrazione
durante lo start-up e non è abilitato a continuare senza la calibrazione.
L’allarme sonoro e luminoso LED rosso rimangono attivi. Spegnere lo
strumento e inviarlo al Servizio Assistenza per la calibrazione.
‘CAL EXPIRED’ Questo messaggio è visualizzato ad intermittenza ogni 30
secondi se la scadenza della calibrazione è stata superata. L’allarme sonoro
e luminoso LED rosso sono attivati solamente nella fase di accensione.
‘ZERO FAULT’ e il simbolo
lampaggiante Appare dopo la fase di
riscaldamento se lo strumento si trova in presenza di gas oppure gli zeri di
tutti i sensori non sono corretti. L’allarme sonoro si attiva, ogni due secondi,
e il LED rosso lampeggia, durante l’accensione. Lo strumento tuttavia può
ancora essere utilizzato per rilevare del gas in quanto gli allarmi sugli altri
sensori rimangono attivi.
1) Se il simbolo della chiave inglese appare sopra un sensore, il sensore richiede
la sostituzione o esiste un guasto elettrico. Inviare lo strumento al Servizio
Assistenza.
2) Se appare il simbolo della chiave inglese lampeggiante con la lettura dello zero,
applicare un gas di test “aria zero” per due minuti per permettere di visualizzare
lo zero poi spegnere lo strumento e riaccenderlo. Se il guasto permane, inviare lo
strumento al Servizio Assistenza.
3) Se appare il simbolo della chiave inglese lampeggiante alternato con un valore
di gas, lasciare lo strumento attivo per 30-60 minuti poi spegnerlo e riaccenderlo.
Se il guasto permane, inviare lo strumento al Servizio Assistenza.
‘FLOW
cambia in
FAULT’ (per strumenti con pompa) Se il simbolo rotante
e l’allarme sonoro e luminoso LED rosso sono attivi, indica un
guasto nella linea di campionamento o un guasto sul flusso. Verificare se la linea
di campionamento, i filtri o la sonda sono bloccati. Ripulire l’ostruzione e cancellare
il guasto tenendo premuto il tasto verde (RH)
.
A-11
Italiano
ALLARMI DI GUASTO
GAS MEASUREMENT INSTRUMENTS LTD.
Pulsante Verde a
OPERAZIONI
destra RH
Accensione
Tenere premuto il pulsante verde
(RH)
per accendere lo
strumento dando inizio al il ciclo di
riscaldamento.
Durante la fase di riscaldamento,
viene visualizzato il modello, serial
number, versione del software e lo
stato di carica della batteria:
Pulsante Giallo
a sinistra LH
Il bargraph della batteria può
indicare: piena carica (vedi figura),
75%, 50% e 25%.
Segue la data della Prossima
Calibrazione. Se superata, tenere premuto il pulsante verde (RH)
, per
acquisire l’informazione. Questo operazione cancella l’allarme sonoro e
luminoso,poi lo strumento continua con la sequenza di verifica sensori.
Se i sensori rispondono e hanno lo
zero corretto, la verifica dei sensori
viene visualizzata sullo schermo
come “CHECK SENSOR”.
Segue con la normale
visualizzazione operativa dello
schermo, come in figura:
Nota: Se un sensore fallisce la
verifica dello zero, l’allarme sonoro
e visivo si abilita e il simbolo della
chiave inglese compare sul sensore
fallito. Per acqusire questo allarme,
premere il pulsante verde (RH)
A-12
.
V!SA - Istruzioni Operative
Retro Illuminazione del Display On / Off
Premendo una volta il tasto verde (RH)
la retro illuminazione del display
Acquisizione e Reset degli Allarmi
Una volta in area sicura, oppure la lettura del gas è rientrata nei limiti,
premendo a lungo il pulsante verde (RH)
viene silenziato l’allarme
sonoro e spenti i Led luminosi.
Registazione del Valore Massimo/Minimo dopo l’Accensione
In condizioni operative normali, premere il pulsante verde (RH)
una
volta per attivare la retro illuminazione. Mentre questa è attiva, premendo
ancora il pulsante verde (RH)
viene visualizzato il valore massino di
lettura. Premendo ancora il pulsante verde (RH)
viene visualizzato il
valore minimo.
Per cancellare la lettura dalla memoria, premere a lungo il pulsante
verde(RH)
per due (2) secondi se lo strumento non presenta allarmi
attivi. Questo riporterà lo strumento nelle condizioni normali di operatività.
Campionamento a Distanza (strumenti con pompa)
Premendo il pulsante verde (RH)
la pompa si aziona in modalita di
bassa aspirazione(aiutando la diffuzione del gas). Premere ancora a lungo
il tasto verde (RH)
si aziona la pompa in normale aspirazione (per il
campionamento a distanza).
Quando la pompa è attiva , il simbolo
ruoterà sullo schermo.
Spegnimento dello Strumento
Premere insieme il pulsante giallo (LH)
e il pulsante verde (RH)
,
tre (3) secondi, per spegnere lo strumento.
A-13
Italiano
si attiva. Rimane illuminato per 20 secondi poi in automatico si disattiva.
GAS MEASUREMENT INSTRUMENTS LTD.
Lista de comprobaciones
1.
2.
3.
4.
5.
6.
Compruebe que el instrumento no tenga fallos obvios.
Compruebe accesorios.
Lea y entienda el manual antes de usar.
Encienda el equipo.
Compruebe el nivel de batería.
Compruebe el “Cero” en aire limpio.
Seguridad
•
Es necesario un servicio de mantenimiento y de calibración regular por
personal competente en una área segura.
•
Sólo se deben cargar las baterías en una zona segura.
•
Nunca use baterías dañadas.
•
Asegúrese que las baterías estén colocadas correctamente antes del
uso del equipo.
•
Nunca exponga las baterías o el instrumento a temperaturas muy altas.
•
Sólo se deben usar recambios de GMI.
•
Si el instrumento detecta gas, siga los procedimientos de su organización
y las instrucciones de uso del manual.
•
El Gas puede ser peligroso y se debe tener cuidado en su uso.
•
El instrumento V!SA está certificado:
ATEX
II 1 G EEx ia llB T3;
ATEX
II 2 G EEx ia d llC T3;
ATEX
II 2 G EEx ia d llC T4.
Certification No. DEMKO03
ATEX 133803X EEx ia IIB T3
Sira 05 ATEX 2295
EEx ia d IIC T3 or T4
UL 913 Class I, Groups A, B, C y D
0038/YY Marine Equipment Directive (Module B&E)
Cualquier derecho de reclamación referente a la responsabilidad por la fabricación
de un producto o del daño consecuente con terceros contra GMI será revocado si
el usuario no hace caso a las precauciones de seguridad.
Áreas de uso
La exposición a ciertos productos químicos puede dar lugar a una pérdida de
sensibilidad del sensor inflamable. Donde se sepa o se sospeche de tales ambientes,
se recomienda que se compruebe más a menudo.
Los compuestos químicos que pueden causar la pérdida de sensibilidad incluyen
Siliconas, Plomo, Halógenos y Sulfuros. No utilice el instrumento en atmósferas
potencialmente peligrosas que contengan oxígeno con una concentración mayor
del 21%.
A-14
V!SA - Instrucciones de operación
Alarmas de error
‘LOW
BATTERY’ (Baja batería) Se muestra de forma intermitente cuando
quedan aproximadamente 30 minutos de funcionamiento. La alarma acústica suena,
cada dos segundos, y el LED rojo parpadea.
‘BAT
FAULT’ (Error de batería) Se muestra en el display cuando quedan
aproximadamente tres minutos de funcionamiento. La alarma acústica suena
continuamente y el LED rojo se ilumina constantemente. Después de tres minutos
el instrumento se apaga automáticamente.
‘CAL REQUIRED’ (Calibración necesaria) Este aviso se muestra durante el
inicio si el instrumento ha detectado un error en la memoria de calibración y no
puede continuar sin recalibracion. La alarma acústica y los LED´s rojos se activarán
también. El equipo se apaga de inmediato y deberán seguir las instrucciones de su
empresa para su calibración.
‘CAL EXPIRED’ (Calibración caducada) Este aviso parpadea en la pantalla cada
30 segundos si la fecha de calibración ha pasado. La alarma acústica y los LED´s
rojos están activados también sólo durante el inicio.
‘ZERO FAULT’ (Error cero) y símbolo
parpadeando Aparece tras el
inicio cuando se enciende el equipo en la presencia de un gas o si el
instrumento ha sido incapaz de hacer el cero de todos los sensores
correctamente. La alarma acústica suena cada dos segundos y los LED´s
rojos parpadean, al inicio solamente. Se puede usar, sin embargo, el
instrumento para la detección y alarmas con los otros sensores
1. Si aparece un símbolo de la llave de tuercas encima de un tipo de gas,
hay que cambiar el sensor o puede que haya un error electrónico. Devuelva
el equipo para el servicio de reparación.
2. Si aparece un símbolo de la llave de tuercas intermitente con una lectura
de cero, aplique gas durante dos minutos para que la lectura baje a cero y
apague y encienda el instrumento de nuevo. Si el error se mantiene, devuelva el
equipo para su reparación.
3. Si aparece un símbolo de la llave de tuercas intermitente con una lectura de un
valor del gas, deje el instrumento entre 30 y 60 minutos y apague y enciéndalo de
nuevo. Si el error se mantiene, devuelva el equipo para su reparación.
‘FLOW
FAULT’ (Error de caudal) instrumentos con bomba Si el símbolo
giratorio
de la bomba cambia a
, una alarma acústica suena y los LED´s
rojos se activan, indicando un fallo del caudal. Compruebe el tubo de muestra, el
filtro o la sonda (si hay) debido a posibles bloqueos. Quite el bloqueo e inicie la
bomba de nuevo manteniendo apretado el botón verde
.
A-15
Español
Nota: Ambas alarmas (acústica y visual) siguen operando después de que la señal
de aviso de baja batería aparezca en el display.
GAS MEASUREMENT INSTRUMENTS LTD.
botón verde
Operación
Encendido
Mantenga pulsado el botón (RH)
verde
para encender el
instrumento e iniciar el ciclo de
“warm-up”.
Durante el “warm-up”, la pantalla
del instrumento muestra el
modelo, número de serie, versión
de software y estado de la
batería:
botón amarillo
El gráfico del estado de la batería
indica: Llena (indicando), 75%,
50% y 25%
La siguiente pantalla indica la
fecha de calibración. Si está caducada, mantenga pulsado el botón verde
para confirmar. Esta acción cancela las alarmas acústicas / visuales.
Continúe con la comprobación de los sensores.
Si los sensores están funcionando
OK, y el cero ha sido correcto, sale
la pantalla “Sensor check”.
A continuación del estado normal
de operación, se mostrará la
pantalla como indica la figura:
Nota: Si un sensor falla en la
comprobación del cero, la alarma
acústica / visual se activa y
aparecerá el símbolo de la llave de
tuercas encima del sensor del gas
que falle. Para confirmar esta
alarma, pulse el botón verde
A-16
.
V!SA - Instrucciones de operación
Luz de fondo On / Off
Pulse el botón verde
una vez para encender la luz de pantalla. Se
enciende por 20 segundos y se apaga automáticamente.
Cancelar /confirmar alarmas
Una vez en una área segura sin gas, o que la lectura del gas haya vuelto
dentro de los limites, mantenga pulsado el botón verde
Ver valores Max/Min desde el inicio
Cuando en la pantalla se muestra la operación normal del equipo, pulse
el botón verde
una vez para encender la luz de pantalla. Con la luz
encendida, pulse el botón verde
Pulse el botón verde
otra vez para ver los valores Max.
otra vez para ver los valores Min. Para borrar las
lecturas de la memoria, mantenga pulsado el botón verde
durante dos
segundos cuando el instrumento está libre de todas las alarmas. Este
devolverá el equipo a la pantalla de funcionamiento normal.
Toma de muestras a distancia (instrumentos con bomba)
Mantenga pulsado el botón verde
para arrancar la bomba a velocidad
baja (difusión asistida para gases reactivos). Mantenga pulsado el botón
verde
otra vez para tener la bomba a velocidad normal (tomar muestras
de distancia). Cuando la bomba está en marcha, aparece un símbolo
rotando en la pantalla.
Apagar
Mantenga pulsado tres segundos el botón amarillo
y el botón verde
para apagar el instrumento.
A-17
Español
para quitar /
silenciar la alarma acústica y extinguir los LED´s.
GAS MEASUREMENT INSTRUMENTS LTD.
CHECKLISTA
1.
2.
3.
4.
5.
6.
Kontrollera att instrumentet ej har några synliga fel.
Kontrollera samtliga tillbehör.
Läs och förstå instruktionsboken innan Du använder instrumentet
Slå på instrumentet
Kontrollera batteriets kapacitet.
Kontrollera “Nollan” I frisk luft.
SÄKERHET
•
Instrumentet skall regelbundet kontrolleras och kalibreras av kunnig
personal I härför avsedd miljö.
•
Batterier: Laddningsbara batteripaket eller Alkalinebatterier (tillval)
måste laddas eller bytas utanför Ex-klassat område och monteras på rätt
sätt.
Använd aldrig skadat batteri. Det får ej heller utsättas för höga
temperaturer.
•
Endast GMI´s originaldelar får användas.
•
Om instrumentet reagerar för gas skall Ert företags normala
rutiner följas.
•
Gas kan vara farlig och skall alltid hanteras med försiktighet.
•
V!SA-instrumentet är klassat enligt
ATEX
II 1 G EEx ia llB T3;
ATEX
II 2 G EEx ia d llC T3;
ATEX
II 2 G EEx ia d llC T4.
Certification No. DEMKO03
ATEX 133803X EEx ia IIB T3
Sira 05 ATEX 2295
EEx ia d IIC T3 or T4
UL 913 Class I, Groups A, B, C and D
0038/YY Marine Equipment Directive (Module B&E)
All rätt till skadestånd med hänvisning till produktansvar eller skada
hos tredje man gentemot GMI upphör om denna varning ej beaktas.
ANVÄNDNINGSOMRÅDE
Exponering för vissa kemikalier kan resultera I att sensorn för brännbara gaser
skadas. I sådan atmosfär rekommenderas att ofta kontrollera instrumentets känslighet.
De kemiska substanser som kan orsaka försämrad reaktion är bl.a. Silikoner, Bly,
Halogener and Sulfider. Använd inte instrumentet där oxygenhalten kan överskrida
21vol%. Instrumenthuset är tillverkat av polypropylen och får ej utsättas för eller
komma I kontakt med vissa kemikalier. En ytterligare skyddsväska kan vara nödvändigt
då instrumentet används i speciella miljöer.
A-18
V!SA - Handhavande
MEDDELANDEN / TECKEN I DISPLAYEN
Olika besked visas I displayen för att indikera instrumentets status.
‘LOW
BATTERY’ blinkar när ca. 30 minuter återstår. Ljud- och ljuslarmet
aktiveras varannan sekund.
OBS: Instrumentet mäter och larmar även då denna symbol visas.
‘BAT
FAULT’ visas när ca. 3 minuter drifttid återstår. Ljud- och ljuslarmet
är konstant aktiverat. Efter tre minuter stängs instrumentet av automatiskt.
‘CAL EXPIRED’ Denna ”varningsflagga” blinkar i displayen var 30´e sekund om
”nästa” kalibreringsdatum överskridits. Även larmsignalerna aktiveras dock endast
under uppstarten.
‘ZERO FAULT’ tillsammans med blinkande ”skiftnyckel”
symbol för
respektive sensor betyder att antingen är gas närvarande eller “nollan” ligger utanför
sin gräns för denna sensor eller sensorer. Ljudlarmet aktiveras varannan sekund
liksom ljuslarmet vilket dock aktiveras endast under uppstarten. Instrumentet mäter
och larmar normalt för övriga sensorer.
1) Om ”skiftnyckeln” visas ovanför gastypen måste denna sensor bytas eller så är
det ett fel i elektroniken. Skick instrumentet för service.
2) Om ”skiftnyckeln” visas växlande med ett ”noll-värde” skall ”nolltgas” för denna
sensor tillföras instrumentet under 2 minuter för att låta instrumentet stabilisera
nollvärdet. Stäng därefter av instrumentet och slå på det igen. Kvarstår felet skall
instrumentet skickas för service till auktoriserad serviceverkstad.
3) Om ”skiftnyckeln” visas växlande med ett ”mät-värde”, Låt instrumentet vara på
30-60 minuter varefter det stängs av och sätts på igen. Kvarstår felet skall instrumentet
skickas för service till auktoriserad serviceverkstad.
‘FLOW
FAULT’ (gäller instrument med inbyggd pump) Om den roterande
pumpsymbolen
försvinner och
det audiovisuella larmet aktiveras suger
inte pumpen längre. Kontrollera sondslangen, filtren och sondstången så att de inte
är täta. Rengör i förekommande fall och återstarta pumpen genom att trycka och
hålla nere den gröna knappen
.
A-19
Svensk
‘CAL REQUIRED’ Denna ”varningsflagga” syns under uppstart om instrumentet
har ett fel i kalibreringsminnet och omöjliggör att instrumentet används innan en ny
kalibrering utförts. Ljud- och ljuslarmet är aktiverat. Stäng omedelbart av instrumentet
och utför kalibrering enligt Era interna rutiner eller sänd instrumentet för service.
GAS MEASUREMENT INSTRUMENTS LTD.
BRUKSANVISNING
Grön knapp till höger
Slå på
Tryck och håll nere ”grön” knapp
för att sätta på instrumentet.
Detta startar även en automatisk
kontroll och uppvärmning av
instrumentet.
Gul knapp till vänster
Under denna period visas alla
tecken i displayen och åtföljs av
Instrumentets beteckning,
mjukvaruversion och batteristatus
(Fullt, 75%, 50% och 25%).
Dessa meddelande följs av datum
för nästa kalibrering. Har detta datum överskridits kan detta kvitteras
genom att trycka in och hålla den gröna knappen
Detta kvitterar larmet och därefter
följer en kontroll av sensorerna.
När sensorerna fungerar som de
skall och justeringen mot frisk luft
gjorts utan anmärkning visas
”Sensor check”.
Därefter visas aktuella mätvärden
enligt bild.
Anm. Om en sensor ej klarar ”nolljusteringen” aktiveras ljud- och
ljuslarmet och en ”skiftnyckel”
visas för den aktuella sensorn. För
att kvittera detta larm – tryck och
håll nere den gröna knappen
A-20
.
.
V!SA - Handhavande
Skalbelysning AV / PÅ
Tryck en gång på den gröna knappen
för att tända skalbelysningen.
Skalan blir nu belyst i 20 sek. varefter den automatiskt släcks.
Kvittering av larm
I en gasfri atmosfär eller då gaskoncentrationen understiger inställda
larmnivåer återställs larmet med ett tryck och håll på den gröna knappen
.
För att avläsa det högsta respektive det lägsta mätvärdet under den tid
instrumentet varit påslaget gör man enligt följande. Slå på skalbelysningen
genom ett tryck på den gröna knappen
gröna knappen
. Tryck ännu en gång på den
för att avläsa det högsta värdet och med ytterligare ett
tryck på den gröna knappen
kan man avläsa det lägsta värdet.
För att radera dessa värden ur minnet trycker man ner den gröna knappen
och håller den nere under 2 sek. (instrumentet får ej larma). Härefter
återgår instrumentet till normal mätning igen.
Provtagning med sondslang (gäller instrument med pump)
Tryck och håll nere den gröna knappen
för att starta pumpen med låg
fart (hjälper instrumentet vid mätning av reaktiva gaser). Tryck och håll
nere den gröna knappen
ytterligare en gång för att höja
pumphastigheten för normal mätning med sondslang. När pumpen går
visas en roterande ”pumpsymbol”
i displayen.
Stäng av
Tryck ner och håll både den gröna
och den gula knappen
i tre
sekunder (displayen räknar ner).
A-21
Svensk
Avläsa Max.- / Min.-värden
GAS MEASUREMENT INSTRUMENTS LTD.
Tjek liste
1.
2.
3.
4.
5.
6.
Tjek at instrumentet ikke har nogle åbenlyse fejl.
Tjek tilbehør.
Læs og forstå burger manualen før brug.
Tænd instrumentet
Tjek batteriet level.
Tænd altid og nulstil i frisk luft.
Sikkerhed
•
Instrumentet skal regelmæssigt serviceres og kalibreres af autoriseret
personale.
•
Opladning af batterier skal ske i et sikkert rum.
•
Brug aldrig skadet batterier.
•
Tjek batteriet sidder rigtigt fast på instrumentet før brug.
•
Udsæt aldrig batteri eller instrumentet for ekstrem varme.
•
Brug kun GMI reserve dele til instrumentet.
•
Hvis instrumentet konstatere gas, følg da de procedure som din organisation har foreskrevet.
•
Gas kan være farlig og man bør altid behandle det med forsigtighed.
Ethvert krav i forbindelse med produkt ansvar eller følge skade på tredje
part imod GMI, er fjernet hvis de ovenstående forskrivelser ikke håndhæves.
•
Dette Visa instrument er certificeret ifølge:
ATEX
II 1 G EEx ia llB T3;
ATEX
II 2 G EEx ia d llC T3;
ATEX
II 2 G EEx ia d llC T4.
Certification No. DEMKO03
ATEX 133803X EEx ia IIB T3
Sira 05 ATEX 2295
EEx ia d IIC T3 or T4
UL 913 Class I, Groups A, B, C and D
0038/YY Marine Equipment Directive (Module B&E)
Bruger områder
Afdækning af bestemte kemikalier kan resultere i tab af følsomheden i LEL sensoren.
Hvor disse omgivelser er kendte eller mistænkt, anbefales det at foretage målinger
oftere. Den kemiske sammensætning som kan resultere i tab af følsomhed, inkludere
silikoner, bly, halogen og svovl. Brug ikke instrumentet ved potentiel farlig atmosfære,
der indeholder mere end 21 % ilt.
A-22
V!SA - Betjeningsvejledning
Alarm pga. fejl
‘LOW
BATTERY’ Vises på displayet når der er ca. 30 minutter bruger tid
tilbage. Den hørlige alarm lyder hver andet sekund, og de røde LED pære blinker.
Note: Instrumentet virker også under ”low battery”
‘BAT
FAULT’ Vises konstant på displayet, når der er ca. 3 minutter bruger
tid tilbage. Den hørlige alarm lyder nu konstant, og de røde LED pære lyser også
nu konstant. Efter 3 minutter slukkes instrumentet automatisk.
‘CAL REQUIRED’ Denne advarsel vises på displayet under opvarmning, hvis den
finder en fejl i kalibrering, og ikke er i stand til at foresætte uden en ny kalibrering.
Den hørlige og synlige alarm er her aktiv. Sluk straks for instrumentet, og følge de
retningslinjer jeres firma har vedr. kalibrering.
‘CAL EXPIRED’ Denne advarsel vises på displayet , og vil blinke hver 30 sekund,
hvis kalibrerings datoen er overskredet. Under opstart vil både den hørlige og synlige
være aktiv.
Fremkommer efter opvarmning
hvis instrumentet bliver tænd i nærheden af gas, eller hvis instrumentet ikke
kunne nul stille sensorerne. Den hørlige alarm lyder hver anden sekund, og
de røde LED pære blinker under opstart. Instrumentet vil stadig fungere på
de resterende sensorer.
1) Hvis et skruenøgle symbol fremkommer over gas typen, så skal sensoren
enten udskiftes eller der er en elektrisk fejl. Send instrumentet til service.
2) Hvis et skruenøgle symbol blinker, skiftende med nul læsning, anvende
test gas i 2 minutter, så målingen vender tilbage til nul. Sluk så instrumentet,
og tænd igen. Hvis fejlen gentager sig, send instrumentet til service.
3) Hvis et skruenøgle symbol blinker, skiftende ved gas værdi, lad instrumentet
være tændt i 30 til 60 minutter, og sluk og tænd igen instrumentet. Hvis fejlen
gentager sig, send instrumentet til service.
‘FLOW fejl’
pumpe symbol
(instrumenter med indbygget pumpe) Hvis det roterende
skifer til hørlig
alarm og de røde LED pære også lyser,
er der tale om suge fejl. Tjek sonde og sonde slangen for blokade. Fjern blokaden
og genstart pumpen ved holde den grønne knap nede
.
A-23
Dansk
‘ZERO fejl’ og blinkende symboler
GAS MEASUREMENT INSTRUMENTS LTD.
grøn knap
Tænd V!SA
Tryk og hold nede den grønne
knap
, så startes opvarmnings
processen.
Under opvarmning identificeres
model, serienummer, software
version, batteristatus information:
gul knap
Batteri status graf viser: 100%,
75%, 50% og 25%
Hvis kalibrerings datoen er
overskredet, hold grøn knap
nede for at accepterer.
Dette afbryder hørlig og synlig alarm, og forsætter med at tjekke
sensorerne.
Hvis sensorerne fungere og er
blevet nulstillet korrekt, kommer
”Sensor Check” frem på displayet.
Følgende bliver ved normal
benyttelse vist:
Bemærk: Hvis en sensor giver fejl
under nulstilling, aktiveres hørlig
og synlig alarm, og et skruenøgle
symbol vises på displayet over den
fejlende sensor. For at stoppe
alarm tryk på grøn knap
A-24
.
V!SA - Betjeningsvejledning
Display lys On / Off
Tryk på grøn knap
en gang. Efter 20 sekunder går lyset automatisk ud
igen.
Alarms afbrydelse
Når man er tilbage til et gas frit område, eller målingen er kommet under
alarm området, tryk og hold ned den grønne knap
nede, så stopper
hørlig og synlig alarmer.
Se maksimum/minimum siden instrumentet har været tændt
Under normal brug af instrumentet, tryk en gang på grøn knap
aktivere display lys. Tryk på grøn knap
for at
igen, imens display lyset er
For at fjerne målingen fra hukommelsen, tryk og hold nede den grønne
knap
i ca. 2 sekunder. Hvis er ikke er nogle alarmer vil instrumentet
nul stille sig.
Pumpe prøve (instrumenter med indbygget pumpe)
Tryk og hold grøn knap
nede for at starte pumpen på lav hastighed
(bruges ved aktiv udslip). Tryk og hold grøn
knap nede igen, og pumpen
vil nu køre i normal hastighed. (til f.eks. tank prøve)
Når pumpen kører, vises et pumpe symbol
på displayet.
Sluk V!SA
Tryk og hold både gul
& grøn knap
nede i ca. 3 sekunder.
A-25
Dansk
tændt, og instrumentet vil vise maksimum måling. Tryk på grøn knap
igen for at vise minimum måling.
GAS MEASUREMENT INSTRUMENTS LTD.
CHECKLIST
1. Kontroleer of het instrument geen duidelijke gebreken heeft .
2. Kontroleer de accessoires.
3. Lees voor gebruik de handleiding.
4. Apparaat inschakelen
5. Controleer batterij niveau.
6. Controleer “ZERO” (nulstelling) in schone lucht.
VEILIGHEID
•
Het instrument moet regelmatig onderhouden en gekalibreerd worden
door vakbekwame mensen in een veilige omgeving.
•
De oplaadbare batterij mag alleen opgeladen worden in een veilige
omgeving.
•
Gebruik nooit een beschadigde batterij-unit.
•
Overtuig uzelf voor gebruik dat de batterij-unit juist bevestigd is.
•
De batterij-unit en het instrument nooit blootstellen aan extreme hitte.
•
Gebruik alleen originele GMI-onderdelen.
•
Indien het instrument gas detecteert, volg dan de procedures en richtlijnen
van uw eigen organisatie.
•
Gas kan gevaarlijk zijn en betracht daarom altijd de nodige voorzichtigheid
bij het gebruik.
•
Het instrument V!SA is als volgt gecertificeerd:
ATEX
II 1 G EEx ia llB T3;
ATEX
II 2 G EEx ia d llC T3;
ATEX
II 2 G EEx ia d llC T4.
Certification No. DEMKO03
ATEX 133803X EEx ia IIB T3
Sira 05 ATEX 2295
EEx ia d IIC T3 or T4
UL 913 Klasse I, Groepen A, B, C en D
0038/YY Marine Equipment Directive (Module B&E)
Alle claims aan GMI in relatie tot productaansprakelijkheid of daaruit voortvloeiende
schade aan een derde partij worden afgewezen indien waarschuwingen niet in acht
genomen worden.
GEBRUIKSOMGEVING
Blootstelling aan bepaalde chemicaliën kan resulteren in verlies aan gevoeligheid
van de gassensor. Daar waar zulke omgevingen bekend zijn of vermoed worden is
het aan te bevelen om vaker een meetwaarde test uit te voeren.
Chemische stoffen die een verlies aan gevoeligheid kunnen veroorzaken zijn
Siliconen, Lood, Halogenen en Zwavel. Gebruik het instrument niet in potentieel
gevaarlijke omgevingen die meer dan 21% Zuurstof bevatten.
A-26
V!SA - Bedienings Instructies
ALARMERING BIJ STORING
‘LOW
BATTERY’ (batterijcapaciteit te laag) Wordt met tussenpozen
weergegeven als er nog ca. 30 minuten bedrijfstijd beschikbaar is. Het geluidsalarm
is elke 2 seconden hoorbaar en de Rode LED’s knipperen. Opmerking: Zowel het
hoor- als zichtbare alarm blijven operationeel nadat de LOW BATTERY indicatie
verschijnt.
symbool
‘ZERO FAULT’ (storing in nulstelling) en knipperend
Verschijnt na de opstart procedure als het instrument is opgestart in een
omgeving met gas of als het instrument niet in staat is geweest om de
nulstelling van alle sensoren correct uit te voeren. Het geluidsalarm is elke 2
seconden hoorbaar en de rode LED’s knipperen alleen bij het opstarten. Het
instrument kan evenwel nog wel gebruikt worden voor de overige aanwezige
sensoren.
1) Indien het steeksleutelsymbool boven de gassoort verschijnt dient de sensor
vervangen te worden of is een storing gevonden in het elektrische circuit.
Stuur in dit geval het instrument op naar een gecertificeerde service/reparatie
instelling(Kamstrup b.v.- Doesburg).
2) Indien het steeksleutelsymbool afwisselend met een nulaflezing verschijnt,
voer dan gedurende 2 minuten een testgas toe om het display in staat te
stellen naar de nulinstelling te gaan. Schakel daarna het instrument uit en
vervolgens weer in. Indien de storing blijft bestaan stuur dan het instrument op naar
een gecertificeerde service/reparatie instelling(Kamstrup b.v. – Doesburg)
3) Indien het steeksleutelsymbool afwisselend met een gasmeetwaarde verschijnt
laat dan het instrument gedurende 30 tot 60 minuten in bedrijf staan en schakel het
instrument daarna uit en vervolgens weer in. Indien de storing blijft bestaan stuur
dan het instrument op naar een gecertificeerde service/reparatie instelling(Kamstrup
b.v. – Doesburg)
‘FLOW
FAULT’ (stromingsstoring, alleen bij instrumenten met pomp)
Indien het roterende pomp symbool
wegvalt en
het geluidsalarm en
de rode LED’s ingeschakeld worden, duidt dit op een monster- of een
stromingsstoring. Kontroleer, indien van toepassing, de aanzuigslang,
aanzuigfilter en/of probe op verstopping. Verwijder eventuele verstopping en
herstart de pomp door groene knop
even ingedrukt te houden.
A-27
Nederlands
‘BAT
FAULT’ (batterijstoring) Wordt continu weergegeven als er nog ca.
drie minuten gebruikstijd beschikbaar is. Het geluidsalarm is continu hoorbaar en
de rode LED’s branden continu. Na drie minuten schakelt het instrument zichzelf
automatisch uit.
‘CAL REQUIRED’ (kalibratie vereist) Deze melding wordt tijdens de
opstartprocedure weergegeven als het instrument een storing in het
kalibratiegeheugen gevonden heeft and niet in staat is om verder te gaan
zonder herkalibratie. Het hoorbare alarm en de rode LED’s zijn nu ook
geactiveerd. Schakel instrument direct uit en volg de procedures voor
herkalibratie die bij uw bedrijf vereist zijn.
‘CAL EXPIRED’ (kalibratie over datum) Deze melding zal elke 30 seconden
op het display verschijnen als de kalibratiedatum overschreden is. Het
hoorbare alarm en de rode LED’s zijn ook reeds geactiveerd gedurende de
opstartprocedure alleen.
GAS MEASUREMENT INSTRUMENTS LTD.
GROENE (RH) KNOP
BEDIENING
Inschakelen
Groene knop
even ingedrukt
houden om instrument in te
schakelen en opstart routine te
activeren.
Gedurende het opwarmen zal het
display het model, serienummer,
software versie en batterij status
weergeven.
GELE (LH) KNOP
Batterij statusbalk geeft aan: Vol,
75%, 50% and 25%
Kalibratie datum. Indien datum
verlopen volgt alarmering. Voor
bevestiging en uitschakelen van het alarm de groene knop
indrukken.
Hierna wordt vervolgt met controle routine en nulstelling van de sensoren.
Op display wordt vervolgens
‘Sensor Check’ weergegeven,
gevolgd door het standaard
display indien de sensoren goed
werken.
Na het juist opstarten en het
standaard display weergegeven
wordt zijn de volgende
handelingen mogelijk:
Opmerking: Indien voor een
sensor geen nulstelling bereikt
wordt, zal het alarm ingeschakeld
worden en een steeksleutel
symbool boven de betreffende
sensor verschijnen. Om dit te
bevestigen en het alarm uit te schakelen de groene knop
A-28
indrukken.
V!SA - Bedienings Instructies
Afleesvenster verlichting Aan / Uit
Druk groene knop
eenmalig om verlichting in te schakelen. De
verlichting zal gedurende 20 seconden blijven branden waarna
automatische uitschakeling volgt.
Alarm Reset / Bevestiging
Indien (weer) in gasvrije omgeving, of wanneer de afgelezen waarde weer
binnen de vooraf ingestelde waarden is, de groene knop
ingedrukt
houden om alarmsignalen uit te schakelen.
Weergave opgeslagen Max / Min waarden sinds inschakelen
Bij weergave van het standaard display, groene knop
eenmalig
indrukken om de verlichting in te schakelen. Bij ingeschakelde verlichting
de groene knop
nogmaals indrukken om maximum waarde weer te
geven. Nogmaals de groene knop
indrukken om de minimum waarde
Om opgeslagen waarden te verwijderen, de groene knop
2 seconden
ingedrukt houden wanneer er geen alarm is. Hierdoor keert het apparaat
terug naar zijn standaard actieve display.
Monstername op afstand (alleen voor instrumenten met pomp)
Groene knop ingedrukt houden om pomp op lage capaciteit te
starten(diffusie met aanzuighulp bij reactieve gassen). Groene knop
nogmaals indrukken om pomp op normale capaciteit in te
schakelen (voor monstername op afstand).
Wanneer de pomp ingeschakeld is zal het pompsymbool
draaiend in het display weergegeven worden.
Uitschakelen
Om het apparaat uit te schakelen de gele
en groene knop
gelijktijdig gedurende 3 seconden ingedrukt houden.
A-29
Nederlands
weer te geven.
GAS MEASUREMENT INSTRUMENTS LTD.
Checkliste
1.
2.
3.
4.
5.
6.
Überprüfen Sie das Gasmessgerät auf offensichtliche Fehler.
Überprüfen Sie das mitgelieferte Zubehör.
Lesen Sie die Bedienungsanleitung, lassen Sie keine Fragen offen.
Schalten Sie das Gasmessgerät ein.
Überprüfen Sie den Ladezustand des Akkus.
Überprüfen Sie den “Nullpunkt” (ZERO) in frischer Luft.
Sicherheitshinweise
•
•
•
•
•
•
•
•
Das Gasmessgerät muss regelmäßig von speziell dafür geschultem Personal
in sicherer Umgebung (d.h. in nicht explosionsgefährdeten Bereichen) überprüft
und kalibriert werden
Der Akku darf nur in sicherer Umgebung aufgeladen werden
Ein defekter Akku ist sofort auszutauschen, der Betrieb mit einem defekten Akku
ist nicht zulässig
Stellen Sie sicher, dass der Akku vor Aufnahme des Messbetriebes korrekt
eingebaut wurde
Setzen Sie das Gasmessgerät und den Akku niemals extremer Wärmeeinwirkung
aus
Als Ersatzteile sind grundsätzlich nur Komponenten von GMI zulässig
Folgen Sie unbedingt den innerbetrieblichen oder gesetzlichen Vorschriften,
sobald das Gasmessgerät eine Gaswarnung generiert
Das V!SA – Gasmessgerät besitzt folgende Zulassung
ATEX
II 1 G EEx ia llB T3;
ATEX
II 2 G EEx ia d llC T3;
ATEX
II 2 G EEx ia d llC T4.
Certification No. DEMKO03
ATEX 133803X EEx ia IIB T3
Sira 05 ATEX 2295
EEx ia d IIC T3 or T4
UL 913 Klasse I, Gruppe A, B, C , D
0038/YY Marine Equipment Directive (Module B&E)
Gase können gefährlich für Mensch und Technik sein, beachten Sie daher unbedingt
die entsprechenden Sicherheitsvorschriften Werden die oben aufgeführten
Sicherheitshinweise nicht beachtet, so erlischt jeglicher Anspruch gegenüber GMI
bezüglich Haftung und Garantie.
Anwendungsbereich
Wird der Sensor für explosionsgefährdete Atmosphäre bestimmten Chemikalien
ausgesetzt, so kann dies zum Verlust der Sensorempfindlichkeit führen. Sind solche
Umgebungsbedingungen bekannt oder werden diese erwartet, so empfehlen wir,
das Gasmessgerät in kurzen Abständen zu überprüfen. Folgende chemische
Verbindungen können zum Verlust der Empfindlichkeit führen: Silikone, Blei,
Halogene und Schwefel. Generell darf das Gasmessgerät nicht in
explosionsgefährdeter Umgebung eingesetzt werden, welche einen Sauerstoffanteil
von mehr als 21% enthält.
Alarme
‘LOW
BATTERY’ Durch diesen blinkenden Hinweis wird angezeigt,
dass ab diesem Zeitpunkt dass Gasmessgerät nur noch für ca. 30 Minuten
A-30
V!SA - Bedienungshinweise
betriebsfähig ist. Gleichzeitig erfolgt alle zwei Sekunden ein akustischer und optischer
Alarm (rote LED‘s blinken). Hinweis: Der akustische sowie auch der optische Gas- Alarm
bleiben auch nach der Anzeige des leeren Akkus (der Batterie) erhalten, sofern ein solcher
Alarm ausgelöst wurde.
‘BAT
FAULT’ Wechselt das blinkende Akkusymbol in ein statisches Symbol,
verbunden mit einem Dauerton und LED- Dauerlicht (Alarm), so stehen Ihnen noch maximal
3 Minuten Betriebszeit zur Verfügung. Nach Ablauf dieser Zeit schaltet sich das
Gasmessgerät selbsttätig ab!
‘CAL REQUIRED’ Erscheint während der Warmlaufphase die Meldung “CALIBRATION
REQUIRED“ im Display, gleichzeitig mit einem akustischen und optischen Alarmsignal, so
wurde ein Fehler im Kalibrierspeicher festgestellt. Die Aufnahme des Messbetriebes ist
nun nicht mehr möglich, da dass Gasmessgerät zuerst neu kalibriert werden muss.
‘CAL EXPIRED’ Wurde das Kalibrierdatum überschritten, so erscheint während des
Normalbetriebes diese Meldung. Alle dreißig Sekunden blinkt dieser Hinweis um den
Anwender auf die notwendige neue Kalibration aufmerksam zu machen.
rscheint nach Ablauf der Einschaltphase das blinkende
Symbol des Schraubenschlüssels sowie die Meldung „ZERO FAULT“, so kann dies zwei
Ursachen haben: Das Gasmessgerät wurde in einer Umgebung eingeschaltet, in der sich
bereits ein Gas befindet, oder für einen (oder mehrere Sensoren) konnte der
Nullpunktabgleich nicht durchgeführt werden. Alle zwei Sekunden ertönt der akustische
Alarm, zusätzlich blinken die roten LED`s, um diesen Fehler zu melden.
Bitte beachten Sie: Das Gasmessgerät kann mit den noch funktionsfähigen Sensoren weiter
messen und auch Alarme ausgeben.
1) Der defekte Sensor wird durch den blinkenden Schraubenschlüssel gekennzeichnet,
dies erfolgt abwechselnd mit der falschen (numerischen) Anzeige des Sensors. Senden
Sie das Gasmessgerät zurück zur Überprüfung und Reparatur.
2) Erscheint das blinkende Symbol des Schraubenschlüssels über einem Sensor
abwechselnd mit einer Null- Anzeige, so beaufschlagen Sie das Gasmessgerät für ca.
zwei Minuten mit einem Testgas. Hierdurch sollte die Anzeige (der Sensor) abgeglichen
sein. Schalten Sie dass Gasmessgerät nach Ablauf dieser Zeit aus und wieder ein. Besteht
der Fehler weiterhin, so senden Sie das Gasmessgerät zur Überprüfung zurück.
3) Erscheint das blinkende Symbol des Schraubenschlüssels über einem Sensor abwechselnd
mit einem Gaswert, so lassen Sie das Gasmessgerät für ca. 30 bis 60 Minuten eingeschaltet.
Schalten Sie dass Gasmessgerät nach Ablauf dieser Zeit aus und wieder ein. Besteht der
Fehler weiterhin, so senden Sie das Gasmessgerät zur Überprüfung zurück.
‘FLOW
FAULT’ (nur bei Geräten mit Pumpe) Erscheint das rotierende Pumpen
symbol
und wechselt auf
so liegt ein Defekt an der Pumpe vor oder der Durch
fluss ist blockiert. Gleichzeitig ertönt der akustische Alarm und zusätzlich blinken die roten
LED‘s, um diesen Fehler zu melden. Prüfen Sie die angeschlossene Probenleitung sowie
den Filter auf Verstopfung. Reinigen Sie ggf. Filter und Leitung und starten Sie die Pumpe
erneut, indem Sie die grüne
Taste betätigen. Besteht der Fehler weiterhin, so senden
Sie das Gasmessgerät zur Überprüfung zurück.
A-31
Deutsch
‘ZERO FAULT’ und blinkendes
GAS MEASUREMENT INSTRUMENTS LTD.
Grüne Taste
Bedienungshinweise
EINSCHALTEN
Drücken Sie die grüne Taste
auf
der rechten Seite des Gasmessgerätes
und halten diese für eine Sekunde
gedrückt, um die Initialisierung zu
starten.
Während der Warmlaufphase werden
das Modell, die Serienummer, die
Softwareversion
und
der
Akkuladezustand (Batteriezustand)
angezeigt:
Gelbe Taste
Der Akkuladezustand (Batterie) wird
mittels Symbol dargestellt. Die im
Akkusymbol
dargestellte
Balkenanzeige kann verschiedene
Ladezustände anzeigen: Voll, 75%,
50% und 25%.
Auf dem Display erscheint nun der
nächste Termin für eine Kalibrierung. Wurde der Fälligkeitstermin der
notwendigen Kalibrierung überschritten, so drücken Sie jetzt noch einmal
und halten diese gedrückt, um diese Meldung zu
die grüne Taste
bestätigen und den akustischen und optischen Alarm zu löschen.
Arbeiten die Sensoren ordnungsgemäß und der Nullabgleich konnte
durchgeführt werden, so wird im
Display ‘Sensor Check’ angezeigt,
anschließend wird die Anzeige für
den Normalbetrieb aufgerufen.
Hinweis: Wird während des
Nullpunktabgleichs für einen (oder
mehrere) Sensor (en) ein Fehler
festgestellt, so wird ein
akustischer und optischer Alarm
generiert, auf dem Display
erscheint an der entsprechenden
Stelle das Symbol eines
Schraubenschlüssels. Drücken
Sie jetzt noch einmal die grüne
Taste
A-32
und halten diese
V!SA - Bedienungshinweise
gedrückt, um den Alarm zu bestätigen und den akustischen und optischen
Alarm zu löschen.
Displaybeleuchtung Ein- /AusschaltenDisplay Drücken Sie die
grüne Taste , um die Displaybeleuchtung einzuschalten. Bitte
beachten Sie, dass die Beleuchtung automatisch nach 20 Sekunden
automatisch abgeschaltet wird.
Alarme löschen / Alarme bestätigen Sobald vom Gasmessgerät
ein Alarm erkannt wird, so wird ein akustischer und optischer Alarm
ausgelöst. Drücken Sie nach Unterschreiten des Grenzwertes oder
nachdem Sie sich wieder an frischer Luft befinden die grüne Taste
um den Alarm abzuschalten. Minimal- und Maximalwerte anzeigen
,
, um
Drücken Sie während des Normalbetriebes bitte die grüne Taste
die Displaybeleuchtung einzuschalten. Drücken Sie jetzt nochmals die
grüne Taste
, um die Maximalwerte für alle Sensoren aufzurufen.
Drücken Sie jetzt wiederum die grüne Taste
, um die Minimalwerte für
alle Sensoren aufzurufen. Nachdem Sie die Werte notiert haben, können
Sie wieder zurück zur Normalanzeige gelangen, indem Sie die grüne Taste
für zwei (2) Sekunden gedrückt halten. Bitte beachten Sie, dass gleichzeitig
der Min- und Max-Speicher gelöscht wird. Voraussetzung hierfür ist, dass
keine Alarme anstehen
Drücken Sie die grüne Taste
und halten Sie diese gedrückt, die Pumpe
wird nun mit ihrer geringsten Geschwindigkeit gestartet. Dieser Modus
eignet sich zur Unterstützung einer Diffusionsmessung für reaktionsfähige
und halten diese gedrückt,
Gase. Drücken Sie nochmals die grüne Taste
um die Pumpe mit Normalgeschwindigkeit laufen zu lassen. Dieser Modus
ist für die Probennahme über einen Messschlauch oder Messrohre geeignet.
Sobald die Pumpe arbeitet, erscheint oben links im Display das
, die Diagonale im Symbol dreht sich
quadratische Pumpensymbol
entsprechend der Pumpengeschwindigkeit.
Ausschalten Drücken Sie die gelbe Taste
und die grüne Taste
gleichzeitig und halten beide gedrückt. Es wird nun ein Zähler
(Countdown) gestartet, auf dem Display wird nun rückwärts von 3 an
bis auf 0 gezählt. Halten Sie beide Tasten solange gedrückt, bis dass
das Display nichts mehr anzeigt.
A-33
Deutsch
Pumpenbetrieb (nur bei Geräten mit eingebauter Pumpe)
GAS MEASUREMENT INSTRUMENTS LTD.
ΛΙΣΤΑ ΕΛΕΓΧΟΥ
1.
2.
3.
4.
5.
6.
Ελέγχτε το όργανο ώστε να µην υπάρχουν εµφανή ελαττώµατα.
Ελέγχτε τα εξαρτήµατα.
∆ιαβάστε προσεχτικά το εγχειρίδιο πριν από την χρήση.
Ανοίξτε το όργανο.
Ελέγχτε την κατάσταση των µπαταριών.
Ελέγχτε το “ZERO” σε καθαρό αέρα.
ΑΣΦΑΛΕΙΑ
•
•
•
•
•
•
•
•
Το όργανο πρέπει να συντηρείται και να βαθµονοµείται τακτικά από
πλήρως εκπαιδευµένο προσωπικό, σε ασφαλές περιβάλλον.
Η επαναφορτιζόµενη µπαταρία πρέπει να φορτίζεται µόνο σε ασφαλές
περιβάλλον.
Μην χρησιµοποιείτε ποτέ κατεστραµµένες µπαταρίες.
Σιγουρευτείτε ότι ο µπαταρίες έχουν τοποθετηθεί σωστά πριν από τη
χρήση.
Μην εκθέτετε ποτέ τις µπαταρίες ή το όργανο σε υπερβολικά υψηλές
θερµοκρασίες.
Πρέπει να χρησιµοποιούνται µόνο εξαρτήµατα της G.M.I για
αντικατάσταση των παλιών.
Εάν το όργανο ανιχνεύσει αέριο, ακολουθείστε τις διαδικασίες και τις
οδηγίες λειτουργίας του οικείου οργανισµού σας.
Τα αέρια µπορεί να είναι επικίνδυνα γι’αυτό πρέπει να χρησιµοποιούνται
µε προσοχή.
Το όργανο Visa είναι πιστοποιηµένο σαν
Certification No. DEMKO03 ATEX
ATEX II 1 G EEx ia llB T3;
133803X
EEx ia IIB T3
ATEX II 2 G EEx ia d llC T3;
Sira 05 ATEX 2295
ATEX II 2 G EEx ia d llC T4.
EEx ia d IIC T3 or T4
UL 913 Class I, Groups A, B, C and D
0038/YY Marine Equipment Directive (Module B&E)
Κάθε δικαίωµα διεκδίκησης, σχετικά µε την παθητικότητα του προϊόντος ή
επακόλουθη ζηµιά, από οποιαδήποτε τρίτη οµάδα εναντίον της G.M.I,
εξαλείφεται εάν οι προειδοποιήσεις δεν τηρούνται.
ΠΕΡΙΟΧΕΣ ΧΡΗΣΗΣ
Έκθεση σε καθορισµένα χηµικά µπορεί να καταλήξει σε µείωση της
ευαισθησίας του εύφλεκτου αισθητήρα ανίχνευσης. Όπου υπάρχουν ή
πιθανολογούνται τέτοιες περιοχές προτείνεται να γίνονται πιο συχνοί έλεγχοι.
Τα χηµικά στοιχεία που µπορεί να προκαλέσουν µείωση της ευαισθησίας
περιλαµβάνουν Σιλικόνη, Μόλυβδο, Αλογόνο και Θείο. Μην χρησιµοποιείτε το
όργανο σε ενδεχοµένως επικίνδυνο περιβάλλον που περιέχει Οξυγόνο σε
ποσοστό µεγαλύτερο του 21%.
A-34
V!SA – Οδηγίες Λειτουργίας
ΣΥΝΑΓΕΡΜΟΙ ΣΦΑΛΜΑΤΩΝ
‘LOW
BATTERY’ φαίνεται στην οθόνη περιοδικά όταν παραµένουν περίπου
30 λεπτά λειτουργίας. Ο ακουστικός συναγερµός ακούγεται, µια φορά κάθε δύο
δευτερόλεπτα και η κόκκινη ενδεικτική λυχνία αναβοσβήνει. Σηµείωση: Τόσο ο
οπτικός όσο και ο ακουστικός συναγερµός συνεχίζουν να λειτουργούν µετά από τη
στιγµή που θα φανεί το µήνυµα προειδοποίησης «low battery».
‘ZERO FAULT’ και η ένδειξη
που αναβοσβήνει εµφανίζεται µετά την
προθέρµανση του οργάνου εάν η εκκίνηση του οργάνου έχει γίνει σε παρουσία αερίου
ή εάν το όργανο δεν έχει την δυνατότητα να µηδενίσει όλους τους αισθητήρες σωστά.
Ο ακουστικός συναγερµός ακούγεται, µια φορά κάθε δύο δευτερόλεπτα, και η κόκκινη
ενδεικτική λυχνία αναβοσβήνει, µόνο κατά την διάρκεια της εκκίνησης. Το όργανο
ωστόσο µπορεί να χρησιµοποιείται για να ανιχνεύσει και να χτυπήσει συναγερµό
στους άλλους αισθητήρες που υπάρχουν προσαρµοσµένοι στο όργανο.
1) Εάν εµφανιστεί πάνω από τον τύπο κάποιου συγκεκριµένου αερίου το σύµβολο
του κλειδιού, τότε ο αισθητήρας χρειάζεται αντικατάσταση ή υπάρχει κάποιο ηλεκτρικό
σφάλµα. Επιστρέψτε το όργανο σε εξουσιοδοτηµένο αντιπρόσωπο για επισκευή.
2) Εάν εµφανιστεί το σύµβολο του κλειδιού να αναβοσβήνει εναλλασσόµενο µε την
ένδειξη µηδενισµού «zero», διοχετεύστε δοκιµαστικό αέριο για δύο λεπτά και αφήστε
να µηδενιστεί η κλίµακα στην οθόνη, µετά κλείστε και ανοίξτε το όργανο ξανά. Εάν το
σφάλµα παραµένει, επιστρέψτε το όργανο σε εξουσιοδοτηµένο αντιπρόσωπο για
επισκευή.
3) Εάν εµφανιστεί το σύµβολο του κλειδιού να αναβοσβήνει εναλλασσόµενο µε την
τιµή του αερίου, αφήστε το όργανο για 30 µε 60 λεπτά µετά κλείστε το και ανοίξτε το
ξανά. Εάν το σφάλµα παραµένει, επιστρέψτε το όργανο σε εξουσιοδοτηµένο
αντιπρόσωπο για επισκευή.
‘FLOW
FAULT’ (σε όργανα µε αντλία) Εάν το περιστρεφόµενο σύµβολο της
αντλίας
αλλάξει σε
, ο ακουστικός συναγερµός και η κόκκινη ενδεικτική λυχνία
είναι ενεργοποιηµένα, δηλώνοντας σφάλµα στο δείγµα ή ανεπάρκεια στην ροή του
δείγµατος. Κάντε έλεγχο στην σωλήνα ροής του δείγµατος, στο φίλτρο του δείγµατος
ή στον ακροσωλήνα για κάποιο µπλοκάρισµα, εάν αυτά είναι εφαρµόσιµα. Καθαρίστε
τα τυχόν εµπόδια και κάντε επανεκκίνηση στην αντλία πατώντας και κρατώντας
πατηµένο το πράσινο πλήκτρο (RH) .
A-35
Greek
‘BAT
FAULT’ φαίνεται µονίµως όταν αποµένουν περίπου τρία λεπτά
λειτουργίας. Ο ακουστικός συναγερµός ακούγεται συνεχώς και η κόκκινη ενδεικτική
λυχνία φωτίζει συνεχώς. Μετά από τρία λεπτά το όργανο κλείνει αυτόµατα.
‘CAL REQUIRED’ Αυτή η προειδοποιητική ένδειξη θα εµφανίζεται στην οθόνη κατά
την διάρκεια προθέρµανσης του οργάνου, εάν το όργανο έχει ανιχνεύσει κάποιο
σφάλµα στην µνήµη βαθµονόµησης κατά την διάρκεια της εκκίνησης και δεν έχει την
δυνατότητα να συνεχίζει να λειτουργεί χωρίς να γίνει βαθµονόµηση. Ο ακουστικός
συναγερµός και η κόκκινη ενδεικτική λυχνία είναι επίσης ενεργοποιηµένα. Κλείστε
αµέσως το όργανο και ακολουθείστε τις κατάλληλες κινήσεις που απαιτούνται από την
εταιρία σας για βαθµονόµηση.
‘CAL EXPIRED’ Αυτή η προειδοποιητική ένδειξη θα αναβοσβήνει στην οθόνη κάθε
30 δευτερόλεπτα εάν η ηµεροµηνία λήξης της βαθµονόµησης έχει περάσει. Ο
ακουστικός συναγερµός και η κόκκινη ενδεικτική λυχνία είναι επίσης ενεργοποιηµένα,
µόνο κατά την διάρκεια εκκίνησης του οργάνου.
GAS MEASUREMENT INSTRUMENTS LTD.
ΛΕΙΤΟΥΡΓΙΑ
Πράσινο (RH) πλήκτρο
Άνοιγµα
Πατήστε και κρατήστε το
πράσινο (RH)
πλήκτρο
για να ανοίξει το όργανο
και να ξεκινήσει ο κύκλος Κίτρινο (LH) πλήκτρο
προθέρµανσης του.
Κατά την διάρκεια της ροθέρµανσης,
στην οθόνη του οργάνου αναγνωρίζεται
το µοντέλο, ο αριθµός σειράς, η έκδοση
του λογισµικού και πληροφορίες για την
κατάσταση της µπαταρίας:
Το γράφηµα της κατάστασης της
µπαταρίας δηλώνει γεµάτο (όπως
φαίνεται), 75%, 50% και 25%
Μετά από αυτό στην οθόνη φαίνεται η ηµεροµηνία λήξης της
βαθµονόµησης. Εάν έχει λήξει, κρατήστε πατηµένο το πράσινο (RH)
πλήκτρο, για επιβεβαίωση.
Αυτή η ενέργεια ακυρώνει τον οπτικό και ακουστικό συναγερµό και
συνεχίζει µε τον έλεγχο των αισθητήρων που φαίνονται στην οθόνη
διαδοχικά.
Εάν οι αισθητήρες λειτουργούν
κανονικά και έχουν µηδενιστεί σωστά,
το µήνυµα ‘Sensor Check’ φαίνεται
στην οθόνη.
Ακολουθεί η κανονική κατάσταση
λειτουργίας στην οθόνη όπως φαίνεται:
Σηµείωση: Εάν κάποιος αισθητήρας
αποτύχει στον µηδενισµό, οπτικός και
ακουστικός συναγερµός ενεργοποιείται
και το σύµβολο του κλειδιού φαίνεται
στην οθόνη πάνω από τον
ελαττωµατικό αισθητήρα. Για να
αγνοήσετε αυτόν το συναγερµό,
πατήστε το πράσινο (RH)
A-36
πλήκτρο
V!SA – Οδηγίες Λειτουργίας
Εσωτερικό φως οθόνης ενεργοποίηση (On) /
απενεργοποίηση (Off)
Πατήστε το πράσινο (RH)
πλήκτρο µια φορά για να ενεργοποιήσετε το
εσωτερικό φως. Παραµένει ενεργοποιηµένο για 20 δευτερόλεπτα και µετά
απενεργοποιείται αυτόµατα.
Εκκαθάριση συναγερµών/ Επιβεβαίωση
Σε ασφαλές από αέρια περιοχή, ή όταν η ένδειξη του αερίου έχει
επανέλθει στα επιτρεπτά όρια, κρατήστε πατηµένο το πράσινο (RH)
πλήκτρο για να σταµατήσει ο ήχος του συναγερµού και να σβήσει η
ενδεικτική λυχνία του συγκεκριµένου αερίου.
Απεικόνιση µέγιστου (Max) / ελάχιστου (Min) των
καταγεγραµµένων µετρήσεων από την ενεργοποίηση του
οργάνου
Όταν φαίνεται στην οθόνη η κανονική κατάσταση λειτουργίας, πατήστε το
πράσινο (RH)
πλήκτρο µια φορά για να ενεργοποιήσετε το εσωτερικό
φως της οθόνης. Όταν ενεργοποιηθεί το εσωτερικό φως της οθόνης,
πατήστε το πράσινο (RH)
πλήκτρο ξανά για να απεικονιστούν οι
µέγιστες µετρήσεις. Πατήστε το πράσινο (RH)
πλήκτρο ξανά για να
απεικονιστούν οι ελάχιστες µετρήσεις.
Για να αφαιρεθούν οι µετρήσεις από την µνήµη του οργάνου, κρατήστε
πατηµένο το πράσινο (RH)
πλήκτρο για δύο (2) δευτερόλεπτα εάν το
όργανο είναι καθαρό από συναγερµούς. Αυτό θα επαναφέρει την οθόνη
στην κανονική κατάσταση λειτουργίας της.
Κρατήστε πατηµένο το πράσινο (RH)
πλήκτρο για να ενεργοποιηθεί η
αντλία στην χαµηλή ταχύτητα (βοηθητική διάχυση για ανενεργά αέρια).
πλήκτρο ξανά και η αντλία θα
Κρατήστε πατηµένο το πράσινο (RH)
λειτουργεί σε κανονική ταχύτητα (για δειγµατοληψία εξ αποστάσεως).
Όταν η αντλία λειτουργεί, το σύµβολο της αντλίας
περιστρέφεται στην
οθόνη.
Κλείσιµο
Κρατήστε πατηµένο τόσο το κίτρινο αριστερό (LH)
πράσινο (RH)
πλήκτρο όσο και το
πλήκτρο, για 3 δευτερόλεπτα, για να κλείσει το όργανο.
A-37
Greek
∆ειγµατοληψία εξ αποστάσεως (όργανα µε αντλία)
GAS MEASUREMENT INSTRUMENTS LTD.
РЕГЛАМЕНТ ПРОВЕРКИ
1.
2.
3.
4.
5.
6.
Проверьте, нет ли очевидных неисправностей в измерительном
устройстве.
Проверьте вспомогательные приборы и приспособления.
Прочитайте и осмыслите руководство перед пользованием.
Включите.
Проверьте уровень энергии батареи.
Проверьте «НУЛЬ» в свежем воздухе.
БЕЗОПАСНОСТЬ
•
•
•
•
•
•
•
•
•
Данное измерительное устройство должен регулярно осматривать
и калибровать полностью обученный персонал в безопасном месте.
Перезаряжаемую аккумуляторную батарею следует подзаряжать
только в безопасном месте.
Ни в коем случае нельзя пользоваться поврежденной
аккумуляторной батареей.
Проверьте, чтобы аккумуляторная батарея была правильно
установлена перед пользованием.
Ни в коем случае нельзя подвергать аккумуляторную батарею или
измерительное устройство воздействию чрезвычайно высокой
температуры.
Можно использовать только запчасти компании GMI.
Если данное устройство обнаруживает газ, следуйте порядку
действий, которые существуют в вашей организации, а также
рекомендациям по эксплуатации.
Газ может быть опасным, и следует всегда предпринимать
необходимые меры предосторожности при пользовании им.
Измерительное устройство V!SA подтверждено следующими
сертификатами:
Certification No. DEMKO03
ATEX II 1 G EEx ia llB T3;
ATEX 133803X
EEx ia IIB T3
ATEX II 2 G EEx ia d llC T3;
Sira 05 ATEX 2295
ATEX II 2 G EEx ia d llC T4.
EEx ia d IIC T3 or T4
UL 913 Class I, Groups A, B, C and D
0038/YY Marine Equipment Directive (Module B&E)
Любое право на рекламацию, связанную с ответственностью
производителя за качество выпускаемой продукции или последующим
повреждением, нанесенным любой третьей стороне, по отношению к
GMI снимается, если не соблюдаются предупреждения.
ОБЛАСТИ ПРИМЕНЕНИЯ
Подверженность воздействию определенных химикатов может привести
к потере чувствительности датчика воспламенения. Там, где известно
или подозревается присутствие таких условий эксплуатации,
рекомендуется более часто проводить проверки срабатывания. В число
химических веществ, которые могут вызвать потерю чувствительности,
входят силиконы, свинец, галогены и сера. Не используйте
измерительное устройство в потенциально опасных атмосферах,
содержащих свыше 21% кислорода.
A-38
СИГНАЛЫ ОТКАЗА
V!SA – Инструкции по эксплуатации
‘LOW
BATTERY’ (РАЗРЯЖЕННАЯ БАТАРЕЯ) Периодически появляется
на экране, когда до конца времени работы остается примерно 30 минут. Через
каждые две секунды звучит звуковой сигнал тревоги, и мигает красный СИД.
Примечание: Как звуковые, так и визуальные сигнализаторы появления газа
продолжают работать после появления предупреждающего сообщения о
разрядке батареи.
‘BAT
FAULT’ (ОТКАЗ БАТ) Постоянно высвечивается на экране, когда до
конца времени работы остается примерно три минуты. Звуковой сигнал тревоги
звучит непрерывно, и постоянно горит красный СИД. По истечению трех минут
измерительное устройство автоматически отключается.
‘CAL REQUIRED’ (ТРЕБУЕТСЯ КАЛ) Этот флажковый индикатор аварийной
сигнализации появляется на экране во время прогрева, если во время запуска
данное устройство обнаружило неисправность в памяти калибровки и не может
продолжать работу без перекалибровки. Также включаются звуковой сигнал
тревоги и красный СИД. Немедленно выключите, а затем выполните
соответствующие действия, предусмотренные вашей компанией в отношении
калибровки.
‘CAL EXPIRED’ (ИСТЕК СРОК КАЛ) Этот флажковый индикатор аварийной
сигнализации вспыхивает на экране через каждые 30 секунд, если срок
действия калибровки истек. Звуковой сигнал тревоги и красный СИД также
включаются, но только во время запуска.
‘ZERO FAULT’ (ОТКАЗ НУЛЯ)
и мигающий символ Появляется после
прогрева, если измерительное устройство включается в присутствии газа или
измерительное устройство не может правильно установить на нуль все датчики.
Через каждые две секунды звучит звуковой сигнал тревоги, и мигает красный
СИД, но только во время запуска. Измерительное устройство можно, тем не
менее, все еще использовать для обнаружения и подачи сигнала тревоги на
другом(их) установленном(ых) датчике(ах).
1) Если над типом газа появляется символ гаечного ключа, то тогда требуется
заменить датчик, или имеется повреждение в электрической цепи. Верните
измерительное устройство одобренной организации по техническому
обслуживанию / ремонту.
3) Если мигающий символ гаечного ключа появляется попеременно с газовым
показателем, оставьте измерительное устройство включенным в течение 30 –
60 минут, а затем выключите и снова включите измерительное устройство.
Если неисправность остается, верните измерительное устройство одобренной
организации по техническому обслуживанию / ремонту.
‘FLOW
FAULT’ (ОТКАЗ ПОТОКА) (Нагнетаемые насосом измерительные
устройства)
Если вращающийся символ насоса
меняется на
,
включаются звуковой сигнал тревоги и красный СИД, что указывает на
неисправность в отборе проб или отказ потока. Проверьте пробоотборную
линию, пробоотборный фильтр или пробоотборник на отсутствие закупорки,
если применимо. Устраните закупорку, а затем снова запустите насос путем
нажатия и удержания в нажатом положении зеленой кнопки (справа) . A-39
Russian
2) Если мигающий символ гаечного ключа появляется попеременно с нулевым
показанием, подавайте в течение двух минут эталонный газ с тем, чтобы экран
мог вернуться к нулю, а затем выключите и снова включите измерительное
устройство. Если неисправность остается, верните измерительное устройство
одобренной организации по техническому обслуживанию / ремонту.
GAS MEASUREMENT INSTRUMENTS LTD.
РАБОТА
ЗЕЛЕНАЯ КНОПКА
(СПРАВА)
Включение
Нажмите и держите в
нажатом положении
зеленую кнопку (справа)
для того, чтобы
включить измерительное ЖЕЛТАЯ КНОПКА
устройство и начать
(СЛЕВА)
режим прогрева.
Во время прогрева на экране
измерительного устройства
появляется информация о модели,
серийном номере, версии
программного обеспечения и
состоянии батареи:
Гистограмма состояния батареи
показывает полную зарядку
(показана), 75%, 50% и 25%
За этим изображением появляется ожидаемое время калибровки.
Если оно истекло, нажмите и держите в нажатом положении зеленую
кнопку (справа)
для того, чтобы подтвердить.
С помощью этого действия отменяется звуковой / визуальный сигнал
тревоги, и продолжается последовательность индикации проверки
датчиков.
Если датчики работают нормально и
правильно установлены на нуль, на
экране появляется надпись
«Датчики проверены».
За этим следует нормально
действующий экран, как показано:
Примечание: Если датчик не
проходит проверку на установку
нуля, включается звуковой /
визуальный сигнал тревоги, и на
экране появляется символ гаечного
ключа над типом газа неисправного
датчика. Чтобы подтвердить этот
сигнал, нажмите на зеленую кнопку
(справа)
A-40
.
V!SA – Инструкции по эксплуатации
Включение / выключение подсветки экрана
Один раз нажмите на зеленую кнопку (справа)
, чтобы включить
подсветку экрана. Она остается включенной в течение 20 секунд, а
затем автоматически выключается.
Сброс / подтверждение сигналов тревоги
В свободном от газа безопасном месте, или когда показатель газа
вернется в уставки ограничения, нажмите и держите в нажатом
положении зеленую кнопку (справа)
выключить устройство звуковой
огнетушения.
, чтобы заставить замолчать /
сигнализации и СИД газа
Просмотр макс. / мин. зарегистрированных величин
после включения
Пока изображен нормально работающий экран, один раз нажмите на
зеленую кнопку (справа)
, чтобы включить подсветку экрана. При
включенной подсветке экрана снова нажмите на зеленую кнопку
(справа)
, чтобы посмотреть макс. величины. Еще раз нажмите на
зеленую кнопку (справа), чтобы посмотреть мин. величины.
Чтобы изъять показания из памяти, нажмите и держите в нажатом
положении в течение двух (2) секунд зеленую кнопку (справа)
,
если на измерительном устройстве нет никаких сигналов тревоги.
Это вернет измерительное устройство к нормально работающему
экрану.
Дистанционный отбор проб (нагнетаемые насосом
измерительные устройства)
Нажмите и держите в нажатом положении зеленую кнопку (справа)
положении зеленую кнопку (справа)
, и насос будет работать с
нормальной скоростью (для дистанционного отбора образцов).
Во время работы насоса на экране вращается символ насоса
.
Выключение
Нажмите и держите в нажатом положении в течение 3 секунд
желтую кнопку (слева)
и зеленую кнопку (справа)
выключить измерительное устройство.
, чтобы
A-41
Russian
, чтобы запустить насос на малой скорости (принудительное
рассасывание активных газов). Снова нажмите и держите в нажатом
GAS MEASUREMENT INSTRUMENTS LTD.
A-42
INDEX
INDEX
Symbols
B
(O2) Alarm Limits 3-2
BACKLIGHT, DISPLAY
2-10
A
ACKNOWLEDGE 2-13
ACKNOWLEDGE GAS
ALARMS 3-5
BAT 4-8
Batteries, Alkaline 4-17
BATTERY PACKS 4-8
ADDITIONAL
INFORMATION 7-1
Battery, Low 3-8
Alarm, Toxic 3-2
Battery Status 2-3
ALARMS 3-1
C
ALARMS, FAULT 3-8
ALARMS, GAS 3-1
ALARMS RESET 2-13
Alkaline Batteries 4-17
Battery Pack 4-12
CALIBRATION 5-1
AUTOMATIC
CALIBRATION SYSTEM
5-1
AREAS OF USE ii
Calibration Due Date 2-4
Assisted Diffusion Option
2-17
Calibration Expired 3-15
ATEX 1-7
Calibration Gas 2-6
AUTOMATIC
CALIBRATION SYSTEM
5-1
Calibration Required 3-15
Calibration, Field 5-1
CALIBRATION VALIDITY
5-2
CERTIFICATION 1-7
i
V!SA - USER HANDBOOK
Charging (Rechargeable)
Battery Pack 4-12
Chlorine 1-5
Display, Operating 2-9
DISPOSAL ADVICE i
E
CLEANING 4-1
CONFIDENCE BEEP
2-15
EN50054 1-6
English A-1
Confidence Signal 2-15
Environment 1-6
Confirmation, Sensor 2-7
Español (Spanish) A-1
CONFORMITY iii
Expired, Calibration 3-15
CONSTRUCTION 1-6
F
COPYRIGHT i
FAULT ALARMS 3-8
D
Fault, Sample 3-14
Dansk (Danish) A-1
Fault, Sensor 3-12
Data Logged Readings
1-5
Fault, Zero 3-8, 3-10
DATA LOGGING 1-5
Field Calibration 5-1
Date 2-4
Filter, Grille 4-2
DECLARATION OF
CONFORMITY iii
Filter, Inlet 4-4
DESCRIPTION,
GENERAL 1-1
Deutsch (German) A-1
FEATURES 1-3
FILTER REPLACEMENT
4-1
FILTER(S) 1-5
Diffusion Option 2-17
Flammable LEL Alarm
Limit 3-1
Dimensions 1-6
Flow, Low 3-14
DISPLAY BACKLIGHT
2-10
Flow Rate Information
1-6
ii
INDEX
Français (French) A-1
G
GAS ALARMS 3-1
Gas, Calibration 2-6
INSTRUCTIONS,
OPERATING A-1
Instrument Identification
2-3
GENERAL
DESCRIPTION 1-1
INSTRUMENT
MANAGEMENT SYSTEM
5-1
Greek A-1
INSTRUMENT OFF 2-15
Grille Filter 4-2
INSTRUMENT ON 2-2
H
INTRODUCTION 1-1
HANDLING ii
Humidity 1-6
HYDROPHOBIC TYPE
FILTER(S) 1-5
I
Identification, Instrument
2-3
IP54 1-6
IP65 1-6
L
LABEL, IDENTIFICATION
1-6
LEL Alarm Limit 3-1
LIABILITY i
IDENTIFICATION LABEL
1-6
LOGGING, DATA 1-5
Identification of Symbols
1-7
Low Flow 3-14
IMS 5-1
In-line Hydrophobic Filter
(Accessory) 4-6
INFORMATION,
ADDITIONAL 7-1
Inlet Filter 4-4
Low Battery 3-8
LTEL 3-2
M
MAINTENANCE,
OPERATOR 4-1
MANUAL CALIBRATION
SYSTEM 5-1
iii
V!SA - USER HANDBOOK
MAXIMUM 2-10
P
MINIMUM 2-10
Pack, Battery 4-12
MODIFICATION
NOTICES i
PACKS, BATTERY 4-8
N
Performance 1-8
Nederlands (Dutch) A-1
PHYSICAL
PROPERTIES 1-6
Normal Operating Display
2-9
PROCEDURE,
OPERATING 2-1
O
PROPERTIES,
PHYSICAL 1-6
OFF, INSTRUMENT 2-15
ON, INSTRUMENT 2-2
Operating Display 2-9
OPERATING
INSTRUCTIONS A-1
OPERATING
PROCEDURE 2-1
pump 2-16
Pump Option 2-16
R
Rate, Flow 1-6
Rechargeable 4-12
OPERATION 2-1
RECORDED VALUES
2-10
OPERATOR
MAINTENANCE 4-1
REMOTE SAMPLING
2-16
Option, Diffusion 2-17
Removing and Replacing
a Battery Pack 4-10
Option, Pump 2-16
OVER-RANGE ALARM
3-6
Over-Range Flammable
Gas Alarm Function 3-1
REPLACEMENT, FILTER
4-1
Replacing a Battery Pack
4-10
Replacing Alkaline
Batteries 4-17
iv
INDEX
Required, Calibration
3-15
RESET, ALARMS 2-13
Response Time (T90) 1-6
S
SAFETY ii
Sample Fault (Pumped
Instruments Only) 3-14
Sample Inlet Filter 4-4
SAMPLING, REMOTE
2-16
Select Calibration Gas
2-6
Sensor Confirmation 2-7
Sensor Fault 3-12
Sensor Grille Filter 4-2
Signal, Confidence 2-15
T
Temperature Limits 1-6
Time 2-4
Time, Response 1-6
Time, Stabilization 1-6
Toxic Alarm Limits 3-2
TRAINING 7-1
TRANSIT ii
TWA 3-2
Typical Flow Rate
Information 1-6
V
VALIDITY, CALIBRATION
5-2
VALUES, RECORDED
2-10
SOFTWARE i
W
Stabilization Time 1-6
warm-up 2-3
Status, Battery 2-3
Warm-up / Stabilization
Time 1-6
STEL 3-2
STORAGE ii
Svensk (Swedish) A-1
Symbols 1-7
Weight 1-6
WORLD WIDE WEB 7-1
Z
Zero Fault 3-8, 3-10
v
V!SA - USER HANDBOOK
vi
GMI Head Office:
Inchinnan Business Park,
Renfrew,
PA4 9RG,
Scotland, U.K.
Telephone +44 (0)141 812 3211
Fax +44 (0)141 812 7820
e-mail: [email protected]
http://www.gmiuk.com
USA Head Office (Detcon):
4055 Technology Forest Blvd.,
Suite 100, The Woodlands,
TX 77381,
USA
Telephone 713 559 9290
Toll Free 888 367 4286
Fax 281 292 2860
e-mail: [email protected]
GMI Service & Calibration Division:
25 Cochran Close, Crownhill,
Milton Keynes,
MK8 OAJ,
England, U.K.
Telephone +44 (0)1908 568867
Fax +44 (0)1908 261056
e-mail: [email protected]