1
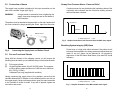
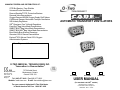
MANUFACTURERS AND DISTRIBUTORS OF:
CPR Bio-Barrier® Face Shields
Universal Pocket Ventilators
Rescue Breather® CPR Protective Barriers
Demand Valve Resuscitators
Oxygen Demand & BVM Oxygen Supply Refill Valves
CAREvent® Range of Automatic Transport Ventilators
SQ Unibody Regulators
SQB “Aluminum Free” Unibody Regulators
EasyGrip® Bag-Valve-Mask Resuscitators
SMART BAG® Bag-Valve-Mask Resuscitators
SMART BAG MO® Bag-Valve-Mask Resuscitators
Burn Relief® Burn Kits and Dressings
Genesis® II IDLH Rescue Resuscitators
Equinox® 50% Nitrous Oxide / 50% Oxygen
Administration Systems
“Innovation in Resuscitation”
AUTOMATIC TRANSPORT VENTILATORS
CAREvent® ATV - 01CV5000
Your Representative is:
CAREvent® ATV+ - 01CV6000
O-TWO MEDICAL TECHNOLOGIES INC.
“Innovation in Resuscitation”
EU Representative:
Marcel Houben
Rue Vinâve, 32
4030 LIEGE
Belgique
7575 Kimbel Street
Mississauga, Ontario
Canada L5S 1C8
Tel. (905) 677-9410 Fax (905) 677-2035
Website: www.otwo.com E-mail: [email protected]
For your nearest Authorized O-Two Distributor
In North America Toll Free 1-800-387-3405
CAREvent® MRI - 01CV7000
01CV5000
01CV6000
01CV7000
USER MANUAL
(For standard and G2K® models)
Manufactured in Canada by
O-Two Medical Technologies Inc.
17MP9654 - Rev “L” 07/05
7. CAREvent® Accessories
TABLE OF CONTENTS
01CV8015
CAREvent® Deluxe Single Use Transport Ventilation
Circuit with PEEP Port
17MP7010
Single Use PEEP Valve
17MP7327-Cs
Air Intake Filter for CAREvent® ATV, ATV+and MRI
01CV7025
CAREvent® MRI Wall mounting Base plate
CHAPTER
1.
2.
3.
4.
5.
27
TITLE
INTRODUCTION
1.1
Warranty
1.2
Warnings
1.3
Terms and Definitions
1.4
CAREvent® MRI
1.5
General Information
1.6
General Description
1.7
Principles of Operation
1.8
Modes of Operation
1.9
Alarms and Gauges
1.10
Accessories
1.11
Control Adjustment
1.12
Technical Data
PAGE
1
1
3
4
5
5
6
7
9
11
12
14
PREPARATION FOR USE
2.1
Component List
2.2
Connection of Hoses
2.3
Pre-use Functional Check
16
17
17
OPERATING INSTRUCTIONS
3.1
Setting of the Ventilation Parameters
3.2
Frequency/Minute Volume Chart
3.3
Operation in Extreme Conditions
21
21
22
AFTER
4.1
4.1.1
4.2
22
23
23
USE CLEANING AND TESTING
Dismantling and Cleaning
Changing the Air Intake Filter
After Use and Monthly Checking
MAINTENANCE SCHEDULE
5.1
Annual Preventative Maintenance
Inspection
24
6.
TROUBLE SHOOTING CHART
25
7.
CAREvent® ACCESSORIES
27
1. INTRODUCTION
1.1 Warranty
Low Input Pressure
Alarm sounds
intermittently
or continuously.
Gas supply low.
Cylinder valve not
fully opened.
Gas supply hose
kinked or cut.
Gas supply
regulator faulty
Change Cylinder
Open Valve fully.
Automatic circuit shut-off
not activating on demand
breathing.
Poor patient circuit
integrity/loose
connections or
faulty patient
valve.
Poor facemask
seal.
Check all circuit
connections and
hose for tears/
holes.
Breathing System Integrity
Alarm Sounds
Patient circuit has
become disconnected
Tidal volume being
delivered is too
low .
Re-connect
circuit.
Adjust ventialtor
settings
Demand flowrate low
or not functioning
Supply pressure
too low (Low Input
Pressure Alarm will
sound).
Faulty gas
supply regulator.
Gas supply
cylinder low or
empty.
Replace cylinder.
Regulator output
insufficient.
Replace regulator
Cylinder valve not
fully open.
Open valve fully.
Brand of circuit used
may be entraining
room air through
expiratory port
Use only O-Two
approved circuits
Incorrectly selected
airway pressure.
Airway obstructed.
Select a higher
pressure.
Correct the
obstruction.
Selected Minute
Volume too high /
Frequency of
ventilation too slow.
Change the settings
selected.
®
The CAREvent ATV, ATV+ and MRI are manufactured from the finest
quality materials. Each individual part is subject to strict quality control
tests to ensure exceptionally high standards. The manufacturer warrants
to the purchaser of the Automatic Transport Ventilator that its component
parts are free from defects in material and workmanship for a period of
two years from the date of purchase. The manufacturer will replace and/
or repair all parts of the Automatic Transport Ventilator at its option for two
years from the date of purchase at no cost to the purchaser, upon the
notification of the defects, in writing by the purchaser and confirmation of
said defect by the manufacturer. All shipping costs shall be borne by the
purchaser. The manufacturer shall be liable under this warranty only if
the Automatic Transport Ventilator and its parts have been used and
serviced in the normal manner described in the instruction manual. There
are no other expressed or implied warranties. This warranty gives no
specific legal rights.
NOTE:THIS DEVICE MUST BE SERVICED BY AN O-TWO SYSTEMS
AUTHORIZED SERVICE CENTER
1.2 Warnings
The CAREvent® ATV, ATV+ and MRI are intended for use by suitably trained
and qualified personnel.
Caution: Federal Law restricts this to sale by or on the order of a physician.
The following precautions should always be observed:
1.
READ THIS MANUAL PRIOR TO ATTEMPTING TO USE THE
VENTILATOR.
2.
WHEN THE UNIT IS IN USE, DO NOT SMOKE OR USE NEAR OPEN
FLAME EITHER DURING USE OR WHEN CHANGING THE
CYLINDER.
3.
WHEN NOT IN USE, ALWAYS TURN OFF THE GAS SUPPLY.
4.
NEVER ALLOW OIL OR GREASE TO COME INTO CONTACT WITH
ANY PART OF THE CYLINDER, REGULATOR OR VENTILATOR.
5.
THIS DEVICE IS NOT DESIGNED FOR USE WITH HEATED
HUMIDIFIERS
1
Airway Pressure Alarm
sounds.
26
Replace supply
hose.
Replace pressure
regulator.
Re-position
facemask.
6.
6.
DO NOT DISASSEMBLE ANY PART OF THE VENTILATOR EXCEPT
WHERE DESCRIBED IN THIS MANUAL AS ANY UNAUTHORIZED
DISASSEMBLY WILL INVALIDATE THE WARRANTY.
7.
AFTER USE, ALWAYS ENSURE THAT ALL COMPONENTS ARE
CLEANED IN ACCORDANCE WITH THE INSTRUCTIONS PROVIDED
IN THIS MANUAL. (SEE SECTION 4)
8.
ALWAYS USE THE CHECK LIST TO ENSURE THAT ALL
COMPONENTS ARE REASSEMBLED CORRECTLY AND READY
FOR USE.
9.
IT IS RECOMMENDED THAT AN ALTERNATIVE MEANS OF
VENTILATING THE PATIENT BE AVAILABLE IN CASE OF GAS
SUPPLY FAILURE.
Replace pressure
regulator.
10.
DURING USE, THE PATIENT SHOULD NOT BE LEFT UNATTENDED.
Replace supply hose.
11.
THE USE OF THIS DEVICE IN AREAS WHERE THE AMBIENT AIR
MAY BE HAZARDOUS OR EXPLOSIVE SHOULD BE AVOIDED AS
ENTRAINMENT OF AMBIENT AIR DURING THE USE OF THE AIR
MIX MODE WILL PERMIT THE PATIENT TO INHALE ATMOSPHERIC
GAS.
TROUBLE SHOOTING CHART
NOTE:
If any of the remedies do not resolve the problem
you are experiencing please contact your nearest
Approved Service Centre.
SYMPTOM
ATV does not function
in any mode
PROBABLE CAUSE
Replace cylinder.
Open cylinder valve
Supply hose not connected
Connect supply hose.
to regulator outlet.
Gas pressure regulator
faulty.
Gas supply hose kinked
or cut.
ATV does not function
in automatic mode
·
Insufficient
ventilations
REMEDY
Gas supply exhausted
Gas supply not turned on
fully.
Manual/AUTO switch in the
Manual position.
Switch to AUTO
Internally clogged orifice in
the Frequency or Minute
Volume controls.
Switch selector
knobs to a different
position.
12.
ONLY THE CAREvent® MRI UNIT MAY BE USED IN A MAGNETIC
RESONANCE IMAGING DEPARTMENT.
Other control knobs may
be incorrectly positioned.
Check all selector
knob positions.
13.
Incorrect control setting
selection.
Check selector
positions.
ONLY PATIENT CIRCUITS SUPPLIED BY O-TWO SYSTEMS
SHOULD BE USED, AS THE USE OF OTHER CIRCUITS MAY
ADVERSELY AFFECT THE OUTPUT PERFORMANCE OF THE ATV.
14.
THE USE OF GAS PRESSURE REGULATORS THAT DO NOT
MAINTAIN A MINIMUM OUTPUT PRESSURE AND FLOWRATE IN
LINE WITH THE REQUIREMENTS OF THE SPECIFICATION MAY
CAUSE THE DEVICE TO FAIL RESULTING IN THE PATIENT NOT
BEING VENTILATED.
15.
THE USE OF THIS DEVICE IN CARRING CASE OF ANY TYPE MAY,
WHEN USED IN THE 60% AIR MIX MODE, RESULT IN AN INCREASE
IN OXYGEN CONCENTRATION. IF THE AIR MIX MODE IS TO BE
USED IT IS RECOMMENDED THAT THE VENTILATOR BE PLACED
IN ITS NORMAL OPERATING ORIENTATION AND THAT THE AIR
INTAKE ON THE REAR OF THE VENTILATOR IS NOT
OBSTRUCTED.
2
Other control knobs may
be incorrectly positioned.
Check selector
positions.
Internal blockage in Minute
Volume Control.
Switch to another
Minute Volume
setting.
Pressure relief setting
too low.
Check selector
position.
·
25
1.3
Terms and Definitions
Airway Resistance:
5.
Pressure drop across the airway per unit flow.
ATV:
Automatic Transport Ventilator
CMV:
Controlled Mandatory Ventilation.
CPAP:
A positive pressure applied to the lungs during
all ventilation phases (Continuous Positive
Airway Pressure).
Demand Valve:
A valve that delivers gas to the patient at a
flowrate equivalent to that demanded by the
patient’s inspiratory effort.
Expiratory Phase:
The time period from the end of the inspiratory
flow to the end of the expiratory flow.
Expiratory Time (Te):
Duration of the expiratory phase.
Frequency (f):
The number of breaths in one minute (also
expressed as BPM).
G2K® :
Guidelines 2000 compliance. Complies with the
requirements of the ERC and AHA for 15:2
compression:ventilation ratio.
Inspiratory Flow:
The flow delivered to the patient by the ventilator
during the inspiratory phase.
Inspiratory Phase:
The interval from the start of the inspiratory flow
to the start of the expiratory phase.
Inspiratory Time (Ti):
Duration of the inspiratory phase.
Lung Compliance:
Volume added per unit pressure increase when
gas is added to a human or artificial lung.
3
MAINTENANCE SCHEDULE
5.1 Annual Preventative Maintenance Inspection
It is recommended that the ventilator is returned to a service centre
(authorized by the manufacturer to undertake service and repair of this
device) for an Annual Preventative Maintenance inspection (more
frequently in high use areas). The inspection will incorporate a full
diagnostic test of all parameters. When complete, a certificate of
compliance will be issued to cover the device for the next service period.
This maintenance inspection, providing it is carried out by an authorized
service centre, will not affect the product warranty.
24
4.1.1
Changing the Air Intake Filter
To change the air intake filter, undo the locking screw on the filter cover,
which is located on the rear panel of the unit. Remove the old filter and
discard following local protocols. Replace the filter with a new one ensuring
that the filter is properly located and then reattach the cover, screwing the
cover on finger tight.
NOTE:
It is recommended that the air intake filter is
changed after each use of the ventilator using the
60% air/ oxygen mix mode to avoid using a partially
occluded or contaminated filter for the next patient.
Fig. 7. Rear Panel Layout
4.2
Maximum Patient
inflation Pressure:
Minute Volume (Vm):
The maximum airway pressure delivered by the
ventilator to the patient.
The total volume of gas delivered to the patient
in one minute.
Oxygen Concentration:The oxygen content of the inspired gases
expressed as a percentage.
Proximal Airway
Pressure:
The airway pressure measured at the patient
valve.
Patient Valve:
The valve which directs the flow of gas into the
lungs and out of the expiratory port to atmosphere
during expiration.
PEEP Valve:
A device which, when attached to the expiratory
port of the patient valve, holds a positive pressure
in the patients airway at the end of the expiratory
phase. (Positive End Expiratory Pressure)
Pressure Relief
Valve:
Valve which limits the maximum lung inflation
pressure by venting excess gas to atmosphere.
Tidal Volume (Vt):
Volume of gas delivered to the patient during
each inspiratory phase.
After Use and Monthly checking
1.4 CAREvent® MRI
After Use
After each use the ventilator should be cycled to confirm function. The
selectors should be rotated through all positions and all alarm functions
should be checked to ensure function (see section 2.3).
Monthly
Every month (or more frequently if local protocols dictate) the ventilator
should be put through a checking procedure to ensure full function of all
features. The checking protocol detailed in section 2.3 “Pre-use Functional
Check” should be followed for this purpose.
The CAREvent® MRI has been designed to meet the requirements of ventilation within the MRI environment. The CAREvent® MRI has been tested
in a 1.5 Tesla MRI environment (unshielded magnet - spatial gradient of
<23Mt/m/sec and a slew rate of 120 T/m/sec at an RF transmitter power
of 2000 watts) and a 3.0 Tesla MRI environment (unshielded magnet spatial gradient of <40Mt/m/sec and a slew rate of 150 T/m/sec at an RF
transmitter power of 8000 watts) during a head phanton spectroscopy
test scan with the device located no less than 12 inches from the magnet aperture which would be its normal use position during clinical use.
In addition, the CAREvent® MRI model can be attached to the CAREvent®
MRI mounting plate or attachment to a cart or wall/medirail mounting
bracket.
23
4
1.5 General Information
The CAREvent® ATV, ATV+ and MRI are designed for use in the prehospital,
intrahospital, interhospital and air ambulance settings.
Designed to be used by suitably trained personnel, the various modes of
operation of the device support the resuscitation and transportation of a
wide range of patients (from infants to adults) who require ventilatory
support. The features and controls offered by the device comply with the
various International Standards for Transport Ventilators.
The G2K® models have been manufactured to comply with the latest
Guidelines 2000 for CPR and ECC from the European Resuscitation
Council and the American Heart Association.
1.6 General Description
The CAREvent® ATV, ATV+ and MRI consist of a ruggedly constructed,
portable control module, input hose and optional single use (or reusable
where available) patient circuit. The ergonomically designed control
groupings facilitate the selection and setting of the breathing parameters.
The colour groupings provided on the controls adds to this ease of use
concept.
The unique pneumatic alarm for low input pressure improves the level of
safety for the patient by warning the operator of any problems of insuffIcient
or failed gas supply.
The air mix capability of the ventilator improves the operating time on
bottled oxygen for long duration transports. The extremely low drive gas
consumption ensures full utilization of the cylinder contents.
This chart gives an easy reference to the delivered tidal volumes provided
by the different combinations of frequency of respiration and minute
volume.
3.3
Operation in Extreme Conditions
Operation of the ventilator in environmental conditions outside of those
detailed in this manual may result in a reduction in the ventilator’s
performance. In extreme cold weather a slowing down of the frequency
of ventilation may be seen with a corresponding increase in the delivered
tidal volume. In high temperature environments the effect is not noticeable
in terms of delivered ventilations but may cause excessive wear in the
ventilator components over time.
Operation of the ventilator under supply pressures outside those detailed
in this manual may result in a reduction in the ventilator’s performance.
Input pressures below the minimum stated will cause the low input
pressure alarm to function and will, as the pressure falls to the point where
the alarm is constant, cause the ventilator to cease cycling.
Input pressures higher than that recommended in this manual may result
in a risk of internal component failure if the pressure exceeds three times
the maximum working pressure stated.
4.
AFTER USE CLEANING AND TESTING
4.1 Dismantling and Cleaning
After use turn off the ventilator and disconnect the supply hose from the
gas supply. Disconnect the patient circuit from the gas outlet on the side
of the ventilator and discard the single use circuit .
The ventilator can be cleaned using a mild soap solution and warm water
and a soft nail brush to remove ingrained contamination.
Controls
The controls provided are as follows:
The exterior of the ventilator may be disinfected using 99% Isopropyl
Alcohol.
•
Ventilation Frequency
•
Pressure Relief (Proximal Airway Pressure)
•
Minute Volume
WARNINGS: Do not immerse the ventilator in any solutions. Do not use
chlorine based cleaning agents. If the ventilator is
accidentally submerged in any liquid it should be shaken to
remove as much of the liquid as possible and then the
ventilator should be returned to the manufacturer for factory
service.
22
5
[8]
BSI Alarm
With the Patient Circuit attached to the ventilator attach a test lung to
the 15/22mm adapter. Set the frequency control to 8 BPM and the Minute
Volume Selector to the 14 L/min position. Turn the ventilator to AUTO and
allow it to cycle for 5 breaths. Remove the test lung and time the delay
until the BSI alarm sounds. Depress the silence button and time the delay
until the alarm re-starts.
[9]
•
Delivered Oxygen Concentration (%)
•
Manual Ventilation
•
Manual/AUTO Selector
•
CPAP/PEEP Control (ATV+ and MRI only)
•
BSI Alarm Silence Button
CPAP/PEEP Control (ATV+ and MRI only)
Visual Indicators
With the Patient Circuit attached to the ventilator attach a test lung to
the 15/22mm adapter. Set the frequency control to 8 BPM and the Minute
Volume Selector to the 14 L/min position. Turn the ventilator to AUTO and
allow it to cycle for 5 breaths. Slowly open the CPAP/PEEP control and
monitor the gauge. As the control is rotated the baseline pressure should
increase.
3.
OPERATING INSTRUCTIONS
3.2 Frequency/Minute Volume Chart (Fig.7)
MINUTE VOLUME (LITRES)
FREQUENCY OF VENTILATION (BPM)
40
36
32
28
24 20 18 16 14 12 10 8
.050
.063
.075
.088
.100
.056
.069
.083
.097
.110
.063
.078
.094
.109
.130
.13
.15
.18
.20
.25
.30
.35
.14
.17
.19
.22
.28
.33
.39
.071
.089
.107
.125
.14
.18
.21
.25
.29
.16
.19
.22
.25
.31 .36
.38 .43
.44 .50
.08
.10
.13
.15
.17
.21
.25
.29
.33
.10
.13
.15
.18
.20
.25
.30
.35
.40
.11 .13 .14 .17 .20 .25
.14 .16
.19
.22
.25
.31
.38
.44
.50
.42 .50 .56 .63
.50 .60 .67 .75
.58 .70 .78 .88
.17
.19
.22
.28
.33
.39
.44
.18
.21
.25
.29
.36
.43
.50
.57
.71
.86
1.0
•
Gas Supply Status Indicator
•
BSI Alarm Indicator
Connections are provided on the side of the ventilator for the Oxygen
Input and the Gas Output.
The setting of the ventilation parameters is dependent upon the patient’s
size, condition and the clinical parameters required to be provided to the
patient by the operator. The controls should be set according to the
established protocols to which the operators perform their tasks.
2.5
3.0
3.5
4.0
5.0
6.0
7.0
8.0
10
12
14
Proximal Airway Pressure Gauge (cmH2O)
Connections
3.1 Setting of the Ventilation Parameters
2.0
•
.21
.25
.29
.33
.42
.50
.58
.67
.83
1.0
1.2
.25
.30
.35
.40
.50
.60
.70
.80
1.0
1.2
1.4
.31
.38
.44
.50
.63
.75
.88
1.0
1.3
1.5
1.8
1.7 Principles of Operation
The CAREvent® ATV, ATV+ and MRI are time-cycled, Intermittent Positive
Pressure devices providing a range of frequencies of ventilation and
Minute Volume settings to provide a comprehensive range of delivered
tidal volumes and ventilation rates. The design of the micro-pneumatic
circuitry in the Automatic Transport Ventilator maintains a consistent
I:E ratio of 1:2 across the Minute Volume/frequency combinations to
optimise the exchange of gases in the alveoli. This helps avoid the risk
of inconsistent ventilations and protracted expiratory times that may
cause additional physiological acidosis or short inspiratory times that
may not allow for complete alveolar filling or may generate high airway
pressures.
NOTE:
The design of these ventilators does not incorporate
a negative pressure phase during either automatic
or manual ventilation.
Recommended bodyweight range: 5 Kg to 180 Kg (@ 10ml/Kg)
21
6
1.8
Modes of Operation
Automatic Ventilation Mode
In the automatic mode (selected by turning the Manual/AUTO Selector on
the ventilator control panel to AUTO) the ventilator will supply the patient
with positive pressure ventilations of a frequency and minute volume as
selected using the Ventilation Frequency and Minute Volume Selectors
on the front panel. The I:E ratio is maintained at a constant 1:2 to ensure
that good gas exchange takes place in the lung.
With the ventilator connected to the 50 psi medical oxygen source, set
the frequency control to 8 BPM and the Minute Volume Selector set at 14
L/min, attach the oxygen monitor to the outlet of the patient connector.
Turn the Air Mix control to the 100% setting and verify that the oxygen
concentration, using the oxygen monitor, is 100%.
Now turn the Air Mix control to the 60% setting and again verify (using the
oxygen monitor) that the oxygen concentration is in the range of 54 to
66%.
[6]
Manual Ventilation Mode
To allow the operator to control the patient’s breathing manually, a Manual
Ventilation Override button is located on the front panel.
In the AUTO mode, when the Manual Override Button is depressed, the
ventilator will cease automatic cycling and will deliver a constant flowrate
equivalent to that selected on the flowrate selector for as long as the
button is depressed. Releasing the button will allow the ventilator to recycle into an automatic ventilation mode following a delay period of
approximately 1.5 times the expiratory time for the frequency setting
selected (10 seconds in the G2K® model). This delay allows the operator
sufficient time to provide chest compressions or initiate a further manual
breath should they so wish. If the Manual Override Button is depressed
for too long the patient is protected from high airway pressure by the
Pressure Relief system.
In the Manual mode, depressing the Manual override button will allow the
operator to manually ventilate the patient at a flowrate equivalent to the
Minute Volume selected.
Demand Breathing
During automatic ventilation, the Demand Breathing mode will allow the
patient to commence spontaneous breathing through the ventilator while
causing the automatic cycling to cease. As with the Manual Override,
there is an increase in the expiratory time before the next automatic breath
is delivered to allow the patient to continue demand breathing. This system
ensures that the patient receives a sufficient minute volume should their
inspiratory efforts be erratic. Demand Breathing is available to the patient
in both the inspiratory and expiratory phases of the ventilation cycle.
7
Manual Ventilation
With the ventilator connected to the 50 psi source turn the Manual/AUTO
Selector to the AUTO position. Set the frequency control to 12 BPM and
the Minute Volume Selector to the 14 lpm position. Allow the ventilator to
cycle automatically for 5 breaths.
Depress the Manual Ventilation Button located on the front of the ventilator.
Hold the button in and gas will flow to the test lung for as long as the
button is depressed.
Release the button and the automatic cycling will restart with a delay of
approximately 7.5 seconds (10 seconds in the G2K® model).
NOTE: In the AUTOmatic mode the delay to re-start following
depression of the Manual Ventilation control is approximately 1.5
times the E-Time for the selected frequency (in the G2K® model
this delay is set to 10 seconds for all frequencies).
[7]
Demand Valve Function and Automatic Circuit Shut Off
With the ventilator connected to the 50 psi source, set the ventilator cycling
at 12 breaths per minute with a Minute Volume control setting of 14
L/min. Turn the Manual / AUTO Selector to AUTO and with the ventilator
cycling, apply a vacuum to the patient connector equivalent to a flowrate
of 30 lpm for a minimum of 1 second. The demand valve will provide a
flowrate equivalent to that demanded and the automatic cycling will cease.
Remove the vacuum from the patient connector and check for the
automatic cycling restart after a delay of 4 – 7 seconds.
NOTE:
The vacuum source can be as simple as a 500 ml
calibration syringe.
20
With the adjustable outlet pressure regulator set with an outlet pressure
of 50 psi, set the ventilator cycling at 12 breaths per minute with a Minute
Volume control setting of 14 L/min.
As the ventilator cycles, gradually reduce the outlet pressure of the
regulator until you hear the Low Input Pressure Alarm activate. This will
be a slow, mid pitched, pulsed tone. Continue to decrease the regulator
outlet pressure and the tone will gradually slow in frequency until it becomes
a continuous tone. This indicates that the drive gas is now exhausted to
the point where the ventilator will no longer function correctly.
[3]
Frequency Adjustment
With the ventilator connected to the 50 psi source, set the ventilator
cycling at 8 breaths per minute with a Minute Volume control setting of 14
L/min. Connect the Test Lung to the Patient Connector and turn the
ventilator Manual/Auto Selector to the Auto position.
After every 5 breaths rotate the frequency control counter clockwise to
the next setting and observe the increasing frequency of ventilation in the
Test Lung. Repeat for every setting. If required, a stopwatch may be used
to check the frequency in each setting.
[4]
Minute Volume Adjustment
With the ventilator connected to the 50 psi source, set the ventilator
cycling at 8 breaths per minute with a Minute Volume control setting of 2
L/min. Connect the Test Lung to the Patient Connector and turn the ventilator Manual/Auto Selector to the Auto position.
After every 5 breaths rotate the Minute Volume counter control clockwise
to the next setting and observe the increasing expansion of the Test Lung.
Repeat for every setting. The increasing expansion of the lung indicates
an increase in the delivered tidal volume, as the frequency remains constant so the delivered Minute Volume (tidal volume x frequency) will increase with each increase in flowrate.
[5]
Air Mix
NOTE: To fully test this function a calibrated 0 - 100% oxygen monitor
is required (not supplied).
19
In the Manual mode the patient can Demand Breathe at their own rate
and volume.
NOTE: It is important to constantly observe the patient’s respirations to
ensure that adequate perfusion is occurring.
NOTE Small children may not be able to demand at a sufficient flowrate
to disable the automatic cycling.
NOTE: If used in conjunction with external chest compressions the Auto
Circuit Shut Off function may be actuated should the depth of
compression create sufficient tidal volume on chest re-coil. Under
these circumstances a manual breath may be delivered (if deemed
necessary) between sets of compressions.
Adjustable Pressure Relief
This control allows the operator to vary the maximum delivered airway
pressure. This is achieved by diverting the excess delivered volume to
atmosphere should the set airway pressure be reached.
Air Mix Mode
To conserve oxygen during long transports or when a patient’s respiratory
condition demands an oxygen concentration of less than 100%, the air
mix mode can be selected. This reduces the oxygen concentration to
60%. In this mode the ventilator entrains ambient air into the system and
automatically reduces the oxygen flow to maintain a consistent tidal
volume. By using this mode the operating time on the cylinder supply is
significantly increased.
NOTE: Due to the design of the micro-pneumatic circuit, increasing
pulmonary resistance has little effect on the delivered tidal volume
or respiratory rate. Research has shown that decreasing
pulmonary compliance in the infant Minute Volume settings may
give a minimal increase in the delivered oxygen concentration
when used in the Air Mix mode.
Emergency Air Intake System for Gas Supply Failure
In accordance with the International Standards for this type of device, the
ventilator is equipped with a failsafe Emergency Air Intake circuit which
allows the spontaneously breathing patient to draw ambient air through
the circuit should the gas supply fail.
8
1.9 Alarms and Gauges
The alarm systems in the Automatic Transport Ventilator provide an audible
indication of any inconsistencies in the patients breathing and warn of a
loss of driving pressure from the gas supply. The alarms function as
follows:
Once no leaks are found, connect the Test Lung to the 15/22mm patient
connector on the Patient Circuit. Using the selectors on the front panel,
select a frequency of ventilation and a flowrate. Turn the Manual/AUTO
Control to the Auto position and the ventilator will commence cycling.
Testing of the Individual Features of the Ventilator.
The following features can be individually tested during the pre-use
Functional Check:
Low Input Pressure Alarm - Gas Supply
A low frequency oscillating alarm occurs when the gas supply
reaches the minimum safe operating pressure. (See also Gas
Supply Status indicator).
p
[1]
[2]
[3]
[4]
[5]
[6]
[7]
[8]
[9]
[1]
t
p= audible pulsed tone
t = time
Fig. 1 Graphic illustration of the audible alarm signal
WARNING:
When this alarm sounds, immediately change the gas
supply.
Airway Over Pressure Alarm, Pressure Gauge Function and
Pressure Relief Adjustment Function
Low Input Pressure Alarm
Frequency Adjustment
Flow Adjustment
Air Mix
Manual Ventilation
Demand Valve Function and Automatic Circuit Shut Off
CPAP/PEEP Control (ATV+ and MRI only)
BSI Alarm
Airway Over Pressure Alarm, Pressure Gauge Function and
Pressure Relief Adjustment Function
With the ventilator connected to the 50 psi source, set the ventilator
cycling at 12 breaths per minute with a Minute Volume control setting of
14 L/min. Set the adjustable Airway Pressure Control to 20 cm H2O.
Remove the Test Lung from the Patient Connector and occlude the Patient
Connector outlet. This will cause the Airway Over Pressure Alarm to
activate and a continuous tone will be heard during the inspiratory cycle
of the ventilator.
To confirm the pressure relief setting, observe the needle on the Airway
Pressure Gauge during the inspiratory cycle and ensure that the needle
reaches the 20 cm H2O mark. Now turn the Adjustable Airway Pressure
Selector to the 60 cm H2O position. Repeat the test and observe that the
needle reaches the 60 cm H2O mark.
[2] Low Input Pressure Alarm
NOTE:
9
To fully test this function it is necessary to have a supply regulator
with an adjustable output pressure. (Not supplied) Checking
of the alarm can be undertaken by simply slowly closing the
cylinder valve.
18
2.2 Connection of Hoses
Airway Over Pressure Alarm – Pressure Relief
The supply hose provided is attached to the input connection on the
side of the ventilator “finger tight” (fig 6).
WARNING:
Using a wrench or excessive force in tightening the
supply hose may damage the seal or the thread of
the connection.
Continuous tone of a low pitch during the inspiratory phase of the
ventilation that indicates that the maximum airway pressure
selected has been reached.
p
The patient circuit is attached to the gas outlet on the right hand side of
the control module by simply pushing the 22mm taper over the outlet.
inspiration
expiration
t
Patient Circuit
ÍÍ
p= audible pulsed tone
t = time
Fig. 2 Graphic illustration of the Pressure Relief audible alarm signal
Supply Hose
Fig 6.
Breathing System Integrity (BSI) Alarm
Pulsed tone of a high pitch which activates if the patient circuit
becomes disconnected or the airway pressure achieved does not
reach 10 cm H2O. Alarm can be silenced for 15 seconds by
depression of the BSI Alarm Mute Button (See also BSI Visual
Indicator).
Connecting the Supply hose and Patient Circuit.
2.3 Pre-use Functional Checks
Along with the contents of the shipping cartons you will require the
following items to enable you to undertake the pre-use functional check:
p
[1]
[2]
Full oxygen cylinder
Oxygen regulator with a 50 psi 9/16 DISS outlet. The regulator
must be able to output a minimum of 100L/min at no less than
40.6 PSIG ( 2.8 Bar).
Calibrated Test Lung (supplied with ventilator)
t
Having connected the supply hose to the regulator, ensure that the
ventilator Manual/AUTO Selector is in the Manual position and turn on
the oxygen supply. Using a mild soap solution, spray the input connection
to the ventilator to check for leaks. If any leak is present, tighten the
connection and re-test.
Fig. 3 Graphic illustration of the BSI audible alarm signal
17
10
p= audible pulsed tone
t = time
Gas Supply Status Indicator
NOTE:
When tested as indicated above, the spectroscopy
traces were not affected in any way by the CAREvent®
MRI ventilator, and the CAREvent® MRI ventilator functioned to specification.
Located on the front panel, this visual indicator will show green when gas
is supplied to the ventilator. Used in conjunction with the Low input pressure
alarm, this indicator provides an additional reference for the operator as
to the ventilators gas supply status.
DIMENSIONS :
9.27 X 7.6 X 4.4 INCHES
236 X 194 X 112 MM
WEIGHT:
9 LB Approx.
4 KG Approx.
PATIENT VALVE DEAD SPACE:
8 ML
BSI Alarm Visual Indicator
Located on the front panel above the airway pressure gauge, this visual
indicator will flash red in time with the BSI Audible Alarm when the patient
circuit is disconnected or insufficient airway pressure is being produced.
CYLINDER DURATION (Aluminum “D” size cylindercontaining 415 Litres of oxygen.):
Airway Pressure Gauge
ON 100% SETTING:
(a)
(b)
(a)
(b)
2 LITRE Mv 14 LITRE Mv 2 LITRE Mv’ 14 LITRE Mv -
207 minutes
30 minutes
345 minutes
50 minutes
Located on the front panel of the ventilator, this gauge provides the operator
with a visual indication of the airway pressure being reached during the
ventilation cycle.
ON 60% SETTING:
1.10 Accessories
2.
Supply Hose
2.1 Component List
The supply hose is a standard armoured oxygen hose with a 9/16 DISS
threaded connection for the ventilator.
Having unpacked the ventilator from its shipping carton, use the following
list to ensure that all components have been received:
PREPARATION FOR USE
Single Use and Reusable Patient Circuits
The Single Use Deluxe Transport Ventilation Circuits and Deluxe Reusable
Patient Circuits are comprised of a patient valve housing and 22mm tubing.
The expiratory port is configured to accept either 30 or 19 mm PEEP
valves. The 22mm corrugated tubing is easily attached to the patient
circuit output connector on the side of the ventilator. (fig 6.)
NOTE:
1.
2.
3.
4.
The choice of using either a Single Use or Reusable circuit is at the discretion of
the user. Only patient circuits supplied by O-Two Medical Technologies inc.
should be used.
The use of a Bacterial/Viral filter is recommended to reduce the potential for
cross infection and contamination of the reusable patient circuit. If used, the
Bacterial/Viral filter must be used on a single patient basis.
The use of a Bacterial/Viral Filter in conjunction with a reusable patient circuit
does not guarantee that the patient circuit will remain free of contamination.
The use of a bacterial/viral Filter on any of the CAREvent® circuits will
increase inspiratory resistance and if used on the distal side of the patient valve
will increase deadspace.
11
[1]
Operating Manual
[2]
Ventilator
[3]
Supply Hose.
[4]
[5]
Single Use or Reusable Patient Circuit with Patient Valve
Calibrated Test Lung
NOTE:
If any components are missing from the shipping carton,
immediately call the supplier quoting the packing slip
number, your original purchase order number and the
description of the item which is missing.
16
LOW INPUT
PRESSURE ALARM:
NOTE:
AUDIBLE PULSED ALARM TO
INDICATE INPUT
PRESSURE IS
DROPPING BELOW THE MINIMUM
REQUIREMENT. CANNOT BE
SWITCHED OFF
AIRWAY PRESSURE
ALARM:
AUDIBLE ALARM TO INDICATE THAT
THE
SELECTED PEAK AIRWAY
PRESSURE HAS BEEN REACHED.
BSI ALARM
AUDIBLE HIGH FREQUENCY
PULSED ALARM INDICATING THAT
THE PATIENT CIRCUIT
IS
DISCONNECTED OR INSUFFICIENT
VENTILATION PRESSURE (<10
cmH2O) HAS BEEN ATTAINED
INSPIRATORY
RESISTANCES:
<-6 cmH2O @ 60 LPM
EXPIRATORY
RESISTANCES:
<6 cmH2O @ 60 LPM
PRESSURE GAUGE
ACCURACY:
NOTE:
Careful consideration should be given to the use of a
reusable patient circuit on more than one patient.
Single use circuits are not designed for use on more
than one patient and must be discarded after each use.
The manufacturer recommends that circuits are used
on a per patient basis and reusable circuits should be
cleaned and single use circuits discarded, after each
use.
The patient valve assembly is flow direction sensitive.
Ensure that the patientcircuit is attached to the ventilator correctly.
1.11 Control Adjustment
The ventilator is equipped with a number of selectors depending on the
model. Each selector is actuated by the following method (Fig s 4 & 5).
NOTE:
All selector positions are as viewed from the front
of the ventilator.
[1]
Ventilation Frequency (BPM):
Located on the top right hand side of the control panel. Rotary
control with an anti-clockwise rotation from low to high.
[2]
Minute Volume (Litres):
Located on the bottom right hand side of the control panel.
Rotary control with a clockwise rotation from high to low.
[3]
Pressure Relief (Maximum Delivered Airway Pressure (cm H2O):
Located on the top of the control panel slightly left of center.
Rotary control with a clockwise rotation from low to high.
[4]
Delivered O2 Concentration(%):
Located on the bottom left hand side of the control panel. Rotary
control with a clockwise rotation from low to high.
[5]
Manual Ventilation:
Located on the lower center section of the control panel activated
by depression of the button.
[6]
Manual/Auto Selector:
Located on the front panel of the ventilator. Rotary control with a
clockwise rotation from Manual to Auto.
± 2% FULL SCALE
MRI TEST CONDITION PARAMETERS:
The CAREvent® MRI has been tested in a 1.5 Tesla MRI environment
(unshielded magnet - spatial gradient of <23Mt/m/sec and a slew rate of
120 T/m/sec at an RF transmitter power of 2000 watts) and a 3.0 Tesla
MRI environment (unshielded magnet - spatial gradient of <40Mt/m/sec
and a slew rate of 150 T/m/sec at an RF transmitter power of 8000 watts)
during a head phanton spectroscopy test scan with the device located
no less than 12 inches from the magnet aperture which would be its
normal use position during clinical use.
15
12
[7]
CPAP/PEEP Control
Located on the front panel of the ventilator. Rotary control with a
clockwise rotation from 0 - 20 cmH2O
[8]
BSI Alarm Mute Button
Located on the front panel of the ventilator above the pressure
gauge. Acitvated by depression of the button.
MANUAL/AUTOMATIC
SELECTOR
ADJUSTABLE
AIRWAY FREQUENCY
PRESSURE RELIEF PRESSURE
(BPM)
GAUGE
SELECTOR
1.12
TECHNICAL DATA
(All specifications are subject to a tolerance of +/- 10% except the I:E Ratio which
is subject to a tolerance of +/- 20% and Maximum Airway Pressure +0/-10%)
MINUTE VOLUME RANGE:
2 - 14 L/min
FREQUENCY RANGE:
8 - 40 BPM
I:E RATIO:
1:2
INPUT PRESSURE:
45 - 70 PSI
(3 - 5 Bar)
MINIMUM INPUT
FLOWRATE REQUIRED:
120 L/min
AUTOMATIC FLOWRATE:
6 - 42 L/min
MANUAL FLOWRATE
6 - 42 L/min
DEMAND BREATHING FLOWRATE:
AIR MIX
SELECTOR
Fig. 4
MANUAL
VENTILATION
BUTTON
GAS SUPPLY
STATUS
INDICATOR
MINUTE
VOLUME
SELECTOR
Front Panel Layout for ATV
BSI ALARM
VISUAL INDICATOR
AIRWAY
BSI ALARM
PRESSURE
SILENCE CONTROL
ADJUSTABLE
PRESSURE RELIEF
CPAP/PEEP
CONTROL
FREQUENCY
(BPM)
SELECTOR
MANUAL
/AUTOMATIC
SELECTOR
MINUTE
VOLUME
SELECTOR
AIR MIX
SELECTOR
Fig. 5
MANUAL
VENTILATION
BUTTON
GAS SUPPLY
STATUS
INDICATOR
0 -120 L/min (MINIMUM)
DEMAND BREATHING TRIGGERING
PRESSURE:
- 5 cm H20 @ 100 LPM
CPAP/PEEP (ATV+ and MRI only)
0 - 20 cmH20
OXYGEN CONCENTRATION:
60 OR 100 %
OPERATING TEMPERATURE:
-18oC to + 50oC
0oF to +122oF
STORAGE TEMPERATURE:
- 40oC to + 60oC
- 40oF to + 140oF
RELATIVE HUMIDITY
FOR STORAGE AND
OPERATING USE:
40% TO 95%
GAS SUPPLY STATUS
INDICATOR:
PROVIDES A VISUAL
INDICATION OF GAS
SUPPLY STATUS.
PRESSURE RELIEF RANGE
20 - 60 cm H20
19.6 TO 58.8 mBar
Front Panel Layout for ATV+ and MRI models
13
14