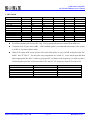
1
8-Bit Micro-controller
In-Circuit Emulator User’s Menu
SONiX 8-Bit MCU
In-Circuit Emulator
USER’S MANUAL
General Release Specification
SONiX 8-Bit Micro-Controller Development Tools
SONIX reserves the right to make change without further notice to any products herein to improve reliability, function or design. SONIX does not
assume any liability arising out of the application or use of any product or circuit described herein; neither does it convey any license under its patent
rights nor the rights of others. SONIX products are not designed, intended, or authorized for us as components in systems intended, for surgical
implant into the body, or other applications intended to support or sustain life, or for any other application in which the failure of the SONIX product
could create a situation where personal injury or death may occur. Should Buyer purchase or use SONIX products for any such unintended or
unauthorized application. Buyer shall indemnify and hold SONIX and its officers, employees, subsidiaries, affiliates and distributors harmless against
all claims, cost, damages, and expenses, and reasonable attorney fees arising out of, directly or indirectly, any claim of personal injury or death
associated with such unintended or unauthorized use even if such claim alleges that SONIX was negligent regarding the design or manufacture of
the part.
SONiX TECHNOLOGY CO., LTD
Revision 1.93
8-bit micro-controller
In-Circuit Emulator User’s Menu
USER MANUAL REVISION HISTORY
Version
Date
Description
VER 1.9
Sep. 2002
V1.9 first issue
VER 1.93
Feb. 2003
1. Re-organize installation procedure
2. Add appendix A
HARDWARE REVISION HISTORY
Part
Date
Description
Kernel chip S8KD-1
Sep. 2002
S8KD second issue.
S8KD-2
Nov. 2002
Revision for S8KD-1.
1.9
0222
V1.9 first issue.
2.0
0224
Modify the LED description on the board.
1.0
Jun. 2002
EV board
ICE board
Version
SONiX TECHNOLOGY CO., LTD
Page 2
Revision 1.93
8-bit micro-controller
In-Circuit Emulator User’s Menu
SONiX 8-Bit MCU ICE User Menu
USER MANUAL REVISION HISTORY ..................................................................................................... 2
HARDWARE REVISION HISTORY ........................................................................................................... 2
1
2
INTRODUCTION .......................................................................................................................... 4
SONIX IN-CIRCUIT EMULATOR ............................................................................................ 5
2.1 CONNECTING SONIX ICE................................................................................................................... 5
2.2 INSTALLING SONIX ICE ..................................................................................................................... 6
3
QUICK START........................................................................................................................... 14
3.1 SETUP SONIX EMULATOR............................................................................................................... 14
3.2 STARTING A NEW PROJECT............................................................................................................ 17
4
5
TROUBLE SHOOTING............................................................................................................. 28
APPENDIX A .............................................................................................................................. 29
5.1 EV BOARD........................................................................................................................................... 29
5.1 ICE BOARD.......................................................................................................................................... 35
5.3 WORKING UNDER DOS MODE: ....................................................................................................... 36
SONiX TECHNOLOGY CO., LTD
Page 3
Revision 1.93
8-bit micro-controller
In-Circuit Emulator User’s Menu
1 INTRODUCTION
SONiX ICE is an In-Circuit Emulator designs to support all series of SONiX 8-bit Microcontroller. It
provides a powerful and reliable emulating environment. To begin with, a complete developer tool includes
SONiX emulator with 8-bit micro-controller kernel chip, assembler, simulator and Window based integrated
development software. Users are allow to do program editting, source level debug and system simulation
with SONiX assembler software. SONiX emulator board supports 5V/3.3V DC power supply or an external
power supply from the target board.
SONiX TECHNOLOGY CO., LTD
Page 4
Revision 1.93
8-bit micro-controller
In-Circuit Emulator User’s Menu
2 SONIX IN-CIRCUIT EMULATOR
In this Chapter, you will learn how to connect and to install the SONiX ICE to your computer.
2.1 CONNECTING SONiX ICE
Accessories
Before you start, check the following items prior to the setup:
SONiX ICE, and it contains
EV board with SONiX S8KD-2 kernal chip (See Appendex A for detailed information)
-information regarding kernal chip version, please contact your local agent for availability
ICE board (See Appendex A for detailed information)
DC power adaptor (+7.5VDC)
Parallel cable –contact your local agent for availability
Transition socket module – contact your local agent for avaliability
Connection Procedure
Follow the steps in this section to connect your SONiX ICE:
The EV board should be in CORRECT setting. If you haven’t set your EV
board, please see Appendex A.
Both SONiX ICE and PC should not have the power be turned ON at this
time.
Step 1: Attach the DC adaptor to SONiX ICE
Step 2: Turn on SONiX ICE
Step 3: turn on PC
Step 4: Locate an unused LPT port of PC
Step 5: Connect SONiX ICE to the LPT port using a parallel cable
Now, go to the next section to install your SONiX ICE.
SONiX TECHNOLOGY CO., LTD
Page 5
Revision 1.93
8-bit micro-controller
In-Circuit Emulator User’s Menu
2.2 INSTALLING SONiX ICE
About SONiX Assembler
SONiX 8-bit microcontroller developer environment software provides text editor, assembler, simulator
and windows-based debug functions. It supports all series of SONiX 8-bit microcontroller.
System Requirment
Windows NT/95/98/2000/ME/XP
2.0MB of available hard drive space
32MB RAM or greater
File Description
SN8ASMxxx.zip: assembler software package, xxx represents the version. (ie. 1.97)
S8ASMxxx.exe: main execution program, xxx represents the version. (ie. 1.97)
MACRO1.h: reference macro 1
MACRO2.h: reference macro 2
MACRO3.h: reference macro 3
DO NOT delete or change any of the hidden directory from the unzipped
files to avoid system errors.
System Interface
Print port (EPP or ECP mode)
Intallation Procedure
Follow the steps in this section to install your SONiX ICE:
Step 1: Download the ZIP file from SONiX’s website http://www.sonix.com.tw. Click “Entry” to enter
the website, then go to the “Download/Tools” page to download the program you need.
Login ID: sonix
Password: spec
Both Login ID and Password are case senstitive.
SONiX TECHNOLOGY CO., LTD
Page 6
Revision 1.93
8-bit micro-controller
In-Circuit Emulator User’s Menu
Step 2: Creat a new folder, and then unzip the file to the destination folder that you wish.
(ie. C:\sonix\s8asmxxx)
If you are using Windows 95/98, please go to Step 15.
If you are using Windows NT/2000/ME/XP, please go to Step 3.
Step 3: Click [Start], go to Setting/Control Panel (See figure below)
Following is an example of Windows 2000. Any questions regarding
Window NT/XP, please contact you local agent for details.
SONiX TECHNOLOGY CO., LTD
Page 7
Revision 1.93
8-bit micro-controller
In-Circuit Emulator User’s Menu
Step 4: Click [Add/Remove Hardware] (See figure below)
Step 5: Select “Add/Troublesshoot a device”, and click [Next>] (See figure below)
SONiX TECHNOLOGY CO., LTD
Page 8
Revision 1.93
8-bit micro-controller
In-Circuit Emulator User’s Menu
Step 6: Go to the top of the lists, Select “Add a new device”, and click [Next>] (See figure below)
Step 7: Select “No, I want to select the hardware from a list”, and click [Next>] (See figure below)
SONiX TECHNOLOGY CO., LTD
Page 9
Revision 1.93
8-bit micro-controller
In-Circuit Emulator User’s Menu
Step 8: Select “Other devices” from the lists, and click [Next>] (See figure below)
Step 9: Select “Standard IDE ATA/ATAPI controller” in the Manufacturers column, then select
“Standard Dual Channel PCI IDE Controller” in the Models column. And click [Have Disk…]
(See figure below)
SONiX TECHNOLOGY CO., LTD
Page 10
Revision 1.93
8-bit micro-controller
In-Circuit Emulator User’s Menu
Step 10: Click [Browse…], find the directory with destination folder that contains unzipped files. Then
click [OK] (See figure below)
Step 11: Select “Sonix ICE System” in the Models column, and click [Next>] (See figure below)
SONiX TECHNOLOGY CO., LTD
Page 11
Revision 1.93
8-bit micro-controller
In-Circuit Emulator User’s Menu
Step 12: Click [Next>] and the system will begin installation automatically (See figure below)
Step 13: Click [Finish] to complete the installation (See figure below)
SONiX TECHNOLOGY CO., LTD
Page 12
Revision 1.93
8-bit micro-controller
In-Circuit Emulator User’s Menu
Step 14: To check if you’ve successfully installed the SONiX ICE, go to the System Properties/Device
Manager. You should be able to find Sonix ICE among the lists. (See figure below)
Step 15: Before you starting using SONiX Assembler, you may want to create a Shortcut for the
SONiX Assembler. To do so, click right button of the mouse over the top of desktop area. And browse
to the S8ASMxxx.exe file.
You are now ready to use the SONiX ICE, please go to Chapter 3 for Quick
Start.
SONiX TECHNOLOGY CO., LTD
Page 13
Revision 1.93
8-bit micro-controller
In-Circuit Emulator User’s Menu
3 QUICK START
In this Chapter, you will learn how to emulate the program using SONiX ICE. The demo code is also
provided in this Chapter.
3.1 SETUP SONiX EMULATOR
Before you begin using the SONiX Assembler, be sure to check the following items:
Item 1: EV board and ICE board are well connected to each other
Item 2: JP2 on ICE board (Bottom board of ICE) is in correct setting which specify the voltage supply
(3.3V, 5V or target power) from EV board (See Appendix A)
Item 3: Select Oscillator type to provide correct setting on EV board (See Appendix A)
Item 4: Adjust DIP switch on EV board to configure the system (See Appendix A)
For items 2, 3 and 4, Please refer to Appendix A.
Item 5: Parellel cable are well connected between PC and SONiX ICE
Item 6: DC power adaptor is connected to the SONiX ICE and both PC and SONiX ICE have been
turned ON
Item 7: Check the linkage between the SONiX Assembler and SONiX ICE. TO DO SO, you will need
execute “S8ASMxxx.exe” then load the demo code and compile it.
Press “F7” to start complie the program code
Then press “F5” to start emulation. When emulator software has successfully linked to the
SONiX ICE, it will enter ICE mode and begin hardware in circuit emulation. (See Figure 3.1)
SONiX TECHNOLOGY CO., LTD
Page 14
Revision 1.93
8-bit micro-controller
In-Circuit Emulator User’s Menu
ICE Mode
Remainder
If the connection between your computer and the SONiX ICE is not stable,
you may want to set PC BIOS from printer port mode to EPP/ECP mode.
We strongly suggest the users not to connect the SONiX ICE through Key
Pro or Print Port Switch. Also, we do advice the users to use LPT1 in order
to receive the best available connectivity.
SONiX TECHNOLOGY CO., LTD
Page 15
Revision 1.93
8-bit micro-controller
In-Circuit Emulator User’s Menu
Simulate Mode
Remainder
The default setting of software simulator is OFF. If users wish to change, please modify the
“S8ASM.INI” file. On the other hand, if the software simulator has already been turned ON,
“S8ASM.INI” and Assembler start up file “S8ASMxxx.EXE” are saves in the same directory. If can’t
find “S8ASM.INI” file, users will need to execute “S8ASMxxx.EXE” again in order for program to
generate the “S8ASM.INI” file. To modify “S8ASM.INI” file, please see the details below:
1.
2.
3.
4.
Exit S8ASMxxx.EXE program.
Use any kind of text editor program (ie. NOTEPAD) to open up
“S8ASM.INT” file.
Find the following messages
[INI]
SIMULATE = NO
Then, change the above line to the following:
Don’t connect SONiX ICE to PC then restart S8ASMxxx.EXE
program to run simulator.
SONiX TECHNOLOGY CO., LTD
Page 16
Revision 1.93
8-bit micro-controller
In-Circuit Emulator User’s Menu
3.2 STARTING A NEW PROJECT
1.
The first time to start SONiX Assembler, the window displays as below:
2.
To create a new assembler file, click [File] from the menus and select “New”.
SONiX TECHNOLOGY CO., LTD
Page 17
Revision 1.93
8-bit micro-controller
In-Circuit Emulator User’s Menu
3.
When finished, click [File] again and type in the file name you wish you have.
4.
After that, you will need to assign a new project. Click [File] from the menus and select “New
Project…”.
SONiX TECHNOLOGY CO., LTD
Page 18
Revision 1.93
8-bit micro-controller
In-Circuit Emulator User’s Menu
5.
A file-open dialog appears to select an assembler file to be the project main file. The file should also
include the chip declaration information.
6.
After assigning the project, the window should display the content information.
SONiX TECHNOLOGY CO., LTD
Page 19
Revision 1.93
8-bit micro-controller
In-Circuit Emulator User’s Menu
7.
Begin writing the program codes, when finishes, click [Tools] and select “Assembly” to start assemble
the program.
Always save the file before you compile the program. To save a
file, click [File] from the menu aboe then select “Save”.
8.
In the start of assembly, the Code Option dialog allows you to specify appropriate code option for
different chip. When done, click [OK] to begin compiling.
Be sure to read the datasheet for detailed configuration of code
options.
SONiX TECHNOLOGY CO., LTD
Page 20
Revision 1.93
8-bit micro-controller
In-Circuit Emulator User’s Menu
9.
The program will then start compiling, information such as ROM size, Check Sum will be listed in the
output window.
10. To begin using ICE emulation, click [Tools] from the menus and select “RUN”.
SONiX TECHNOLOGY CO., LTD
Page 21
Revision 1.93
8-bit micro-controller
In-Circuit Emulator User’s Menu
11. The program halts at the reset vector if it’s first time to run. A yellow arrow indicates where the
program is.
12. To set a breakpoint, simply move the cursor to the line where you wish the program to be stopped. Then,
click [Tools] from the menus and select “Breakpoint”.
SONiX TECHNOLOGY CO., LTD
Page 22
Revision 1.93
8-bit micro-controller
In-Circuit Emulator User’s Menu
13. Red dot represents successful breakpoint setting.
14. To continue running the program, just repeat item number 9. The yellow arrow will stop at the
breakpoint where you’ve set it initially.
SONiX TECHNOLOGY CO., LTD
Page 23
Revision 1.93
8-bit micro-controller
In-Circuit Emulator User’s Menu
15. Any time the program stops, “Watch” function could be set to monitor the variable. Click [Watch]
button located at lower left hand corner of the program window. Then, select one of the empty edit box
right above [Watch] button, a Search Symbol dialog box will automatically pop up. Check “EQU
access” and pick one of the variable to monitor. (ie. PCL) NOTE!!!
To REMOVE the Watch variable, select the edit box again (ie.
PCL). When the Search Symbol dialog box pop up, then remove
all the contents from the top column.
16. “PCL” is selected and it will also appear in the edit box.
SONiX TECHNOLOGY CO., LTD
Page 24
Revision 1.93
8-bit micro-controller
In-Circuit Emulator User’s Menu
17. Click [Tools] from the menus and select “Step Over”, you could trace Macro or Subroutine of the
program in one step.
18. When finished “Step Over” function, the yellow arrow will move to the next line and stops. One of the
macro PCL has been selected to be monitor in the above step, thus, you will see the content changes in
the edit box. From “0C” to “13”, and it is because of the macro.
SONiX TECHNOLOGY CO., LTD
Page 25
Revision 1.93
8-bit micro-controller
In-Circuit Emulator User’s Menu
19. Click [Tools] from the menu and select “RUN” or press “F5” to continue program execution. The RUN
dialogue will indicate the program status.
20. Click “Stop Run” or Press “F5” to terminate the program execution.
SONiX TECHNOLOGY CO., LTD
Page 26
Revision 1.93
8-bit micro-controller
In-Circuit Emulator User’s Menu
21. Click [Tools] from the menu and select “Reset” or press “Ctrl+F5” to reset the program. Then, you may
emulate again starting from the program reset vector.
All the menu item function could work by using the hot keys, if
there is a hot key description at the end of the select item.
SONiX TECHNOLOGY CO., LTD
Page 27
Revision 1.93
8-bit micro-controller
In-Circuit Emulator User’s Menu
4 Trouble shooting
Q
The ICE is reset spontaneously sometimes in ICE mode.
A It occurs when the user maps his network printer to the LPT1 that is connected to the ICE system.
To solve it, just map the network printer to LPT2.
Q
ICE can’t work under Windows 2000.
A When ICE works under Windows 2000/ Windows XP, ICE device driver needs to be installed. The
document of ICE device driver describes the details of how to install the ICE under Windows
2000/Windows XP.
Q
Could ICE work emulate the 3.3 voltage supply?
A Yes. Just short the JP2 of the ICE board to the 3.3 voltage option.
Q
LCD can’t work normally!
A Check the LCD connected port first. I/O port for LCD function is JP13 on the ICE board. If the
connection is correct, then check the duty switch (c0, c1) at the SW1. Select the right duty mode
that the LCD is.
SONiX TECHNOLOGY CO., LTD
Page 28
Revision 1.93
8-bit micro-controller
In-Circuit Emulator User’s Menu
5 Appendix A
5.1 EV BOARD
Fig. A-1
SONiX TECHNOLOGY CO., LTD
Page 29
Revision 1.93
8-bit micro-controller
In-Circuit Emulator User’s Menu
1. DIP Switch
OPTION
RC Mode
X’TAL 32K
X’TAL 12M
X’TAL 4M
X’TAL/2
X’TAL
OSG Enabled
OSG Disabled
LCD 1/8 DUTY
LCD 1/3 DUTY
LCD 1/4 DUTY
LCD 1/5 DUTY
S4
ON
OFF
-
S3
ON
ON
OFF
OFF
-
S2
ON
OFF
ON
OFF
-
S1
ON
OFF
-
C1
ON
ON
OFF
OFF
C0
ON
OFF
ON
OFF
Press Reset button will reset the EV chip. The program will then be restarted from address 0.
If system clock is lower than 1Mhz. “OSG enabled option is recommended no matter if the system
is in RC or Crystal oscillator mode.
When ICE works at RC mode, please refer to the table below to set your DIP switch for both “RC
Mode” and “X’TAL/2”. Do not place any components at C4 and Y1. Leave them open and then
adjust appropriate R3 and C3 value to get proper RC oscillator clock frequency you wish you have.
Following table provides a reference table of R3 and C3 VS. frequency when ICE works at 5V.
R3 (KOhm)
0.1
1
3
0.1
1
3
SONiX TECHNOLOGY CO., LTD
C3 (pF)
30
30
30
58
58
58
Frequency (KHz)
3380
1315
595
2660
785
320
Page 30
Revision 1.93
8-bit micro-controller
In-Circuit Emulator User’s Menu
2. I/O Connector (See below)
3. Analog Input Voltage Related Circuit
JP10 and JP11 socket provide the connection interface between kernel chip and target board as well
as all the I/O ports. But except LCD interface. It is very convinence for users to verify the actual
circuit quickly and efficiently. Please see the above diagram for detailed description.
JP2 and JP6 jumpers provide on-board power supply for the ADC reference voltage input. Short
JP2 will connect AVREFH pin (ADC high reference voltage input) with AVDD (analog power
supply) pin. Short JP6 will connect AVREFL pin (ADC low reference voltage input) with AGND
(analog ground) pin. If JP2 and JP6 are leaved open, user’s target board must provide appropriate
reference voltage for AVREFH and AVREFL pin.
Be aware that the value of AVREFH minus AVREFL (AVREFH –
AVREFL) must be greater than 1.2V.
SONiX TECHNOLOGY CO., LTD
Page 31
Revision 1.93
8-bit micro-controller
In-Circuit Emulator User’s Menu
The bypass capacitor C10 and C11 is important for suppling a stable and clean power source for
ADC reference voltage. Users can replace default value (0.1 uF) of C10 and C11 with larger
capacitor to improve the performance of reference voltage.
4. LCD Connector (See below)
5. LCD Bias Switch (See below)
6. RES. for LCD Bias
LCD Connector
LCD Bias Voltage Network
LCD BIAS
SW1
SW0
1/2 BIAS
ON
ON
1/3 BIAS
ON
OFF
1/4 BIAS
OFF
OFF
Bias Selection Table
The pin assignment for LCD Connector and LCD Bias Voltage Network are descriped in the above
diagram.
To display data on the LCD, users will have to connect the desired pins to the LCD module.
SONiX TECHNOLOGY CO., LTD
Page 32
Revision 1.93
8-bit micro-controller
In-Circuit Emulator User’s Menu
Users may select three different types of LCD Bias simply by setting SW0 and SW1 of DIP SW2.
When each combination of SW2 is selected, the bias voltage of the network output is listed in the
above bias selection.
VLCD
VLCD
VLCD
R
R
R
VLCD4
VLCD4
R
R
R
VLCD3
VLCD3
R
R
R
R
LCDLn
VLCD2
R
VLCD1
VLCD1
VR
VLCD3
VLCD2
VLCD2
R
VLCD4
VR
LCDLn
VLCD1
VR
LCDLn
Adjust
LCD Contrast
Adjust
LCD Contrast
Adjust
LCD Contrast
BLANK
BLANK
BLANK
VSS
1/2 Bias
VSS
VSS
1/3 Bias
1/4 Bias
The internal LCD Bias circuit connection of the 8-bit MCU kernal
chip on EV board is shown in the above diagram.
SONiX TECHNOLOGY CO., LTD
Page 33
Revision 1.93
8-bit micro-controller
In-Circuit Emulator User’s Menu
7. LED Indicator
Status
D4
D3
D2
D1
Power Supply
-
-
-
ON
Green Mode
-
-
ON
-
High Clock Stop
-
ON
-
-
Stack Overflow /Underflow
ON
-
-
-
The four LED display indicates different status of the ICE operation
mode. Users are able to monitor the program simply by looking at
the LED.
SONiX TECHNOLOGY CO., LTD
Page 34
Revision 1.93
8-bit micro-controller
In-Circuit Emulator User’s Menu
5.1 ICE BOARD
ICE Board
Description:
i.
J1: 7.5V DC power supply input.
ii.
P1: Printer port socket. Connect to PC.
iii.
JP2: EV board’s power source selection jumper. ICE board provide on board 3.3V and 5V
power supply for EV board. If EV board’s power is from external power supply, please
release JP2.
iv.
D2: Power indicator.
v.
D3: ICE board initial indicator. ON = ICE initialize successfully. Off=ICE without initial.
SONiX TECHNOLOGY CO., LTD
Page 35
Revision 1.93
8-bit micro-controller
In-Circuit Emulator User’s Menu
5.3 WORKING UNDER DOS MODE:
Command:
path\S8ASMxxx
path2\xxx.asm [-A]
The path is the path of S8ASMxxx.EXE.
The path2 is the path of file (.ASM).
The “xxx.asm“ is the source file name.
Description:
Compiler without [-A] parameter > If the compiler program compiles a file successfully, system will
export a .SN8 & .HEX file and exits automatically. If compiling fail, system won’t exit. The user can debug
in the program and finish compiler.
Compiler with [-A] parameter >The [-A] parameter is to control the code option window and output
some files. Including [-A], system will omit code option windows. System compiles a file successfully,
system will export “.SN8”, “.HEX”, “.LST” and ”.ERR” files, and then exits automatically. If compiling fail,
system will only export “.ERR” file and exits automatically. The “.ERR” file is the debug file for some
editors as “Code Wright”.
*.SN8 for SONiX Writer. (works for both Mask and OTP devices)
*.HEX for 3rd party writer. (eg. Hi-Lo)
Example:
C:>\TOOLS\SN8ASM DEMO\MOVE1.ASM
SONiX TECHNOLOGY CO., LTD
-A
Page 36
Revision 1.93
8-bit micro-controller
In-Circuit Emulator User’s Menu
SONIX reserves the right to make change without further notice to any products herein to improve reliability, function or
design. SONIX does not assume any liability arising out of the application or use of any product or circuit described herein;
neither does it convey any license under its patent rights nor the rights of others. SONIX products are not designed,
intended, or authorized for us as components in systems intended, for surgical implant into the body, or other applications
intended to support or sustain life, or for any other application in which the failure of the SONIX product could create a
situation where personal injury or death may occur. Should Buyer purchase or use SONIX products for any such
unintended or unauthorized application. Buyer shall indemnify and hold SONIX and its officers , employees, subsidiaries,
affiliates and distributors harmless against all claims, cost, damages, and expenses, and reasonable attorney fees arising
out of, directly or indirectly, any claim of personal injury or death associated with such unintended or unauthorized use
even if such claim alleges that SONIX was negligent regarding the design or manufacture of the part.
Main Office:
Address: 9F, NO. 8, Hsien Cheng 5th St, Chupei City, Hsinchu, Taiwan R.O.C.
Tel: 886-3-551 0520
Fax: 886-3-551 0523
Taipei Office:
Address: 15F-2, NO. 171, Song Ted Road, Taipei, Taiwan R.O.C.
Tel: 886-2-2759 1980
Fax: 886-2-2759 8180
Hong Kong Office:
Address: Flat 3 9/F Energy Plaza 92 Granville Road, Tsimshatsui East Kowloon.
Tel: 852-2723 8086
Fax: 852-2723 9179
Technical Support by Email:
[email protected]
SONiX TECHNOLOGY CO., LTD
Page 37
Revision 1.93