Download USER MANUAL
Transcript
Lattemagic 15309 IB:Layout 1
15/3/11
12:05
Page 1
USER MANUAL
The Lakeland Guarantee....
is probably the simplest guarantee in the world!
If you are not satisfied at any time, you receive your money back!
This is our promise.
Lakeland
Alexandra Buildings, Windermere, Cumbria LA23 1BQ
Tel: 015394 88100 Web: www.lakeland.co.uk
L AT T E M AG I C
Model: 15309
Helpline No: 015394 88100
Lattemagic 15309 IB:Layout 1
15/3/11
12:06
Page 3
INTRODUCTION
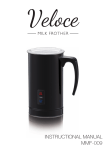
Thank you for choosing the Lakeland Lattemagic which can transform home-made, cappuccinos and hot
chocolates into coffee-shop perfection at the touch of a button. To help you make the most of your purchase,
please take a few moments to read these instructions
before using the Lattemagic for the first time, and keep them in a safe place for future reference.
5.
Place the Lattemagic on a level, sturdy and dry surface.
6.
Do not let the power cord hang over the edge of your table or worktop, where a child could grab it or
people could trip over it. The power cord must not become tangled or touch any hot surfaces.
7.
Do not place the Lattemagic on or near a hot gas or electric burner, or in or near a heated oven.
8.
Do not place the appliance on a polished wood, or a very delicate surface
9.
Do not operate without milk in the jug
10. After frothing or heating allow 2 minutes for the thermostat to reset and the frother to be ready for use
again. To shorten this time, rinse with water and wipe dry after each use.
11. The unit will become hot during use – do not touch the metal parts, the filter holder or its housing when
the appliance is in use.
12
FEATURES
1.
Transparent lid
2.
s/s jug with non-stick coating
3.
Button for heating milk
4.
Button for cold milk
5.
Base unit with power cord
6.
Whisk for frothing milk
7.
Whisk for heating milk
8.
Fixing clip for spare whisk
Power: 600W
Operating Voltage: 230V-50Hz
To protect against electric shock, never immerse the Lattemagic, power cord or plug in water or any other
liquid. Do not let the power cord or plug get wet.
13. The Lattemagic is not intended for use by children or infirm people unless they have been adequately
supervised by a responsible person to ensure they can use it safely. Children should be supervised to
ensure they do not play with the milk frother.
14. Do not use the Lattemagic if the power cord or plug show any signs of damage, or if the appliance is
dropped, damaged or working incorrectly. Call the helpline on 015394 88100 to arrange a repair or
replacement. Never try to repair the milk frother yourself as this may cause electric shock.
BEFORE USING YOUR LATTEMAGIC FOR THE FIRST TIME
Carefully unpack the Lattemagic and remove any packaging. Wipe the inside of the milk frother with a slightly
damp cloth and dry with a soft cloth.
Using the milk frother
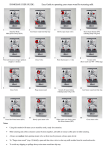
1.
IMPORTANT SAFEGUARDS
When using this lattemagic, please follow these basic safety precautions.
1.
Please read all instructions before use
Choose the appropriate whisk and fix into the jug. The other whisk that is not being used can be placed
into the fixing in the lid.
2.
Pour milk into Lattemagic. Ensure that you don’t t exceed the maximum capacity indicated inside
2.
Make sure your electricity supply matches the voltage shown on the appliance.
3.
Press button to start milk frother
3.
This Lattemagic is for household use only. It is not suitable for commercial use, or for use outdoors.
4.
Using the Lattemagic with accessories not recommended by the manufacturer may result in fire, electric
shock or injury, and should be avoided.
Lattemagic 15309 IB:Layout 1
15/3/11
12:06
Page 5
SERVING SUGGESTIONS
Whisk
Function
Max capacity
of milk
Time
Frothing cold milk
Min/Max
75ml/125ml
60s/90s
Frothing & heating
Min/Max
75ml/125ml
60s/90s
Heating
(small amount of froth)
250ml
Approx
2mins
TO FROTH AND HEAT MILK OR HEAT MILK
Press the top button and the red light will illuminate and the middle light turns blue at the same time. After approx
60-80 seconds, the red light will switch off and the blue light will continue to flash for 20 seconds..
TO FROTH MILK
Press the bottom button for 2-3 seconds until the blue light illuminates. After approx. 1 minute, the blue light will
switch off and the middle power light will continue to flash for 20 seconds
HELPFUL HINTS
For best results use whole milk
Milk will be heated too approximately 65-70℃. This is the ideal temperature to ensure the flavour of your drink
is not impaired.
The Lattemagic is designed to heat and froth milk. If you add flavourings, coffee granules or hot chocolate
powder in the frother ensure you thoroughly clean immediately after using.
CARE AND CLEANING
Before cleaning the Lattemagic, ensure it is switched off and the power cord is unplugged from the mains
socket.
Jug- Wash inside with warm, soapy water and dry thoroughly. Do not use abrasives The exterior of the jug should
be cleaned using a soft cloth, do not use abrasive cleaning products or metal brushes as these may cause
damage to the stainless steel surface.
Lid and whisk – Clean in warm, soapy water and dry thoroughly.
CAUTION: the jug and base unit must never be immersed in water or any other liquid.
With frothed milk
Cappuccino
1/3 espresso
Add 2/3 frothed milk
Top with cocoa powder
Latte Macchiato
Pour frothed milk in a tall glass
Add espresso carefully along rim of the glass.
With hot milk
Caffè Latte
1/3 espresso
Add 2/3 heated milk and stir.
Hot Chocolate
Pour heated milk into a large mug
Add chocolate powder and stir to mix.
RECYCLING YOUR ELECTRICALS
Along with many other high street retailers, Lakeland has joined a scheme whereby customers can take their
unwanted electricals to recycling points set up around the country. Visit www.recycle-more.co.uk to find your
nearest recycling point.
Lattemagic 15309 IB:Layout 1
15/3/11
12:06
Page 7
ELECTRICAL CONNECTIONS
THIS APPLIANCE MUST BE EARTHED
This appliance is fitted with a fused three-pin plug to BS1363 which is suitable for use in all homes fitted with
sockets to current specifications. If the fitted plug is not suitable for your socket outlets, it should be cut off and
carefully disposed of. To avoid an electric shock, do not insert the discarded plug into a socket.
Fitting a new plug
If for any reason you need to fit a new plug, the flexible mains lead must be connected as shown here. The wires
in the mains lead fitted to this appliance are coloured in accordance with the following code:
Earth(green/yellow)
Neutral(blue)
13amp FUSE
E
L
13amp fuse
N
Live(brown)
Connect BLUE to Neutral (N)
Connect GREEN & YELLOW to Earth (E)
Connect BROWN to Live (L)
13 amp fuse to be used
If the colours of the wires in the mains lead of this appliance do not correspond with the coloured markings
identifying the terminals in your plug, proceed as follows. The wire which is coloured green and yellow MUST
be connected to the terminal which is marked with the letter E (Earth) or coloured green. The wire which is
coloured blue MUST be connected to the terminal which is marked with the letter N (Neutral) or coloured black.
The wire which is coloured brown MUST be connected to the terminal which is marked with the letter L (Live)
or coloured red.
Before refitting the plug cover, check that there are no cut or stray strands of wire inside the plug. Use a 13 amp
BS1362 fuse. Only BSI or ASTA approved fuses should be used. If you are at all unsure which plug or fuse to
use, always refer to a qualified electrician.
Note: after replacing or changing a fuse on a moulded plug which has a fuse cover, the cover must be refitted
to the plug; the appliance must not be used without a fuse cover. If lost, replacement fuse covers can be
obtained from an electrical shop. This appliance complies with the following EEC Directives: 73/23 EEC (Low
Voltage Directive) and 89/336 EEC (EMC Directive).
0001


