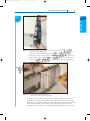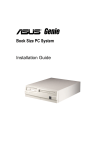
1
1435487389_ch02_CTP.qxd
7/30/09
5:17 PM
CHAPTER
2
In this chapter,
you will learn:
• About different
form factors used
for computer
cases, motherboards, and
power supplies
• How electricity is
measured and
about electrical
components
• How to select a
power supply
• How to protect
yourself and your
equipment against
the dangers of
electricity
• How to work
inside a computer
case
• How to
troubleshoot
electrical
problems
Page 35
Form Factors, Power Supplies,
and Working Inside a Computer
T
his chapter focuses on the power supply, which provides power to
all other components inside the computer case. Several types of
power supplies are available. The form factor of the computer case
and motherboard drive which type of power supply can be installed
in a system. Therefore, we begin the chapter discussing the form
factors of computer cases, motherboards, and power supplies. To
troubleshoot problems with the power system of a PC, you need a
basic understanding of electricity. You’ll learn about the measurements of electricity and the form in which it comes to you as house
current. The chapter then covers how to select a power supply and
how to protect a computer system from damage caused by electrical
problems. Next, we discuss how to take a computer apart and put it
back together again. Finally, we talk about ways to detect and correct
problems with the PC’s electrical system, including how to change a
defective power supply.
This chapter is the first in a group of chapters to learn how to
service computer hardware. We begin with the electrical system
because it’s so important that you know how to protect yourself and
the equipment against electrical dangers as you work. In later
chapters, you’ll want to apply the safety skills learned in this chapter.
Other skills learned in this chapter, such as taking a computer apart
and putting it back together, will be useful to know in future chapters
in which you will exchange other computer parts besides the power
supply.
35
1435487389_ch02_CTP.qxd
7/30/09
36
5:17 PM
CHAPTER 2
Page 36
Form Factors, Power Supplies, and Working Inside a Computer
FORM FACTORS USED BY COMPUTER CASES, MOTHERBOARDS,
AND POWER SUPPLIES
A+
220-701
1.2
This chapter is all about a computer’s electrical system and power supply, such as the one
shown in Figure 2-1. However, because motherboards, power supplies, and computer cases
are often sold together and must be compatible with each other, we begin by looking at
these three components as an interconnecting system. When you put together a new system,
or replace components in an existing system, the motherboard, power supply, and case must
all be compatible. The standards that describe the size, shape, and major features of these
components so that they work together are called form factors.
4-pin Molex
6-pin PCIe
SATA
8-pin Aux
Floppy drive
4-pin Aux
24-pin P1
8-pin PCIe
Figure 2-1 Computer power supply with connectors
Courtesy: Course Technology/Cengage Learning
When you are deciding which form factor to use, the motherboard drives the decision
because it determines what the system can do. After you’ve decided to use a certain form
factor for the motherboard, you must use the same form factor for the case and power
1435487389_ch02_CTP.qxd
7/30/09
5:17 PM
Page 37
Form Factors Used by Computer Cases, Motherboards, and Power Supplies
A+
220-701
1.2
37
supply. Using a matching form factor for the motherboard, power supply, and case assures
you that:
TYPES OF FORM FACTORS
When selecting a computer case, motherboard, and power supply, choose a design that fits
its intended use. For instance, you might find that you need a high-end tower system, a
rack-mounted server, or a low-profile desktop. When you understand the intended use, you
then can decide which form factor you will use.
The current and better-known form factors are listed in Table 2-1. These form factors are
discussed next.
Form Factor
Motherboard Size
Description
ATX, full size
Up to 12" x 9.6''
Most popular form factor, which has had many revisions
MicroATX
Up to 9.6" x 9.6"
Smaller version of ATX
FlexATX
Up to 9" x 7.5"
Smaller version of MicroATX
BTX
Up to 12.8" wide
Has improvements over ATX and can have up to seven
expansion slots
MicroBTX
Up to 10.4" wide
Has up to four expansion slots
PicoBTX
Up to 8" wide
None or one expansion slot
NLX
Up to 9" x 13.6"
Used in low-end systems with a riser card
Table 2-1
Form factors
A+ Exam Tip The A+ 220-701 Essentials exam expects you to recognize and know the more
important features of the ATX, BTX, Micro ATX, and NLX motherboards.
ATX FORM FACTOR
ATX (Advanced Technology Extended) is the most commonly used form factor today. It is
an open, nonproprietary industry specification originally developed by Intel in 1995, and
has undergone several revisions since then.
An ATX motherboard measures up to 12" x 9.6". The CPU and memory slots sit
beside expansion slots so that full-length expansion cards don’t bump into the CPU or
memory modules (see Figure 2-2). The original ATX form factor had case fans blowing
air into the case but early revisions to the form factor had fans blowing air out of the
case. Blowing air out of the case does a better job of keeping the system cool.
Video
The first ATX power supplies and motherboards used a sinIdentifying Form Factors
gle power connector called the P1 connector that had 20 pins
A+ 220-701
The motherboard fits in the case.
The power supply cords to the motherboard provide the correct voltage, and the
connectors match the connections on the board.
The holes in the motherboard align with the holes in the case for anchoring the board
to the case.
Holes in the case align with ports coming off the motherboard.
For some form factors, wires for switches and lights on the front of the case match up
with connections on the motherboard.
The holes in the power supply align with holes in the case for anchoring the power
supply to the case.
2
1435487389_ch02_CTP.qxd
7/30/09
5:17 PM
Page 38
Five PCI slots
A+
220-701
1.2
Audio connector
to CD drive
AGP slot
CPU auxiliary
power connector
Power connector
for CPU fan
Bracket for CPU cooler
Pentium 4 processor
Extra USB connectors
Serial ATA connector for HDD
Exhaust fan power
Two IDE connectors
P1 power connector
Floppy drive connector
Group of pins for
LED connectors
Figure 2-2 The CPU on an ATX motherboard sits opposite the expansion slots and does not block the room needed
for long expansion cards
Courtesy: Course Technology/Cengage Learning
P1 on an ATX motherboard
Figure 2-3 The first ATX P1 power connector used 20 pins
Courtesy: Course Technology/Cengage Learning
(see Figure 2-3). These pins provided +3.3 volts, +5 volts, +12 volts, -12 volts, and an optional
and rarely used -5 volts. The electrical requirements for motherboards change over time as
new technologies make additional demands for power. When processors began to require more
power, the ATX Version 2.1 specifications added a 4-pin auxiliary connector near the processor socket to provide an additional 12 V of power (see Figure 2-4). A power supply that provides this 4-pin 12-volt power cord is called an ATX12V power supply. Later boards changed
38
1435487389_ch02_CTP.qxd
7/30/09
5:17 PM
Page 39
Form Factors Used by Computer Cases, Motherboards, and Power Supplies
39
A+
220-701
2
1.2
A+ 220-701
Figure 2-4 The 4-pin 12-volt auxiliary power connector on a motherboard
Courtesy: Course Technology/Cengage Learning
the 4-pin 12-volt power connector to an 8-pin connector that provided more amps for
the processor.
Later, when PCI Express slots were added to motherboards, more power was required
and a new ATX specification (ATX Version 2.2) allowed for a 24-pin P1 connector, which is
backward compatible with the 20-pin P1 connector. The extra 4 pins on the connector provide +12 volts, +5 volts, and +3.3 volts pins. Motherboards that support PCI Express and
have the 24-pin P1 connector are sometimes called Enhanced ATX boards. Figure 2-5 shows
a 20-pin P1 power cord from the power supply and a 24-pin P1 connector on a motherboard. Figure 2-6 shows the pinouts for the 24-pin power cord connector, which is colorcoded to wires from the power supply. The 20-pin connector is missing the lower four pins
in the photo and diagram.
Figure 2-5 A 20-pin power cord ready to be plugged into a 24-pin P1 connector on an ATX motherboard
Courtesy: Course Technology/Cengage Learning
1435487389_ch02_CTP.qxd
40
7/30/09
5:17 PM
CHAPTER 2
Form Factors, Power Supplies, and Working Inside a Computer
1
A+
220-701
1.2
Page 40
13
Orange — +3.3V
+3.3V — Orange/Brown
Orange — +3.3V
–12V — Blue
COM — Black
Black — COM
Red — +5V
PS_ON# — Green
COM — Black
Black — COM
Red — +5V
+
COM — Black
–
Black — COM
COM — Black
Gray — PWR_ON
NC — White
Purple — +5VSB
+5V — Red
Yellow — +12V1
+5V — Red
Yellow — +12V1
+5V — Red
Orange — +3.3V
COM — Black
Figure 2-6 P1 24-pin power connector follows ATX Version 2.2 and higher standards
Courtesy: Course Technology/Cengage Learning
Notes For more information about all the form factors discussed in this chapter, check out the form
factor Web site sponsored by Intel at www.formfactors.org.
Another feature of an ATX motherboard is a soft switch, sometimes called the soft
power feature. If an operating system supports the feature, it can turn off the power
to a system after the shutdown procedure is done. In addition, BIOS setup can be
configured to cause a keystroke or network activity to power up the system (wake
on LAN). When a user presses the power switch on the front of the case while the
computer is on, the OS goes through a normal shutdown procedure before powering
off. There are several variations of ATX motherboards. A less popular one is the
Mini-ATX, which is a smaller ATX motherboard (11.2" x 8.2") that can be used
with ATX cases and power supplies. Another less popular one is the Extended
ATX (eATX) motherboard that can be up to 12" x 13" in size; it is used in rackmounted servers.
MICROATX FORM FACTOR
The MicroATX form factor is a major variation of ATX and addresses some technologies that have emerged since the original development of ATX. MicroATX reduces
the total cost of a system by reducing the number of expansion slots on the motherboard, reducing the power supplied to the board, and allowing for a smaller case
size. A MicroATX motherboard (see Figure 2-7) will fit into a case that follows the
ATX 2.1 or higher standard. A variation of the MicroATX is the Mini-ITX. This form
factor is smaller than the MicroATX and designed for small systems such as a home
theatre system.
1435487389_ch02_CTP.qxd
7/30/09
5:17 PM
Page 41
Form Factors Used by Computer Cases, Motherboards, and Power Supplies
41
A+
220-701
2
1.2
A+ 220-701
Figure 2-7 This MicroATX motherboard by Biostar is designed to support an AMD processor
Courtesy: Course Technology/Cengage Learning
FLEXATX FORM FACTOR
FlexATX is a variation of MicroATX. It allows for maximum flexibility (giving it the
name FlexATX), and therefore can be a good choice for custom systems. A FlexATX
motherboard can be up to 9" x 7.5". The motherboard costs less, has fewer features, and
is smaller than a MicroATX board. FlexATX is commonly used in slimline and all-in-one
cases, but can fit into any FlexATX, MicroATX, or ATX case that follows the ATX 2.03
or higher standard.
BTX FORM FACTOR
The BTX (Balanced Technology Extended) form factor was designed by Intel in 2003
for flexibility and can be used by everything from large tower systems to those ultrasmall
systems that sit under a monitor. BTX was designed to take full advantage of serial ATA,
USB 2.0, and PCI Express technologies. The BTX form factor design focuses on reducing
heat with better airflow and improved fans and coolers. It also gives better structural support for the motherboard than does ATX. BTX motherboards use a 24-pin power connector
that has the same pinout arrangement as the ATX 24-pin P1 connector. The BTX form
factor can also use one or more auxiliary power connectors for the processor, fans, and
lighting inside the case (for really cool-looking systems). Because the 24-pin connectors are
the same, a BTX motherboard can use an ATX power supply.
In the case configuration shown in Figure 2-8, notice how the processor is sitting
immediately in front of the intake fan installed on the front of the case. This intake fan
together with the exhaust fan on the rear of the case produce a strong wind tunnel effect
over the processor, making it unnecessary to have a fan on top of the processor itself. Also
notice in Figure 2-8 that memory modules and expansion cards fit into the slots parallel to
airflow rather than blocking airflow as they sometimes do with ATX form factors. Airflow
in a BTX system is also designed to flow underneath the BTX motherboard.
1435487389_ch02_CTP.qxd
42
7/30/09
5:17 PM
CHAPTER 2
Page 42
Form Factors, Power Supplies, and Working Inside a Computer
A+
220-701
1.2
Hot air out
Memory
l air
Coo
in
CPU
Figure 2-8 Improved airflow in a BTX case and motherboard makes it unnecessary
to have a fan on top of the processor
Courtesy: Course Technology/Cengage Learning
A BTX case by Gateway with a motherboard installed is shown in Figure 2-9. This BTX
case has fans on the front and rear to force air over the processor heat sink. Notice in the
figure the green encasement that directs airflow over the heat sink. Also notice the vents on
the front case panel to help with airflow.
Front
panel
Air
vents
Rear exhaust
fan
Heat sink over
processor
Encasement
to direct airflow
over heat sink
Front intake
fan is behind
this grid
Figure 2-9 A Gateway BTX system is designed for optimum airflow
Courtesy: Course Technology/Cengage Learning
1435487389_ch02_CTP.qxd
7/30/09
5:17 PM
Page 43
Form Factors Used by Computer Cases, Motherboards, and Power Supplies
A+
220-701
1.2
43
NLX FORM FACTOR
The NLX (New Low-profile Extended) form factor for low-end personal computer motherboards was developed by Intel in 1998 to improve on an older and similar form factor, called
the LPX form factor. In these systems, the motherboard has only one expansion slot, in
which a riser card (also called a bus riser, daughter card, or daughter board), is mounted.
Expansion cards are mounted on the riser card, and the card also contains connectors for the
floppy and hard drives. The riser card on an NLX motherboard is on the edge of the board,
which differs from the LPX motherboard that had the riser card near the center of the board.
The NLX standard applies only to motherboards; NLX motherboards are designed to use
ATX power supplies. An example of an NLX system is shown in Figure 2-10.
A+ Exam Tip The A+ 220-701 Essentials exam expects you to know the purpose of the riser card
(also called a daughter board) used with the NLX form factor.
Riser card for expansion slots
and other connectors
CPU with heat sink
attached
FRONT
Two PCI slots
Two ISA slots
Memory modules
REAR
Motherboard
Ports on rear of board for
peripheral devices
Figure 2-10 The NLX form factor uses a riser card that connects to the motherboard; the riser card provides expansion slots
for the expansion cards
Courtesy: Course Technology/Cengage Learning
TYPES OF COMPUTER CASES
Several types and sizes of cases are on the market for each form factor. The computer case,
sometimes called the chassis, houses the power supply, motherboard, expansion cards, and
drives. The case has lights and switches on the front panel that can be used to control and
monitor the PC. Generally, the larger the case, the larger the power supply and the more
amps (current) it carries. These large cases allow for the extra space and power needed for a
larger number of devices, such as multiple hard drives needed in a server.
2
A+ 220-701
When the BTX form factor was first introduced, it was expected to replace ATX.
However, BTX has not gained as much popularity with those who build custom systems as
was first anticipated. Even though Dell and Gateway have both produced their own BTX
brand name systems, it appears ATX will continue to be the most popular form factor.
1435487389_ch02_CTP.qxd
44
A+
220-701
1.2
7/30/09
5:17 PM
CHAPTER 2
Page 44
Form Factors, Power Supplies, and Working Inside a Computer
Computer cases come in different colors and have cool features, such as clear plastic
panels so you can see lights inside. Ports that connect by cables to the motherboard
might be mounted on the front, top, side, or rear of the case. When you select a case, be
aware that the power supply is often included with the case and it’s important to match
the power supply to the electrical needs of the system. How to do that is coming up later
in the chapter.
Cases for personal computers and notebooks fall into three major categories: desktop
cases, tower cases, and notebook cases. Figure 2-11 shows examples of each of the three
main tower cases, as well as two desktop cases.
Full-size tower
Midsize tower
Minitower
Desktop
Slimline desktop
Figure 2-11 Tower and desktop cases
Courtesy: Course Technology/Cengage Learning
The following sections discuss each in turn.
DESKTOP CASES
The first personal computers used a desktop case that sat flat on a desktop doing double
duty as a monitor stand. The motherboard sat on the bottom of a desktop case, and the
power supply was near the back. If you have a desktop case designed to lie flat, don’t place
it on its end because the CD or DVD drive might not work properly. Desktop cases are built
to accommodate all form factors for personal computers. Because of the space a desktop
case takes, it has fallen out of favor in recent years and is being replaced by smaller and
more space-efficient cases.
For low-end desktop systems, compact cases, sometimes called low-profile cases or
slimline cases, follow the MicroATX, FlexATX, or NLX form factor. Likely to have
fewer drive bays, they generally still provide for some expansion. Some cases lay flat
and can be used as a monitor stand and others stand upright. You can see an upright
slimline case in Figure 2-12. Slimline desktop cases are gaining in popularity for lowend personal computers because they come in nice colors and do double duty as a
monitor stand.
TOWER CASES
A tower case sits upright on the floor or a desk and can be as high as two feet and has room
for several drives. Often used for servers, this type of case is also good for PC users who
anticipate upgrading, because tower cases provide maximum space for working inside a
computer and moving components around.
The variations in tower cases are as follows:
Midsize towers, also called midi-towers or mid-towers, are the most versatile and most
popular. They are midrange in size and generally have around six expansion slots and
four drive bays, providing moderate potential for expansion. They are used for ATX,
MicroATX, Extended ATX, Mini-ATX, and BTX systems.
1435487389_ch02_CTP.qxd
7/30/09
5:17 PM
Page 45
Form Factors Used by Computer Cases, Motherboards, and Power Supplies
45
A+
220-701
2
1.2
A+ 220-701
Figure 2-12 This slimline case by ENlight supports a MicroATX motherboard
Courtesy of ENlight Corp
The minitower, also called a microtower, is the smallest type of tower case and
does not provide room for expansion. They are popular for MicroATX and FlexATX
systems.
Full-size towers are used for high-end personal computers and servers. They
are usually built to accommodate ATX, Mini-ATX, and BTX systems (see
Figure 2-13).
Figure 2-13 Full-size tower case for an ATX motherboard
Courtesy: Course Technology/Cengage Learning
1435487389_ch02_CTP.qxd
46
A+
220-701
1.2
7/30/09
5:17 PM
CHAPTER 2
Page 46
Form Factors, Power Supplies, and Working Inside a Computer
NOTEBOOK CASES
Notebook cases are used for portable computers that have all the components of a desktop
computer. The cost and power of notebook systems vary widely. As with other small systems, notebooks can present difficulties in expansion. The smallest notebook cases are called
subnotebooks or netbooks. Notebook designs are often highly proprietary, but are generally
designed to conserve space, allow portability, use less power, and produce less heat. The case
fan in a notebook usually attaches to a thermometer and runs only when temperature needs
to be lowered.
Table 2-2 lists a few case and power supply manufacturers.
Manufacturer
Web Site
Antec
www.antec.com
ASUS
www.asus.com
Cooler Master
www.coolermaster.com
ENlight Corporation
www.enlightcorp.com
Lian Li
www.lian-li.com
PC Power and Cooling
www.pcpowerandcooling.com
Rosewill
www.rosewill.com
Silverstone
www.silverstonetek.com
Sunus Suntek
www.suntekgroup.com
Thermaltake
www.thermaltakeusa.com
Zalman
www.zalman.com
Table 2-2
Manufacturers of cases and power supplies for personal computers
Notes Resellers sometimes closely match the domain name of a manufacturer so that you might
accidentally land on their site. For example, if you key in www.lianli.com (without the hyphen) you’re
taken to a reseller’s site rather than the Lian Li site.
Toward our goal of learning about power supplies and the electrical current they provide,
let’s turn our attention to understanding how electricity is measured and about some of its
properties.
MEASURES AND PROPERTIES OF ELECTRICITY
In our modern world, we take electricity for granted, and we miss it terribly when it’s cut
off. Nearly everyone depends on it, but few really understand it. But to become a successful
PC technician (that is, you don’t tend to encounter fried motherboards, smoking monitors,
or frizzed hair), you need to understand electricity. In addition, you need to know how to
use it, how it’s measured, and how to protect computer equipment from its damaging
power.
Let’s start with the basics. To most people, volts, ohms, watts, and amps are vague terms
that simply mean electricity. All these terms can be used to measure some characteristic of
electricity, as listed in Table 2-3.
1435487389_ch02_CTP.qxd
7/30/09
5:17 PM
Page 47
Measures and Properties of Electricity
Definition
Computer Example
Volt (for
example, 115 V)
A measure of electrical “pressure”
differential. Volts are measured by
finding the potential difference
between the pressures on either
side of an electrical device in a
circuit. The symbol for volts is V.
An ATX or BTX power supply
provides these separate voltages: +12 V, -12 V, +5 V, and
+3.3 V. (-5 V is included in the
specs for these power supplies
but is almost never used.)
Amp or ampere
(for example,
1.5 A)
A measure of electrical current. Amps
are measured by placing an ammeter
in the flow of current. The symbol for
Amps is A.
A 17-inch monitor requires less
than 4 A to operate. A small
laser printer uses about 2 A. A
CD-ROM drive uses about 1 A.
Ohm (for
example, 20 ⍀)
A measure of resistance to electricity.
Devices are rated according to how
much resistance they offer to
electrical current. The ohm rating of a
resistor or other electrical device is
often written somewhere on the
device. The symbol for ohm is ⍀.
Current can flow in typical
computer cables and wires
with a resistance of near zero
⍀ (ohm).
Watt (for
example, 20 W)
A measure of electrical power.
Whereas volts and amps are measured
to determine their value, watts are
calculated by multiplying volts by
amps. Watts measure the total
electrical power needed to operate a
device. The symbol for watts is W.
A computer power supply is
rated at 200 to 800 W.
Table 2-3
Measures of electricity
Notes To learn more about how volts, amps, ohms, and watts measure the four properties of
electricity, see the content “Electricity and Multimeters” on the CD that accompanies this book.
Now let’s look at how electricity gets from one place to another and how it is used in
house circuits and computers.
AC AND DC
Electricity can be either AC, alternating current, or DC, direct current. Alternating current
(AC) goes back and forth, or oscillates, rather than traveling in only one direction. House
current in the United States is AC and oscillates 60 times in one second (60 hertz). Voltage in
the system is constantly alternating from positive to negative, which causes the electricity to
flow first in one direction and then in the other. Voltage alternates from +110 V to -110 V.
AC is the most economical way to transmit electricity to our homes and workplaces. By
decreasing current and increasing voltage, we can force alternating current to travel great
distances. When alternating current reaches its destination, it is made more suitable for
driving our electrical devices by decreasing voltage and increasing current.
Direct current (DC) travels in only one direction and is the type of current that most
electronic devices require, including computers. A rectifier is a device that converts AC to
DC, and an inverter is a device that converts DC to AC. A transformer is a device that
changes the ratio of voltage to current. Large transformers reduce the high voltage on power
lines coming to your neighborhood to a lower voltage before the current enters your home.
The transformer does not change the amount of power in this closed system; if it decreases
2
A+ 220-701
Unit
47
1435487389_ch02_CTP.qxd
48
7/30/09
5:17 PM
CHAPTER 2
Page 48
Form Factors, Power Supplies, and Working Inside a Computer
voltage, it increases current. The overall power stays constant, but the ratio of voltage to
current changes is illustrated in Figure 2-14.
Power
Less current
More voltage
Power
Transformer
More current
Less voltage
Figure 2-14 A transformer keeps power constant but changes the ratio of current to voltage
Courtesy: Course Technology/Cengage Learning
A computer power supply changes and conditions the house electrical current in several
ways, functioning as both a transformer and a rectifier. It steps down the voltage from the
110-volt house current to 3.3, 5, and 12 volts, and changes incoming alternating current to
direct current, which the computer and its peripherals require. The monitor, however,
receives the full 110 volts of AC voltage, converting that current to DC.
Direct current flows in only one direction. Think of electrical current like a current of
water that flows from a state of high pressure to a state of low pressure or rest. Electrical
current flows from a high-pressure state (called hot) to a state of rest (called ground or neutral). For a PC, a line may be either +5 or -5 volts in one circuit, or +12 or -12 volts in
another circuit. The positive or negative value is determined by how the circuit is oriented,
either on one side of the power output or the other. Several circuits coming from the power
supply accommodate different devices with different power requirements.
HOT, NEUTRAL, AND GROUND
When AC comes from the power source at the power station to your house, it travels on a
hot line and completes the circuit from your house back to the power source on a neutral
line, as shown in Figure 2-15.
When the two lines reach your house and enter an electrical device, such as a lamp, electricity flows through the device to complete the circuit between the hot line and the neutral
line. The device contains resistors and other electrical components that control the flow of
electricity between the hot and neutral lines. In a controlled environment, the hot source
then seeks and finds a state of rest by returning to the power station on the neutral line.
A short circuit, or a short, occurs when uncontrolled electricity flows from the hot line to the
neutral line or from the hot line to ground. Electricity naturally finds the easiest route to a state
of rest. Normally that path is through some device that controls the current flow and then back
through the neutral line. If an easier path (one with less resistance) is available, the electricity follows that path. This can cause a short, a sudden increase in flow that can also create a sudden
increase in temperature—enough to start a fire and injure both people and equipment. Never put
yourself in a position where you are the path of least resistance between the hot line and ground!
Notes A Class C fire extinguisher is used to put out fires fueled by electricity.
A fuse is a component included in a circuit and designed to prevent too much current
from flowing through the circuit. A fuse is commonly a wire inside a protective case, which
is rated in amps. If too much current begins to flow, the wire gets hot and eventually melts,
breaking the circuit, as an open switch would, and stopping the current flow. Many devices
have fuses, which can be easily replaced when damaged.
1435487389_ch02_CTP.qxd
7/30/09
5:17 PM
Page 49
Hot contacts neutral
in the lamp
Power station
Neutral
Hot
2
Hot
utra
A+ 220-701
Ne
l
Ground
al
utr
Ne
t
Ho
Ground
Hot
Neut
ral
Ground
Ground
Figure 2-15 Normally, electricity flows from hot to neutral to make a closed circuit in the controlled
environment of an electrical device such as a lamp
Courtesy: Course Technology/Cengage Learning
To prevent uncontrolled electricity from continuing to flow indefinitely, which can happen
because of a short, the neutral line is grounded. Grounding a line means that the line is
connected directly to the earth, so that, in the event of a short, the electricity flows into
the earth and not back to the power station. Grounding serves as an escape route for
out-of-control electricity. The earth is at no particular state of charge and so is always
capable of accepting a flow of current.
Caution
Beware of the different uses of black wire. In PCs and in DC circuits, black is used
for ground, but in home wiring and in AC circuits, black is used for hot!
The neutral line to your house is grounded many times along its way (in fact, at each electrical
pole) and is also grounded at the breaker box where the electricity enters your house. You can
look at a three-prong plug and see the three lines: hot, neutral, and ground (see Figure 2-16).
Neutral
Hot
Ground
Figure 2-16 A polarized plug showing hot and neutral, and a three-prong plug showing hot, neutral, and ground
Courtesy: Course Technology/Cengage Learning
49
1435487389_ch02_CTP.qxd
50
7/30/09
5:17 PM
CHAPTER 2
Page 50
Form Factors, Power Supplies, and Working Inside a Computer
Generally, electricians use green or bare wire for the ground wire, white for neutral, and
black for hot in home wiring for 110-volt circuits. In a 220-volt circuit, black and red are
hot, white is neutral, and green or bare is ground. To verify that a wall outlet is wired correctly, use a simple receptacle tester, as shown in Figure 2-17. Even though you might have a
three-prong outlet in your home, the ground plug might not be properly grounded. To know
for sure, always test the outlet with a receptacle tester.
Notes House AC voltage in the United States is about 110 V, but know that in other countries, this
is not always the case. In many countries, the standard is 220 V. Outlet styles also vary from one country
to the next.
Figure 2-17 Use a receptacle tester to verify that hot, neutral, and ground are wired correctly
Courtesy: Course Technology/Cengage Learning
SOME COMMON ELECTRONIC COMPONENTS
It’s important you understand what basic electronic components make up a PC and how
they work. Basic electronic components in a PC include transistors, capacitors, diodes,
and resistors (each of which we will discuss in detail in a moment). Figure 2-18 shows
the symbols for these components. Also notice in the figure the symbol for ground.
Resistor
Capacitor
Ground
Diode
Transistor
Figure 2-18 Symbols for some electronic components and for ground
Courtesy: Course Technology/Cengage Learning
1435487389_ch02_CTP.qxd
7/30/09
5:17 PM
Page 51
Measures and Properties of Electricity
51
To understand how these components are constructed, it helps to know that all the materials used to make the components fall into one of these three categories:
Caution
It’s very important that PC components be properly grounded. Never connect a PC
to an outlet or use an extension cord that doesn’t have the third ground plug. The third line can prevent a short from causing extreme damage. In addition, the bond between the neutral and ground
helps eliminate electrical noise (stray electrical signals) within the PC sometimes caused by other electrical equipment sitting very close to the computer.
TRANSISTOR
A transistor is an electronic device that can serve as a gate or switch for an electrical signal
and can amplify the flow of electricity. Invented in 1947, the transistor is made of three
layers of semiconductor material.
A charge (either positive or negative, depending on the transistor’s design) placed on the
center layer can cause the two outer layers of the transistor to complete a circuit to create
an “on” state. An opposite charge placed on the center layer can make the reverse happen,
causing the transistor to create an “off” state. Manipulating these charges to the transistor
allows it to hold a logic state of either on or off. The on state represents binary 1 and the
off state represents binary 0 when used to hold data in a computer.
When the transistor maintains this state, it requires almost no electrical power. Because
the initial charge sent to the transistor is not as great as the resulting current that the transistor creates, a transistor sometimes is used as a small amplifier. For instance, transistors
are used to amplify the tiny dots or pixels on an LCD monitor screen used to create a
sharper image. The transistor is also used as the basic building block of an integrated circuit
(IC), which is used to build a microchip.
CAPACITOR
A capacitor is an electronic device that can hold an electrical charge for a period of time and
can smooth the uneven flow of electricity through a circuit. Capacitors inside a PC power
supply create the even flow of current the PC needs. Capacitors maintain their charge long
after current is no longer present, which is why the inside of a power supply can be dangerous even when it is unplugged. You can see many capacitors on motherboards, video cards,
and other circuit boards (see Figure 2-19).
DIODE
A diode is a semiconductor device that allows electricity to flow in only one direction.
(A transistor contains two diodes.) One to four diodes used in various configurations can be
used to convert AC to DC. Singularly or collectively, depending on the configuration, these
diodes are called a rectifier.
RESISTOR
A resistor is an electronic device that limits the amount of current that can flow through it.
In a circuit, a resistor is used to protect a circuit from overload or to control the current.
Resistors are color-coded to indicate the degree of resistance measured in ohms.
A+ 220-701
Conductors. Material, such as gold or copper, that easily conducts electricity
Insulators. Material, such as glass or ceramic, that resists the flow of electricity
Semiconductors. Material, such as silicon, whose ability to conduct electricity, when a
charge is applied, falls between that of a conductor and an insulator
2
1435487389_ch02_CTP.qxd
52
7/30/09
5:17 PM
CHAPTER 2
Page 52
Form Factors, Power Supplies, and Working Inside a Computer
Crosshatch on top
of capacitor
Figure 2-19 Capacitors on a motherboard or other circuit board often have embedded crossed lines on top
Courtesy: Course Technology/Cengage Learning
SELECTING A POWER SUPPLY
A+
220-701
1.3
Now that you have a basic understanding of electricity, you’re ready to take a closer look at
the features of a power supply and how to select one. A power supply, also known as a
power supply unit (PSU), is a box inside a computer case (see Figure 2-20) that supplies
power to the motherboard and other installed devices.
Recall that a power supply serves as both a rectifier and transformer to convert AC house
current to DC and to step down voltage from 110 V or 220 V to 3.5, 5, and 12 V. Let’s now
turn our attention to the features of a power supply.
TYPES AND CHARACTERISTICS OF POWER SUPPLIES
As you select the right power supply for a system, you need to be aware of the following
power supply features:
Feature 1. The form factor of a power supply determines the size of the power
supply and the placement of screw holes used to anchor the power supply to the case
(see Figure 2-21).
Feature 2. Consider the type and number of power cables and connectors the unit
provides. Connector types are shown in Table 2-4. If a power supply doesn’t have the
1435487389_ch02_CTP.qxd
7/30/09
5:17 PM
Page 53
Selecting a Power Supply
53
A+
220-701
2
1.3
A+ 220-701
Figure 2-20 This case comes with a power supply, power cord, and bag of screws
Courtesy: Course Technology/Cengage Learning
connector you need, it is likely you can use an adapter to convert one connector to
another. To find an adapter, search a good Web site such as Cables To Go
(www.cablestogo.com) that sells computer parts and cables. For example, if your
power supply does not have a 12 V 6-pin connector for your PCIe x16 video card,
you can buy an inexpensive adapter to convert two Molex cables to this type of
connector (see Figure 2-22).
Feature 3. A power supply might have a voltage selector switch on the back. For
example, the voltage selector switch on the power supply in Figure 2-21 can be
set to 230 V or 115 V. When in the United States, set the switch to 115 V. Be sure
to never change the switch setting until you first turn off and unplug the power
supply.
1435487389_ch02_CTP.qxd
54
7/30/09
5:17 PM
CHAPTER 2
Page 54
Form Factors, Power Supplies, and Working Inside a Computer
A+
220-701
1.3
On/off switch
Voltage
selector switch
Four screw
holes
Figure 2-21 Holes in the rear of an ATX power supply match up with holes in the ATX case to anchor the
power supply to the case
Courtesy: Course Technology/Cengage Learning
Connector
Description
P1 20+4 pin connector is the main motherboard power
connector
P1 20+4 pin connector with four pins removed so the
connector can fit into a 20-pin P1 motherboard connector
4-pin 12 V auxiliary motherboard connector used for extra
power to the processor
8-pin 12 V auxiliary motherboard connector used for extra
power to the processor, providing more power than the older
4-pin auxiliary connector
Molex 4-pin connector is used for IDE drives
Table 2-4 Power supply connectors
Courtesy: Course Technology/Cengage Learning
1435487389_ch02_CTP.qxd
7/30/09
5:17 PM
Page 55
Selecting a Power Supply
A+
220-701
Connector
1.3
55
Description
2
SATA connector used for SATA drives
6-pin plus 2-pin +12 V connector is used by high-end video
cards using PCIe x16 slots to provide extra voltage to the
card. PCI Express, Version 1, uses the 6-pin connector and PCI
Express, Version 2, uses the 8-pin connector. To get the 8-pin
connector, combine both the 6-pin and 2-pin connectors
Table 2-4
Power supply connectors (continued)
Courtesy: Course Technology/Cengage Learning
Figure 2-22 This adapter converts two Molex cables to a single 12 V 6-pin PCIe connector
Courtesy: Course Technology/Cengage Learning
Feature 4. Every power supply has a fan inside its case; some have two fans. The fan can
be mounted on the back or top of the PSU. Fans range in size from 80mm to 120mm wide.
Feature 5. A power supply might have an on/off switch that controls power to the
system (refer back to Figure 2-21).
Feature 6. A power supply has wattage ratings, which are the amounts of power it
can supply. These wattage capacities are listed in the documentation and on the side
of a power supply, as shown in Figure 2-23. When selecting a power supply, pay particular attention to the capacity for the +12 V rail. (A rail is the term used to describe
each voltage line of the power supply.) The +12 V rail is the most used one, especially
in high-end gaming systems. Sometimes you need to use a power supply with a
higher-than-needed overall wattage in order to get enough wattage on this one rail.
Feature 7. Consider the warranty of the power supply and the overall quality. Some come
in bright colors, and cables might be of higher quality than others. The more expensive
power supplies are quieter, last longer, and don’t put off as much heat as less expensive
ones. Also, expect a good power supply to protect the system against over voltage.
A+ 220-701
Floppy drive connector
1435487389_ch02_CTP.qxd
56
7/30/09
5:17 PM
CHAPTER 2
Page 56
Form Factors, Power Supplies, and Working Inside a Computer
A+
220-701
1.3
Figure 2-23 Look on the side of a power supply for its wattage ratings
Courtesy: Course Technology/Cengage Learning
HOW TO SELECT A POWER SUPPLY
When selecting a power supply, match the form factor to that used by the case and motherboard, make sure it provides the connectors you need, and match the wattage capacity to
the requirements of the system. In addition, consider the warranty, price, and the additional
features you learned about in the previous section.
When deciding what wattage capacity you need for the power supply, consider the total
wattage requirements of all components inside the case as well as USB and FireWire devices
that get their power from ports connected to the motherboard.
Keep these points in mind when selecting the correct wattage capacity for a power supply:
Point 1. A power supply produces slightly higher wattage at room temperature than it
does when the temperature inside the case has risen above room temperature (called operating temperature). Therefore, a power supply might have two ratings: one wattage rating
for room temperature (called the peak rating) and another rating for continuous operation at operating temperature (sometimes called the actual rating). If a power supply has
only one rating, assume that rating is the peak rating for room temperature. To calculate
the rating for continuous operation, deduct about 10 to 15 percent off the peak rating.
For example, the Silencer 610 power supply by PC Power and Cooling is rated at 610 W
at operating temperature and continuous operation but has a peak rating of 670 W.
Point 2. Video cards draw the most power in a system, and they draw from the +12 V output. So pay particular attention to this rating. For example, in Figure 2-23, you can see the
+12 V output is 300 W. Notice in the figure the unit is rated at total peak load of 450 W.
Point 3. Use a power supply that is rated about 30 percent higher than you expect the
system will use. Power supplies that run at less than peak performance last longer and
don’t overheat. In addition, a power supply loses some of its capacity over time. Also,
don’t worry about a higher-rated power supply using too much electricity.
Components only draw what they need. To know what size power supply you need,
add up the wattage requirements of all components, and add 30 percent. Device technical documentation might give you the information you need. Table 2-5 lists appropriate wattage ratings for common devices with the 30 percent extra already added in.
Point 4. The Web sites of some power supply and motherboard manufacturers have a
wattage calculator where you can enter the components in your system and then the
calculator will recommend the wattage you need for your power supply. You will see
one example of a wattage calculator in Project 2-7 at the end of this chapter.
1435487389_ch02_CTP.qxd
7/30/09
5:17 PM
Page 57
Selecting a Power Supply
Devices
Approximate Wattage
1.3
Moderately priced motherboard, processor,
RAM, keyboard, and mouse
100 watts
High-end motherboard, processor, RAM,
keyboard, and mouse
100 to 150 watts
Fan
5 watts
IDE hard drive
25 watts
SATA or SCSI hard drive
35 watts
CD-RW drive
25 watts
DVD-RW or Blu-ray drive
35 watts
Tape drive
25 watts
Low-end AGP or PCI video card
40 watts
Moderately priced video card
100 watts
High-end PCIe x16 video card
150–300 watts
PCI card
20 watts
PCI e x16 card
100 watts
Liquid cooling system
50–150 watts
Table 2-5
To calculate power supply rating, add up total wattage
Here are the wattage needs of four typical systems:
• Example 1. A regular desktop system with a moderately priced motherboard using socket LGA775 for Intel processors or an AMD2 socket for
AMD processors, one moderately priced video card, two SATA hard
drives, a DVD-RW drive, and two fans needs a power supply rated at
about 300 to 350 watts.
• Example 2. A desktop system used as a file server with a high-end
motherboard, Intel or AMD processor, moderately priced video card,
six SATA hard drives, DVD-RW drive, tape drive, PCI RAID card, and
four fans needs a power supply rated at about 550 watts.
• Example 3. A gaming system with a high-end motherboard using socket
LGA775 for Intel processors or an AMD2 socket for AMD processors,
two high-end video cards, two SATA hard drives, a Blu-ray drive, and
four fans needs a power supply rated at about 800 watts. (The two
high-end video cards require about 275 watts each.)
• Example 4. If a liquid cooling system used by gamers for overclocking
a system is installed in the gaming system described above, the power
supply wattage rating should be increased to about 1000 watts.
(Overclocking is running a processor, motherboard, or video card at
a higher frequency than the manufacturer recommends and is not
considered a best practice. It might also void the warranty of a
component.)
Point 5. Dell ATX power supplies and motherboards might not use the standard P1
pinouts for ATX, although the power connectors look the same. For this reason, never
use a Dell power supply with a non-Dell motherboard, or a Dell motherboard with a
non-Dell power supply, without first verifying that the power connector pinouts
2
A+ 220-701
A+
220-701
57
1435487389_ch02_CTP.qxd
58
A+
220-701
1.3
7/30/09
5:17 PM
CHAPTER 2
Page 58
Form Factors, Power Supplies, and Working Inside a Computer
match; otherwise, you might destroy the power supply, the motherboard, or both.
End PC Noise (www.endpcnoise.com) sells a pinout converter to convert the connector
of a Dell power supply or motherboard to standard ATX. Also, PC Power and Cooling
(www.pcpowerandcooling.com) makes power supplies modified to work
with a Dell motherboard.
PROTECT YOURSELF AND THE EQUIPMENT AGAINST
ELECTRICAL DANGERS
A+
220-701
6.1
A+
220-701
6.1
2.2
In this part of the chapter, you’ll learn about the physical dangers of supporting personal
computers and how to protect yourself and others. Then you’ll learn about what can
happen to damage a computer or other equipment while you are working on it and what to
do to prevent that damage. As you work with computers, to stay safe and protect the
equipment, always make it a habit to apply all the safety precautions discussed here.
PROTECT YOURSELF AGAINST ELECTRICAL SHOCK AND BURNS
To protect yourself against electrical shock, when working with any electrical device, including computers, printers, scanners, and network devices, disconnect the power if you notice a
dangerous situation that might lead to electrical shock or fire. When you disconnect the
power, do so by pulling on the plug at the AC outlet. To protect the power cord, don’t pull
on the cord itself. Also, don’t just turn off the on/off switch on the device; you need to actually disconnect the power. Note that any of the following can indicate a potential danger:
The power cord is frayed or otherwise damaged in any way.
Water or other liquid is on the floor around the device or spilled on it.
The device has been exposed to excess moisture.
The device has been dropped or you notice physical damage.
You smell a strong electronics odor.
The power supply or fans are making a whining noise.
You notice smoke coming from the computer case or the case feels unusually warm.
When working on the inside of computers, printers, and other electrical devices, remove
your jewelry that might come in contact with components. Jewelry is made of metal and
might conduct electricity if it touches a component.
Power supplies and CRT monitors (the old-fashioned monitors that have a large case with a
picture tube) contain capacitors. A capacitor holds its charge even after the power is turned off
and the device is unplugged. A ground is the easiest possible path for electricity to follow. If you
are grounded and touch a charged capacitor, its charge can flow through you to the ground,
which can shock you! Therefore, if you ever work inside one of these devices, be careful that you
are not grounded. Later in the chapter, you will learn that being grounded while working on sensitive low-voltage electronic equipment such as a motherboard or processor is a good thing, and
the best way to ground yourself is to wear an antistatic grounding bracelet connected to ground.
However, when working on a CRT monitor, power supply, or laser printer, don’t wear the antistatic bracelet because you don’t want to be ground for these high-voltage devices. How to work
inside a power supply or CRT monitor is not covered in this book and is not considered a skill
needed by an A+ certified support technician. The power supply and monitor are both considered to be a field replaceable unit (FRU). That means, as a support technician, you are expected
to know how to replace one when it breaks, but not how to repair one.
1435487389_ch02_CTP.qxd
7/30/09
5:17 PM
Page 59
Protect Yourself and the Equipment Against Electrical Dangers
A+
220-701
6.1
59
A+ Exam Tip The A+ exams expect you to know about the dangers of high voltage when working
inside a power supply, CRT monitor, or laser printer.
PROTECT THE EQUIPMENT AGAINST STATIC ELECTRICITY OR ESD
Suppose you come indoors on a cold day, pick up a comb, and touch your hair. Sparks
fly! What happened? Static electricity caused the sparks. Electrostatic discharge (ESD),
commonly known as static electricity, is an electrical charge at rest. When you came
indoors, this charge built up on your hair and had no place to go. An ungrounded conductor (such as wire that is not touching another wire) or a nonconductive surface (such
as your hair) holds a charge until the charge is released. When two objects with dissimilar
electrical charges touch, electricity passes between them until the dissimilar charges
become equal.
To see static charges equalizing, turn off the lights in a room, scuff your feet on the carpet, and touch another person. Occasionally, you can see and feel the charge in your fingers.
If you can feel the charge, you discharged at least 1,500 volts of static electricity. If you hear
the discharge, you released at least 6,000 volts. If you see the discharge, you released at least
8,000 volts of ESD. A charge of only 10 volts can damage electronic components! You can
touch a chip on an expansion card or motherboard, damage the chip with ESD, and never
feel, hear, or see the discharge.
ESD can cause two types of damage in an electronic component: catastrophic failure
and upset failure. A catastrophic failure destroys the component beyond use. An upset
failure damages the component so that it does not perform well, even though it may
still function to some degree. Upset failures are more difficult to detect because they
are not consistent and not easily observed. Both types of failures permanently affect
the device.
Caution
A CRT monitor can also damage components with ESD. Don’t place or store
expansion cards on top of or next to a CRT monitor, which can discharge as much as 29,000 volts onto
the screen.
To protect the computer against ESD, always ground yourself before touching electronic
components, including the hard drive, motherboard, expansion cards, processors, and
memory modules. You can ground yourself and the computer parts by using one or more
of the following static control devices or methods:
Ground bracelet. A ground bracelet, also called an antistatic wrist strap or ESD
bracelet, is a strap you wear around your wrist. The strap has a cord attached with an
alligator clip on the end. Attach the clip to the computer case you’re working on, as
shown in Figure 2-24. Any static electricity between you and the case is now
discharged. Therefore, as you work inside the case, you will not damage the
components with static electricity. The bracelet also contains a resistor that prevents
electricity from harming you.
2
A+ 220-701
Tip
Go to www.youtube.com and search on “discharge a CRT monitor” to see
some interesting videos that demonstrate the charge inside a monitor long after the monitor is
turned off and unplugged. As for proper procedures, I’m not endorsing all these videos; just
watch for fun.
1435487389_ch02_CTP.qxd
60
7/30/09
5:17 PM
CHAPTER 2
Page 60
Form Factors, Power Supplies, and Working Inside a Computer
A+
220-701
6.1
Figure 2-24 A ground bracelet, which protects computer components from ESD, can clip to
the side of the computer case and eliminate ESD between you and the case
Courtesy: Course Technology/Cengage Learning
Ground mats. Ground mats dissipate ESD and are commonly used by bench technicians (also called depot technicians) who repair and assemble computers at their workbenches or in an assembly line. Ground mats have a connector in one corner that you
can use to connect the mat to ground (see Figure 2-25). If you lift a component off the
mat, it is no longer grounded and is susceptible to ESD, so it’s important to use a
ground bracelet with a ground mat.
Figure 2-25 A ground mat dissipates ESD and should be connected to ground
Courtesy: Course Technology/Cengage Learning
1435487389_ch02_CTP.qxd
7/30/09
5:17 PM
Page 61
Protect Yourself and the Equipment Against Electrical Dangers
A+
220-701
6.1
61
Figure 2-26 Static shielding bags help protect components from ESD
Courtesy: Course Technology/Cengage Learning
Antistatic gloves. You can purchase antistatic gloves designed to prevent an ESD discharge between you and a device as you pick it up and handle it (see Figure 2-27). The
gloves can be substituted for an antistatic bracelet, and are good for moving, packing,
or unpacking sensitive equipment. However, they tend to get in the way when working
inside computer cases.
The best way to guard against ESD is to use a ground bracelet together with a ground
mat. Consider a ground bracelet essential equipment when working on a computer.
However, if you are in a situation in which you must work without one, touch the computer
case or the power supply before you touch a component. When passing a circuit board,
memory module, or other sensitive component to another person, ground yourself and then
touch the other person before you pass the component. Leave components inside their protective bags until you are ready to use them. Work on hard floors, not carpet, or use antistatic spray on the carpets. Generally, don’t work on a computer if you or the computer have
just come in from the cold, because there is more danger of ESD when the atmosphere is
cold and dry.
With ATX and BTX cases, know that residual power is still on even when the power
switch on the rear of the case is turned off. Some motherboards even have a small light
inside the case to remind you of this fact and to warn you that power is still getting to the
system. For this reason, when working on ATX and BTX systems, be certain to unplug the
power cord and then press the power button to completely drain the power supply. Only
then would it be safe to work inside the case.
2
A+ 220-701
Static shielding bags. New components come shipped in static shielding bags, also
called antistatic bags. These bags are a type of Faraday cage, named after Michael
Faraday, who built the first cage in 1836. A Faraday cage is any device that protects
against an electromagnetic field. Save the bags to store other devices that are not
currently installed in a PC. As you work on a computer, know that a device is not
protected from ESD if you place it on top of the bag; the protection is inside the bag
(see Figure 2-26).
1435487389_ch02_CTP.qxd
62
7/30/09
5:17 PM
CHAPTER 2
Page 62
Form Factors, Power Supplies, and Working Inside a Computer
A+
220-701
6.1
Figure 2-27 Use antistatic gloves to prevent static discharge between you and the equipment you are handling
Courtesy: Course Technology/Cengage Learning
A+ Exam Tip The A+ 220-701 Essentials exam emphasizes that you should know how to protect
computer equipment as you work on it.
PROTECT AGAINST ELECTROMAGNETIC INTERFERENCE
Another phenomenon that can cause electrical problems with computers is electromagnetic
interference (EMI). EMI is caused by the magnetic field produced as a side effect when electricity flows. EMI in the radio frequency range is called radio frequency interference (RFI).
CRT monitors and the older CRT television sets contain electronic magnets that can emit
EMI. Other devices that are known to emit EMI/RFI are PDAs, cell phones, cordless
phones, microwave ovens, magnets, laser printers, power supplies, fluorescent lighting, AC
adapters, bug zappers, and other electric and electronic devices.
EMI and RFI are reduced in these devices by using EMI/RFI shielding (a type of Faraday
cage) inside the device. This shielding might be a second layer of housing inside the device
housing, but is more commonly done with a chemical coating on the inside of the device
housing. This chemical coating might be made of an acrylic compound, nickel, silver, or
copper, and is sprayed or brushed onto the inside of the housing.
Many electronic devices are affected by EMI/RFI, including computers, CRT monitors,
and data cables. If a CRT monitor flickers occasionally, try moving it to a new location,
away from fluorescent lighting or a laser printer, or turn them off. If the problem goes away
or lessens, suspect EMI/RFI. For laser printers, you can check with the manufacturer for
instructions on how to verify that the RFI shield inside the printer is properly installed.
Data in data cables that cross an electromagnetic field or that run parallel with power
cables can become corrupted by EMI/RFI, causing crosstalk. Crosstalk can be partially
controlled by using data cables covered with a protective material; these cables are called
shielded cables. One thing you can do to prevent crosstalk is to use only shielded data
cables, especially when installing network cable. However, shielded cables are more
1435487389_ch02_CTP.qxd
7/30/09
5:17 PM
Page 63
Protect Yourself and the Equipment Against Electrical Dangers
A+
220-701
6.1
63
expensive than unshielded cables. Also, you might need to reroute data cables so they are
not running parallel to power cables or alongside fluorescent lighting.
If mysterious, intermittent errors persist on a PC, one thing to suspect is EMI/RFI. Try
moving the PC to a new location. If the problem continues, try moving it to a location that
uses an entirely different electric circuit. Move the PC away from any suspected device to
eliminate it as a source. A simple way to detect EMI is to use an inexpensive AM radio.
Turn the tuning dial away from a station and all the way
down into a low-frequency range. With the radio on, you can
Video
hear the static that EMI produces. Try putting the radio next
Testing for EMI
to several electronic devices to detect the EMI they emit.
If EMI in the electrical circuits coming to the PC causes a
significant problem, you can use a line conditioner to filter the electrical noise that causes
the EMI. Line conditioners are discussed later in the chapter.
Notes After you remove the source of EMI or RFI, the problem that the EMI or RFI is causing goes
away. In contrast, the problems caused by ESD permanently damage a component.
A+
220-701
6.1
2.5
SURGE PROTECTION AND BATTERY BACKUP
The power supplies in most computers can operate over a wide range of electrical voltage
inputs; however, operating the computer under these conditions for extended periods of time
can shorten not only the power supply’s life, but also the computer’s. Also, electrical storms
can end a computer’s life quite suddenly. To prevent such things from happening, consider
installing a device to filter AC input.
A wide range of devices that stand between the AC outlet and computer equipment are on
the market and generally fall into these four categories:
Power strips that provide additional outlets without providing any protection from
changes in AC power
Surge protectors which protect equipment against power spikes or surges
Line conditions that condition or smooth out the highs and lows in power
Uninterruptible power supplies (UPSs) that provide backup power when the AC fails
All these devices should have the UL (Underwriters Laboratory) logo, which says that the
laboratory, a provider of product safety certification, has tested the device. The UL standard
that applies to surge suppressors is UL 1449, first published in 1985 and revised in 1998.
Let’s look at the features and benefits of the last three items in the list: surge protectors, line
conditioners, and UPSs.
SURGE PROTECTORS
A surge protector, also called a surge suppressor, protects equipment against sudden
changes in power level, such as spikes from lightning strikes. The device, such as the ones
shown in Figure 2-28, typically provides one or more power outlets, an on/off switch, and
A+ 220-701
Notes PCs can emit EMI to other nearby PCs, which is one reason a computer needs to be inside a
case. To help cut down on EMI between PCs, always install face plates in empty drive bays or slot covers
over empty expansion slots.
2
1435487389_ch02_CTP.qxd
64
7/30/09
5:17 PM
CHAPTER 2
Page 64
Form Factors, Power Supplies, and Working Inside a Computer
A+
220-701
6.1
2.5
Figure 2-28 Both surge suppressors alert you when protection is not working. The small surge
suppressor is designed to travel with a laptop
Courtesy: Course Technology/Cengage Learning
a protection light that indicates the device is protecting equipment from overvoltage (also
called transient voltage) on AC power lines and telephone lines. Surge suppressors can
come as power strips, wall-mounted units that plug into AC outlets, or consoles designed
to sit beneath the monitor on a desktop. Some provide RJ-11 telephone jacks to protect
modems and fax machines from spikes. Be aware, too, that not all power strips are surge
suppressors; some power strips only multiply the number of outlets without offering any
protection from a power surge.
A surge suppressor might be a shunt type that absorbs the surge, a series type that blocks
the surge from flowing, or a combination of the two. A suppressor is rated in joules, which
is a measure of work or energy. One joule (pronounced “jewel”) is the work or energy
required to produce one watt of power in one second, and a suppressor is rated as to the
amount of joules it can expend before it no longer can work to protect the circuit from the
power surge. Suppressors are commonly rated from 250 joules to several thousand joules—
the higher the better.
Some suppressors are also rated by clamping voltage (also called let-through
voltage), which is the voltage point at which a suppressor begins to absorb or block voltage.
Normally, house current is rated at 110 V, so you would think the clamping voltage should
be close to this number, such as around 130 V. However, the clamping voltage value is best
not set this low. House current regularly spikes past 200 V, and a PC power supply is
designed to handle these types of quick spikes. If the surge suppressor kicks in to work on
these spikes, not only is it unnecessary, but the suppressor is likely to wear out prematurely.
A clamping voltage of 330 V or higher is appropriate.
The difference between a joule rating and a clamping voltage rating for a suppressor is
that the clamping voltage rating determines at what point the suppressor begins to work
and the joule rating has to do with how much work the suppressor can do.
The circuitry inside the suppressor that handles a surge can burn out if a surge is
too high or lasts too long. In this case, most suppressors continue to work just like
a normal extension cord, providing no surge protection. Because of this fact, it’s
important that a surge suppressor have a light indicator that says the suppressor
part of the device is still working. Otherwise, you might not have protection and not
even know it.
1435487389_ch02_CTP.qxd
7/30/09
5:17 PM
Page 65
Protect Yourself and the Equipment Against Electrical Dangers
A+
220-701
Notes Whenever a power outage occurs, unless you have a reliable power conditioner installed at the
breaker box in your house or building, unplug all power cords to the PC, printers, monitors, and the like.
Sometimes when the power returns, sudden spikes are accompanied by another brief outage. You don’t want to
subject your equipment to these surges. When buying a surge suppressor, look for those that guarantee against
damage from lightning and that reimburse for equipment destroyed while the surge suppressor is in use.
When shopping for a surge protector, look for these features:
Joules rating (more than 600 joules) and the time it takes for the protection to start
working (less than 2 nanoseconds is good)
Warranty for connected equipment
UL seal of approval
A light that indicates the surge protection is working
Let-through voltage rating
Line noise filtering
If you use a phone line for Internet access, look for a data line protector to protect
the modem from spikes in the phone line.
When you plug in a surge protector, know that if the protector is not grounded using
a three-prong outlet, the protector cannot do its job. One more thing to consider: You can
purchase a whole-house surge protection system that is installed by an electrician at your
breaker box. It’s more expensive, but your entire house or office building is protected.
LINE CONDITIONERS
In addition to providing protection against spikes, line conditioners, also called power
conditioners, regulate, or condition, the power, providing continuous voltage during
brownouts. These voltage regulators can come as small desktop units. They provide
a degree of protection against swells or spikes (temporary voltage surges) and raise
the voltage when it drops during brownouts or sags (temporary voltage reductions). They
also filter EMI/RFI interference from the electrical line. Power conditioners are measured
by the load they support in watts, volt-amperes (VA), or kilovolt-amperes (kVA).
To determine the VA required to support your system, multiply the amperage of each component by 120 volts and then add up the VA for all components. For example, a 17-inch
LCD monitor has “1.3 A” written on its back, which means 1.3 amps. Multiply that value
by 120 volts, and you see that the monitor requires 156 VA or 156 watts. A Pentium PC with
a 17-inch monitor requires about 500 VA or 500 watts of support. Figure 2-29 shows a line
conditioner by Tripp Lite that is rated at 1800 watts.
Power conditioners are a good investment if the AC in your community suffers excessive
spikes and brownouts. However, a device rated under 1kVA will probably provide corrections only for brownouts, not for spikes. Line conditioners, like surge suppressors, provide
no protection against a total blackout (complete loss of power).
UNINTERRUPTIBLE POWER SUPPLY
Unlike a line conditioner, the uninterruptible power supply (UPS) provides backup power in
the event that the AC fails completely. The UPS also provides some filtering of the AC. A
UPS offers these benefits:
Conditions the line to account for both brownouts and spikes
Provides backup power during a blackout
Protects against very high spikes that could damage equipment
2
A+ 220-701
6.1
2.5
65
1435487389_ch02_CTP.qxd
66
7/30/09
5:17 PM
CHAPTER 2
Page 66
Form Factors, Power Supplies, and Working Inside a Computer
A+
220-701
6.1
2.5
Figure 2-29 Line conditioner by Tripp Lite has six outlets and is rated to support up to 1800 watts of
conditioned power
Courtesy of TrippLite
A UPS device that is suitably priced for personal computer systems is designed as a
standby device (battery-powered circuit is used when AC input fails), an inline device
(battery-powered circuit is used continually), or a line-interactive device (which combines
features of the first two). Several variations of these three types of UPS devices are on the
market at widely varying prices.
A common UPS device is a rather heavy box that plugs into an AC outlet and provides one or more outlets for the computer and the monitor (see Figure 2-30). It has
an on/off switch, requires no maintenance, and is very simple to install. Use it to provide uninterruptible power to your desktop computer and monitor during a blackout.
It’s best not to connect it to nonessential devices such as a laser printer or scanner.
Expect a UPS to provide power during a blackout long enough for you to save your
work and shut down the system. Also know that a UPS is not as essential for a laptop
computer as it is for a desktop because a laptop has a battery that can sustain it during
a blackout.
The Smart UPS
When you look through ads of UPS devices, some of them are labeled as a smart UPS. A
smart UPS (also called an intelligent UPS) can be controlled by software from a computer.
For example, from the front panel of some UPSs you can check for a weak battery, but with
a smart UPS, you can perform the same function from utility software installed on your
computer. To accommodate this feature, a UPS has a USB connection to the PC and a
microprocessor on board.
Some activities this utility software and a smart UPS can do include the following:
Diagnose the UPS.
Check for a weak battery.
Monitor the quality of electricity received.
Monitor the percentage of load the UPS is carrying during a blackout.
Automatically schedule the weak-battery test or UPS diagnostic test.
Send an alarm to workstations on a network to prepare for a shutdown.
1435487389_ch02_CTP.qxd
7/30/09
5:17 PM
Page 67
Protect Yourself and the Equipment Against Electrical Dangers
67
A+
220-701
2
A+ 220-701
6.1
2.5
Figure 2-30 Uninterruptible power supply (UPS)
Courtesy of American Power Conversion Corp.
Close down all servers protected by the UPS during a blackout.
Provide pager notification to a facilities manager if the power goes out.
After a shutdown, allow for startup from a remote location over the Internet.
What to Consider When Buying a UPS
The UPS rating is given in VA and watts, and the VA rating is generally about 60 percent higher than the watts rating. The VA rating is the theoretical rating that is calculated by multiplying volts by amps and then added up for all the equipment. The watts
rating is the actual draw available to the equipment it protects. Make sure both ratings
are adequate for your equipment. When matching a UPS to the needs of your equipment, add up total watts needed by your equipment and double it for the VA rating.
Then check to make sure the wattage capacity of the UPS is about 25 to 30 percent
higher than the total watts required.
You do not want to buy a UPS that runs at full capacity. This is especially important for
an inline UPS because this type of UPS is constantly recharging the battery. If this battery
charger is operating at full capacity, it is producing a lot of heat, which can reduce the
battery’s life.
You should also be aware of the degree of line conditioning that the UPS provides.
Consider the warranty and service policies as well as the guarantee the UPS manufacturer gives for the equipment that the UPS protects. For example, one standby UPS by
Tripp Lite that costs less than $100 claims to support up to 450 VA or 280 watts power
requirements for up to 4 minutes during a complete power failure or 225 VA/140 watts
for up to 15 minutes. The battery has an expected lifetime of three to six years. This
smart UPS has a USB connector to a computer, and carries a guarantee on connected
equipment of $100,000.
1435487389_ch02_CTP.qxd
68
7/30/09
5:17 PM
CHAPTER 2
Page 68
Form Factors, Power Supplies, and Working Inside a Computer
A+ Exam Tip Content on the A+ 220-701 Essentials exam ends here and content on the A+ 220-702
Practical Application exam begins.
HOW TO WORK INSIDE A COMPUTER CASE
In this section, you’ll learn how to take a computer apart and put it back together. This skill
is needed in this and other chapters as you learn to replace computer parts inside the case
and perhaps even build a system from scratch. We begin with looking at the tools a PC
support technician needs to work inside a computer and then look at safety precautions you
need to take to protect yourself and the equipment. Finally, you’ll see the step-by-step
procedures to take a PC apart and put it back together.
A+
220-702
1.4
PC SUPPORT TECHNICIAN TOOLS
Several hardware and software tools can help you maintain a computer and diagnose and
repair computer problems. The tools you choose depend on the amount of money you can
spend and the level of PC support you expect to provide.
Essential tools for PC troubleshooting are listed here, and several of them are shown in
Figure 2-31.You can purchase some of these tools in a PC toolkit, although most PC toolkits contain items you really can do without.
Cable ties
Network cable
testers
AC ground
tester
Multimeter
Figure 2-31 PC support technician tools
Courtesy: Course Technology/Cengage Learning
Here is a list of essential tools:
Ground bracelet, ground mat, or ground gloves to use when working inside the computer case. How to use them is covered earlier in the chapter.
Flathead screwdriver
Phillips-head or crosshead screwdriver
1435487389_ch02_CTP.qxd
7/30/09
5:17 PM
Page 69
How to Work Inside a Computer Case
A+
220-702
1.4
69
The following tools might not be essential, but they are very convenient:
Cans of compressed air, small portable compressor, or antistatic vacuum cleaner to
clean dust from inside a computer case
Cleaning solutions and pads such as contact cleaner, monitor wipes, and cleaning
solutions for CDs, DVDs, tapes, and drives
Multimeter to check cables and the power supply output
Power supply tester
Needle-nose pliers for removing jumpers and for holding objects (especially
those pesky nuts on cable connectors) in place while you screw them in
Cable ties to tie cables up and out of the way inside a computer case
Flashlight to see inside the PC case
AC outlet ground tester
Network cable tester (you will learn to use this tool in Chapter 11)
Loop-back plugs to test ports (you’ll learn about these plugs in Chapter 7)
Small cups or bags to help keep screws organized as you work
Antistatic bags (a type of Faraday cage) to store unused parts
Chip extractor to remove chips (to pry up the chip, a simple screwdriver is usually
more effective, however)
Pen and paper for taking notes
POST diagnostic cards
Utility software, virus-detection software, and diagnostic software on CD
or floppy disk
Keep your tools in a toolbox designated for PC troubleshooting. If you put disks and
hardware tools in the same box, be sure to keep the disks inside a hard plastic case to
protect them from scratches and dents. In addition, make sure the diagnostic and utility
software you use is recommended for the hardware and software you are troubleshooting.
Now let’s turn our attention to the details of several support technician tools, including
diagnostic cards, power supply tester, and multimeter.
POST DIAGNOSTIC CARDS
Although not an essential tool, a POST diagnostic card can be of great help to discover and
report computer errors and conflicts at POST. The POST (power-on self test) is a series of tests
performed by the startup BIOS when you first turn on a computer. These tests determine if
startup BIOS can communicate correctly with essential hardware components required for a
successful boot. If you have a problem that prevents the PC from booting that you suspect is
related to hardware, you can install the diagnostic card in an expansion slot on the motherboard and then attempt to boot. The card monitors the boot process and reports errors, usually
as coded numbers on a small LED panel on the card. You then look up the number in the documentation that accompanies the card to get more information about the error and its source.
2
A+ 220-702
Torx screwdriver set, particularly size T15
Tweezers, preferably insulated ones, for picking pieces of paper out of printers or
dropped screws out of tight places
Extractor, a spring-loaded device that looks like a hypodermic needle (When you push
down on the top, three wire prongs come out that can be used to pick up a screw that
has fallen into a place where hands and fingers can’t reach.)
Recovery CD or DVD for any OS you might work on (You might need several,
depending on the OSs you support.)
1435487389_ch02_CTP.qxd
70
A+
220-702
1.4
7/30/09
5:18 PM
CHAPTER 2
Page 70
Form Factors, Power Supplies, and Working Inside a Computer
Examples of these cards are listed below. Some manufacturers make cards for either
desktop or laptop computers. The Post Code Master card is shown in Figure 2-32:
PC POST Diagnostic Test Card by Elston System, Inc. (www.elstonsystems.com)
PCI POST Diagnostic Test Card by StarTech.com (www.startech.com)
Post Code Master by Microsystems Development, Inc. (www.postcodemaster.com)
Figure 2-32 Post Code Master diagnostic card by Microsystems Developments, Inc.
Courtesy: Course Technology/Cengage Learning
Before purchasing these or any other diagnostic tools or software, read the documentation
about what they can and cannot do, and, if possible, read some product reviews. The
Internet is a good source of information. Try using Google.com and searching on “PC diagnostic card reviews.”
POWER SUPPLY TESTER
A power supply tester is used to measure the output of each connector coming from the
power supply. You can test the power supply when it is outside or inside the case. Connect
the motherboard P1 connector to the tester, plug up the power supply, and turn on the
tester. An LCD panel reports the output of each lead (see Figure 2-33). The tester also has
plugs for other cables, including the SATA cable, PCIe x16 cable, and Molex cable. In
Figure 2-33, the +12 V line on the additional 4 pins of the P1 connector reads LL, which
indicates low output.
MULTIMETER
A multimeter (see Figure 2-34) is a more general-purpose tool that can measure several
characteristics of electricity in a variety of devices. Some multimeters can measure voltage,
current, resistance, or continuity. (Continuity determines that two ends of a cable or fuse are
connected without interruption.) Set to measure voltage, you can use it to measure output of
each pin on a power supply connector. Set to measure continuity, a multimeter is useful to
test fuses or to determine if a cable is good or to match pins on one end of a cable to pins
1435487389_ch02_CTP.qxd
7/30/09
5:18 PM
Page 71
How to Work Inside a Computer Case
A+
220-702
1.4
Video
Using a Multimeter
71
Figure 2-33 Use a power supply tester to test the output of each power connector on a power supply
Courtesy: Course Technology/Cengage Learning
To measure
DC voltage
Data hold switch
Install the red
probe at the
positive (+) jack
on the meter
Install the black
probe at the
negative (–) jack
on the meter
To measure
AC voltage
To measure
resistance
To measure
continuity
Function switch
Figure 2-34 This digital multimeter can be set to measure voltage, resistance, or continuity
Courtesy: Course Technology/Cengage Learning
2
A+ 220-702
on the other end. To learn how to use a multimeter to
measure the voltage output of a power supply and determine
if it is supplying correct voltages, see the content “Electricity
and Multimeters” on the CD that accompanies this book.
1435487389_ch02_CTP.qxd
72
A+
220-702
1.1
7/30/09
5:18 PM
CHAPTER 2
Page 72
Form Factors, Power Supplies, and Working Inside a Computer
SAFETY PRECAUTIONS
Here are some important safety precautions that will help keep you and your equipment
safe as you go through the process of taking it apart and putting it back together:
Make notes as you work so that you can backtrack later if necessary. (When you’re
first learning to take a computer apart, it’s really easy to forget where everything fits
when it’s time to put it back together. Also, in troubleshooting, you want to avoid
repeating or overlooking things to try.)
To stay organized and not lose small parts, keep screws and spacers orderly and in one
place, such as a cup or tray.
Don’t stack boards on top of each other: You could accidentally dislodge a chip this way.
When handling motherboards and expansion cards, don’t touch the chips on the
boards. Hold expansion cards by the edges. Don’t touch any soldered components on
a card, and don’t touch the edge connectors unless it’s absolutely necessary. All this
helps prevent damage from static electricity.
To protect the chip, don’t touch it with a magnetized screwdriver.
Don’t use a graphite pencil to change DIP (dual inline package) switch settings,
because graphite is a conductor of electricity, and the graphite can lodge in the switch.
These on/off switches are used on older motherboards to configure the board.
In a classroom environment, after you have reassembled everything, have your
instructor check your work before you put the cover back on and power up.
To protect both yourself and the equipment when working inside a computer, turn off
the power, unplug the computer, and then press the power button to completely drain
the power. Always use a ground bracelet.
Never ever touch the inside of a computer that is turned on.
Consider the monitor and the power supply to be “black boxes.” Never remove the
cover or put your hands inside this equipment unless you know about the hazards of
charged capacitors, and have been trained to deal with them. Both the power supply
and the monitor can hold a dangerous level of electricity even after you turn them off
and disconnect them from a power source. The power supply and monitor contain
enough power to kill you, even when they are unplugged.
When unpacking hardware or software, to help protect against static electricity,
remove the packing tape and cellophane from the work area as soon as possible.
To protect against static electricity, keep components away from your hair and clothing.
Now that you know about PC technician tools and how to keep safe, let’s look at the
steps to take apart a computer.
STEPS TO TAKE APART A COMPUTER
A PC technician needs to be comfortable with taking apart a computer and putting it back
together. In most situations, the essential tools you’ll need for the job are a ground bracelet,
a Phillips-head screwdriver, a flat-head screwdriver, paper, and pen. As you work inside a
computer, be sure to use a ground bracelet, the safety precautions in the chapter, and the
guidelines in the following list:
1. If you are starting with a working computer, make sure important data is first backed
up. Copy the data to an external storage device such as a flash drive or external hard
drive.
2. Power down the system, unplug it, and press the power button. Unplug the monitor, mouse,
keyboard, and any other peripherals or cables attached and move them out of your way.
1435487389_ch02_CTP.qxd
7/30/09
5:18 PM
Page 73
How to Work Inside a Computer Case
A+
220-702
1.1
73
4. Sometimes I think figuring out how to open a computer case is the most difficult part
of disassembling. If you need help figuring it out, check the user manual or Web site
of the case manufacturer. To remove the cover of your PC, do the following:
Many newer cases require you to remove the faceplate on the front of the case
first. Other cases require you to remove a side panel first, and really older cases
require you to first remove the entire sides and top as a single unit. Study your
case for the correct approach.
Most cases have panels on each side of the case that can be removed. It is usually necessary to only remove the one panel to expose the top of the motherboard. To know which panel to remove, look at where the ports are on the rear
of the case. For example, in Figure 2-35, the ports on this motherboard are on
the left side of the case, indicating the bottom of the motherboard is on the left.
Therefore, you will want to remove the right panel to expose the top of this
Motherboard is
mounted to this side
of the case
Figure 2-35 Decide which side panel to remove
Courtesy: Course Technology/Cengage Learning
2
A+ 220-702
3. Put the computer on a table with plenty of room. Have a
Video
plastic bag or cup handy to hold screws. When you
Opening a Computer Case
reassemble the PC, you will need to insert the same screws
in the same holes. This is especially important with the
hard drive, because screws that are too long can puncture the hard drive housing.
1435487389_ch02_CTP.qxd
74
A+
220-702
1.1
7/30/09
5:18 PM
CHAPTER 2
Page 74
Form Factors, Power Supplies, and Working Inside a Computer
motherboard. Lay the case down to its left so the ports and the motherboard are
sitting on the bottom. Later, depending on how drives are installed, it might
become necessary to remove the bottom panel in order to remove the screws
that hold the drives in place.
Locate the screws that hold the side panel in place. Be careful not to unscrew any
screws besides these. The other screws probably are holding the power supply,
fan, and other components in place (see Figure 2-36).
Figure 2-36 Locate the screws that hold the top cover in place
Courtesy: Course Technology/Cengage Learning
After the screws are removed, slide the panel toward the rear, and then lift it off
the case (see Figure 2-37).
Figure 2-37 Slide the panel to the rear of the case
Courtesy: Course Technology/Cengage Learning
Newer cases require you to pop the front panel off the case before removing the
side panels. Look for a lever on the bottom of the panel and hinges at the top.
Squeeze the lever to release the front panel and lift it off the case (see Figure 2-38).
1435487389_ch02_CTP.qxd
7/30/09
5:18 PM
Page 75
How to Work Inside a Computer Case
75
A+
220-702
2
1.1
A+ 220-702
Figure 2-38 Newer cases require you to remove the front panel before removing
the side panel of a computer case
Courtesy: Course Technology/Cengage Learning
Then remove a single screw (see Figure 2-39) and slide the side panel to the front
and then off the case (see Figure 2-40). Also, know that some case panels don’t use
screws; these side panels simply pop up and out with a little prying and pulling.
Figure 2-39 One screw holds the side panel in place
Courtesy: Course Technology/Cengage Learning
5. If you plan to remove several components, draw a diagram of all cable connections to
the motherboard, adapter cards, and drives. You might need the cable connection diagram to help you reassemble. Note where each cable begins and ends, and pay particular
attention to the small wires and connectors that connect the front of the case to the
motherboard. It’s important to be careful about diagramming these because it is so easy
1435487389_ch02_CTP.qxd
76
7/30/09
5:18 PM
CHAPTER 2
Page 76
Form Factors, Power Supplies, and Working Inside a Computer
A+
220-702
1.1
Figure 2-40 Slide the side panel to the front of the case and then lift it off the case
Courtesy: Course Technology/Cengage Learning
to connect them in the wrong position later when you reassemble. If you want, use a
felt-tip marker to make a mark across components, to indicate a cable connection, board
placement, motherboard orientation, speaker connection, brackets, and so on, so that
you can simply line up the marks when you reassemble. This method, however, probably
won’t work for the front case wires because they are so small. For these, consider writing down the color of the wires and their position on the pins (see Figure 2-41).
Figure 2-41 Diagram the pin locations of the color-coded wires that connect to the front of the case
Courtesy: Course Technology/Cengage Learning
6. Drives are connected to the motherboard with ribbon cables or thinner serial ATA
cables. Before removing any ribbon cables, look for a red color or stripe down one
side of each cable. This edge color marks this side of the cable as pin 1. Look on the
board or drive that the cable is attached to. You should see that pin 1 or pin 2 is
clearly marked, as shown in Figure 2-42. However, some boards mark pin 34 or pin
40. For these boards, pin 1 is on the other side of the connector. Also know that
some boards and drives don’t mark the pins, but rather have a notch in the connector
1435487389_ch02_CTP.qxd
7/30/09
5:18 PM
Page 77
How to Work Inside a Computer Case
77
A+
220-702
2
1.1
A+ 220-702
Figure 2-42 Pin 1 for this IDE connection is clearly marked
Courtesy: Course Technology/Cengage Learning
so that a notched ribbon cable can only be inserted in one direction (see Figure 2-43).
Verify that the edge color is aligned with pin 1. Serial ATA cables can only connect to
serial ATA connectors in one direction (see Figure 2-44).
Figure 2-43 The notch on the side of this floppy drive connector allows the floppy drive cable to
connect in only one direction
Courtesy: Course Technology/Cengage Learning
7. A system might have up to three types of ribbon cables. A floppy drive cable has 34 pins
and a twist in the cable. IDE cables have 40 pins. A CD or DVD drive can use either a 40conductor IDE cable or a higher-quality 80-conductor IDE cable. Older hard drives use an
80-conductor IDE ribbon cable. (Newer drives use narrow SATA cables rather than ribbon cables.) See Figure 2-45 for a comparison of the three
ribbon cables. Remove the cables to all drives. Remove
Video
the power supply cords from the drives. Notice as you
Replacing an Expansion Card
disconnect the power cord, the Molex connector is shaped
so it only connects in one direction (see Figure 2-46).
1435487389_ch02_CTP.qxd
78
7/30/09
5:18 PM
CHAPTER 2
Page 78
Form Factors, Power Supplies, and Working Inside a Computer
A+
220-702
1.1
Figure 2-44 A serial ATA cable connects to a serial ATA connector in only one direction.
Use red connectors on the motherboard first
Courtesy: Course Technology/Cengage Learning
34-pin floppy drive
cable with twist
40-pin IDE cable
with 40 wires
40-pin IDE cable
with 80 fine wires
(80-conductor
cable)
Figure 2-45 A system might have up to three types of ribbon cables
Courtesy: Course Technology/Cengage Learning
8. Do the following to remove the expansion cards:
Remove any wire or cable connected to the card.
Remove the screw holding the card to the case (see Figure 2-47).
Grasp the card with both hands and remove it by lifting straight up. If you have
trouble removing it from the expansion slot, you can very slightly rock the card
from end to end (not side to side). Rocking the card from side to side might
spread the slot opening and weaken the connection.
As you remove the card, don’t put your fingers on the edge connectors or touch a chip,
and don’t stack the cards on top of one another. Lay each card aside on a flat surface.
Notes Some video cards use a latch that helps to hold the card securely in the slot. To remove these
cards, use one finger to hold the latch back from the slot, as shown in Figure 2-48, as you pull the card
up and out of the slot.
9. Depending on the system, you might need to remove the motherboard next or remove
the drives next. My choice is to first remove the motherboard. It and the processor are
the most expensive and easily damaged parts in the system. I like to get them out of
1435487389_ch02_CTP.qxd
7/30/09
5:18 PM
Page 79
A+
220-702
1.1
2
A+ 220-702
Figure 2-46 Molex power connector to a drive orients in only one direction
Courtesy: Course Technology/Cengage Learning
Figure 2-47 Remove the screw holding an expansion card to the case
Courtesy: Course Technology/Cengage Learning
harm’s way before working with the drives. However, in some cases, you must remove
the drives or the power supply before you can get to the motherboard. Study your situation and decide which to do first. To remove the motherboard, do the following:
Unplug the power supply lines to the motherboard. You’ll find a main power line,
and maybe one auxiliary power line from the power supply to the motherboard.
There might also be an audio wire from the CD drive to the motherboard.
Disconnect it from the motherboard.
79
1435487389_ch02_CTP.qxd
80
7/30/09
5:18 PM
CHAPTER 2
Page 80
Form Factors, Power Supplies, and Working Inside a Computer
A+
220-702
1.1
Figure 2-48 Hold the retention mechanism back as you remove a video card from its expansion slot
Courtesy: Course Technology/Cengage Learning
The next step is to disconnect wires leading from the front of the computer
case to the motherboard. If you don’t have the motherboard manual handy, be
very careful to diagram how these wires connect because they are never labeled
well on a motherboard. Make a careful diagram and then disconnect the wires.
Figure 2-49 shows five leads and the pins on the motherboard that receive
these leads. The pins are color-coded and cryptically labeled on the board.
You’ll learn more about matching these wires to their connectors in Chapter 3.
You’re now ready to remove the screws that hold the motherboard to the case.
For an older motherboard, instead of screws you’ll see spacers that keep the board
Figure 2-49 Five leads from the front panel connect to two rows of pins on the motherboard
Courtesy: Course Technology/Cengage Learning
1435487389_ch02_CTP.qxd
7/30/09
5:18 PM
Page 81
How to Work Inside a Computer Case
A+
220-702
1.1
81
Figure 2-50 Remove up to nine screws that hold the motherboard to the case
Courtesy: Course Technology/Cengage Learning
Figure 2-51 This motherboard connects to a case using screws and spacers that keep the board from
touching the case
Courtesy: Course Technology/Cengage Learning
2
A+ 220-702
from resting directly on the bottom of the computer case. Carefully pop off these
spacers and/or remove the screws (up to nine) that hold the board to the case (see
Figure 2-50) and then remove the board. Set it aside in a safe place. Figure 2-51
shows a motherboard sitting to the side of these spacers. One spacer is in place
and the other is lying beside its case holes. Also notice in the photo the two holes
in the motherboard where screws are used to connect the board to the spacers.
The motherboard should now be free and you can carefully remove it from the
case, as shown in Figure 2-52.
1435487389_ch02_CTP.qxd
82
7/30/09
5:18 PM
CHAPTER 2
Page 82
Form Factors, Power Supplies, and Working Inside a Computer
A+
220-702
1.1
Figure 2-52 Remove the motherboard from the case
Courtesy: Course Technology/Cengage Learning
Caution
Some processors have heavy cooling assemblies installed on top of them. For these
systems, it is best to remove the cooler before you take the motherboard out of the case because the
motherboard is not designed to support this heavy cooler when the motherboard is not securely seated
in the case. How to remove the cooler is covered in Chapter 4.
10. To remove the power supply from the case, look for screws that attach the power
supply to the computer case, as shown in Figure 2-53. Be careful not to remove any
screws that hold the power supply housing together. You do not want to take the
housing apart. After you have removed the screws, the power supply still might not
be free. Sometimes, it is attached to the case on the underside by recessed slots. Turn
the case over and look on the bottom for these slots. If they are present, determine in
which direction you need to slide the power supply to free it from the case.
11. Remove each drive next, handling the drives with care. Here are some tips:
Some drives have one or two screws on each side of the drive attaching the drive
to the drive bay. After you remove the screws, the drive slides to the front or to
the rear and then out of the case.
Sometimes, there is a catch underneath the drive that you must lift up as you slide
the drive forward.
Some drive bays have a clipping mechanism to hold the drive in the bay.
First release the clip and then pull the drive forward and out of the bay (see
Figure 2-54). Handle the drives with care.
Some cases have a removable bay for small drives (see Figure 2-55). These bays can
hold narrow drives such as hard drives, floppy drives, and Zip drives. The bay is
removed first and then the drives are removed from the bay. To remove the bay, first
remove the screws or release the clip holding the bay in place and then slide the bay
out of the case. The drives are usually installed in the bay with two screws on each
side of each drive. Remove the screws and then the drives (see Figure 2-56).
1435487389_ch02_CTP.qxd
7/30/09
5:18 PM
Page 83
How to Work Inside a Computer Case
A+
220-702
83
2
1.1
A+ 220-702
Figure 2-53 Removing the power supply mounting screws
Courtesy: Course Technology/Cengage Learning
Figure 2-54 To remove this CD drive, first pull the clip forward to release the drive from the bay
Courtesy: Course Technology/Cengage Learning
1435487389_ch02_CTP.qxd
84
7/30/09
5:18 PM
CHAPTER 2
Page 84
Form Factors, Power Supplies, and Working Inside a Computer
A+
220-702
1.1
Figure 2-55 Push down on the clip and then slide the removable bay forward and out of the case
Courtesy: Course Technology/Cengage Learning
Figure 2-56 Drives in this removable bay are held in place with screws on each side of the bay
Courtesy: Course Technology/Cengage Learning
STEPS TO PUT A COMPUTER BACK TOGETHER
To reassemble a computer, reverse the process of disassembling. Do the following:
1. Install components in the case in this order: power supply, drives, motherboard, and
cards. When installing drives, know that for some systems, it’s easier to connect data
1435487389_ch02_CTP.qxd
7/30/09
5:18 PM
Page 85
Troubleshooting the Electrical System
A+
220-702
1.1
85
cables to the drives and then slide the drives into the bay. If the drive is anchored to
the bay with screws, be careful to align the front of the drive flush with the front of
the case before installing screws (see Figure 2-57).
2
A+ 220-702
Figure 2-57 Align the front of the drive flush with the case front and then anchor with a screw
Courtesy: Course Technology/Cengage Learning
2. Connect all data and power cables. Before you replace the cover, take a few minutes to
double-check each connection to make sure it is correct and snug.
3. Plug in the keyboard, monitor, and mouse.
4. In a classroom environment, have the instructor check your work before you power up.
5. Turn on the power and check that the PC is working properly. If the PC does not
work, most likely the problem is a loose connection. Just turn off the power and go
back and check each cable connection and each expansion card. You probably have
not solidly seated a card in the slot. After you have double-checked, try again.
TROUBLESHOOTING THE ELECTRICAL SYSTEM
A+
220-702
1.2
Electrical problems can occur before or after the boot and can be consistent or intermittent.
Many times PC repair technicians don’t recognize the cause of a problem to be electrical
because of the intermittent nature of some electrical problems. In these situations, the hard
drive, memory, the OS, or even user error might be suspected as the source of the problem
and then systematically eliminated before the electrical system is suspected. This section will
help you to be aware of symptoms of electrical problems so that you can zero in on the
source of an electrical problem as quickly as possible.
Your friend Sharon calls to ask for your help with a
computer problem. Her system has been working fine
for over a year, but now strange things are happening. Sometimes, the system powers down for
no apparent reason while she is working and sometimes Windows locks up. As you read this
section, look for clues as to what the problem might be. Also, as you read, think of
questions to ask your friend that will help you.
APPLYING CONCEPTS
1435487389_ch02_CTP.qxd
86
A+
220-702
1.2
7/30/09
5:18 PM
CHAPTER 2
Page 86
Form Factors, Power Supplies, and Working Inside a Computer
Possible symptoms of a problem with the electrical system are:
The PC appears “dead”—no lights, no spinning drive, or fan.
The PC sometimes halts during booting. After several tries, it boots successfully.
Error codes or beeps occur during booting, but they come and go.
You smell burnt parts or odors. (Definitely not a good sign!)
The PC powers down at unexpected times.
The PC appears dead except you hear a whine coming from the power supply.
Without opening the computer case, the following list contains some questions you can ask
and things you can do to solve a problem with the electrical system. The rule of thumb is
“try the simple things first.” Most PC problems have simple solutions.
If you smell any burnt parts or odors, don’t try to turn the system on. Identify the
component that is fried and replace it.
When you first plug up power to a system and hear a whine coming from the power
supply, the power supply might be inadequate for the system or there might be a
short. Don’t press the power button to start up the system. Unplug the power cord so
that the power supply will not be damaged. The next step is to open the case and
search for a short. If you don’t find a short, consider upgrading the power supply.
Is the power cord plugged in? If it is plugged into a power strip or surge suppressor, is
the device turned on and also plugged in?
Is the power outlet controlled by a wall switch? If so, is the switch turned on?
Are any cable connections loose?
Is the circuit breaker blown? Is the house circuit overloaded?
Are all switches on the system turned on? Computer? Monitor? Uninterruptible power
supply?
Is there a possibility the system has overheated? If so, wait awhile and try again. If the
system comes on, but later turns itself off, you might need additional cooling fans
inside the unit. Where and how to install them is covered in Chapter 4.
The next step is to open the computer case and then do the following:
If the fan is not running, turn off the computer, unplug it, press the power button,
open the case, and check the connections to the power supply. Are they secure? Are all
cards securely seated?
If you smell burnt parts, turn off the system and carefully search for the source of the
problem. Look for shorts and frayed and burnt wires. Disassemble the parts until you
find the one that is damaged.
As you read through the rest of this section on troubleshooting, you’ll see other possible
solutions to electrical problems during the boot such as loose internal connections.
PROBLEMS WITH EXTERNAL POWER
A brownout (reduced current) of the house current might cause symptoms of electrical
power problems. If you suspect the house current could be low, check other devices that are
using the same circuit. A copy machine, laser printer, or other heavy equipment might be
drawing too much power. Remove the other devices from the same house circuit.
A line conditioner might solve the problem of intermittent errors caused by noise in the
power line to the PC. Try installing a line conditioner to condition voltage to the PC.
1435487389_ch02_CTP.qxd
7/30/09
5:18 PM
Page 87
Troubleshooting the Electrical System
A+
220-702
1.2
87
PROBLEMS WITH LOOSE INTERNAL CONNECTIONS
Remote SW
Figure 2-58 For an ATX or BTX power supply, the remote switch wire must be connected to
the motherboard before power will come on
Courtesy: Course Technology/Cengage Learning
Notes Remember from earlier in the chapter that strong magnetic or electrical interference can
affect how a power system functions. Sometimes an old monitor emits too much static and EMI
(electromagnetic interference) and brings a whole system down. When you troubleshoot power
problems, remember to check for sources of electrical or magnetic interference such as an old monitor,
fluorescent lighting, or an electric fan sitting near the computer case.
PROBLEMS THAT COME AND GO
If a system boots successfully to the Windows desktop, you still might have a power system
problem. Some problems are intermittent; that is, they come and go. Here are some symptoms that might indicate an intermittent problem with the electrical system after the boot:
The computer stops or hangs for no reason. Sometimes it might even reboot itself.
Memory errors appear intermittently.
Data is written incorrectly to the hard drive.
The keyboard stops working at odd times.
The motherboard fails or is damaged.
The power supply overheats and becomes hot to the touch.
The power supply fan becomes very noisy or stops.
2
A+ 220-702
Loose connections inside the computer case can cause a system to appear dead or reboot itself.
For most of the ATX and BTX power supplies, a wire runs from the power switch on the
front of the case to the motherboard. This wire must be connected to the pins on the motherboard and the switch turned on before power comes up. Check that the wire is connected correctly to the motherboard. Figure 2-58 shows a wire, which is labeled “REMOTE SW,”
connected to pins on the motherboard labeled “PWR.SW.” If you are not sure of the correct
connection on the motherboard, see the motherboard documentation. While inside the case,
check all power connections from the power supply to the motherboard and drives. Also,
some cases require the case’s front panel be in place before the power-on button will work.
1435487389_ch02_CTP.qxd
88
A+
220-702
1.2
7/30/09
5:18 PM
CHAPTER 2
Page 88
Form Factors, Power Supplies, and Working Inside a Computer
Generally, intermittent problems (those that come and go) are more difficult to solve than
a dead system. There can be many causes of intermittent problems, such as an inadequate
power supply, overheating, and devices and components damaged by ESD. Each of these
sources of intermittent problems is covered in this section.
PROBLEMS WITH AN INADEQUATE POWER SUPPLY
If you have just installed a new device such as a second hard drive or a DVD drive and are concerned that the power supply is not adequate, you might test it after you finish the installation.
Make all the devices in your system work at the same time. For instance, you can make
two hard drives and the DVD drive work at the same time by copying files from one hard
drive to the other while playing a movie on the DVD. If the new drive and the other drives
each work independently, but data errors occur when all work at the same time, suspect a
shortage of electrical power.
If you prefer a more technical approach, you can estimate how much total wattage your system
needs by calculating the watts required for each device and adding them together. You learned
how to match a power supply to the wattage requirements of the system earlier in the chapter.
A system with a standard power supply of about 250 watts that has multiple hard drives,
multiple CD drives, and several expansion cards is most likely operating above the rated
capacity of the power supply, which can cause the system to unexpectedly reboot or give
intermittent, otherwise unexplained, errors. If the power supply is grossly inadequate, it will
whine when you first plug up the power. Upgrade the power supply as needed to accommodate an overloaded power system.
PROBLEMS WITH A FAULTY POWER SUPPLY
If you suspect the power supply is faulty, you can test it using either a power supply tester (the
easier method) or a multimeter (the more tedious method). However, know that a power supply
that gives correct voltages when you measure it might still be the source of problems, because
power problems can be intermittent. Also be aware that an ATX power supply monitors the
range of voltages provided to the motherboard and halts the motherboard if voltages are inadequate. Therefore, if the power supply appears “dead,” your best action is to replace it.
PROBLEMS WITH THE POWER SUPPLY FANS
An improperly working fan sometimes causes power supply problems. Usually just before a
fan stops working, it hums or whines, especially when the PC is first turned on. If this has
just happened, replace the fan if you are trained to service the power supply. If not, replace
the entire power supply. If you replace the power supply or fan and the fan still does not
work, assume the problem wasn’t the fan. A short somewhere else in the system drawing
too much power might cause the problem. Don’t operate the PC if the fan does not work.
Computers without cooling fans can quickly overheat and damage chips.
To troubleshoot a nonfunctional fan, which might be a symptom of another problem and
not a problem of the fan itself, follow these steps:
1. Turn off the power and remove all power cord connections to all components except
the motherboard. Turn the power back on. If the fan works, the problem is with one of
the systems you disconnected, not with the power supply, the fan, or the motherboard.
2. Turn off the power and reconnect one card or drive at a time until you identify the
device with the short.
1435487389_ch02_CTP.qxd
7/30/09
5:18 PM
Page 89
Troubleshooting the Electrical System
A+
220-702
1.2
89
3. If the fan does not work when all devices except the motherboard are disconnected,
the problem is the motherboard or the power supply. Since the power supply is less
expensive and easier to replace than the motherboard, try replacing it first.
If a computer powers down after it has been operating for a few minutes or a few hours, the
problem might be caused by overheating. Leave the system turned off for about 30 minutes
and then try again. If the computer works for a while and then stops again, check its internal temperature. You might need to install additional fans. How to check the internal temperature and solve overheating problems are covered in Chapter 4.
POWER PROBLEMS WITH THE MOTHERBOARD
The motherboard, like all other components inside the computer case, should be
grounded to the chassis. Look for a metal screw that grounds the board to the computer
case. However, a short might be the problem with the electrical system if some component on the board makes improper contact with the chassis. This short can seriously
damage the motherboard. For some cases, check for missing standoffs (small plastic or
metal spacers that hold the motherboard a short distance away from the chassis). A
missing standoff most often causes these improper connections. Also check for extra
standoffs not used by the motherboard that might be touching a wire on the bottom of
the board and causing a short.
Shorts in the circuits on the motherboard might also cause problems. Look for damage on
the bottom of the motherboard. These circuits are coated with plastic, and quite often
damage is difficult to spot. Also look for burned-out capacitors that are spotted brown or
corroded. You’ll see examples of burned out capacitors in the next chapter.
APPLYING CONCEPTS
Back to Sharon’s computer problem. Here are some questions that will help you identify the source of the problem:
Have you added new devices to your system? (These new devices might be drawing too much
power from an overworked power supply.)
Have you moved your computer recently? (It might be sitting beside a heat vent or electrical
equipment.)
Does the system power down or hang after you have been working for some time?
(This symptom might have more than one cause, such as overheating or a power supply,
processor, memory, or motherboard about to fail.)
Has the computer case been opened recently? (Someone working inside the case might not
have used a ground bracelet and components are now failing because of ESD damage.)
Are case vents free so that air can flow? (The case might be close to a curtain covering the vents.)
Intermittent problems like the one Sharon described are often heat related. If the system only
hangs but does not power off, the problem might be caused by faulty memory or bad software,
but because it actually powers down, you can assume the problem is related to power or heat.
If Sharon tells you that the system powers down after she’s been working for several
hours, you can probably assume overheating. Check that first. If that’s not the problem,
the next thing to do is replace the power supply.
A+ 220-702
PROBLEMS WITH OVERHEATING
2
1435487389_ch02_CTP.qxd
90
A+
220-702
1.2
A+
220-702
1.2
1.1
7/30/09
5:18 PM
CHAPTER 2
Page 90
Form Factors, Power Supplies, and Working Inside a Computer
Caution
Never replace a damaged motherboard with a good one without first testing or
replacing the power supply. You don’t want to subject another good board to possible damage.
REPLACING THE POWER SUPPLY
The easiest way to fix a power supply you suspect is faulty is to
replace it. When selecting a replacement power supply, be
Replacing a Power Supply
sure the new power supply uses the correct form factor that
provides the correct output voltages, is adequately rated for
power in watts, and has all the power connectors needed by your system. To determine if
the power supply really is the problem, turn off the PC, open the computer case, and
set the new power supply on top of the old one. Disconnect the old power supply’s cords and
plug the PC devices into the new power supply. Turn on the PC and verify that the new power
supply solves your problem before installing it.
Video
A+ Exam Tip The A+ IT 220-702 Practical Application exam expects you to know how to select
and install a power supply. Know it must match wattage requirements and have the correct connector
types and number of connectors to meet the demands of the system.
Caution
Remember from earlier in the chapter that you need to consider the monitor and
the power supply to be “black boxes.” Never remove the cover or put your hands inside this equipment
unless you know about the hazards of charged capacitors and have been trained to deal with them.
Both the power supply and the monitor can hold a dangerous level of electricity even after you turn
them off and disconnect them from a power source. The power supply and monitor contain enough
power to give you a strong shock even when they are unplugged.
Follow these steps to replace a power supply:
1. Turn off the power to the computer, unplug the computer, and press the power button to drain the system of power.
2. Remove the power cable.
3. Remove the computer case cover.
4. Inside the case, disconnect all power cords from the power supply to other devices.
5. Determine which components must be removed before the power supply can be safely
removed from the case. You might need to remove the hard drive, several cards, or the
CD or DVD drive. In some cases, you may even need to remove the motherboard.
6. Remove all the components necessary to get to the power supply. Remember to protect the components from static electricity as you work.
7. Unscrew the screws on the back of the computer case that hold the power supply to
the case.
8. Look on the bottom or back of the case for slots that hold the power supply in position.
Often the power supply must be shifted in one direction to free it from the slots.
9. Remove the power supply.
10. Place the new power supply in position, sliding it into the slots the old power
supply used.
1435487389_ch02_CTP.qxd
7/30/09
5:18 PM
Page 91
Chapter Summary
A+
220-702
1.1
1.2
91
11. Replace the power supply screws.
12. Replace all other components and cables.
13. Replace the case cover and connect the power cord.
14. Turn on the PC and verify all is working.
>> CHAPTER SUMMARY
A form factor is a set of specifications for the size and configuration of hardware components, such as cases, power supplies, and motherboards.
The most common form factor today is ATX. Popular variations in ATX include
MicroATX (a smaller version of ATX) and FlexATX (a smaller version of MicroATX).
Other current form factors are BTX and NLX. NLX uses a riser card that plugs into the
motherboard.
Case types include desktop, low-profile or slimline desktops, minitower, mid-tower, fullsize tower, and notebook. The most popular case type in use today is the mid-tower.
Electrical voltage is a measure of the potential difference in an electrical system.
Electrical current is measured in amps, and electrical resistance is measured in ohms.
Wattage is a measure of electrical power. Wattage is calculated by multiplying volts by
amps in a system.
Microcomputers require direct current (DC), which is converted from alternating current
(AC) by the PC’s power supply inside the computer case.
A PC power supply is actually a transformer and rectifier, rather than a supplier of power.
Materials used to make electrical components include conductors, insulators, and
semiconductors.
A transistor is a gate or switch for an electrical signal, a capacitor holds an electrical charge,
a diode allows electricity to flow in one direction, and a resistor limits electrical current.
Important features of a power supply to consider when purchasing it are its form factor,
number and type of connector types it provides, voltage selector switch, fan size and position, on/off switch, wattage capacity, and warranty.
To decide on the wattage capacity of a power supply, add up the wattage requirements for
all components in a system and then increase that total by about 30 percent.
Power supplies and monitors are considered field replaceable units and you should not
work inside one unless you are trained to do so.
To protect a computer system against ESD, use a ground bracelet, ground mat, and static
shielding bags.
Protect a computer system against EMI or RFI by covering expansion slots (which also
reduces dust inside the case and improves airflow), by not placing the system close to or
on the same circuit as high-powered electrical equipment, and by using line conditioners.
Devices that control the electricity to a computer include surge suppressors, line conditioners, and UPSs.
A surge suppressor protects a computer against damaging spikes in electrical voltage.
2
1435487389_ch02_CTP.qxd
92
7/30/09
5:19 PM
CHAPTER 2
Page 92
Form Factors, Power Supplies, and Working Inside a Computer
Line conditioners level the AC to reduce brownouts and spikes.
A UPS provides enough power to perform an orderly shutdown during a blackout.
There are two kinds of UPSs: the true UPS (called the inline UPS) and the
standby UPS.
The inline UPS is more expensive because it provides continuous power. The standby UPS
must switch from one circuit to another when a blackout begins.
Utility software at a remote computer or a computer connected to the UPS through a USB
cable can control and manage a smart UPS.
Data line protectors are small surge suppressors designed to protect modems from spikes
on telephone lines.
Tools necessary for a PC support technician include a ground bracelet, screwdrivers,
tweezers, extractor, and recovery CDs.
A POST diagnostic card is useful when troubleshooting startup errors caused by
hardware.
A power supply tester and multimeter can be used to measure the voltage output of
power supplies. In addition, a multimeter can be used to test cables and fuses.
A faulty power supply can cause memory errors, data errors, system hangs, or reboots; it
can damage a motherboard or other components.
When troubleshooting the electrical system, consider the problem might be caused by
external power problems, loose connections, bad components drawing too much power,
the power supply, the motherboard, or overheating.
>> KEY TERMS
For explanations of key terms, see the Glossary near the end of the book.
alternating current (AC)
amp
ampere
antistatic wrist strap
ATX
ATX12V power supply
brownouts
BTX (Balanced Technology
Extended)
bus riser
capacitor
clamping voltage
compact cases
data line protector
daughter card
desktop case
diagnostic card
diode
DIP (dual inline package) switch
direct current (DC)
electromagnetic interference (EMI)
electrostatic discharge (ESD)
field replaceable unit (FRU)
FlexATX
form factor
ground bracelet
intelligent UPS
inverter
joule
line conditioners
low-profile cases
MicroATX
mid-tower
multimeter
NLX
notebook cases
overclocking
P1 connector
POST (power-on self test)
power conditioners
power supply
power supply tester
power supply unit (PSU)
radio frequency interference (RFI)
rectifier
resistor
riser card
sags
slimline cases
smart UPS
soft power
soft switch
spikes
static electricity
surge protector
surge suppressor
swells
tower case
transformer
transistor
uninterruptible power
supply (UPS)
volt
voltage selector switch
watt
1435487389_ch02_CTP.qxd
7/30/09
5:19 PM
Page 93
Reviewing the Basics
93
>> REVIEWING THE BASICS
1. How many pins does the P1 connector have that use the ATX Version 2.2 standard?
2. What are the maximum dimensions for a motherboard that uses the MicroATX
form factor?
3. Which form factor is a smaller version of the MicroATX form factor?
4. Which form factor uses a riser card on the edge of the motherboard?
5. How many pins does the main power connector on a BTX motherboard have?
6. Which type of case form factor is best for keeping a system cool?
7. Which type of computer case is most popular for desktop systems?
8. What is the normal voltage of house electricity in the United States?
9. Hot wires in home wiring are normally colored ______ and ground wires in computers are
normally colored ______ .
10. What is the difference between a transformer and a rectifier? Which are found in a PC
power supply?
11. What are the five voltages that can be produced by an ATX or BTX power supply? Which
voltage is seldom used?
12. What device uses the 12 V 6-pin power connector?
13. What device uses the 12 V 8-pin power connector?
14. What is the purpose of the 4-pin auxiliary connector on a motherboard?
15. What is the purpose of the 4-pin Molex connector?
16. How do you determine the wattage capacity needed by a power supply?
17. Which one component in a high-end gaming computer is likely to draw the most power?
18. Why is a power supply dangerous even after the power is disconnected?
19. Which tool of a PC support technician is the most important tool to protect the system
against ESD?
20. Which permanently damages a computer component, damage caused by ESD or damage
caused by EMI?
21. What is a simple way to detect EMI?
22. What is an unintended, high-current, closed connection between two points in a circuit
called?
23. What device protects a system against lighting strikes but does not protect against sags and
brownouts?
24. What device protects a system against blackouts?
25. What two measurements are used to rate the capacity of a UPS?
26. What unit of measure is used to describe the amount of work a surge suppressor can do
before it stops protecting the circuit from an electrical surge?
2
1435487389_ch02_CTP.qxd
94
7/30/09
5:19 PM
CHAPTER 2
Page 94
Form Factors, Power Supplies, and Working Inside a Computer
27. Why is it important to have an indicator light on a surge suppressor?
28. What are the two main types of uninterruptible power supplies?
29. How does a smart UPS differ from one that is not smart?
30. What is the purpose of a POST diagnostic card?
31. When taking a computer apart, why is it important to not stack boards on top of each
other?
32. When assembling a system, which do you install first, the drives or the motherboard?
33. List four computer symptoms that indicate a faulty power supply.
>> THINKING CRITICALLY
1. How much power is consumed by a load drawing 5 A with 120 V across it?
2. You suspect that a power supply is faulty, but you use a multimeter to measure its voltage
output and find it to be acceptable. Why is it still possible that the power supply may be faulty?
3. Someone asks you for help with a computer that hangs at odd times. You turn it on and work
for about 15 minutes, and then the computer freezes and powers down. What do you do first?
a. Replace the surge protector.
b. Replace the power supply.
c. Wait about 30 minutes for the system to cool down and try again.
d. Install an additional fan.
4. When working on a computer, which of the following best protects against ESD? Why?
a. Always touch the computer case before touching a circuit board inside the case.
b. Always wear a ground bracelet clipped to the side of the case.
c. Always sit a computer on an antistatic mat when working on it.
5. What is a reasonable wattage capacity for a power supply to be used with a system that
contains a DVD drive, three hard drives, and a high-end video card?
a. 250 watts
b. 1000 watts
c. 700 watts
d. 150 watts
>> HANDS-ON PROJECTS
PROJECT 2-1:
Taking a Lab Computer Apart and Putting It Back Together
Working with a partner and using a lab computer designated to be disassembled, take a
computer apart. It is not necessary to remove the processor from the motherboard, but be very
careful to properly support the motherboard and processor as you remove them from the case.
Then reassemble the system. Don’t replace the computer case panel until your instructor has
inspected all cable connections. Then turn on the computer and verify all is working.
1435487389_ch02_CTP.qxd
7/30/09
5:19 PM
Page 95
Hands-On Projects
PROJECT 2-2:
95
Making Price and Value Comparisons
2
Using the two computer parts retail Web sites, Tiger Direct (www.tigerdirect.com) and Micro
Electronics (www.microcenter.com), find out the following about products discussed in the
chapter:
1. Compare the prices and ratings of two different surge suppressors. Print Web pages of
your findings. How are the surge suppressors rated?
2. Compare the prices and ratings of two different UPS devices. Compare a smart UPS to
one that does not interface with a PC, but otherwise has similar ratings.
3. Compare the prices and features of two different power supplies that are rated at
500 watts.
PROJECT 2-3:
Finding PC Power Supply Facts
Remove the cover from your home or lab PC, and answer the following questions:
1. How many watts are supplied by your power supply? (The number is usually printed on
the label on the top of the power supply.)
2. How many cables are supplied by your power supply?
3. Where does each cable lead?
4. Does the back of the power supply have a switch that can
be set for 230 volts (Europe) or 115 volts (U.S.)?
PROJECT 2-4:
Video
Building a Circuit
Building a Circuit to Turn On a Light
1. From the following components, build a circuit to turn on a light:
An AC light bulb or LED (Note: An LED has polarity—it must be connected with the
negative and positive terminals in the correct positions.)
A double-A battery (Note: A 9-volt battery can burn out some bulbs.)
A switch (A knife switch or even a DIP switch will work.)
Three pieces of wire to connect the light, the switch, and the battery
2. Add a second battery to the circuit, and record the results.
3. Add a resistor to the circuit, and record the results.
4. Place an extra wire in the middle of the circuit running from the battery to the switch
(thus making a short), and record the results.
PROJECT 2-5:
Researching the Market for a UPS for Your Computer System
On a computer system that you can access, determine how much wattage output a UPS
should have in the event of a total blackout, and estimate how long the UPS should sustain
1435487389_ch02_CTP.qxd
96
7/30/09
5:19 PM
CHAPTER 2
Page 96
Form Factors, Power Supplies, and Working Inside a Computer
power. Research the market and report on the features and prices of a standby UPS and an
inline UPS. Include the following information in your report:
Wattage supported
Length of time the power is sustained during total blackout
Line-conditioning features
AC backup present or not present for the inline UPS
Surge suppressor present or not present
Number of power outlets on the box, and other features
Written guarantees
Brand name, model, vendor, and price of the device
PROJECT 2-6:
Detecting EMI
Use a small, inexpensive AM radio. Turn the dial to a low frequency, away from a station.
Put the radio next to several electronic devices. List the devices in order, from the one producing the most static to the one producing the least static. Listen to the devices when they
are idle and in use.
PROJECT 2-7:
Calculating Wattage Capacity for Your System
Do the following to compare the wattage capacity of the power supply installed in your
computer to the recommended value:
1. Using the free power supply wattage calculator at www.antec.outervision.com/PSUEngine,
enter the information about your computer system. Print the resulting calculations.
2. What is the recommended wattage capacity for a power supply for your system?
3. Look on the printed label on the power supply currently installed in your computer.
What is its wattage capacity?
4. If you had to replace the power supply in your system, what wattage capacity would you
select?
PROJECT 2-8:
Exploring Computer System Form Factors
You will need to open your computer case to answer these questions about your computer
system:
What type of case do you have?
What are the dimensions of your motherboard in inches?
What form factor does your motherboard use?
How many pins does the main power connection on the motherboard have?
1435487389_ch02_CTP.qxd
7/30/09
5:19 PM
Page 97
Real Problems, Real Solutions
>> REAL PROBLEMS, REAL SOLUTIONS
REAL PROBLEM 2-1: Replacing a Power Supply
Suppose you turn on a system and everything is dead—no lights, nothing on the monitor
screen, and no spinning fan or hard drive. You verify the power to the system works, all
power connections and power cords are securely connected, and all pertinent switches are
turned on. You can assume the power supply has gone bad. It’s time to replace it. To prepare for this situation in a real work environment, exchange power supplies with another
student in your lab who is using a computer that has a power supply rated at about the
same wattage as yours. Then verify that your system starts up and works.
97
2
1435487389_ch02_CTP.qxd
7/30/09
5:19 PM
Page 98